dragcarz
-
Posts
2,134 -
Joined
-
Last visited
Content Type
Profiles
Forums
Events
Gallery
Everything posted by dragcarz
-
Very nice!
-
 That’s beautiful Michael, I have tried and failed to build her car more times than I care to think about. d
 -
Hey Jeff, I love the Wally Booth Gremlin, very cool build. Love the Vega also! Someone needs to do a Monza conversion.
-
Ok, this is a little weird as I started building the same two cars a couple of months ago. I got both painted and I was up to decals, I used the Slixx decals on the Blue Max, but only had the kit decals for the Billy Meyer car. I had three sets of kit decals and all were bad and unusable. You stated you used Slixx on both cars, did you use the Glidden TBird decals? Both of your builds are beautiful, very well done!

-
Very nice build!
-
Fantastic work Mark! I built the Mustang from the Polar Lights kit some years ago and was really impressed by the decals. Your Don Hardy chassis is amazing. The car started the season with the Logghe Chassis and quickly moved on to the Don Hardy, improved safety and performance. Very nice pair of builds!
-
Hey Michael thanks for the input. I tried some new things with this build, and in all honesty this is the first issue like this I’ve had. I don’t think it was the Slixx decals, I normally don’t use setting solutions on decals, but I did on this one. I also used Splash 2K clear. I also painted it in my impatience in 50 degree weather. It was pure chance that Slixx came out with this decal as my first thought was to adapt the Dart decals to the build.
-
’72 Dodge Demon Drag Racer 1/25 scale
dragcarz replied to AmericanMuscleFan's topic in WIP: Drag Racing Models
Just amazing work Francis! -
IM NEEDING HELP….I normally try and clear over the graphics, so as usual I applied the roof decal and door lettering and cleared the body. It looked great but as it cured pits began to develop over the decals. I let it set a couple days and decided to try and polish it out. It did polish out and I was relieved thinking the problem was solved. A week later the problem returned. Here’s where I’m stuck , do I just finish it as is, or purple pond and repaint? I can’t decide, so your thoughts would be greatly appreciated
-
Looks great! This kit looks good in any color!
-
Looks beautiful!
-
Looks great, you sure don’t see many of these built! Looks like a great kit.
-
1969 Dodge Charger Daytona
dragcarz replied to jjsipes's topic in WIP: Stock Cars (NASCAR, Super Stock, Late Model, etc.)
I agree, the damage looks very realistic! You may want to display it with the car when finished. -
Loving this build!
-
Thanks everyone!
-
Model master black, Splash 2K clear, it’s not polished yet
-
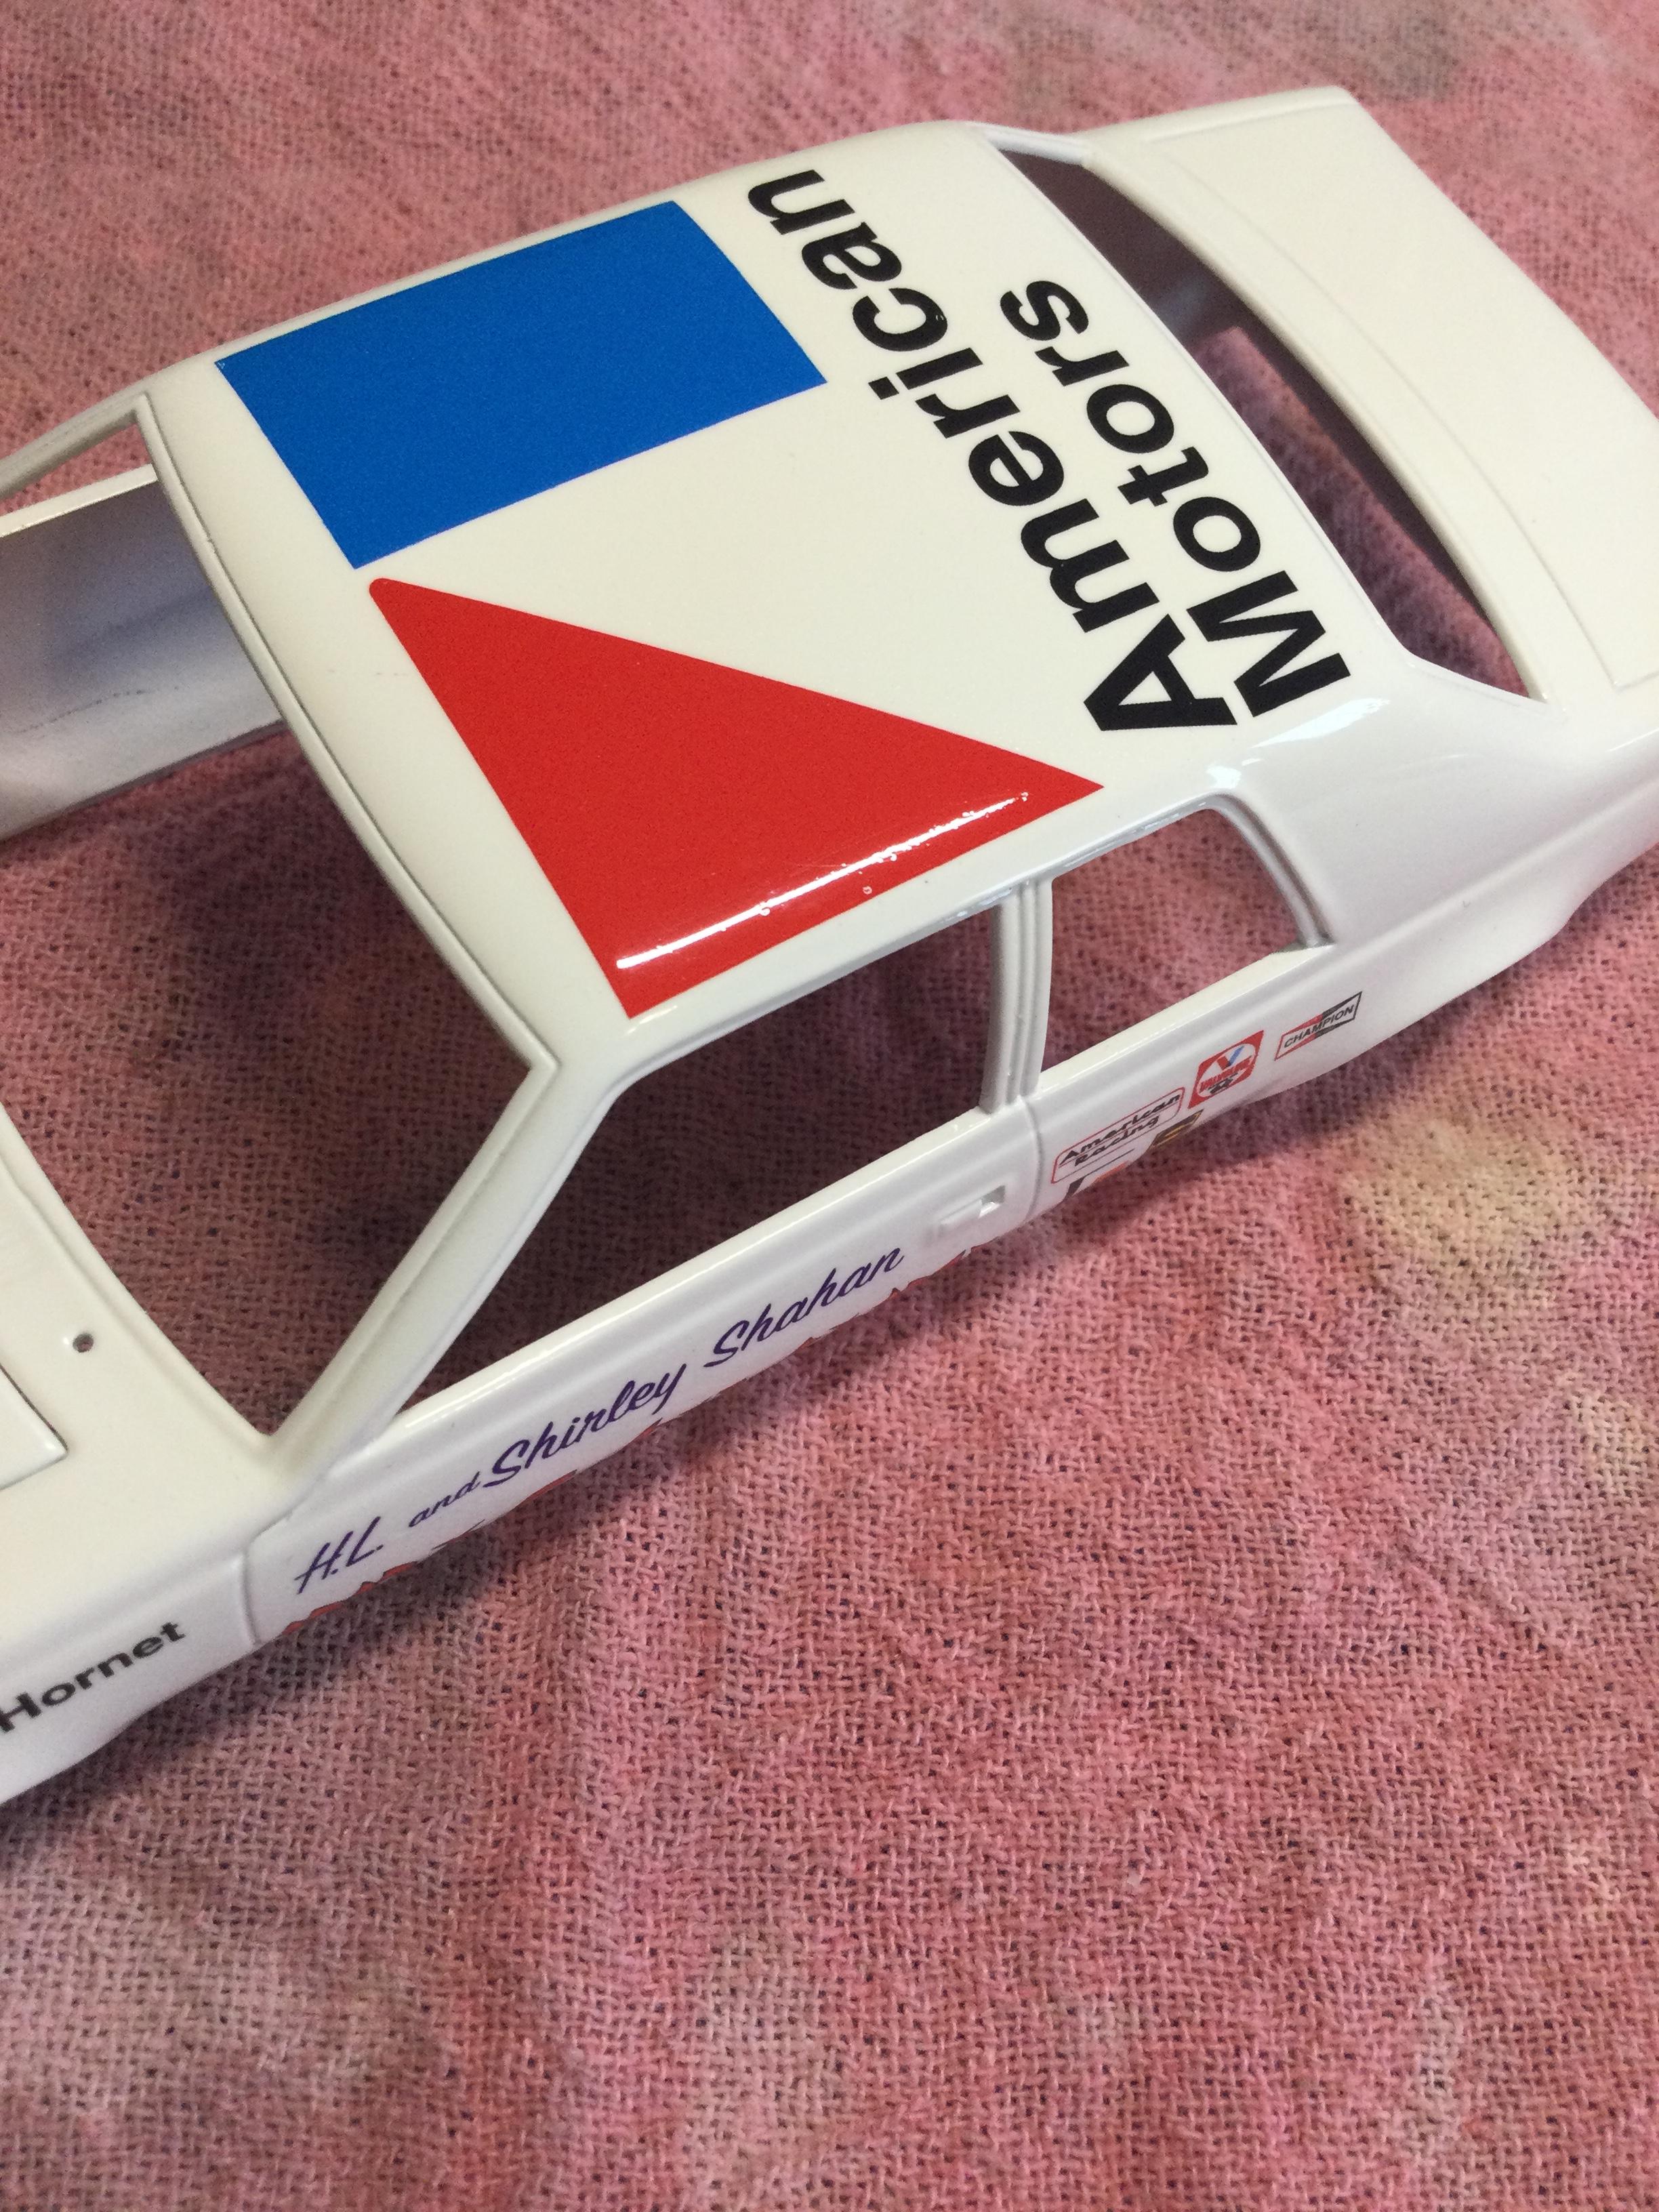
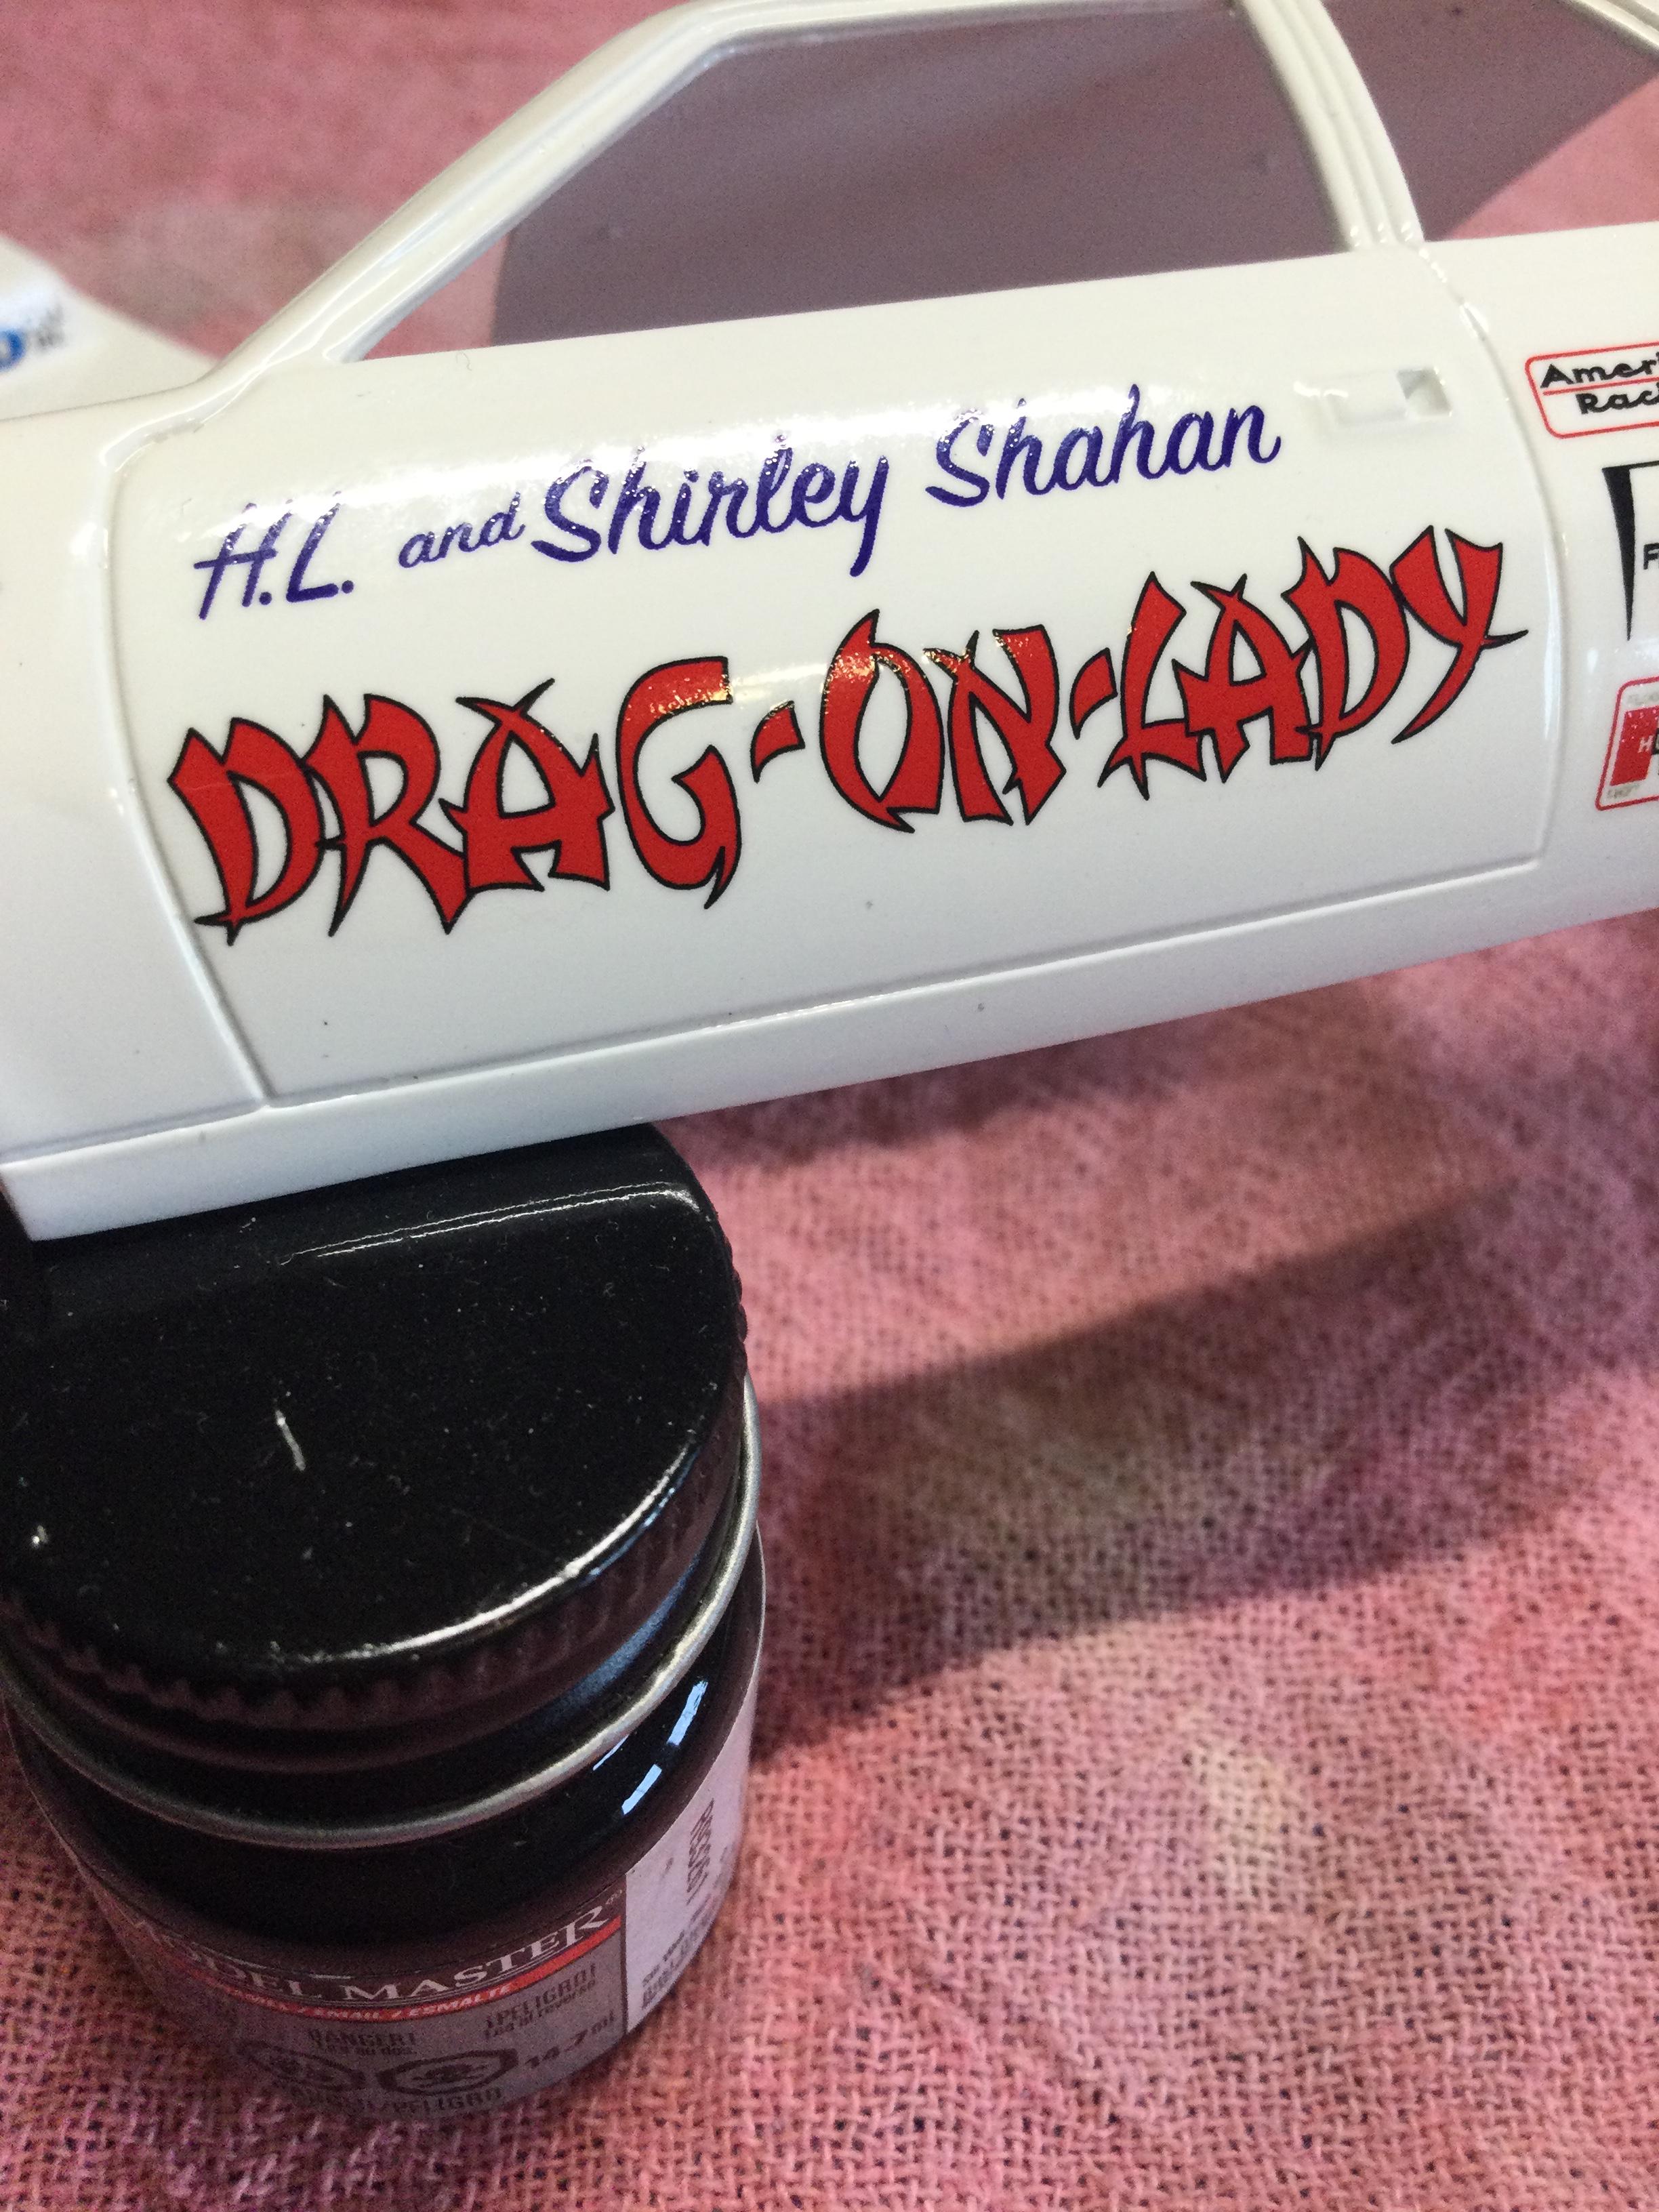
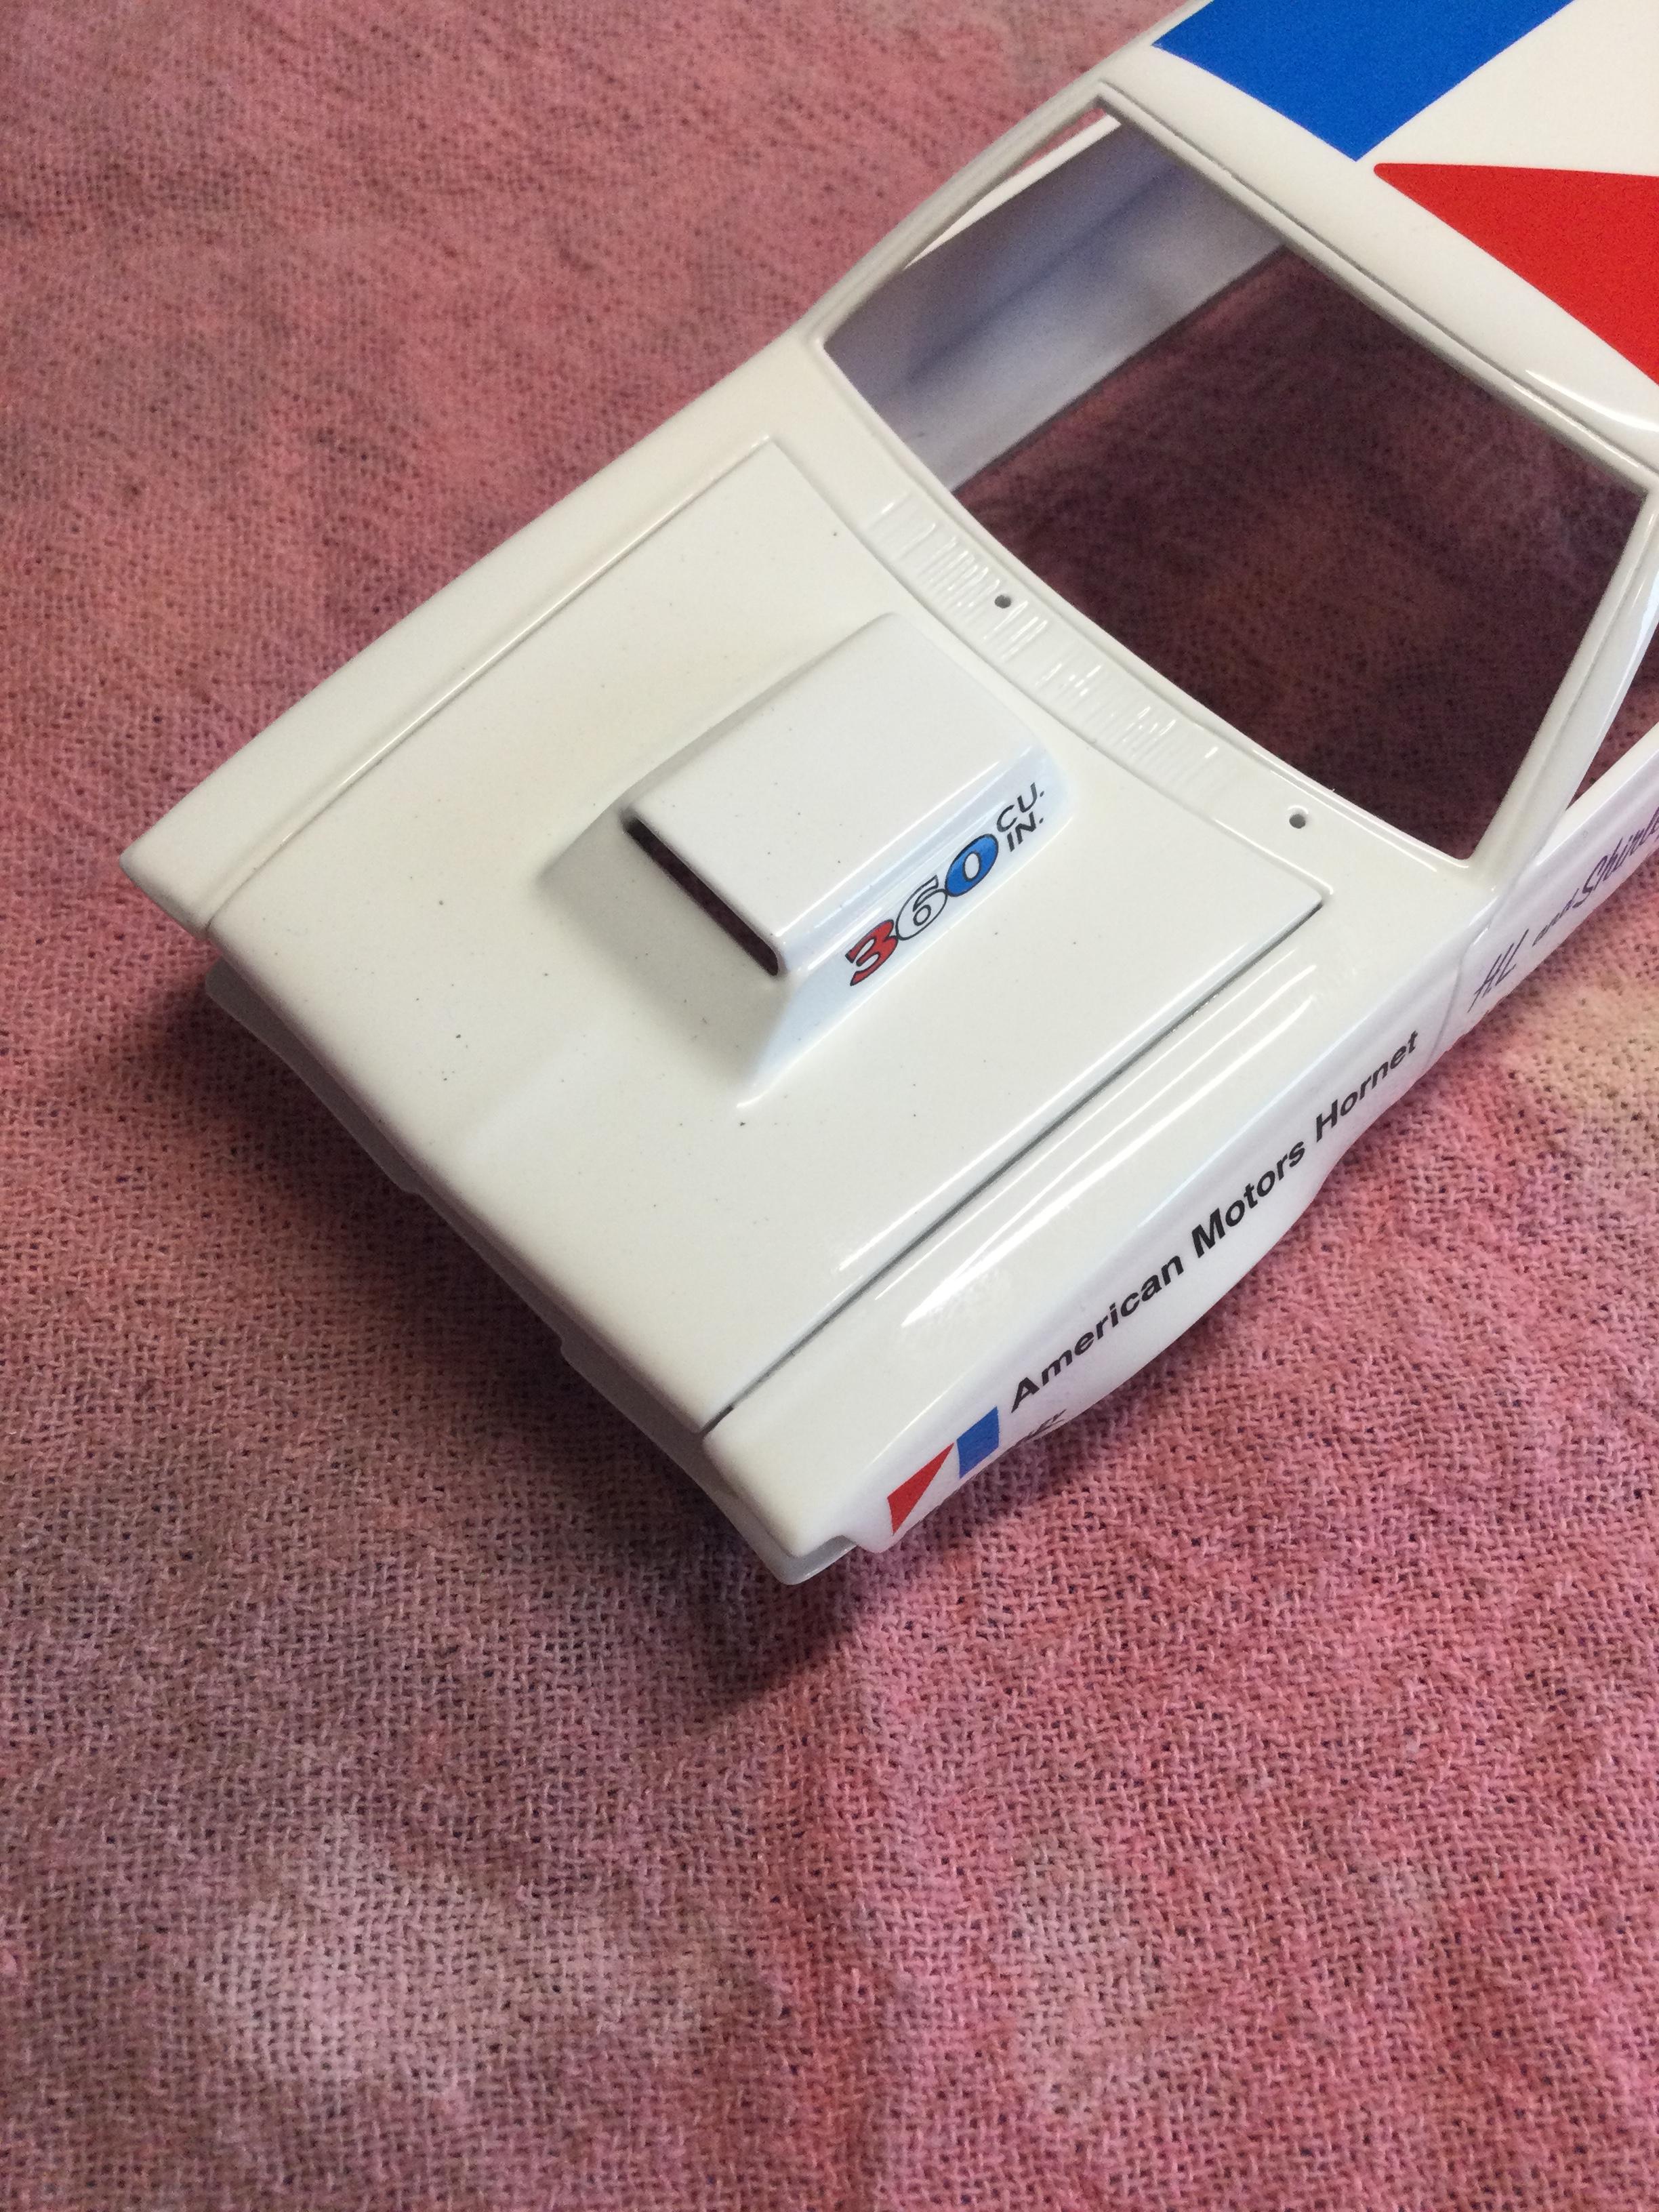
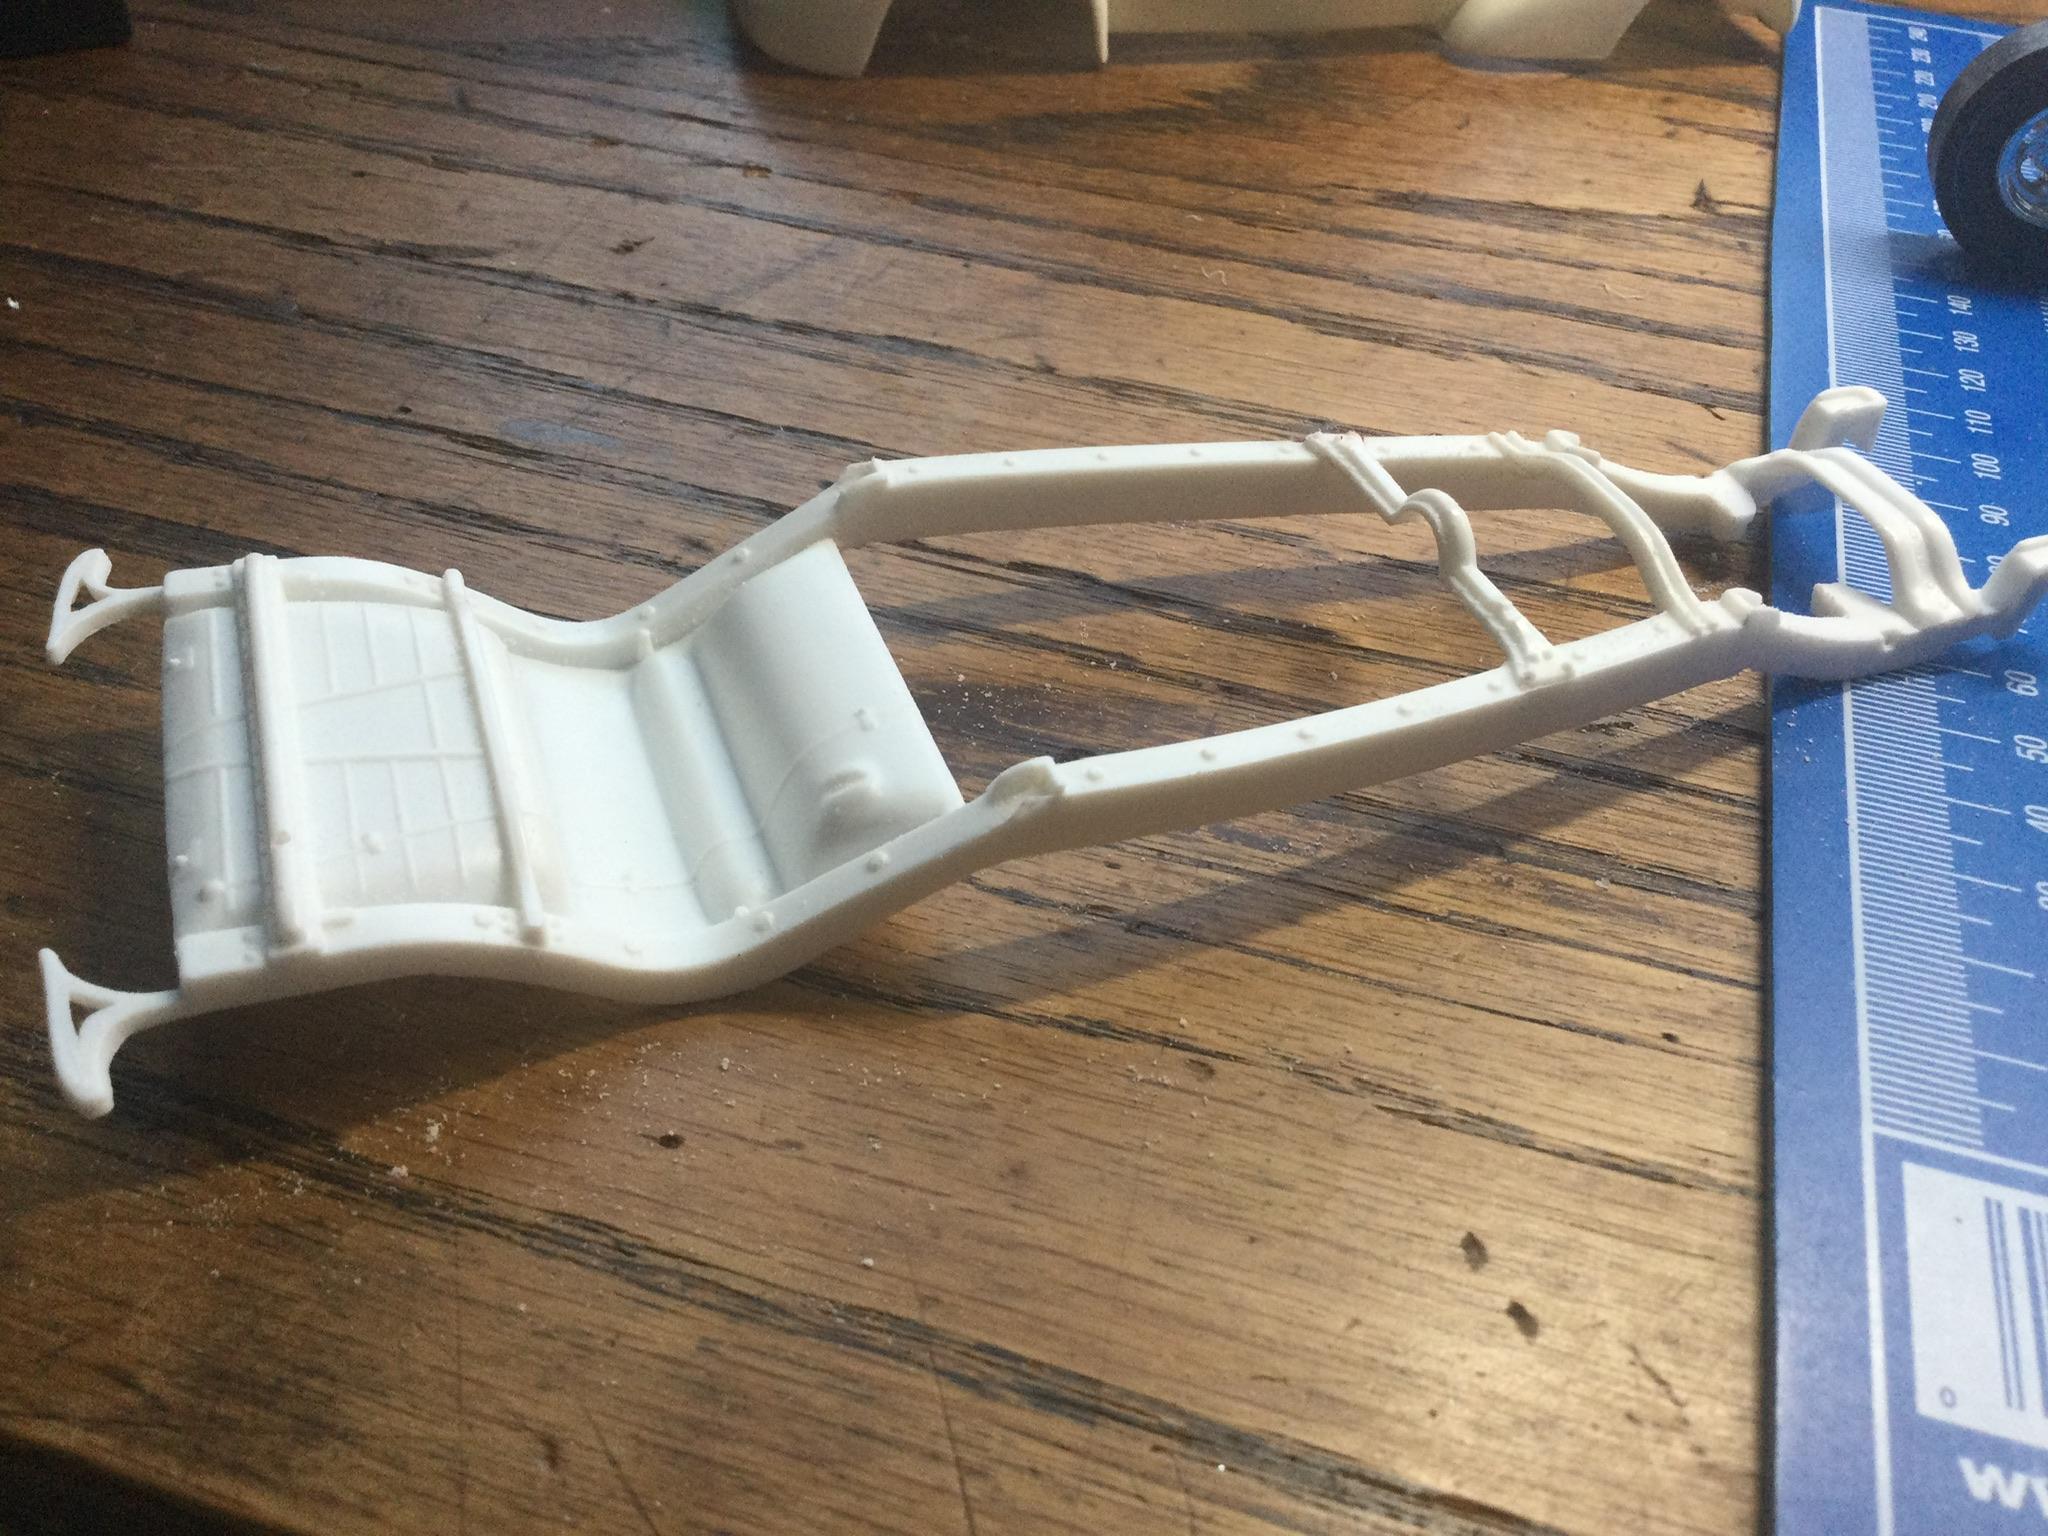
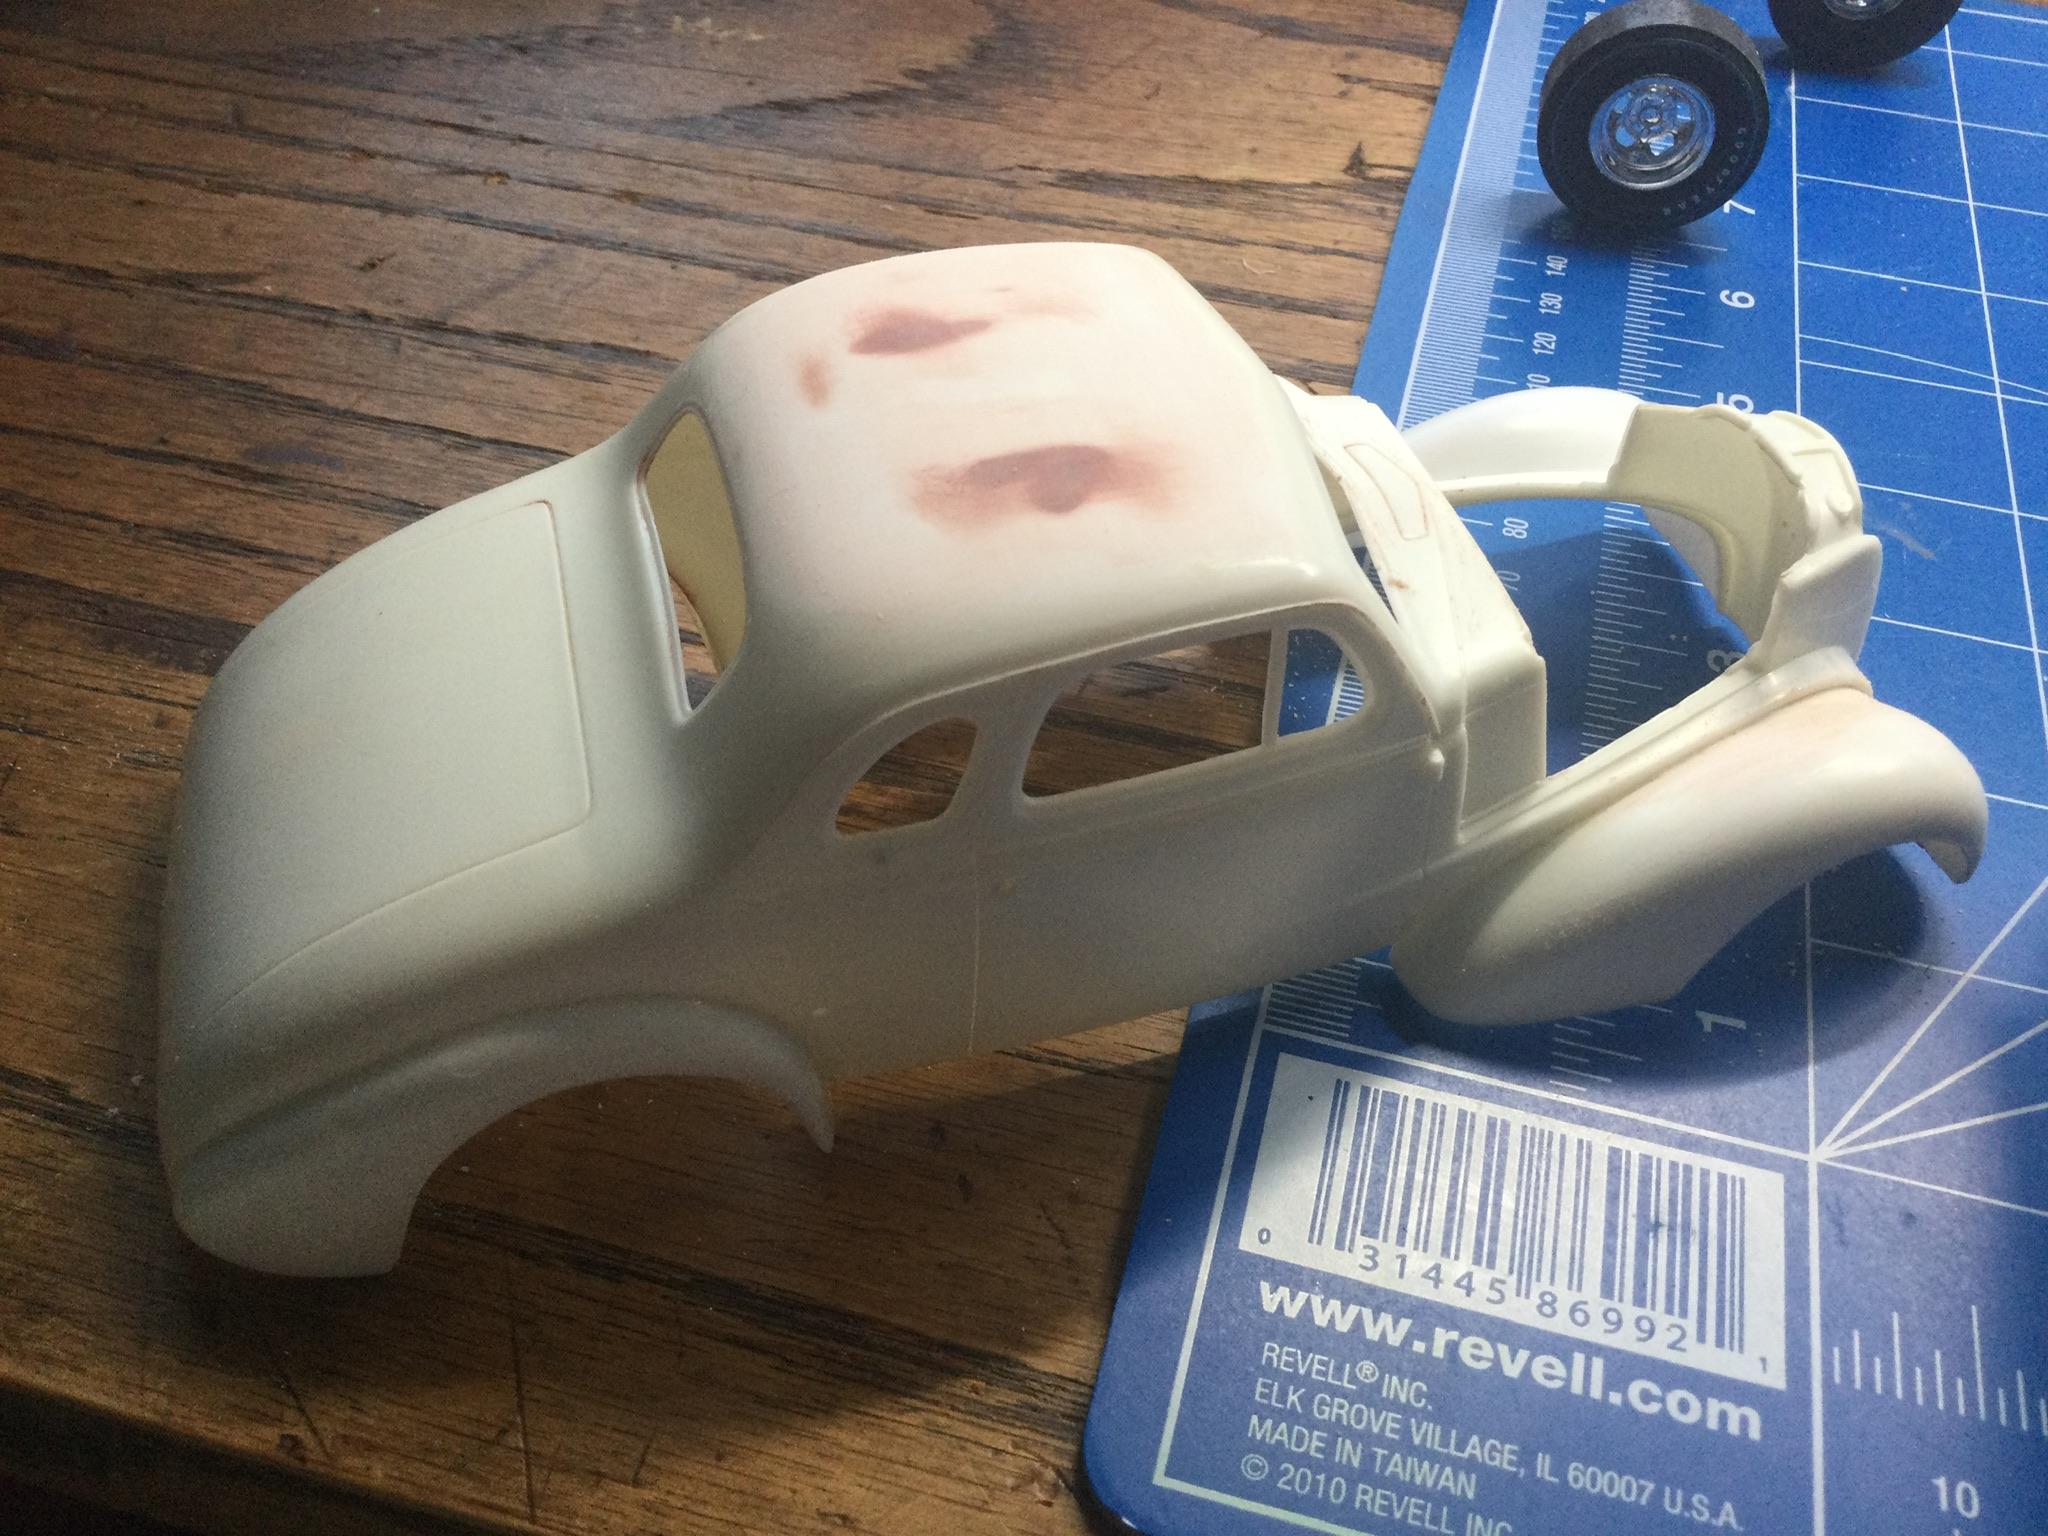
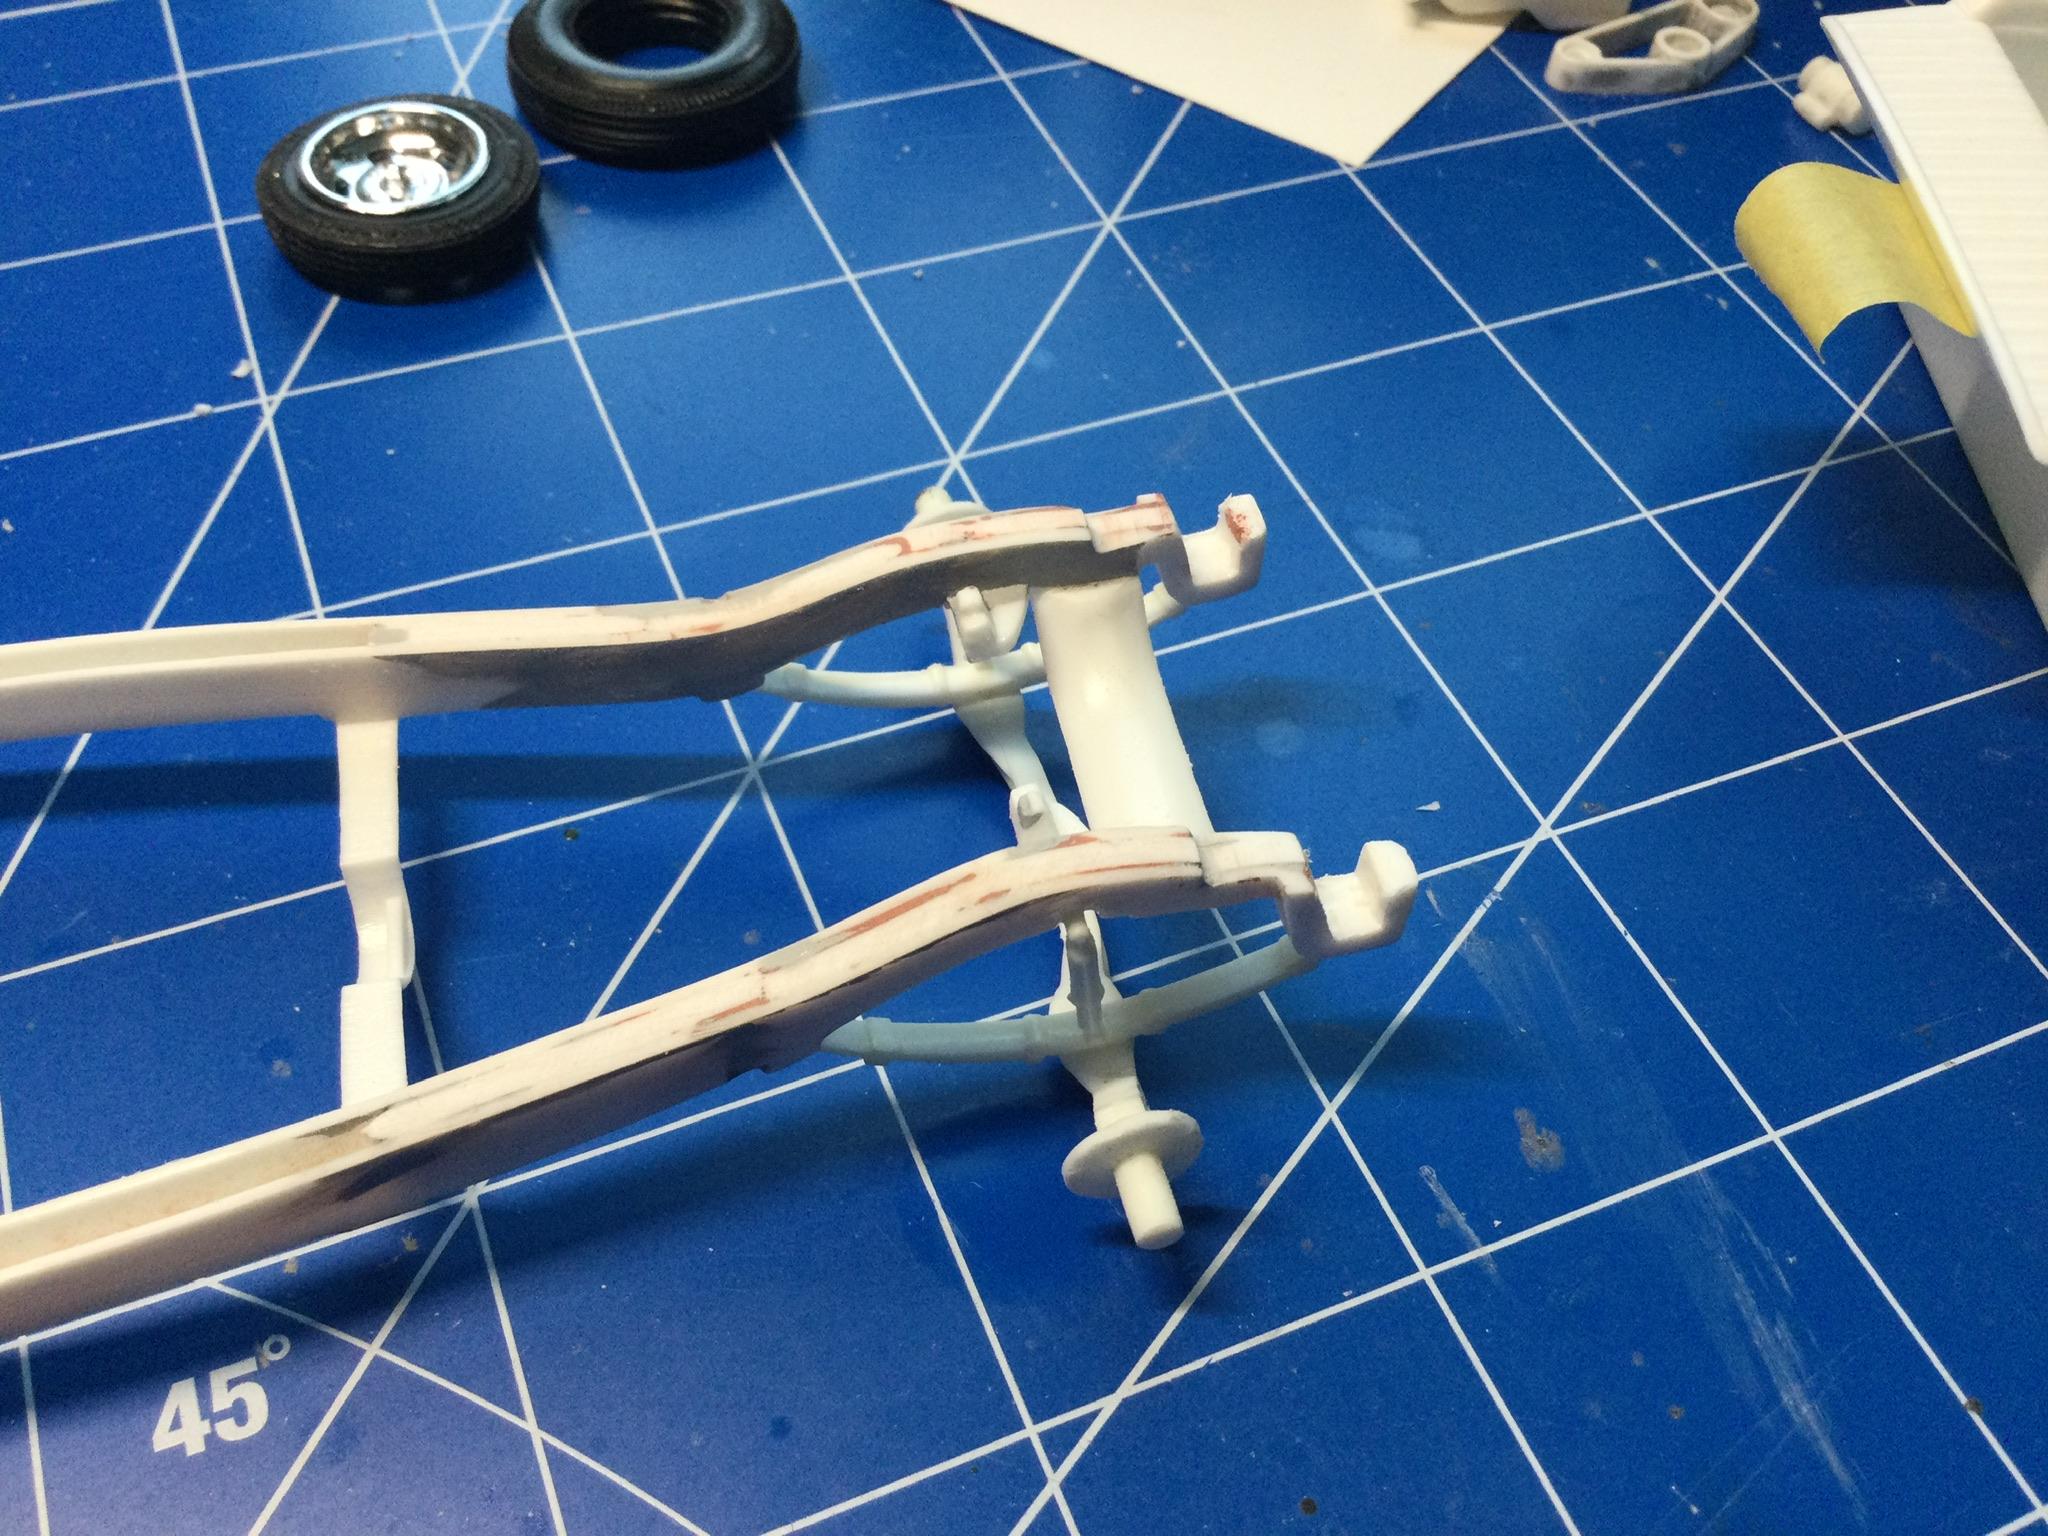
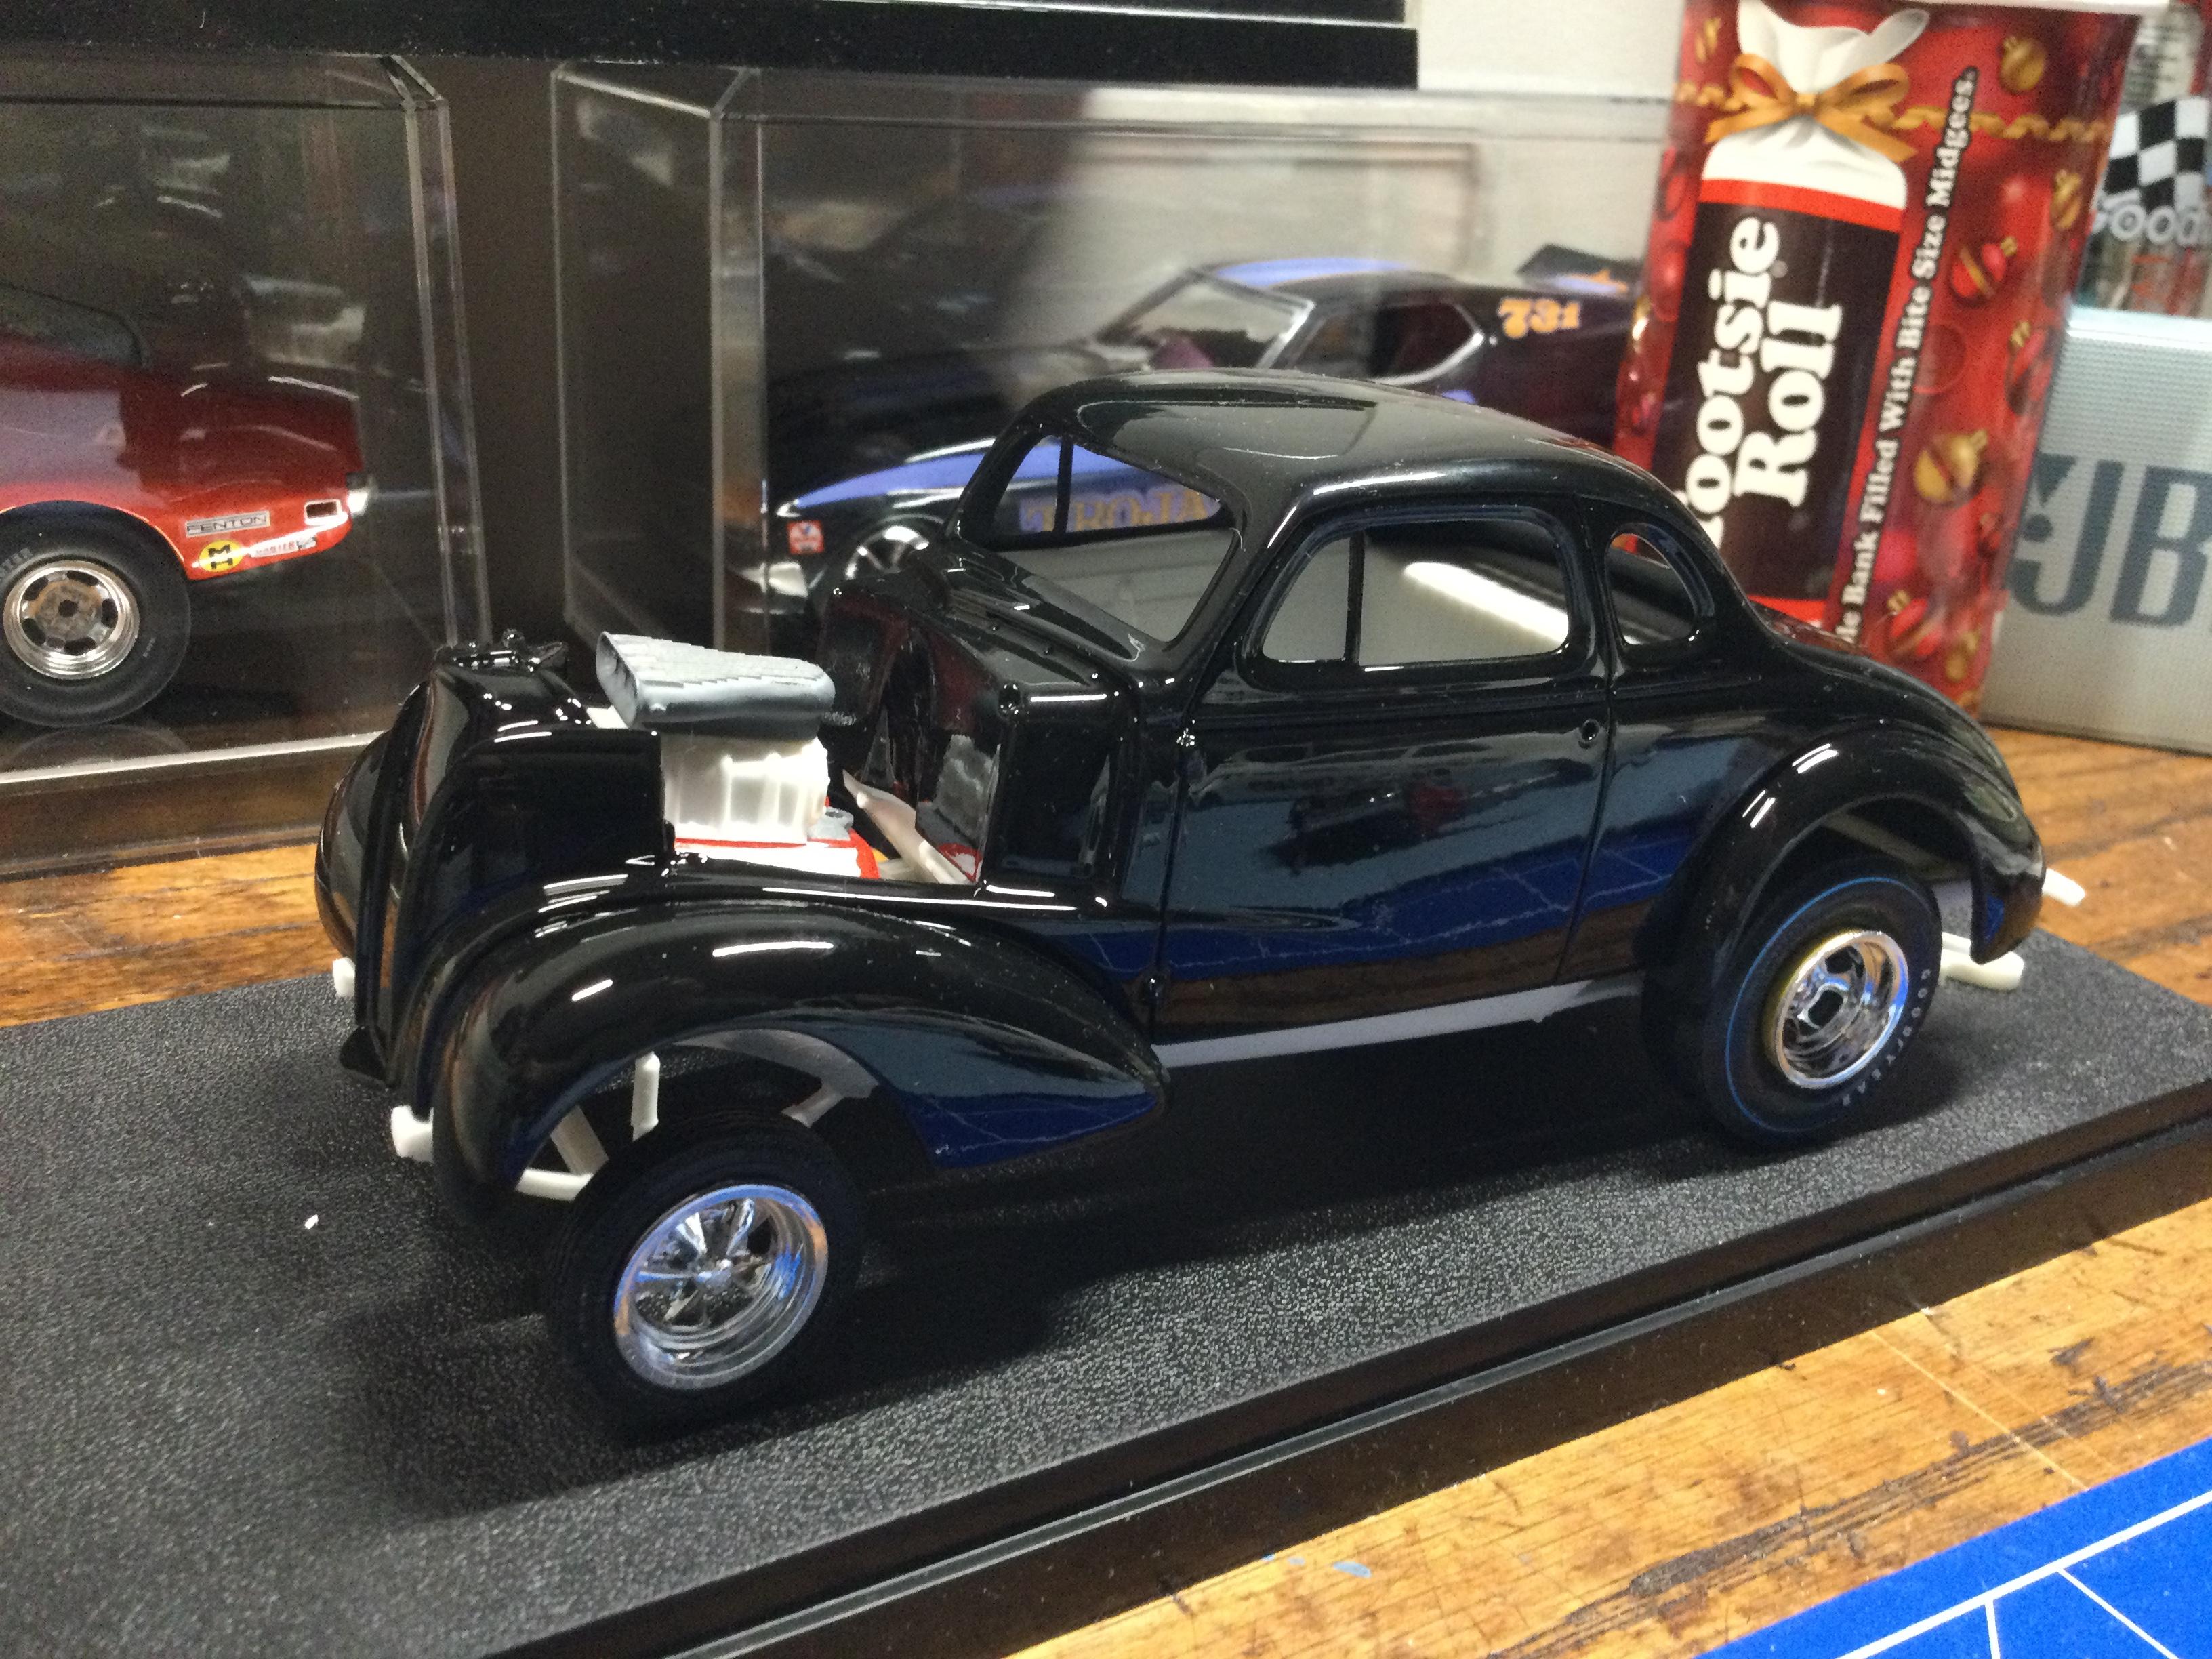
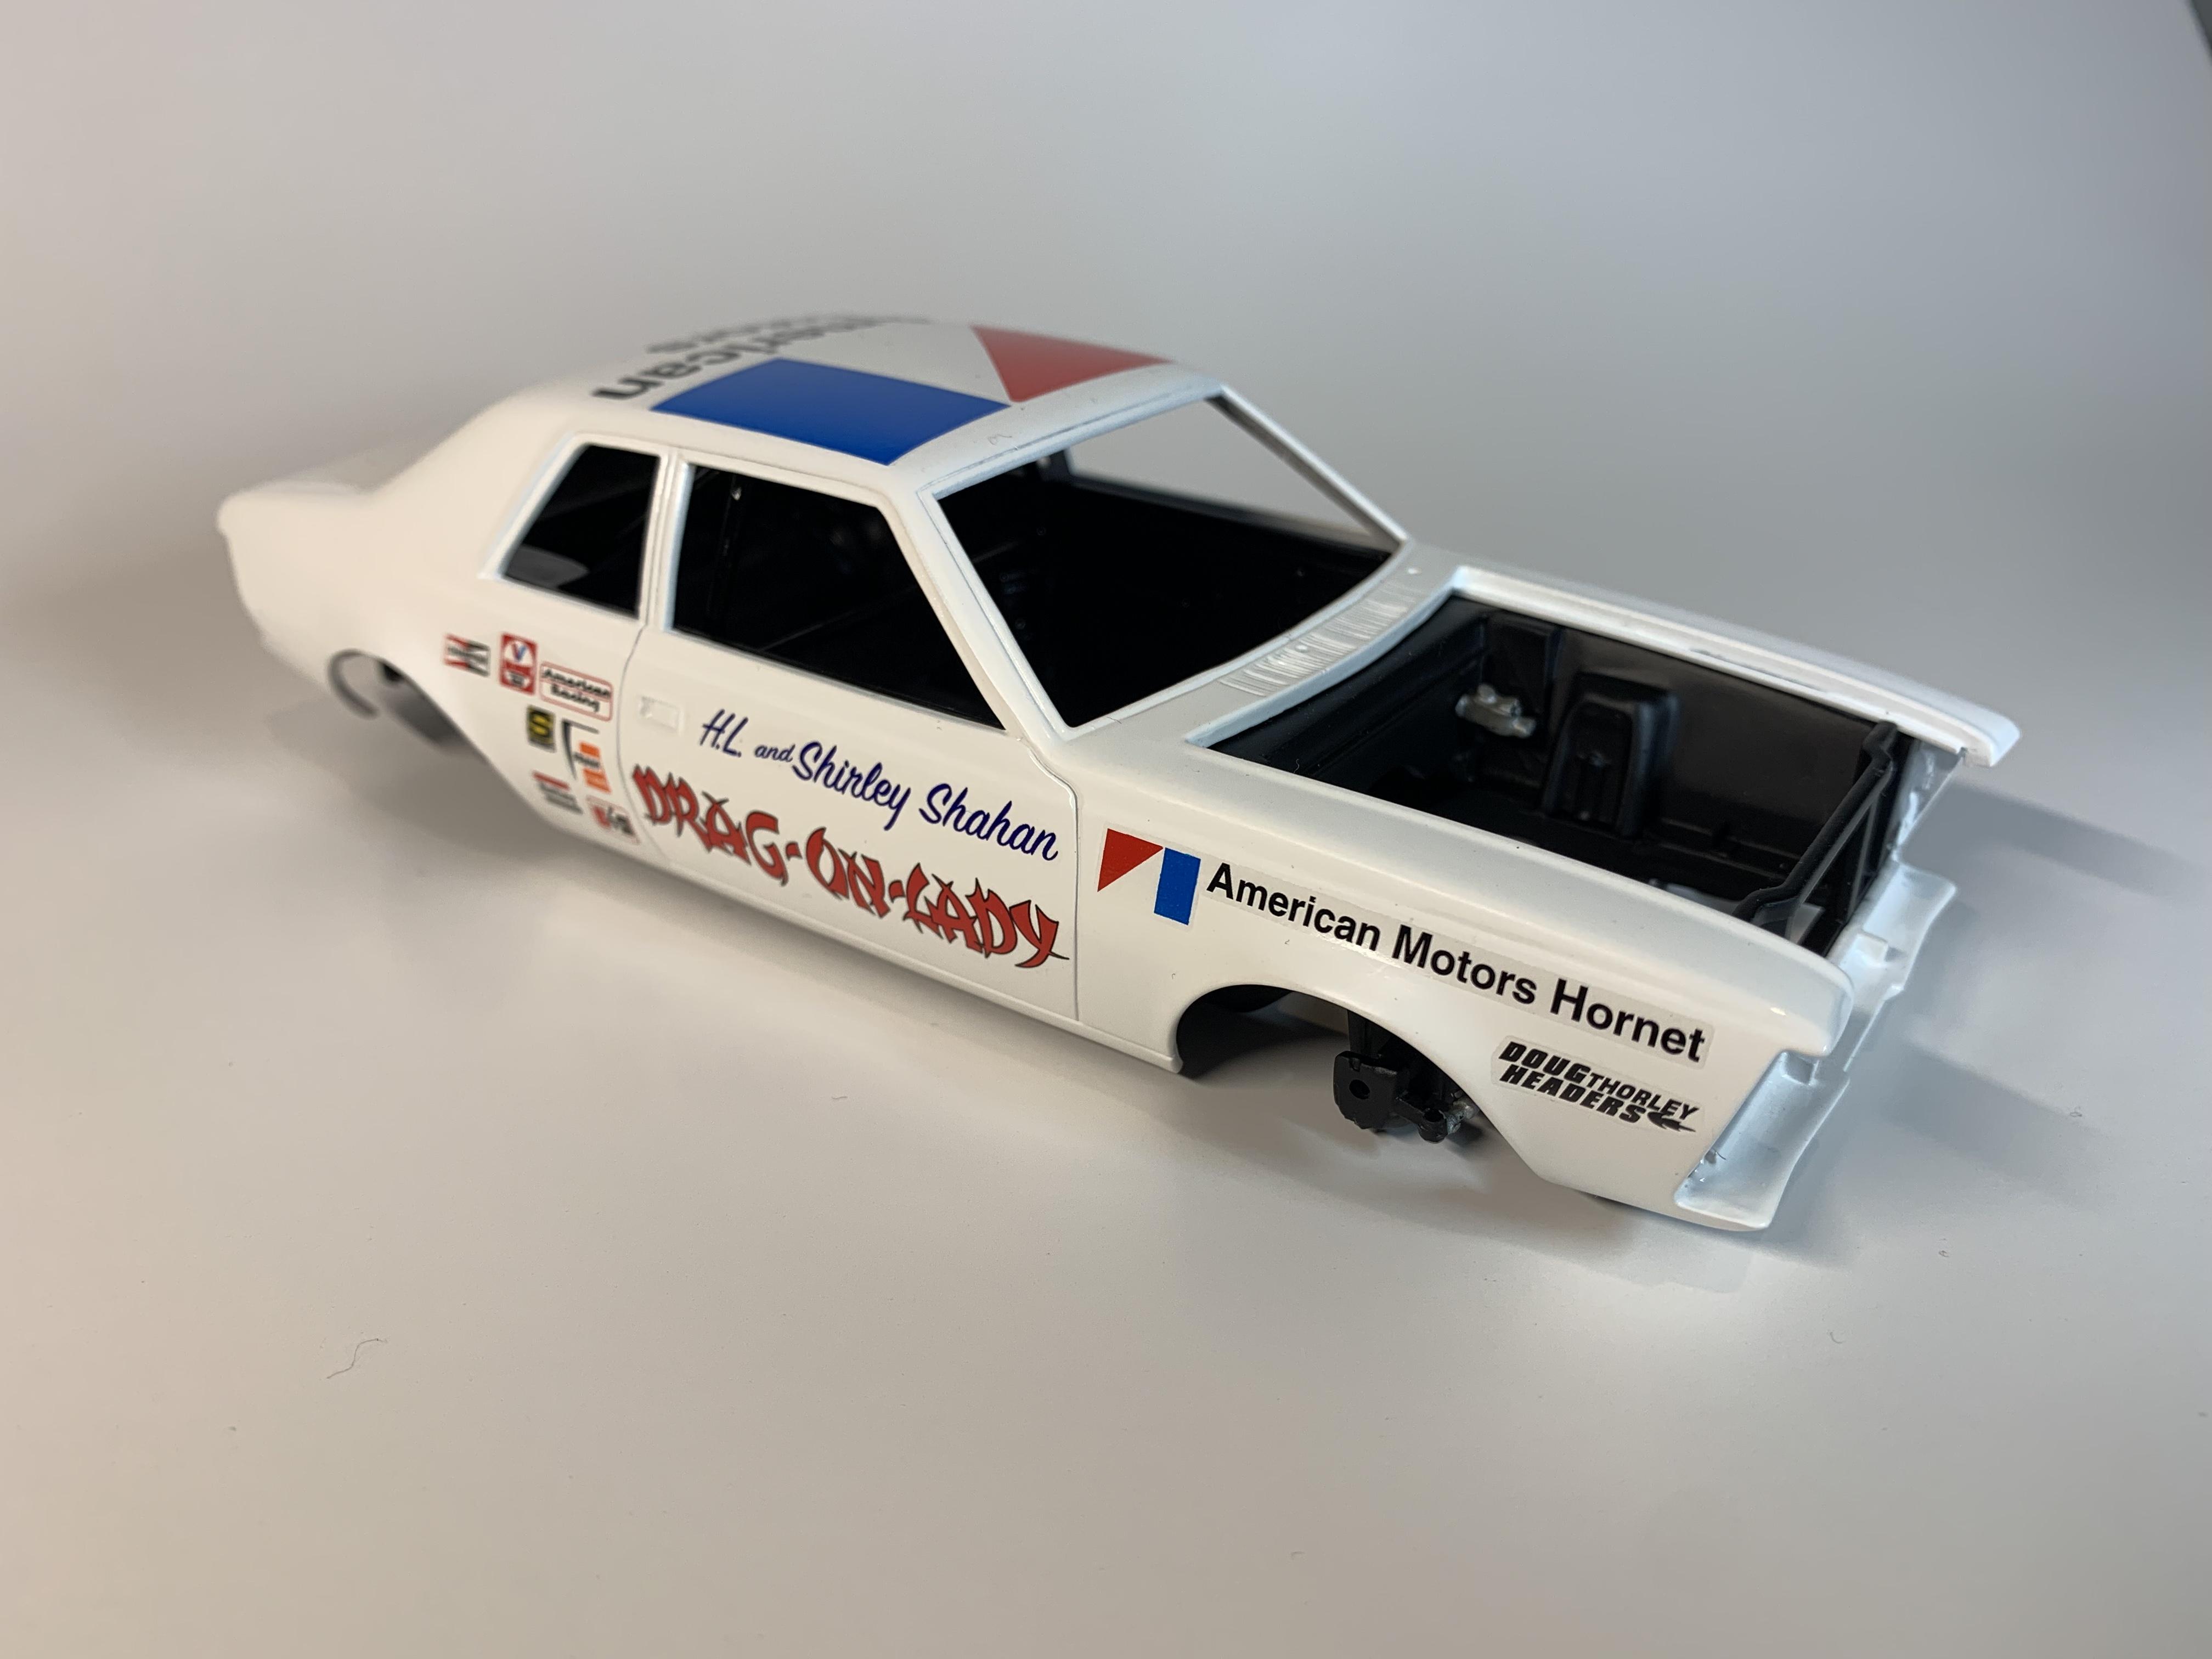
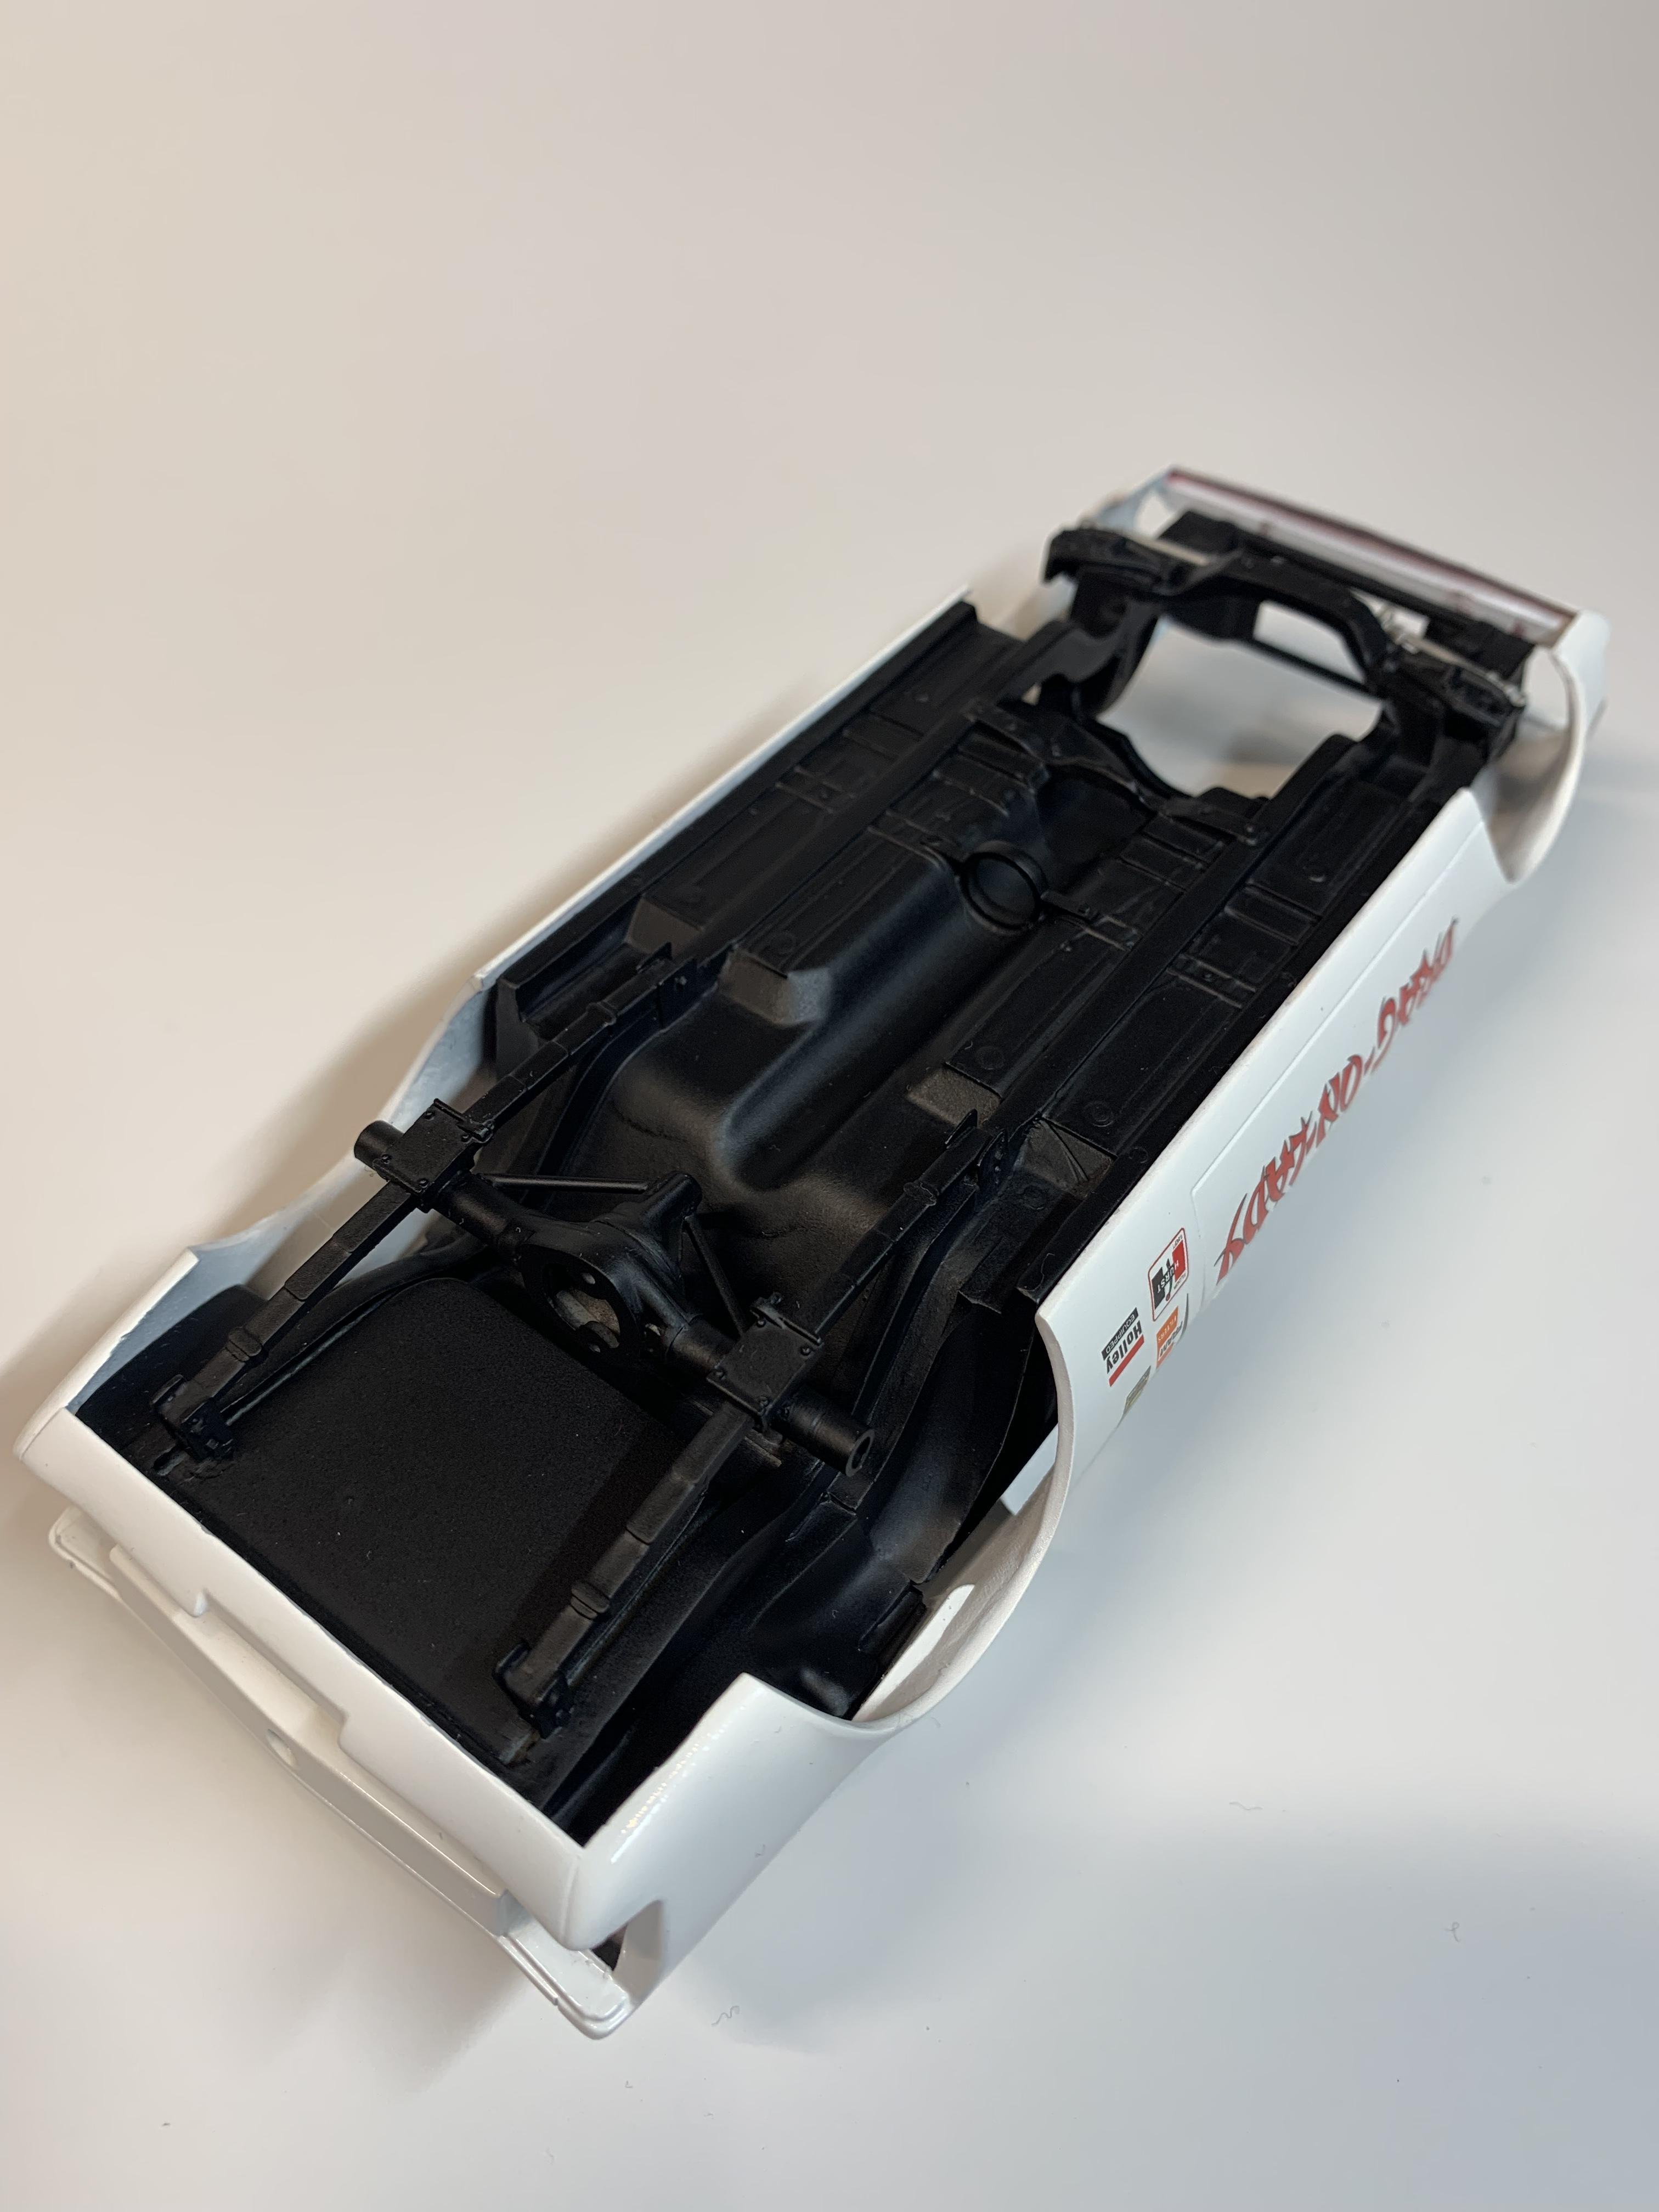
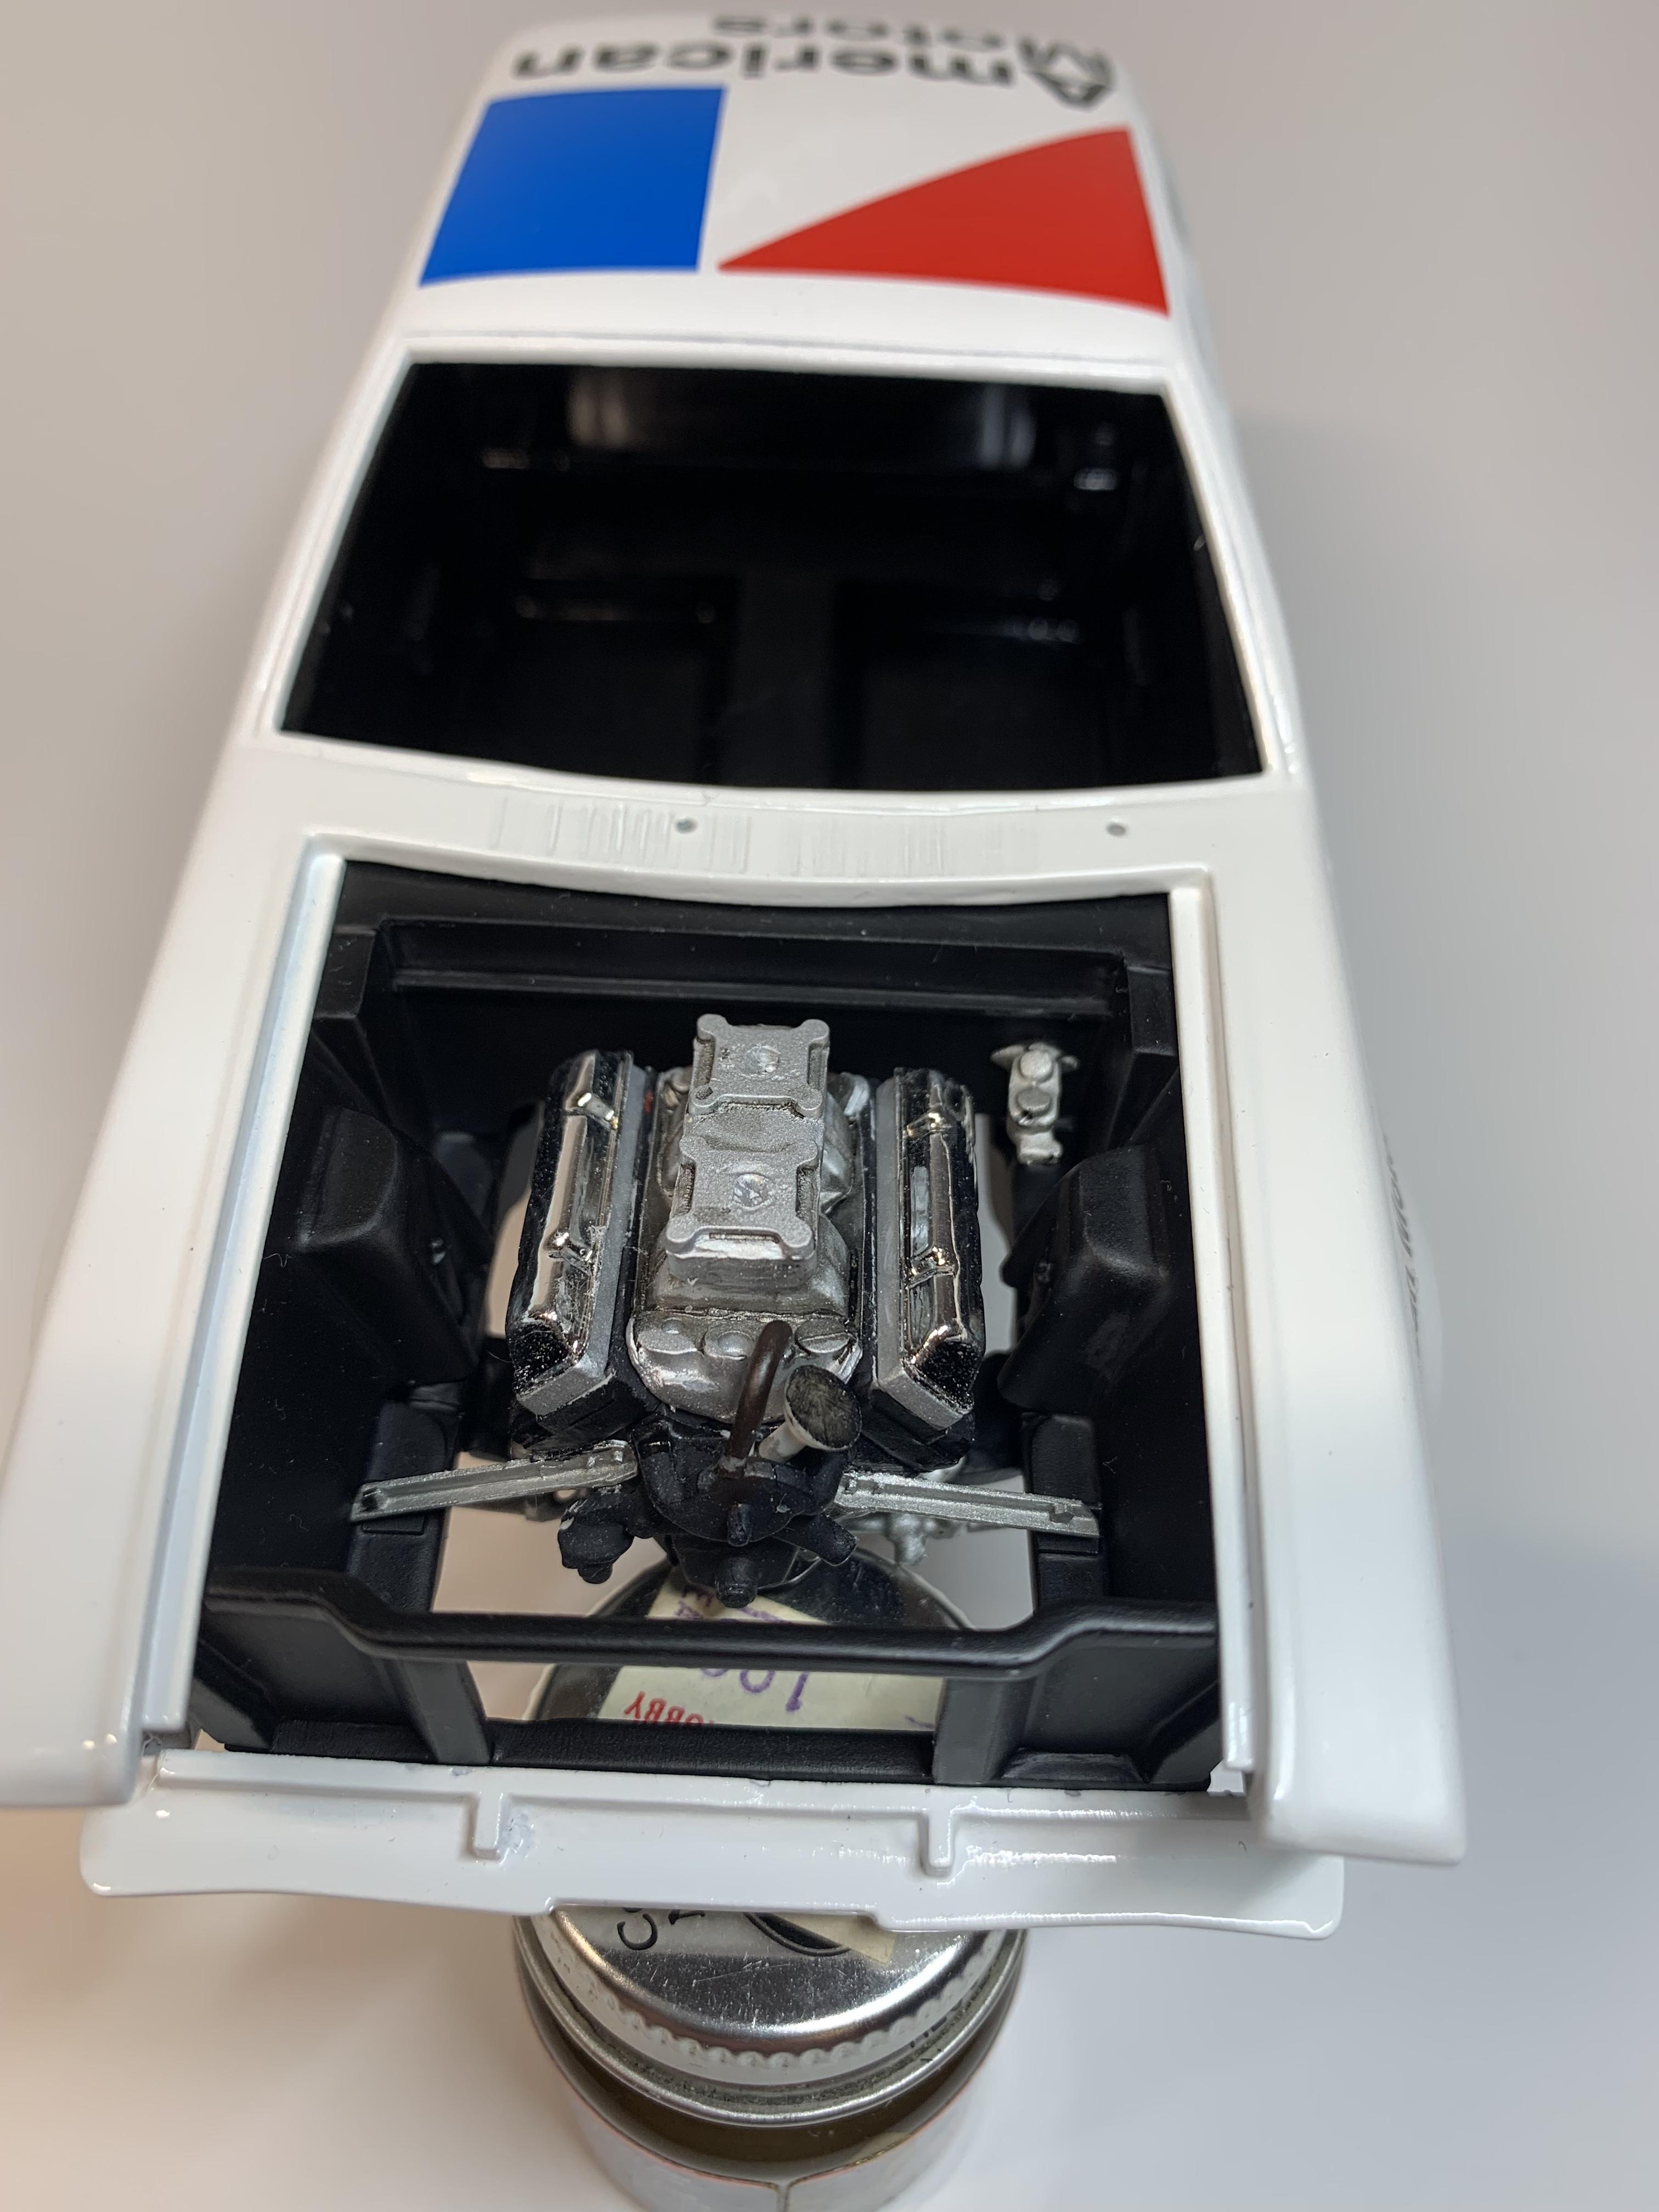
I started this project back in April 2021. When I had purchased this kit pre owned and opened, I did a quick check of the contents and it appeared all there, only to find later, it had two right fenders and no left. I jumped on the parts wanted forum and posted my request and Thomas Coffee responded and sent me a pair of front fenders, Thank you again Thomas! I’ve slowly been building on this and wasn’t going to post it, but with my Shirley Shahan’s Hornet stalled in crappy Indiana weather, I decided to post it out of boredom. im pretty much building it out of the box with the exception of the rear wheels and slicks, from the AMT parts pack, and the injector. I filled the gaps in the top of the frame rails and trimmed the running boards off. I painted the body it black.
-
Great builds you have there !
-
Looks great
-
’72 Dodge Demon Drag Racer 1/25 scale
dragcarz replied to AmericanMuscleFan's topic in WIP: Drag Racing Models
Wow! That’s insane….. in a good way! -
Small update. I really started pushing this build as I haven’t finished a build this year. Huge mistake, I sanded through the paint on the hood, now have to repaint it. I sprayed the chassis but it is too cold in Indiana for painting. It looks ok but could have been better, I opted to brush paint the interior and I’m not happy with the results but after the windows are installed you won’t be able to see it. The roll bar and braces are installed and painted. I thinned the motor mounts more to my liking and created the by-pass hose from the water pump to the intake. I added the master cylinder to the firewall as well as the pinch weld to add some visual interest. I applied Molotow chrome paint with a brush to the outer rims of the wheels and it was too bright for my liking, so there in the Purple Pond and we’re starting over there. I’ve been struggling with lots of dirt and debris, black specks, in my paint and I think the culprit may be rust from my 45 year old compressor. I’m wondering if it’s rust from inside the tank….. I have an in-line filter on both my hose and on my air brush hose as well. Anyone got any ideas?
-
’72 Dodge Demon Drag Racer 1/25 scale
dragcarz replied to AmericanMuscleFan's topic in WIP: Drag Racing Models
That’s beautiful Francis, I just don’t have words, amazing talent! -
Clean chop! Looks great!
-
Thanks John,I appreciate that. I purchased “AMC Motorsports” book suggested by another follower and I was disappointed as there were no new photos that I didn’t already have and then the written information on the Hornet was completely wrong as it had it listed as a tube chassis car, and that wasn’t legal in 71. I’m so far into this build that I’ll probably just continue with what I have. I already have too much time and money invested in this project to spend another $30.00 on a book. Had this book came out a year ago I would have been all in.
-
’72 Dodge Demon Drag Racer 1/25 scale
dragcarz replied to AmericanMuscleFan's topic in WIP: Drag Racing Models
I love your thought process, a very analytical approach to the issues of this kit! My uncle was a collision repair tech ( Bodyman ) in the 60s and 70s, he used to get a cup of coffee and sit staring at the repair before starting, I questioned him what he was doing and he said he was repairing the car in his head, weighing the problems he might encounter and the order he wanted to proceed with, so he didn’t mess things up and create more work. I found this advice very sound and I have drank a lot of coffee in my decision making over the years. I can only imagine the cups of coffee you’ve consumed, or is it tea?