Brudda
-
Posts
4,357 -
Joined
-
Last visited
Content Type
Profiles
Forums
Events
Gallery
Everything posted by Brudda
-
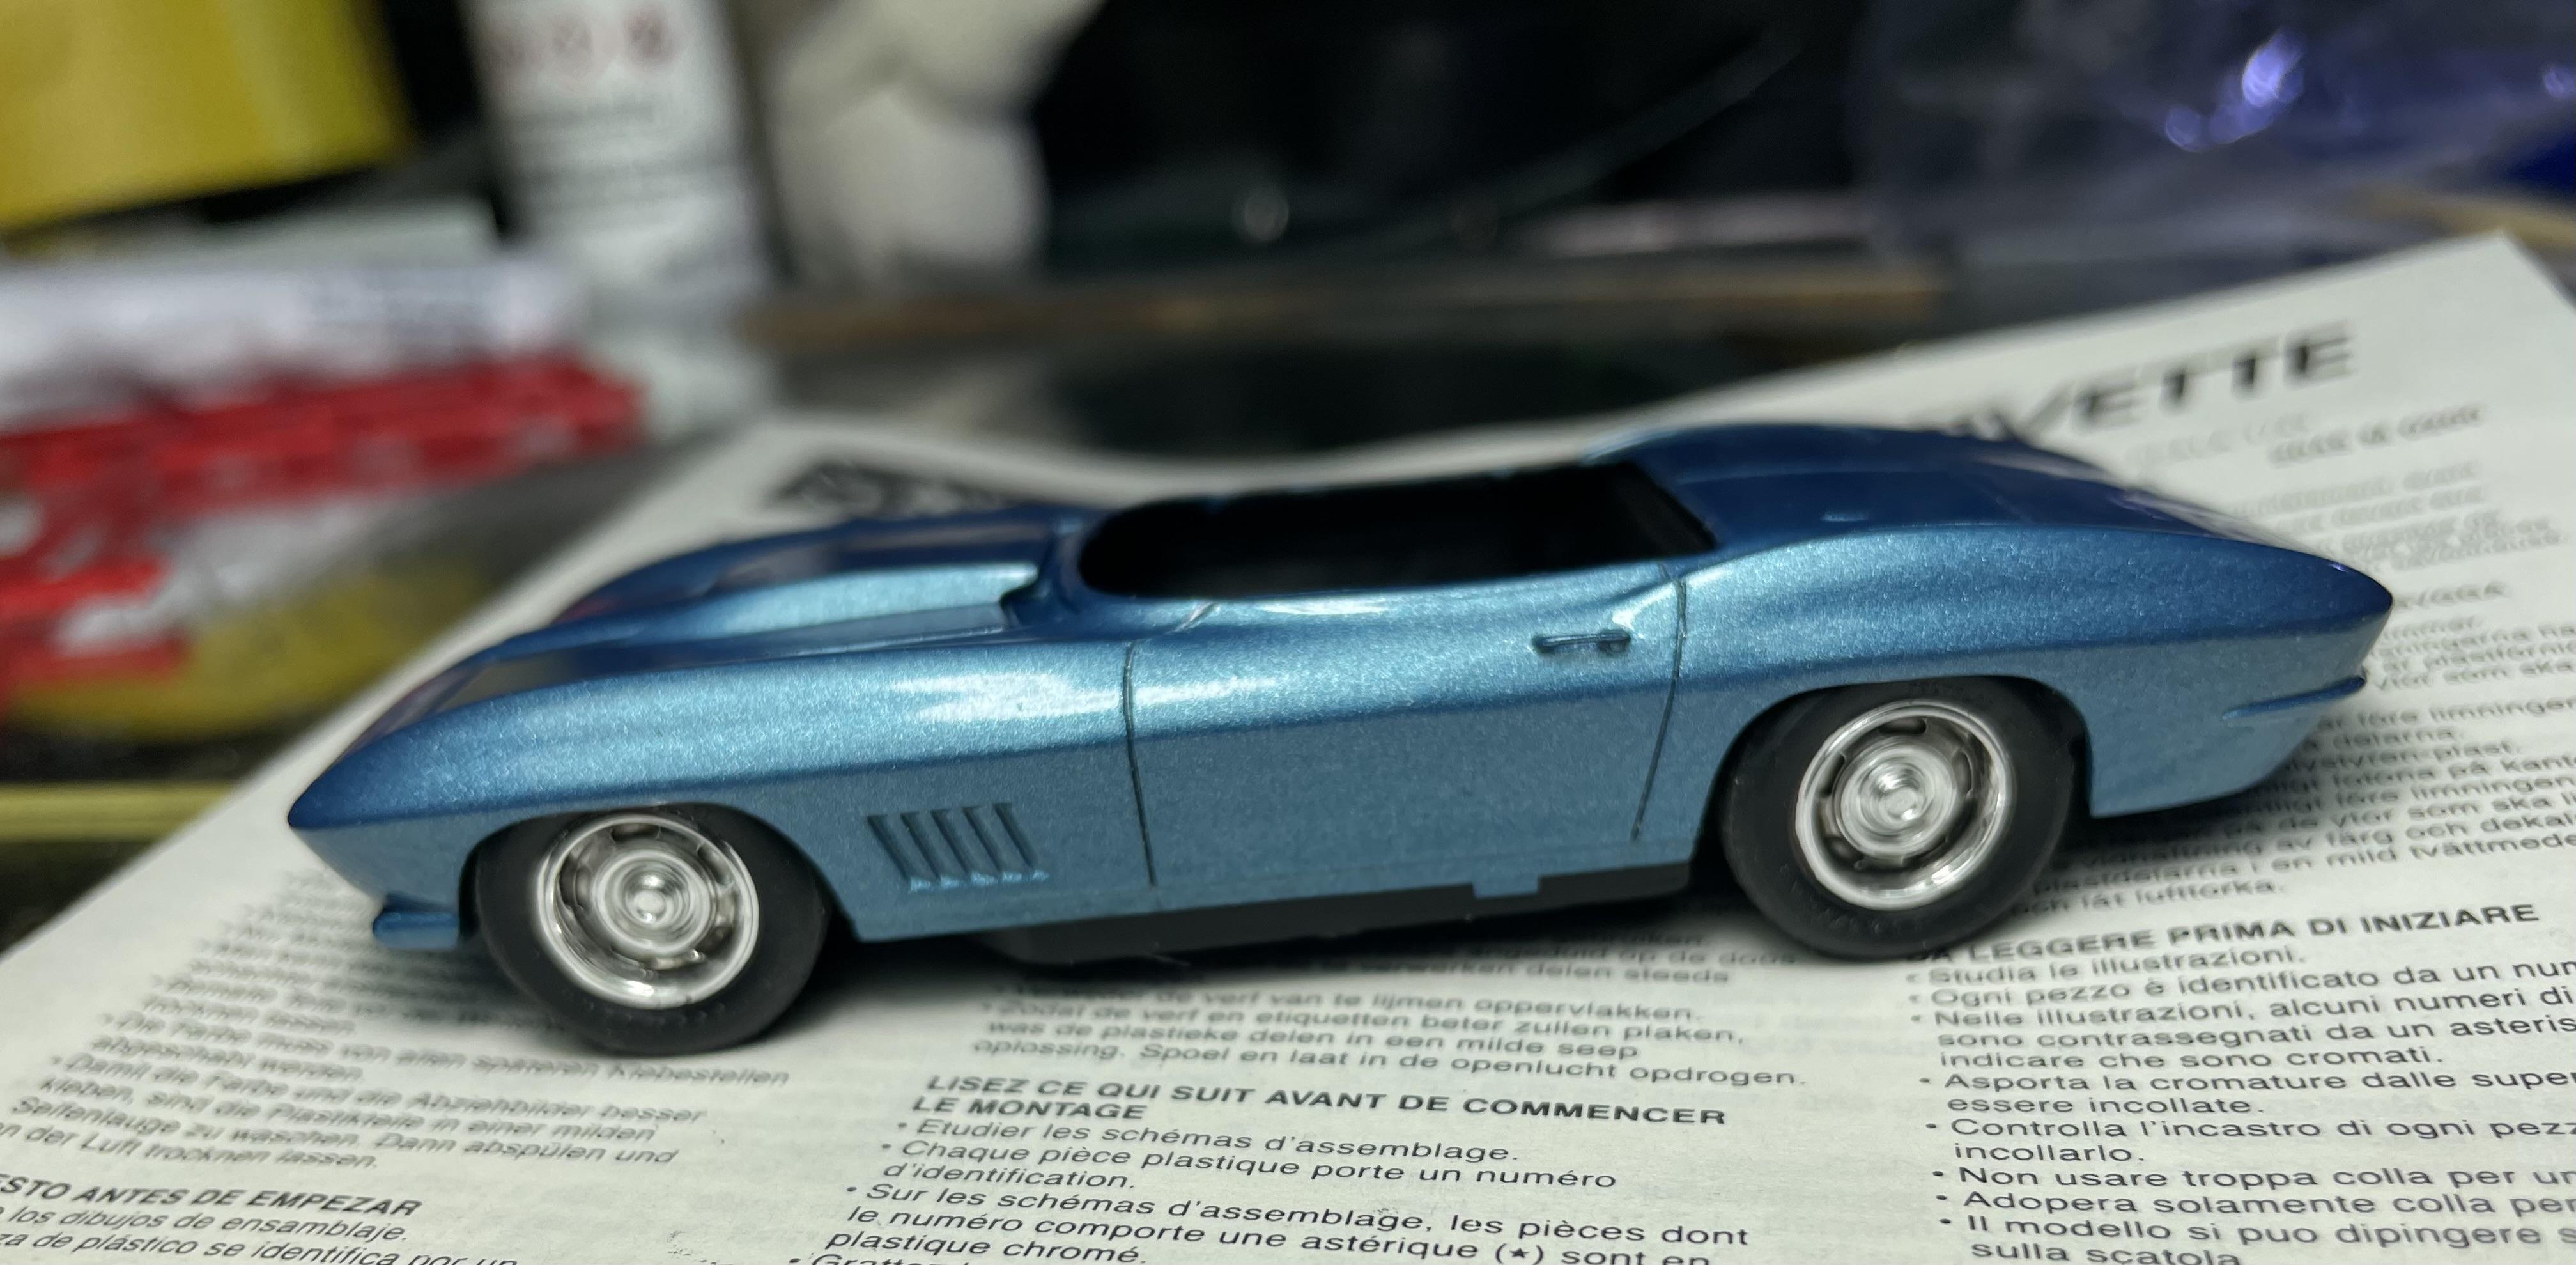
 My first try at a 1/43 corvette.
-
Favourite Rims
Brudda replied to Falcon Ranchero's topic in General Automotive Talk (Trucks and Cars)
These are some of my favorite
-
Very very nice. As a kid I was able to walk by the Chevy showroom . The cos Vega was in the showroom. Loved that car. Good build of a really fun and cool car.
-
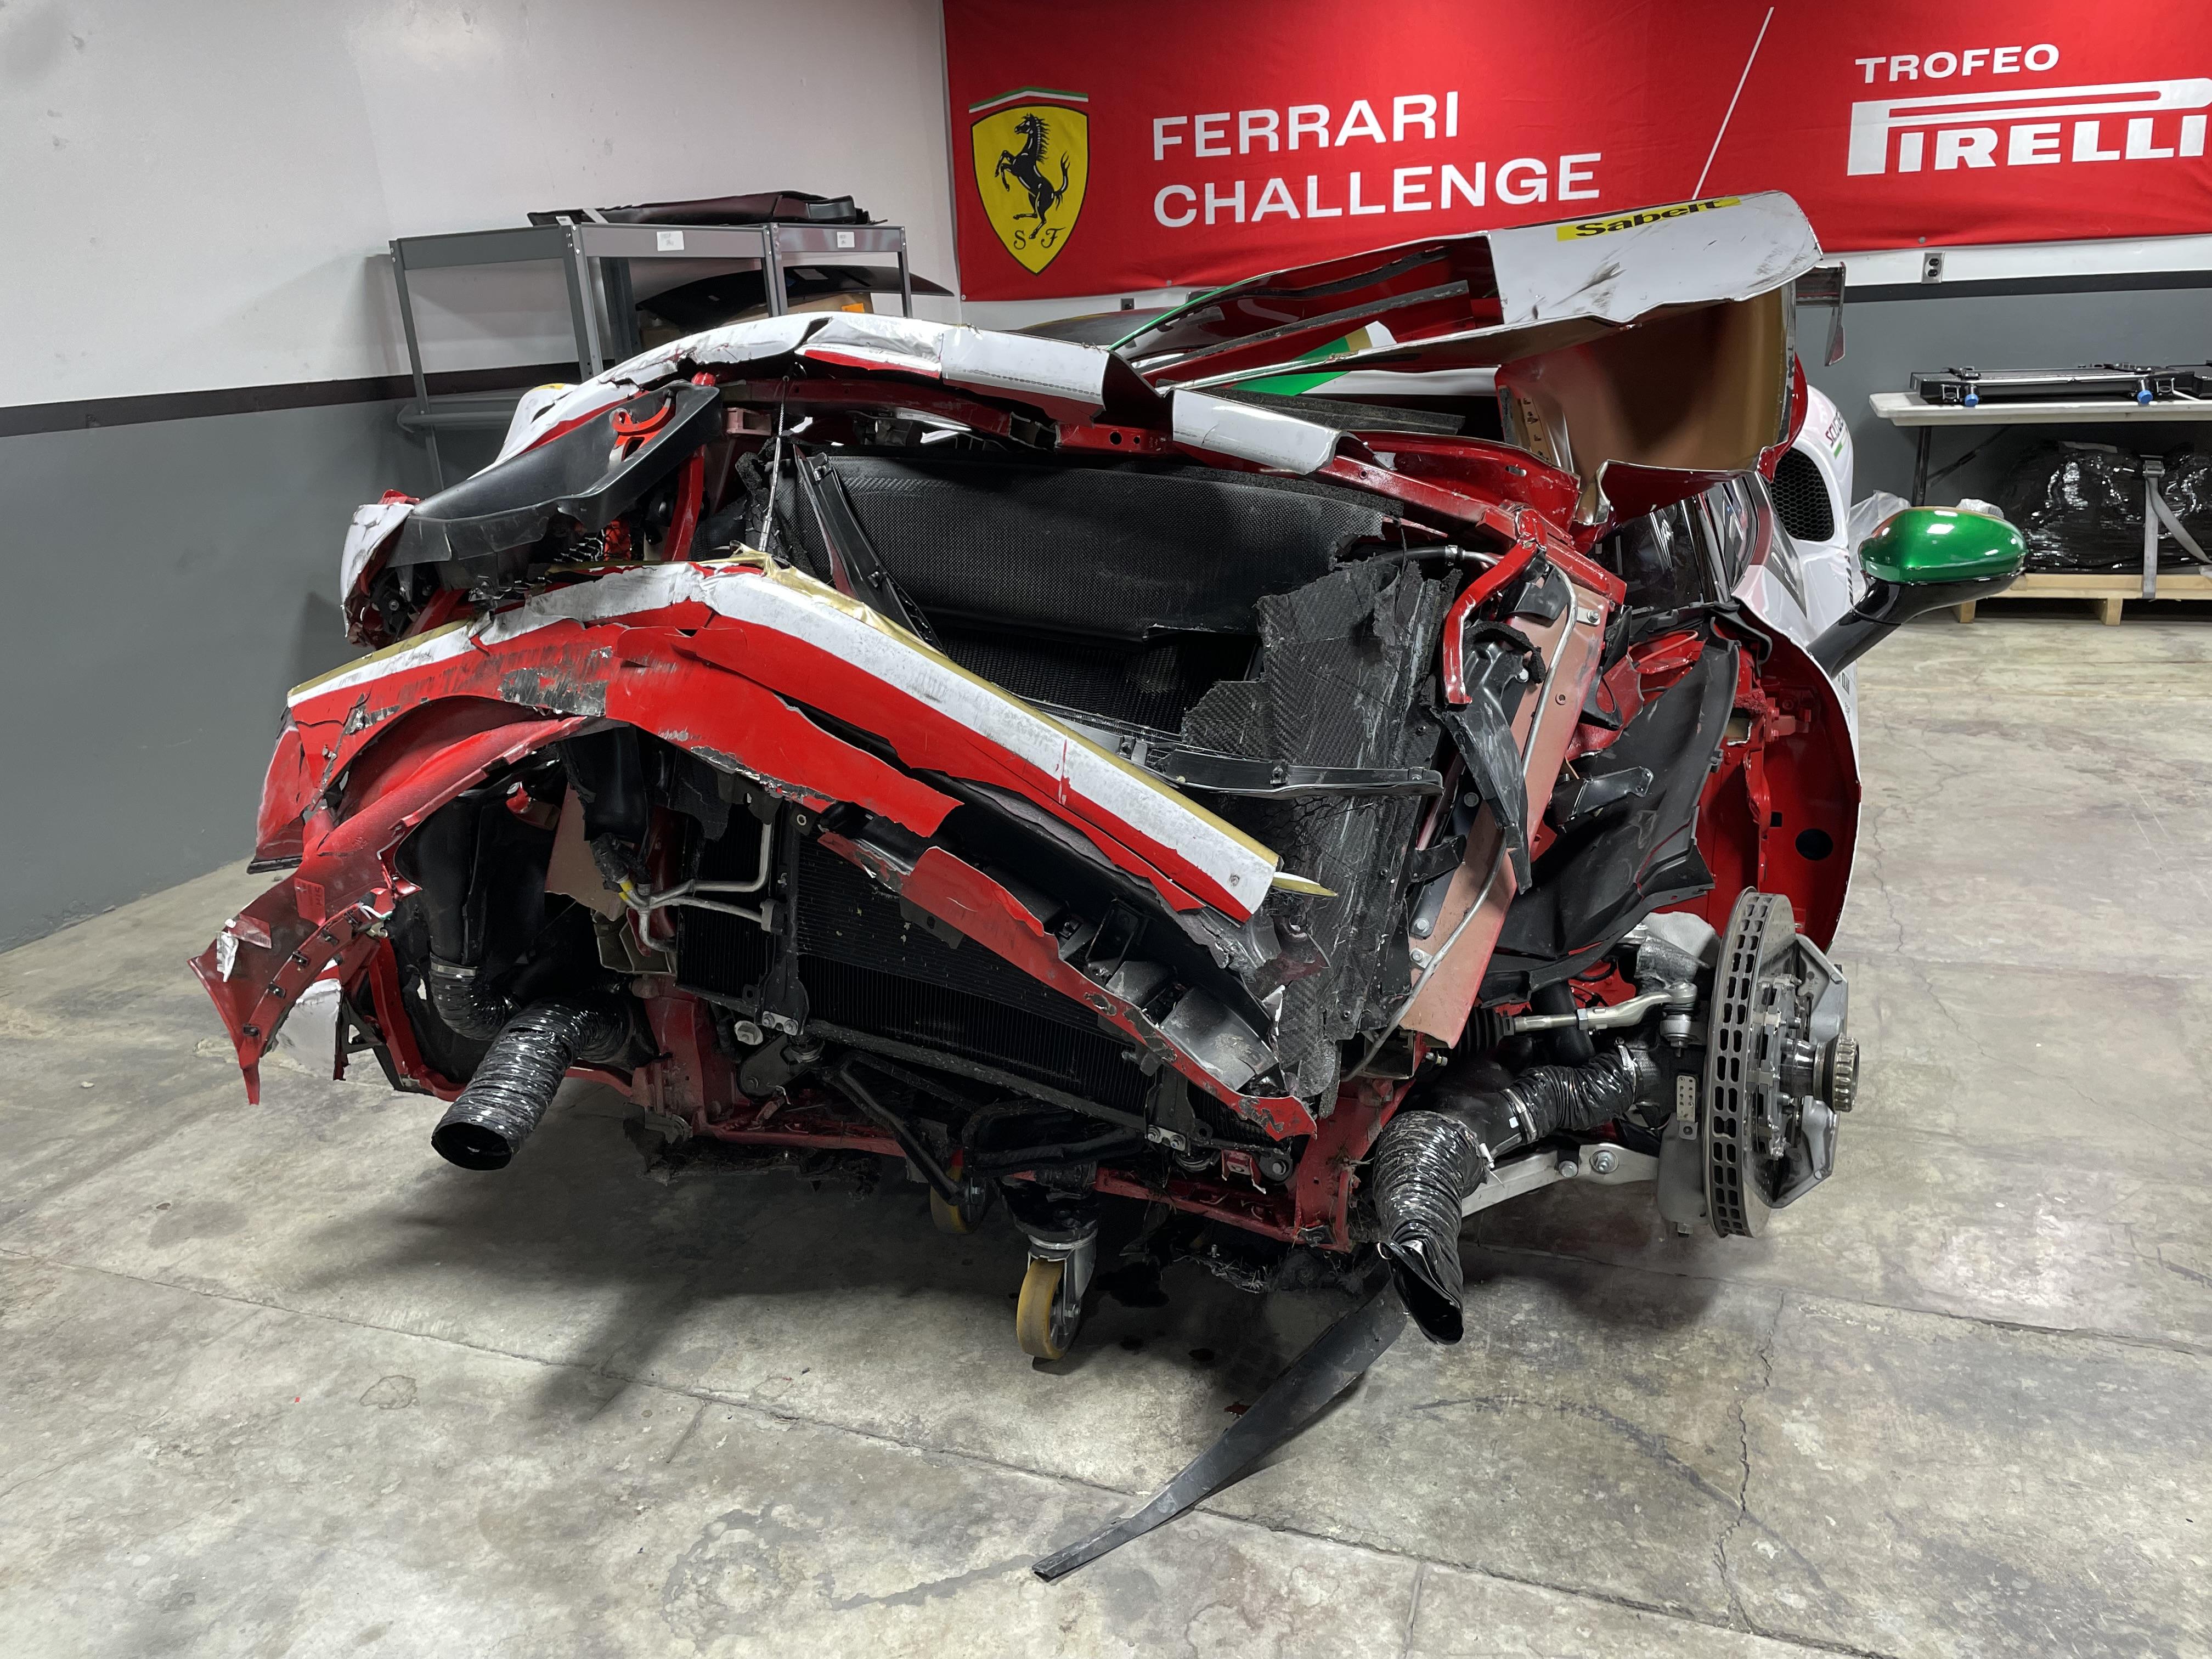
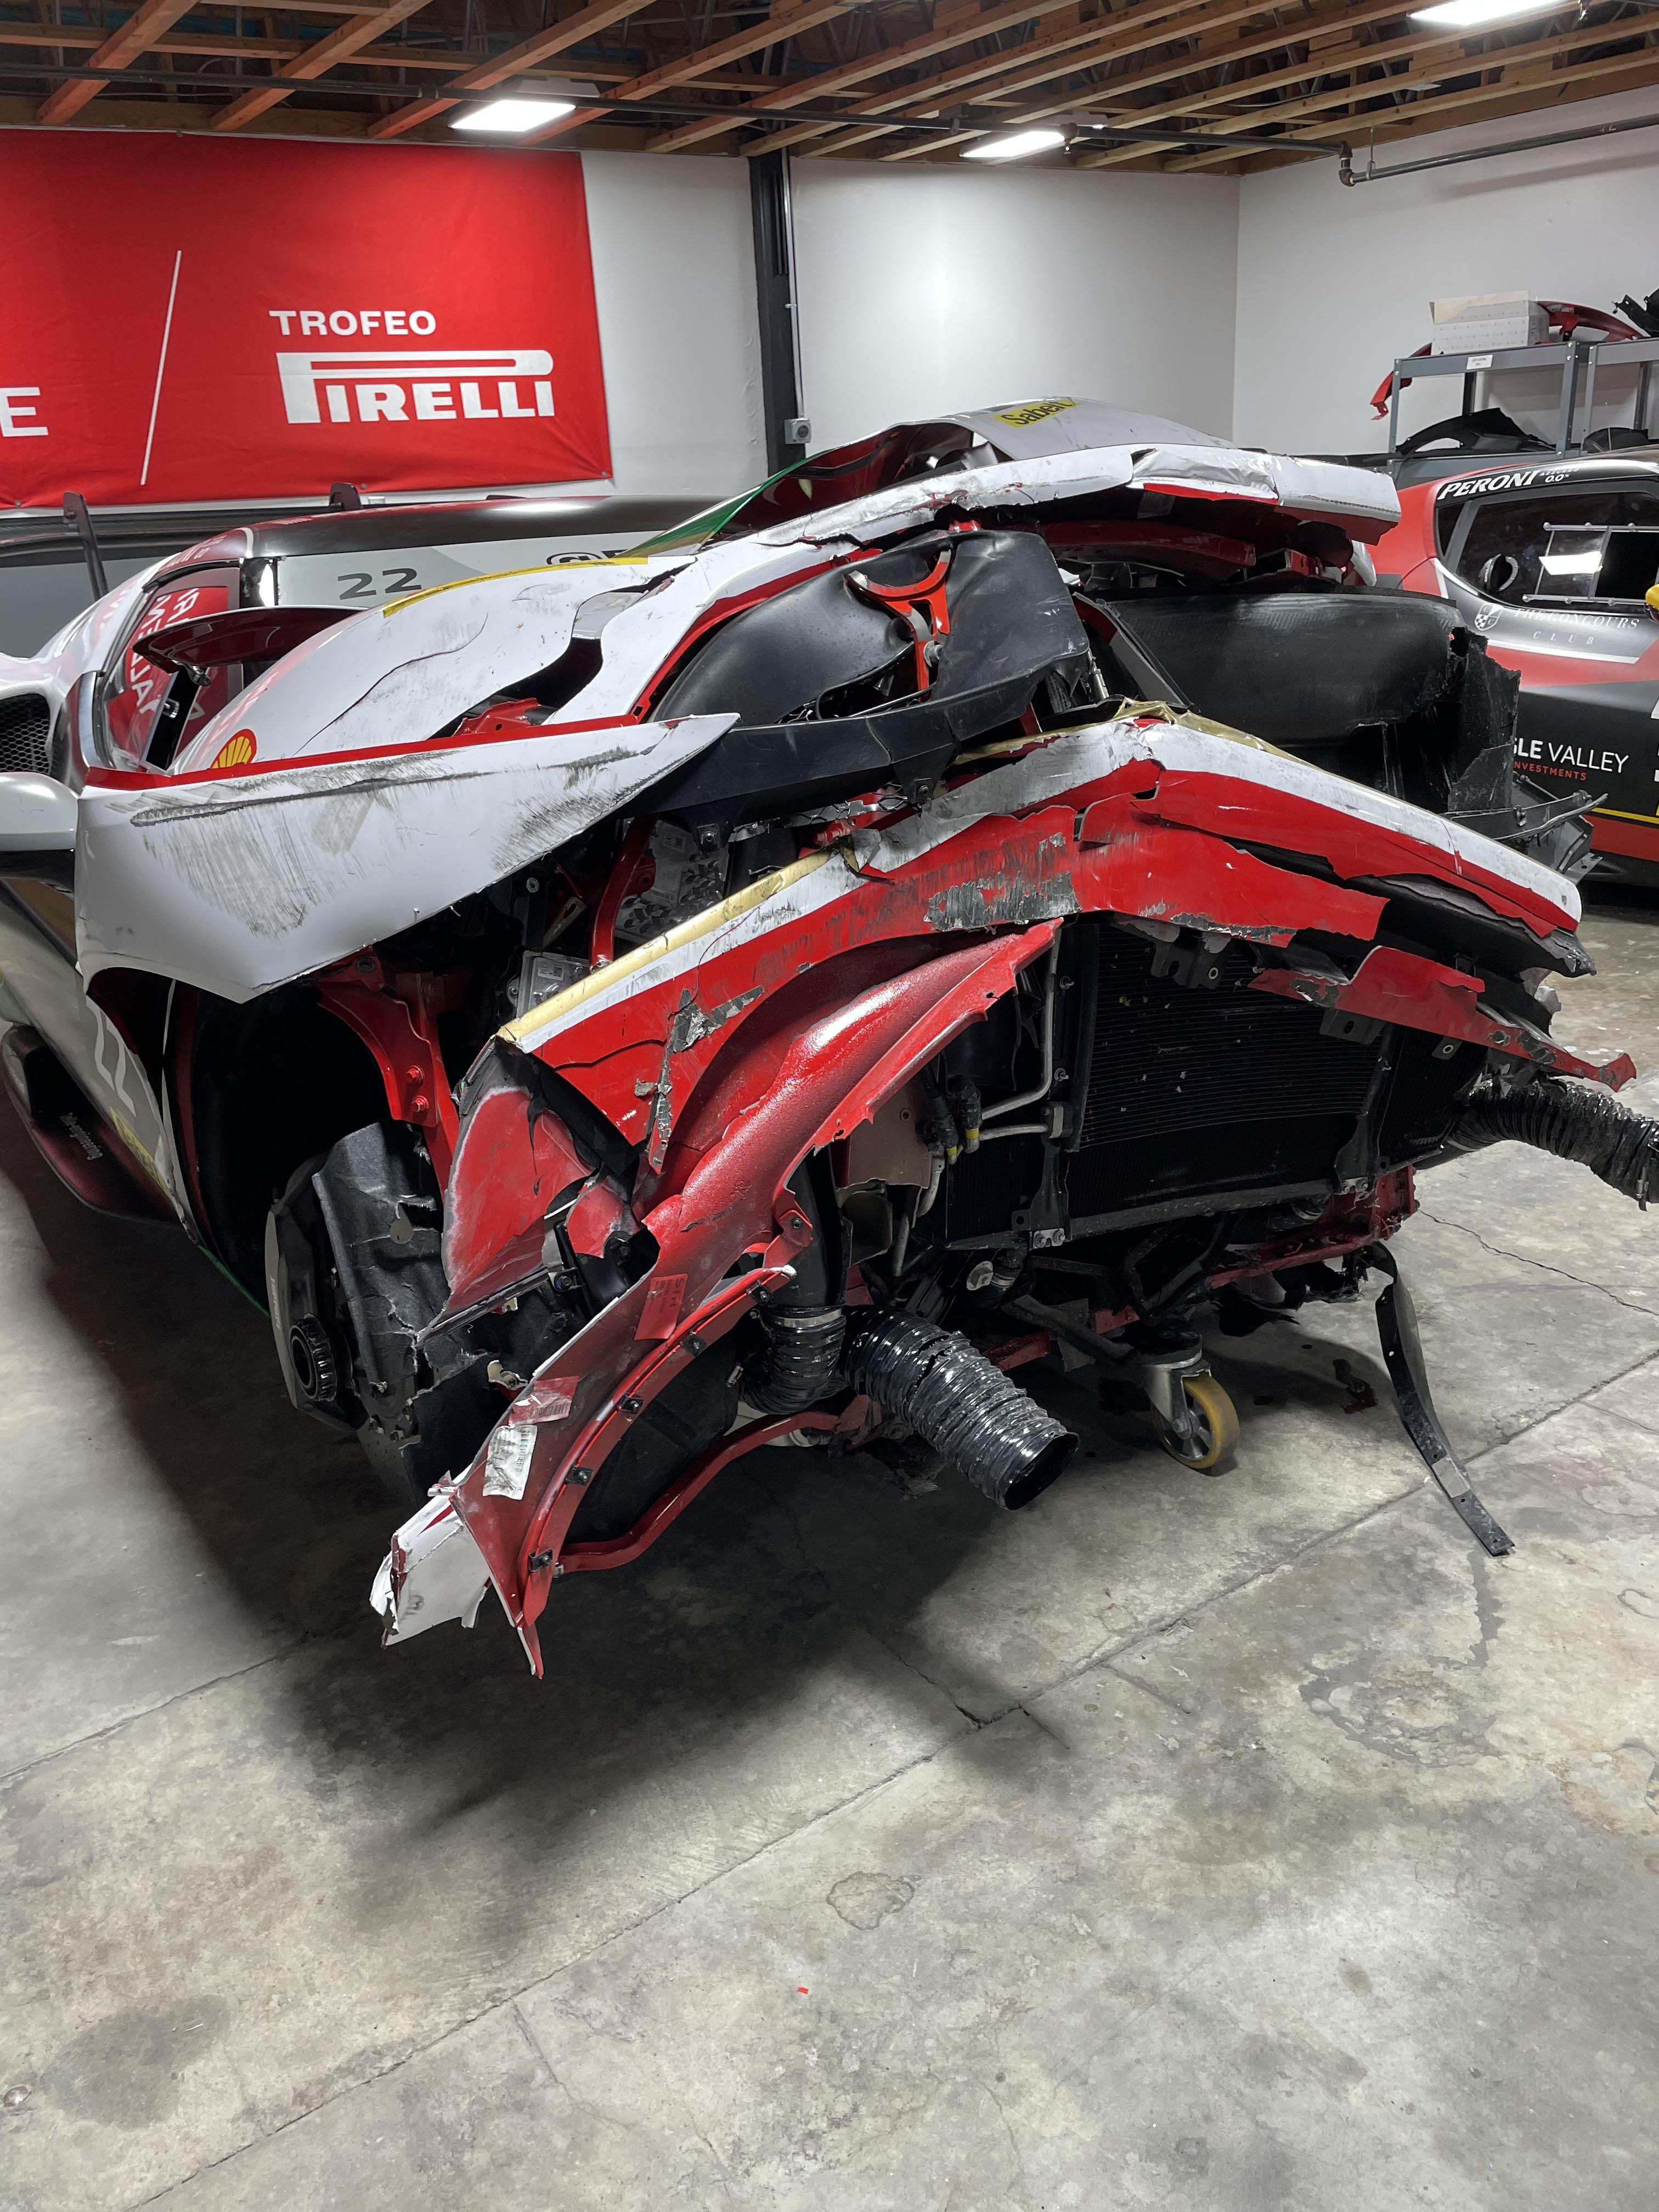
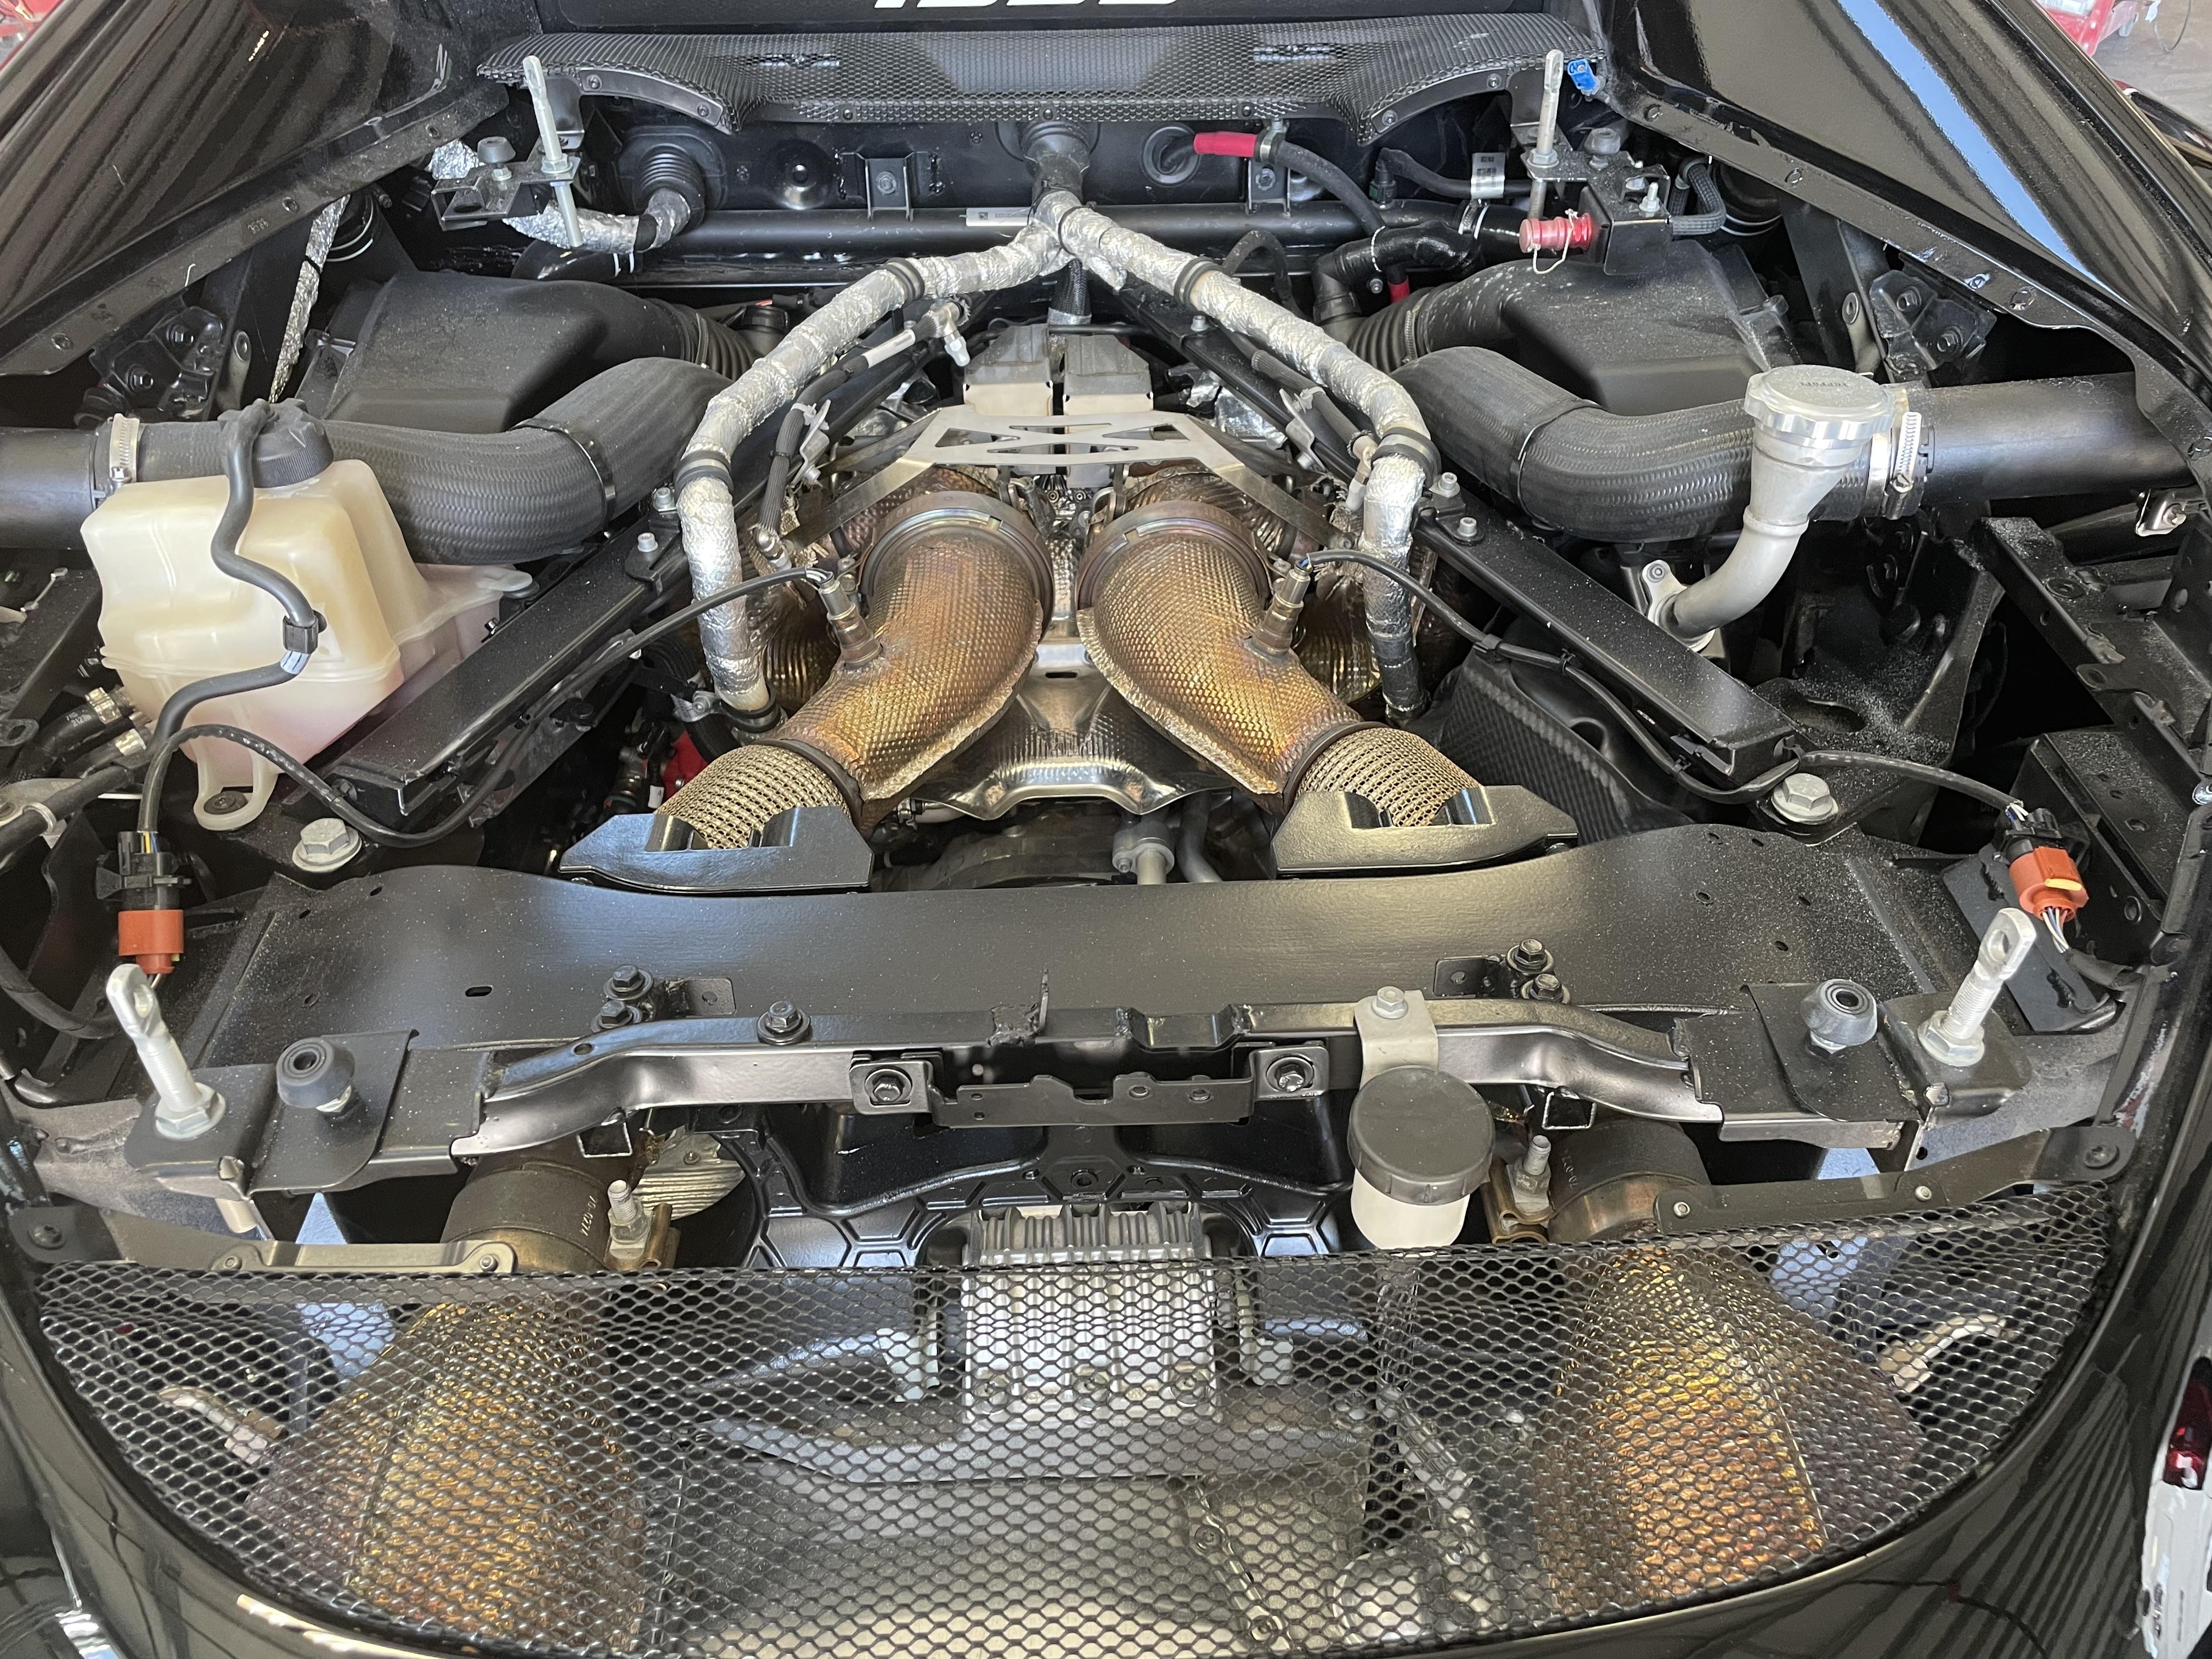
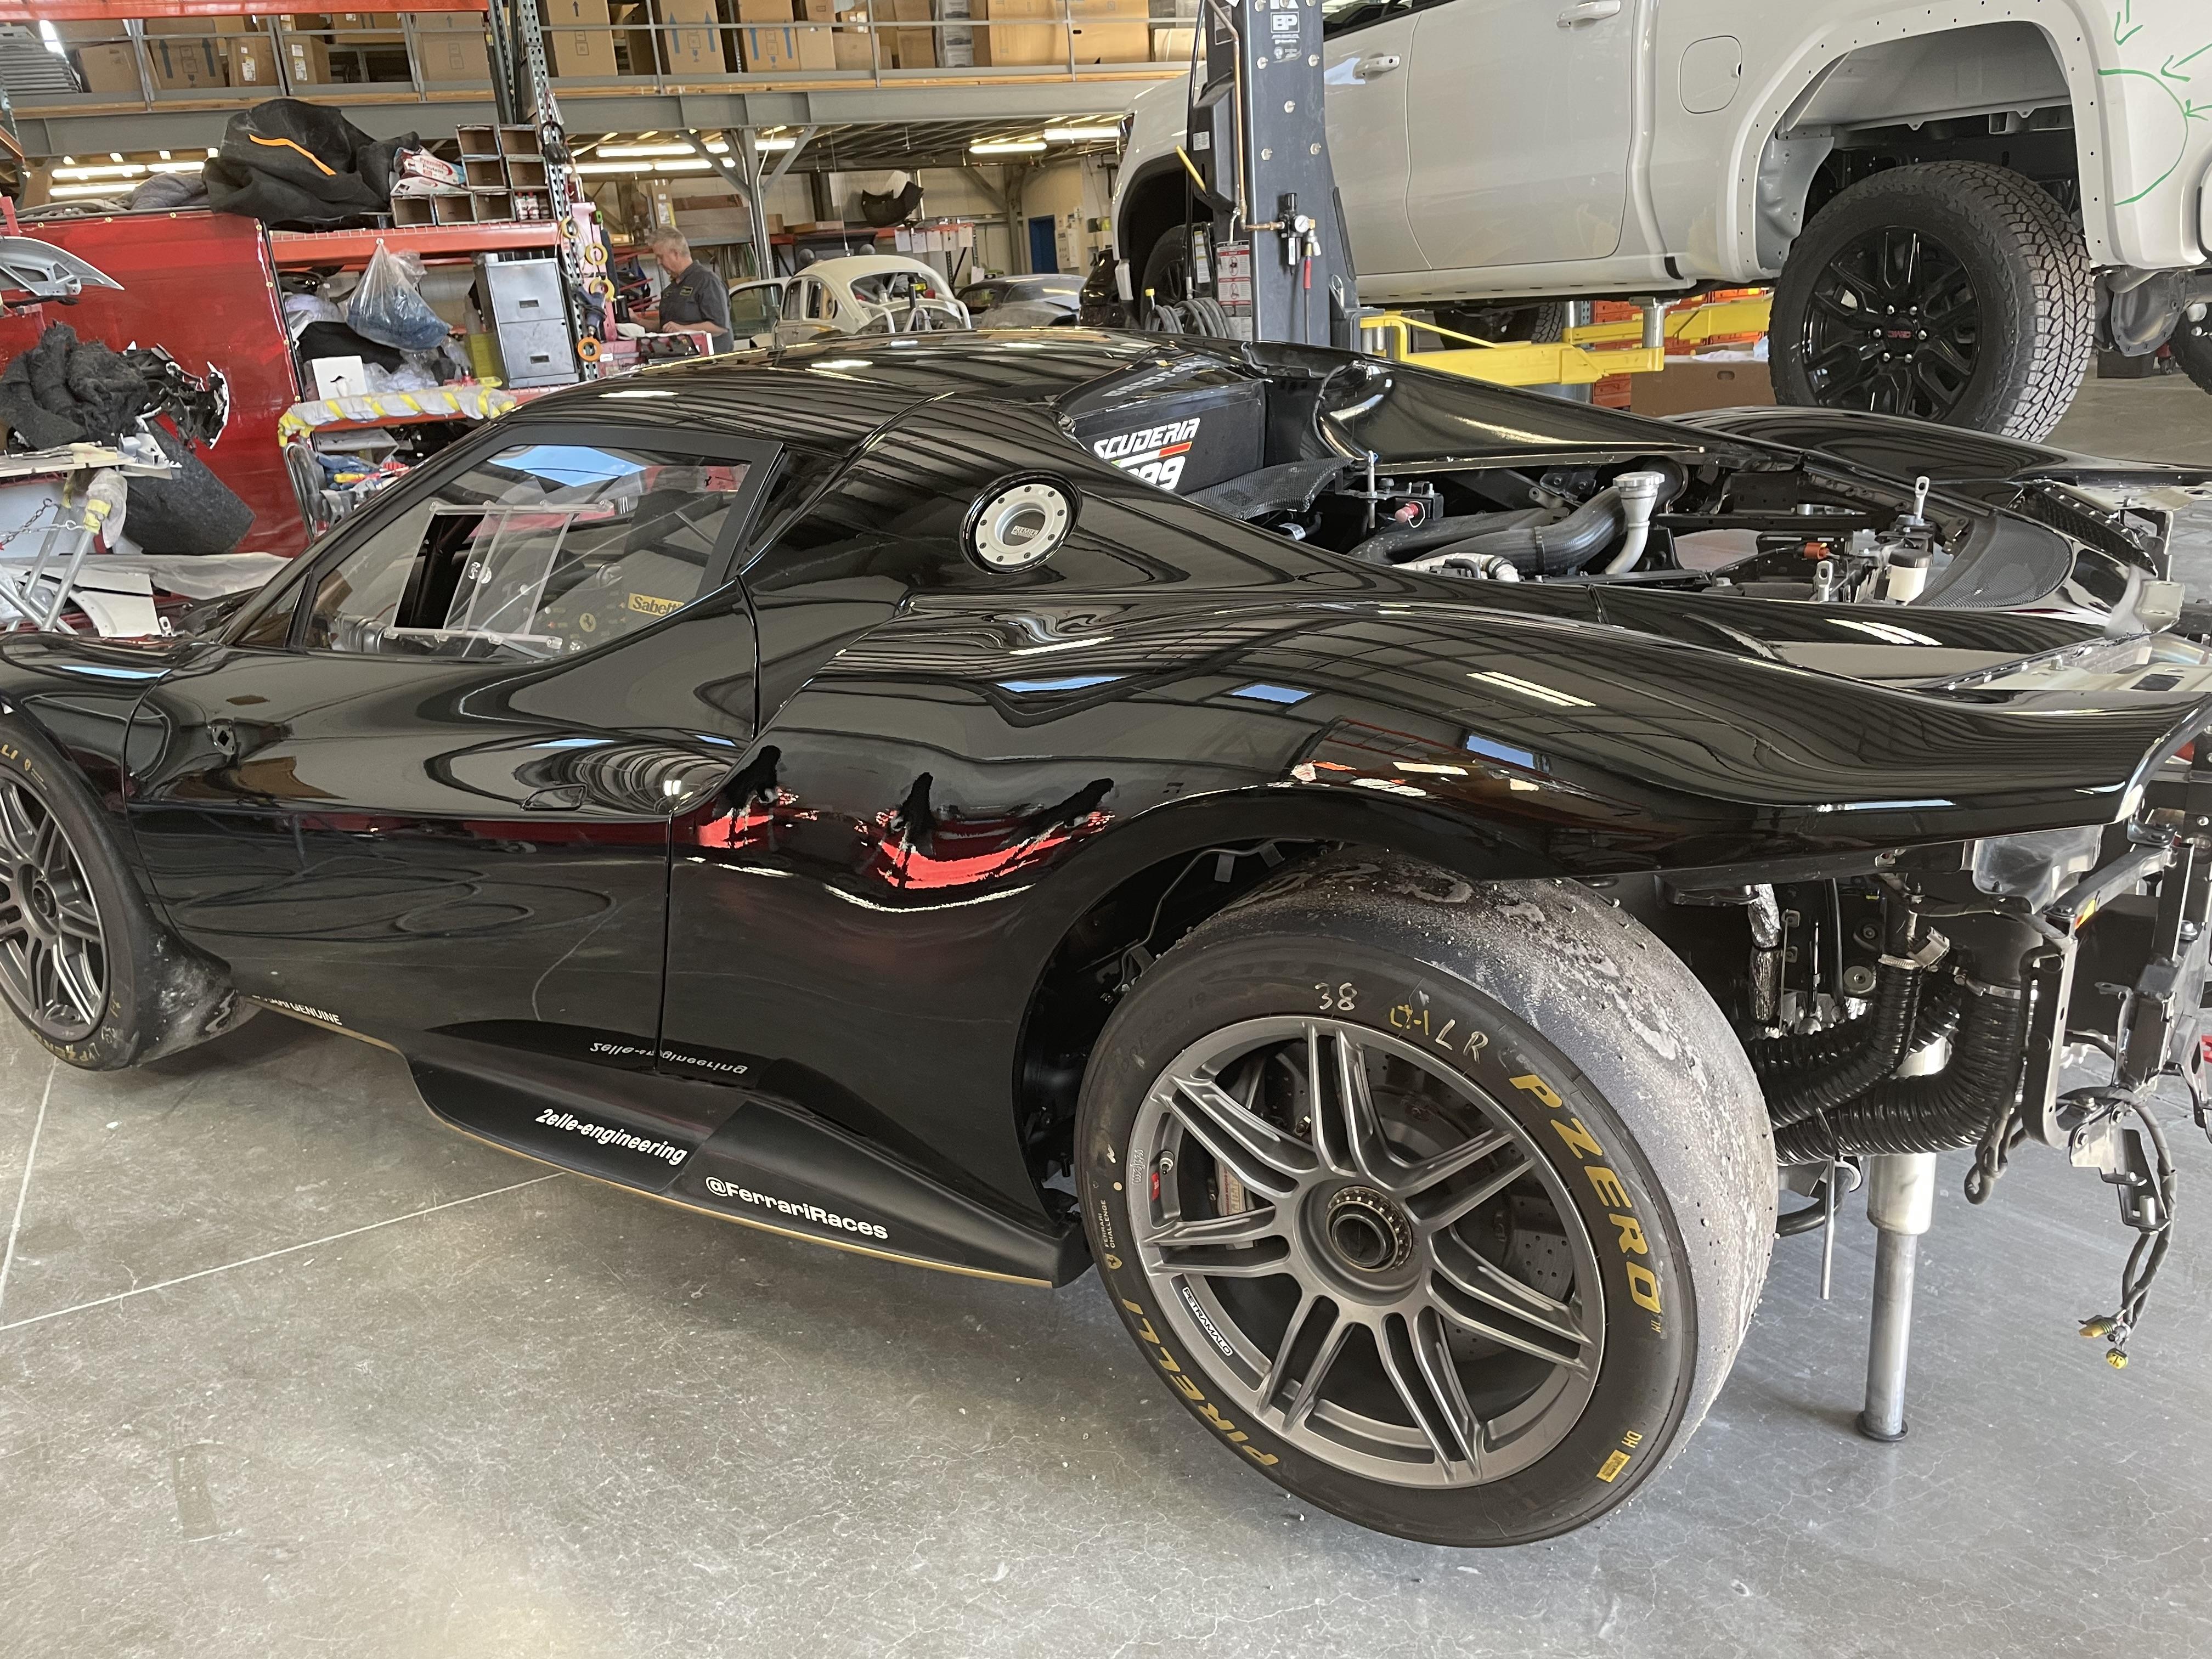
This is what happens when you hit the wall at Daytona. Yes the driver got hurt. Broken ribs. But he lived. It’s not a total though. We will fix it or it might be sent to LA for repairs. We do not have a frame jig for measuring. So it might go down there.
-
Alfa Romeo 158/59
Brudda replied to Chris Smith's topic in WIP: Other Racing: Road Racing, Land Speed Racers
Hello Chris! Fantastic in every way -
Hello Perry, yes it is but I’m lucky to have a tiny visit. But I really like the simple life, this was more of a surprise. I have not built a model since these arrived. I miss that. The other world that I do not see is probably pretty rough also. Believe me , when this is over, I’m going fishing and building models. I used to go fishing with my dad to a place in Idaho called Henry’s fork. I’m going there first , fish my brains out then do some modeling. This other world is … fast cars, fast and very beautiful women, and lots of money. When I was 30, this would have caught me but today, I see this differently. Fast cars ok great but expensive. Same with the women. Money is great but I was able to get a glimpse of the immense pressure that these guys are under. No thanks. Give me my retirement money and I’m happy.
-
Yes Perry it’s pretty cool to work on these cars. Not all fun and games, they pressure us in time , even though we have them down pretty good. Now that we can fix most things in a few days , they want it faster. The more you give , the more they want. Part of the really rich, always getting what they want. But it does cost them. This last repair I did in 4 hours. It goes into our paint department and it’s finished in a day. I put it together in another 3-4 hours. The cost is around $12,000. The owner gets around $5000 and the painter gets $2000 and I get the rest. Not bad , for 8 hours of work. But I do have many years of experience repairing aluminum. I built sprint car bodies out of aluminum with my dad in the late 60’s and 70’s. So when aluminum came out on real passenger cars it was easy as putting on my shoes. Carbon fiber was pretty easy also, with my Boeing experience. And I make sure the doors stay on these cars!😆
-
I had an idea that there was money out there , I just never saw any of it. These guys are sooooo rich they do not care how much it costs, but time to them is everything. I pretty much have these cars memorized now. I can fix a pretty destroyed car in a few days. They do not care about price. Time is what’s important to them. The first one took a few days and they were very happy with it. Charged them around $20,000 and they did not even flinch. They supply parts this was just labor. Then what surprised me was “ when can you do more” . I was very surprised. So we have repaired around a dozen cars now and we have a few more destroyed cars comming from Daytona. The team is there now. Really fun way to retire.
-
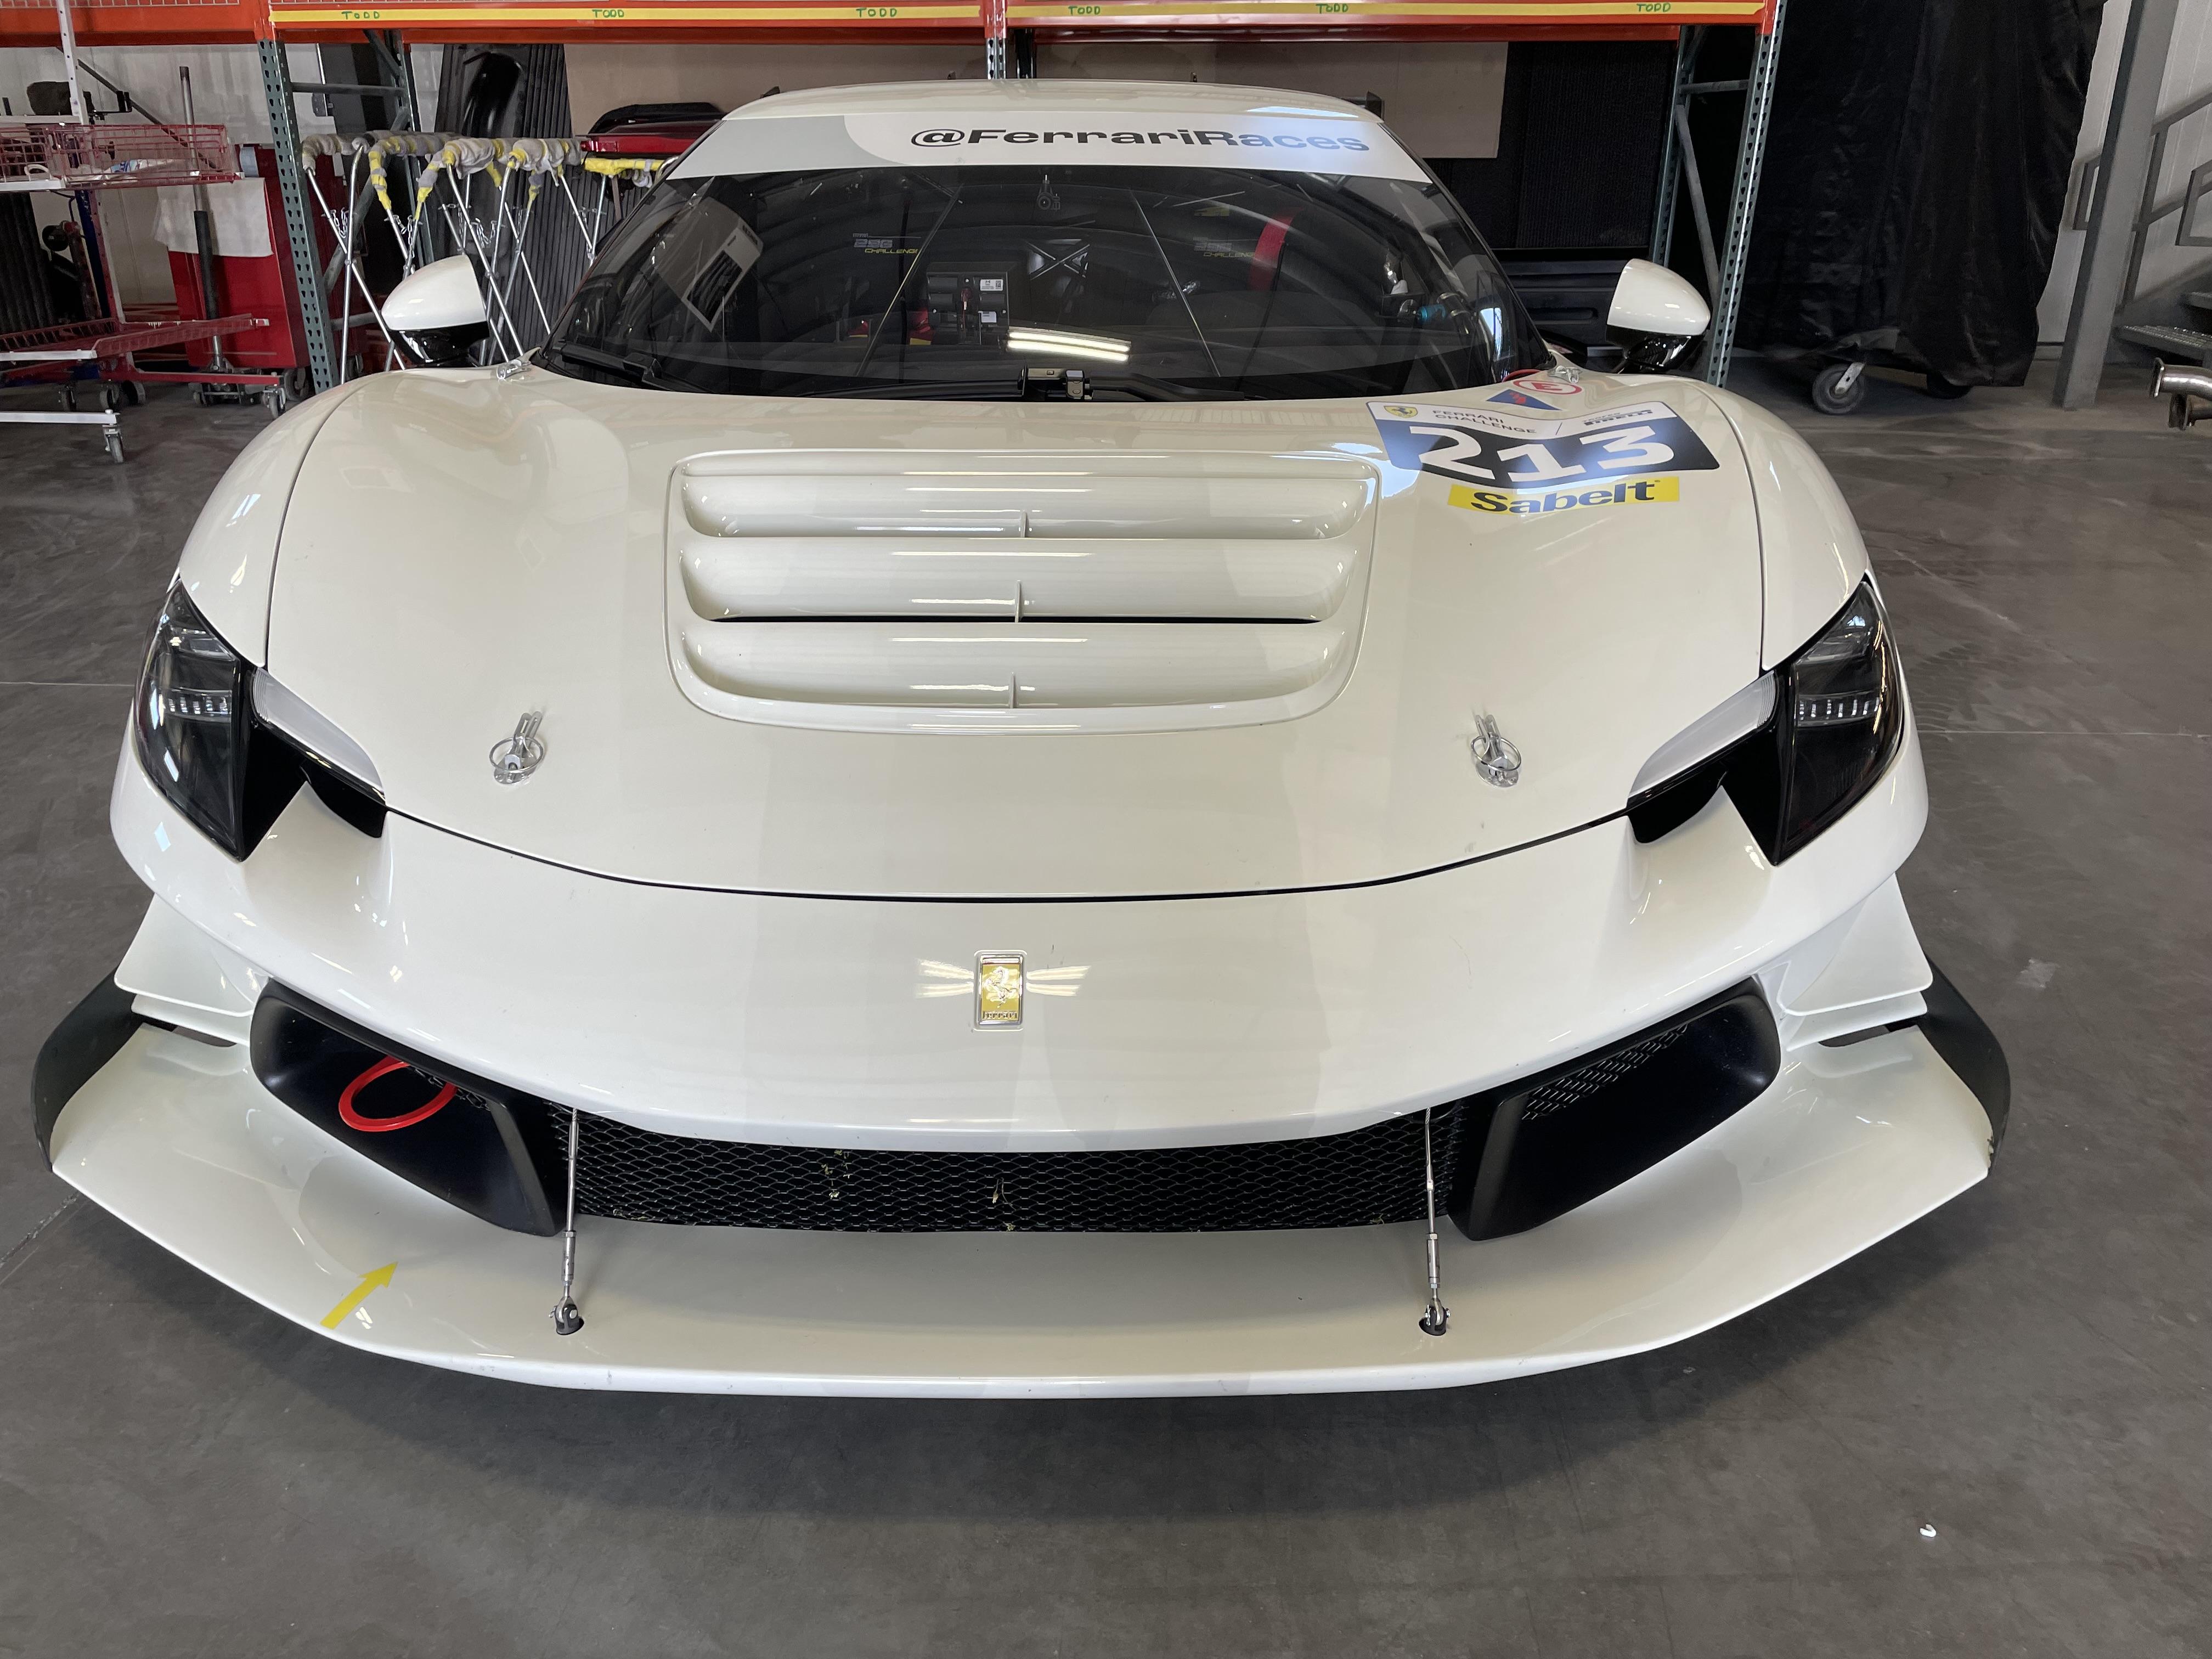
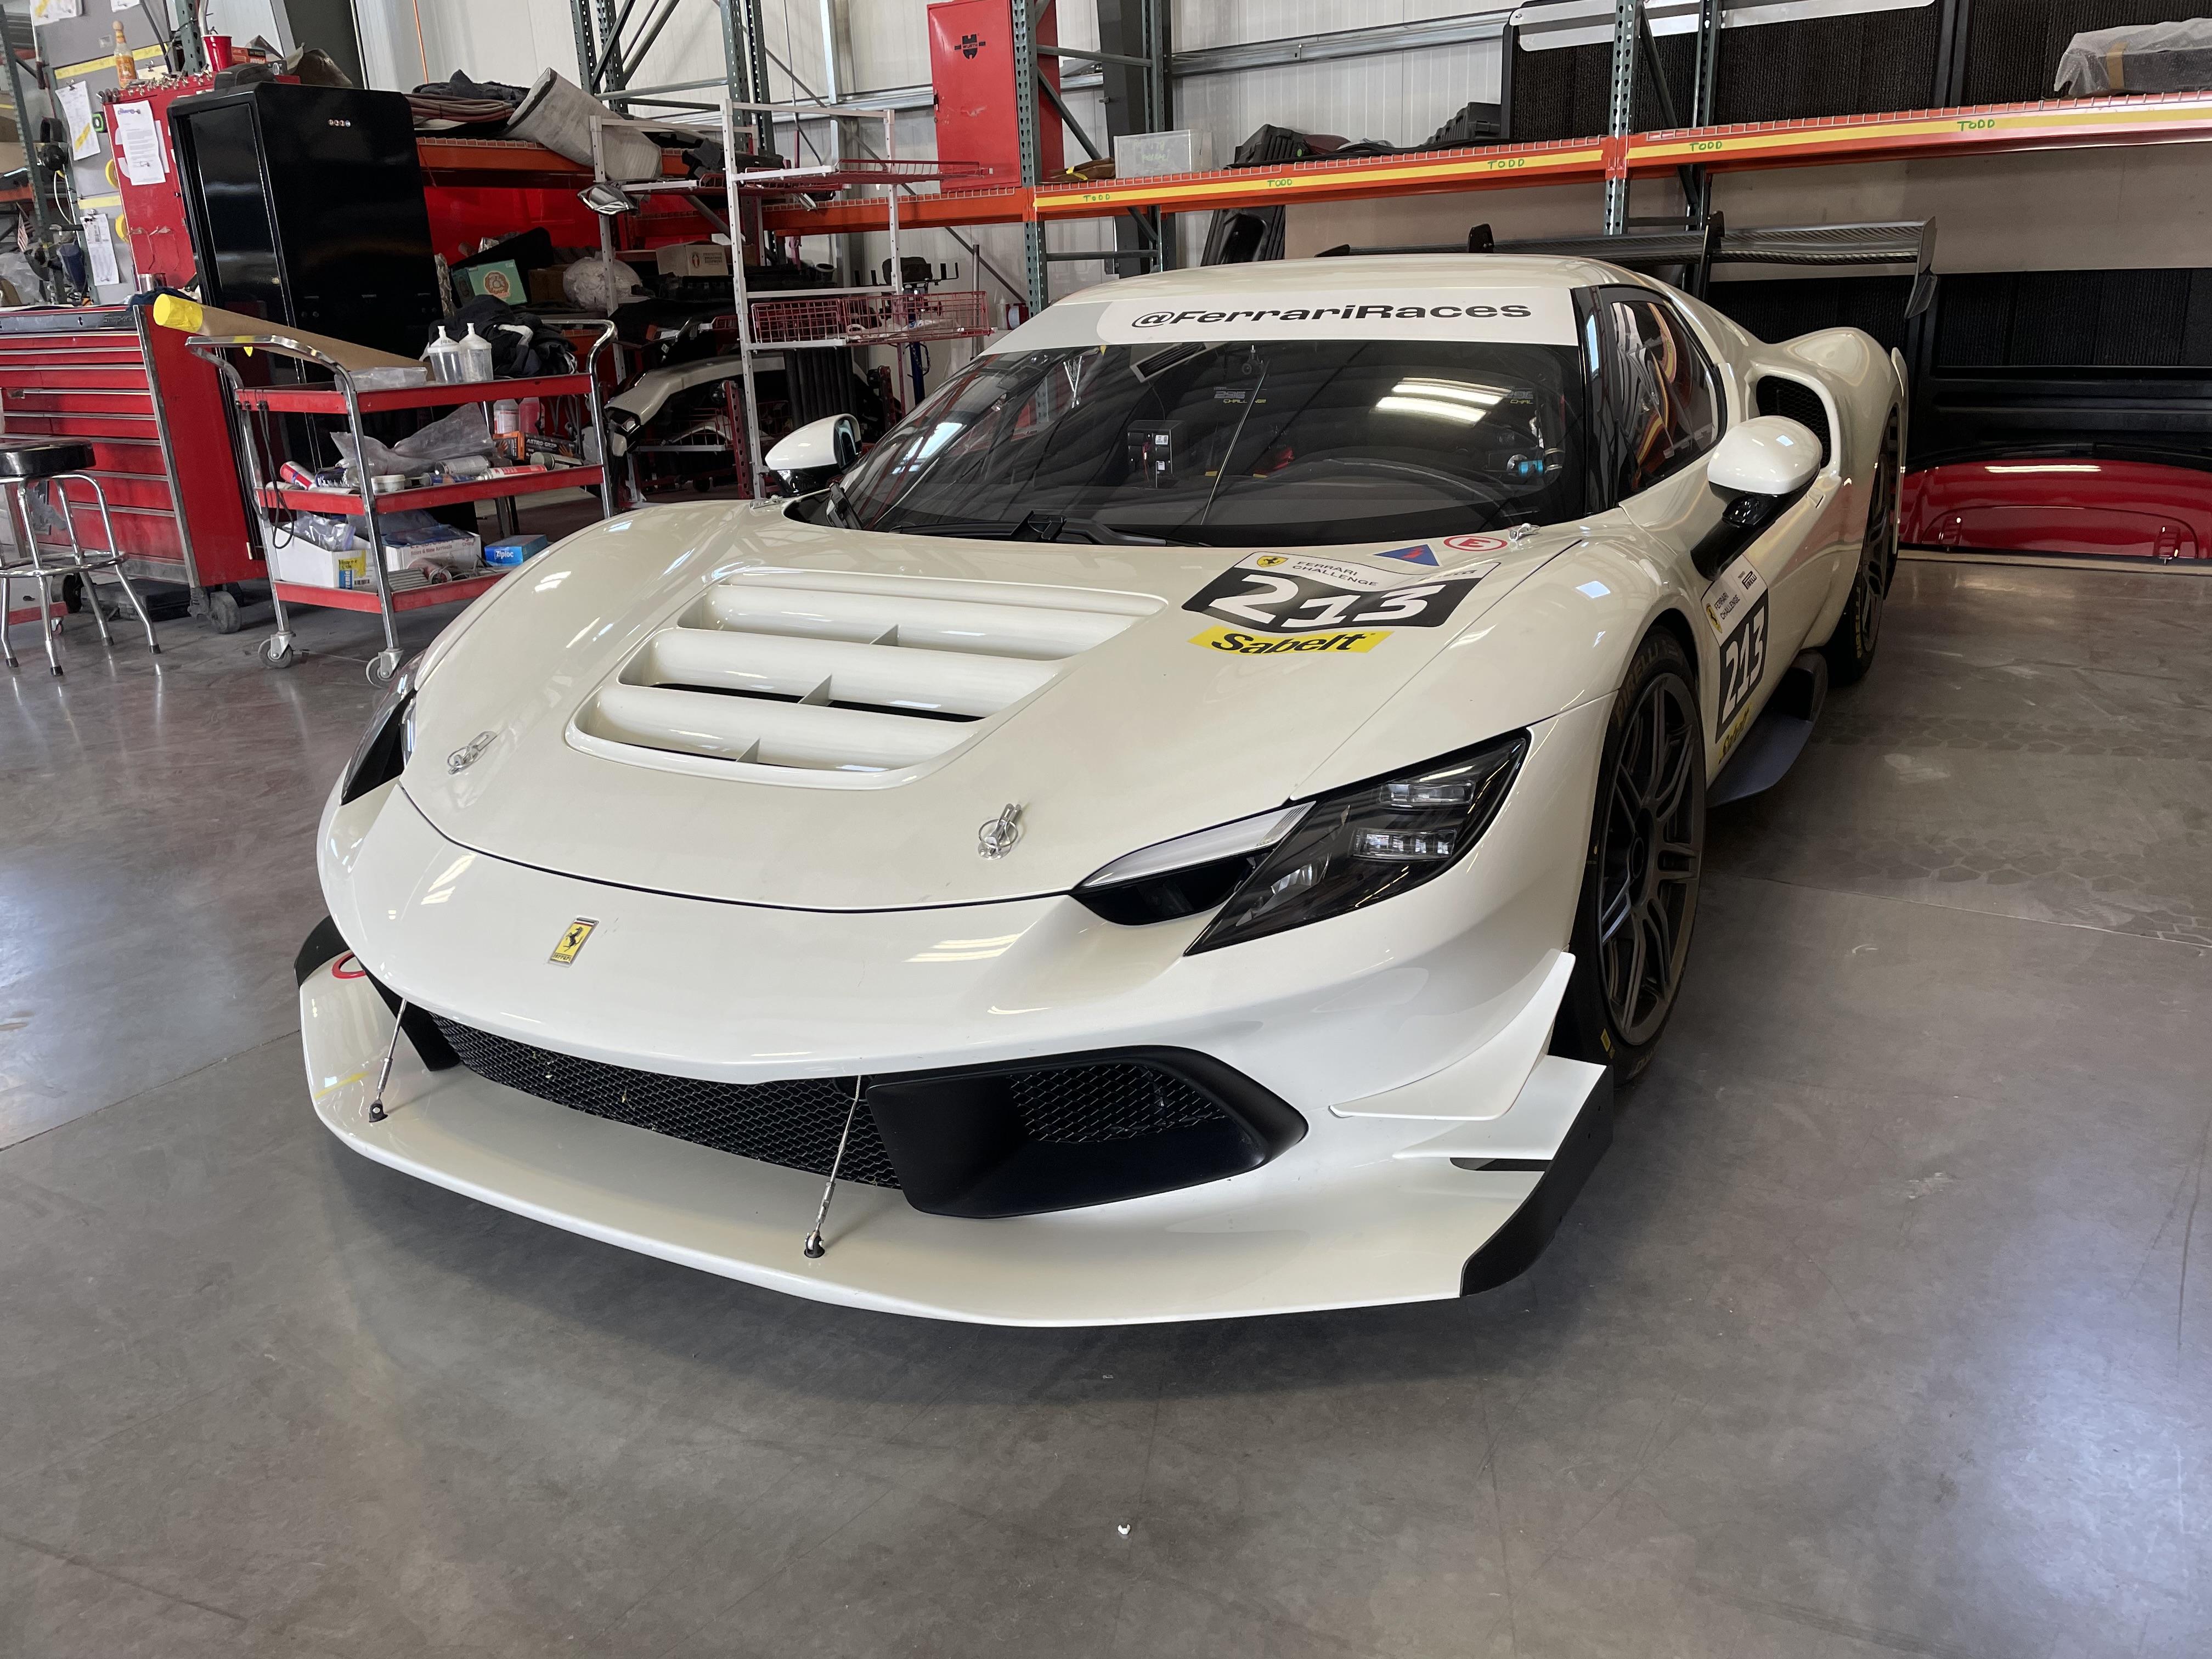
296 challenge cars
-
Rick Mears Penske 1988
Brudda replied to Lizard Racing's topic in Other Racing: Road Racing, Salt Flat Racers
Absolutely fantastic -
Another one right side messed up
-
Fantastic!
-
Revell 1966 Pontiac GTO in Tamiya Titanium Gold.
Brudda replied to Dragonhawk1066's topic in Model Cars
That is a beautiful GTO! Great job -
The Miller High Life Mustang
Brudda replied to RIXprints's topic in Other Racing: Road Racing, Salt Flat Racers
Fantastic! -
How to Smartly Aquire Vintage Kits?
Brudda replied to Falcon Ranchero's topic in General Automotive Talk (Trucks and Cars)
Sorry old man mess up. It is Carl not Ray. Sorry Carl -
How to Smartly Aquire Vintage Kits?
Brudda replied to Falcon Ranchero's topic in General Automotive Talk (Trucks and Cars)
4 -
How to Smartly Aquire Vintage Kits?
Brudda replied to Falcon Ranchero's topic in General Automotive Talk (Trucks and Cars)
My friend Bob taught me how to buy the old kits that you want. If you go to IPMS shows and look in the vendors area you might find a good deal. Some guys think their stuff is gold but i bought some really old models for cheap. And another thing is come late to the vendors area for your best deals. Some guys do not want to take them back to their car. I wanted a monogram Buick and it was cheap, $15. At the end of the show he asked me if I wanted to buy the Buick. I hesitated and he said I can have the whole box of models for $15. So I took the box. I found a Jo-Han 1963 cad and sent it to Ray(Slusher) for free. So you can find deals if your patient. Also we have a few antique stores here. I go in there sometimes. Found a few old models for reasonable prices. Some were crazy high but a few were low. You have to know prices. Bought a ford mk4 mpc kit for $10 there. A mpc Toyota 2000 GT convertible for the same price. So you might find a kit at an antique stores. Just a few ideas that worked for me. -
I have a 1970. My buddy has a 1969. I drove that 69 and fell in love with it. You want a very strong car that’s very reliable and fun to drive, the 69 is hard to beat. His has a 273 in it and it’s pretty respectable on performance. I do have a question, what model companies make a 1/25-24 69? I would like to buy some. I have the hemi under glass kit. Your build is great!
-
More pics
-
Oh boy! Another beauty from the Studio!!really cool!!
-
Great job! I just wonder on some kits why things don’t fit. You wonder if anyone actually builds it at revell. I really used to get upset on models. That did not fit. Now I just cut, sand or whatever it takes. Model factory hiro kits are really bad for this. You pay a fortune on a kit and things just do not fit. Getting burnt out on this so I’m putting them away for awhile. I have bought so many hiro kits that now I’m insane. So for my own good I’m putting them away for awhile to regain my sanity. Your build is nice. And I understand completely on fit.
-
Very,very nice!!!
-
Oh man you need a garage
-
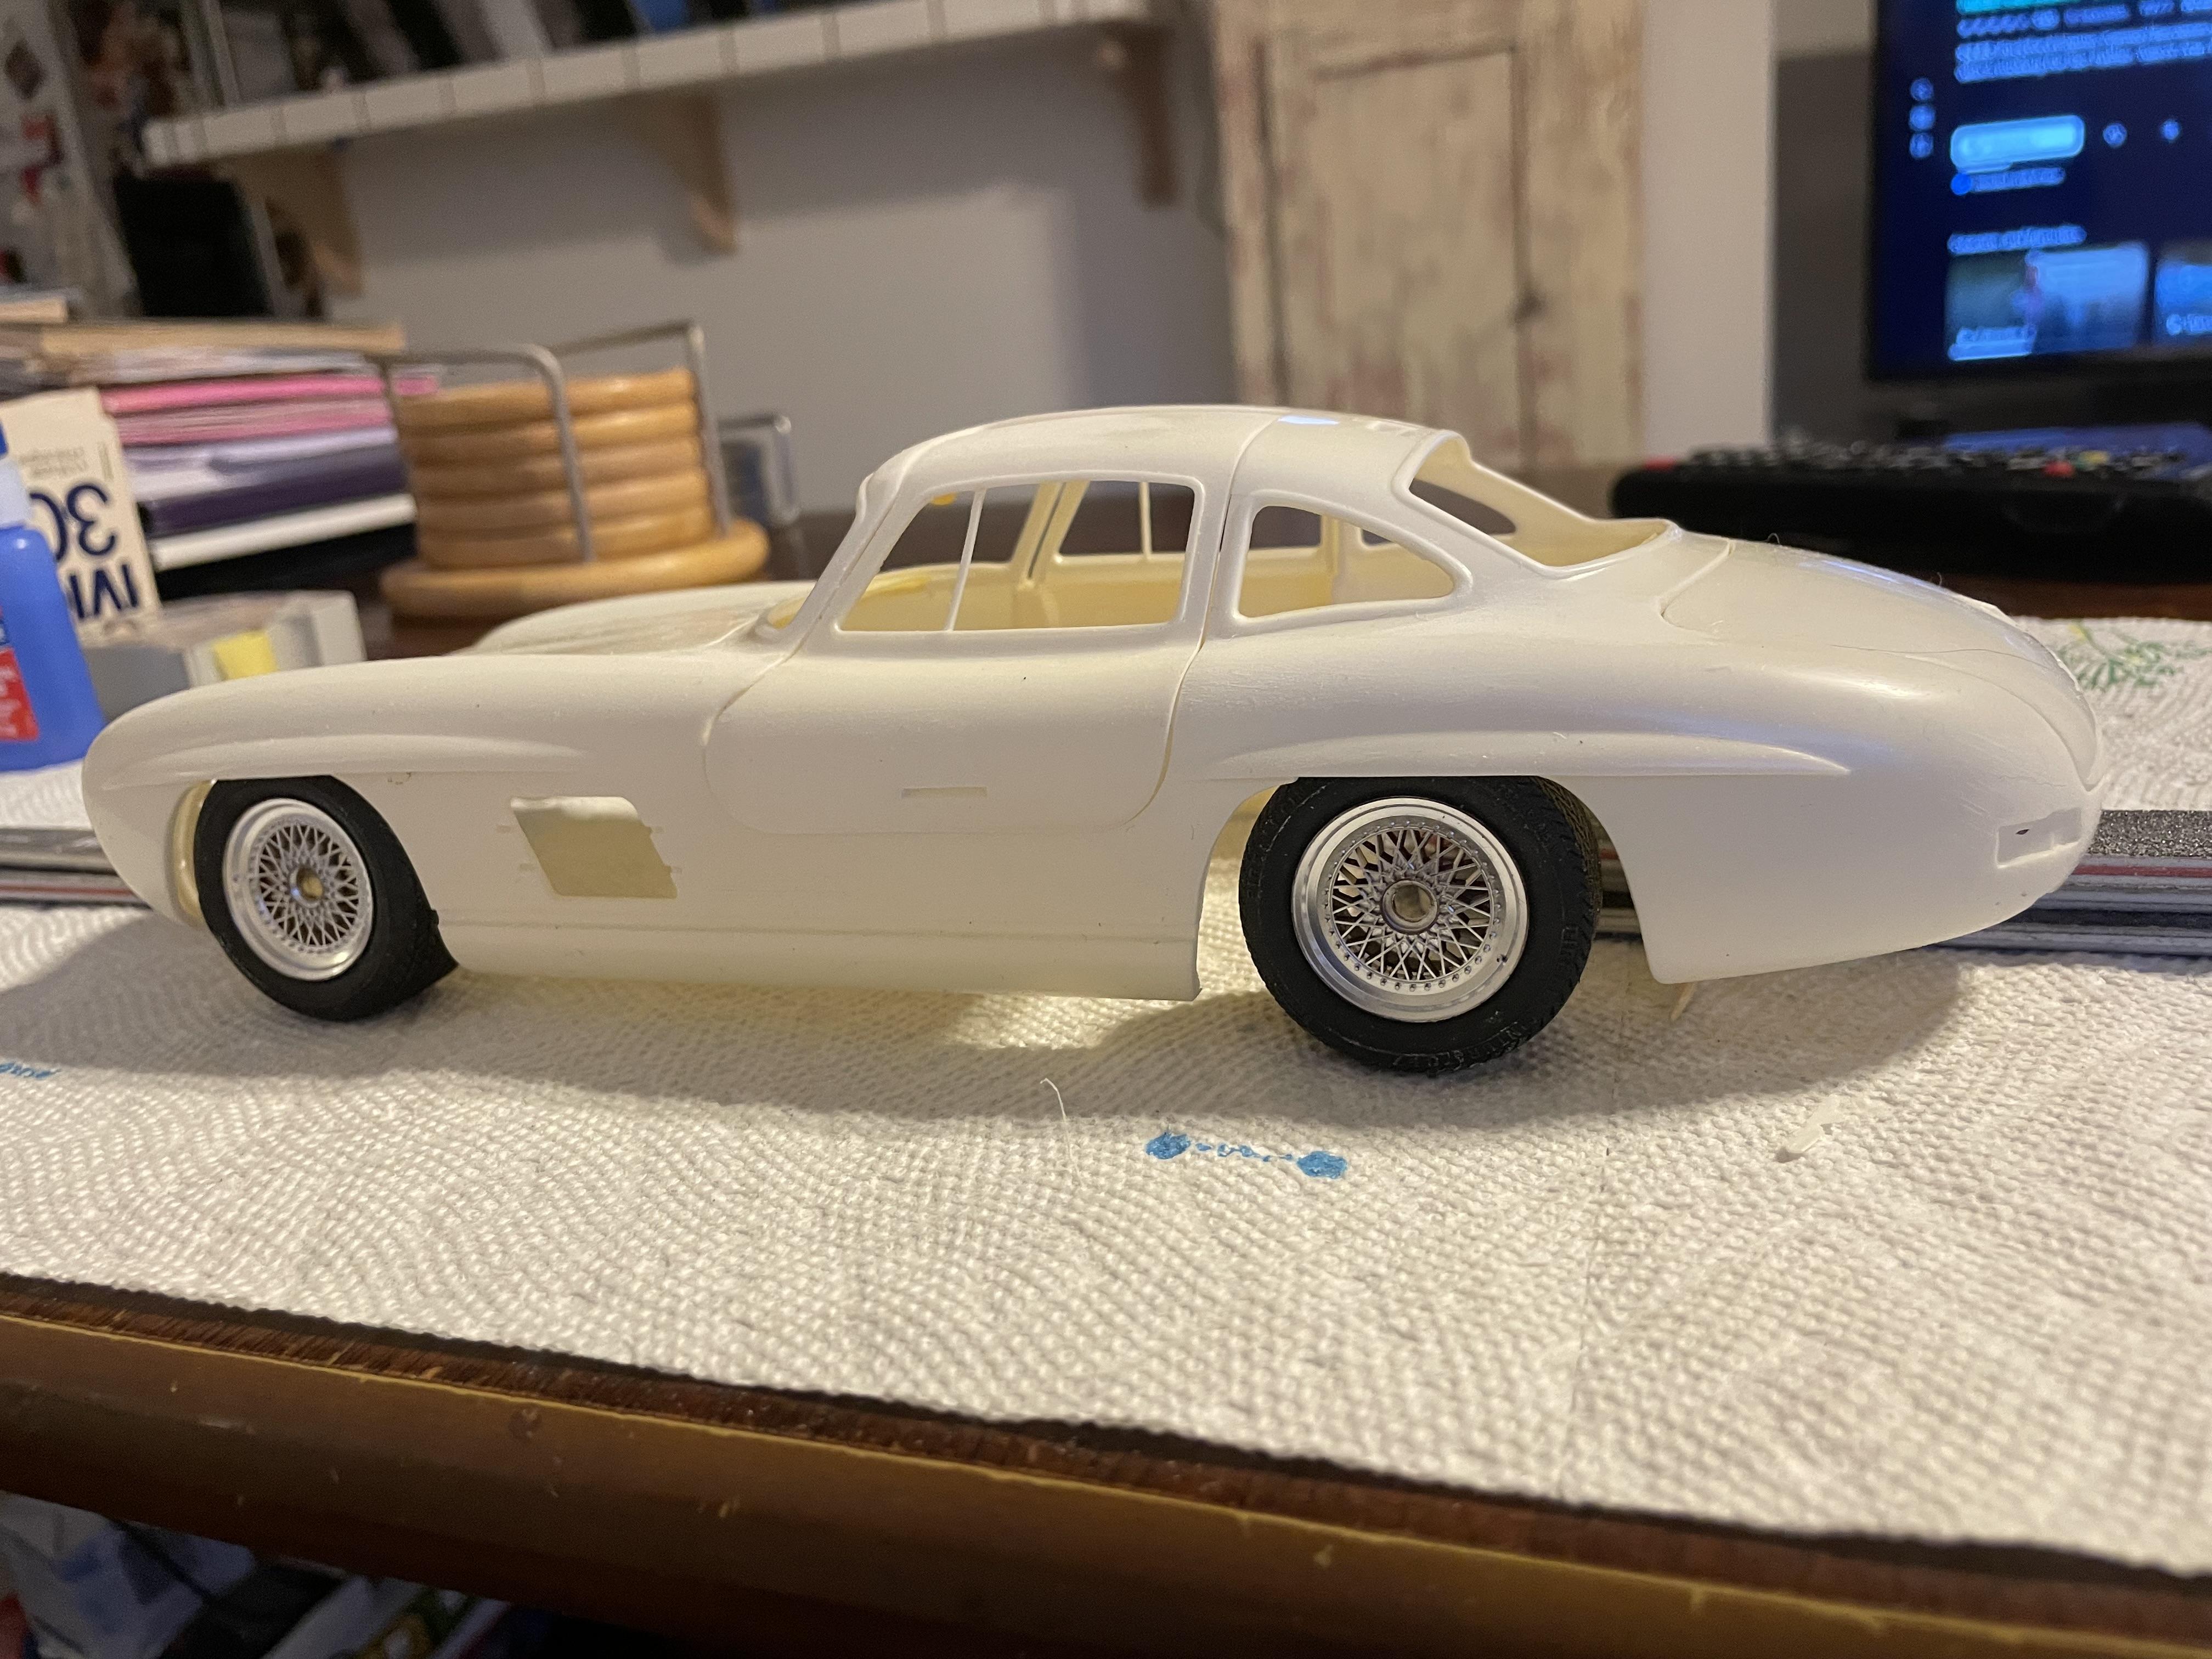
Who doesn't love a mock-up? Let's see yours!
Brudda replied to Belairconvertable's topic in WIP: Model Cars
300sl had this kit for a long time. Not really into gull wings but found some wheels and thought it might make this merc a little more exciting. It’s 1/16 scale thought i might try it. It’s an old entex kit so things do not fit. Took several hours to get the hood , doors and deck lid to fit. Might be a kit that’s not as involved as my mfh kits. Give me a nice break from those kits. The wheels came from a 1/16 revell testarossa kit. I might give this a try. Outlaw Gullwing.