Brudda
-
Posts
4,357 -
Joined
-
Last visited
Content Type
Profiles
Forums
Events
Gallery
Everything posted by Brudda
-

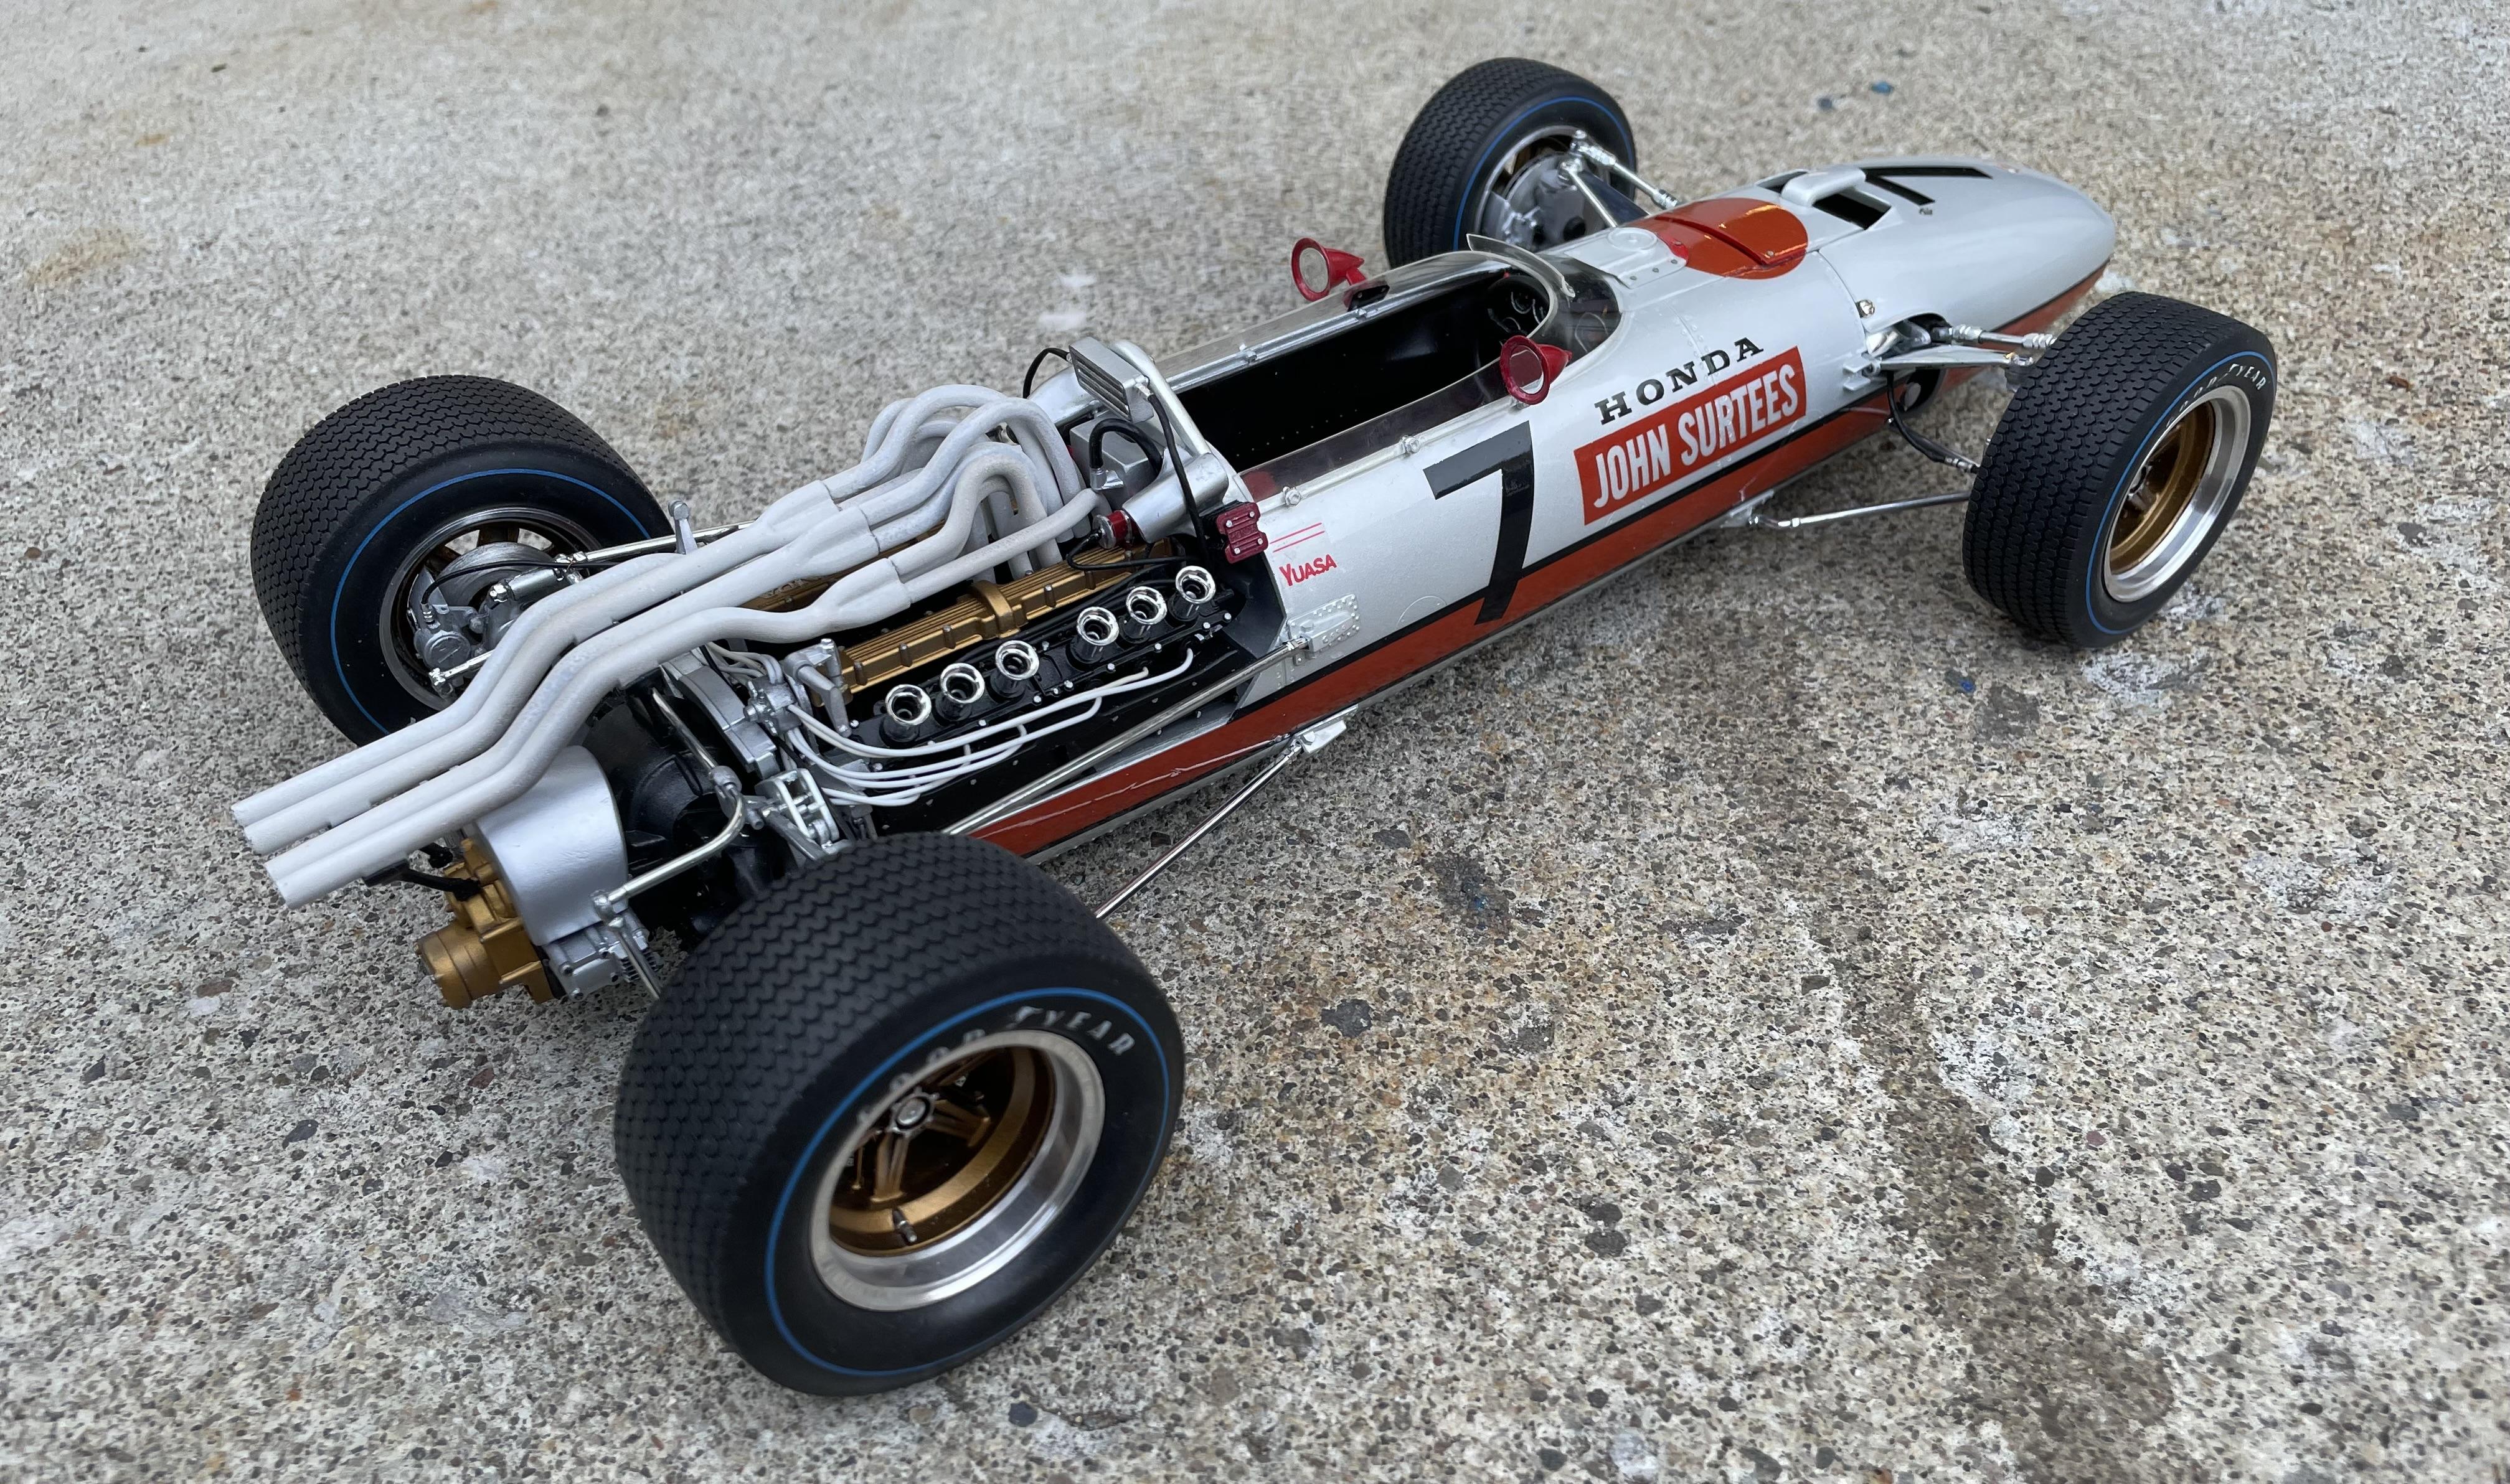
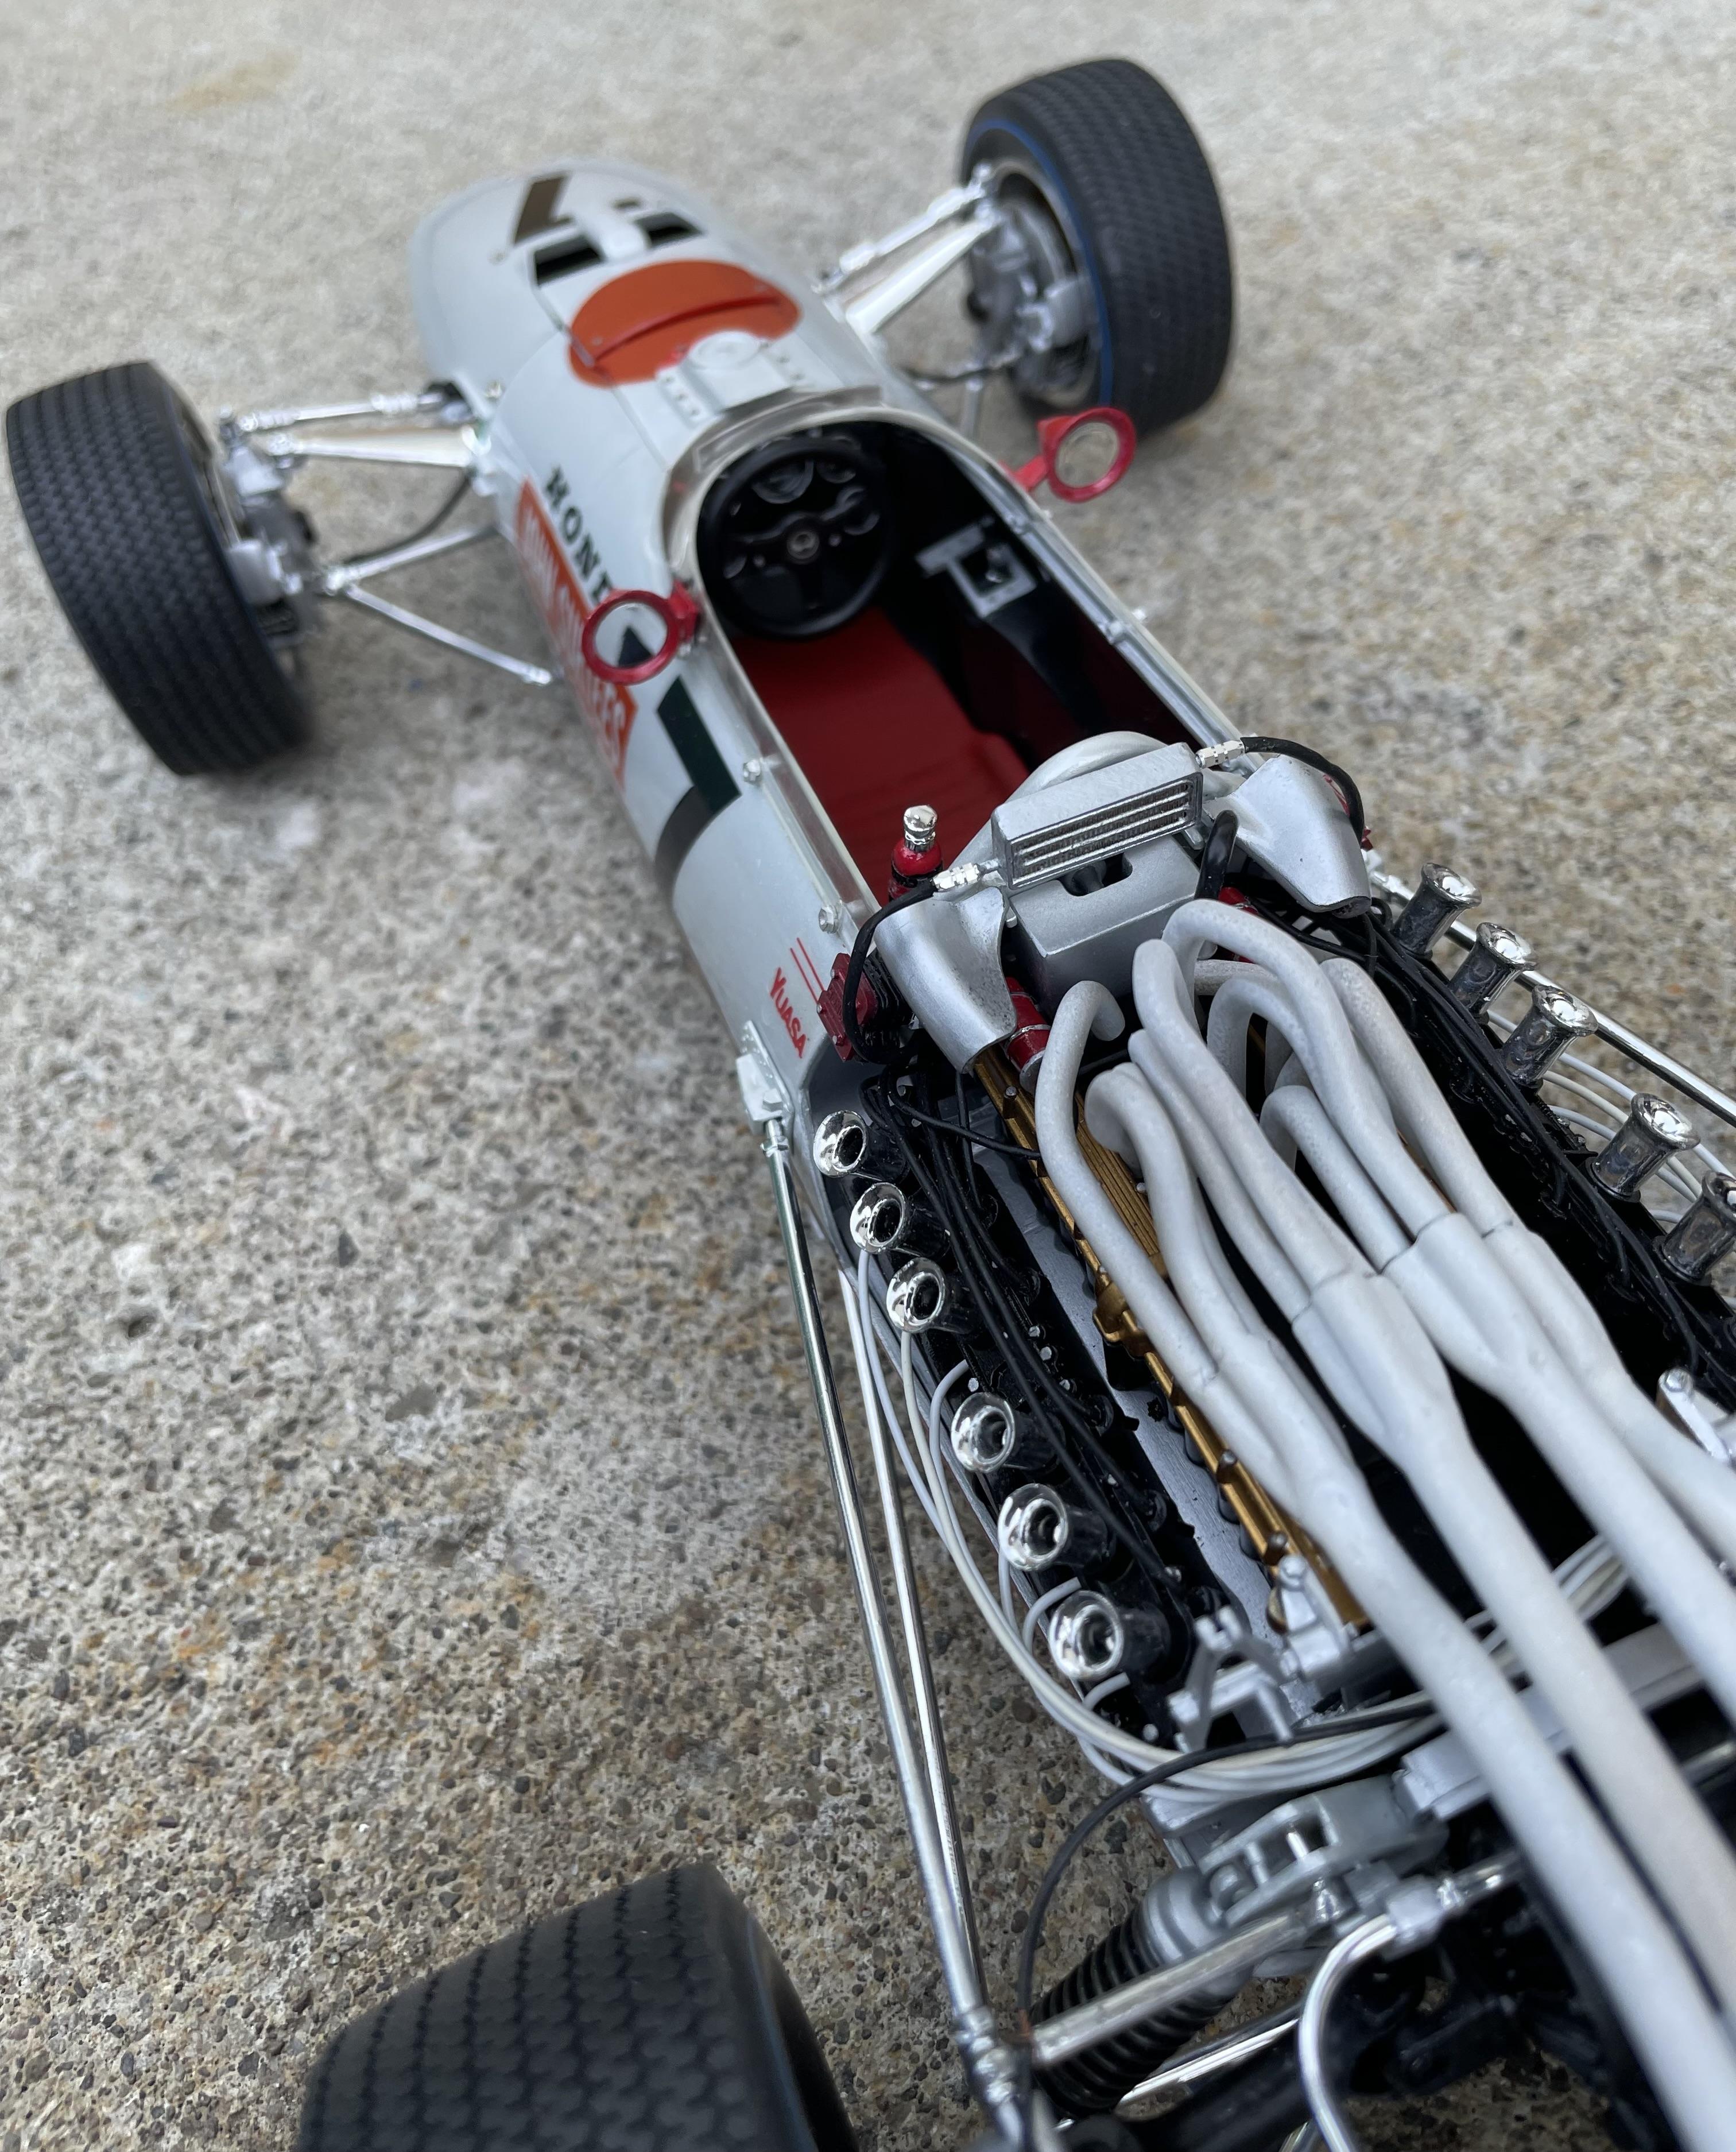
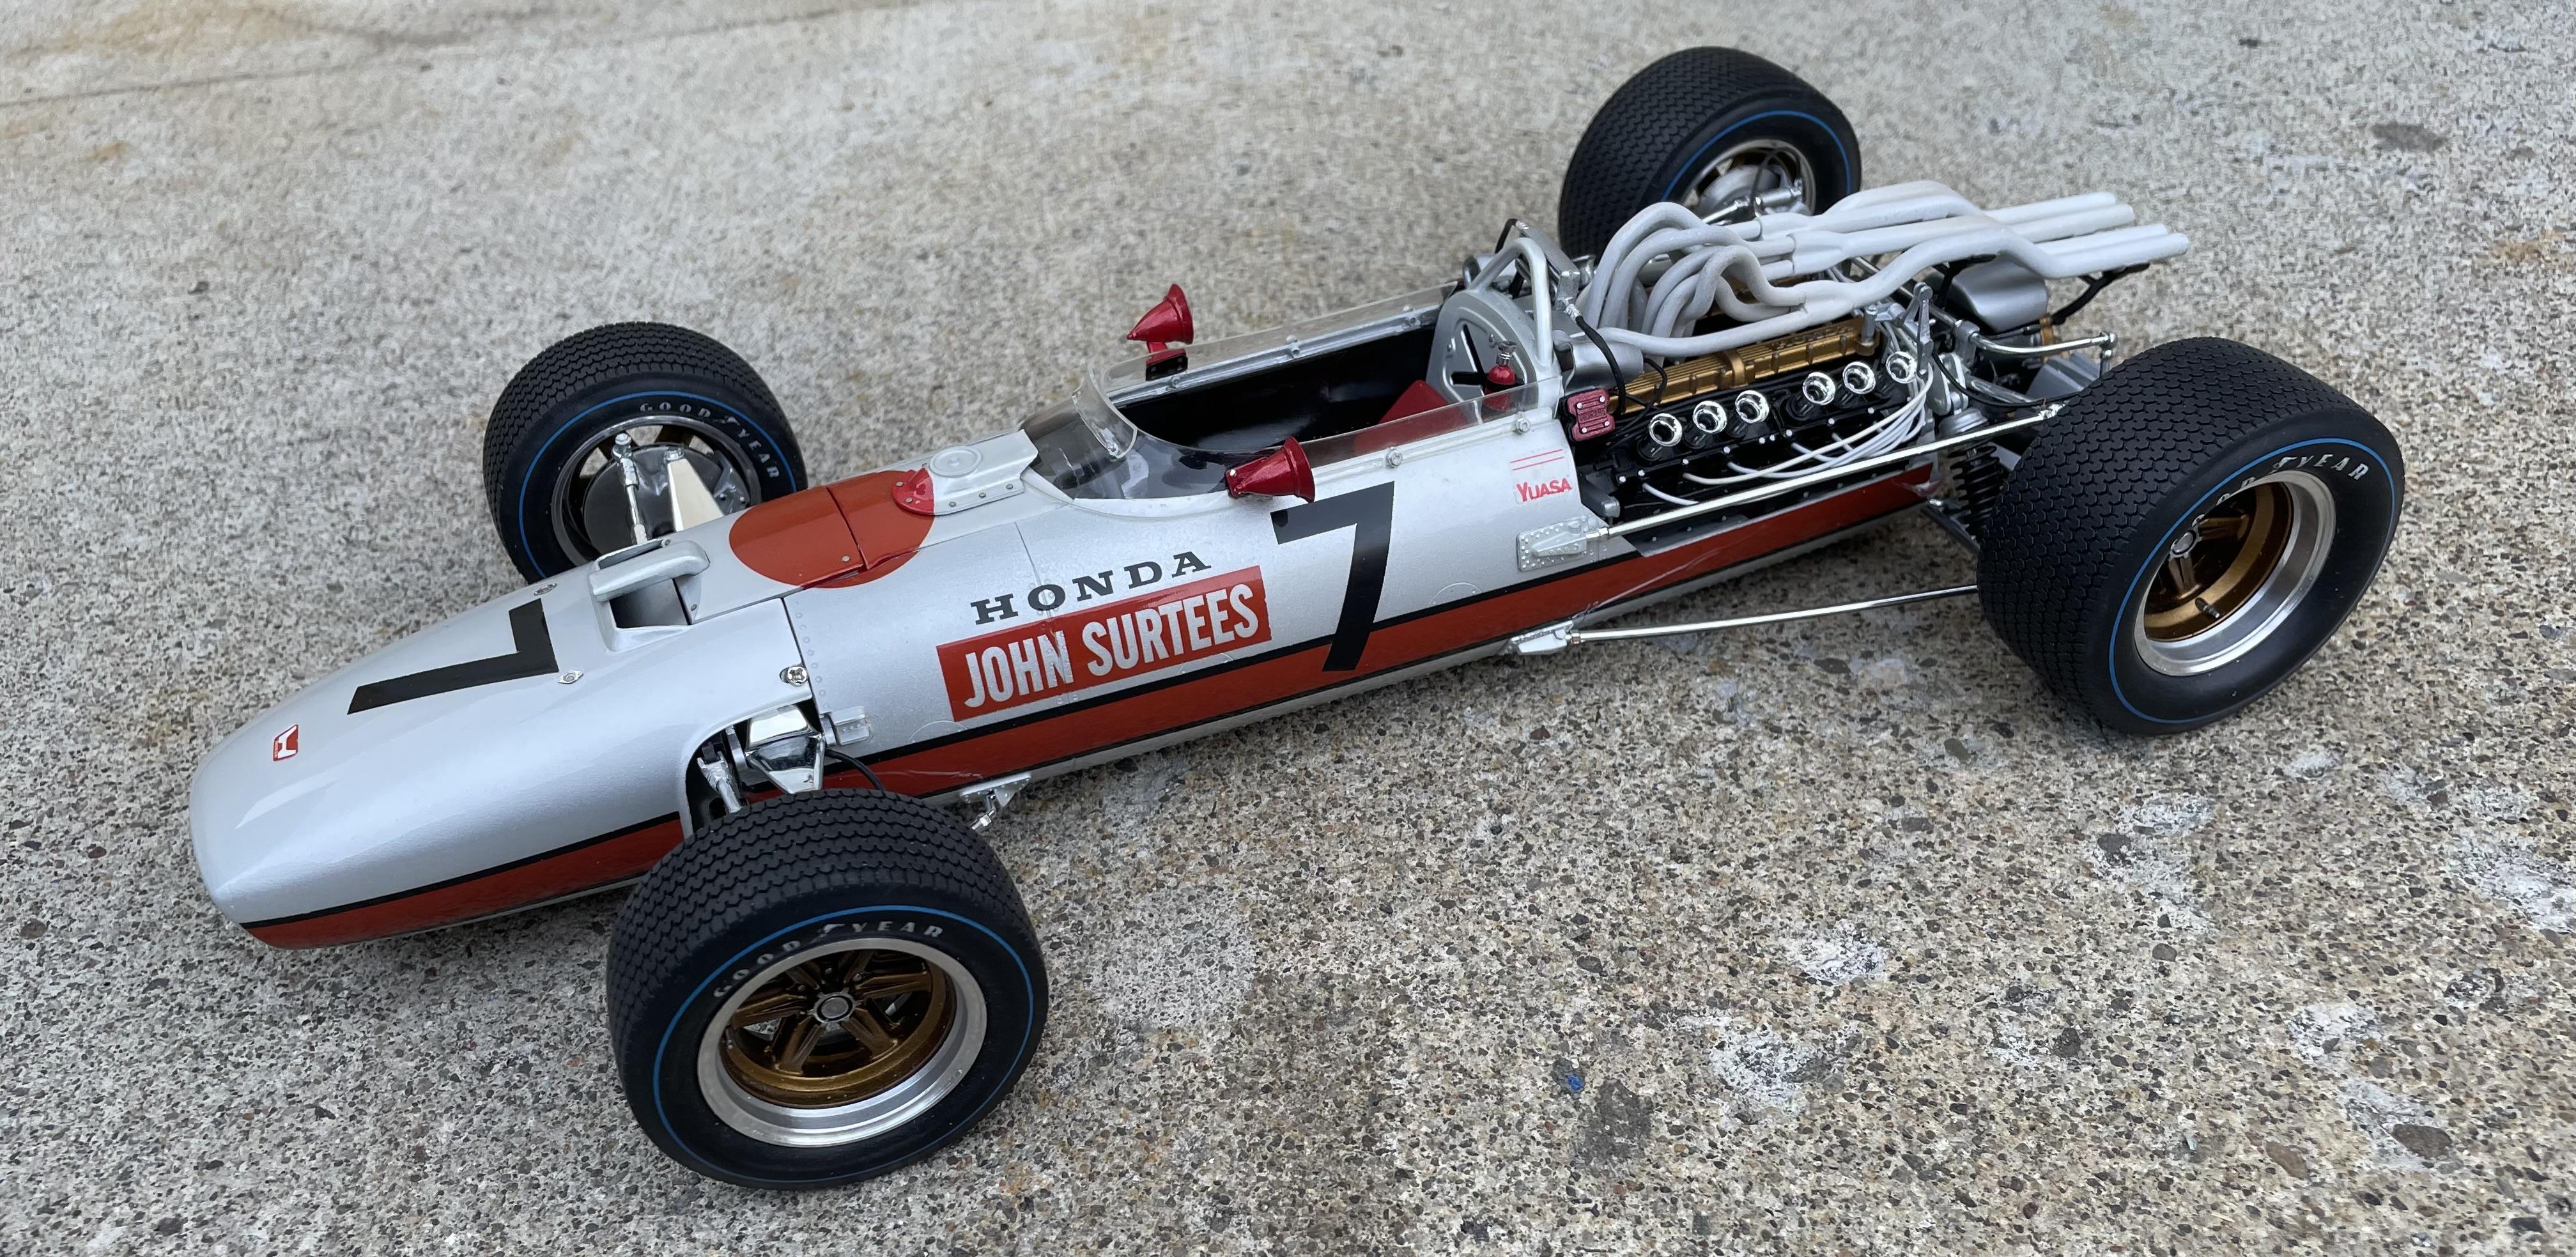
Monogram early Indy car
Brudda replied to BIGTRUCK's topic in WIP: Other Racing: Road Racing, Land Speed Racers
Fantastic -
copy_2045B80E-EA40-41F7-A92F-1F5166B29214.mov
-
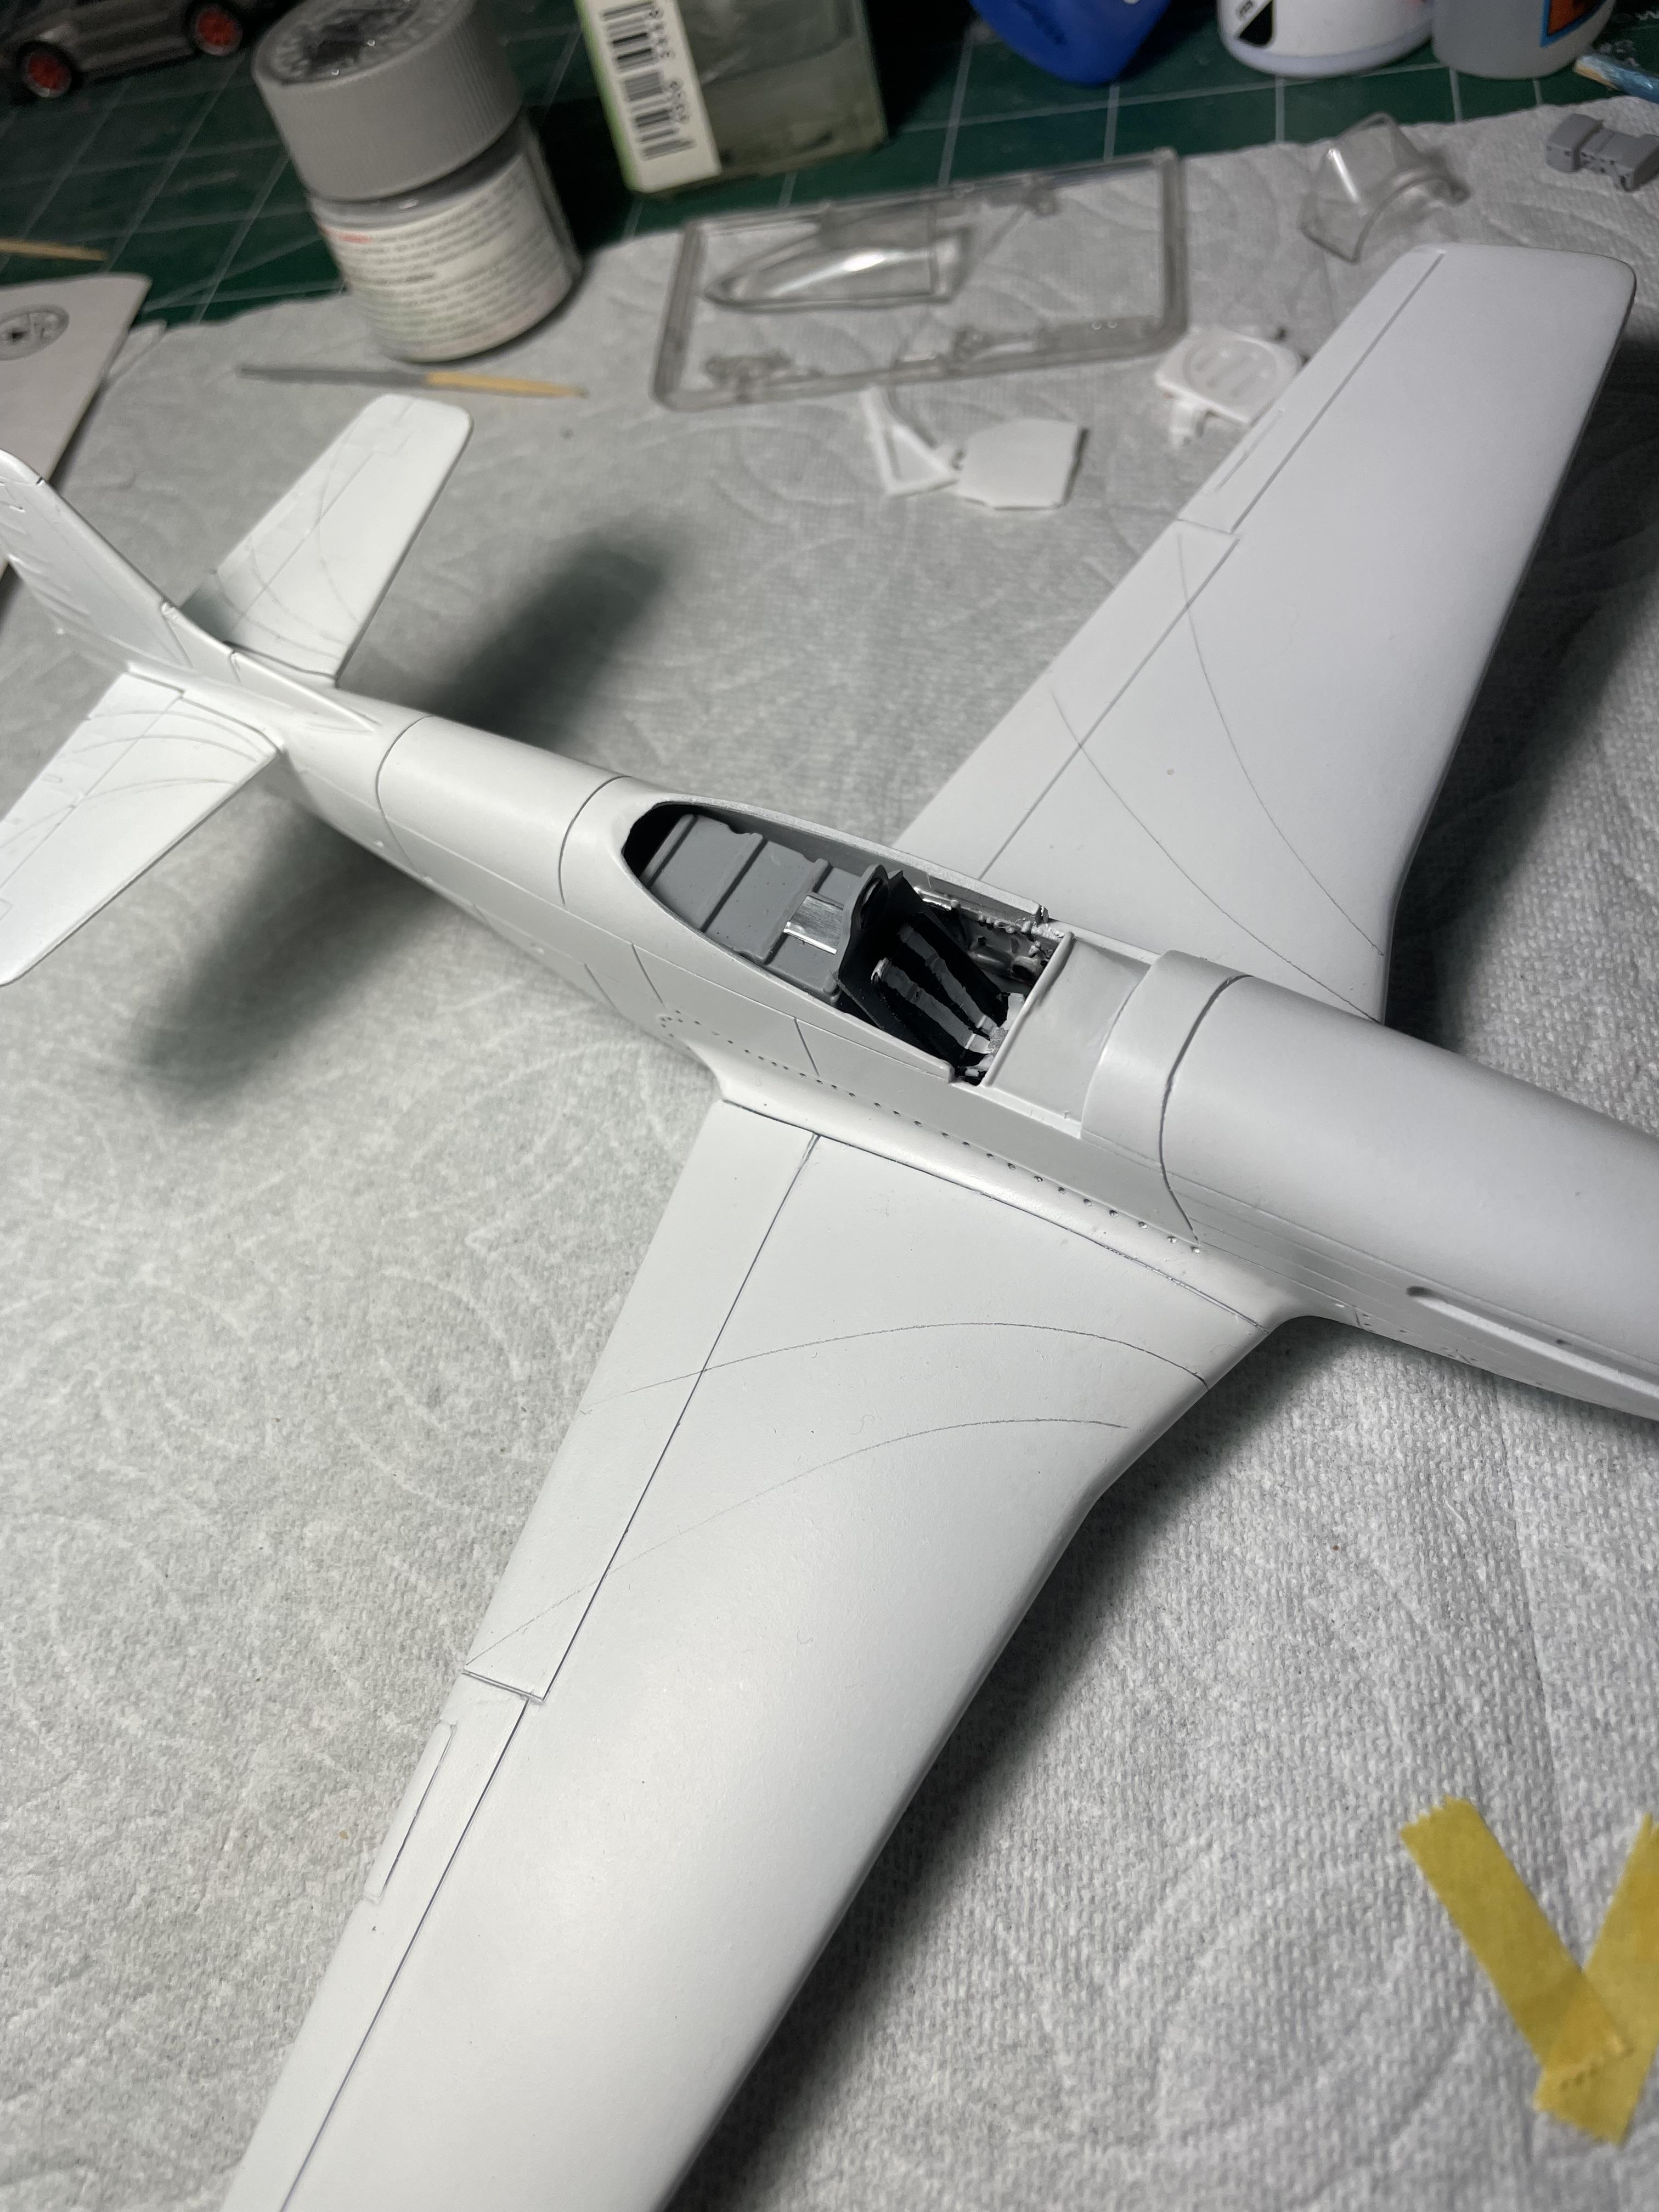
1/48 p51
Brudda replied to Brudda's topic in WIP: All The Rest: Motorcycles, Aviation, Military, Sci-Fi, Figures
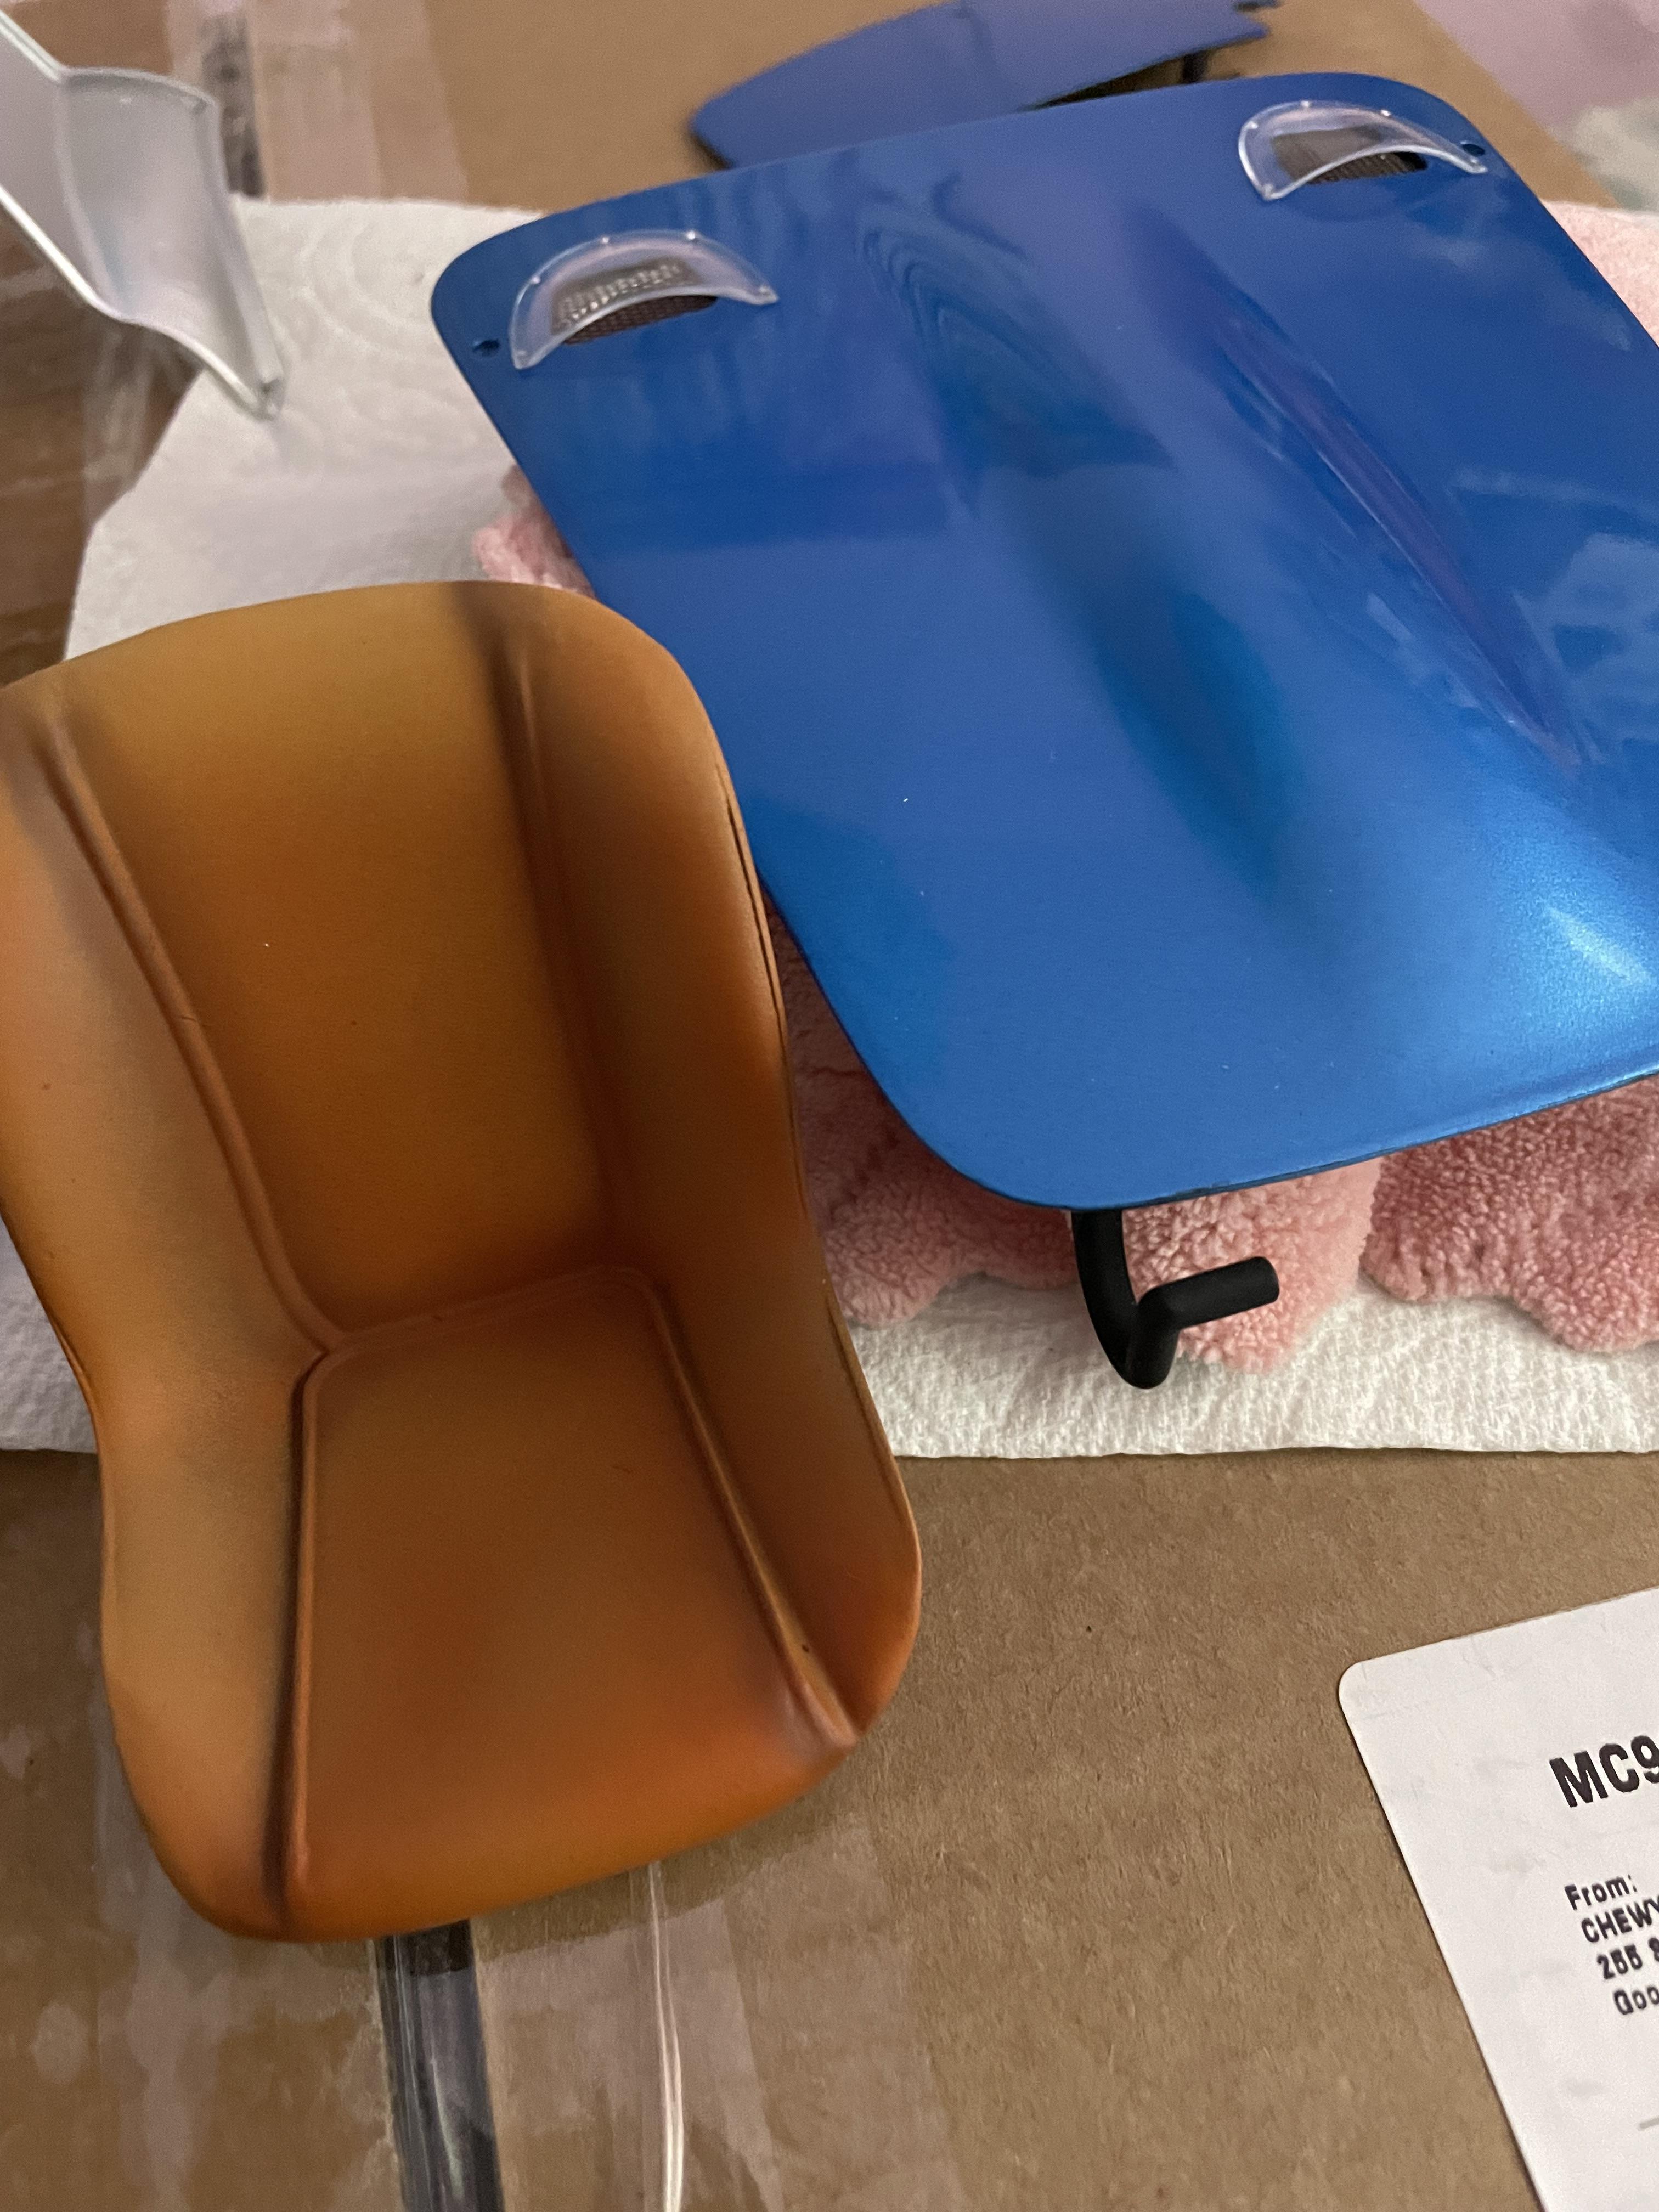
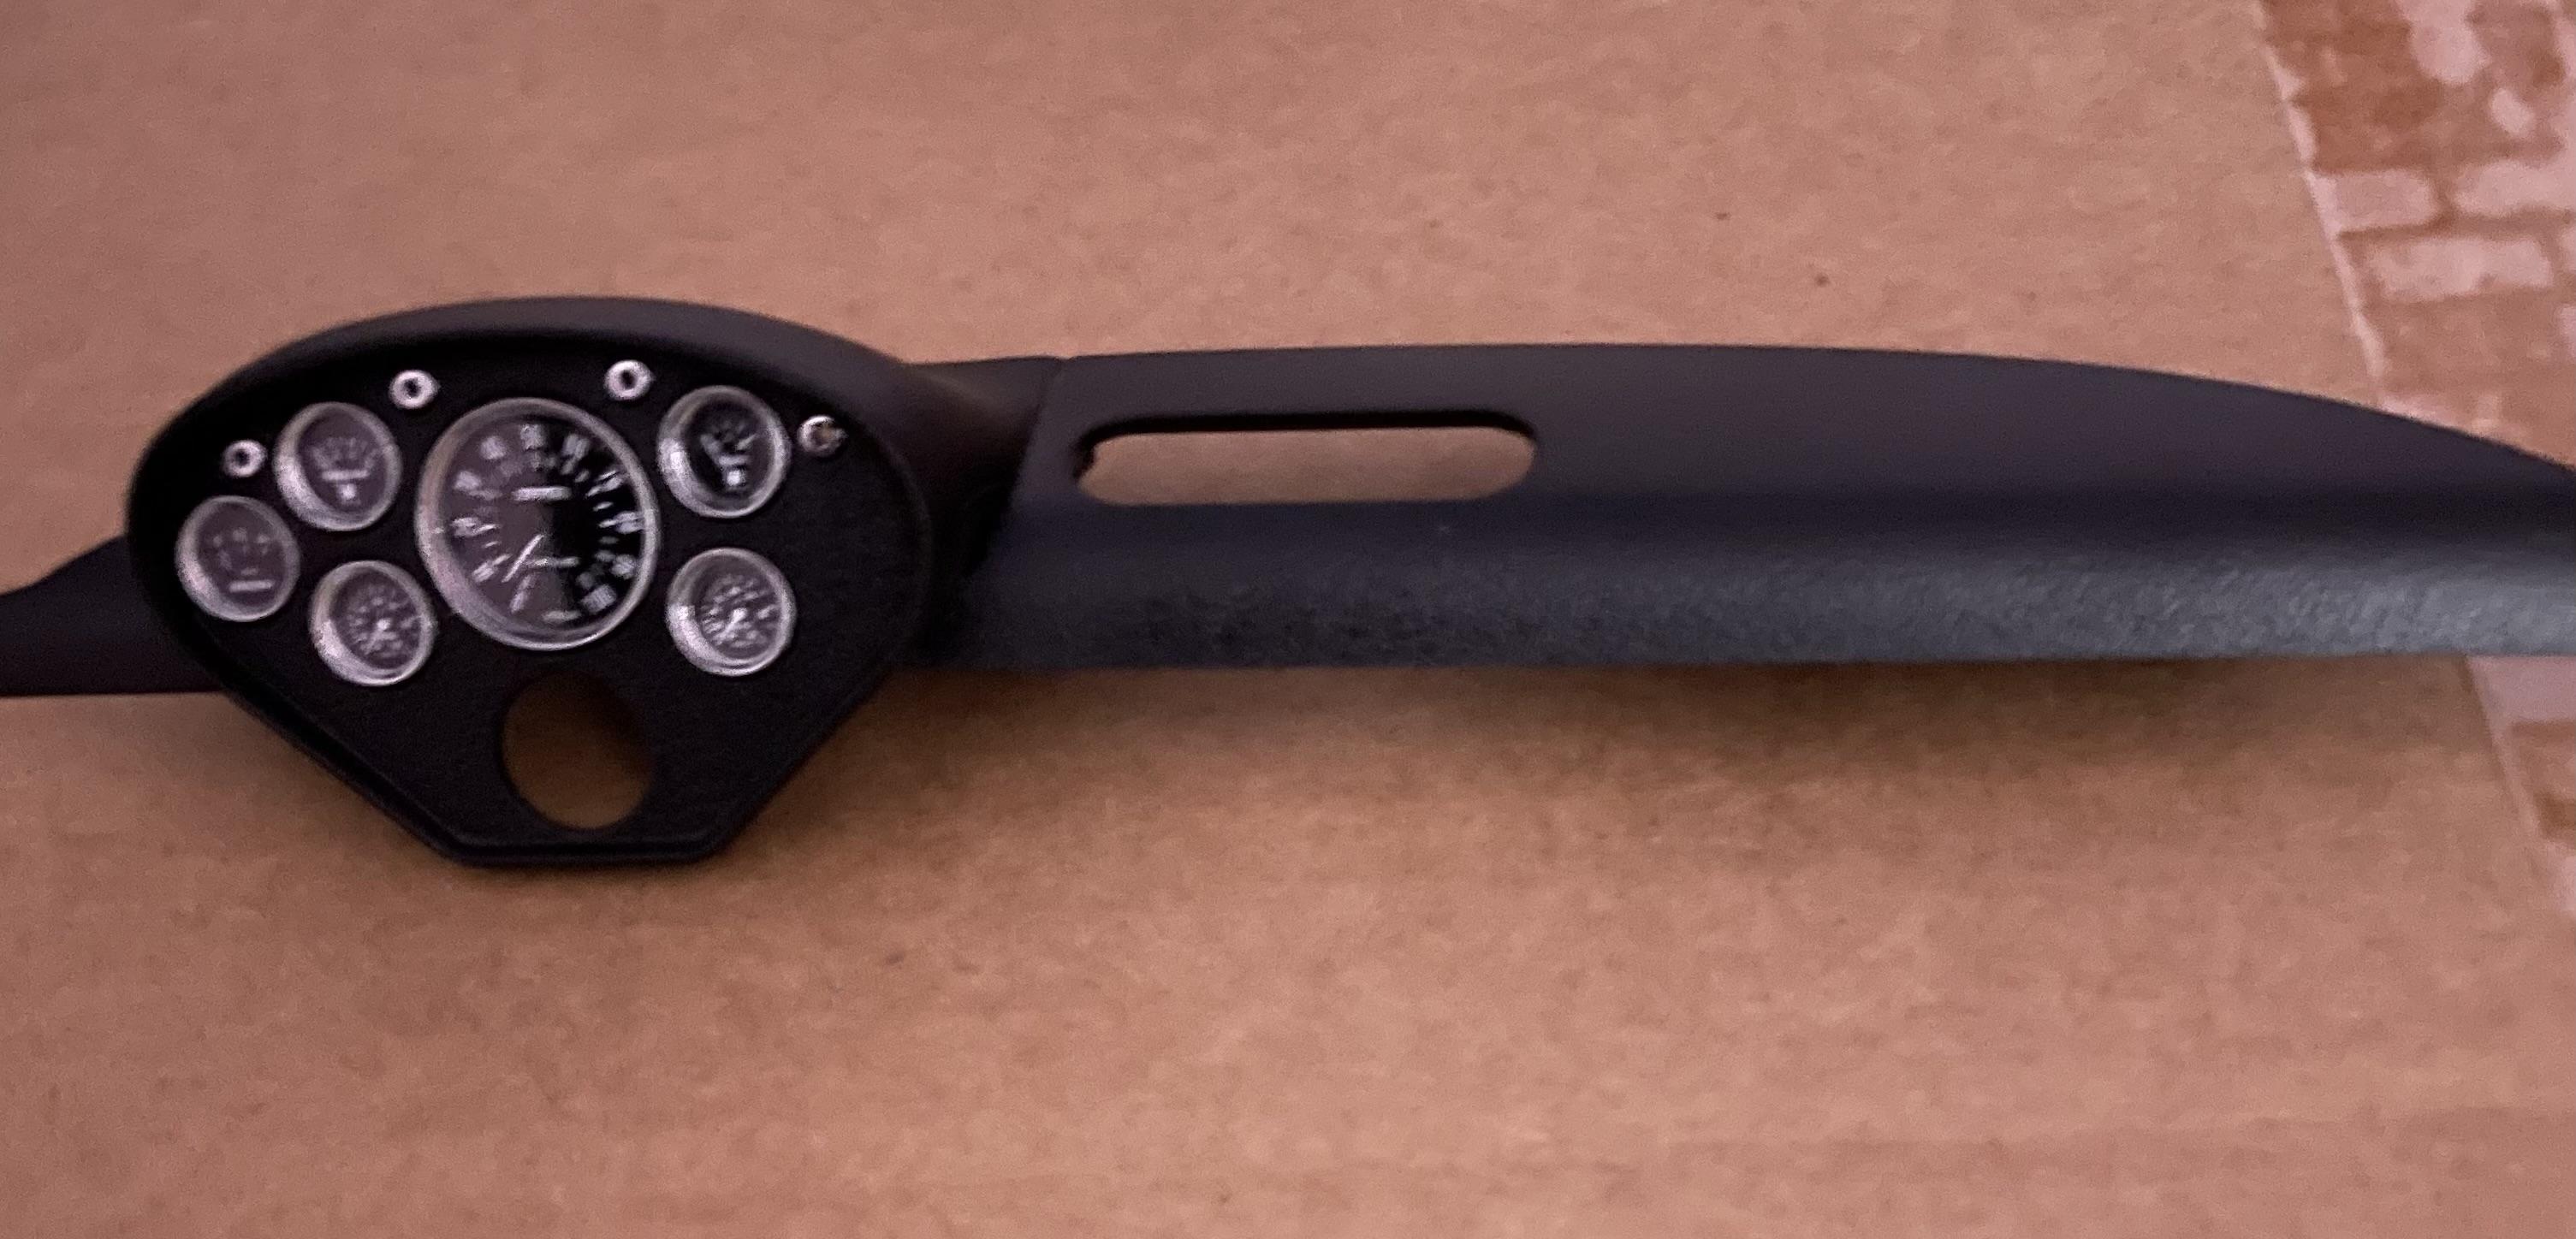
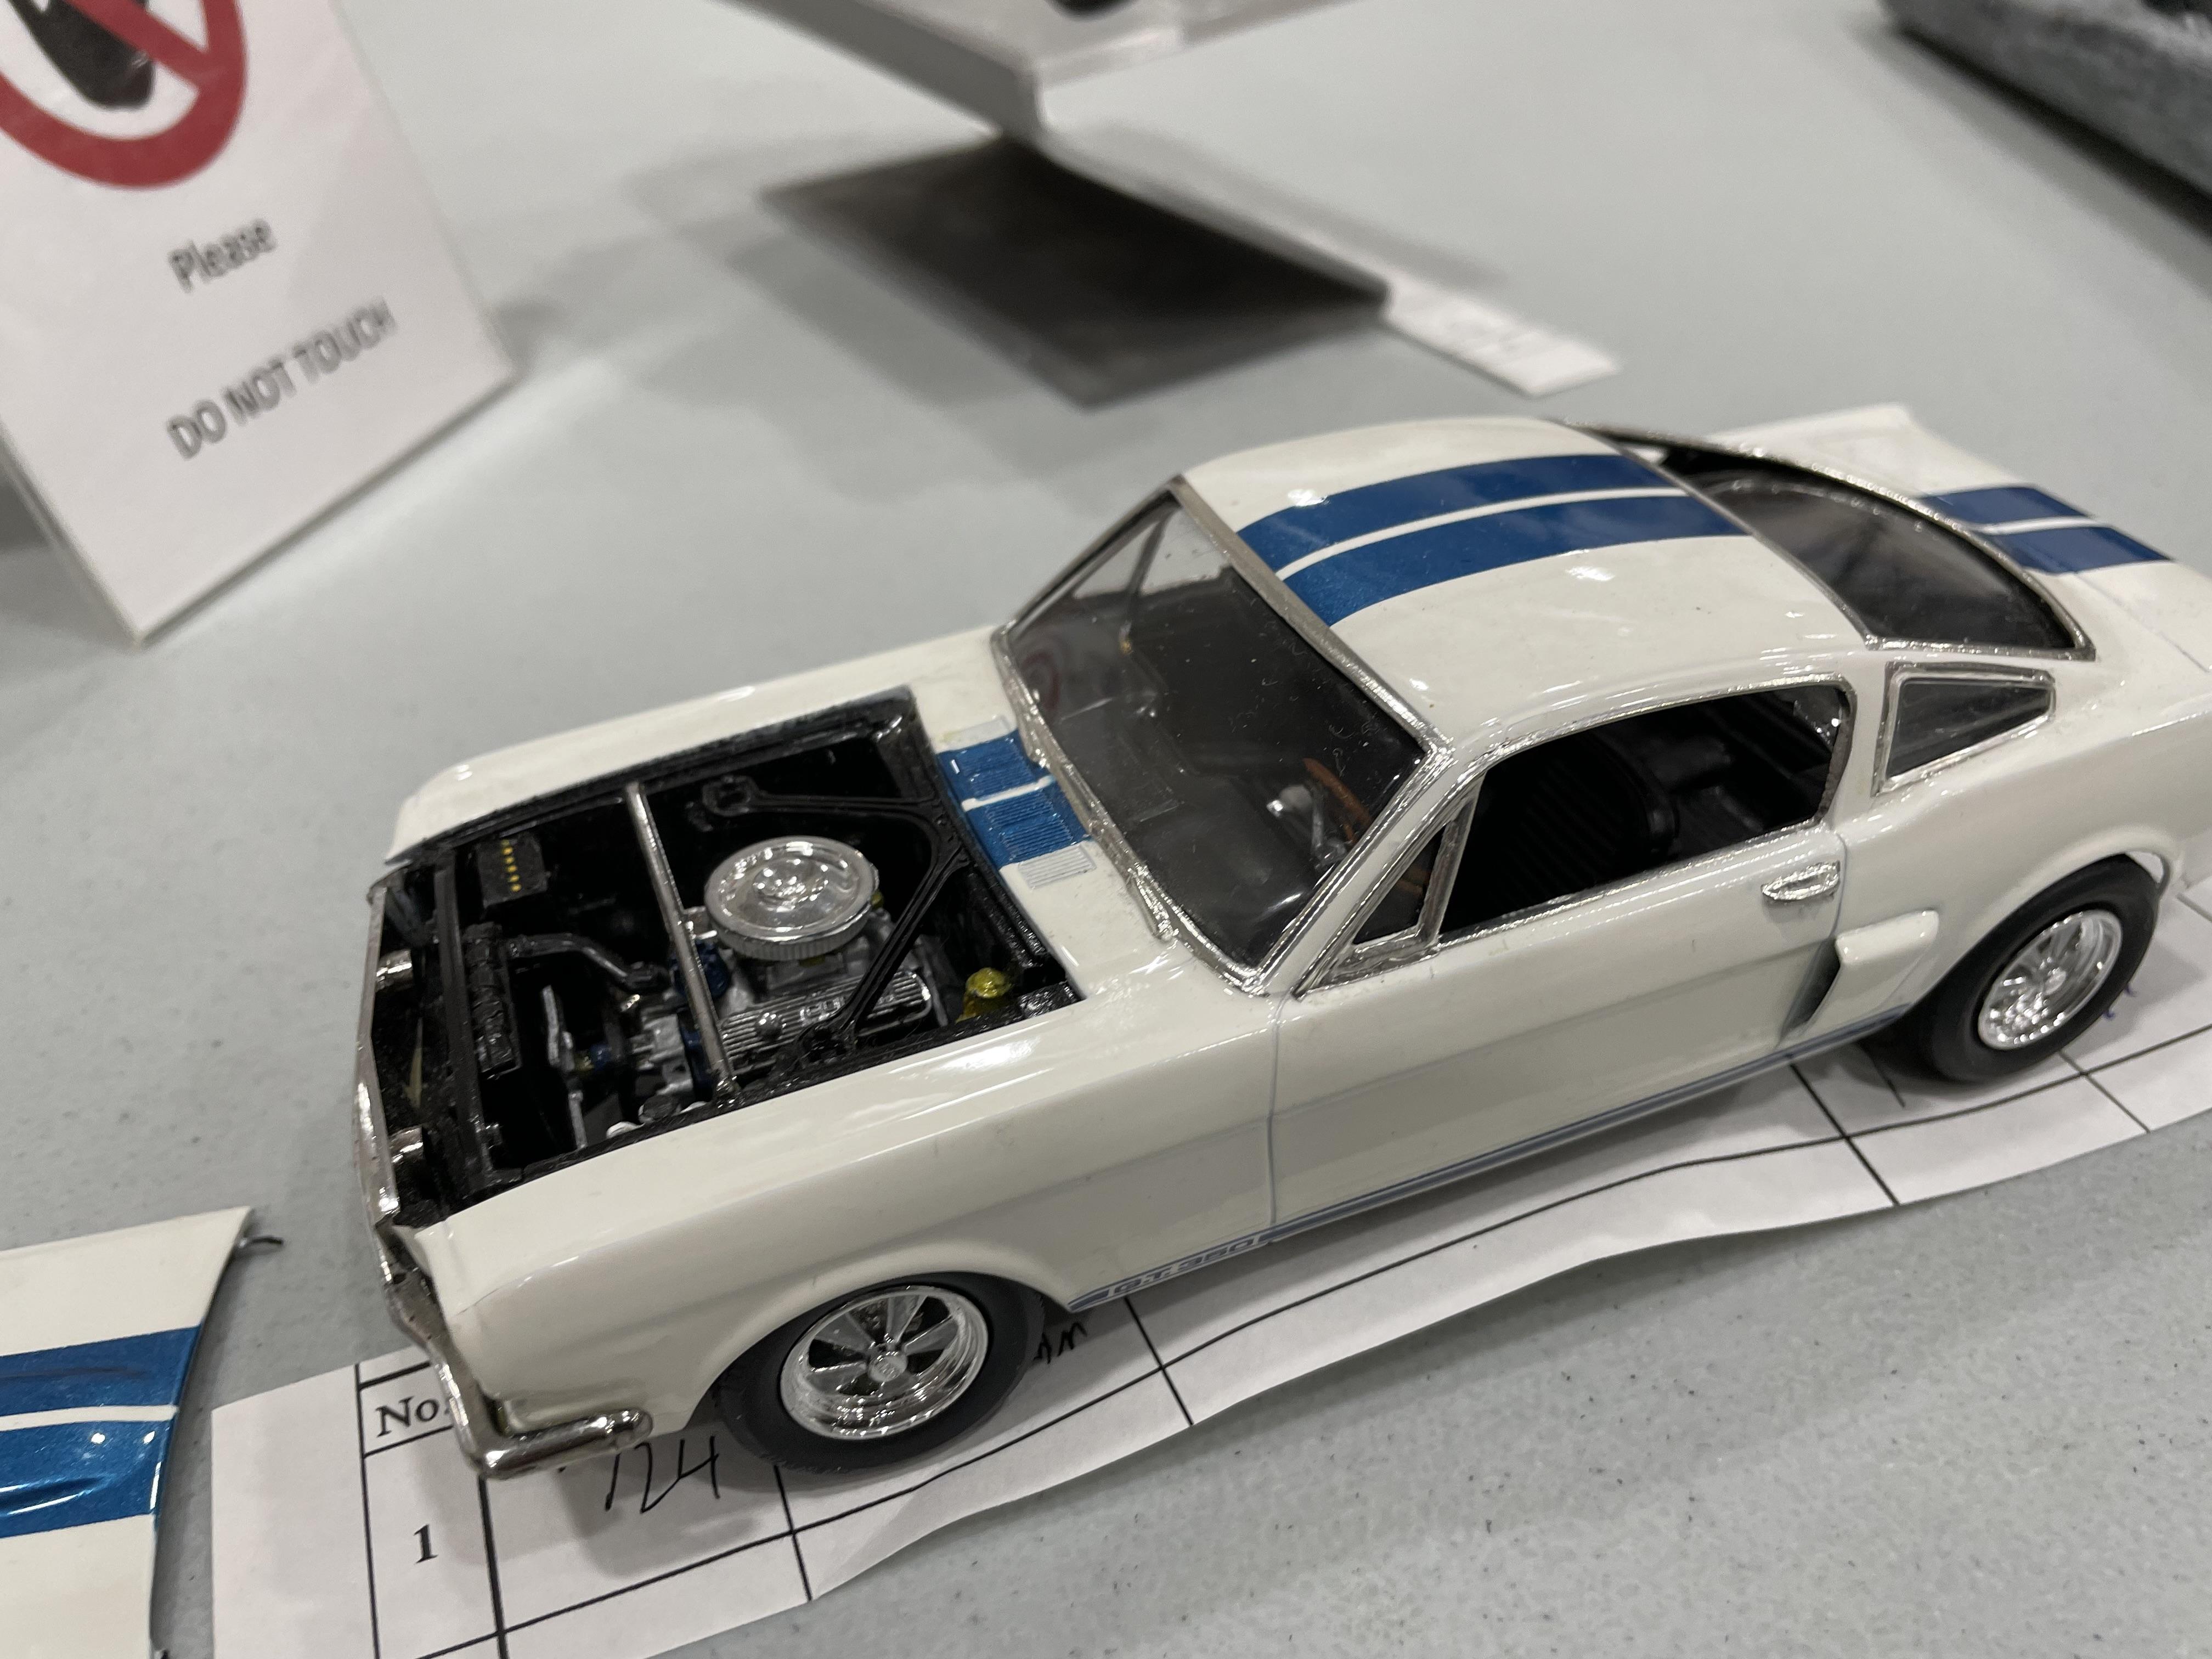
Yes that’s great info as the kit is so generic. Took the radio out but will not add another seat. This kit is so far off and not accurate at all. The kit is not even close to the real plane. The interior of the model is so far off the real plane. But since it’s a revell kit and not a tamiya it’s going to be very generic. I should get the draw decal set, because it’s more modern , but I’m going to try to use the kit decal set. So again it’s not accurate. But I’ll try to get it the best I can. I’m going to use a blue from a Chevy truck and the red is going to be from a corvette so this will be interesting. Again not accurate. Marked the lines for masking. In pencil, Again not accurate. But I think it will be a good looking model when finished.
-
Me too
-
Here's a costly model
Brudda replied to johnyrotten's topic in General Automotive Talk (Trucks and Cars)
-
One piece of information I recieved from my ferrari people is that fly yellow is the actual color for Ferrari. The FIA mandated that each country has a color. French it was French blue. Ferrari is red . Mercedes was silver and British cars were green. Etc , etc. I did not know that. My Ferrari guys told me this, so I just might repaint the GTO in its Ferrari color. Fly yellow.
-
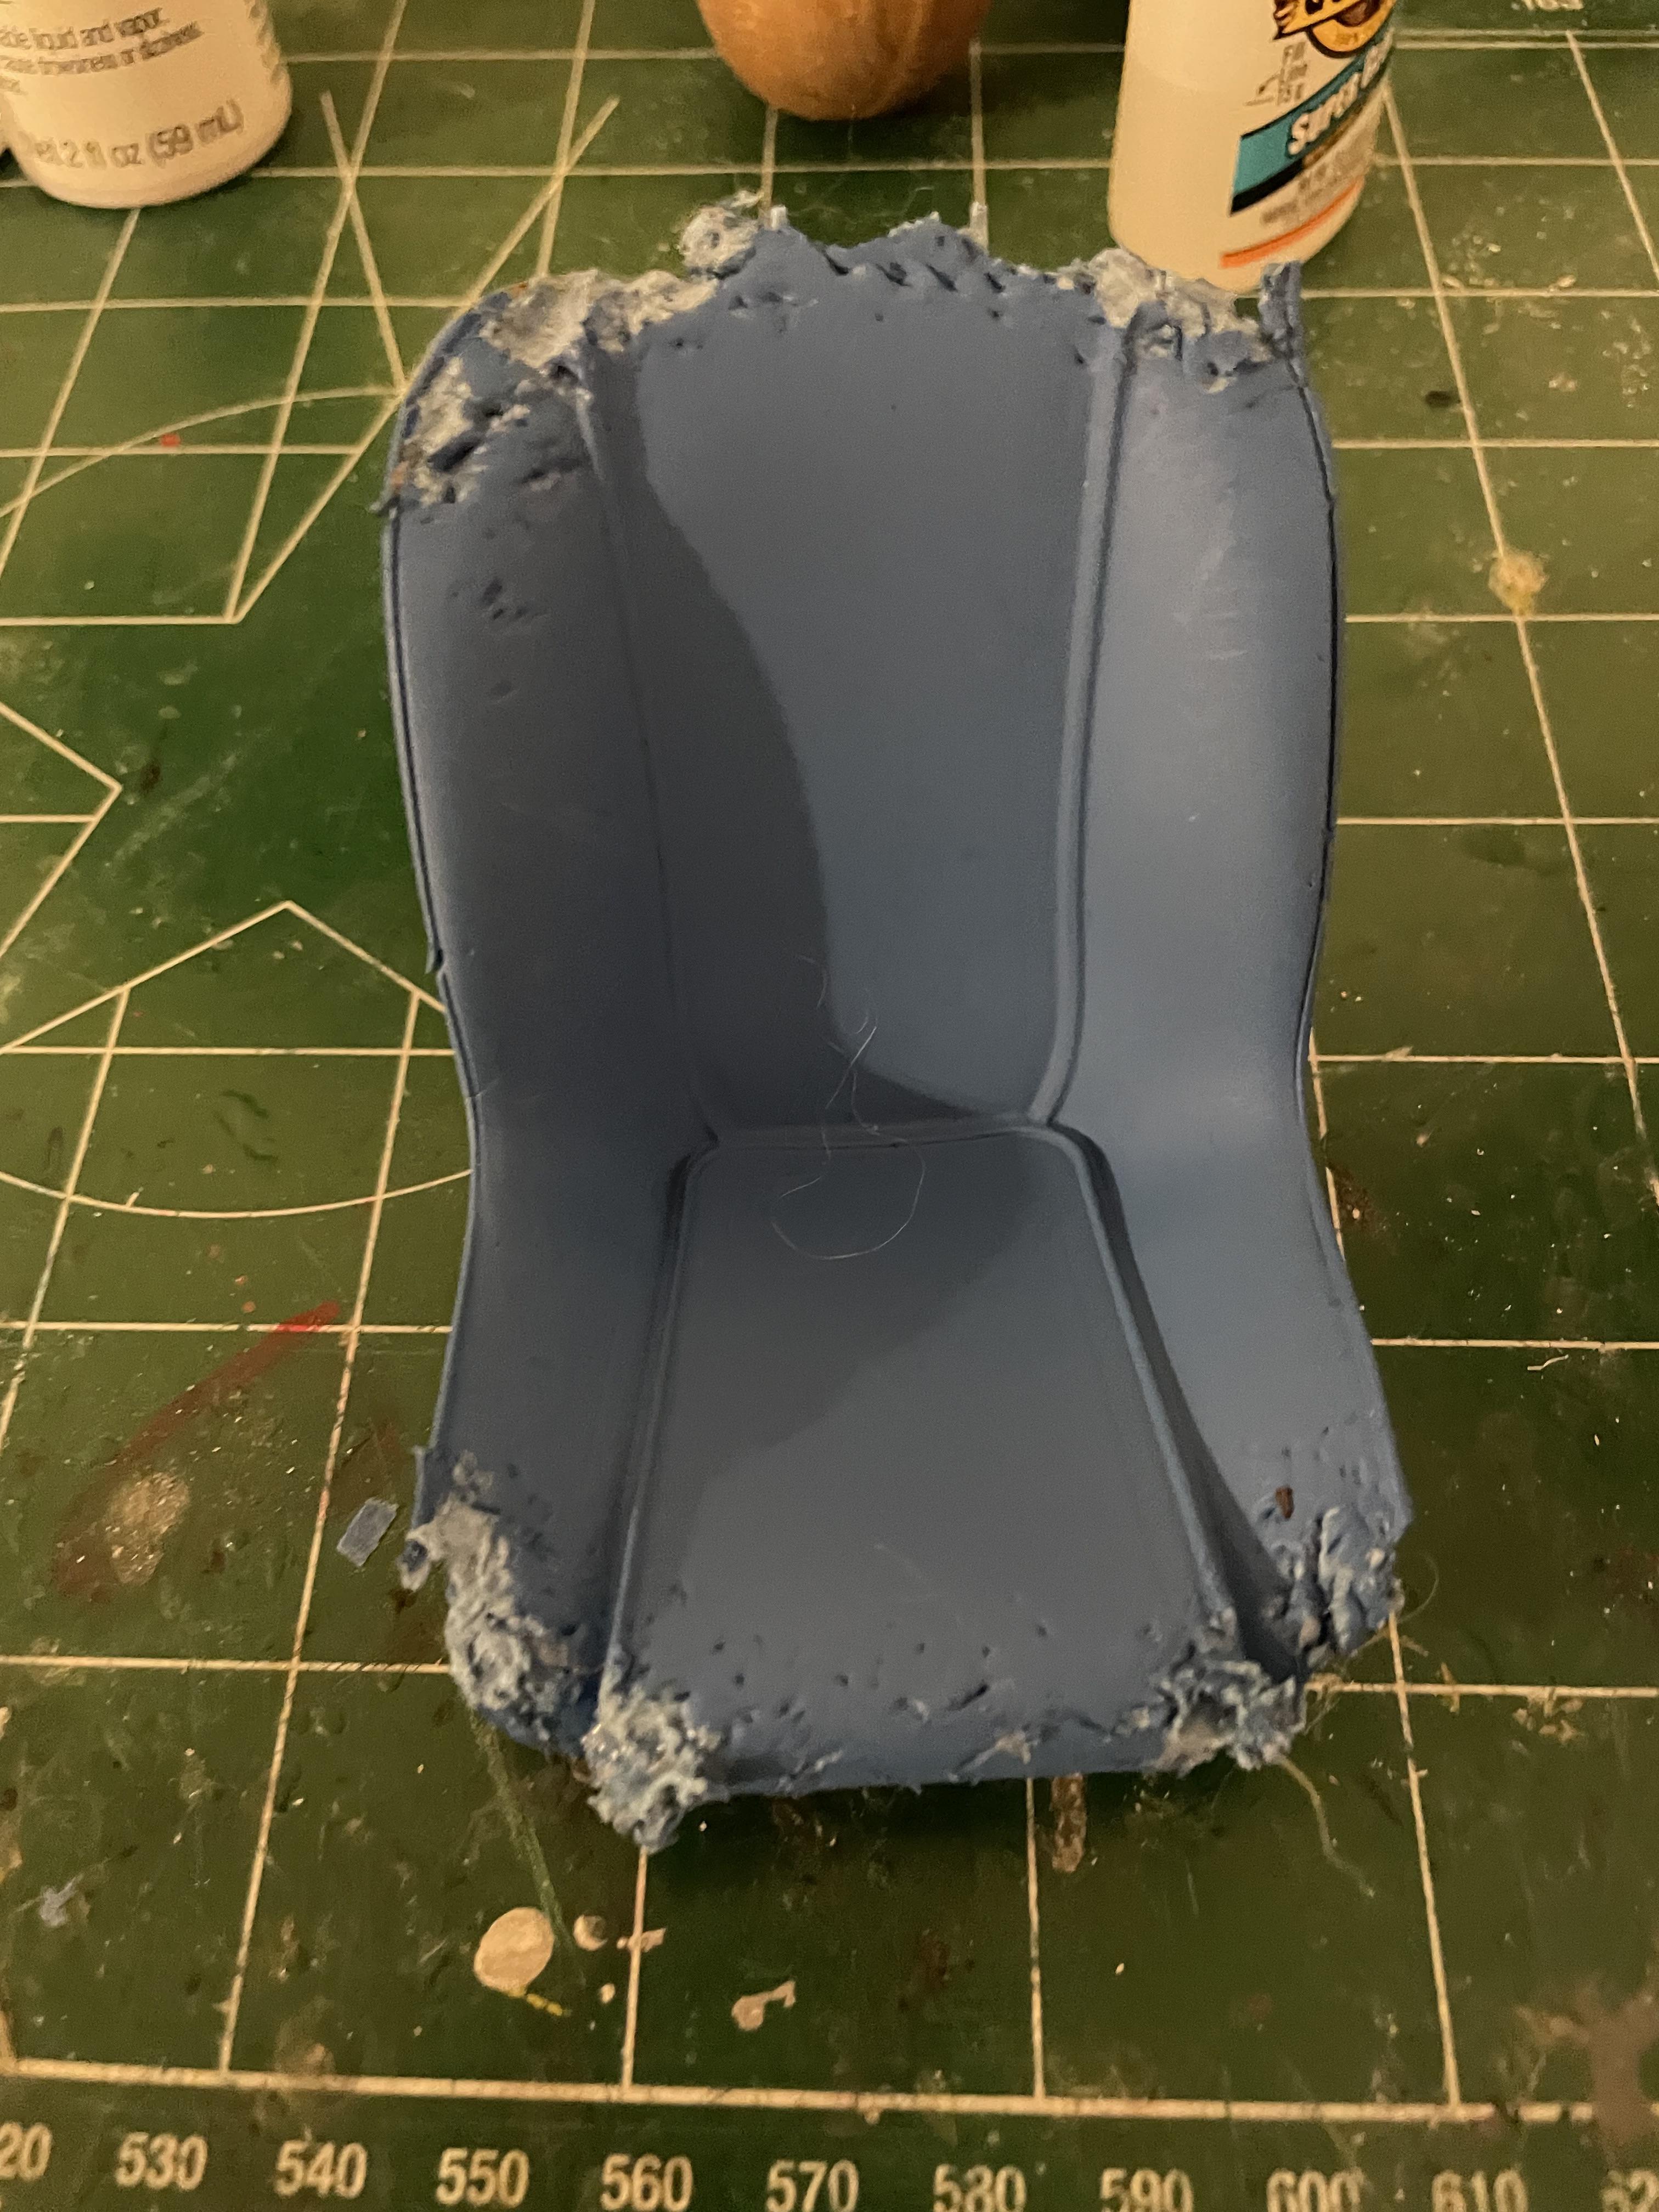
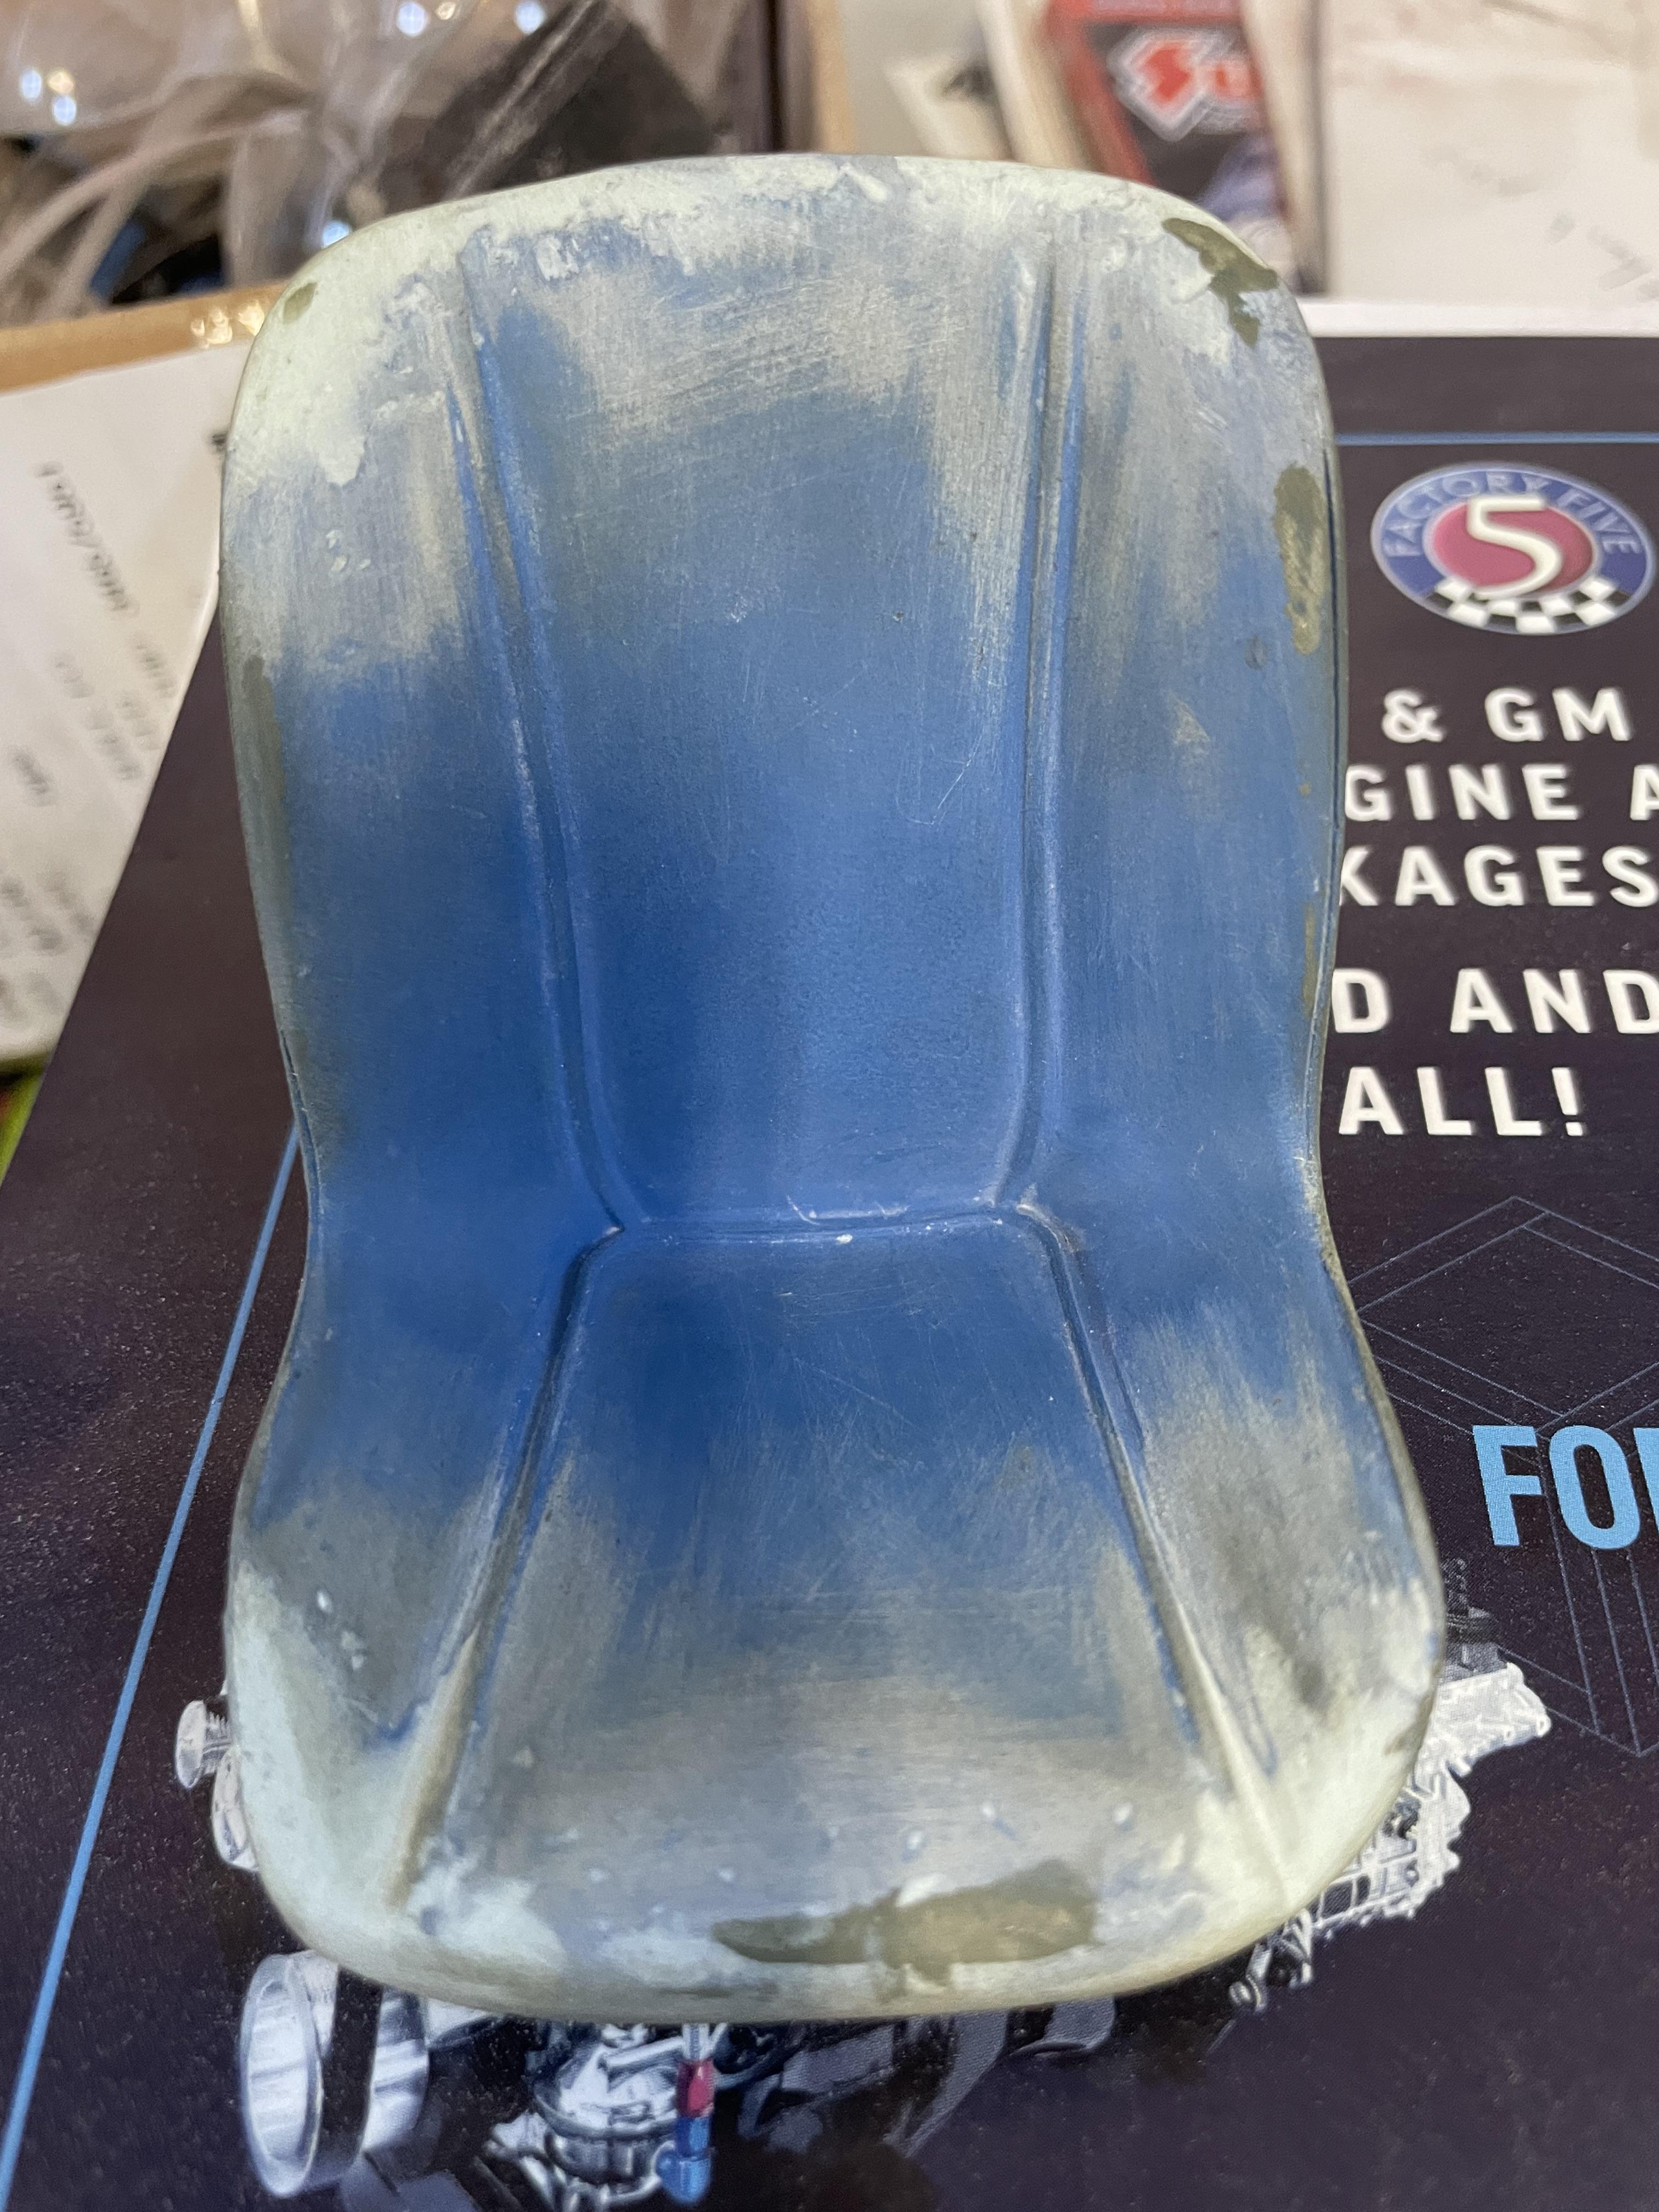
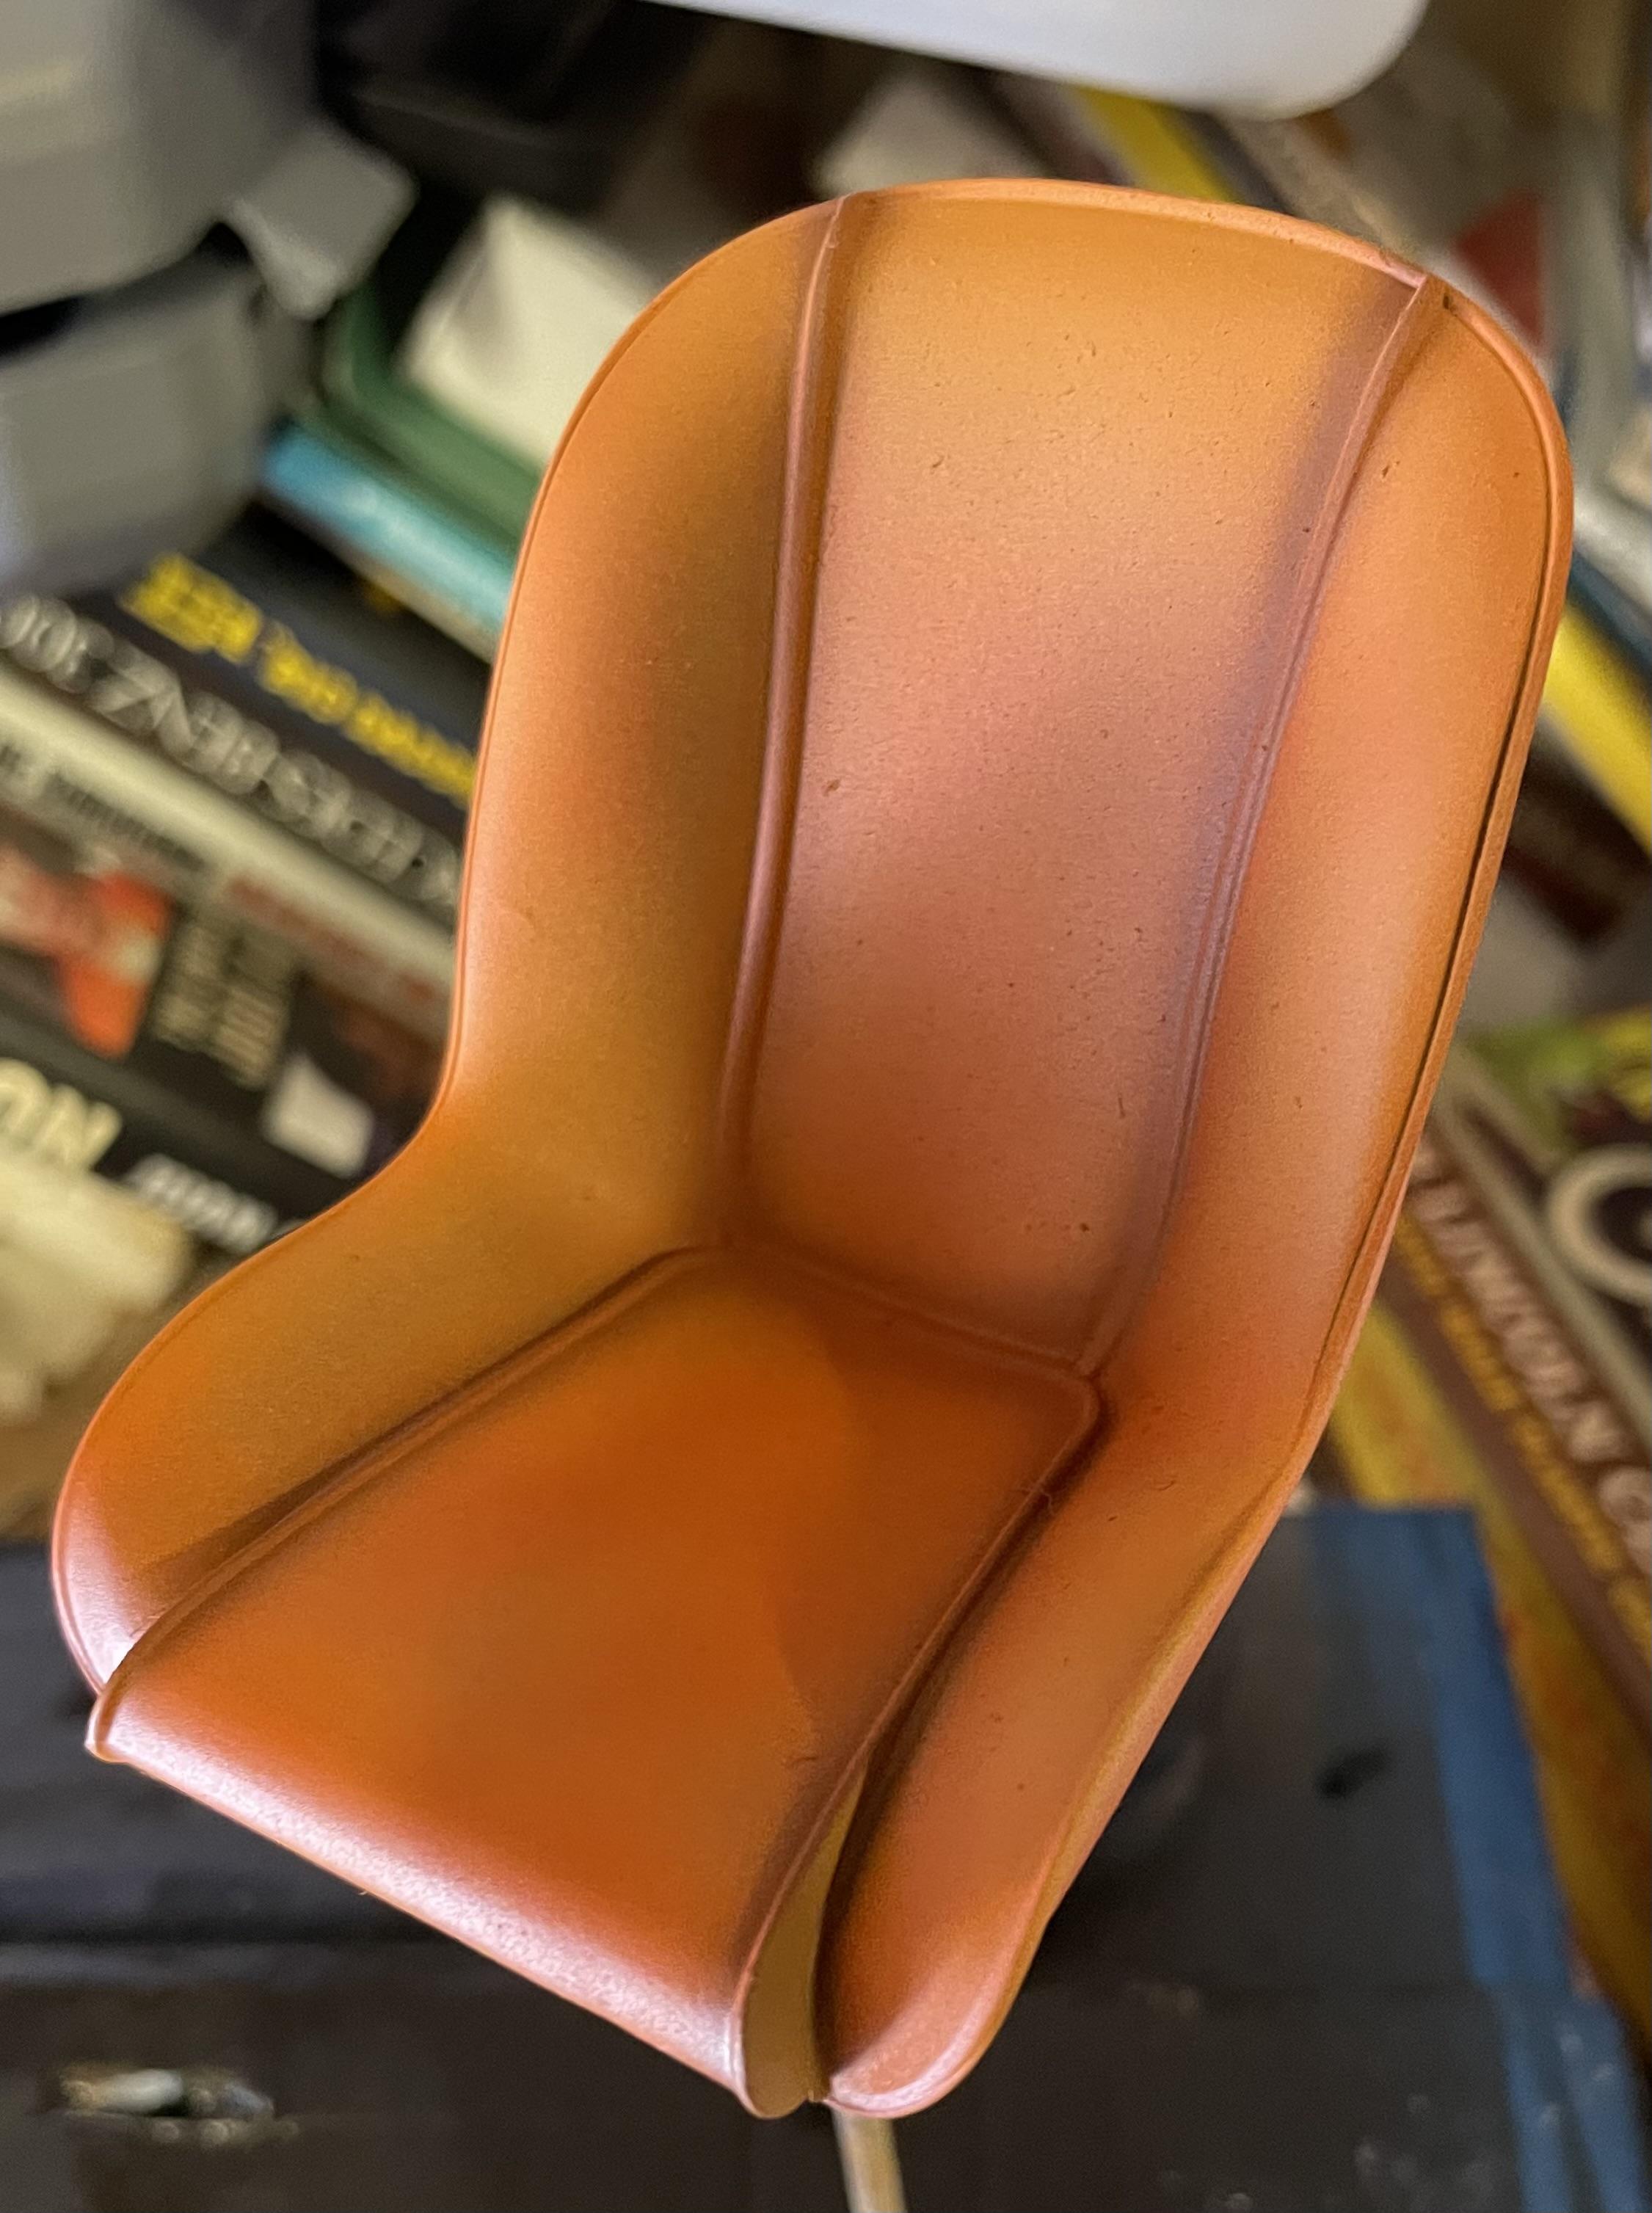
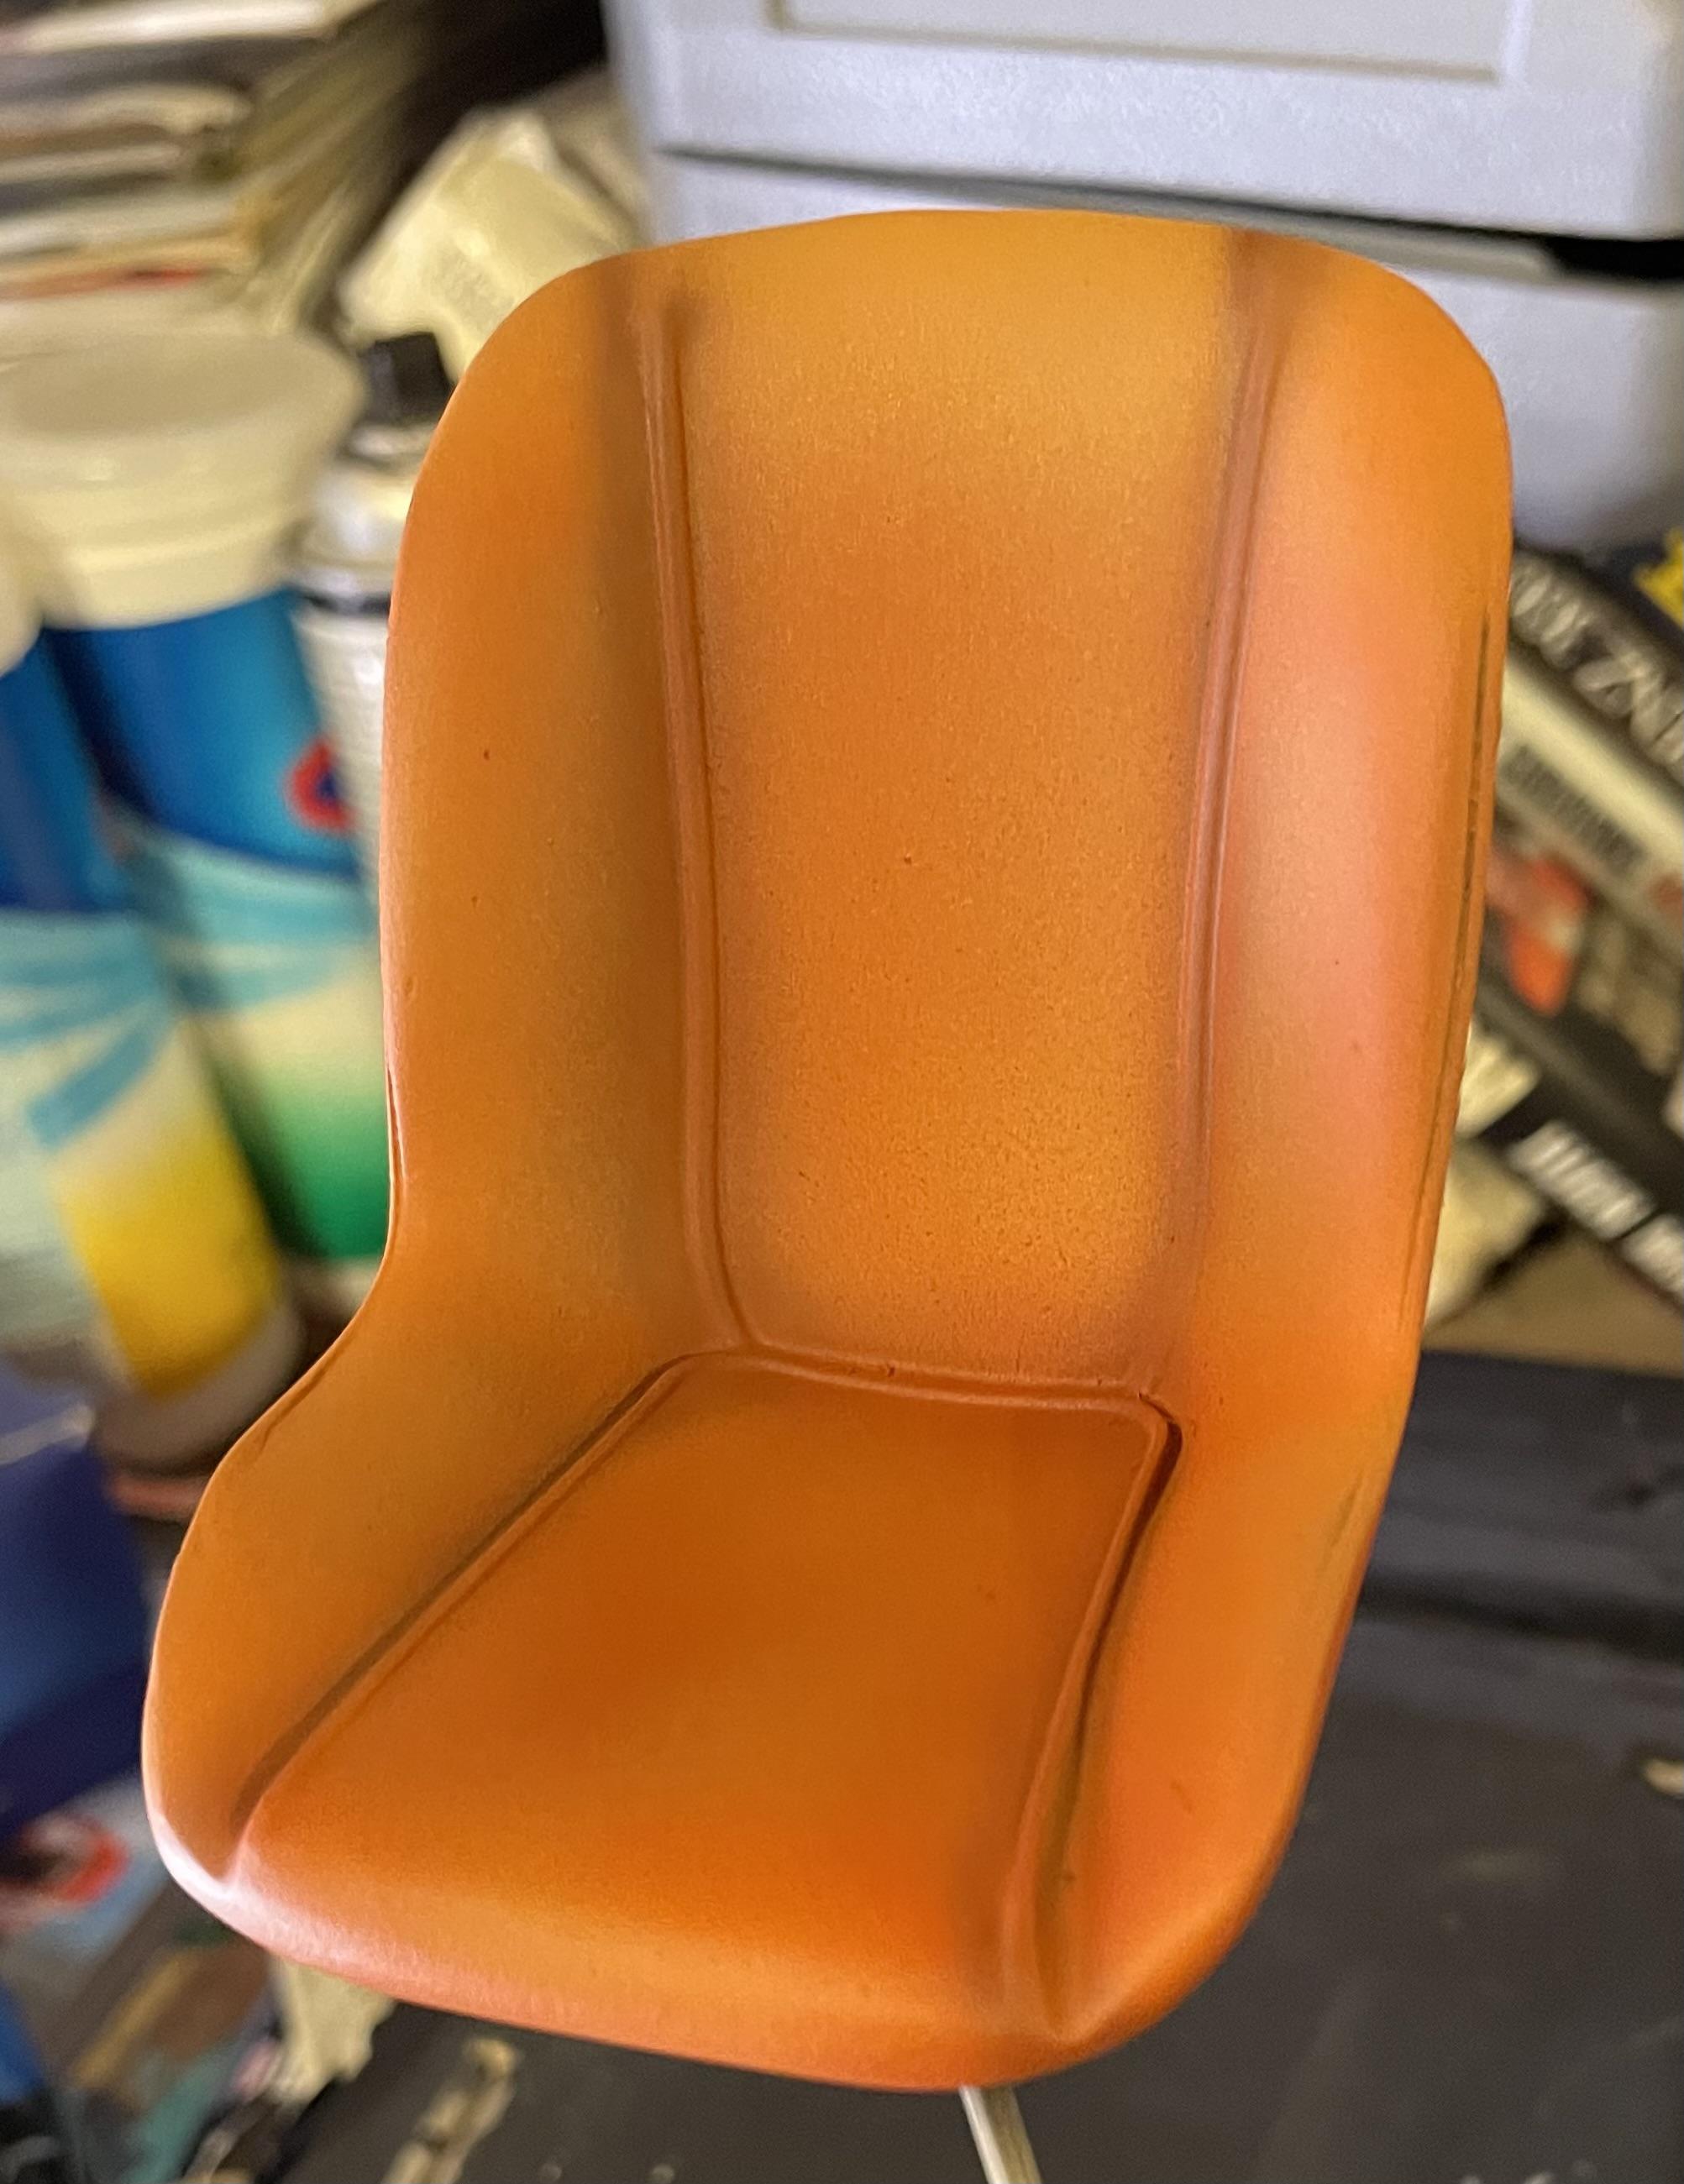
I had a disaster on one seat. My puppy loved the seat. Here is a pic of the destroyed seat.and the culprit who destroyed it. It repaired nice somehow.
-
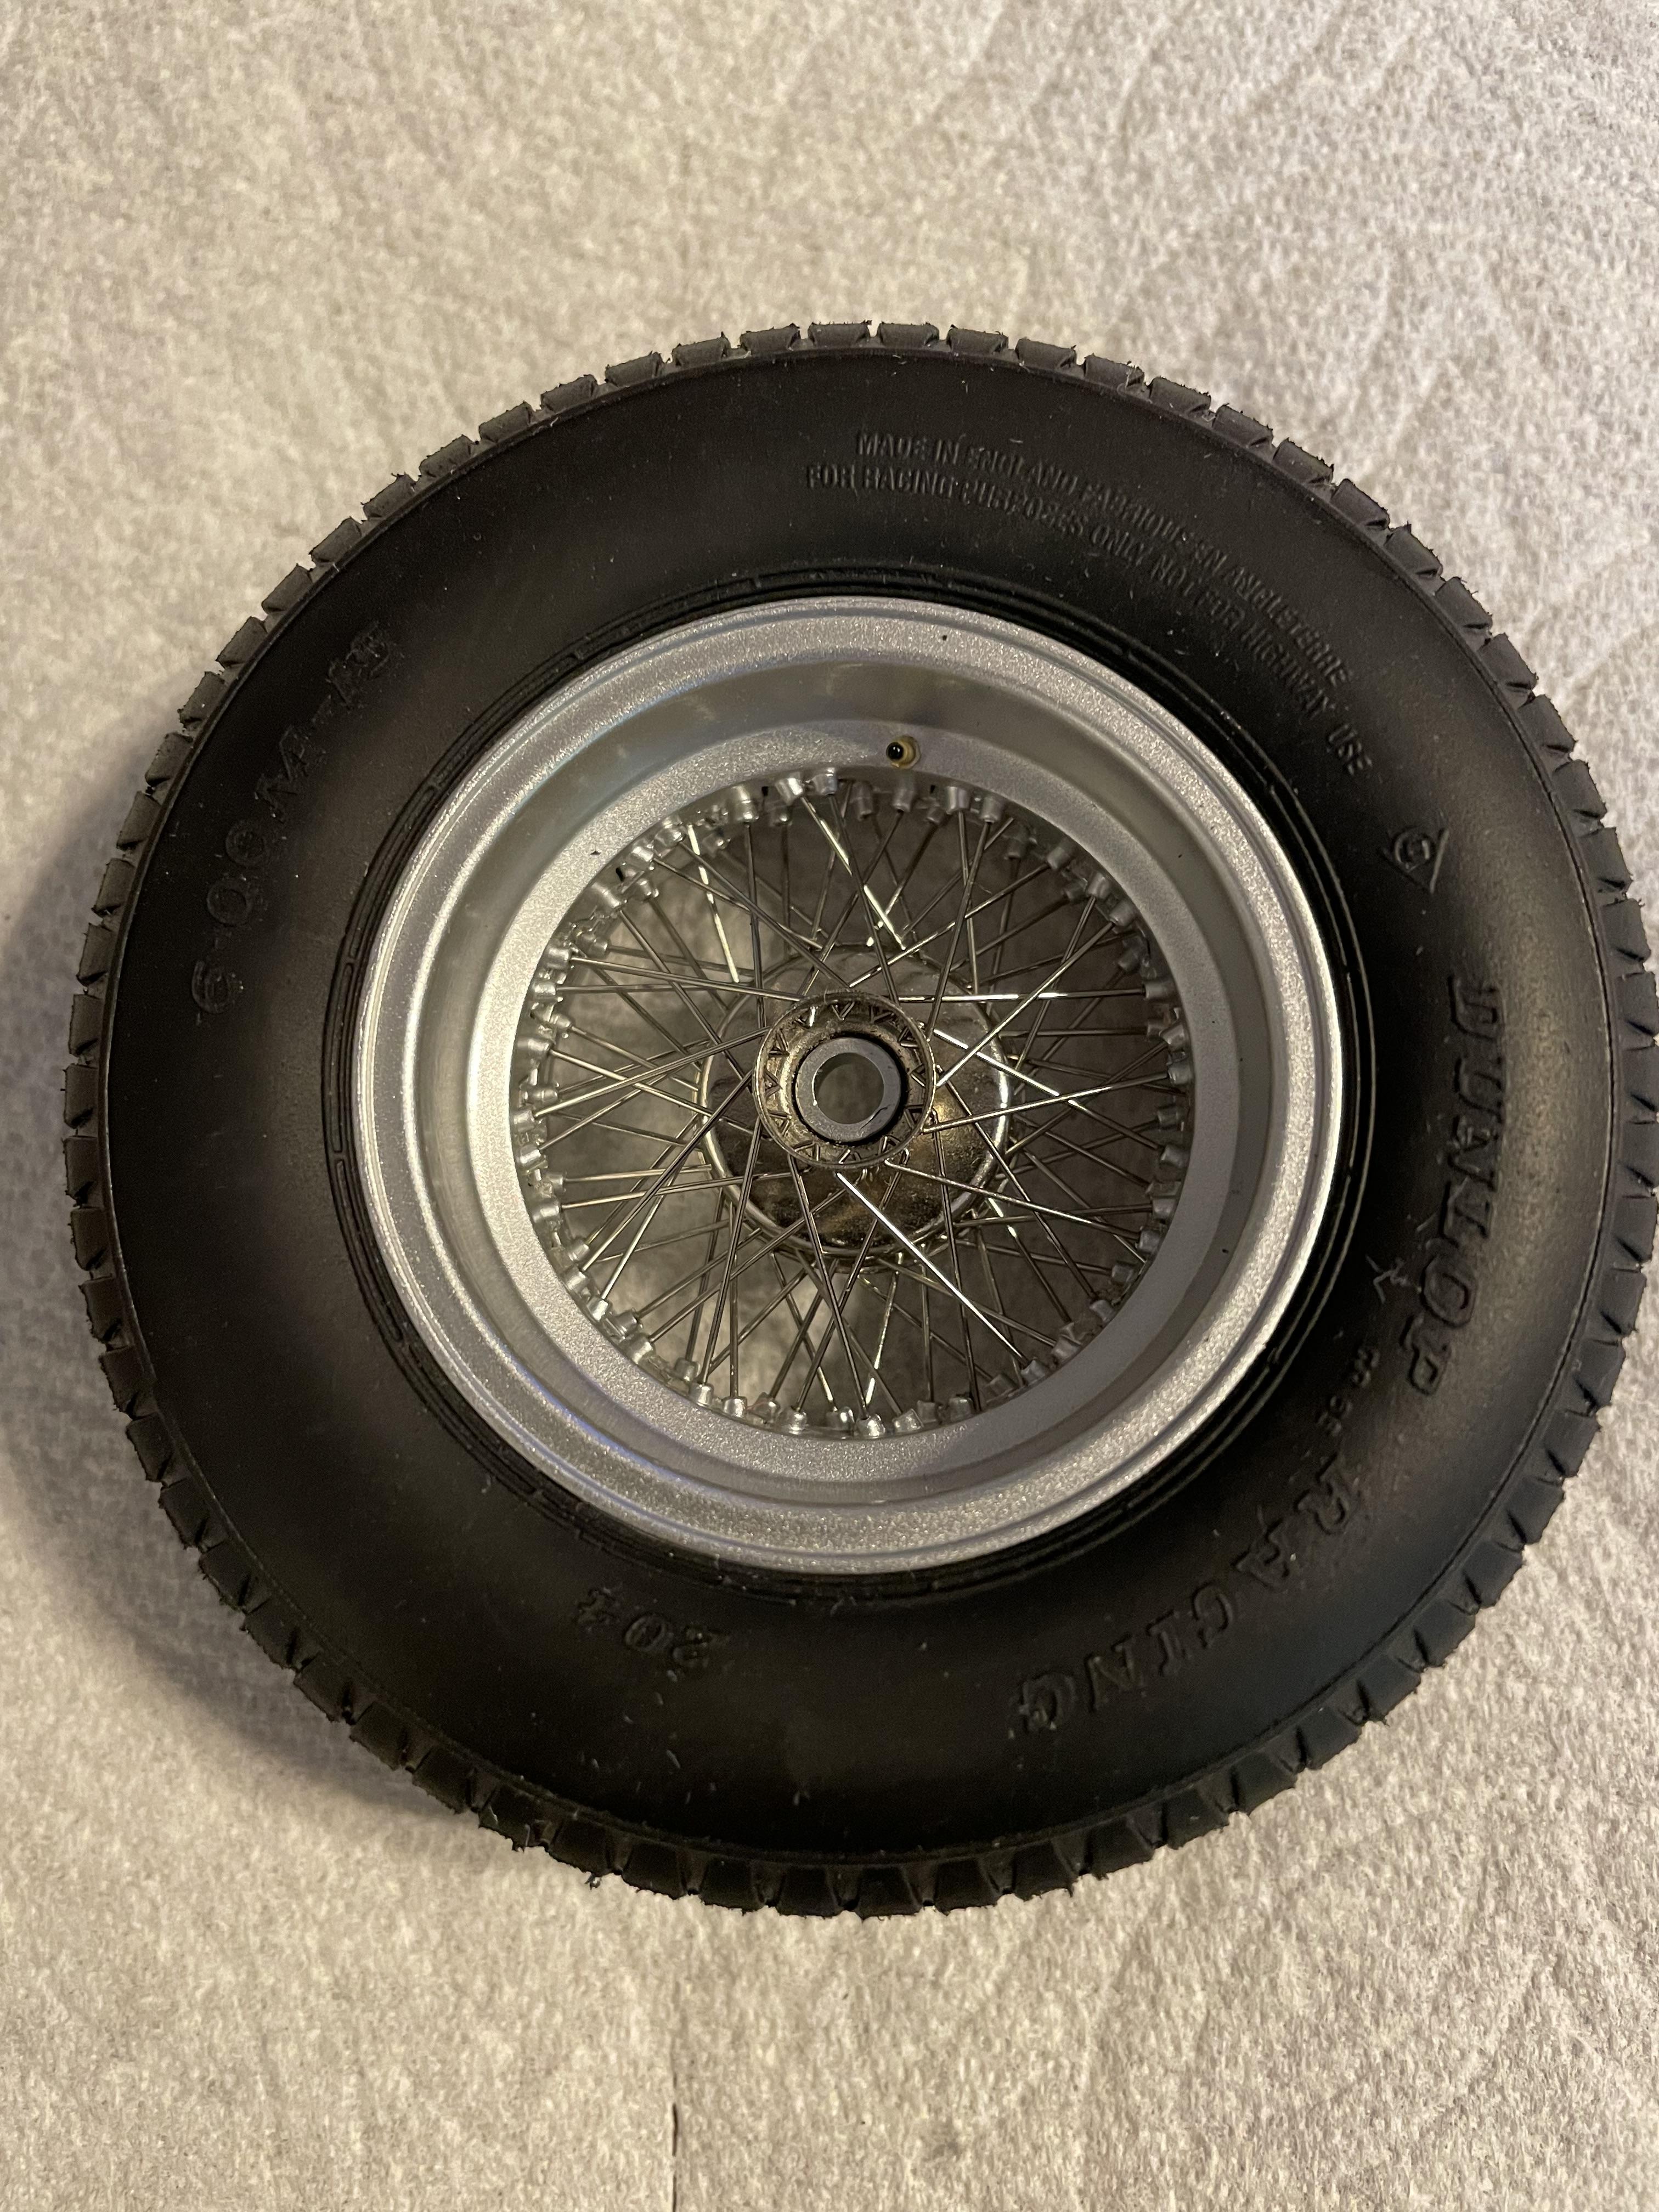
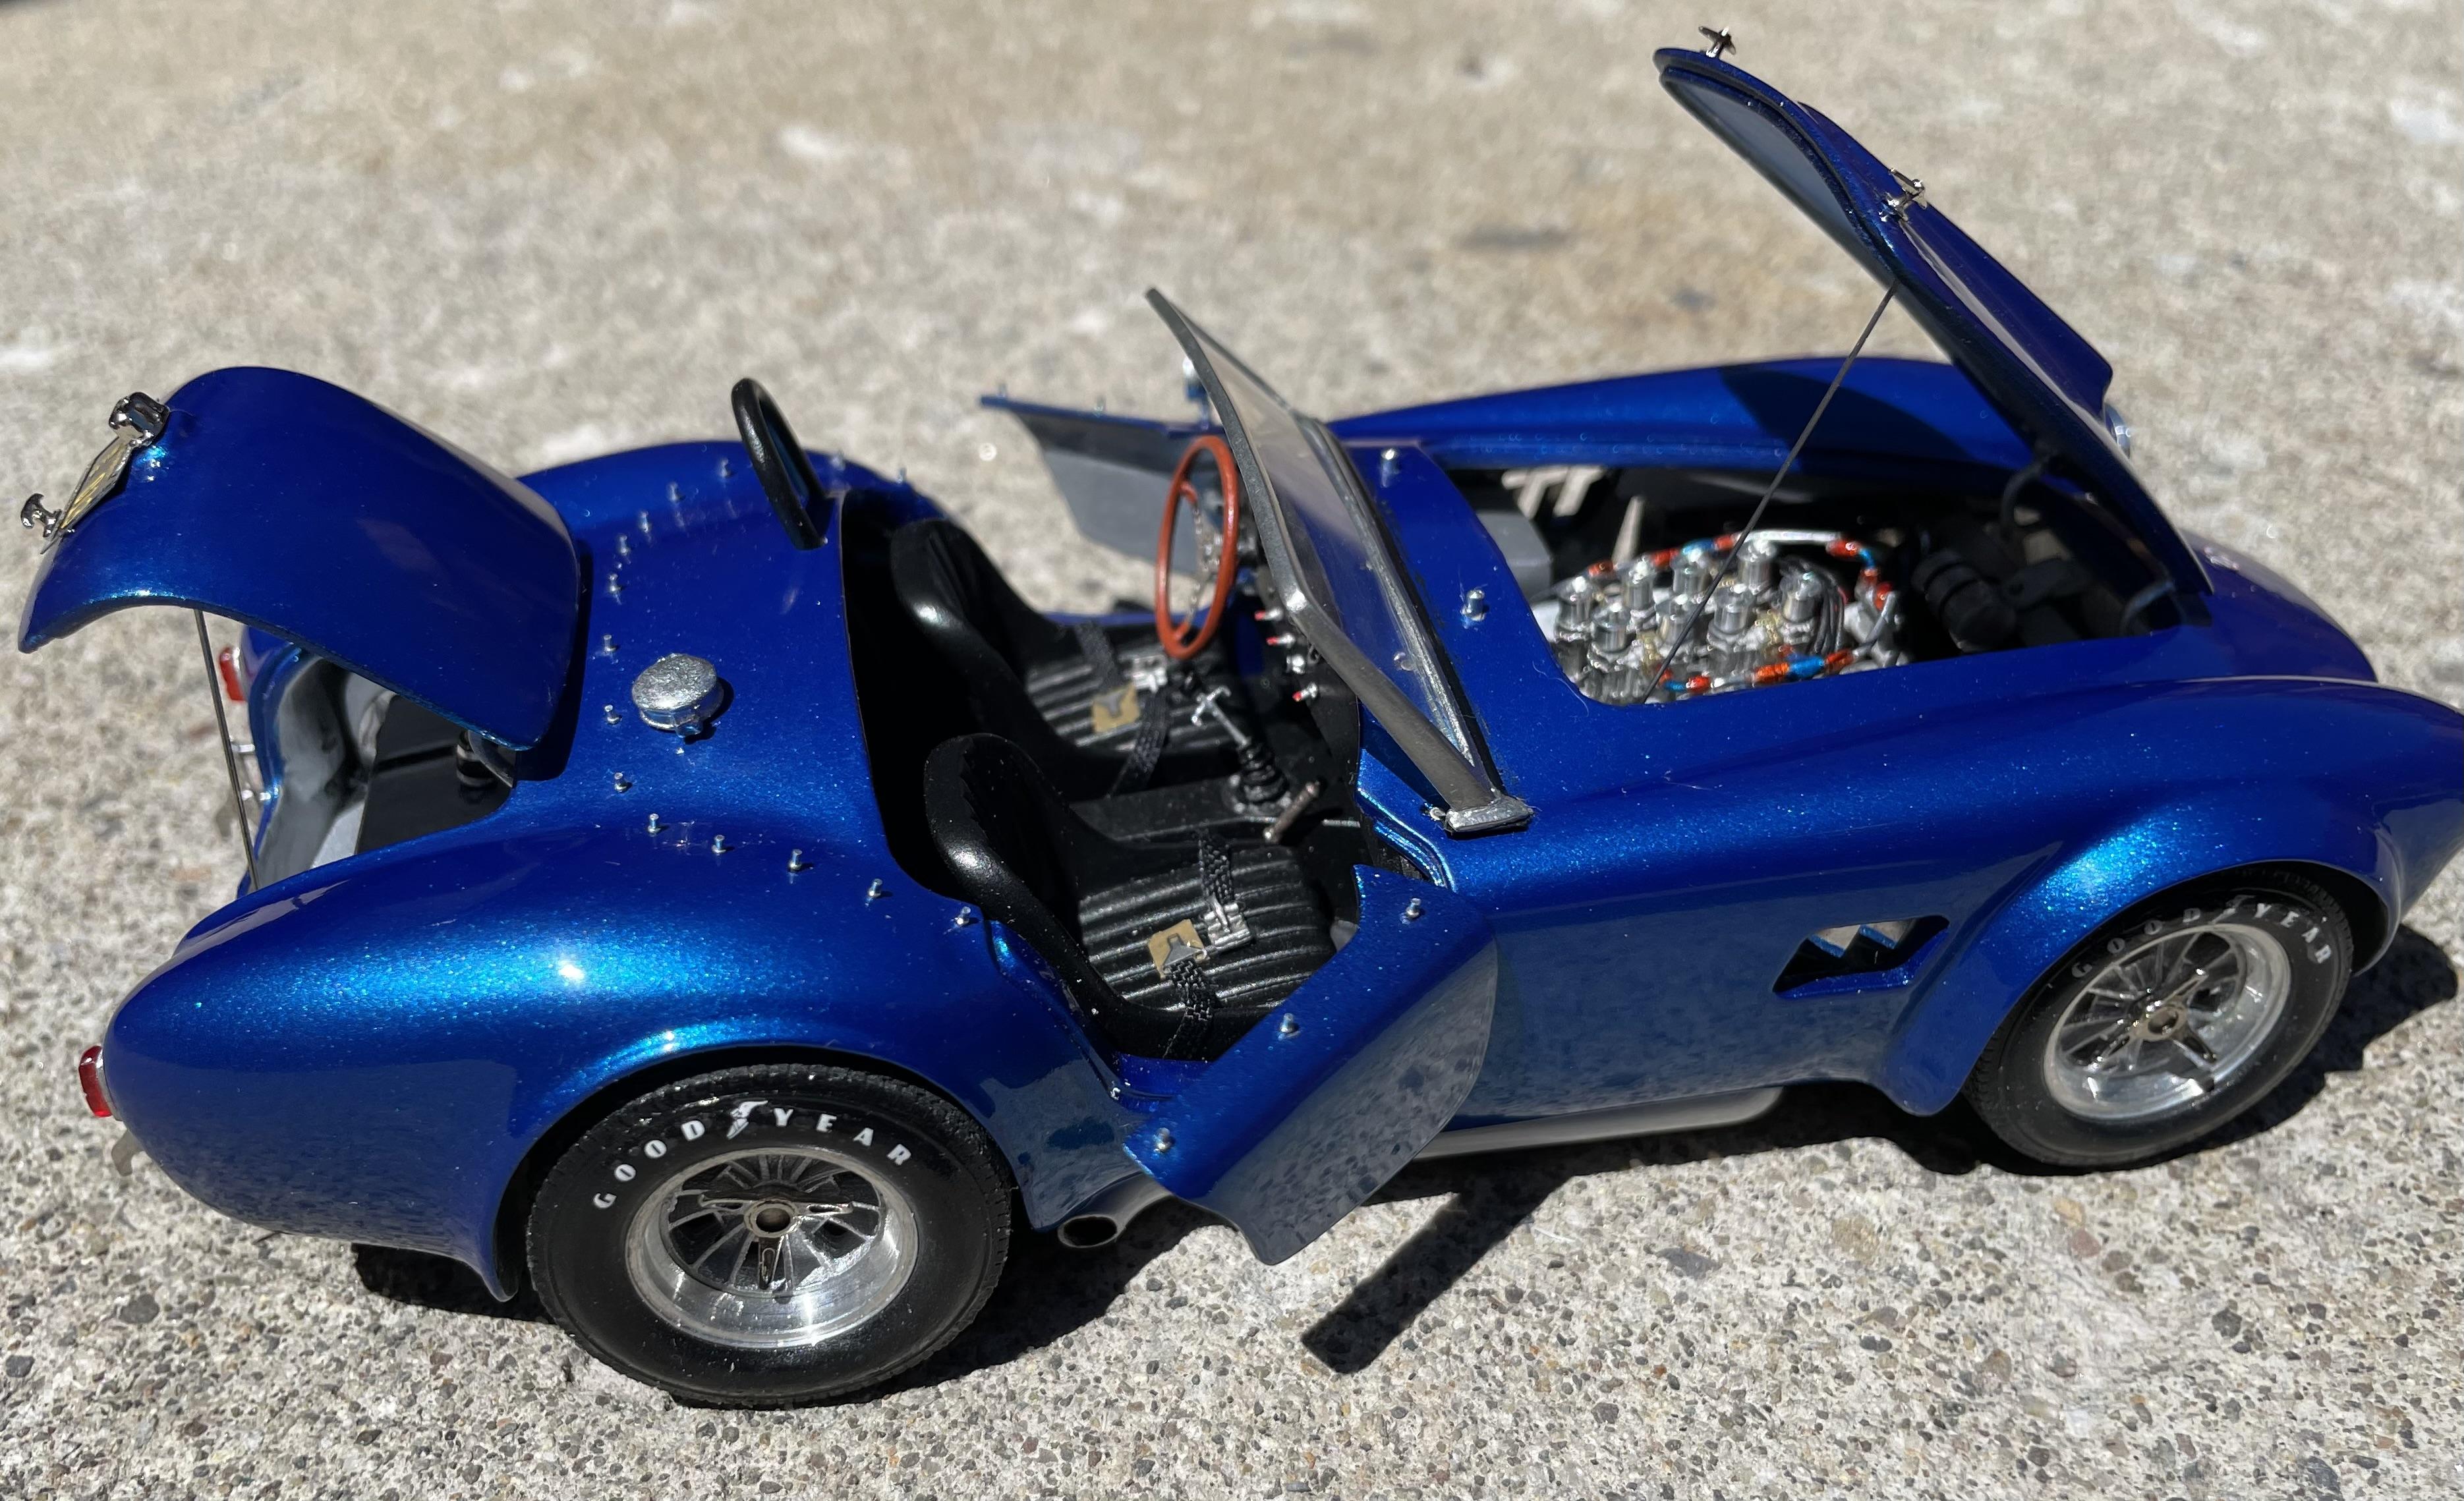
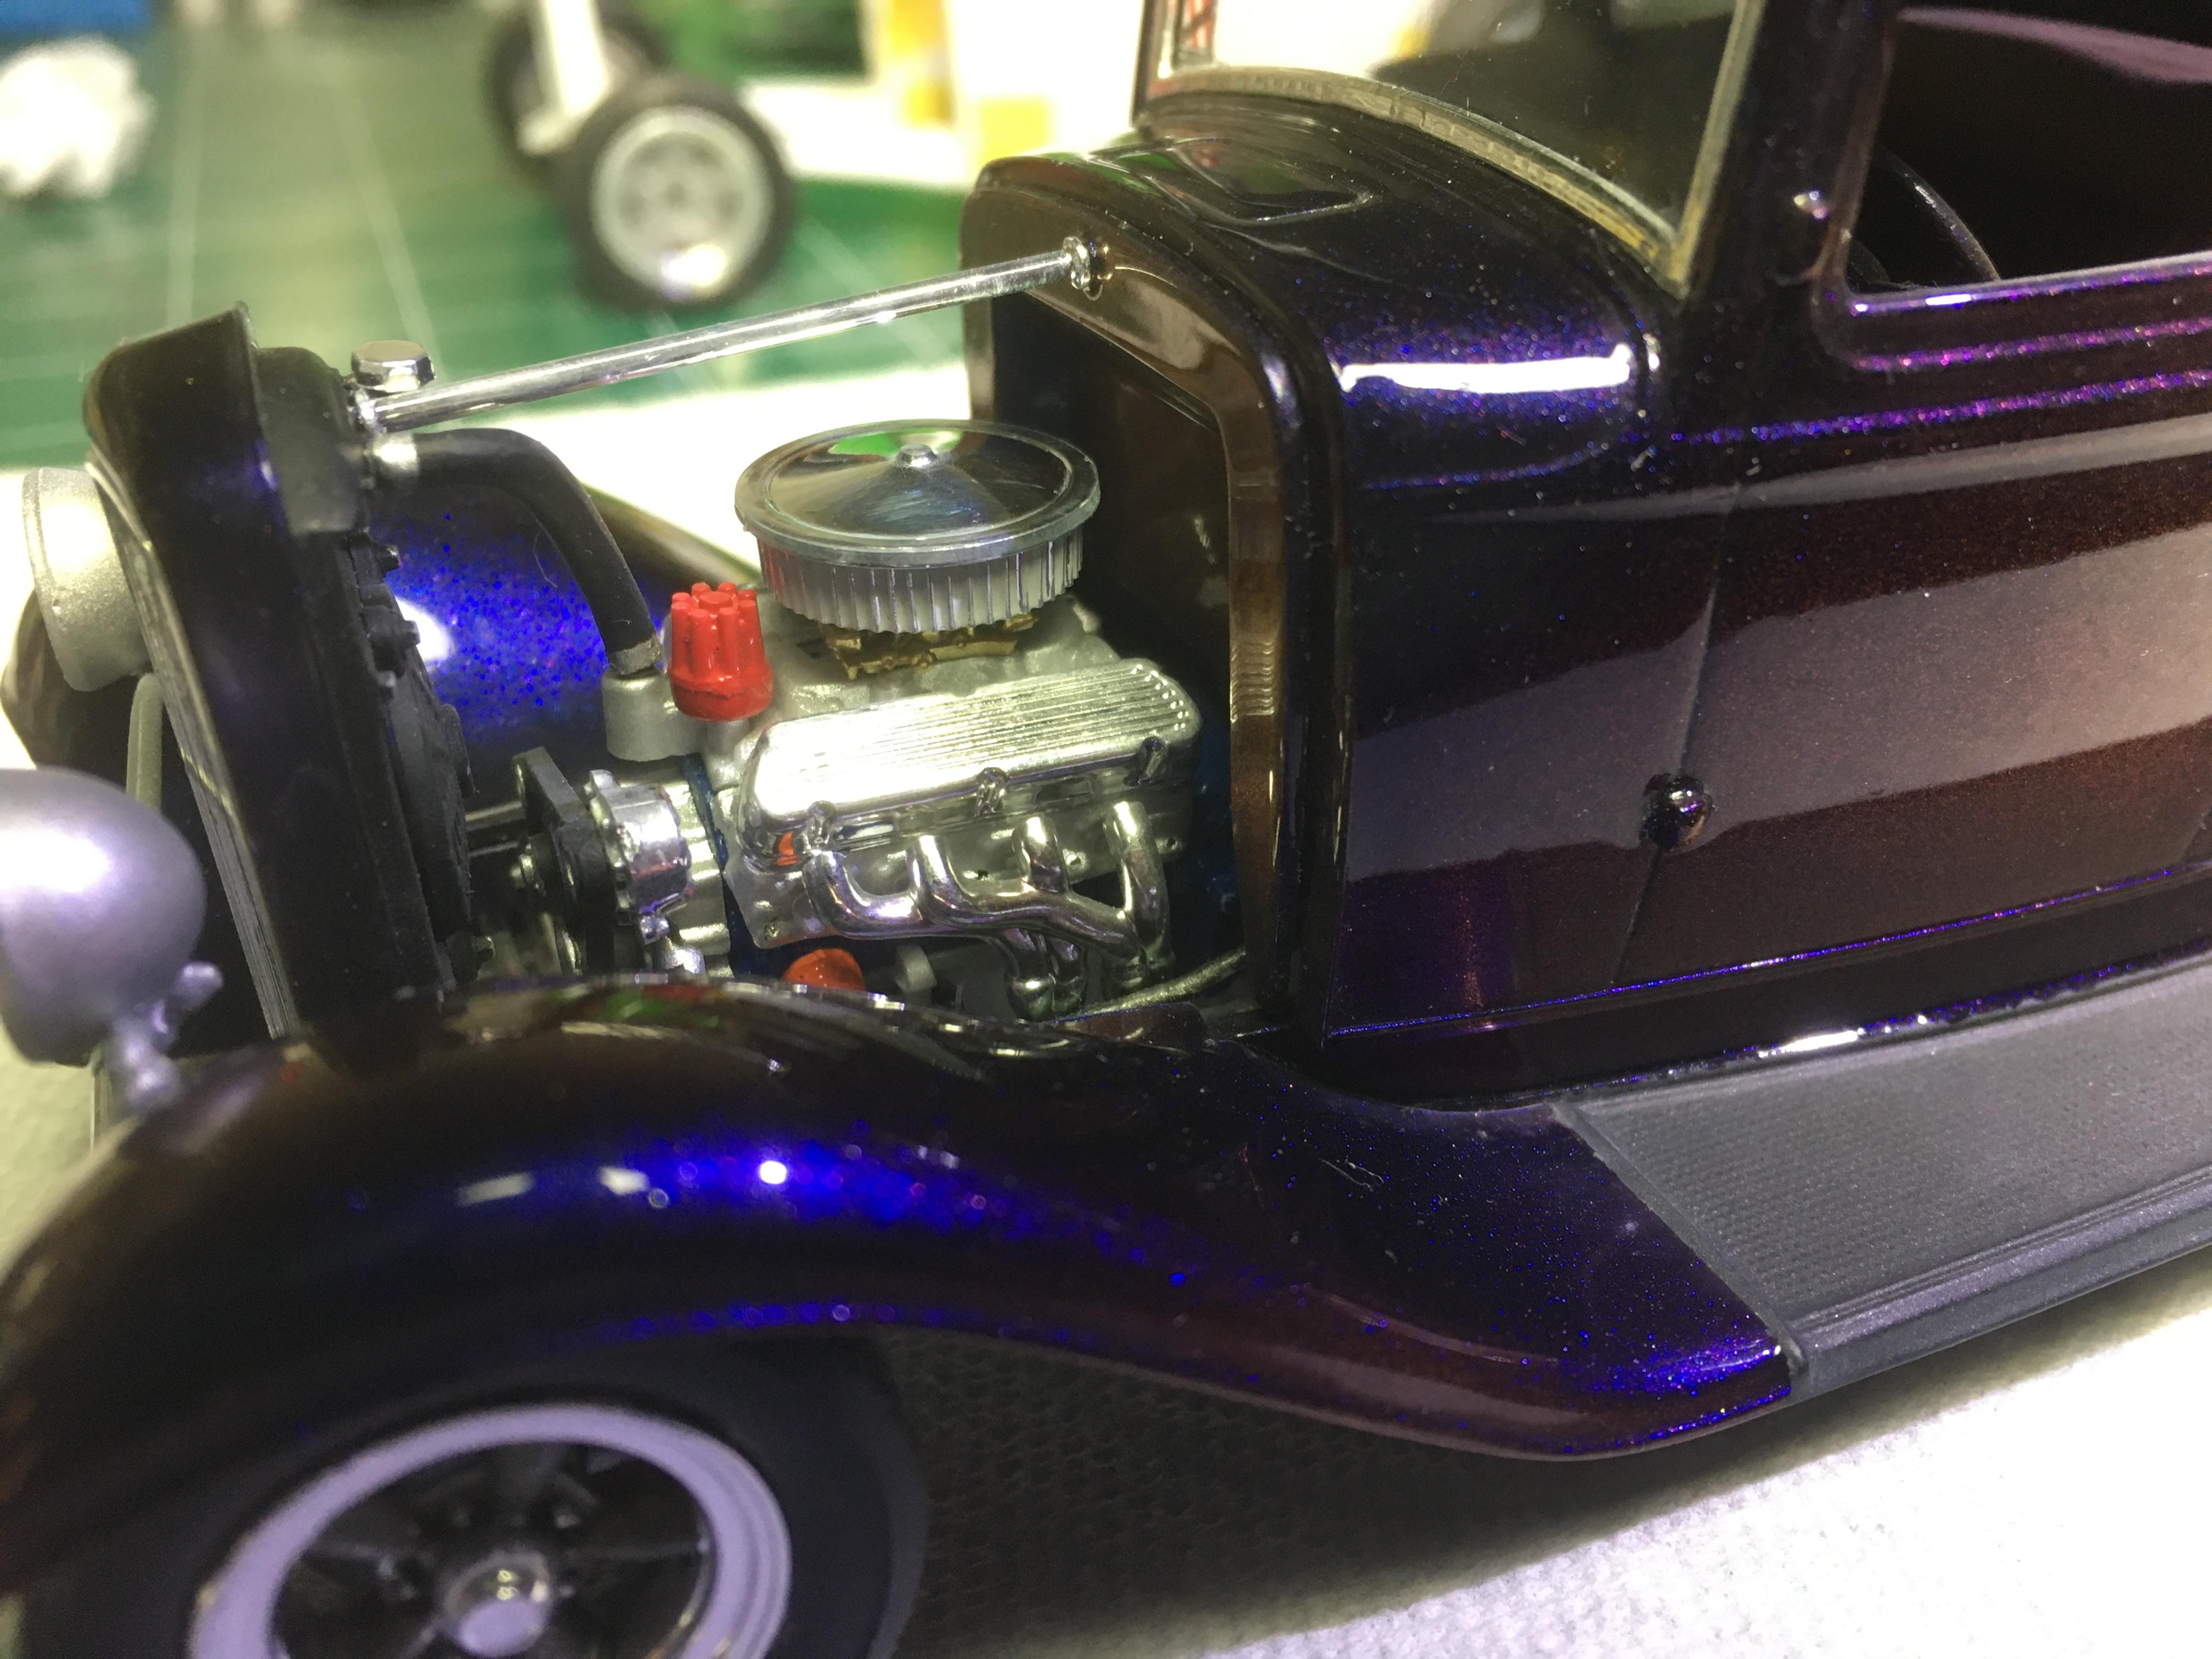
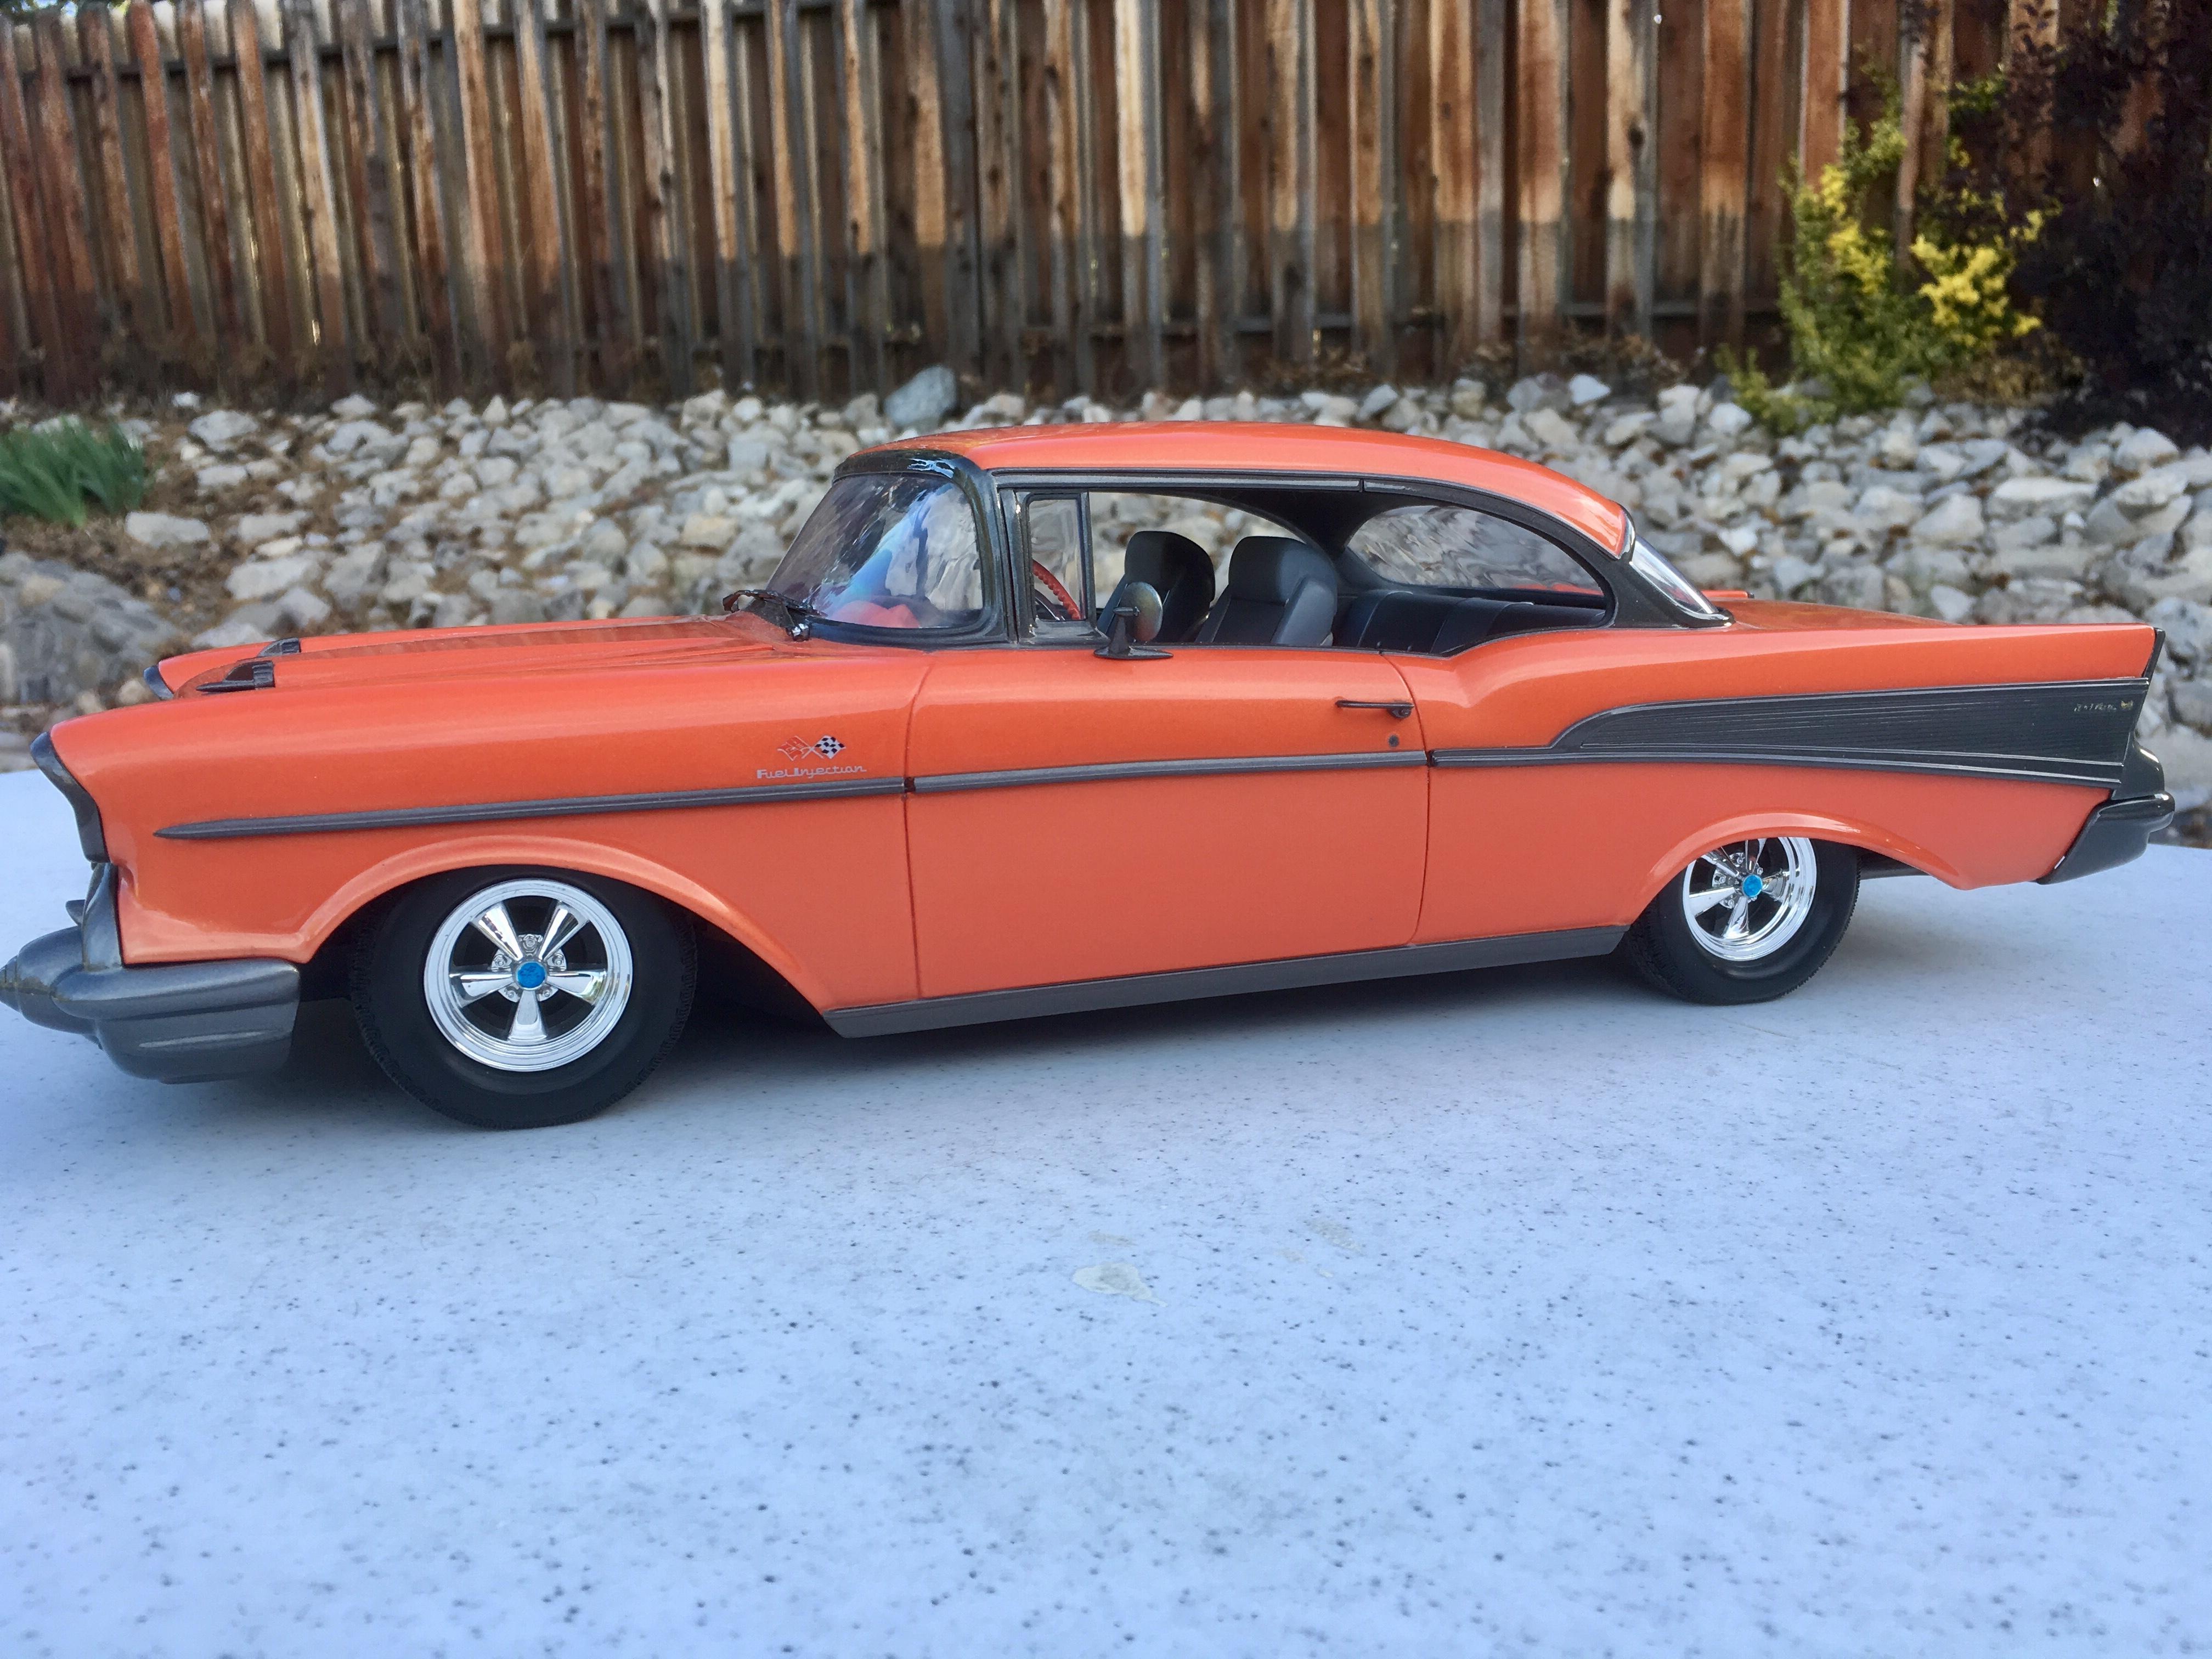
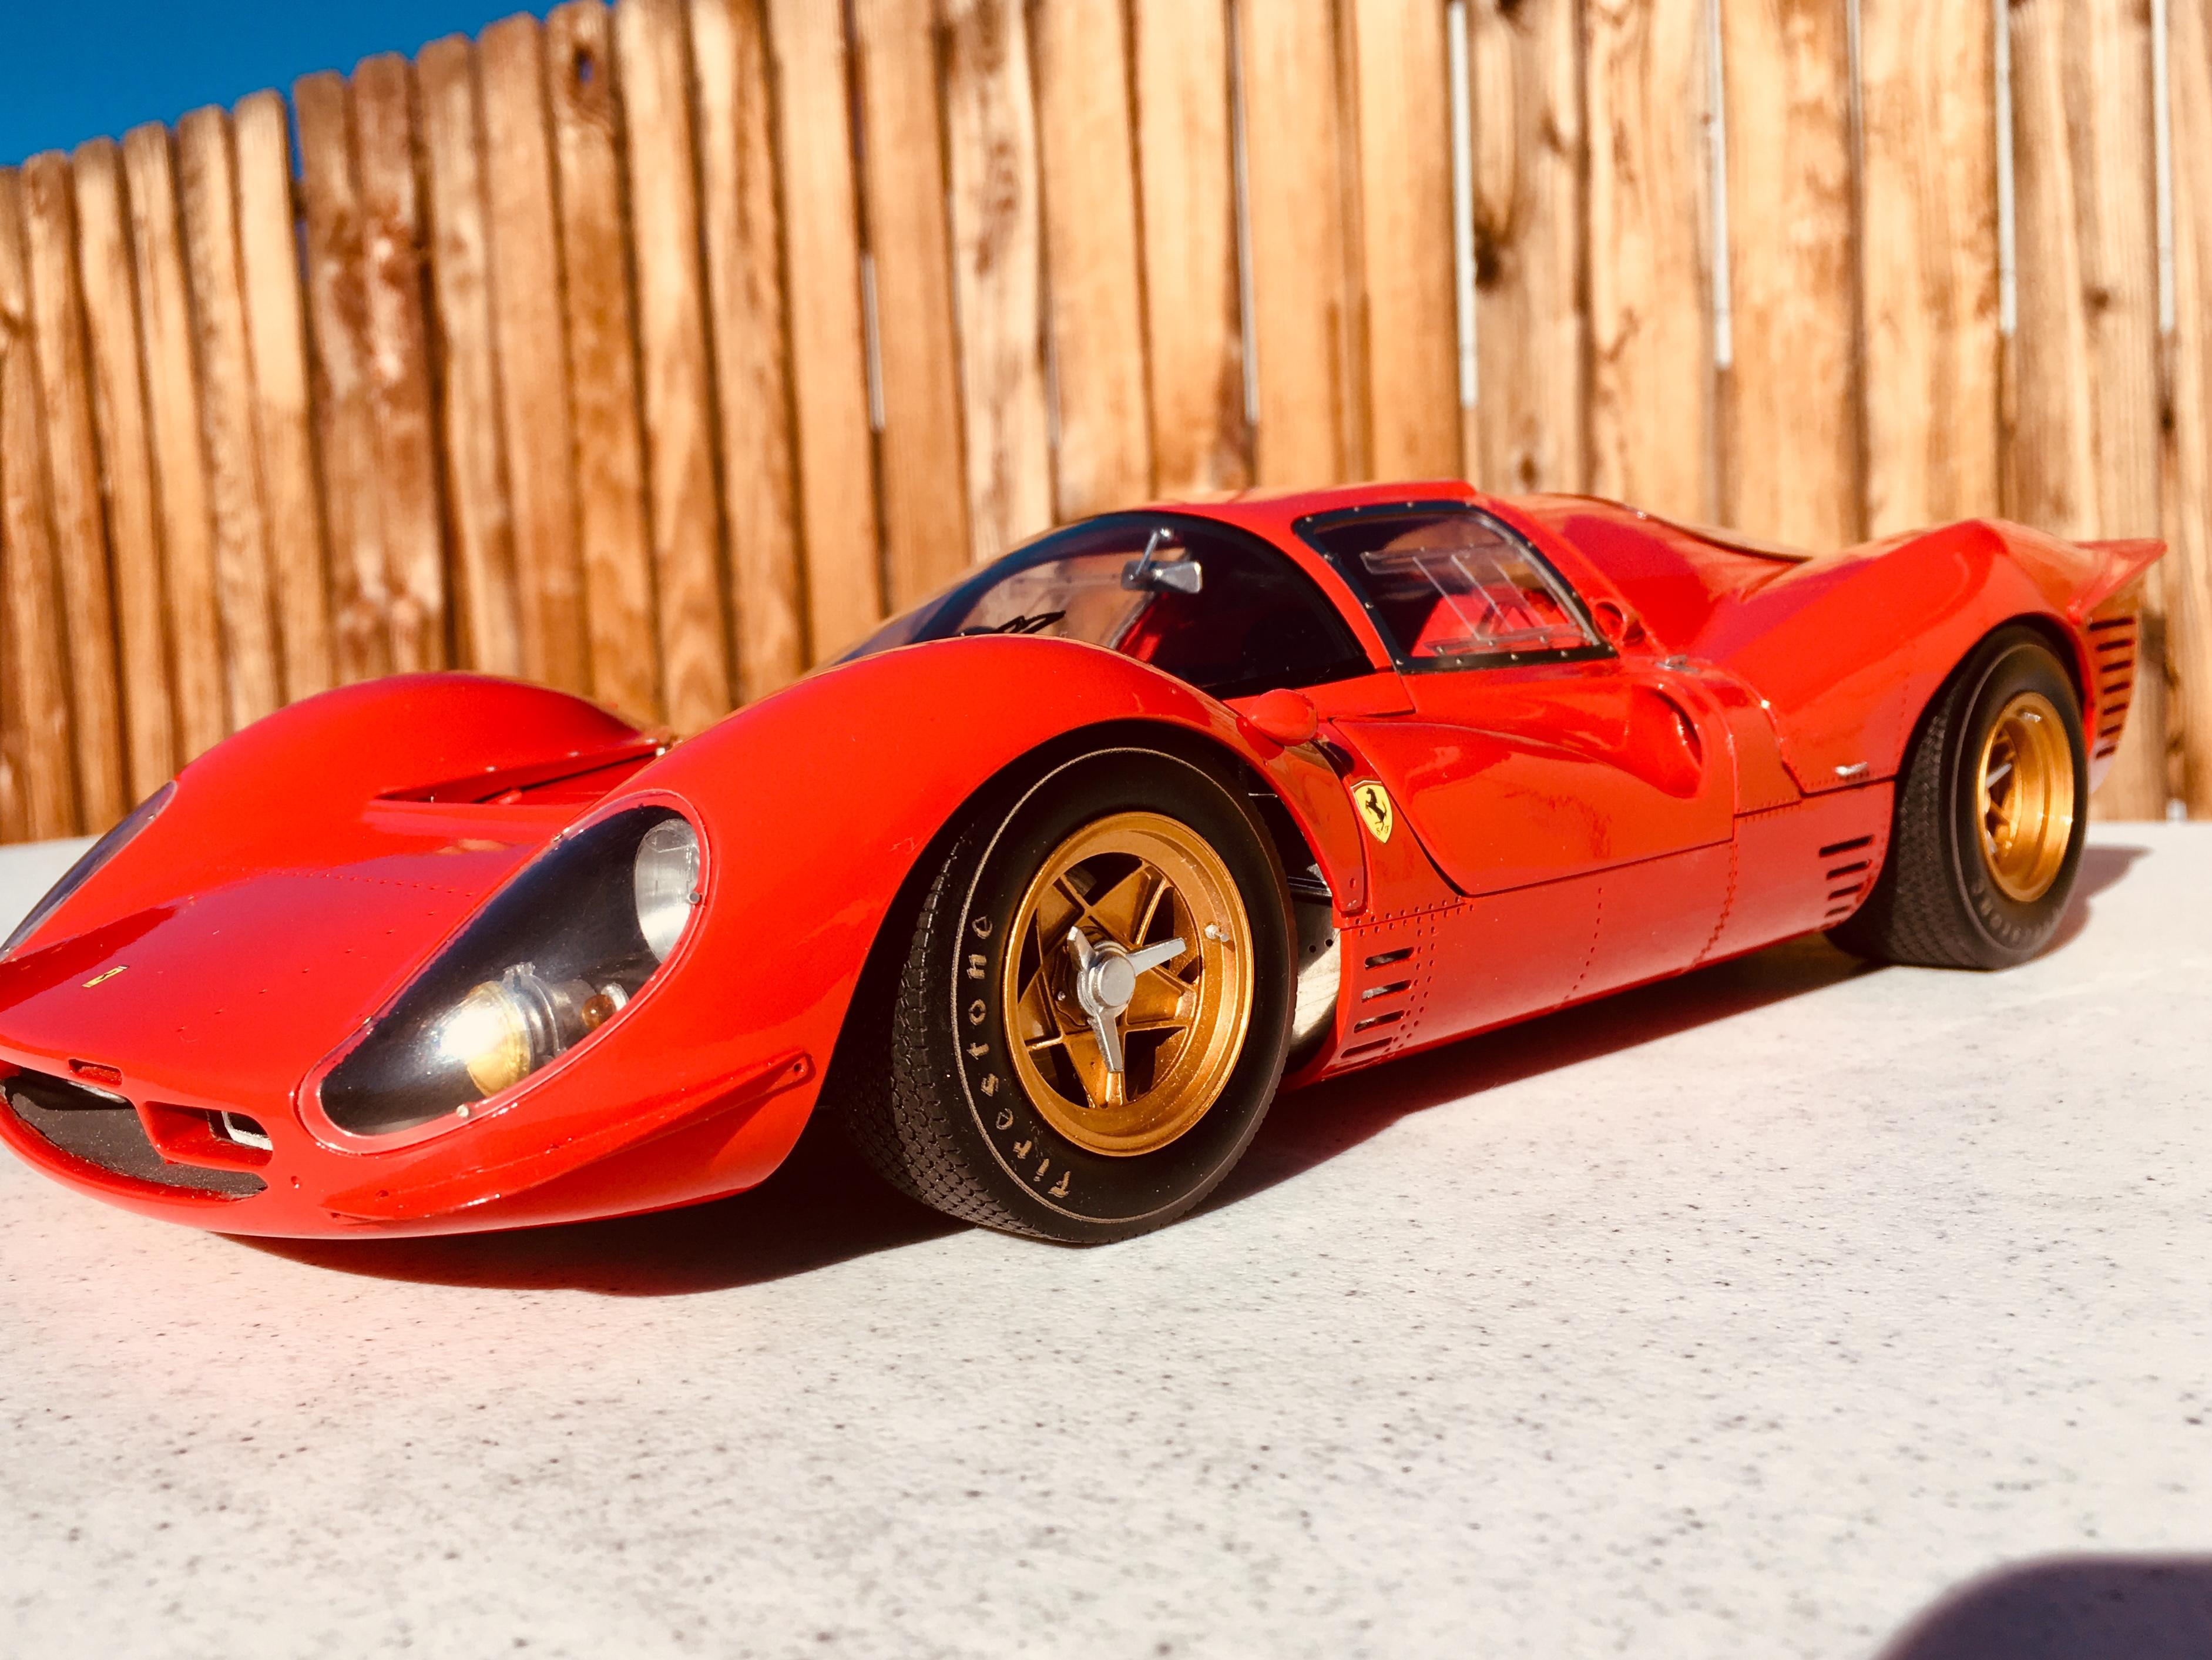
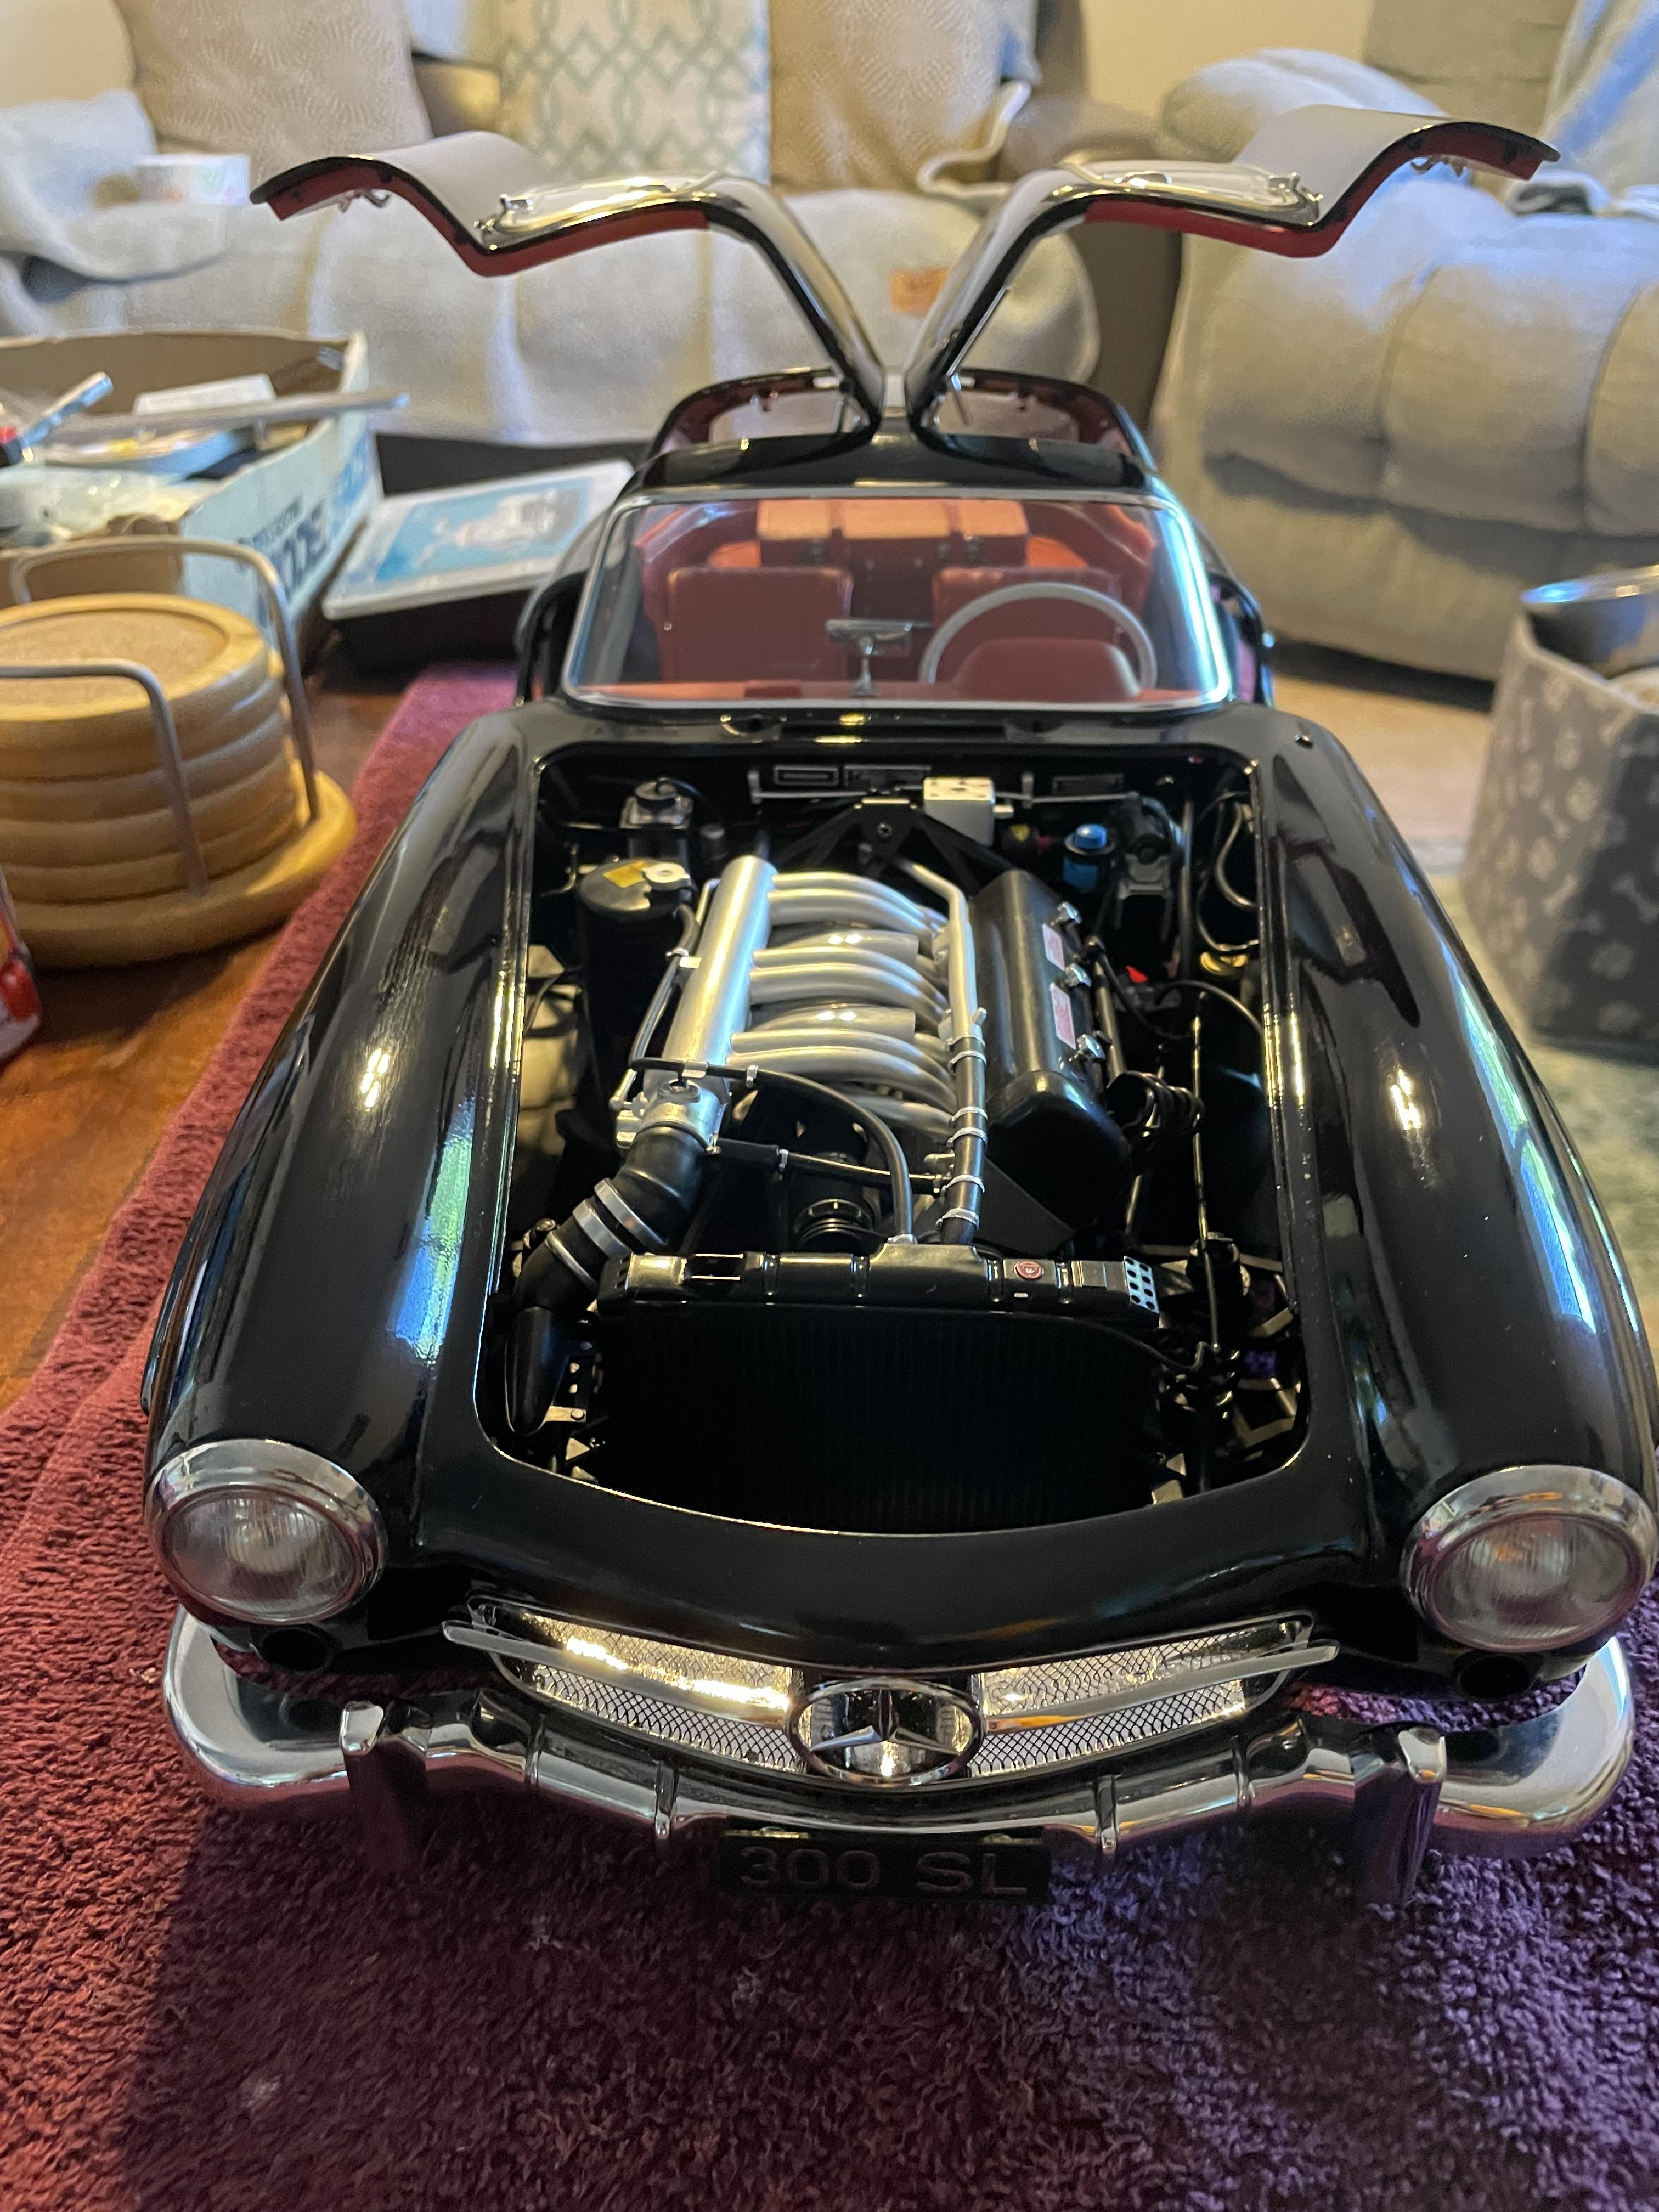
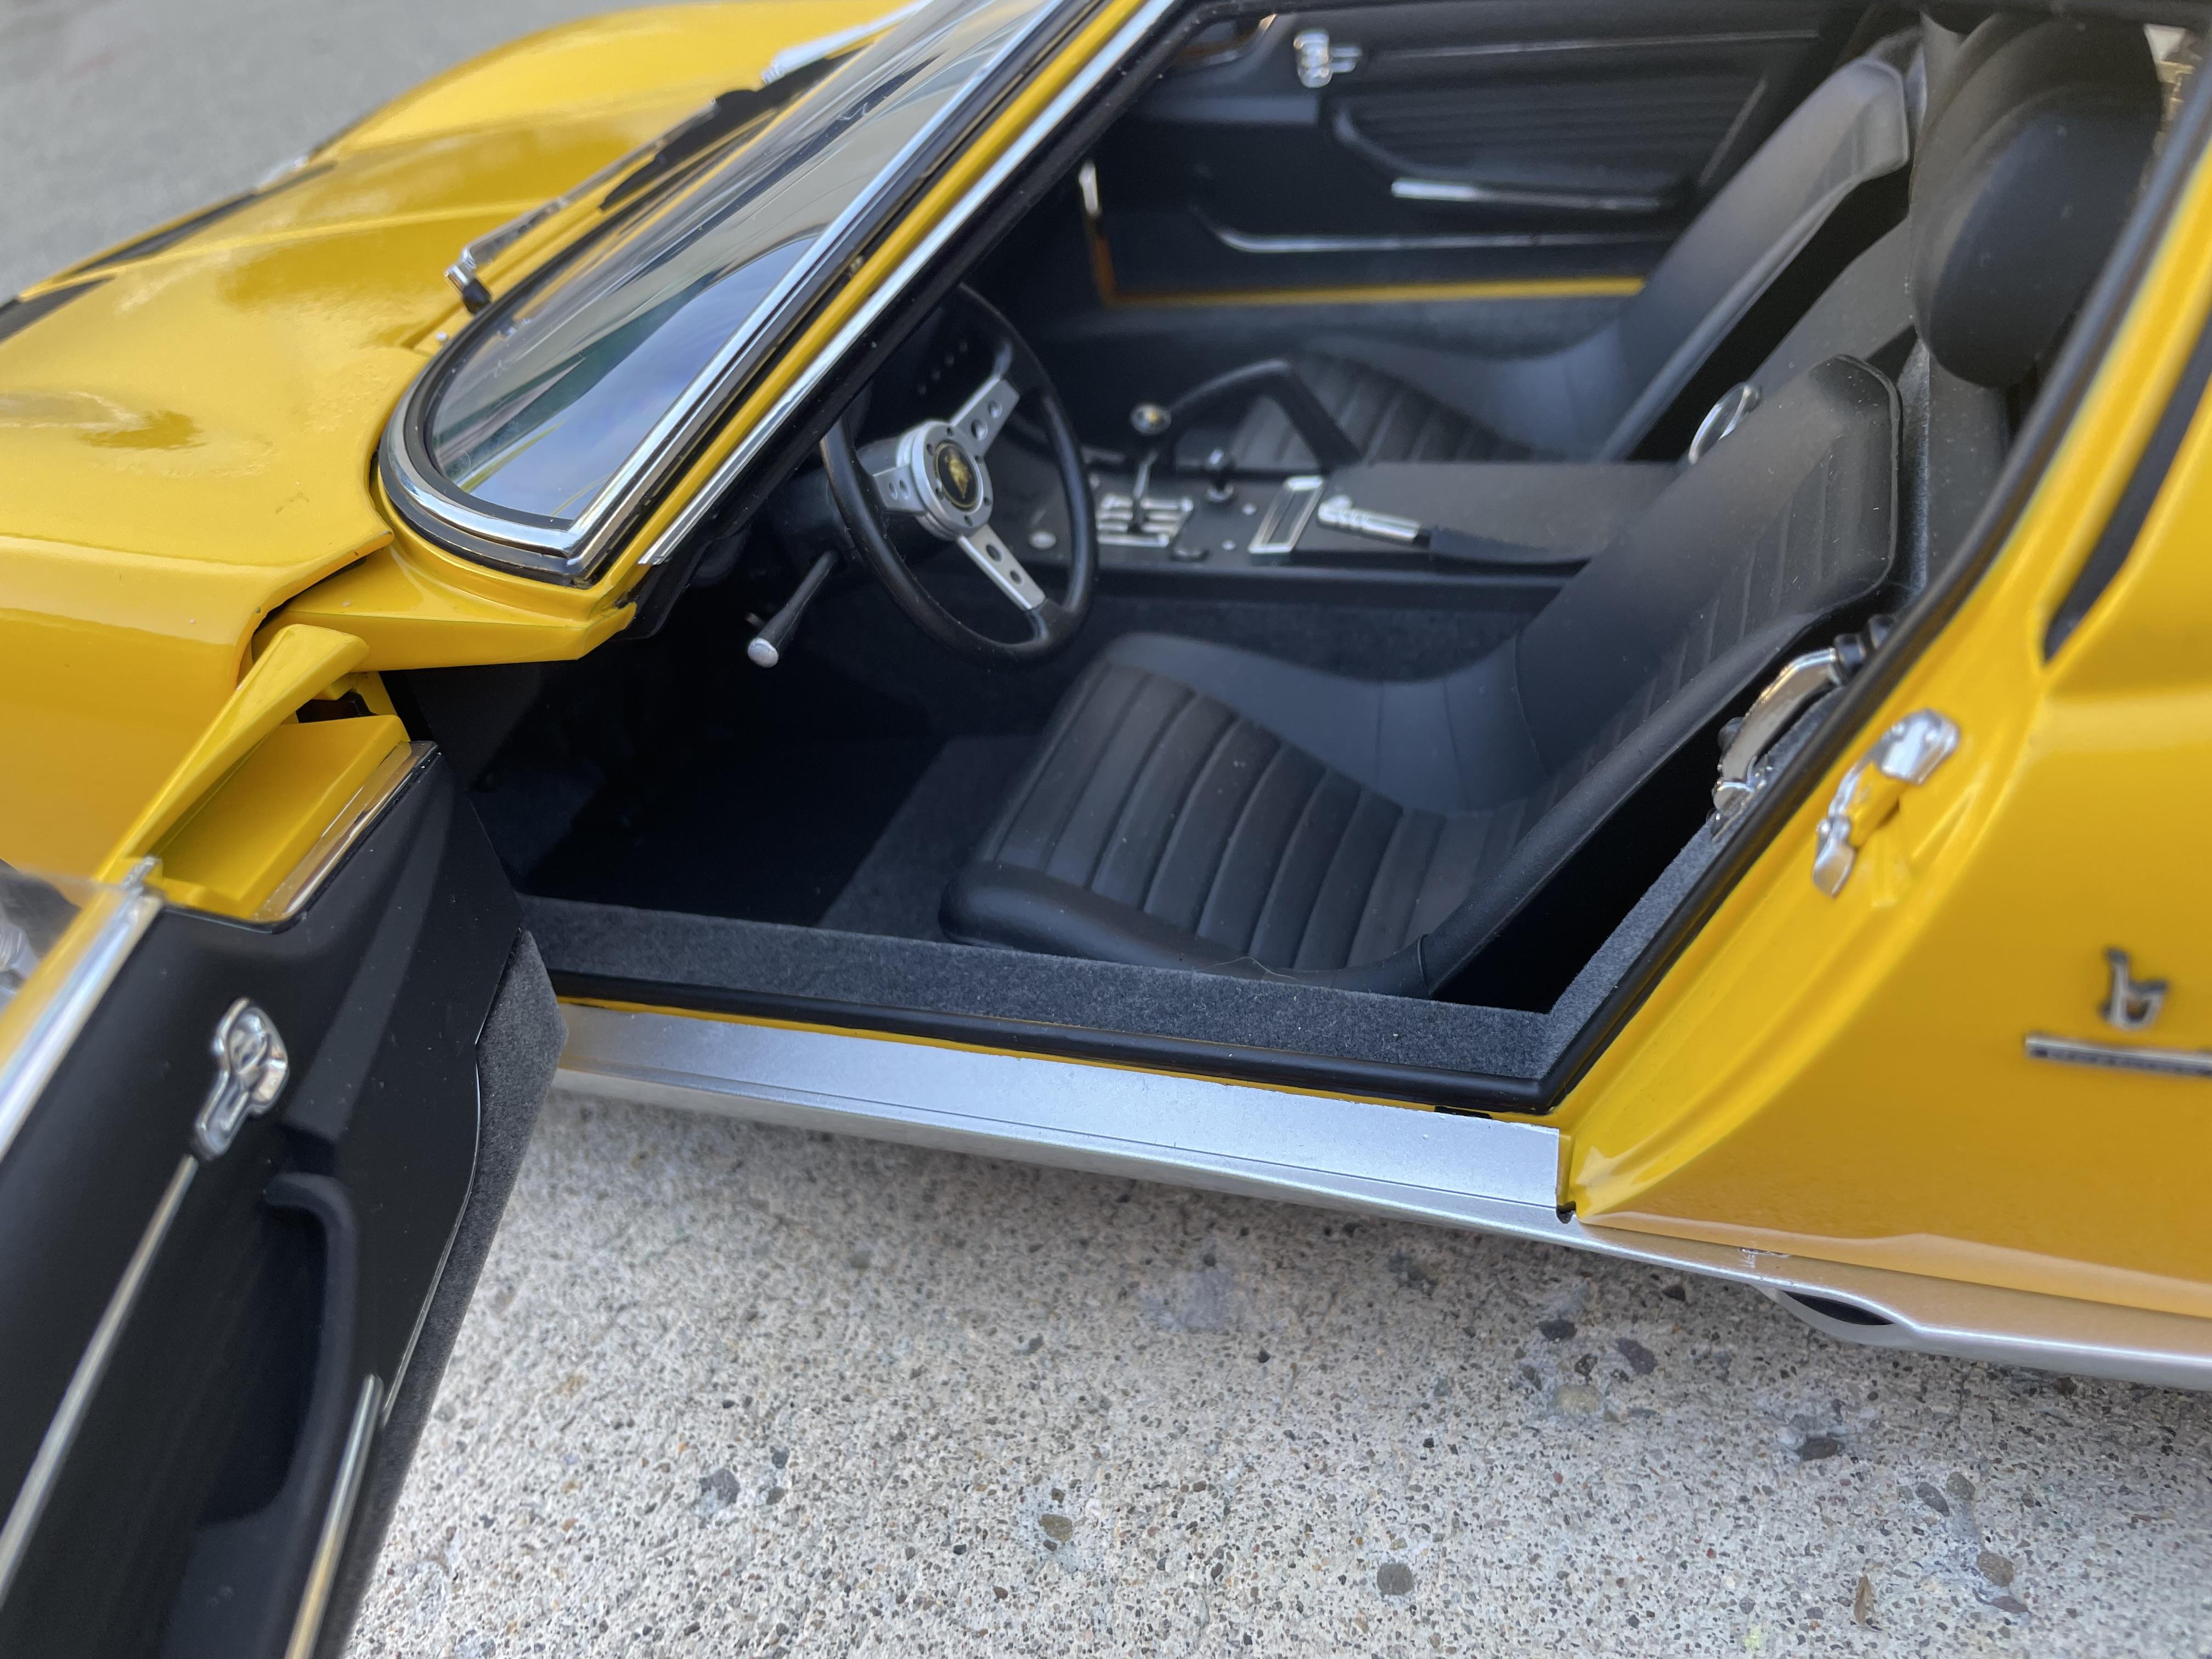
Started my 1/8 Ferrari 250 . Painted her blue. Not really excited by the color. Might have to change it. The seats came out cool. Only one wheel finished. Have to put each spoke in the wheel. Takes several hours to just do one.
-
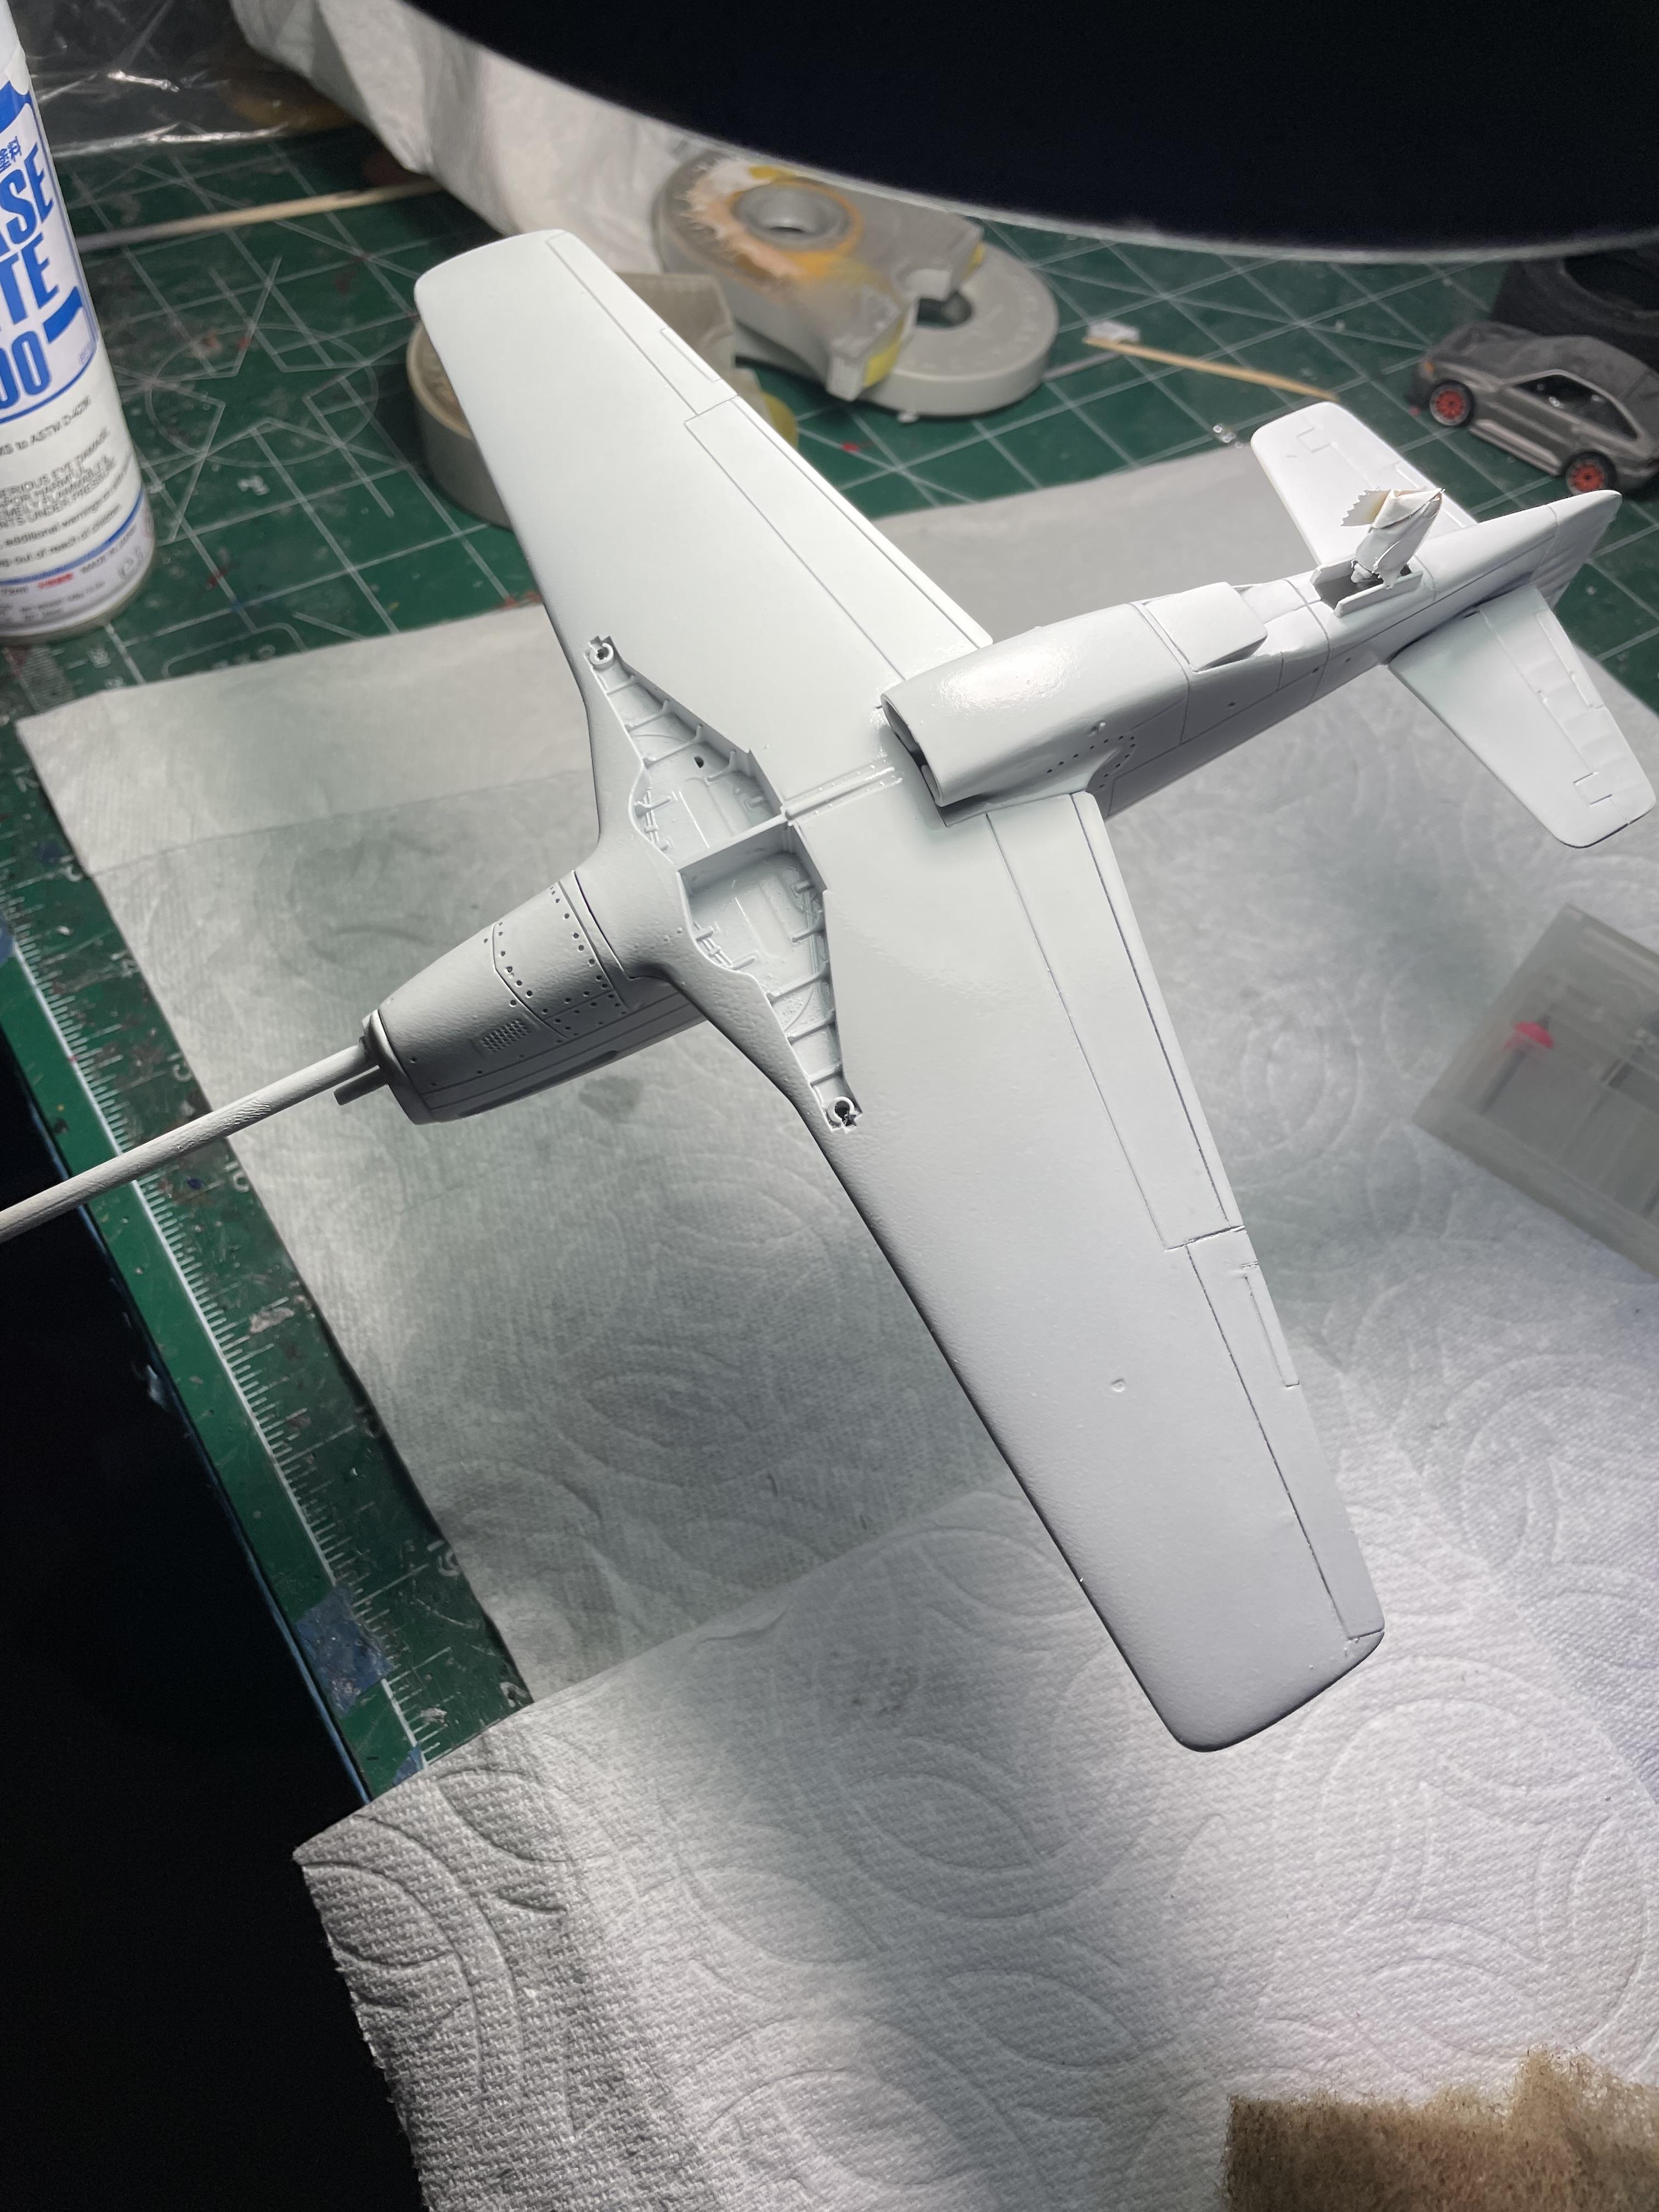
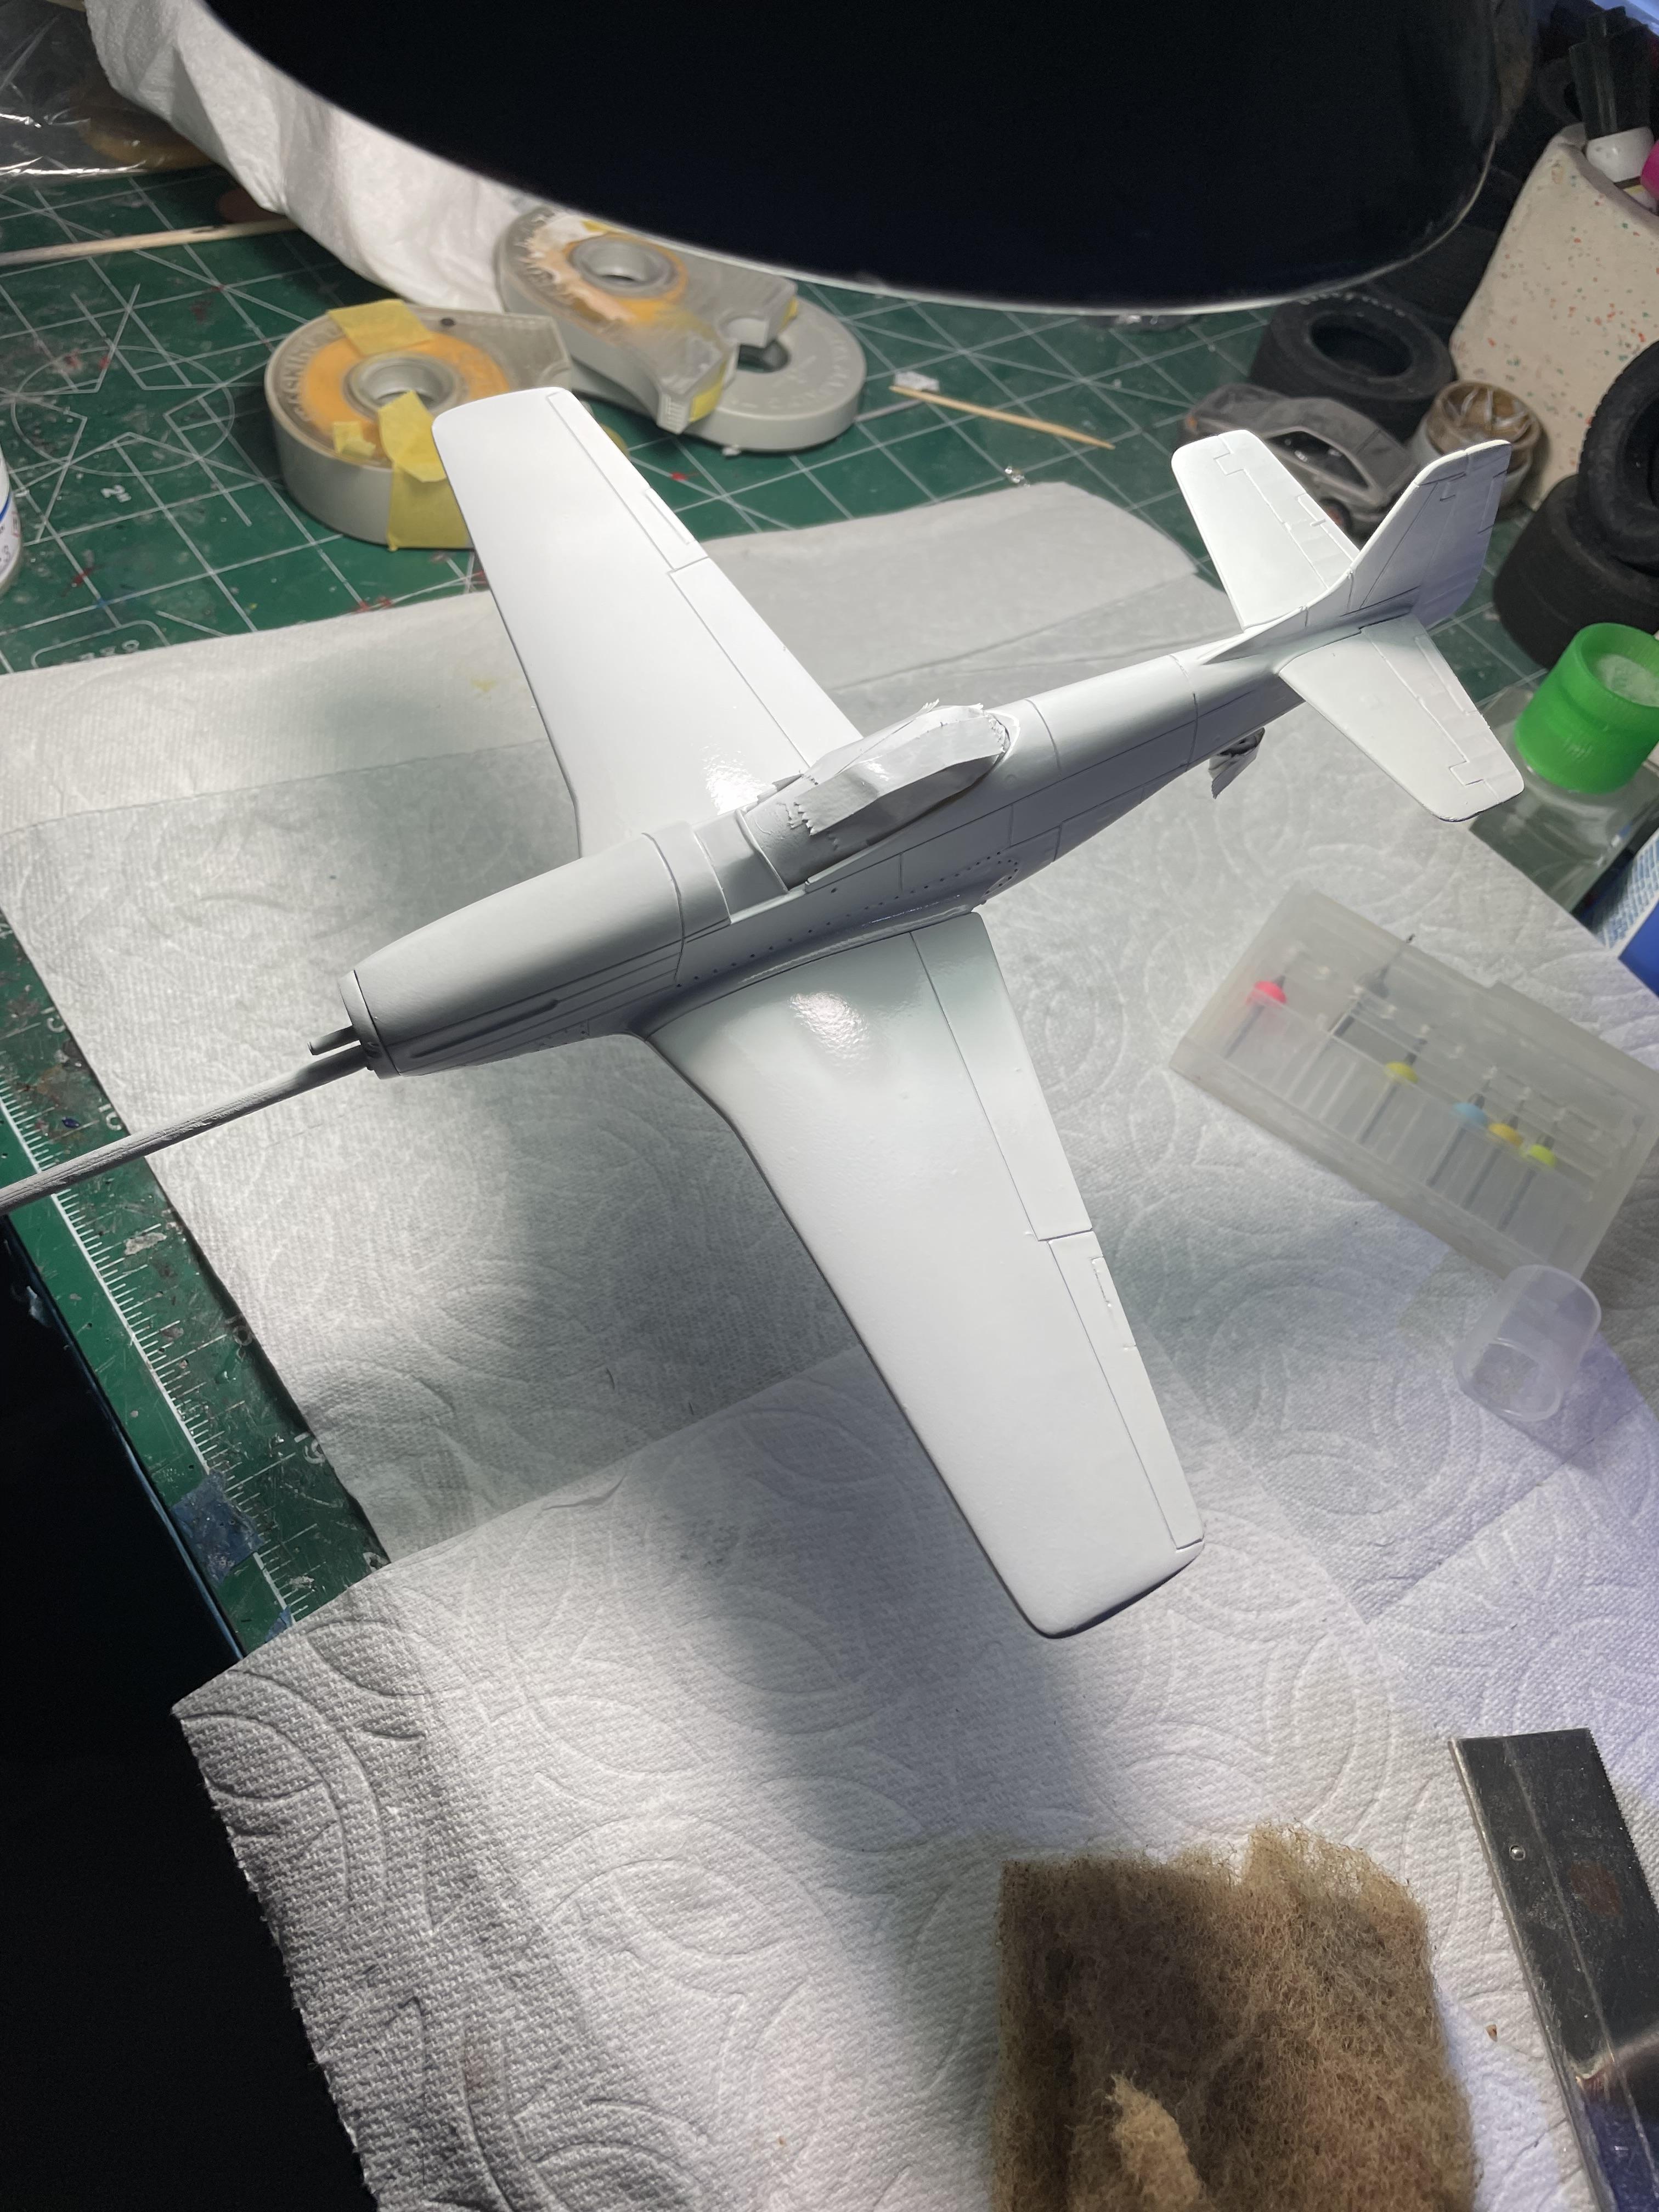
1/48 p51
Brudda replied to Brudda's topic in WIP: All The Rest: Motorcycles, Aviation, Military, Sci-Fi, Figures
Hello, painted her white. Took awhile . Kept finding imperfections after priming but now it’s white. Used Mr hobby white spray can. I will paint the blue and red with an airbrush. This old revell kit takes a little to get her in shape. I don’t know if it will win any contest but I’ll get it as good as I can.
-
Very nice Claude! Another beauty from the studio
-
Very nice!
-
What’s not to like? It’s great!
-
Man this is beautiful!
-
Fantastic sir! Last year I bought the monogram 1/43 corvette ant a swap meet for $2 and built her. It was great fun to build. I did build the monogram cobra and that was a fun build. A few weeks ago at the Fremont contest , I bought 3 f1 kits in 1/43. I did not realize that these little gems cost . Bought them at a great price, and they are detailed. I hope my eyesight holds on so I can build these. Your build is fantastic. Love the color!
-
Leo64 is a great trader, thank you
-
1963 Triumph TR4
Brudda replied to Scale-Master's topic in Other Racing: Road Racing, Salt Flat Racers
I love these! TR 4’s! Great job and super great subject! -
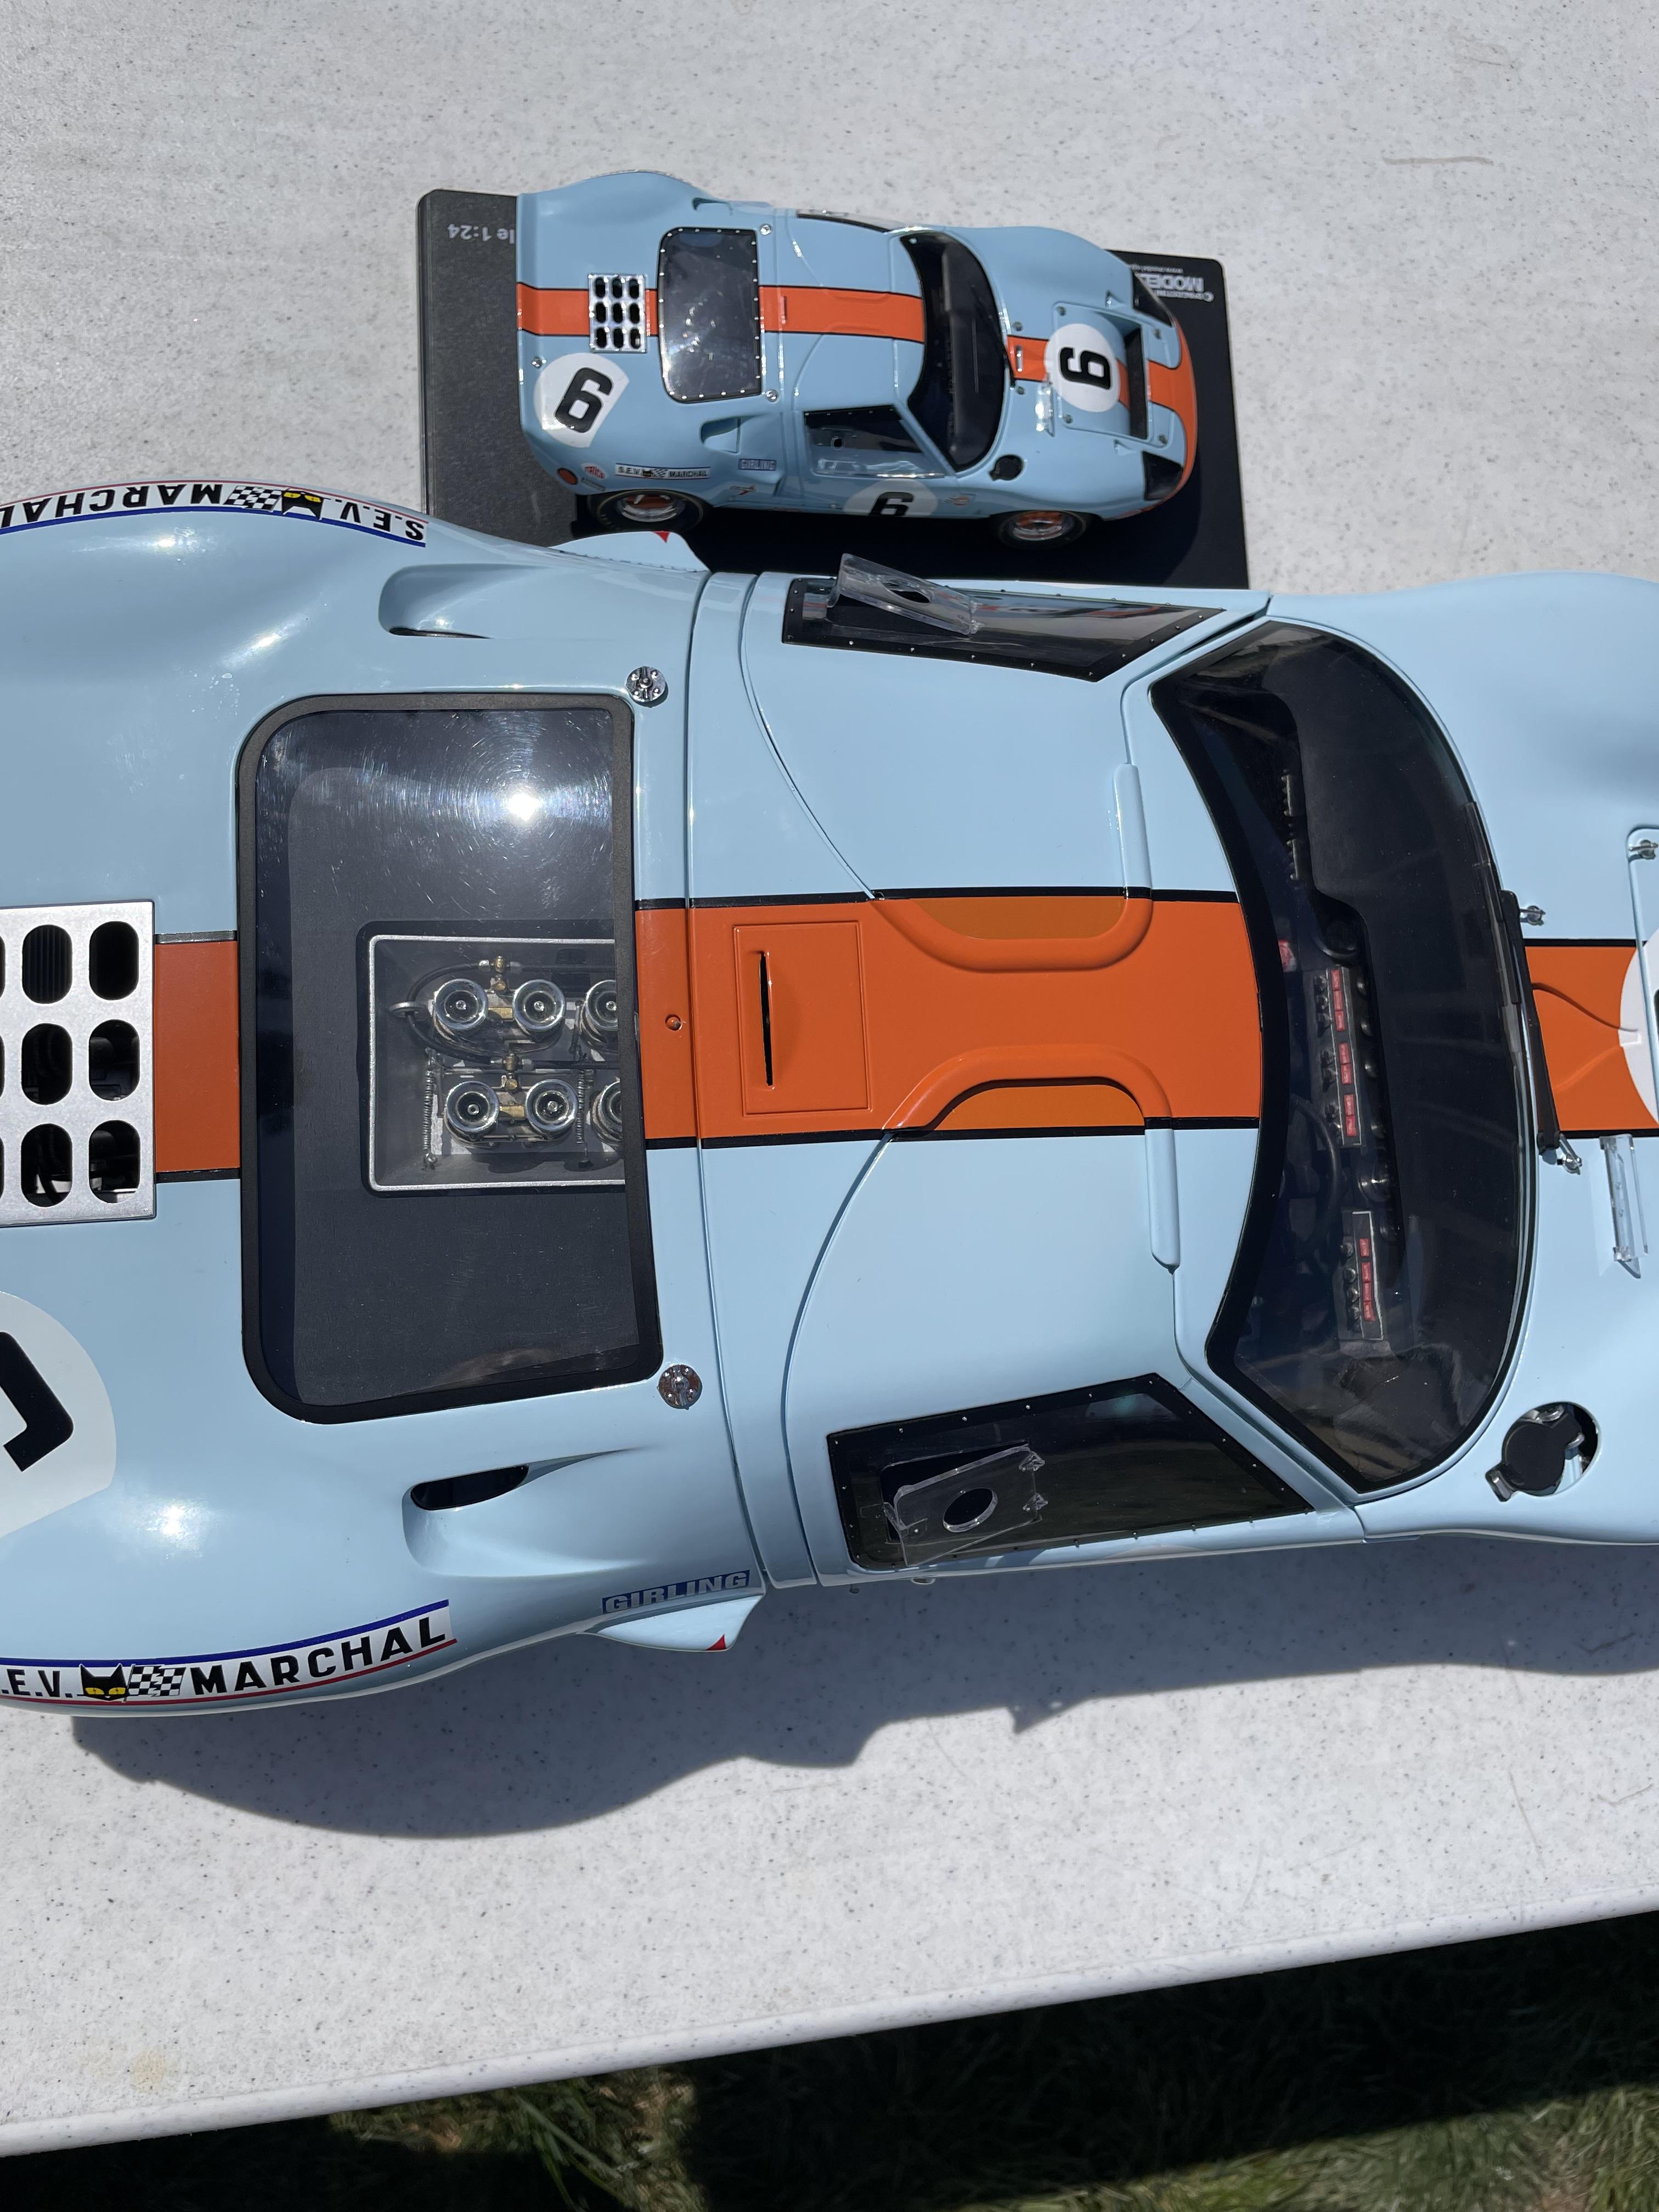
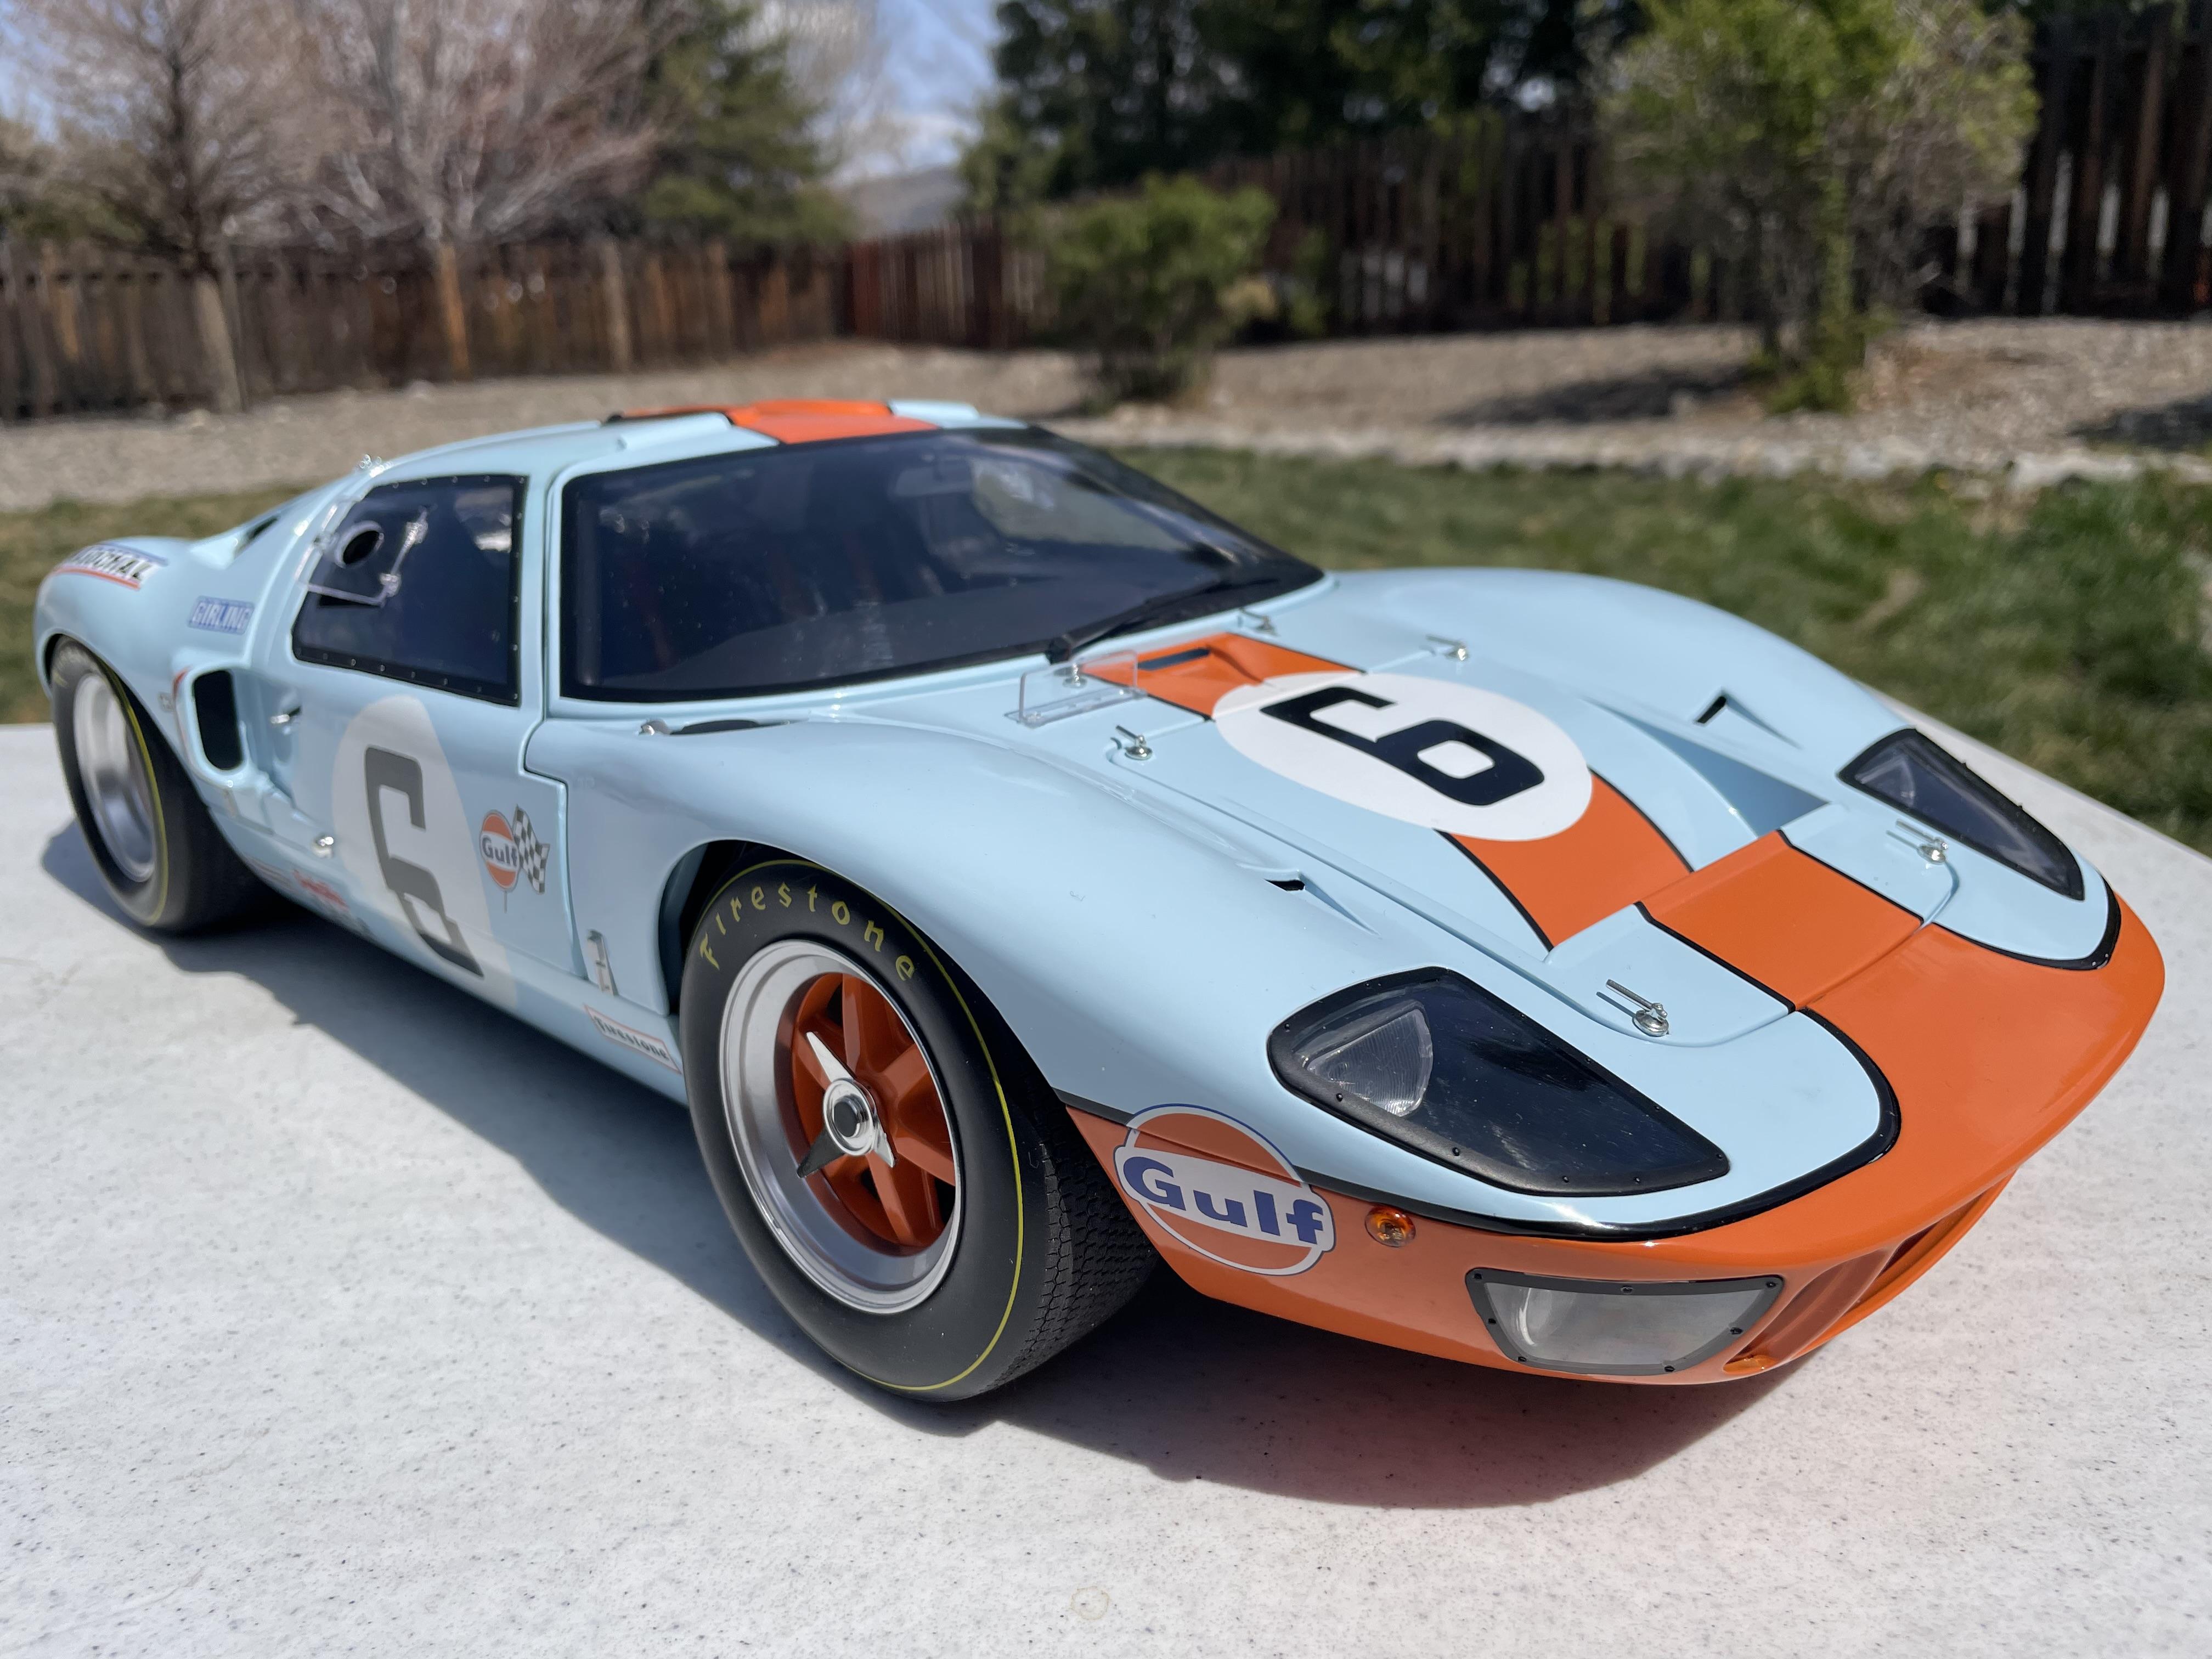
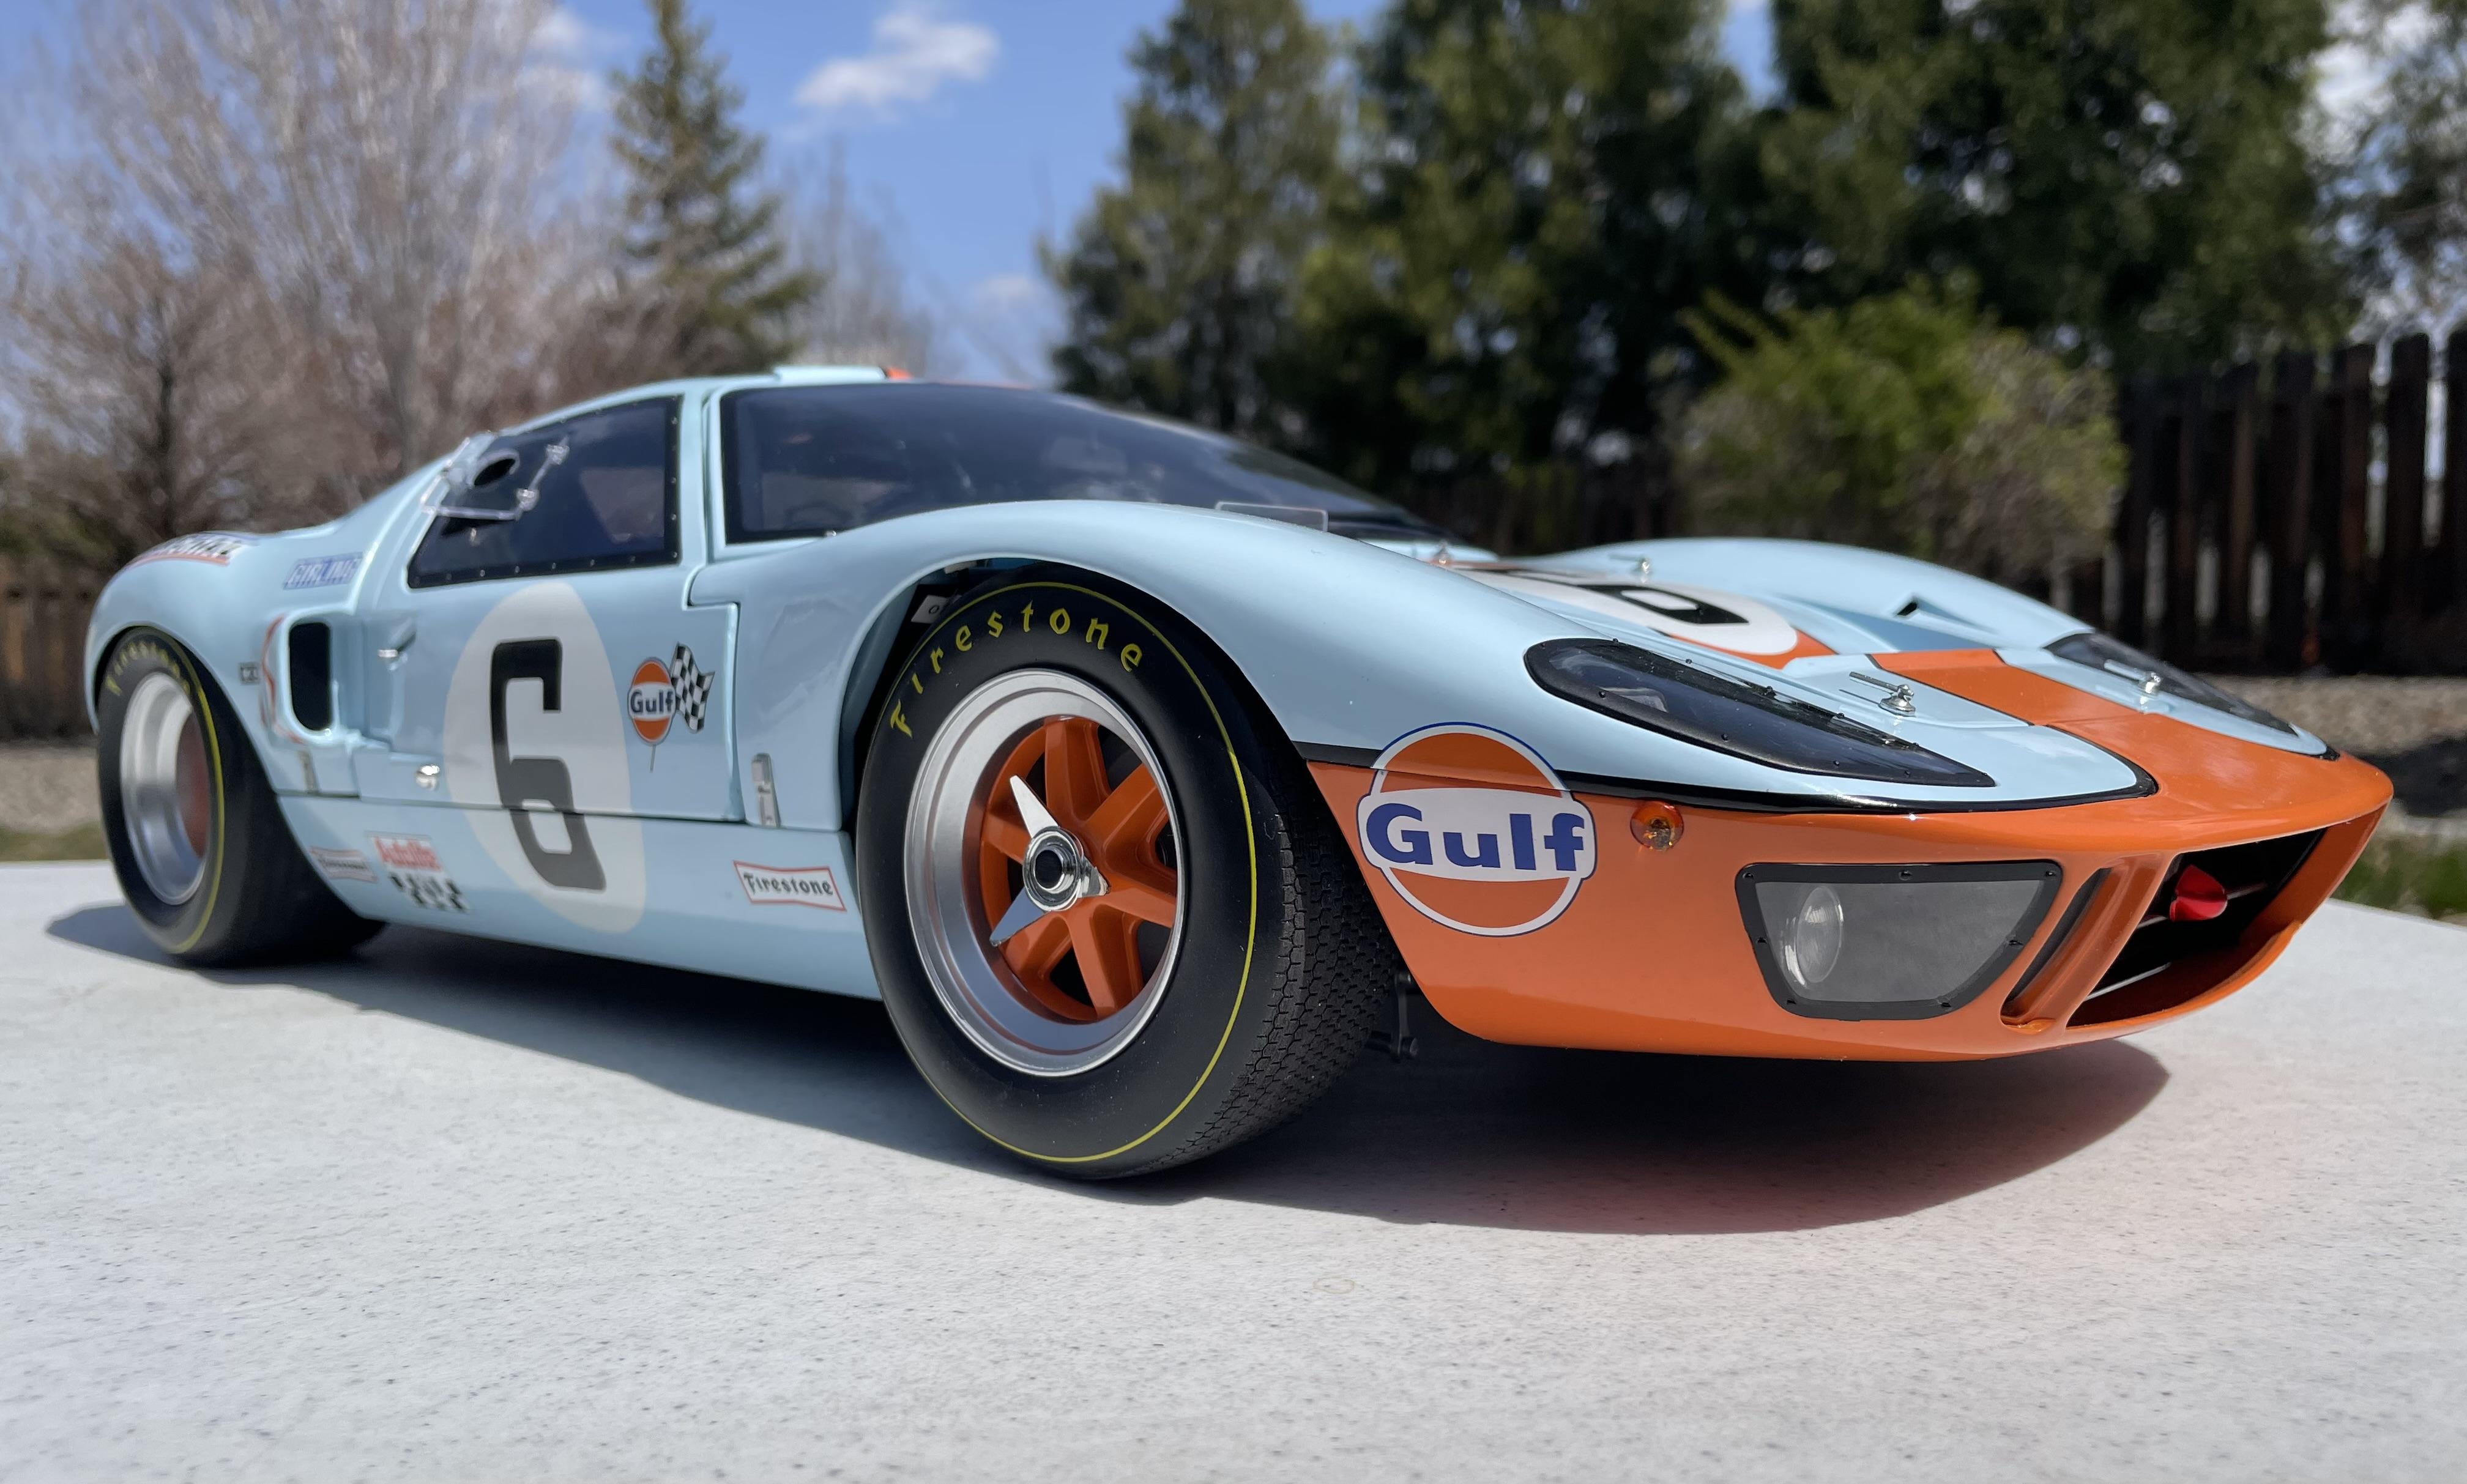
1967 Ford GT MKIV Gurney/Foyt
Brudda replied to Rich Chernosky's topic in Other Racing: Road Racing, Salt Flat Racers
Thanks Rich. Well I looked at it and it went back on the shelf.LOL. I’m just going to look at yours. 👍 -
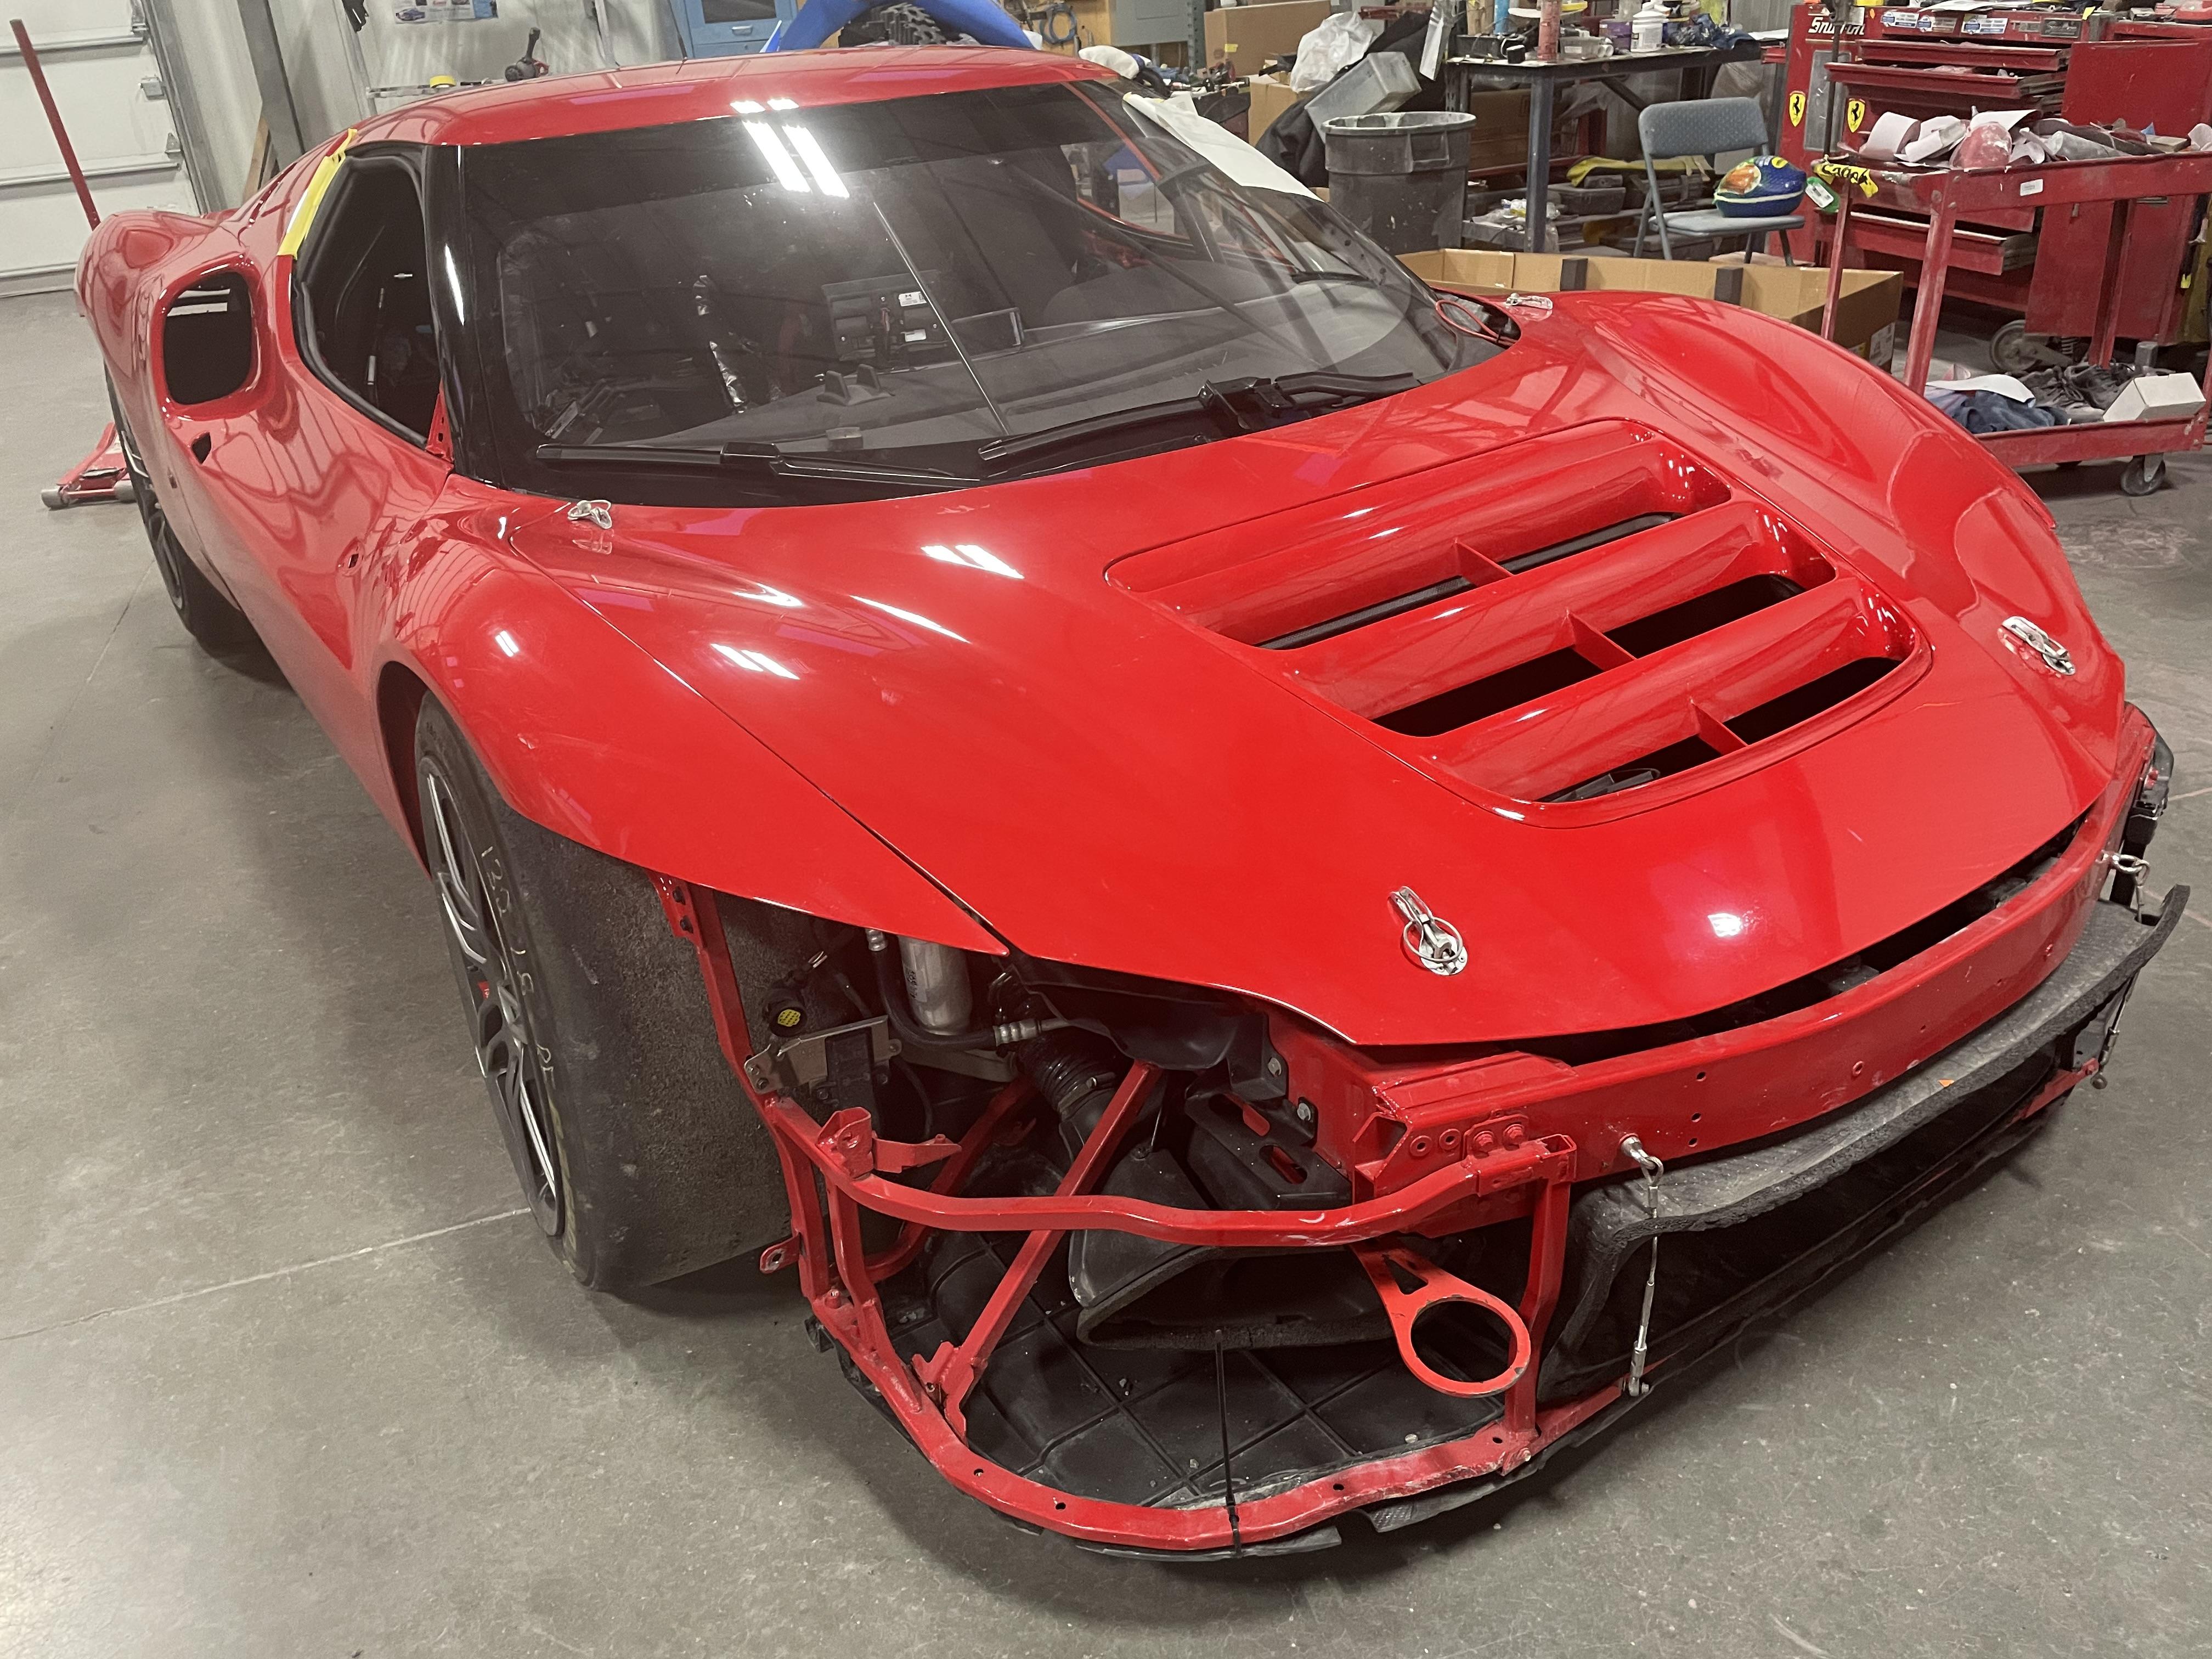
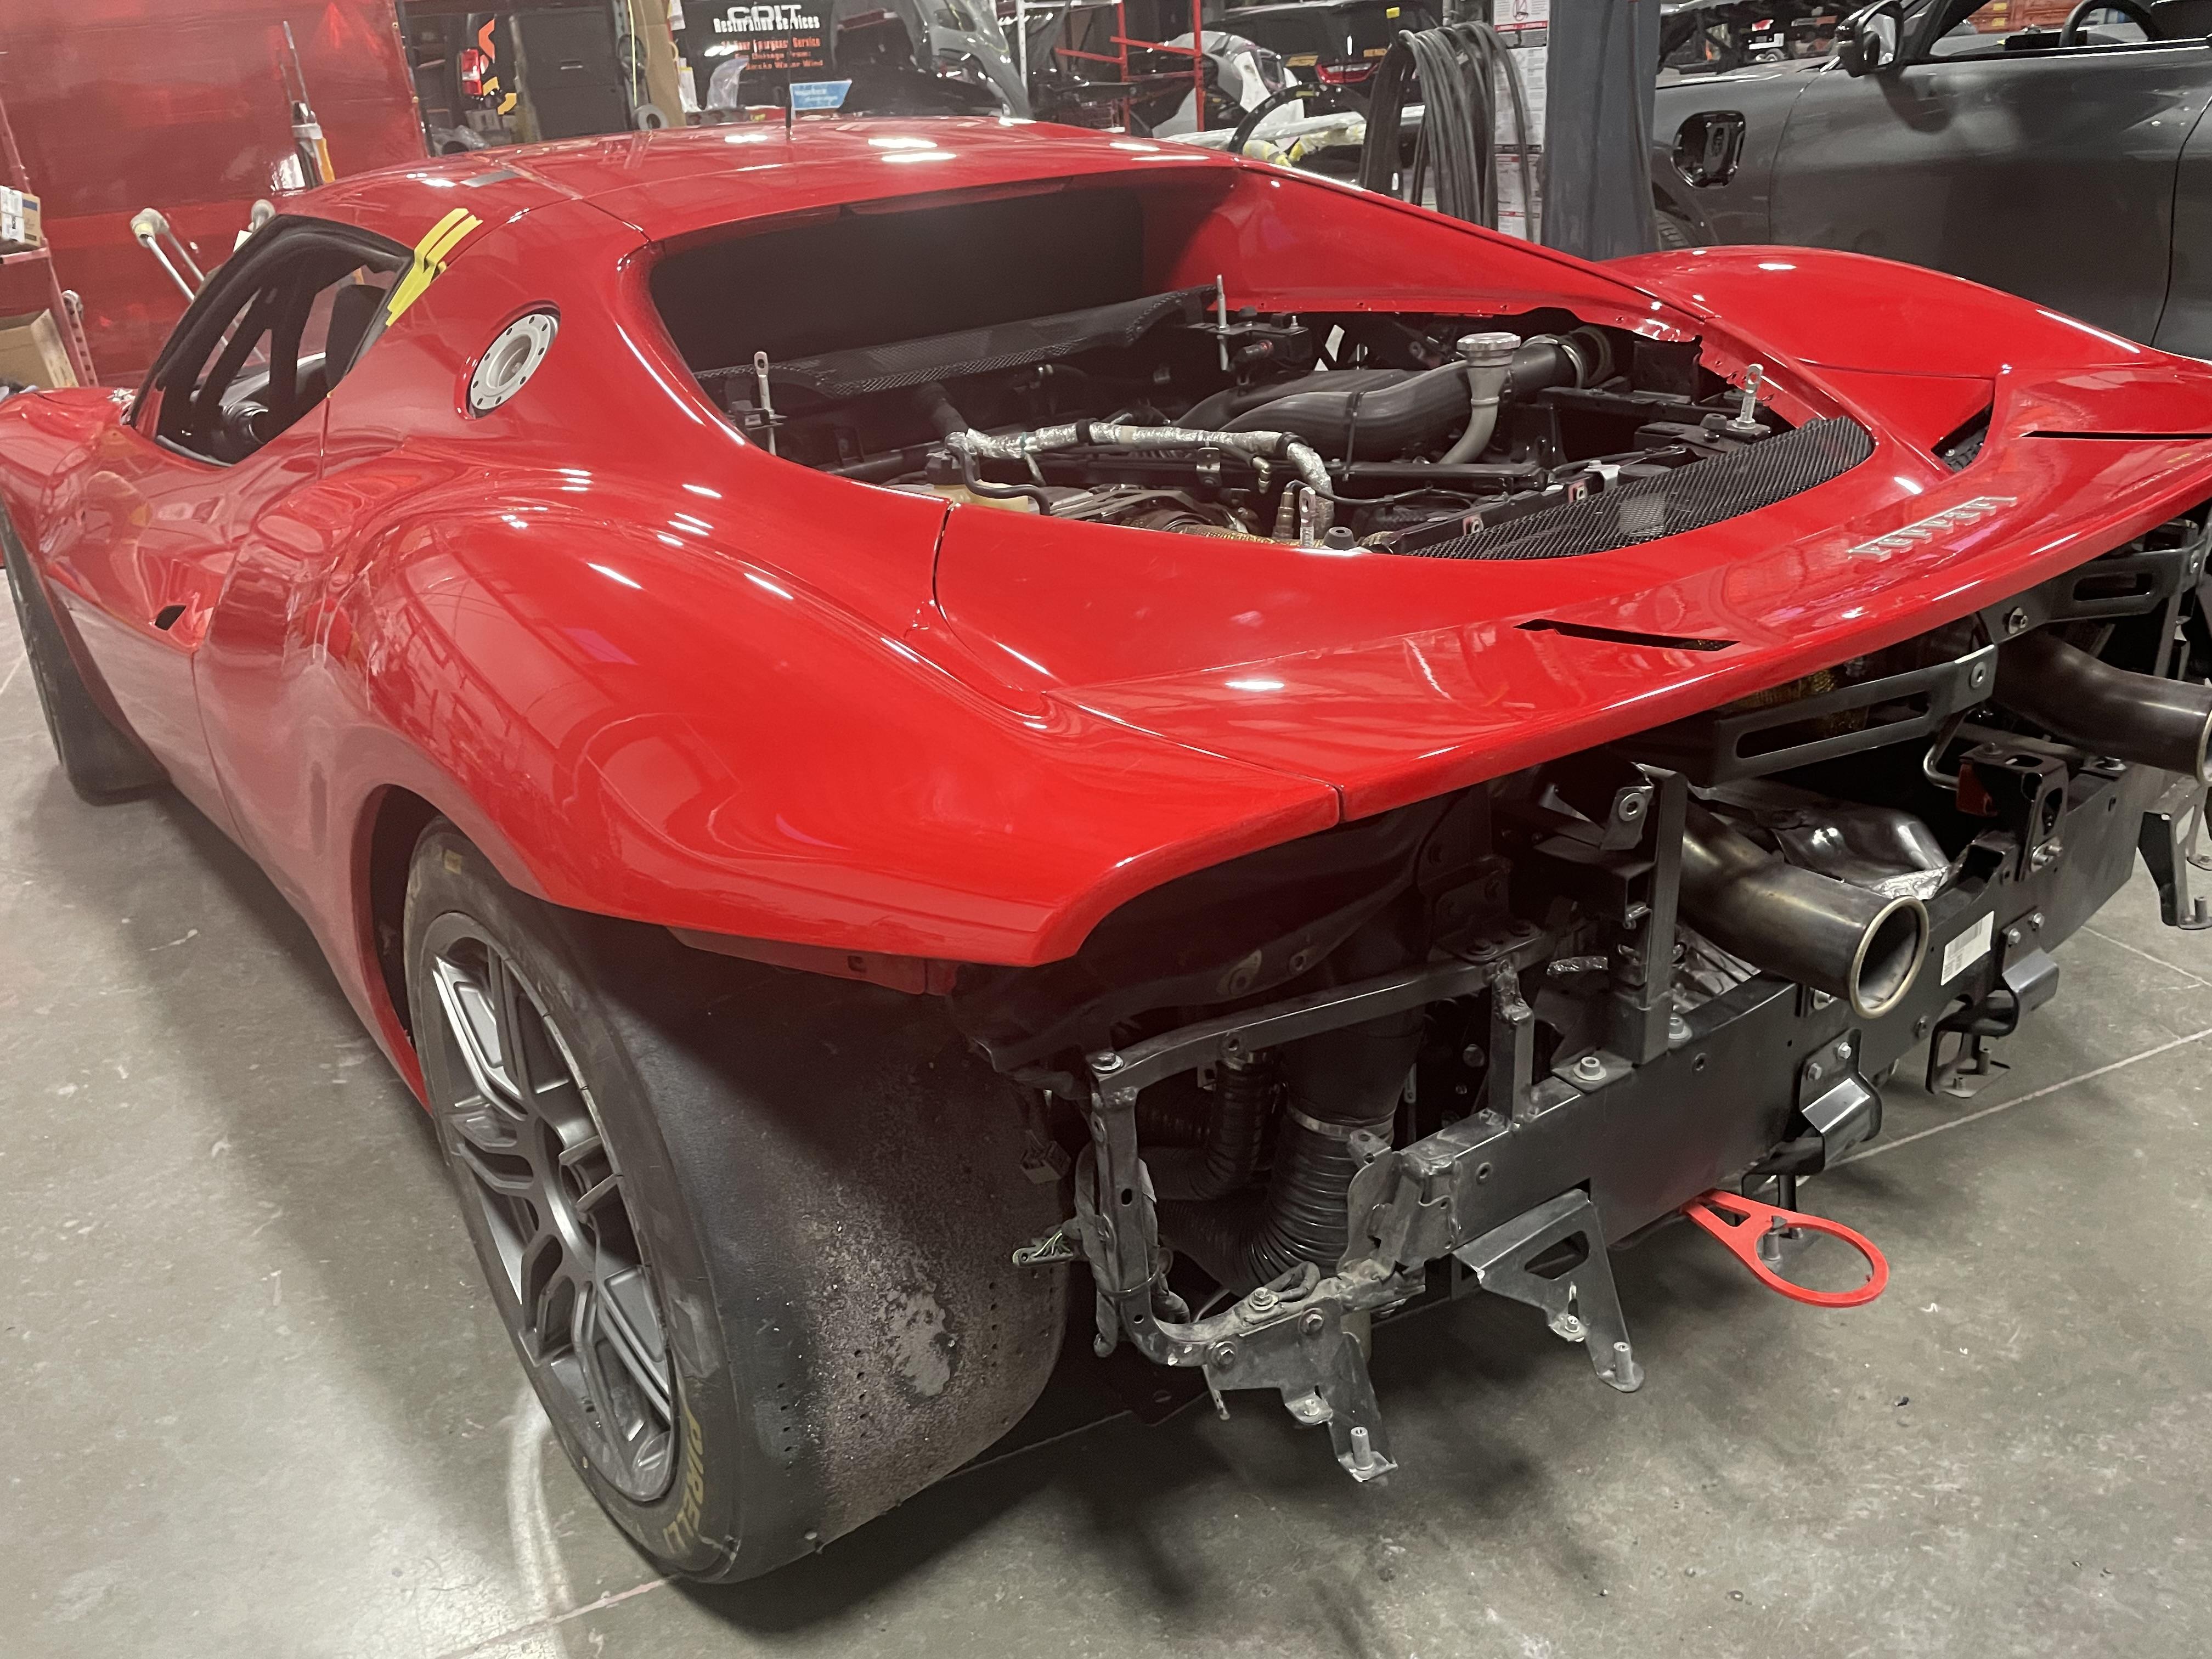
I was at laguna seca several weeks ago with MG1 Ferrari. I had my MG1 shirt on walking the pits, I’m talking to people from all over the world. The owner from MG1 must have told them they had a guy repairing their cars. Guys and girls from all over wanted to shake my hand. People would introduce them selves and I did not know who they were. Danny Sullivan was walking by and stopped to shake my hand and asked me if we could talk for a few minutes. He wanted to know how I straighten out aluminum Ferraris. He has several in need of repairs and asked me to stop in at his Los Angeles house. I was like a deer and a car comming. I did not understand any of it. Then Scott, a guy (billionaire)from Seattle told me that there is only 5 guys in the US that can do what you do. Everyone wants to hire you to repair their cars. I did get offers from all over the world at laguna. Told them all that I’m ready to retire. They did not hear that and kept throwing numbers at me for three days. I’m getting calls from every where. The call today was from London. Really? No more guys that can repair aluminum in a short period of time? Scott told me these people only expect the best. And only a handful of people are accepted in this community. I’m very lucky to be one of those guys. But where has the talent gone? I’m just stunned. Also very lucky to be in this elaborate community. My dad taught me well on sprint cars , Indy cars and hand made Ferraris. I never thought I would be doing this. Another thing he taught me is to be humble. I’m trying not to let any of this go to my head. I’m lucky I have a beautiful wife that settles me down,LOL here is a pic of my latest project. It was hit every where. I’m putting her back together, this car is Scott’s, the billionaire from Seattle.
-
Yup, glad I’m passed those days. Same goes for collision repair. I usually can read a customer. We have writers and they are good. And we have to deal with insurance companies. That’s a whole discussion in itself. Had a corvette customer come in and thought he was king sh.. Was bossing people around. I have enough and told him to f…. O.. and said I did not wreck your f….. corvette. Take it out of here now!!! He wanted the most experienced guy on his car. Guess what that was the guy that told him off. It’s weird he actually apologized and was really great after that. But I no longer have to deal with that nonsense. I have one customer, Ferrari and they do not care about costs, they just pay their bills. I’m very lucky in that way.
-
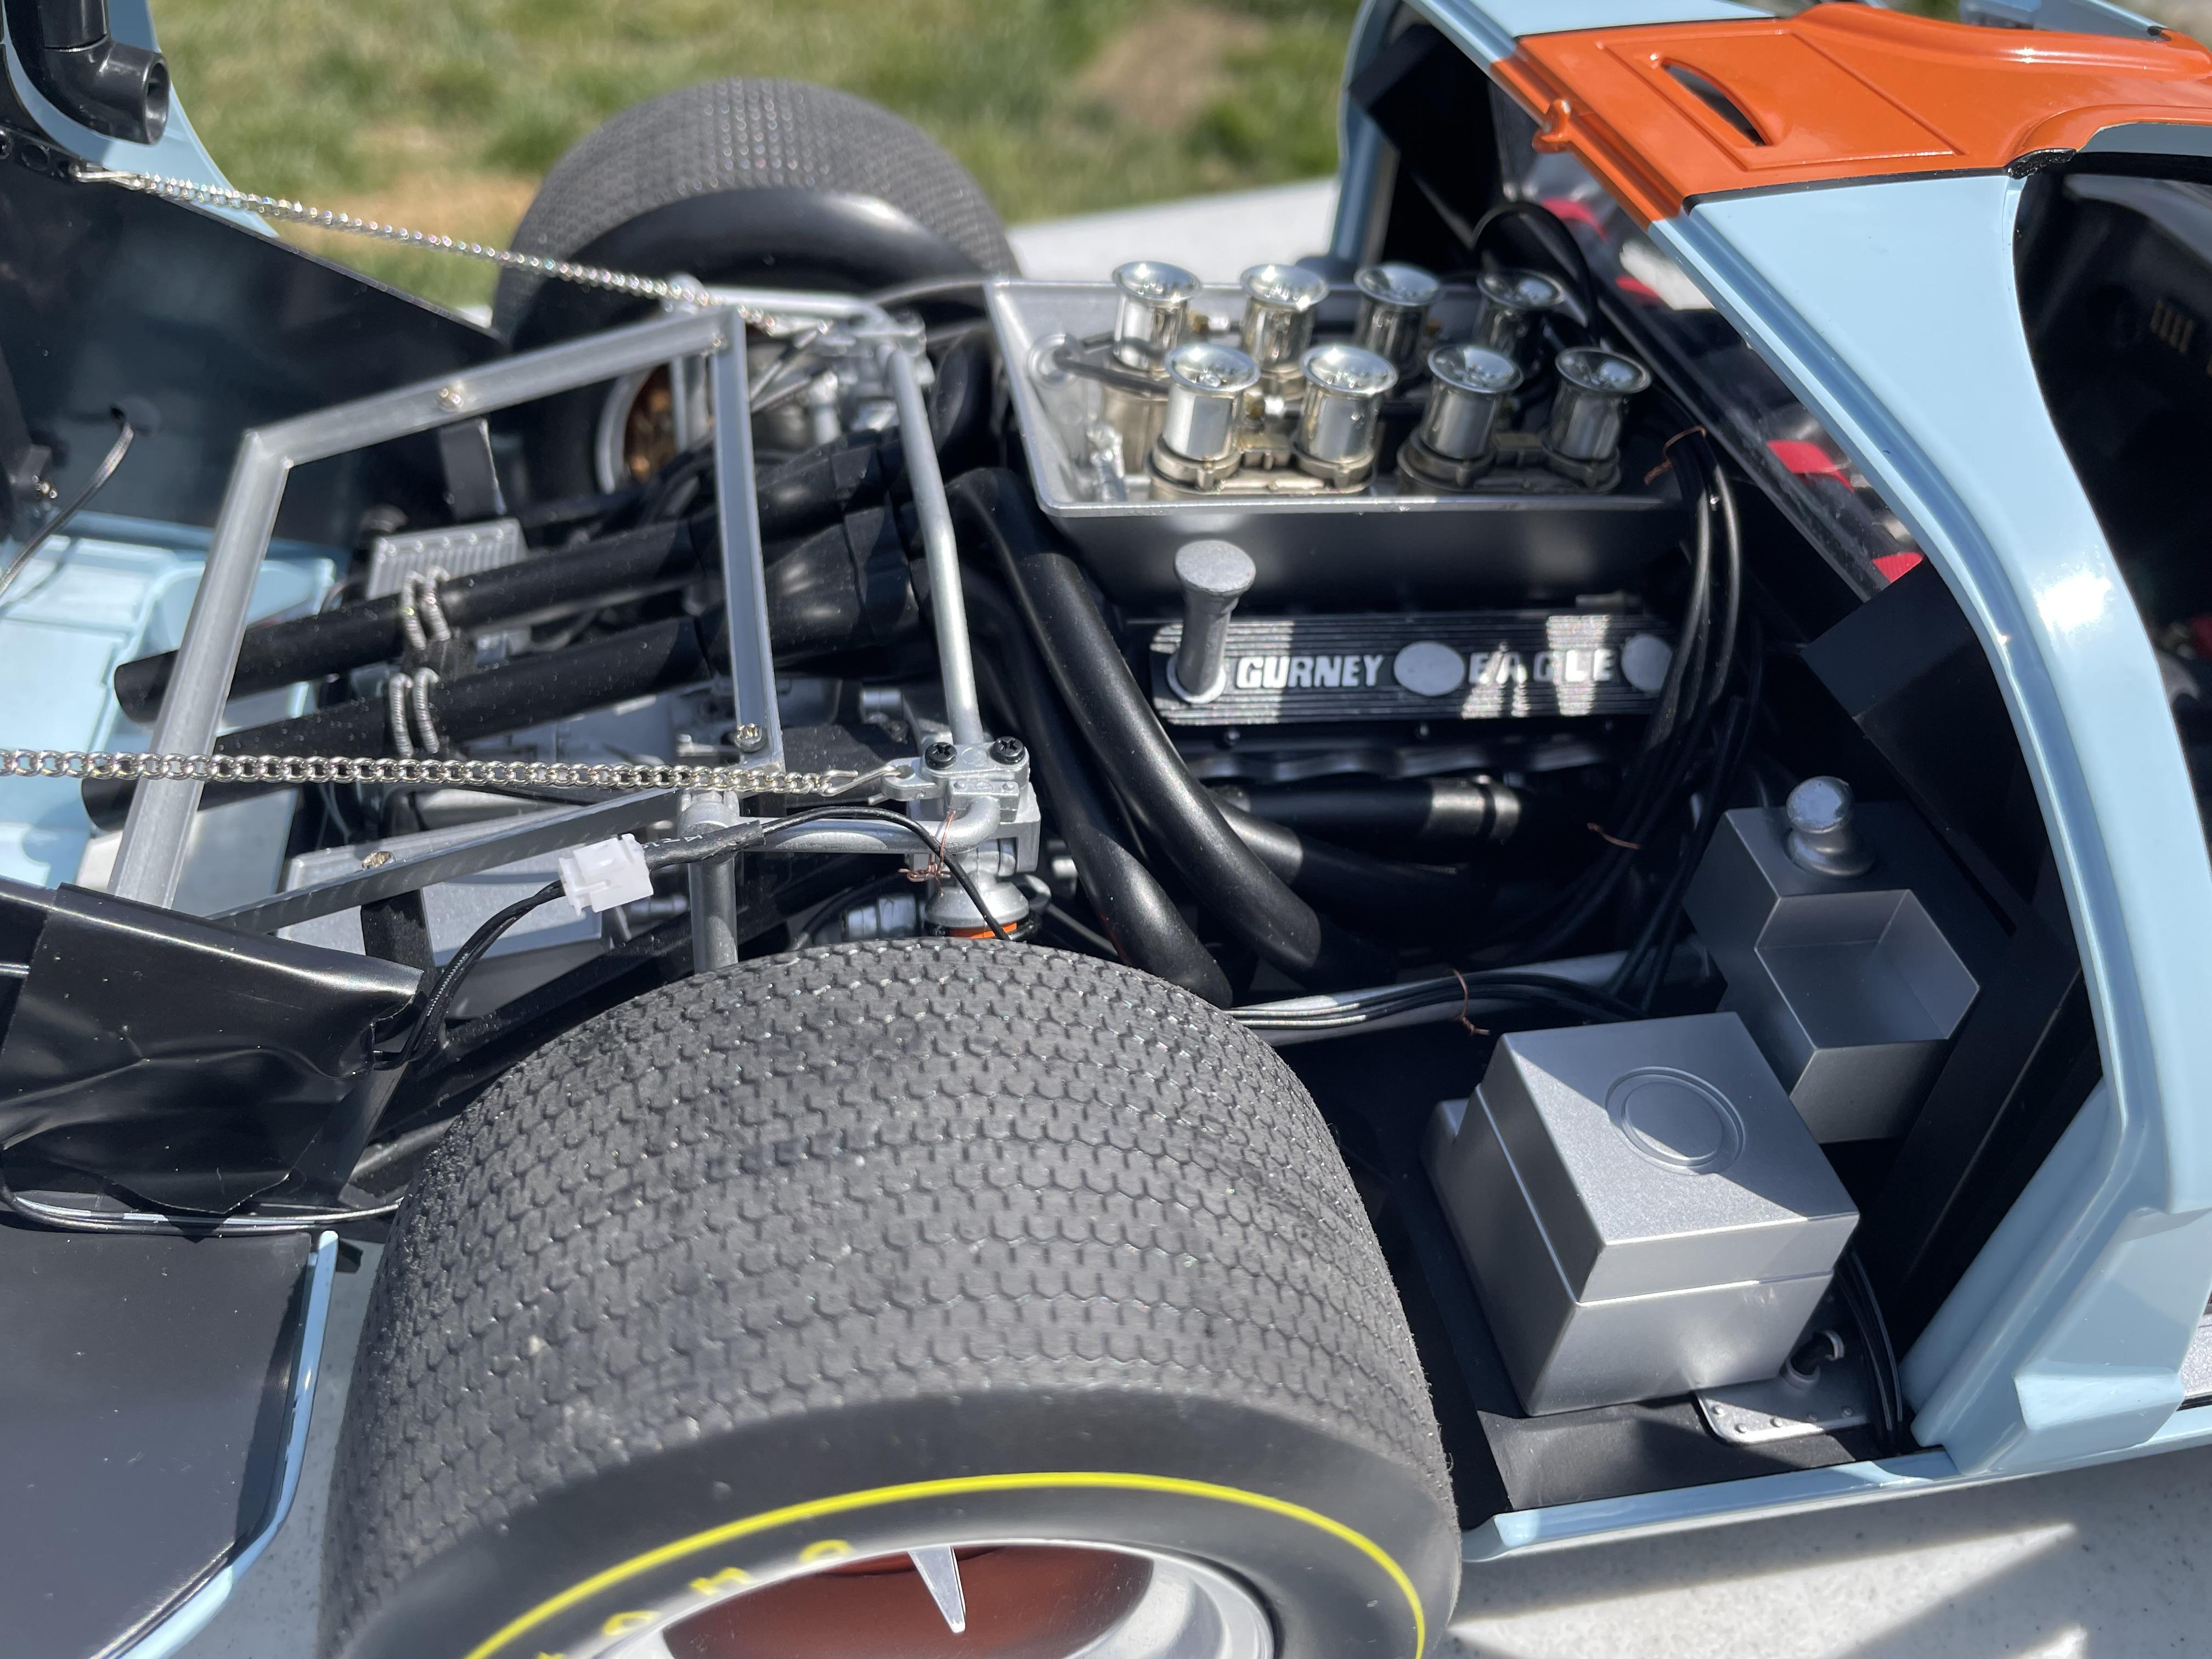
1967 Ford GT MKIV Gurney/Foyt
Brudda replied to Rich Chernosky's topic in Other Racing: Road Racing, Salt Flat Racers
Great job!!! I have the union kit and it looks like a handful! I heard about the fit issues and always put it back on the unbuilt shelf. You made it look great ! -
Cool , a bidders contest. Kurt I believe you are close. $88,000,000 is more reasonable but the rich are not so much. I have seen the craziness of billionaires. Unreal. If two ego maniacs go at it , the price will be crazy. I just worked on a Ferrari splitter front lower bumper on a challenge 296 car yesterday. I told them it was just about impossible to repair. The price of a lower splitter is around $7500. If you can find one . And you cannot right now. So he said I do not care what it costs, can you have it done by Monday? So the bill is around $10,000 and he is glad to pay it. Insane? Probably but who says the billionaires are sane. So attach this mentality to bidding on a very rare and beautiful car. If egos go insane , who knows what it will bring. A billionaire told me at laguna that he will spend around $100,000 for three days of playing with race cars. Three days?……he told me his car prep, mechanics, catering people, shipping cars , renting laguna seca etc, etc around $100,000. To me it’s crazy , to him it was a great weekend.
-
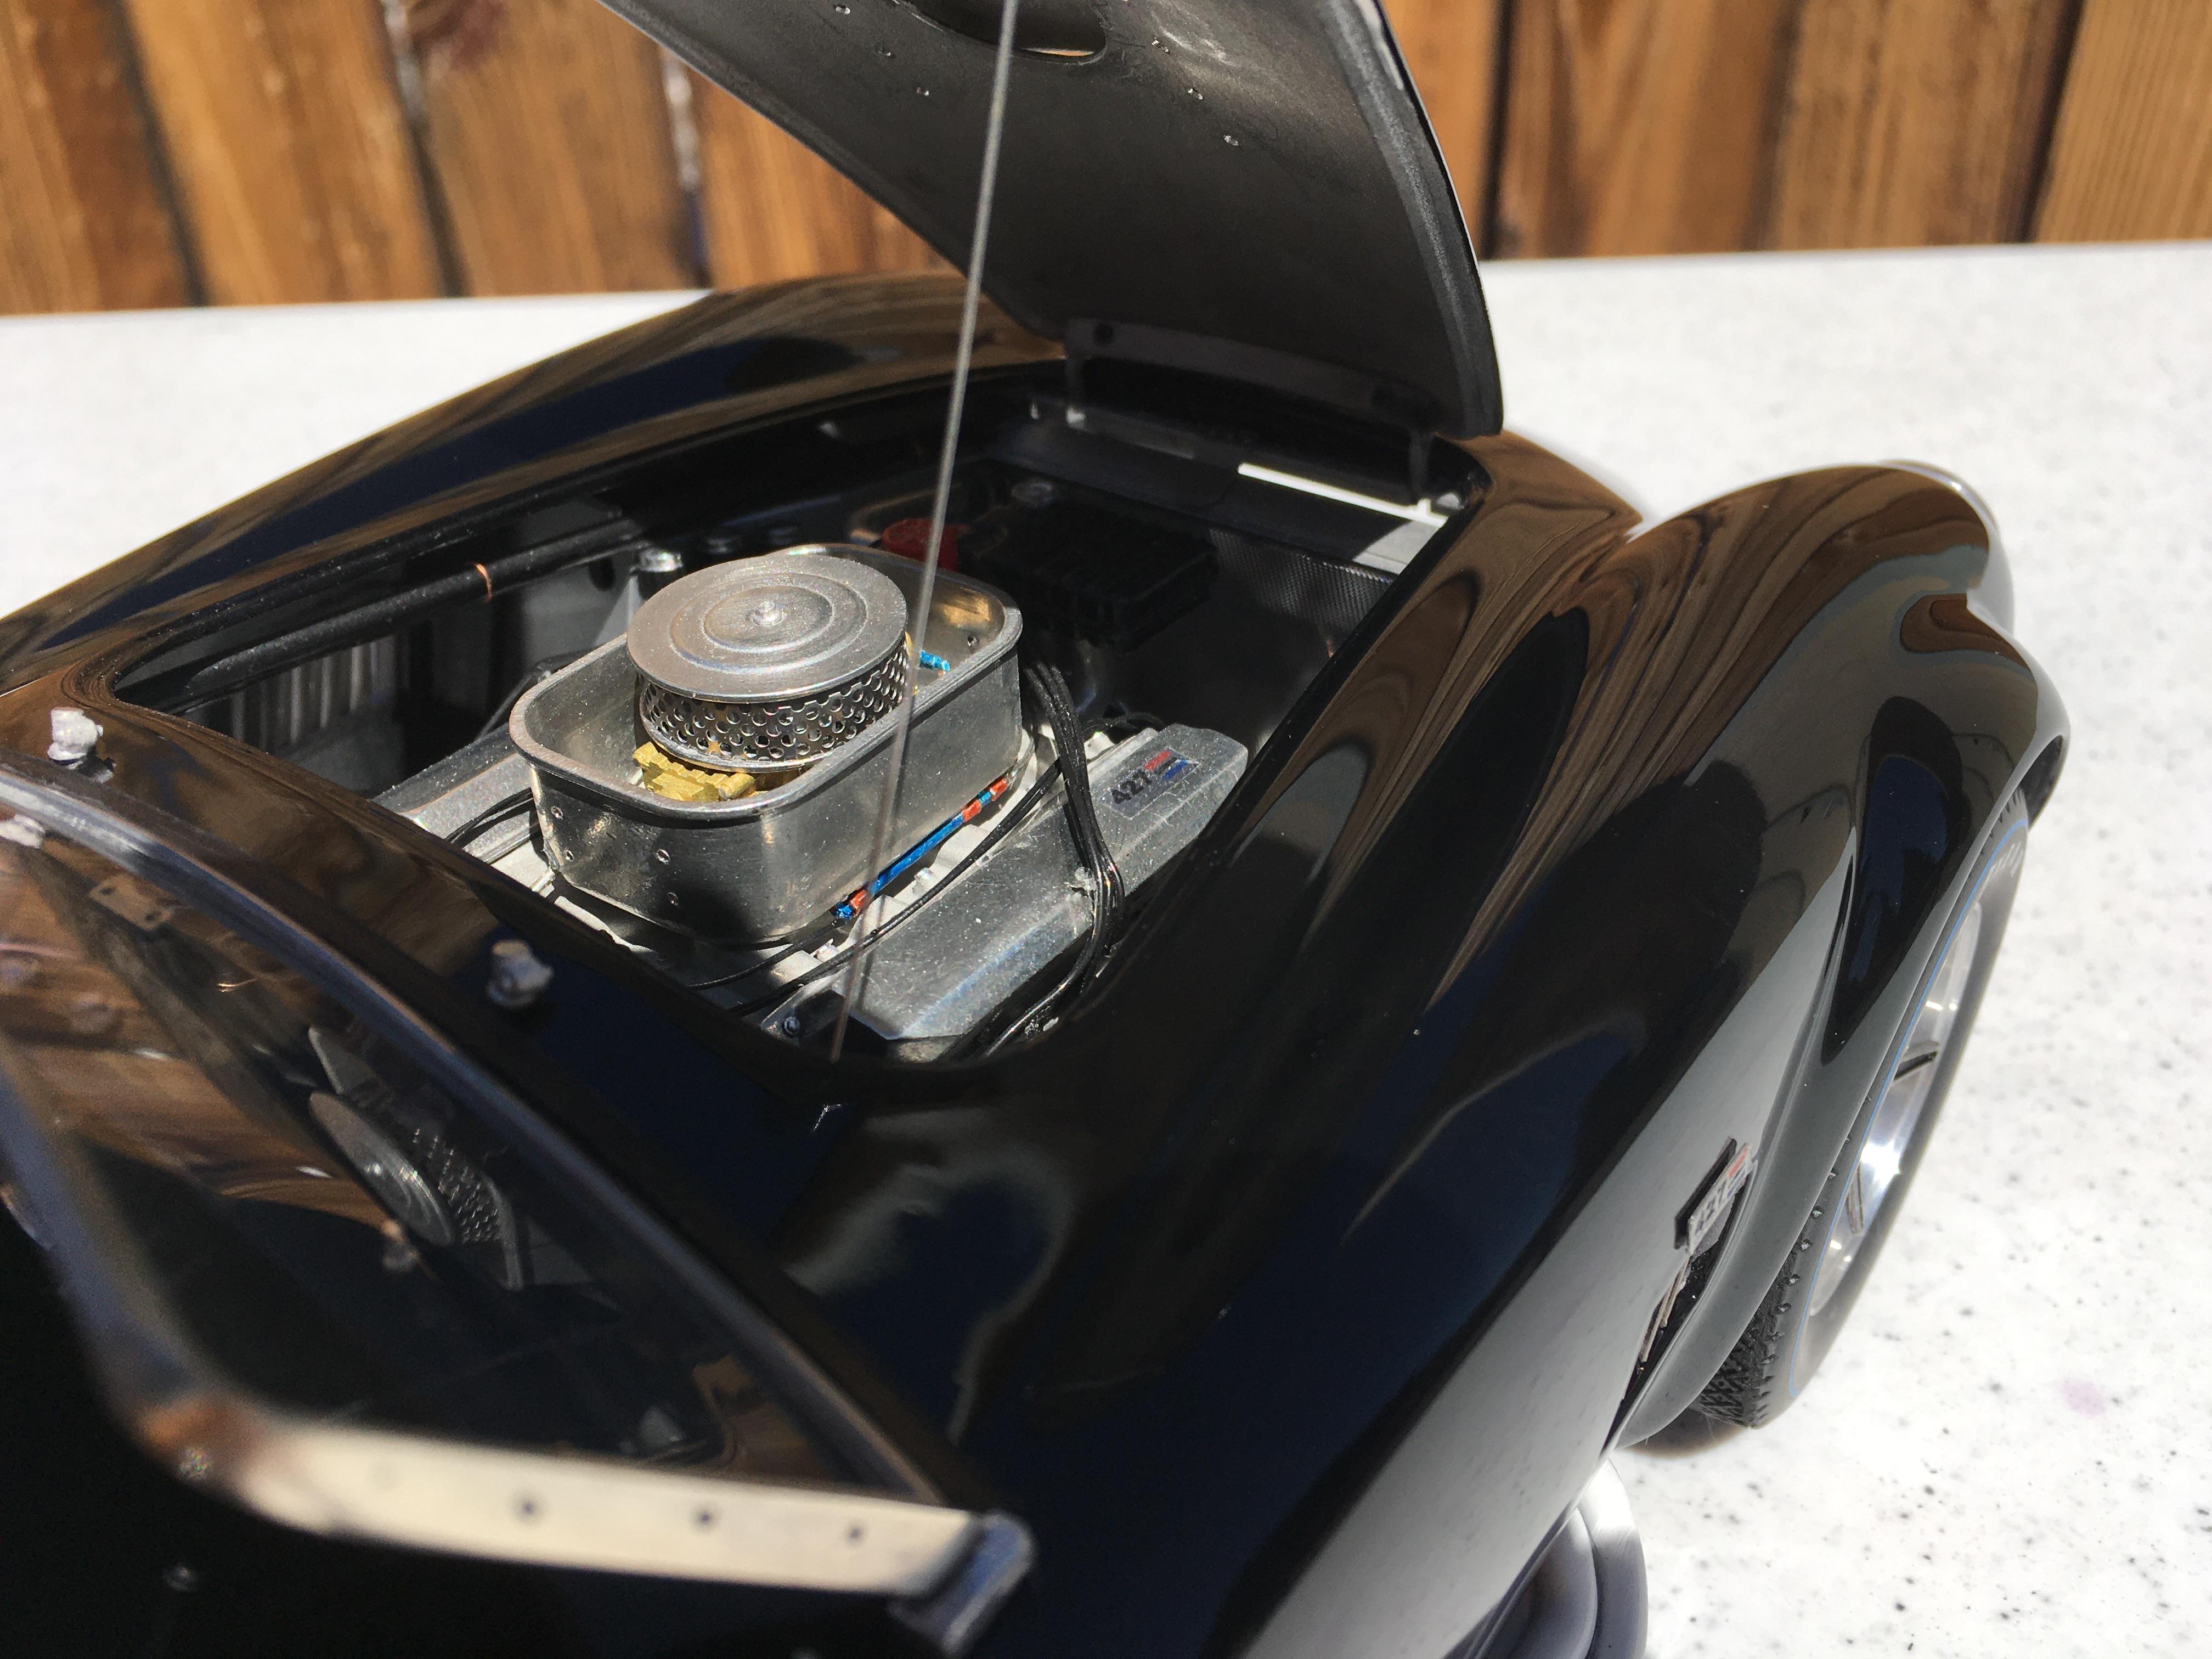
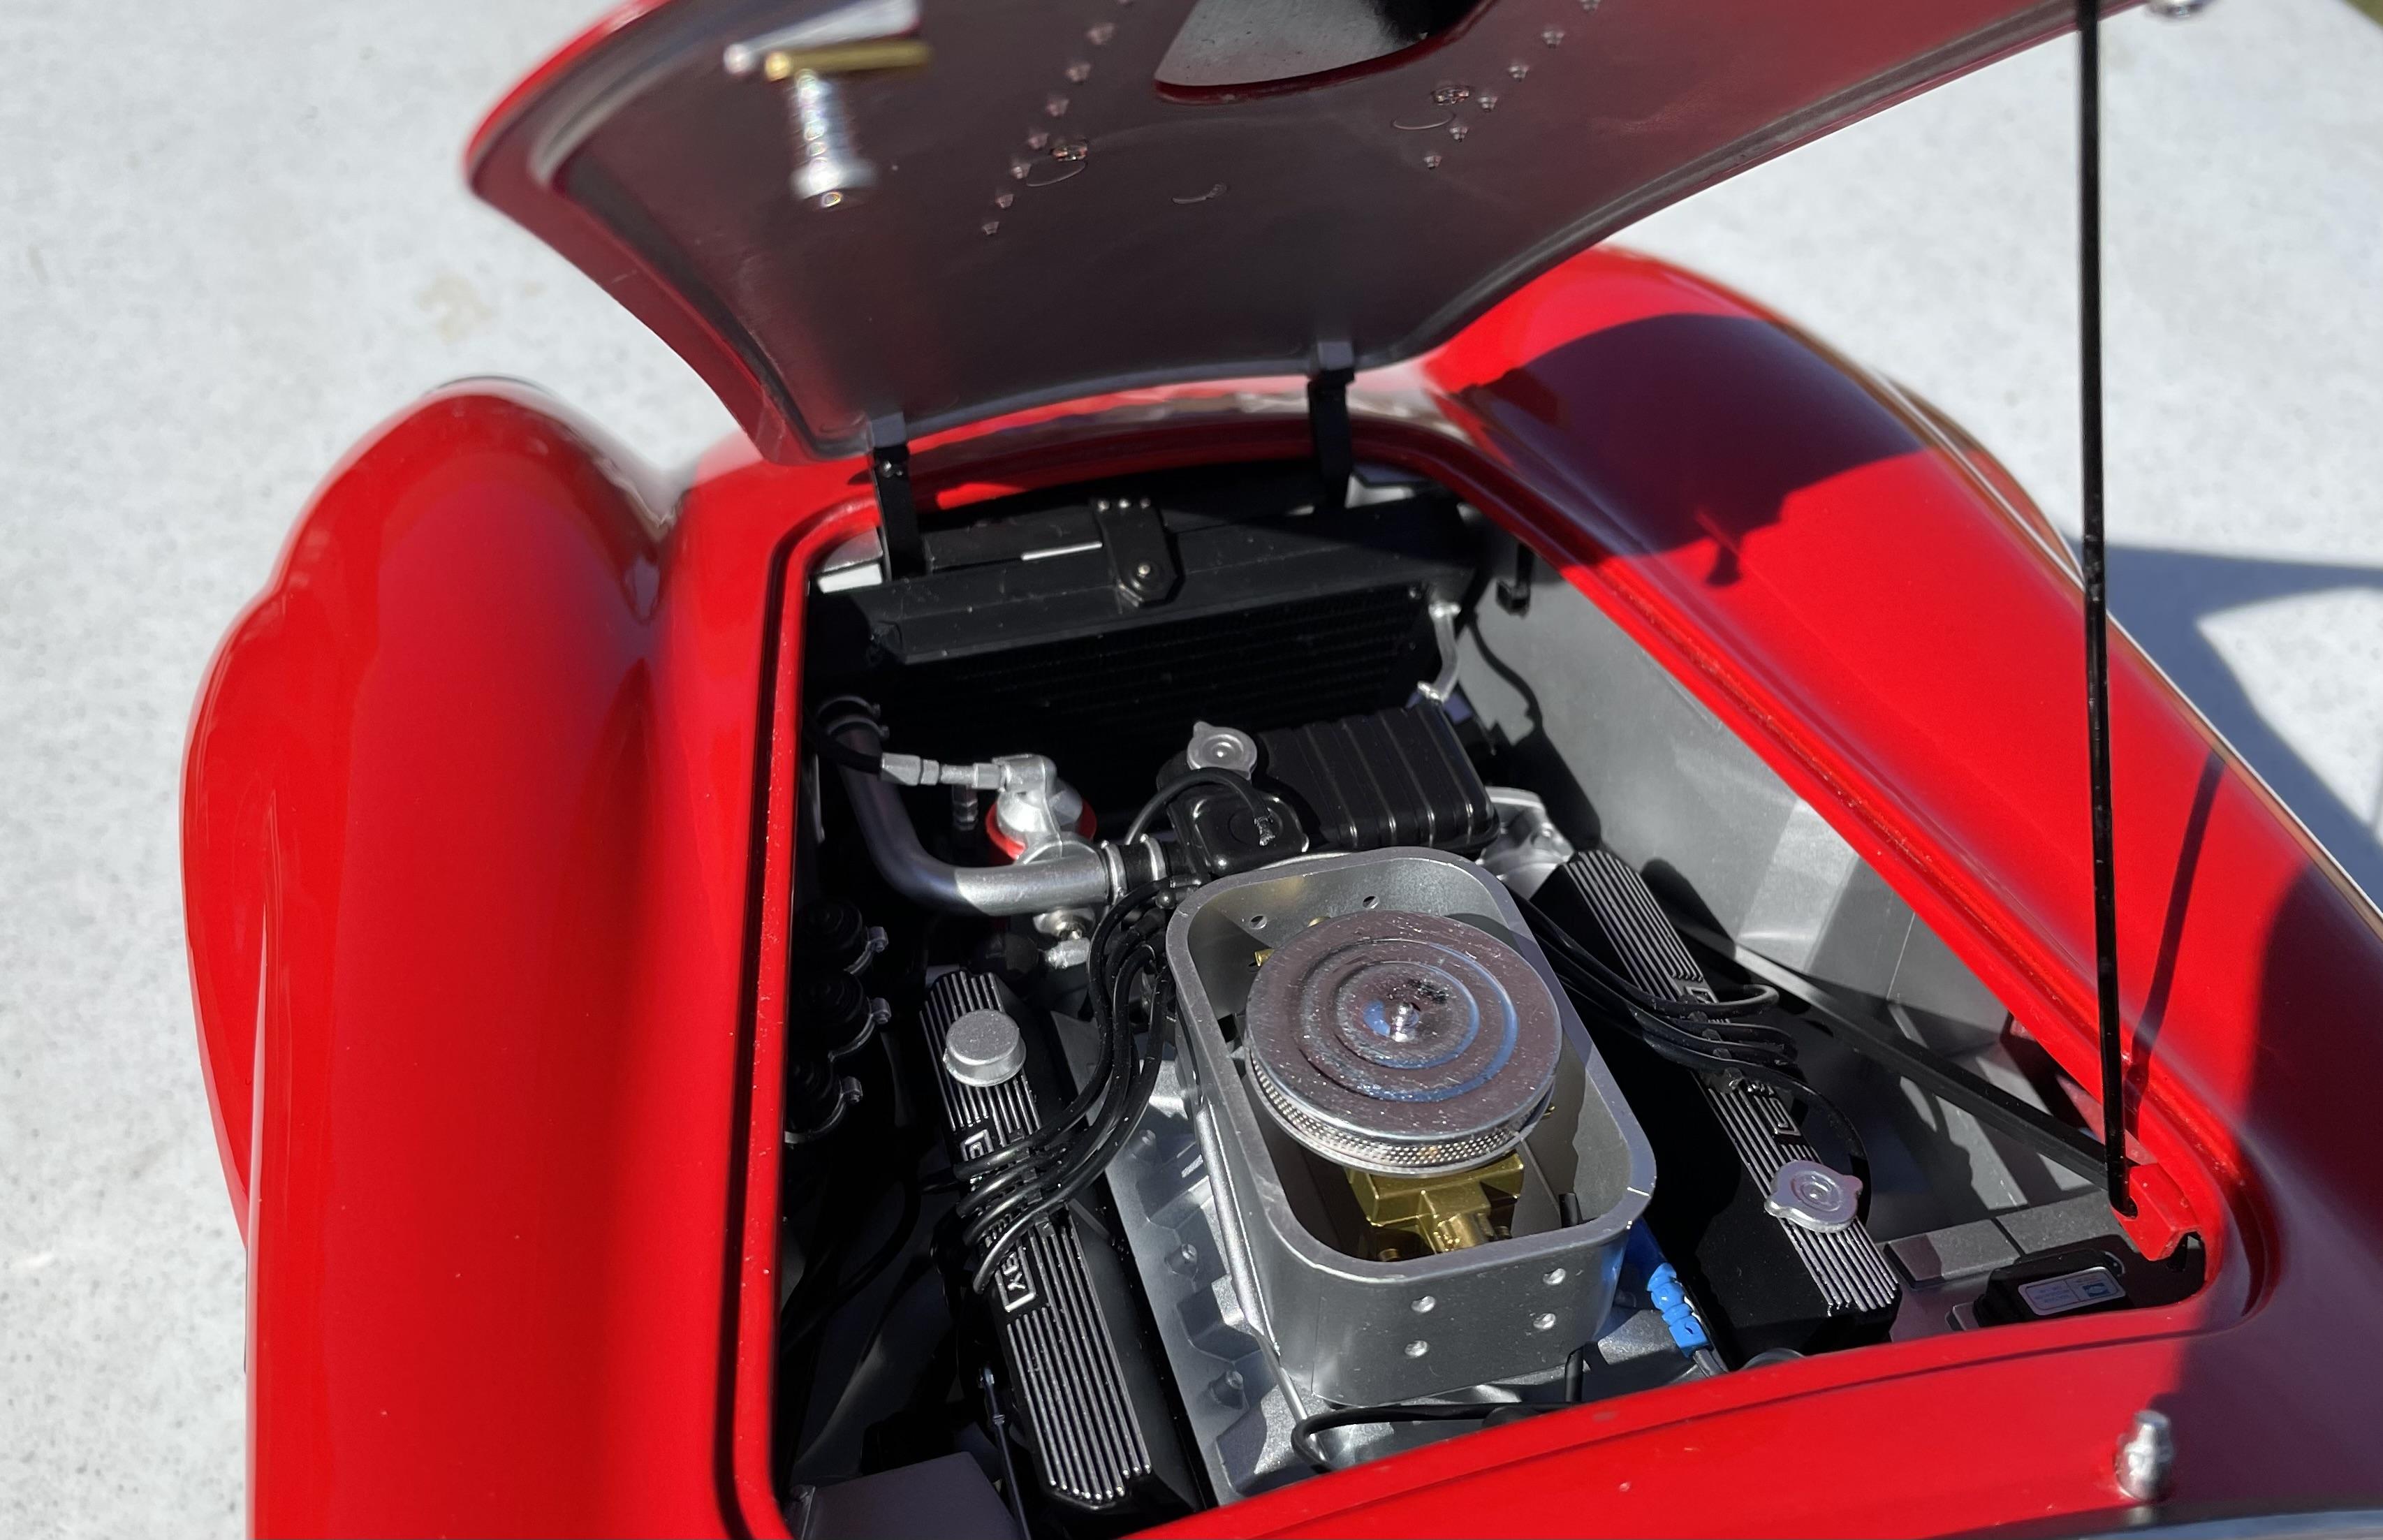
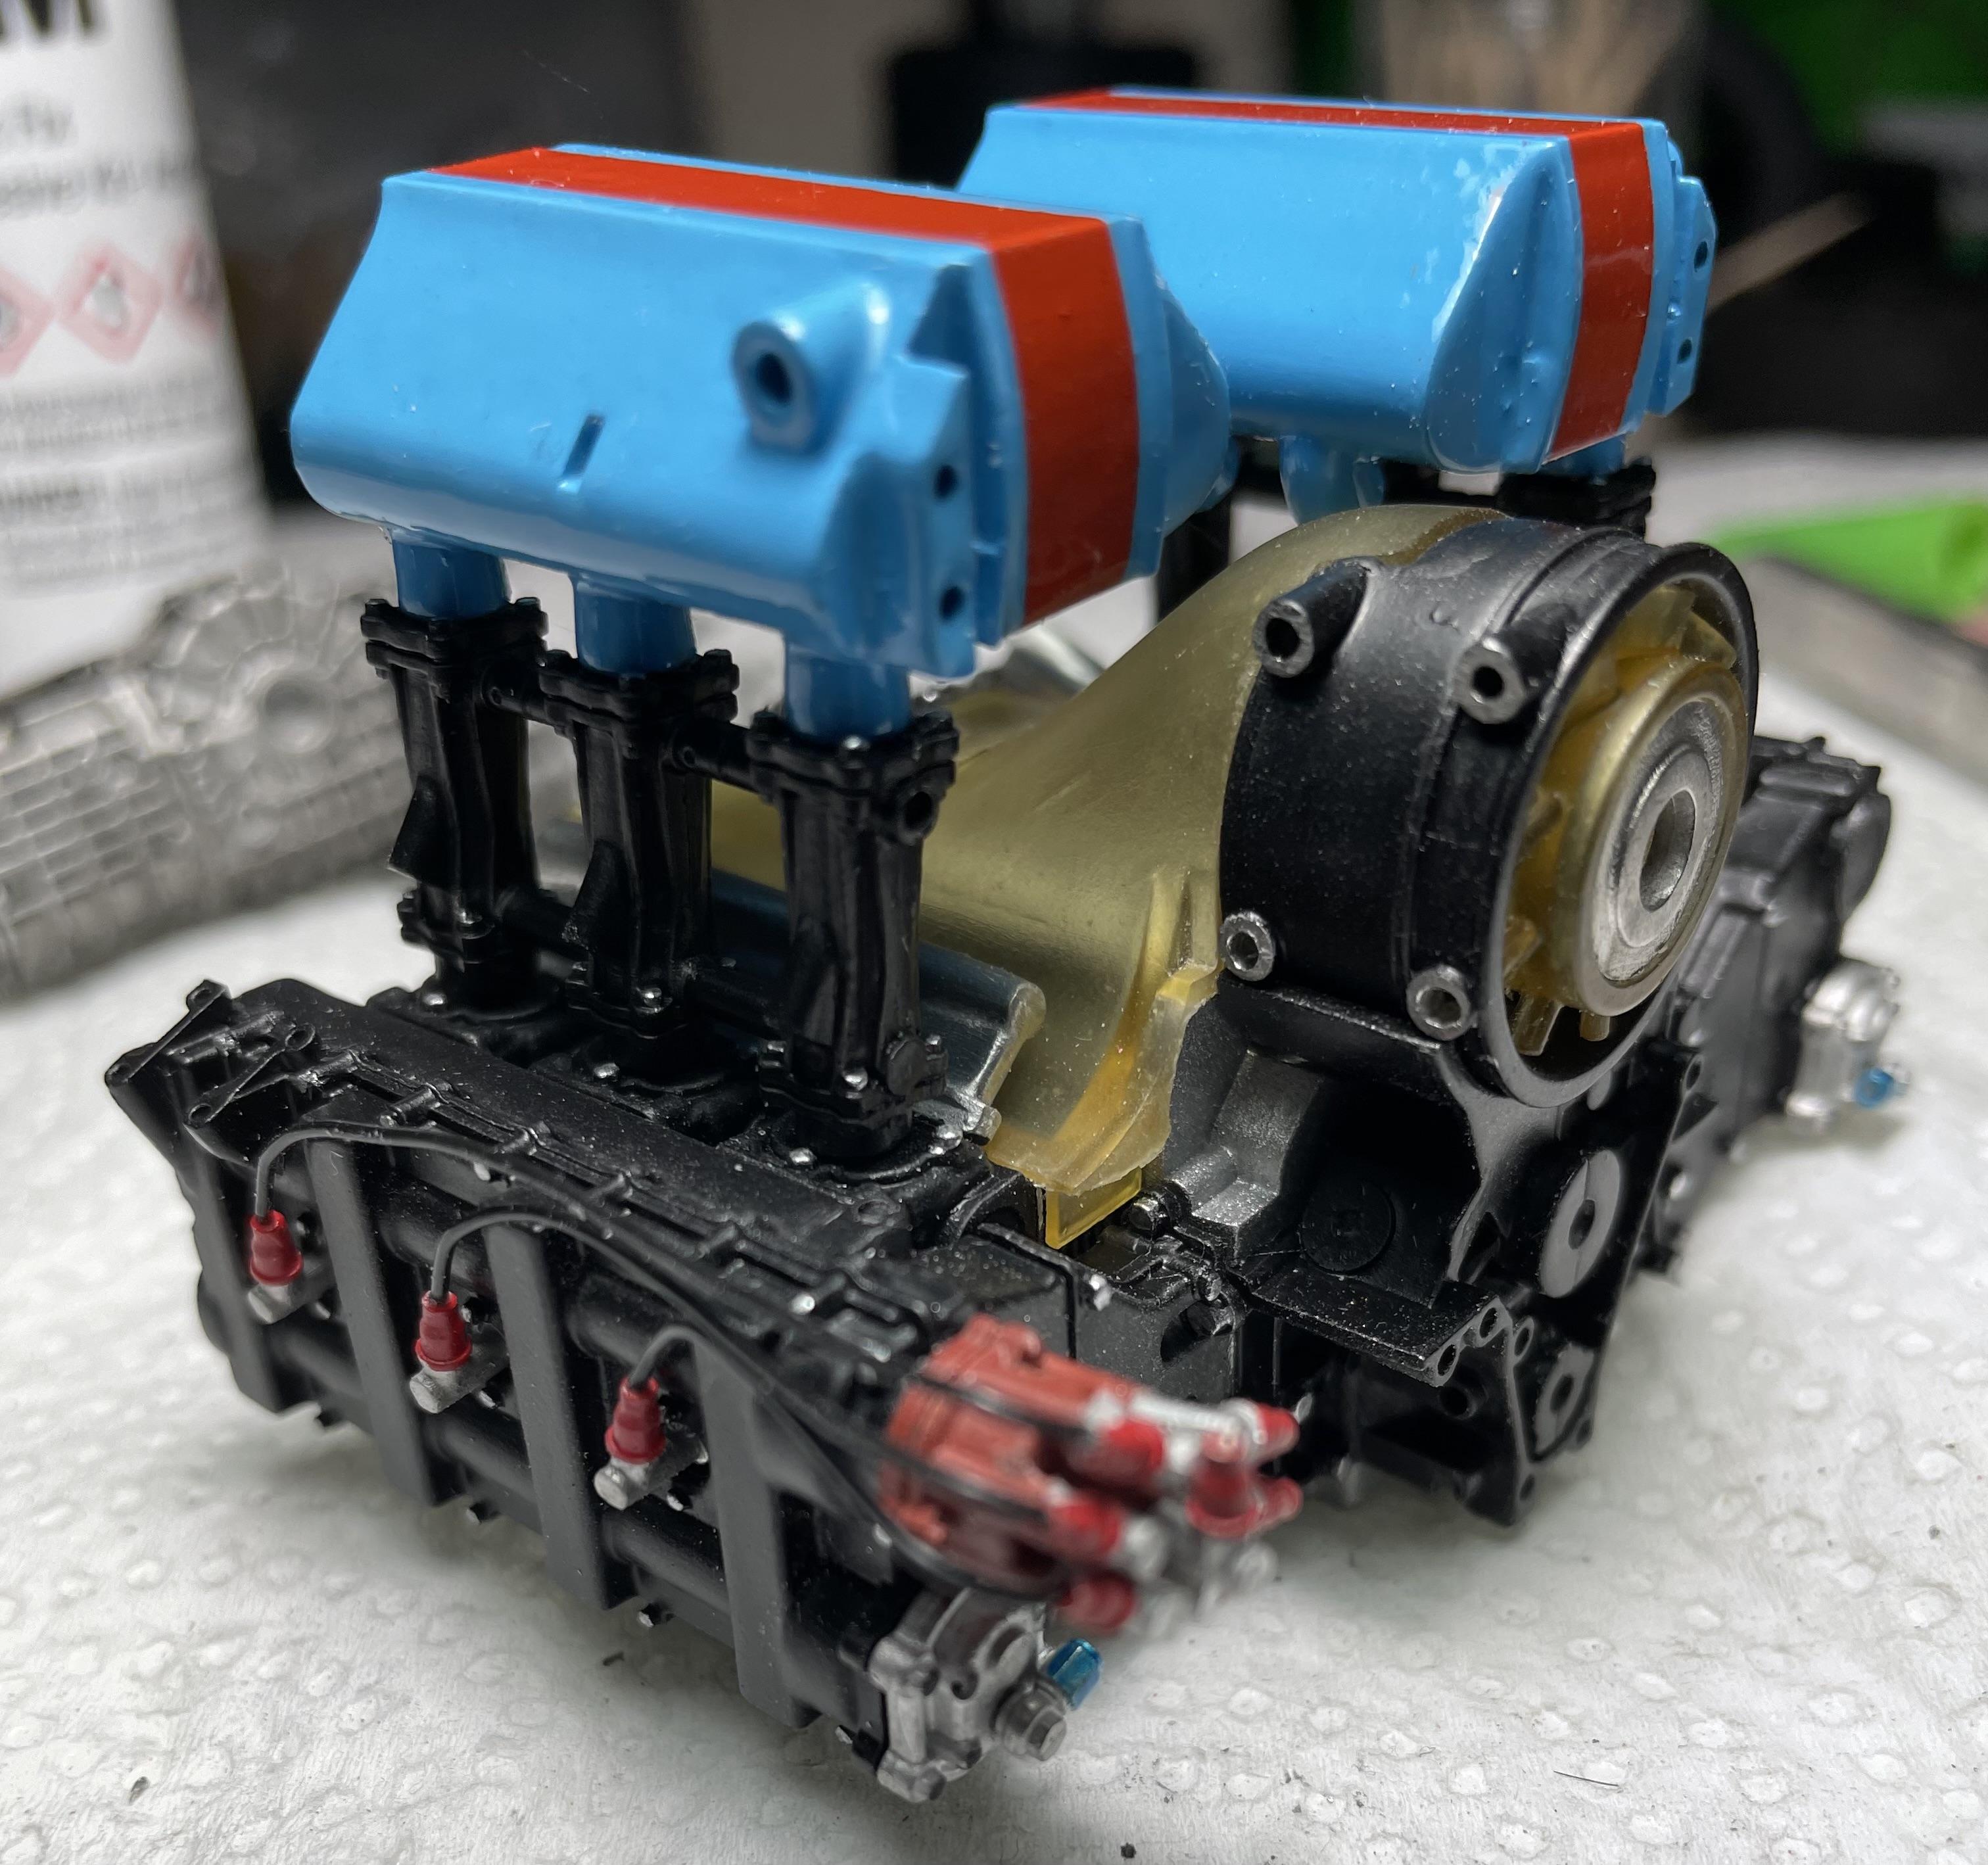
Oops ….a real 289 fia engine. Fell in the pics. Sorry it’s real. Was going to take it out but thought you guys might like it.
-
Any intrest in a large scale community build?
Brudda replied to Sam I Am's topic in Community Builds
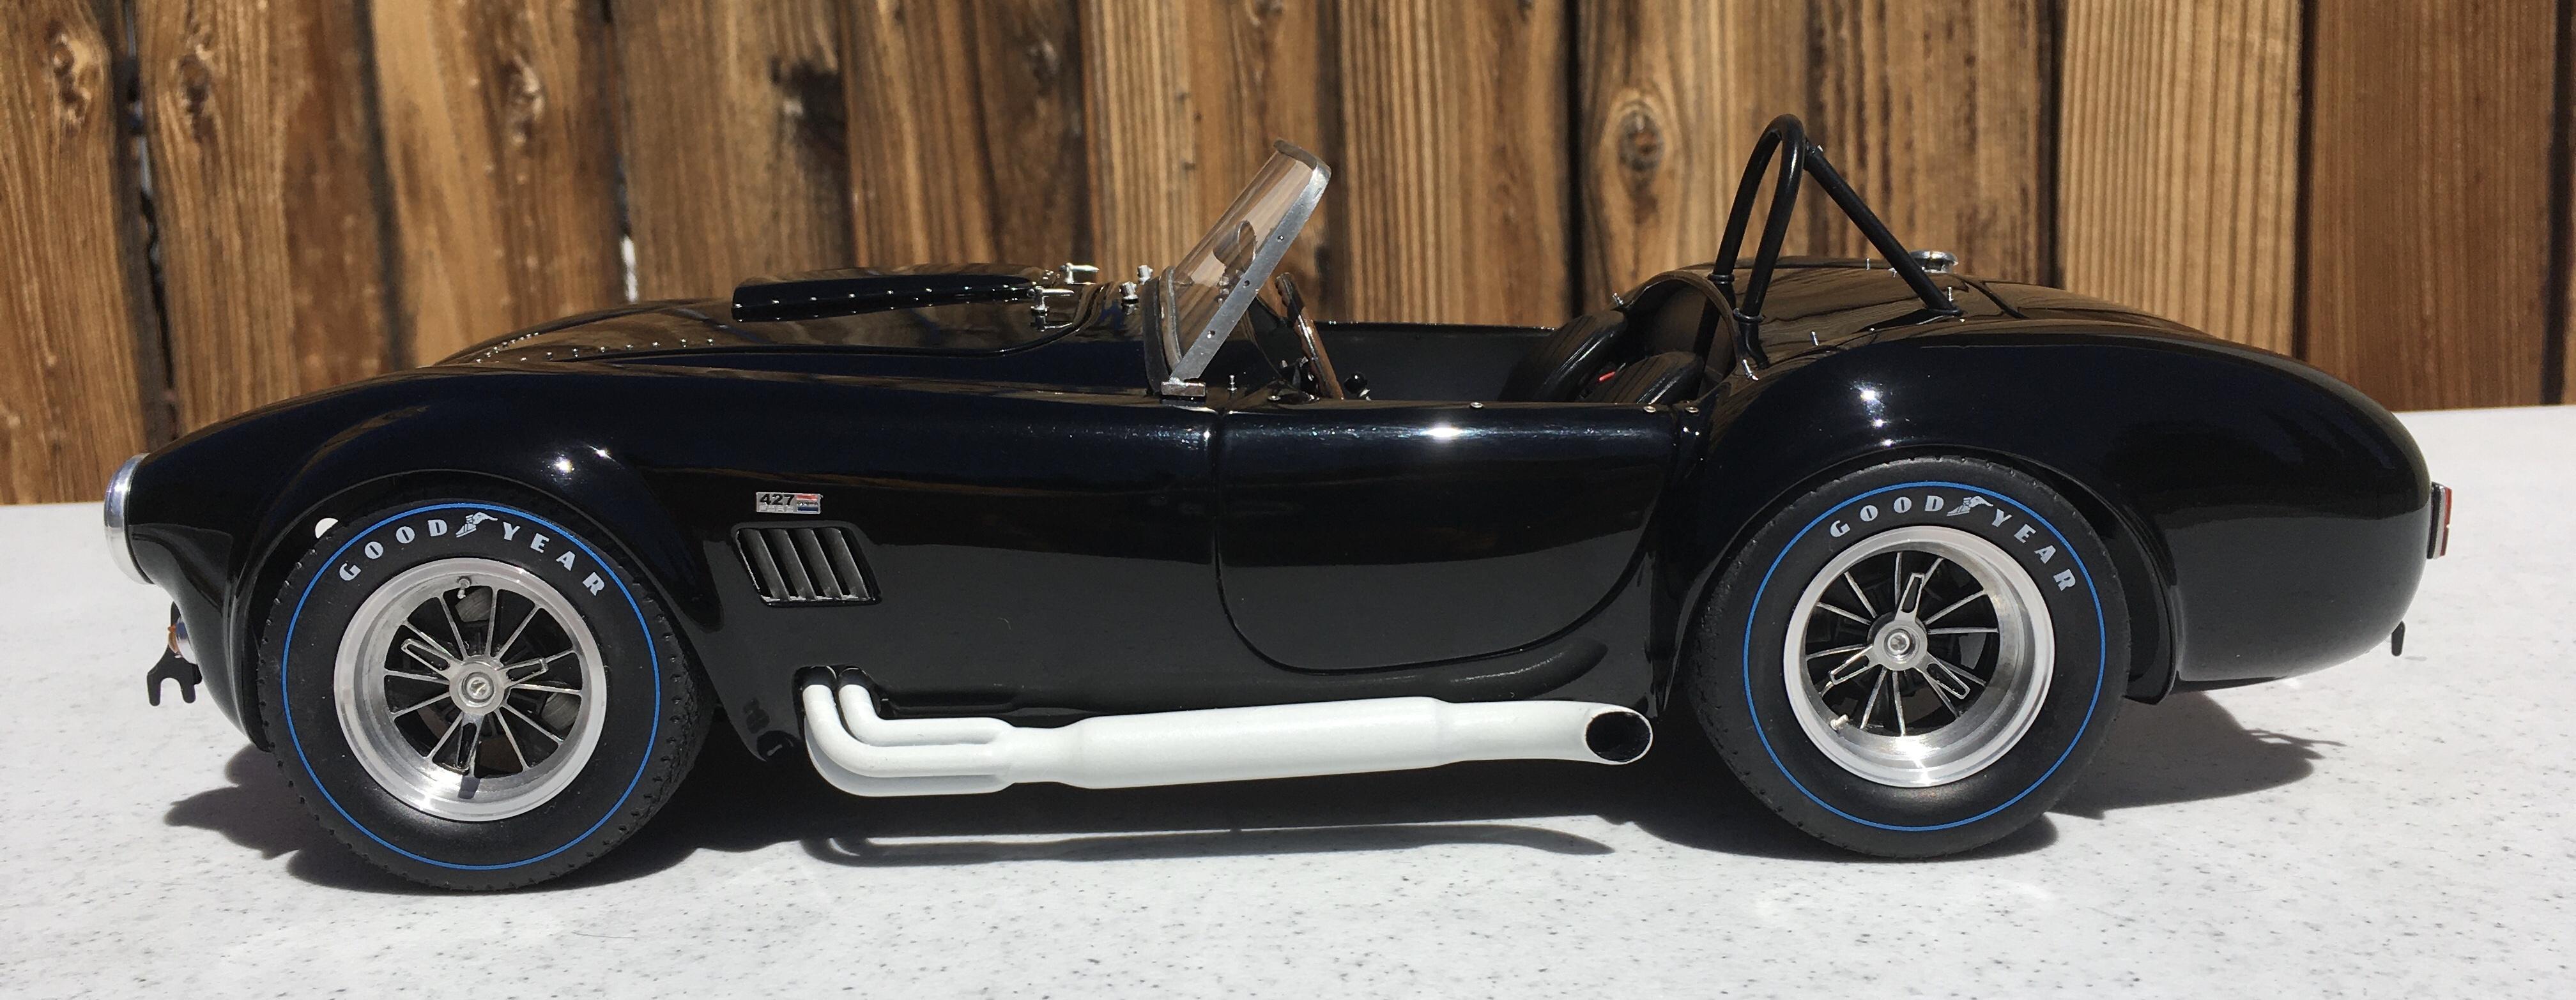
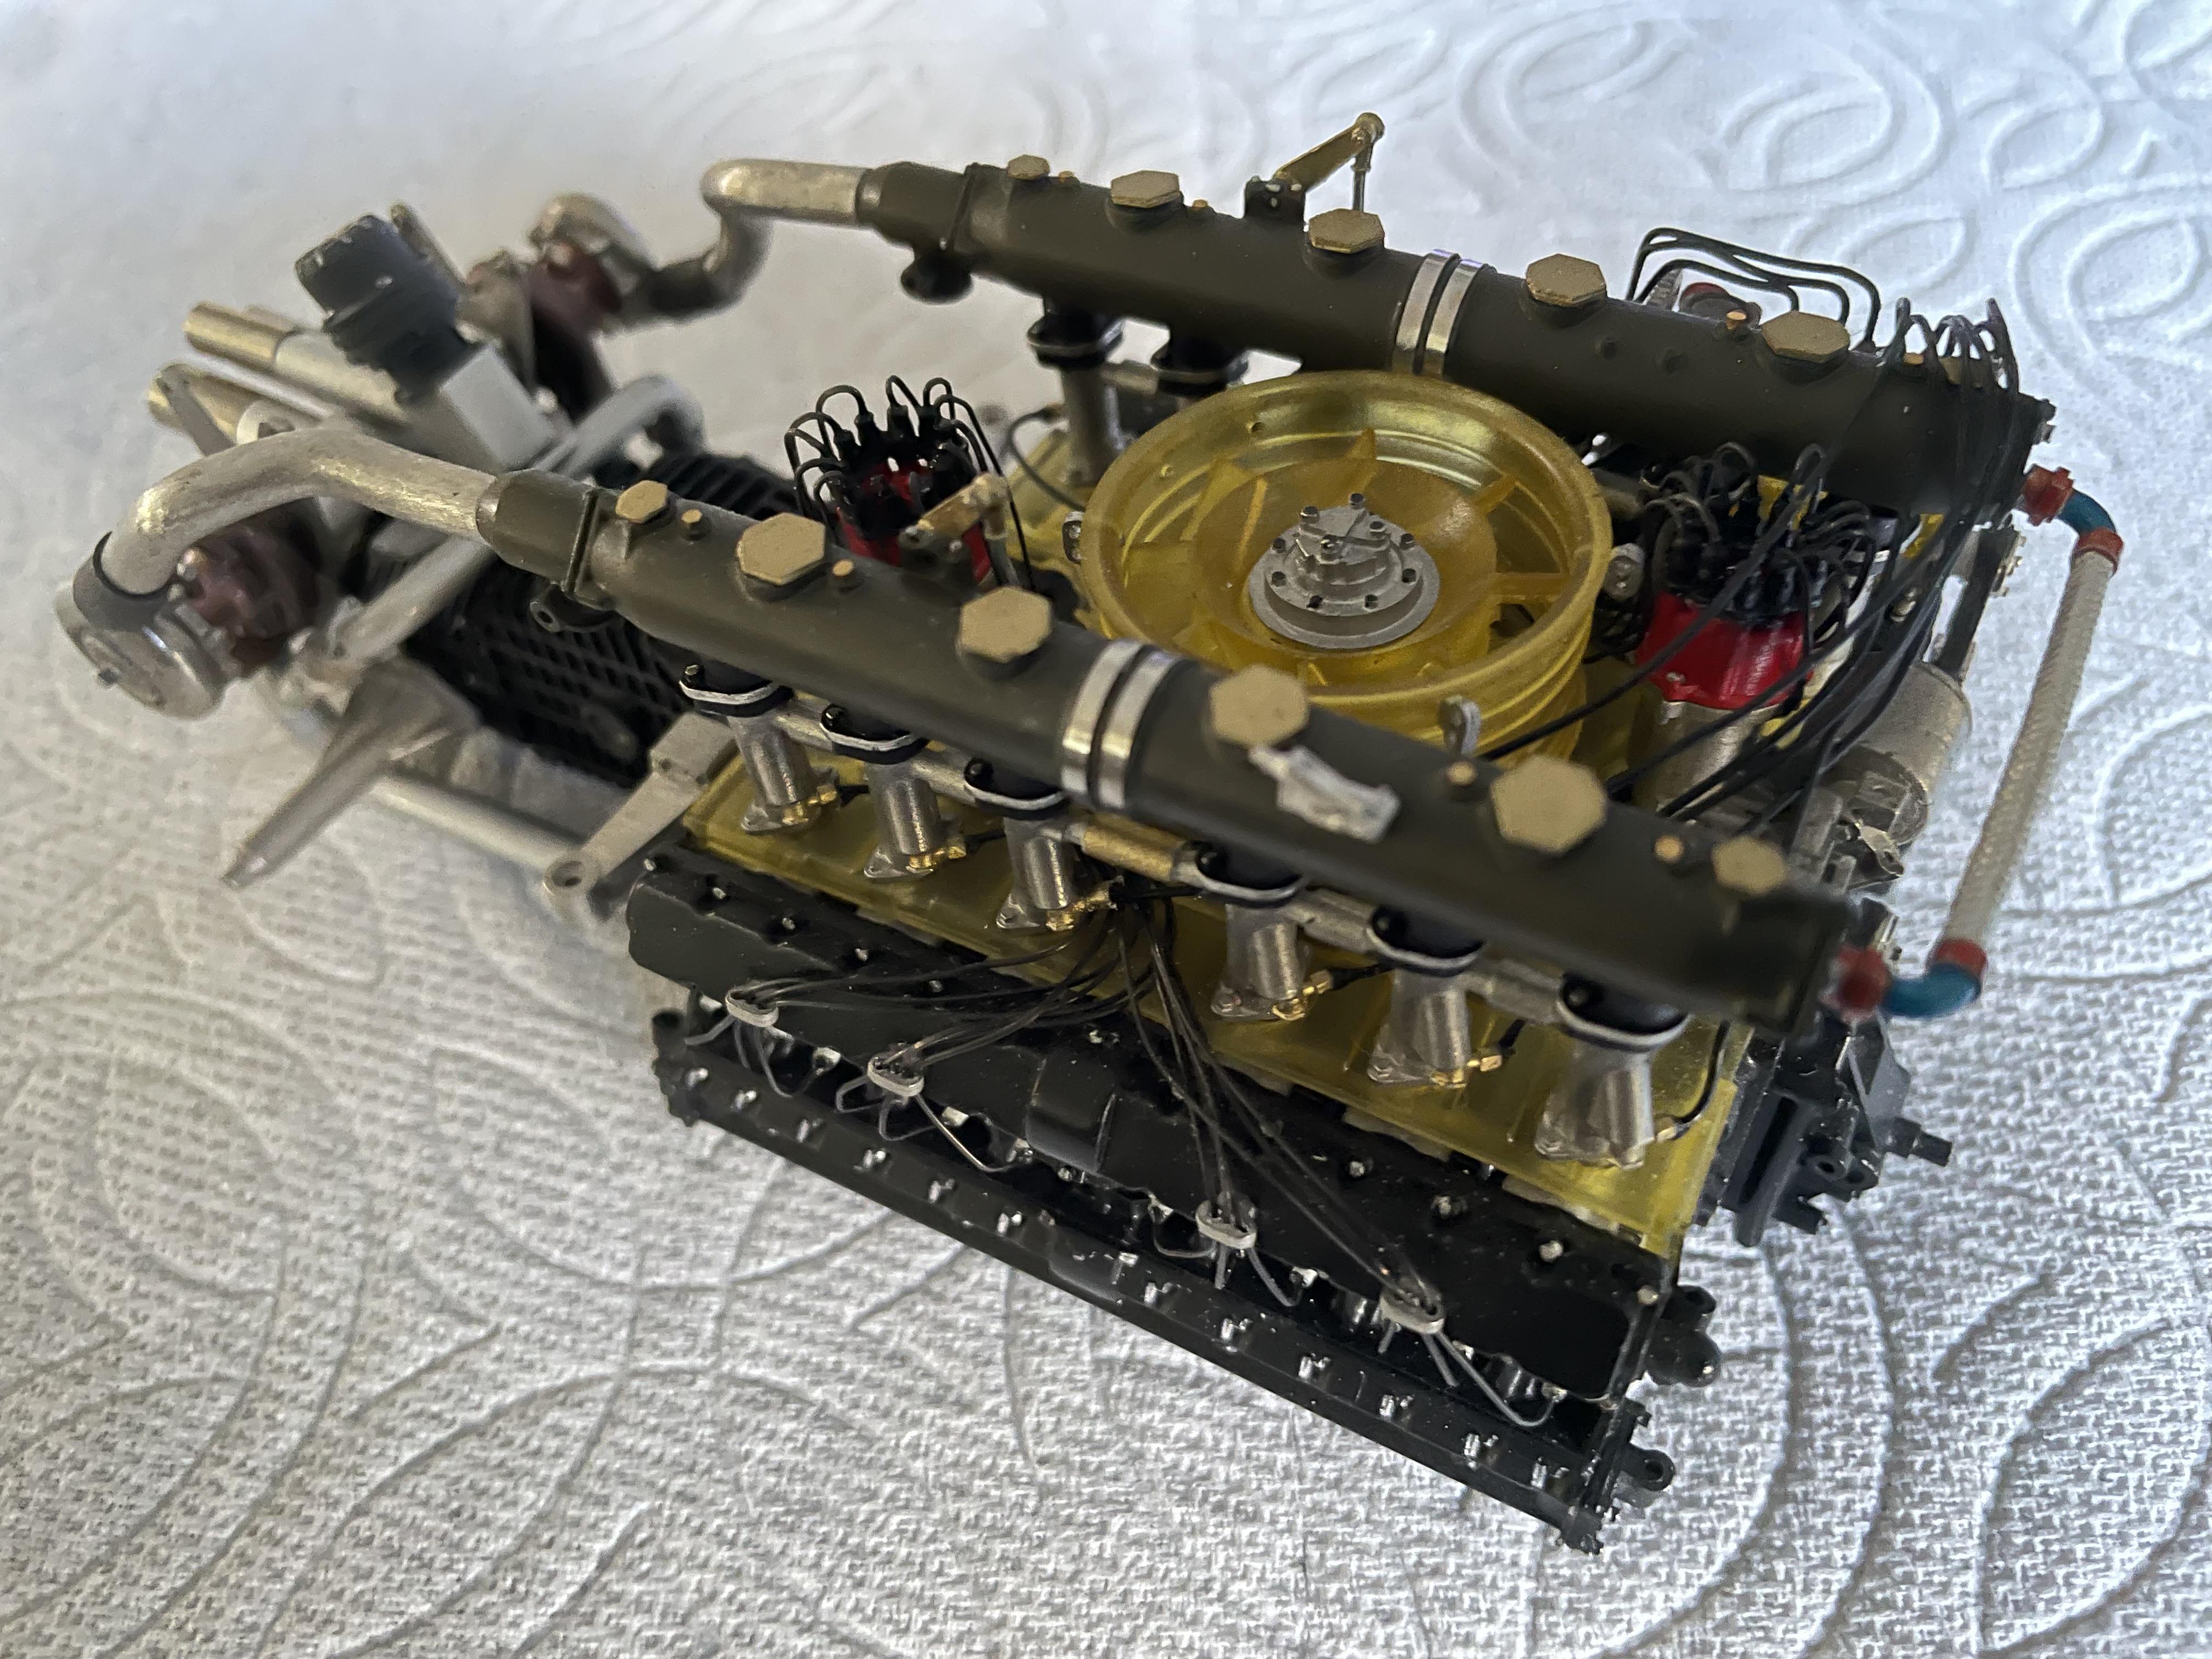
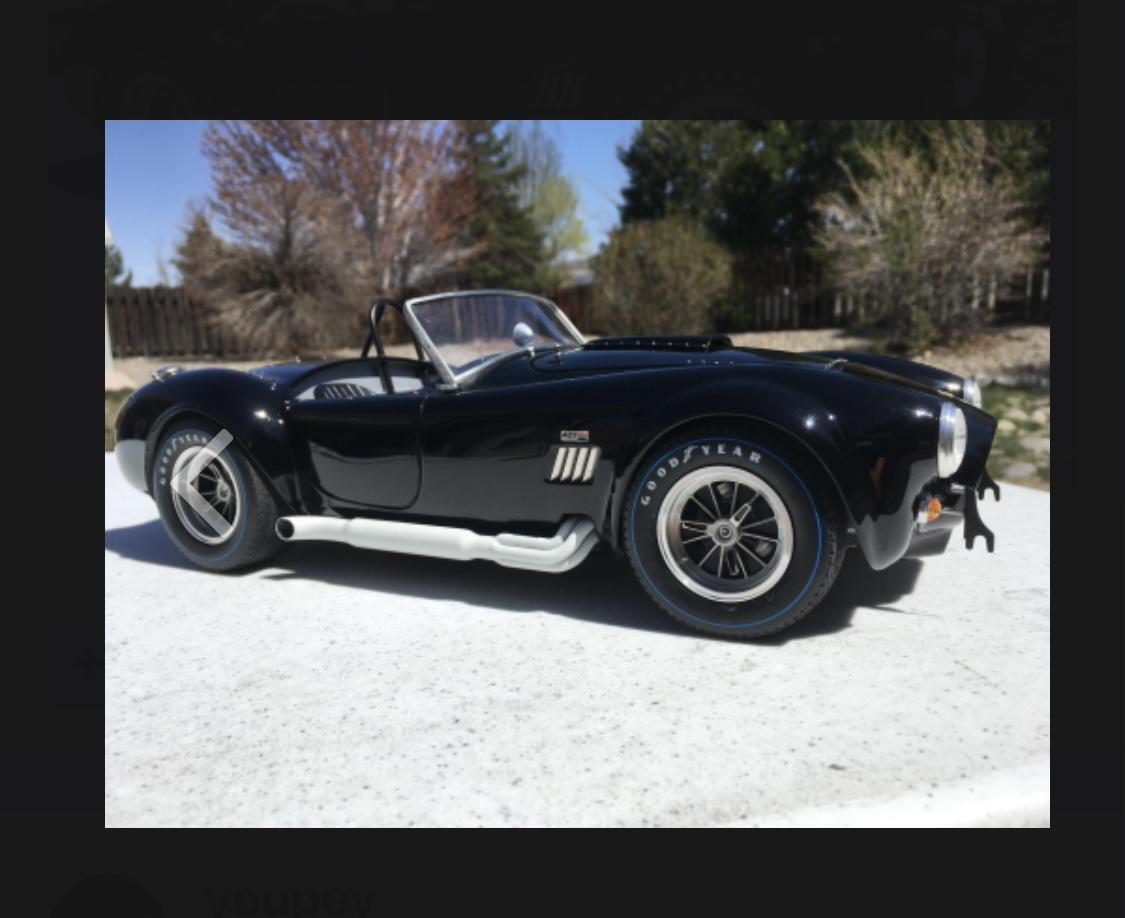
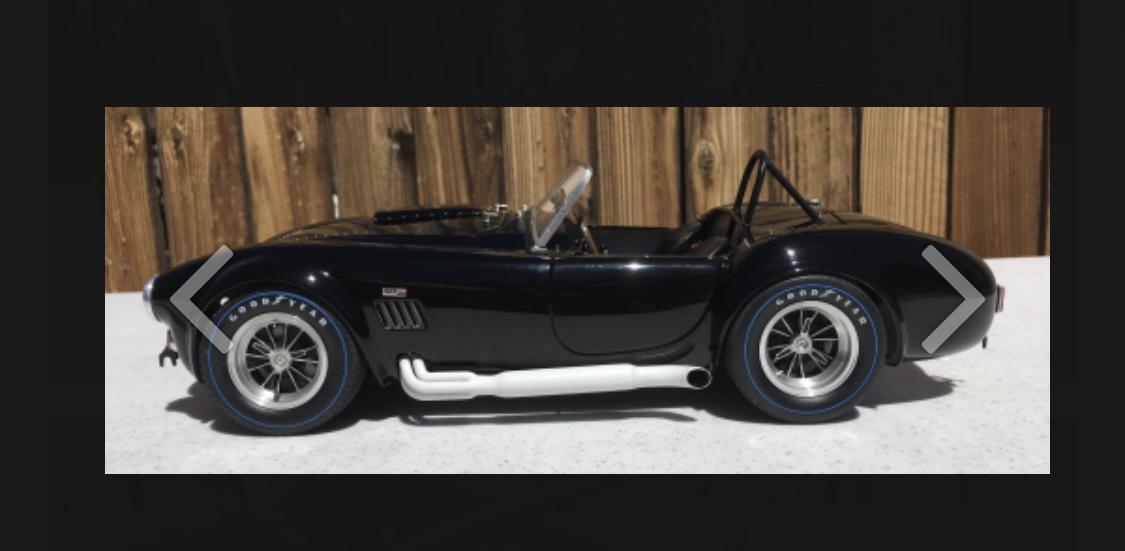
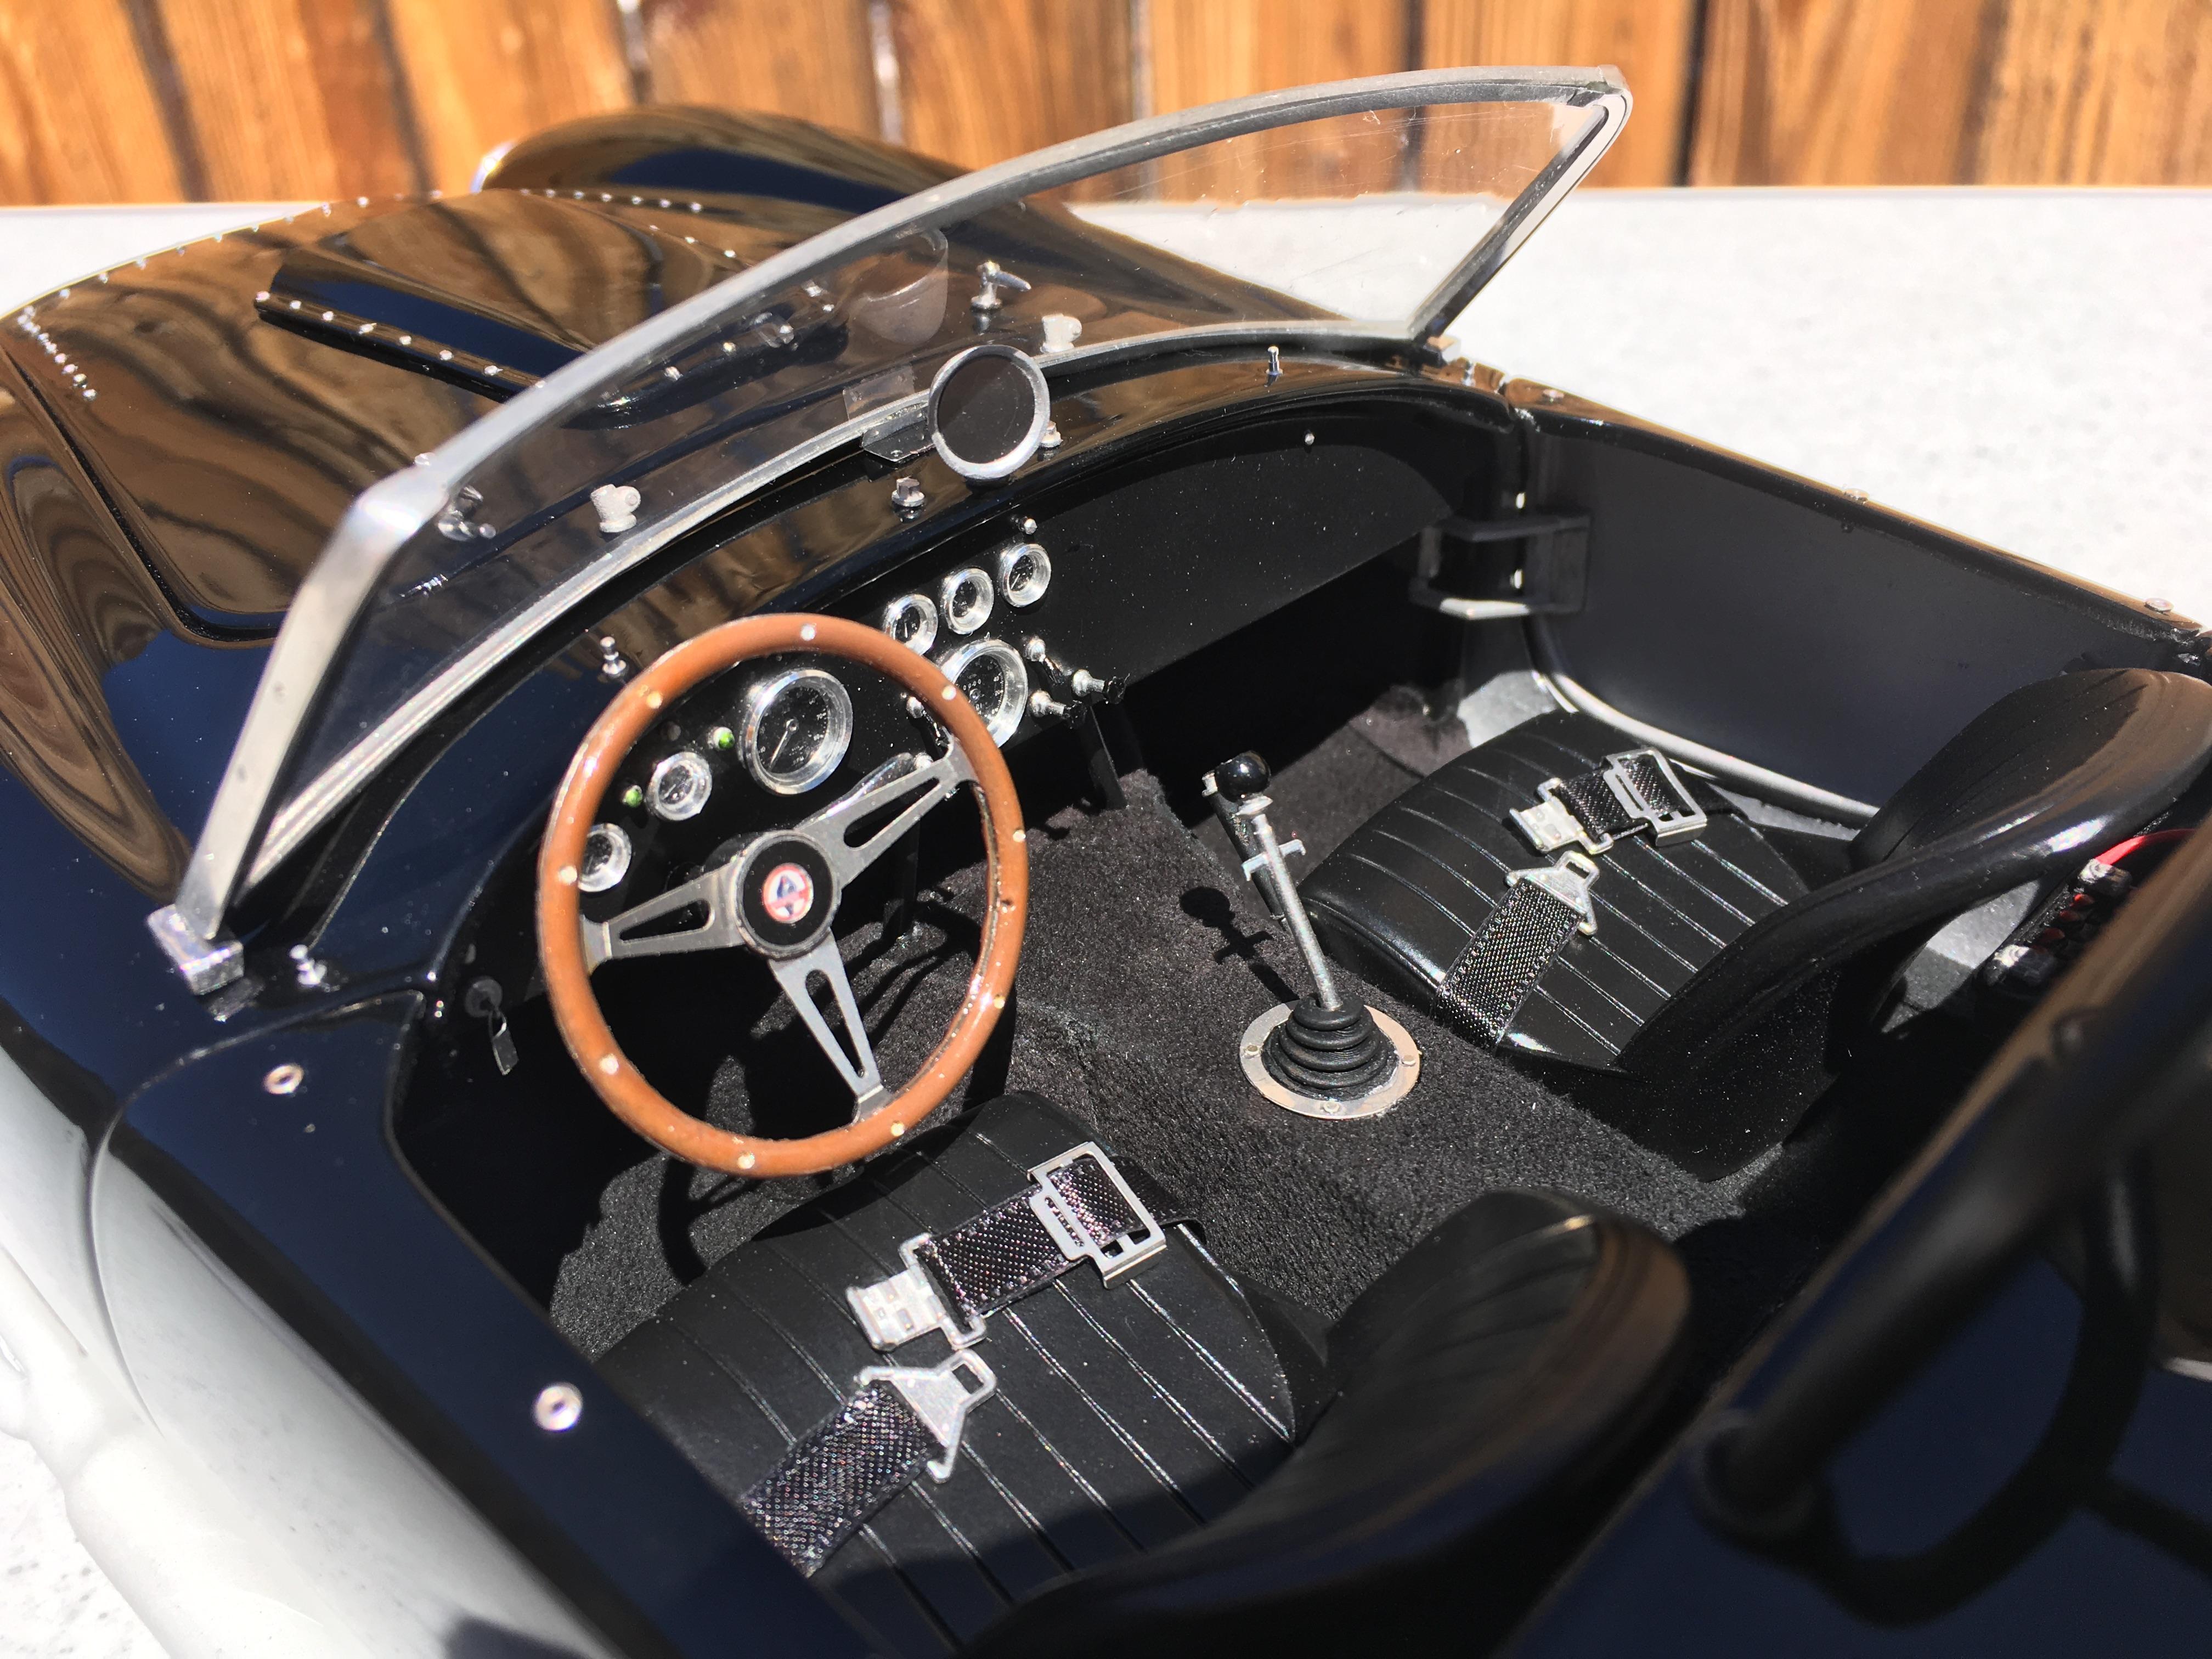
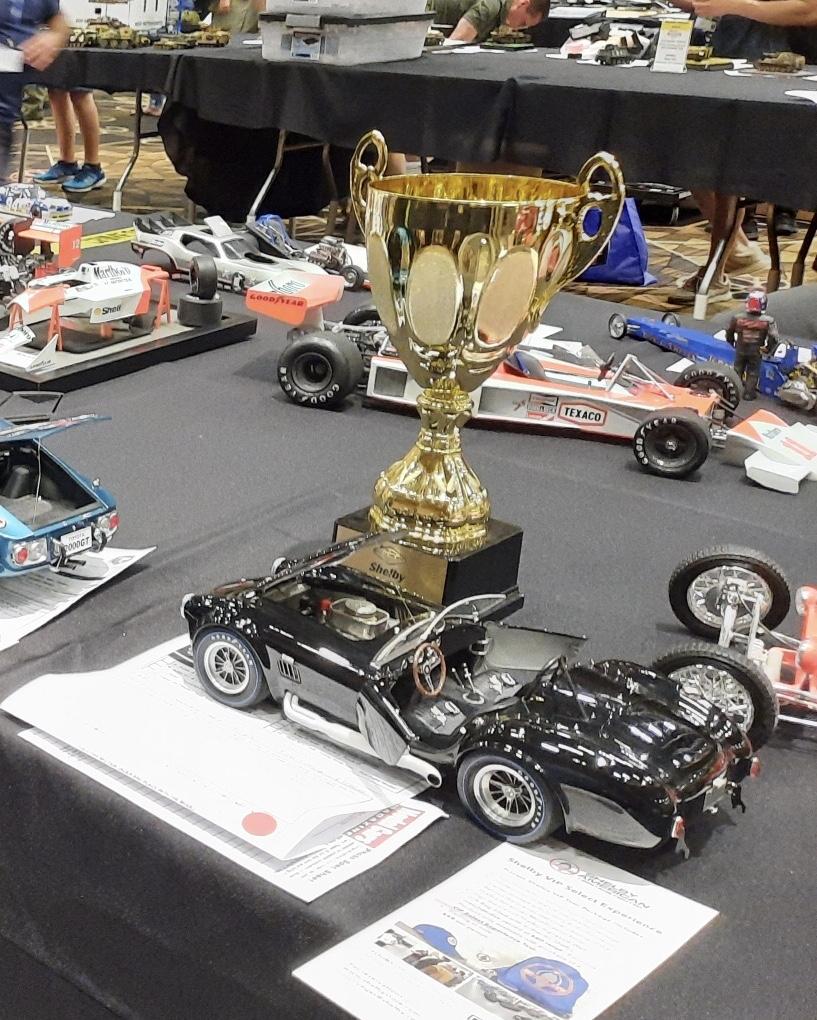
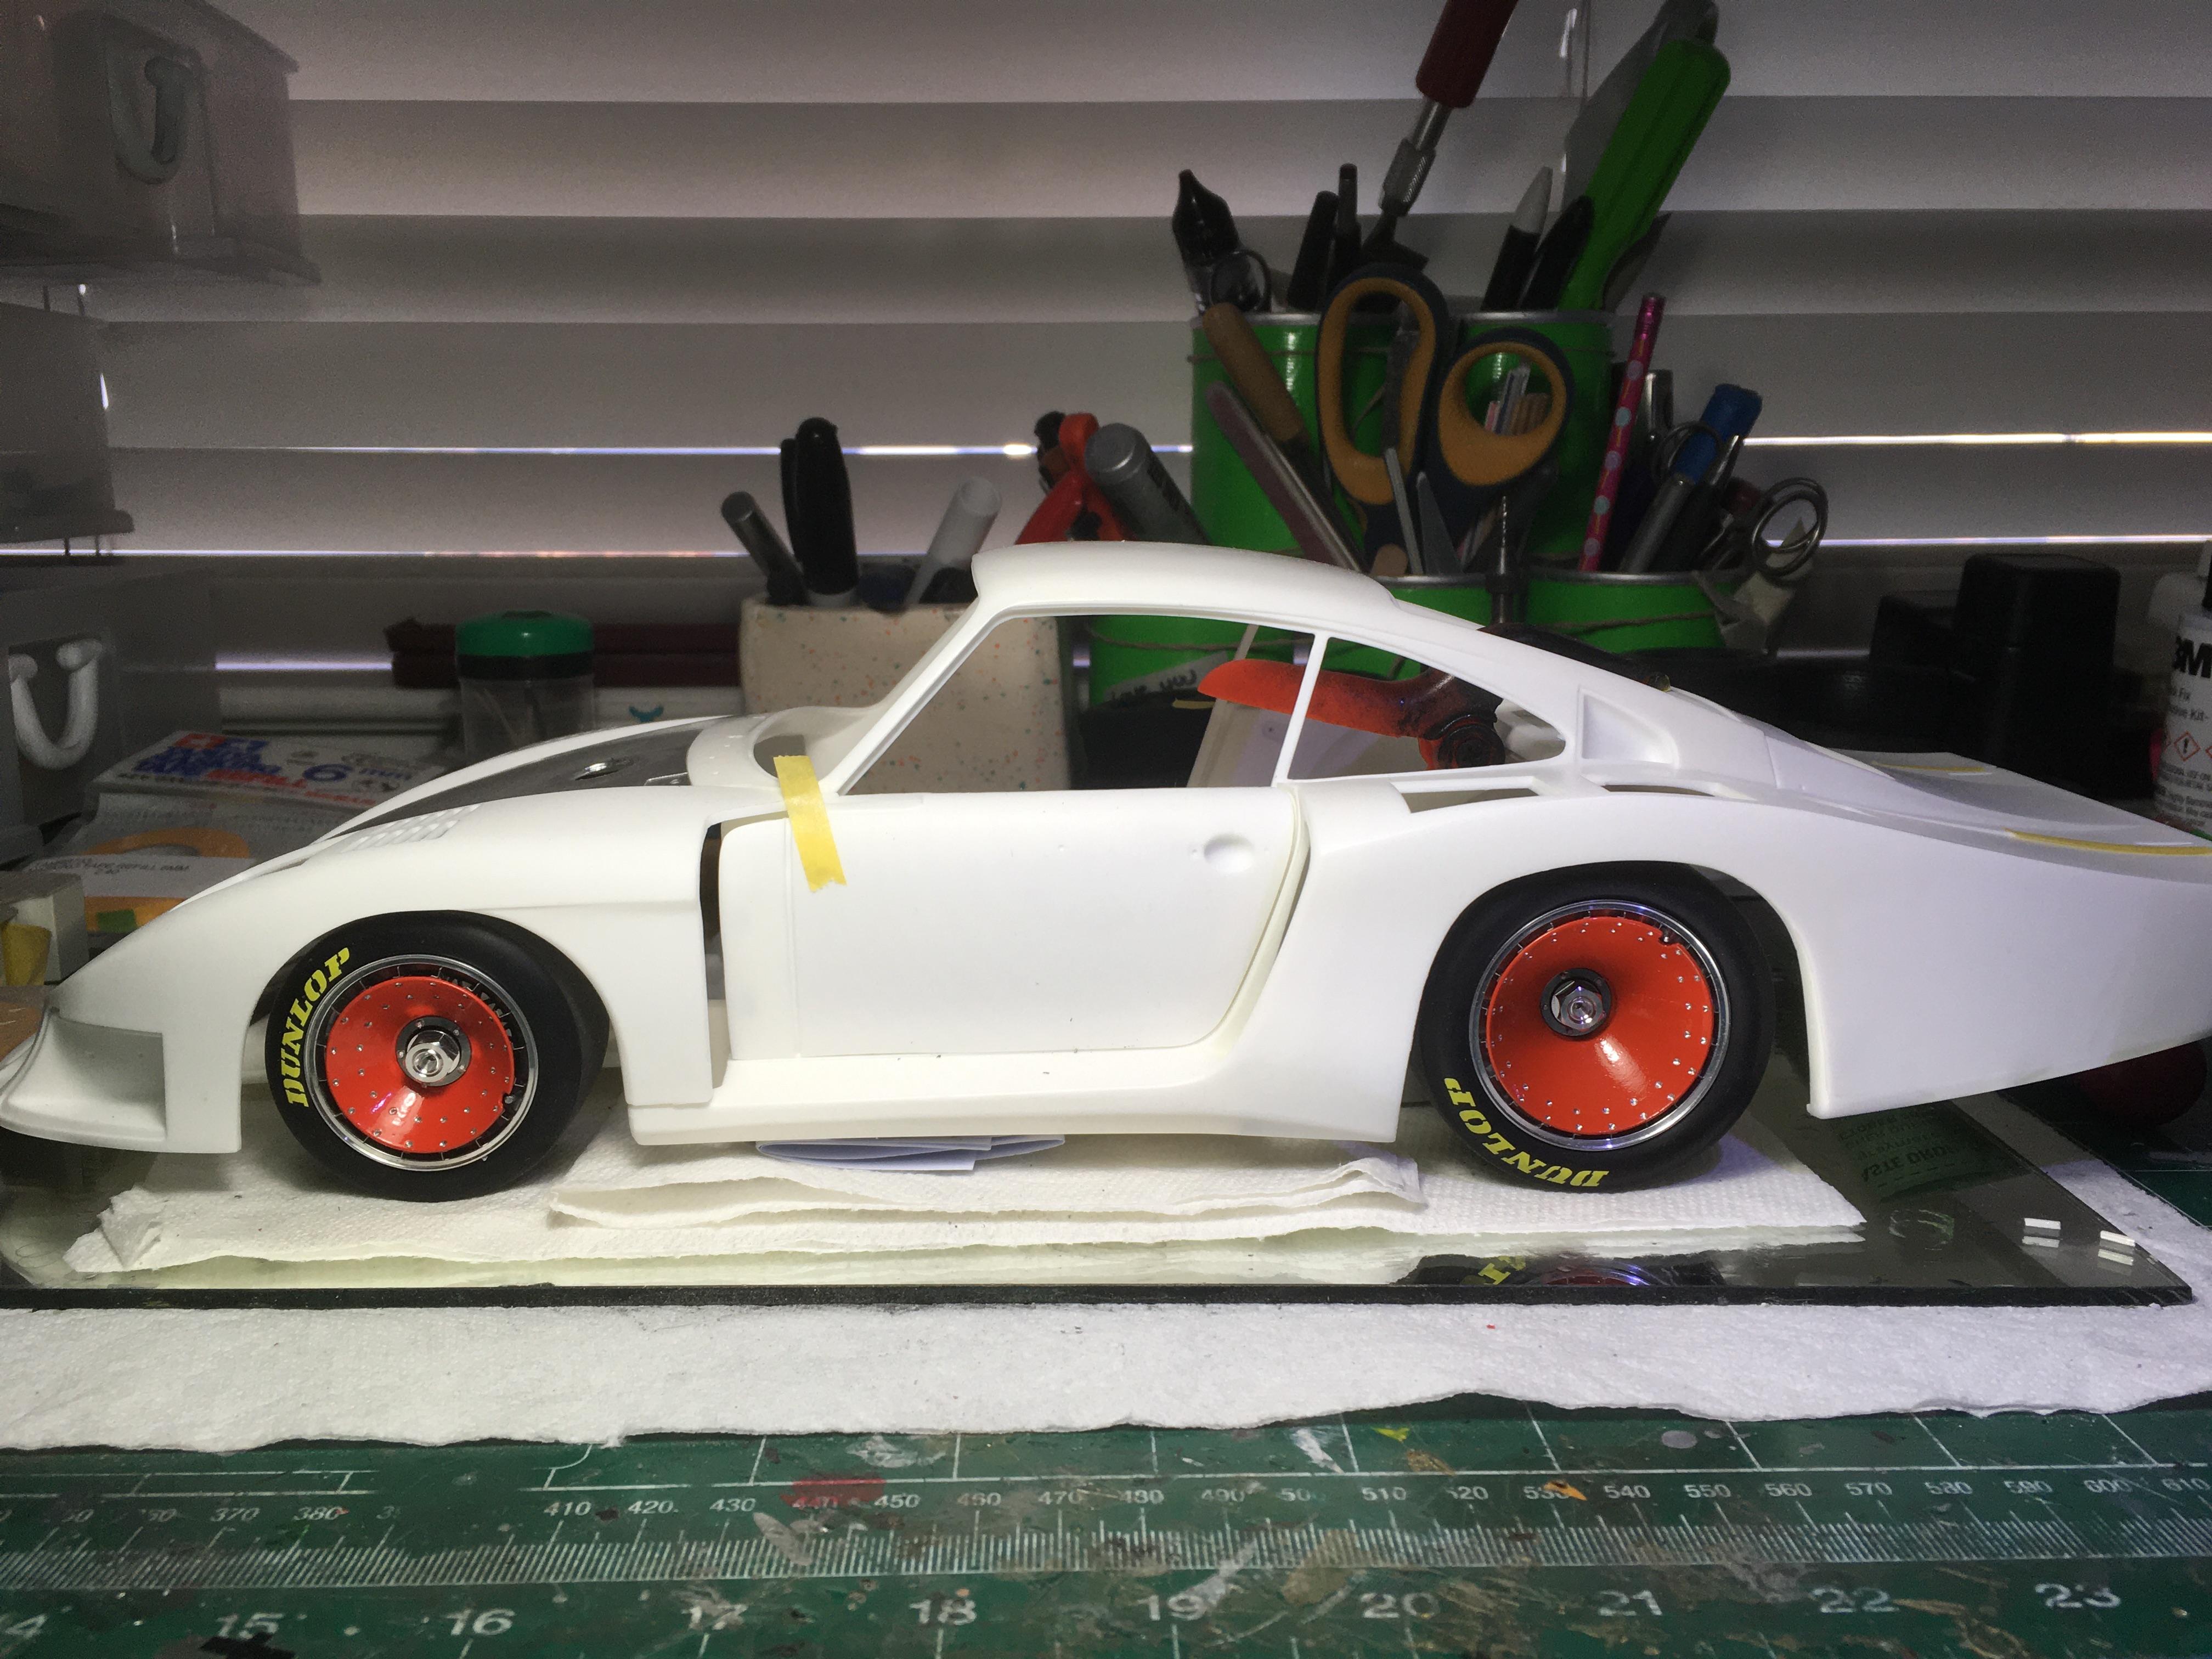
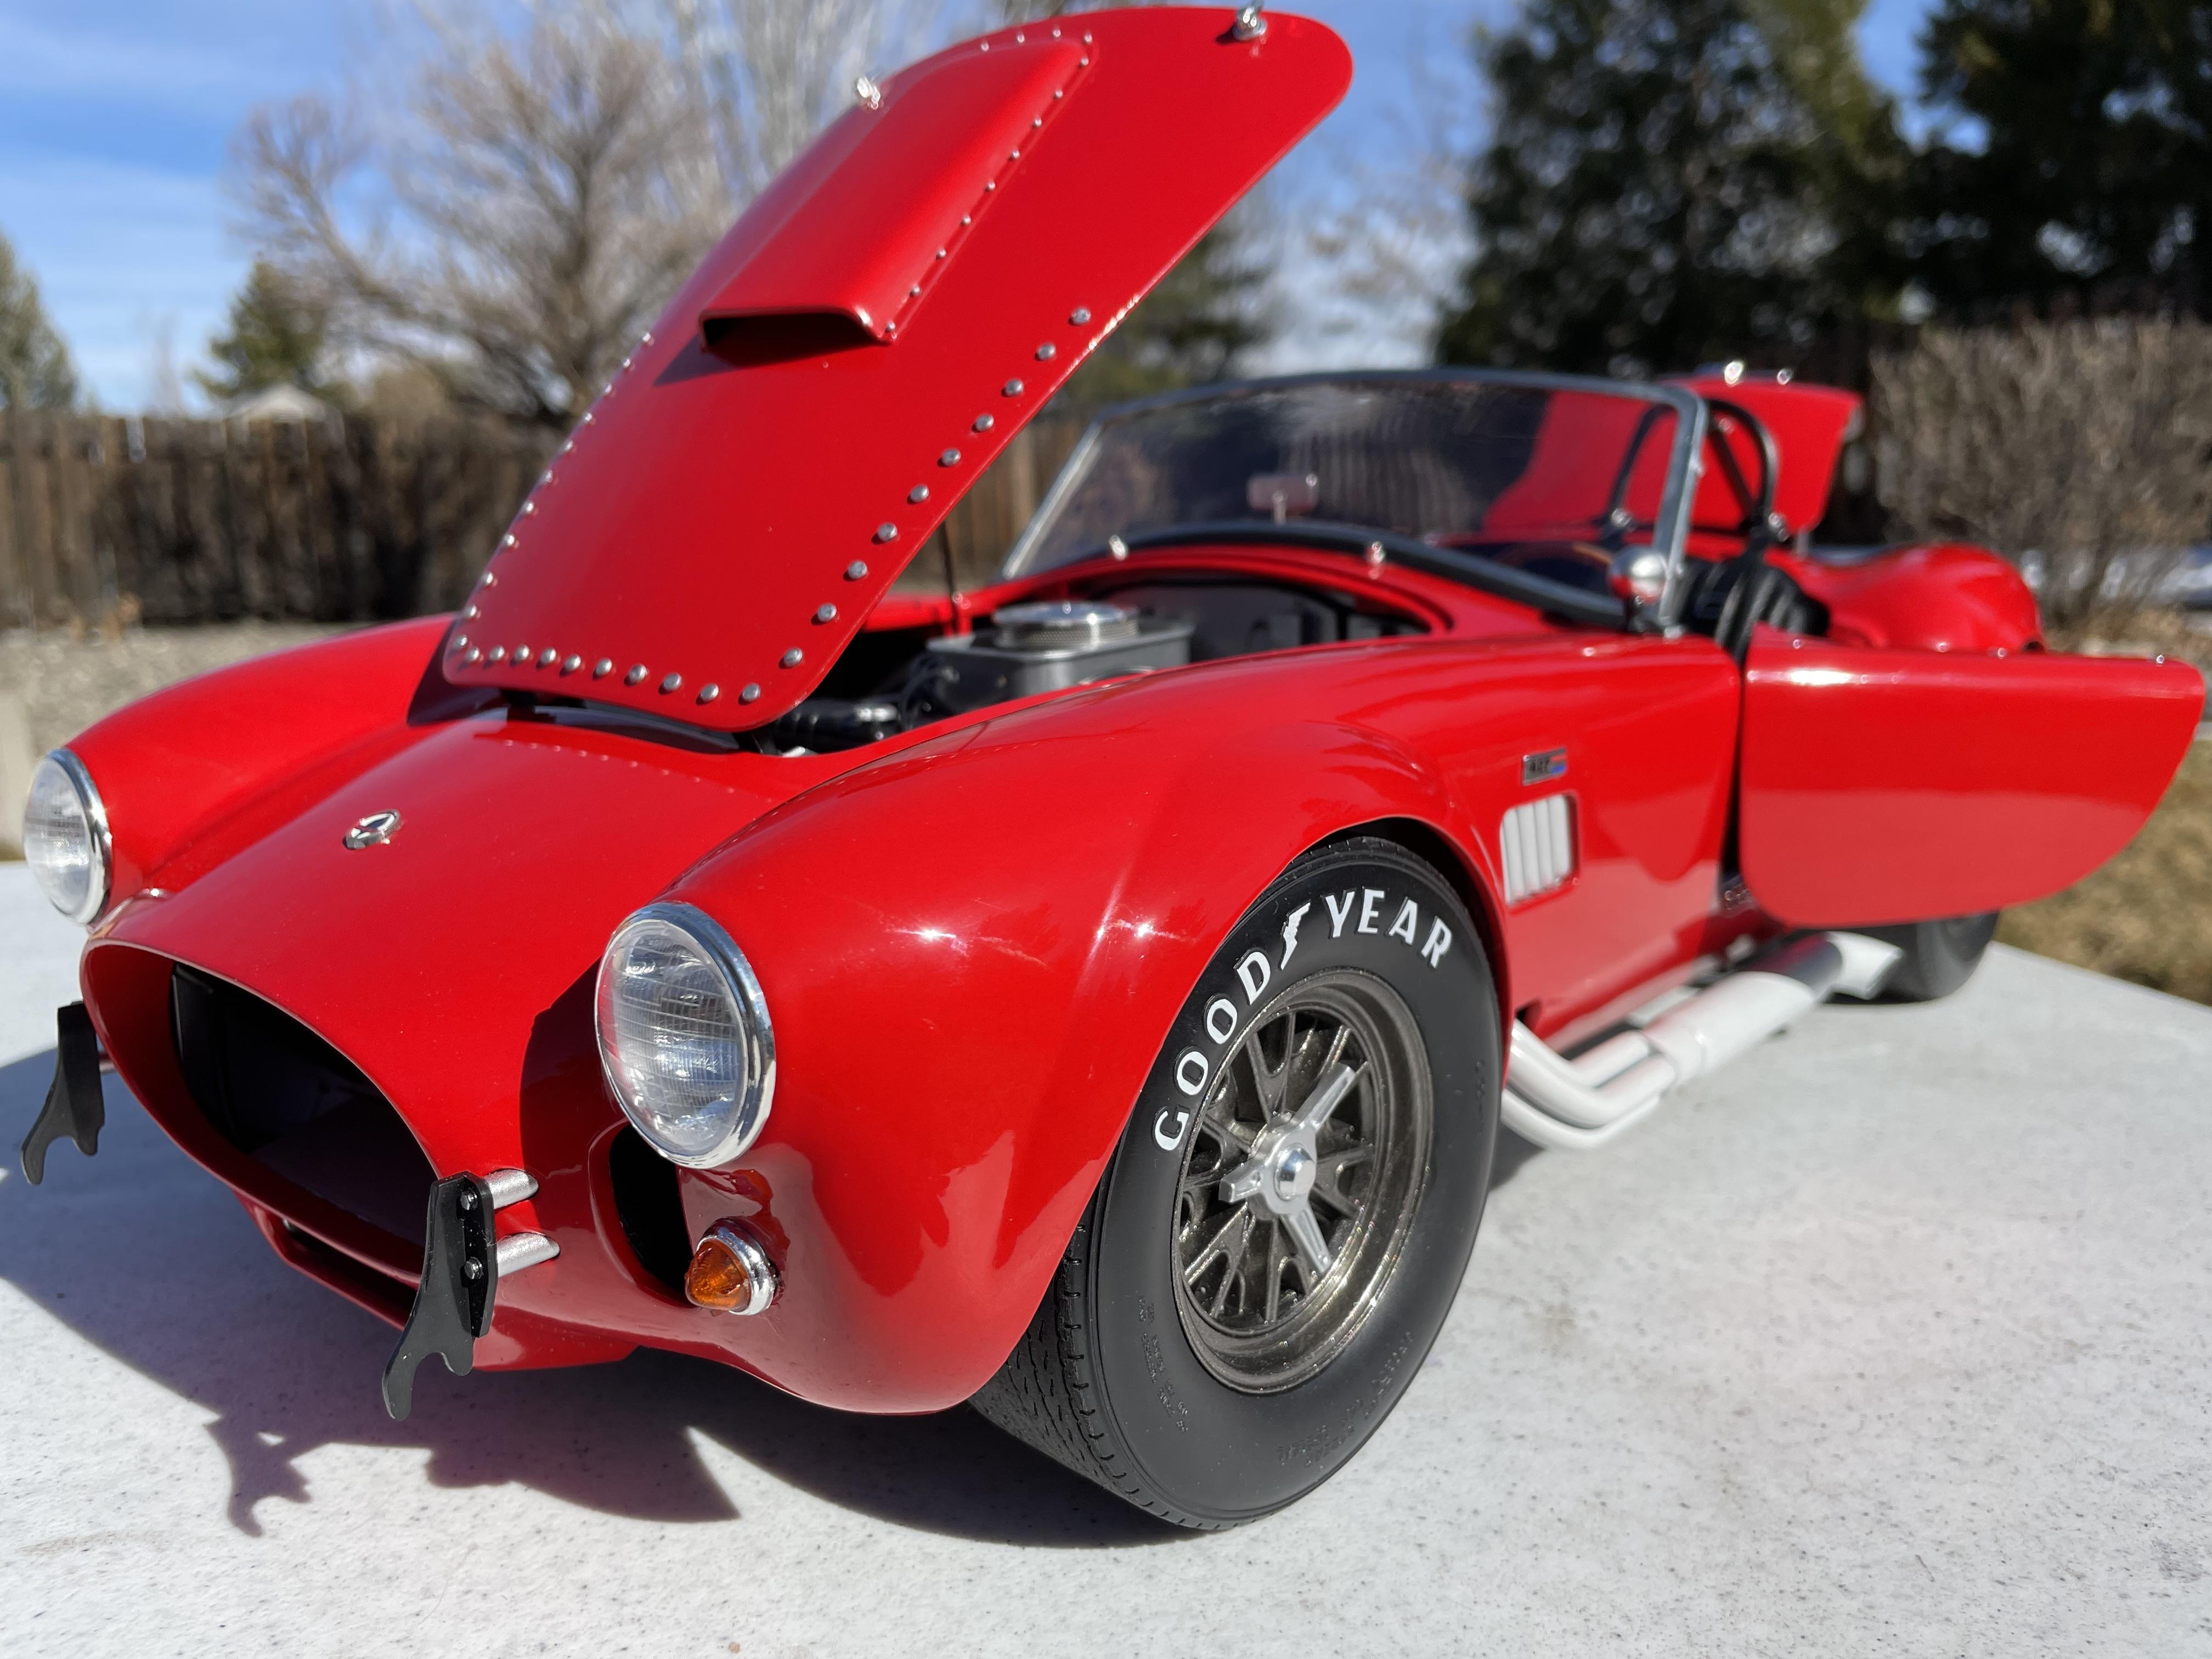
Here are some 1/12. a mock up of a 911-78 Moby dick Porsche. The black 427 cobra took the 1st place in special awards in the 2021 IPMS Las Vegas Nationals.
-
Any intrest in a large scale community build?
Brudda replied to Sam I Am's topic in Community Builds
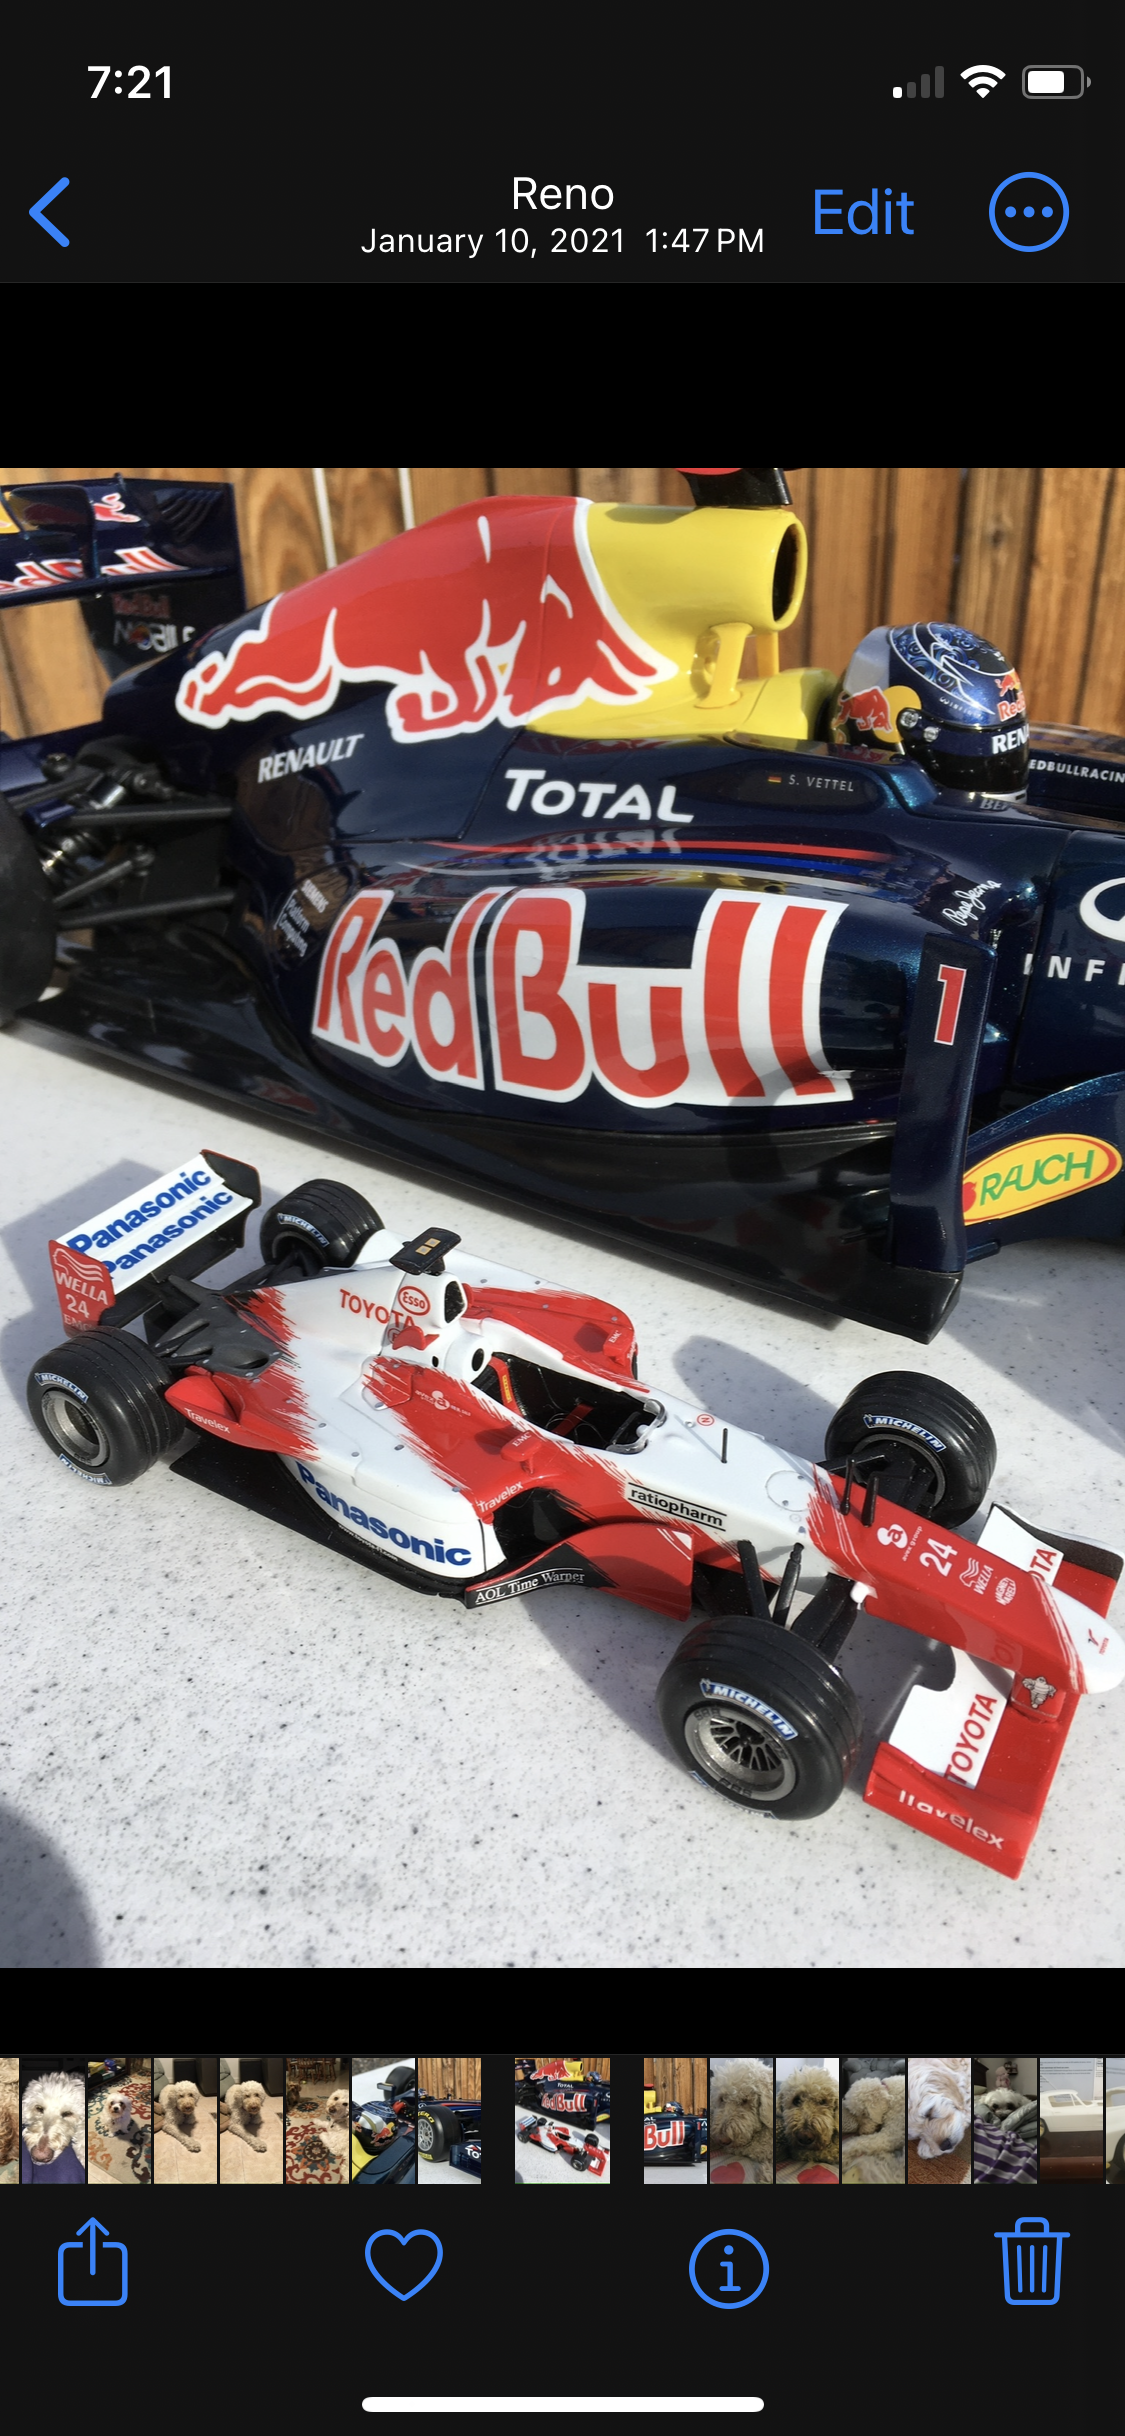
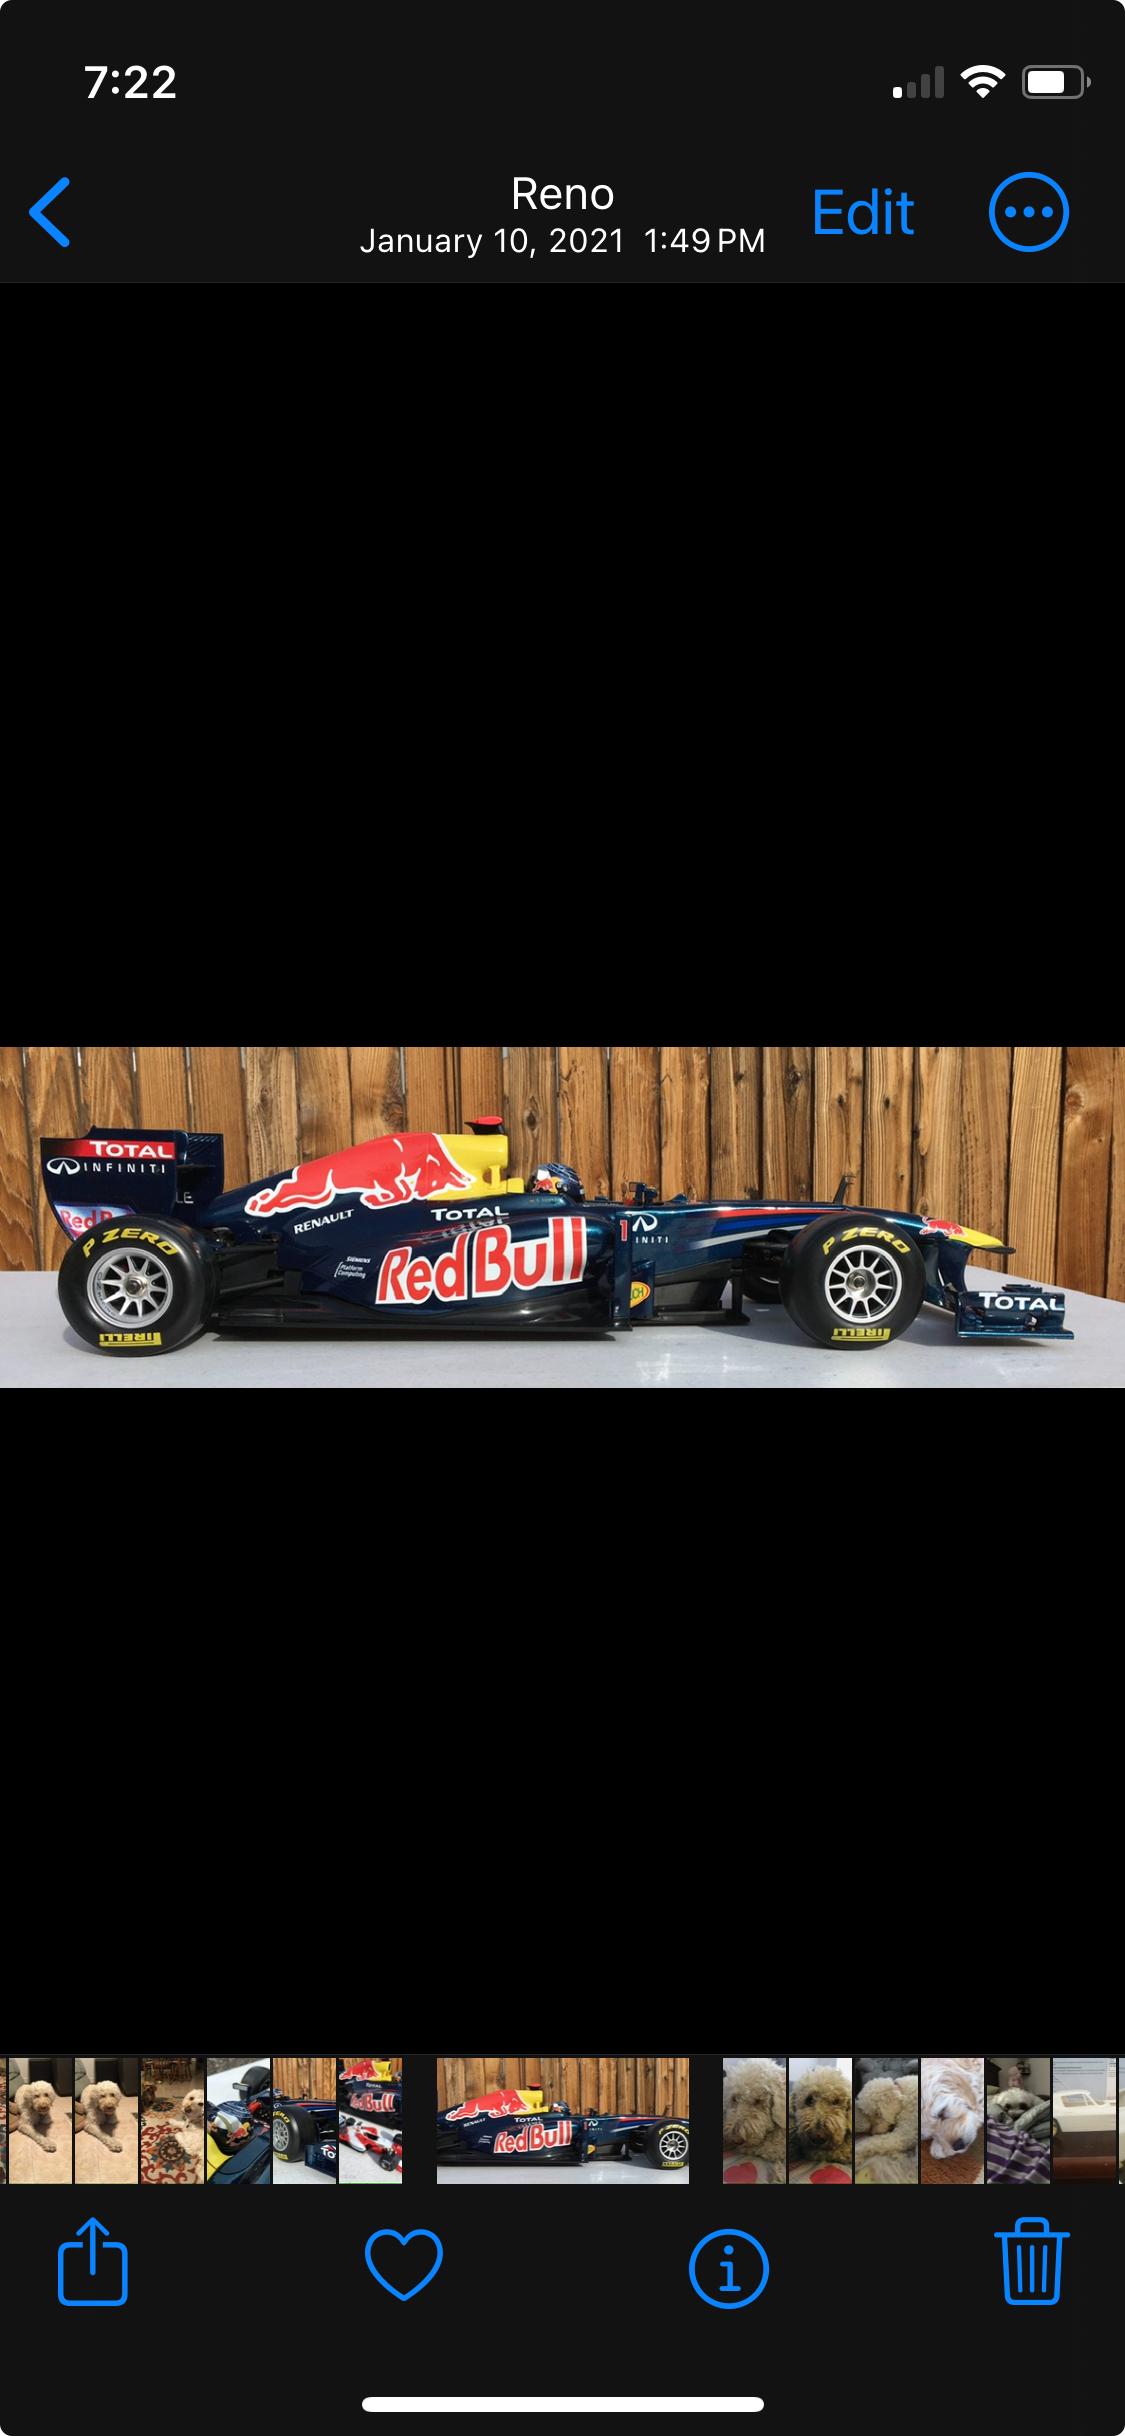
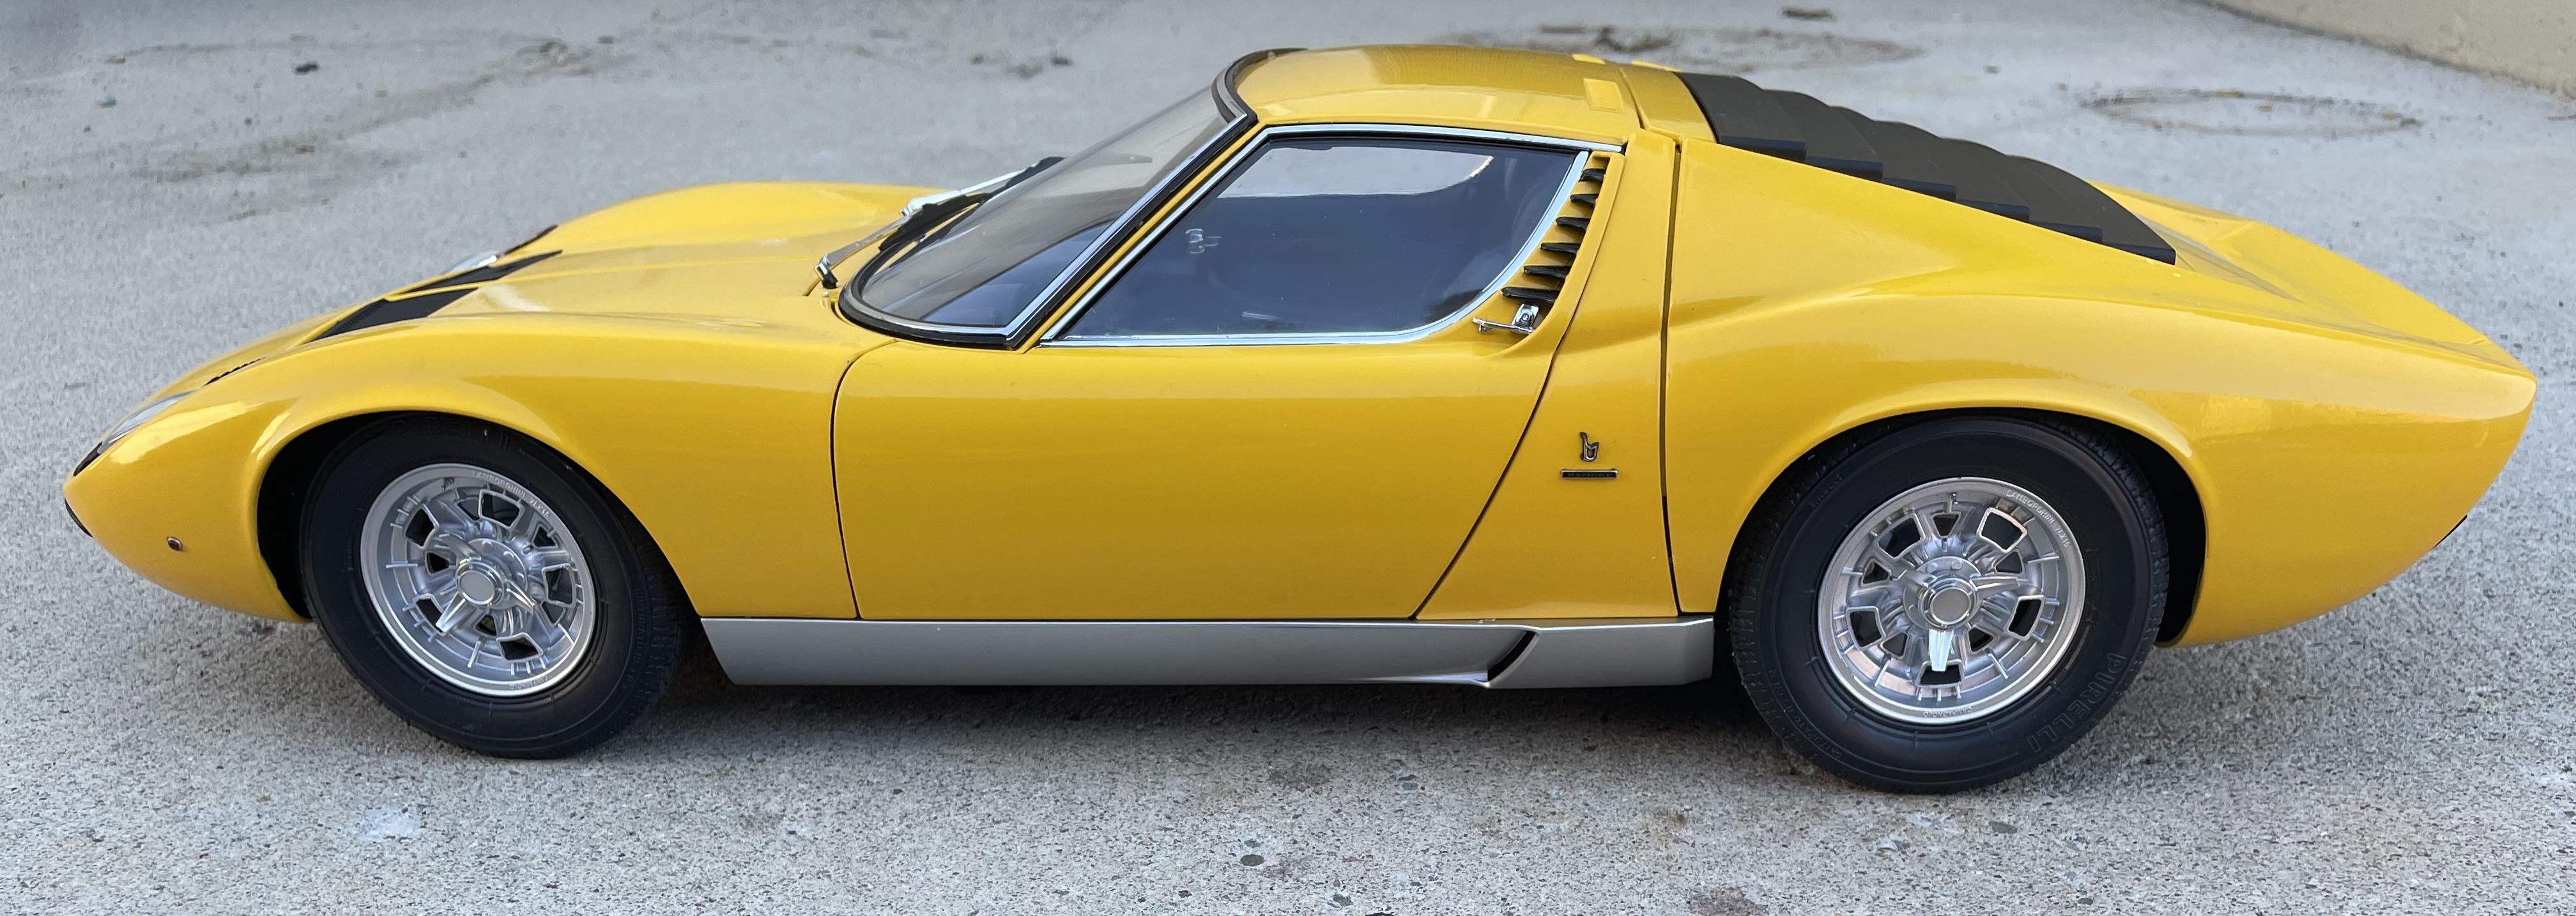
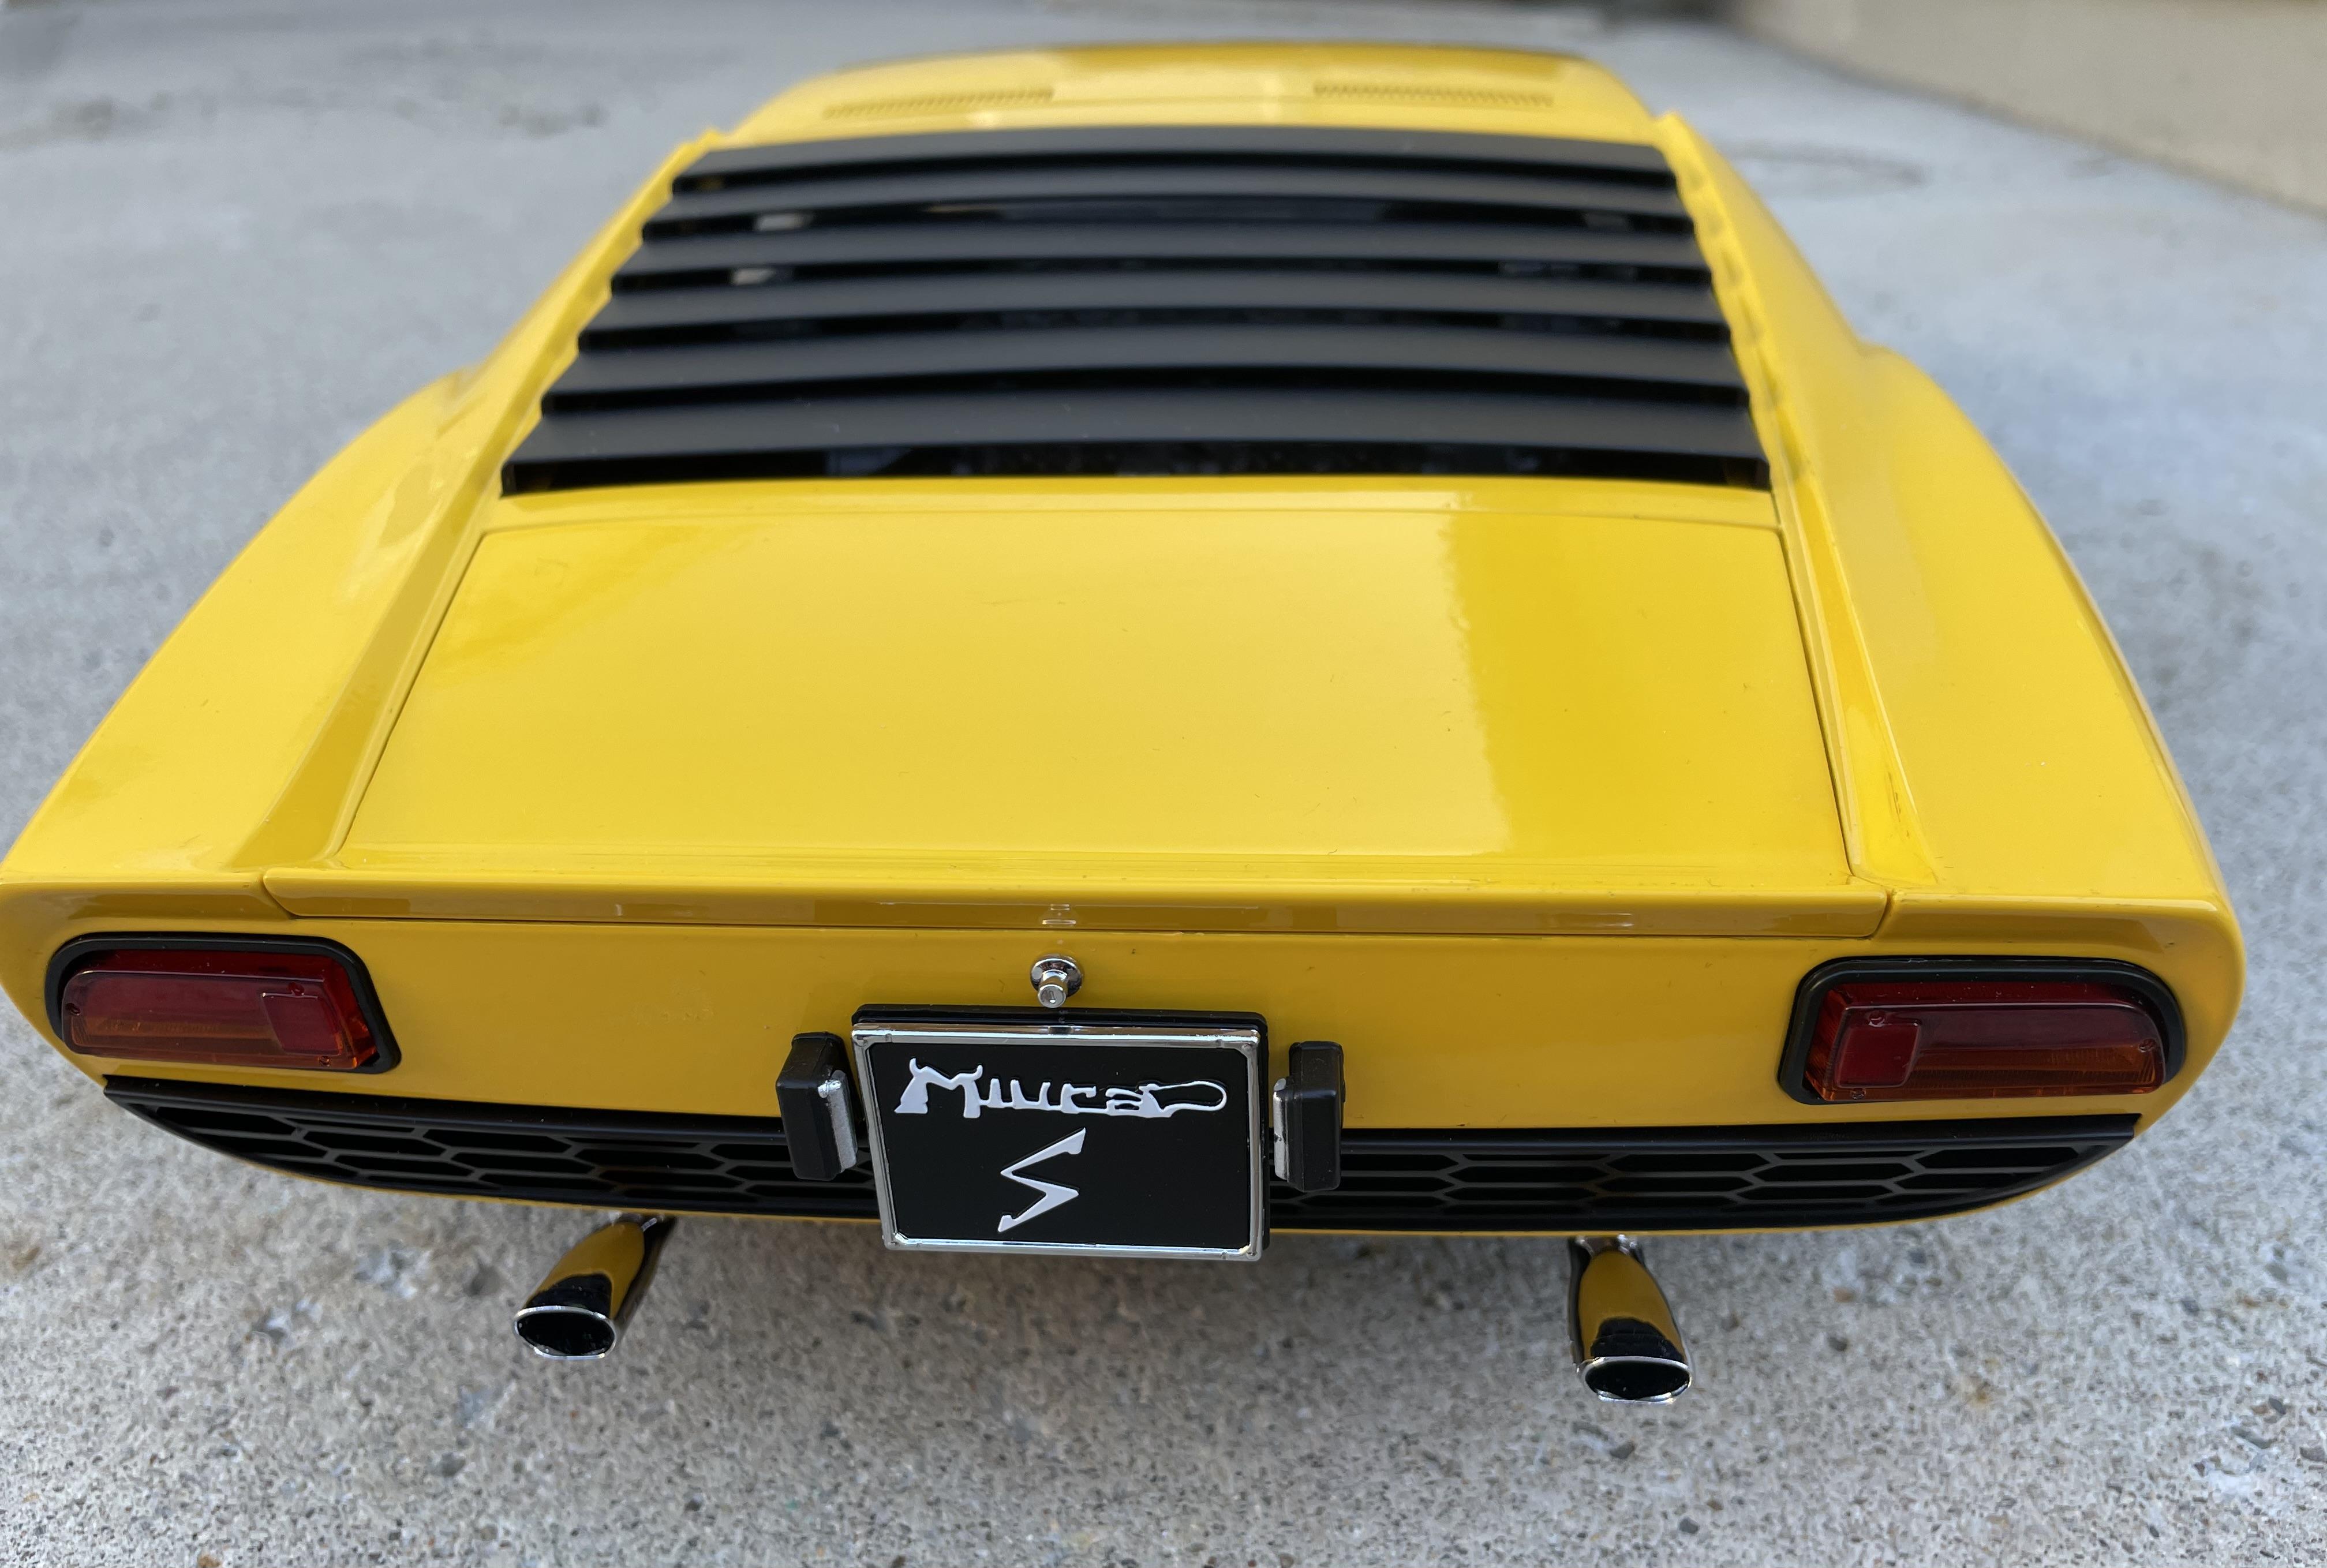
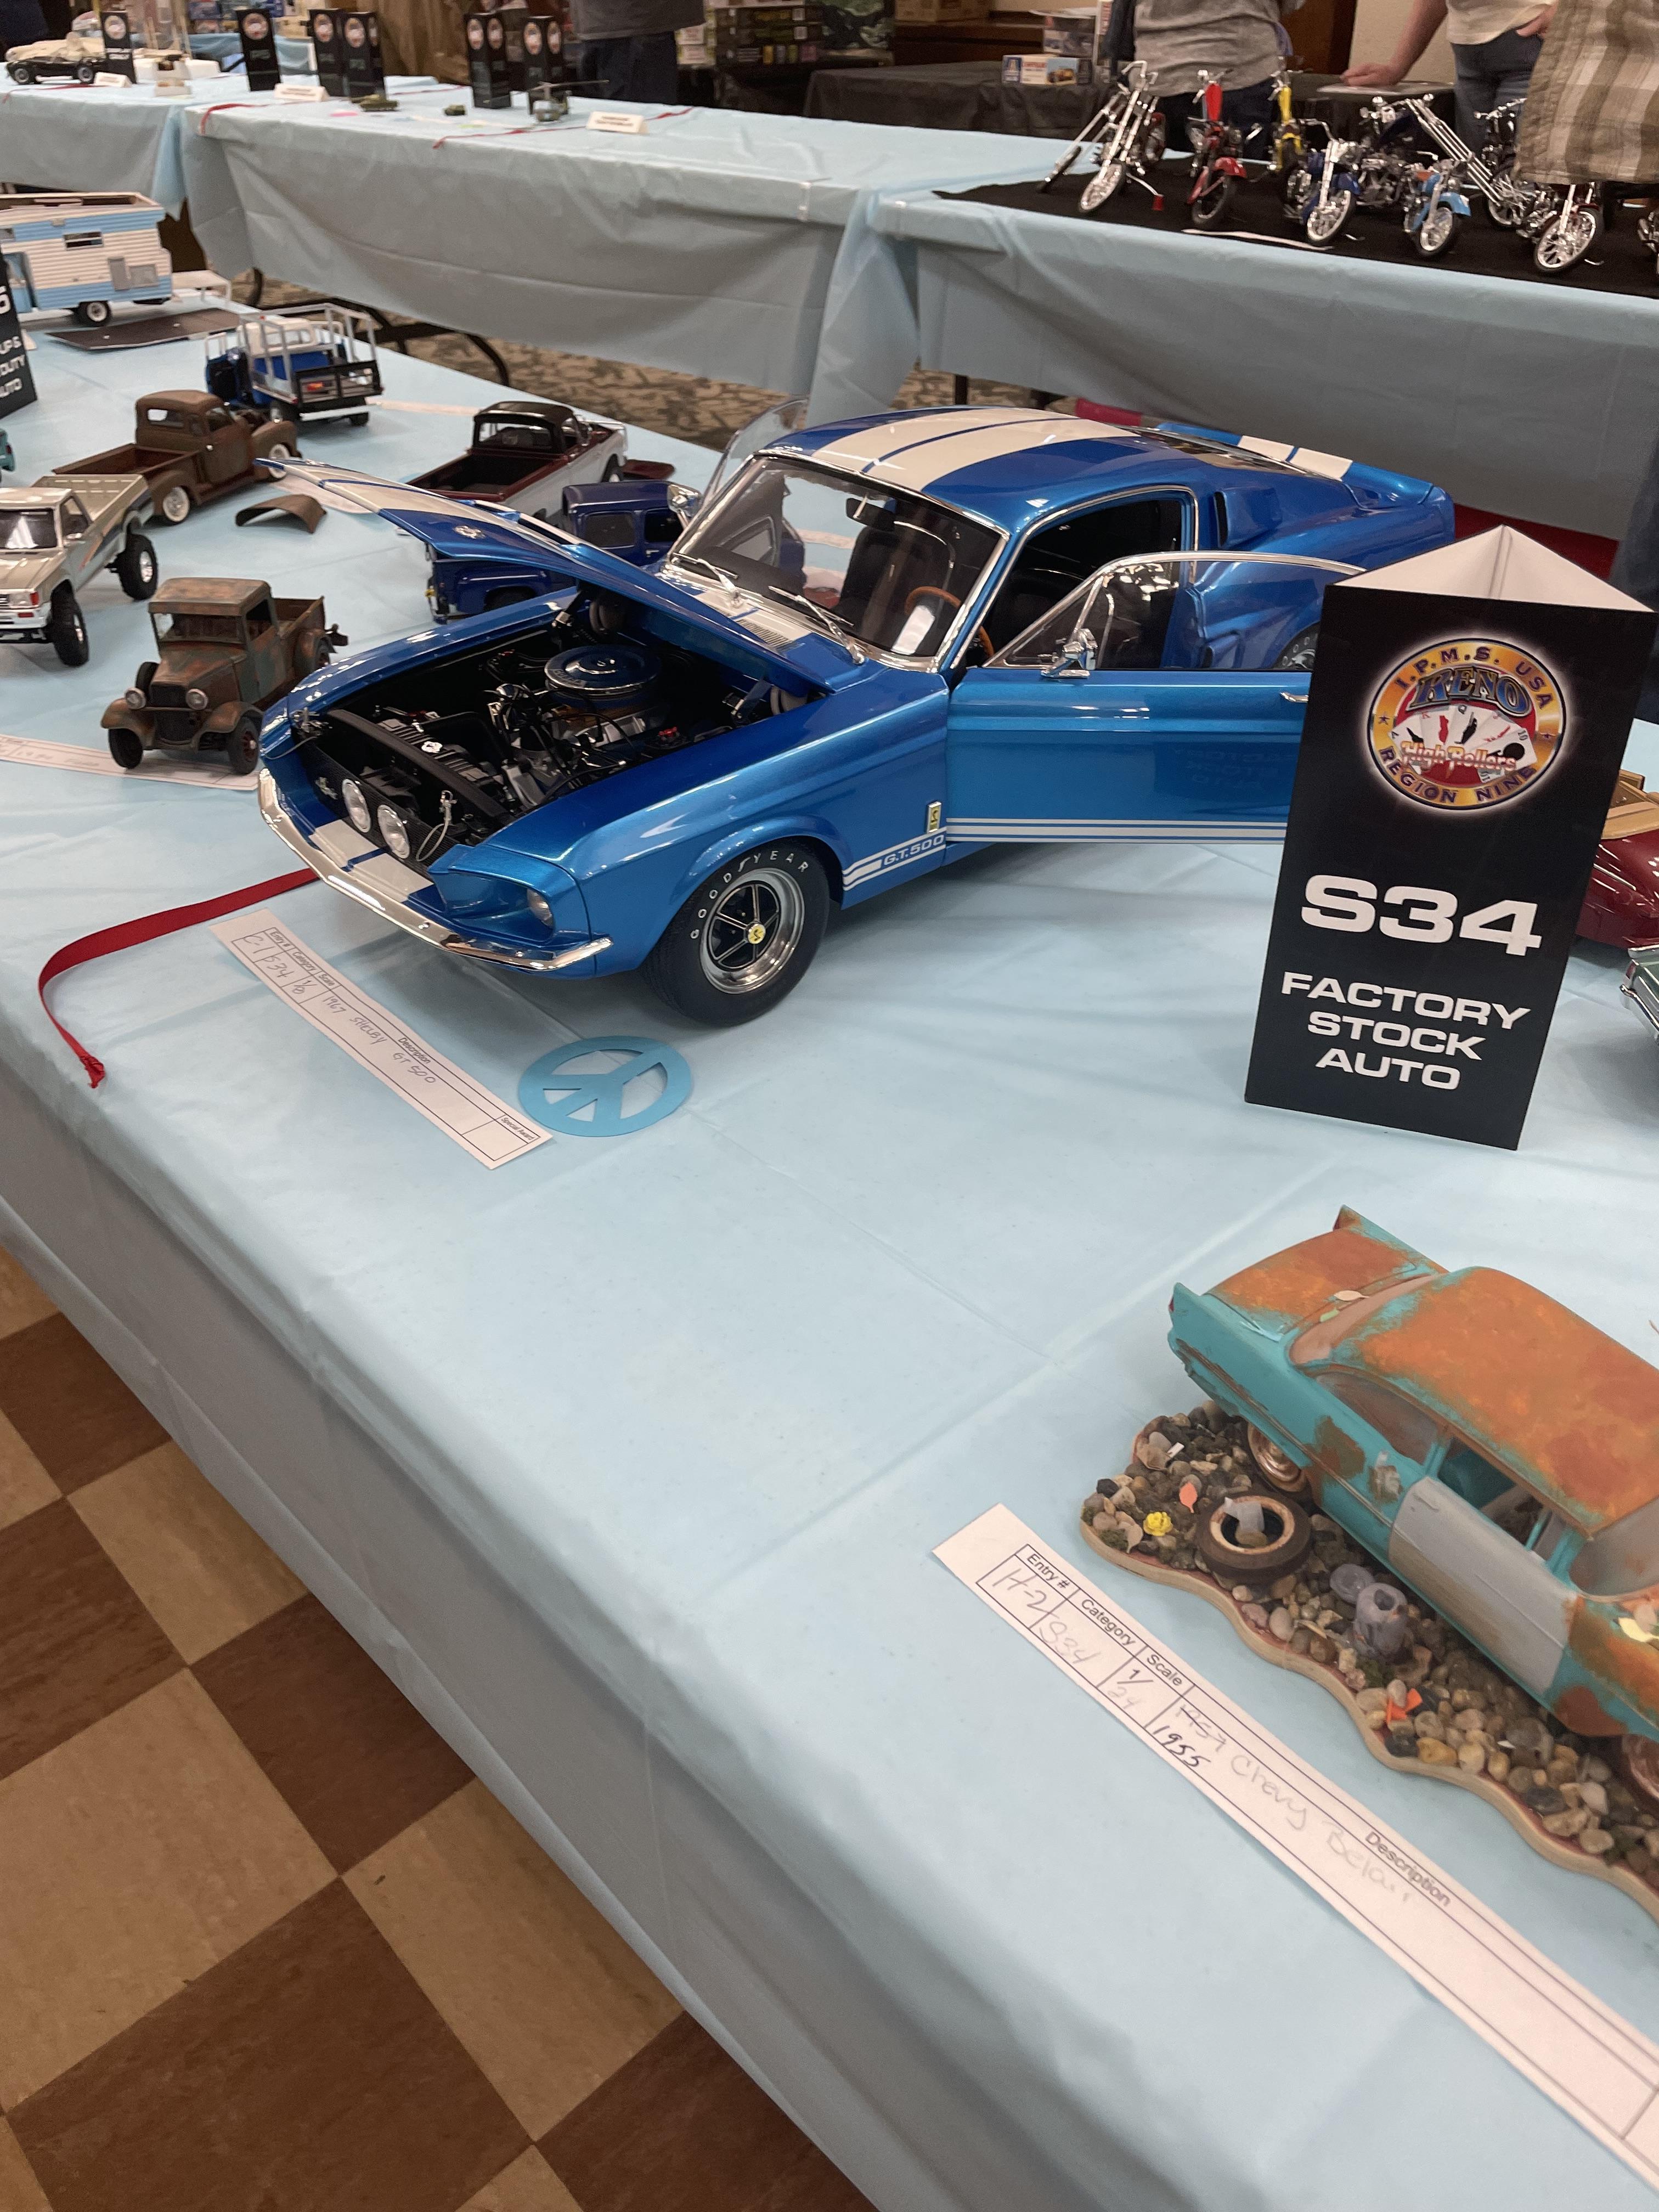
I have a few 1/8 cars built. Here are a few pics the Toyota 2000 GT is 1/10 and the Red Bull f1 is 1/7