
eviltwincustoms
-
Posts
903 -
Joined
-
Last visited
Content Type
Profiles
Forums
Events
Gallery
Everything posted by eviltwincustoms
-
 Looking Good Joe! I am very embarrassed that you are so much further along than I could ever be, you are just plugging right along. I do have a question, since I am not any sort of familiar with racing and building 1:1 cars. On the 4Link bracket on the rear axle. Now is it suppose to be clocked forward to the top slightly tip forward? Or should it run straight up and down like you have it? I have been calculating mine to clock forward so the rear shocks will mount up to the bottom bracket on the back side of the 4 Link. Is this wrong? Maybe Dave can shed some more light on this as well.
 -
1/16th scale 69 Mustang Funny Car body
eviltwincustoms replied to Magic Photos's topic in WIP: Drag Racing Models
Nice job on the Mustang, it looks really nice. Can't wait to see you get started on these two so see how they turn out. Keep those pictures coming. -
1-8 scale 69 camaro pro mod (mike hill's car)
eviltwincustoms replied to comp1839's topic in WIP: Drag Racing Models
Oh Man.... that is outstanding, I bet you are one happy camper getting that beauty in the mail! Now Dave hurry up and OK that thing, so Tim and Shapeway's can get it up on their site. -
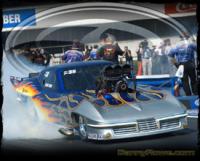
Not sure that I have graduated to the Big Boyz section or not... still wearing my training pants. lol Here is my next Pro Mod project, decided to play with the body a little bit since I am waiting on parts and getting frustrated with my block on my other project. Started with two of the 1/16th 1963 Corvette's and started hacking away... So far, I have been able to cut Horizontally down the side of the car to widen the lower section of the car and in the process of adding in 7/8" scaled up roughly 14" to the wheelbase to get 112". Once that is completed I will move to the nose of the car to drop it and lengthen it, so I come up with the 45" from center hub to the furthest point on the front end. Once I get that completed... hopefully tomorrow, I can begin to work on the rear section to fit those big meats out back.
-
Breaking NEWS Model King/Revell-1/16 and YOU!
eviltwincustoms replied to Decal Art's topic in WIP: Drag Racing Models
Very Cool, makes me want to buy one! -
The Pro Mod body shop is open
eviltwincustoms replied to 1320wayne's topic in WIP: Drag Racing Models
That is a cool start to a long journey of body work to come. Looks like the body shop guy is making sure the rear tub is squared off to the ground and it has that right stance! -
Those look really nice Jim. Now all I have to do is get some candy red and throw my decals on it and will be set! How did the Amazon order go, was it the right stuff you were looking for? Being 60" long I was wondering.
-
Ah... Ha! Watson, my dear I think I got it!, say's Sherlock Holmes. Thanks for drawing me that picture because I am slow some times... especially when it is cold outside. My Brain slows way down, almost wants to Hibernate!
-
Right I knew you were building the specific 1:1. I was just saying as a side note. So the interior skins were attached to the actual door? When you say skins most models dont have the door tub interior attached to the doors, it would have been an interior tub. Or did this car come with opening doors and they were already built out?
-
'69 Chevrolet Nova F/Stock *Finished*
eviltwincustoms replied to W-409's topic in WIP: Drag Racing Models
Niko in the F/Stock class do they use Sub Frame connectors? I think this is what he is trying to ask why you didnt show these in your build. -
Wow Dave that Paint Job is a Million Bucks! Outstanding execution on that, and looks like it would be period correct during that era as well.
-
1/16th scale 69 Mustang Funny Car body
eviltwincustoms replied to Magic Photos's topic in WIP: Drag Racing Models
Big difference in the way it looks now nice job. In looking at your build and the "Blue Max" mustang they look very close. Is that a Mach 1 air vent at the top of the quarter on the drivers side? I ask, because I don't see it on the Passengers side, so wasn't sure if that is something you are leaving or not. -
Thanks Charlie for the update. So I have to ask, with your Nut/Bolt set when you pull them off of the black backing are the backs of the PE flat? The reason for asking, is I purchased some Nut/Bolt PE, can't remember who now... but when I went to apply them the backs of the PE had like a raised area. Causing them to not lay flat on my subject matter. Or is there a process one should use to get the PE part off of the back paper backing so this doesn't happen? Still new to the small PE parts that come on this paper backing stuff. I have only dealt with PE on the tin tree sort of thing..
-
Yep looks amazing.... and it can fly now it officially has its wings! That was kinda the reason why I was asking about your doors... sorry to hear you had to mess with that section and now having to touch-up the chassis. Myself I am not a fan of Top Fuel type wings, but it sure looks good on your car!
-
1/16 Scale Army Vega Funny Car - Finished 10/14/2018
eviltwincustoms replied to Mooneyzs's topic in WIP: Drag Racing Models
Man Chris, I am very jealous your chassis looks great! And that brass seat just takes it to that next level with all the details you have. Can't wait to see you get started on the engine again. -
Very cool duster, even looks like that blue has some metal flake in it. I say you have done a very outstanding job on that chassis work.
-
Looking good, nice cuts on the doors. Now did that hard white plastic decided it wasn't going to cooperate and break or did you just reinforce it on the outside so it wouldn't break due to handling it? Because that looks like a very wise move to me.
-
'41 Willys Pickup Gasser circa late '60s - Finished
eviltwincustoms replied to gasser59's topic in WIP: Drag Racing Models
Thanks Brad, I needed a laugh at the whole "Captain Obvious" thing this morning. I hear you about running out of these darn little things.... having to purchase more and then the waiting part just kills you. -
'41 Willys Pickup Gasser circa late '60s - Finished
eviltwincustoms replied to gasser59's topic in WIP: Drag Racing Models
Great Job with the moving parts very nice ingenuity you got going on... Ok, so I have to ask, and maybe this is obvious for others. Me being captain obvious, I just have to ask. LOL you bought SS rod from RB motion, why didnt you purchase the Rod Ends and some scale hardware and washers? This way the turning functionality would be butter smooth and not catch when it rotates due to the bent wire. -
Looks good, subtle yet understated, and the BMF will really set it off! The Yellow/Brown or black can't tell, hockey stick gives it some needed color. Man, it just screams out GTO JUDGE ORANGE! Black just seems to suck up any and all light.
-
68 Camaro El General Pro Mod (updates 05/06/12)
eviltwincustoms replied to tyrone's topic in WIP: Drag Racing Models
Great Job Tyrone, I am sure this one will be no exception. I see your Ross Gibson Intake fits much better. Mine had issues with the Intake Runners not fitting right, it looked way off even after cleaning up the extra resin from the pour. Oh and you gotta stop on the cars and finish up that 70 Chevy Pickup in the background... I wanna see that with an awesome NOS Ross Gibson engine as well! -
I have to agree with Chris, this is a really nice build. I bet that paint job with the Fuscia flake job really sparkles in the direct sunlight!
-
I could be wrong, but if you are going to go with Steel Rotors you may want to take that flange off of the Hub. I don't know of any steel rotors that use a flange mount up, they would be more of a 5, 7 or 8 bolt set up. They would be more like how Chris has his on his Vega build, since you have a lathe you can turn that flange off pretty easy.
-
Sorry Joe, I didn't reply sooner on your question. I am using .082 SS Tubing that I had from my Slot Car days... even have some .072 SS Tubing that is just a tad smaller.
-
1-8 scale 69 camaro pro mod (mike hill's car)
eviltwincustoms replied to comp1839's topic in WIP: Drag Racing Models
Thanks Tim, nothing really to clear up because you said this once before. I miss spoke and meant Shapeway's, and was specifically told by one of the employee's that the 3D printer was down and this was what caused my parts to take longer than expected. Dave was saying he was excited and like all of us, the wait is very difficult knowing what will be coming in the mail from TDR/Shapeway's. I was just mearly stating what happened to my order based on what conversations took place between myself and the Shapeway's employee. I was just throwing it out there that, due to what was provided to me, things may take a bit longer than the regular shipping time frames.