Ace-Garageguy
-
Posts
39,253 -
Joined
-
Last visited
Content Type
Profiles
Forums
Events
Gallery
Everything posted by Ace-Garageguy
-
"Follower" can be a synonym for "acolyte" or "minion" or "lackey" or "henchman".
-
 Great looking model. Lotsa work, and worth it.
 -
Deephole is an unincorporated community located in Lawrence County, Kentucky, according to Wikipedia's boundless knowledge of the arcane.
-
Pond scum is apparently responsible for the early accumulation of oxygen in our atmosphere, among other accomplishments, and hasn't really evolved all that much.
-
MV products headlights.....
Ace-Garageguy replied to Allan31's topic in Model Building Questions and Answers
If you have originals to pull simple molds from, it's easy to make copies from clear UV-inhibited casting resin. https://www.smooth-on.com/product-line/crystal-clear/ -
Swimsuits for dogs are actually a thing.

-
Roll bar, roll cage material.....
Ace-Garageguy replied to Allan31's topic in Model Building Questions and Answers
-
Roll bar, roll cage material.....
Ace-Garageguy replied to Allan31's topic in Model Building Questions and Answers
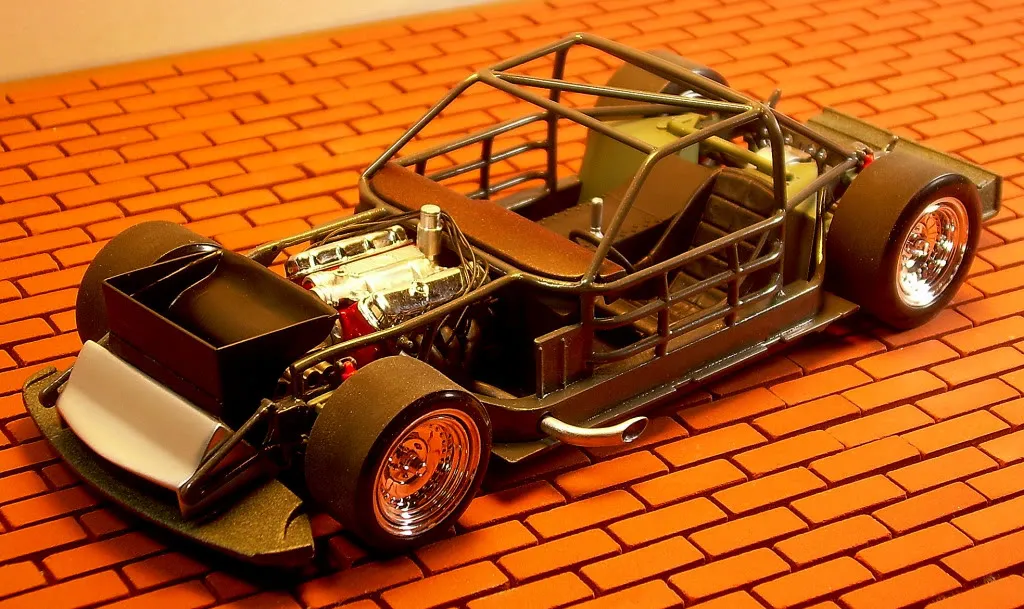
Sorry...can't help you on the Plas-T-Rod. Sounds great. EDIT: Hmmmmm...I wonder if this was the magic stuff: https://www.perigeedirect.com/products/maven-plastics-pvc-gray-flexible-semi-rigid-plastic-welding-rods-coils-reels Plain old Evergreen or Plastruct styrene rod is pretty much the universal choice for 1/24-1/25, though a few more accomplished builders use brass rod and tube, or aluminum Tig welding rod. Smaller diameter styrene rod (up to about .080") will take reasonable radius bends cold without cracking if you work slowly and carefully, but not the larger rod. It also tends to spring back, so some form of heat-tempering after bending works best for me. I've developed several methods to make clean small bends in larger rod, mostly using heat at some point in the process. I built this cage for a road-racing Chevelle using styrene rod. Here's some more specific info:
-
Very nice. Sure wish I'd realized what good looking cars those bubbletop Chevys were back in '95.
-
I like it. Lots. Pretty cool.
-
Fire anyone for incompetence and you might find yourself facing a lawsuit.
-
Thanks for the heads-up...looks like somebody already bought it.
-
The Official EBay Discussion Thread
Ace-Garageguy replied to iamsuperdan's topic in General Automotive Talk (Trucks and Cars)
I'm in an endless loop they seem to be incapable of dealing with. Weeks ago I requested a combined-shipping invoice from a seller, following the seller's instructions on the auction pages. No response after repeated requests, and his feedback starting going negative as paid-for items were never shipped. Apparently he's dead or incapacitated, but I'm still getting pinged every day about "AWAITING PAYMENT" Tried every online way to contact the feePay minions, unsuccessfully. Either I get bounced out, get an error message, or some equally frustrating response. The "sale" doesn't show up in the list of options, and if I manually enter the "order numbers" (which can still be found by going from the "purchases" page), I get "no results found". But I'm STILL getting the "AWAITING PAYMENT" messages. I'm impressed. -
I hadn't intended to make a political inference. Since I was a kid in the 1950s and we'd practice duck-and-cover under the desks at school, I've been aware there's always a chance looming in the background...no matter who the major players are. It's not politics. It's reality, and another of the really good reasons to live in the moment as best you can, like every day might be your last, and treat people as you'd wish to be treated.
-
Every morning I watch the news and see nobody's dropped a nuke yet is a good one.
-
Shop til ya drop.
-
Inexpensive solvent based glue
Ace-Garageguy replied to Oldmopars's topic in Tips, Tricks, and Tutorials
That's a little steep. $70 a gallon is more like it. https://www.amazon.com/DIYChemicals-Methyl-Ethyl-Ketone-Gallon/dp/B096SVGMN9 https://diychemicals.com/product/methyl-ethyl-ketone/ -
Trade my non chrome engines for chrome ones.
Ace-Garageguy replied to rssschris's topic in Trading Post
Done deal, everybody happy. -
Good trade with rssschris. Thanks.
-
You'd best avoid dark alleys...
-
"Derivative" is a derisive term applied to creative work that seems to lack originality, and in mathematics, the "derivative" of a function describes the function's instantaneous rate of change at a certain point.
-
"Well, well, well..." she said disapprovingly, tapping her foot, and looking at the latest bag of models I brought home.
-
Right now it's a '60 Buick hardtop annual...but the prices are crazy if you can even find one. Big surprise, eh?
-
Over and over and over and over, some things never change.
-
And speaking of precision lathes and ancient technology...