Search the Community
Showing results for tags 'Lamborghini'.
-
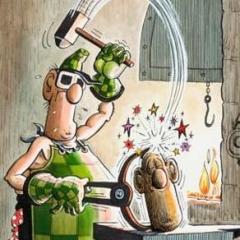
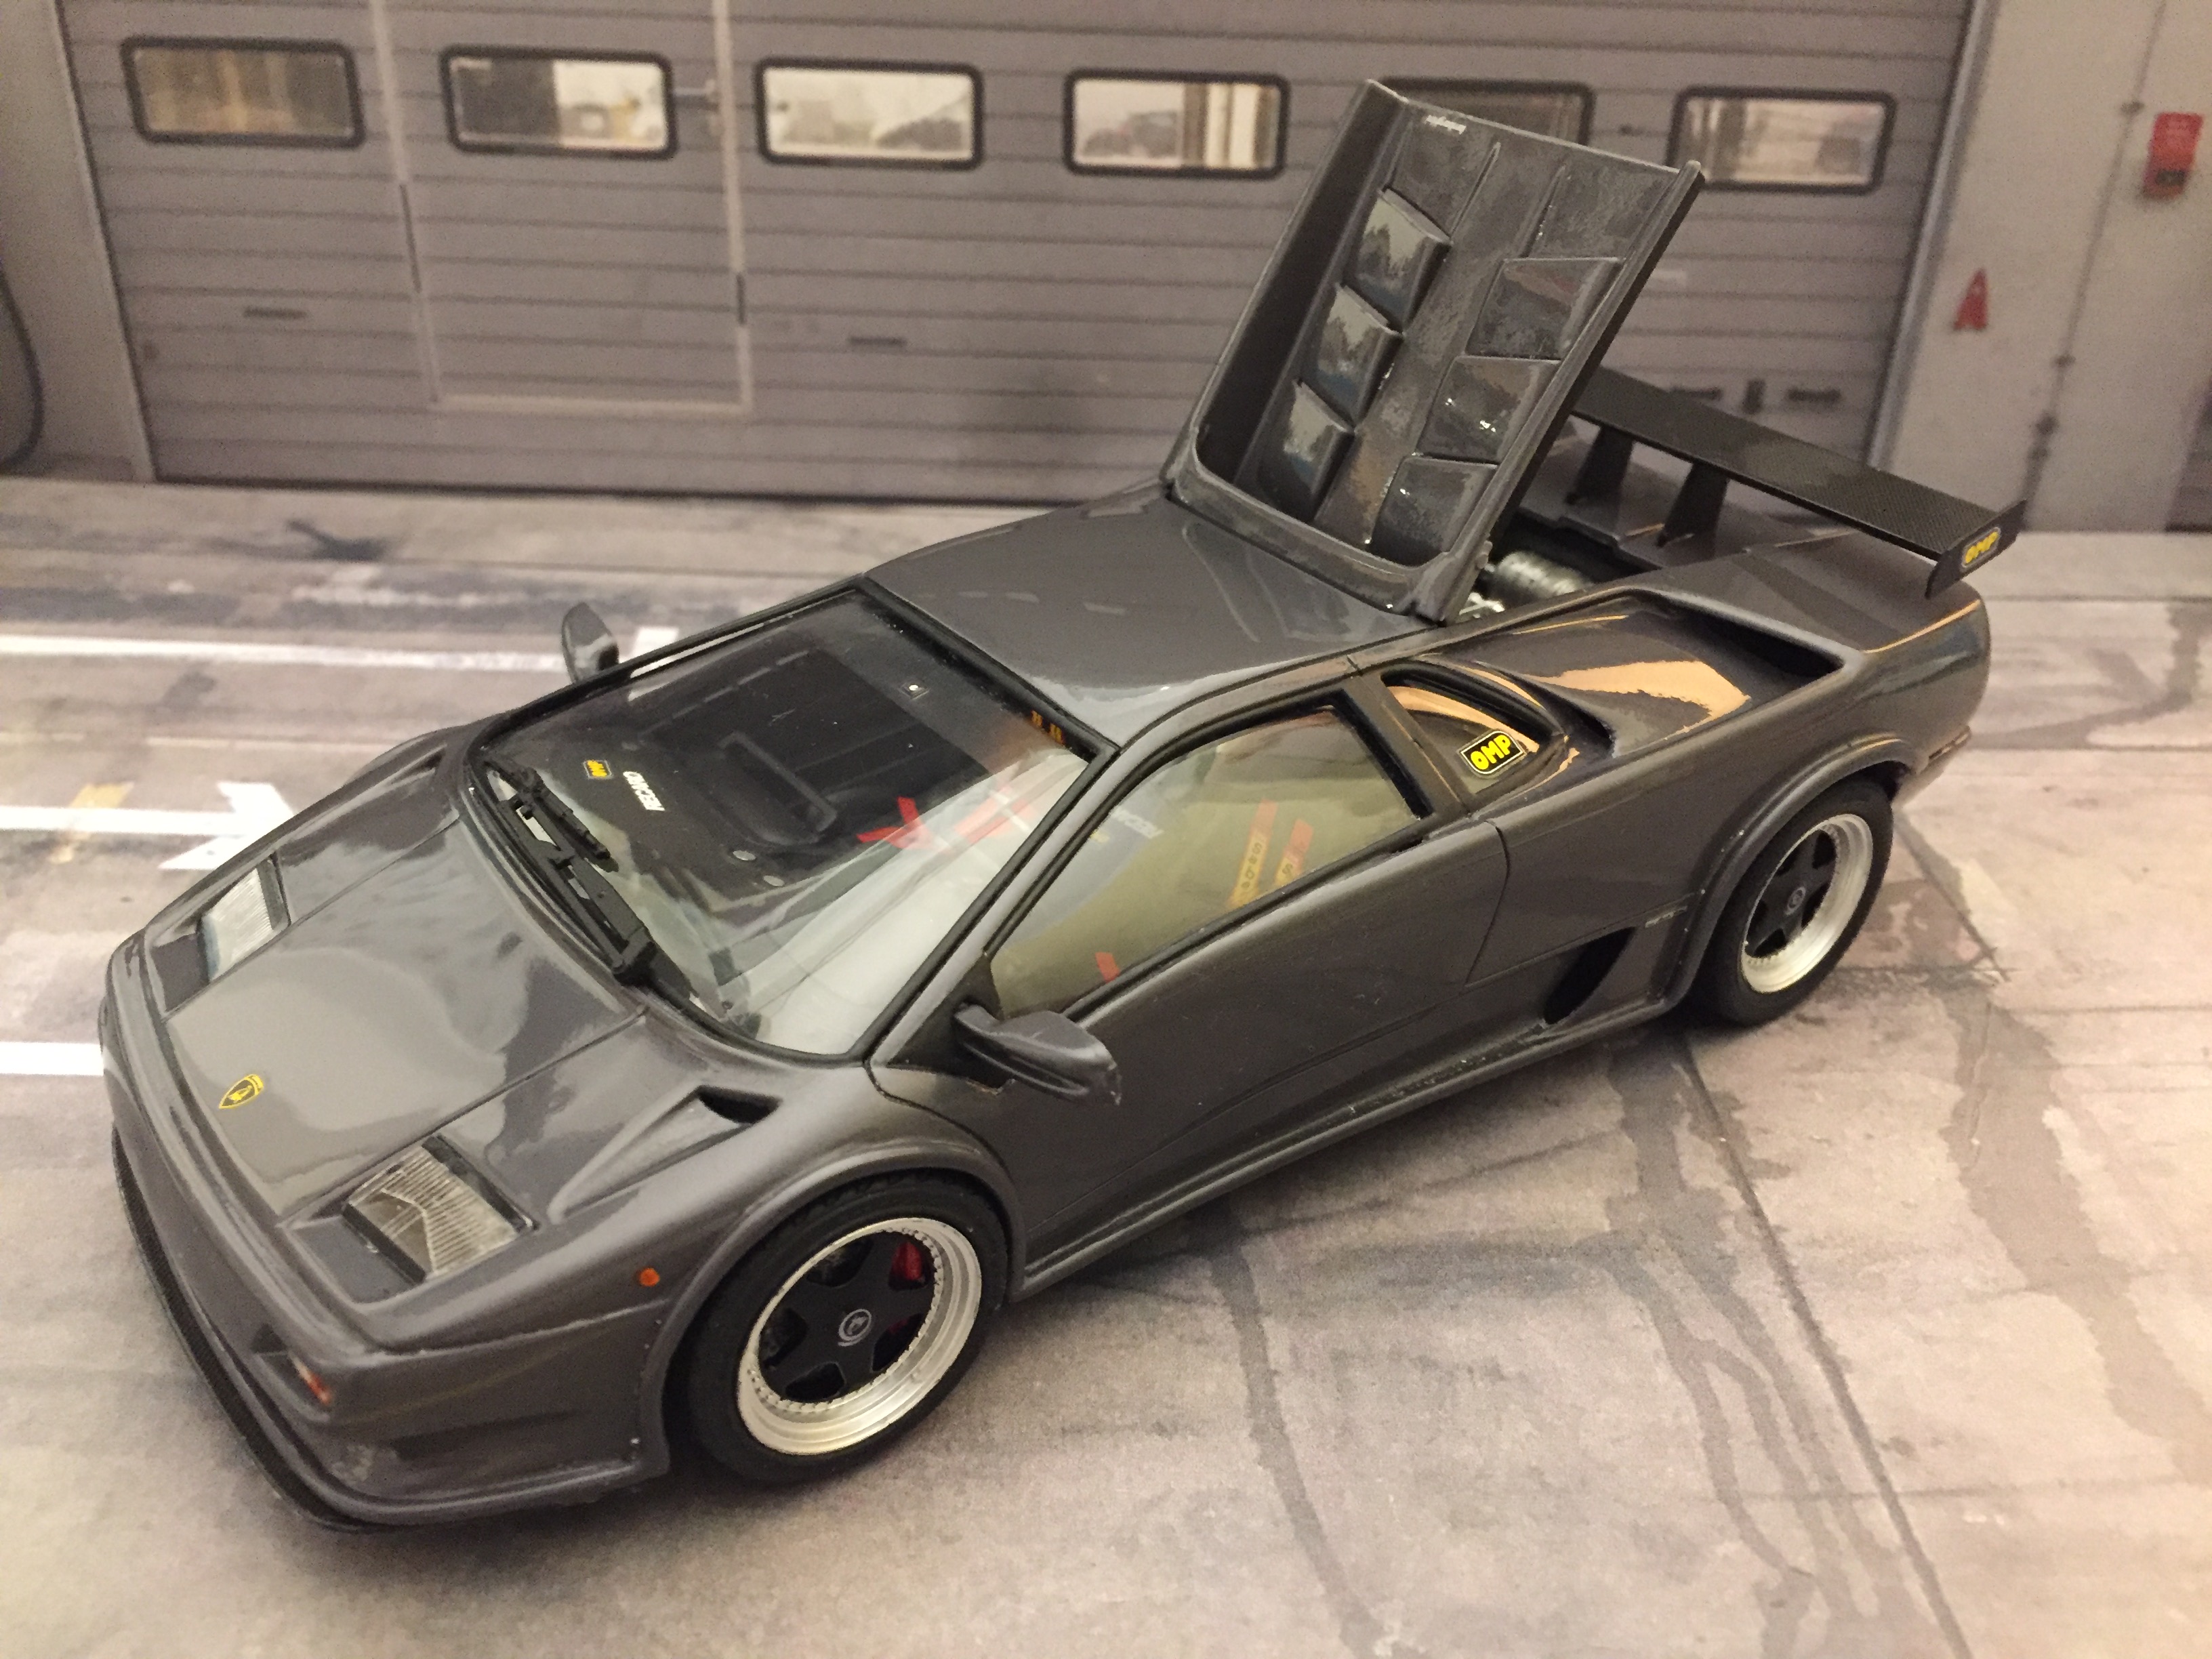
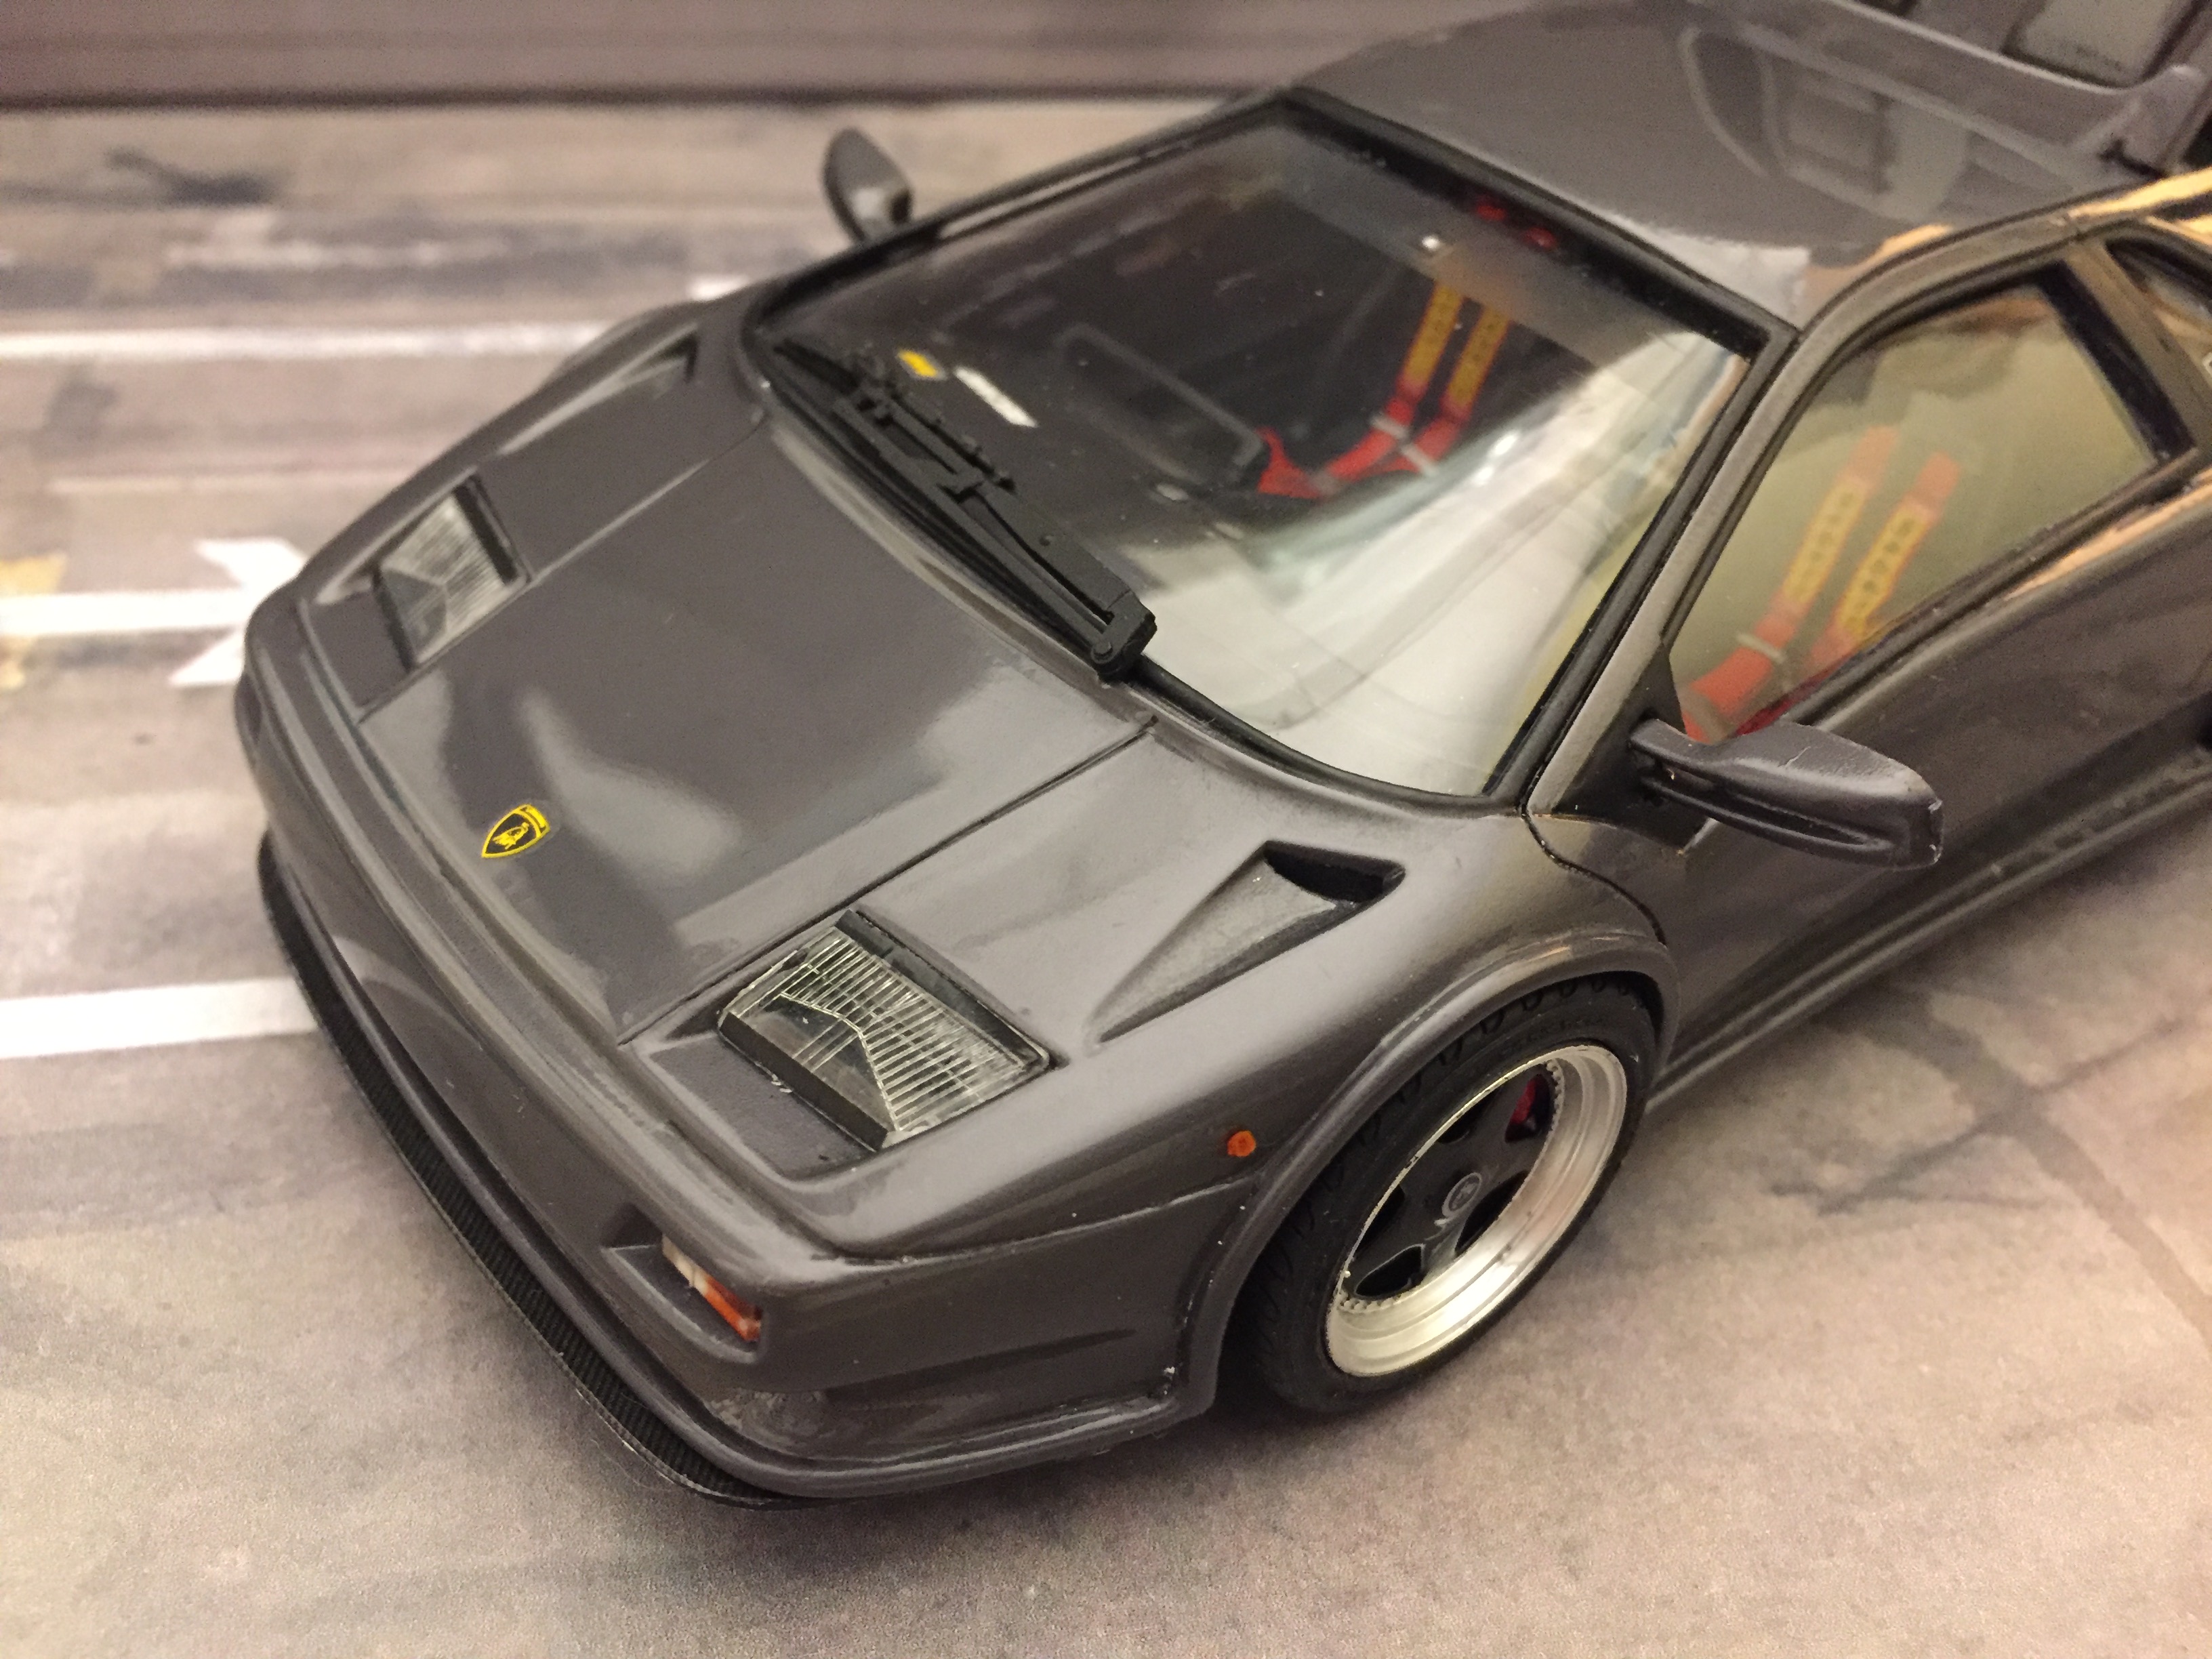
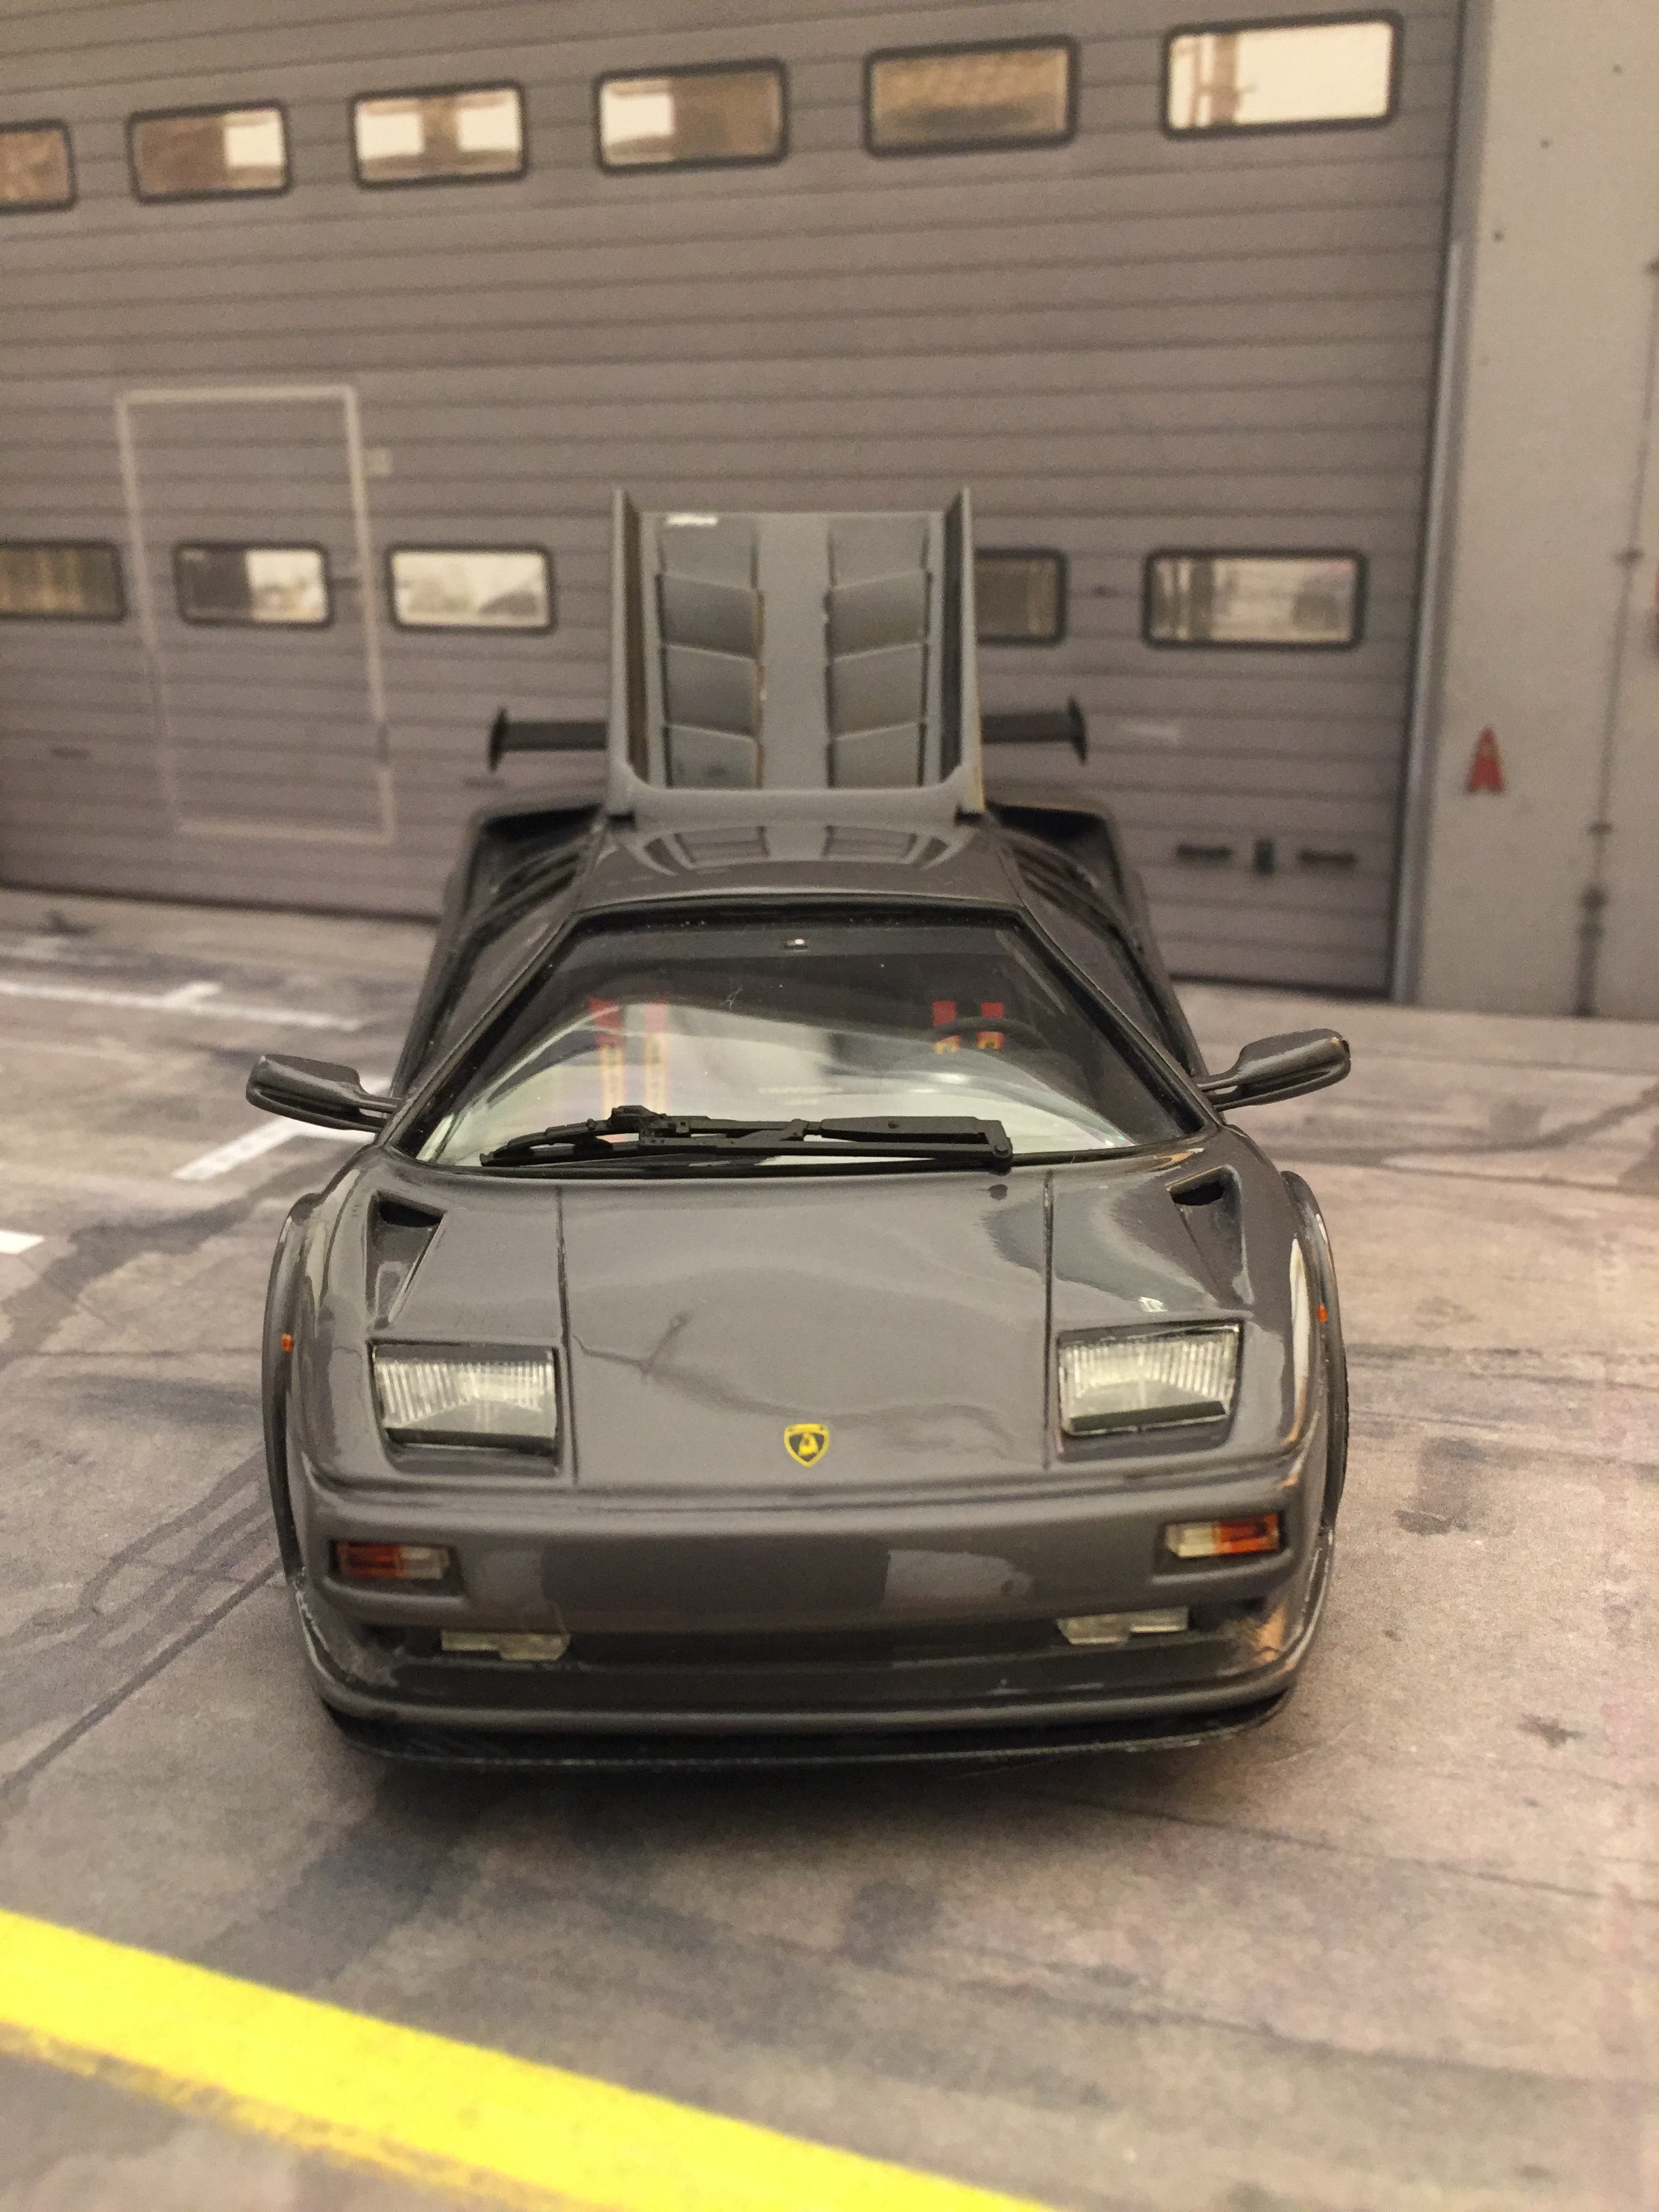
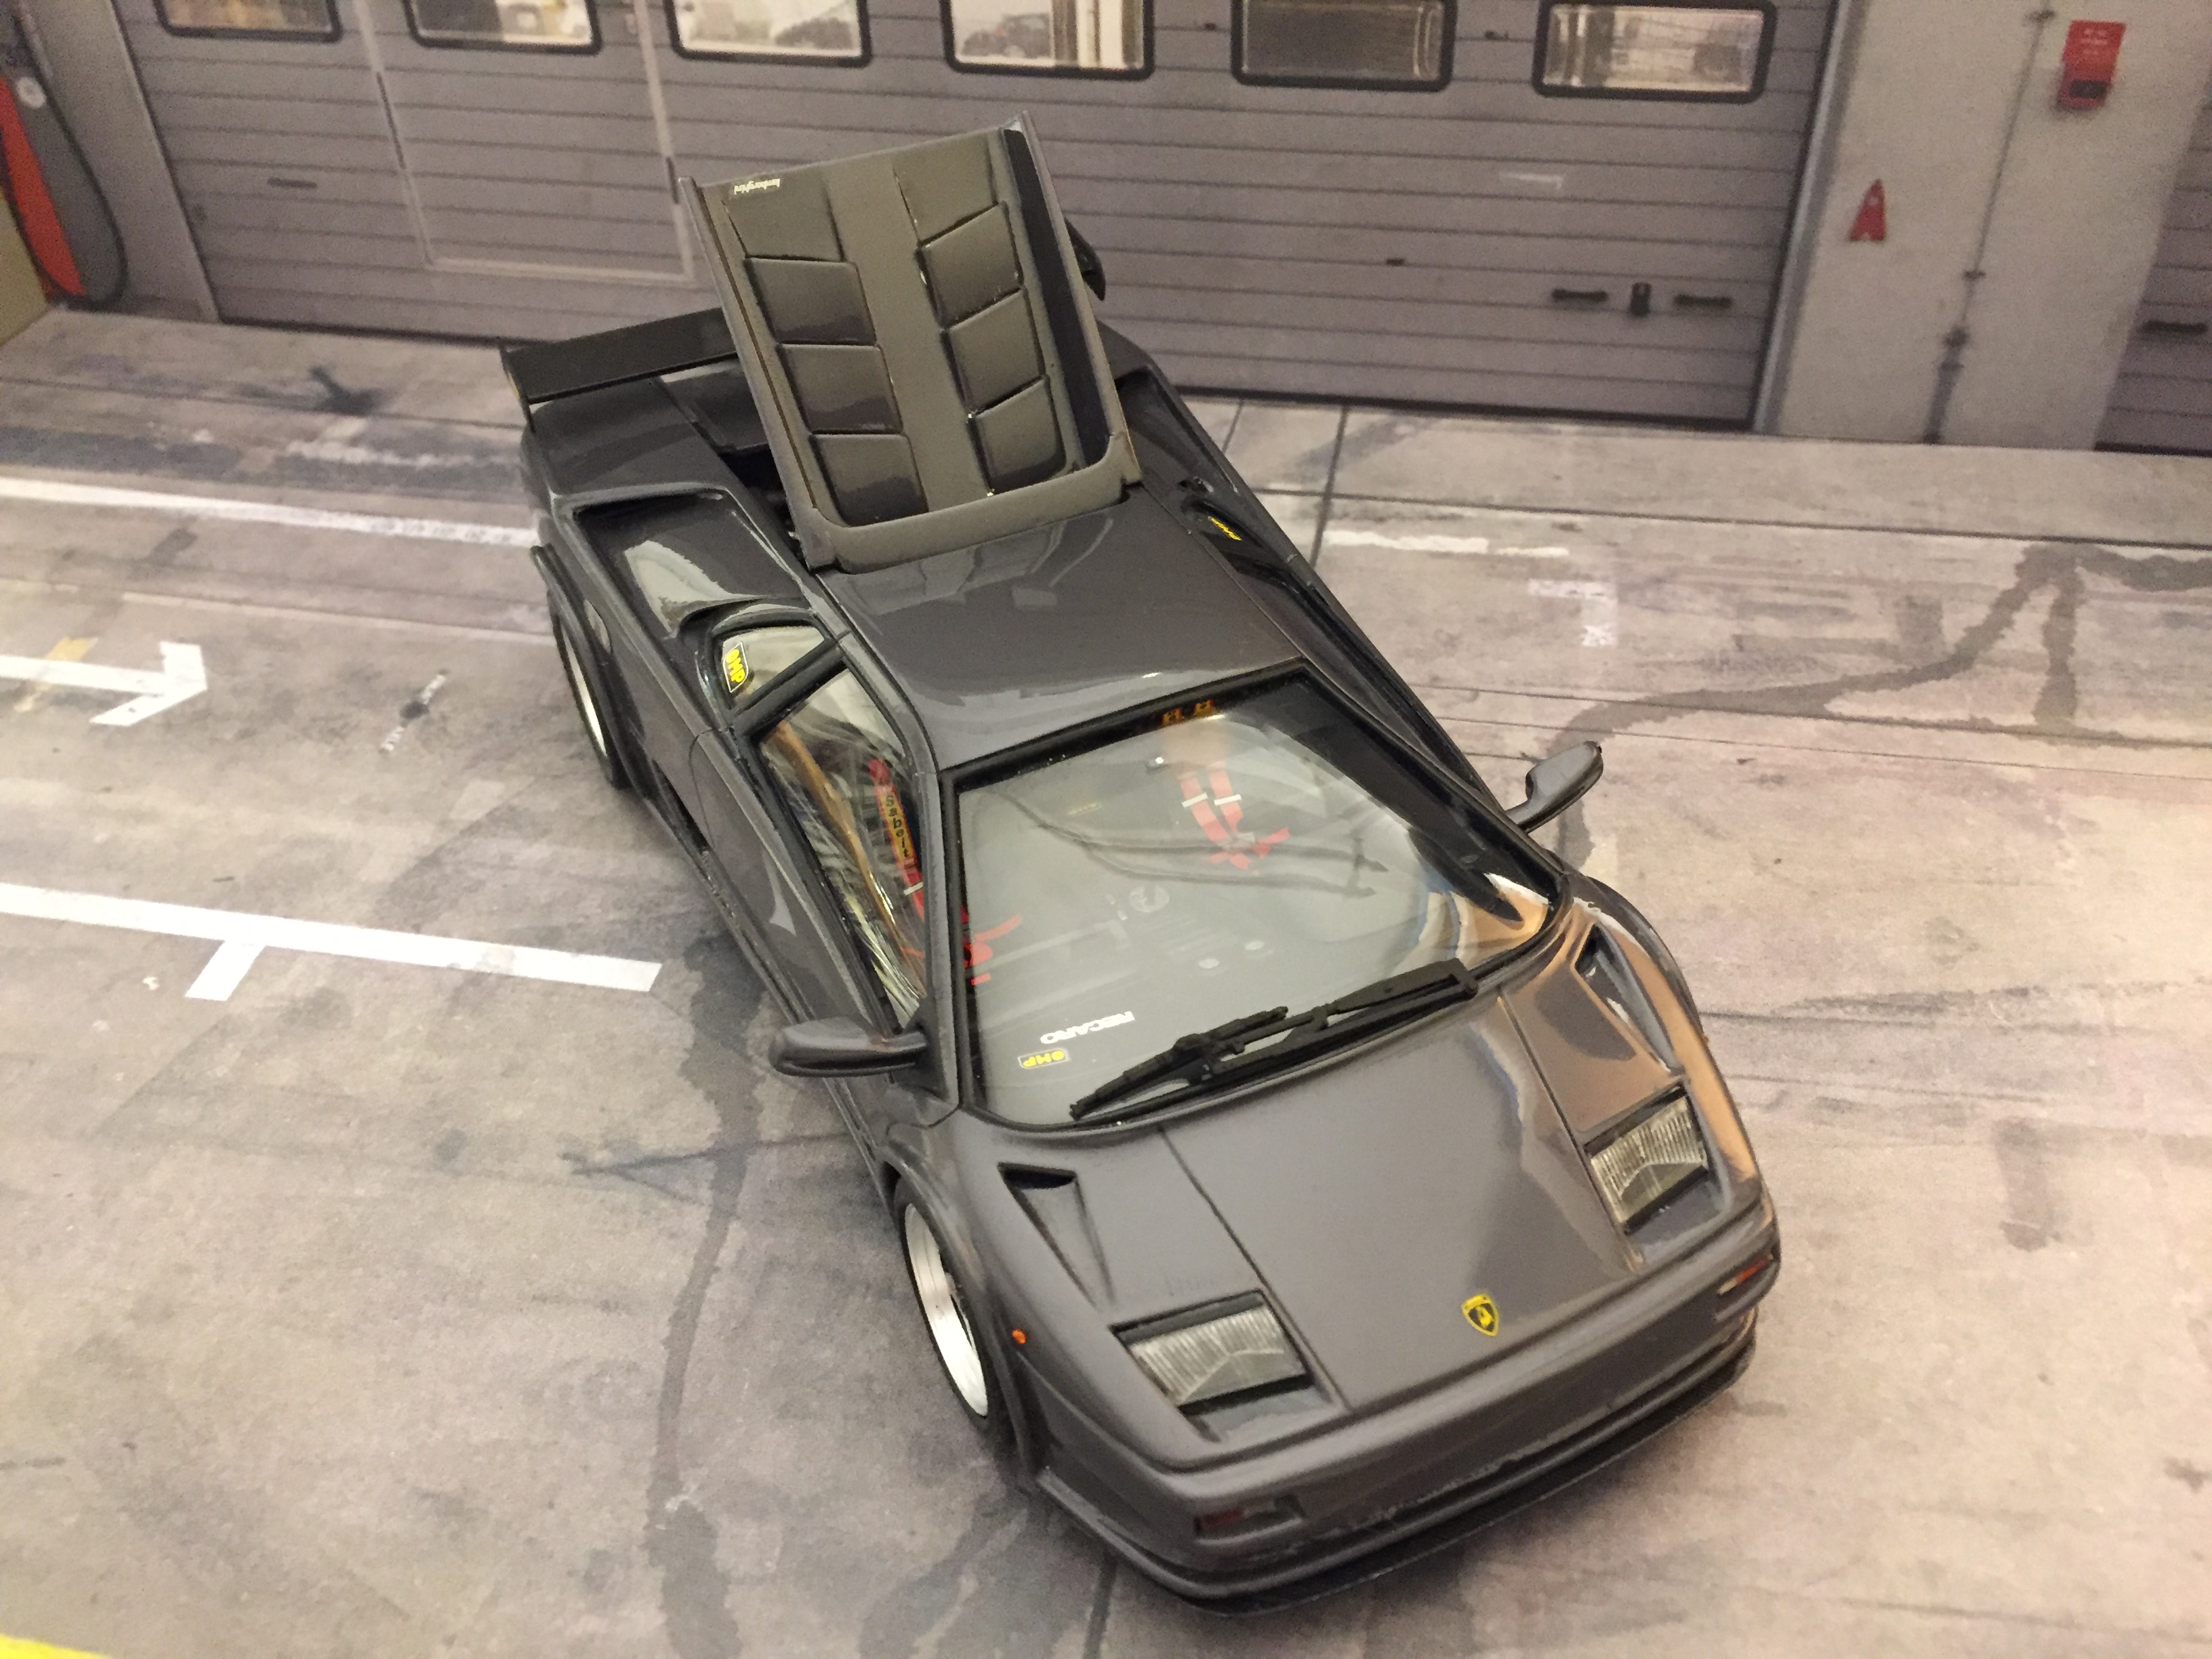
Hi folks, I'd like to show another one I built some time ago. This was actually the first model I finished when I got back into modelling in 2016 after a 20 year hiatus (so please be mercyful on your judgement). I had seen lots of scratch builds on the internet back then and I had the urge to try some of that on my own. As a result, I built the ROG Lambo (this one: https://www.scalemates.com/kits/155383-revell-07351-lamborghini-diablo-sv) and added quite some scratch-building, mostly in order to create some kind of a "raceday look". I used Evergreen parts in order to make an overall widening on the body. Moreover, horrible ROG kit rims and tyres were replaced using a Fujimi set of OZ Futura 18" rims and wider tyres from the spare parts box. Styrene sheets and CF decals were used in order to make a front splitter and a rear wing. Wire end ferrules have been used to create an exhaust system looking similar to that of the Diablo GT (the Aoshima Diablo GT kit hadn't been released yet at the time). Metal mesh has been used to replace the plastic in the rear engine cooler. The cover of the quick filling system is a PE part from Scale Production, just like the seat belts and several "racing" decals used. Painting has been done using ZP Graphite Grey and 1k clear, the latter being quite a disappointing product. Hope you like it anyway!

-
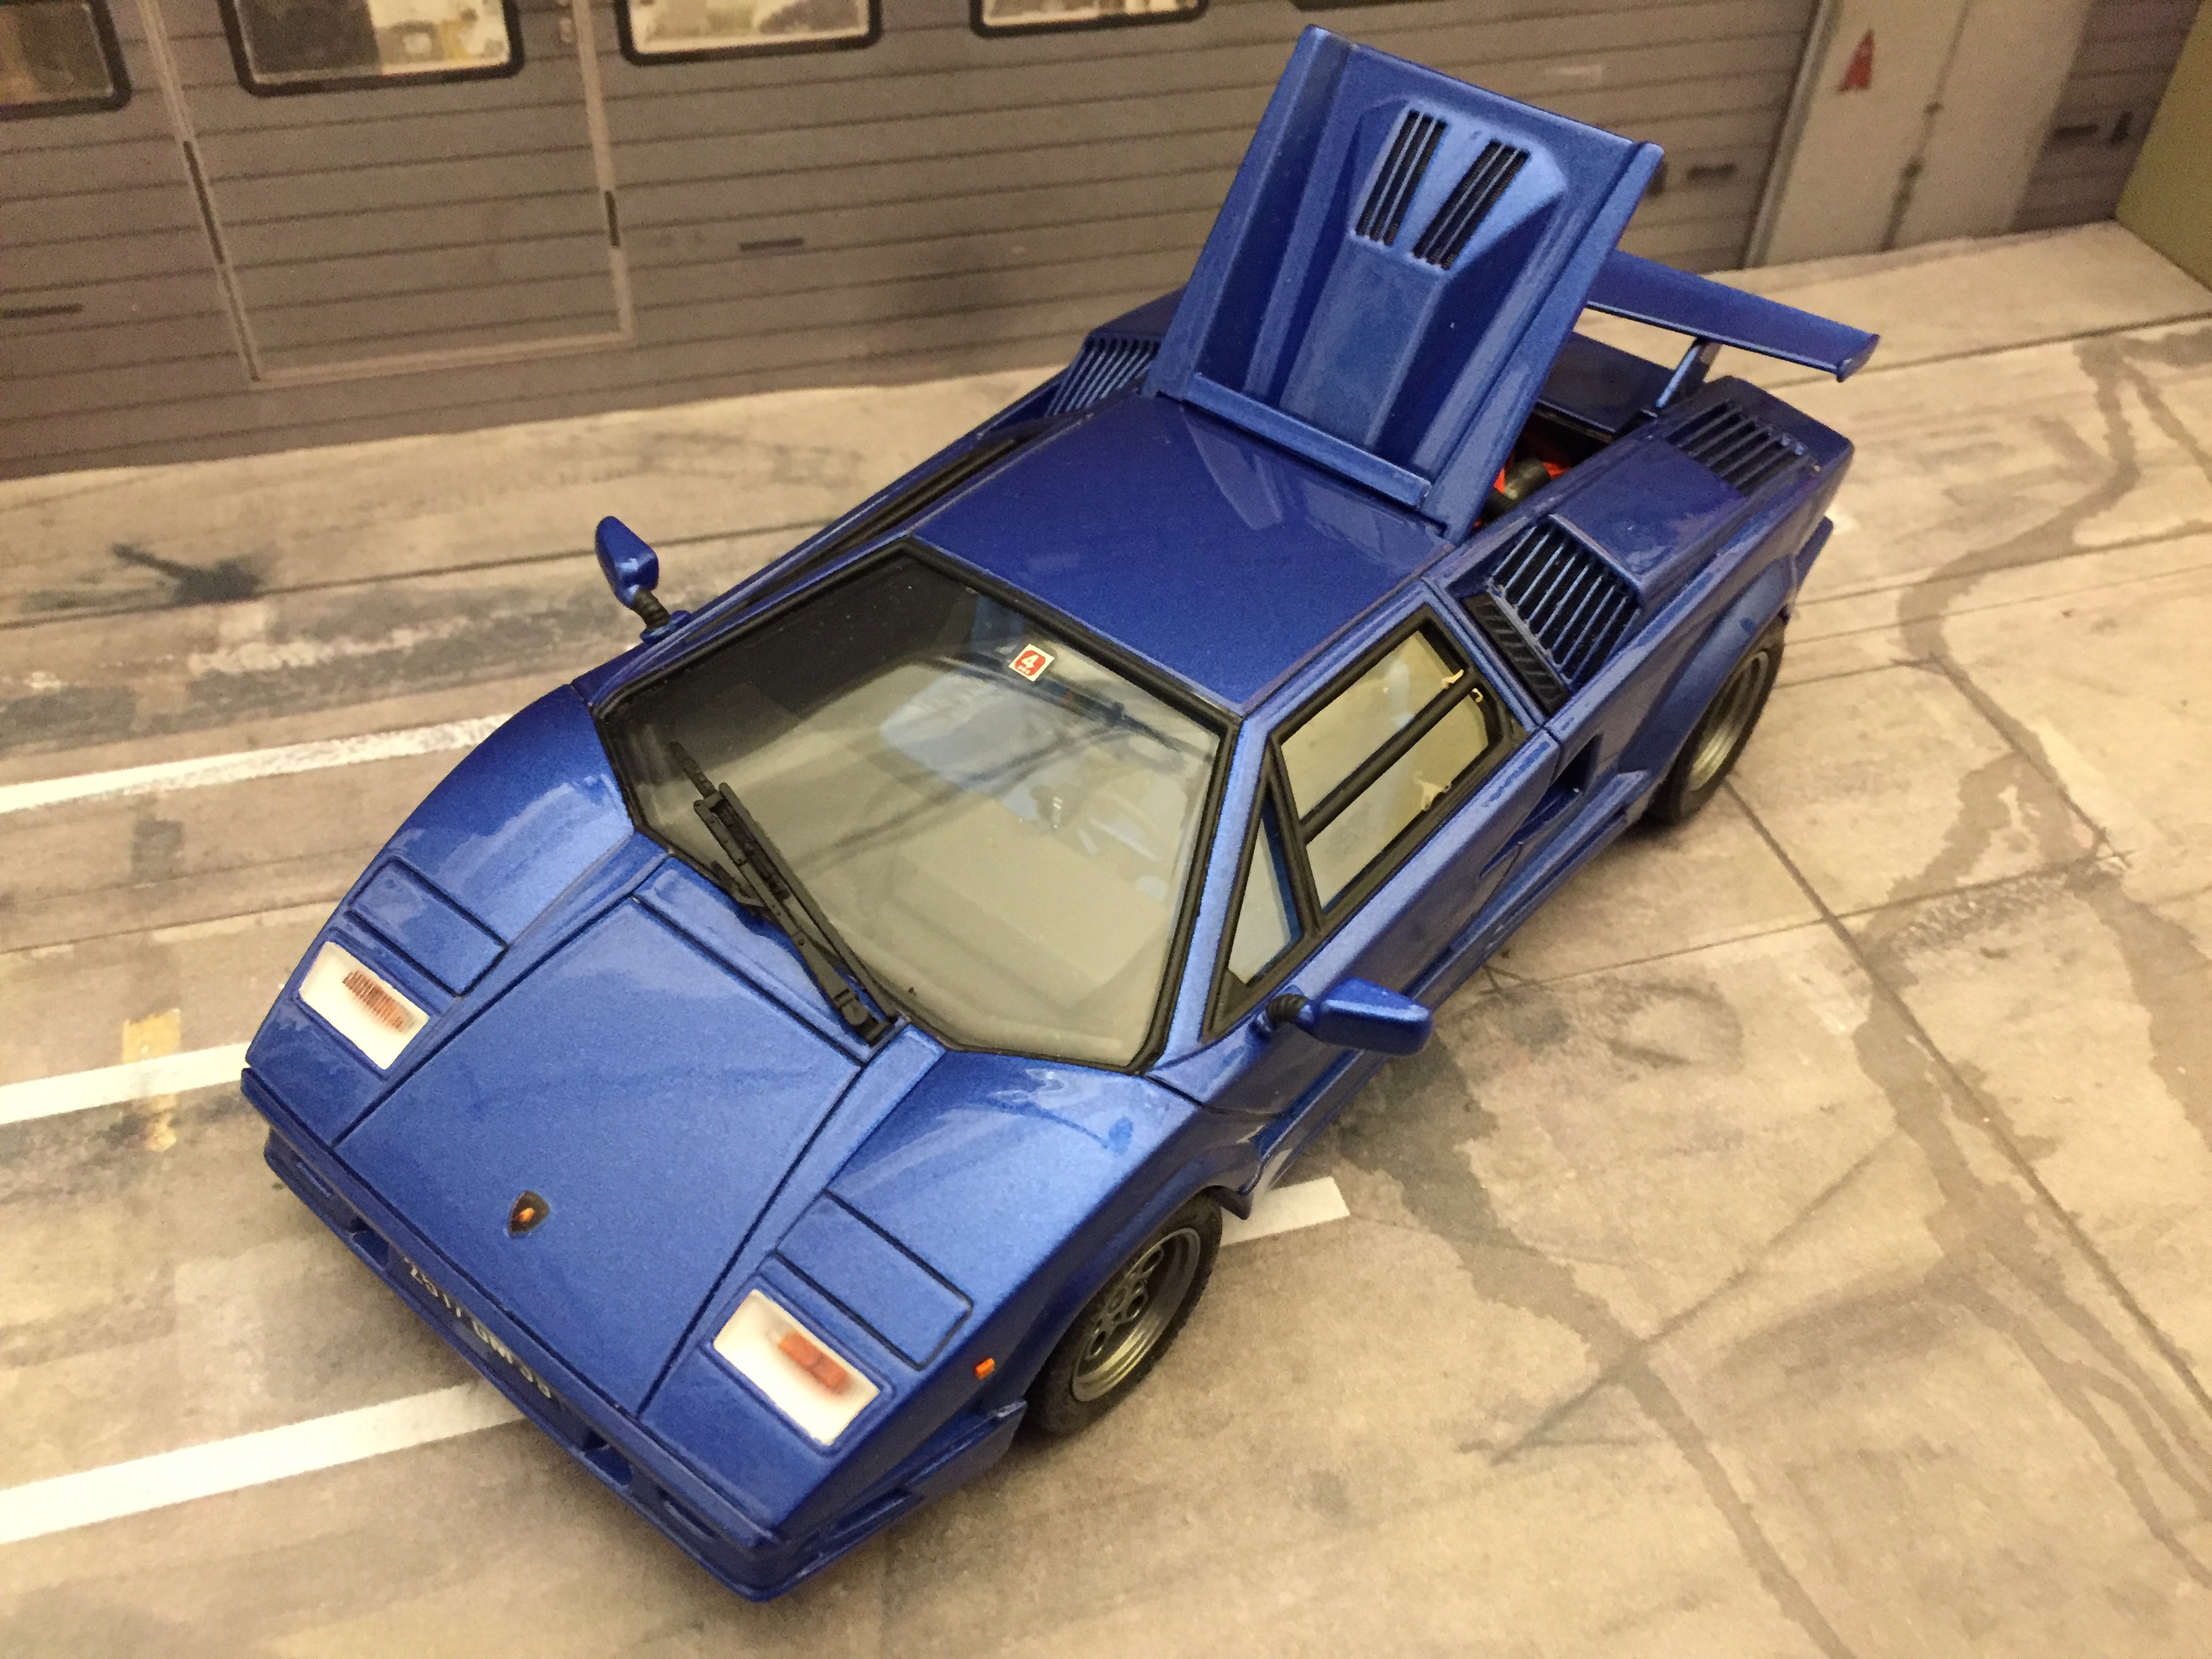
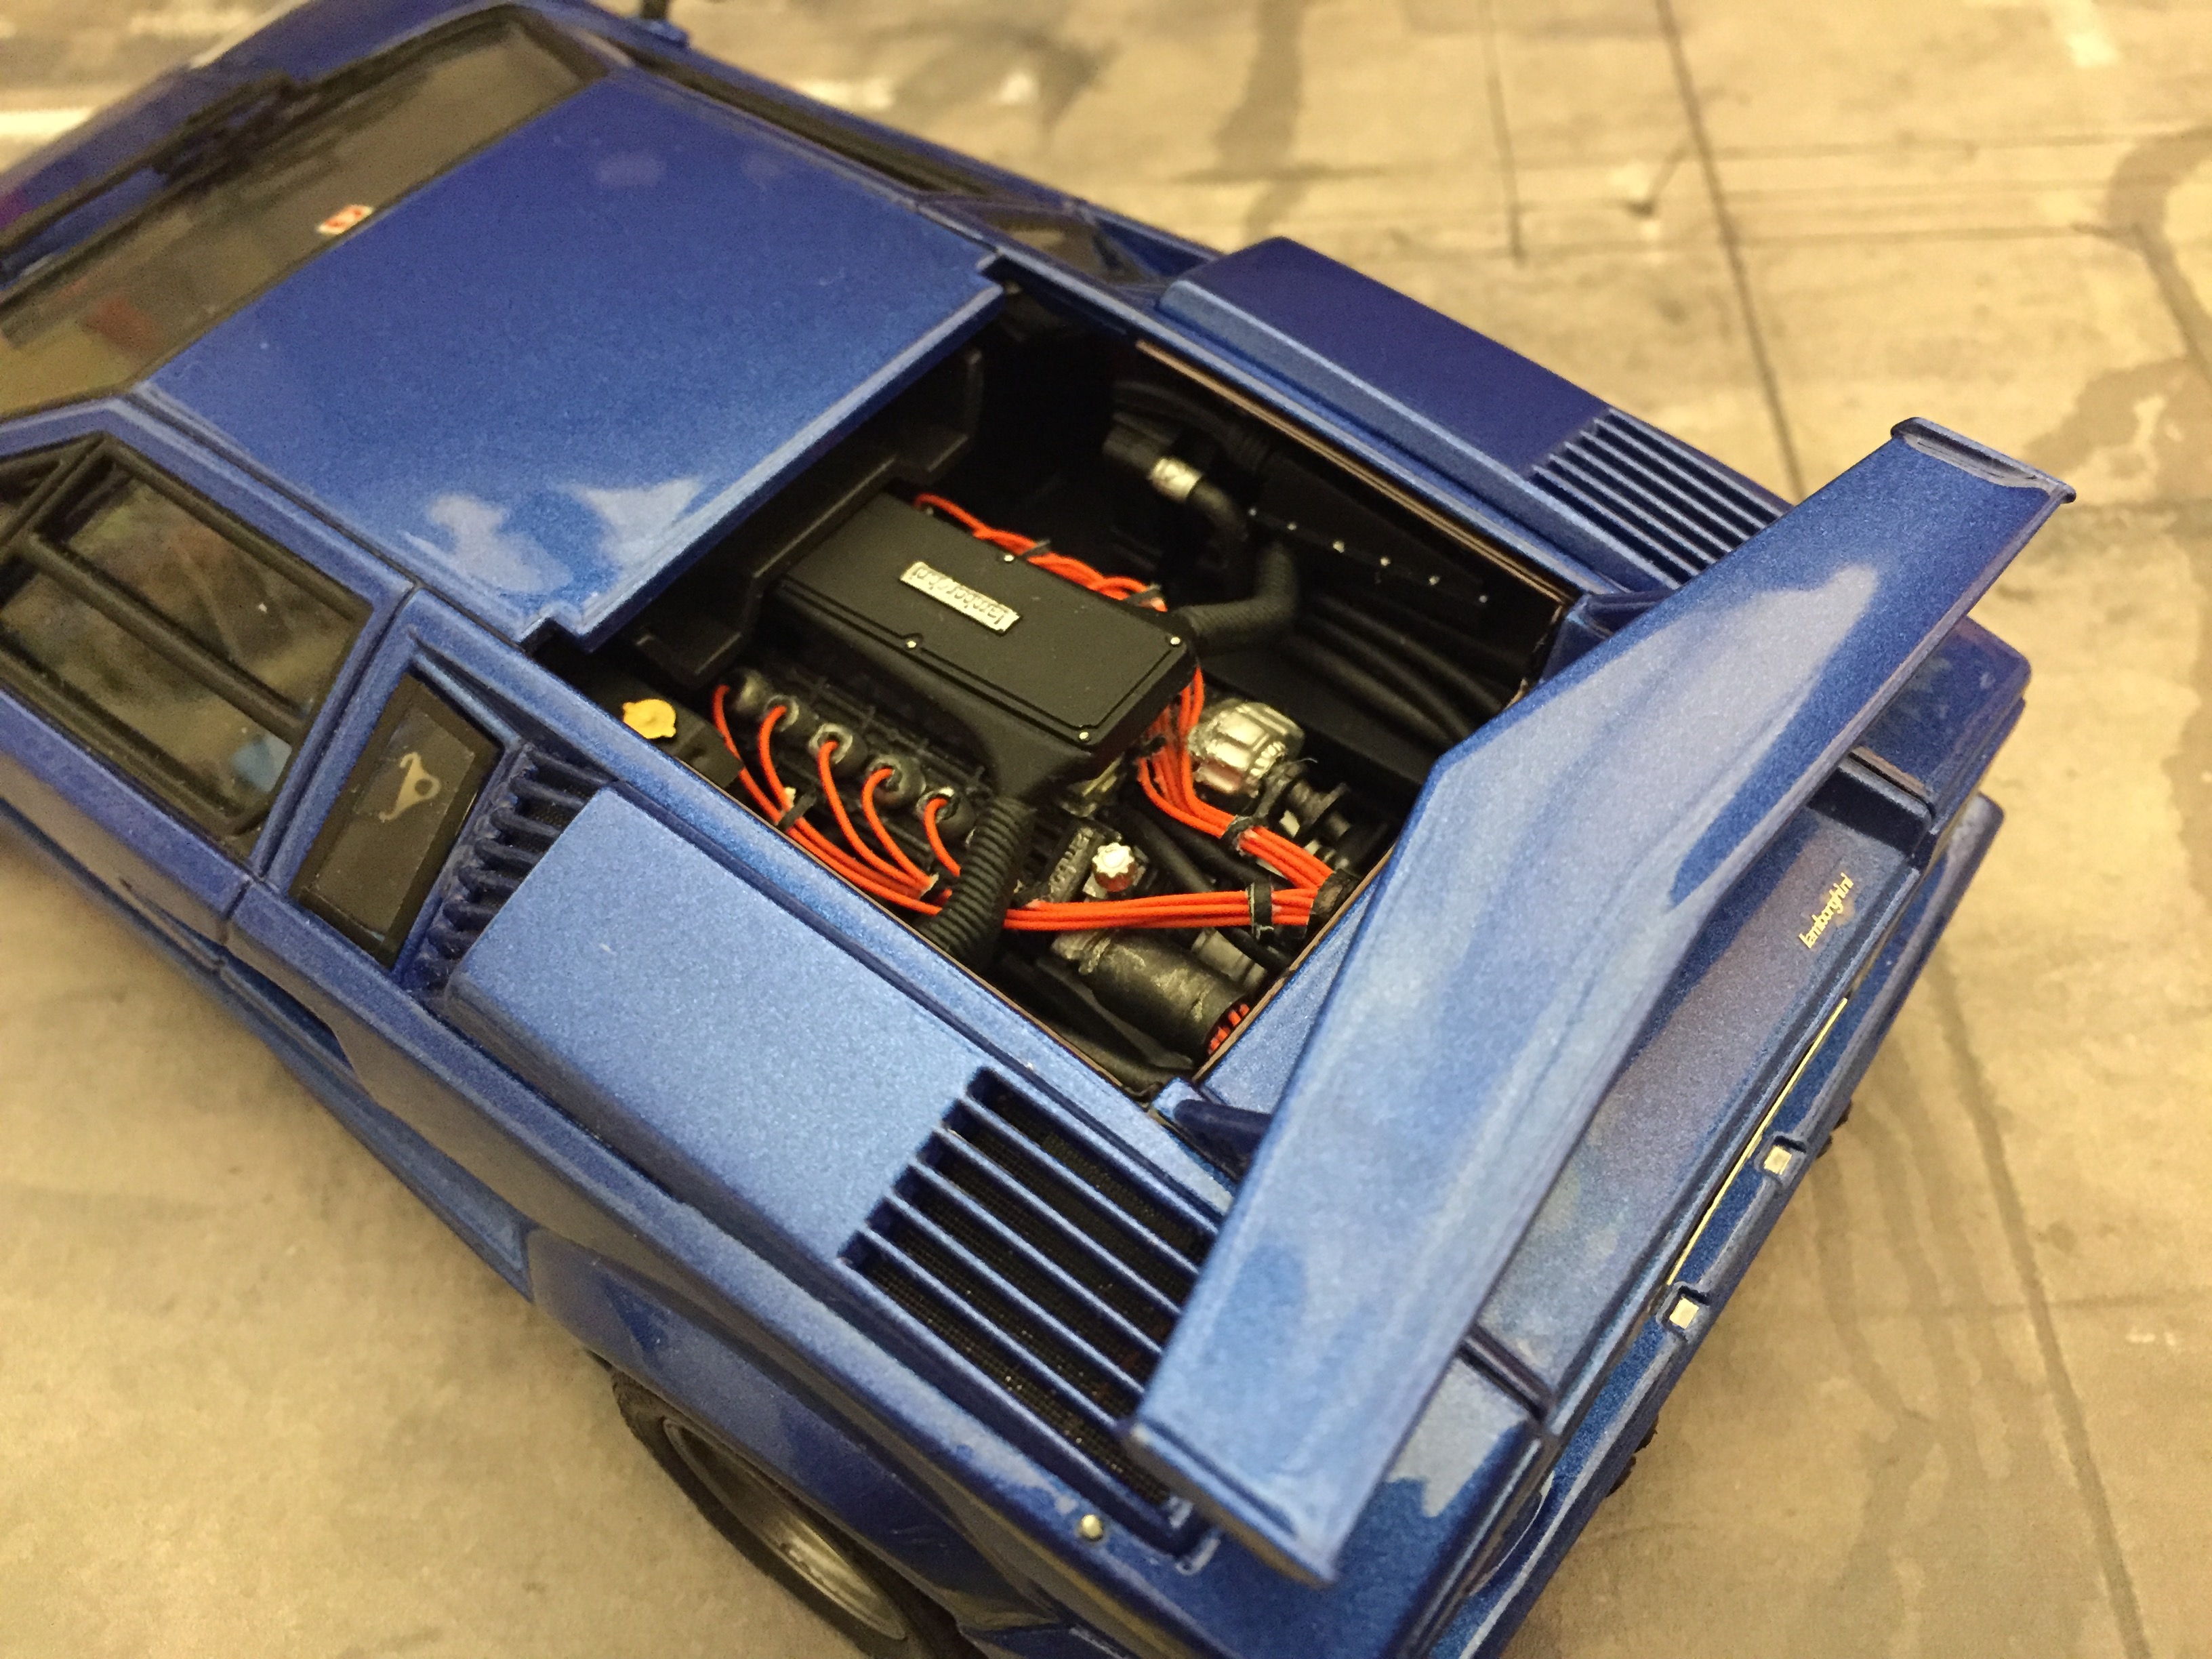
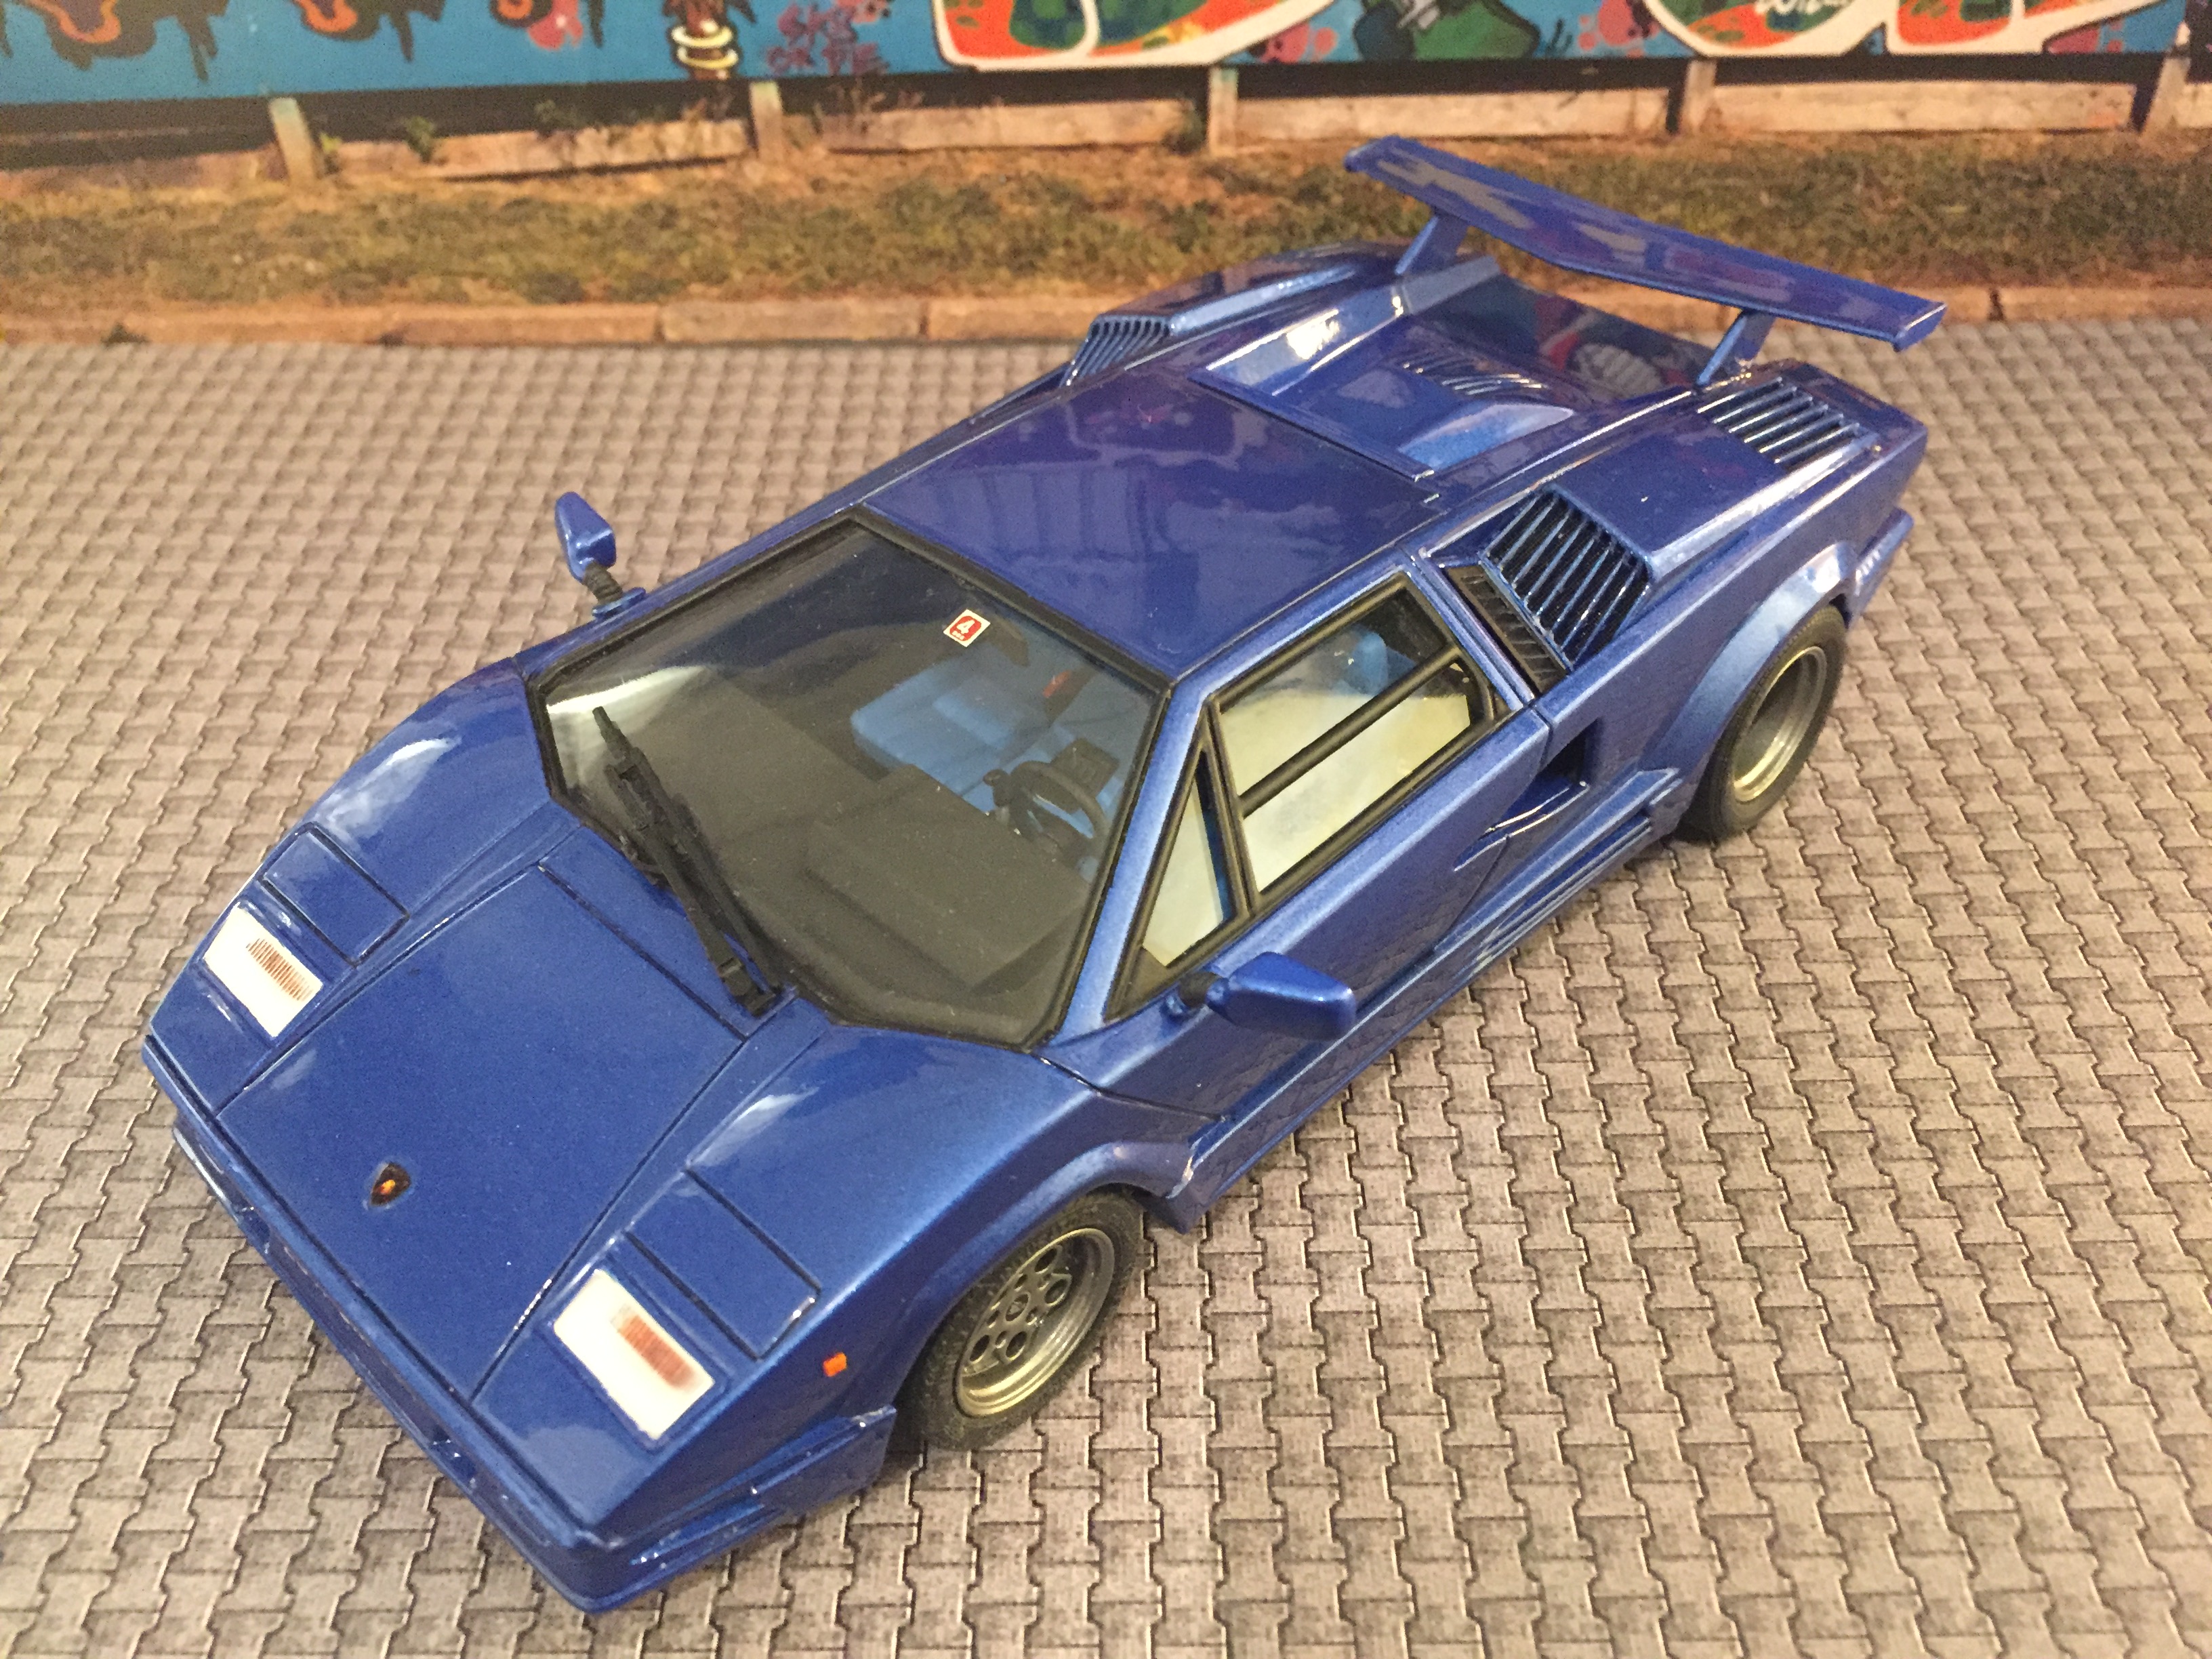
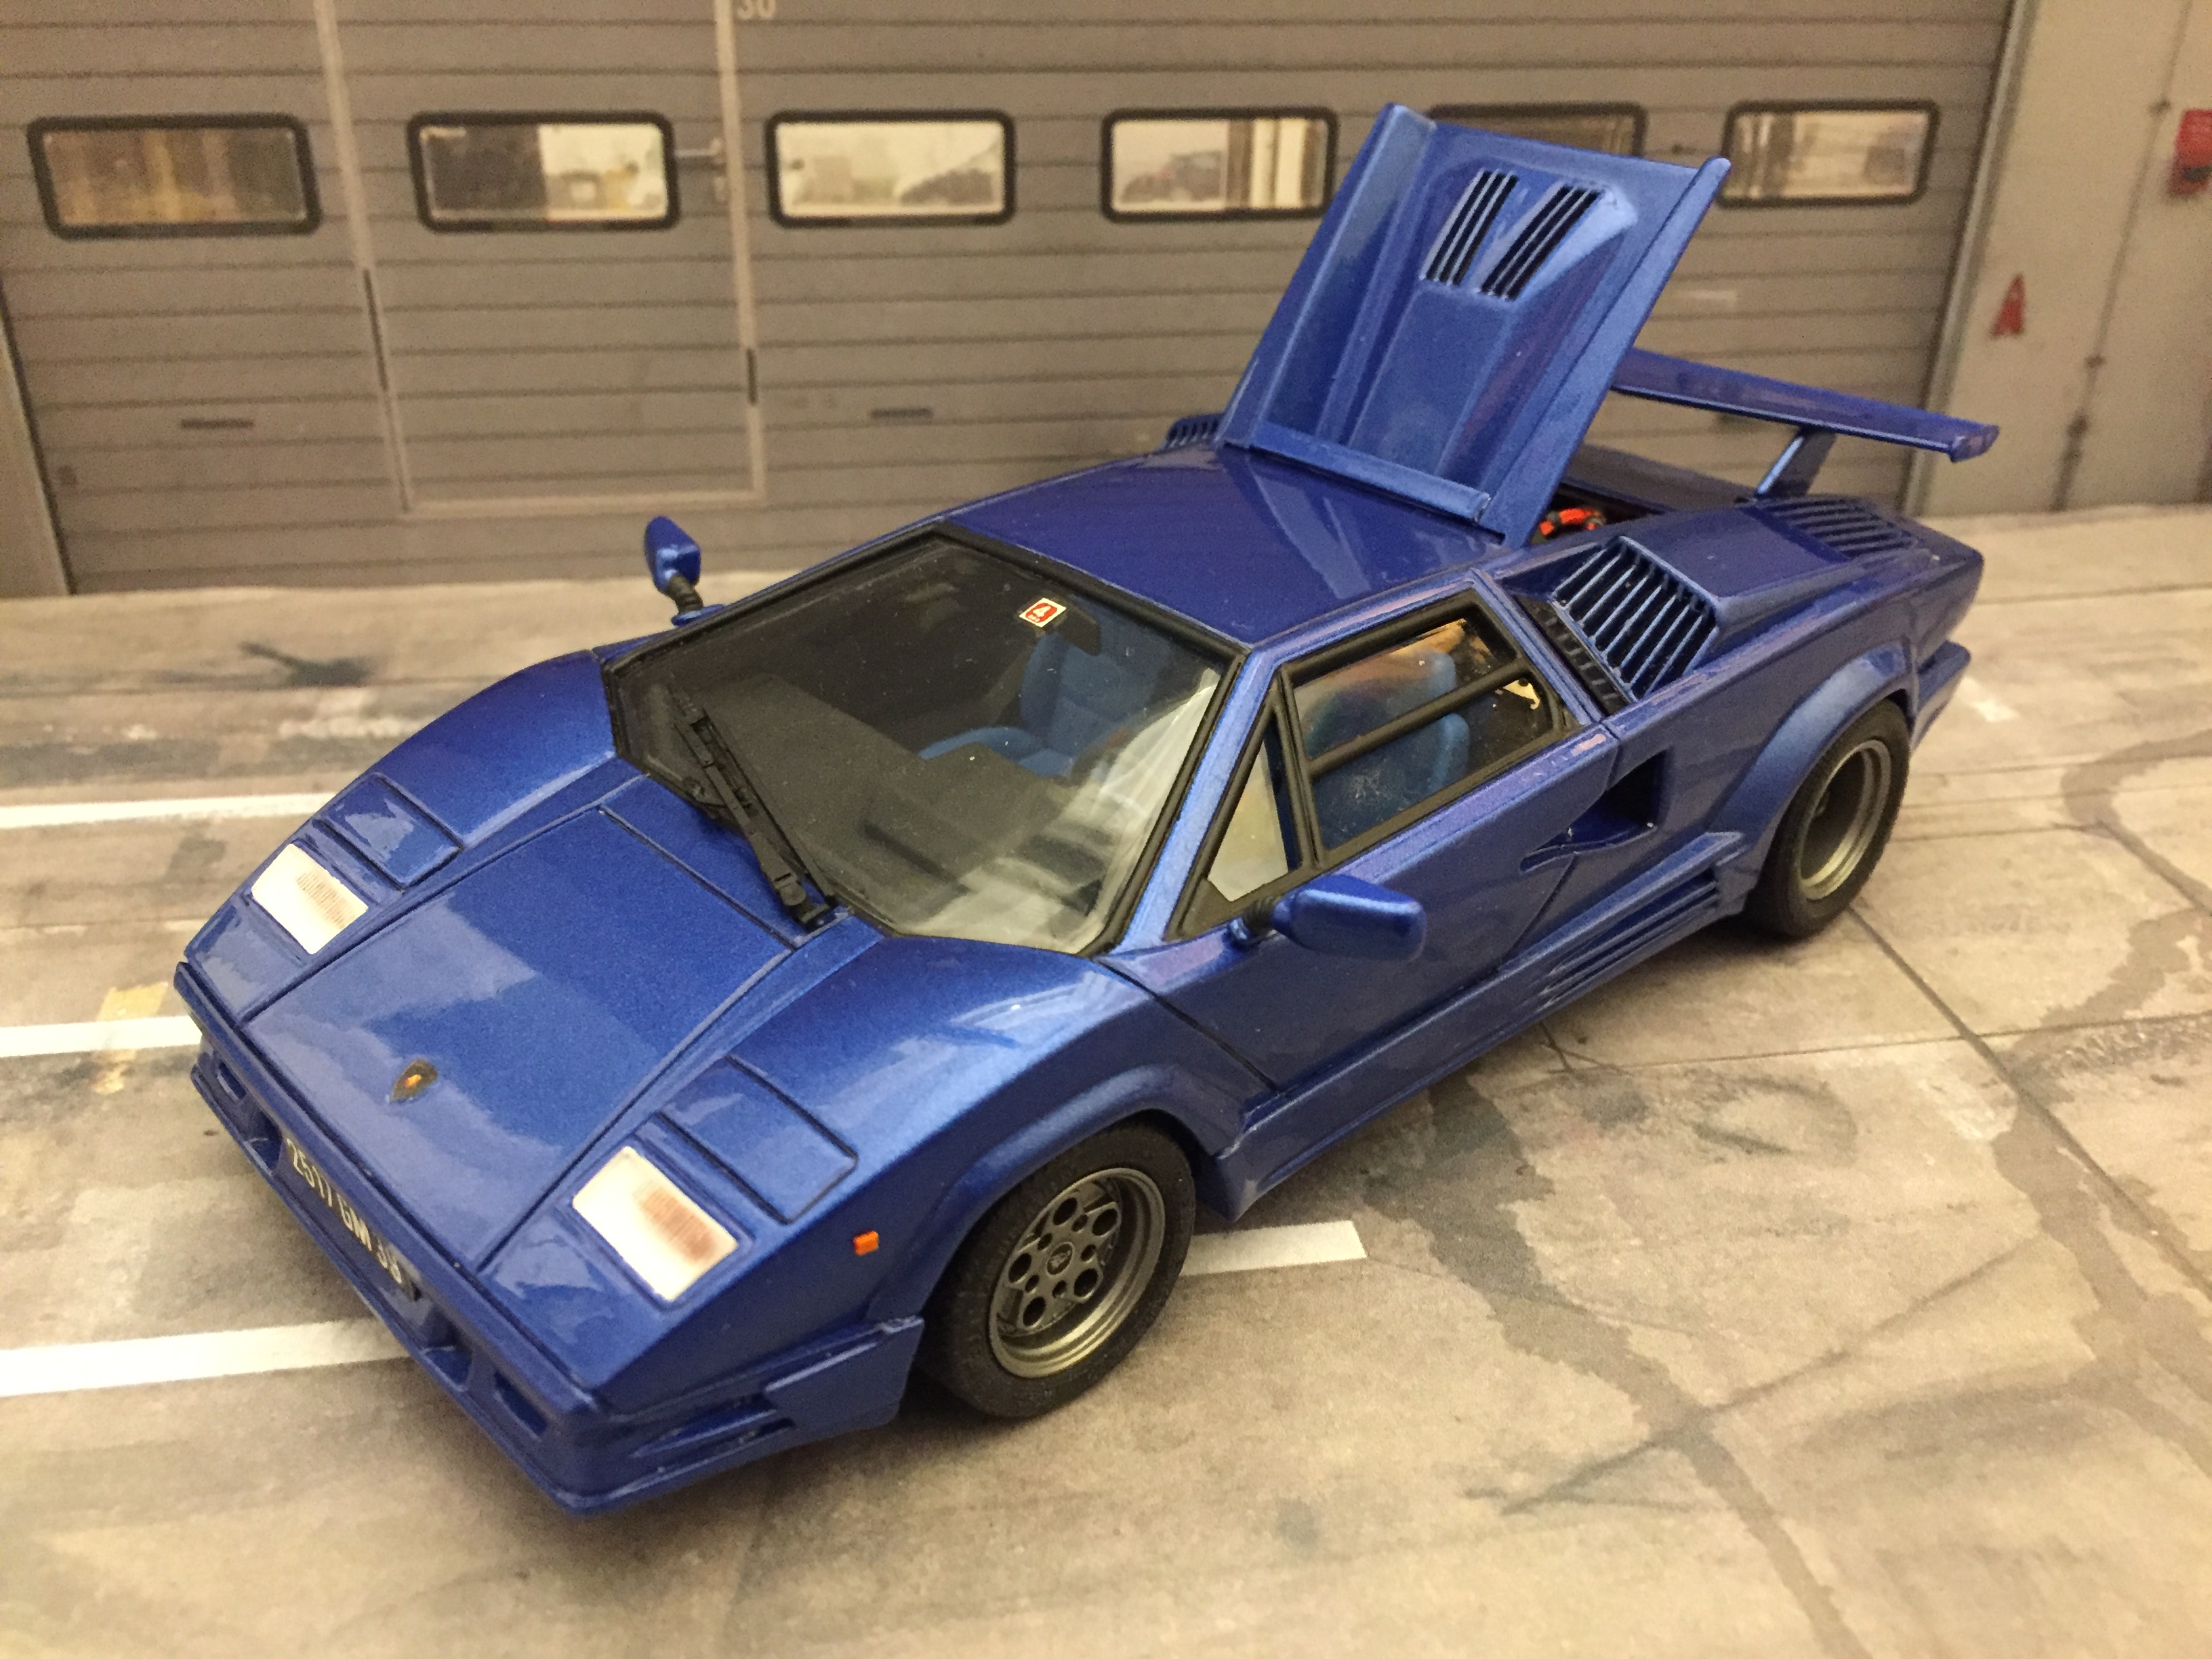
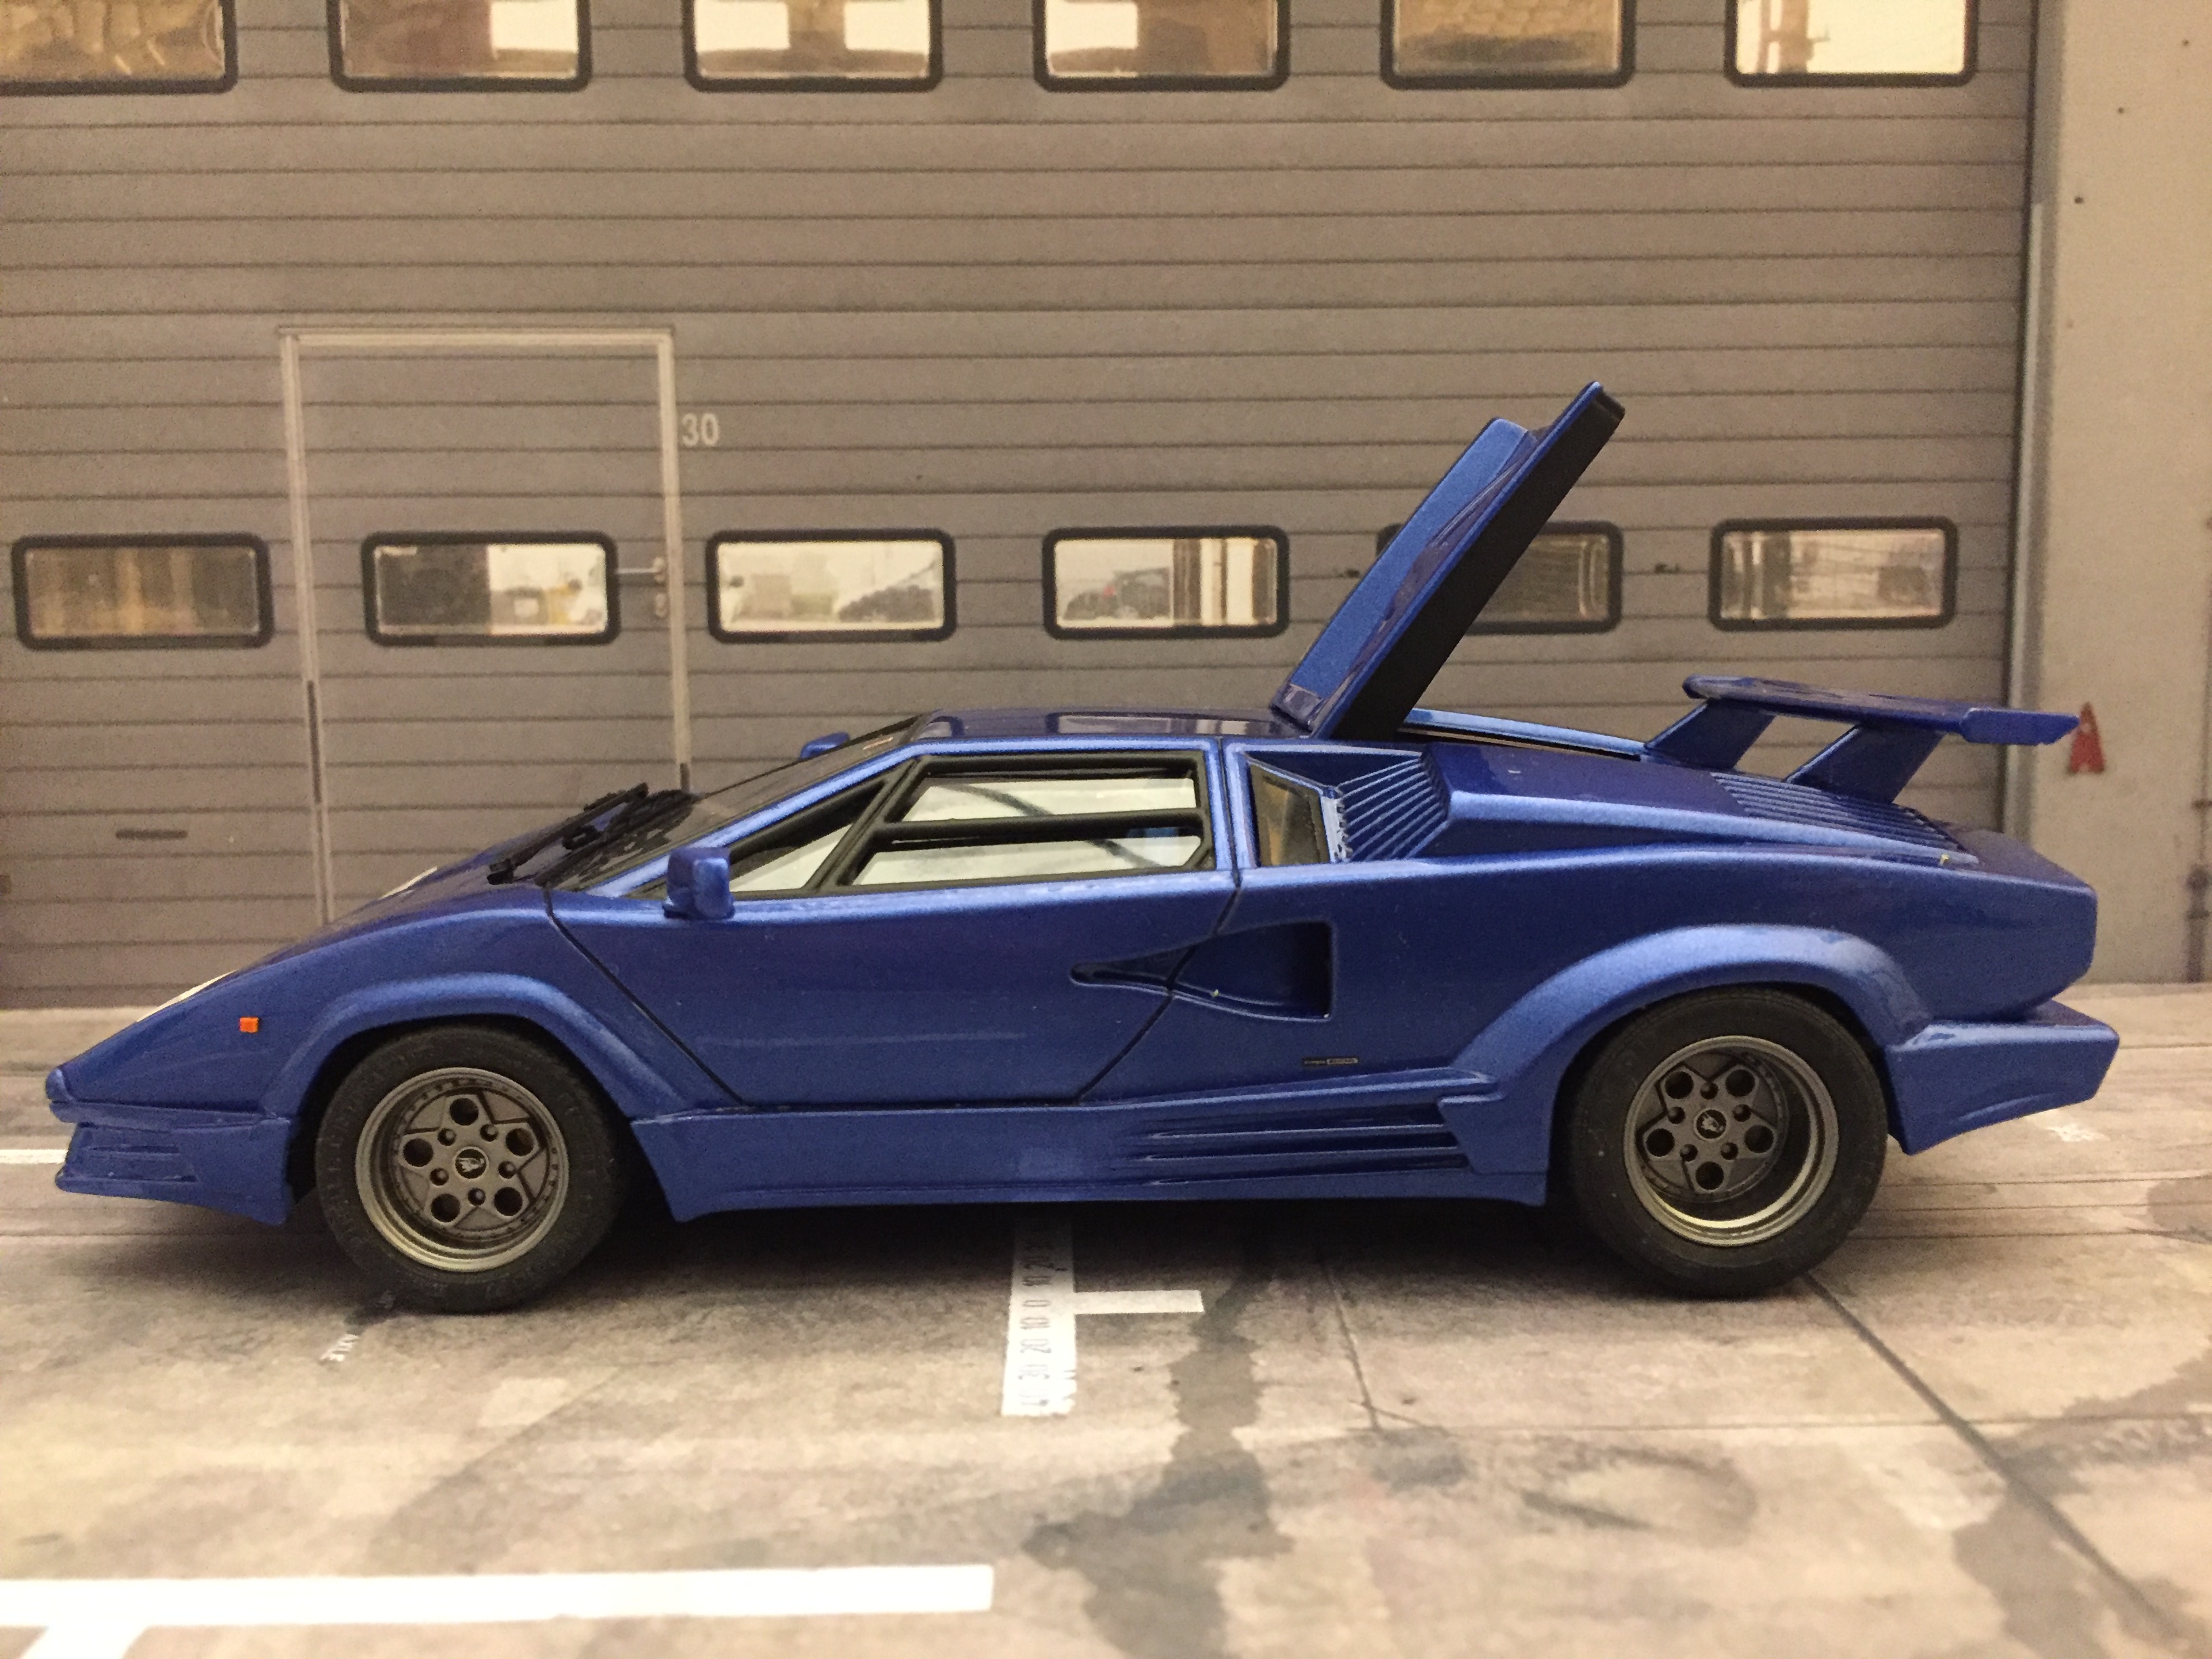
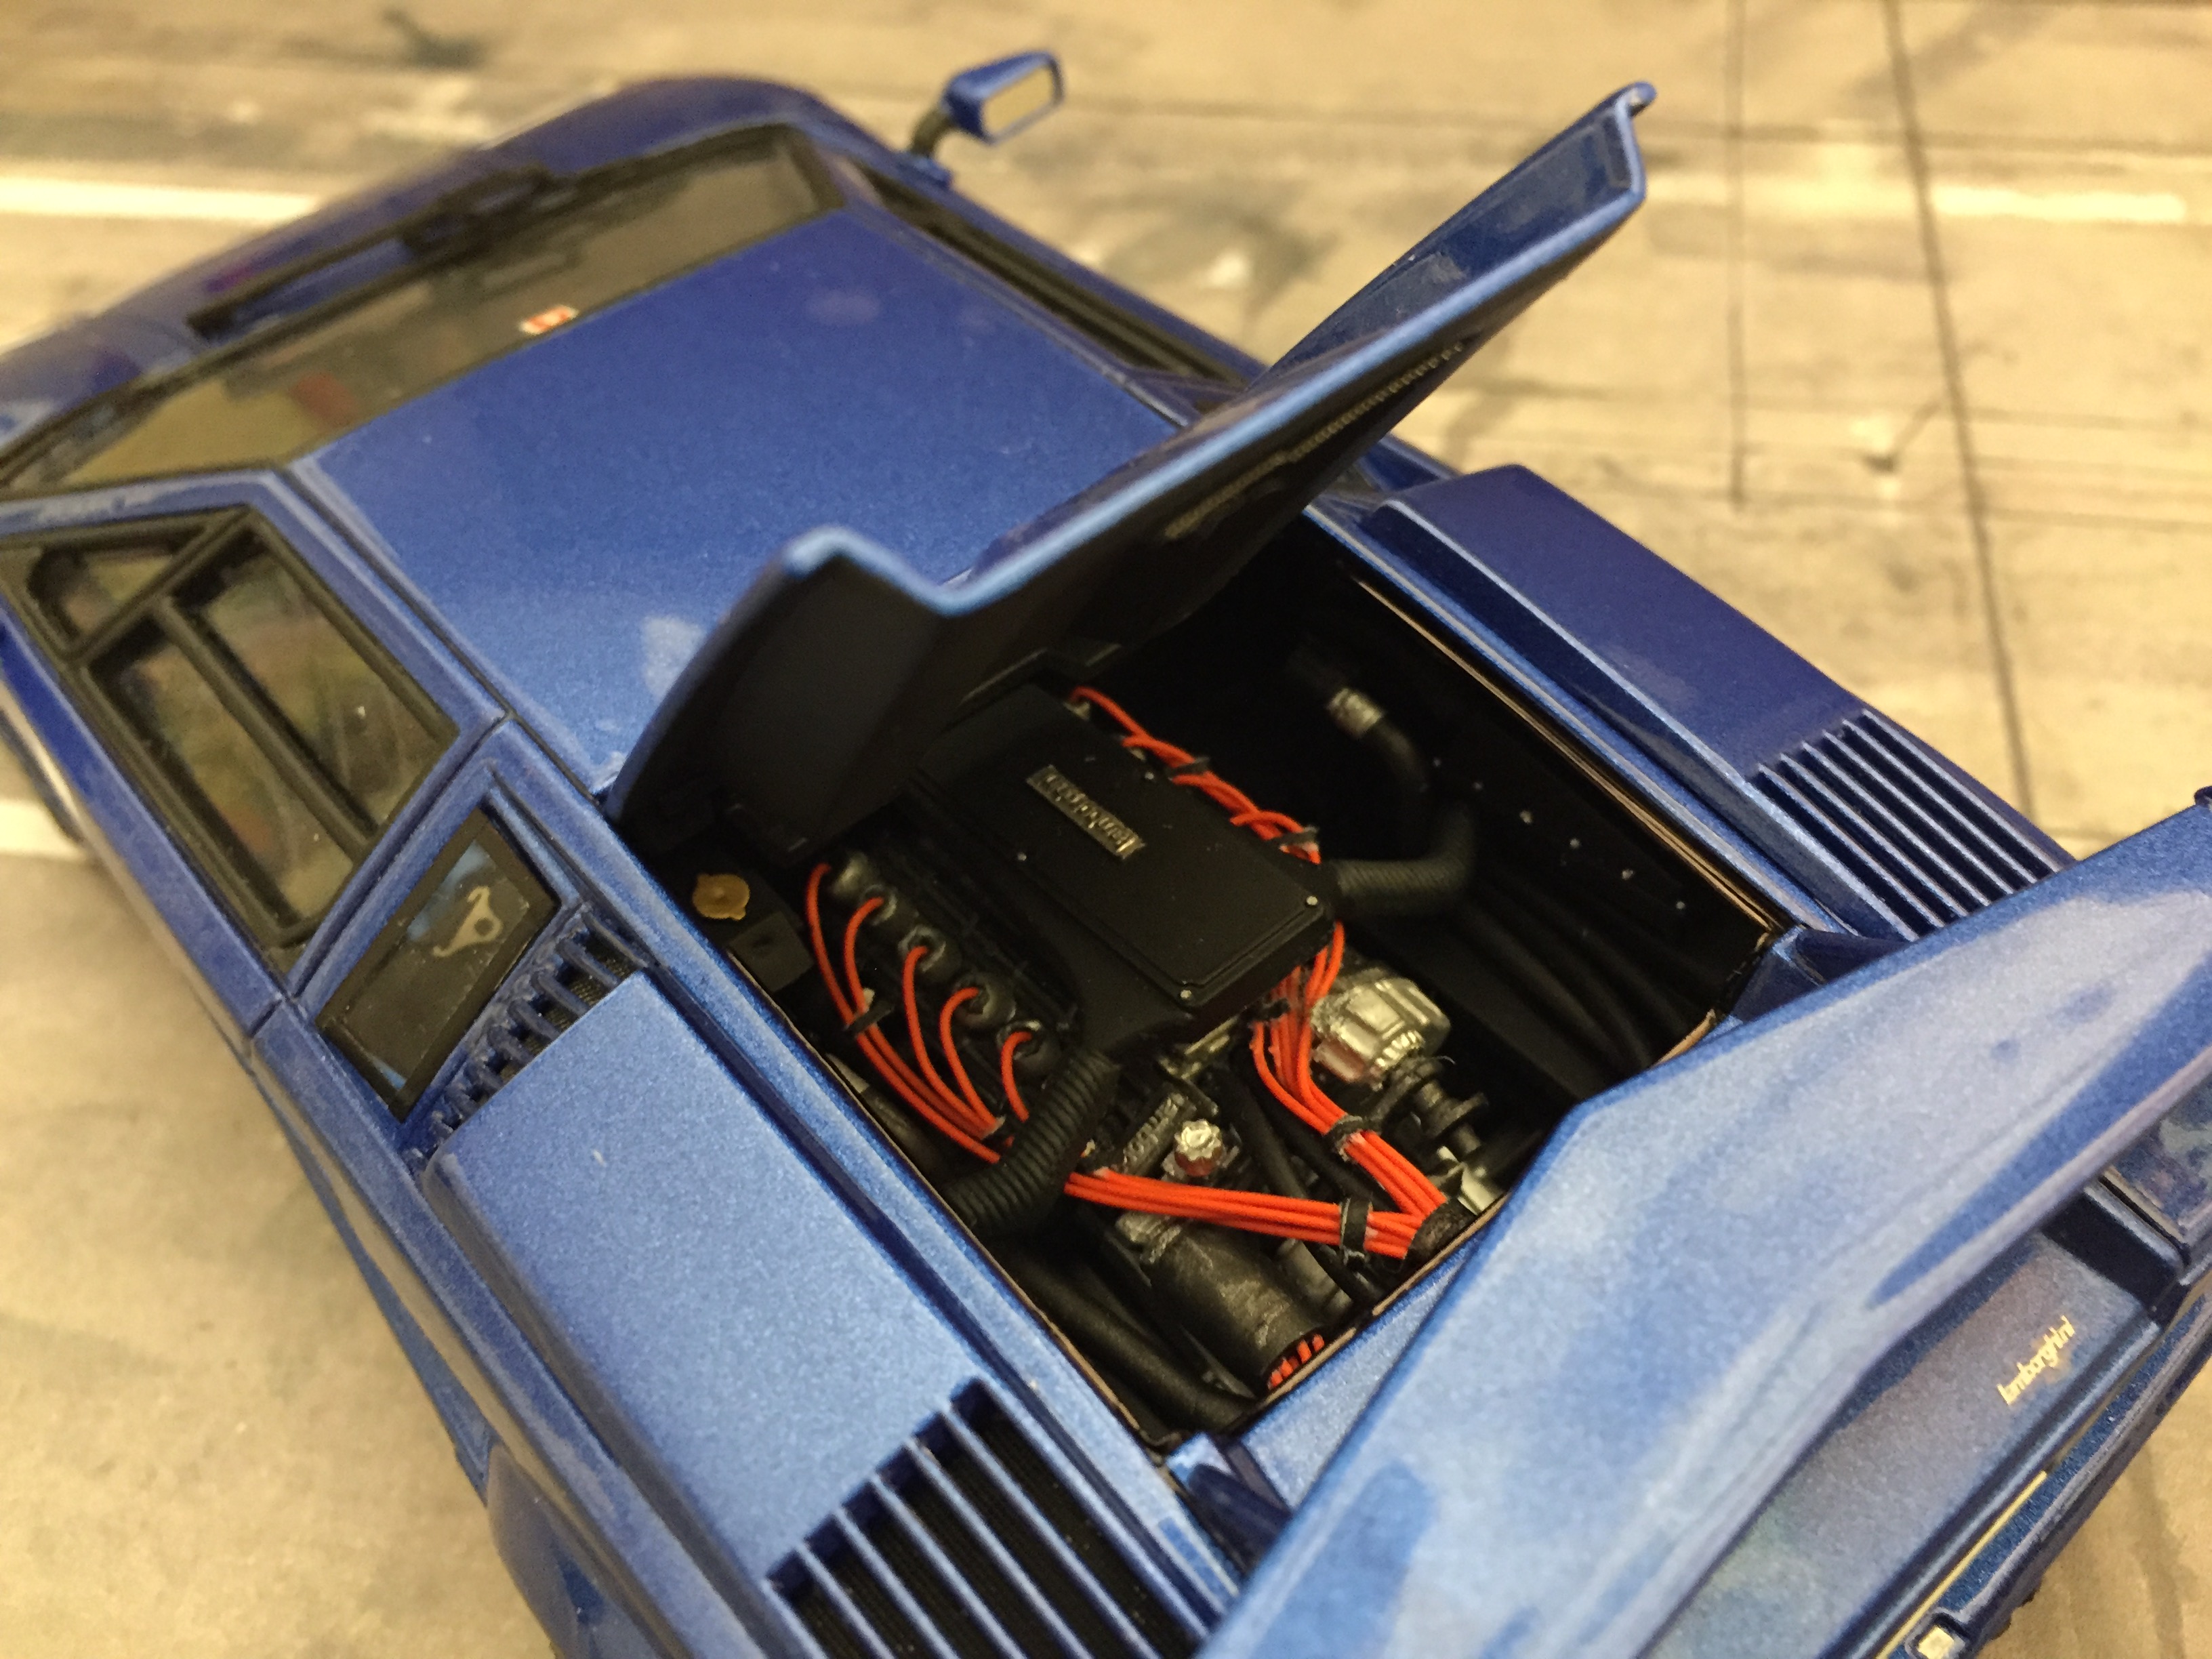
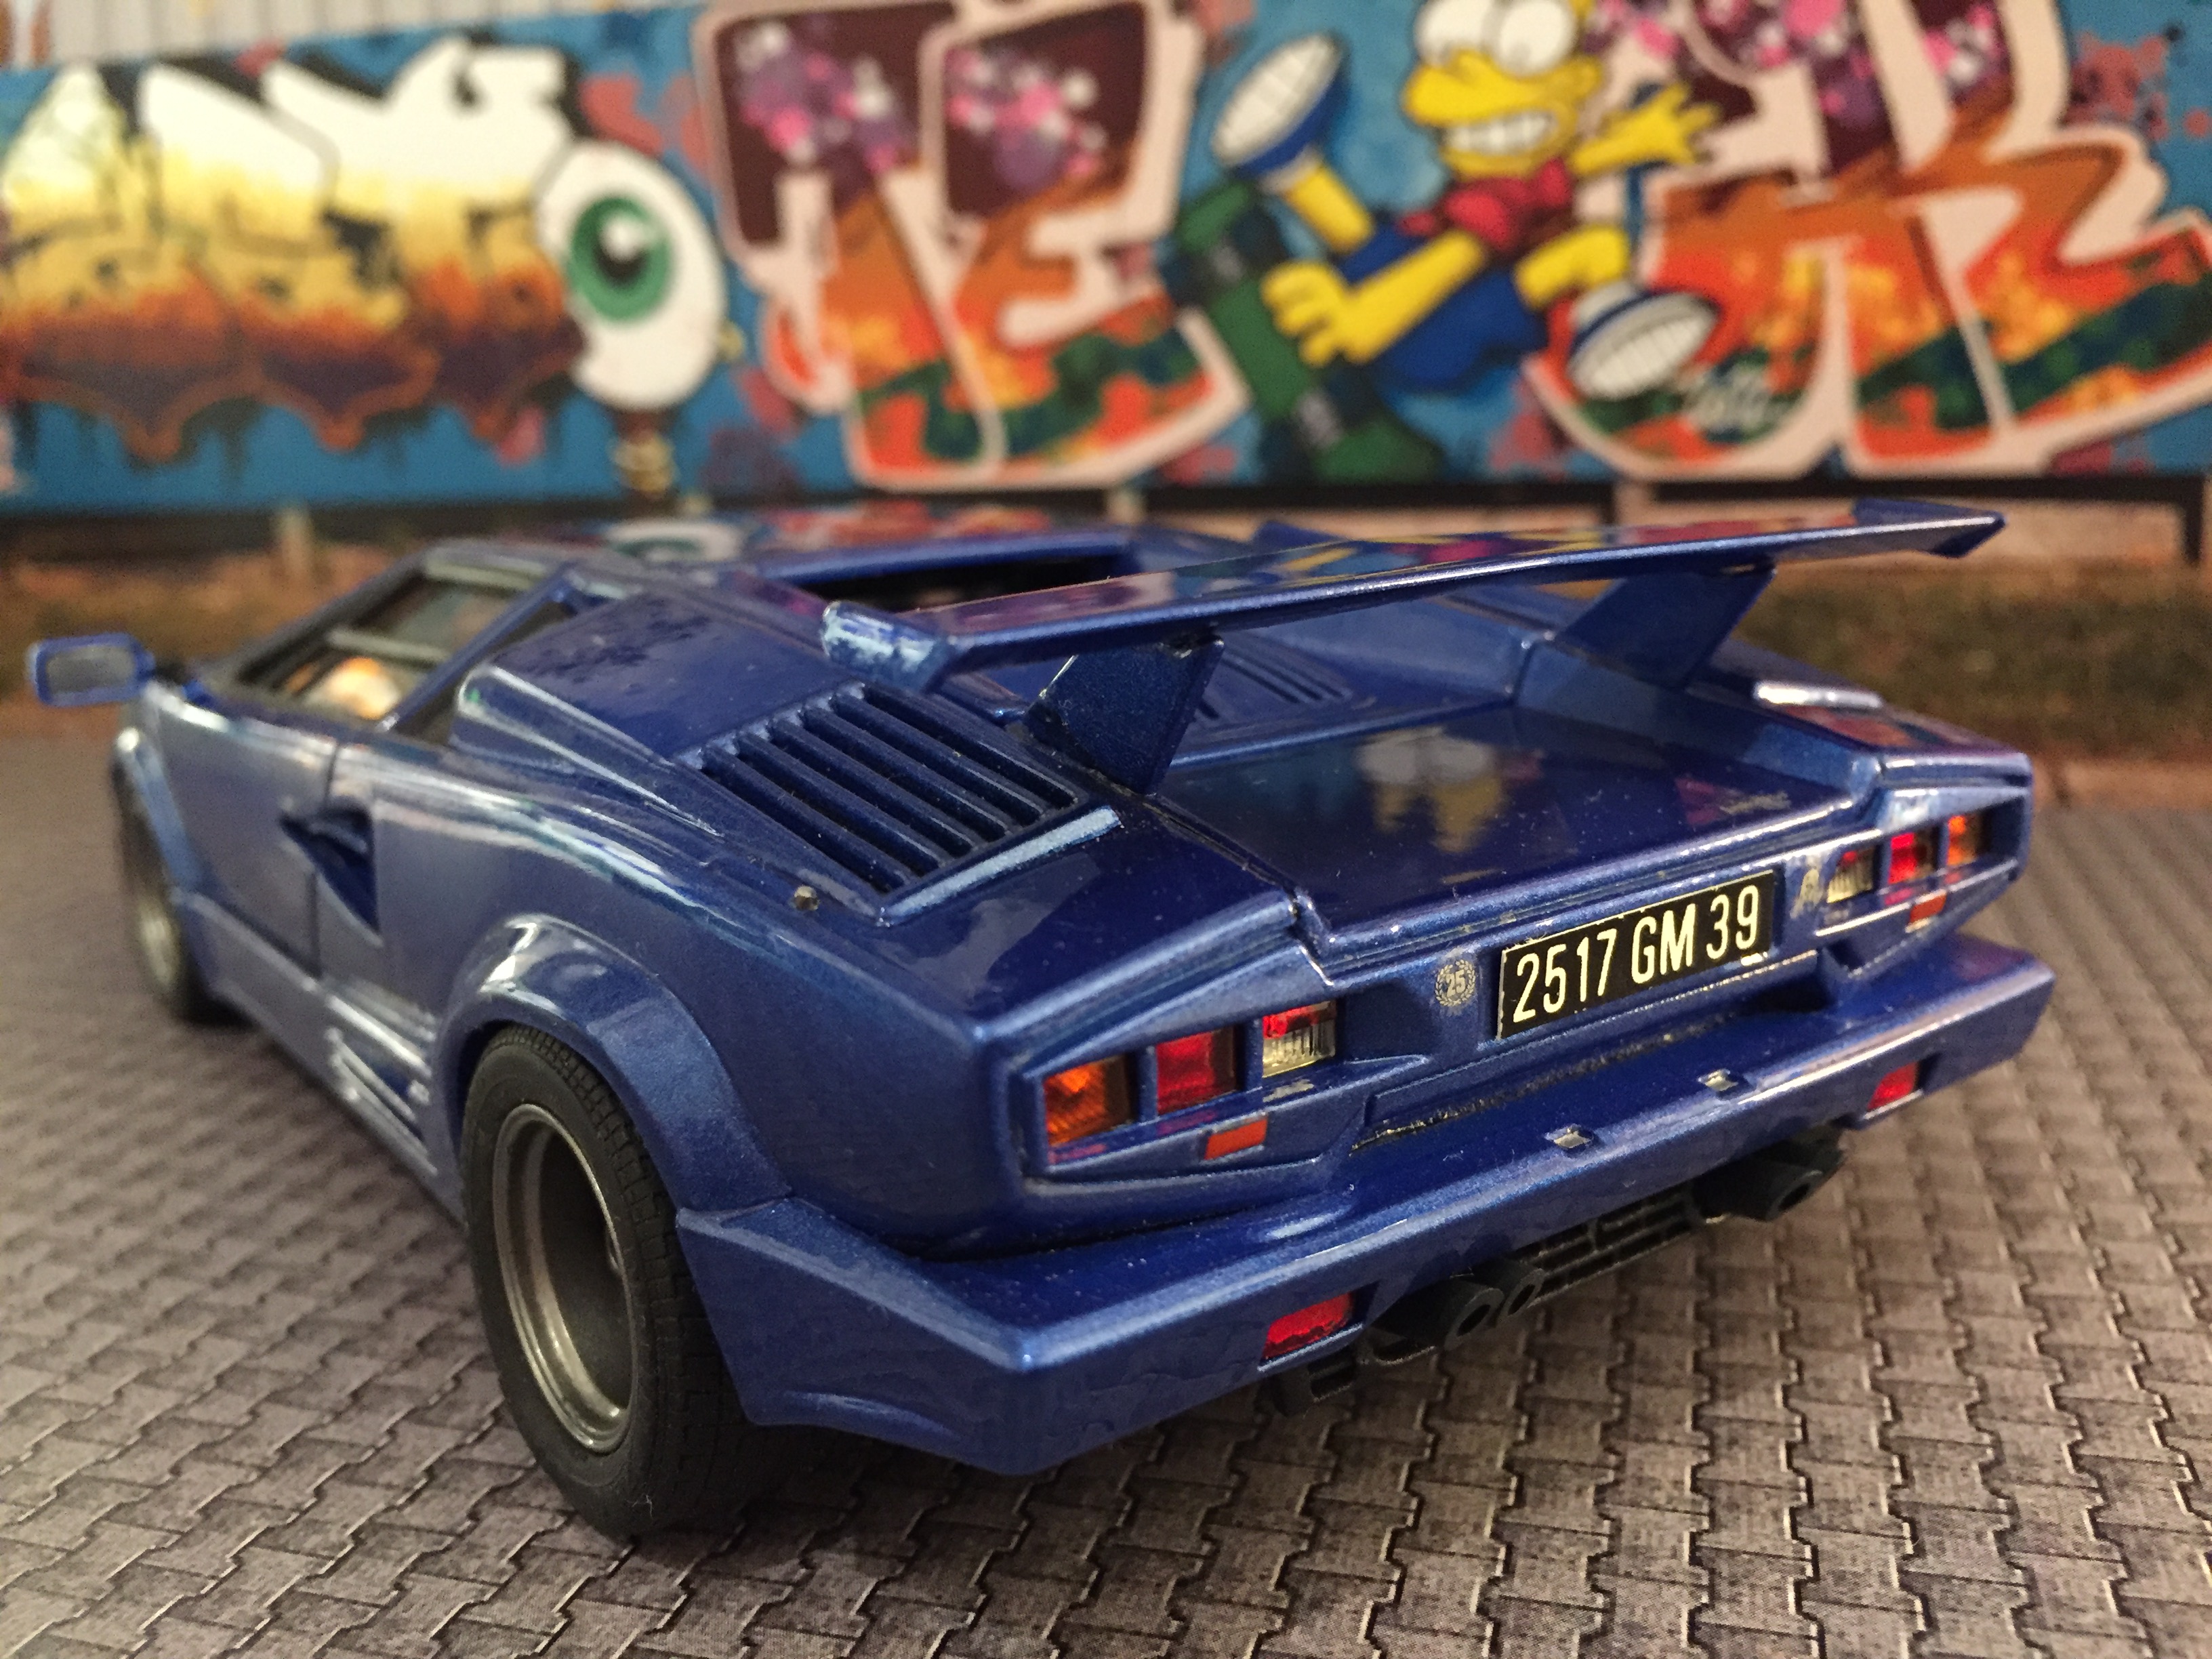
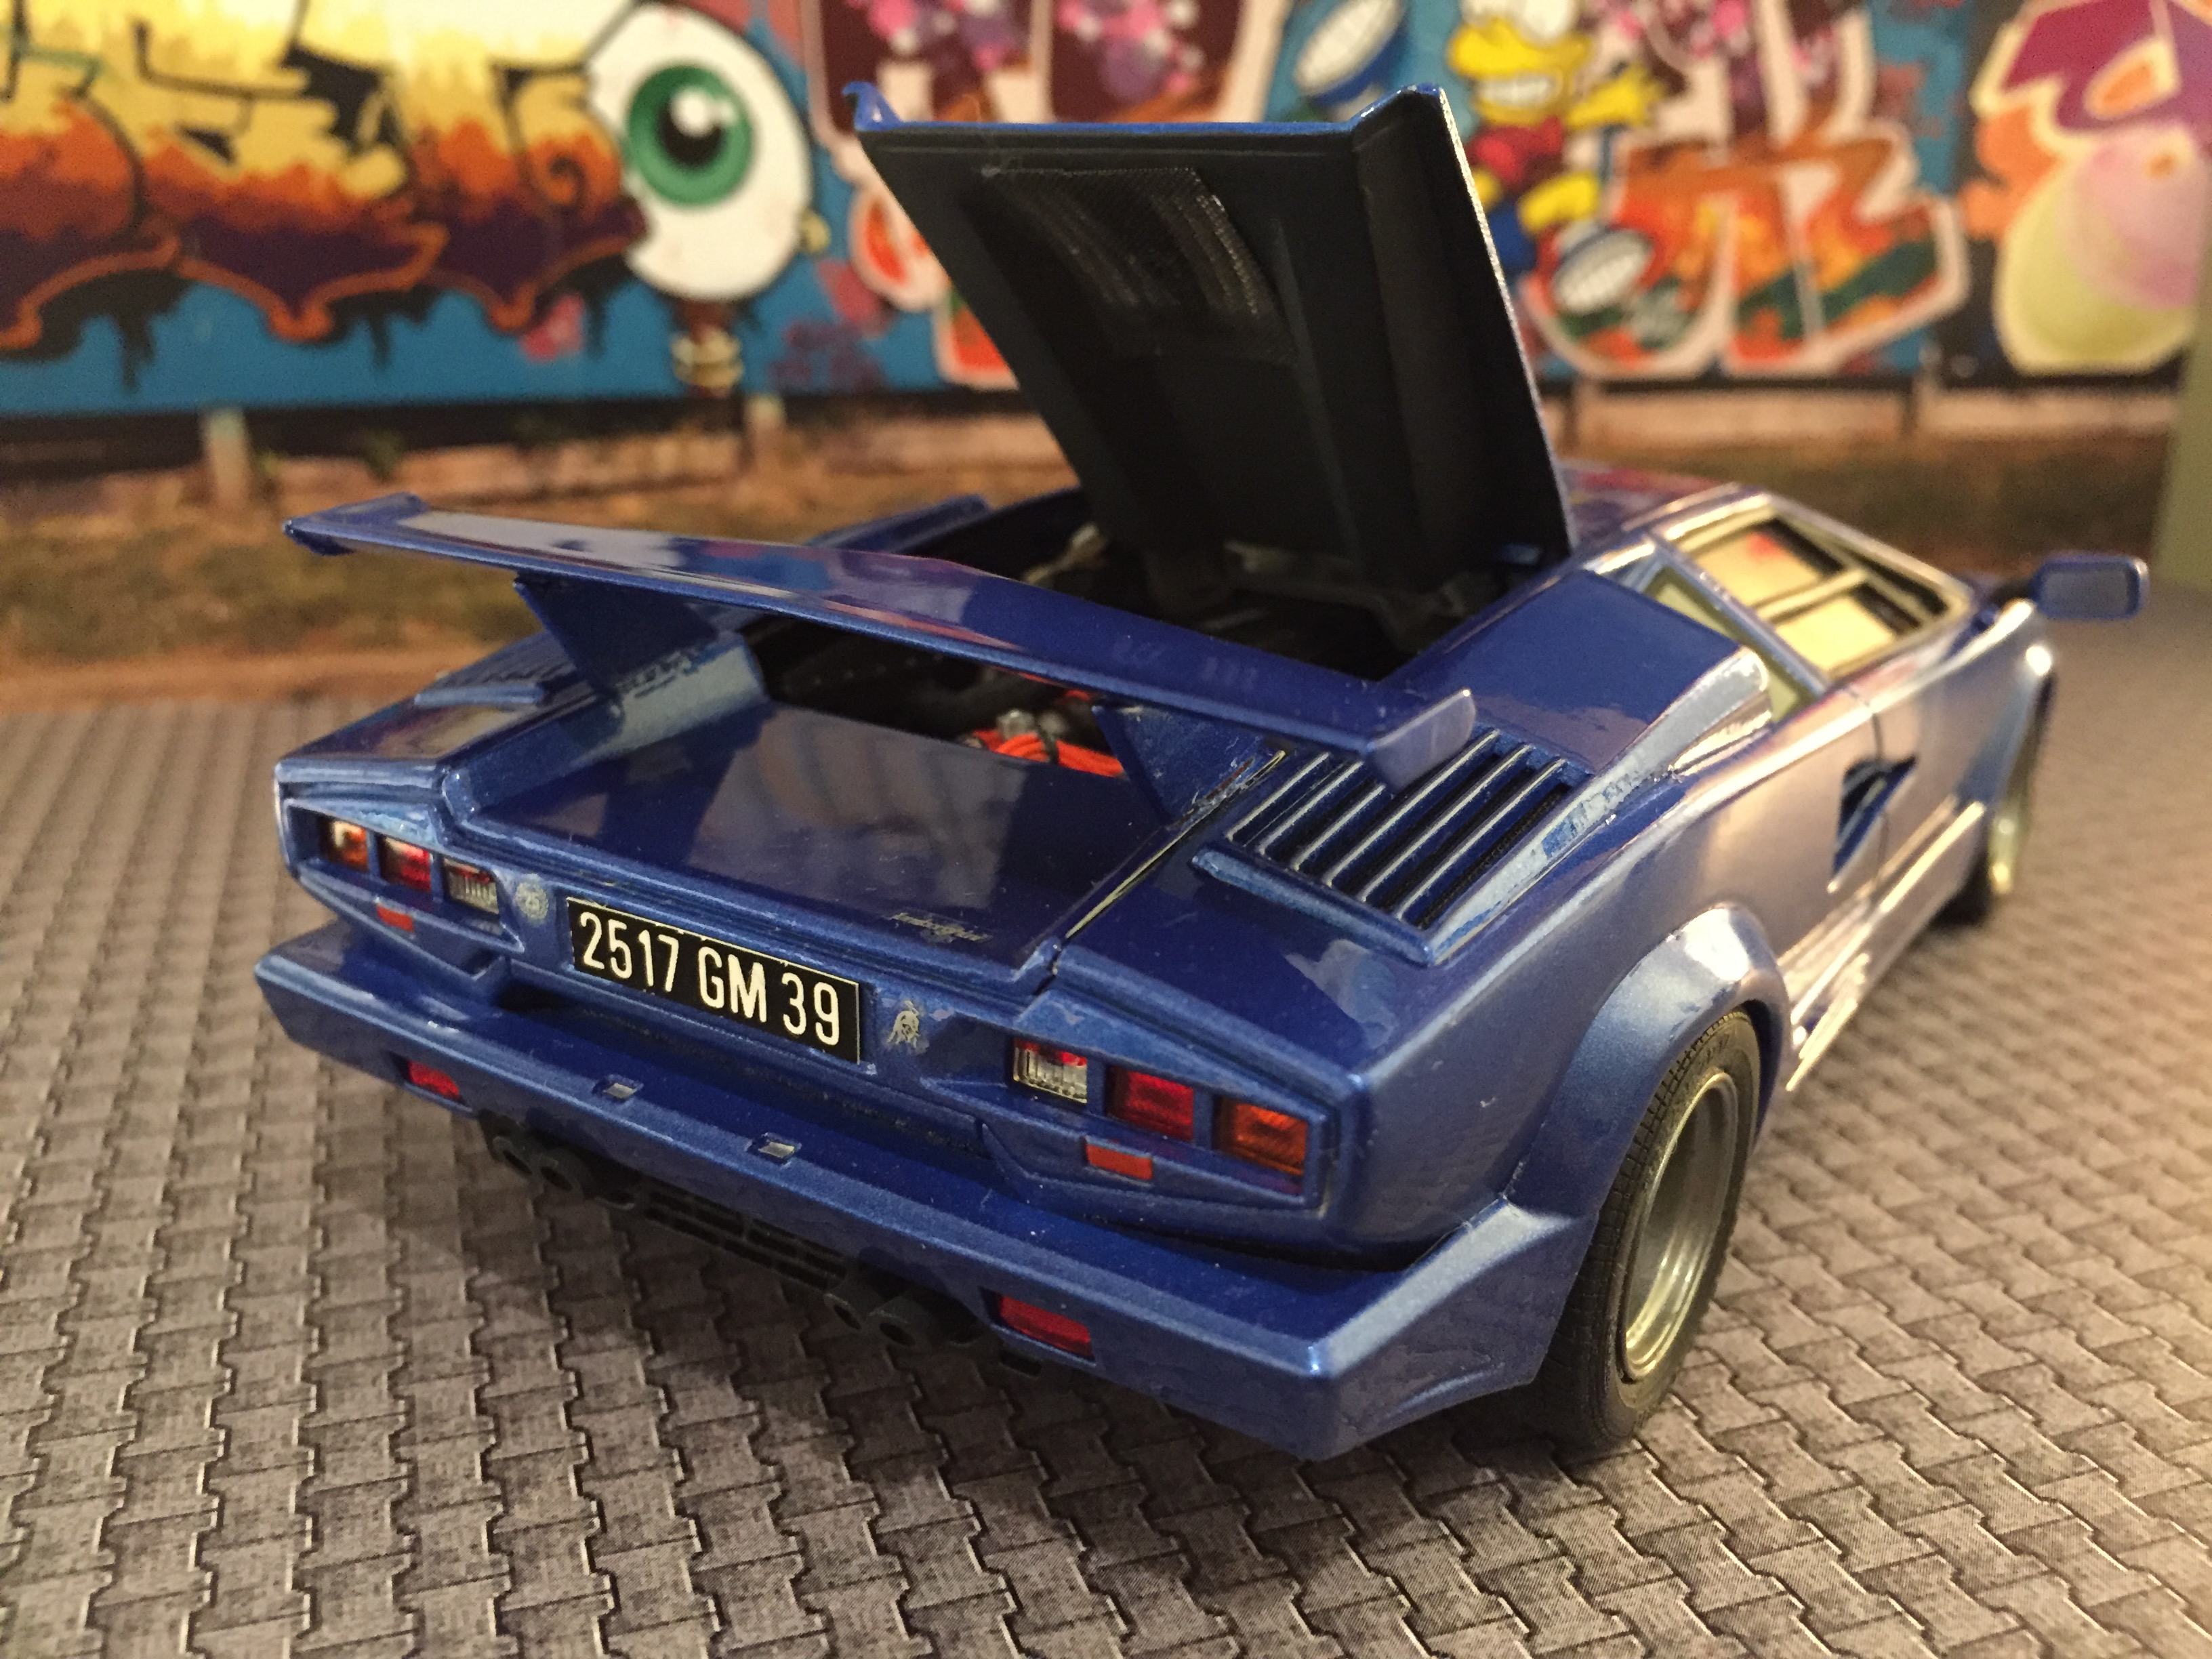
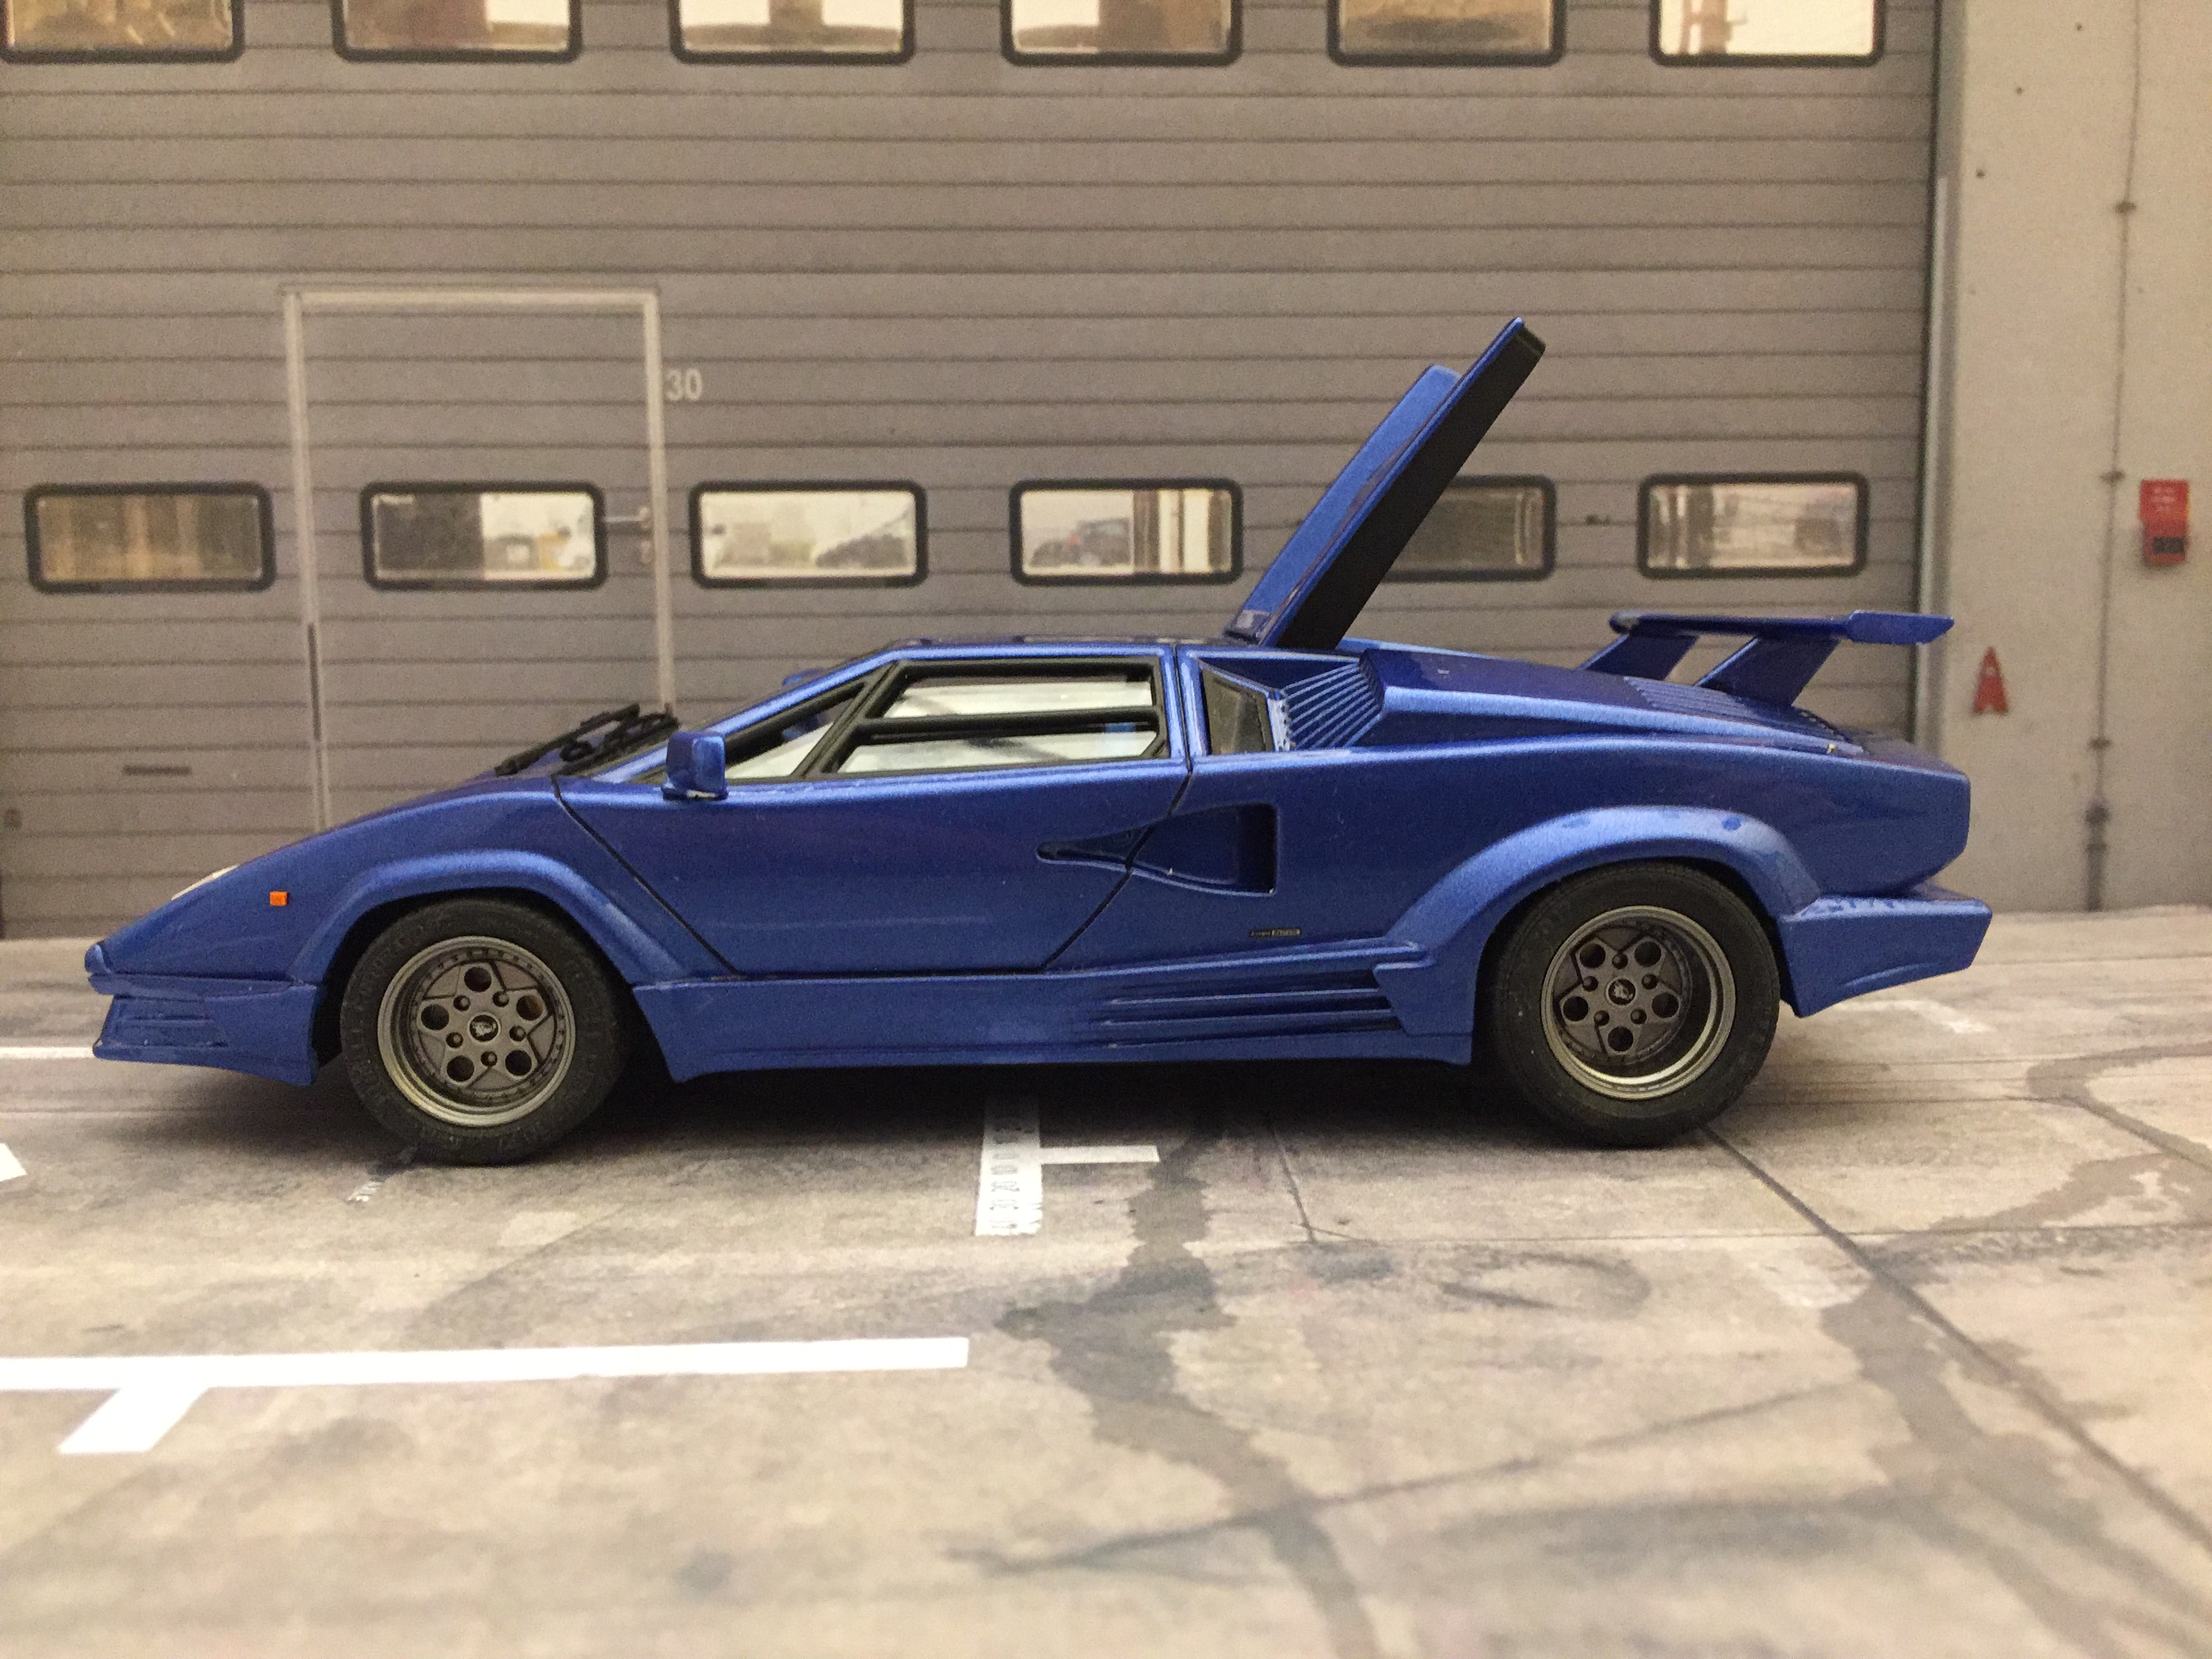
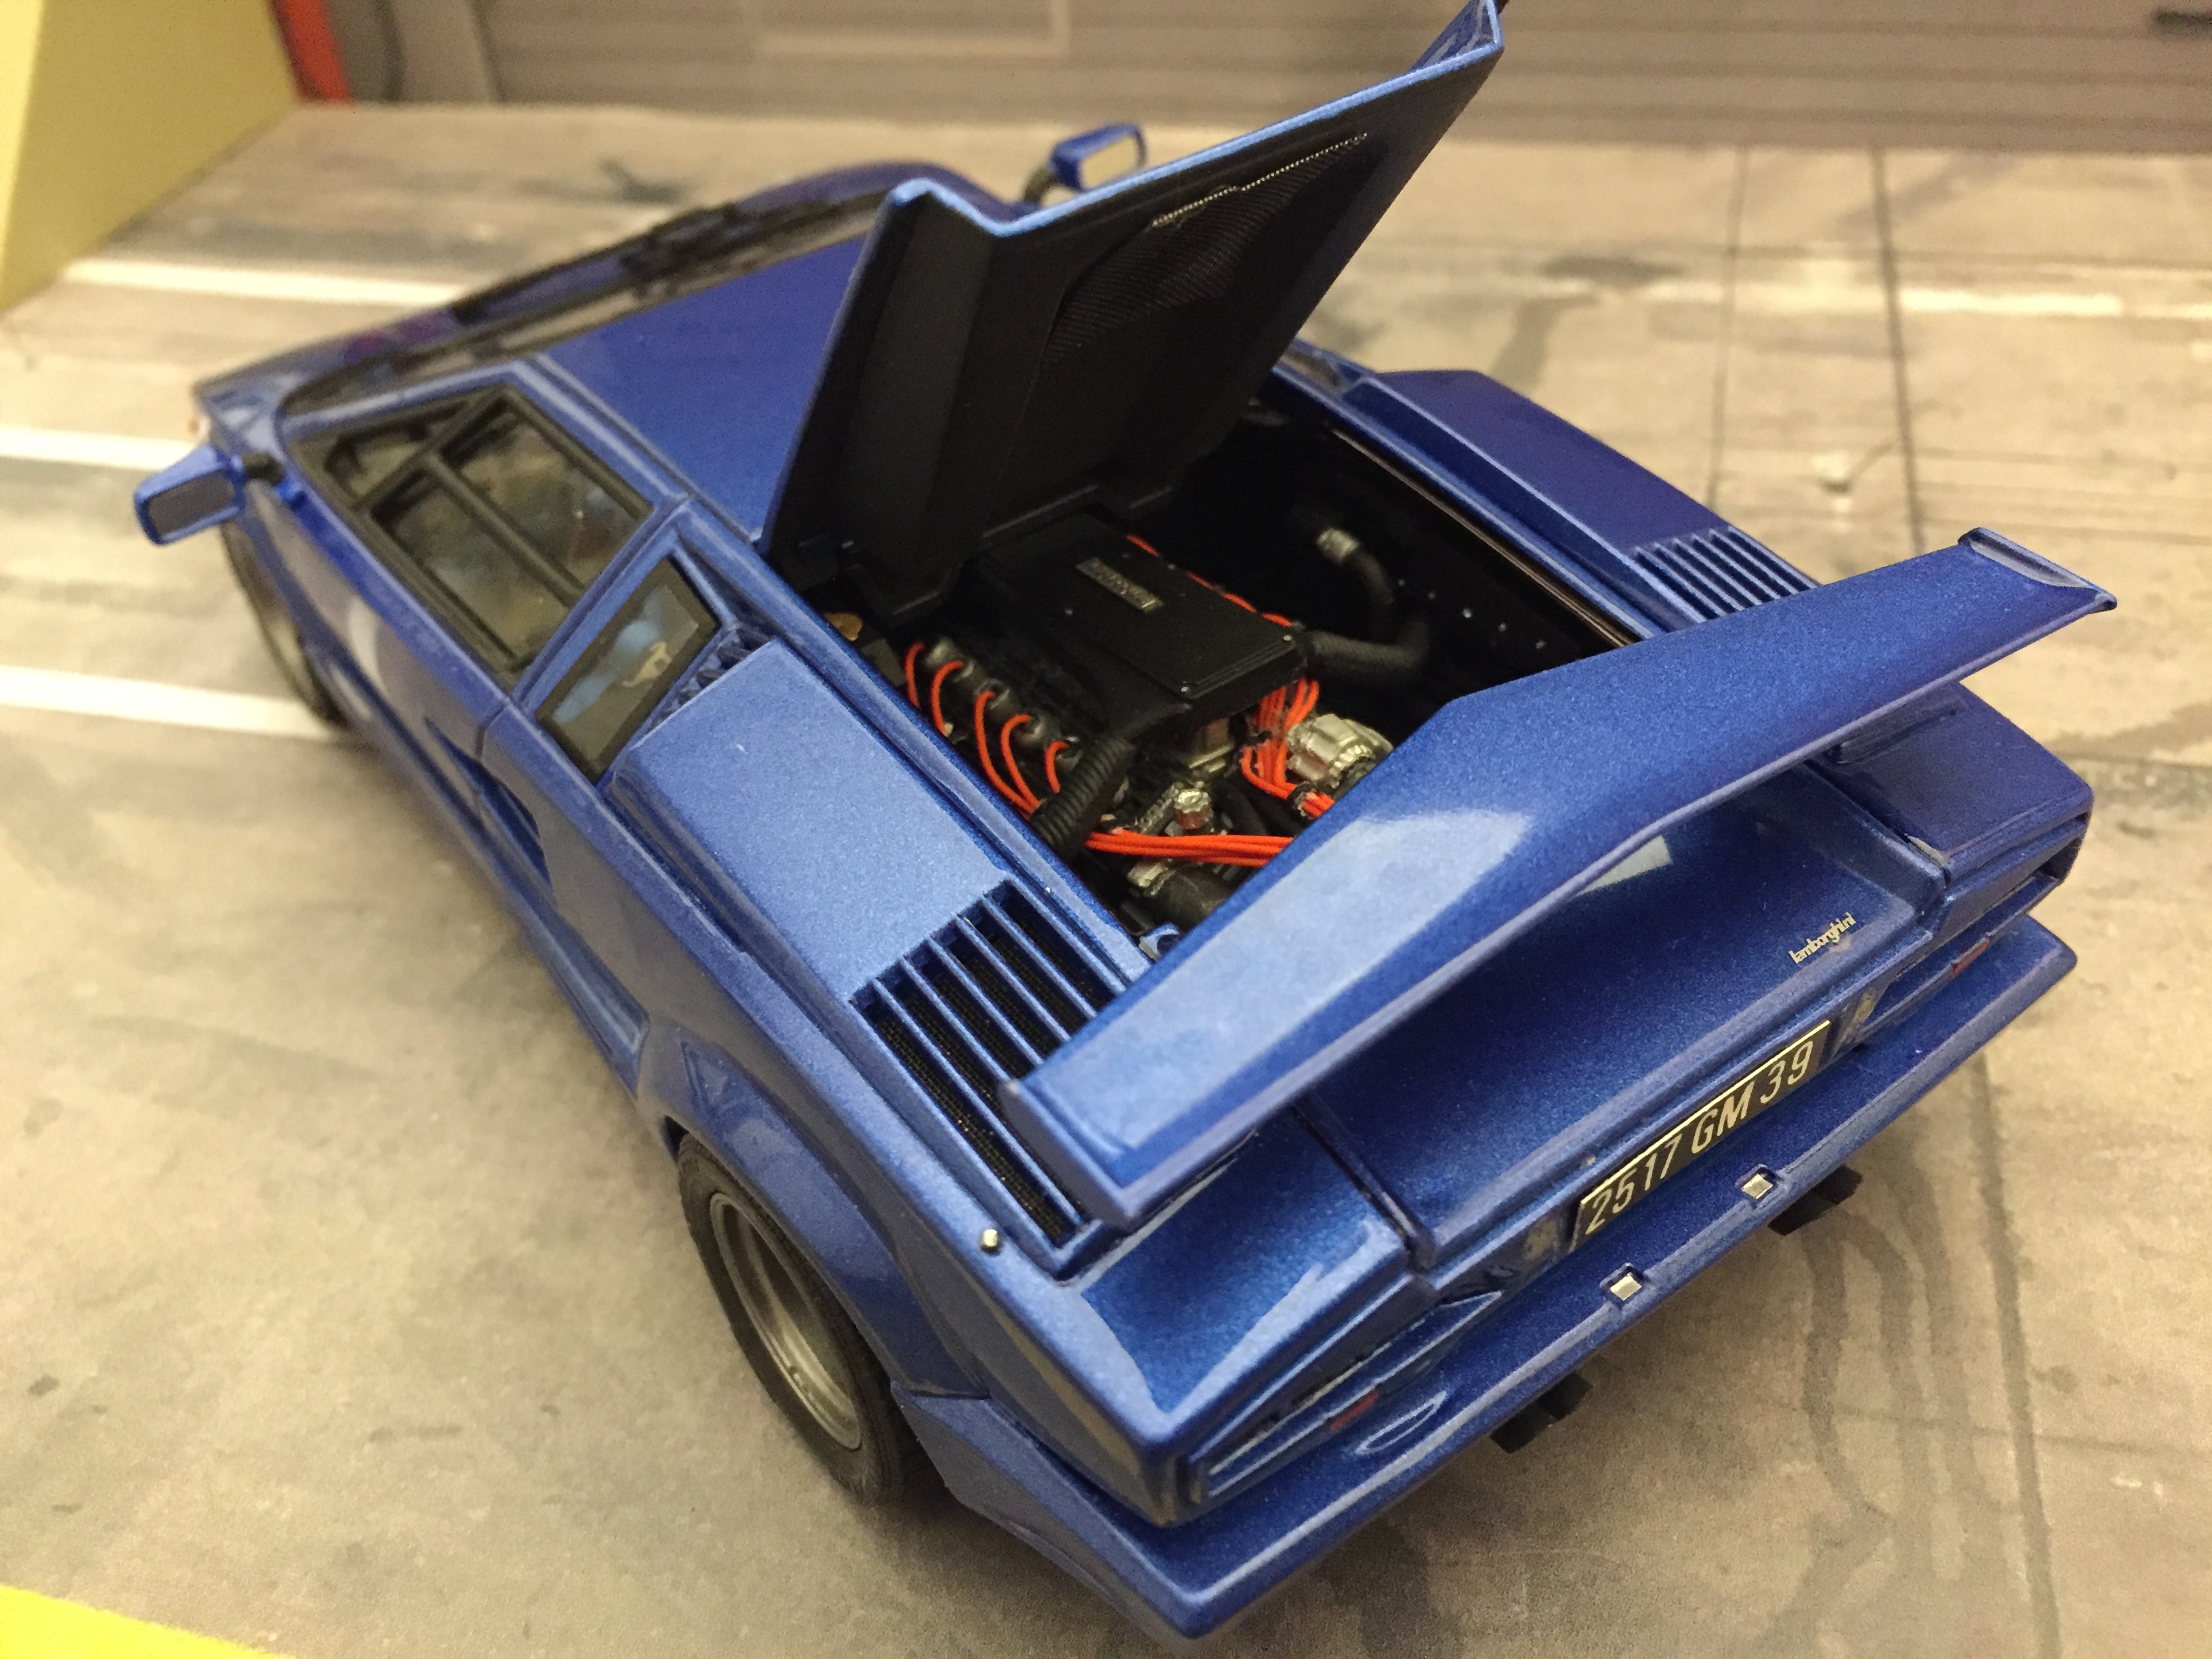
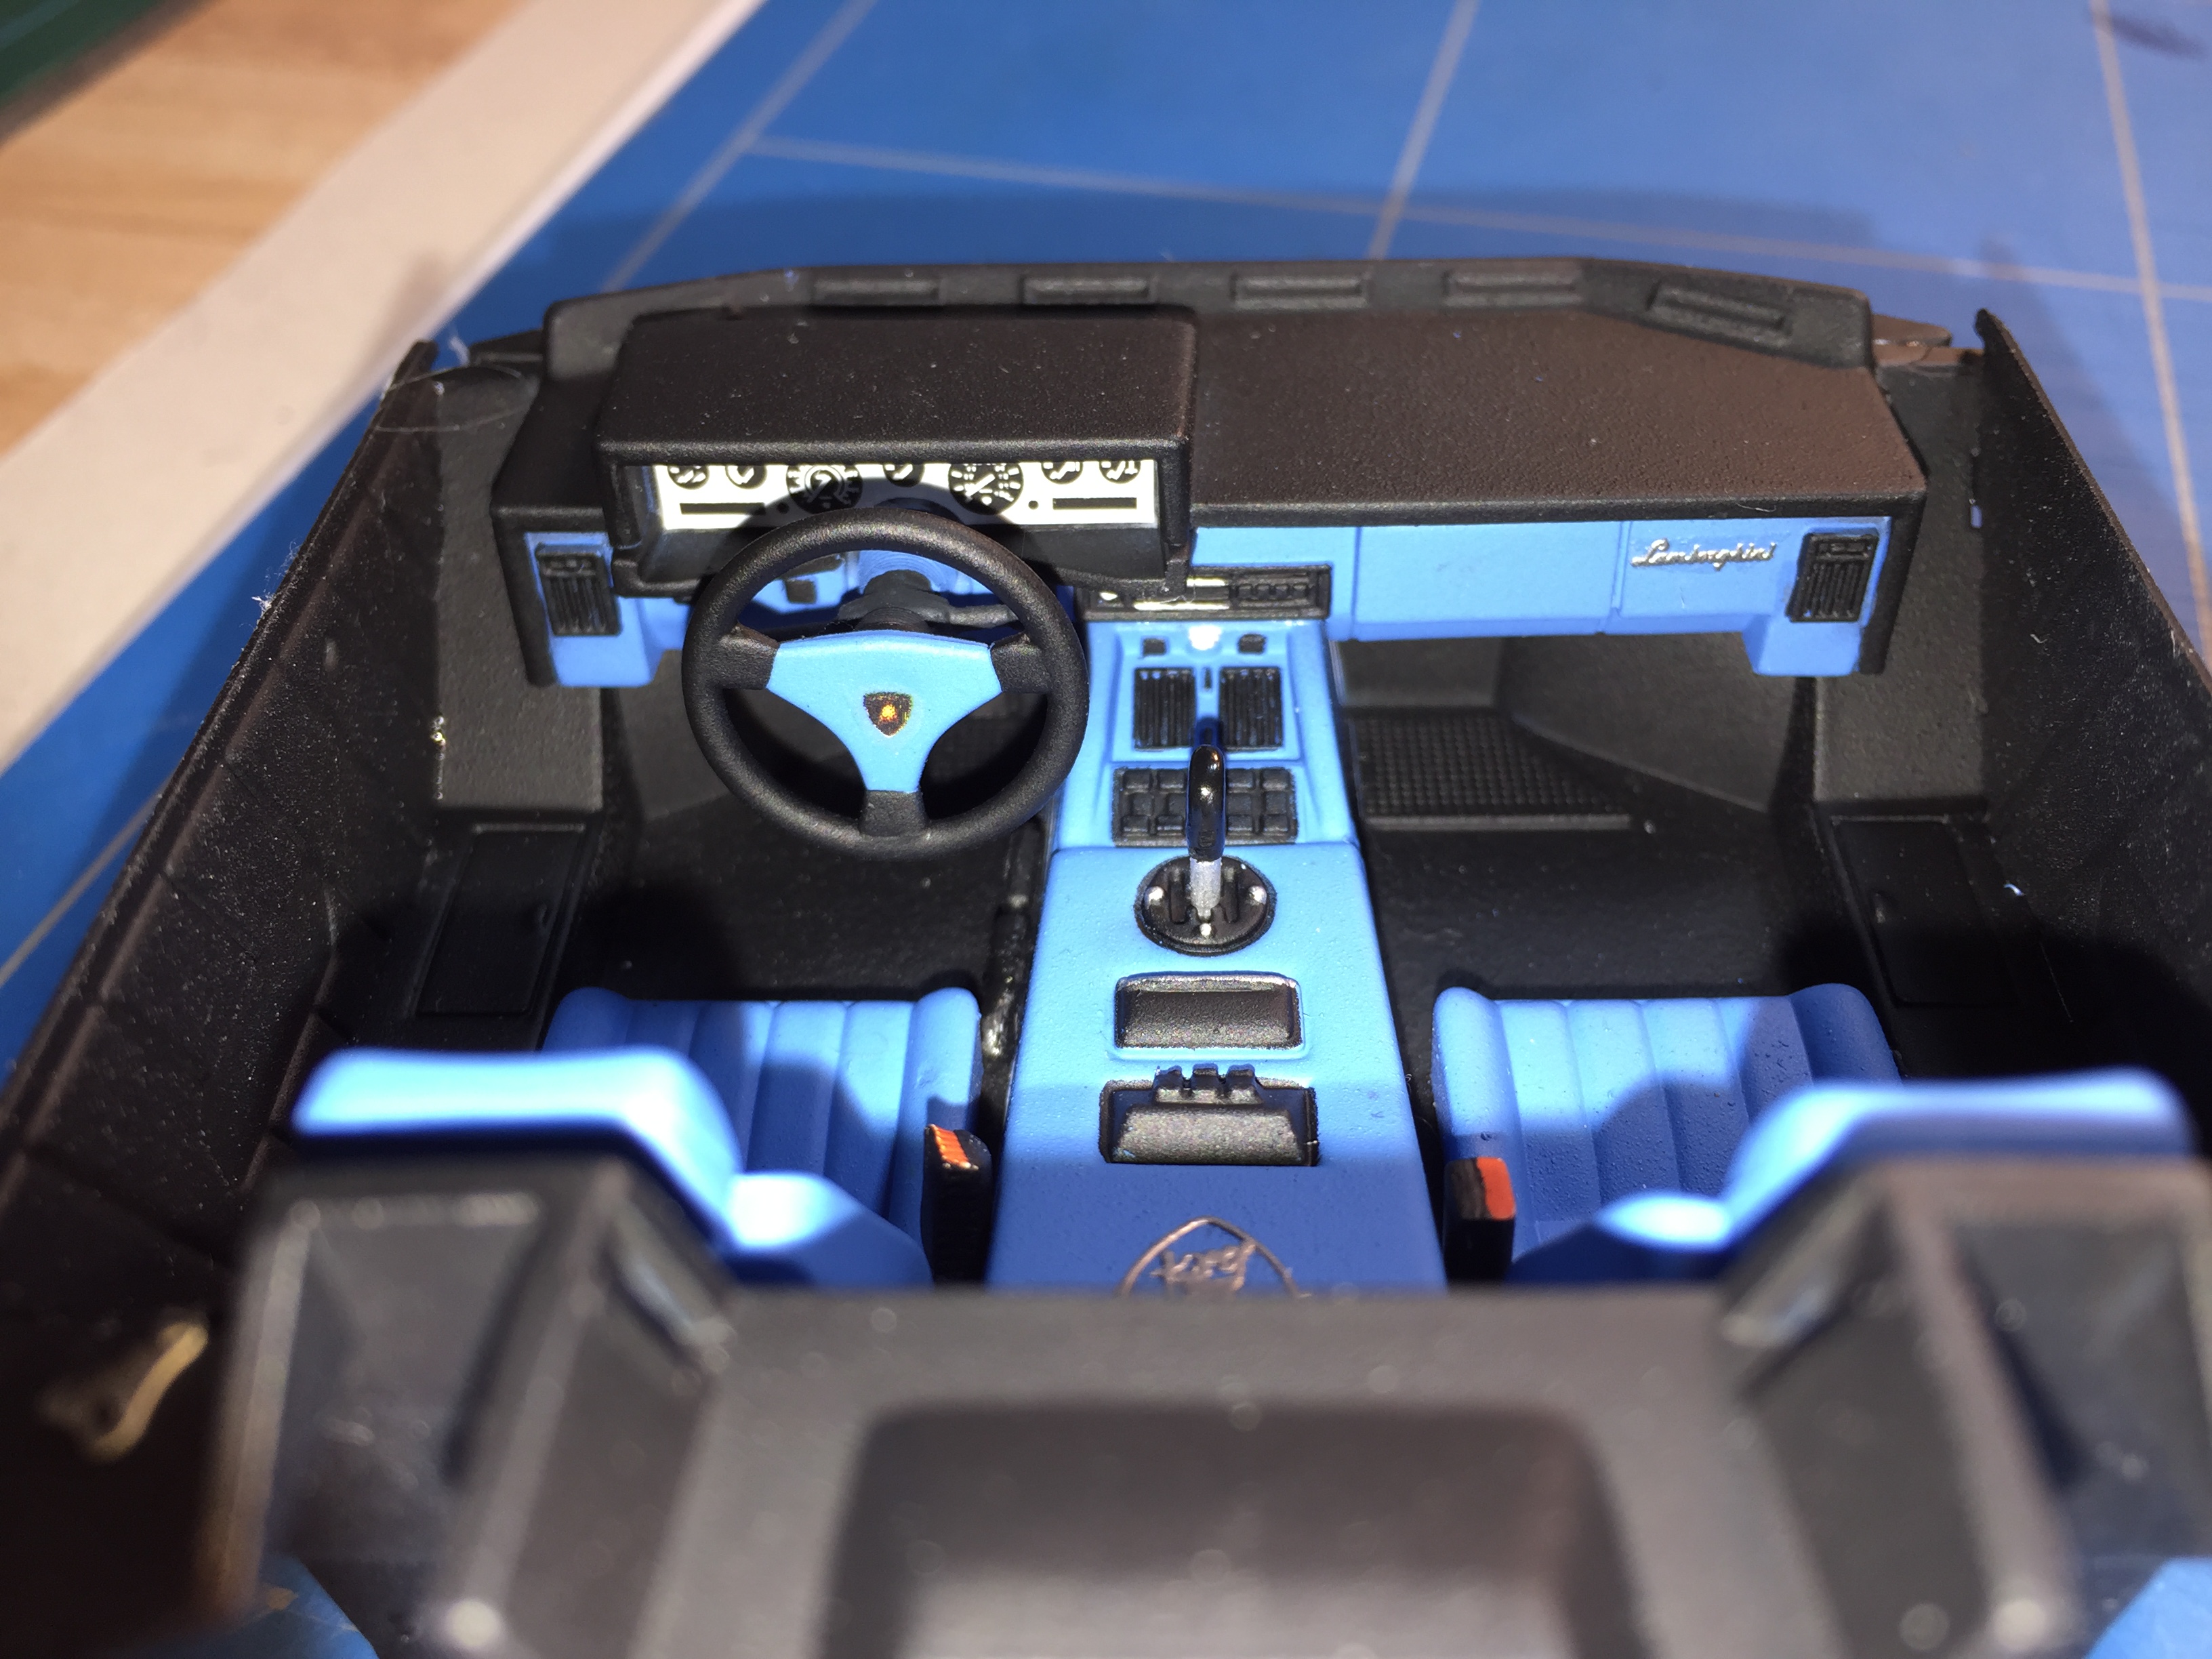
Hi folks, I would like to show you this one which I finished around 1 year ago. So right about that, Dann! The reason why I chose the Italeri over the Fujimi is... I don't know! In fact, I like the body shape of the Italeri a bit more, it's a bit wider in the front area, maybe more massive. The Fujimi probably is more true to scale, but I don't know. Anyways, I had bought the Italeri second-hand (some of the body parts were glued but that was all) so it was available. I have the Fujimi Anniversary Countach kit too, but only the non-EM kit without the engine. As I wanted to do one with an engine, this was the one to go for. As with most Italeri kits, the rims and tyres are a complete no-go. Even though the design of the rims itself is not that bad, they are all the same size and imho you just cannot do that on a Countach. As a result of my search on the internet I bought a set of Fujimi aftermarket rims + tyres with MUCH to wide rear tyres. Fortunately those were just right for Marcel_T4's massive Turbo Countach build, so he got them from me... As for my Anniversary Countach, I finally decided to use the rims from my Fujimi kit but as ALL Fujimi Countach tyres are too small in width, I had to add some wider ones from my spare parts box. Another modification that has been made is that I used the the "pointed" rear wing from the Aoshima QV 5000 kit. There are 2 wings included in that kit, the pointed one and the straight one. Back in the day, I always liked the Anniversary Countach without the rear wing but nowadays I think all Countach's except for the LP 400 HAVE to have one... The body color is ZP Lamborghini Blu Caelum, a very beautiful metallic blue which has been sealed with ZP 2k clear. Rims have been painted using AK Interactive's Gun Metal. Enough said, here come the images, hope you like them:
-
Hello, everyone!, this is my Aoshima Lamborghini Aventador. I love the "stealthy" look on him, I used 3D decal emblems on the bonnet, steering wheel, and centercaps. I carefully cut the side glass out, since I don't really like them up on my builds, I also left off the taillight lense covers.....I don't really like them on it either. This is Aoshima's "full engine detail" kit which actually translates to; A lot of engine stuff, but not everything....the lower-end is missing. Still, with the outstanding way they designed it, the awesome detail of the parts, and the fact that these kinds of autos have full belly-pans, the engine bay CAN still look realistically complete with the help of wiring, painting, and other detail add-ons! This one is proof of it. This kit is so easy, and fun...….I could just keep buying and building them!!
-
Hello, i will show my Lamborghini. Thema Inspiration was a John Sibal picture. Alle body parts are 3D printed. Sorry for my bad english.
-
 I'm surprised nobody has come out with a transverse V12 engine for the Lambo Miura. Seems like all the kits have only the top, and pan of the engine. Please prove me wrong!
 -
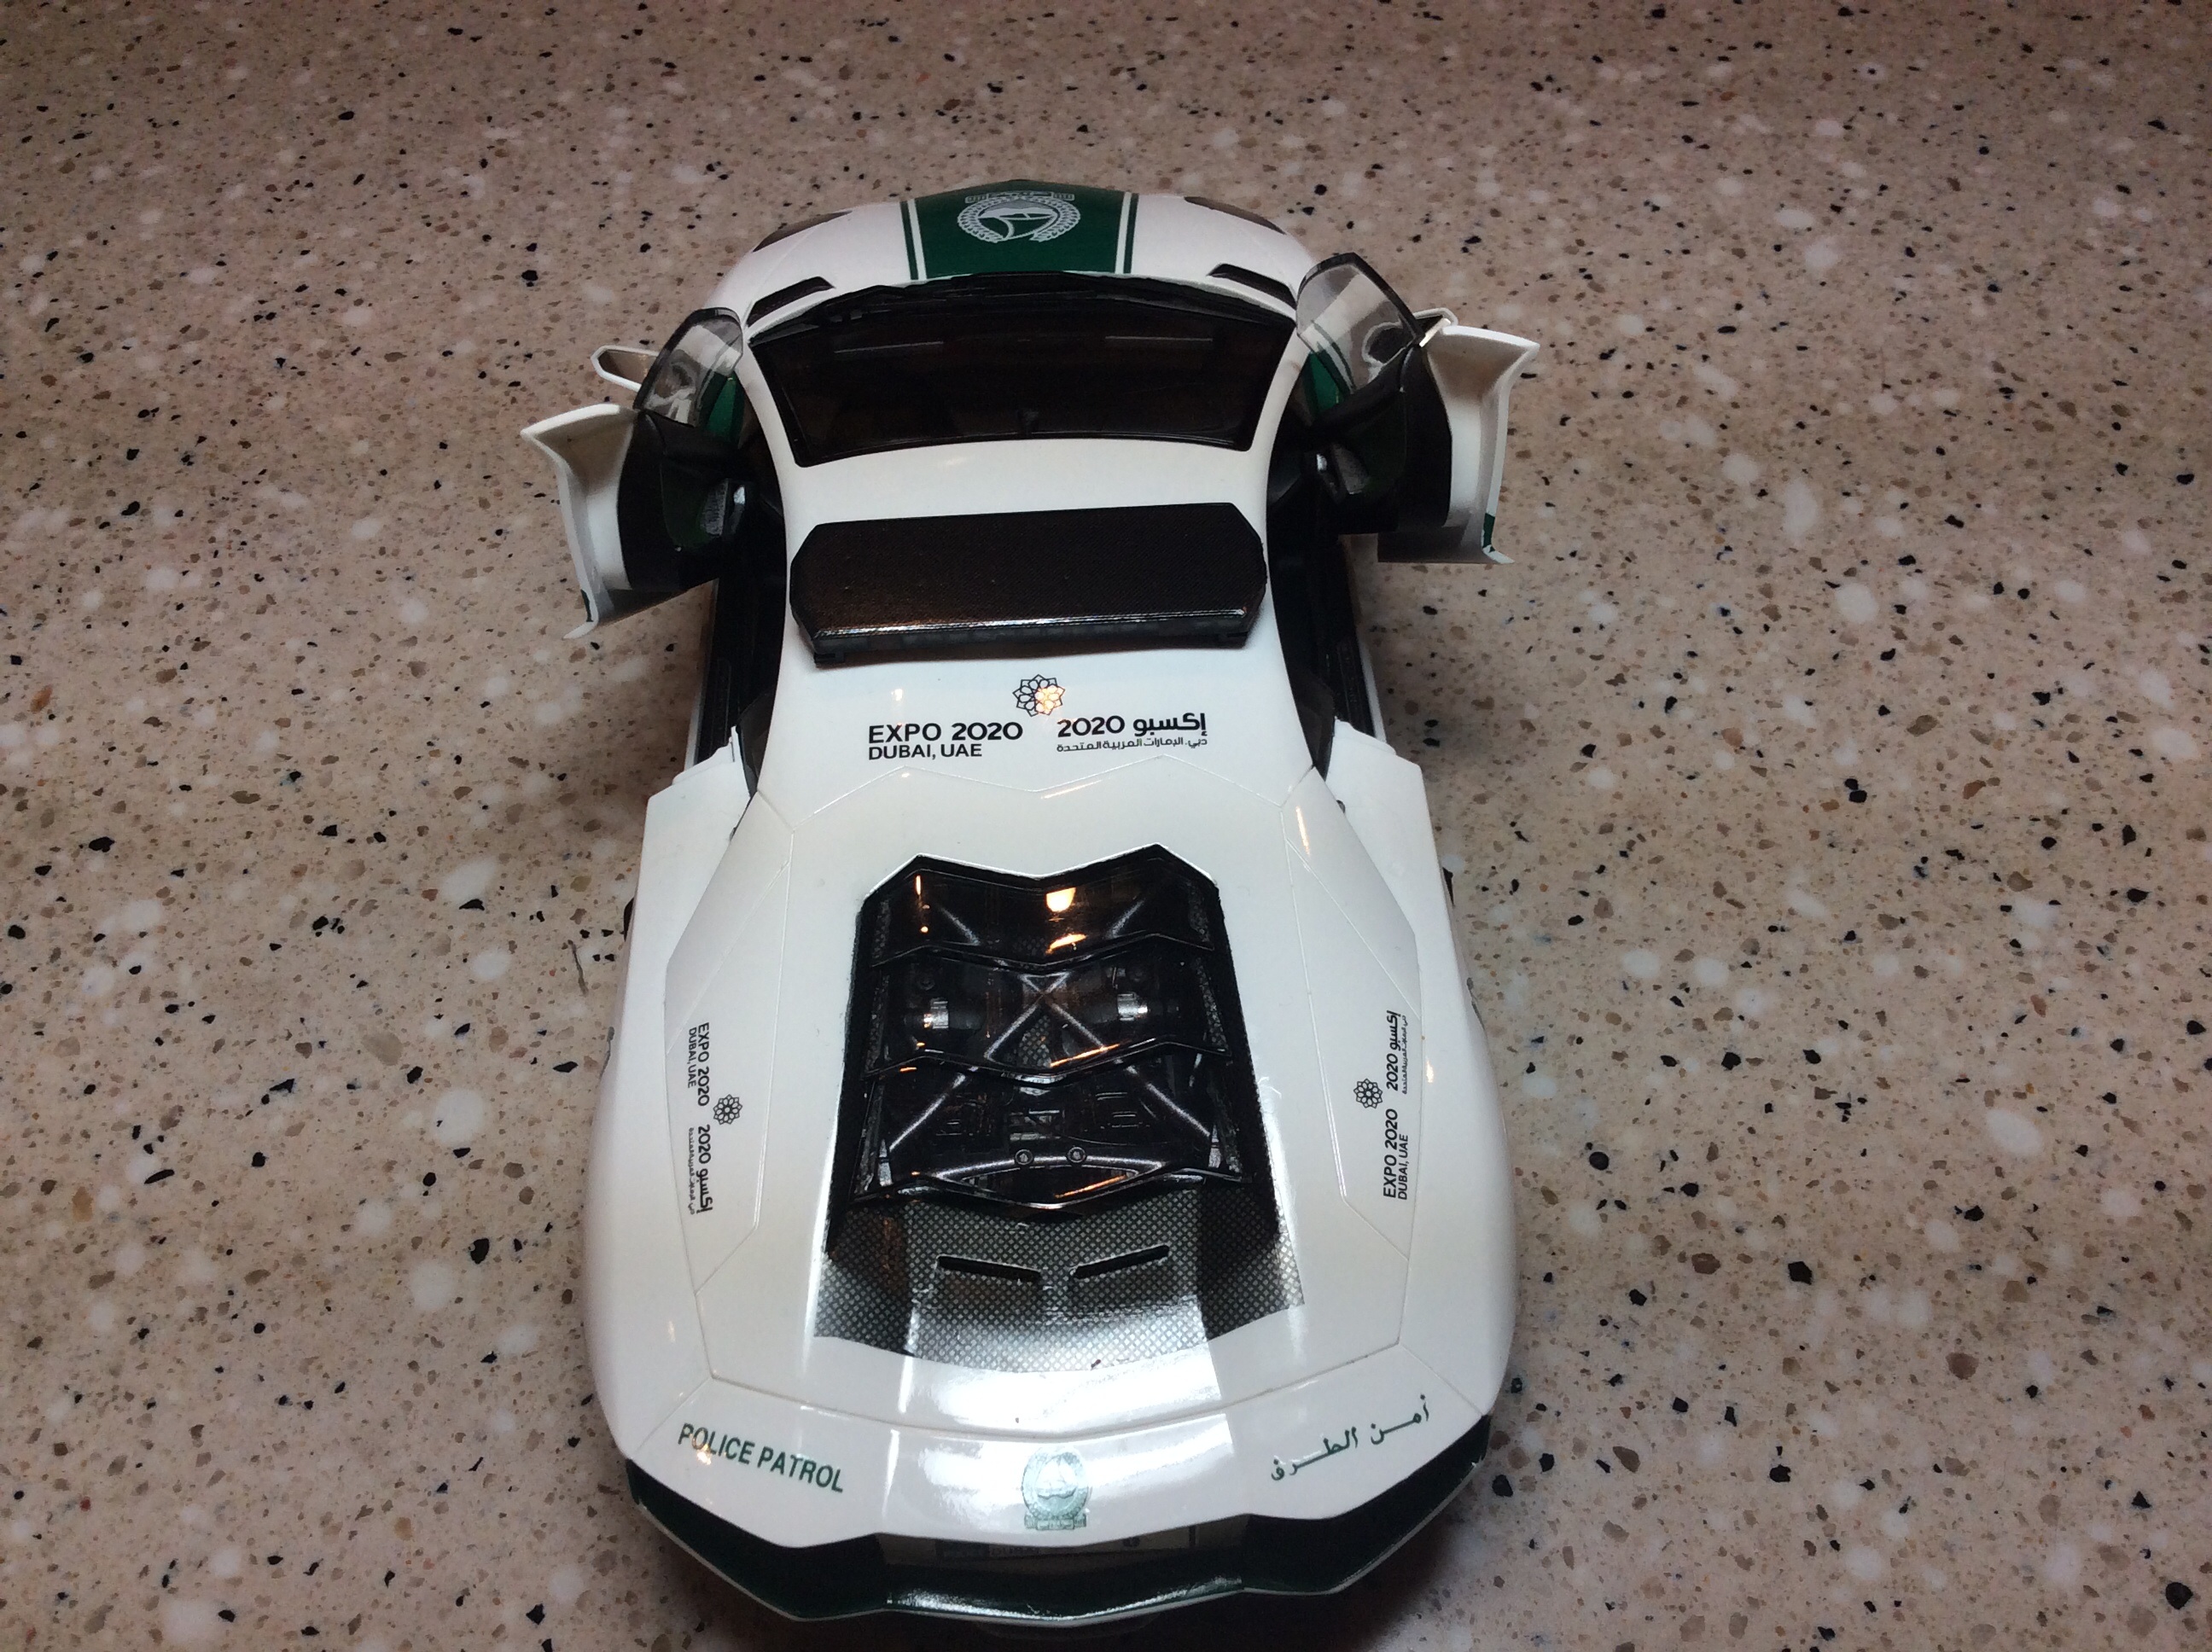
So i just finished this model, looks good in general, some small mistakes, luckily they are pretty much all on the right side of the car, i should therefore just display it showing the right side i guess Although the big SV sticker looks better on the right, i got so annoyed with the left side sticker i just left it like it is, as it just wouldnt move anymore and didnt want to rip it in pieces moving it anymore... big decals are a pain in the ***
-
So i have no clue wether this should be under the workbench or glass section as its completed but ill post some building pic's also. The build of my Diablo VT Fully painted with 3 layers of the TS-89 spraycan Final assembly: Completed (although still needs polishing and decals): Quite happy with the outcome of it, must say Revell is alot less detailed than im used to from Tamiya (steering dont work for example), but its fun as a "quick build" depending on how far you go with paint etc...
-
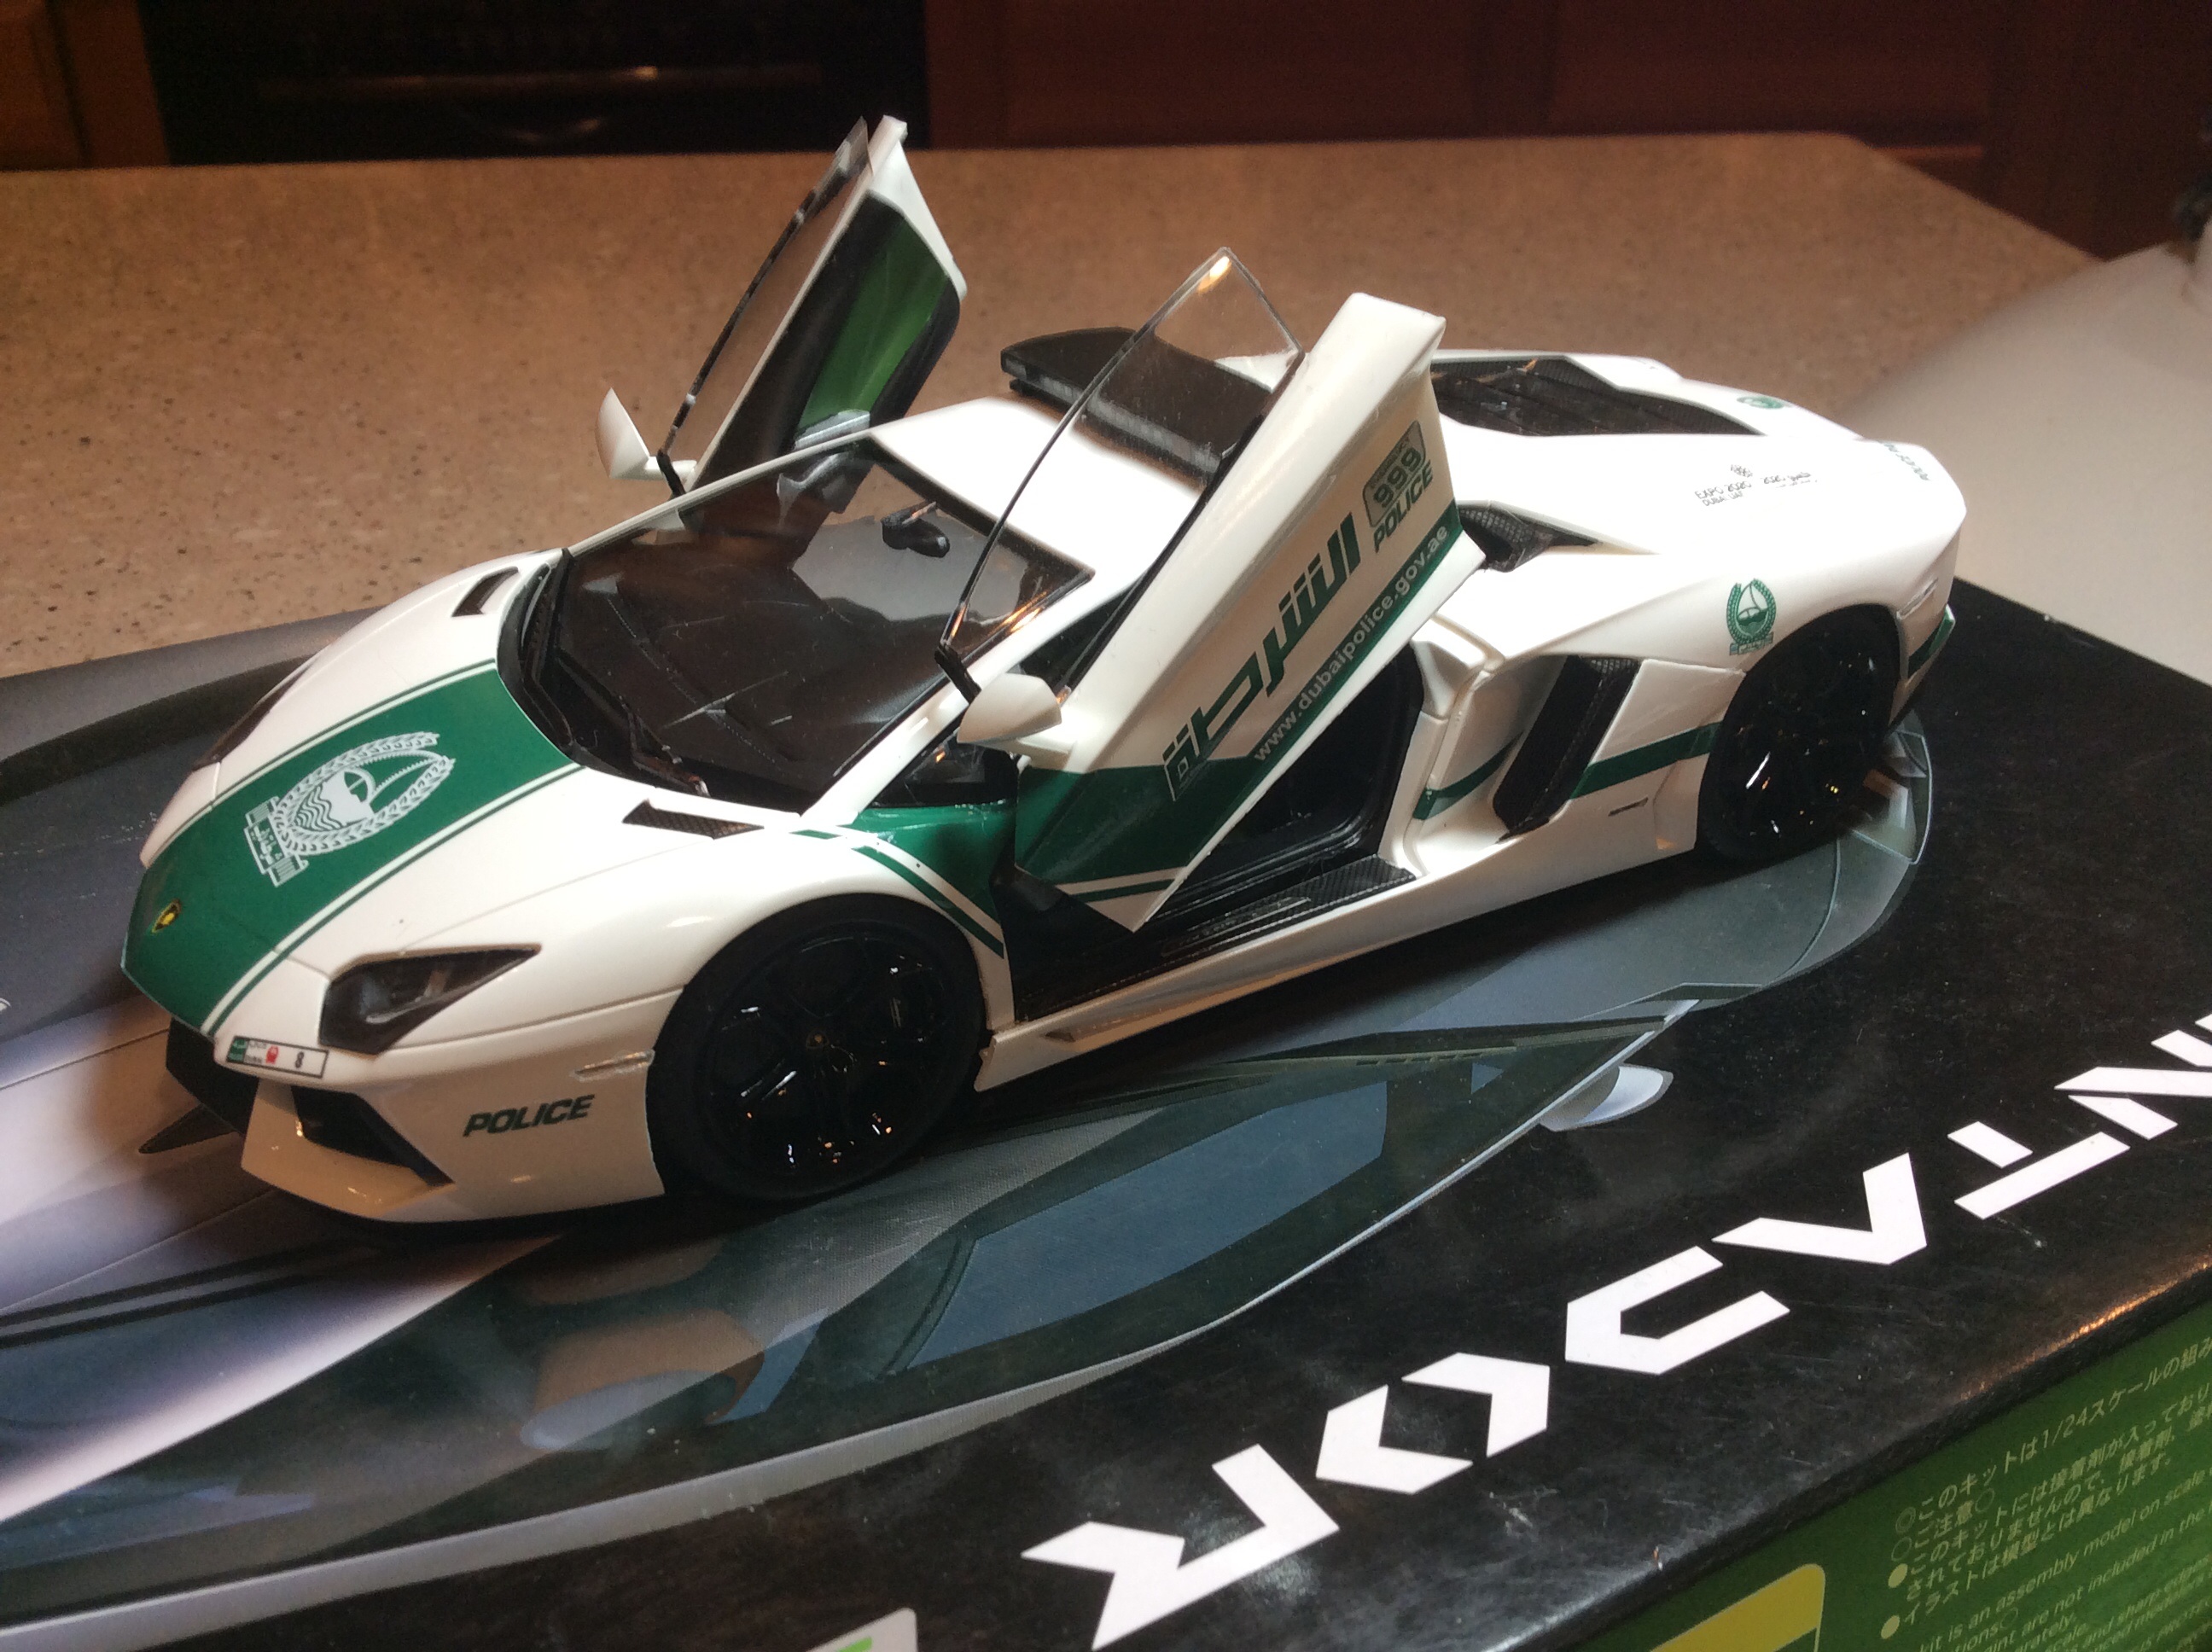
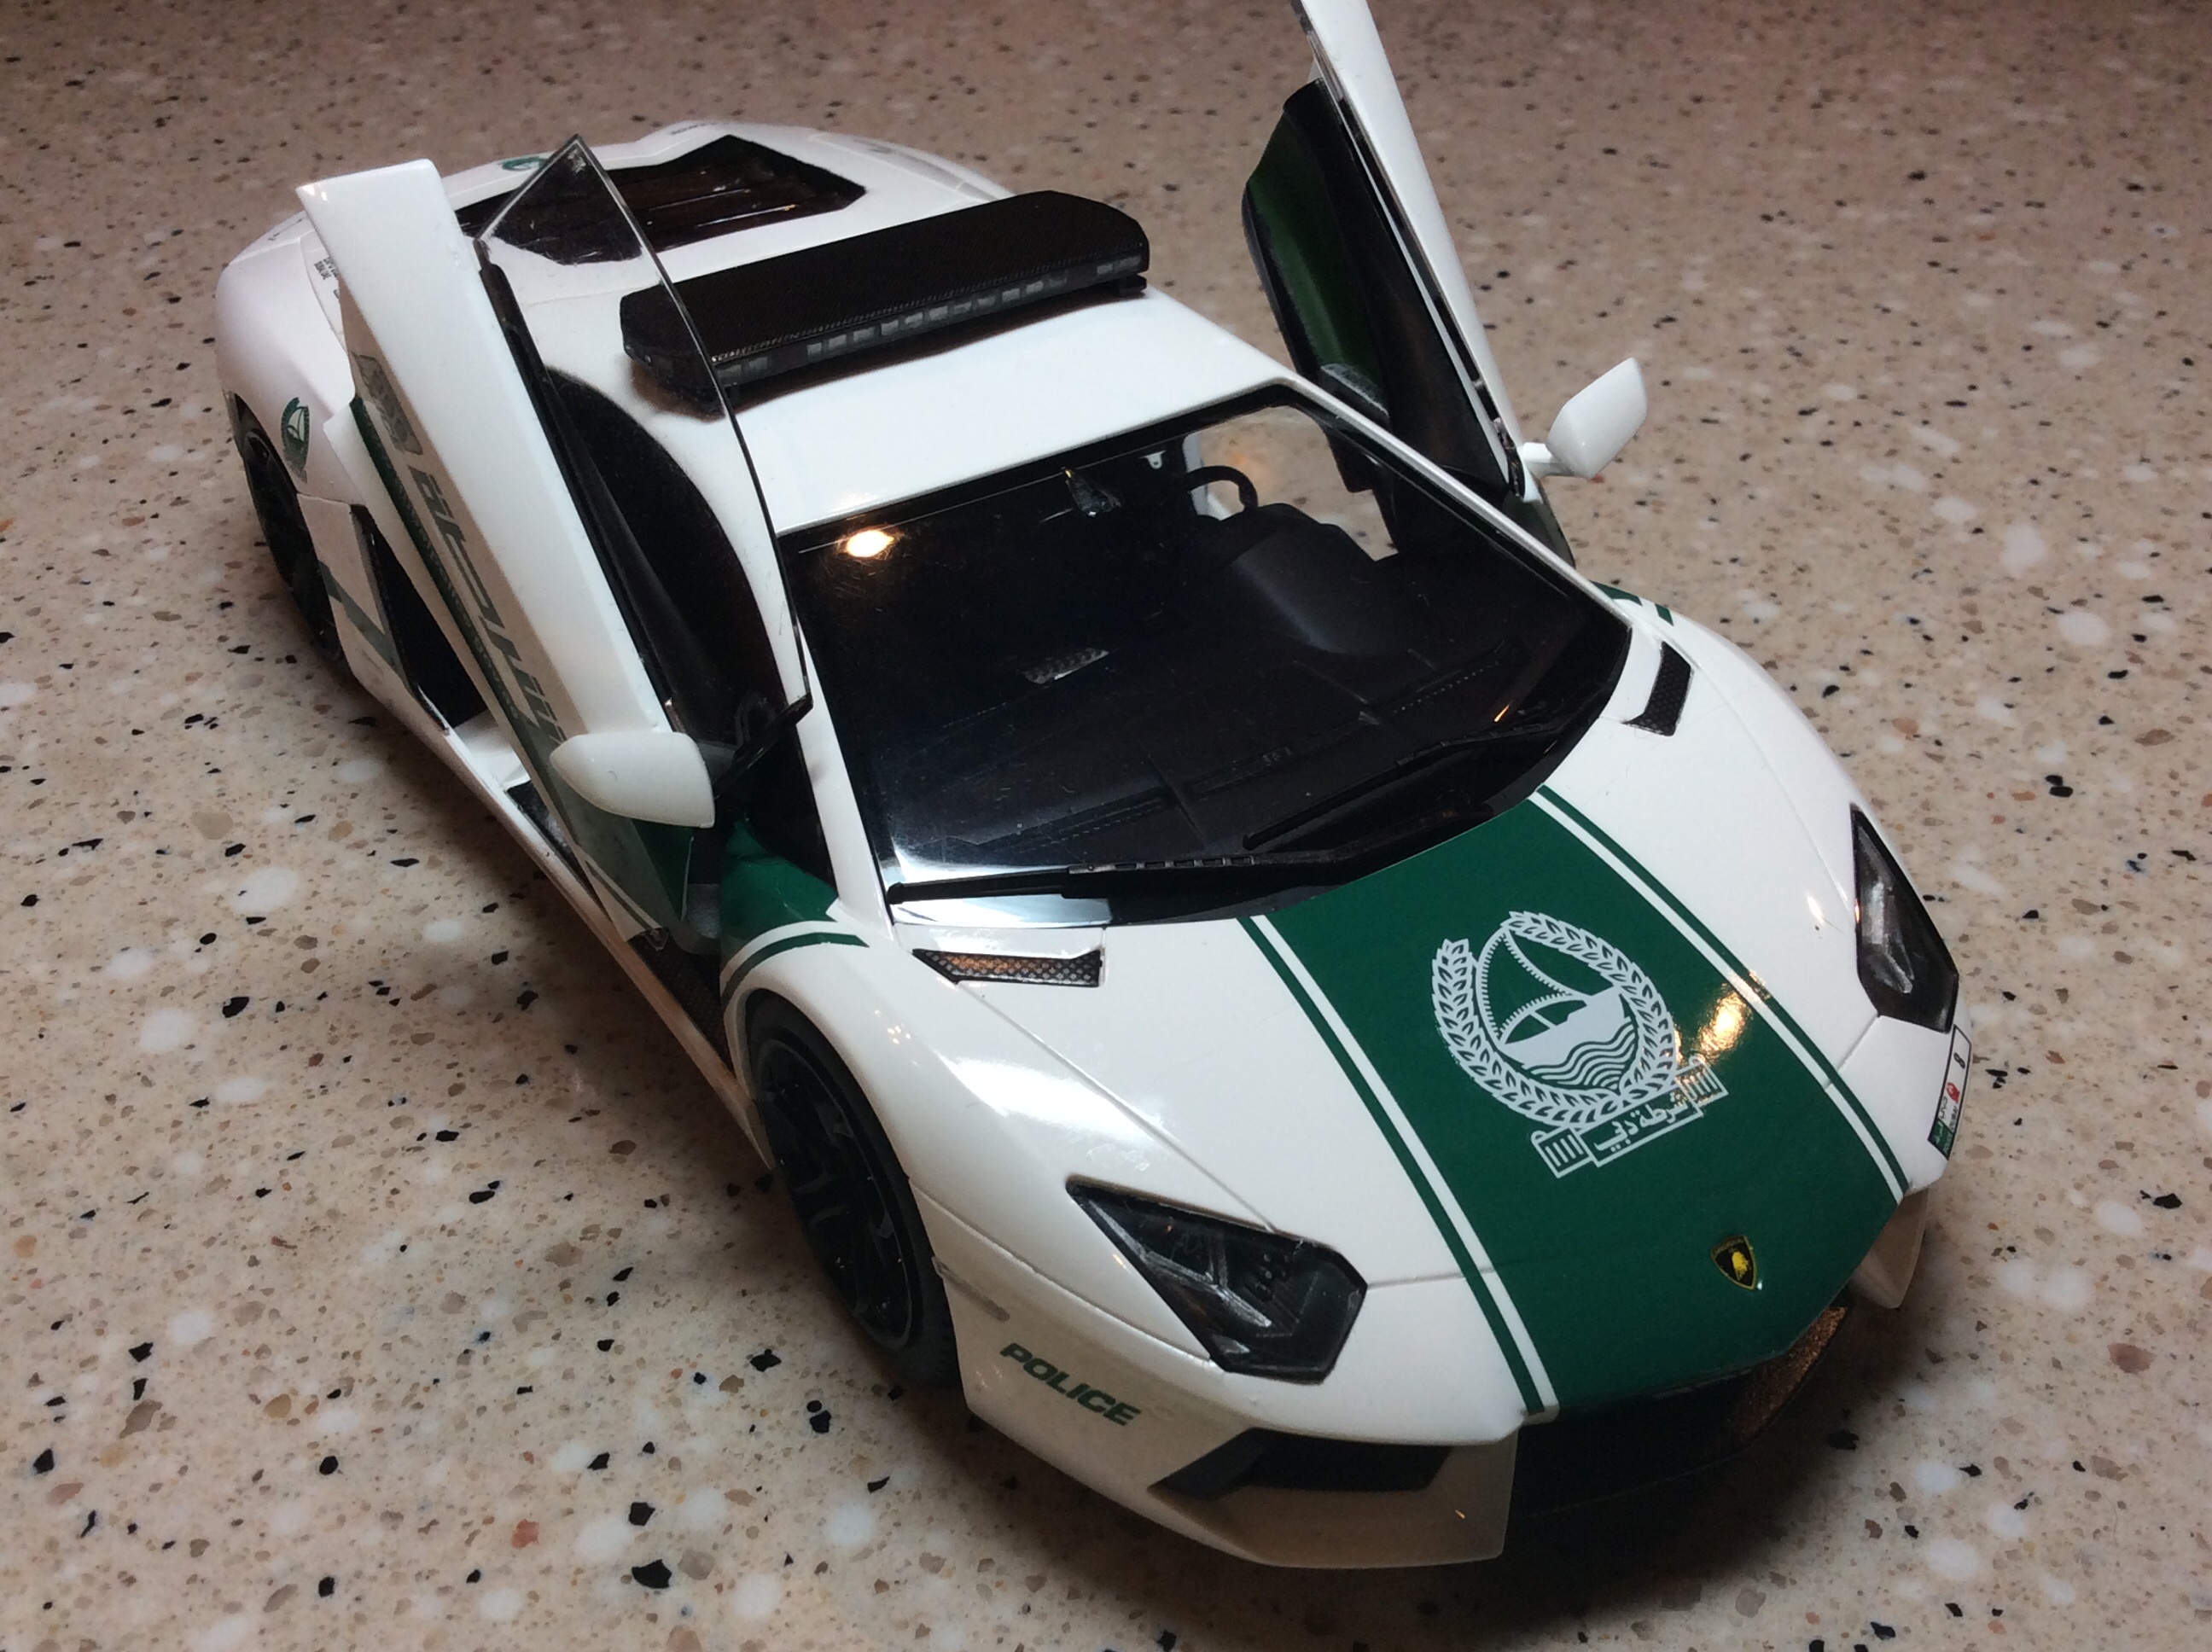
I saw a picture of this car on the internet and when Studio 27 came out with the decals and light bar kit,it was a no brainer. The kit is the Fujimi Aventador LP 700-4 . The kit is fantastic . Has all the photo-etch and a sheet of laser printed details( dash face ,wheels logos and the side badges) The trans kit is from Studio27. They make the kits for all the different cars. I added a few carbon details here and there. Scale Motorsports carbon was used. A fun build and something different for the shelf.
-
A few taken to experiment with a new photography set-up which I thought I'd share: bestest, M.
-
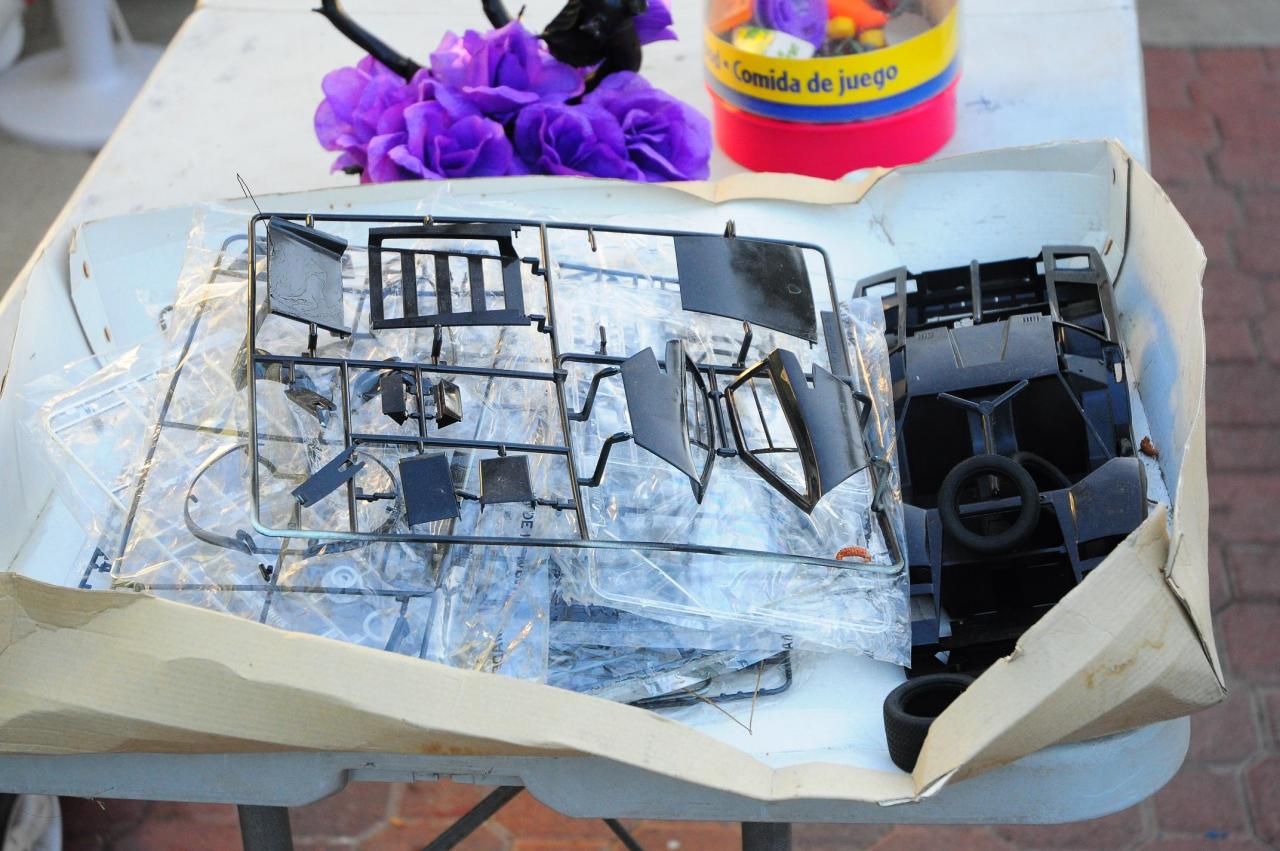
Hello, I've been looking through my grandfather stuff during Christmas (Grandpa passed away 25 years ago) and I've found something interesting. He was collecting train models TT and N, but in dozens of boxes containing those I've found two OTAKI Plastic Models. These are Alfa Romeo Coupe 33 and Lamborghini Miura P400. Both are 1:16 scale and are in PERFECT condition, they were never opened nor used. As they are something around 30-40 years old I think they might be pretty valuable, that's why I am not planning to build them, but to sell them. Do you know how much may they cost? I mean, I've seen this Alfa Romeoon the Ebay for 200$ with damaged box, while mine, as I've mentioned before, is in 100% perfect condition. I haven't found Miura anywhere on the net so it might be pretty rare especially considering their age. I attached photos of boxes and the parts inside it.
-
Kit: Aoshima Lamborghini Aventador Transkit: Hobby Design Upgrade: Hobby Design Upgrade-set (deluxe with resin parts) Paint: Arencio Argos (Lamborghini) and gloss black by Zero Paints Clear: 2K Gloss Clear by Zero Paints Extra: Carbon Fibre decals by Ka Models; seat belt material from Hiroboy Please let me know what you think, Chris.
-
A fantastic kit of a uncompromisingly old school super car: What a beautifully engineered kit, especially around the "working" features. Literally the only place I used filler in the whole build was a small smear to fill the join line UNDERNEATH the black wing mirrors -- a real "because God can see" moment... There's a bit of extra wiring on the engine (the only bits you can see are the four wires from the cylinder heads disapperaing under the airbox, and then only if you look. The OOB engine is pretty good. Interior paint is mostly Vallejo and Citadel, plus Tamiya Rubber Black and NATO black. Exterior is Zero Paints Giallo Orion and Tamiya Rubber Black from a rattle can. The wing has a masked "carbon" texture, not that you'd notice in these pictures! The main thing I learned from this is that if you are spraying a two-layer colour (yellow base overlaid with gold "pearl"), then you need to keep the pieces physically as close together as you can while you spray, to make sure they come out an even colour. If you look carefully, the doors and airscoops are a very slightly darker yellow than the main body. I've distracted as much as possible from it with big black decals etc so it's not too noticeable, but it's a lesson I've hauled on board. bestest, M.
-
Time for a separate thread for this one. Those of you with long memories may recall that I began this back in May, alongside the Tamiya Alfa GTA. Well... this one's finally got back to the bench, after I was distracted by finishing the GTA, the XJ220, moving house etc etc... NIcely detailed parts and good engineering make this a pleasure to build. The engine bay is lined in cigarette foil. I'm not going to town on this one like the XJ220, but I'll busy it up a little. No point in wiring the plugs, though -- they are completely invisible under the inlet manifold. One thing to note, though, if you do decide to wire it, is that the wires come out at 90 degrees to the "obvious" direction... Not many parts in this assembly, but it looks nicely complex. The engine is the chromed kit part, matt varnished and then treated to some Citadel wash. My owner has swapped his shocks for some aftermarket ones in purple and yellow... The body in Giallo Orion. You can see the risks of painting parts separately here: the doors and air scoops are a very lightly different yellow from the body, thanks to different amounts of pearl. It was a lesson learned, hence painting all the XK220 body colour parts as physically close together as possible... bestest, M.
-
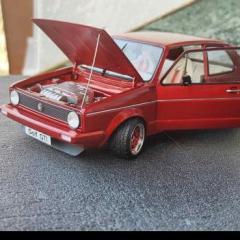
A tale of sadness yet hope. A long time ago, when I just had started to build model cars I bought this kit and...well, trashed it. Now almost 5 years its time to do it right! I found it today in my storage! everything is here except the instructions, first off, stripping the horrible rattle can paint job! and brushed on interior work!
-
 Two very different cars, but both a tribute to the best of Italian sports car know-how... The GTA in primer. I'm trying out the technique suggested by "Cruz" in which you wash the shut lines with black while the car is in primer, before painting. He suggests rescribing the lines first, but I thought that the GTA had crisp and deep enough lines out of the box to test the technique without needing to scribe them. The Murcielago in primer. I wanted to get as many parts of the body together as possible to avoid having to match the colours, and glue clear-coated pieces together. In practice, this means the extreme nose, skirts and lower edges of the extreme rear can be attached. Doors and one intake (which has a segment of body colour inside) have to remain separate... The Murcielago will be Giallo Orion -- a pearl yellow colour -- with lots of black/grey carbon trim. This is, once again, the ever reliable Zero Paints system of ground coat, base coat and clear coat. Whereas the Giulia Sprint GTA is in a colour scheme inspired by some of the racers I've seen at Donington over the years. More Zero Paints, this time Alfa Rosso Corse and Lamborghini Powder Blue (a Miura colour which eventually lost out to the lime green when I built mine, but I may still do another in this colour, because it looks so cool...) And now with the clear coat on. You can see how much it changes the apparent colour of the base coat, especially on the Lambo. I think the change is even more intense with the pearl finish because it reduces the scattering of light by the pearl layer, and lets you "see through" to the base coat more directly. I also tried using clear over a decal for the first time, (the Alfa "snake" on the bonnet) which has worked very well. There are the odd spot imperfections here and there, but once again the Zero 2K clear has done its job and settled into a smooth, glossy finish all over. These will now go away into plastic boxes for a week or so to fully cure before polishing out those spots. It's good to be back at the bench! bestest, M.
 -
Working on getting a Countach engine in a 68 firebird. I put the rear wing, side air scoops, and seats into the Pontiac, which work out fairly well. Now I need to concentrate on the body and brake/fuel lines. Getting the Lamborghini radiators attached to the grill is going to be a challenge.