Alan Barton
-
Posts
2,128 -
Joined
-
Last visited
Content Type
Profiles
Forums
Events
Gallery
Everything posted by Alan Barton
-
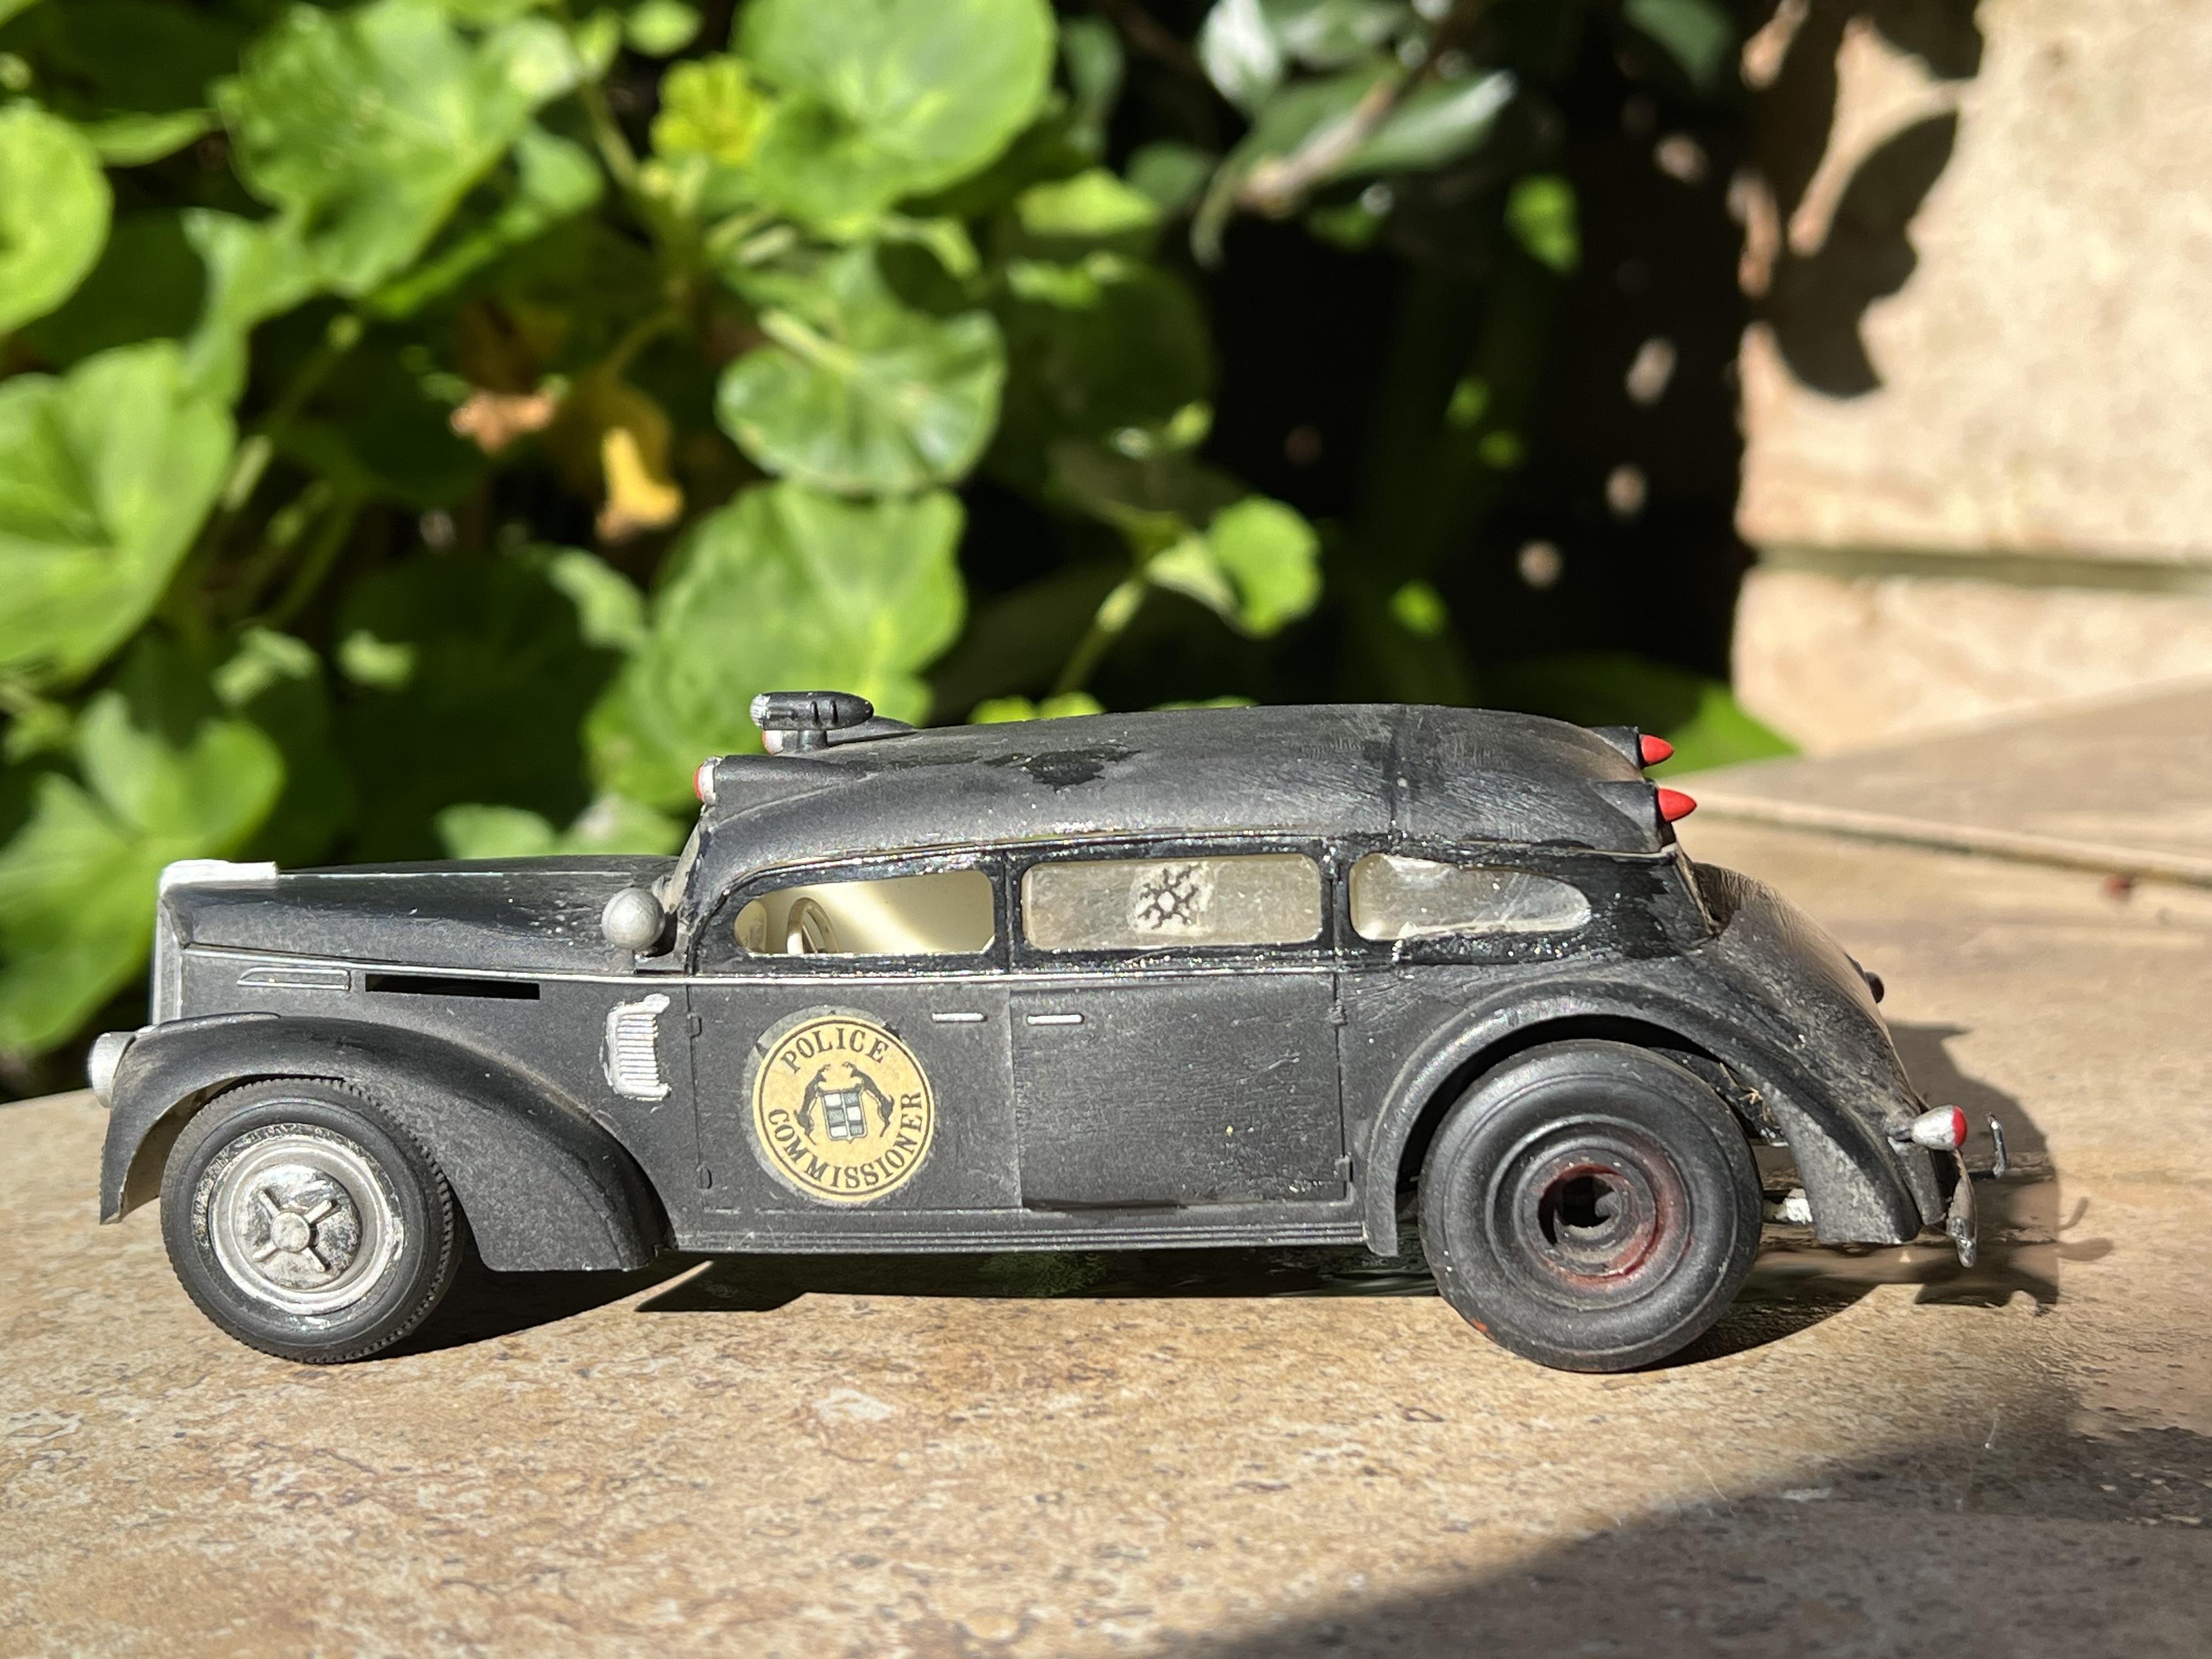
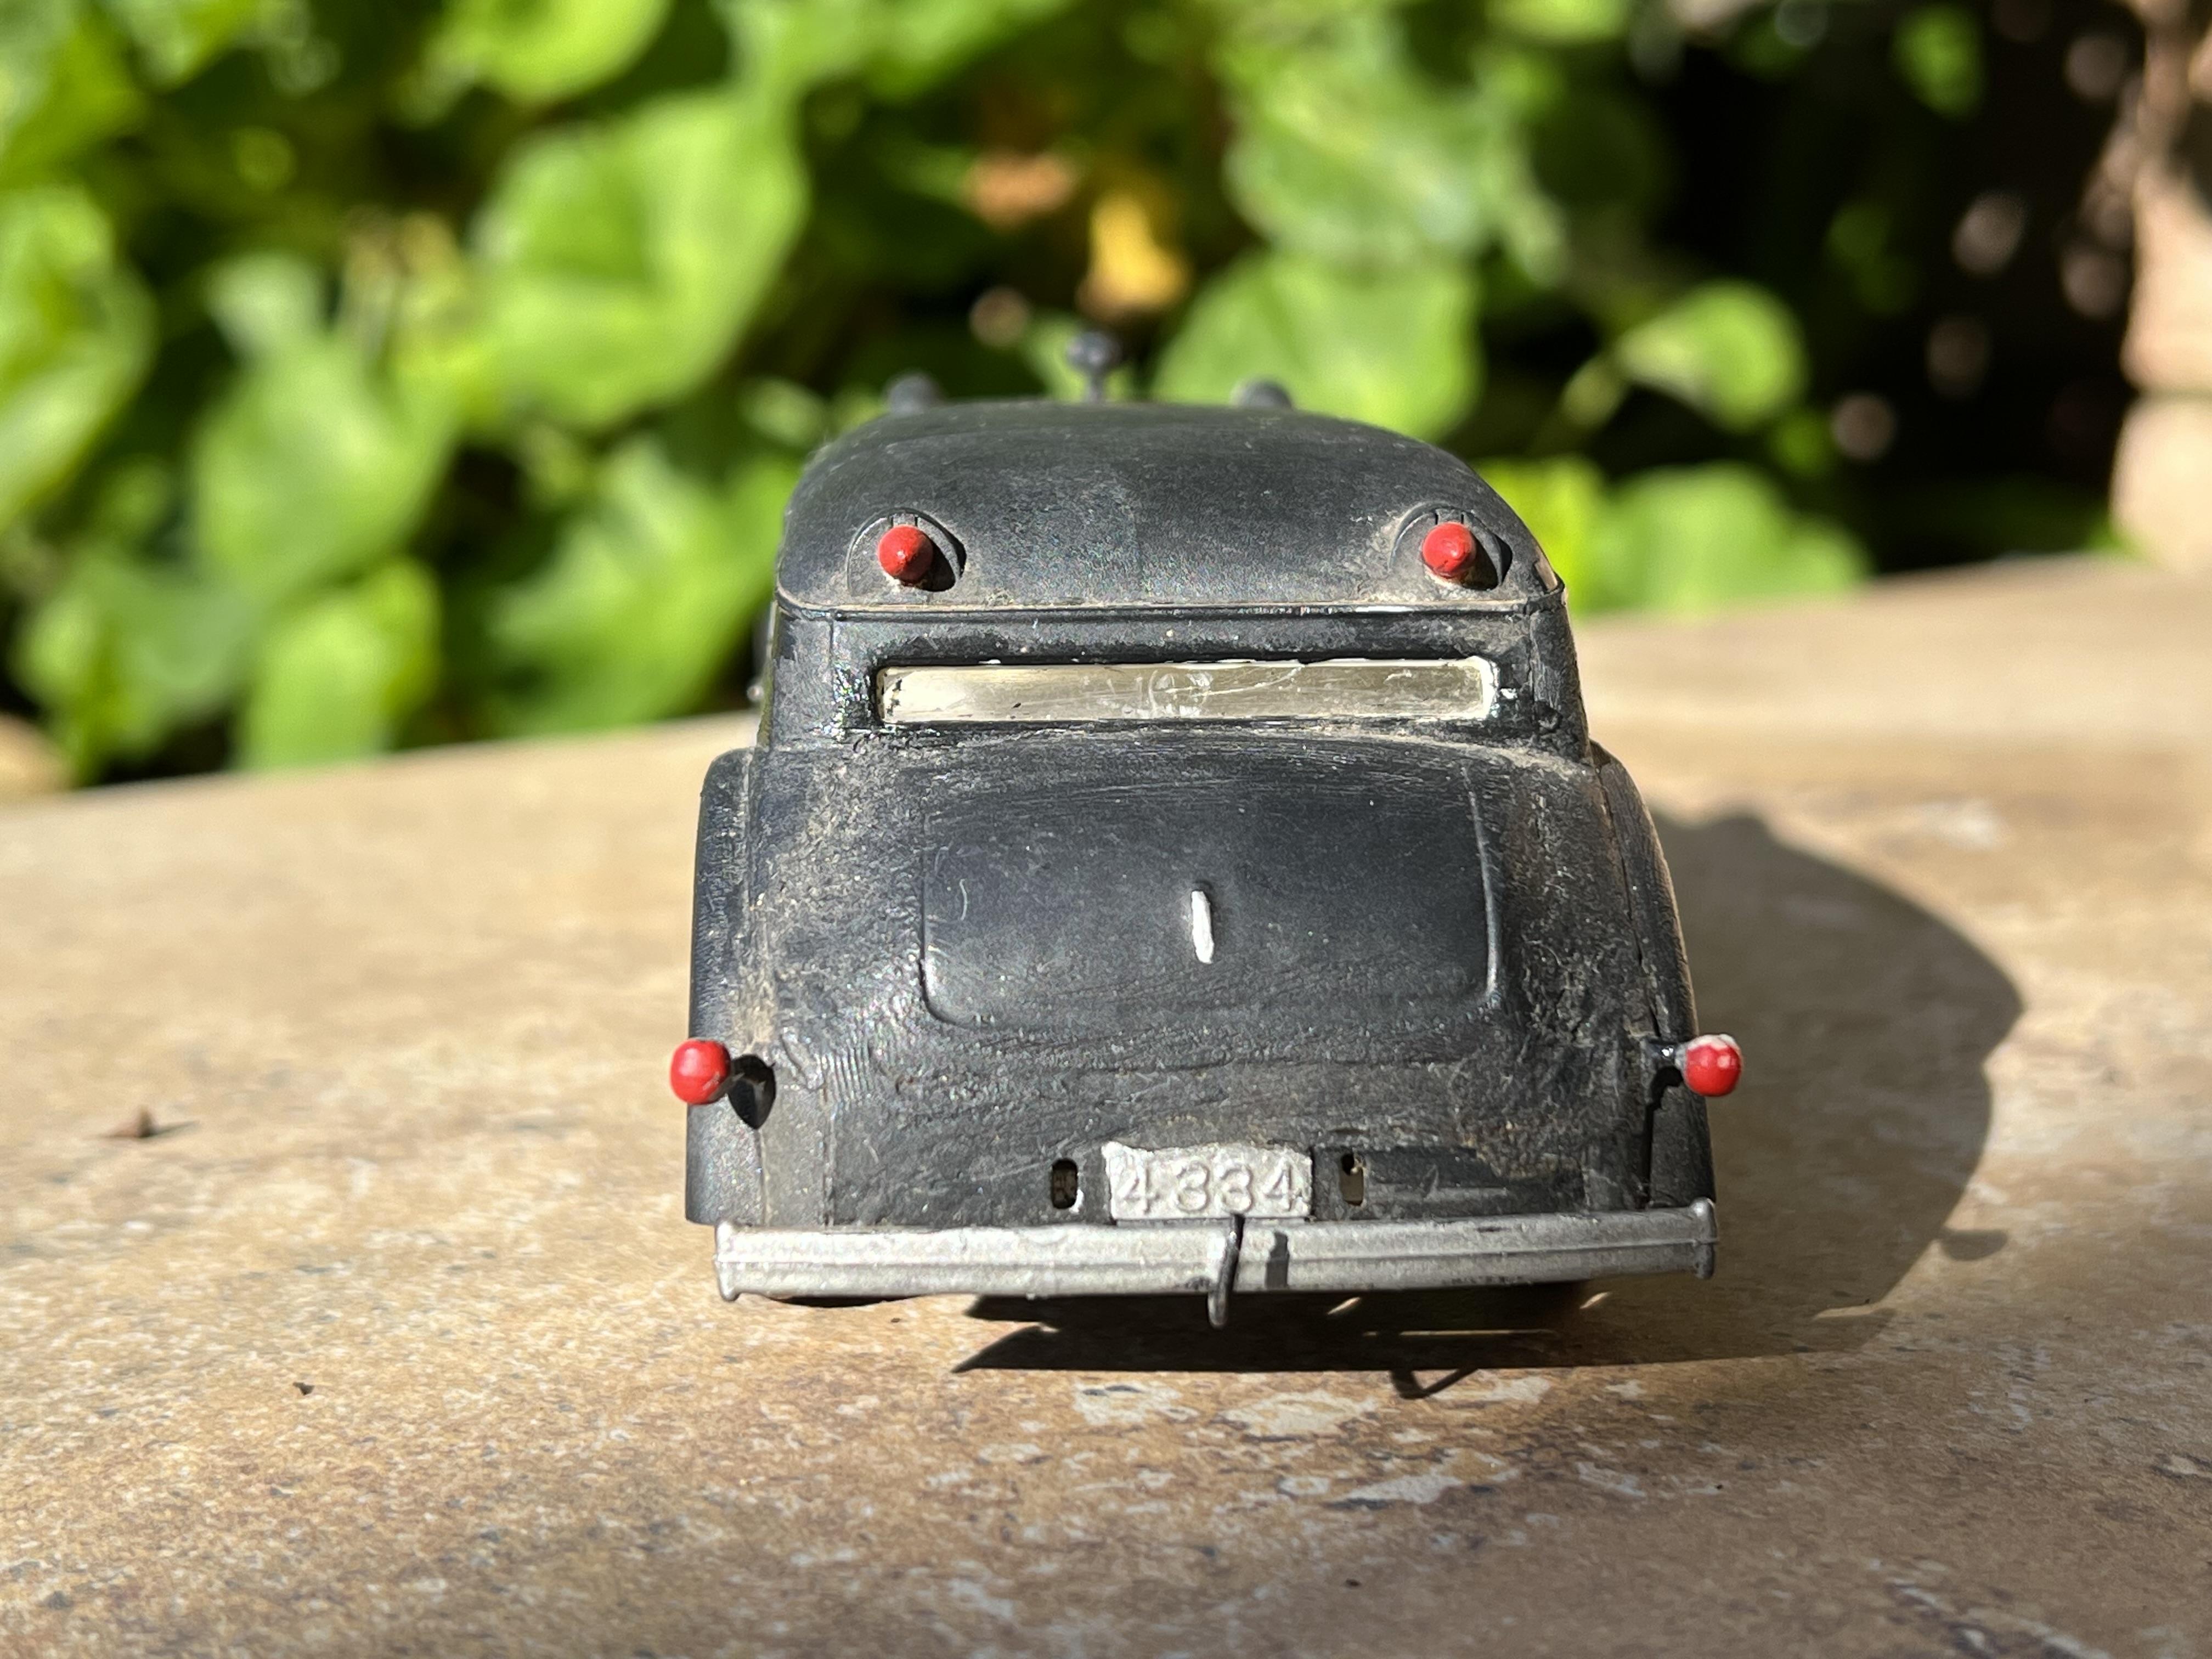
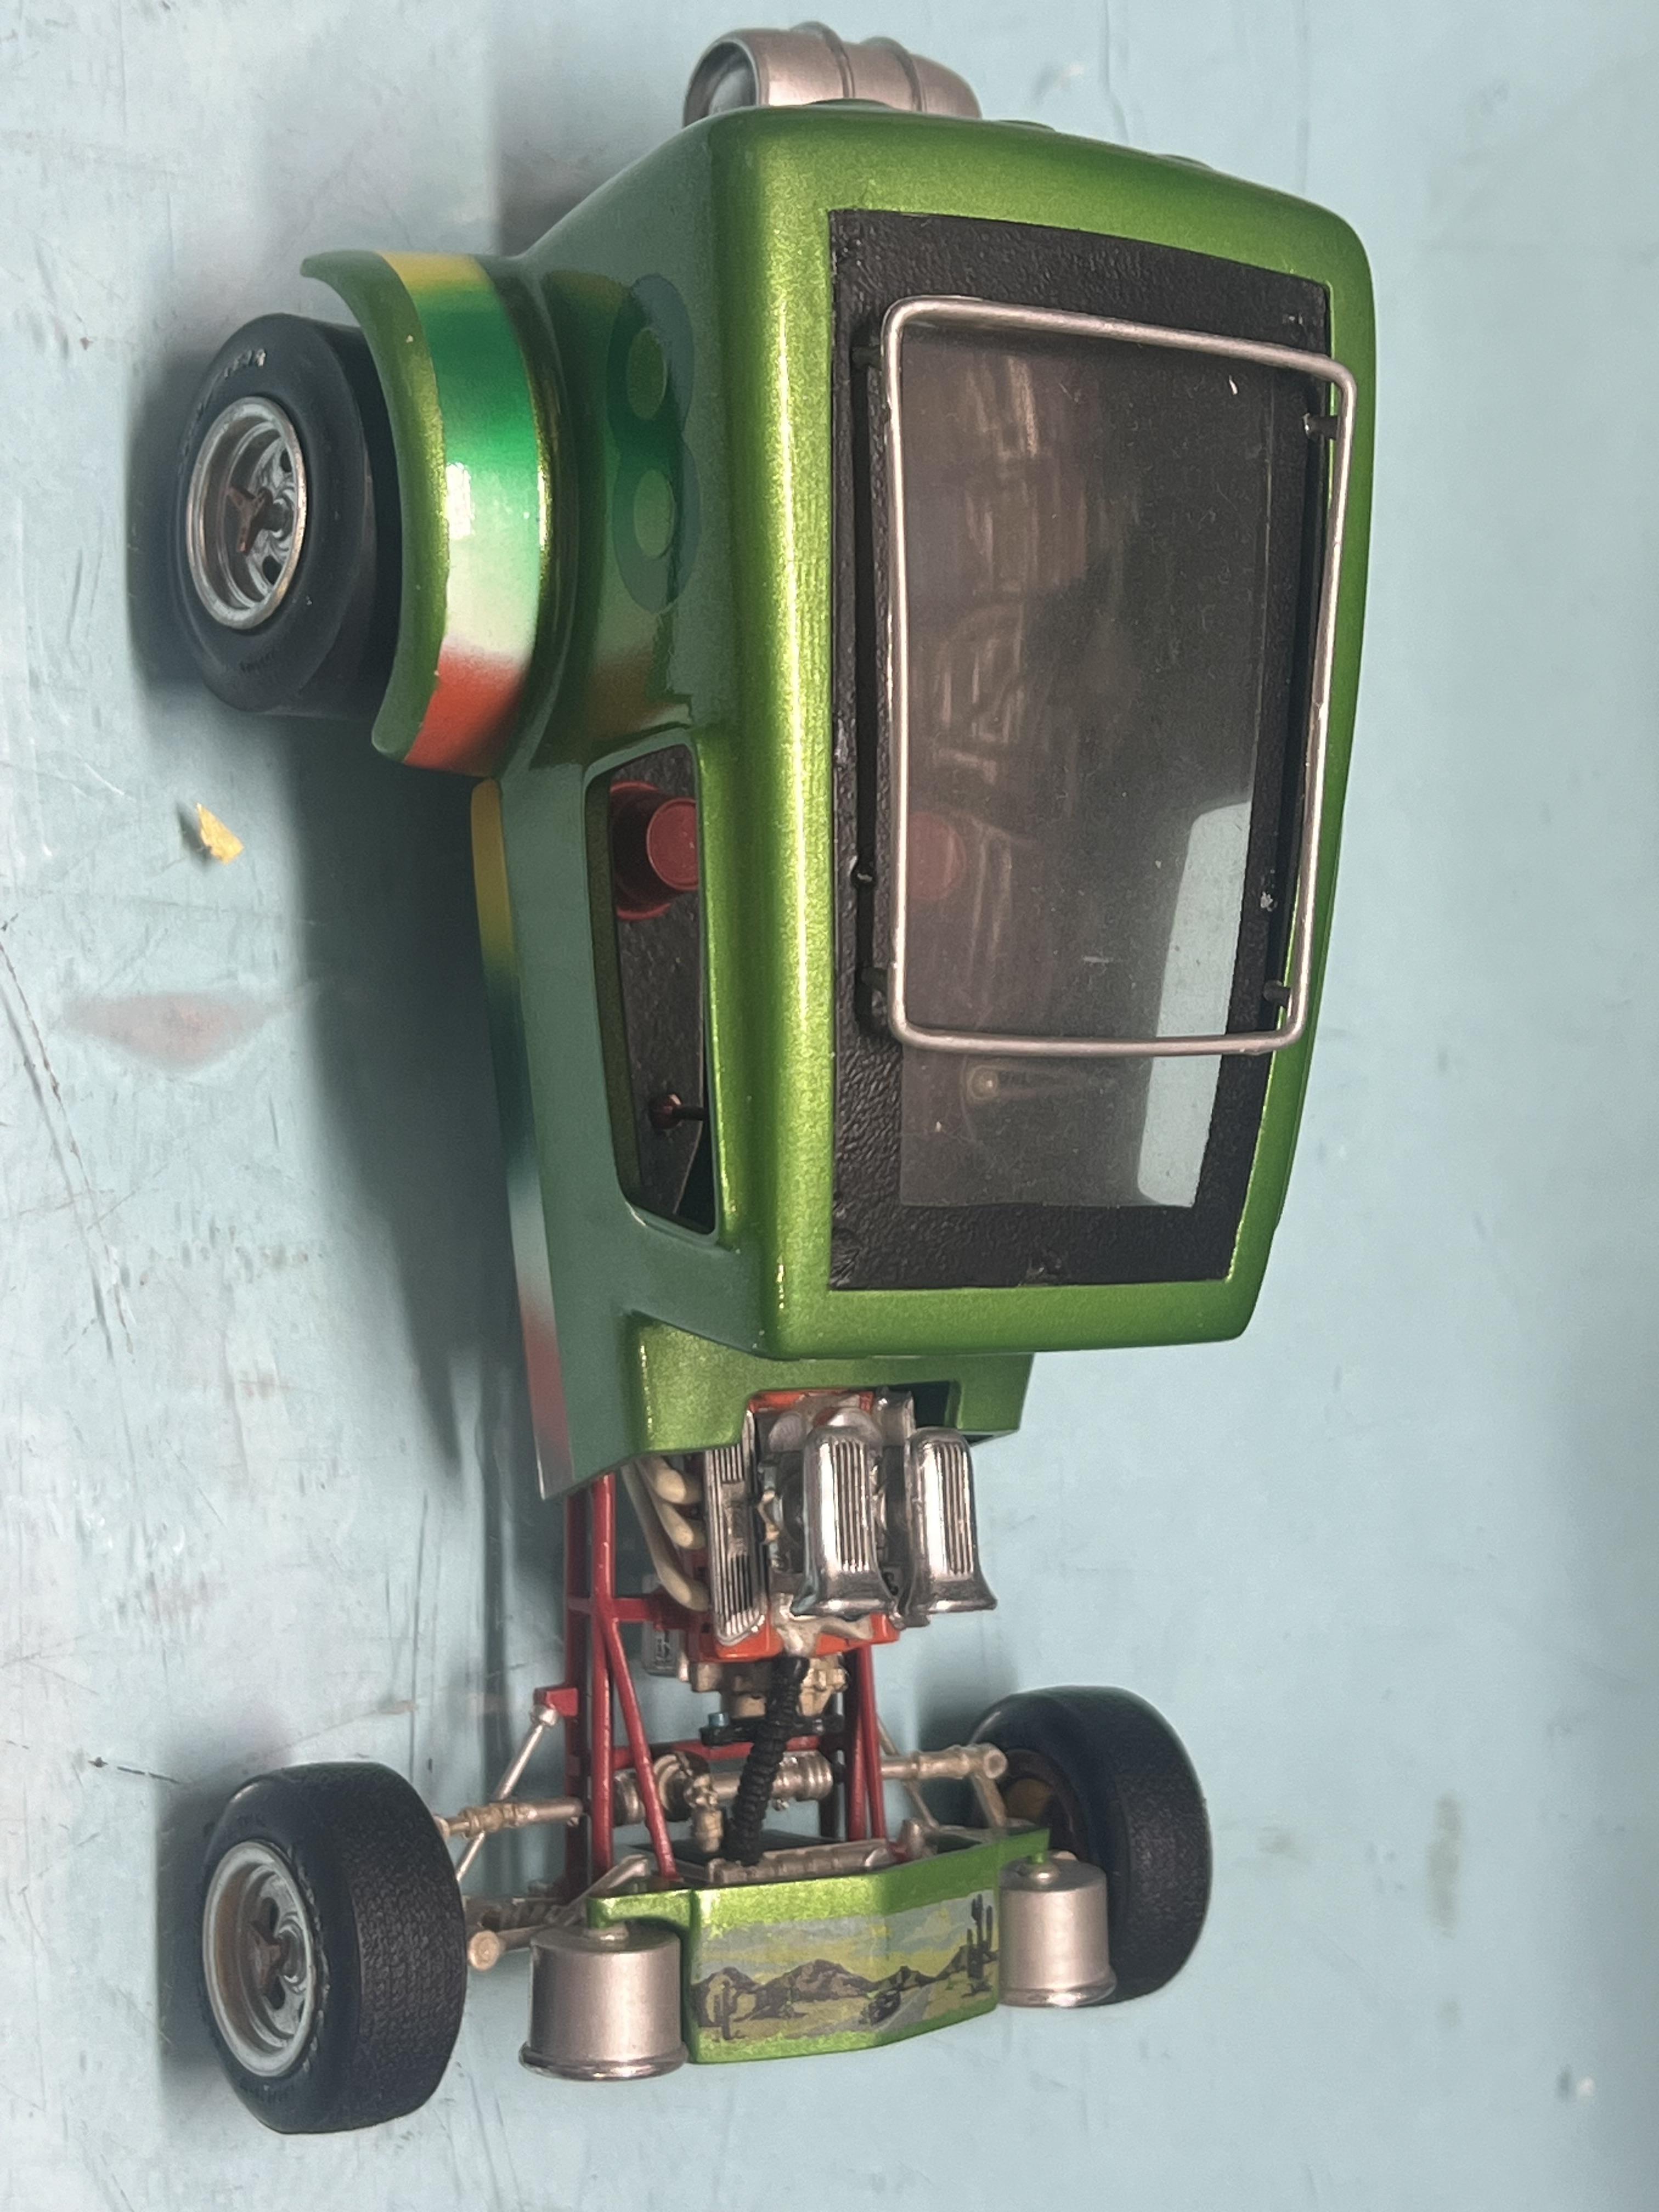
With hot rods being my number one automotive passion, I have set myself the goal of obtaining and building one example of every hot rod model kit ever built. Áfter 45 years on the job I am doing pretty well, having only one more 1/32nd scale hot rod to find (if you have a dead Hearse with A Curse - call me!) and less than half a dozen 1/24th or 25th examples to find, to the best of my knowledge. Early this year Mr Metallic, Craig Stansfield, gave me a tip off about an Aurora Meatwagon on eXpensiveBay. The Meatwagon was based on a chopped 37 Packard Ambulance, just your typical surf rod from the early sixties. It's one of the three hardest Aurora hot rods to find. With our Aussie dollar being worth only 60-65% of the US dollar, extortionate overseas shipping rates and our ever-caring government with its hand out for import tax, it was never going to be a cheap exercise. The model that Craig spotted was certainly interesting in its own right. It appears that the original builder attempted to make a police chief's car from the ambulance. He did a pretty good job for the time but the build quality and materials used (paint and putty) suggest to me that this conversion was done a very long time ago. Missing were the original bumpers and four spotlights, the engine, radiator and exhaust pipes top and bottom and the rolled up stretchers from the roof. The front wheels were from a Monogram T bucket and I don't recognise the rears at all.The box and instructions and decals were probably missing since the sixties! The back of the body had been replaced with the rumble seat of an unknown model and the louvres on the hood were filed off - judging by the scratches, he may have used a chainsaw to remove them! Landed in Oz it owed me just over $120 Aus! Here's what I got for the money

-
I believe this to be my oldest build, an AMT 49 Mercury from around 1971. I would have been around 13. Hard to believe it is nearly 54 years old. It was moulded in black plastic and was probably my first real custom. It is not chopped, just turned into a hardtop by removing the B pillar which seems to give the impression of a chop top. Front extensions from my first ever 1/25th scale kit, the AMT 57 Fairlane. Rear wheel arches were radiussed. It was painted in about six coats of brushed on Humbrol enamel. The photos, for once, hide a few ugly bits here and there but I love it to bits. I recently polished the roof with Meguiars Scratch - X and gave it a good clean. I had robbed the Monogram whitewalls and mags off it to restore another model years ago so added Pegasus chromies which really suit it. It'll stay this way forever now. Cheers Alan
- 89 replies
-
- 10
-

-
Gee that's nice! I might have to steal the grille bar idea for a custom Willys convertible that has been stalled for decades - that is exactly the sort of highlight it needs! Cheers Alan
-
Big Al 2 - Jim Lytles Allison powered 34 Ford Tudor
Alan Barton replied to Alan Barton's topic in WIP: Drag Racing Models
Thank you everyone for your kind comments and your patience. The Big Al ll is finally finished (sort of) but I will just put up a few more construction pics before putting it Under Glass. I took a few liberties in regards to colour. The paint is certainly darker than most of the period photos show. However, when I saw the restored body (on a street rod chassis) in the Don Garlits museum in 1992 I remembered it as being quite dark and I really liked it. The Tamiya dark blue pearl (I will check for the actual paint code shortly), is a neat colour that I thought suited the car. I briefly considered respraying it a lighter shade to match period photos but in the end decided it was my model and my choice so I left it in the darker shade - not a hard car to repaint so who knows, that may change! The actual Allison engine appears to be painted black in the photos I used. When I stripped the paint, however, I was blown away by the incredible detail throughout the model. Words cant do it justice. I am going to go out on a limb and say it might well be the finest engine that AMT ever produced. To hide it all under a coat of gloss black or even flat black just seemed sacrilegious, disrespectful to the skilled pattern makers that produced it. Instead, I used the last dregs of a hardware store green that evokes memories of military aircraft, a nod to the source of the engine. I love the look and the details really pop. There was only one element left to paint and that was the chassis and to be honest, the original bright red looked a bit "clown car" to me so I used a maroon shade of red instead. even though the final colours are not authentic to Jim Lyttles race car, I think they look good on it. Cheers Alan
-
So nice. I have the Flintstone body and some years ago I started a conversion using the BAd Actor roof on an AMT Elky body. Lots of work ahead of me but this model definitely provides some inspiration. Cheers Alan
-
Hi Michael, my pleasure!!! The first time that we displayed this diorama we had about eight participants and the second time about ten. The last time there was just me and a friend and we also had some models on loan from another club member making three. Both my friend Rob and I have about 100 dirt track racers each!!! We are fortunate to belong to a very active club and the car modellers are the most active group within the club. Cheers Alan
-
Something we always try to do with our club dioramas is make them easy to transport and store. This is basically just a flat board with mud stuck on - the fences and other items are pinned on and easily removed. The models go back to the homes of their respective builders and we plan for next year. Meanwhile the board takes up minimal space in someone's shed in case it gets a second outing! Cheers Alan
-
Thanks everyone, great to see renewed interest in our club's diorama from a few years ago. Cheers Alan
-
Mine will be the same one I've had for at least ten years, probably close to twenty. I resolve to build models that come from a box with just one model in it. Let me explain. I have a stash of about 250 model boxes but there is considerably more models in those boxes than 250 - probably closer to 350. Since I retired I work on my models pretty much every evening plus I have the luxury of painting during the warmer hours of the day when necessary. In the three years that I have enjoyed retirement, I have completed just over 100 models, something I'm pretty proud of. The problem is, while there are 100 new builds on my shelves, there are not 100 spaces on my shelves where they came from. I bought about twenty kits this year but that is not the problem - the problem is that I seem to be building lots of kits from parts, so while the number of models finished goes up, the number of full boxes does not go down. Making it worse, my two rooms full of floor to ceiling cabinets for my toy and model collection is bursting at the seams - if I could get rid of some boxes off the shelves in my build room I could have more space for new builds. Yeah, I know, first world problem but it is frustrating to me! Cheers Alan
-
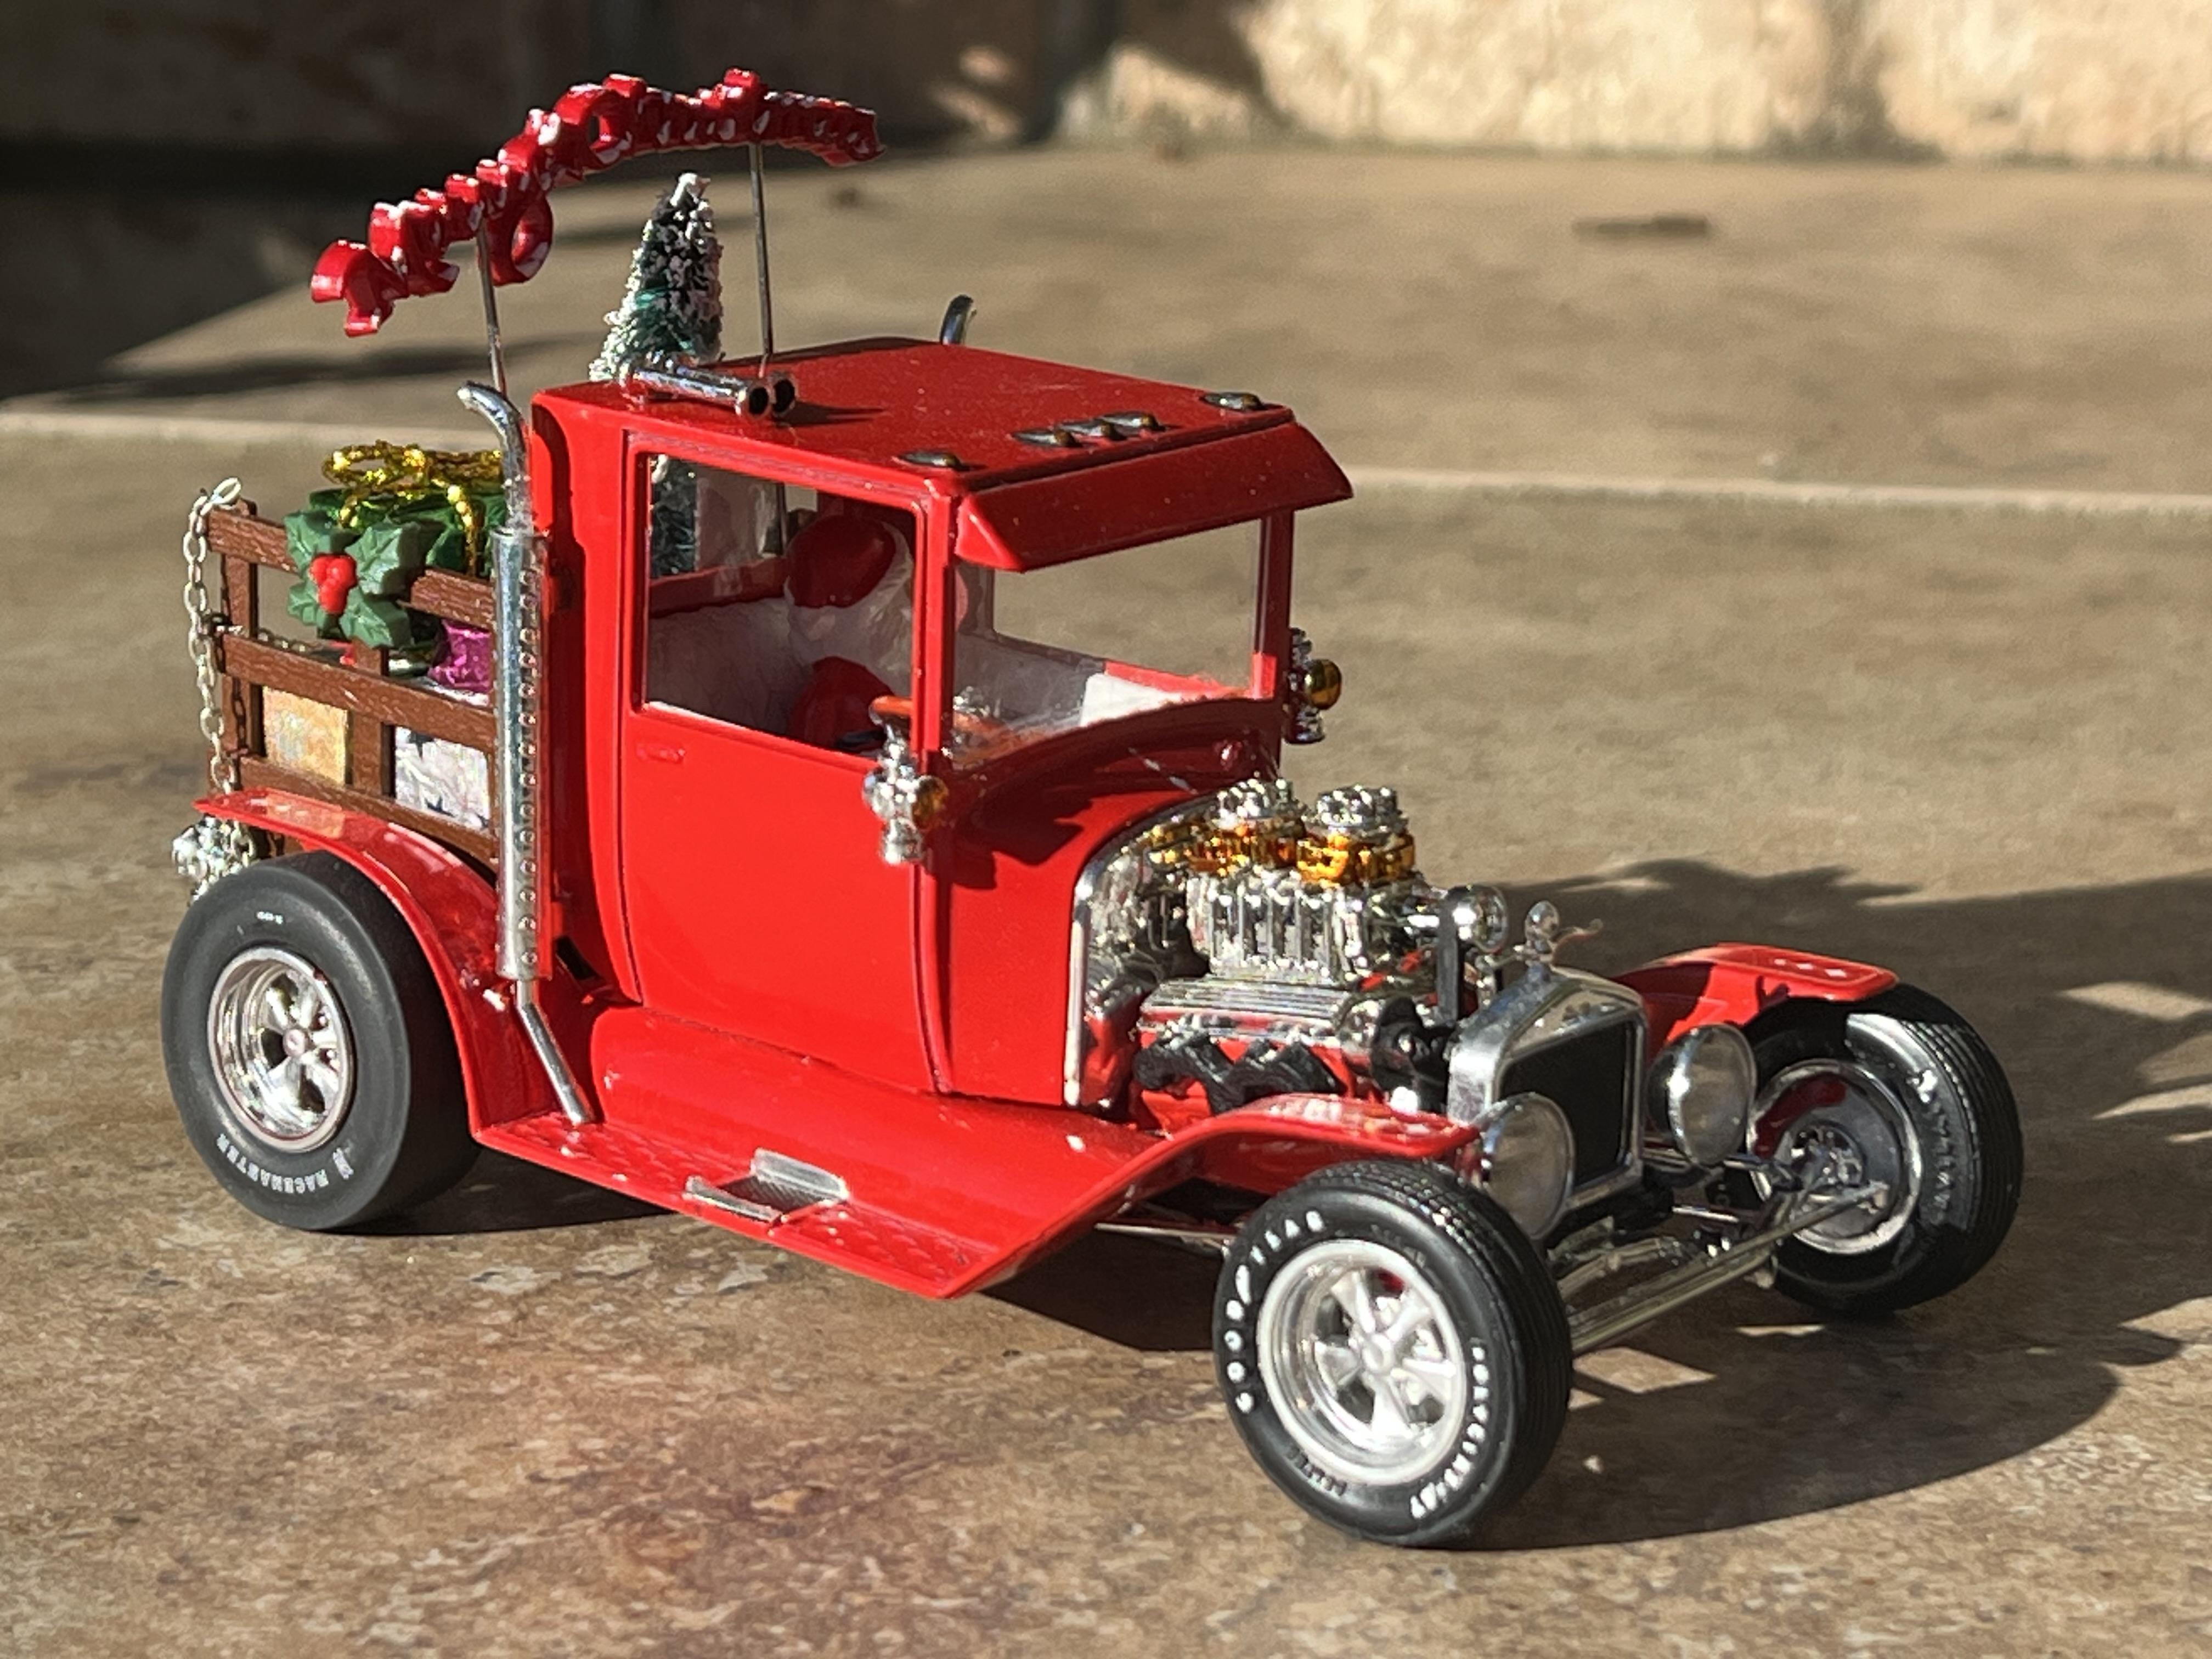
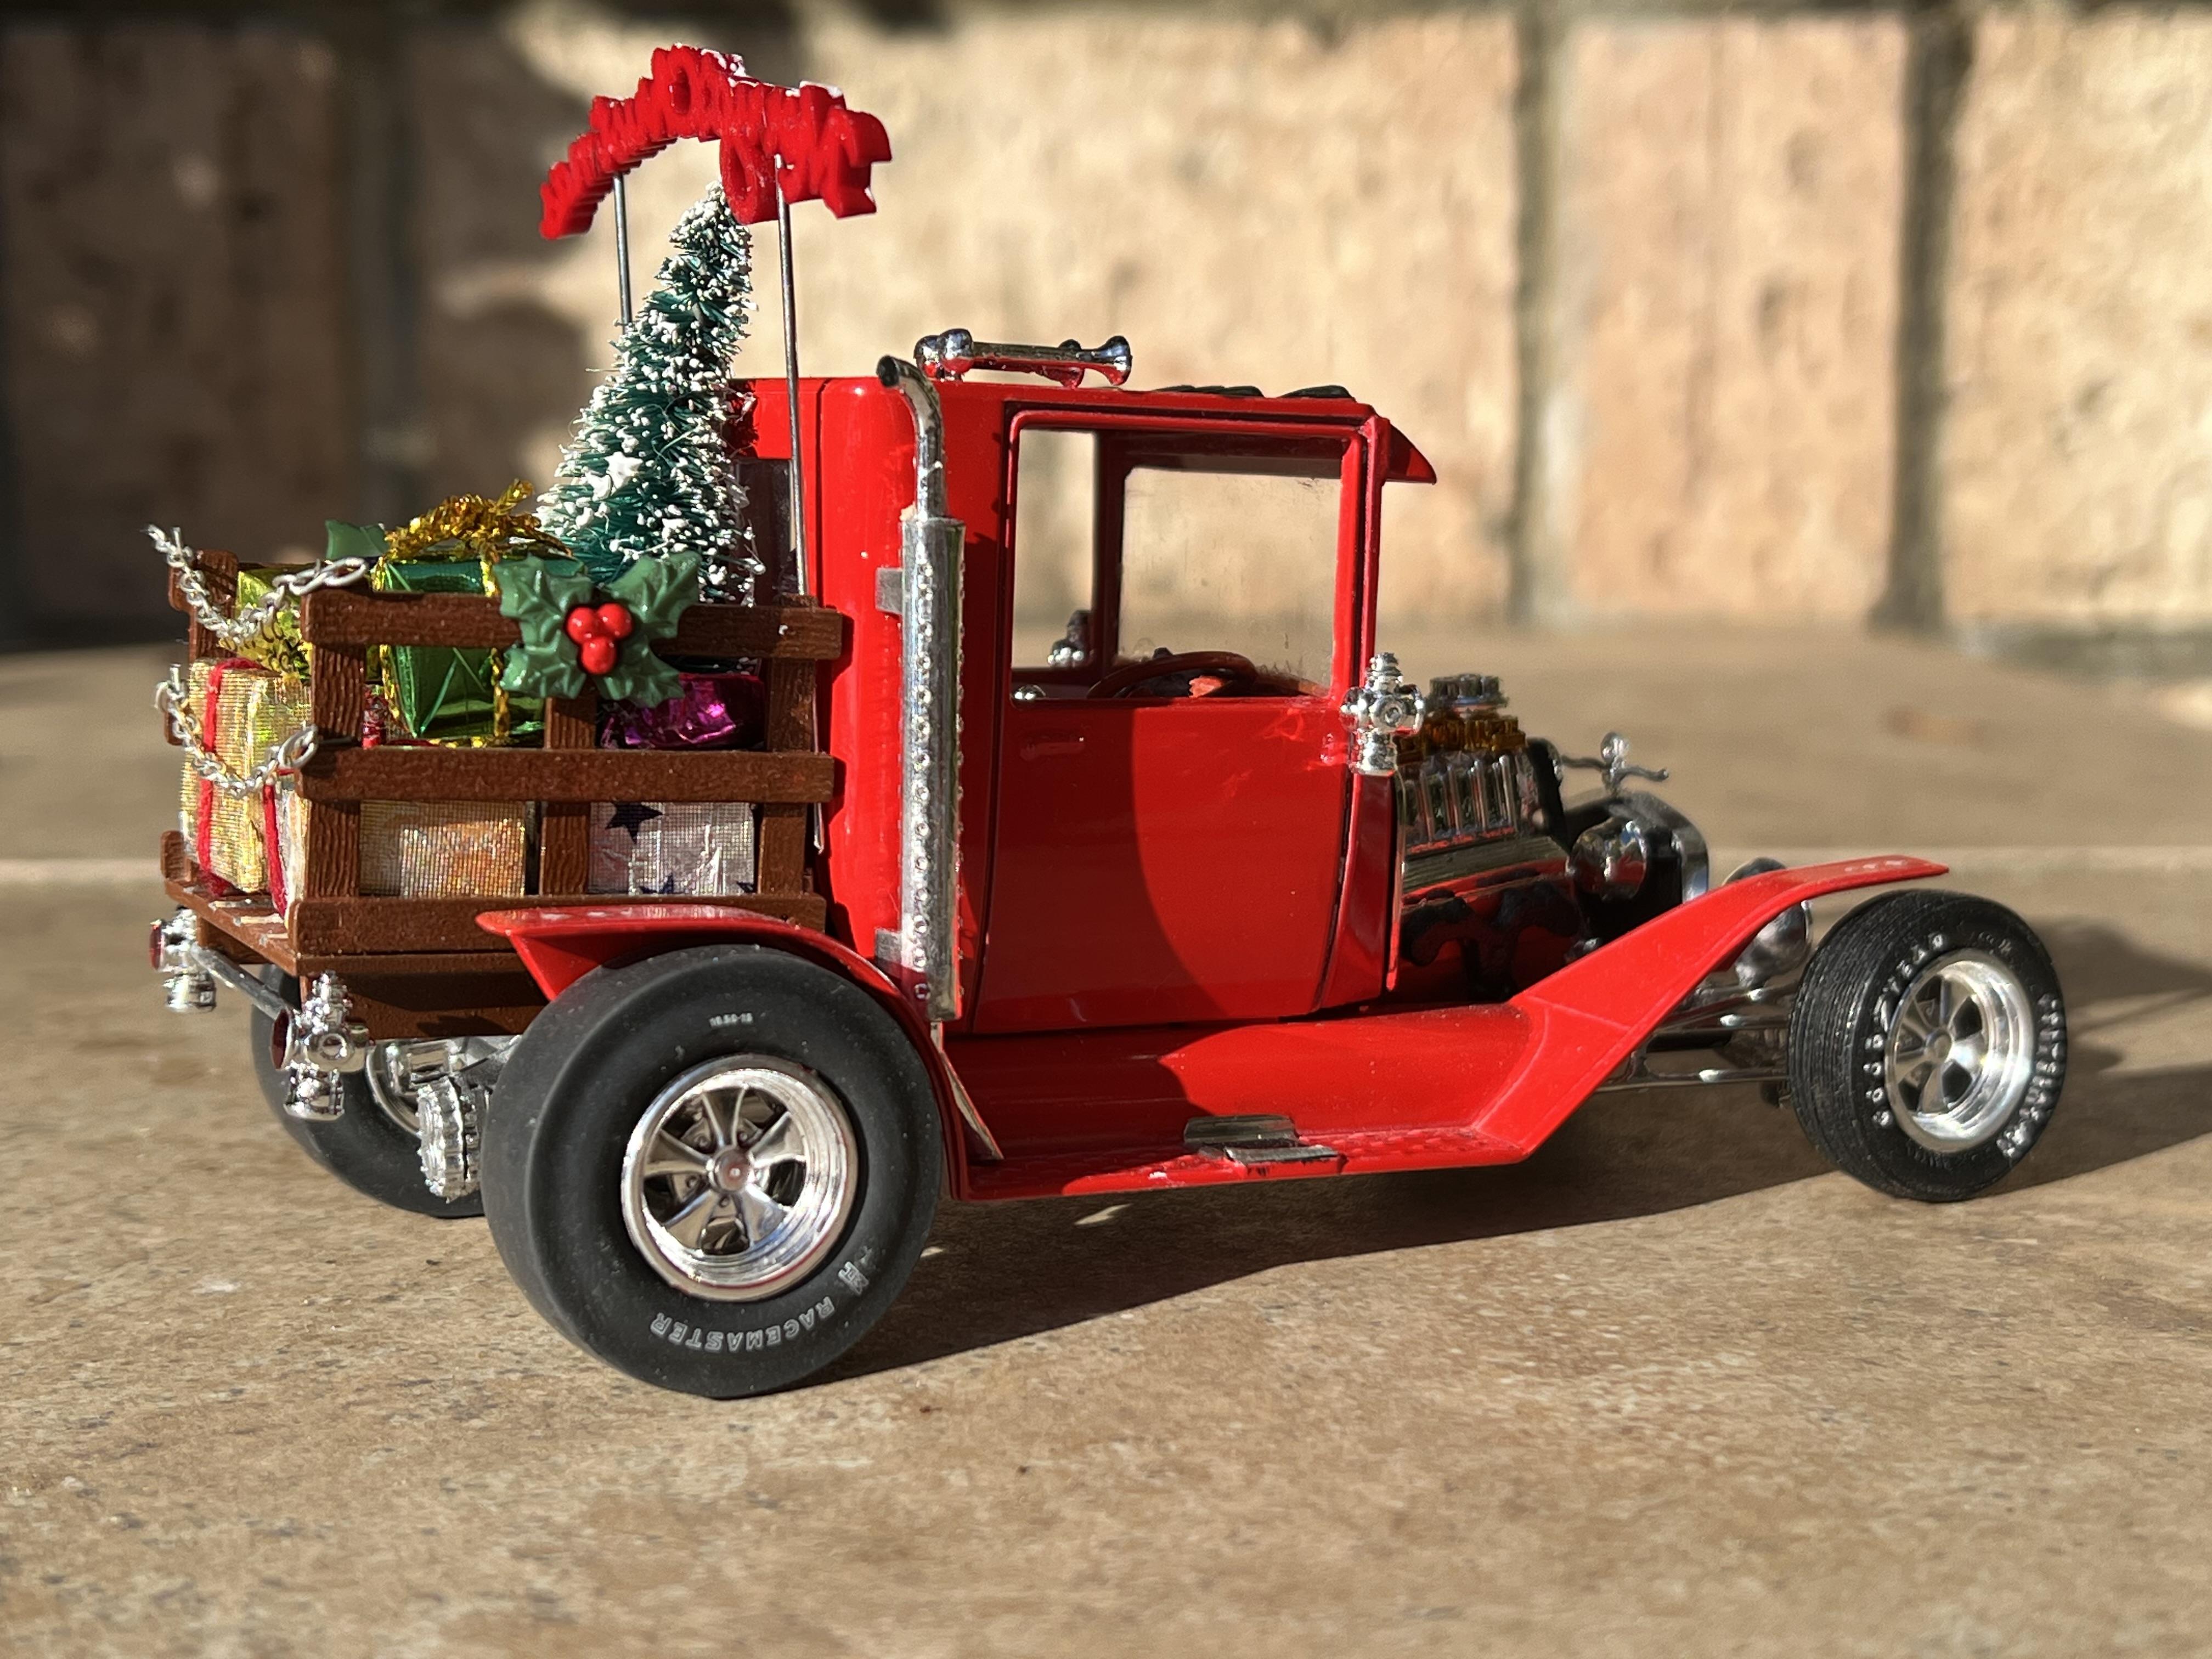
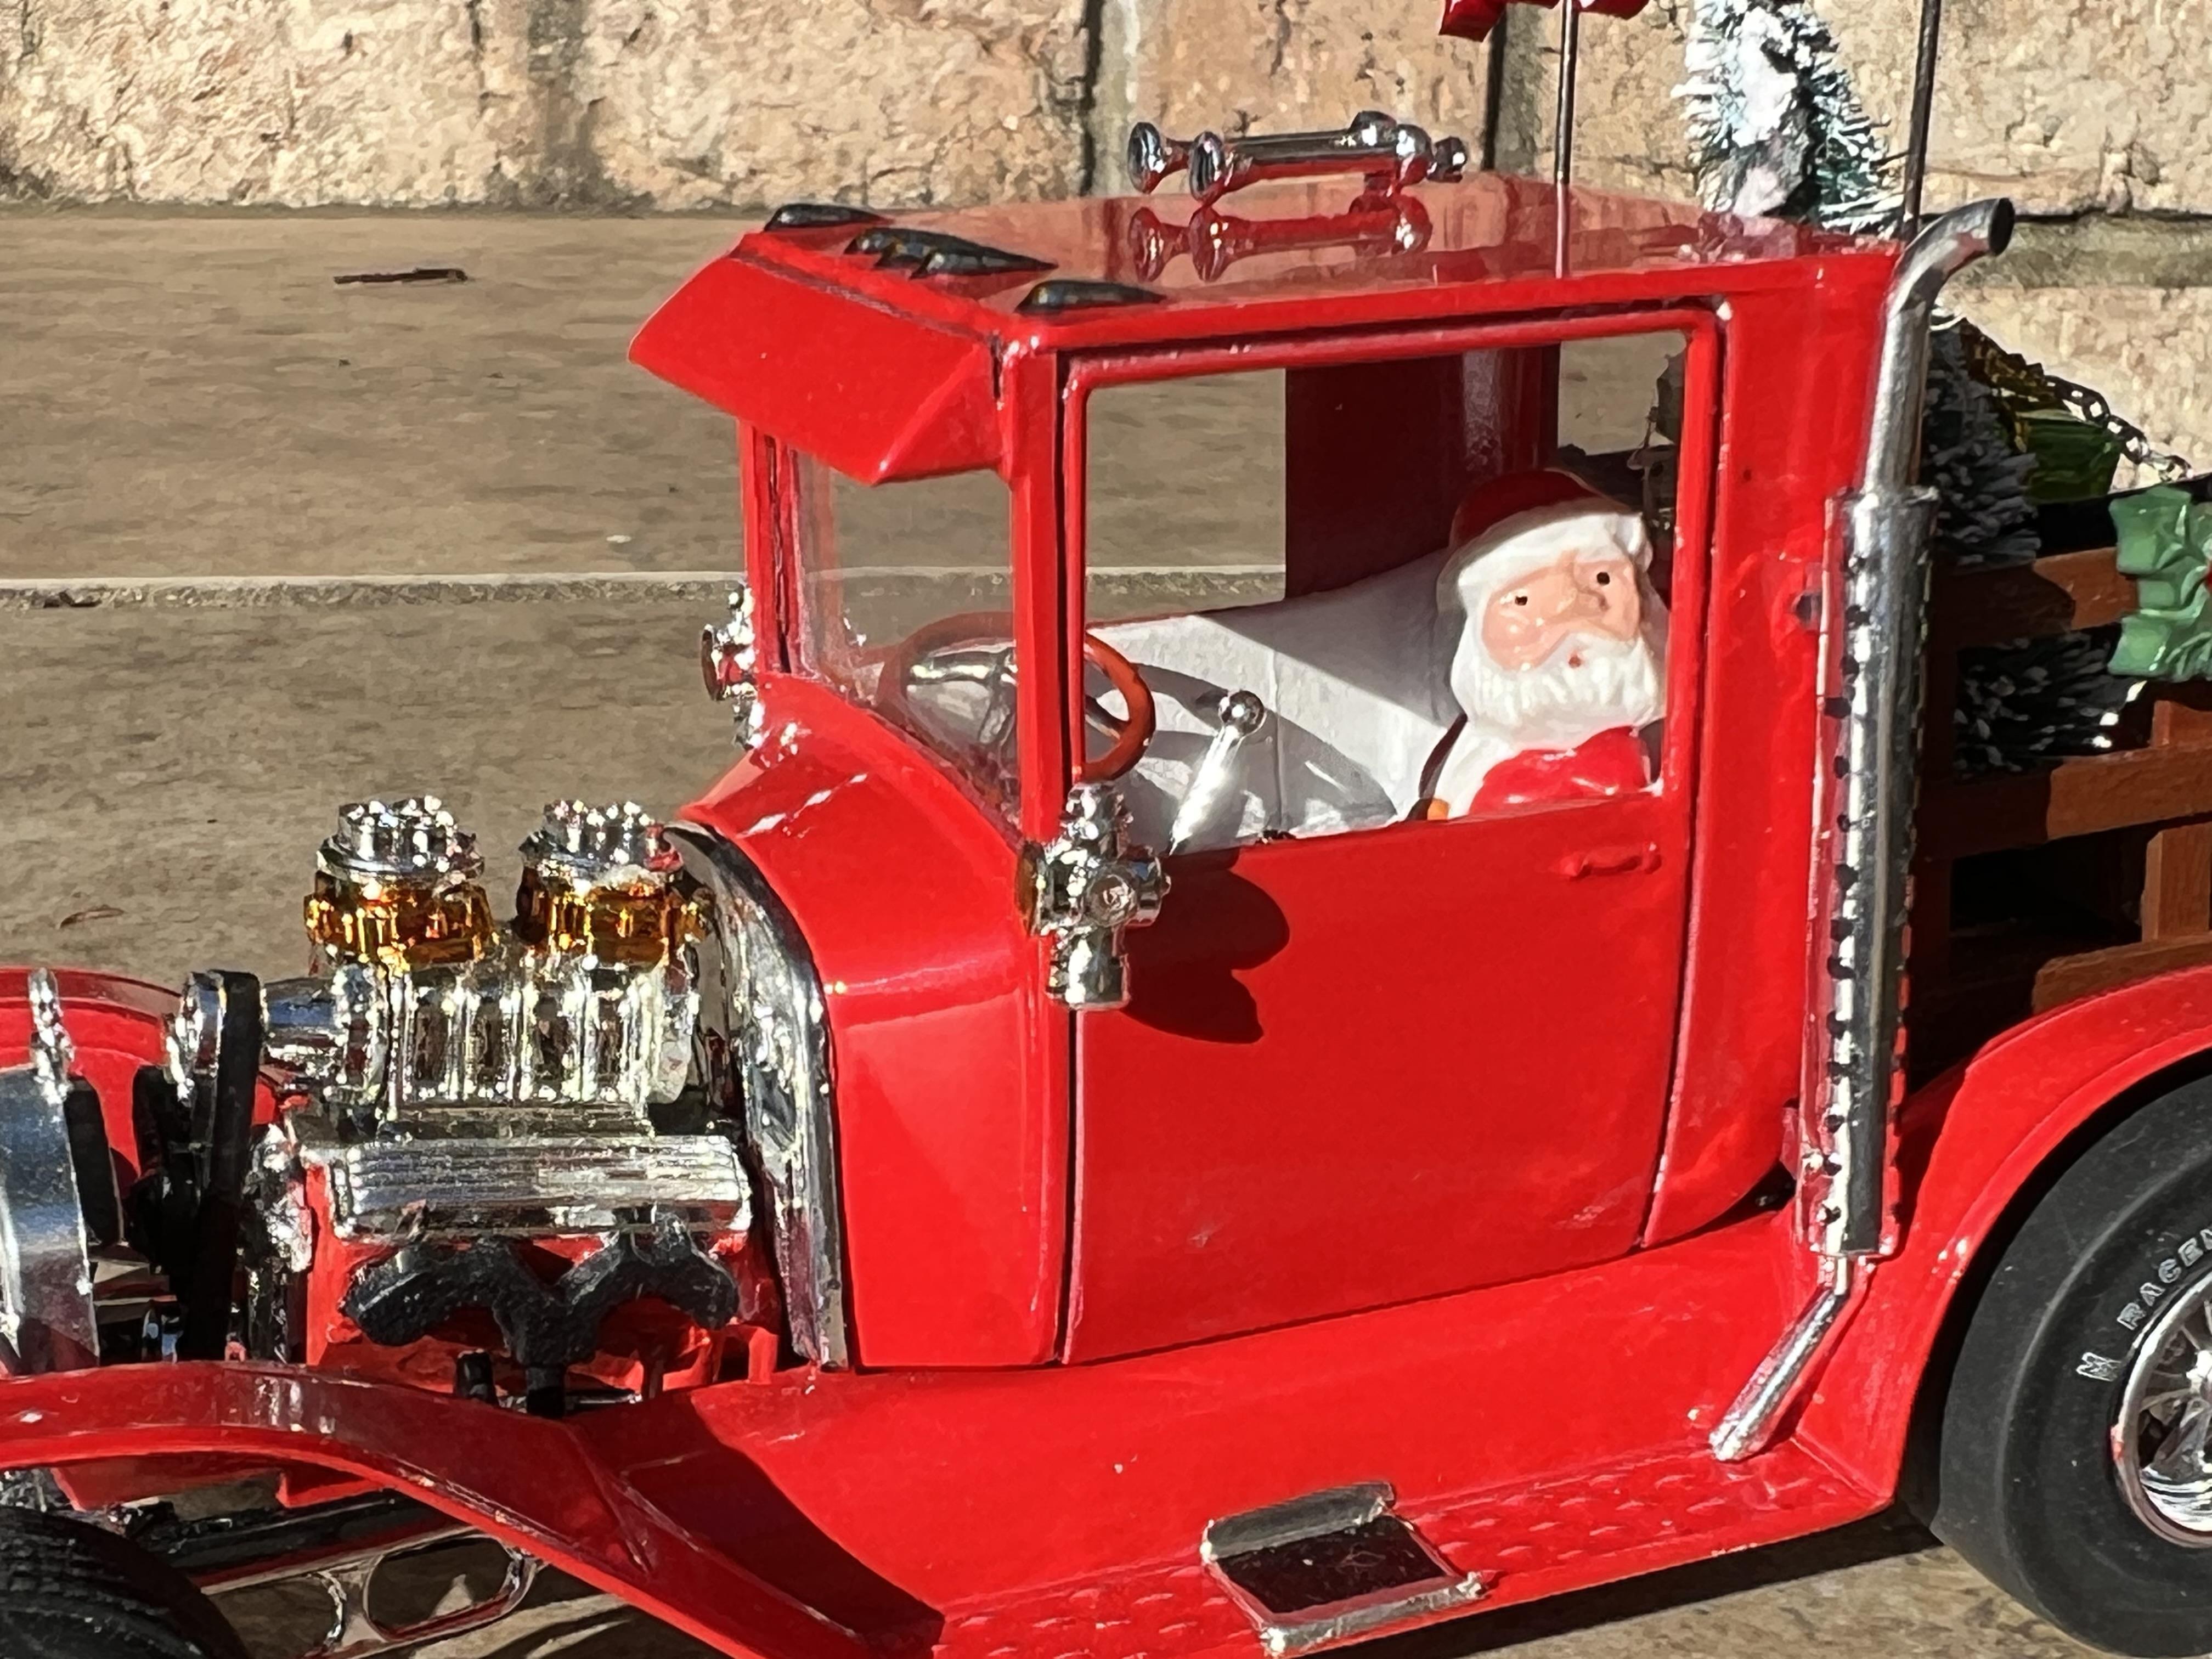
It's that time of the year to spread good will amongst all model builders so I give you ...... Santa's new ride! It's an MPC Big Rig Rod, built mostly box stock with a few upgrades. This kit is copyrighted 1978 and it came from an era when MPC cobbled together a lot of " new " kits by combining parts from existing models - a factory kitbash if you like. In this case, the lightly reworked fender unti from the Don tognotti King T is badly fitted over the frame and running gear from the Switchers series 27 T coupe/pickup kit with a shrunken stake bed thrown into the bargain. I needed to build a Christmas themed model for our club Christmas party so as I had no special plans for this one I decided it could be made fit for purpose. Modifications include AMT parts pack M&H slicks Cragar SS mags AMT 25 T bucket radiator and grille Revell Model A hiboy headlights Right hand drive conversion. Stacks from a Lindberg kit - the stacks from the MPC kit were very lame! Body and engine moved forwards on frame, with a section of the rear of the fender unit removed to allow it to snuggle down on the stepped frame. I finished it off with an assortment of mini Christmas decorations and my own wrapped presents using wooden blocks and chocolate wrappers. Colour is Tamiya bright red with Tamiya clear, all from spray cans and polished with Meguiars Scratch-X. Hope you enjoy - it is not one you see built very often! Merry Christmas and a happy New Year to my modelling friends all over the world! Cheers Alan
-
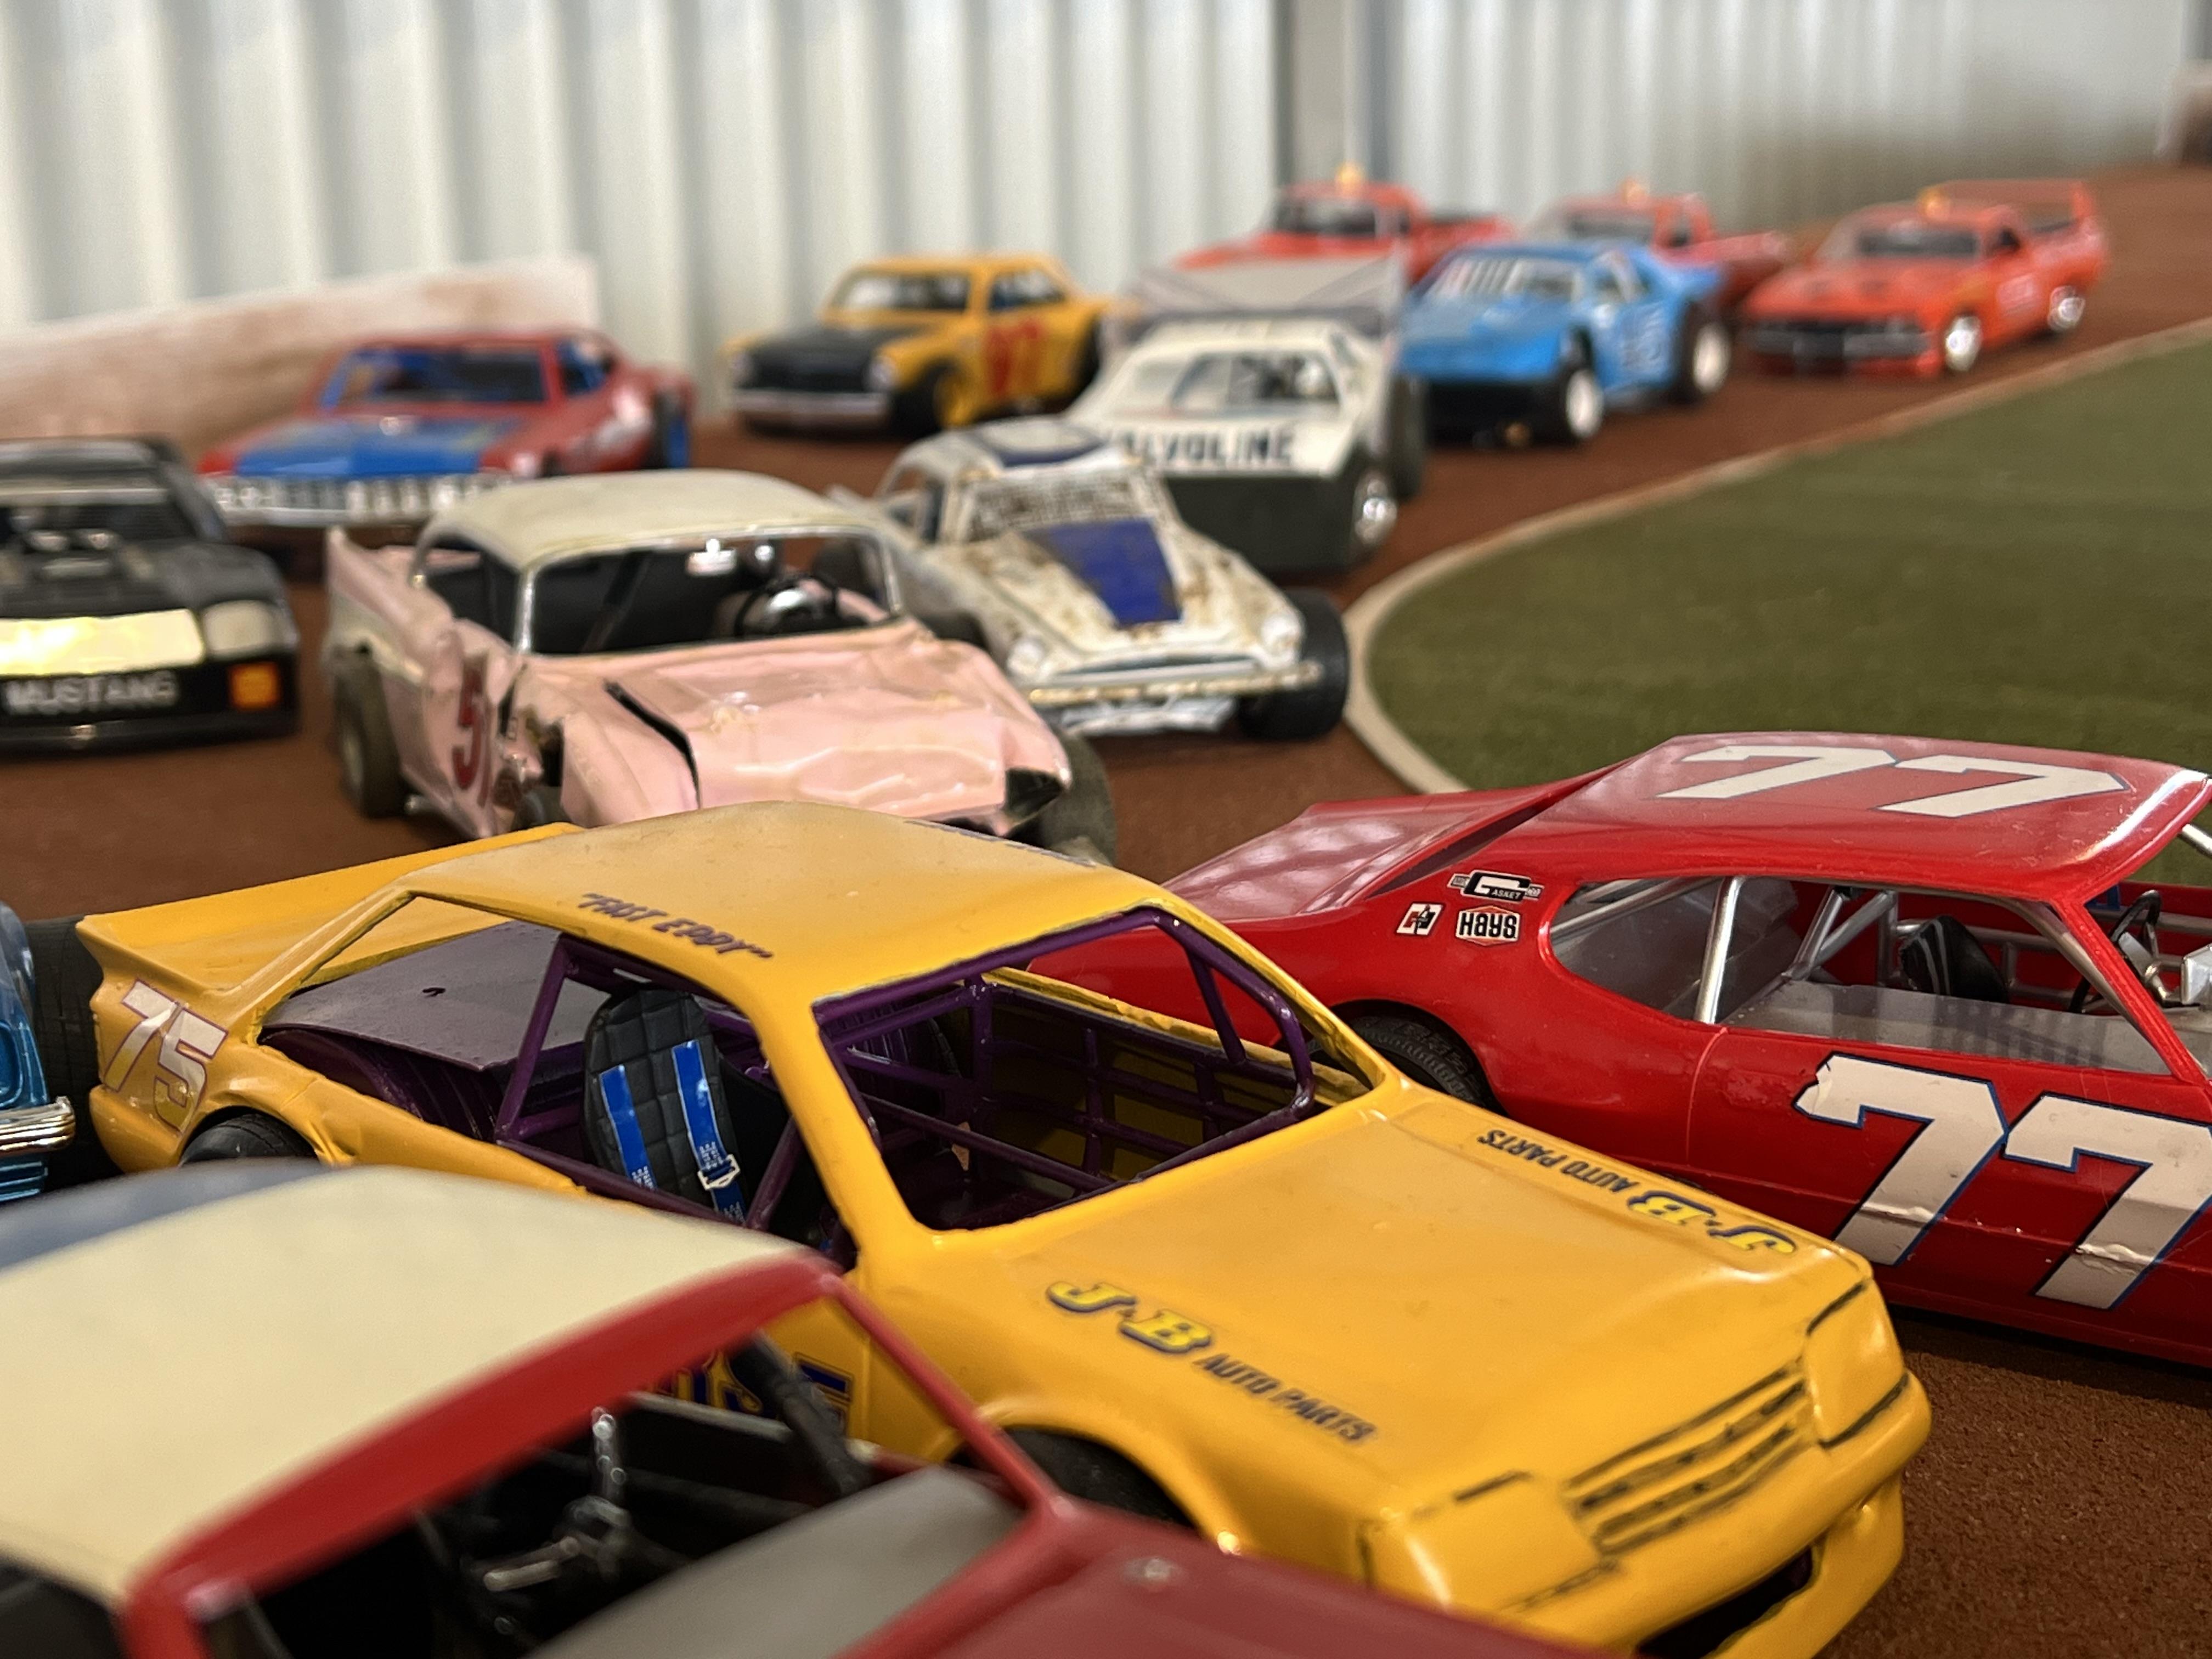
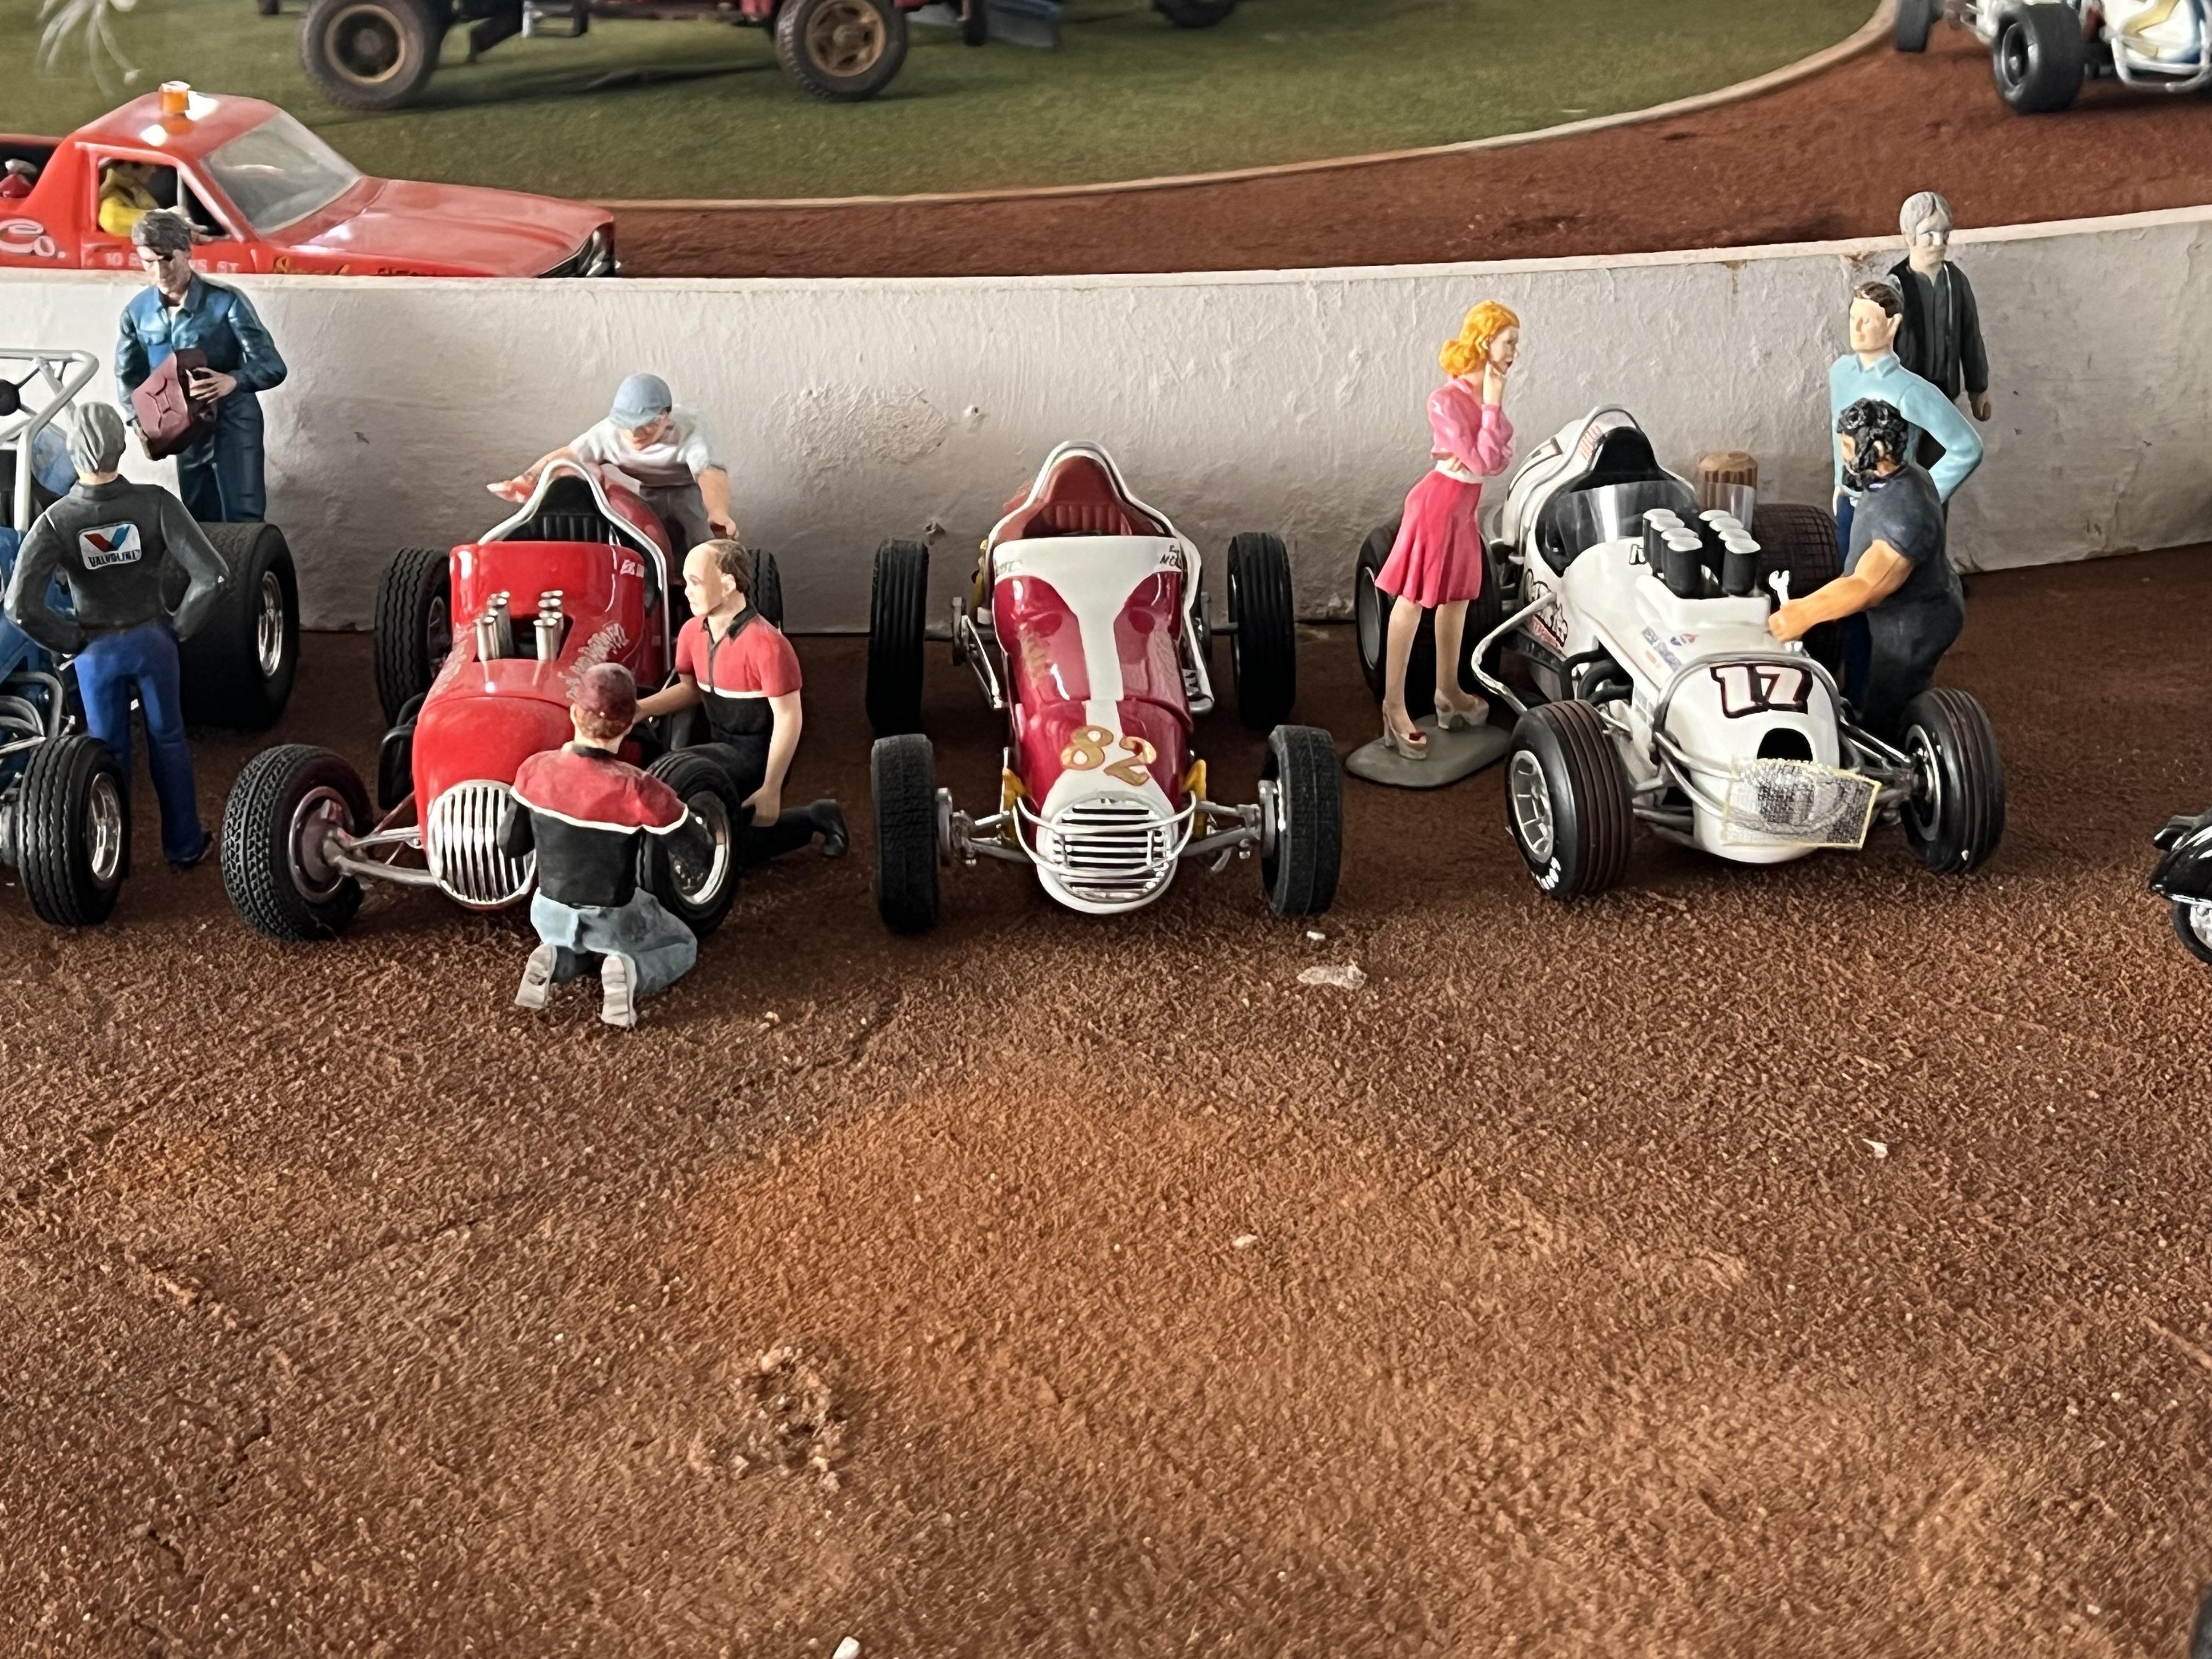
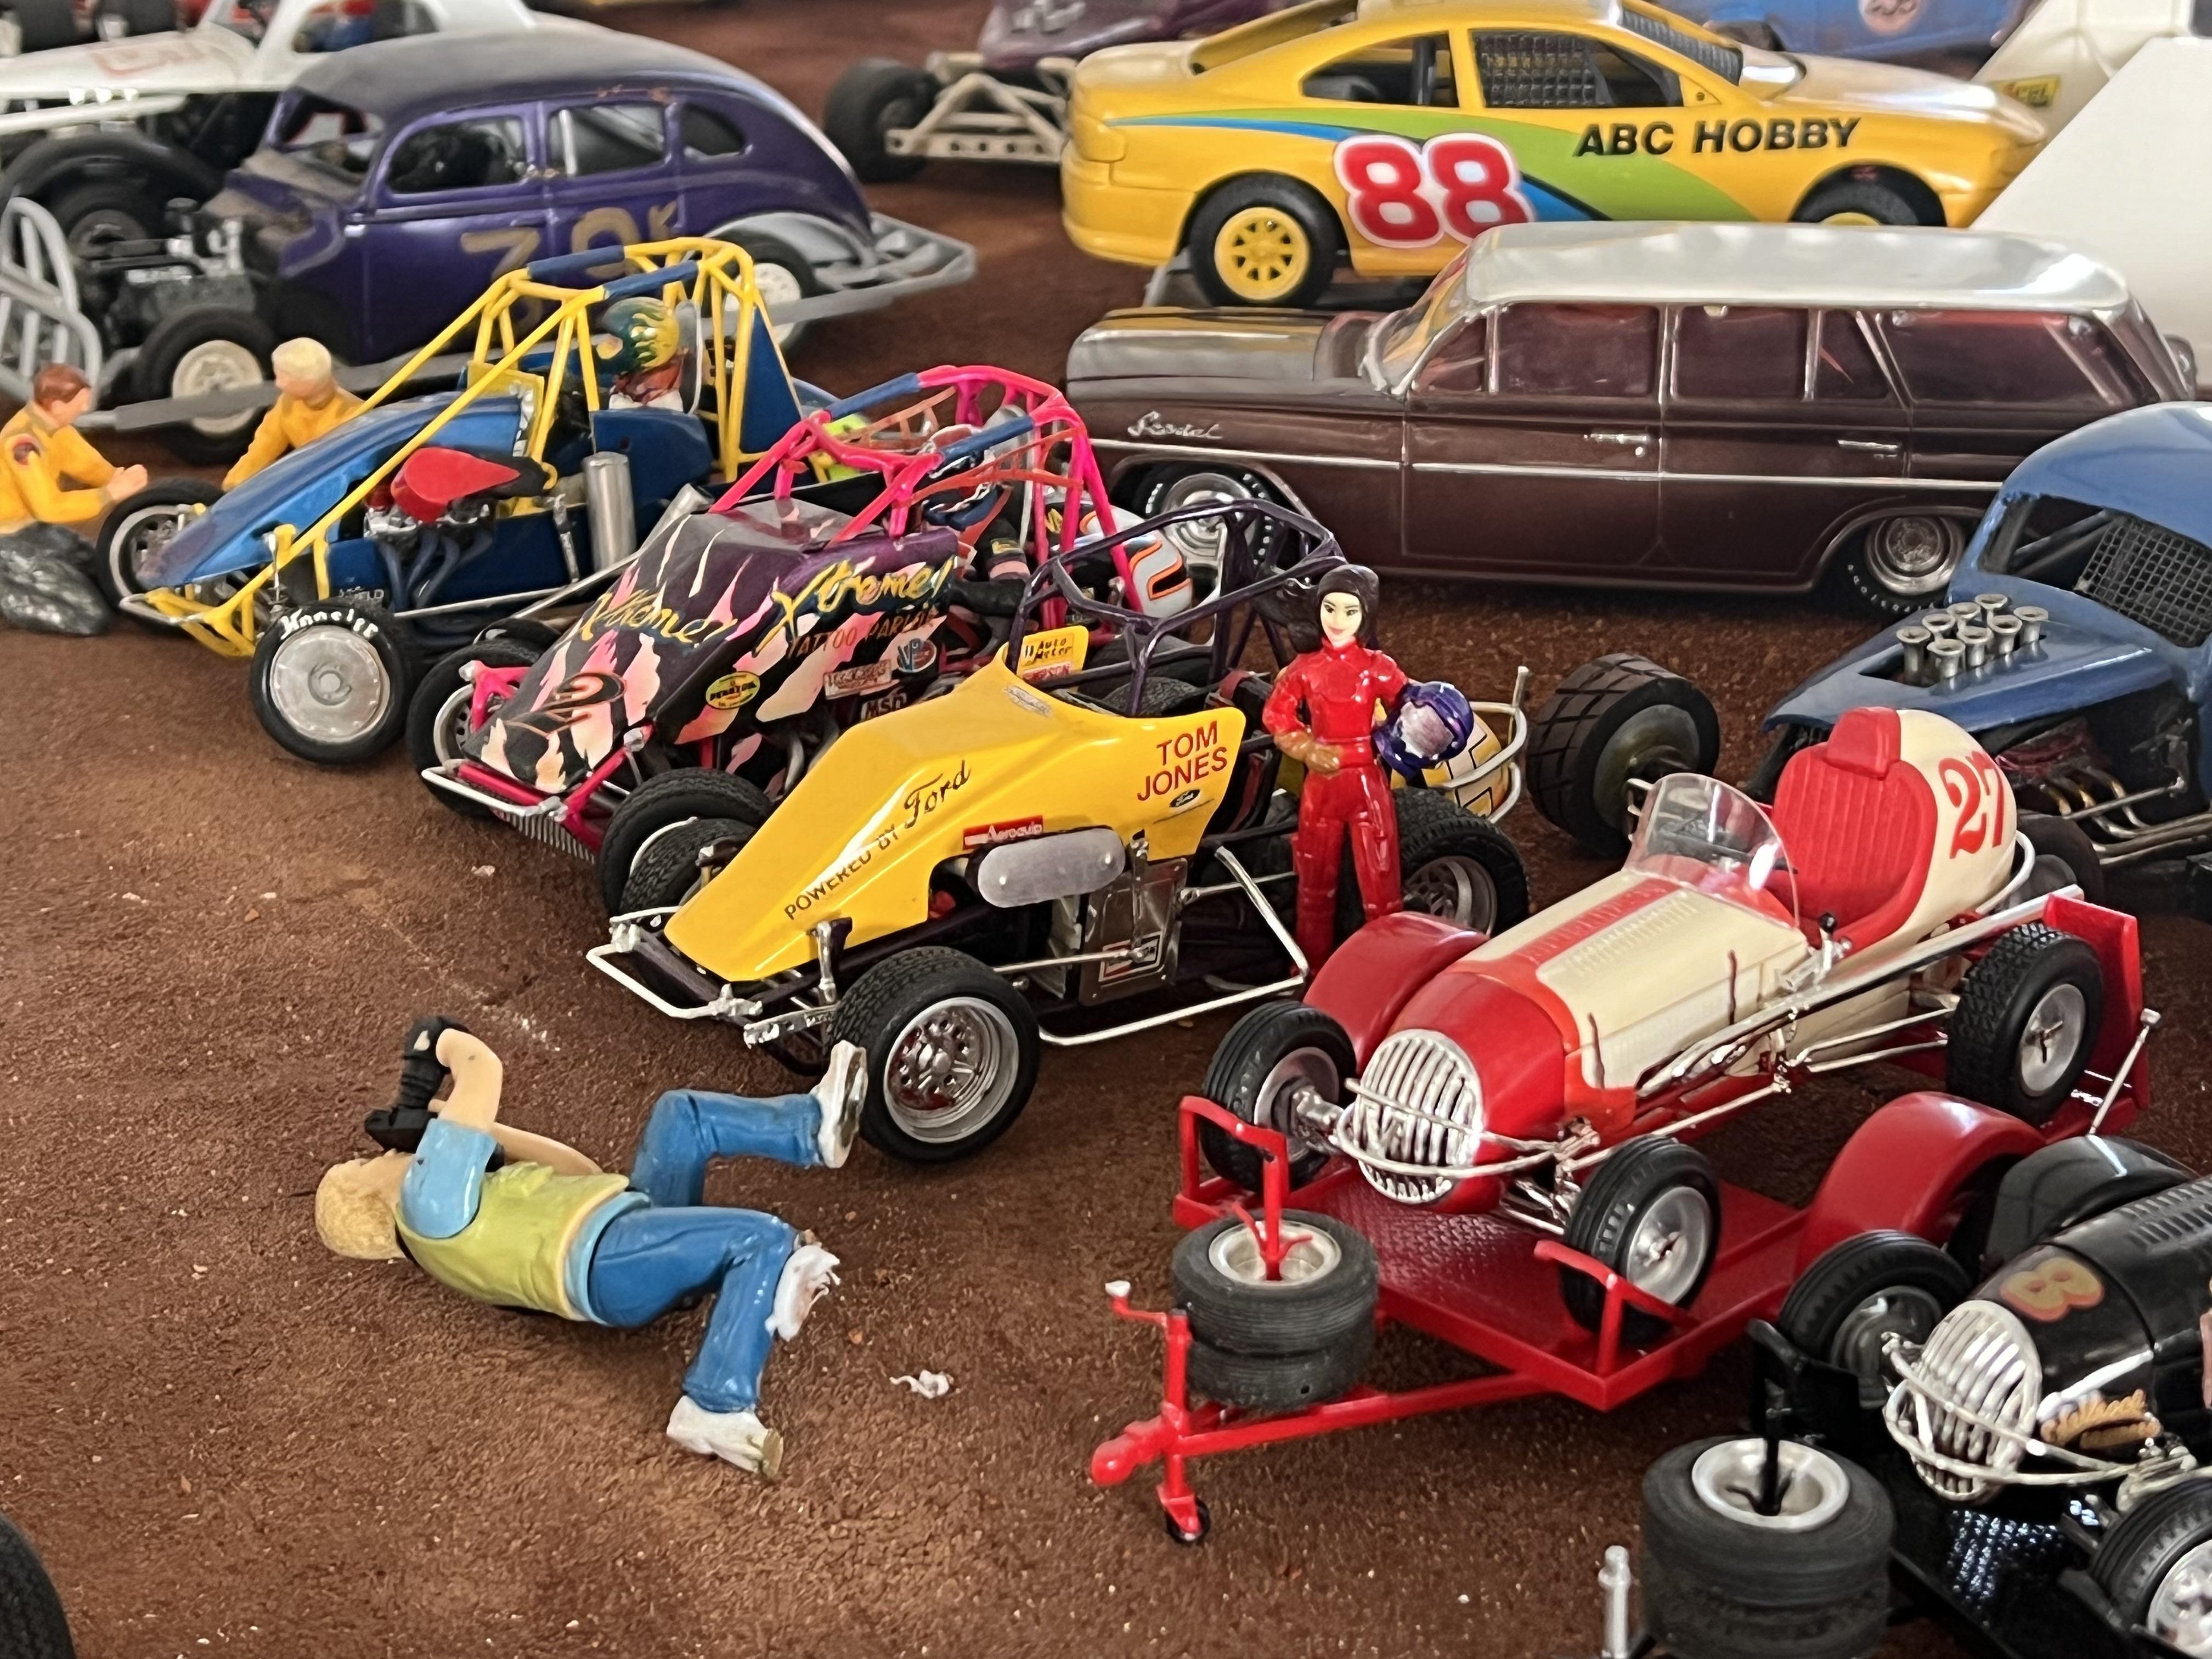
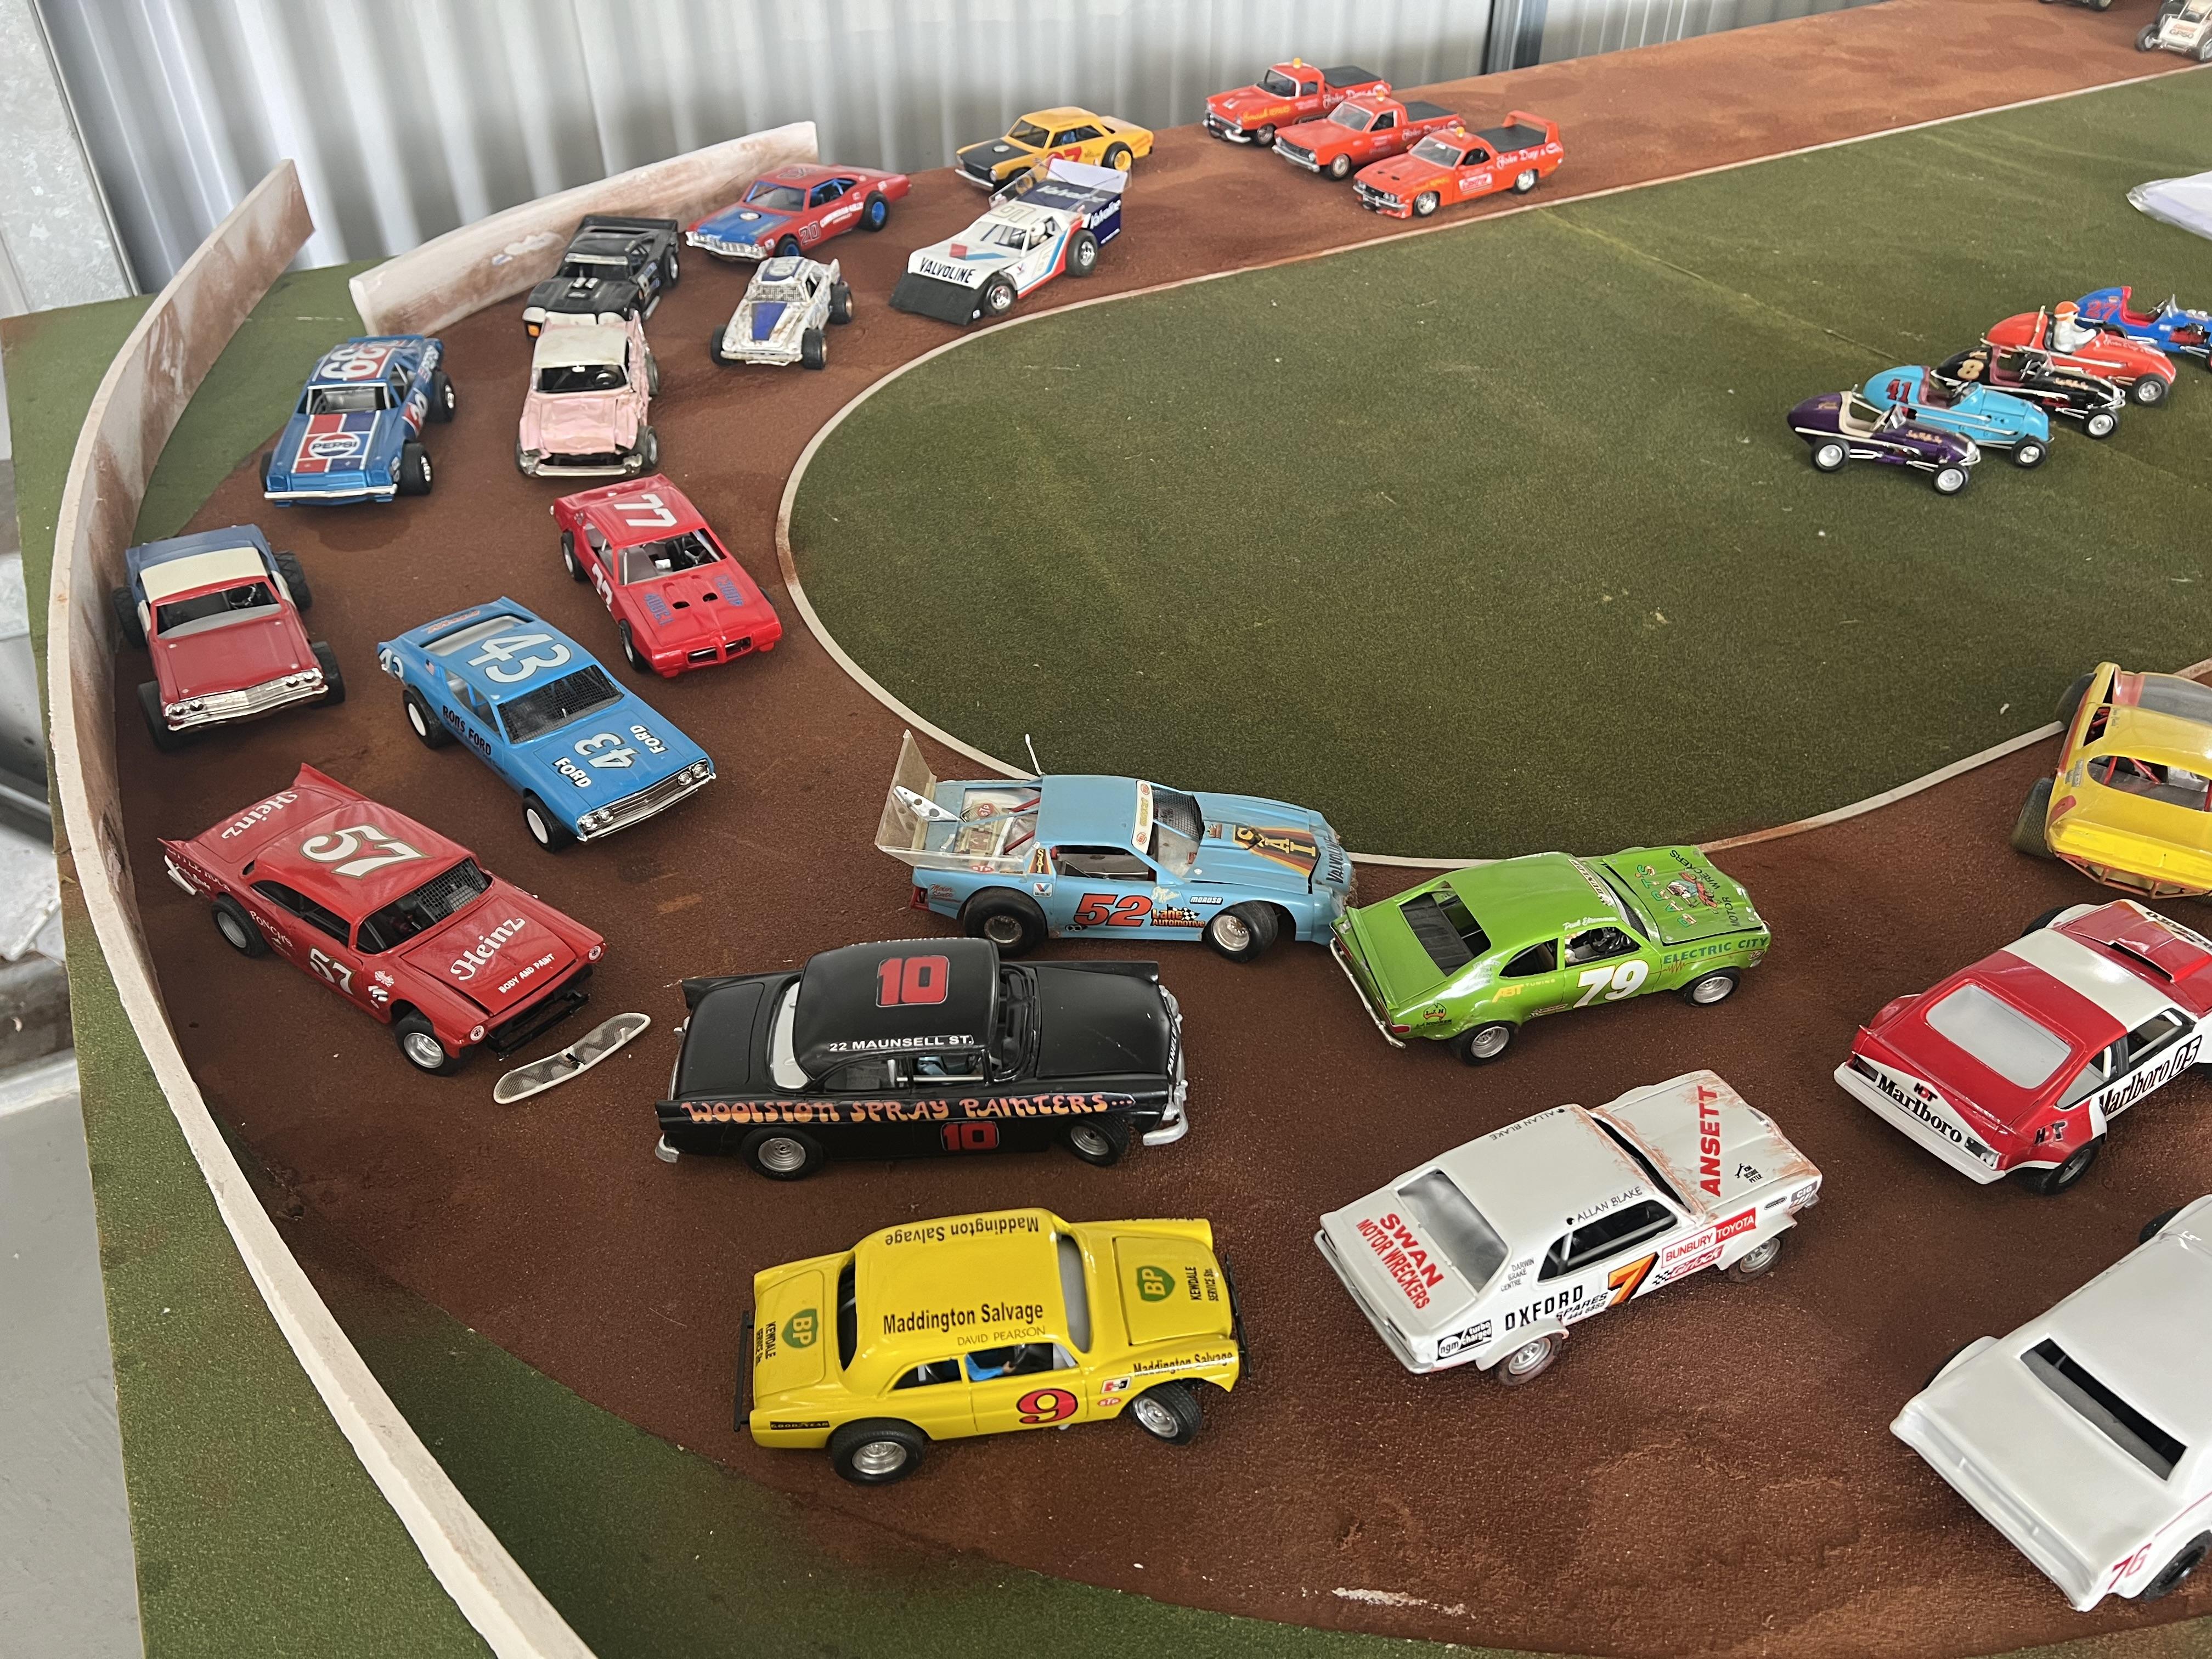
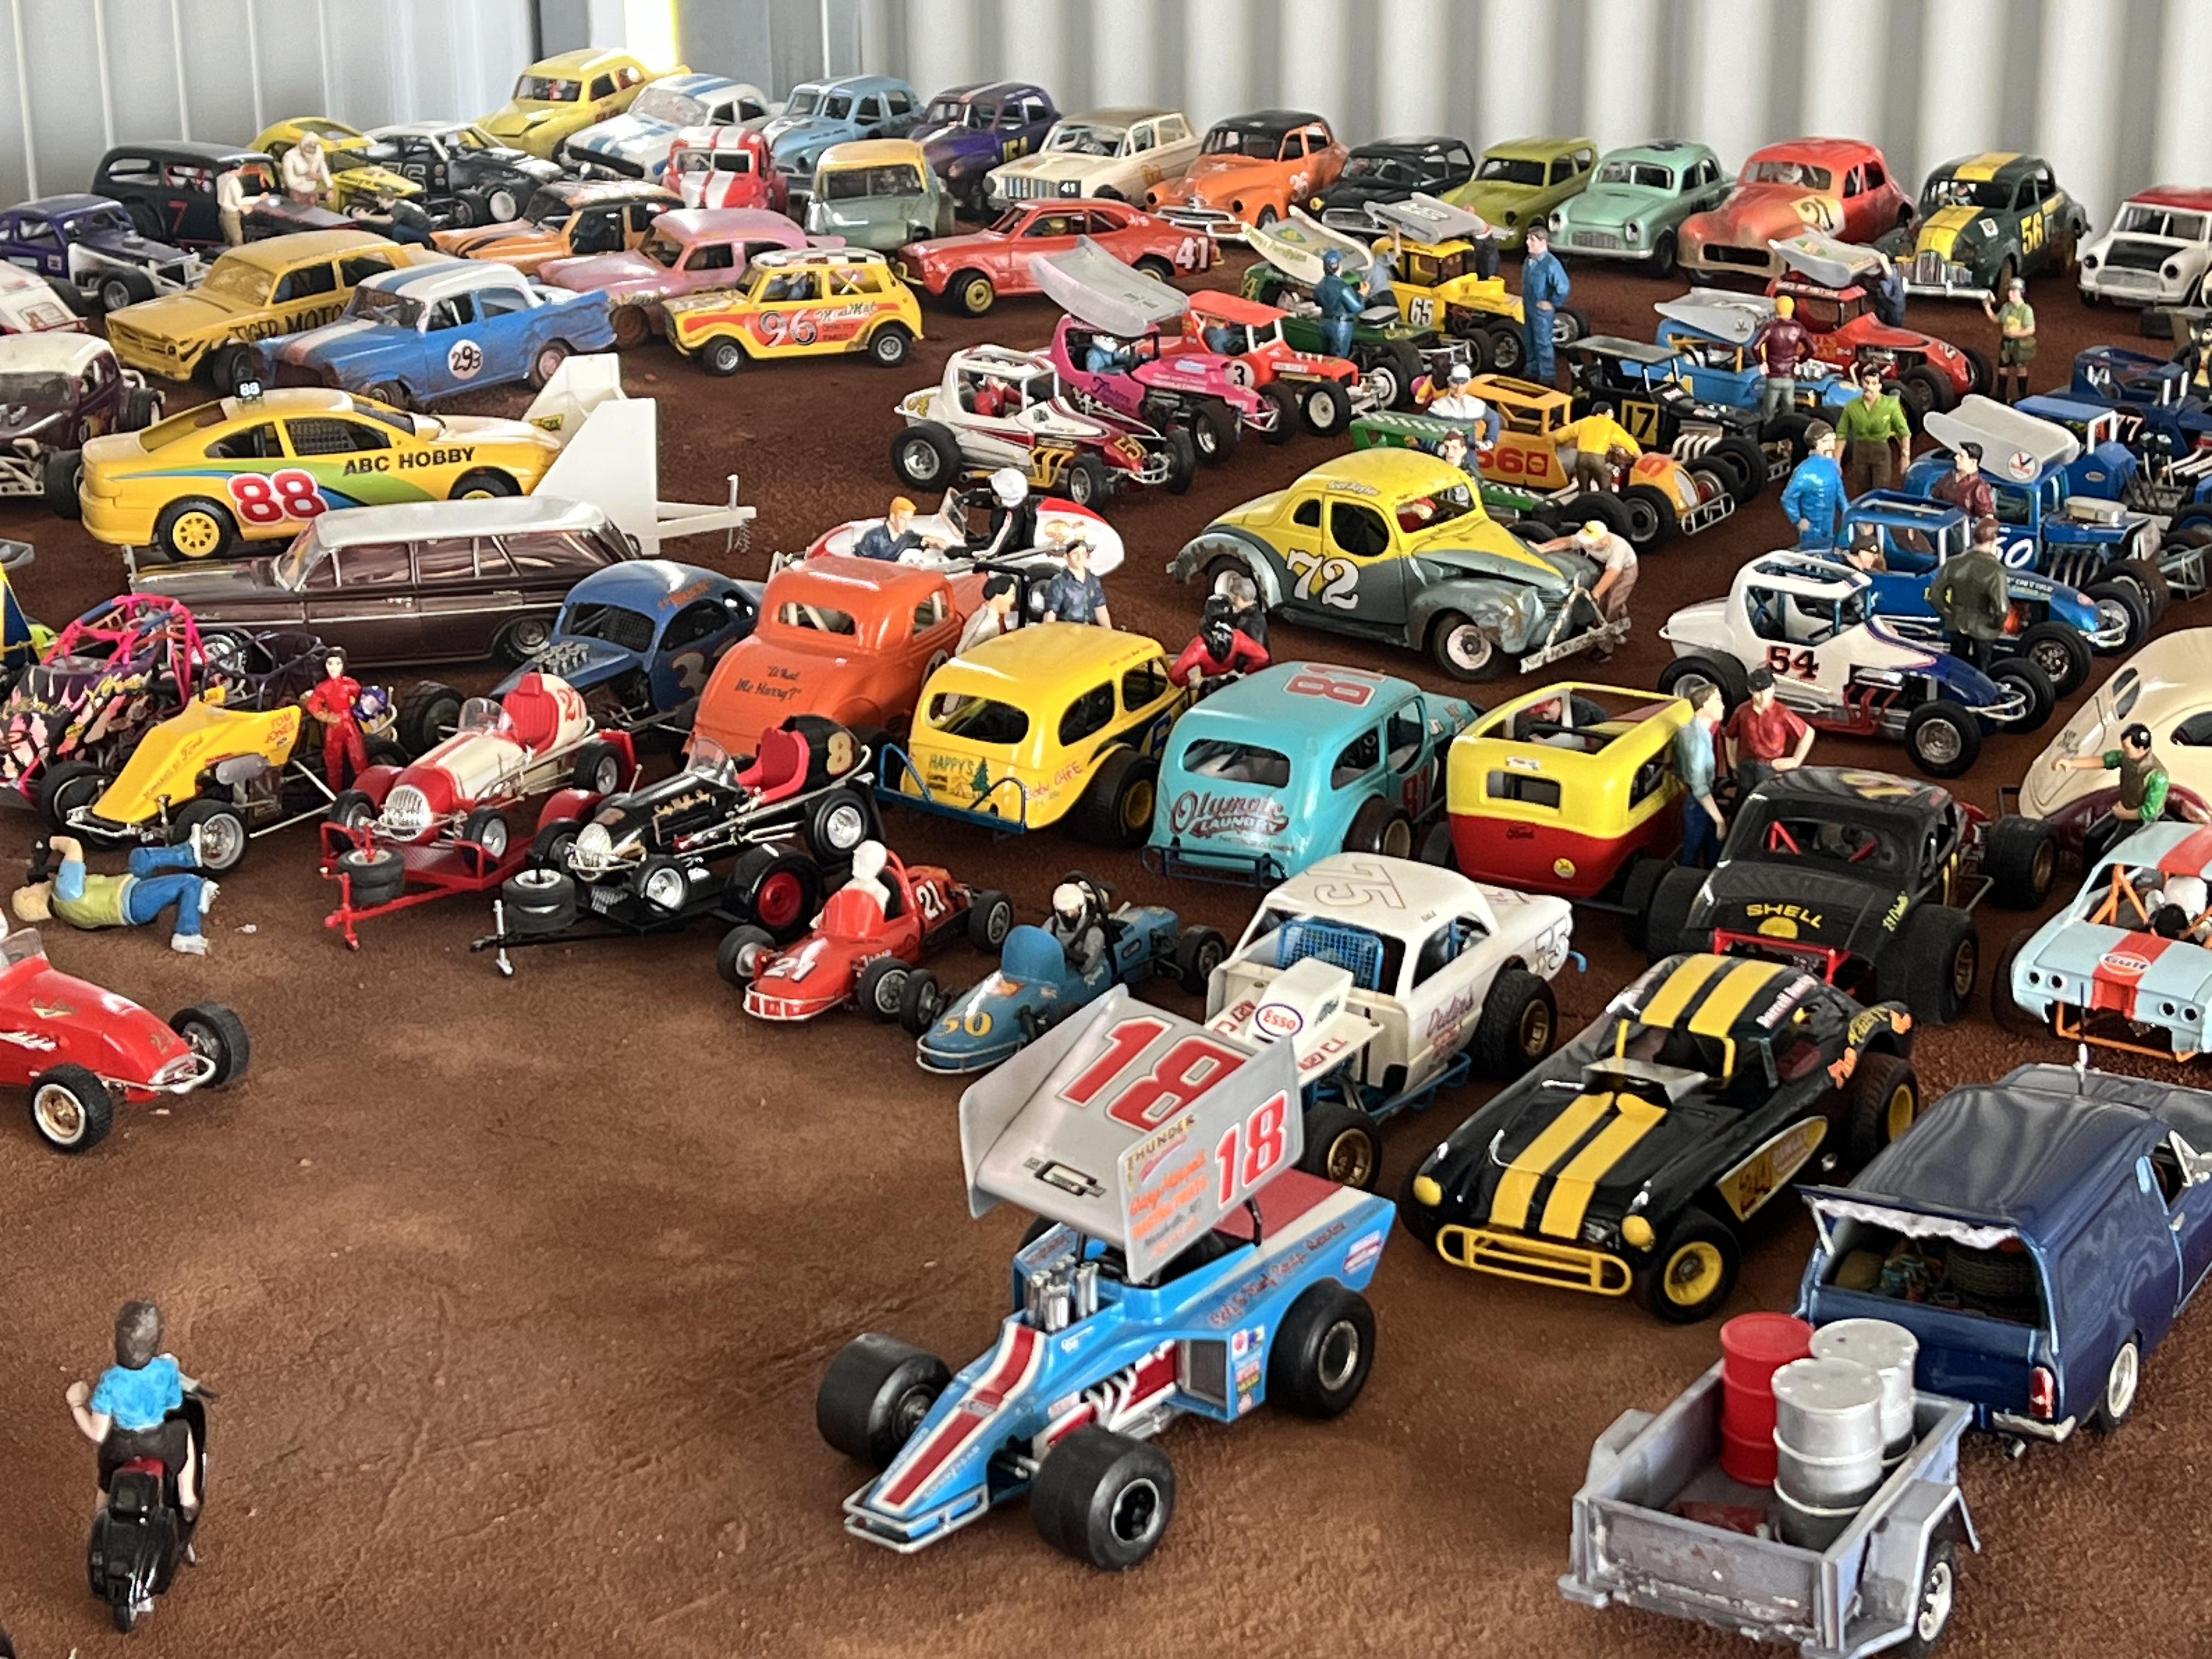
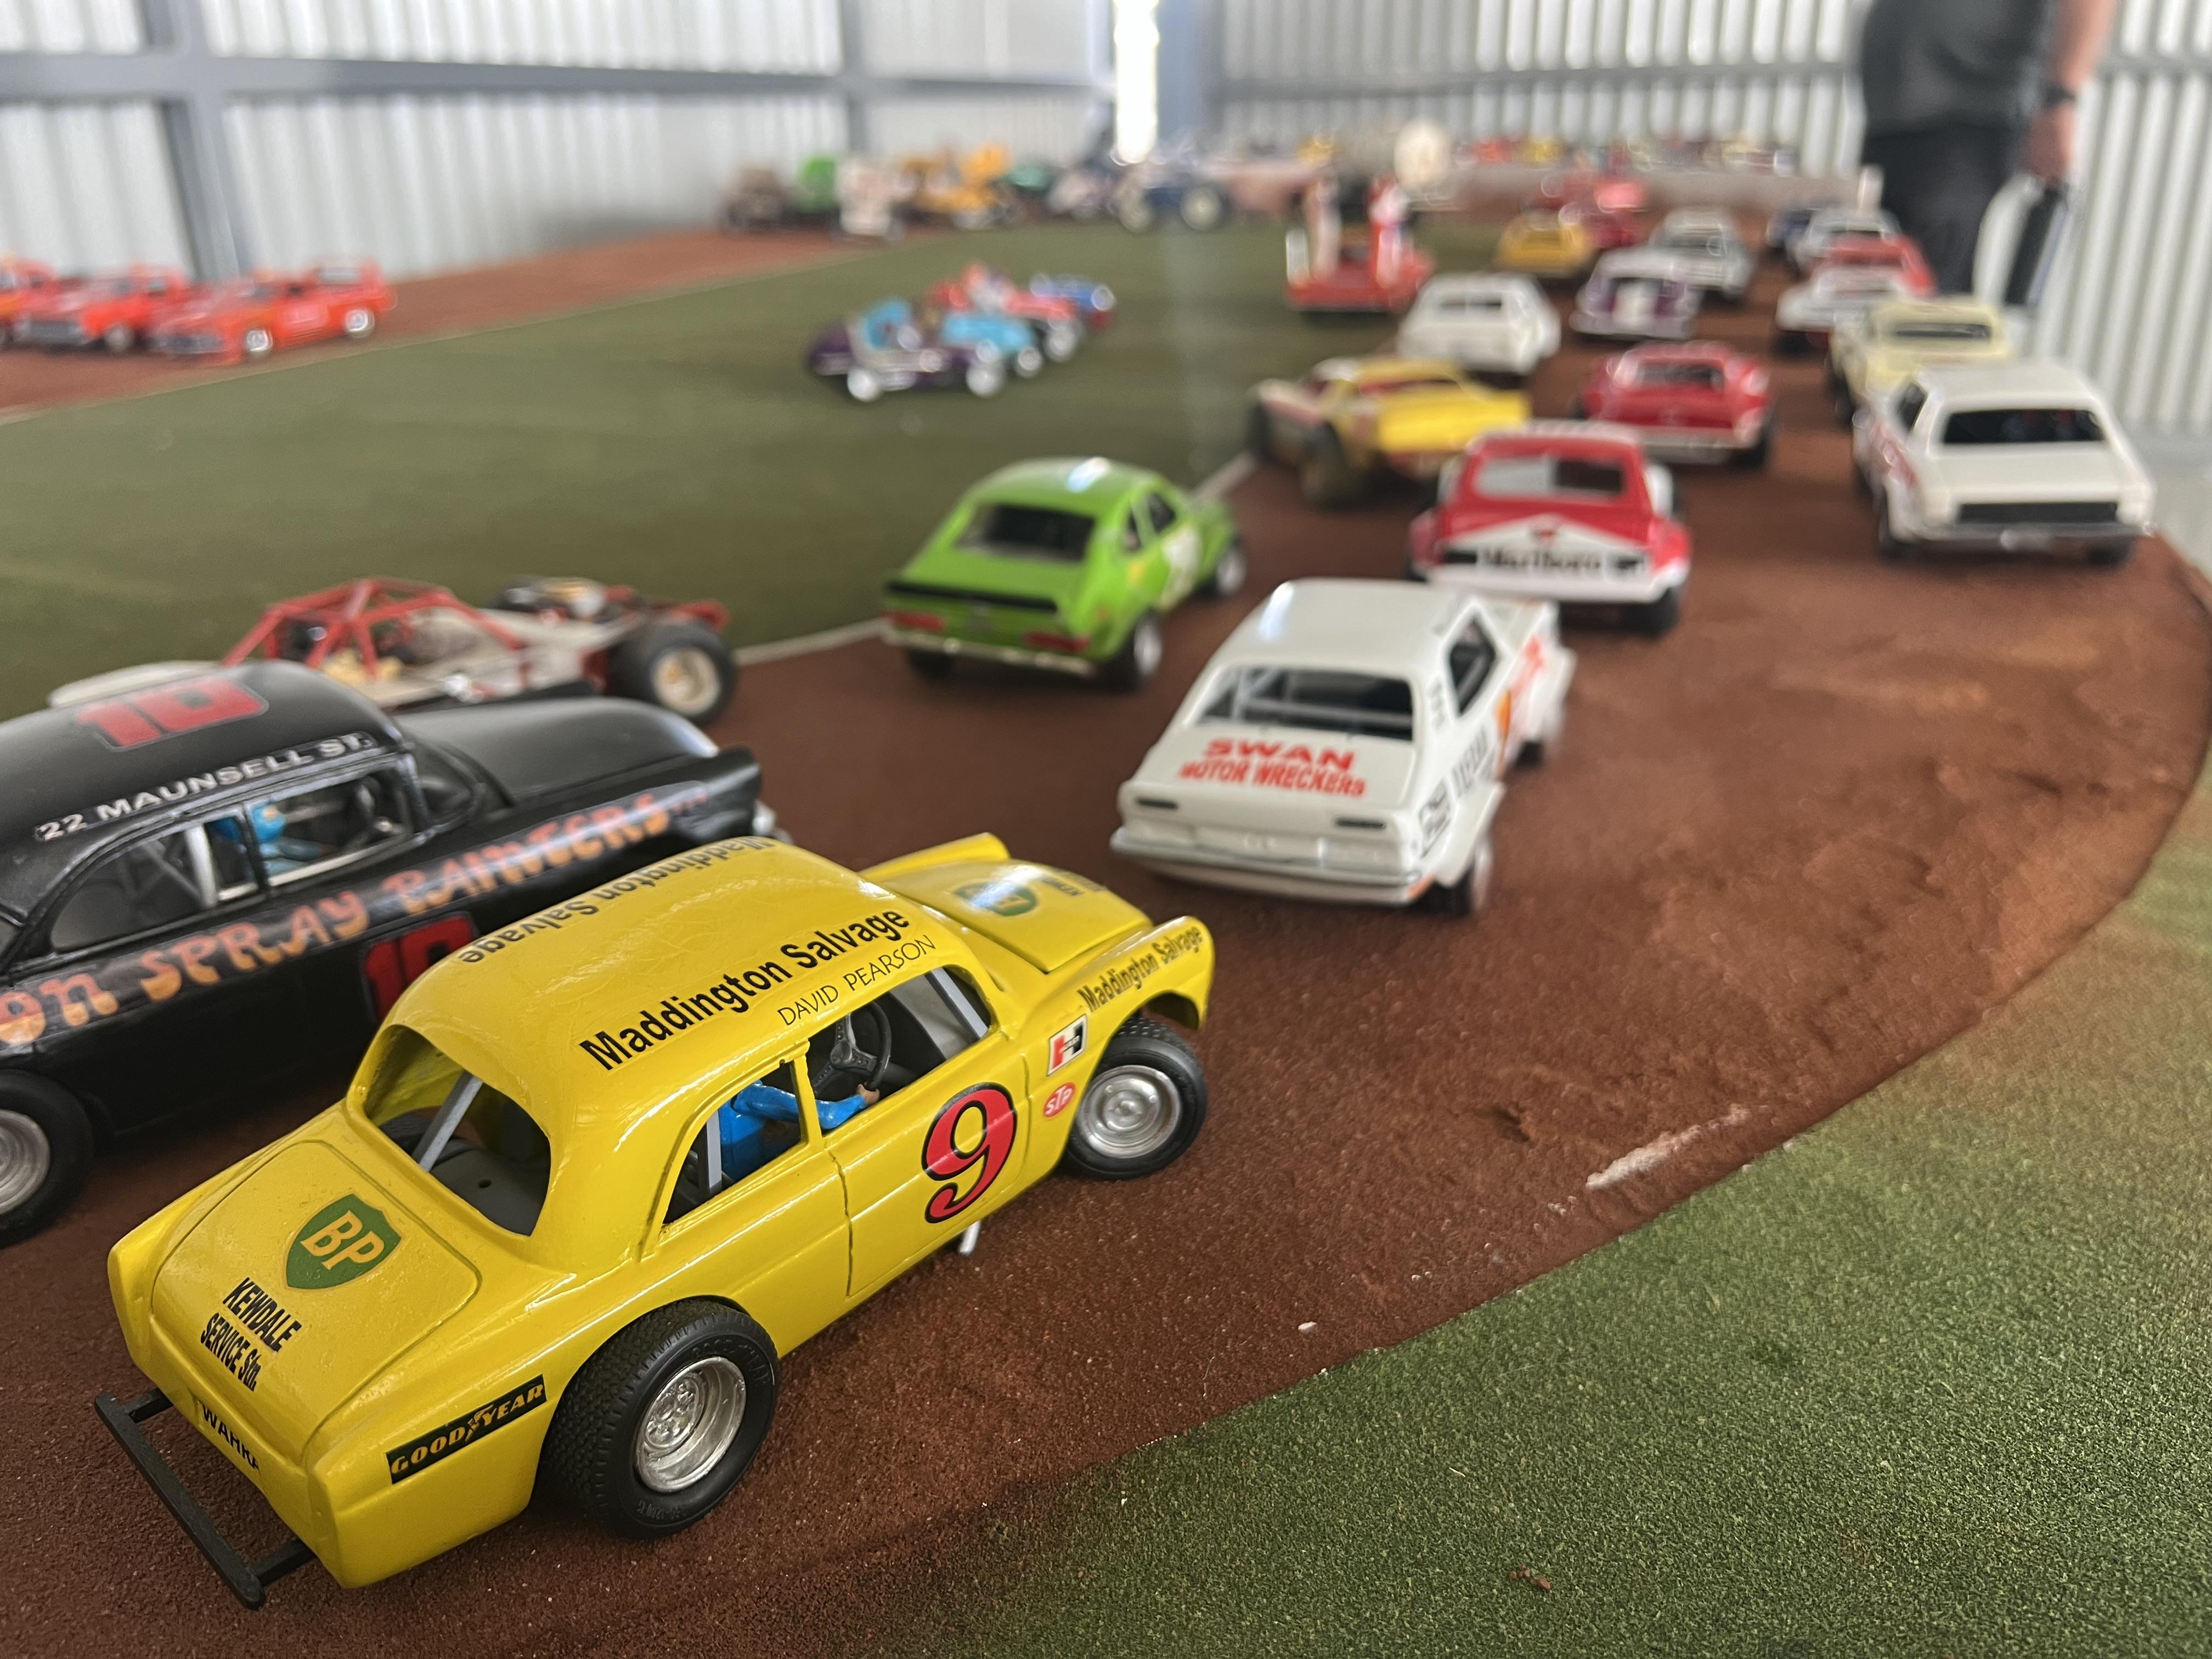
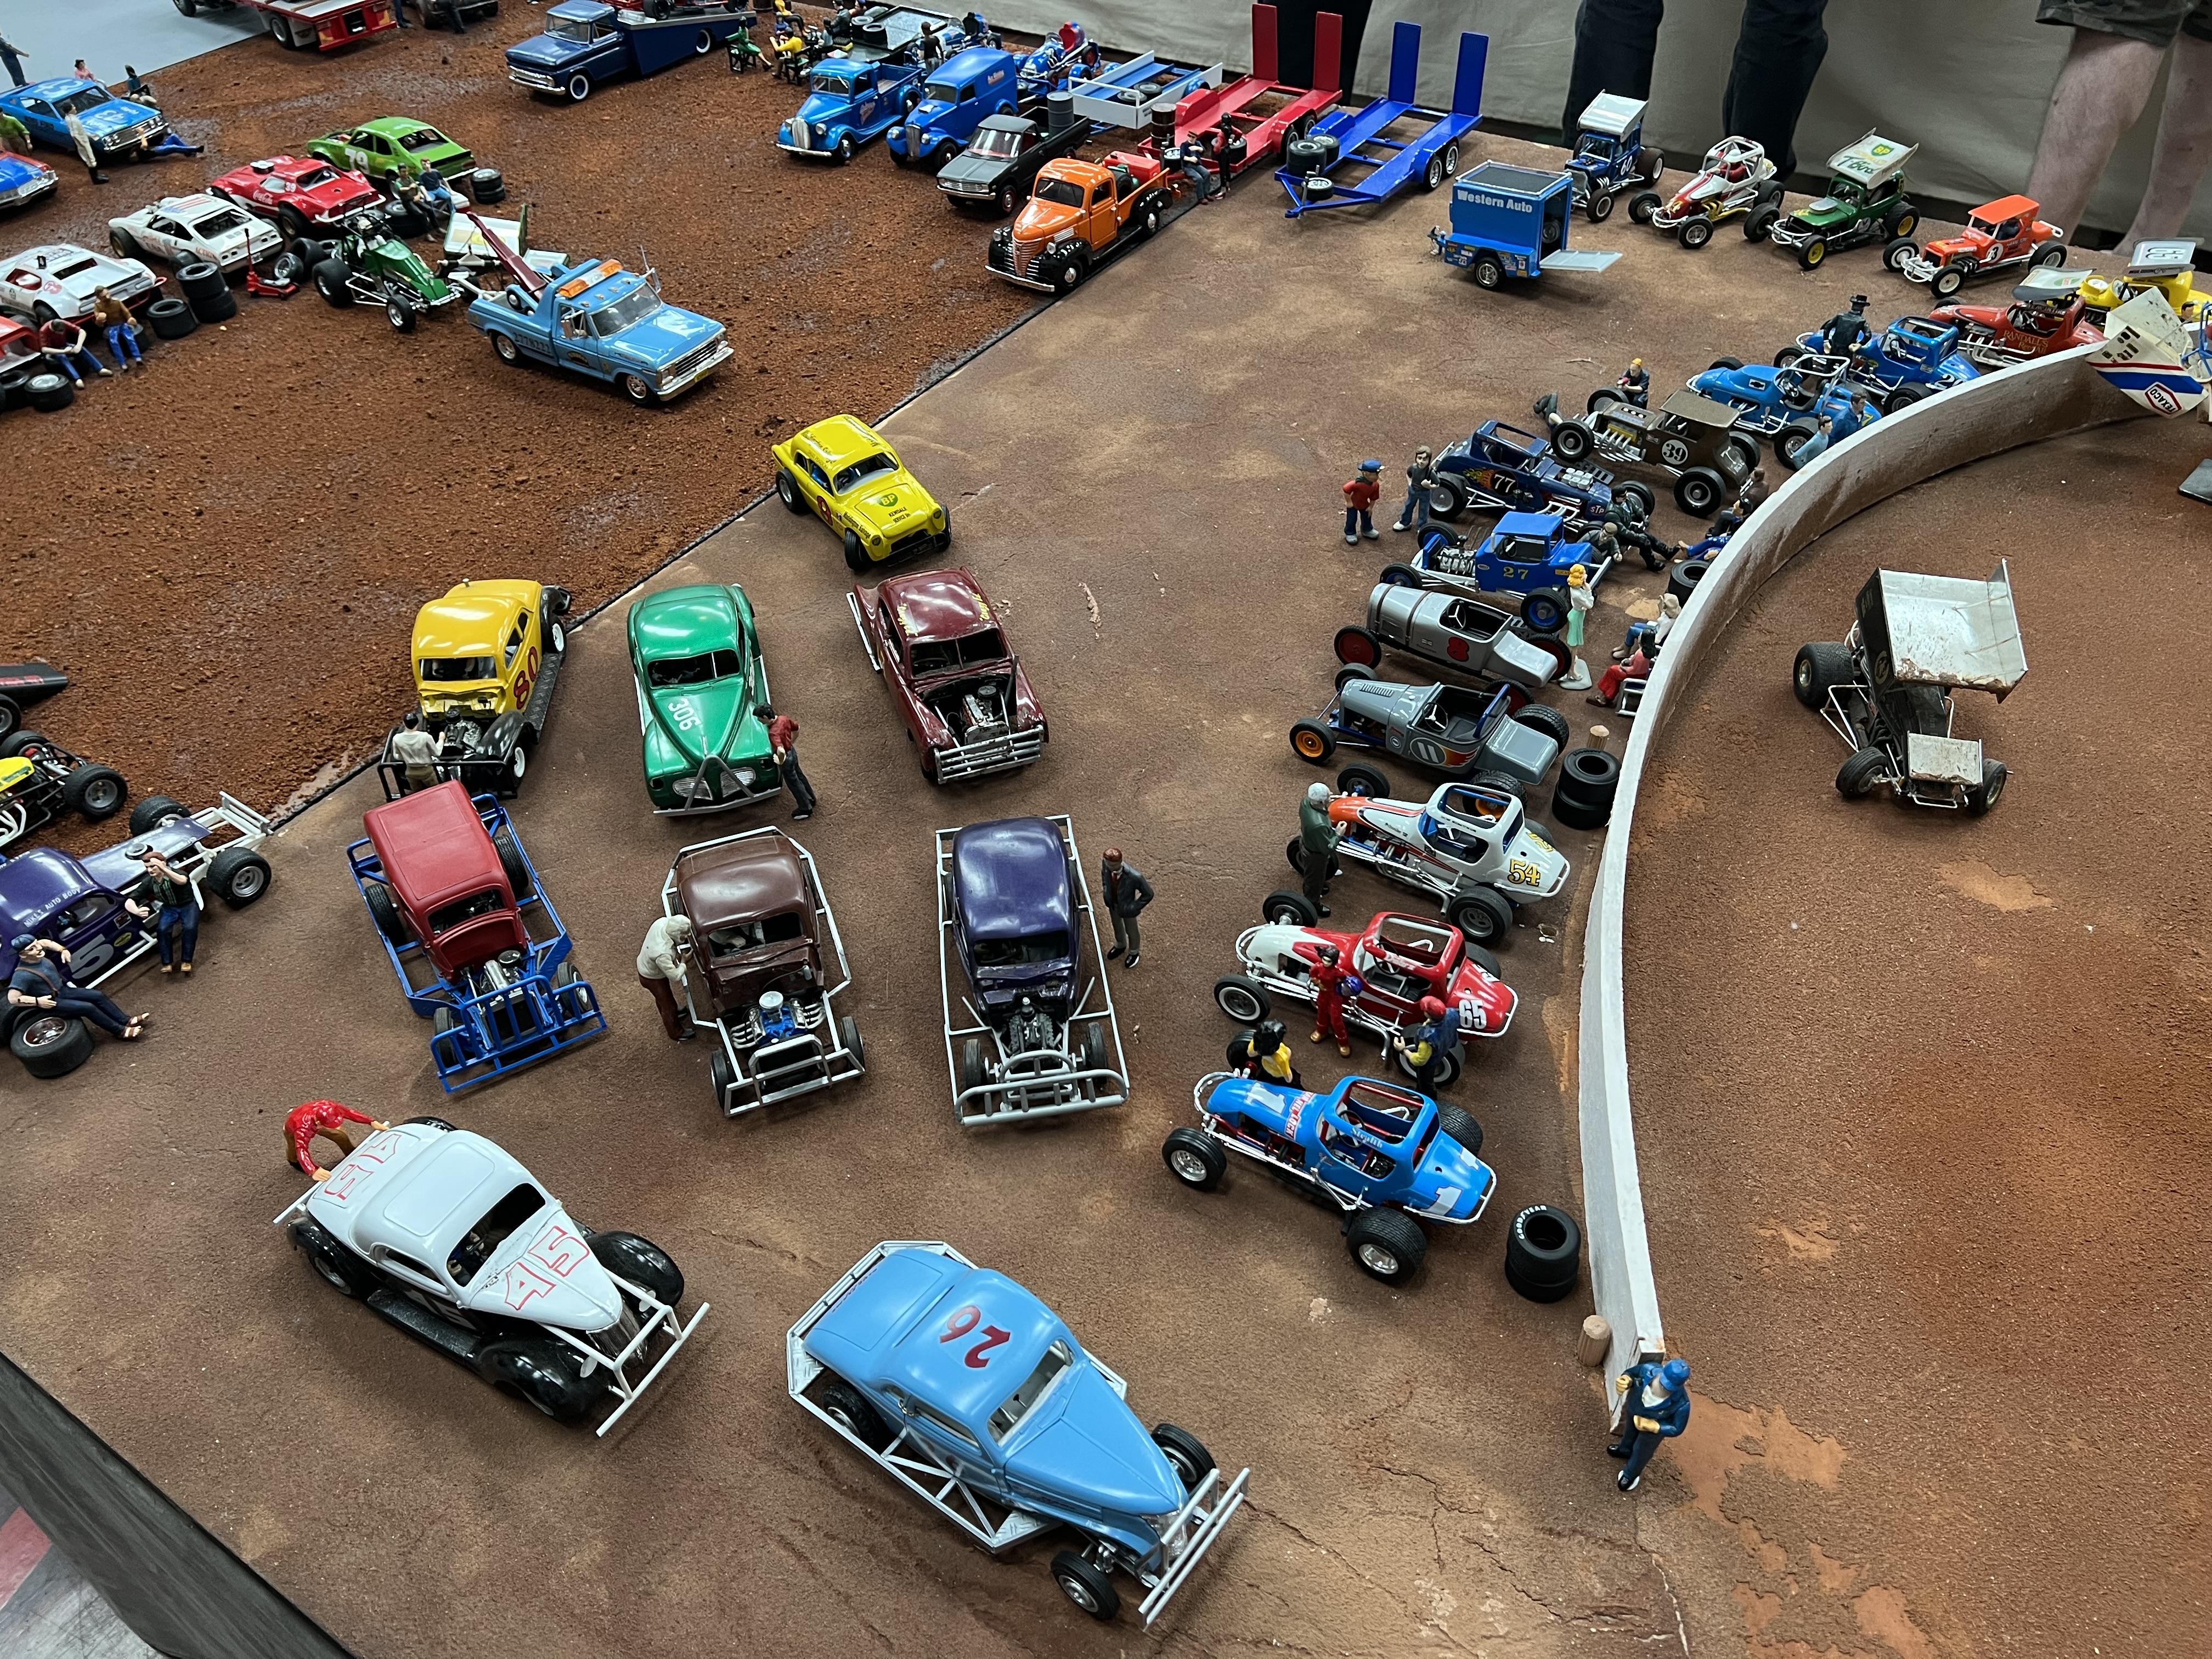
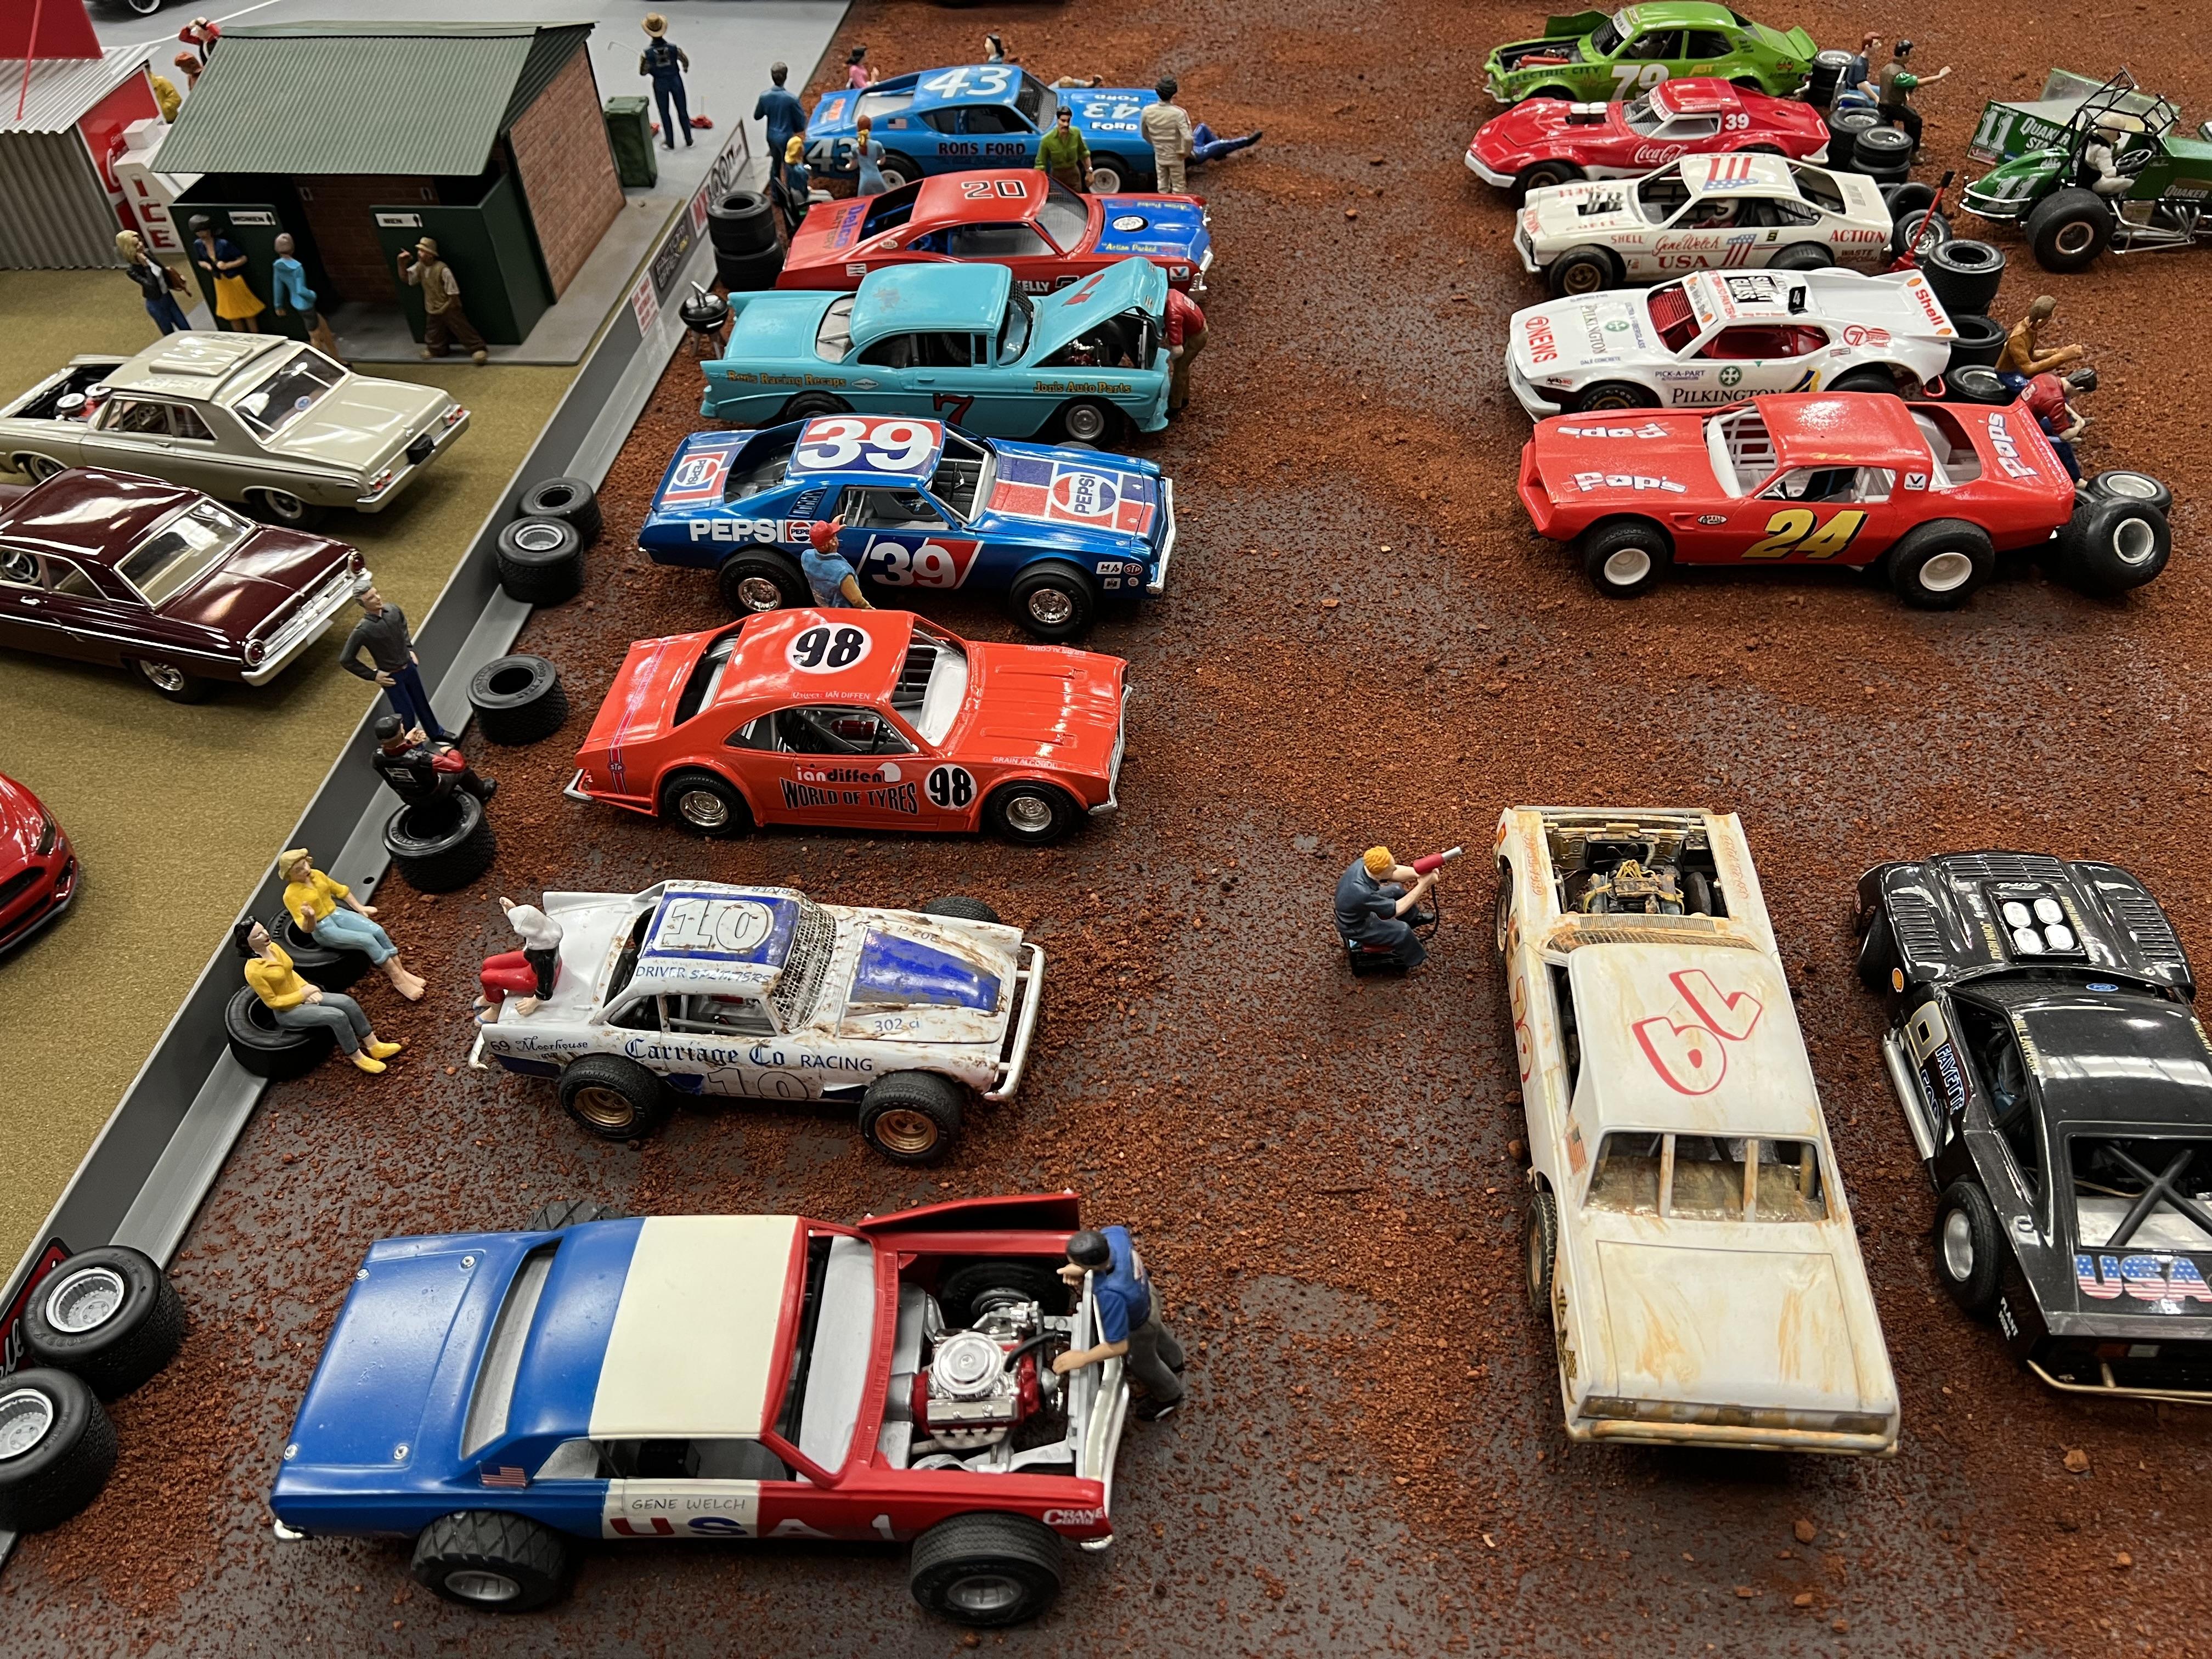
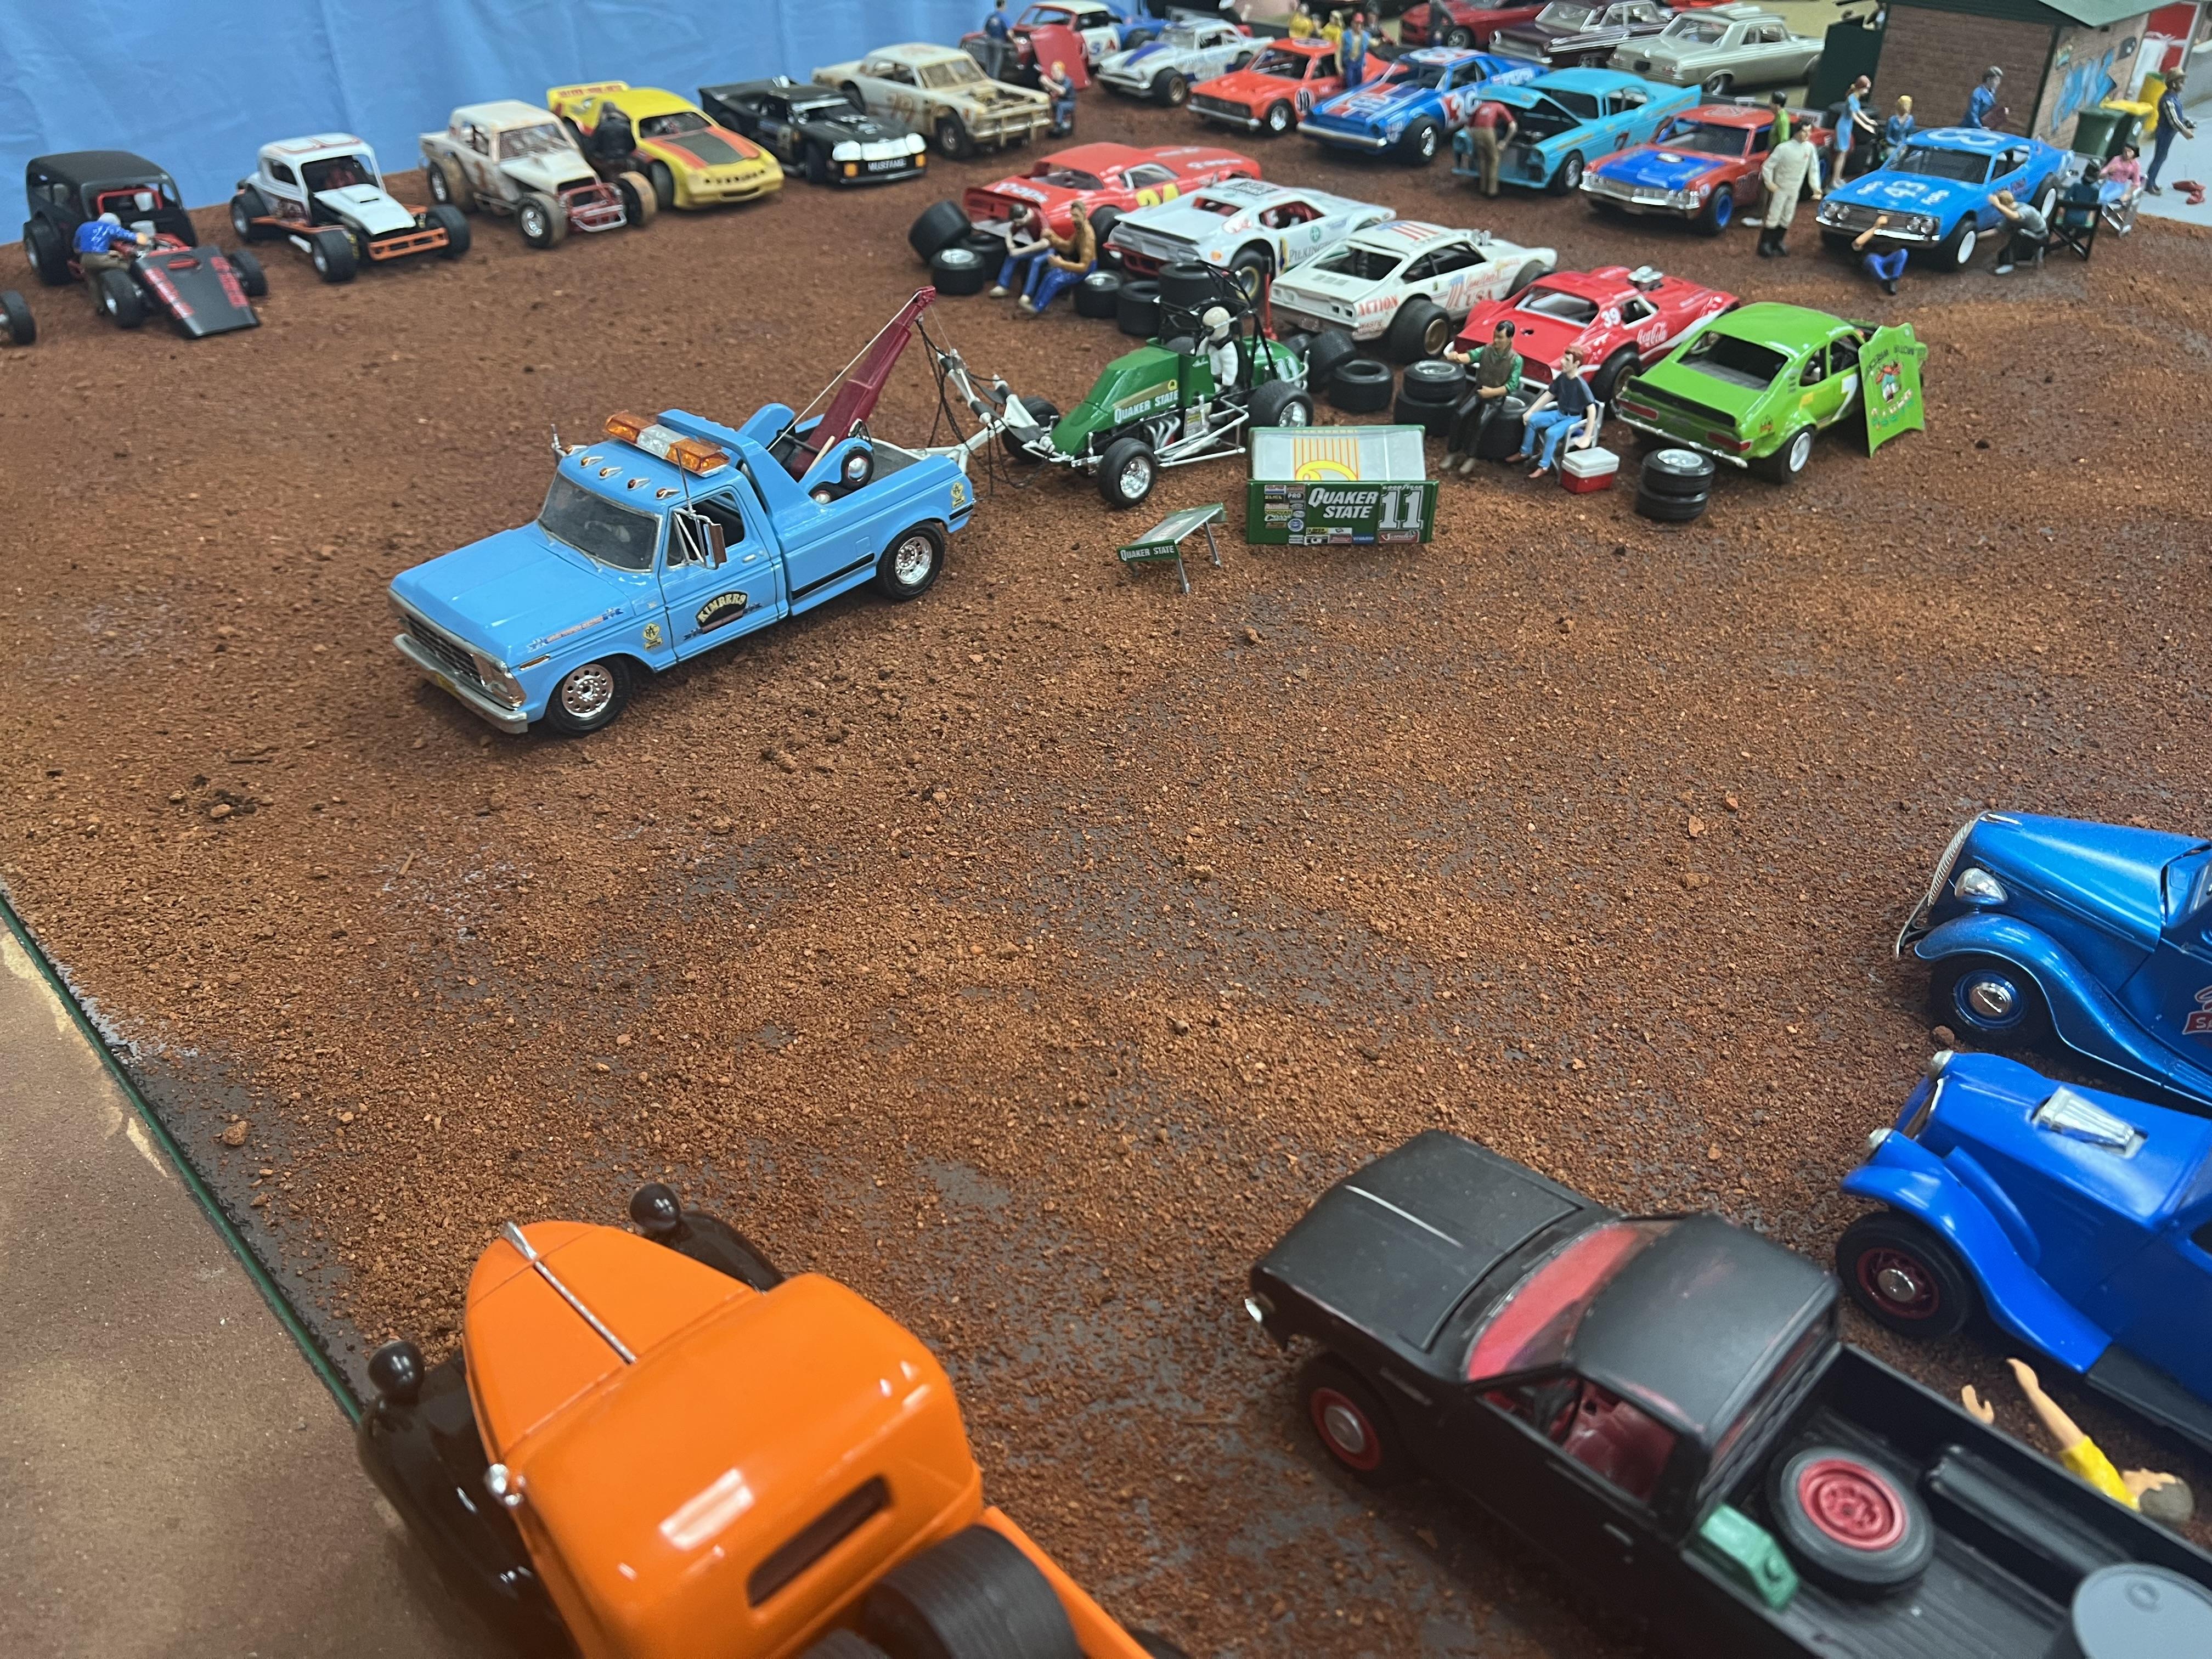
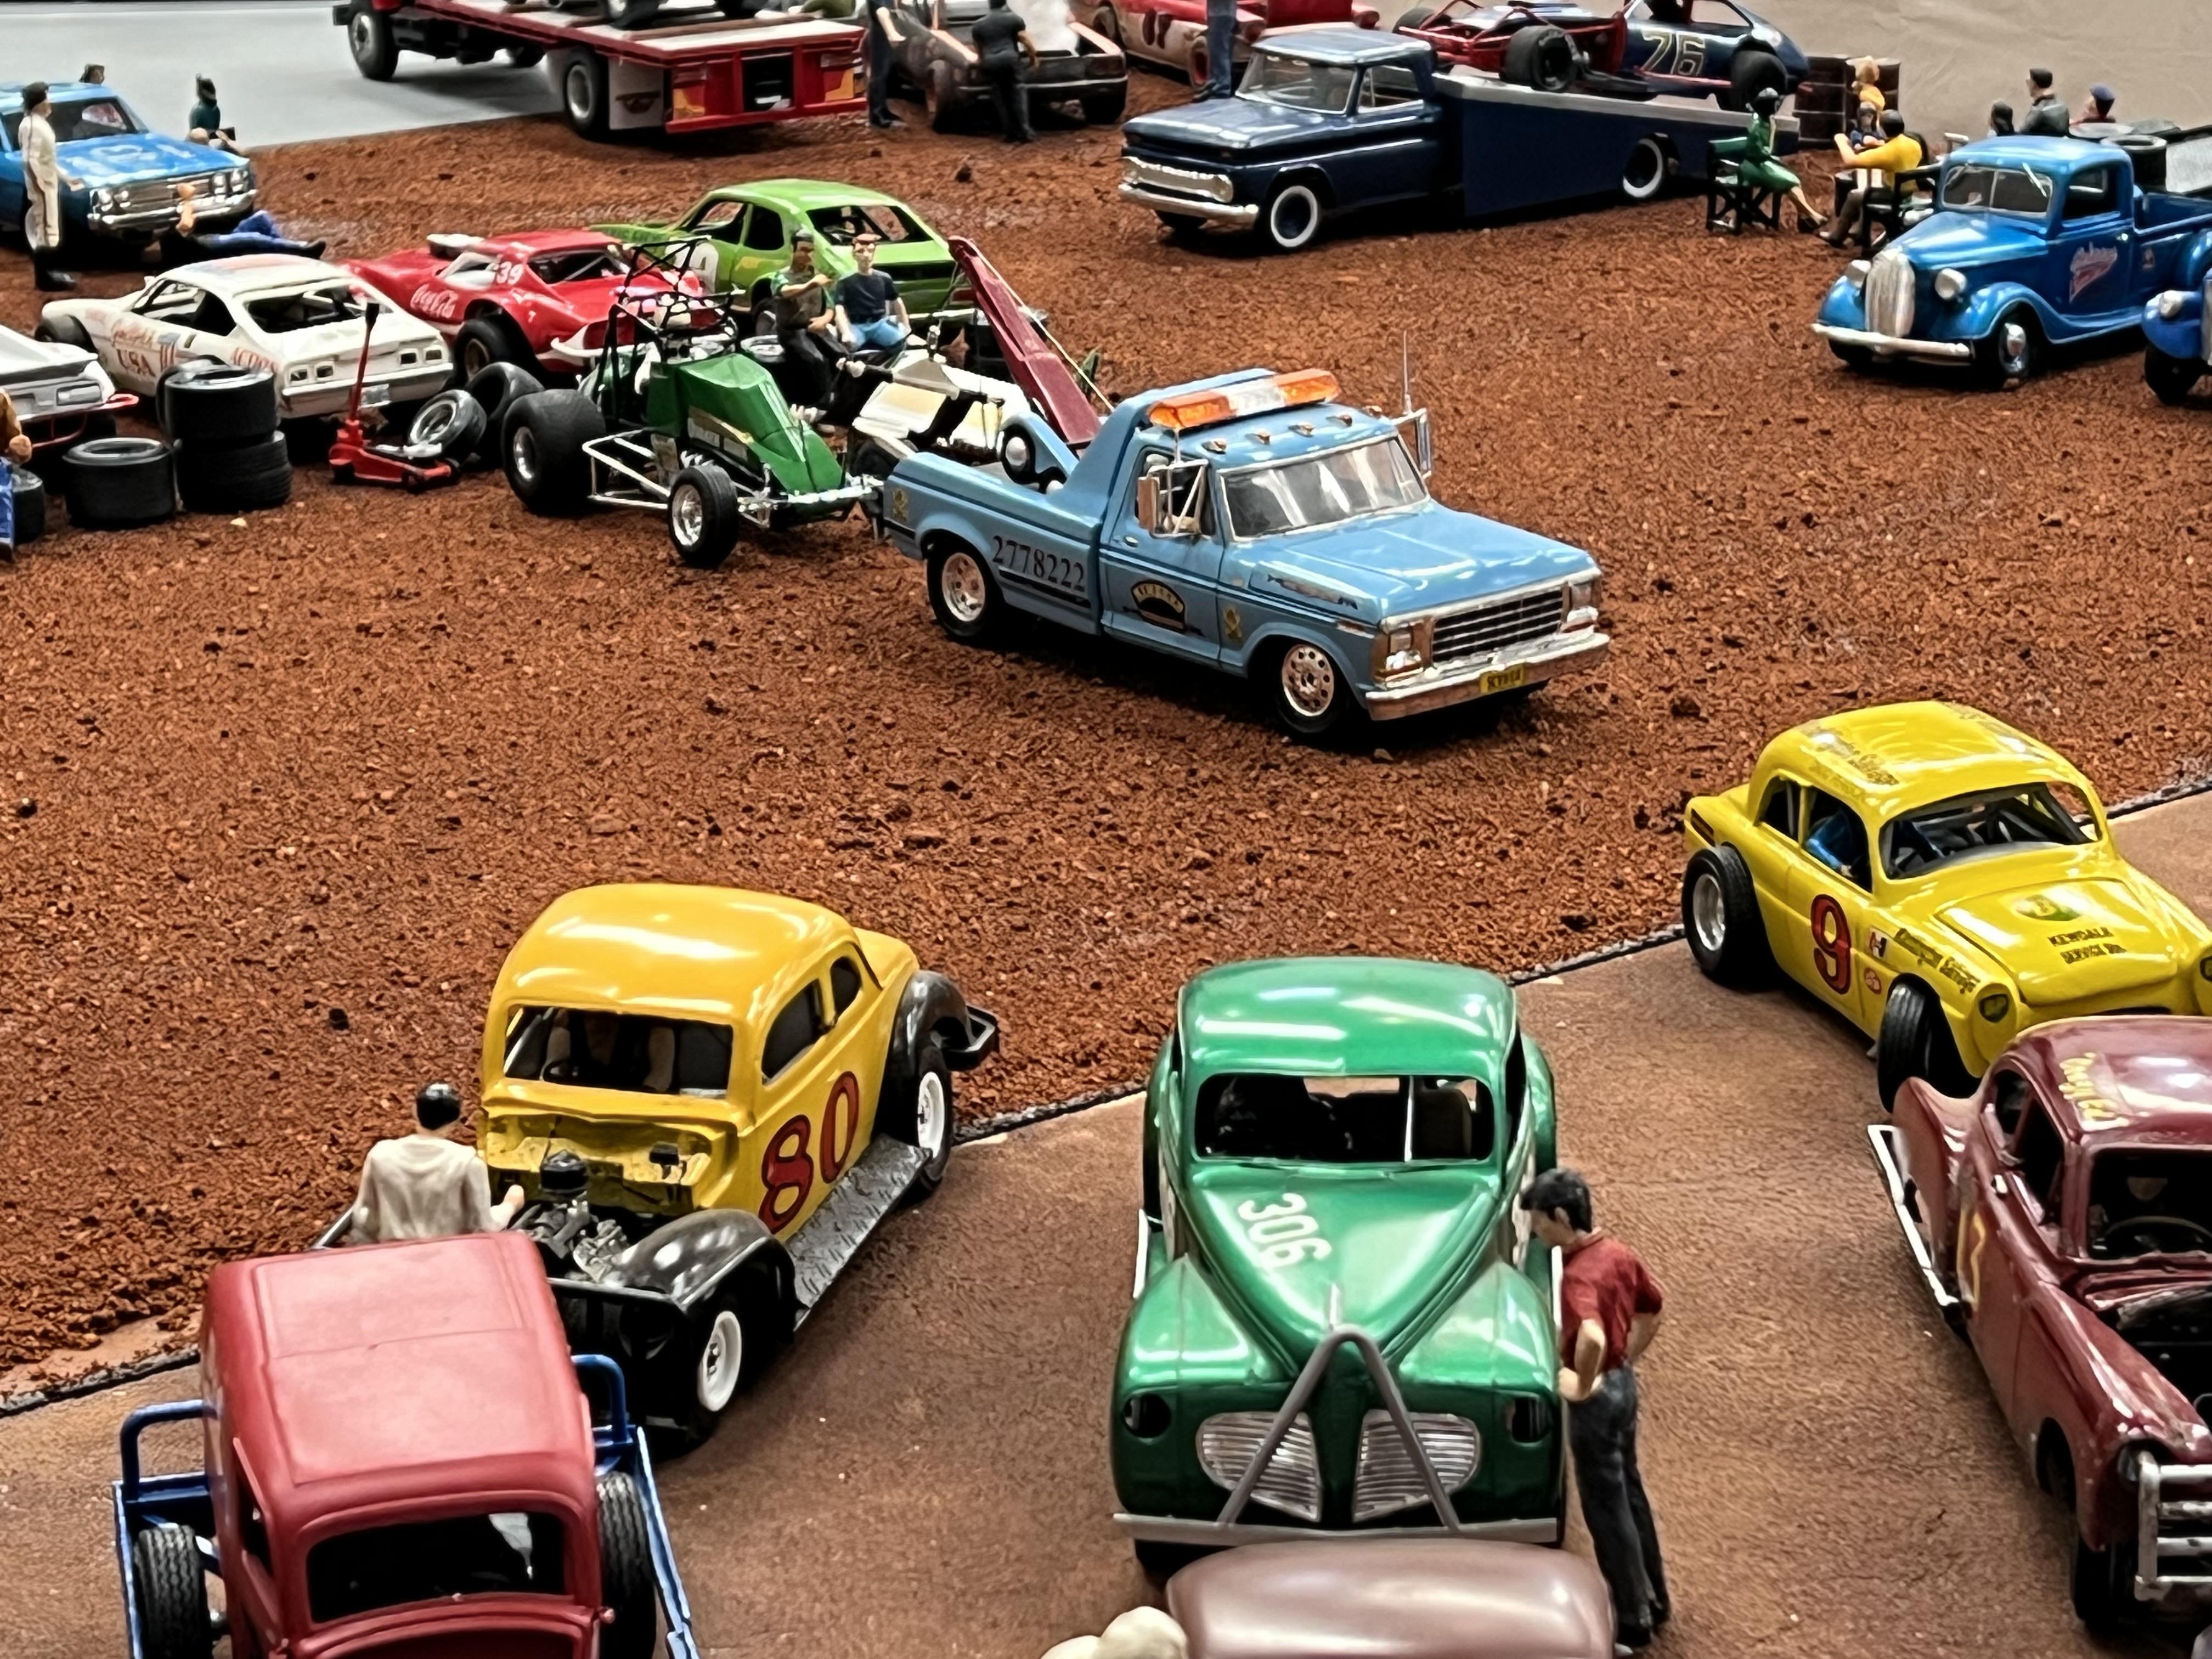
I didn't have many photos of the full track in my first post so I found these taken in October when we displayed at the WA Classic Speedway Spectacular. It was a great day and the display was well received by the patrons. A lot of our models are replicas of actual Western Australian speedway cars so the drivers showed a lot of interest as well!
-
A stunning model, even more so considering what a challenge the Testors/IMC multi piece body is to assemble! You have really shown your talents with this achievement! Cheers Alan
-
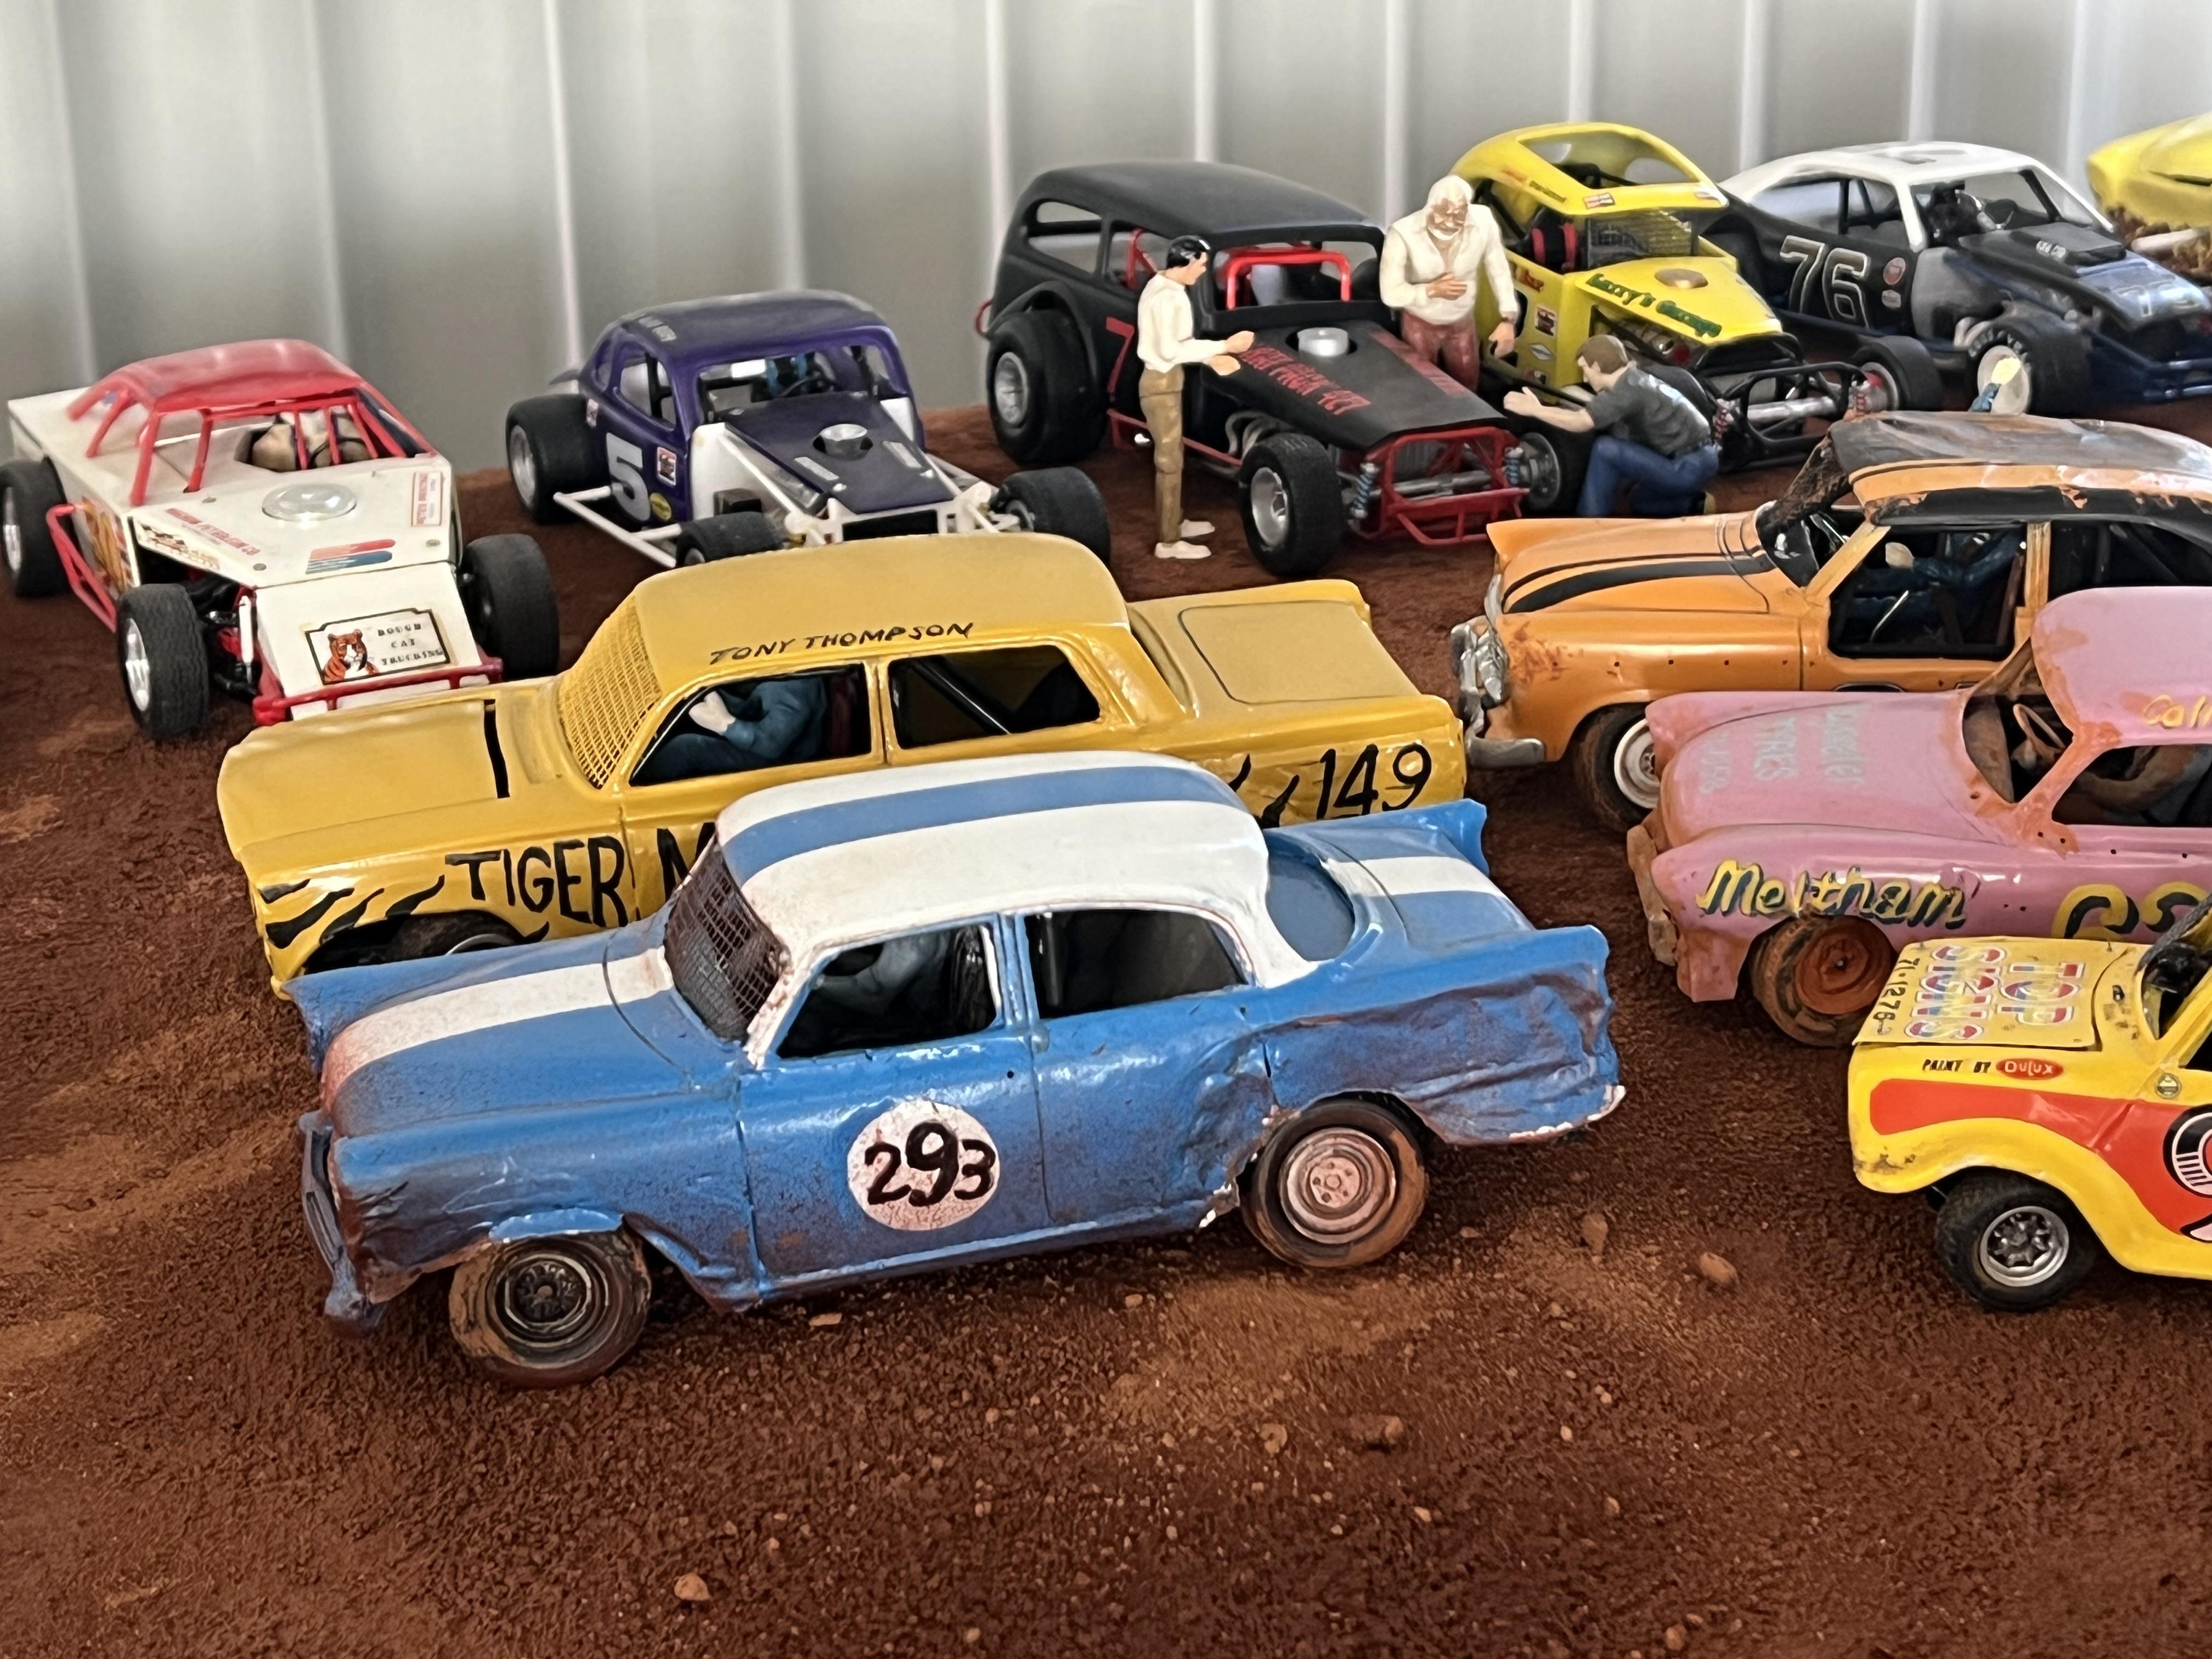
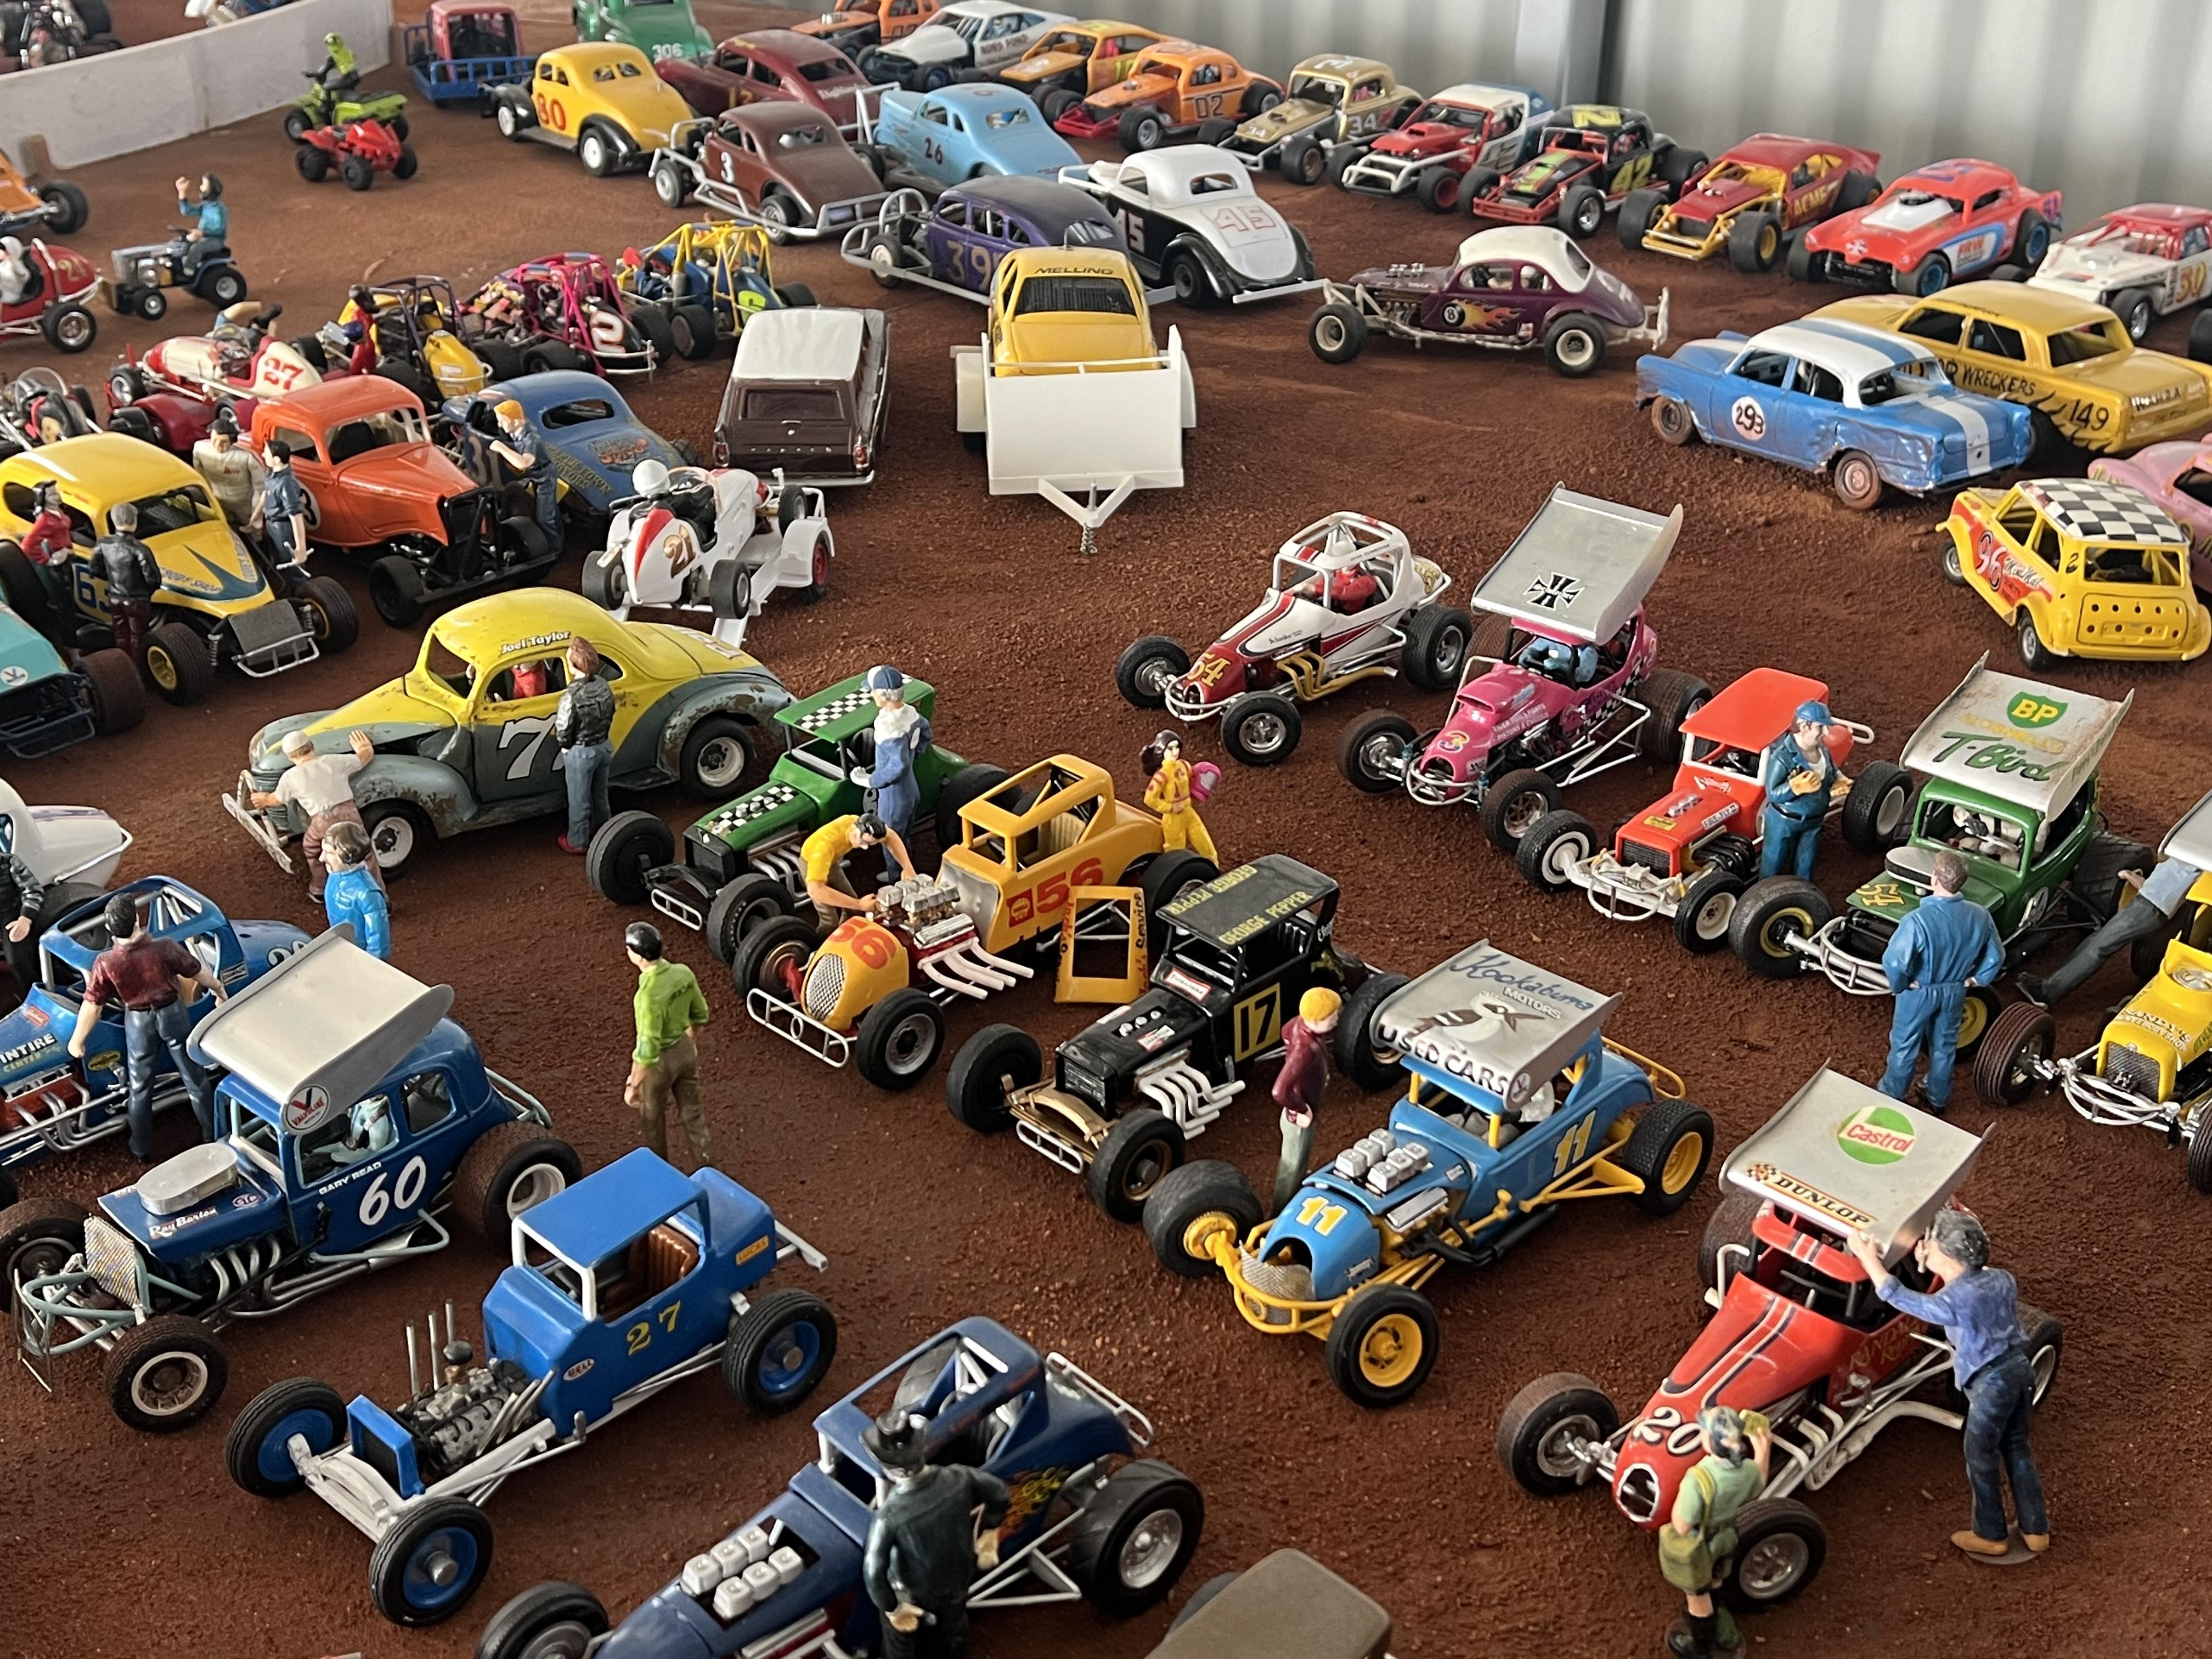
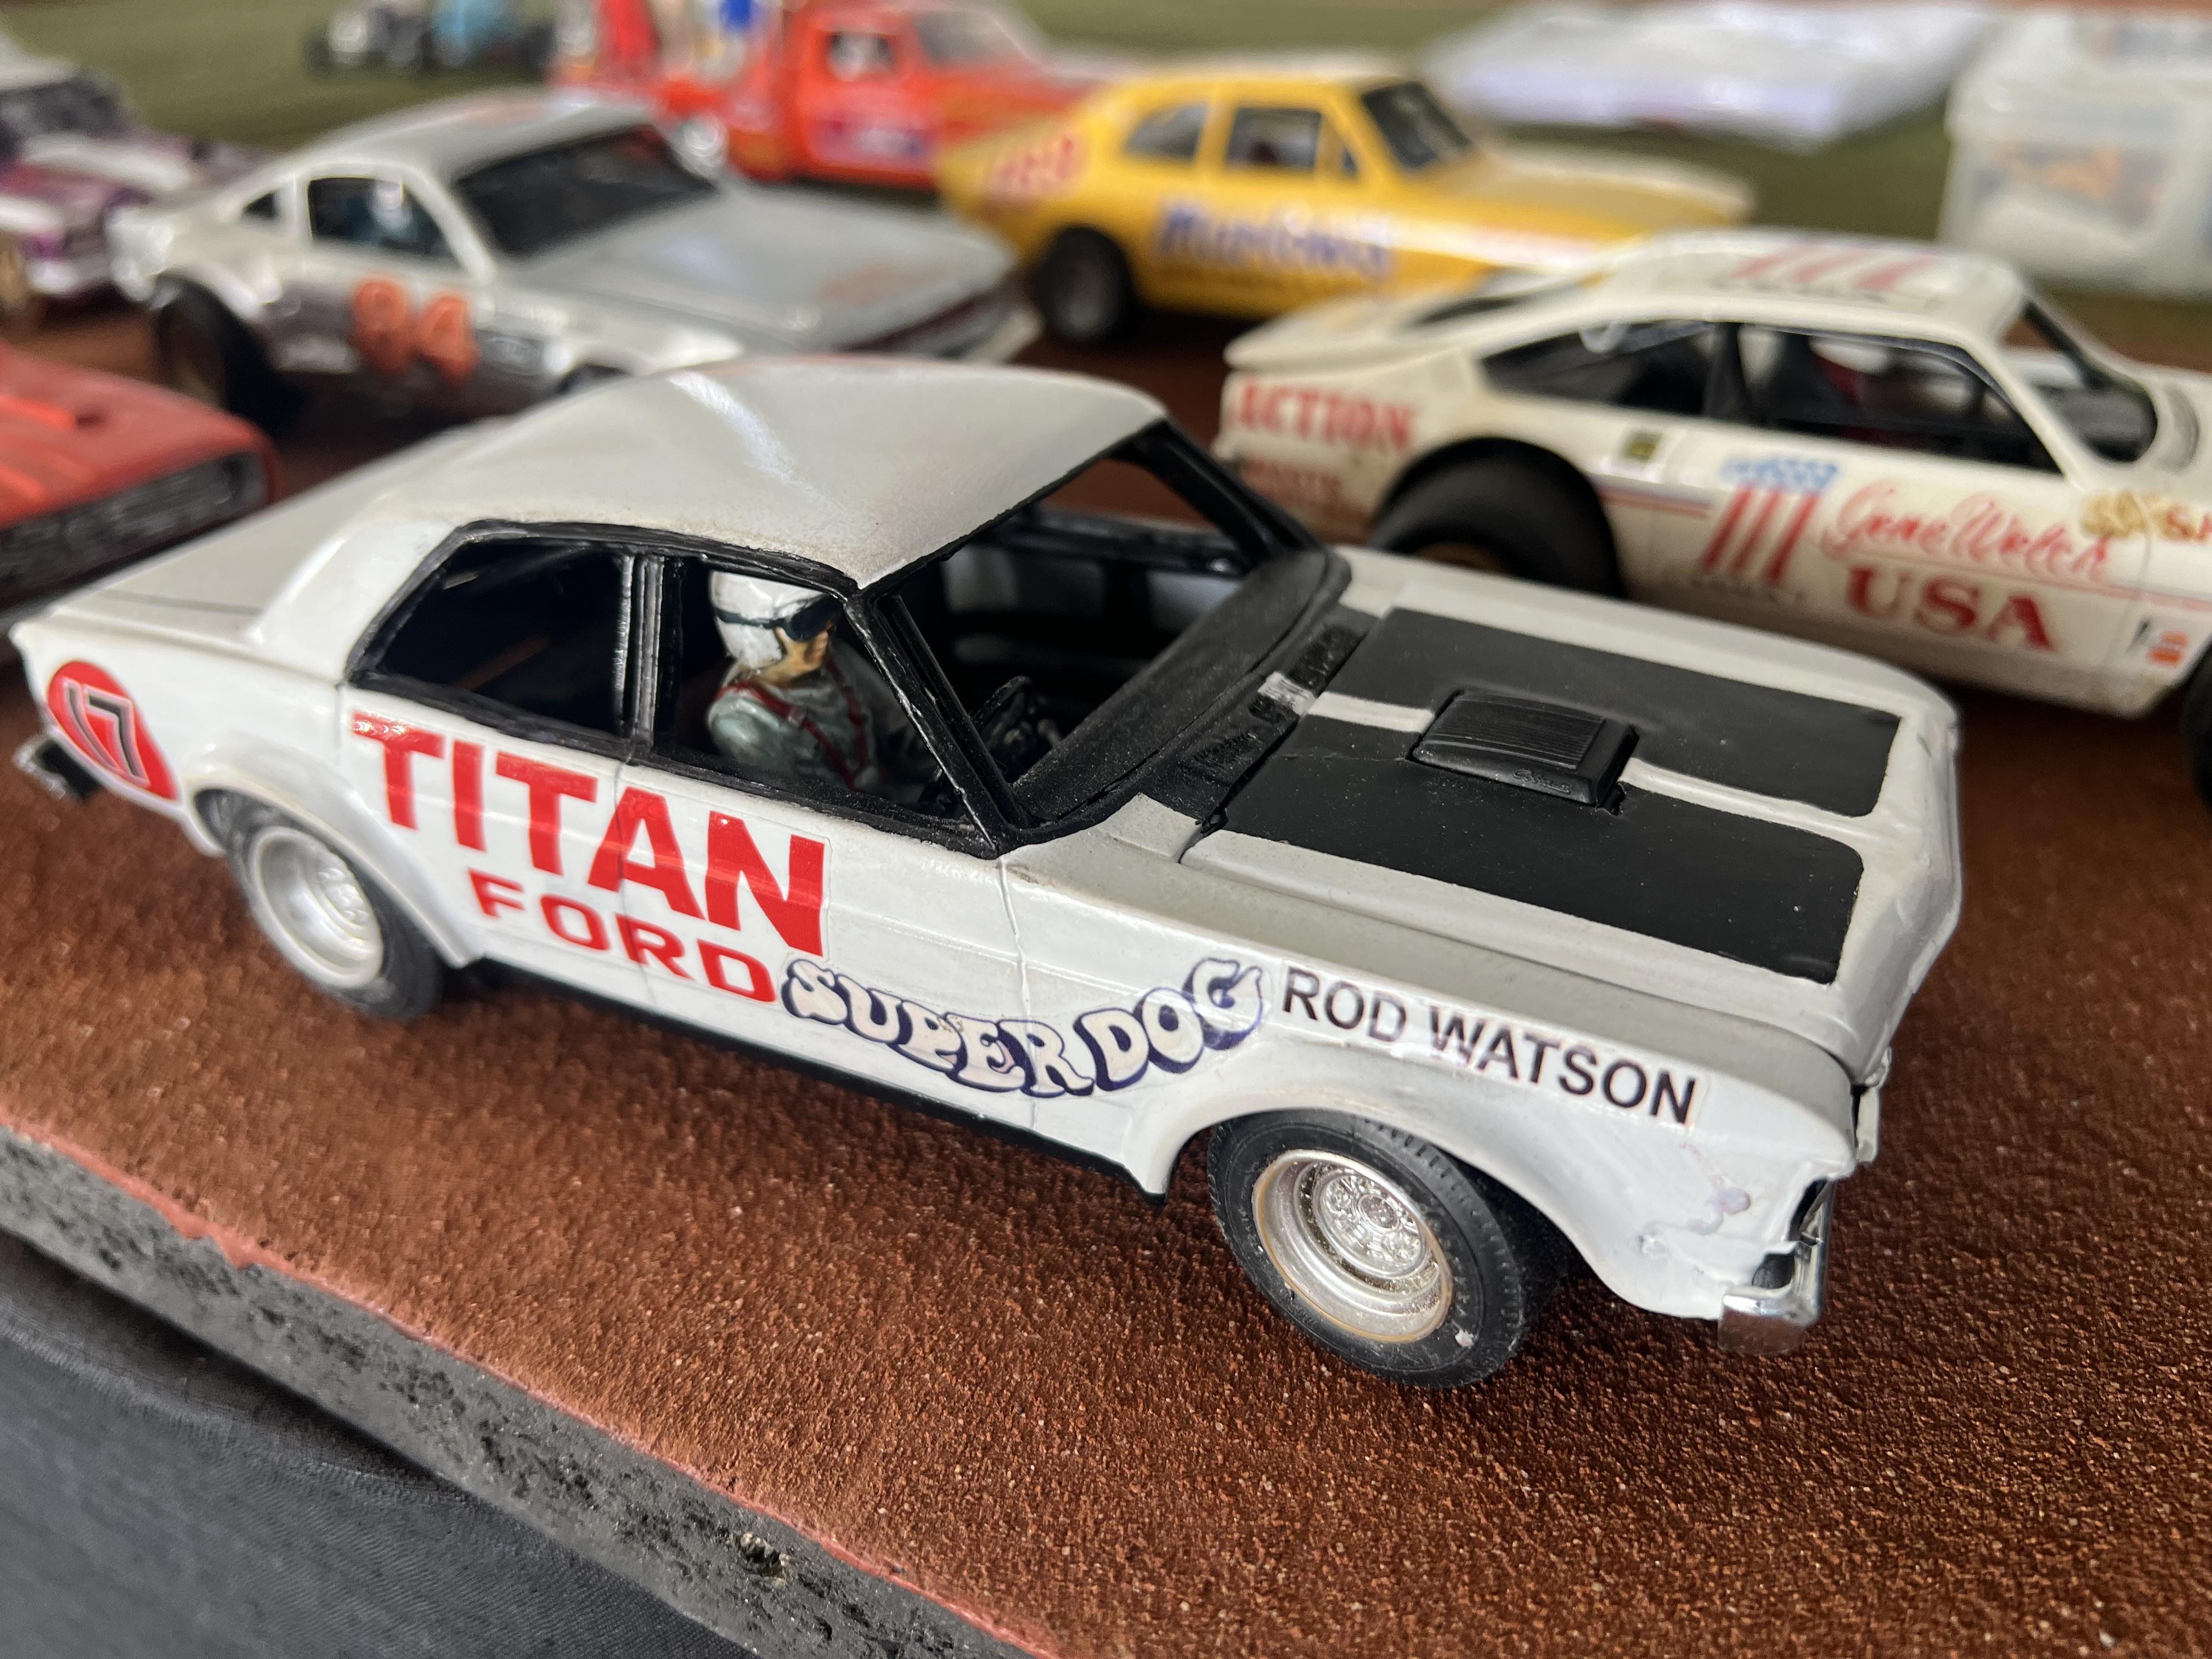
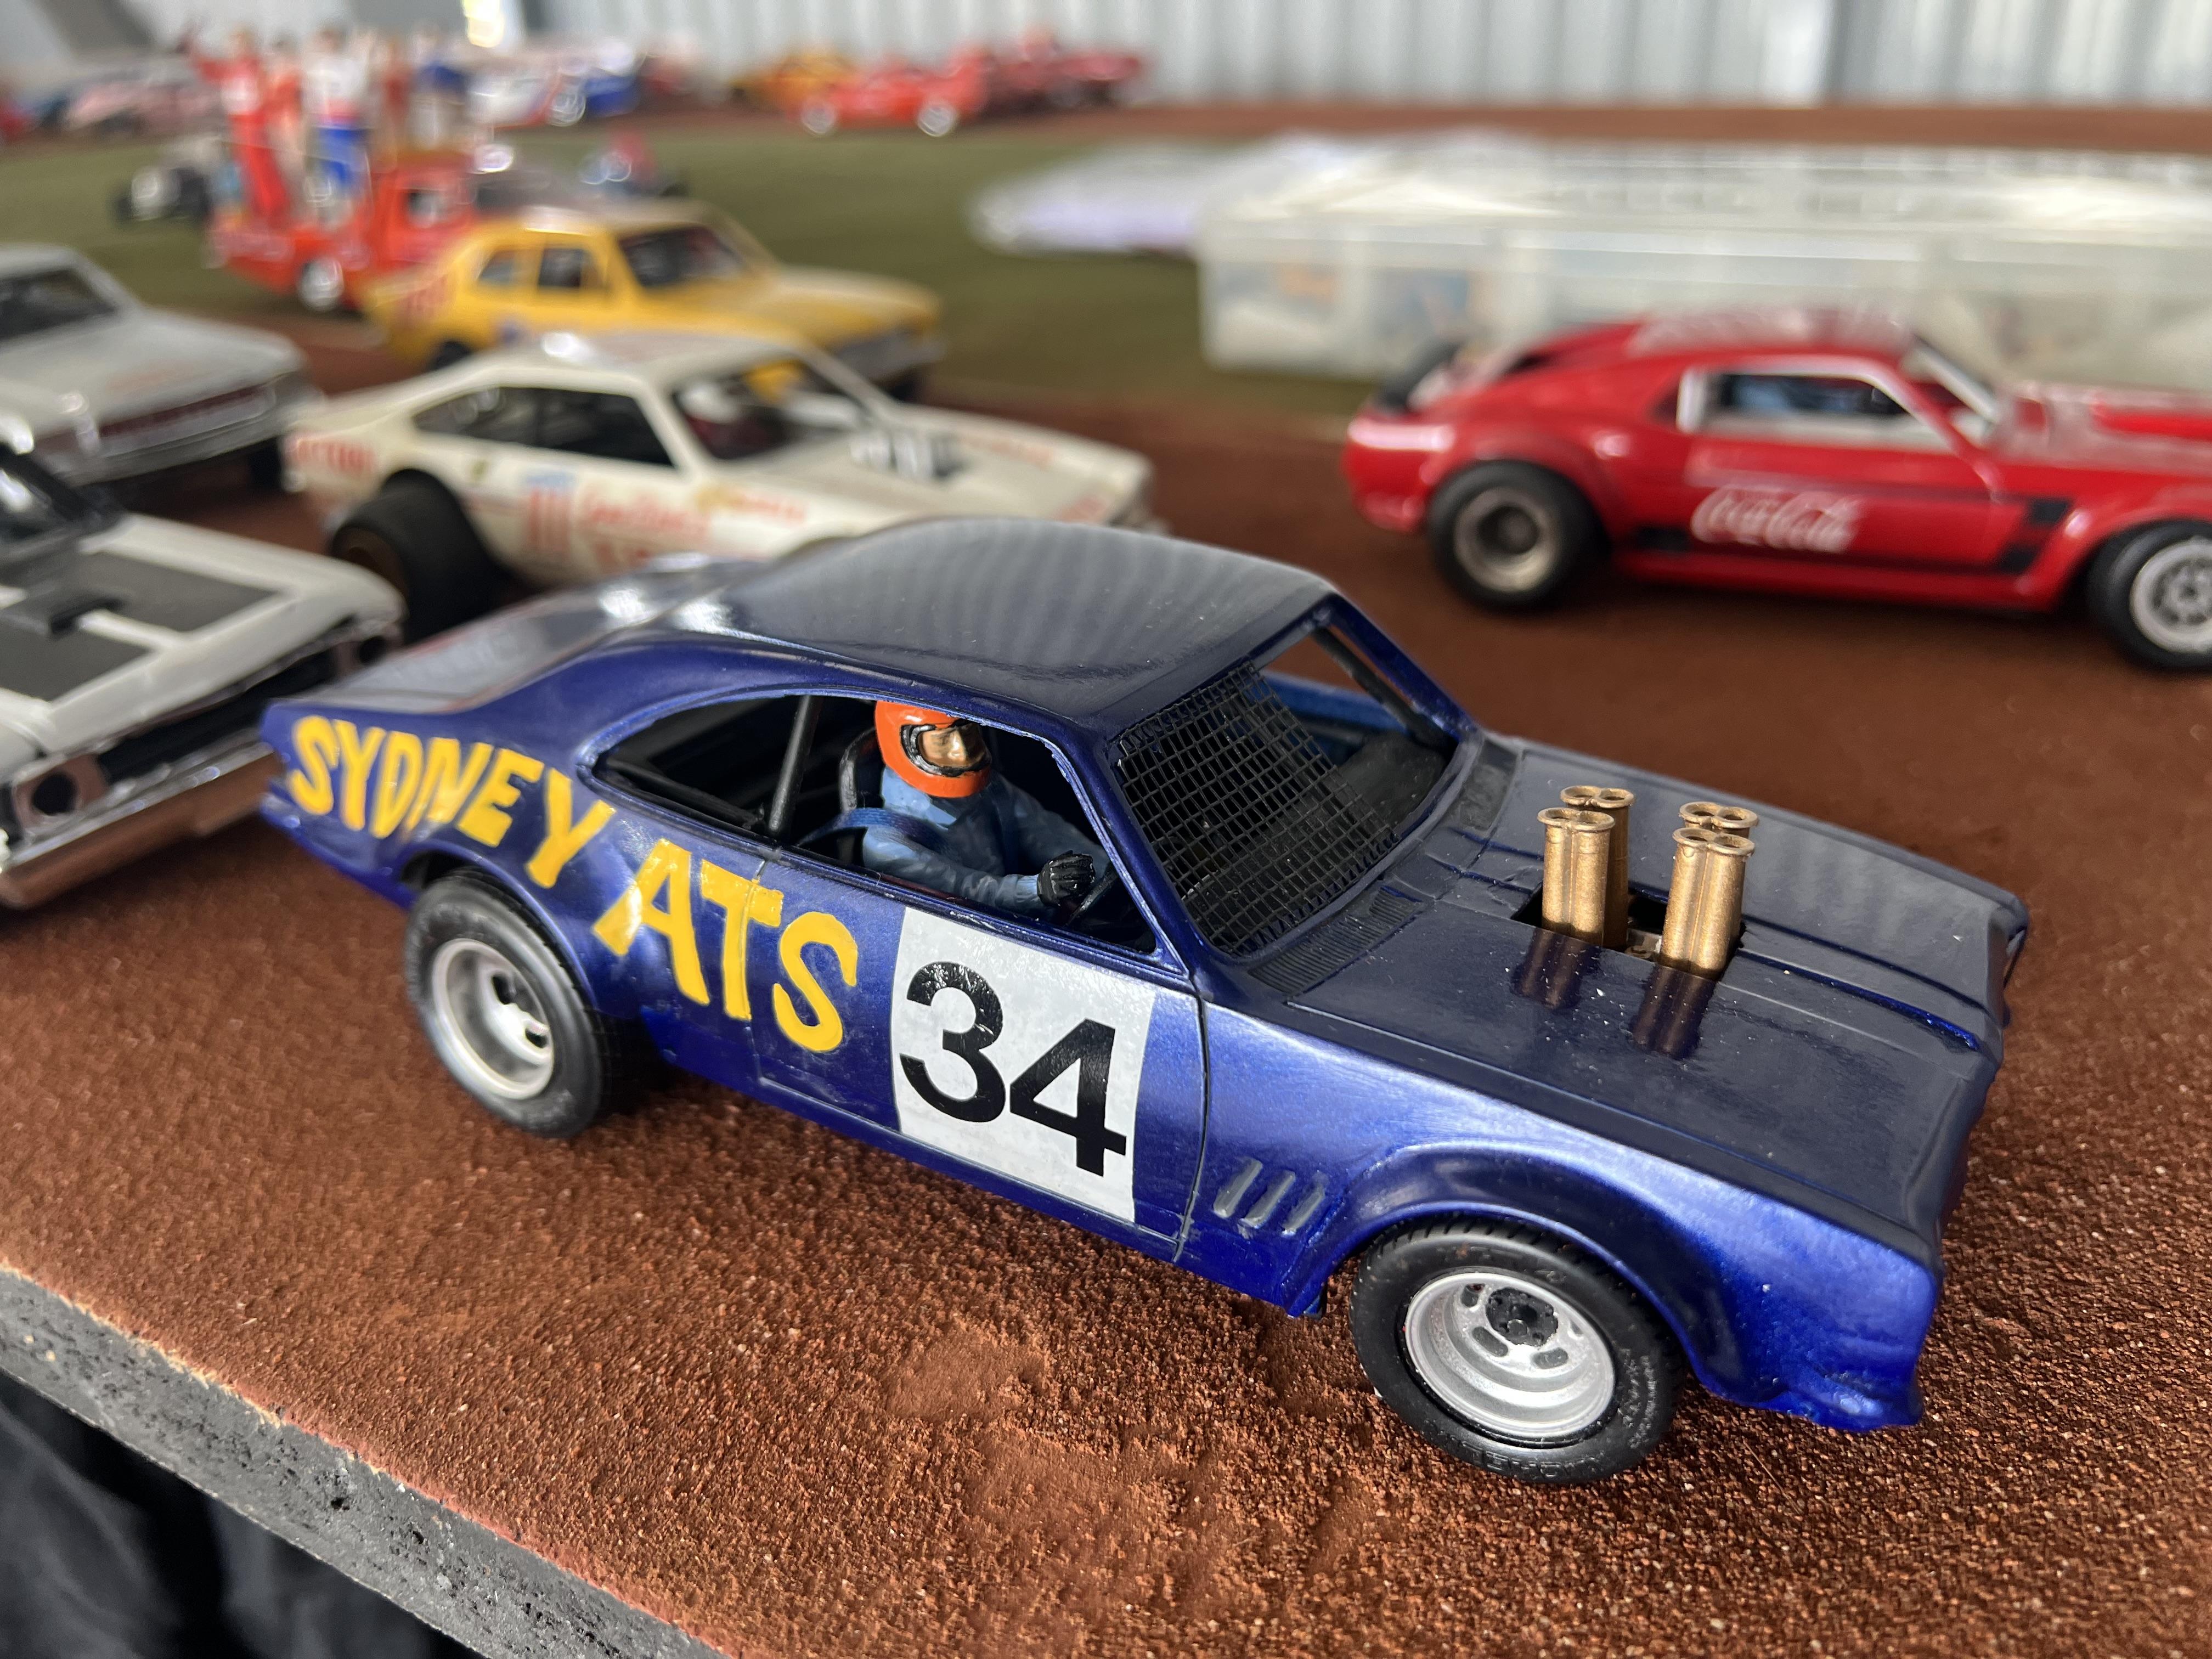
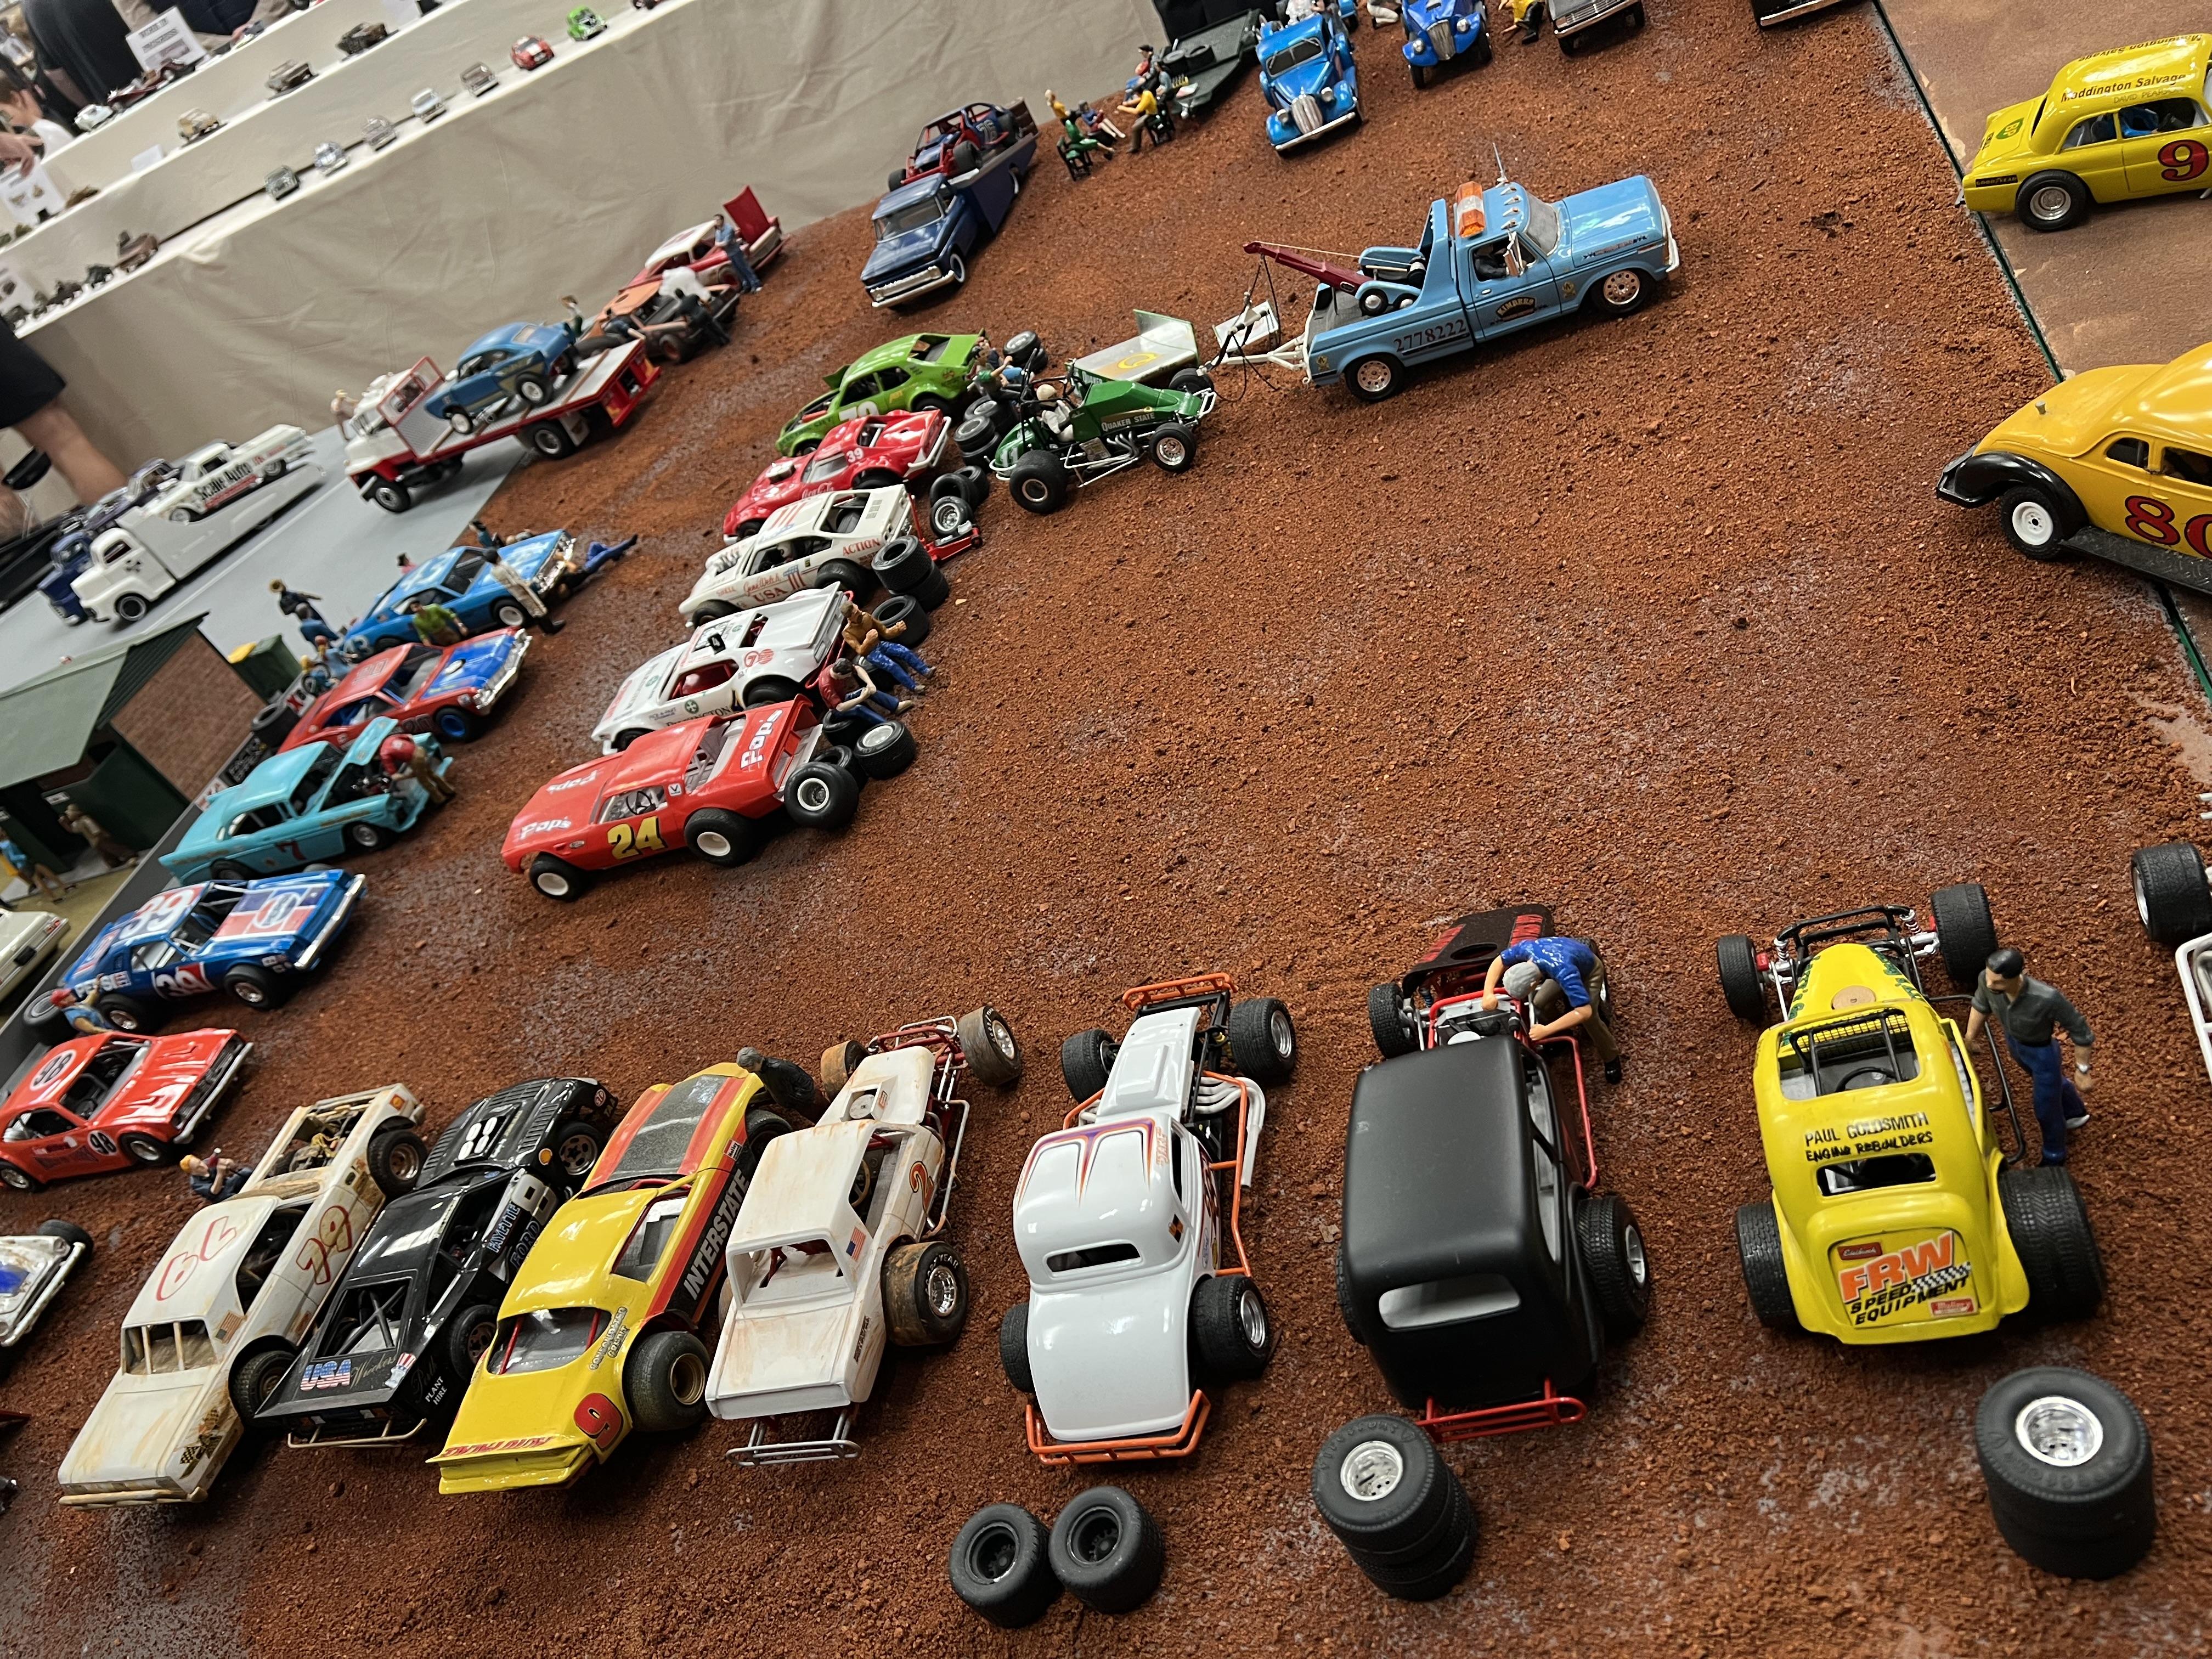
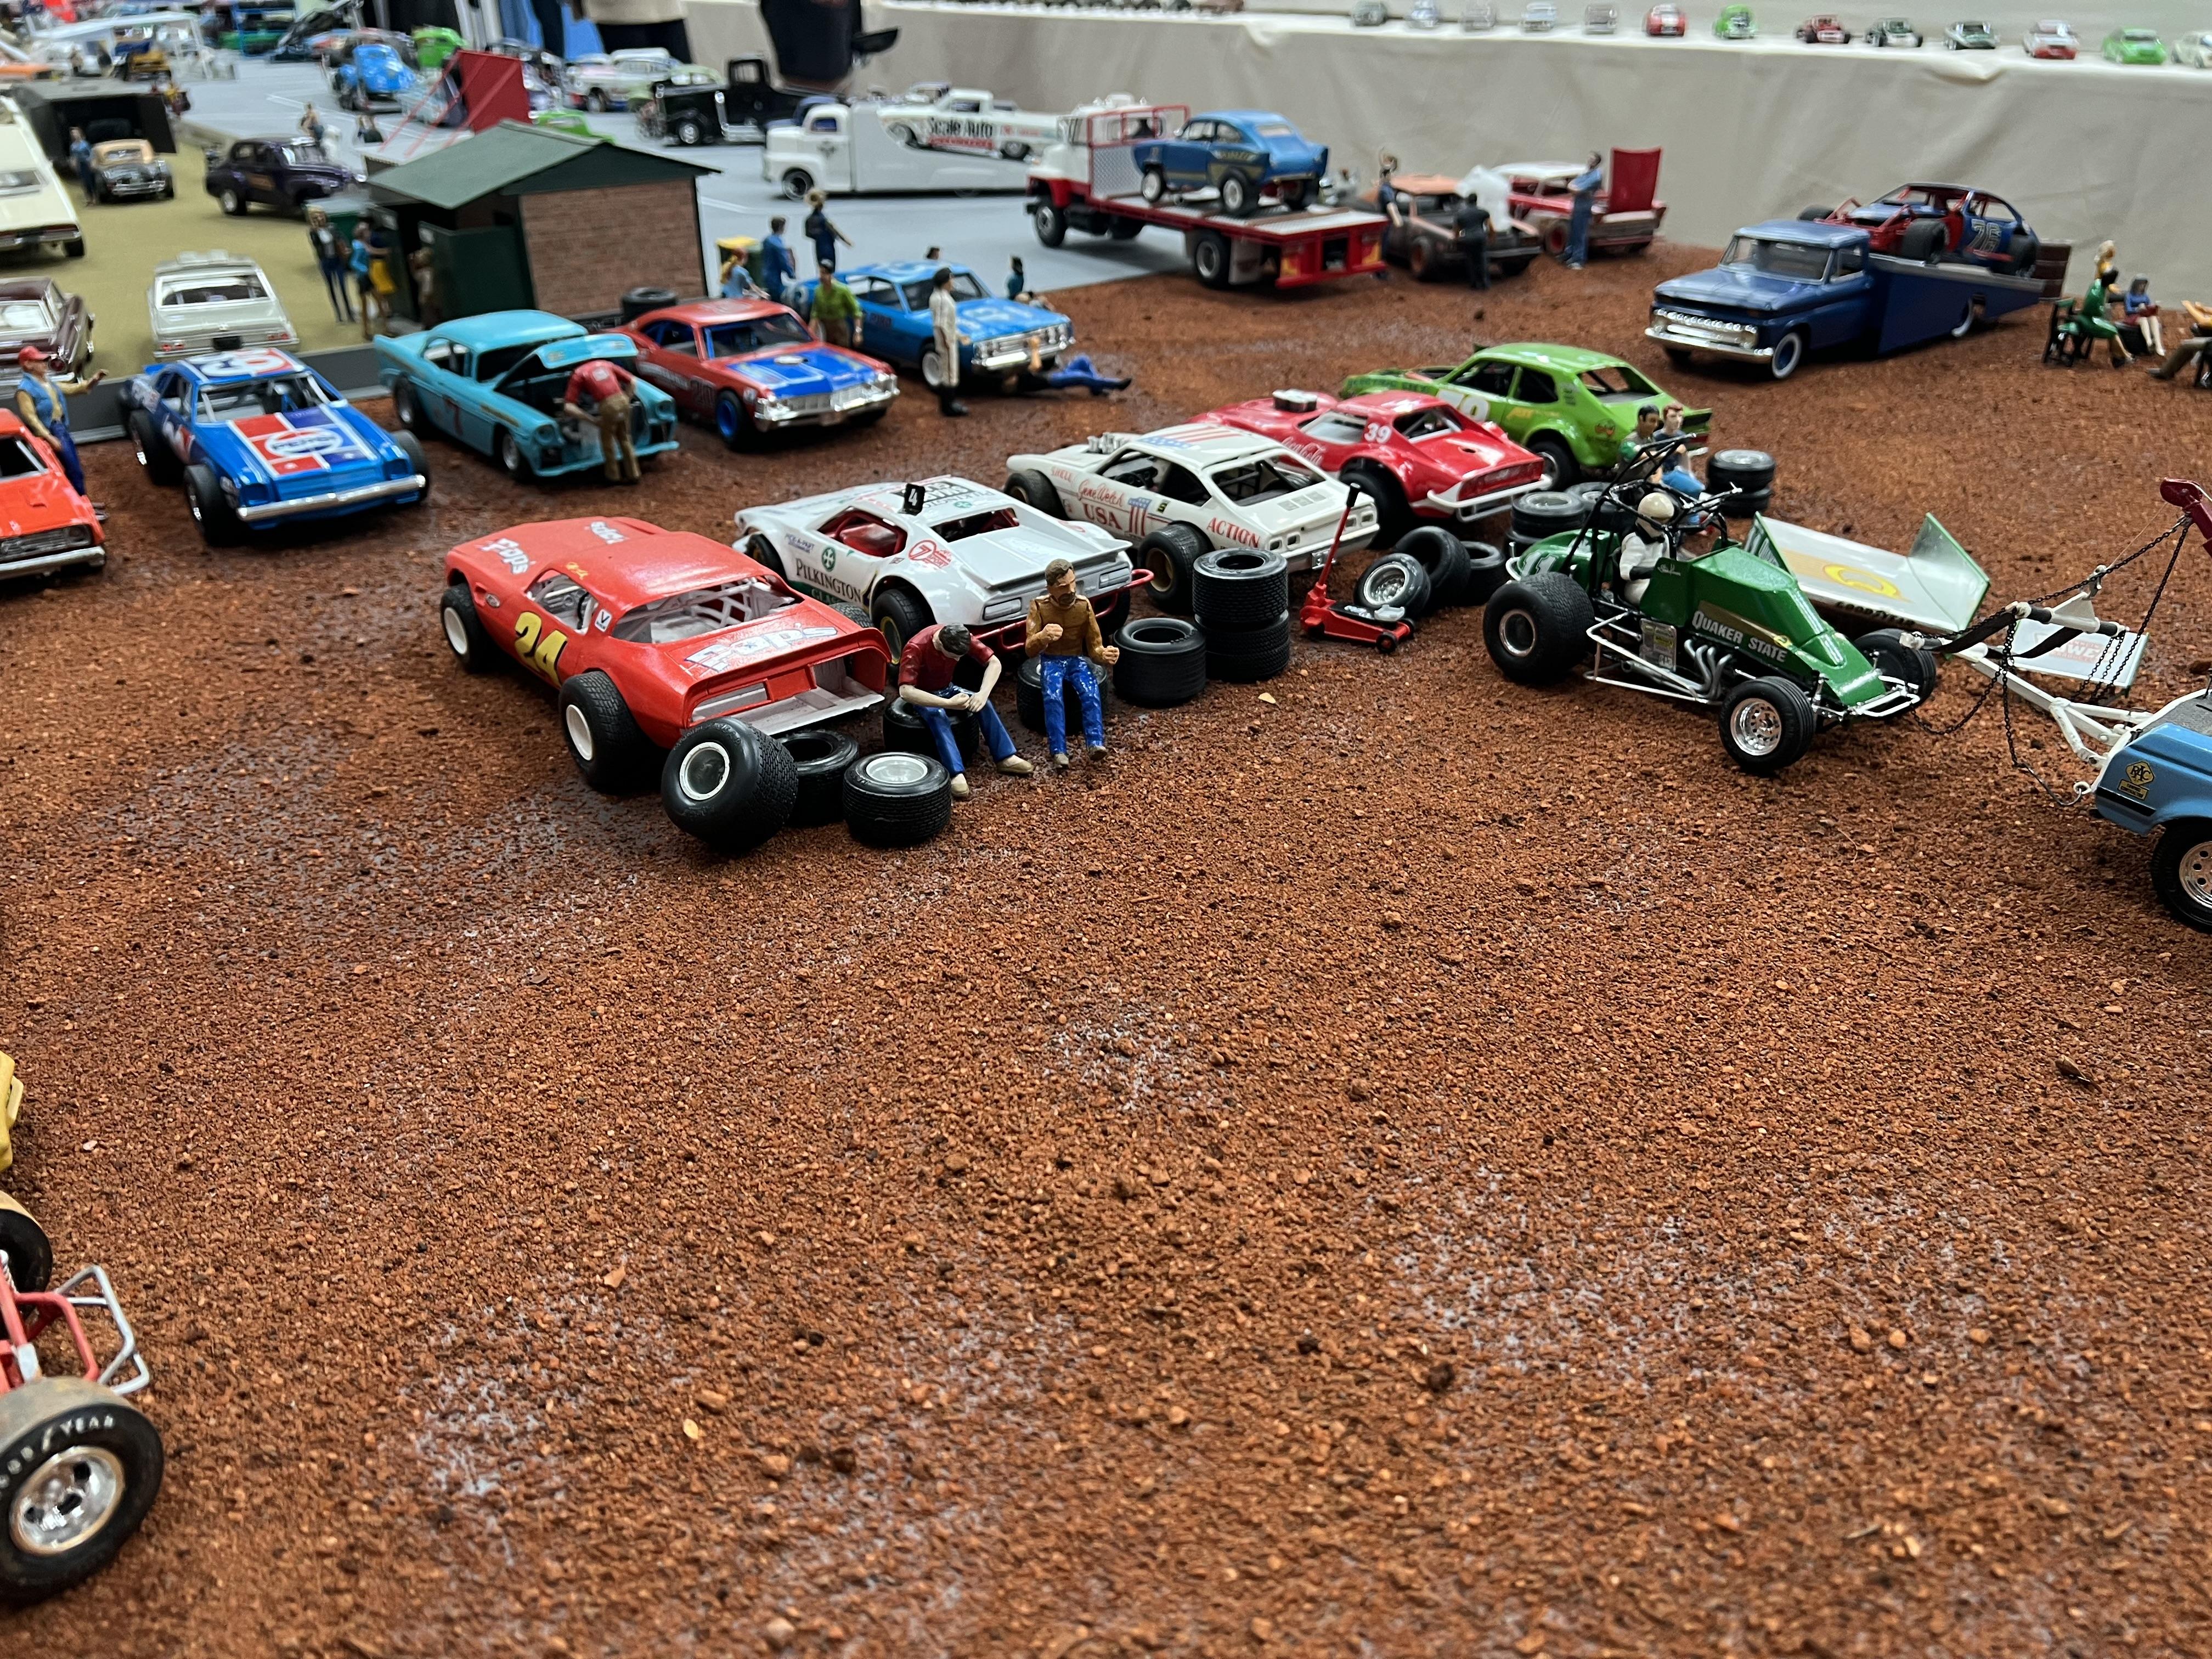
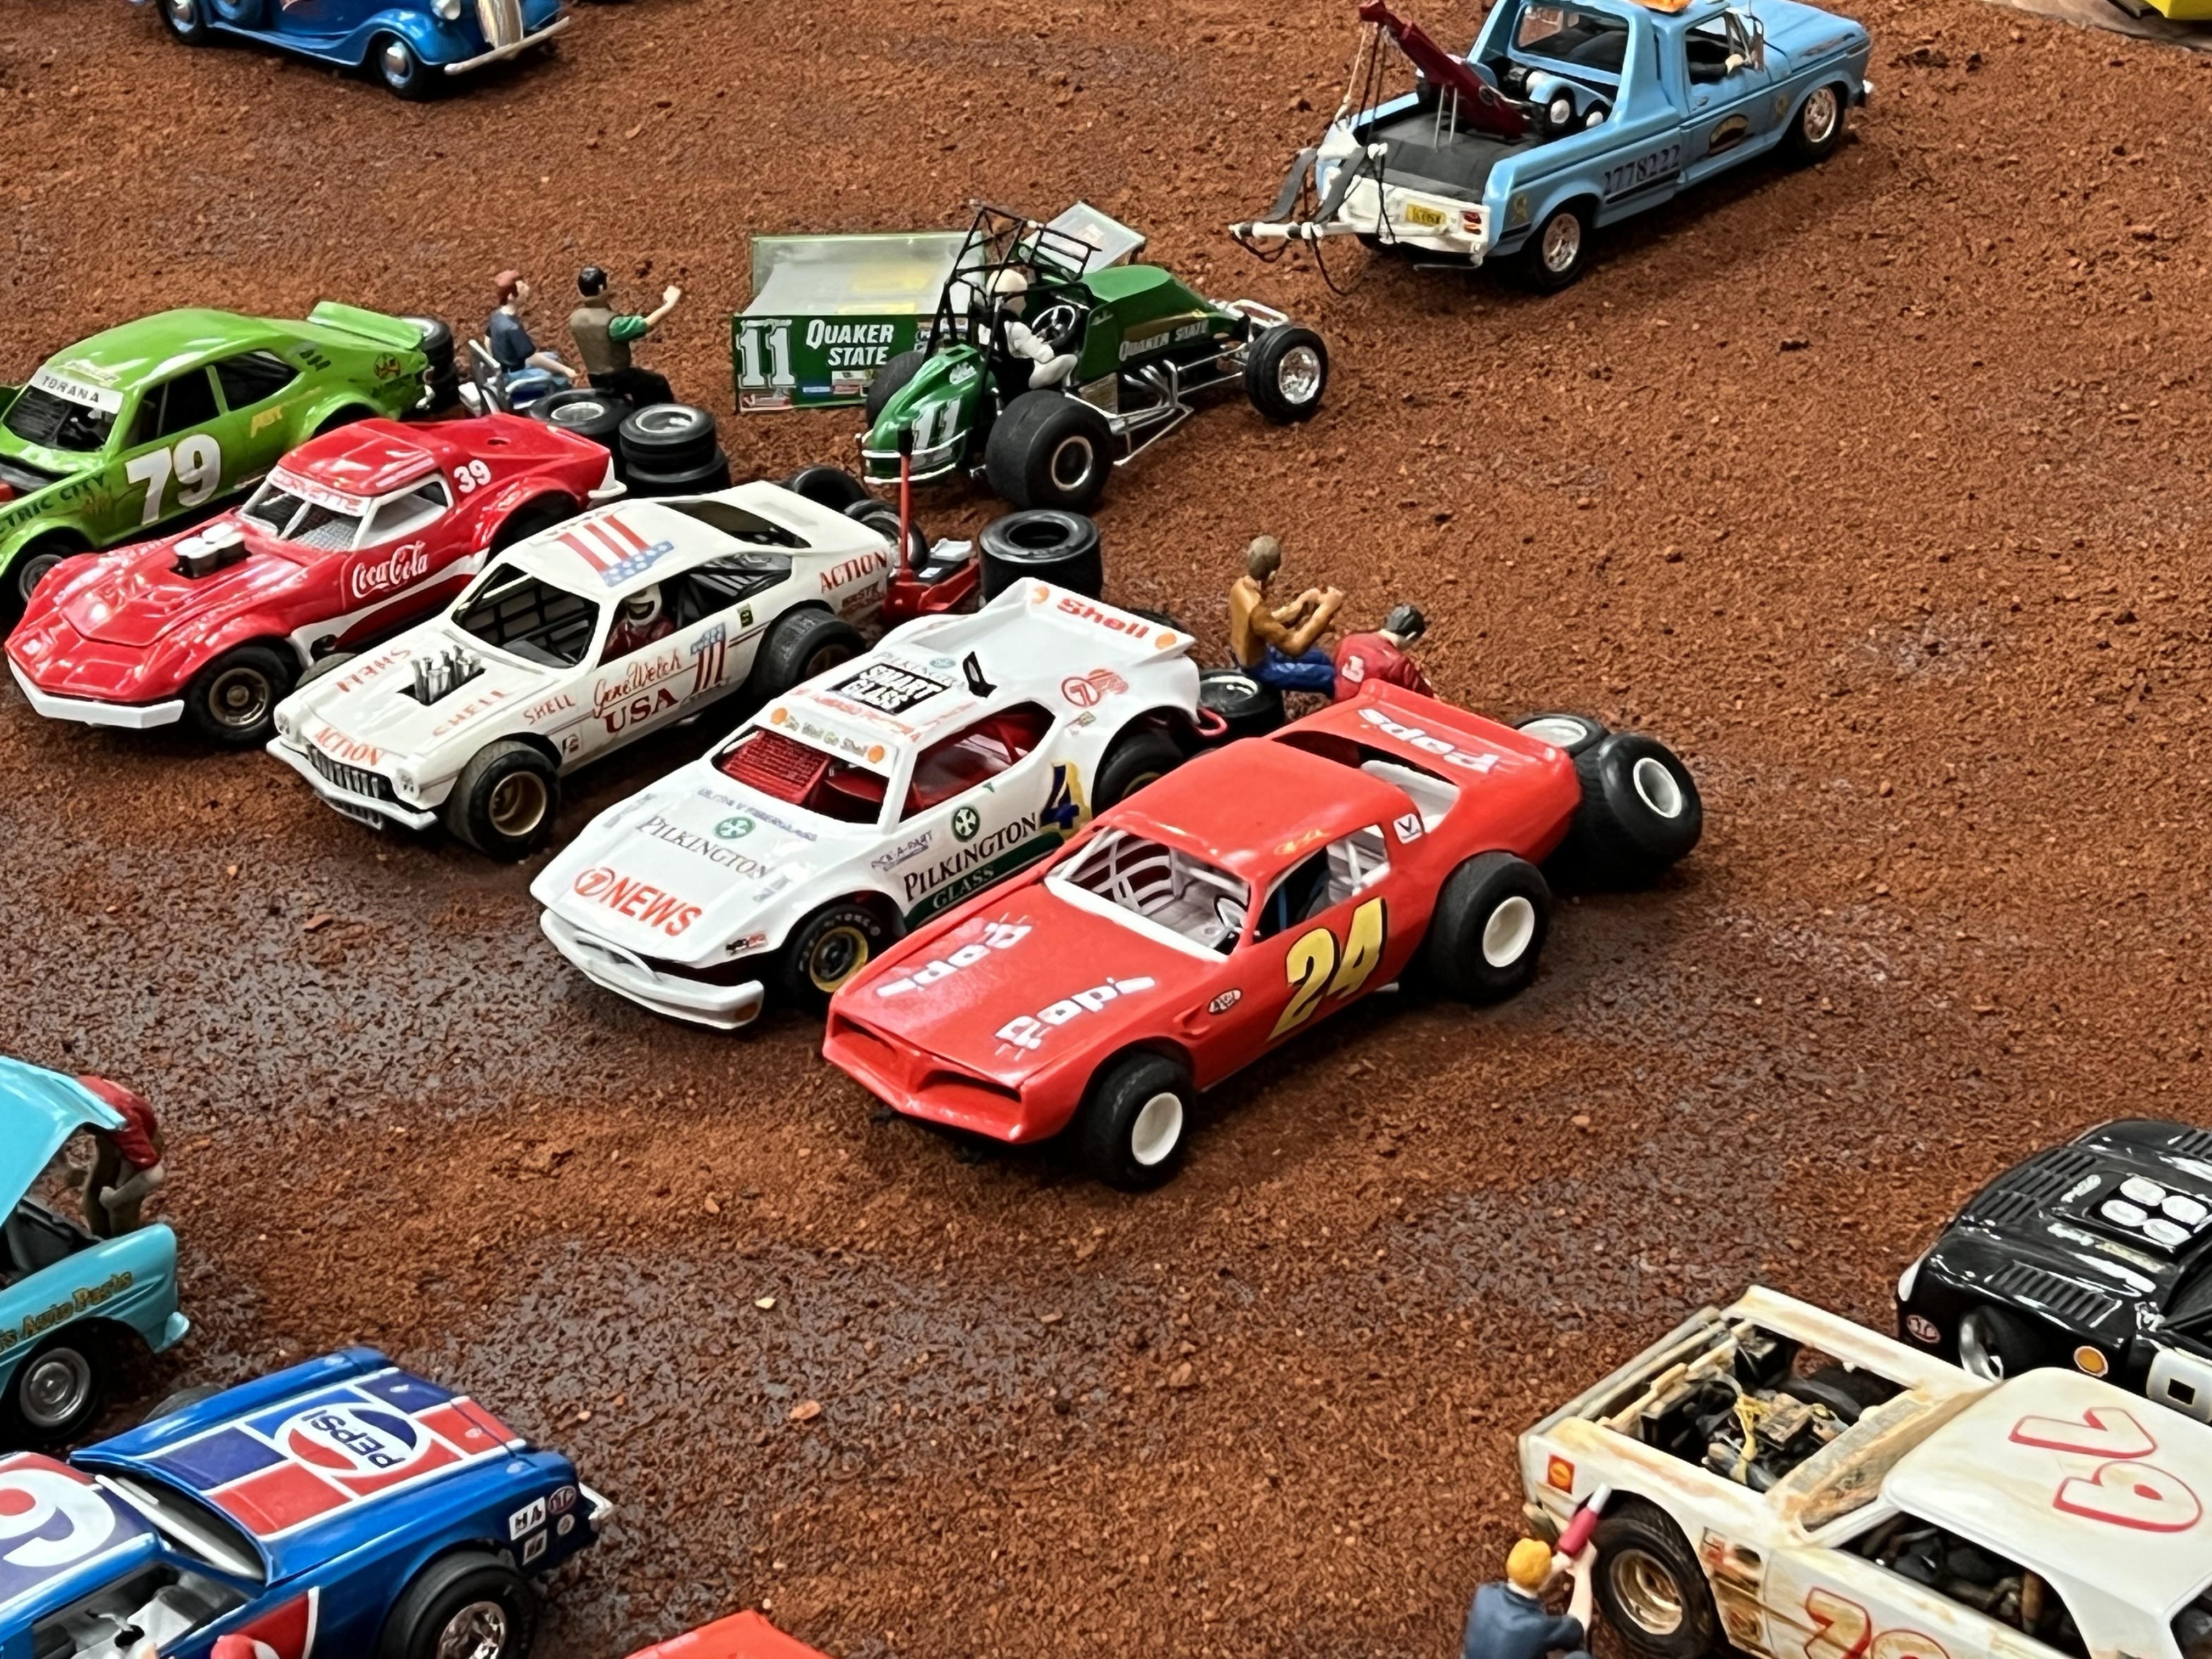
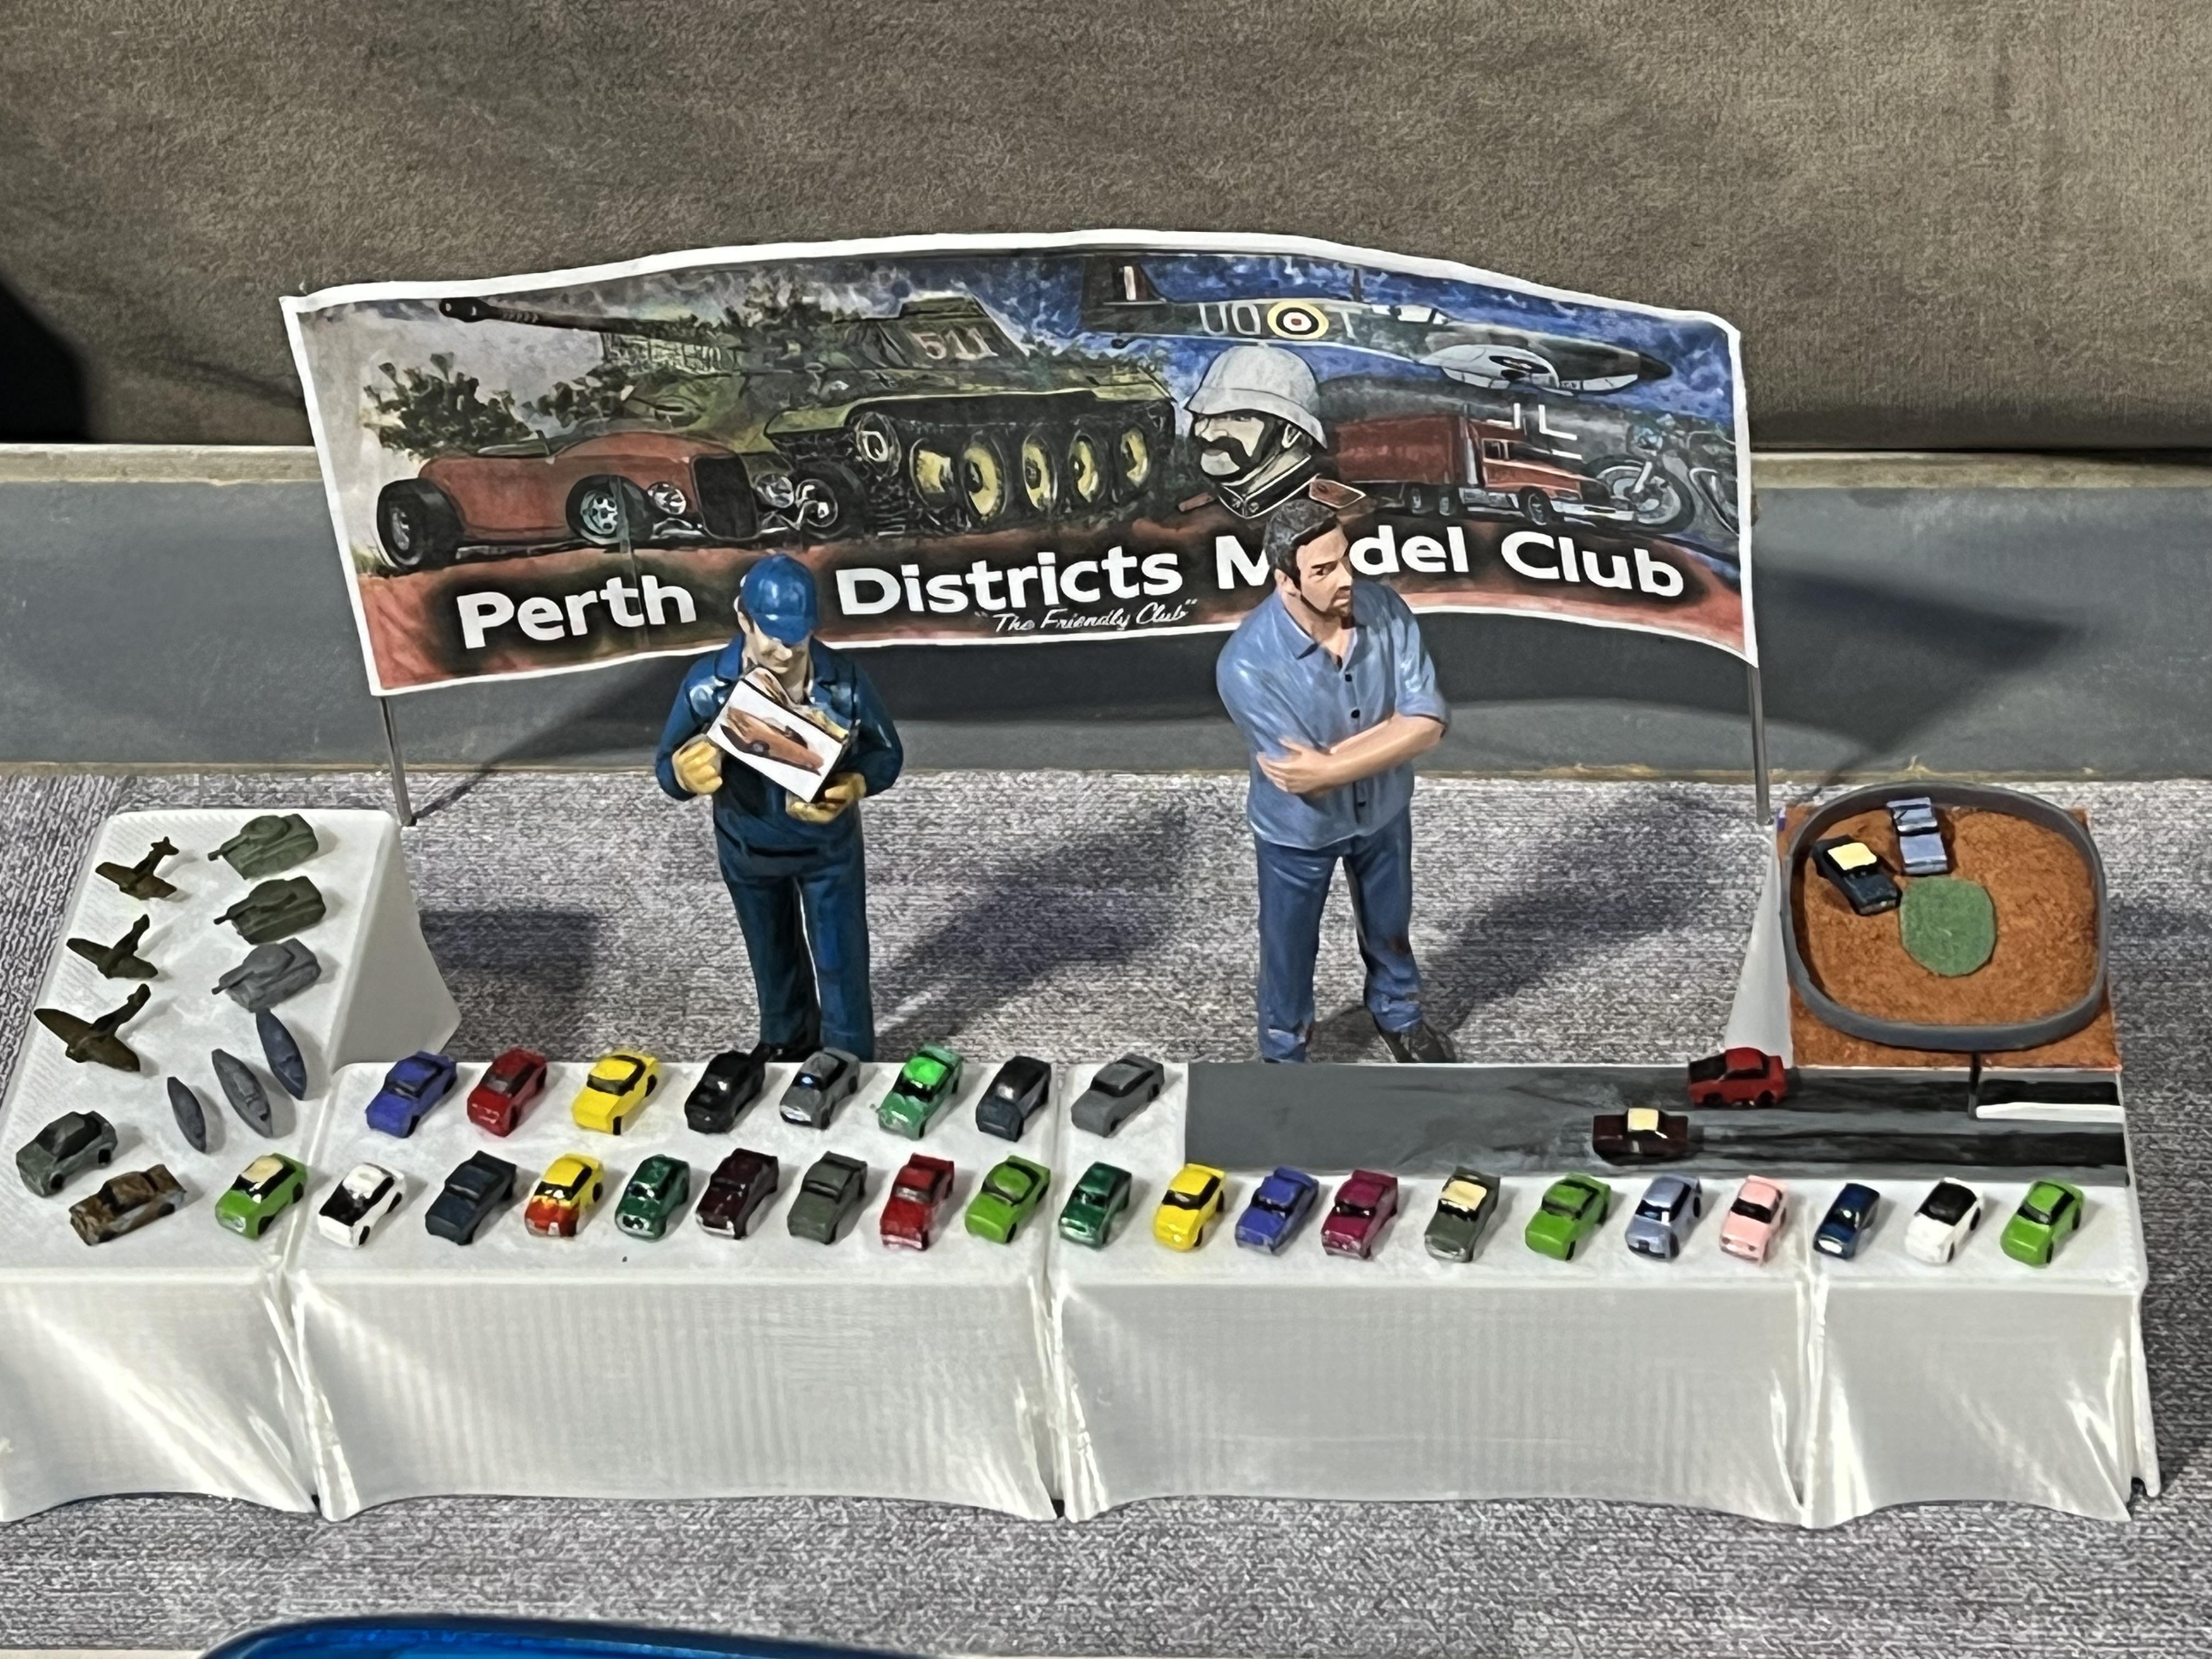
Hi everyone, MichaelF asked about this display that he could see in the background of our Modular Hot Rod Show diorama that I posted last week. The club has displayed this track about four times now in both our annual NNL, the Model Car Spectacular, and the WA Classic Speedway Club open day. Like all our displays, it is designed to be knocked down for easy transport and storage. The fence is made from strips of MDF that were wet and then forced into a curve with ropes and weights and allowed to set in the sun for several days. It took numerous applications to get it right but it does the job well. The dirt came from the ultra fine dust found in the Australian Outback, commonly referred to as bulldust and universally hated because it gets into every nook and cranny f your car - once there it is there forever! I collected a couple of kilos of it on a road trip so that we could use it for displays like this. Being so fine it works out nicely to scale ( and colour) for a dirt track. It is sprinkled over PVA ( white glue) and then a weak mix of water and white glue is sprayed over the whole thing to lock it in place. About eight club members contributed to this display. In case you haven't guessed we are pretty keen speedway fans and try to model all classes and eras of dirt track race cars (and bikes!) We built both American and Australian style race cars. Cheers Alan
-
Every now and then I see a model on these pages and I think "I have to build that!" This is one of them. What a sensational model, capturing all the flare and spirit of the original car. One of your best, Phil! Cheers Alan
-
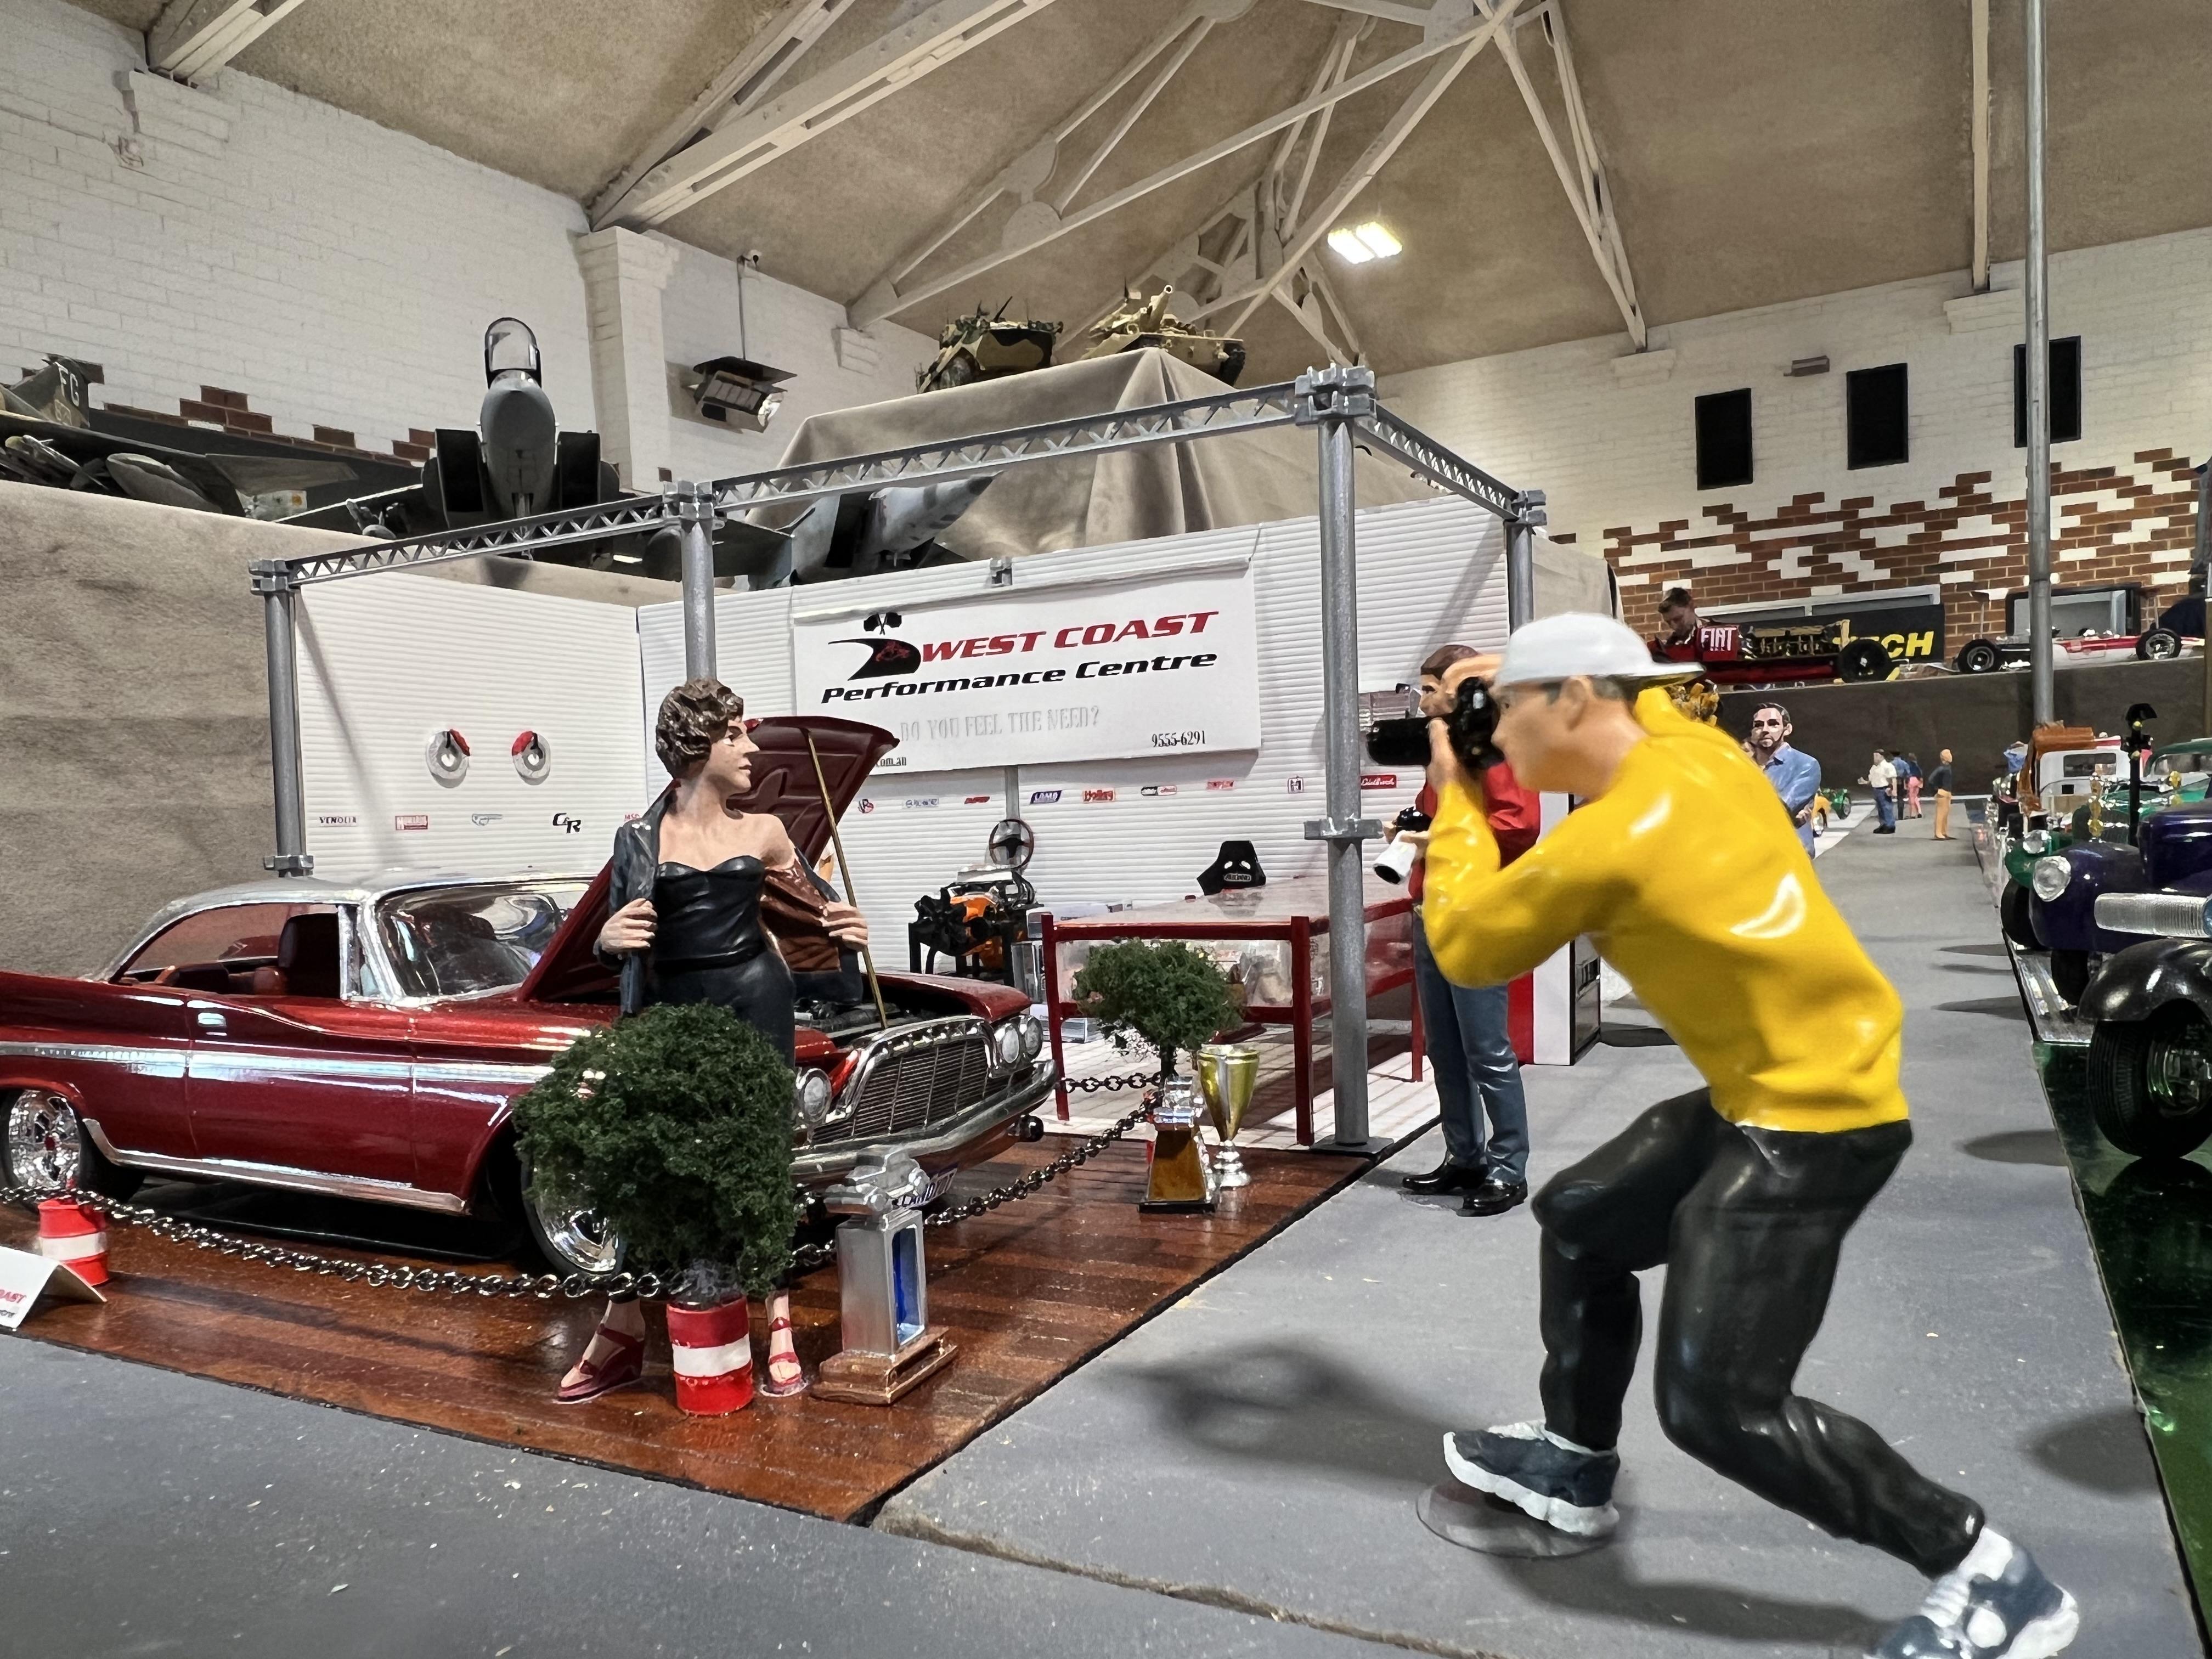
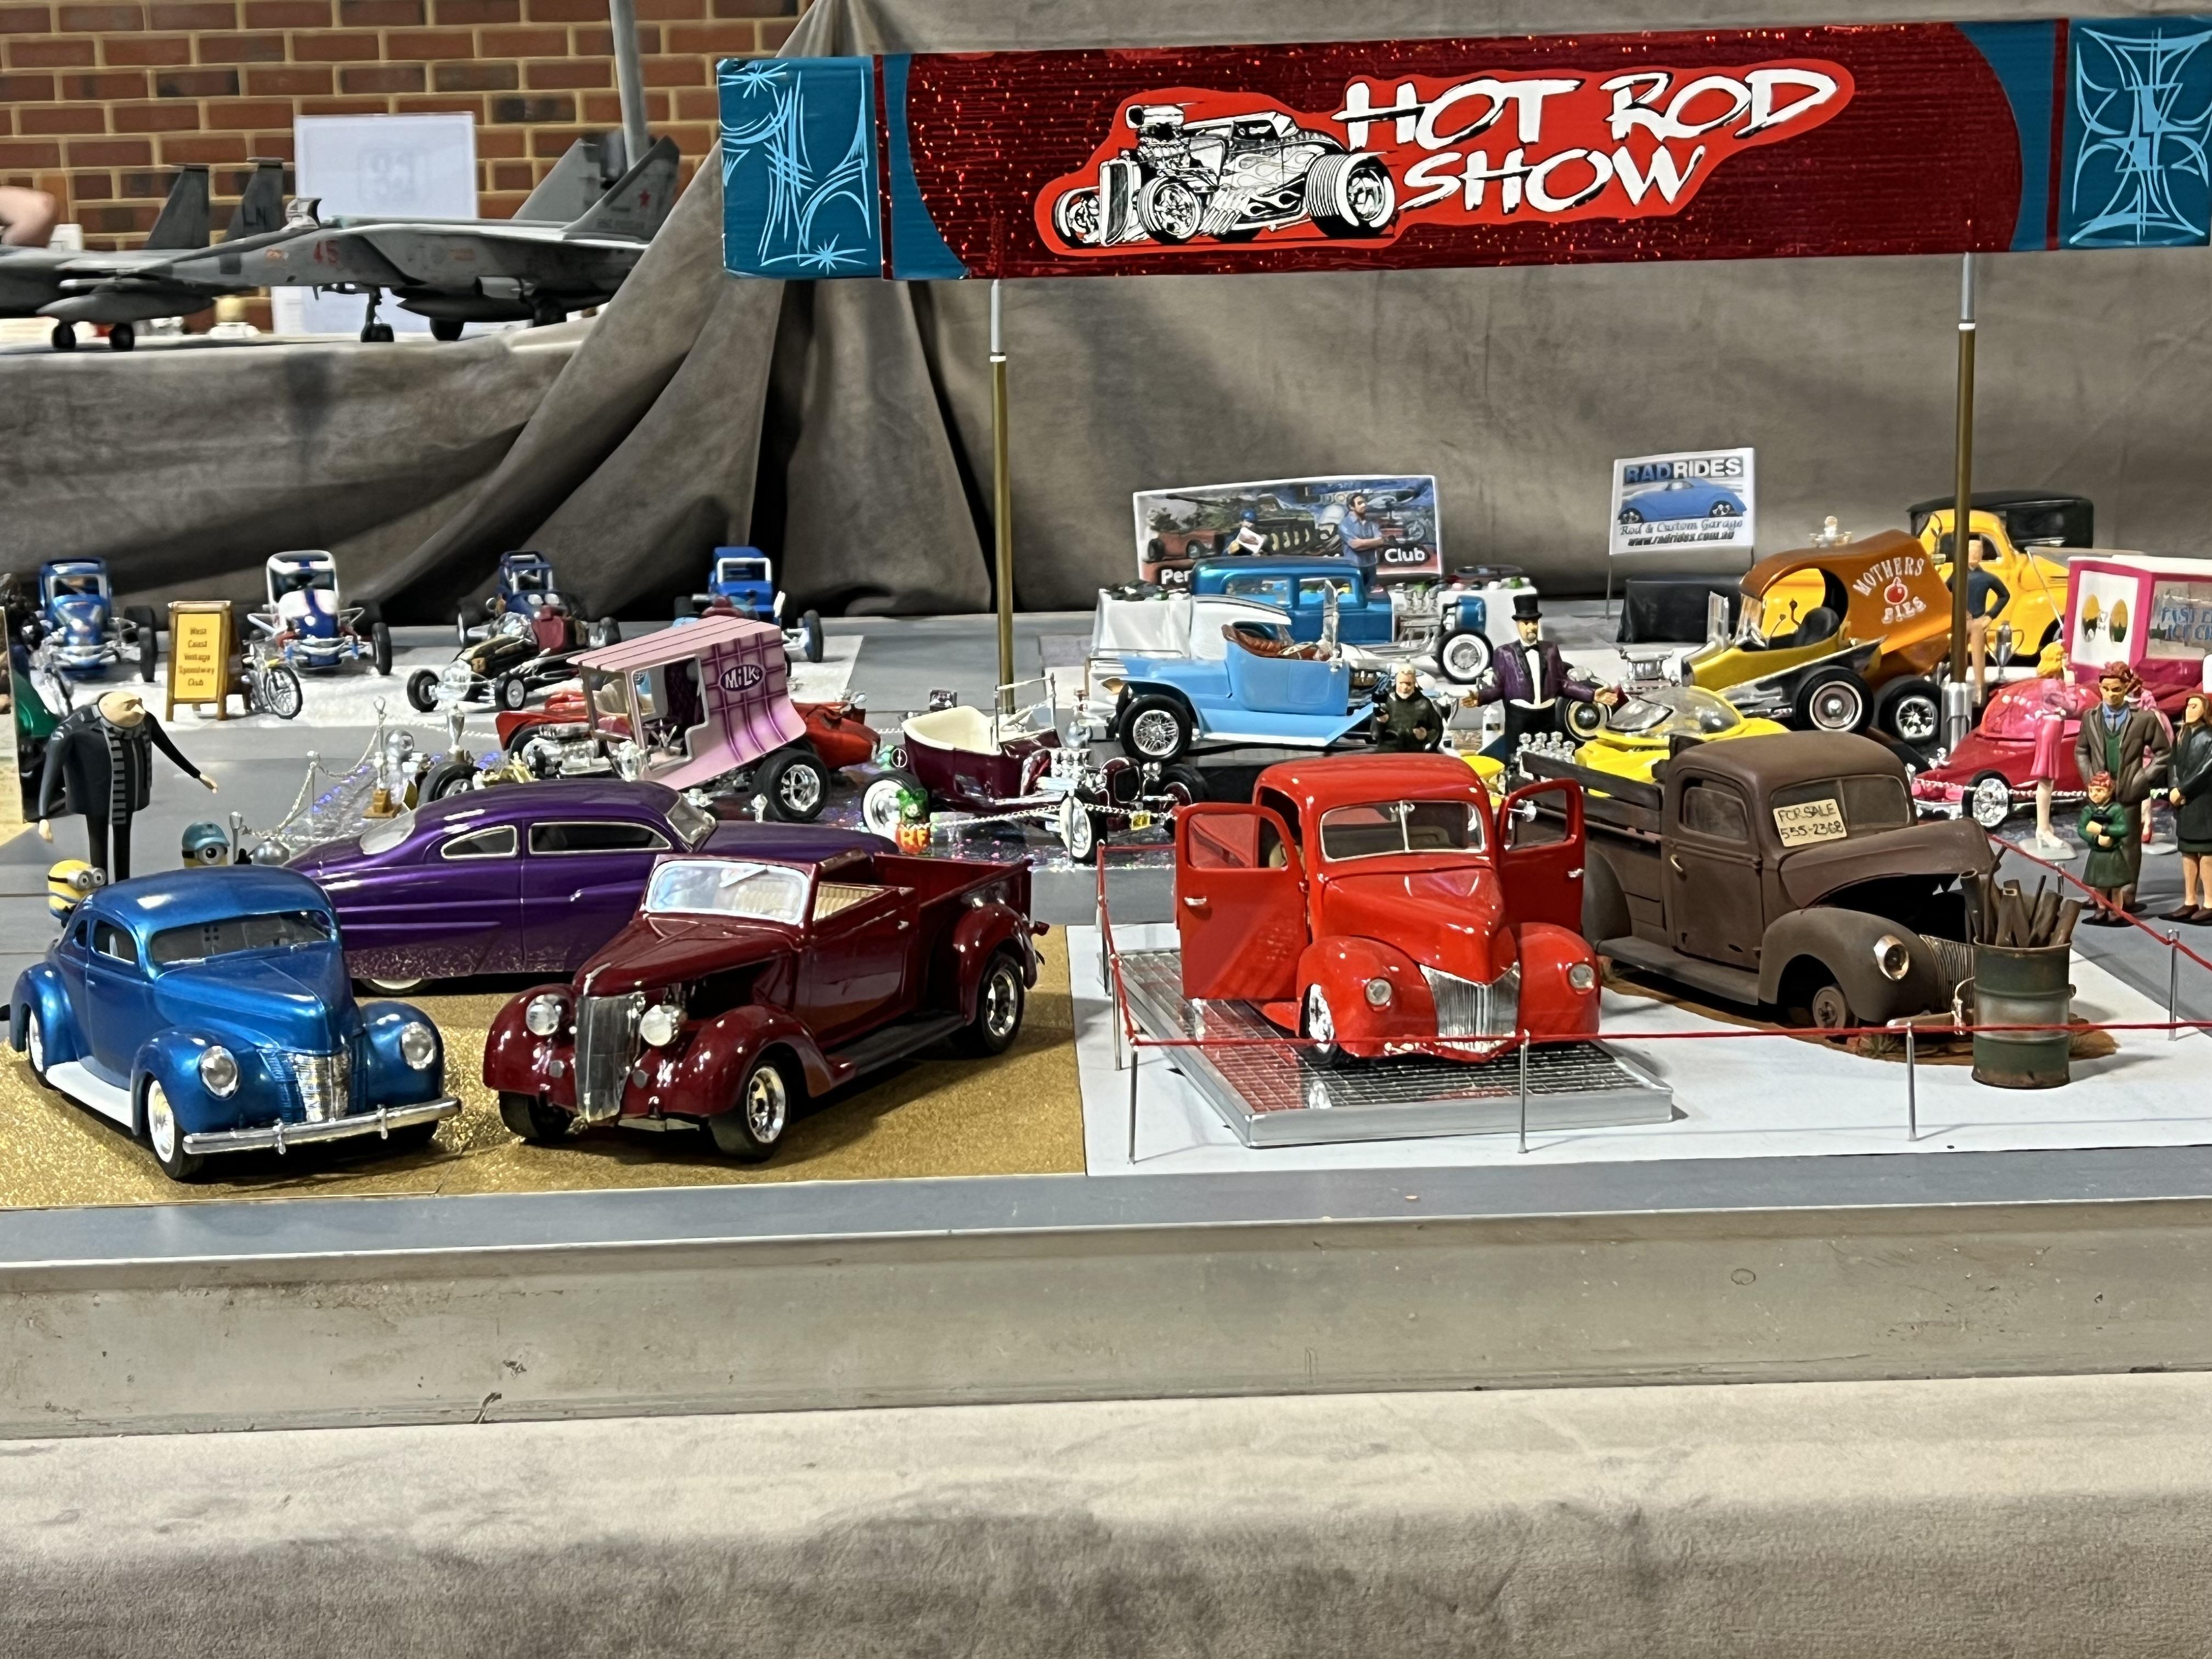
Modular Hot Rod Show by Perth and Districts Model Club
Alan Barton replied to Alan Barton's topic in Dioramas
Al, it was built by a local guy, a resin copy of a 3D print. It came out very nice but not ready for market just yet. Cheers Alan -
MPC Flip Nose '57 gasser converted to......well, a gasser.
Alan Barton replied to roadhawg's topic in Drag Racing
It's taken me over two years to find this post but I am very glad I did! What an absolutely stunning build! Your sentiments on the over abused use of the term "gasser" and your commentary on the awesome South East Gassers crew are spot on. I have been watching them on YouTube for quite a while and have them on my list of destinations for my next trip to the USA. What is particularly interesting to me is that I have assembled the pieces to build a similar but different car to your own. It will use a lightly glue bombed MPC body fitted to a frame from the MPC 34 slammer modified kit which is actually a really tidy, cleaned up 57 Chevy frame. It will run a big block because I intend to build it as a SEGA style Badman tribute car - yeah, I know the Badman is a 55 but I think the 57 will work just fine!. I didn't notice that SEGA don't run blowers so will have to attend to that detail but injection is cool so no worries there. Congratulations, Tommy, this really is a very special model! Cheers Alan -
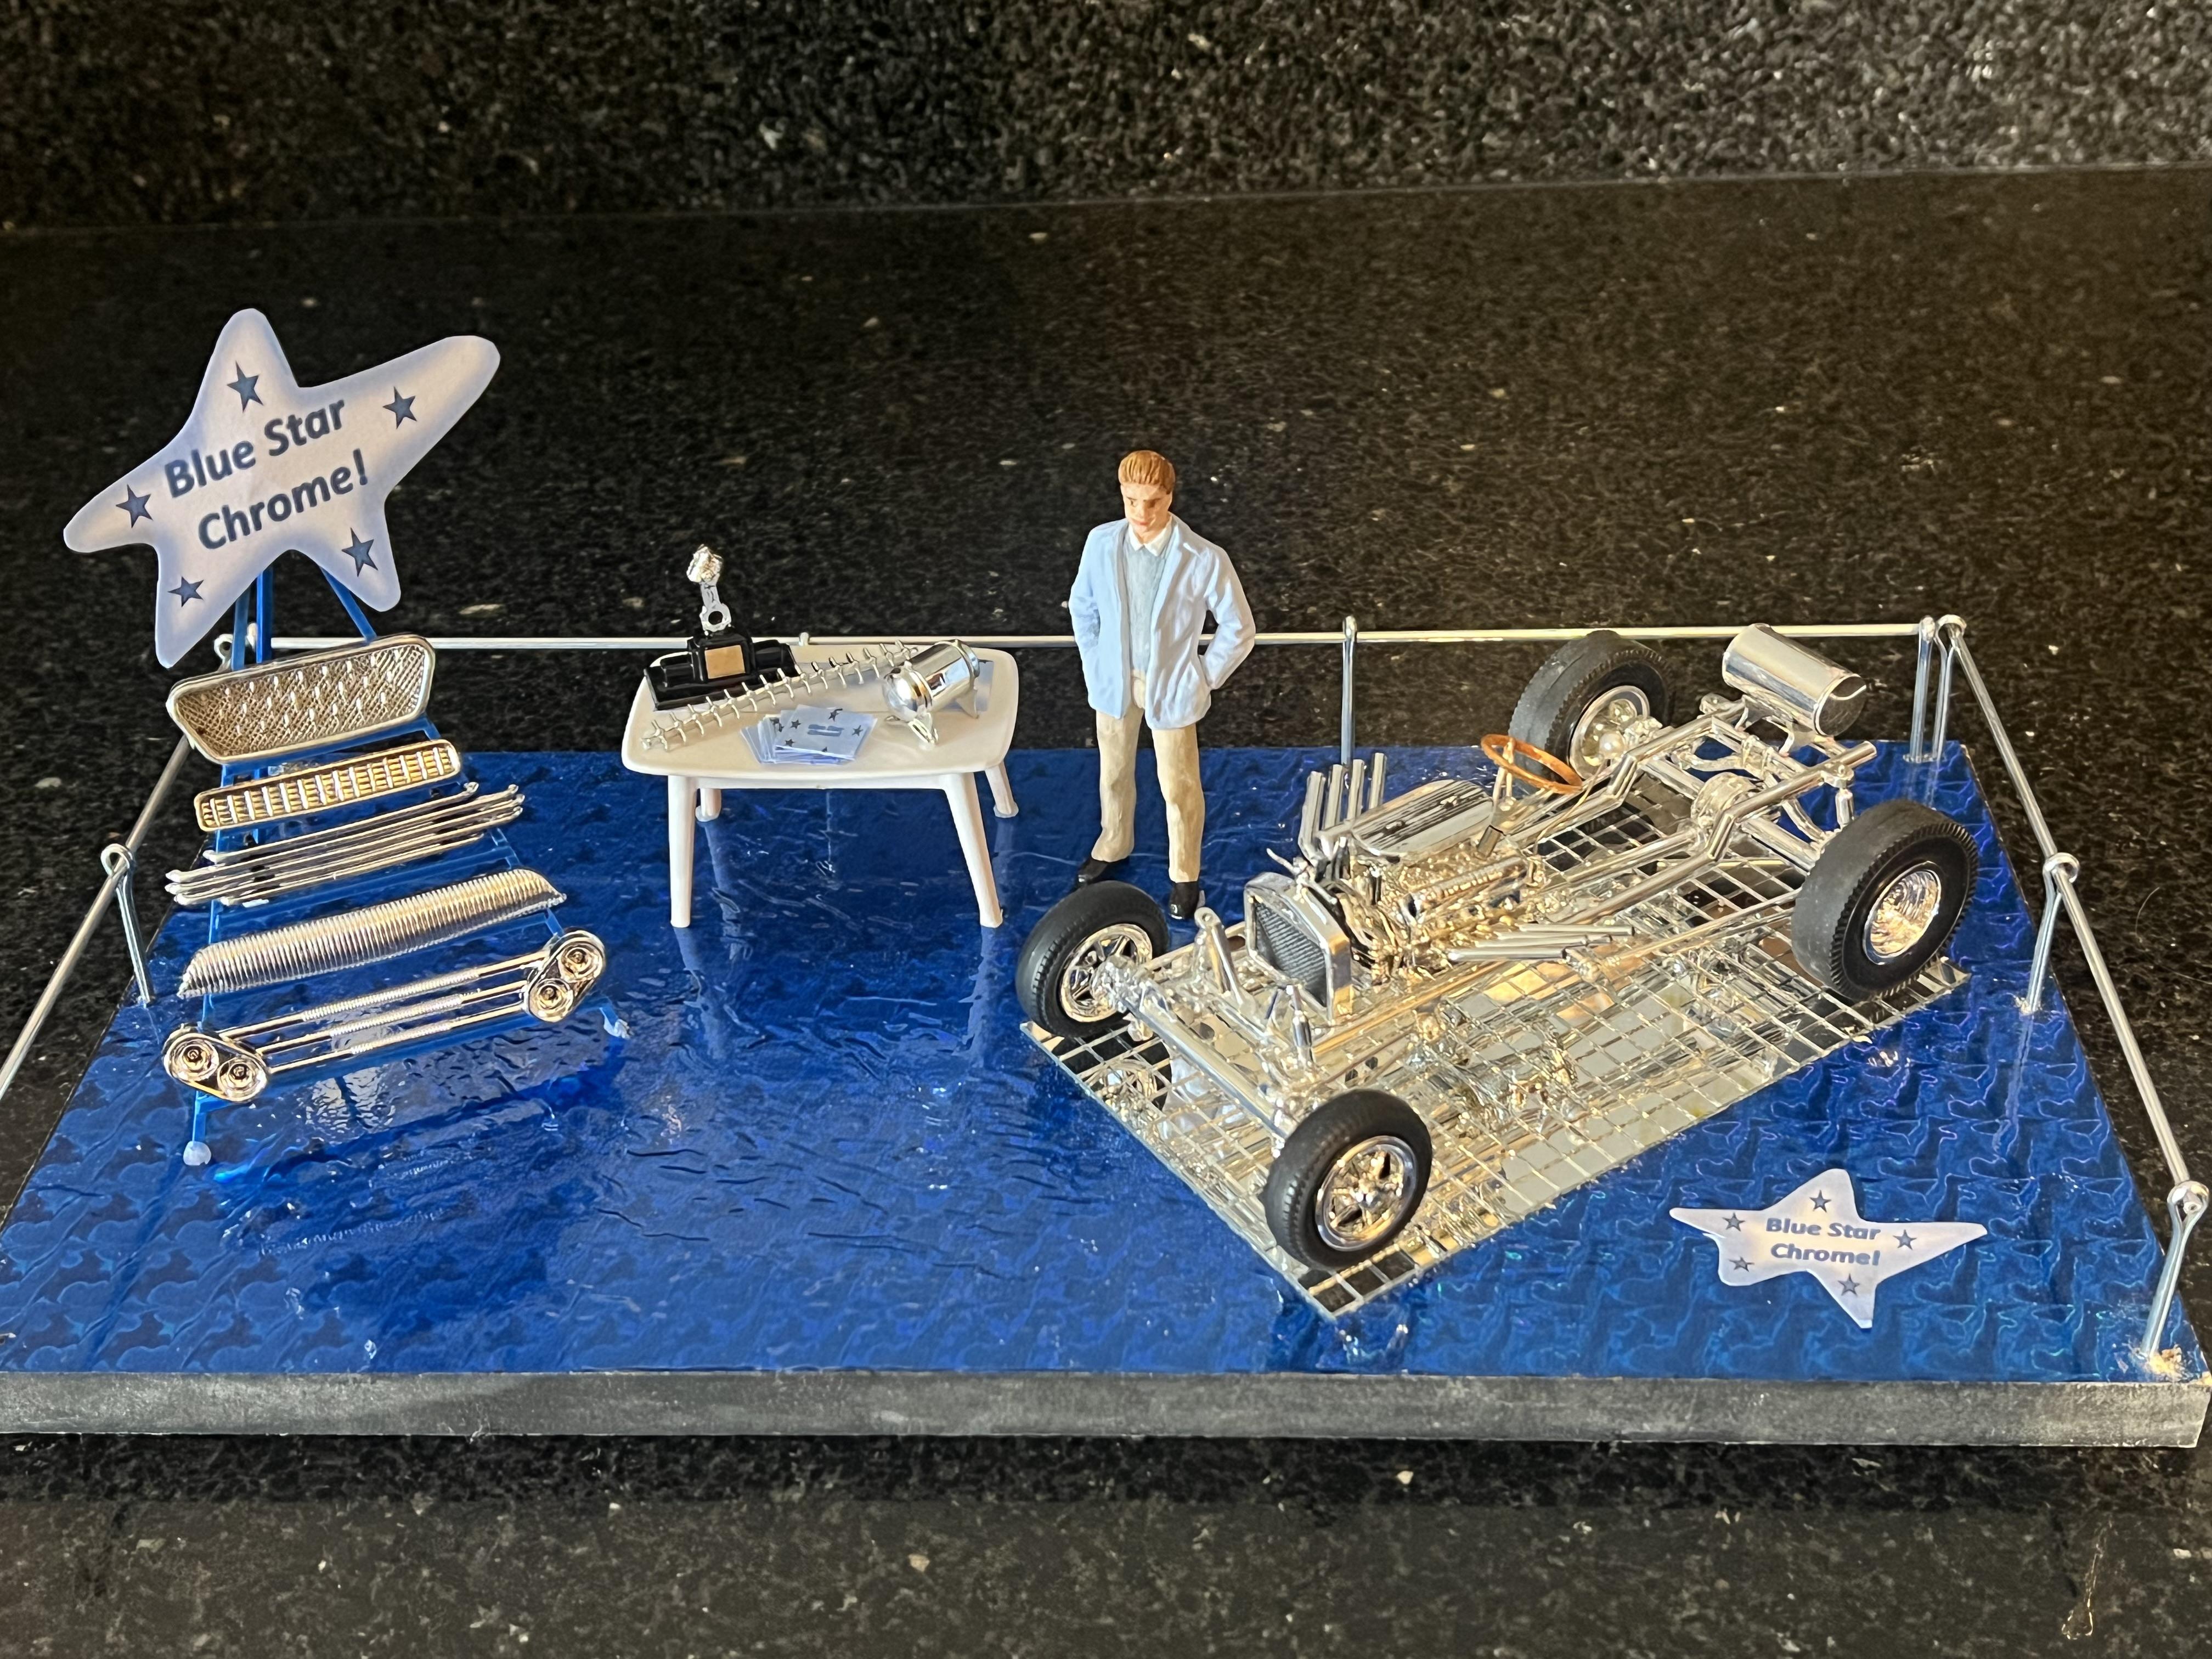
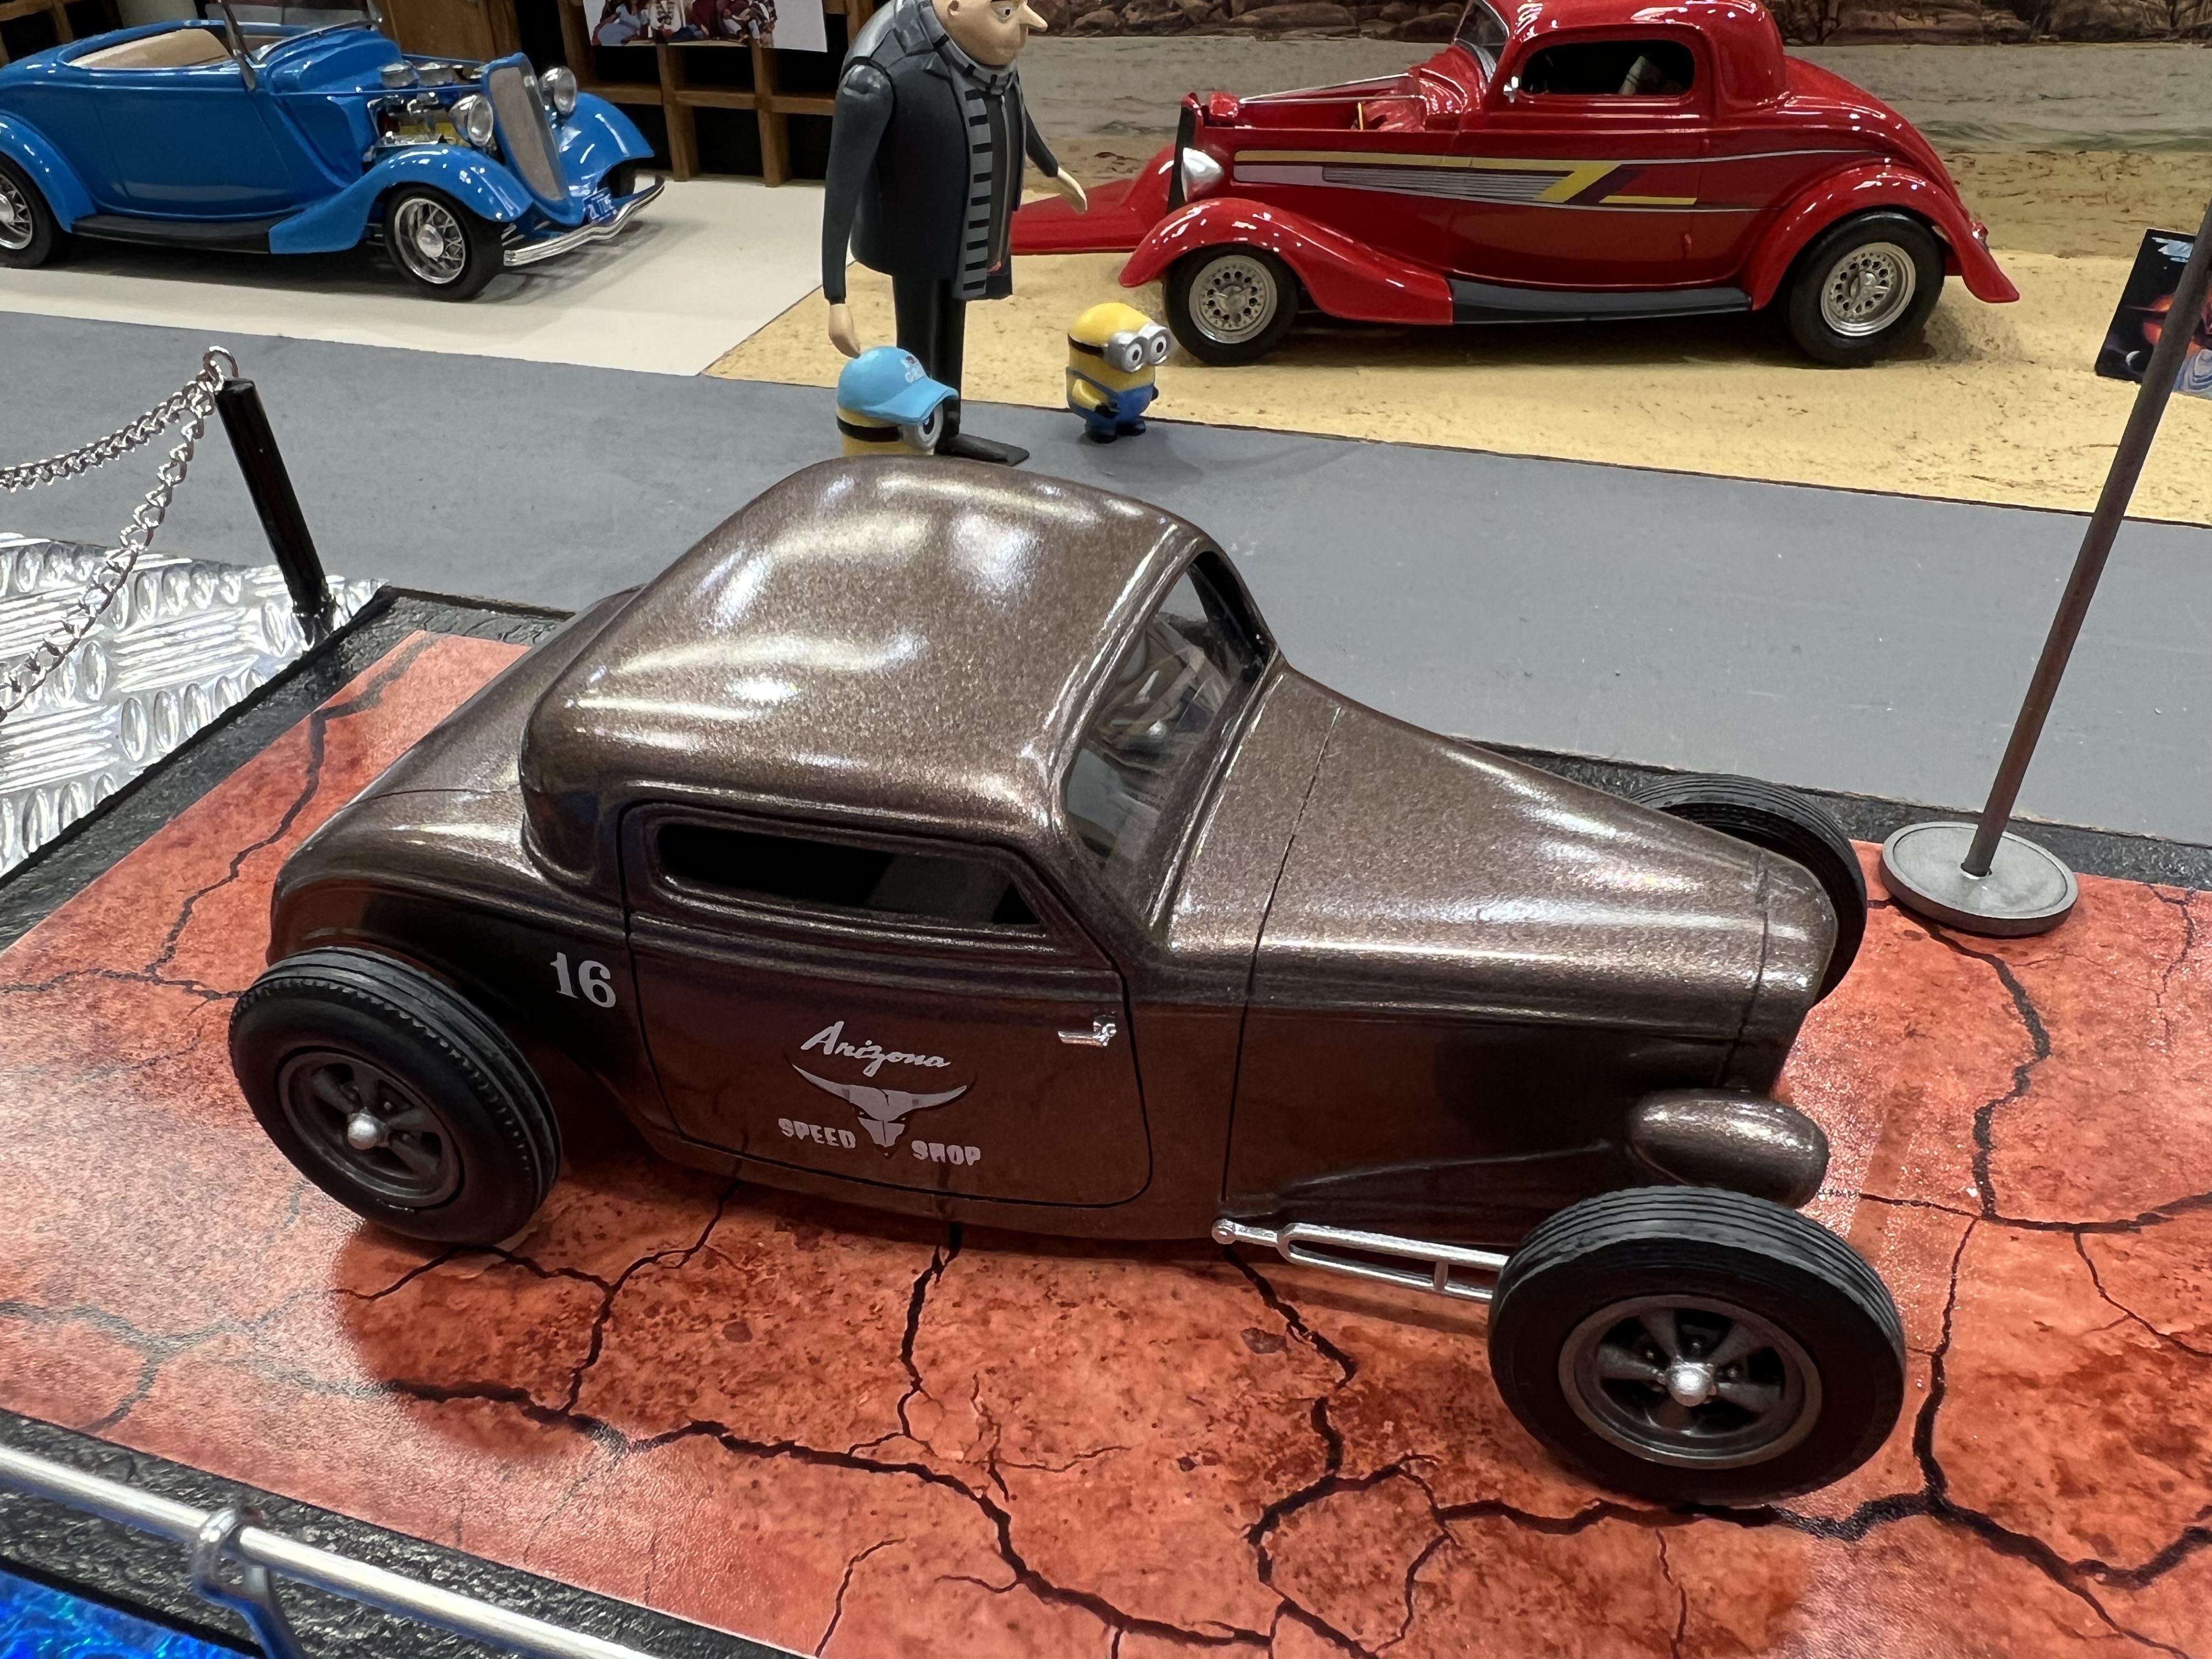
Hi guys, I neglected to post our display at the 2024 Model Car Spectacular here in Western Australia so it's time I made amends. I came up with this concept at least fifteen years ago but we hadn't done it for about ten years or more and one of our members suggested we revive the idea. It was displayed at our own show this year as well as the Western Australian Scale Model Expo so you will see slight variations in some of the photos. It works like this. The host club prepares a 2240 by 1220 mm board of MDF or chipboard - in the US you would call it a 4 x 8 board. We have an aluminium angle attached around the perimeter to keep everything neat and contained. The club also prepares a set of walkways to go along and across the display, these are painted in a uniform grey, concrete like colour. About fifty 300mm x 150 mm bases are produced, also from 12 mm mdf. These are distributed amongst club members and show entrants well in advance of the event. The idea is that the participants then prepare a hot rod show display on their base. Nothing is allowed to protrude beyond the edges nor be glued down or wrapped over the edges - precision is vital here if the finished result is going to look convincing. Everything EXCEPT the vehicle is to be glued to the base to avoid it falling onto anyone's model and causing damage. The great advantage of presenting a hot rod show is that pretty much every type of vehicle ever made on the planet has appeared in a hot rod show at some stage - diversity rules! So while hot rods, customs, muscle cars and drag cars will usually form the backbone of the show, race cars of every type, motorcycles, classics and antiques, restorations and even showroom stock brand new cars will be in attendance . Plus you have your vendors in the form of speed shops, car dealers, hot rod shops, tyre stores, T shirts stores, collectibles and the like. Heck, you can even do a model show! This concept lets a show have a real centrepiece to attract its patrons and give them something to remember. The show will be different every time it is displayed. Imagine being able to have one pre-prepared display to carry with you to NNLs, literally all over the world, and instantly become an active participant in the modular hot rod show! The 300 by 150 mm base ( 12 inch by 6 inch) will hold pretty much any 1/24 or 25th scale model, right up to prime movers! I think our show had the equivalent of 44 bases on it but you can end up with 50 or more models on there depending on how you utilise them. I produced a larger board as a centrepiece, still using the standard proportions of six bases in a 3x 2 arrangement so that I could produce a one piece dedicated show rod display. It is good insurance for the club to prepare a few generic bases in case some people drop out or can't make it - gaps are not acceptable! The best thing is, after the show the club only has to find storage for a flat board and a few walkways that can be safely stored in someones garage or shed until next time. The modeller goes home with a neat display base that will look good displayed in his cabinet until next time.' Win , win! I'll let the photos do the talking from here but I have a dream that one day this will be a common feature of model shows all over the world - just be sure to call them Ausmodules displays! Cheers Alan
- 11 replies
-
- 16
-
-
Fantastic to see this model built up! You've done a great job of bringing it back to life, Bill. I hope you don't mind me posting a photo of Garry Ritchie's (R.I.P.) build of the Surf-n-Go. Garry was originally from Omaru in New Zealand. His build would be easily 40 years old. Garry was well known for his cool paintjobs and all the graphics on the body are airbrushed by him. So now we know there are definitely still two Kiwi Surf n Go models still inexistence! Cheers Alan
-
Cheers Alan
-
Palmer model kit history?
Alan Barton replied to Oldcarfan27's topic in General Automotive Talk (Trucks and Cars)
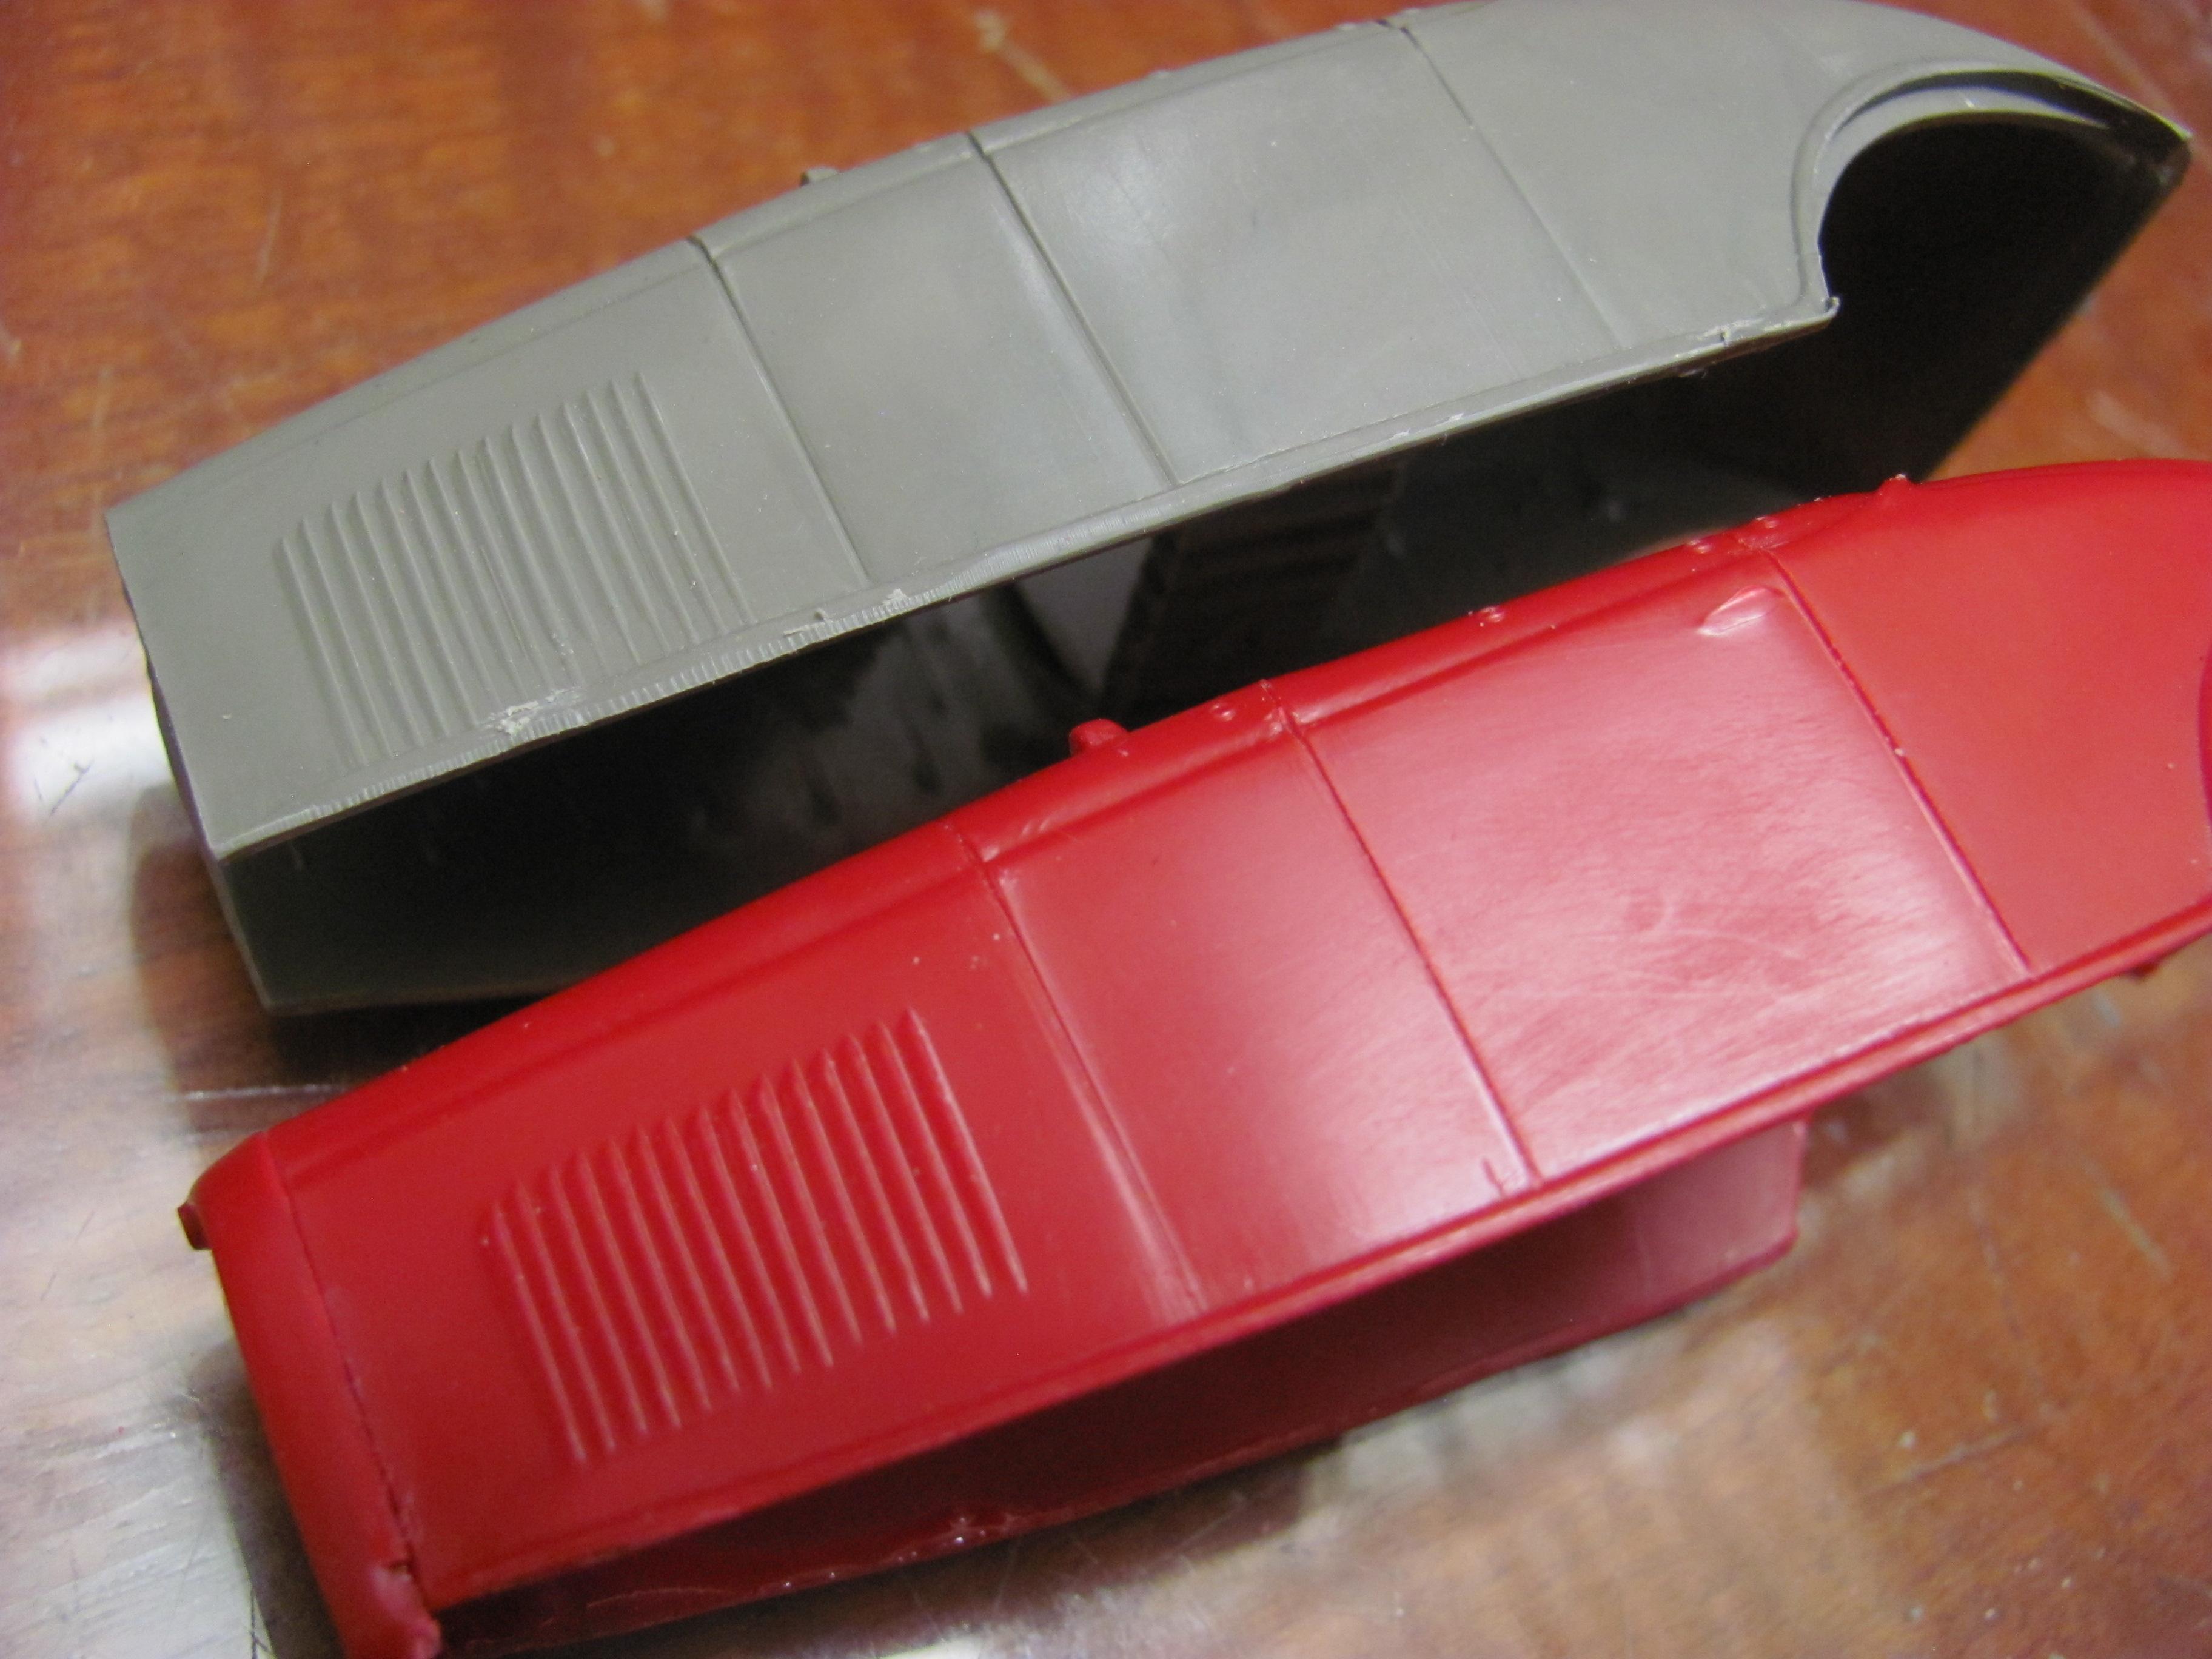
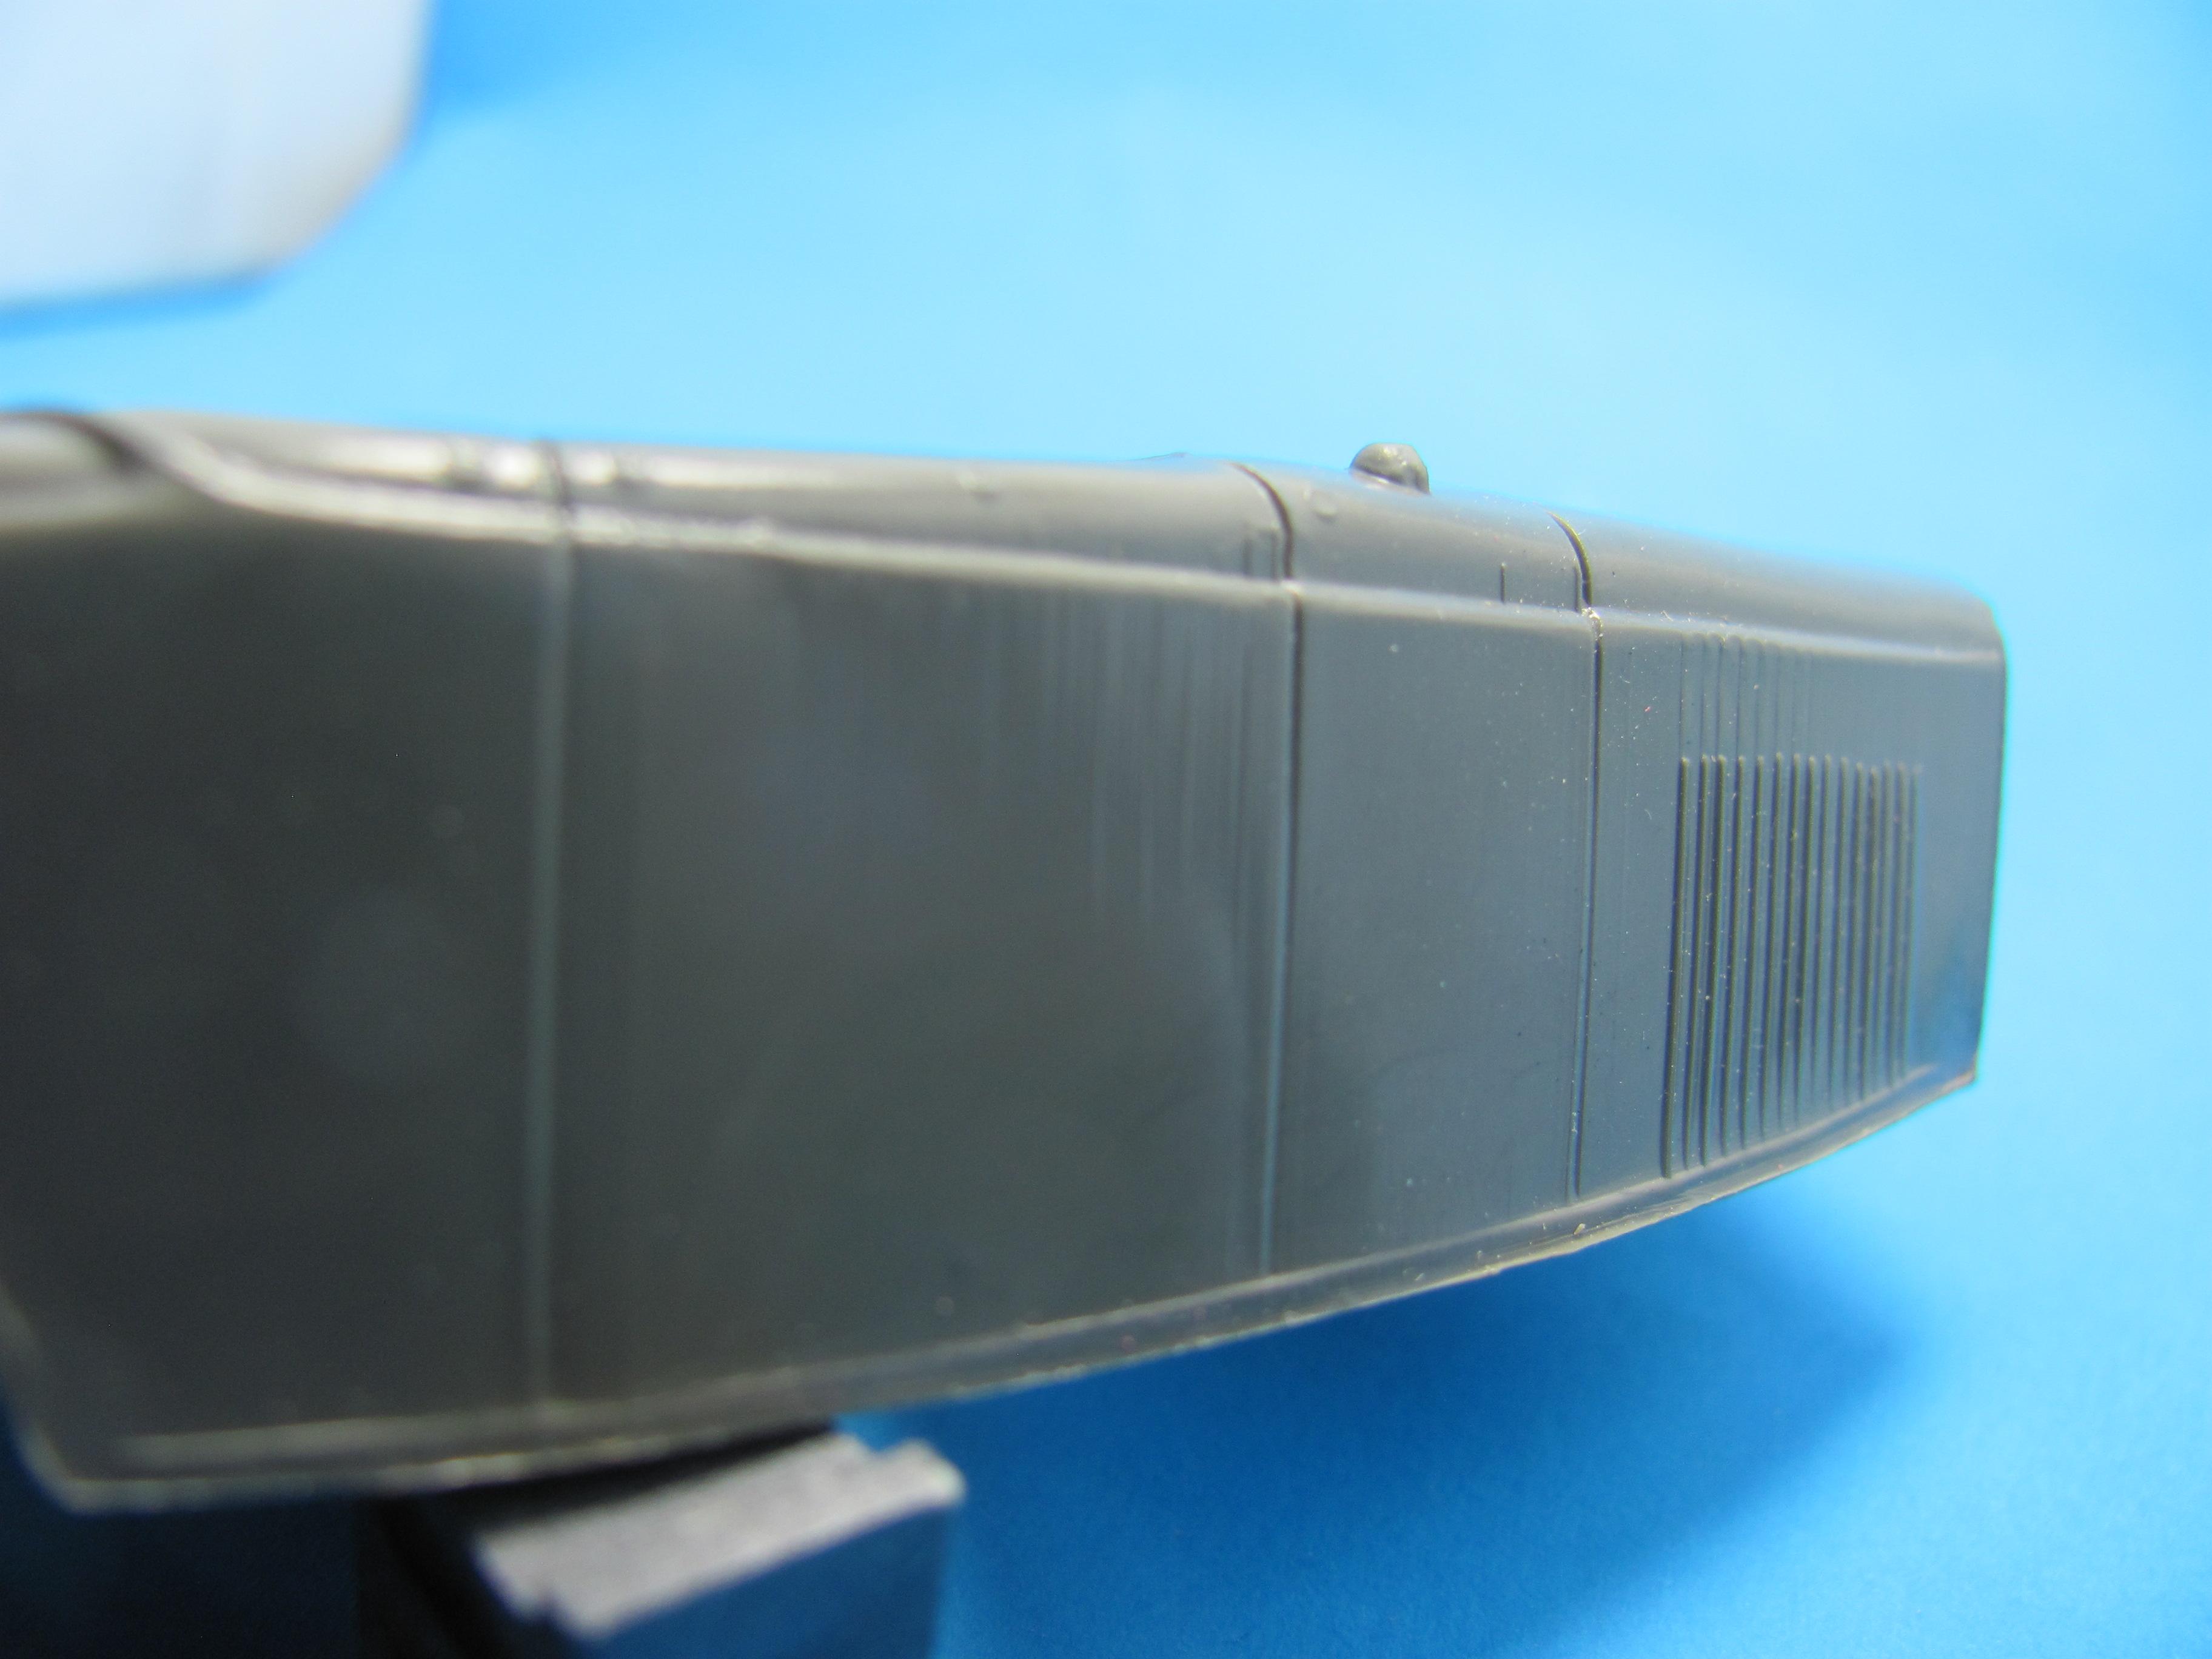
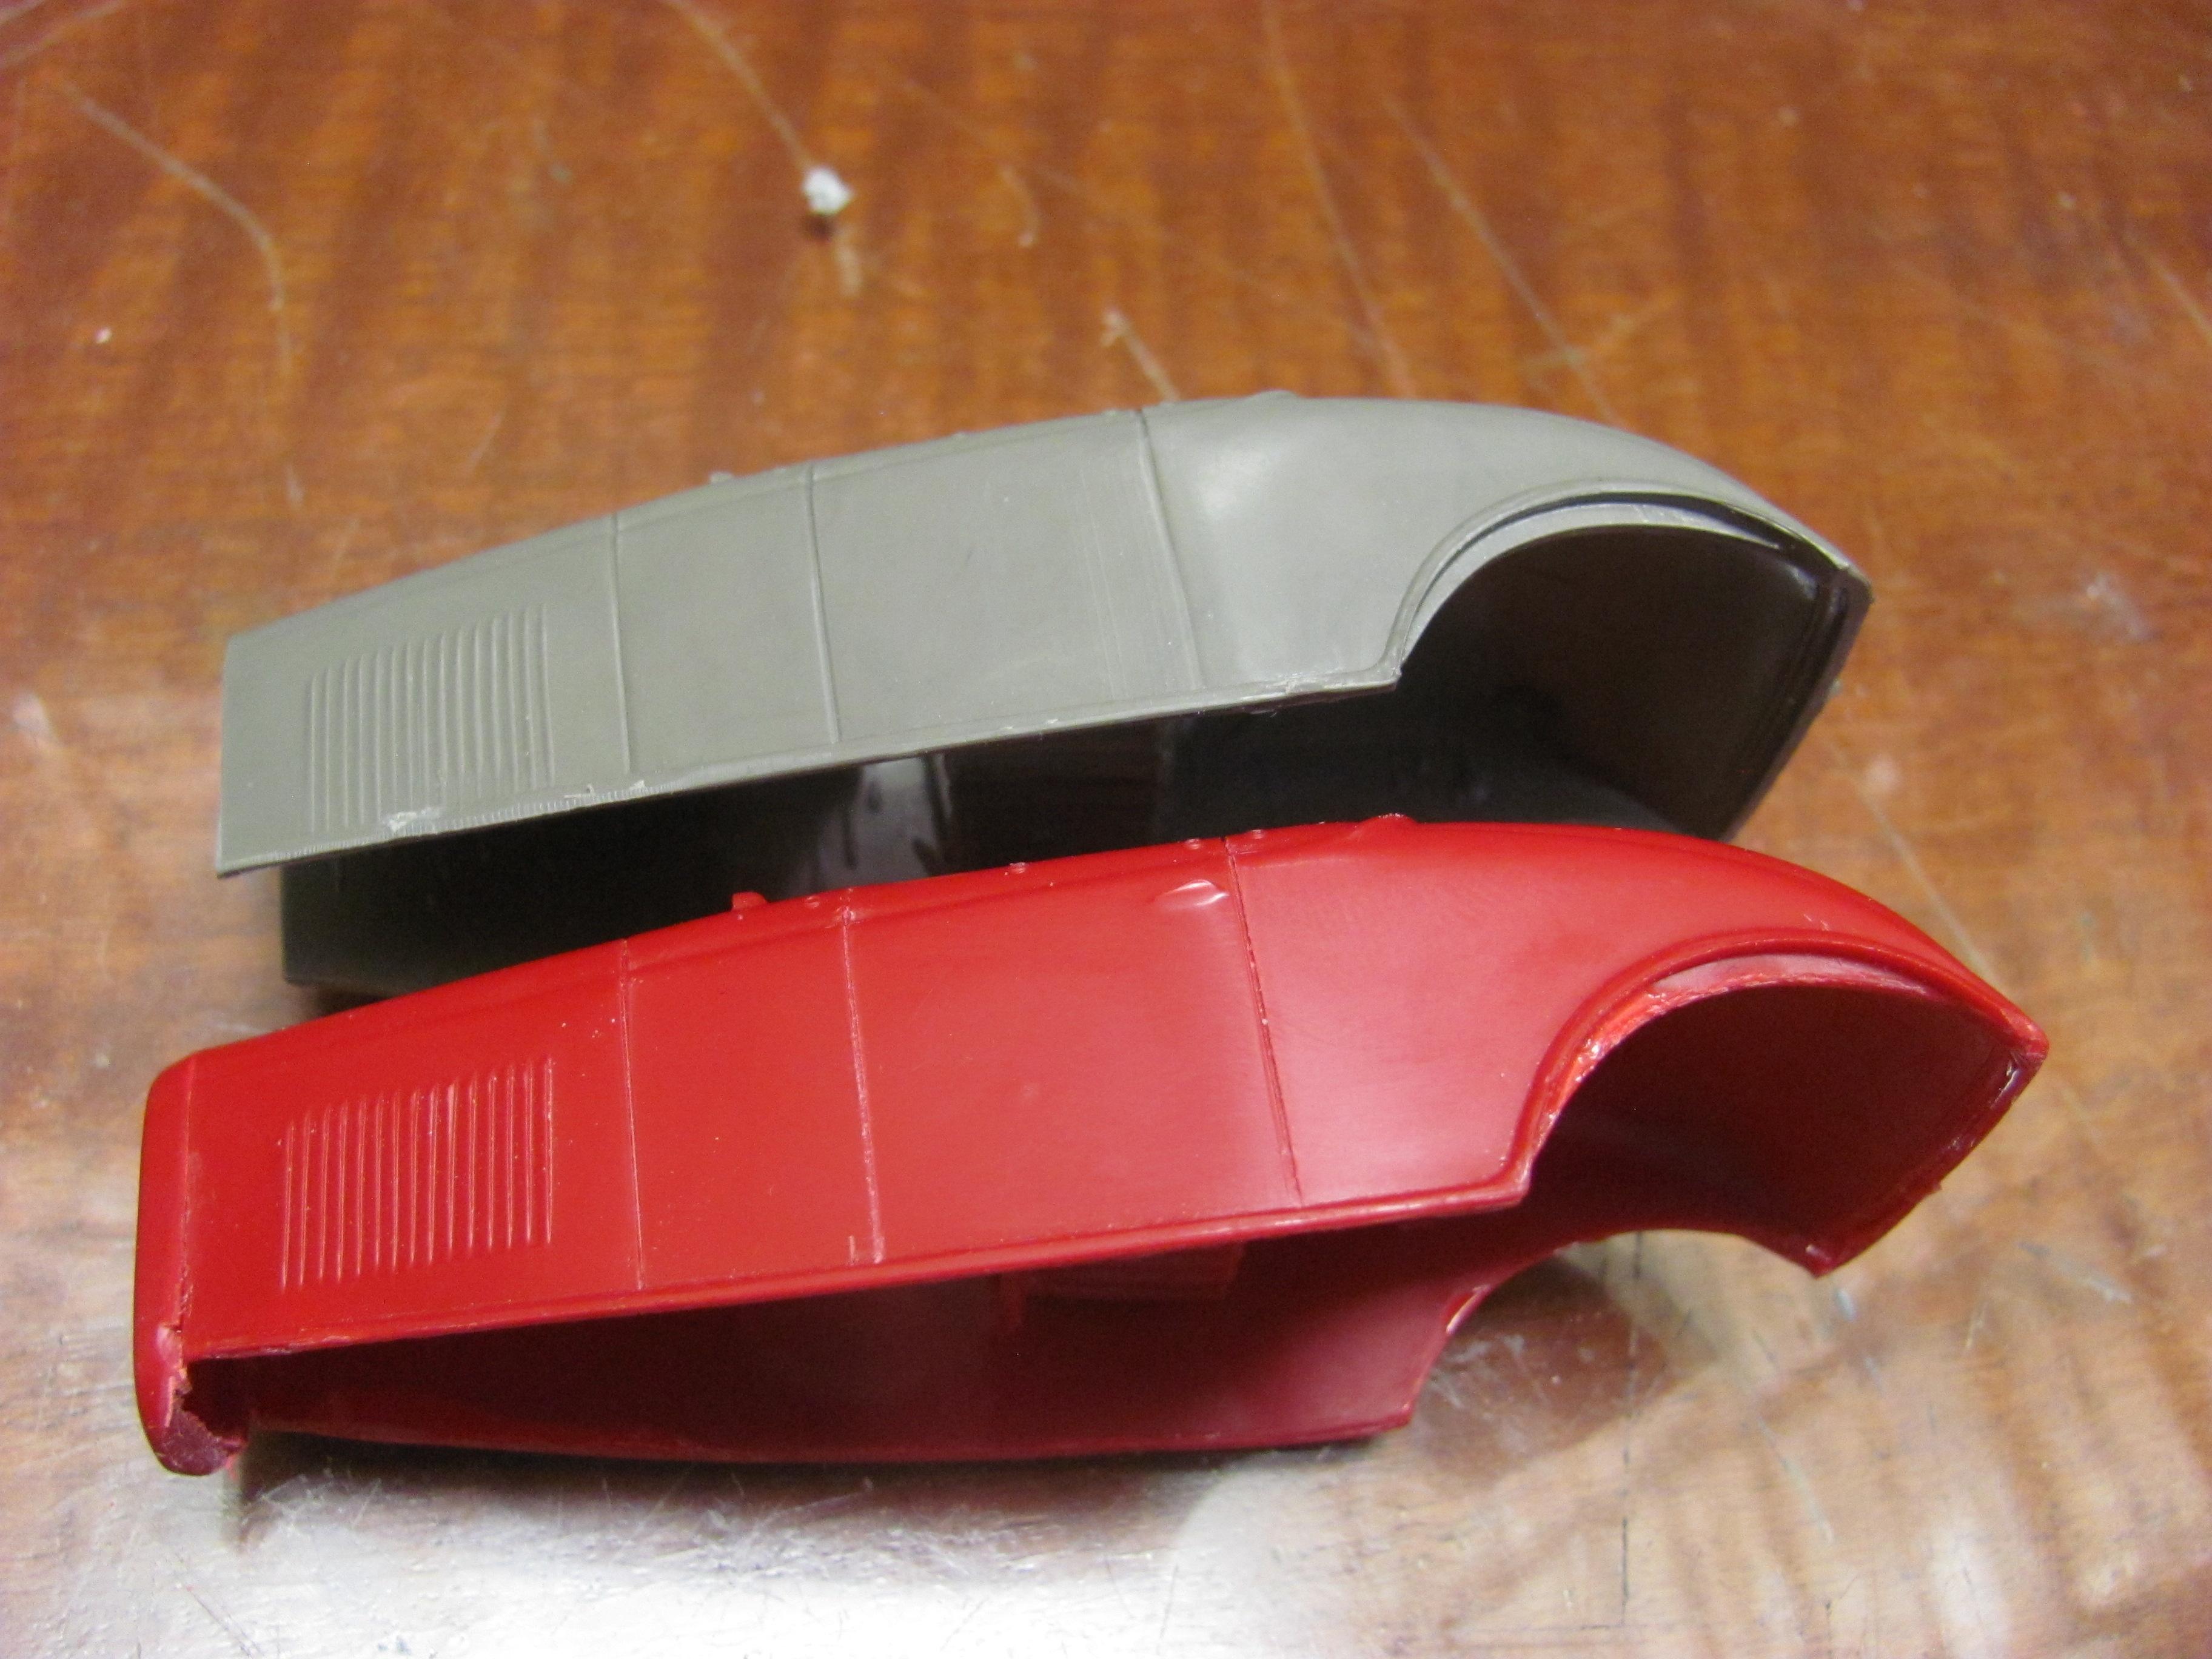
Just found these old photos taken before I built the Pyro and Palmer 32 Fords. You can see how the grey roadster Palmer body is butchered compared to the red Pyro Coupe/roadster body. If Palmer was using the Pyro tooling, they really hacked it up! The louvres are awful, the door lines are hacked and it has lost its door-handles. In my photo of the blue coupe above, I have removed the door handles myself from the Pyro body to try to de-emphasise that the doors are all wrong for a 3 Window anyway! (Note that the Pyro body has the grille shell attached - I had to restore a gentle glue bomb that I bought from Spain of all places!) Cheers Alan
-
Palmer model kit history?
Alan Barton replied to Oldcarfan27's topic in General Automotive Talk (Trucks and Cars)
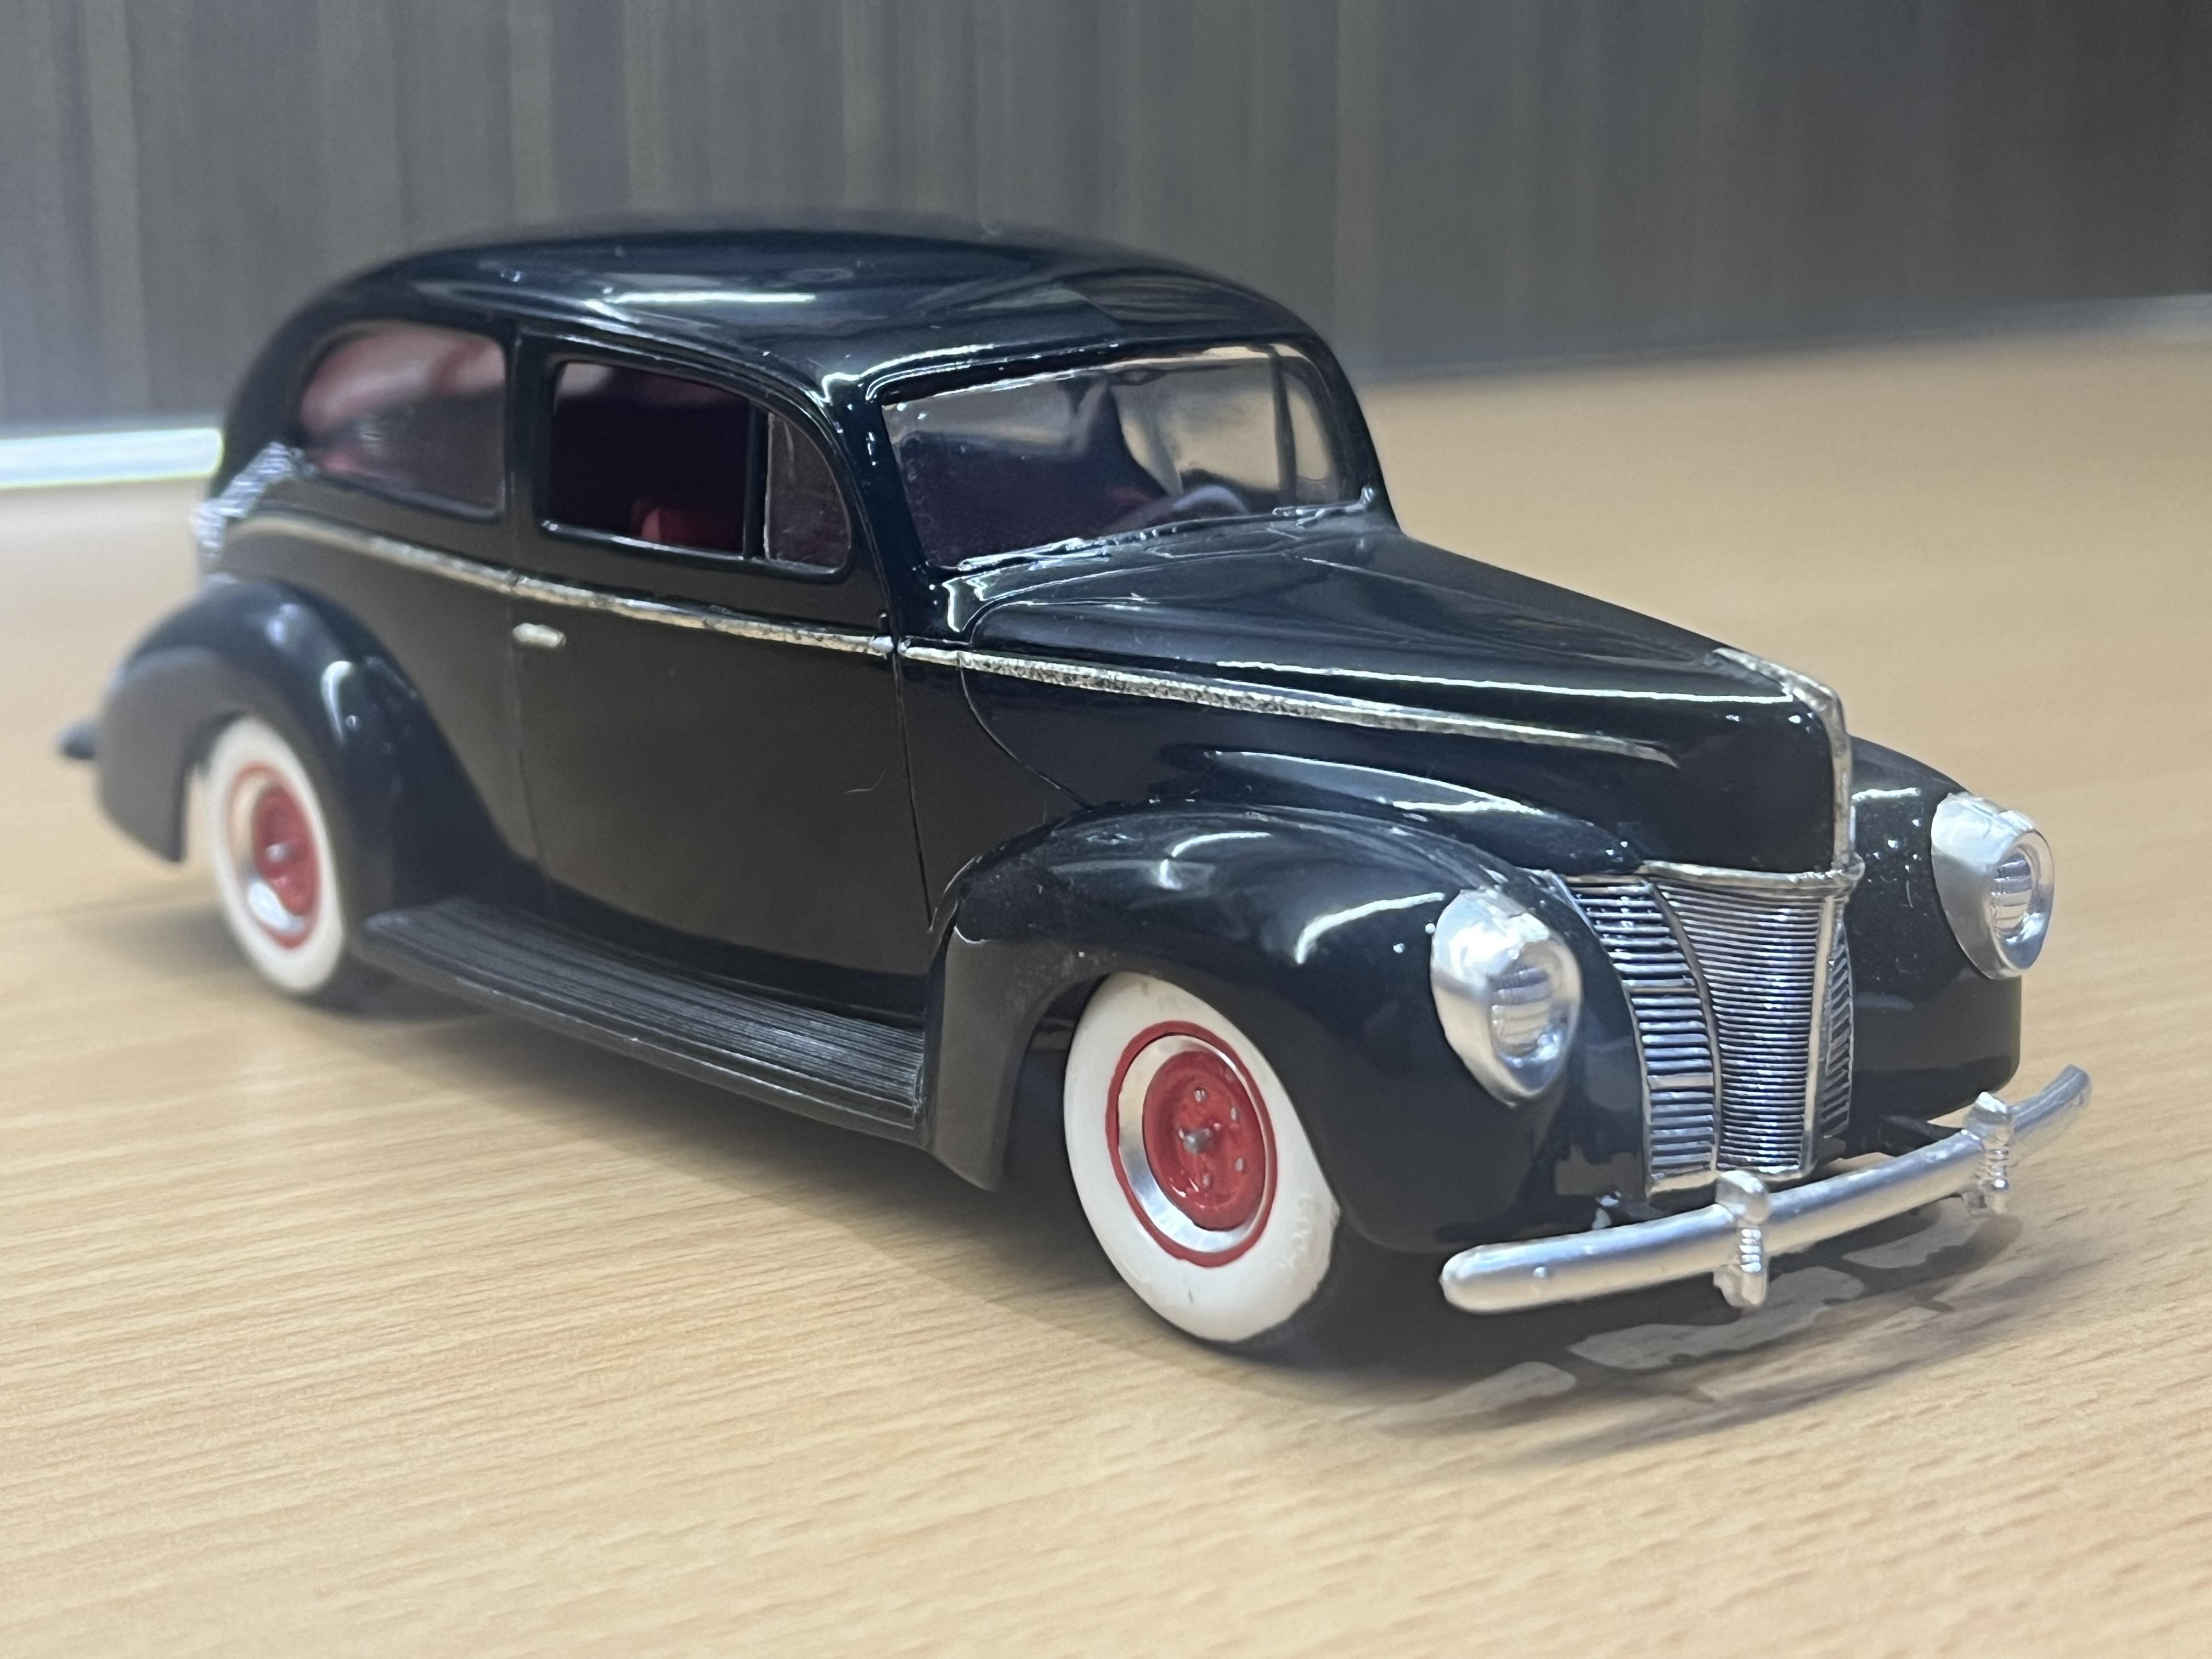
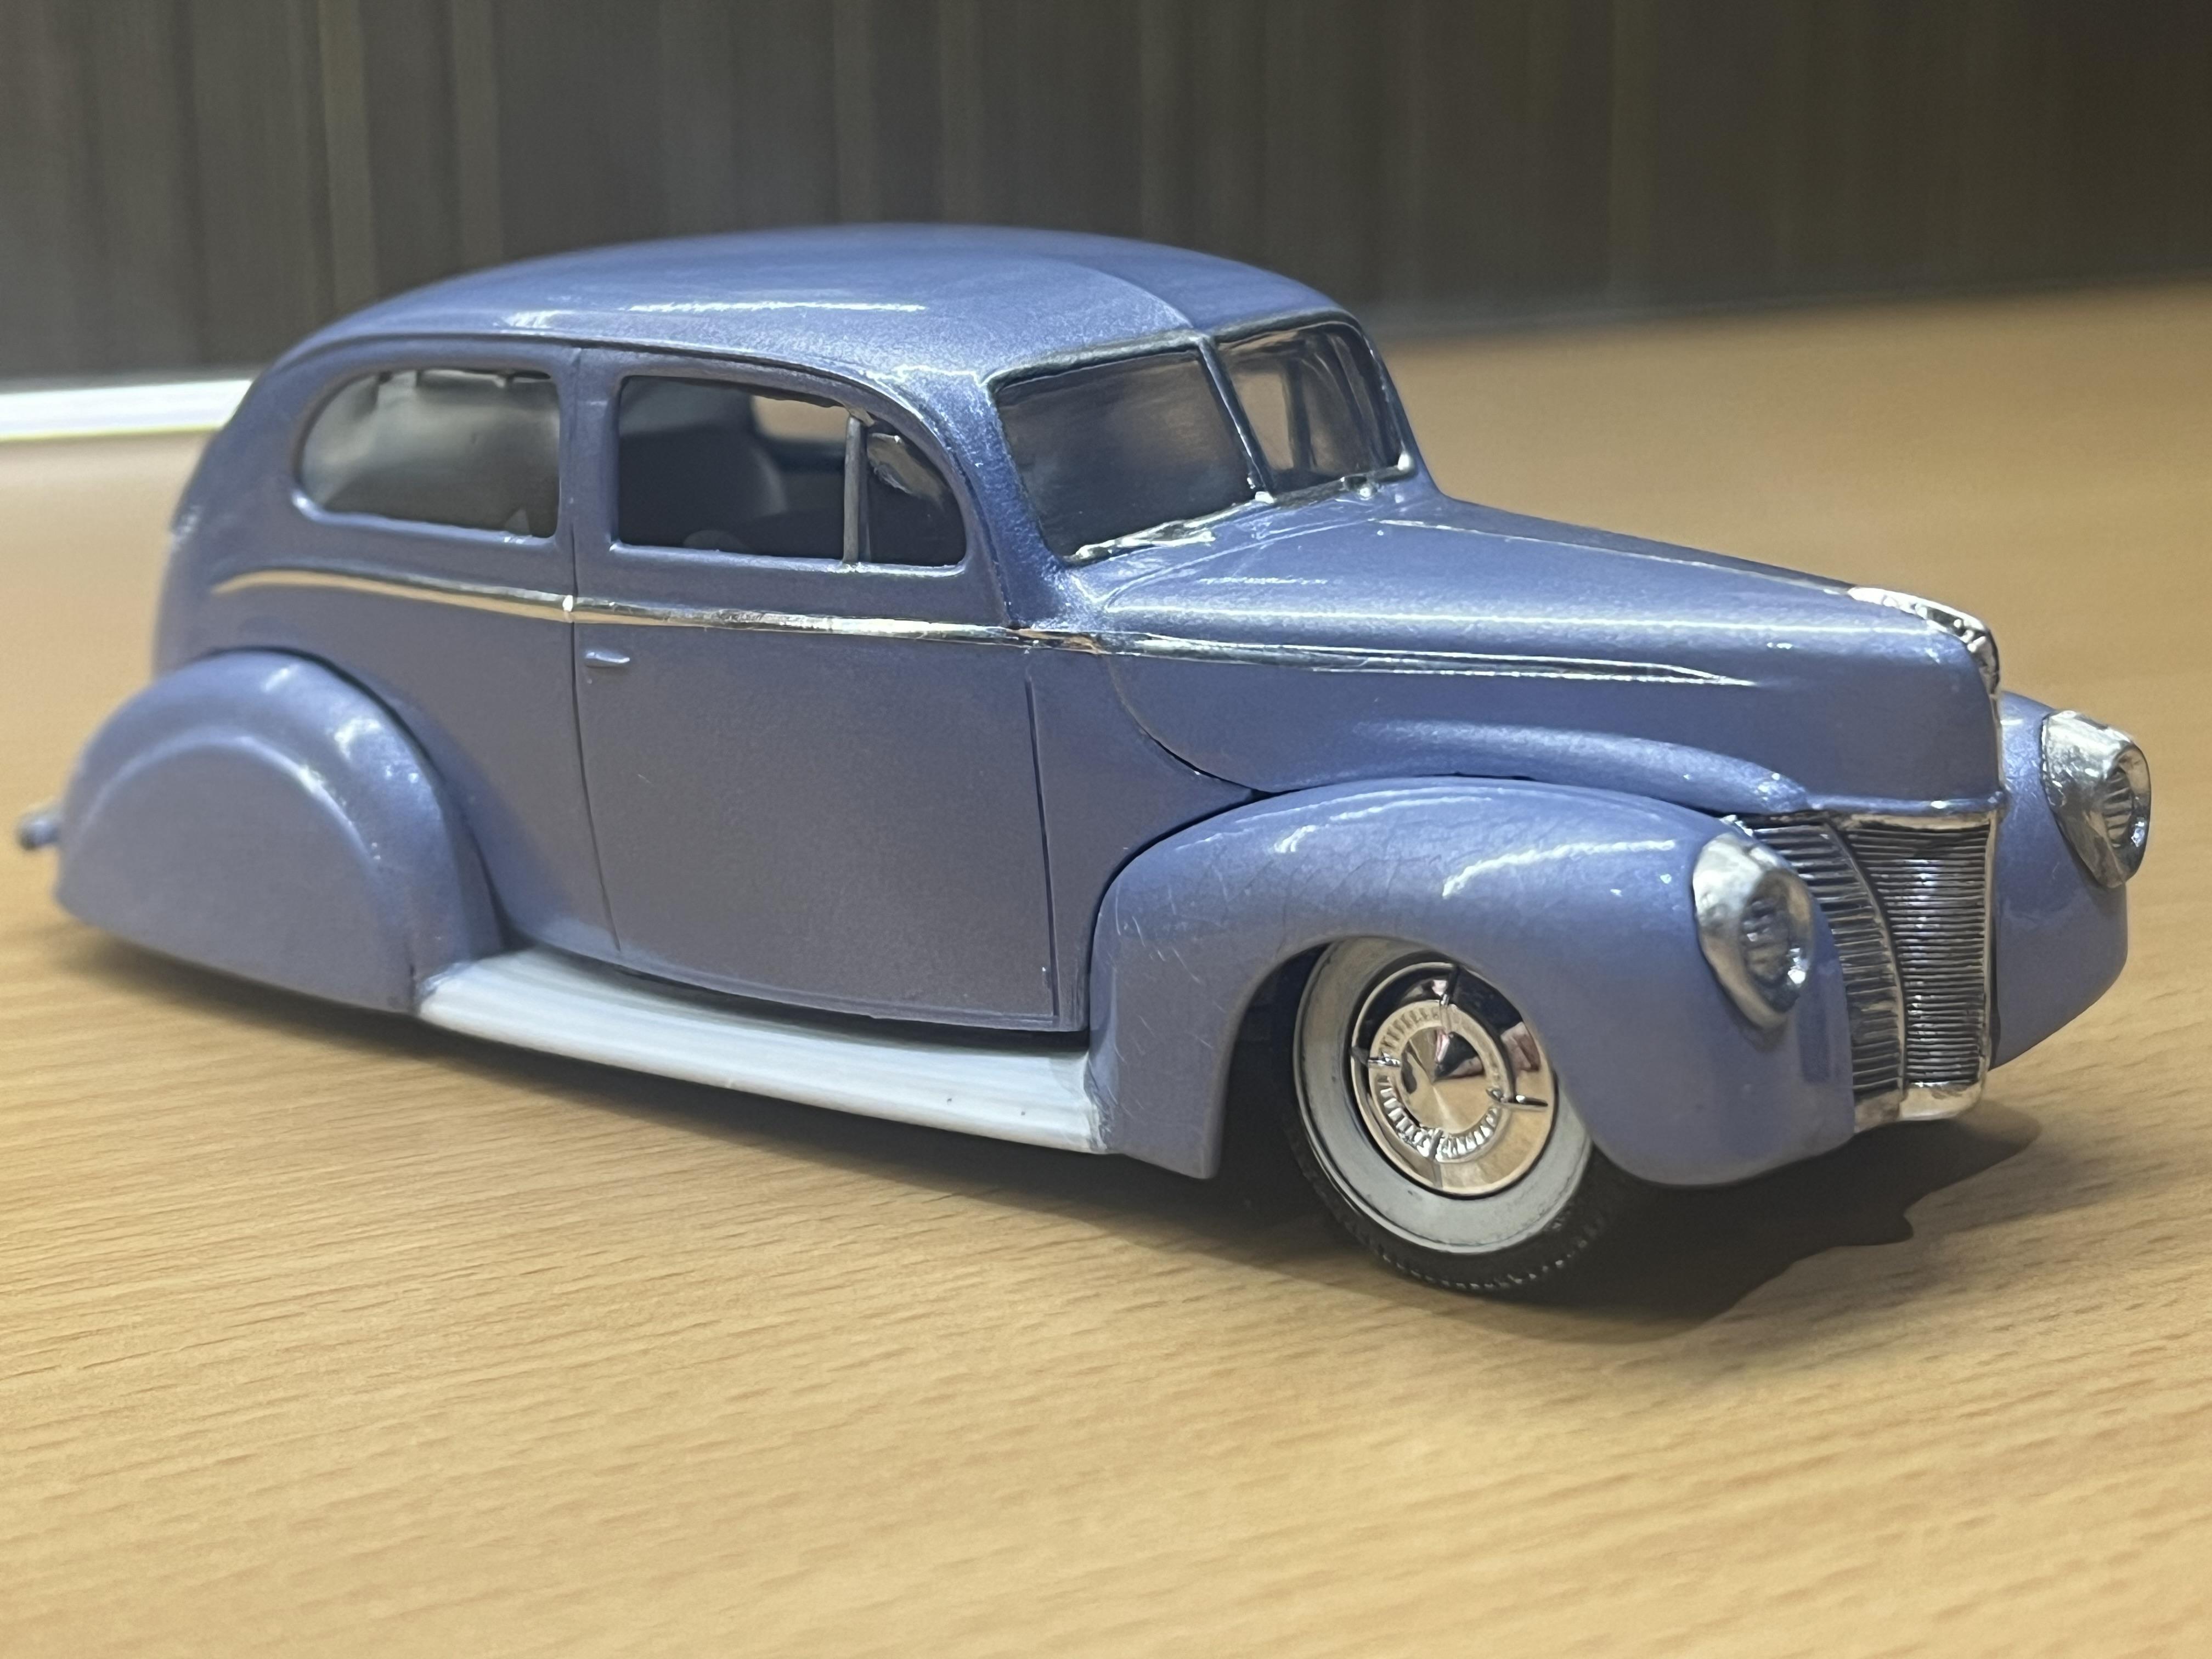
I'd like to offer some more information on the relationship between Palmer and Pyro 1/32 scale models, and others. I have been building model cars for nearly sixty years and I have set myself an ambitious target of obtaining one example of every styrene hot rod model ever made in any scale by model kit manufacturers around the world. and so far I am doing pretty well. I'm sticking with the traditional definition of a hot rod, being based on a car built up to 1948 and my list includes both hot rod kits and kits of vintage cars that would typically be hot rodded. So a 34 Plymouth sedan is fine, a 32 Duesenberg maybe not so much. Thanks to great mates in the USA including Dale Daugherty, Tom Geiger, Tom Martin and Craig Stanford, I am very close to achieving my dream. As of this writing, I have only one more 1/32 scale hot rod kit to find, the Aurora La Salle Hearse with a Curse. I have close to 100 built 1/32nd scale rods in my collection and this is where my interest in Pyro, Palmer and other manufacturers kicks in. These photos show three versions of essentially the same model. The Blue coupe is the Pyro 32 Ford 3 window. It's based on their roadster kit with a poorly fitting 3 window coupe roof slapped on top but it is what it is. Next is a maroon Palmer 32 Roadster. Almost identical to the base model of the Pyro coupe but somewhat cruder in execution. Before I did a lot of bodywork, the body exhibited noticeable drag marks down the doors, as if the body had been pulled from the mould while still molten! The door lines weren't vertical or straight. The louvres on the hood, particularly the right hand side, looked like a stick had been dragged through wet sand to form them - very low-rent indeed. The yellow and black model (unpainted) is made in Japan by UPC. I would suggest that they got hold of a Pyro model and then made an entirely new tooling for it. It incorporates all the slightly awkward proportions of the original Pyro but is a much cleaner crisper mold all over. The hood louvres are crisp and well executed, a huge improvement on both the Pyro and Palmer items. The finish on the plastic is much finer. The hood is now removable whereas the first two are moulded to the bodyshell. It has a seperate 4 banger under the hood. The wire wheels are chromed and have separate tyres. In short, they are all close cousins but I don't believe they are triplets! Dave, living on the opposite side of the planet to you guys, I am not in a position to provide documented proof ( like plans, memos or contracts) of the relationship between the AMT and Palmer 40 Tudor but I do have both of them built as you can see here and my gut feeling is that the Palmer multi pieced model is a direct copy of the AMT kit. The fact that it is a three piece body shell and that the overall length of the Palmer is a couple of mm shorter is proof that it is indeed a different mould but the attention to detail is so similar it couldn't be an accident. As you look a the photos of the black AMT and the blue Palmer, note things like the identical shape of the rear windows and trunk handle, the delicacy of the crease running back from the peak of the windshield frame, the pattern of ribbing on the running boards for starters. Upside down, every single detail and the method of parts breakdown of the chassis and floorpan is identical - other than the aforementioned shorter length. Considering that some manufacturers cant keep proportions of similar cars in their own range identical, I can't imagine that Palmer got this close to the AMT kit without measuring directly off the AMT kit. I find this detailed analysis and investigation of our modelling history to be extremely interesting ( if not significantly nerdy!) so would love to hear your thoughts on my observations here. Cheers Alan
-
That made me smile - what a stunningly beautiful Forty! Cheers Alan
-
Beautiful - I wouldn't change a thing! Cheers Alan
-
The HK Ute was a fibreglass body by Jaymar Models The XC Falcon, EK Holden, HQ one tonner and VC Valiant are by Tony Ashton of AAA Resin models but he has retired recently and sold all his stock. You may be able to get some of these bodies (sorry, I am not sure what he has) from Stewie at Dinki-Di Resin Models. This is a small business in Western Australia. Cheers Alan
-
So crisp! I love everything about this one - nice build! Cheers Alan