Search the Community
Showing results for tags 'tamiya'.
-
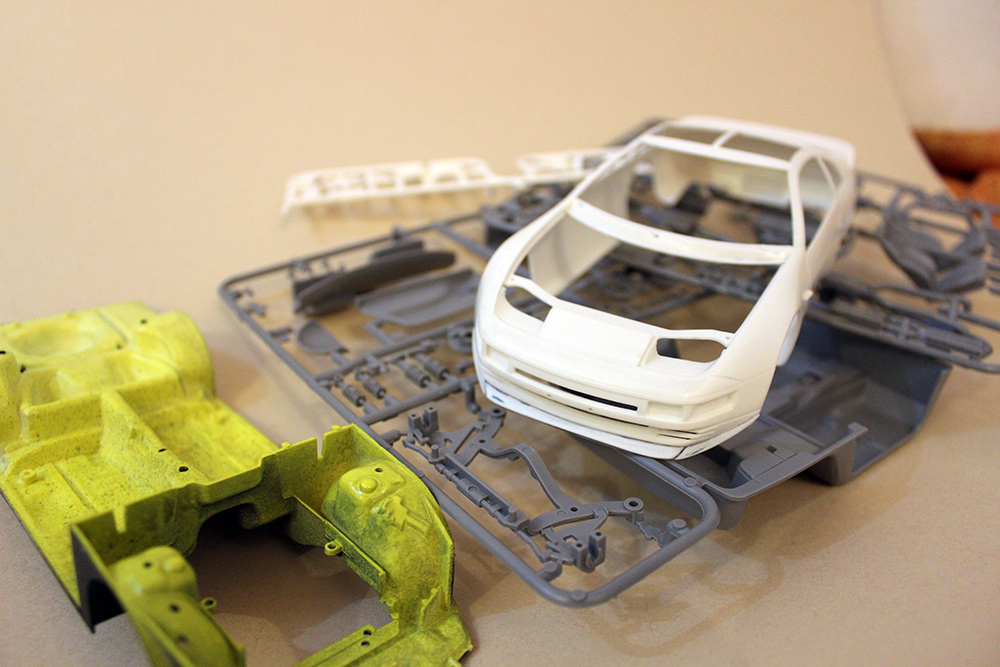
Hi all, just made a start on painting some parts tonight - this is my first attempt at properly painting a model and actually taking some care over the end result, unlike my former self Nothing too exciting yet, but hoping to make some more significant progress soon...

-
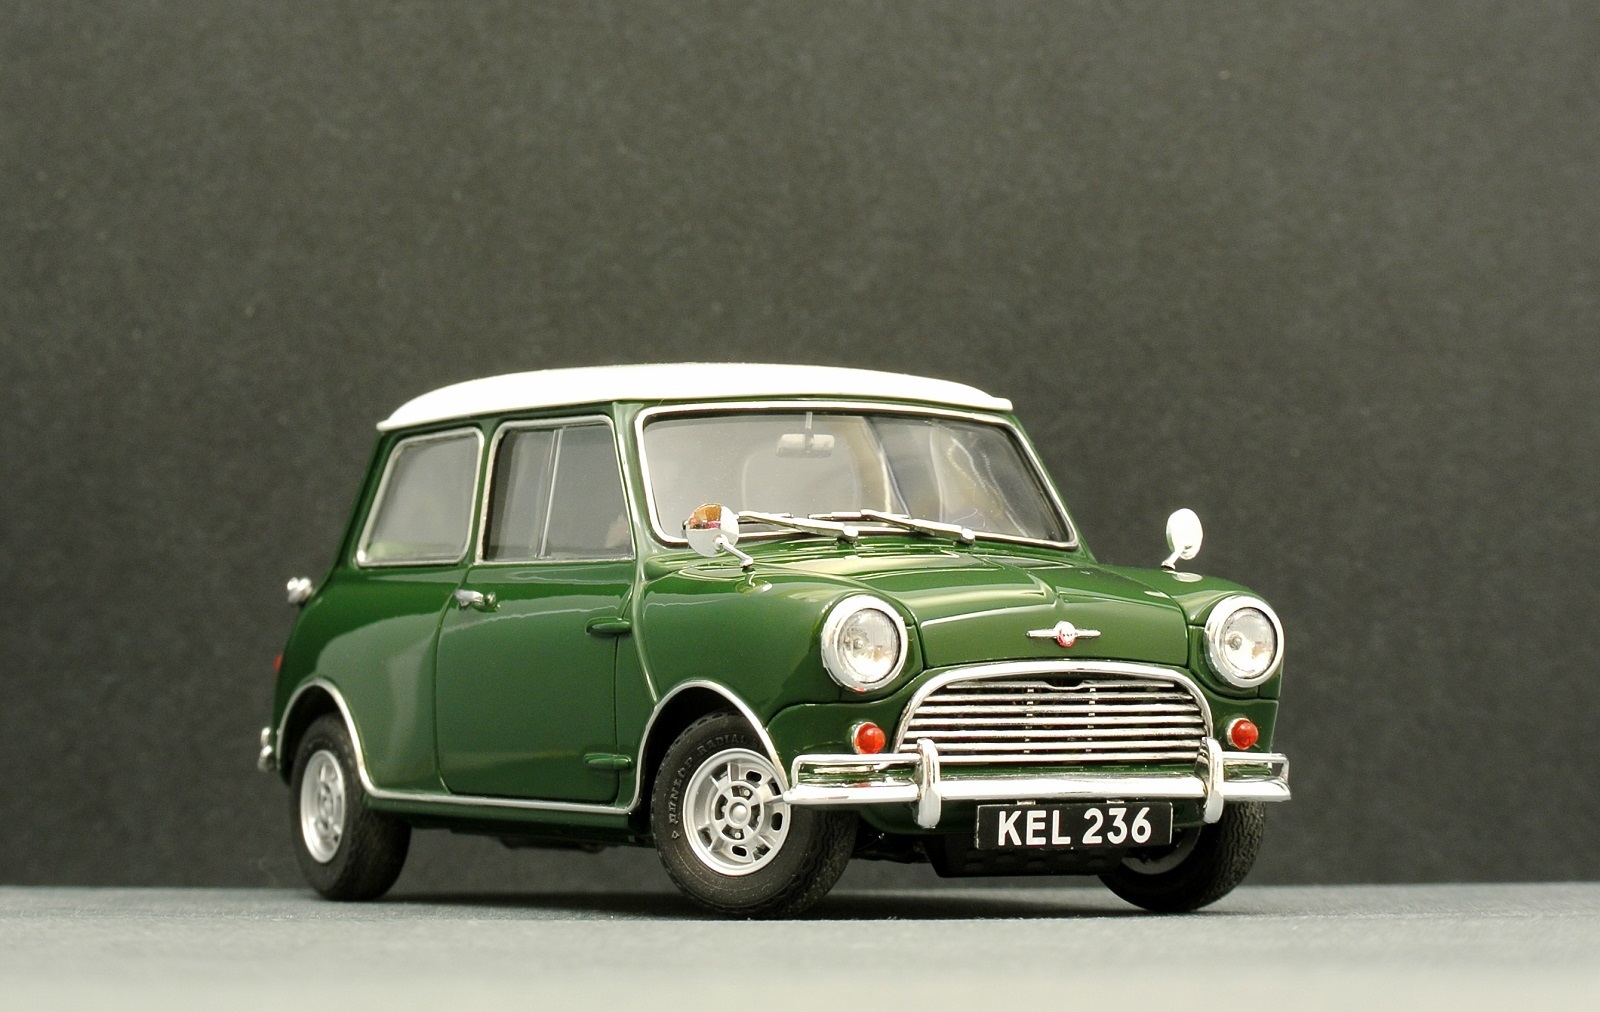
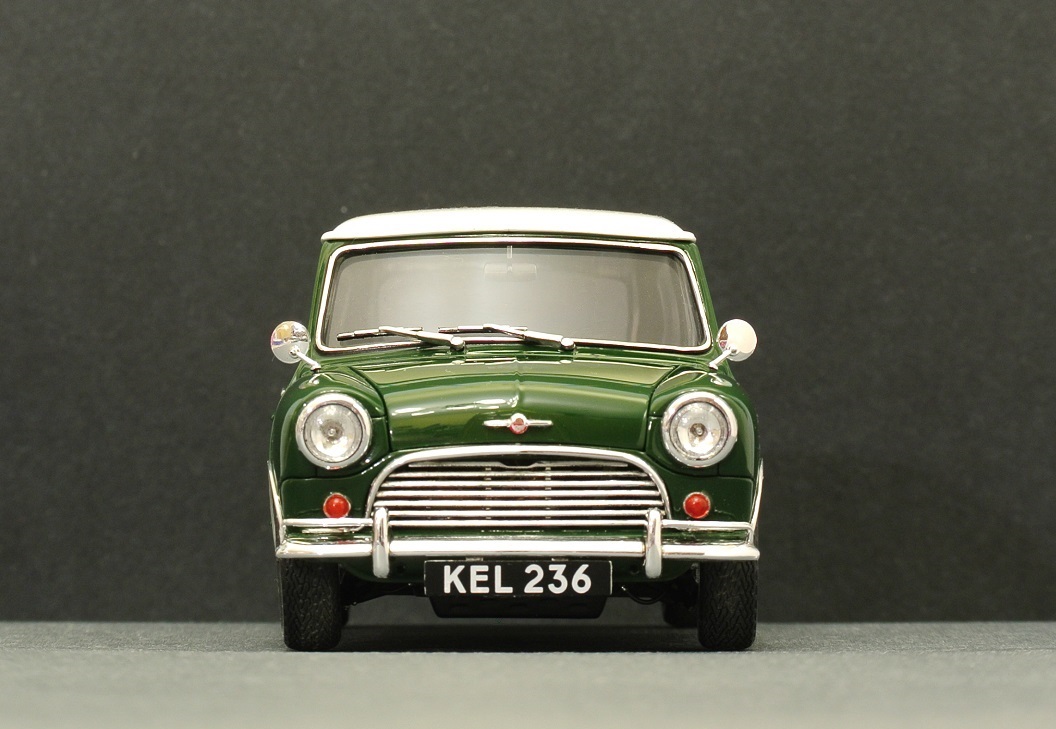
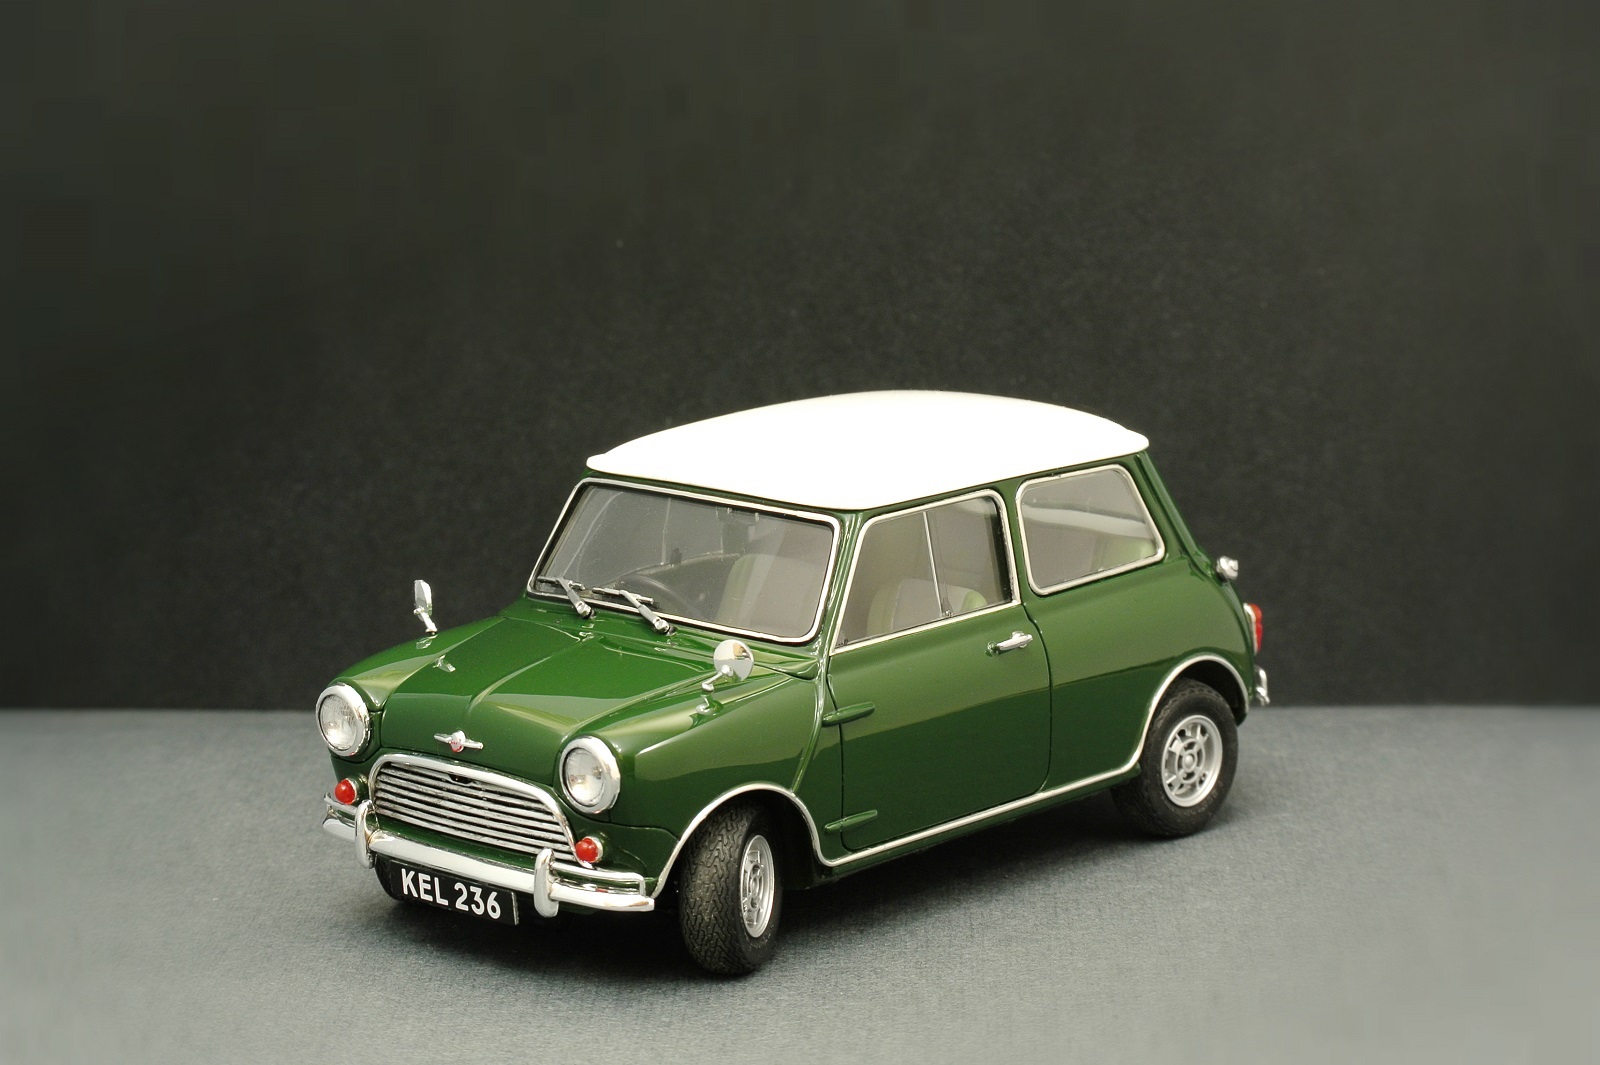
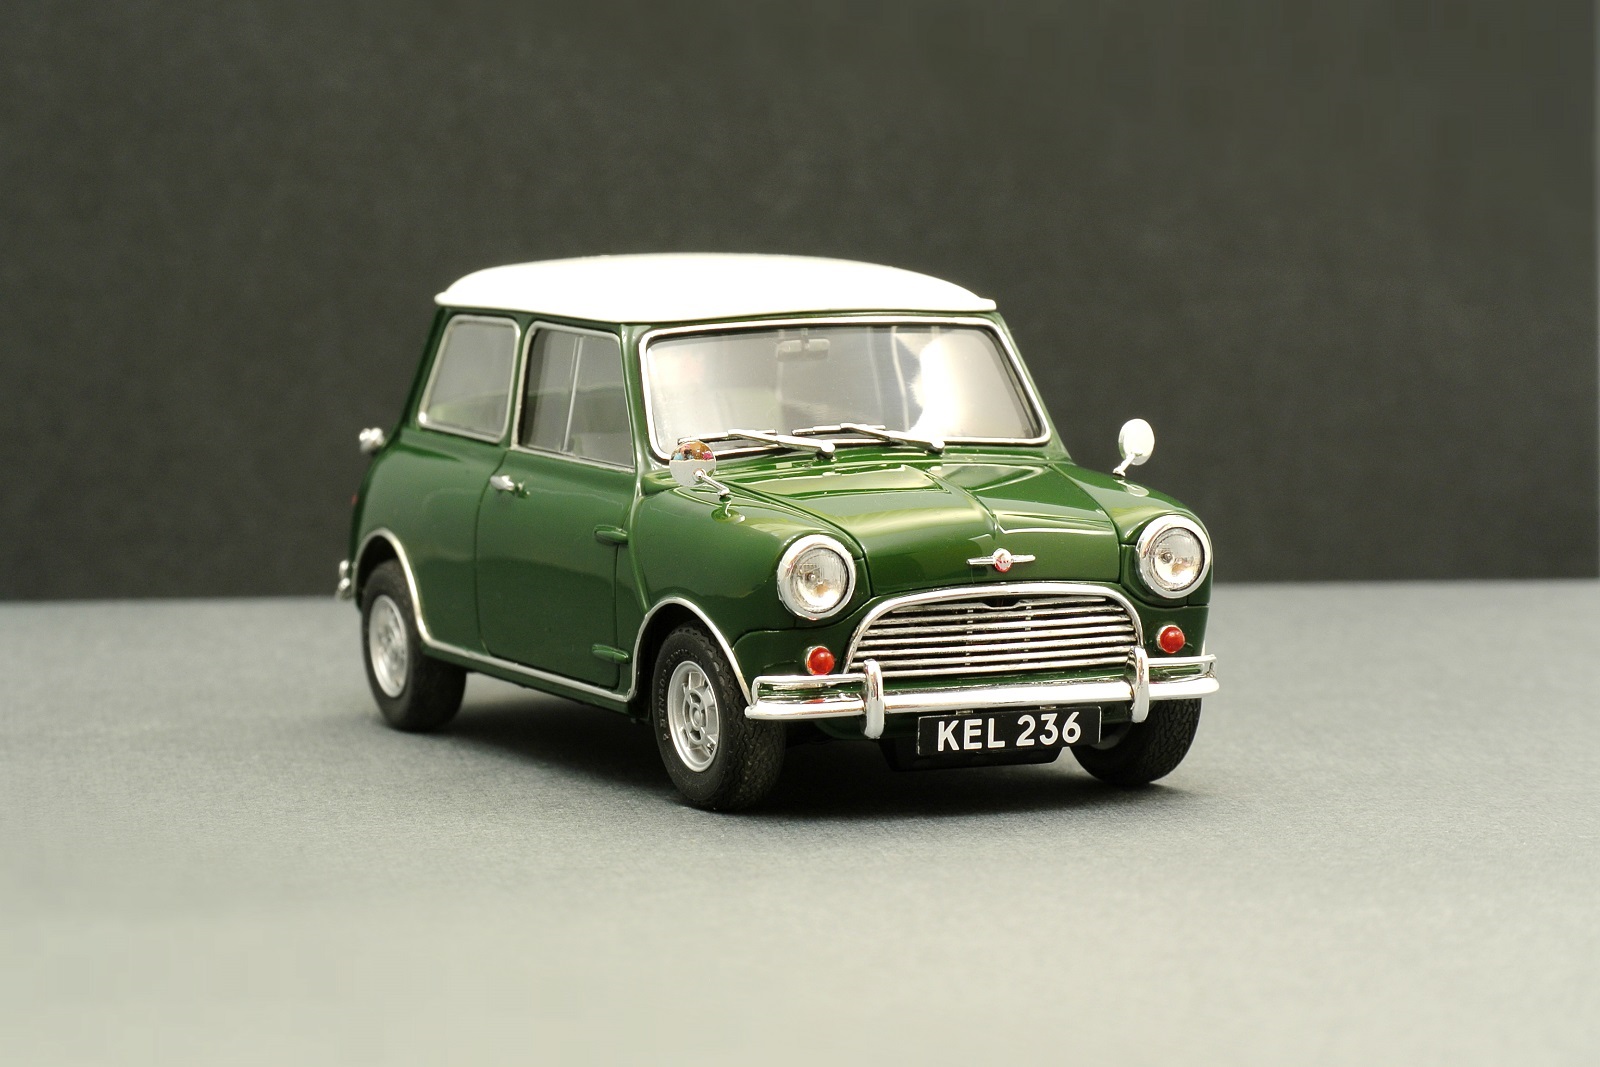
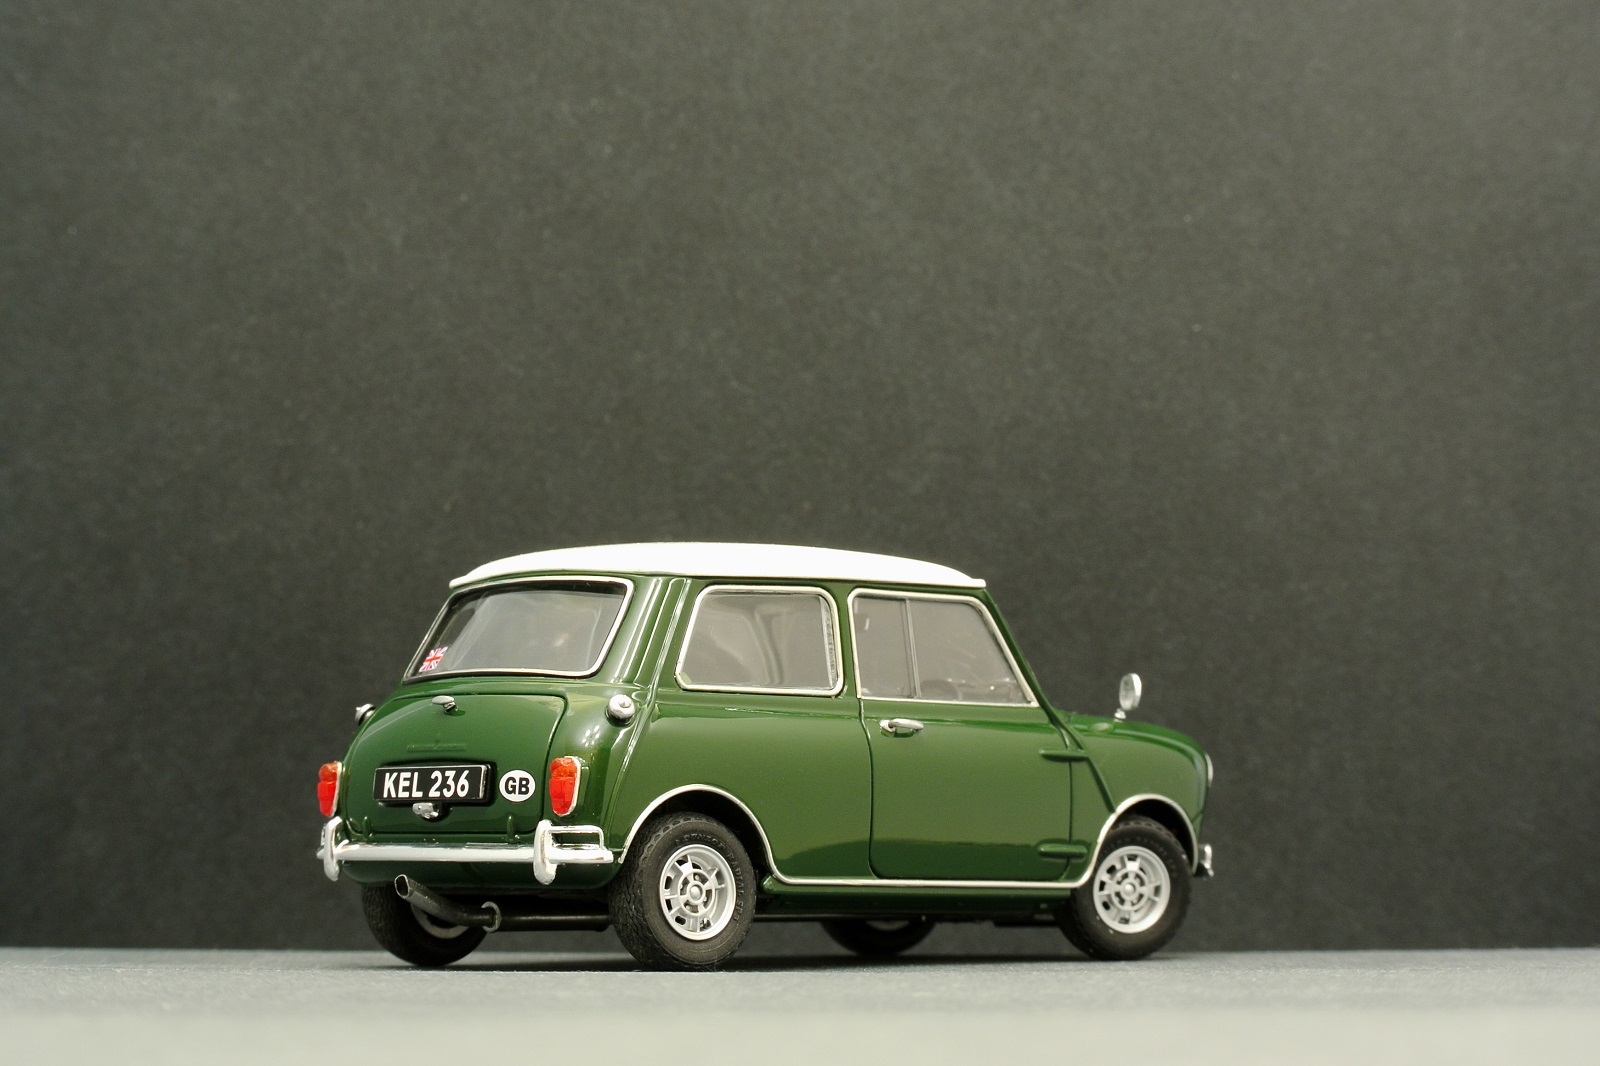
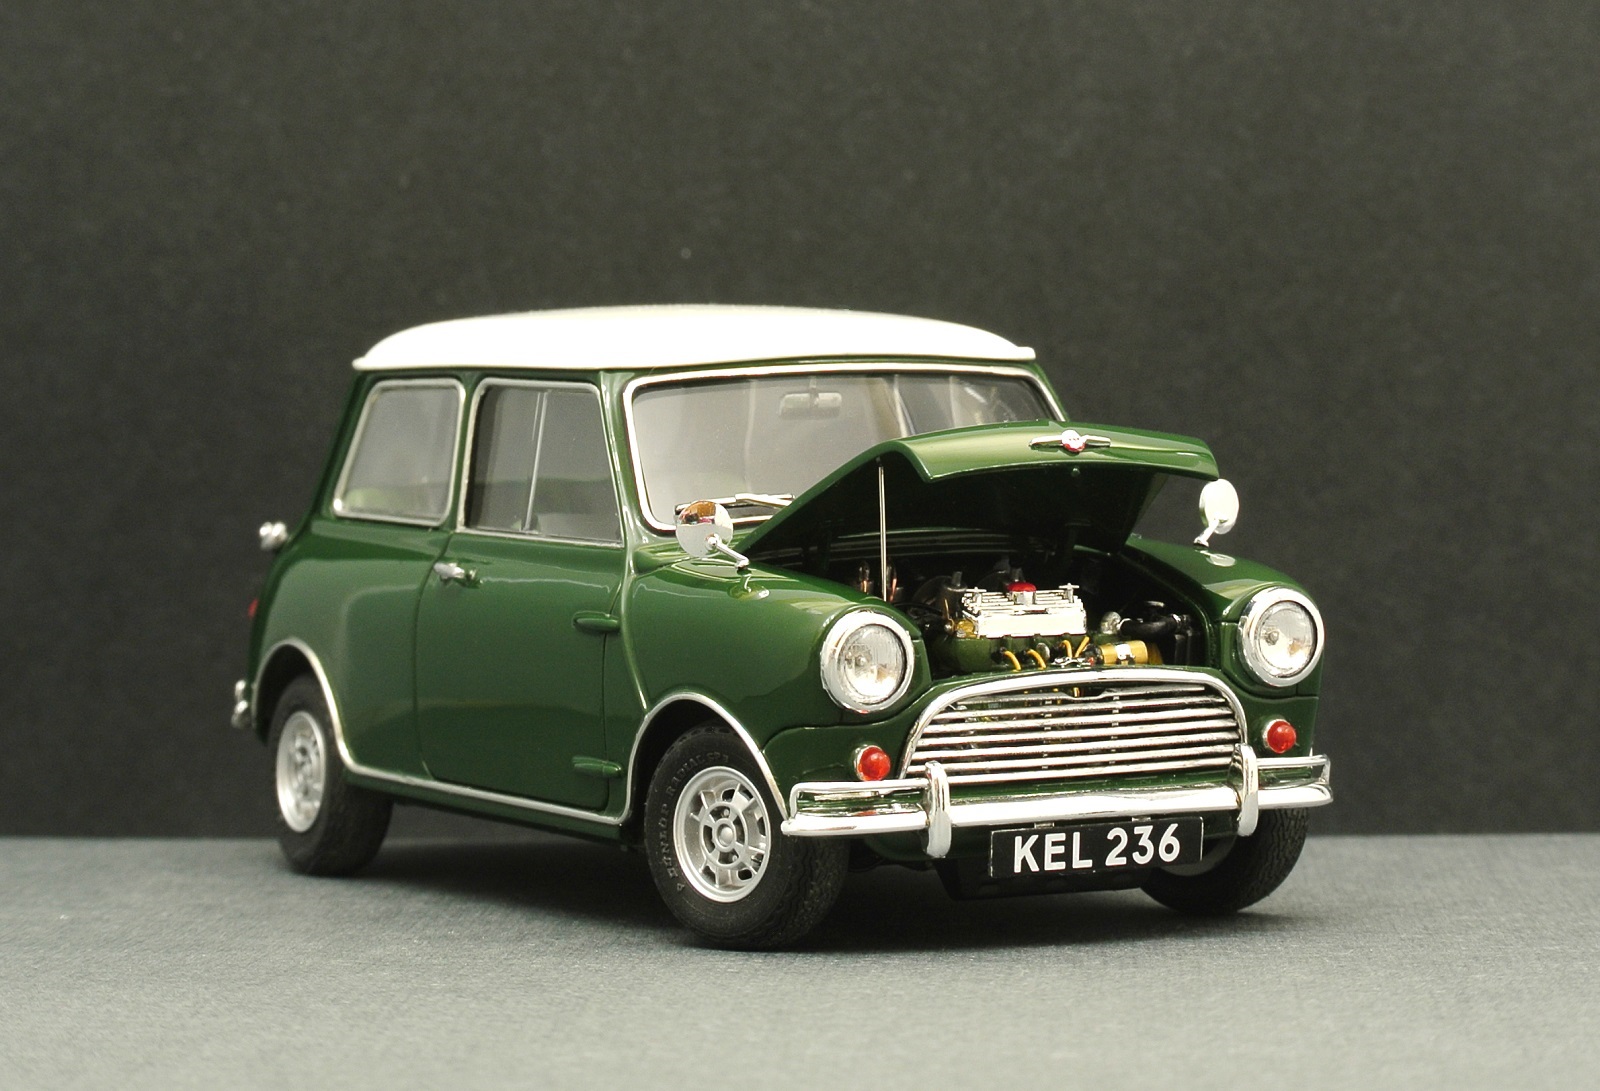
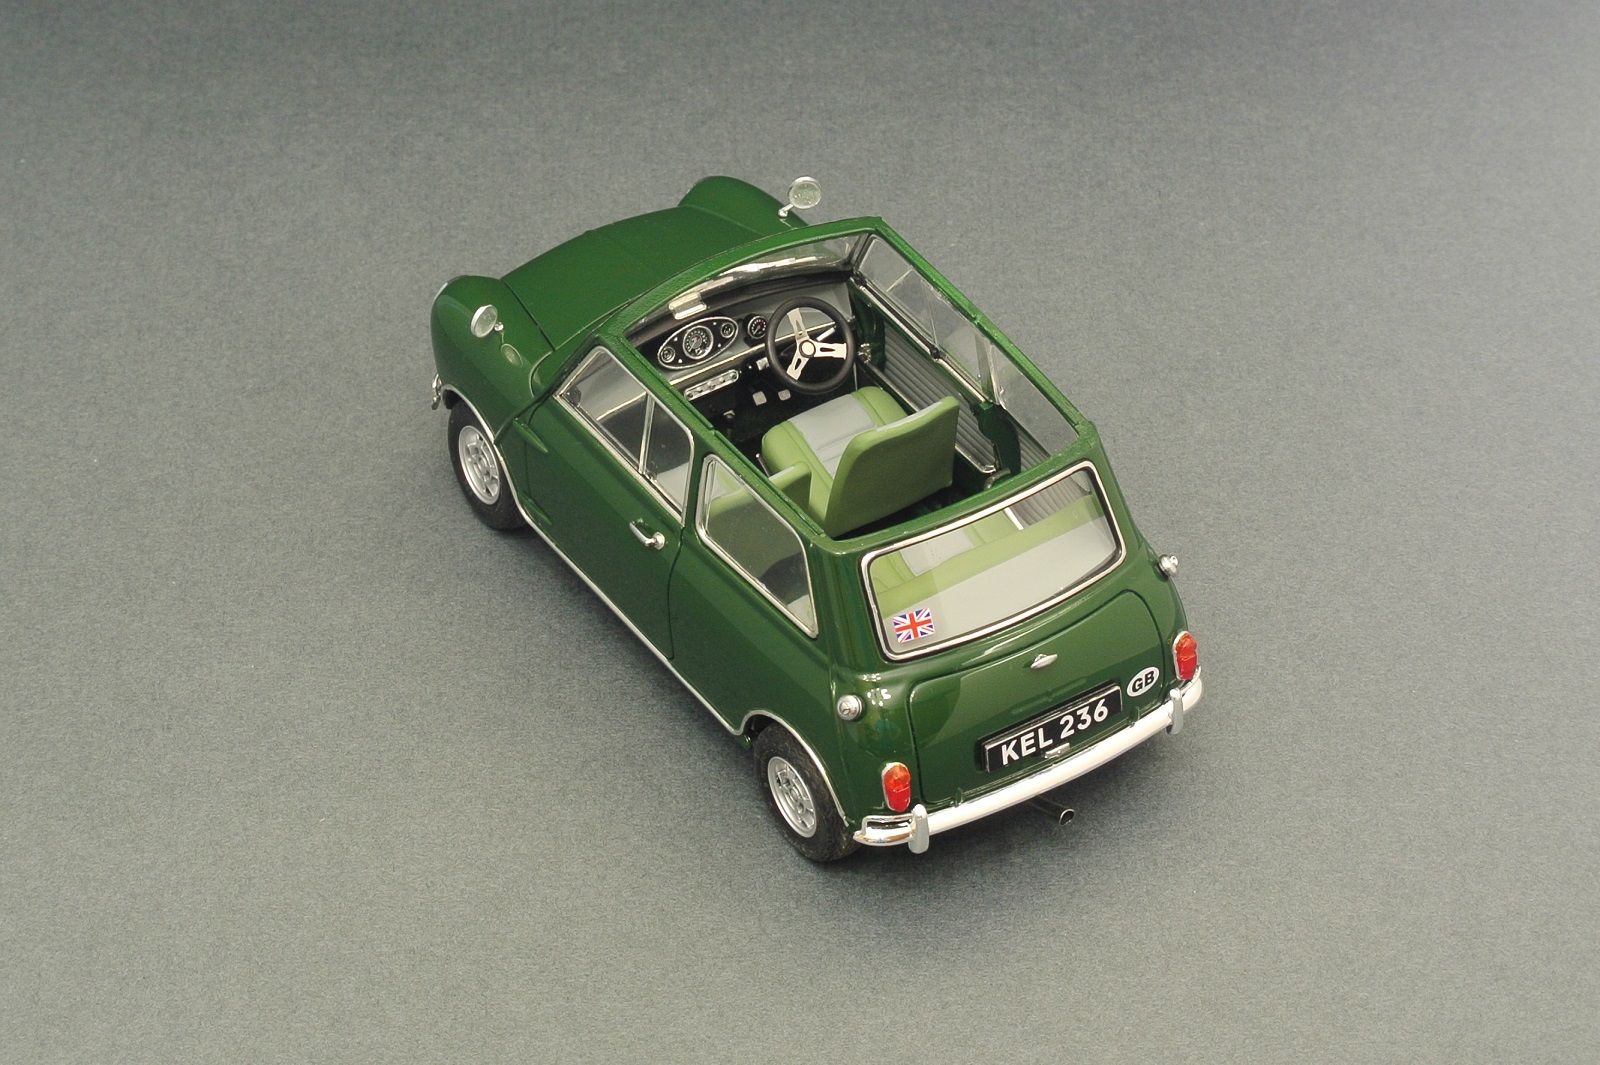
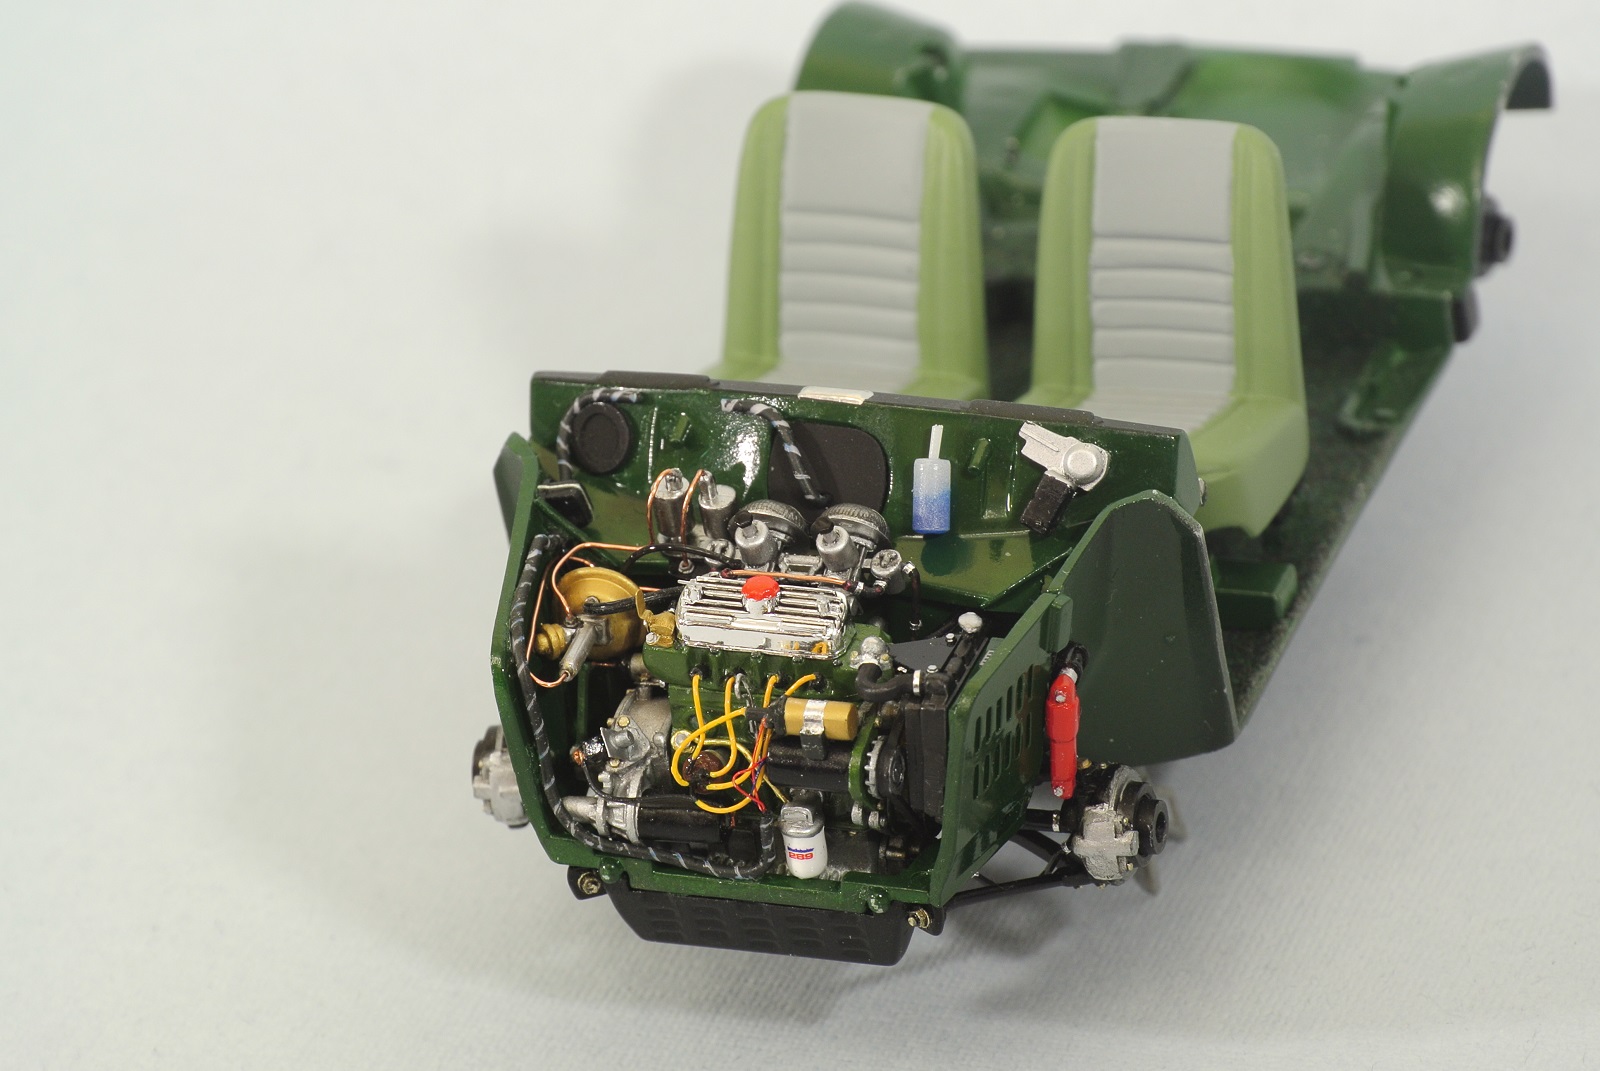
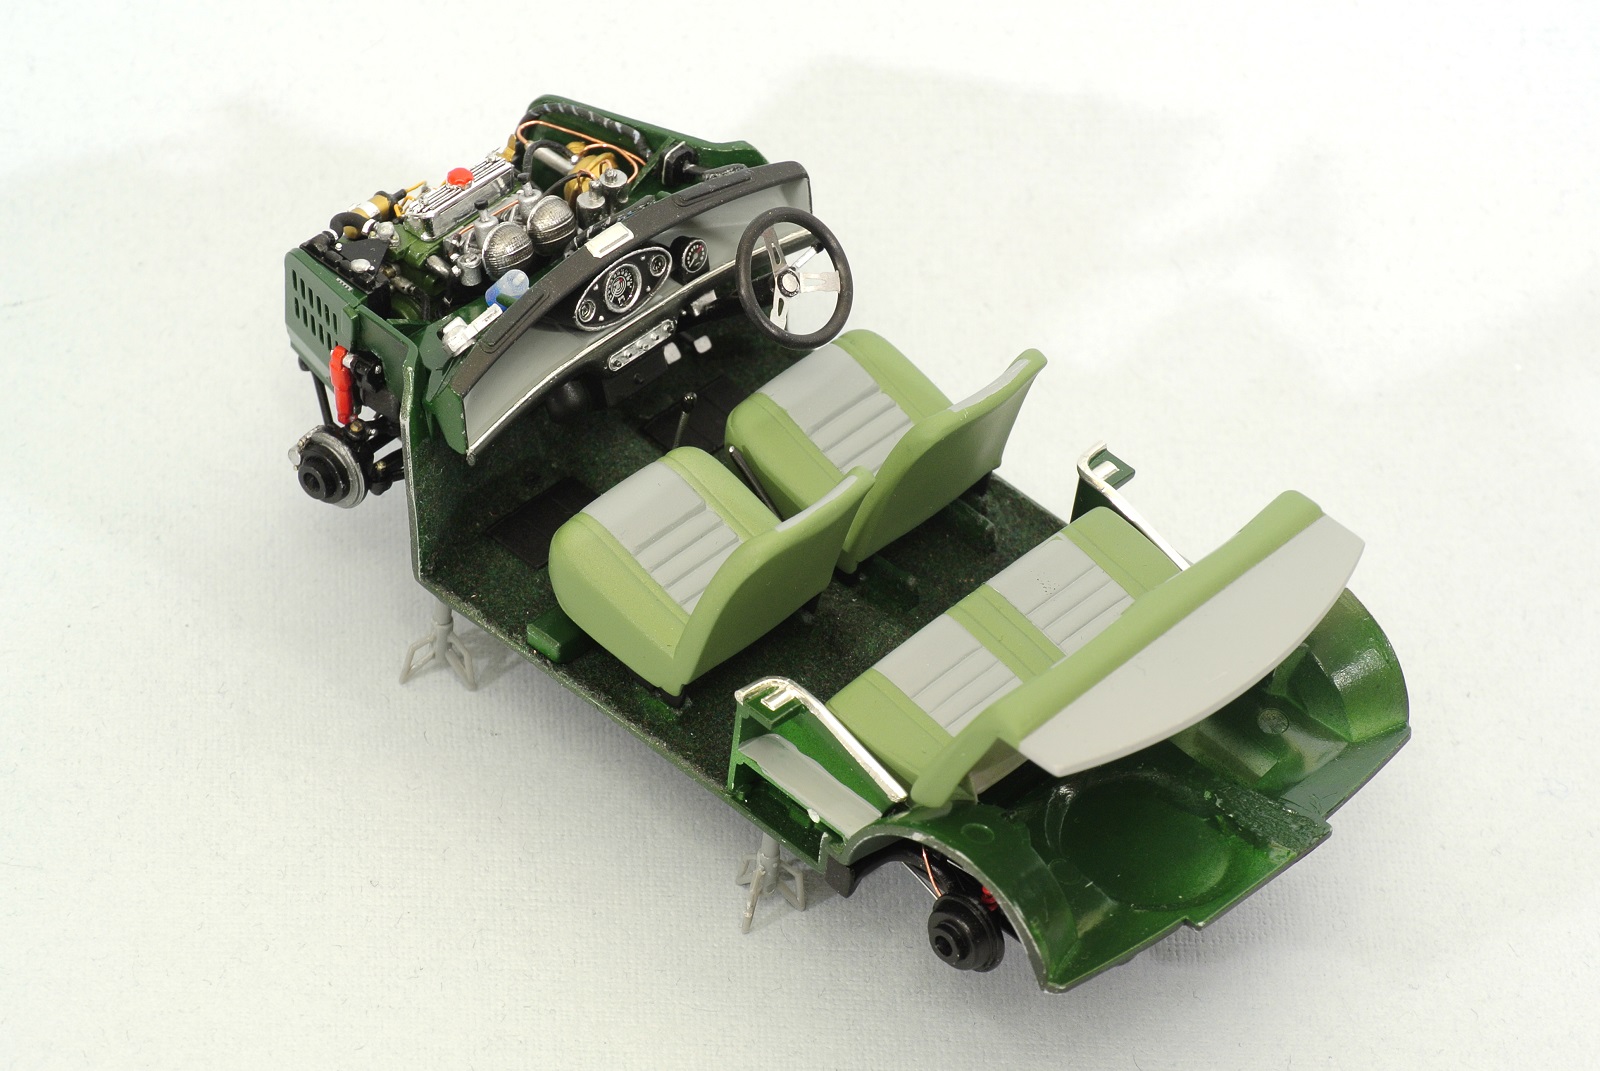
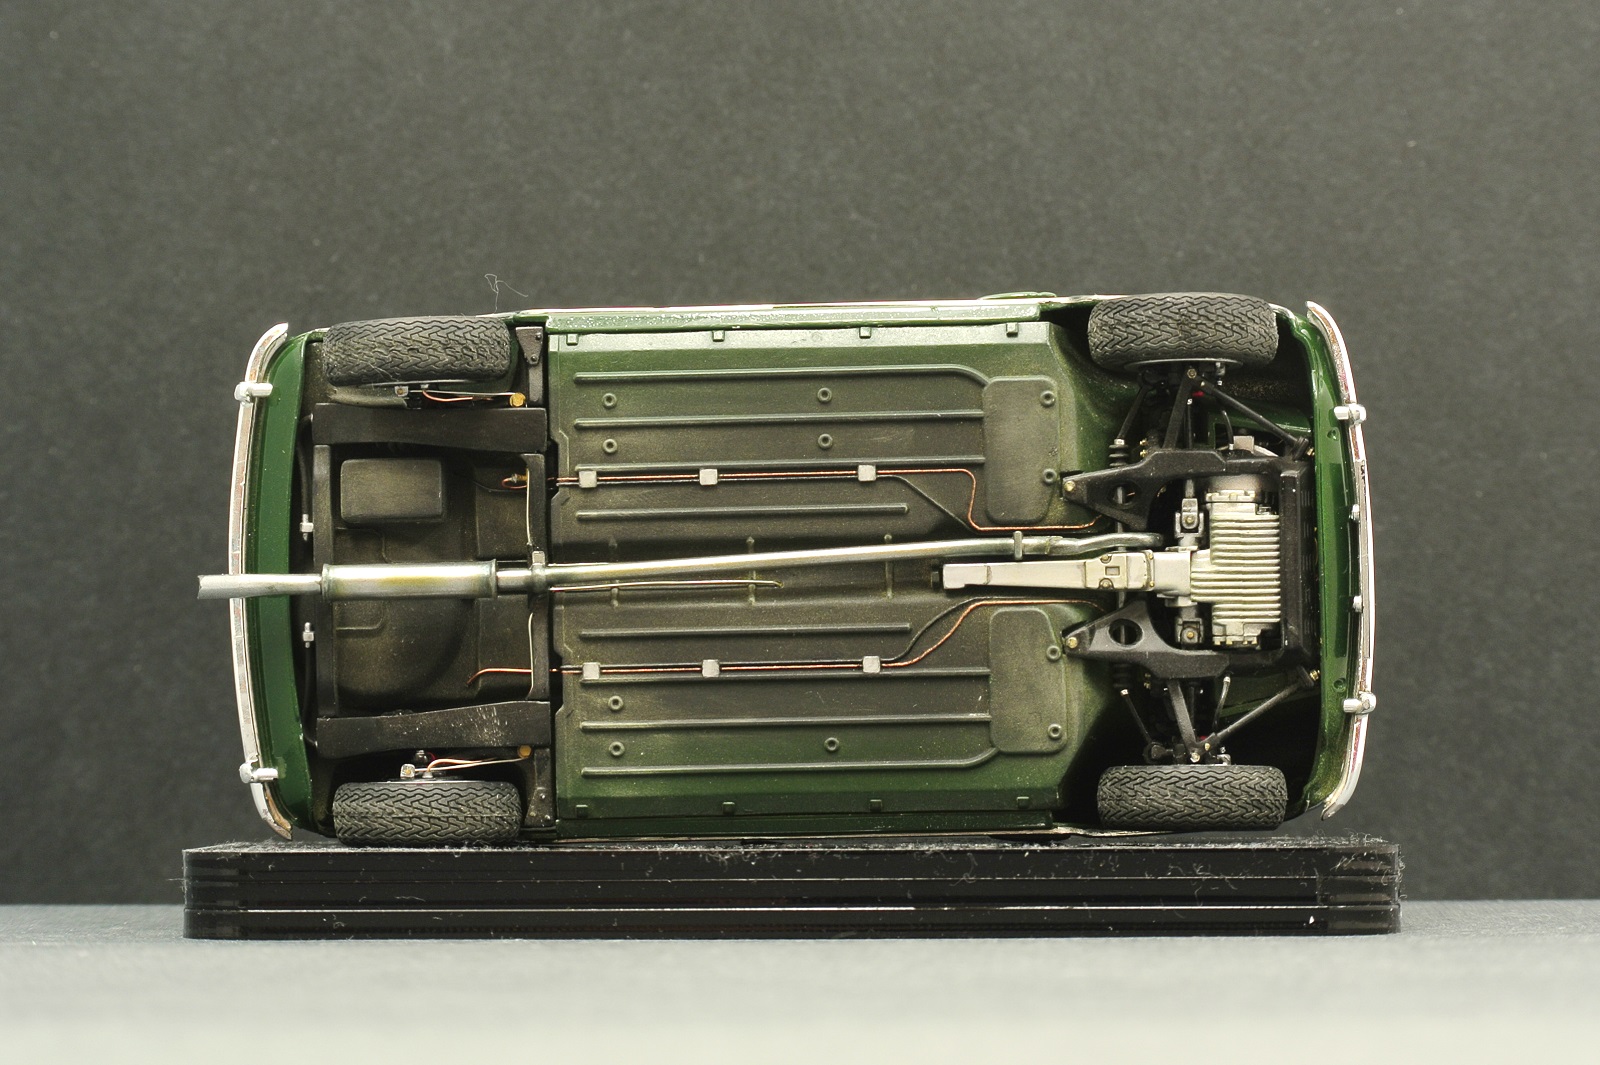
Hi all! I would like to show you my second build - Morris cooper mini Mk.1 Tamiya. Model was finished 8 months ago. The body is painted with green acrylic Mr.Hobby, top is covered with 2k varnish. The rest of the details were painted using the paints Tamiya, Testors, Mr.Color, AlcadII. I decided to maximize the detail of the engine compartment under the hood and the brake lines under the bottom, using a wire of different color and thickness. Also, many scratchbuild parts were added under the hood such as the radiator cover with the brackets, the oil dipstick with the engine tide, the clutch cylinder, the generator relay, the heater crane, the engine support, the speedometer niche and the salon air intake. As a whole there was still a lot of work to be done, but I can not enumerate everything. Only one significant mistake i made - logos on back door. I decided to paint it after varnishing, but I get thick coat of lacquer in this place and left unpainted as is Enjoy....
-
 My most recent build completed, the 'funny front end' Bimota Tesi 1D with hub centre steering. Tesi Unfaired1 by mike michael michaels, on Flickr tesi4 by mike michael michaels, on Flickr Build blog info and more detailed images here: https://miksmodelkits.wordpress.com/2017/08/24/tamiya-bimota-tesi-1d-906sr-112/ Build video series on my youtube channel here:
 -
Changed this inquiry into a poll . Feel free to add your choice(s) to the list ( example : I'd like to see a 1971 GMC Sprint SP-1 or How about a Toyota Stout ! ) . Have fun !
-
 Well, this one is a real challenge. I am going to super detail it like I have never done before on any other model. I have the Scale Motorsports CF decals, the Top Studio super-kit and the chain kit (yeah, build this chain one link at a time, about $40 too. I bought an already built chain for my mountain bike for $20). I also have the brass fork kit from Tamiya. I had the super-kit for a good few years, in fact I had it for three years before I bought the bike kit. I had bought it for another bike kit not realizing it wasn't the correct kit number to go with it. Then when I decided to finally build it I had to order the chain kit, I had thought it was part of the super-kit which it wasn't. I got it from Japan in 8 days. The fork kit was discontinued, but I found it on Amazon for $15 from some Japanese company that seems to sell just toys. That took almost 2 weeks. I also added Pro Tech braided oil line with hex AN fittings. So here are mostly engine pictures and a some frame shots.Box art" All the stuff going into the kit: Engine shots: The frame:
 -
Hello, here is one of my latest builds.. Its Tamiya`s Mini with brush paintjob and some added details, not much since its allmost out of box model..
-
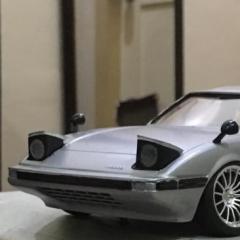
I wanted to make another fast build since my last one was a lot of fun and turned out great (Link to its U-G thread: http://www.modelcarsmag.com/forums/topic/123302-porsche-911-outlaw-8-hour-build/ ). This newest build took three days from start to finish, but the middle day became a resting day with no progress since work was very tough that day. I decided on the Tamiya Starcard Porsche 911 GT2, and at the start I was going to build it with the Starcard livery, but in the end I decided to dust some Tamiya TS19 Metallic Blue over the black plastic which the body is molded in. It turned out great; a very dark color with a lot of blue pearl and sparkles in it. Here's a few photos, enjoy!
-
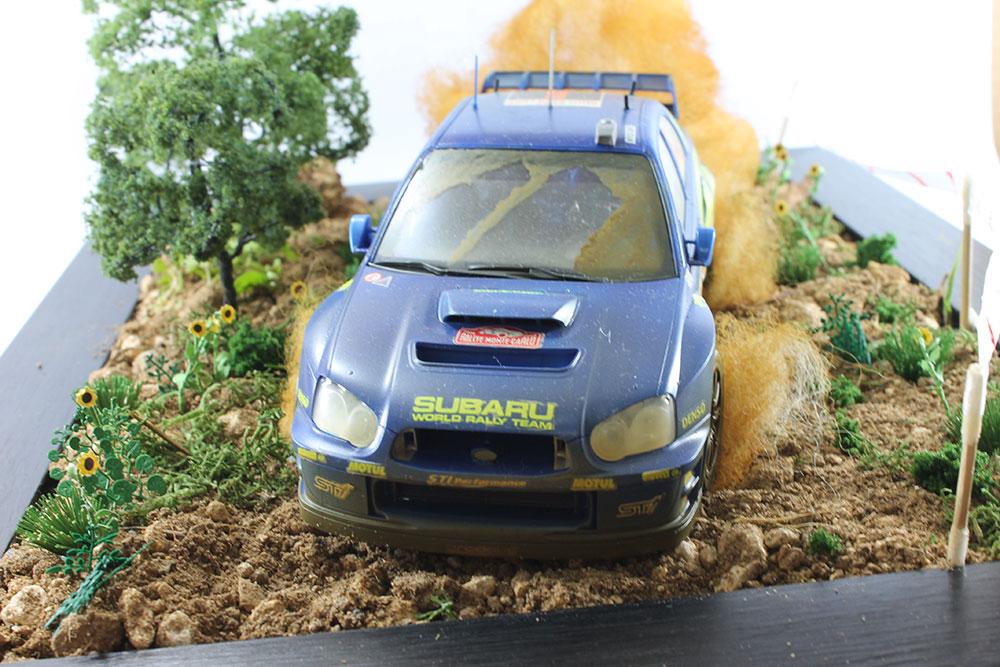
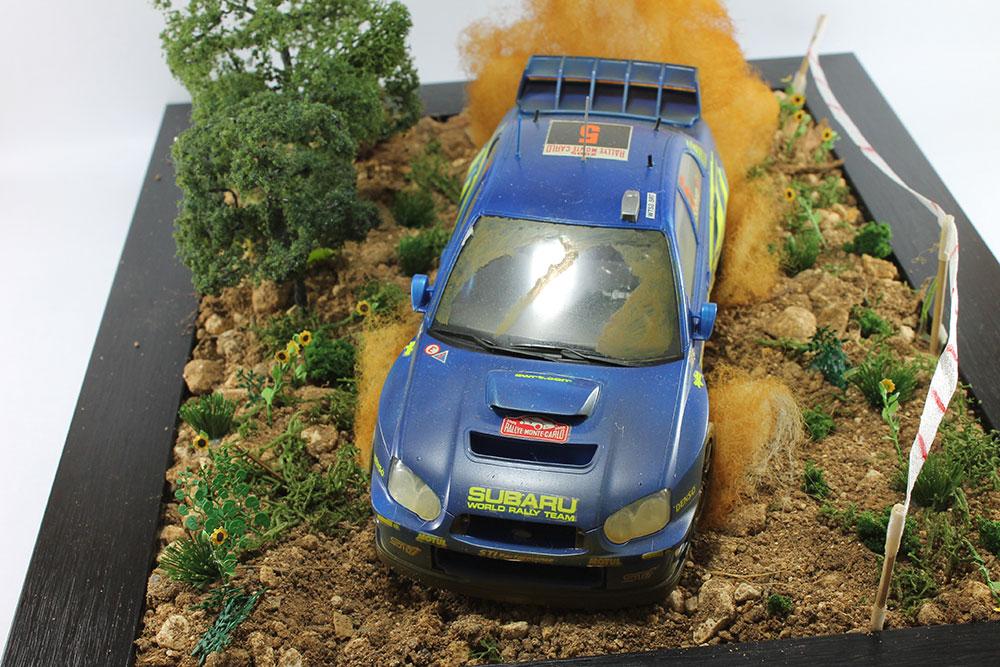
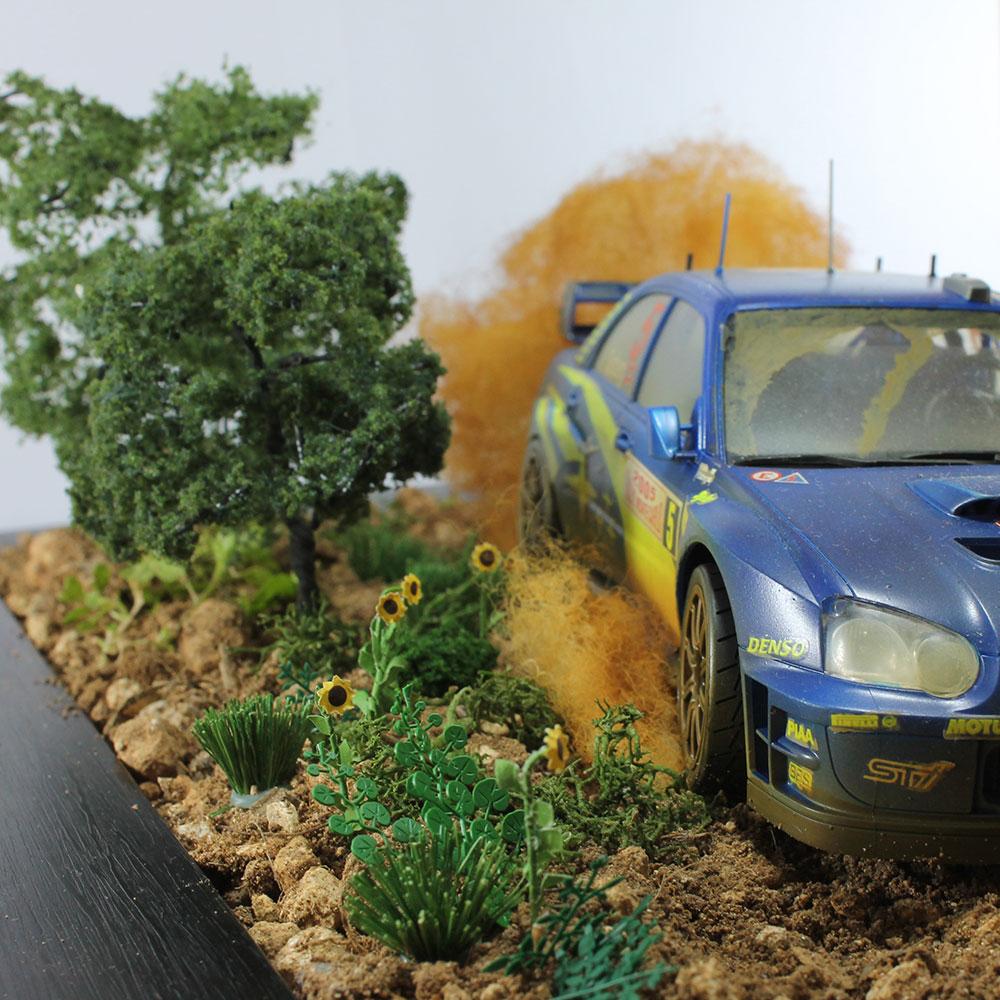
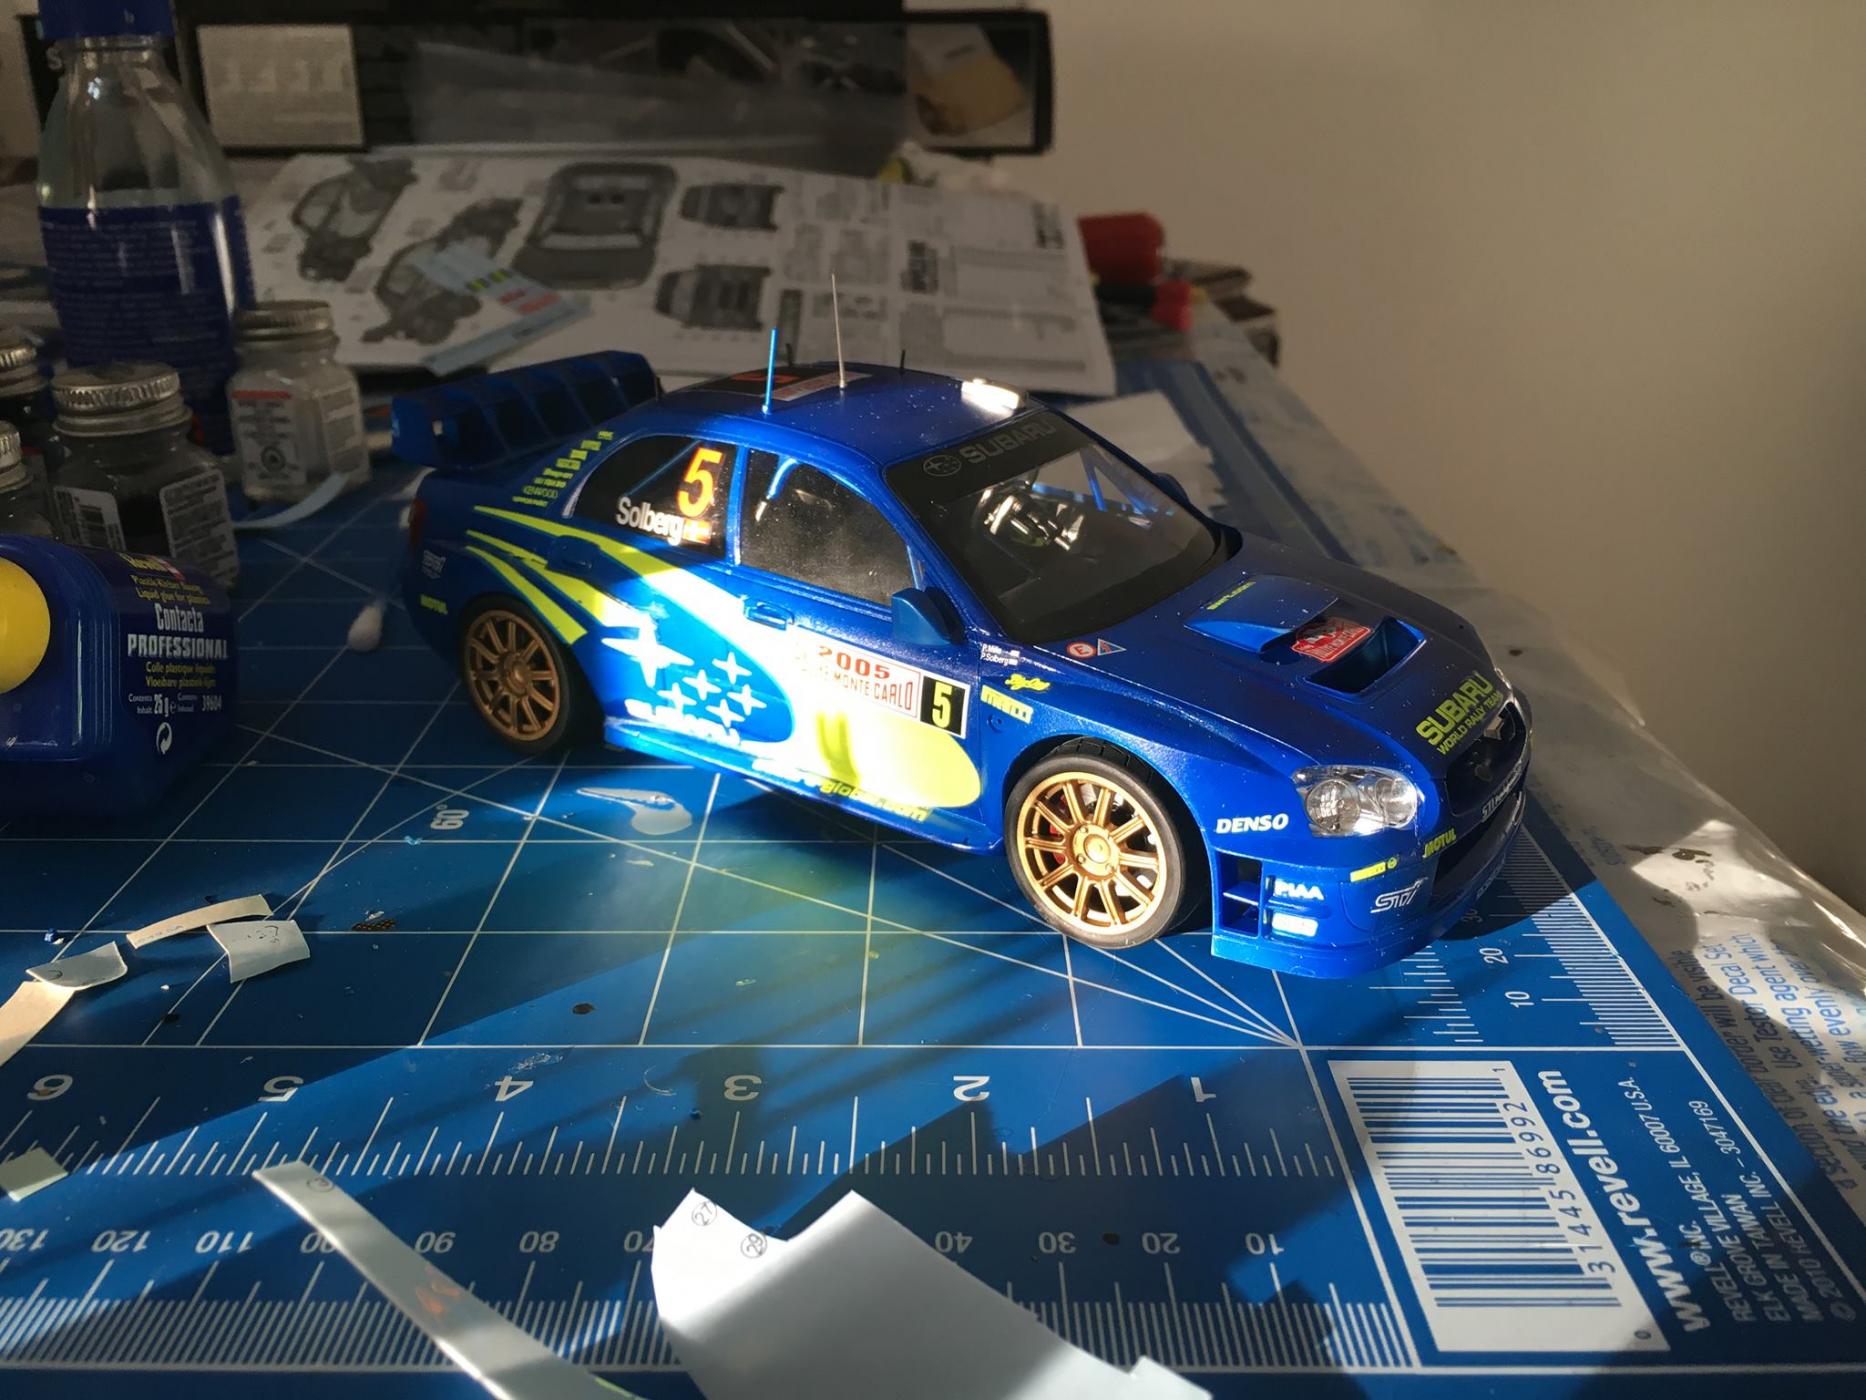
Great model this, went together soo well, only has issues with the gloss coat & the flocking. I do have a WIP post as well... Enjoy! Criticisms welcome.
-
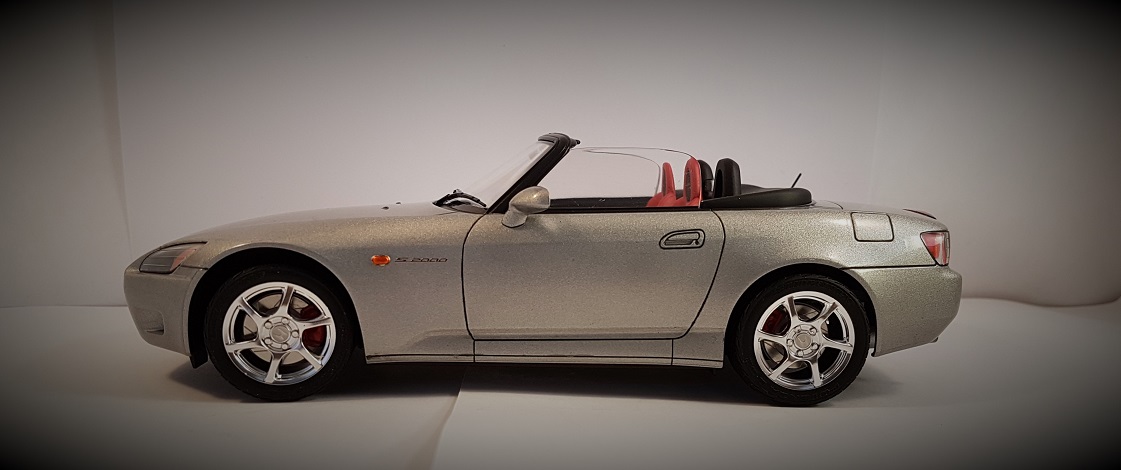
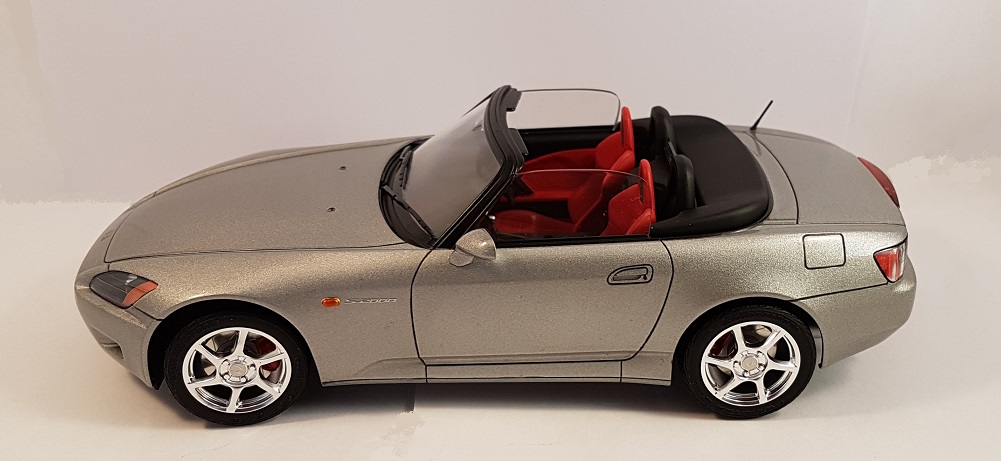
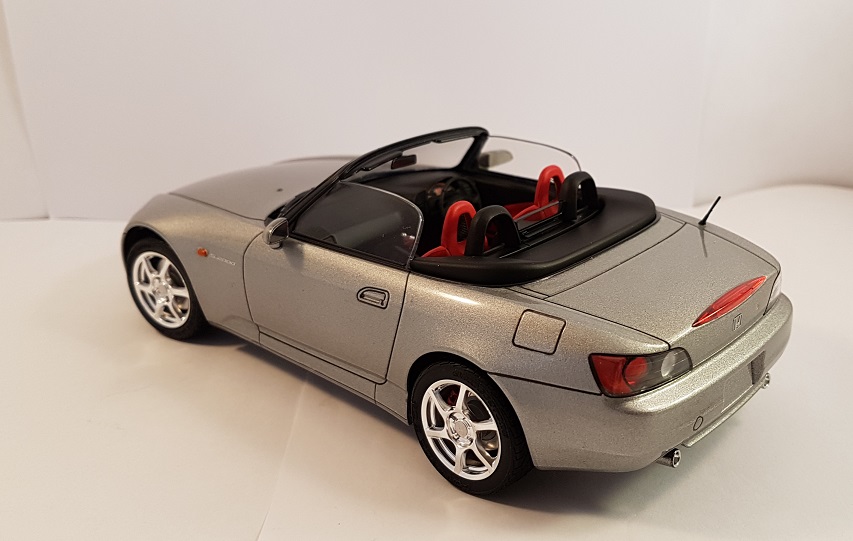
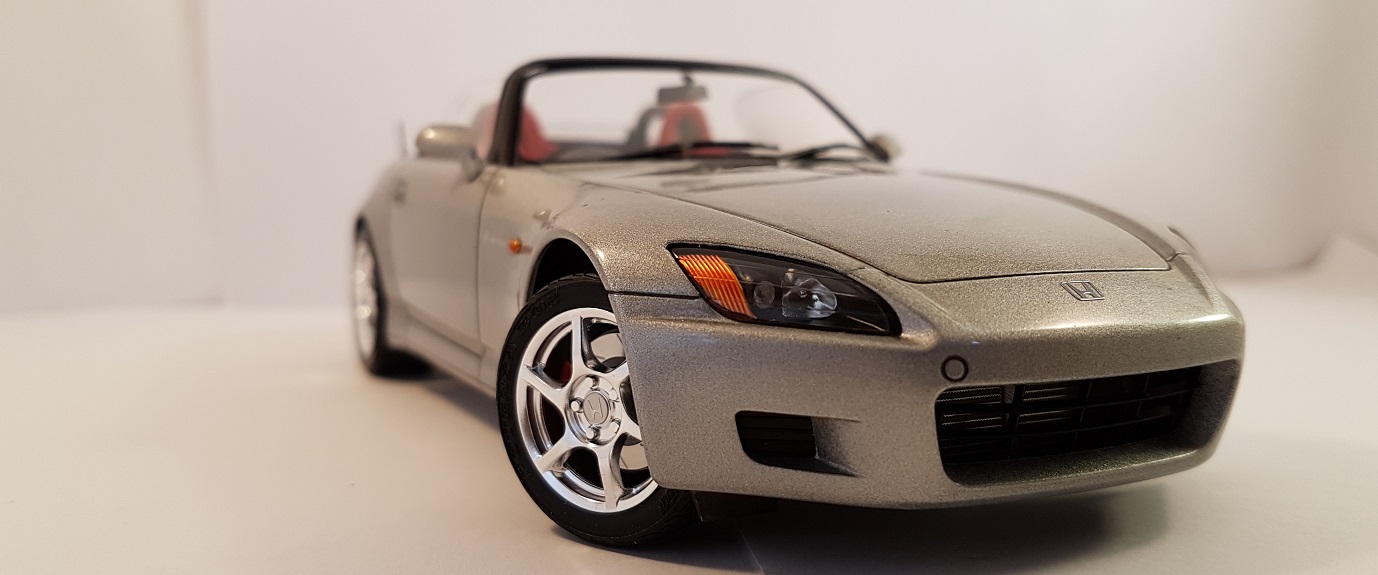
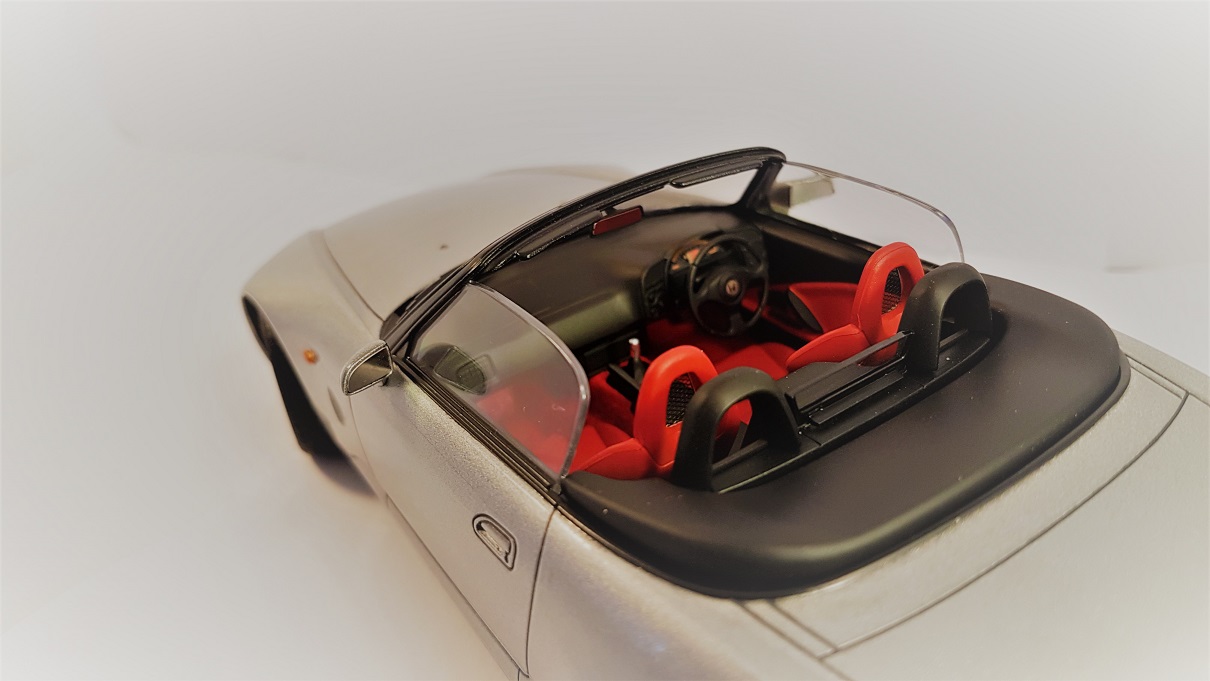
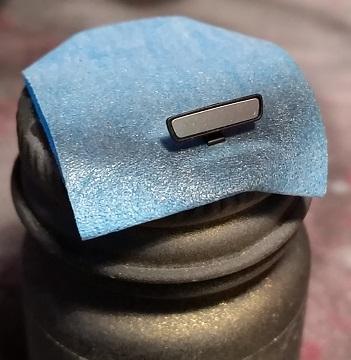
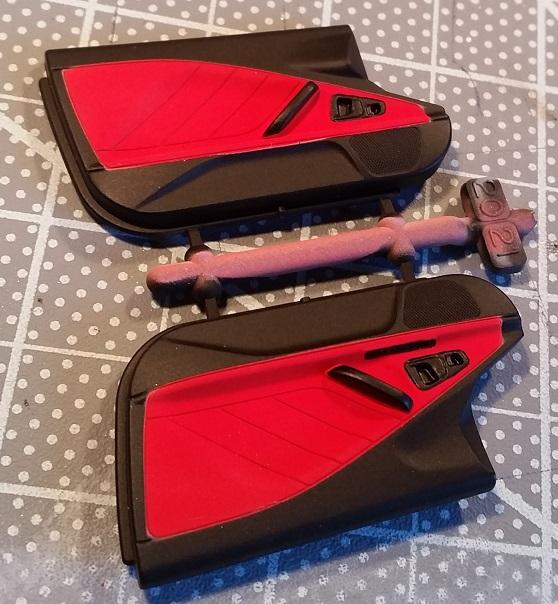
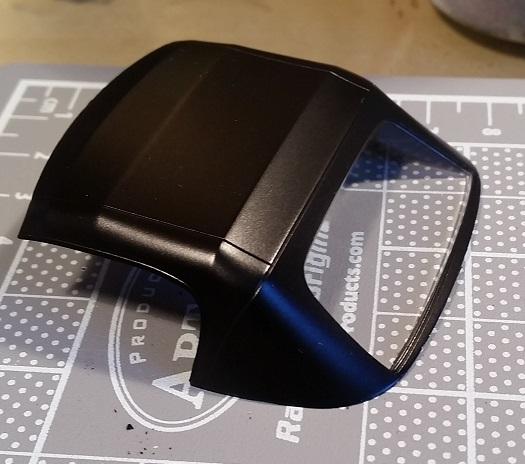
I always wanted an S2000, but it was too impractical, so I ended up with a civic type R instead - which is a car I loved to own, so much so, that I ended up keeping it for 5 years and sold it on at 90k on the clock (miles). Any how, decided to do this build as it's curb side, and should be quick. I haven't actually finished a model in 2 and a half years due to house renovations. This will be a quick build with not too much detail, I want to learn more about clear coating with 2K, and use my first set of PE in earnest. Box art: Using Hobby Design Photoetch: I've cut out the grill to add P/E later: Finished the chassis: (made a hash job of the wash on the sump & transmission) Finished 2 bits of the interior too: and the cabriolet hood:
-
So, this was sitting for a long time now, very much unfinished, becuase im still working on the rx7, which is still waiting for some sprays and clear coat but i still have high hopes with this!
-
Started up this build lately, i might get it finished before christmas, i think i must hurry up with it...
-
Had some fun with this build, it kind of created it self while i did seek ideas what i could use.. Mix of decals i had and so on.. Best part of this hobby, havin fun Cheers...
-
How about some hippie beetle? Far from Perfect but i was bit in Purple Haze while building it, and i really enjoyed... Peace man...
-
well, it's been over a year, since I last built a kit. I had to move home and then get one of the rooms fixed up as a hobby room, so it's been a while. anyway, here's the Tamiya Citroën 2CV. Weathering was done using the salt technique and some pastels. suspension was lowered very easily, thanks to the way the kit is engineered. I added wires and gubbins under the hood, a battery clamp and a relay box. I also added valve stems to the wheels, but you can hardly see them! Interior junk was also added, along with some tape repairs to the roof and drivers seat. here are the pics. I hope you like it All comments welcome, thanks for looking
-
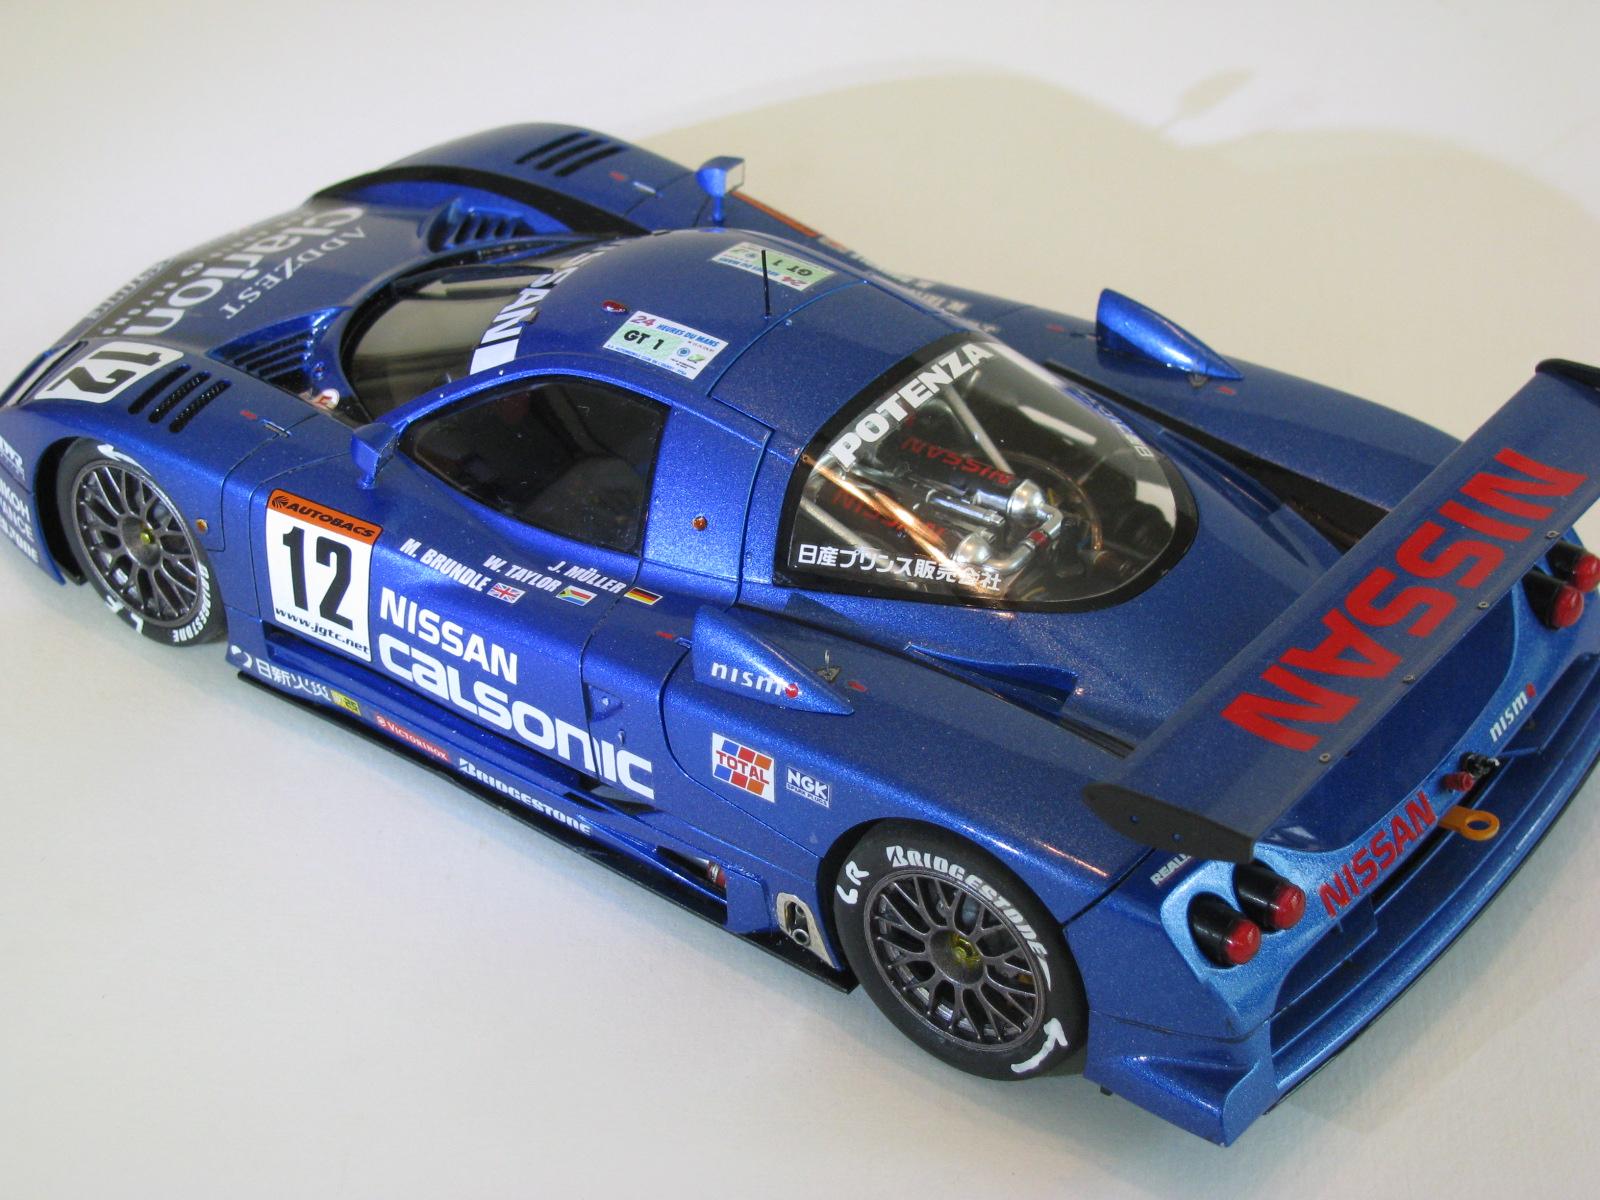
This is the Tamiya 1/24 scale kit of the Nissan R390 GT1 Le Mans car, and the body shell was spray-painted with Tamiya Metallic Blue over a base of Silver Leaf. Paint was polished up with MicroMesh 3200 grit thru 12000 grit, then rubbed up with Meguiar's Scratch-X. Mesh was added for vents and grills, and kit decals were used, as well as a few sponsor decals from Scale Motorsport. A lot of stuff added to the engine bay - thermostats were added to the radiators and exhaust system, hand-made shielded cable, fuel line, transmission fluid box, and tail light wiring from Model Factory Hiro, & spark plug wires from Detail Master. Exhausts were given a bit of Tamiya burnt metal powder pigments for added realism. Driver electronics are fully wired from comm. boxes, to temp gauges, to front lights. Front brake air ducts were scratch-built with parts-box leftovers. The P/E rivets and fast-release hood pins are from Scale Motorsport.
-
Finished this one last night, my very first Tamiya kit. Very well engineered, the only trouble I had was the metal transfers, the kit is old and they wouldn't stick. I used a little Micro Crystal Clear on the ends to keep them on. Pretty happy with the outcome, not my usual subject. Comments welcome, thanks for looking!
-
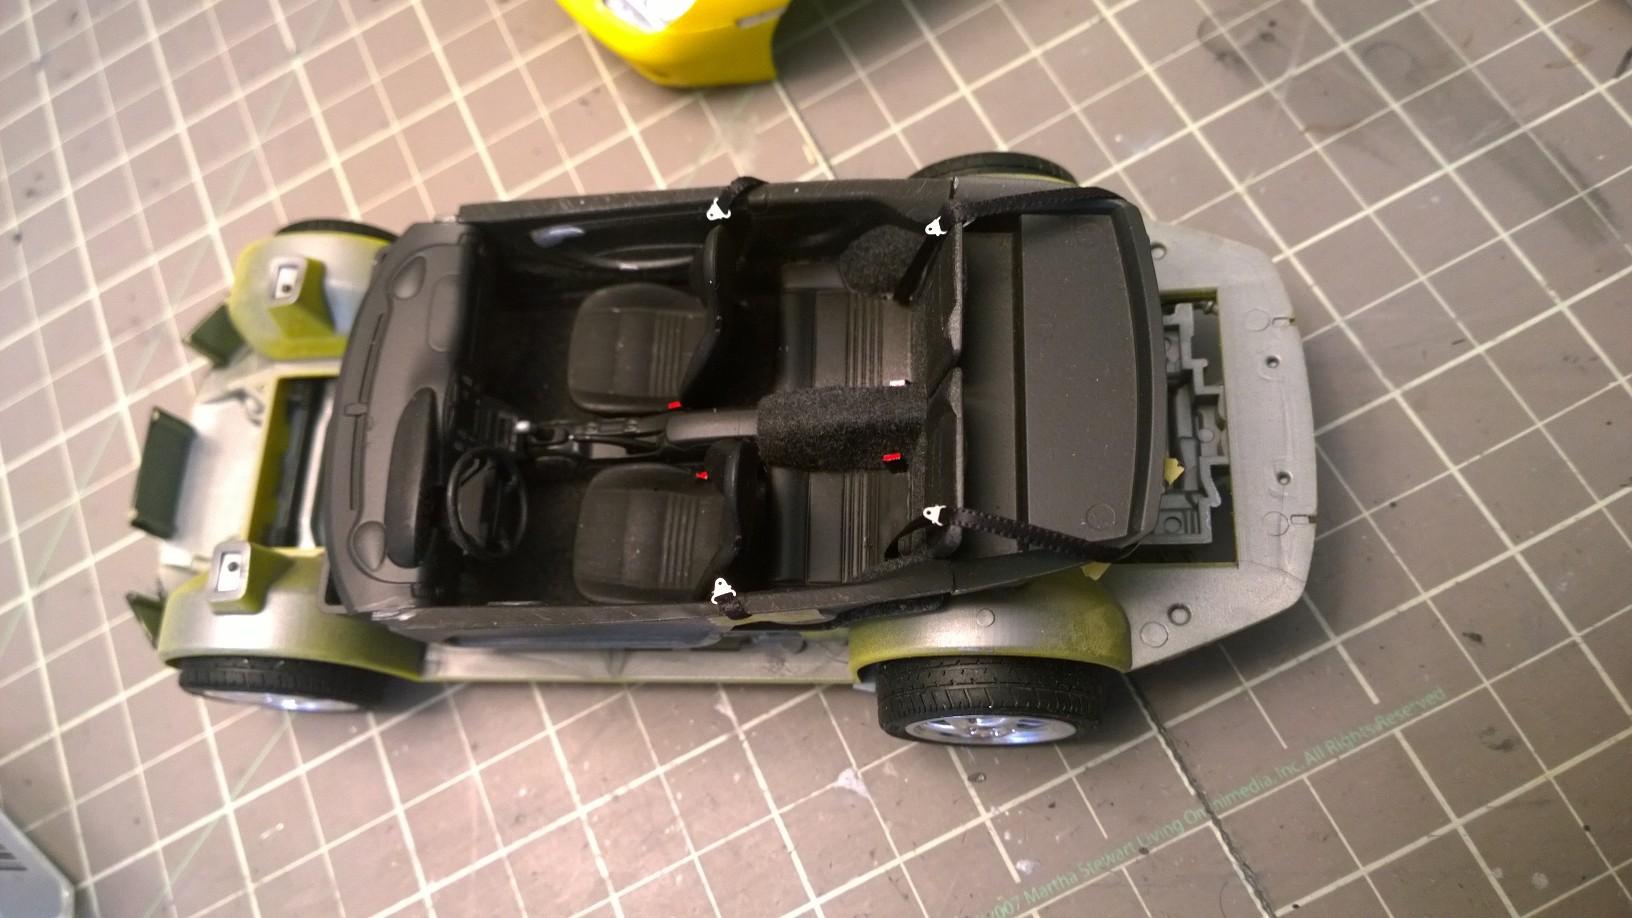
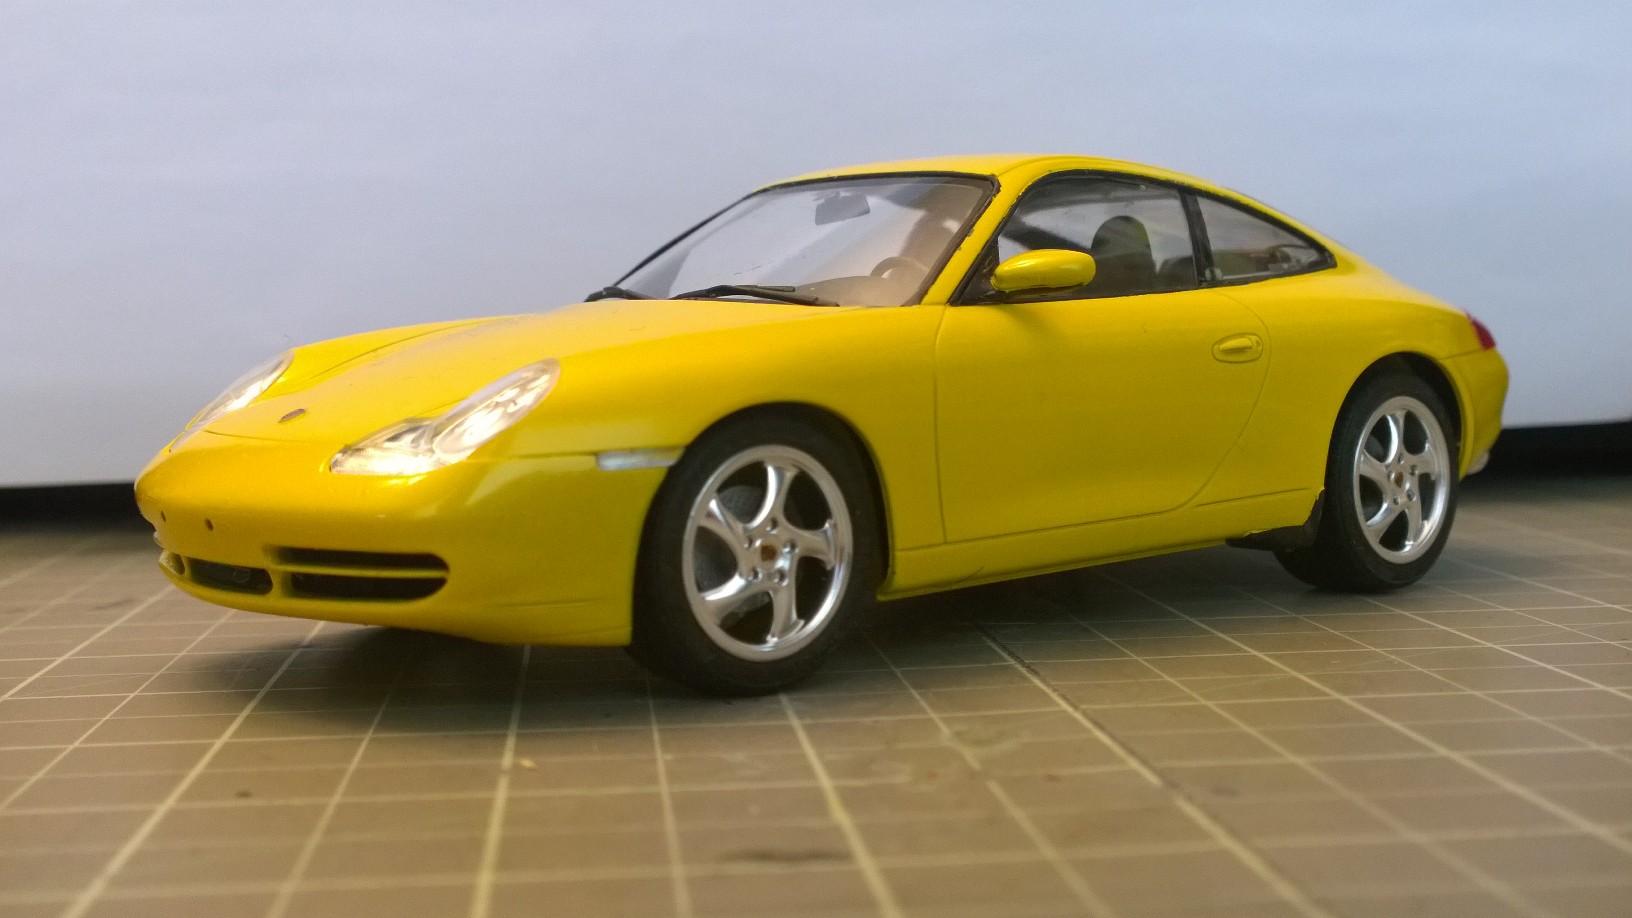
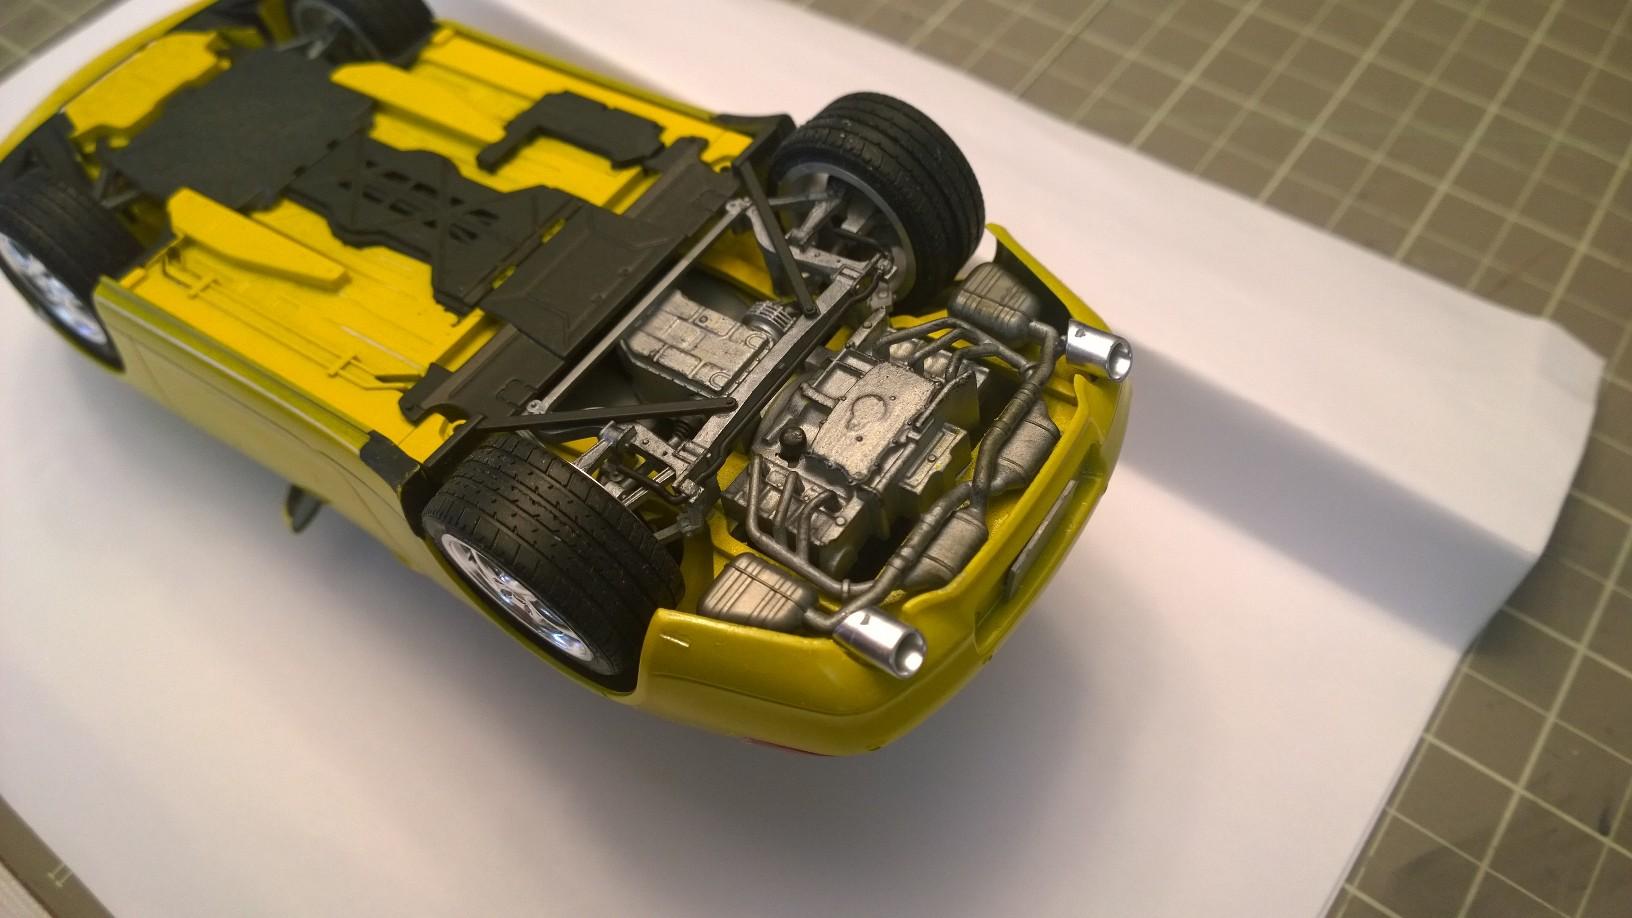
Finally finished this one. It's the Tamiya kit and I bought it about 5 years ago for $5 on Ebay. Body parts had been partially glued together, but no painting done on it. Luckily, after I got it stripped (without breaking anything) I discovered that everything was there. Yellow isn't my fav Porsche colour, but I went with a combo near and dear to my heart. I spend many years working for the local Porsche dealership. After I transferred to sales, the first factory order I took was a 2000 Porsche 996 coupe. Speed Yellow with black leather, 18" chrome Turbo alloys, sport exhaust, manual transmission, navigation, sunroof delete. When the car arrived, all orange reflectors were replaced with clear pieces. So this is my version of that car. The holes in the front bumper are intentional. In my province, we don't require front plates, so the when the new cars arrive, they arrive with two holes in the front bumper for mounting the plate holder. I think I did a decent job on the interior, but I'm not happy with my paint. The black trim bugs me. Having said that, I'm comfortable enough with it to call it done. As for photography, I think I need to start wiping everything with microfibre cloths or something, as there's dust all over this thing that wasn't visible when I was taking pics. Anyway, there it is.
-
Here's my first build of 2015. Tamiya Nissan Calsonic Skyline. My first Tamiya kit. Have to say it was a pretty good one. My interest in this one came from my love of playing racing games like Gran Turismo and Forza Motorsport. Box stock. Took me 3 paint jobs to get it right. First time I tried to settle with the testors blue enamel that Hobby Lobby had. Mistake. She took a bath in degreaser. Second time I had er slick and went through while polishing. So the THIRD time I laid on 5 coats clear and it finally worked out. While I was impressed with the kit, I was NOT impressed with their spray paint. Went on slick and as it dried it fuzzed up something awful. The slick paint you see is the 5 coats of clear and a lot of elbow grease. Hope everyone likes it.
-
I built this replica of my dad's '85 CRX Si 28 years ago for his birthday in '86. It's one of the my oldest surviving builds. I had to do a little repair work on it recently, so I cleaned it up and photographed it for my web site. You can see more pics at the link. http://www.svensworldofwheels.com/85_honda_crx_page.html
-
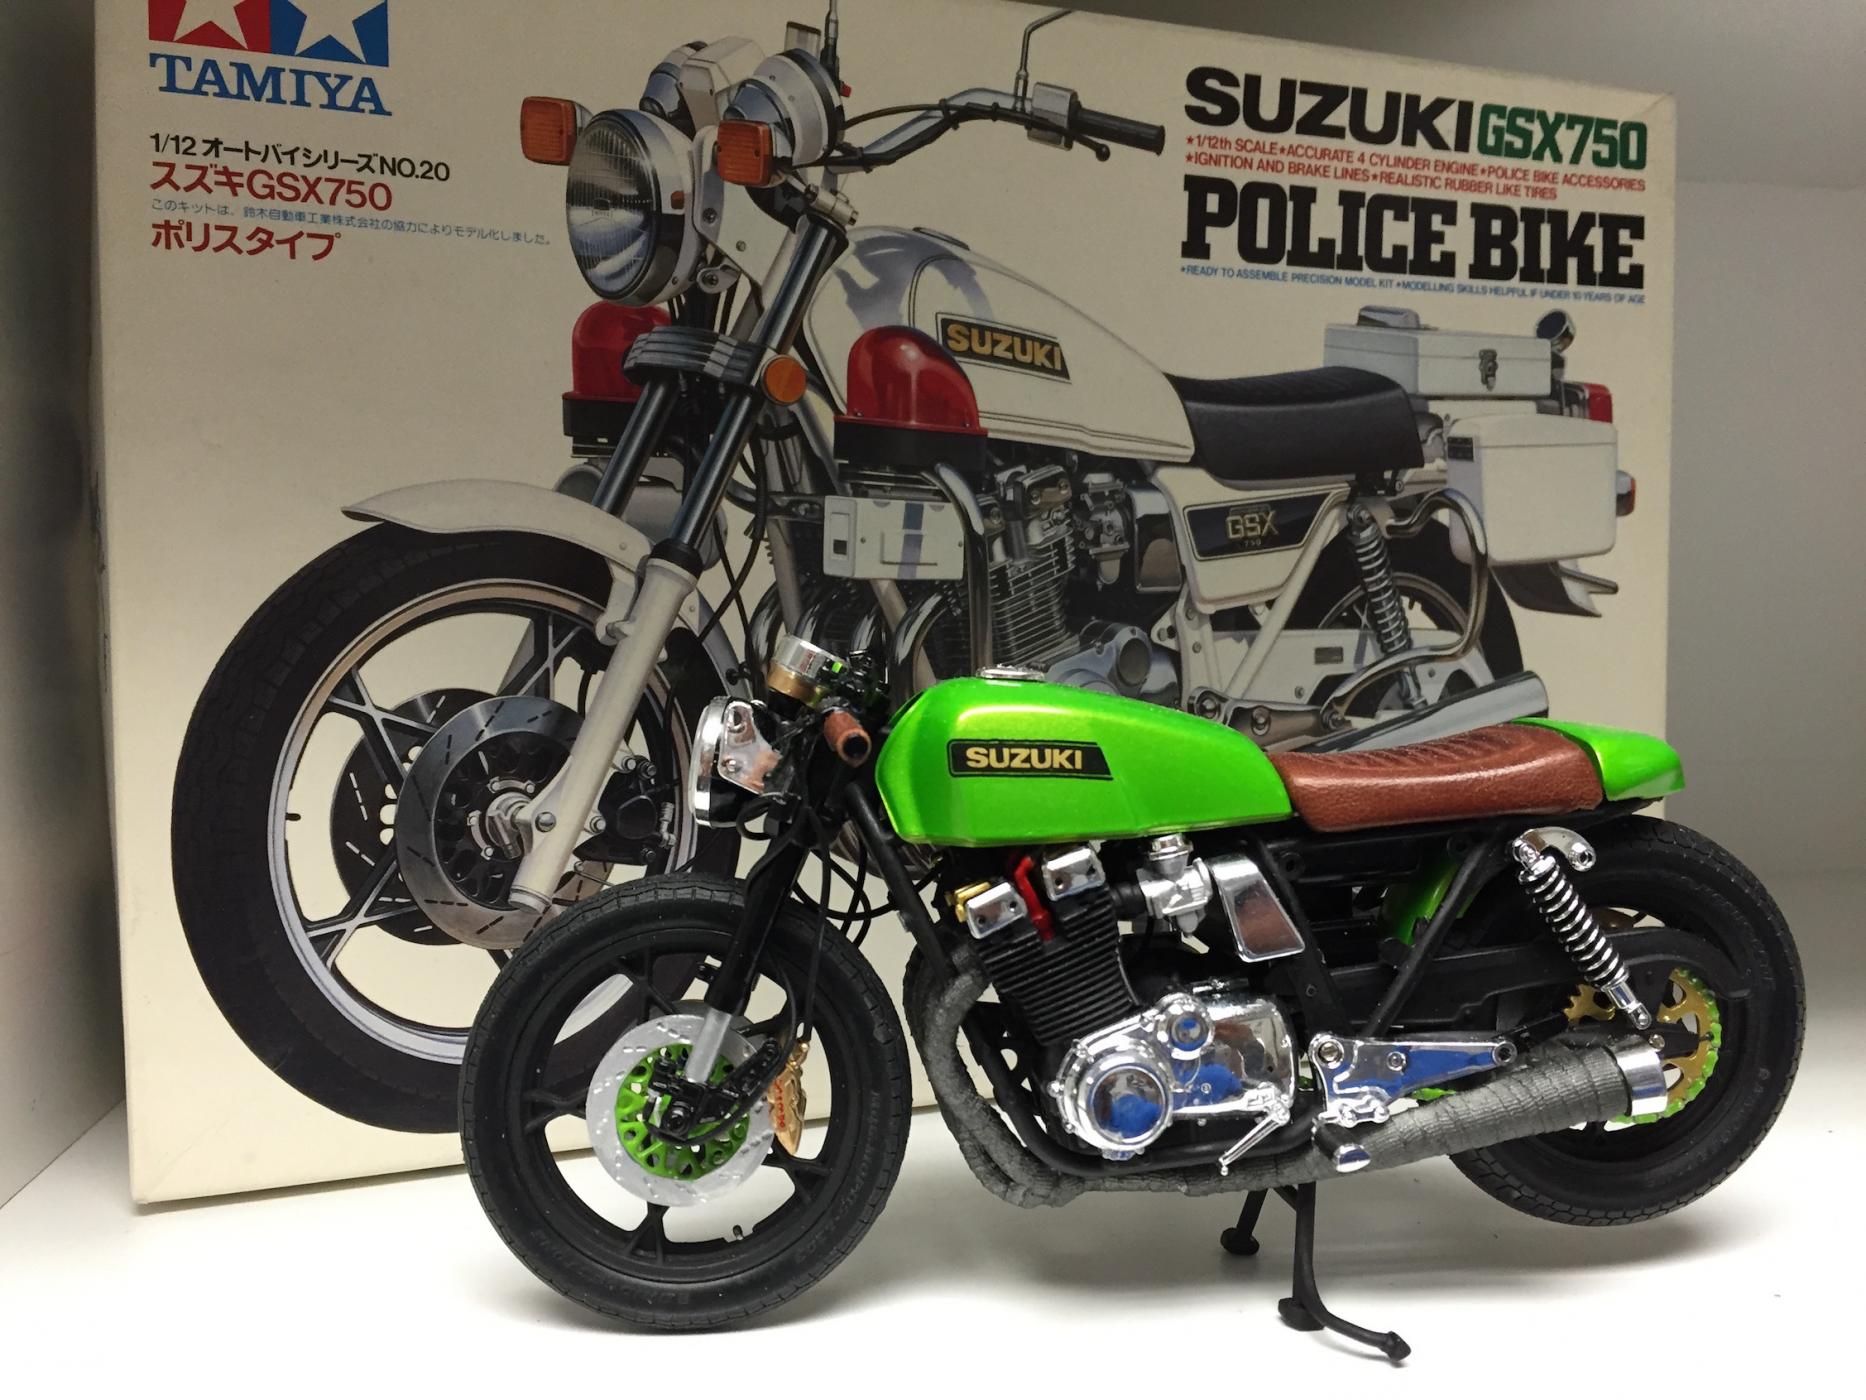
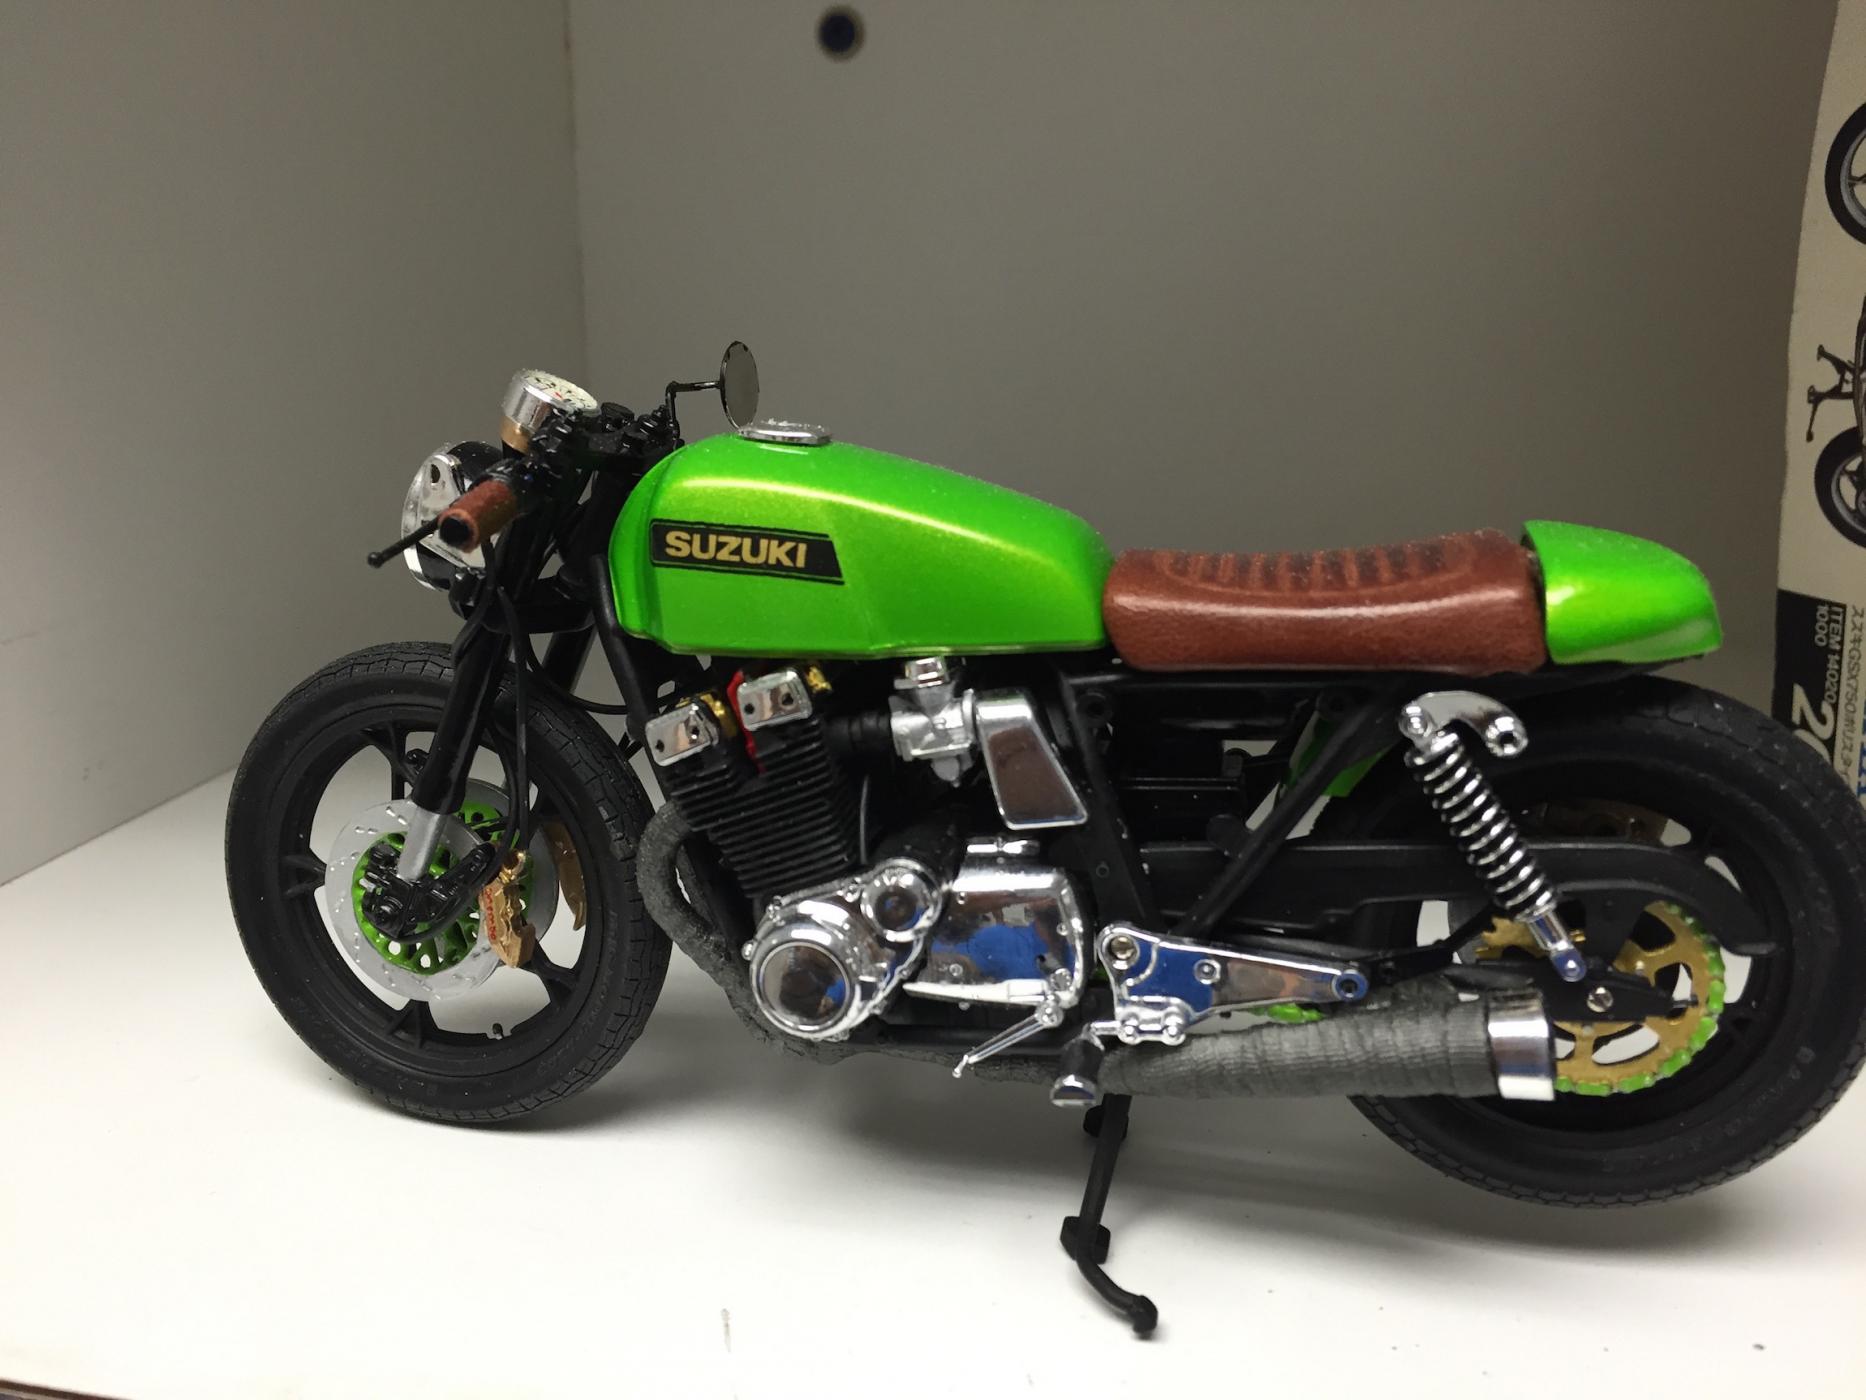
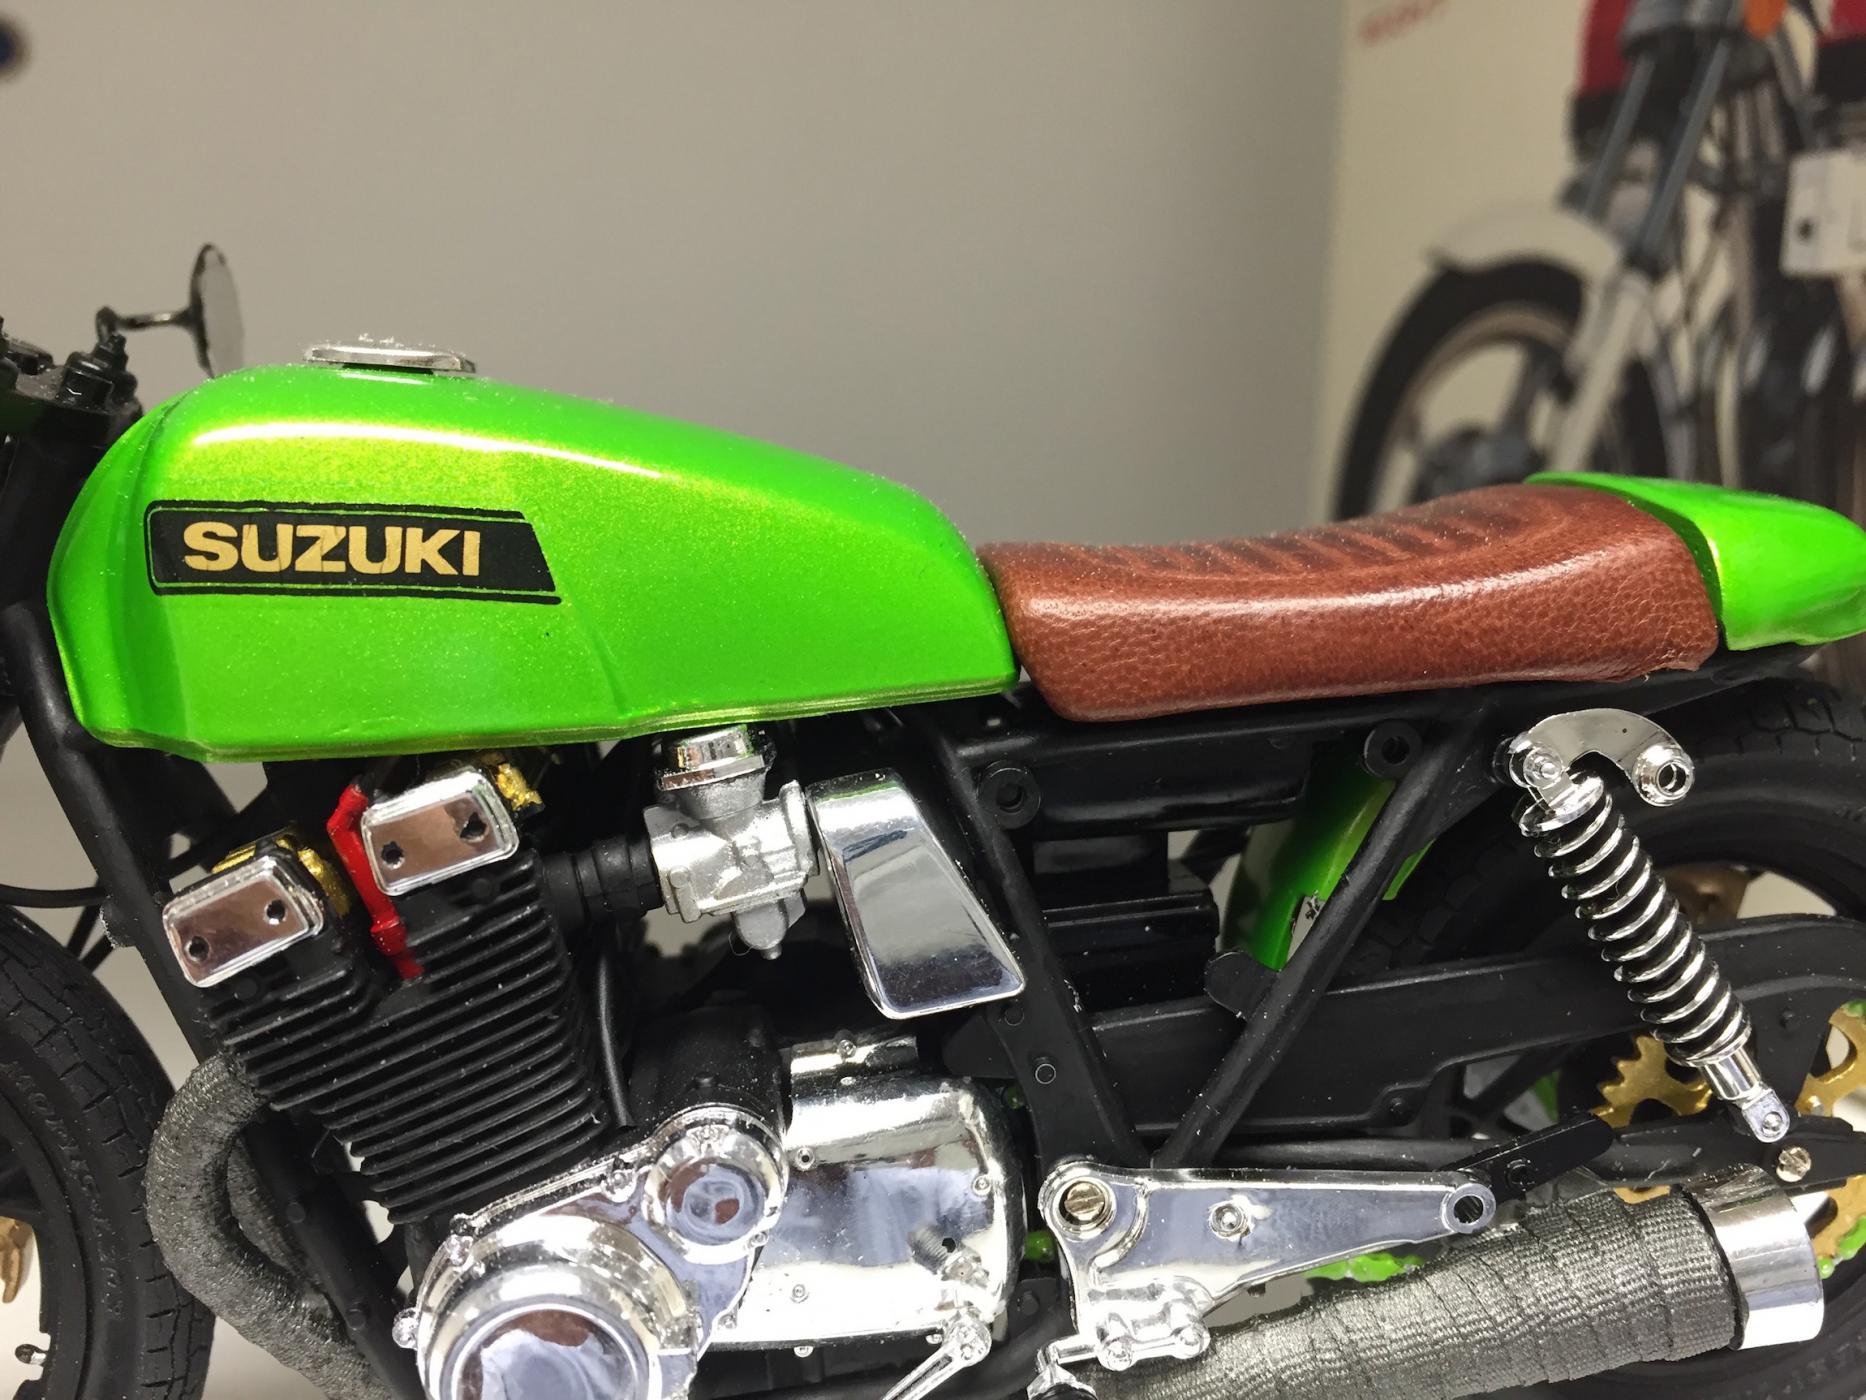
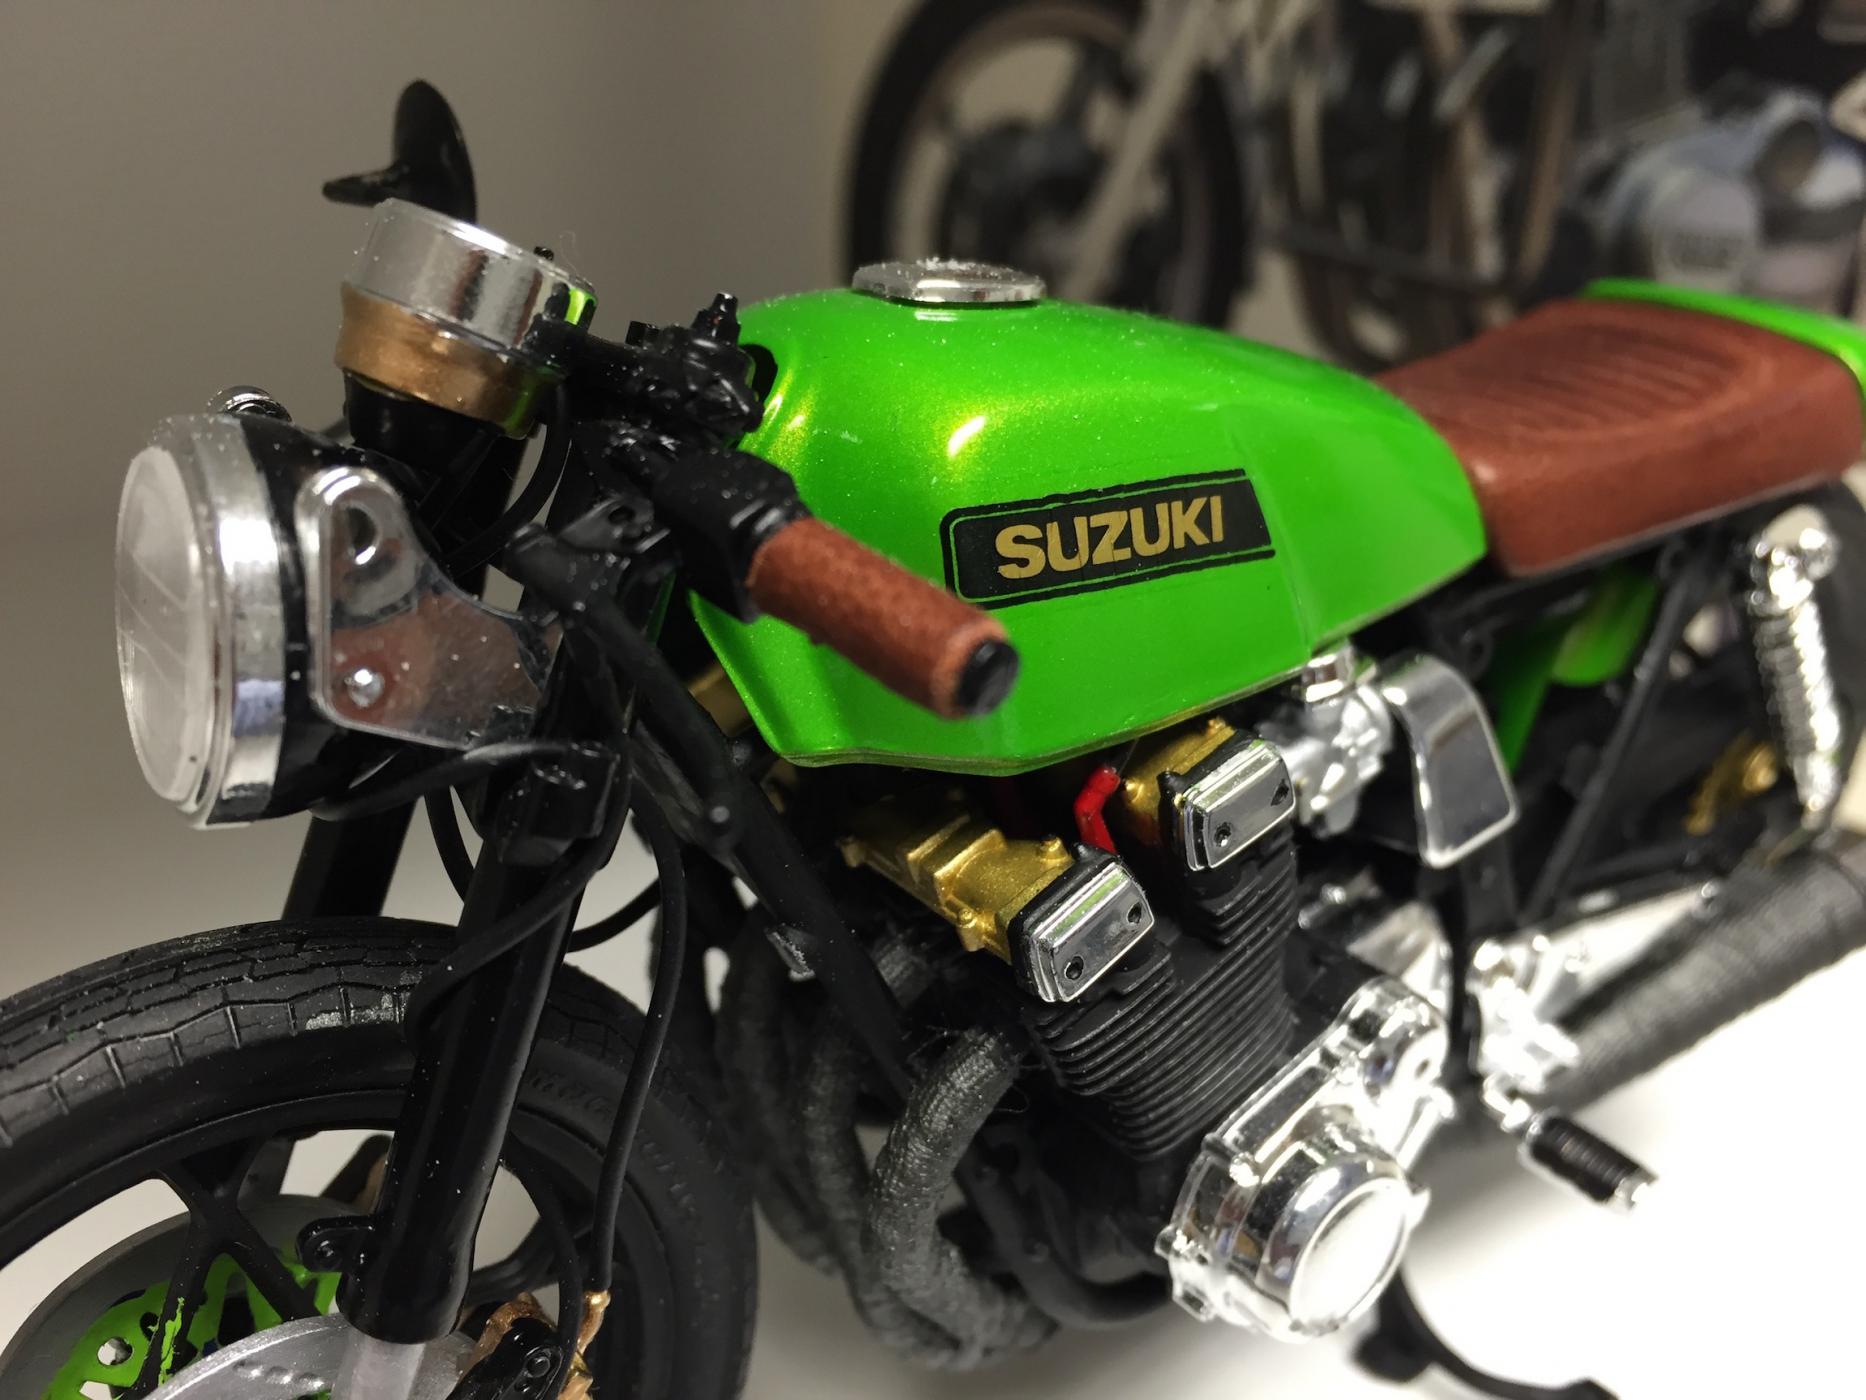
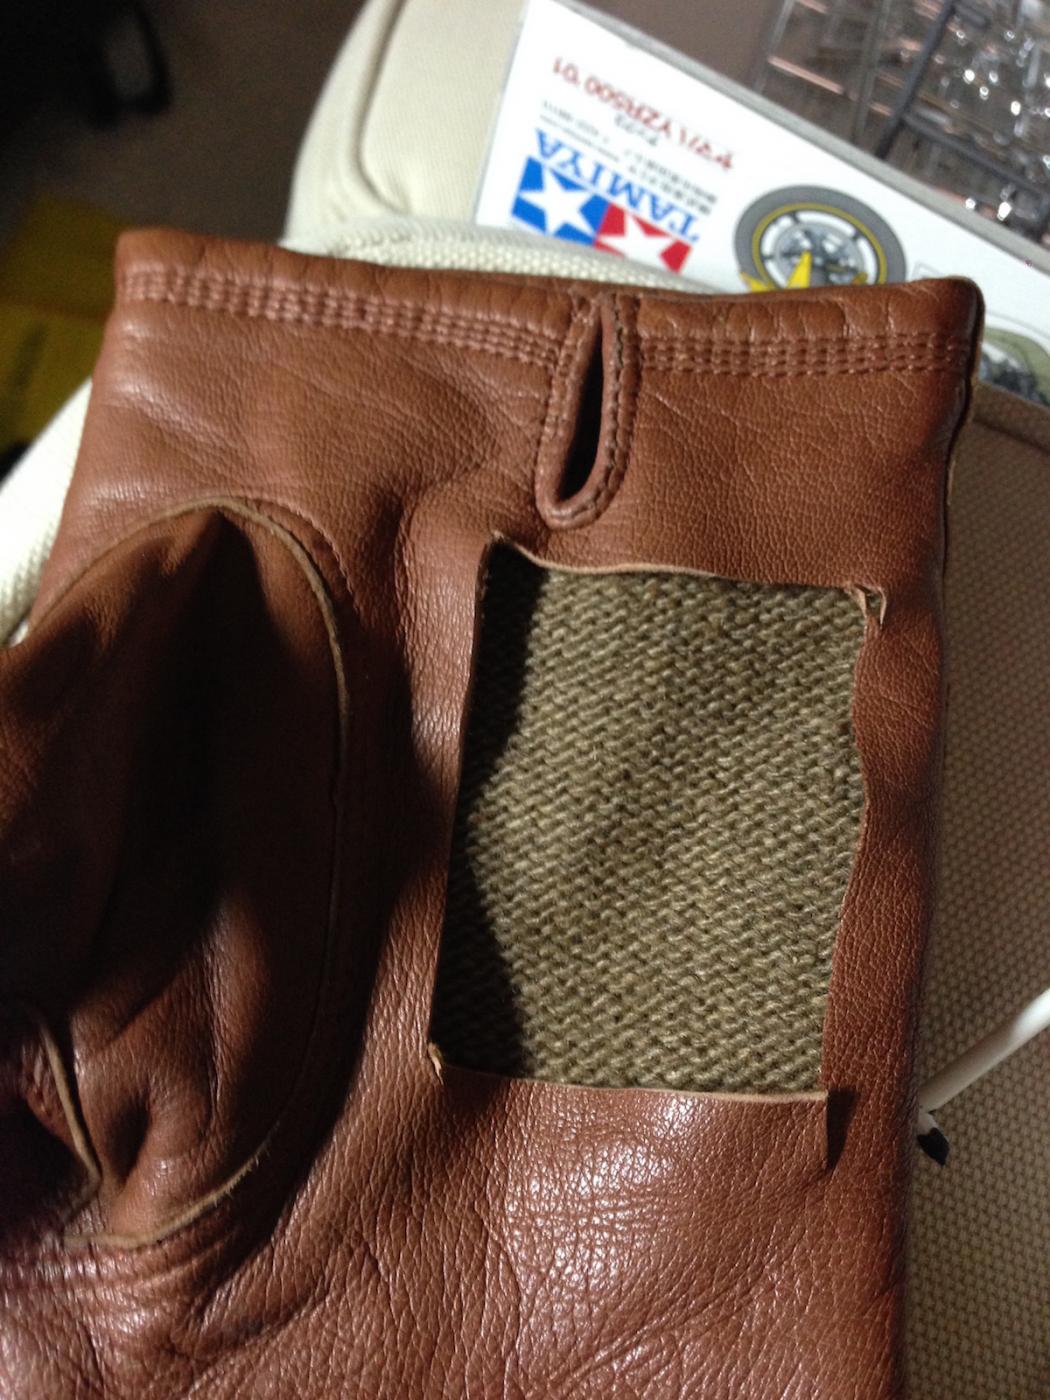
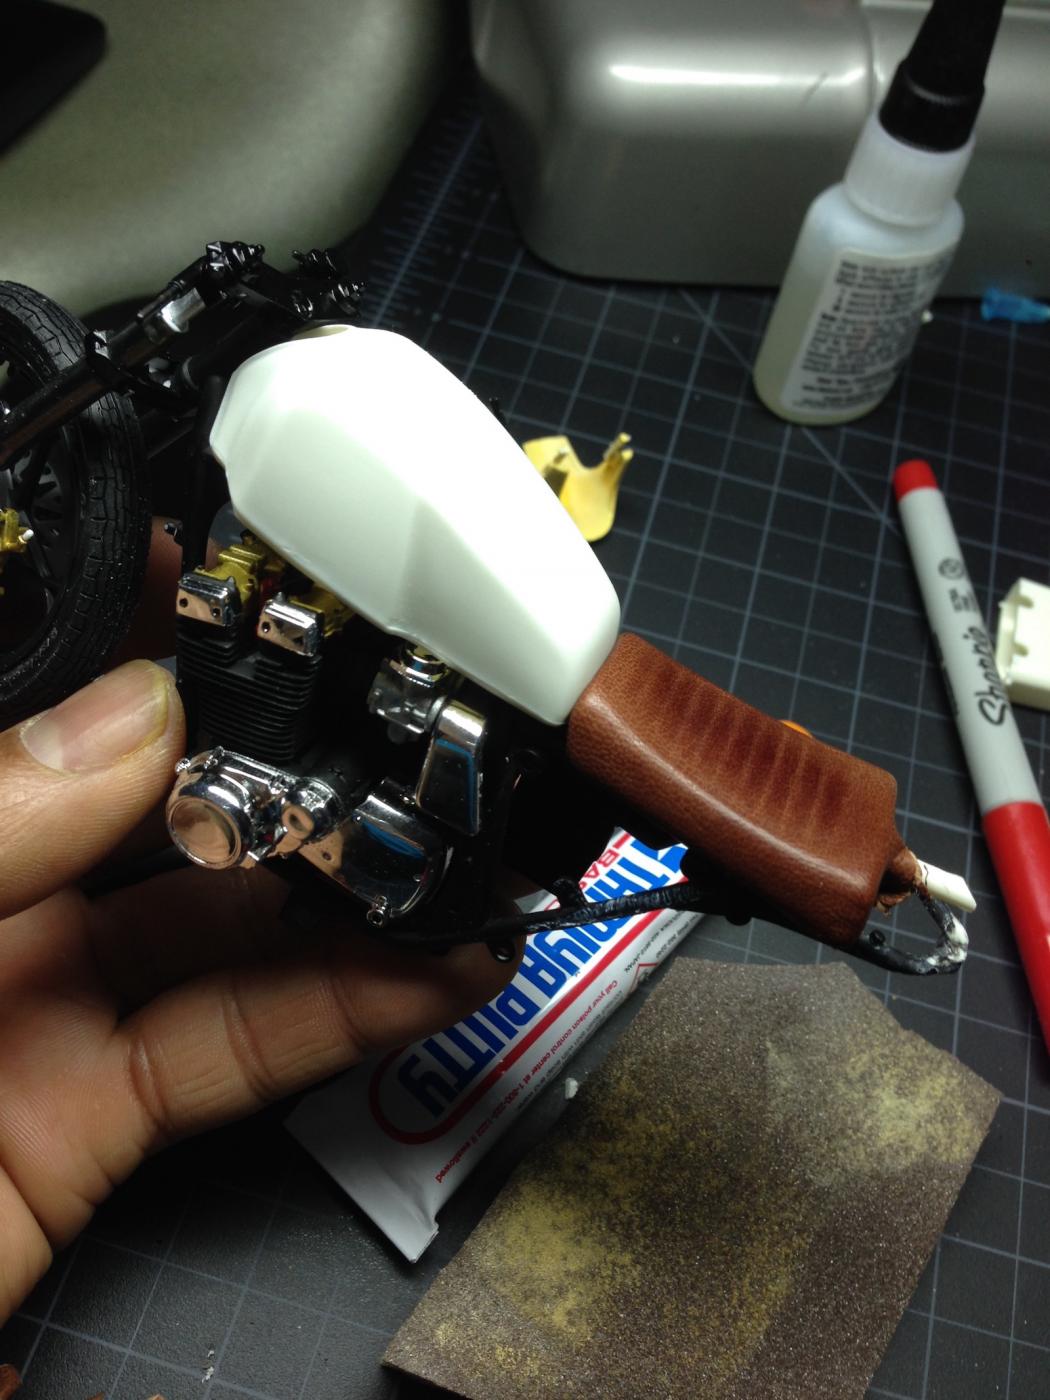
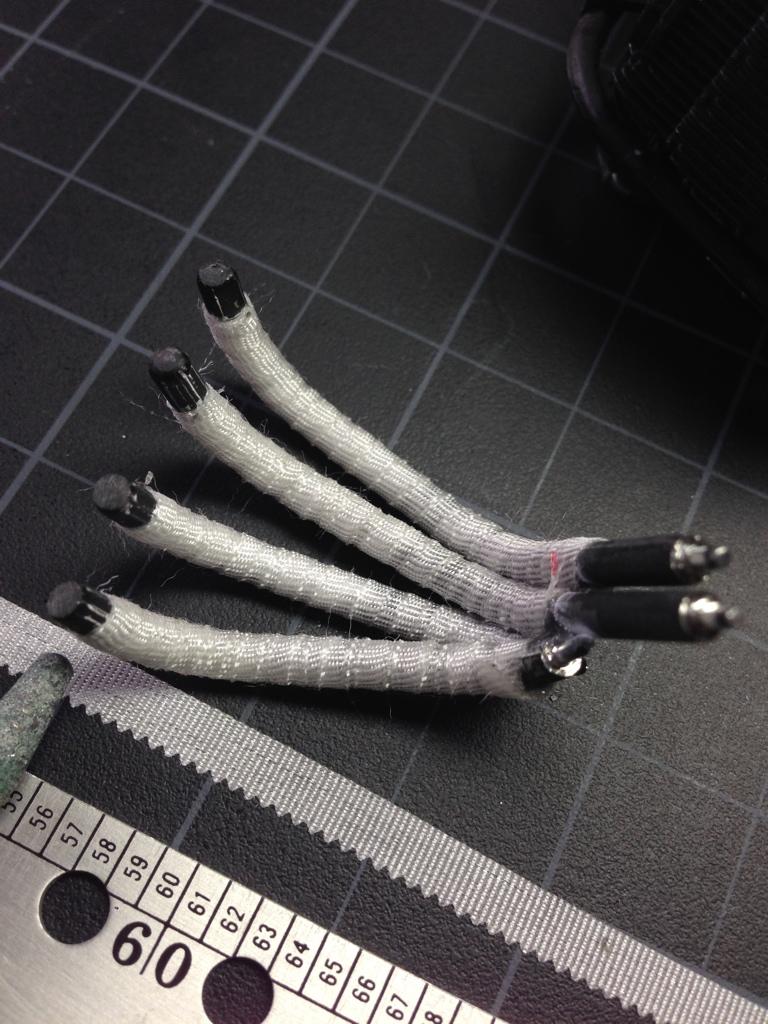
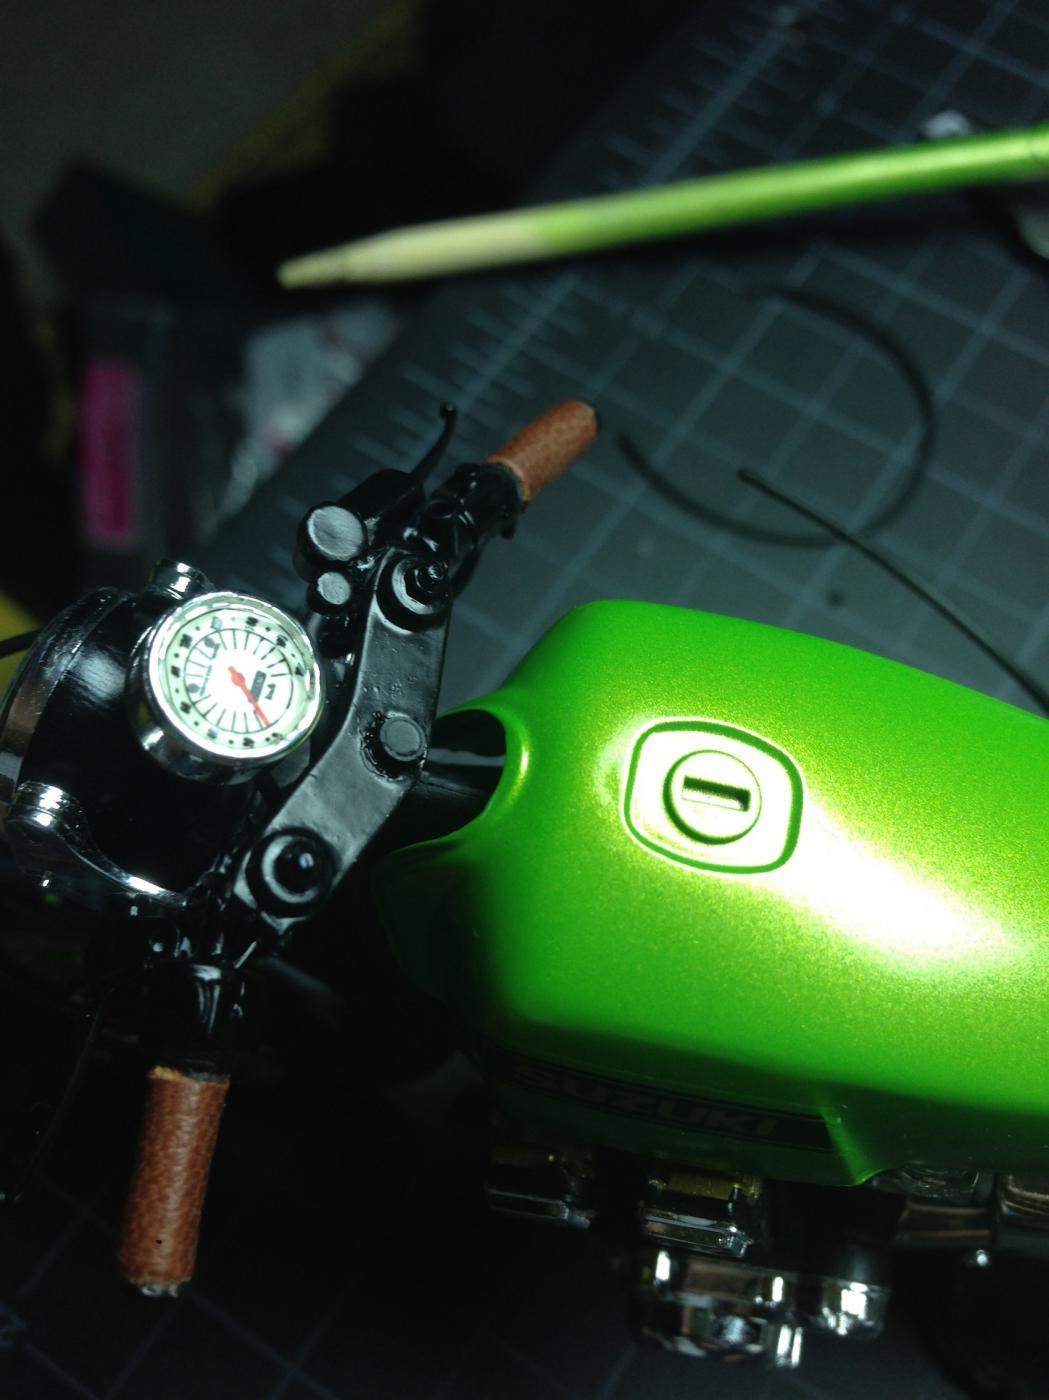
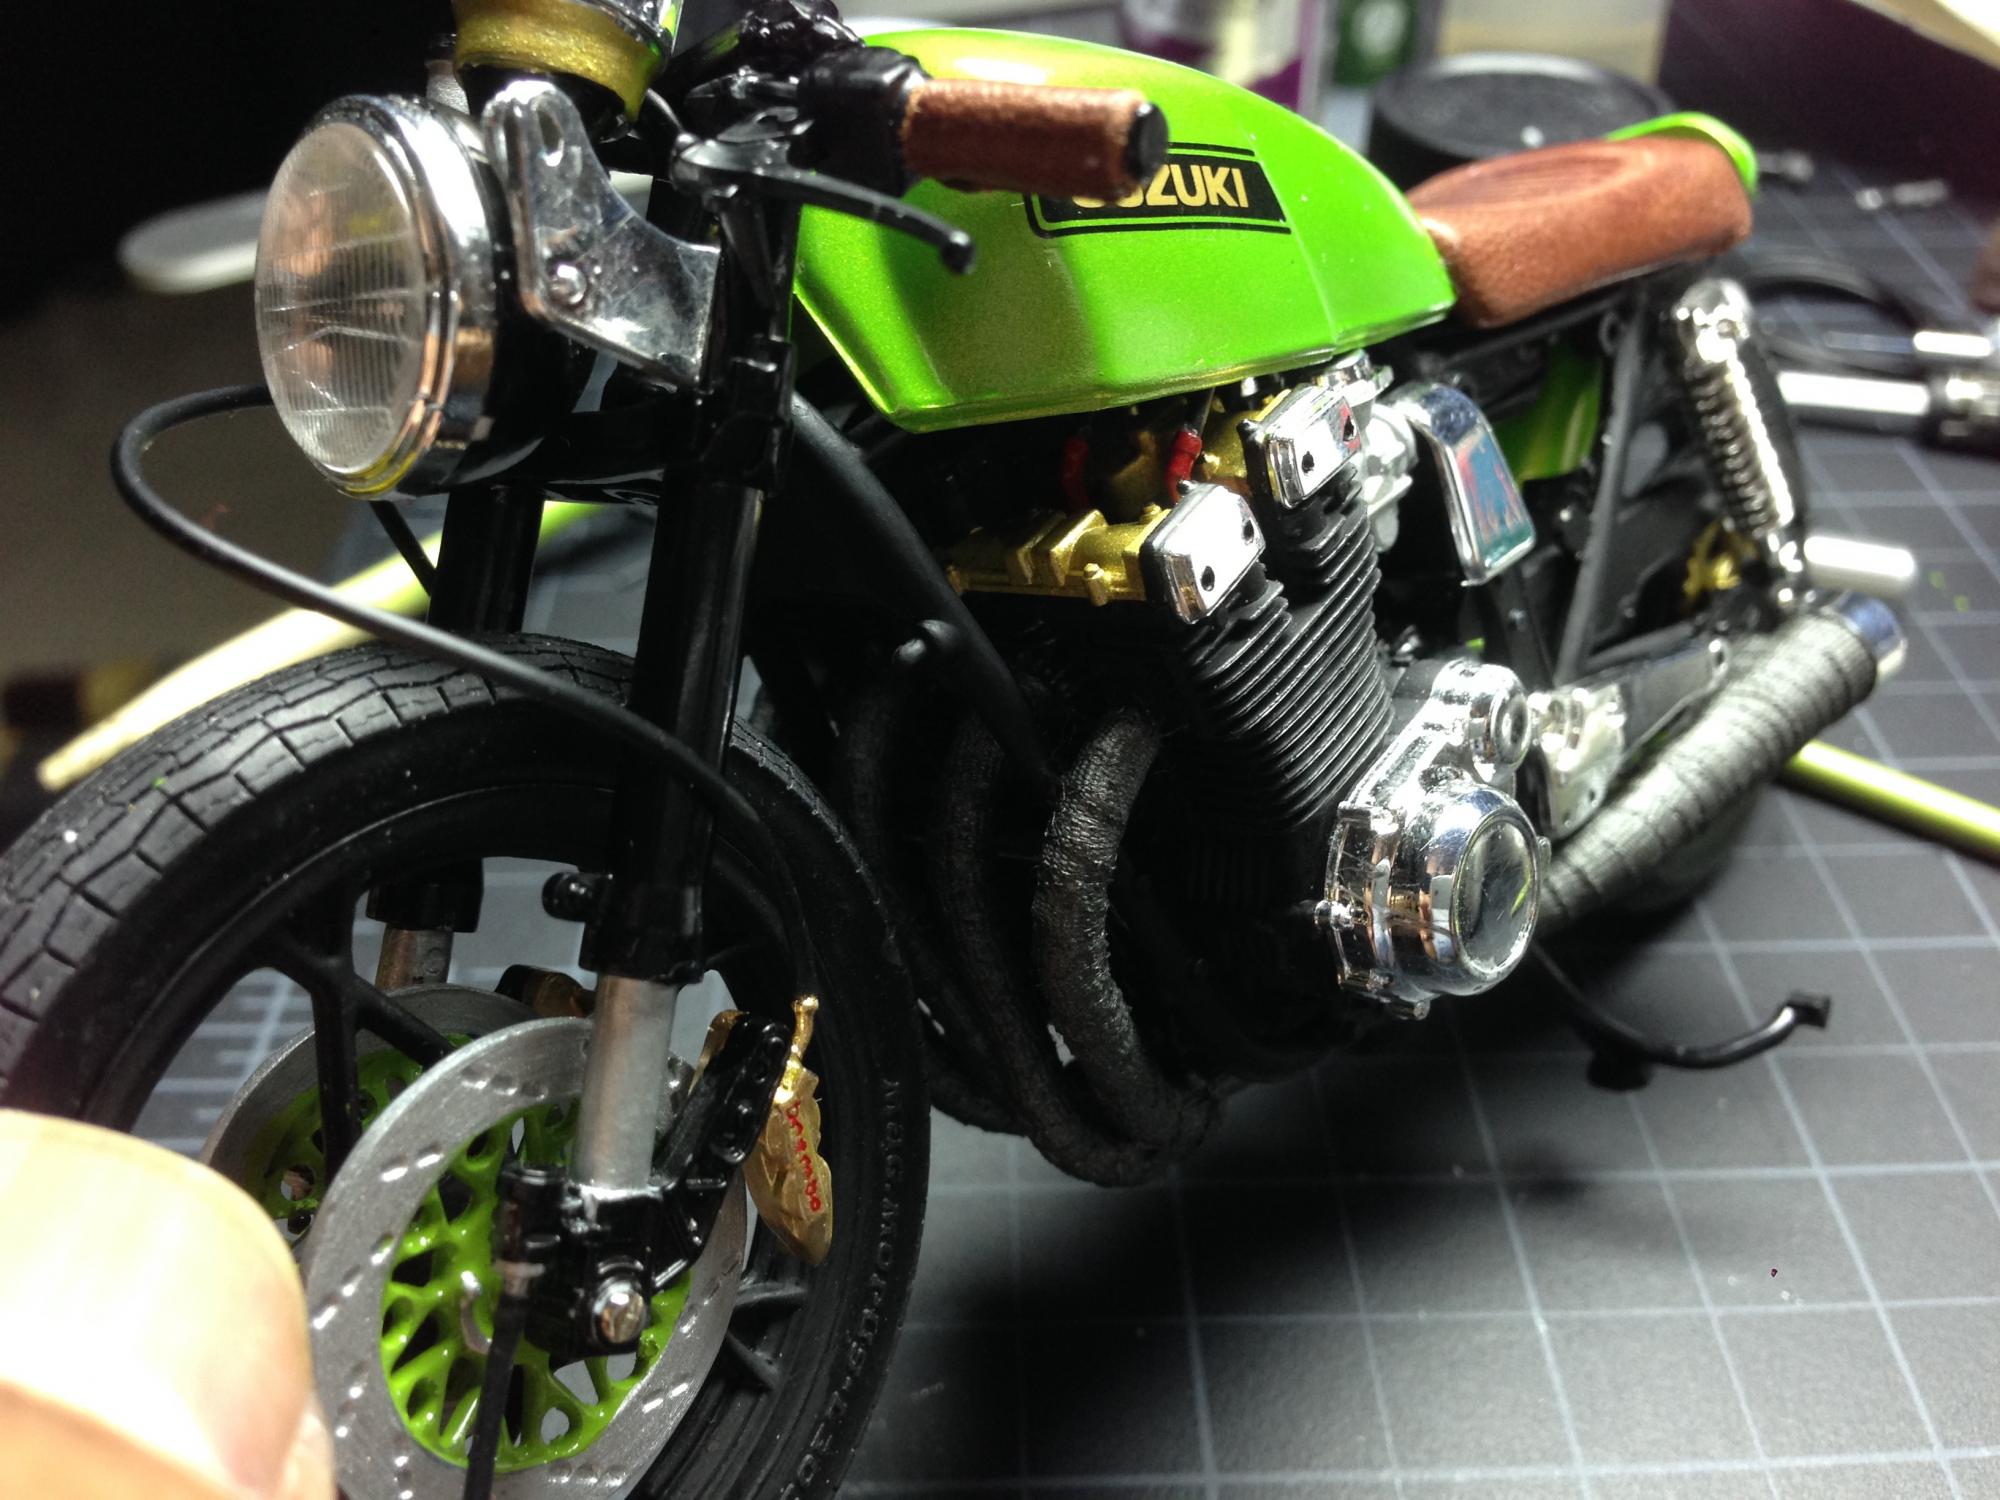
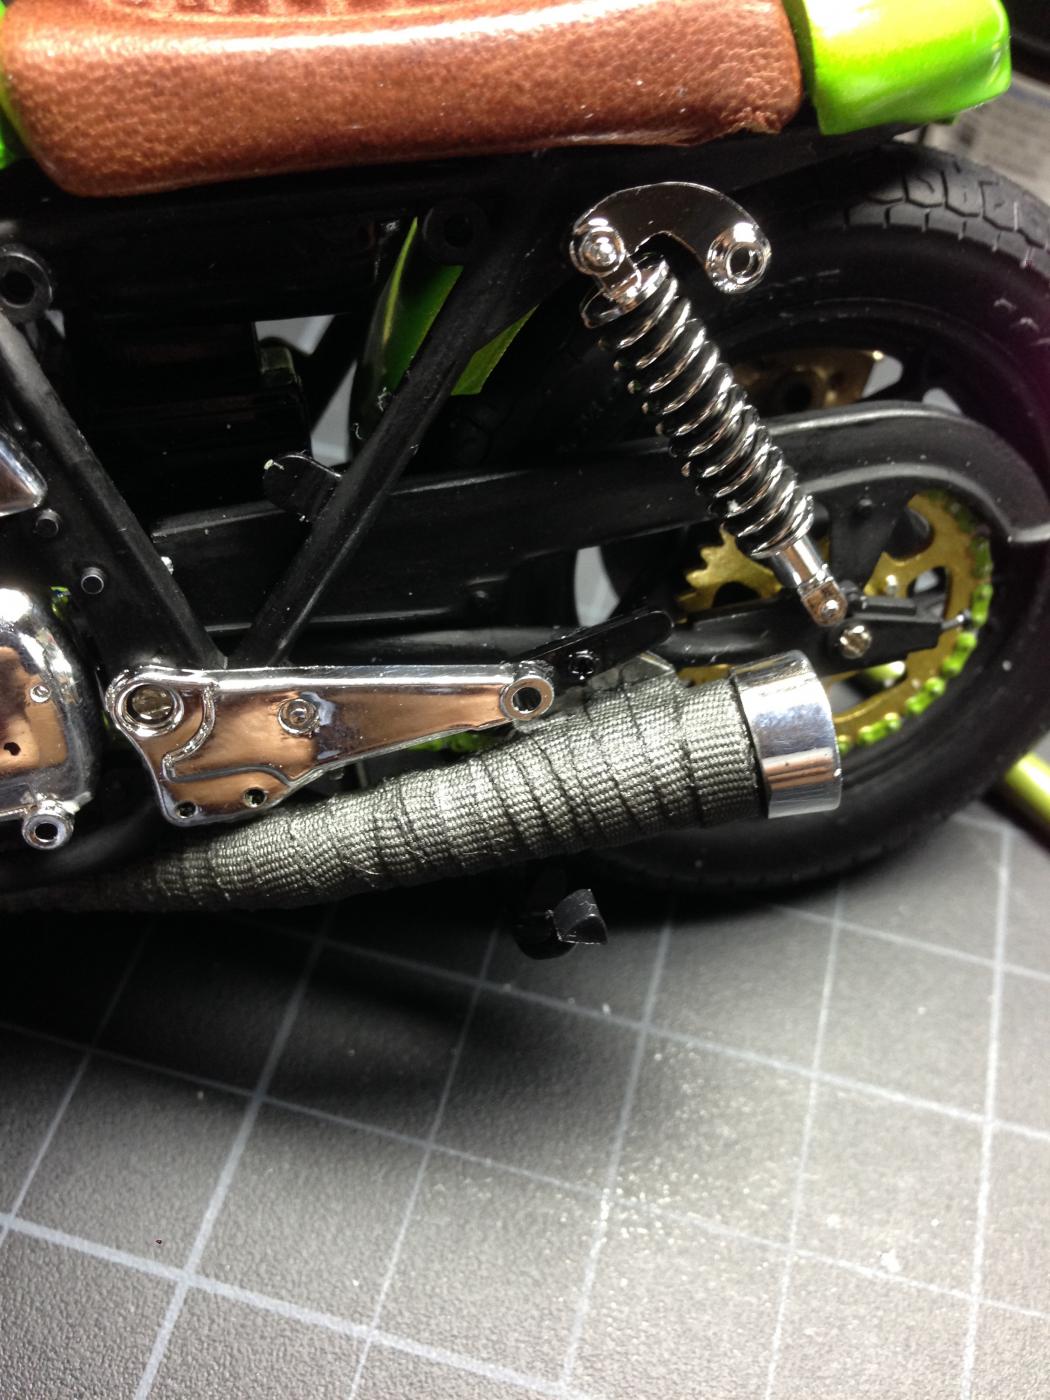
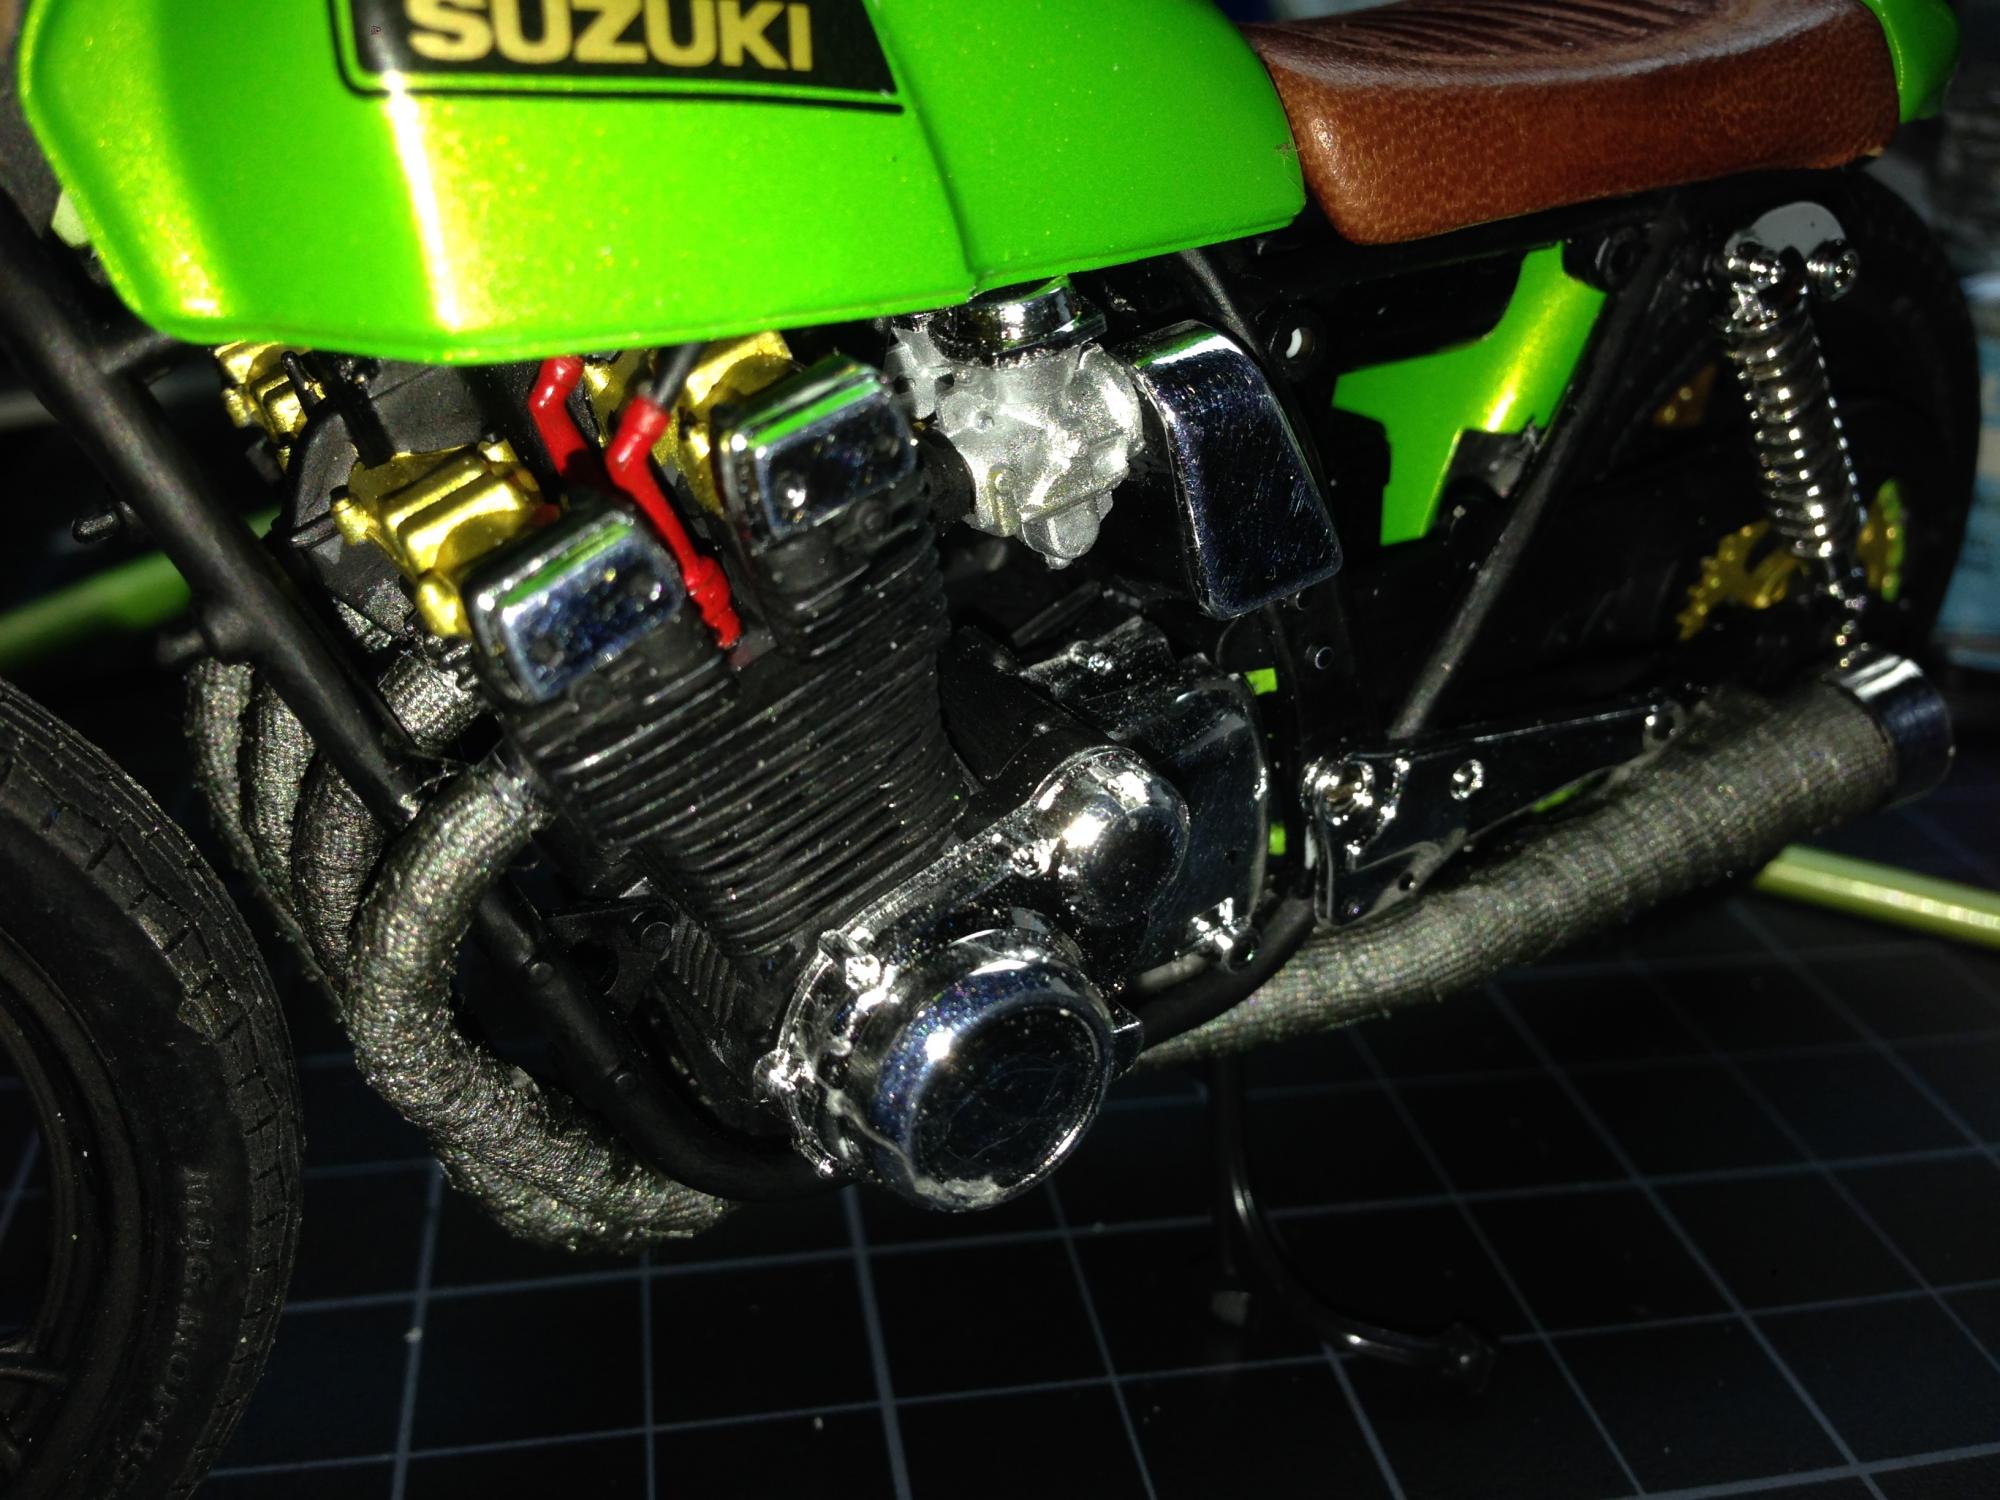
I decided to make my own Cafe racer, and as you gents (and some ladies) know, they don't sell Cafe Racer model kits...just like the real ones, you just don't go buy one....someone builds it for you from an old motorcycle. Therefore I took an old Tamiya 1/12 Suzuki GSX750 Police Bike kit and made my own. I made the rear cow from a piece of plastic and putty and metal and the seat and grips I made out of real leather donated via the glove in the picture. I custom made the pipes by cutting the 4 into 2 pipe into pieces, melting them in shape to wrap around the frame and wrapped them in strips of surgical tape, then painted the tape. I used the forks of a GP Race bike and cut the speedo down from 4 dials to one. First one I ever done, therefore the gap in the rear cowing is off, but hey...its my first! I put the picture of what the model would've looked like on the box behind mine.. Enjoy
-
Good afternoon gents, Here's my first model in a year or so, the Tamiya Ferrari F60. It's my first F1 model and I learned a lot about the construction of these guys. Several parts fought me and I had extreme issues on the front suspension. The paint went well, I'm very happy at the paint I messed several things up during the build. The rear wing was an absolute nightmare. It fell apart several times as I attempted to build it. Then in the process of attempting to attach it to the car it again fell apart. It truly was the most frustrating experience. However, I learned a lot about the use of the carbon fiber decals and have prepared a jig using balsa wood for my in progress Ferrari F310B build. It was a fun first F1 build although I don't believe I did the kit justice. Thanks for looking!
-
I got into modeling recently. This is my first semi-professional build I hope you like it
-
This is going to be a very long and drawn out build, as I don't have the time to build that I wish I had! Anyway, go easy on me. A little background on me; I've been a VW/Porsche/Audi nut since elementry school, and spent almost 15 years working for Porsche, so you'll see a number of Porsche kits coming from me. I finally got around to starting a kit that I've had sitting around for years. This is Tamiya's Porsche 996 Carrera kit. Curbside, no engine detail. I decided to build this in Speed Yellow with the black interior, a somewhat uncommon colour combo around here. I've started by spraying the interior pieces in black. This is an automotive semi-gloss black, can confirm brand later. Then I masked, laid down the white glue, and flocked it. Turned out pretty good I think. I've since touched up the spot on the passenger door. Not too exciting yet, more pics to come as I get working on this.
-
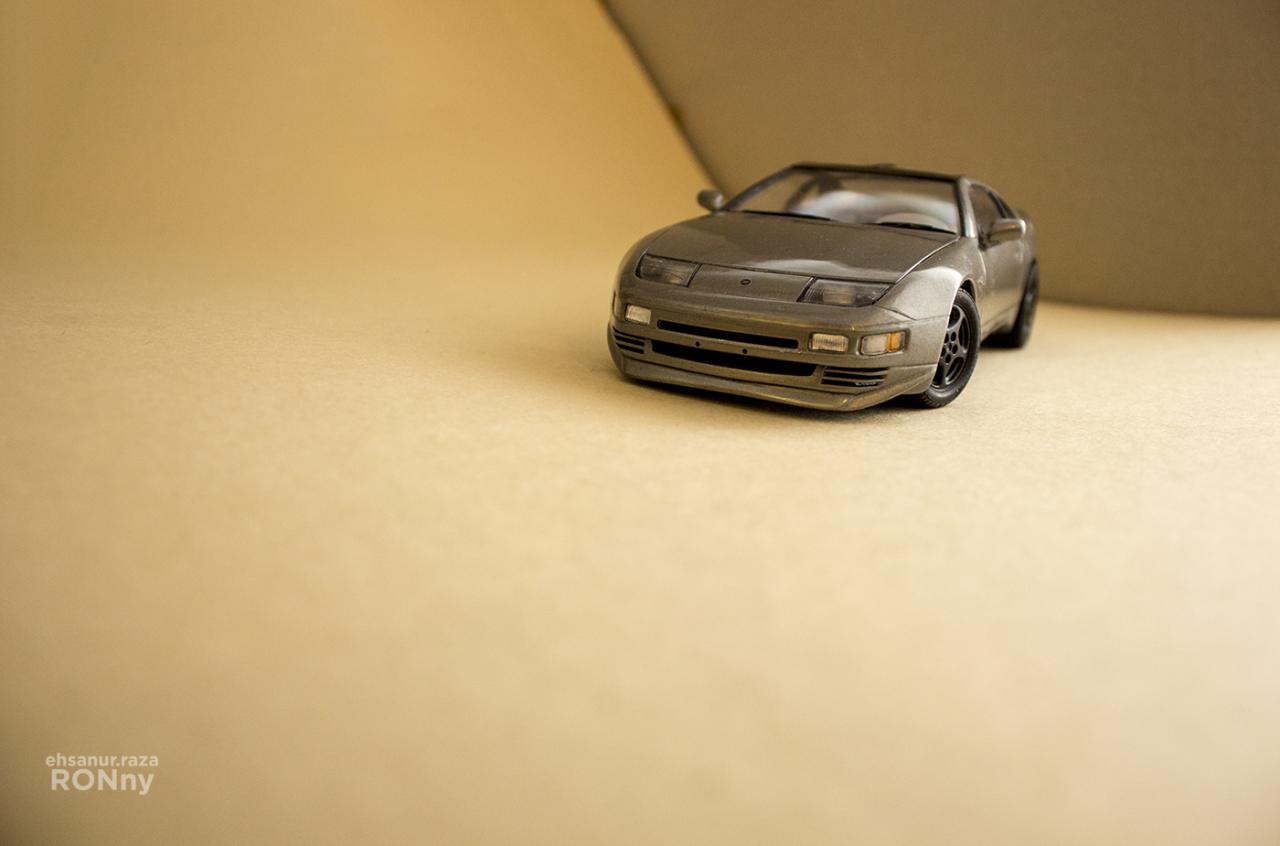
The one build where almost everything went flawlessly....almost. Then the black basecoat bled through after I applied the clear. Too soon perhaps. The Nissan is lightly tweaked. Slight lowering of the front, added a hand made chin spoiler and smoothed the rear spoiler for a more fluid look. Currently has the left hand drive setup but thinkgin of going for the right hand drive. The engine has a few molded in parts. Needed to clear up some of that. An actual 300ZX engine isn't pretty to look at. The piping looks wrong here, in fact it's kinda incomplete on these Tamiya models, but oh well. I wish I could have added different wheels but where I'm from, kinda difficult to get parts. THe best I could do is give it a satin black finish. Overall, this is a wonderful kit by Tamiya with everything providing excellent fit.
-
OK... the Lambo is still under way, but this one is now done! Lovely little kit of a lovely little car. The only thing I'd do differently if I did another one would be to thin out the body at the wheel arches, to give the dropped suspension a bit more room to move... bestest, M.


.thumb.jpg.d0926de2d8346363976c7c0a63bd15d7.jpg)