majel
-
Posts
860 -
Joined
-
Last visited
Content Type
Profiles
Forums
Events
Gallery
Everything posted by majel
-

1/12th Porsche 934 Vaillant
majel replied to majel's topic in WIP: Other Racing: Road Racing, Land Speed Racers
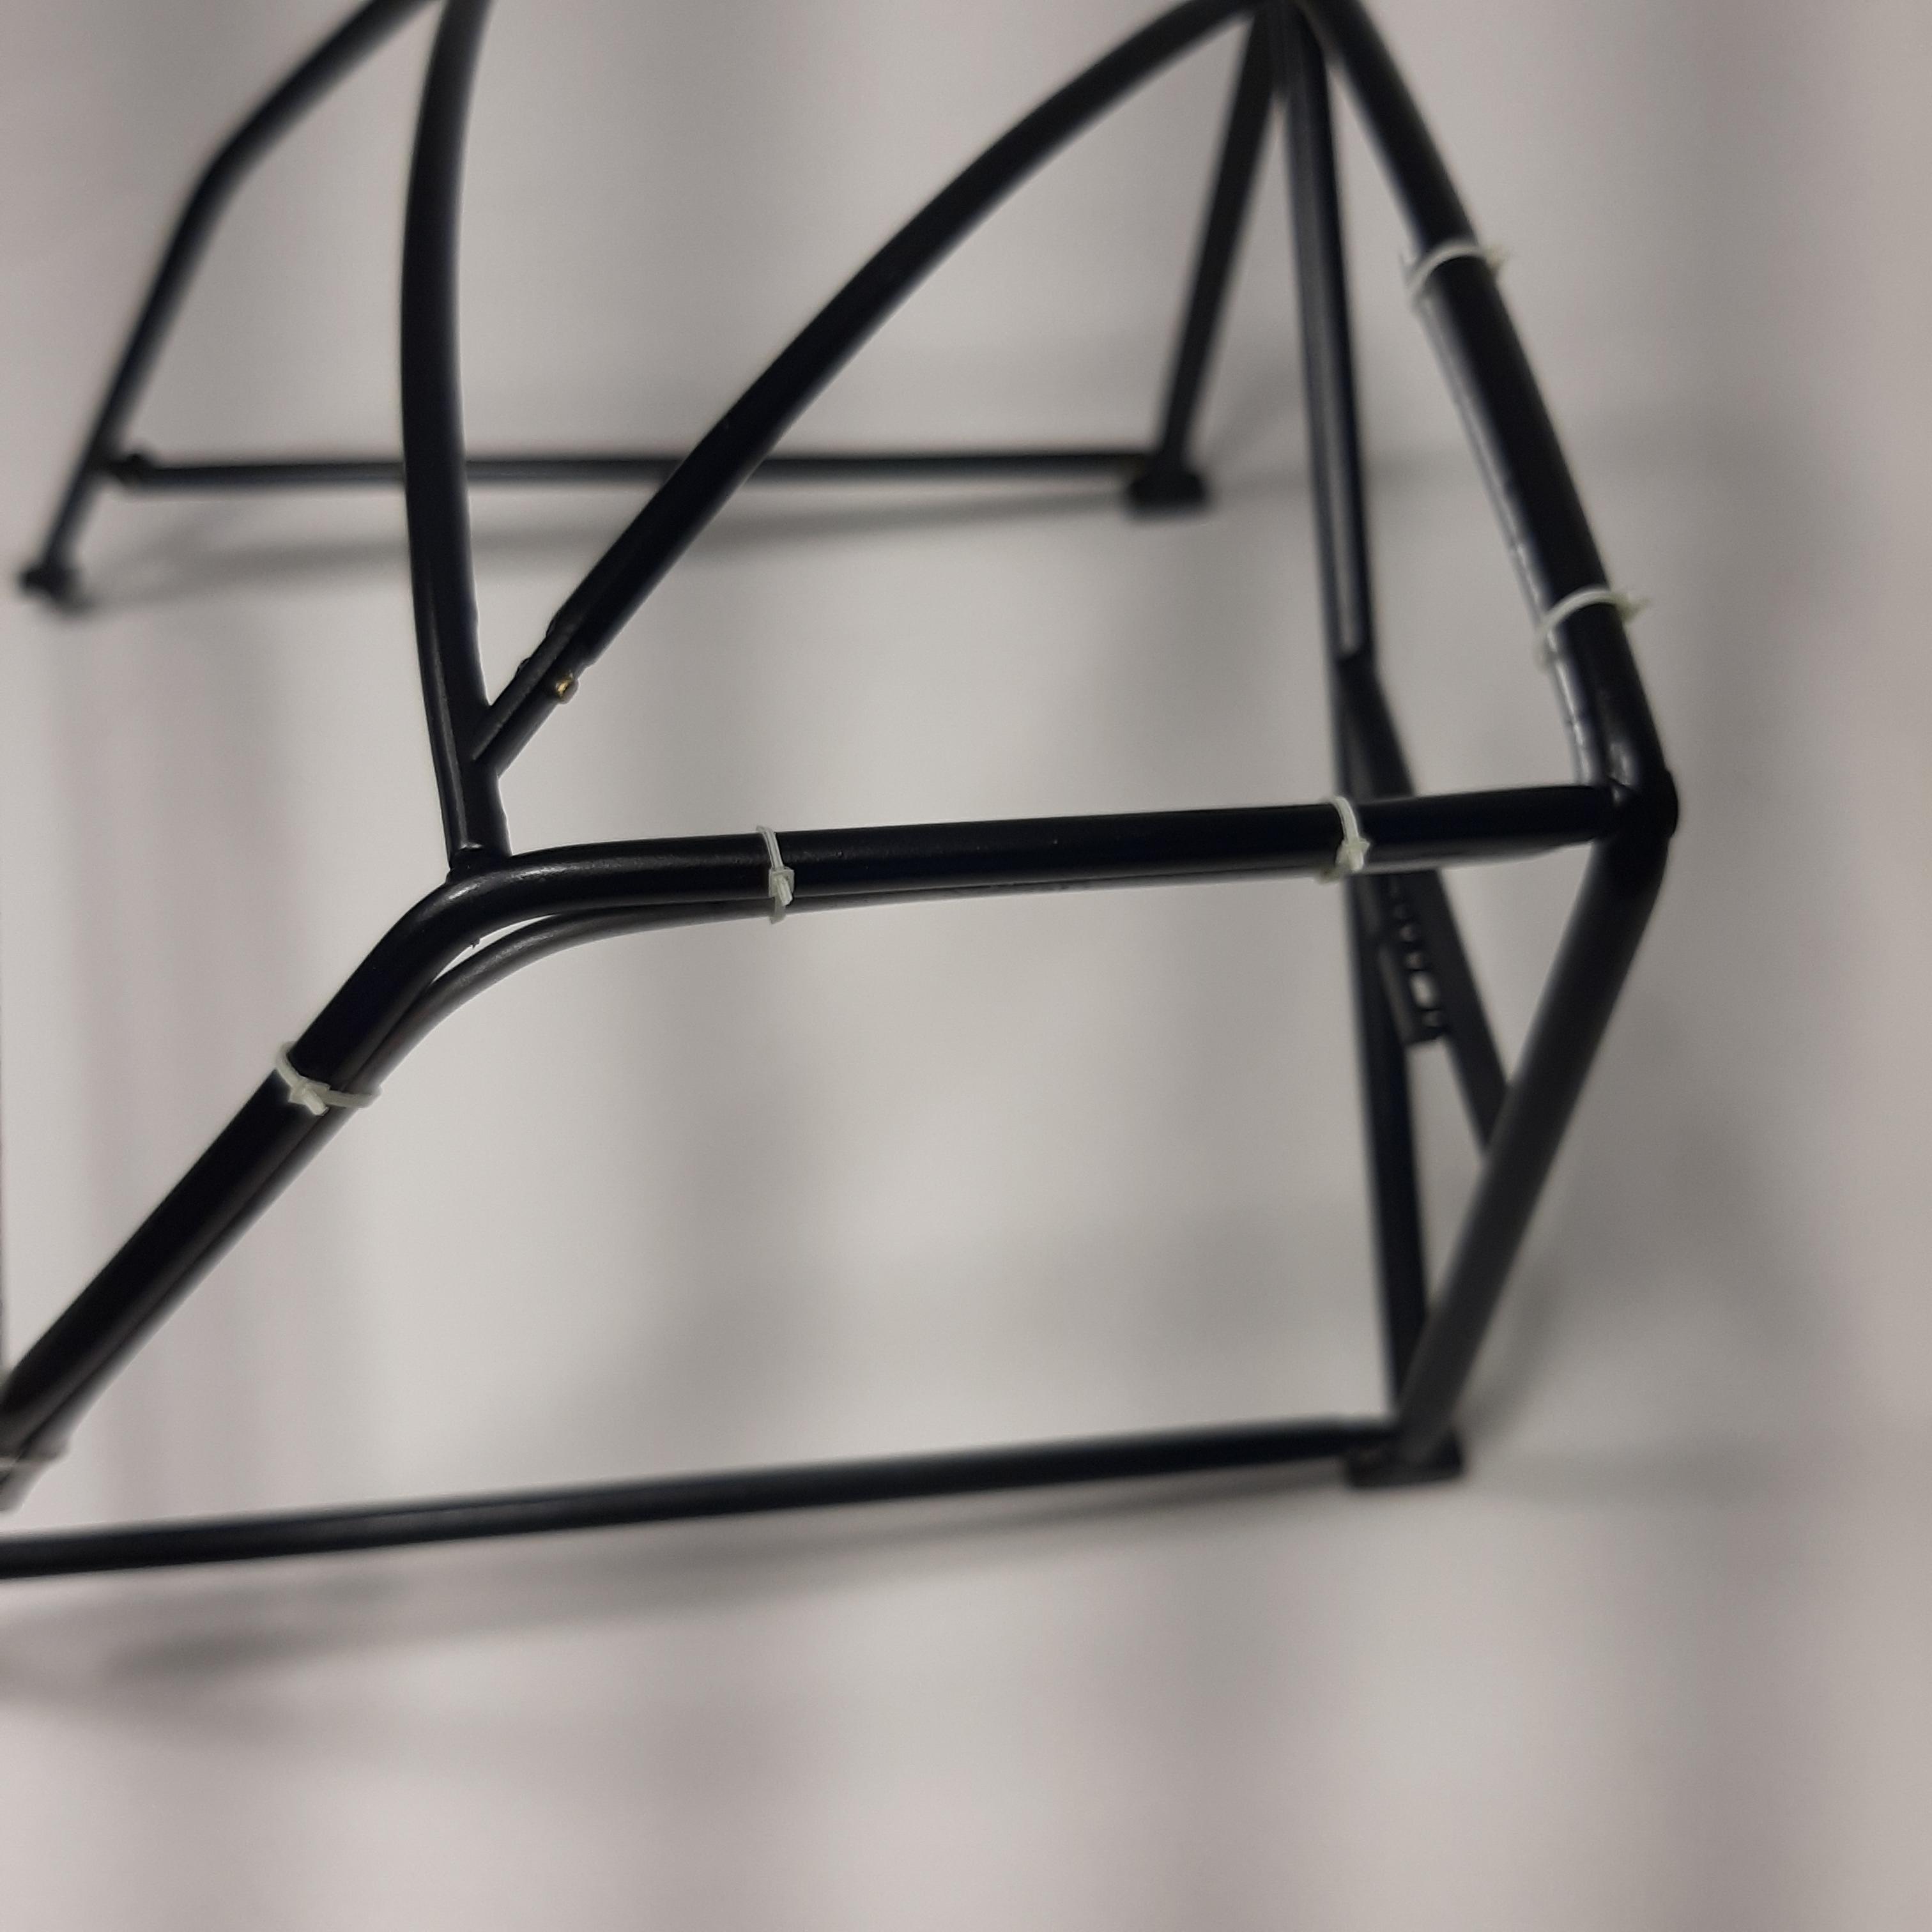
Ok Jason I feel better knowing someone else suffered a huge failure rate! What i ended up doing is spraying the roll cage and the ties with Tamiya semi gloss in hopes that it would keep the ties from breaking. I has the same issue, yesterday i picked up the roll cage and one of the ties broke. I didn't pick it up anywhere near a tie! Very frustrating. -
1/12th Porsche 934 Vaillant
majel replied to majel's topic in WIP: Other Racing: Road Racing, Land Speed Racers
To be honest with you I don't know what that half moon cut out is for. There is one on the other side of the seat also and both of them have a rectangular notch in the seat frame right below them. -
1/12th Porsche 934 Vaillant
majel replied to majel's topic in WIP: Other Racing: Road Racing, Land Speed Racers
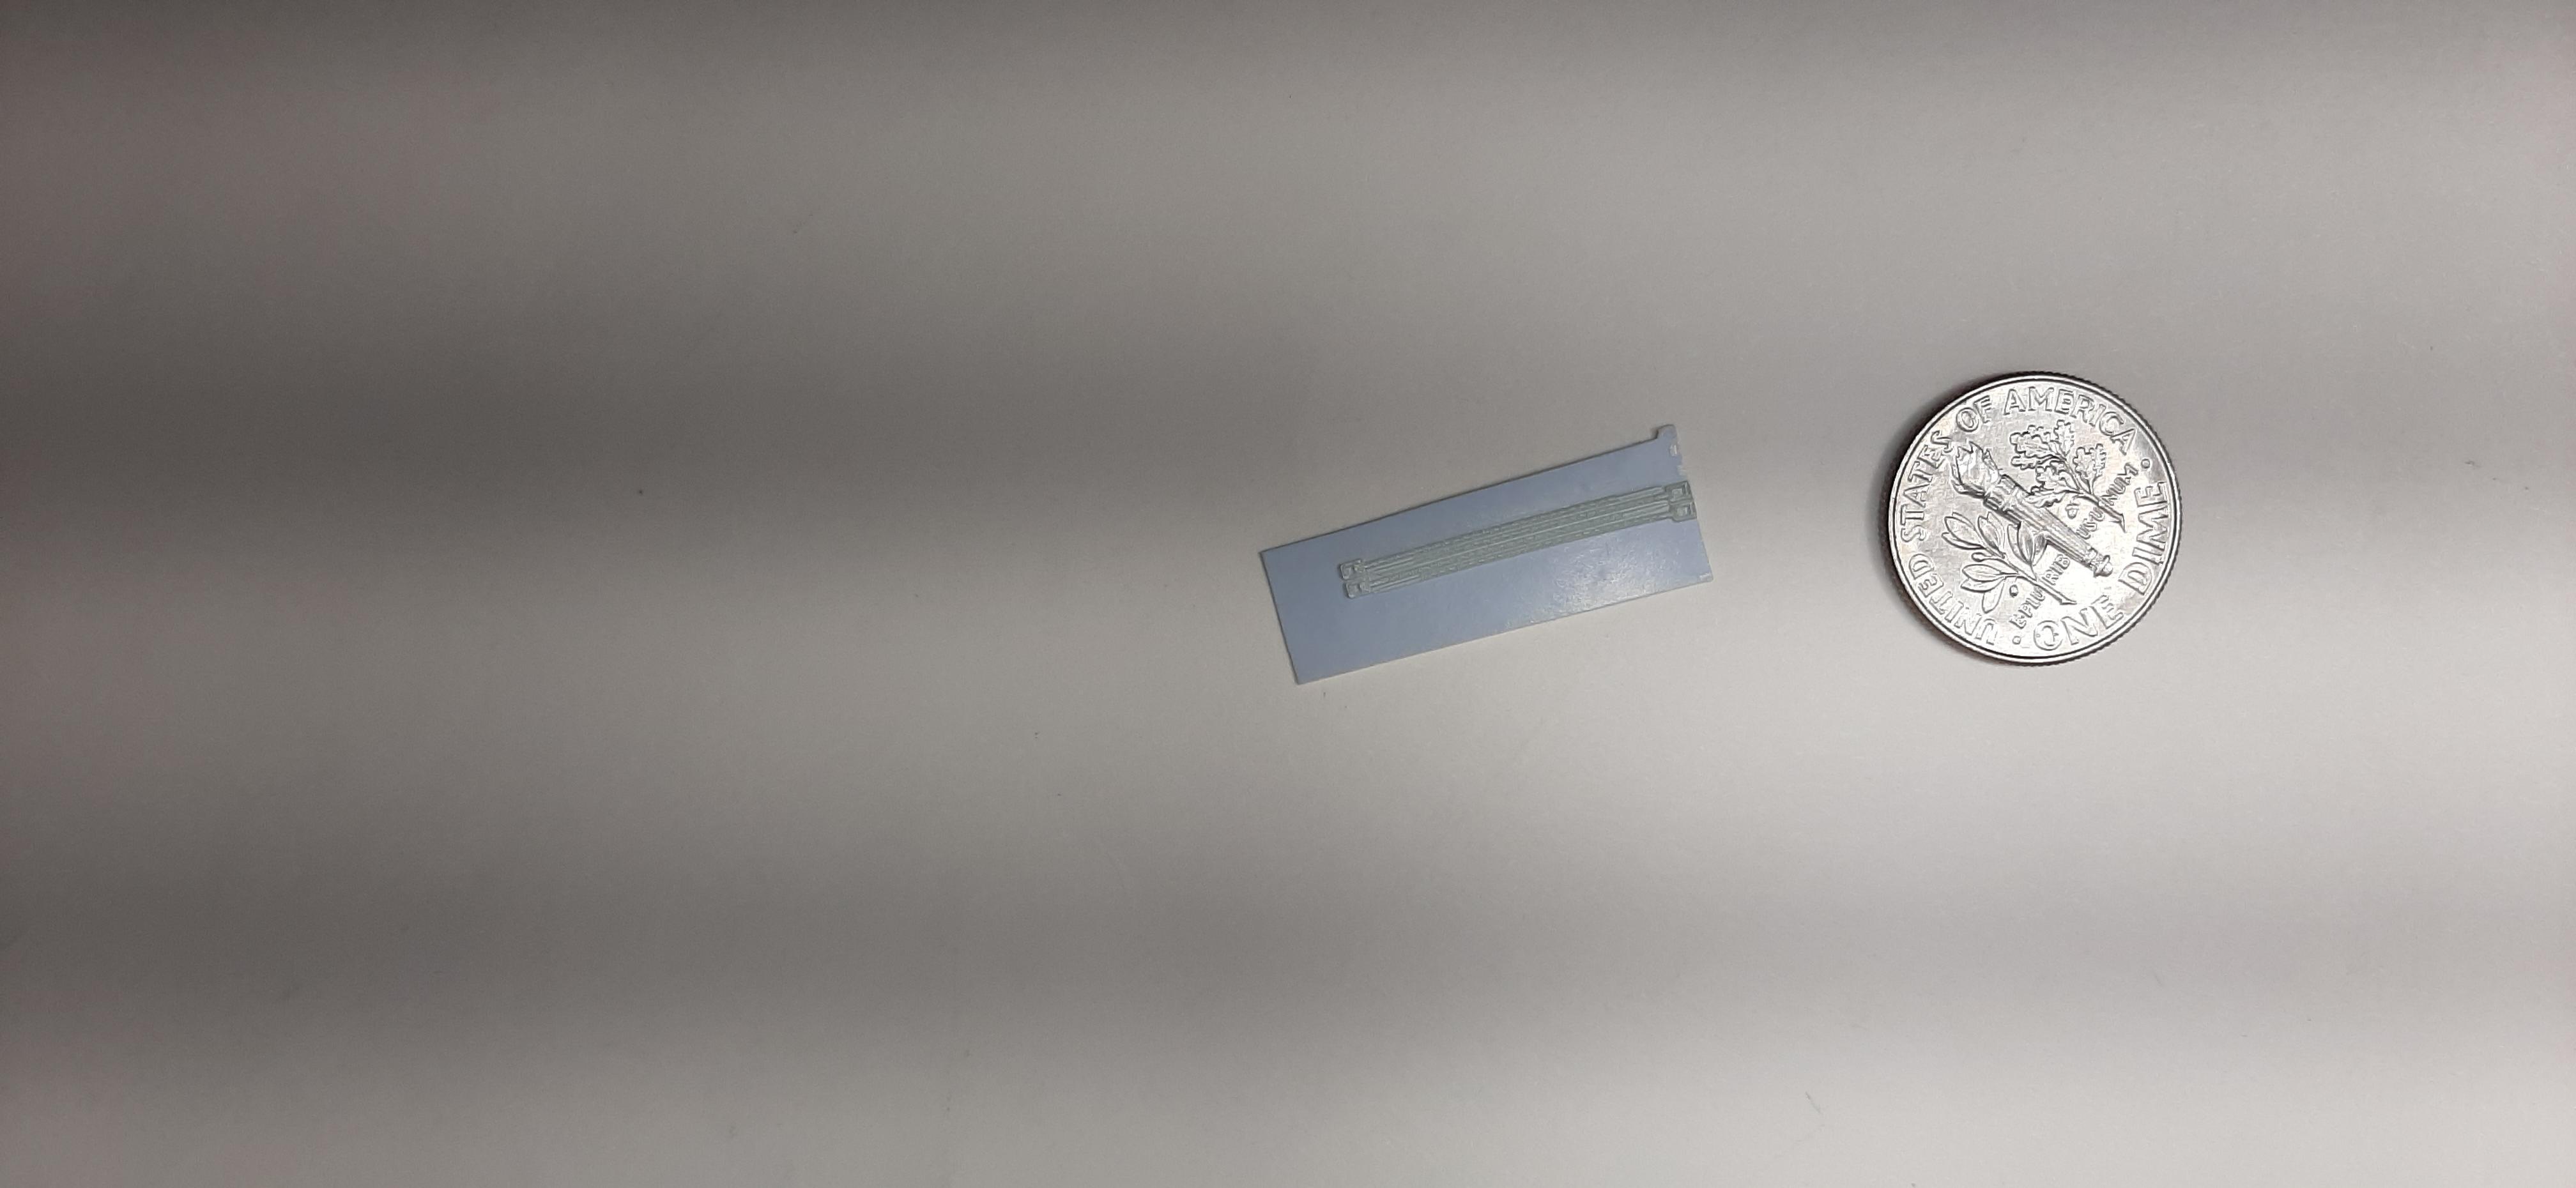
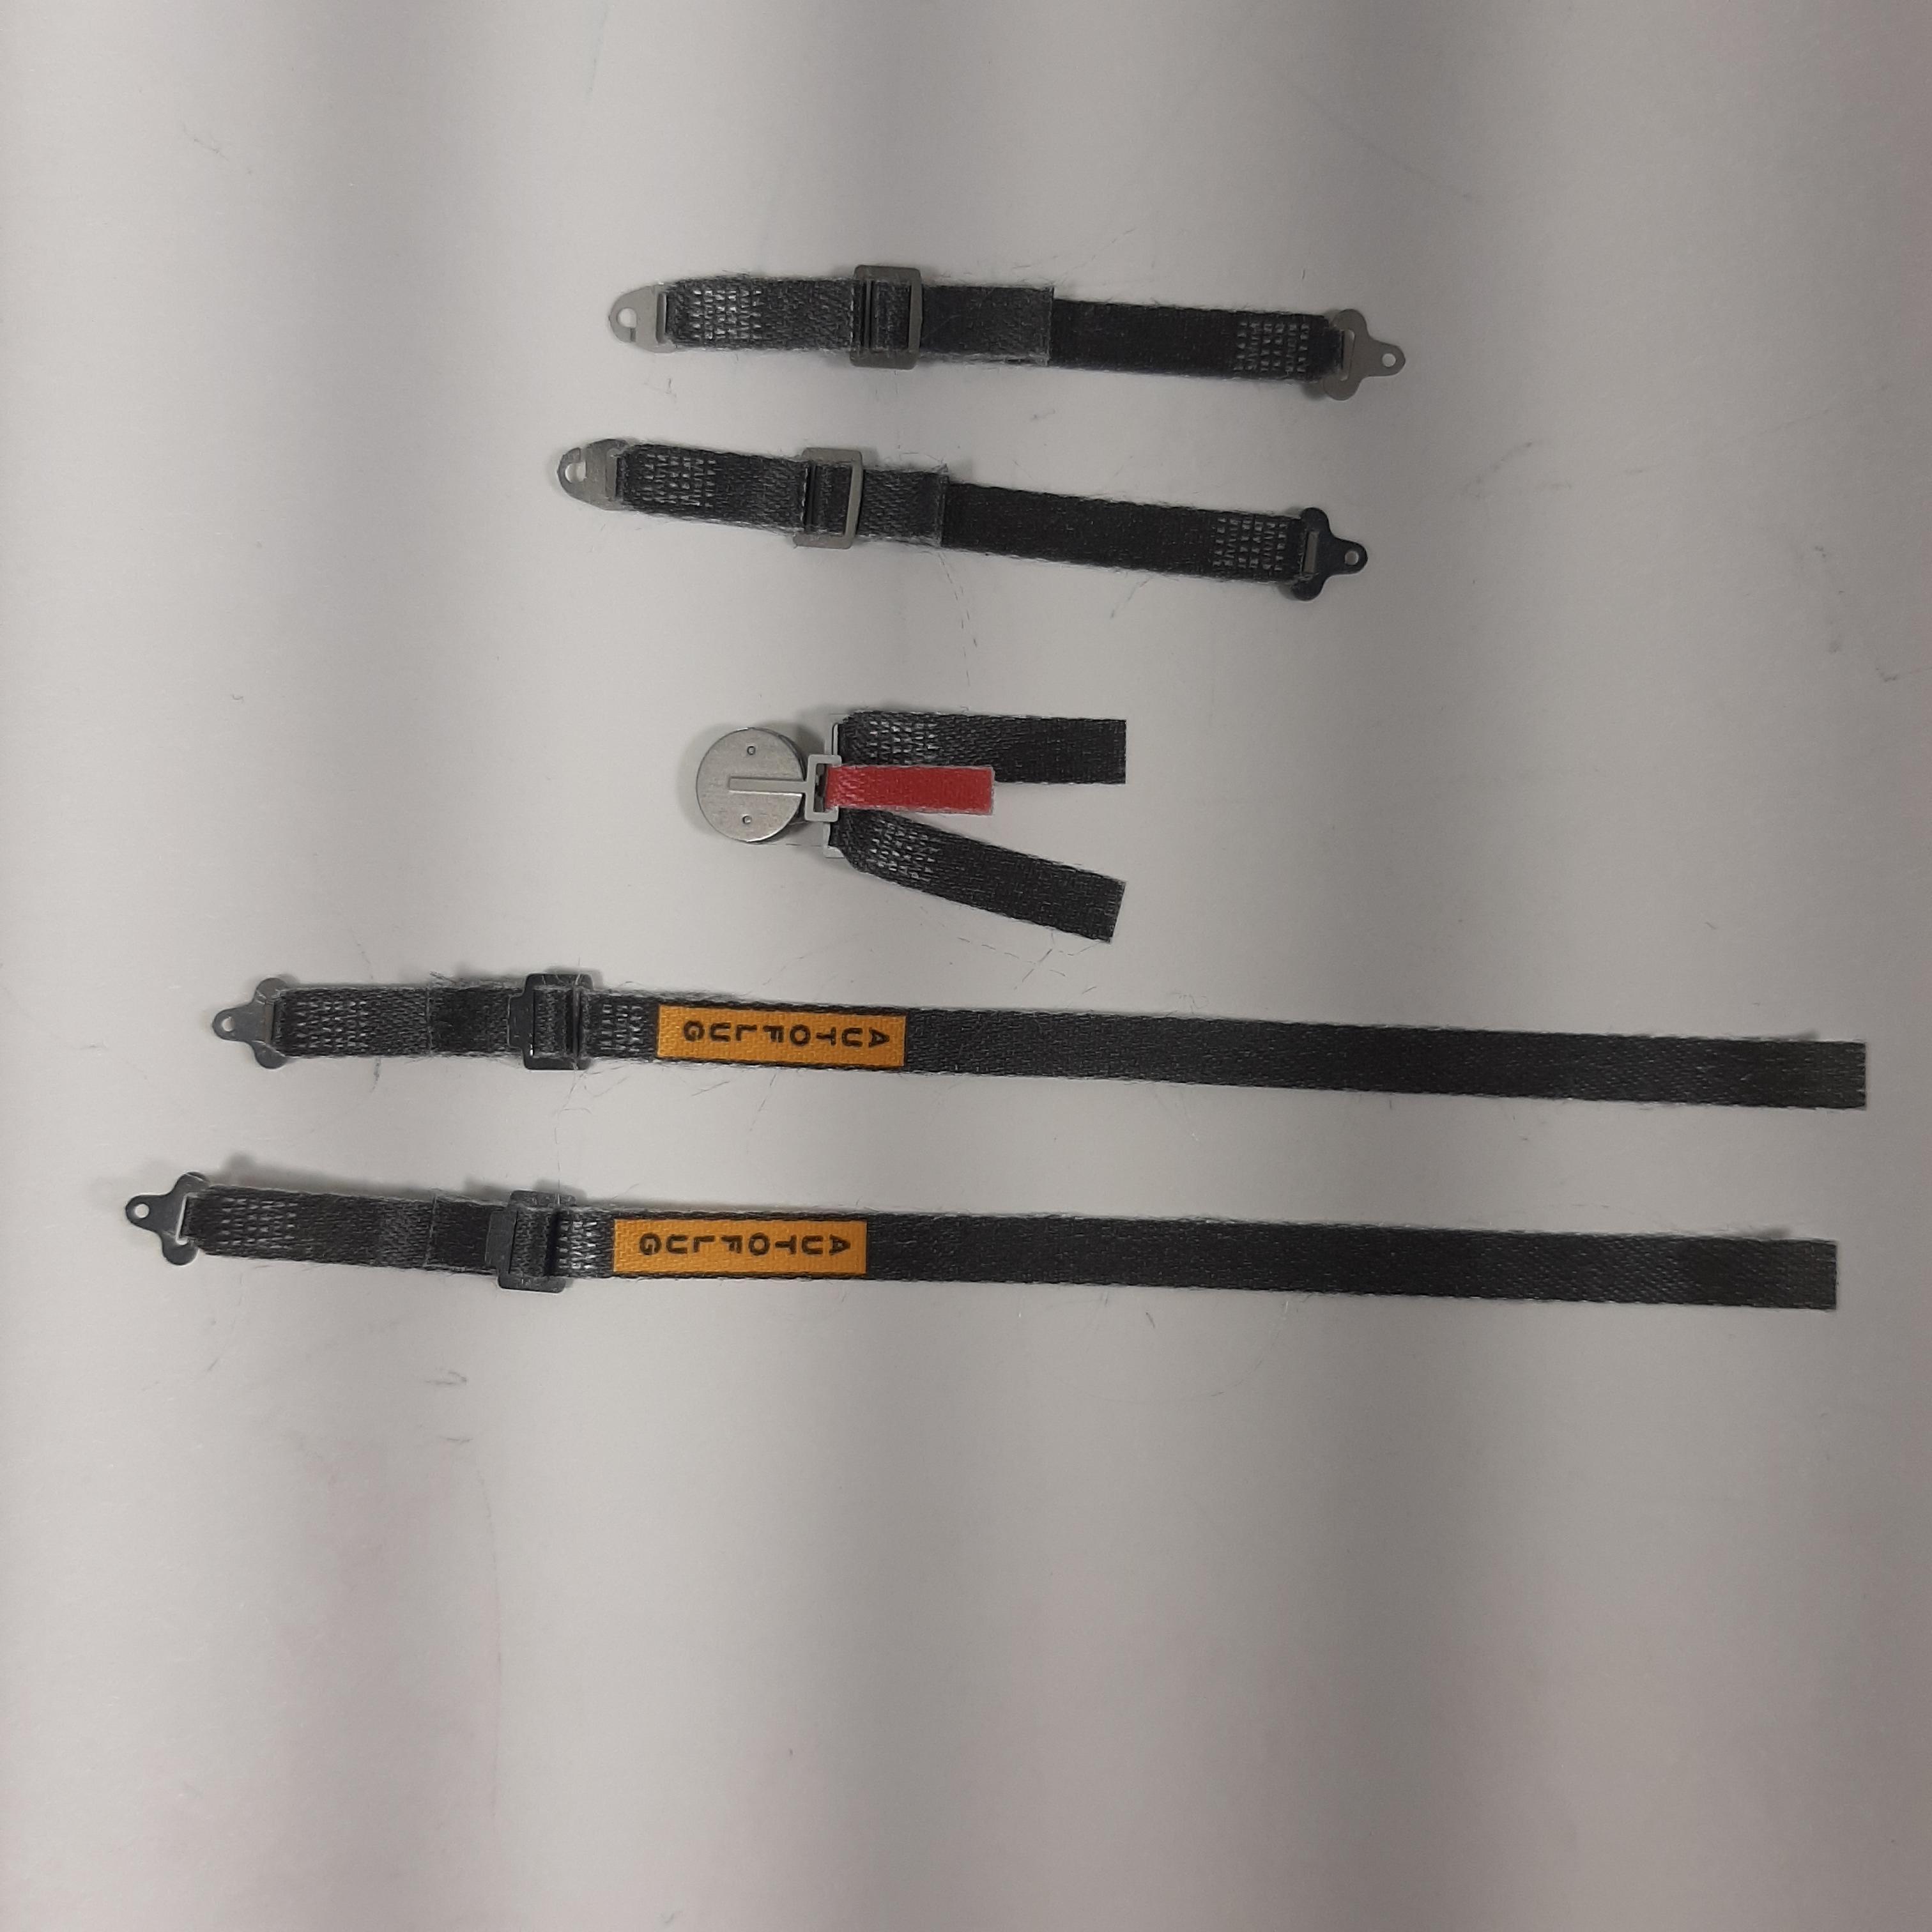
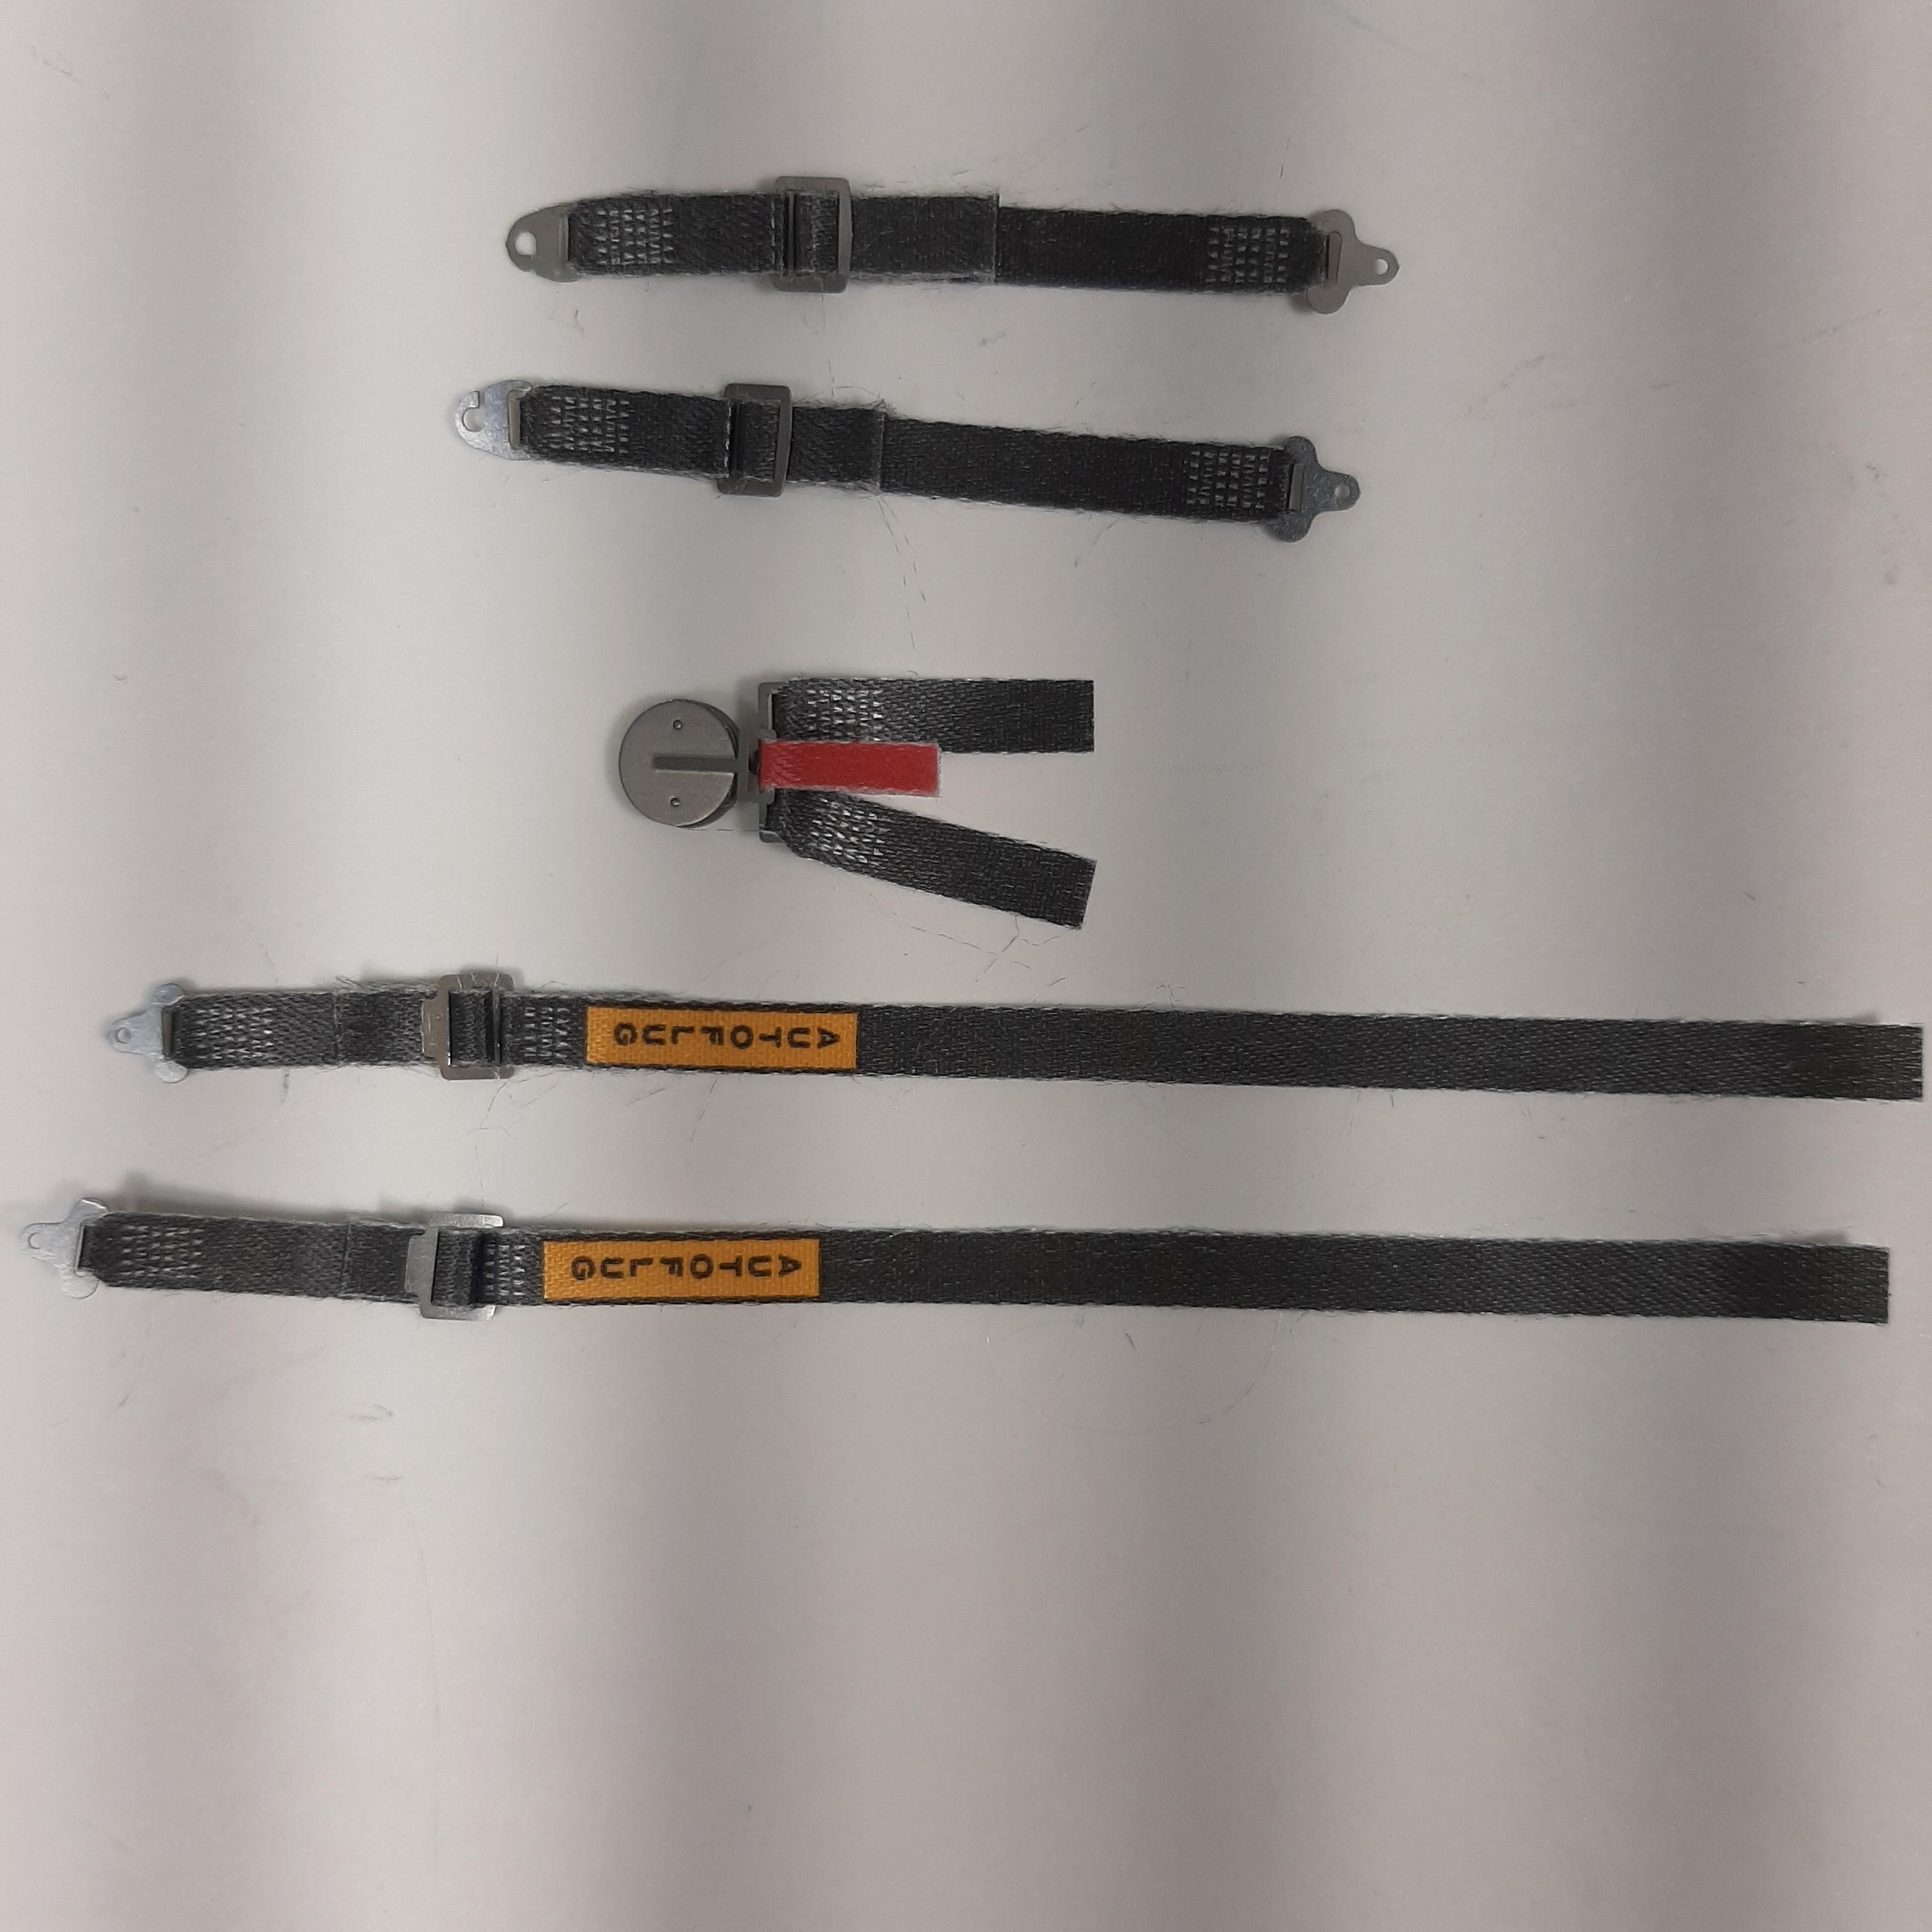
Installed the seat belts this weekend and started working on the fire system distribution line that provides fire extinguishing to the drivers cockpit. The Tamiya seat belt material and PE hardware was some of the easiest I have ever worked with. Unseen in the pictures are the eyelets that the lap belts click into on the sides of the cockpit. Great detail! The fire distribution line is made out of 3/64" Evergreen rod and the distribution holes were drilled with a #68 bit. It took me four tries to bend the rod in the right shape with all the bends in the right spots. Not totally happy with the final result but I think it is a cool detail. I still need to make two straps to hold the line to the dash. The line is held to the roll cage using MFH 1/12th scale zip ties. They are extremely delicate and i broke 11 of them to get six on the roll cage! Hopefully none of them break when I install the cage and hook up the fire line to the dash and the extinguisher hose.
-
1/12th Porsche 934 Vaillant
majel replied to majel's topic in WIP: Other Racing: Road Racing, Land Speed Racers
Thank you guys for the kind words. I'm currently trying to get the fire extinguisher distribution line made that runs along the bottom of the dash and along the drivers side of the to cage. It has been a fight the whole way. I'm going to try and get some pictures tomorrow of the progress and the seat belts installed on the seat (not connected to the roll cage yet). -
Magnifier 1/12 Ford GT 40
majel replied to cobraman's topic in WIP: Other Racing: Road Racing, Land Speed Racers
That is coming along very nicely Ray, great job! -
72 Ferrari 312PB
majel replied to Chris Smith's topic in Other Racing: Road Racing, Salt Flat Racers
That is a gorgeous model. The fact that you completed it in three months blows me away!! Fantastic job! -
That is a beautiful build, great choice for the color combo! Your BMF work is spot on, very impressive.
-
1/12th Porsche 934 Vaillant
majel replied to majel's topic in WIP: Other Racing: Road Racing, Land Speed Racers
I put the seat belts together today and I must say they are some of the easiest to assemble that I have used. They are made up of 23 PE pieces and 11 pre-cut pieces of seat belt material. As soon as I get the seat painted I can get the belts installed. The frame of the seat seems to be a semi gloss black and the padding a dark grey. I'm trying to mix something up that will be close to the pictures I have. Sorry the pictures aren't real good, hopefully when I get final pictures of the assembled chassis outside they will be better.
-
Very cool funny car! The paint job is fantastic, what a great idea.
-
1/12th Porsche 934 Vaillant
majel replied to majel's topic in WIP: Other Racing: Road Racing, Land Speed Racers
Thanks David! Maybe a small carry on? -
Super Gas '77 Vega--Completed! (11/12)
majel replied to Straightliner59's topic in WIP: Drag Racing Models
That is some fantastic tin work and bead rolling. Amazing build so far! -
Project 1/16th AA/FA AND HERE IT IS!
majel replied to Ian McLaren's topic in WIP: Drag Racing Models
This is going to be an awesome build! I really like the look of the canards on the front. I agree with Daniel, I think the dragster headers look better, I like that they are tucked up closer to the body. Either way it looks fantastic! -
Magnifier 1/12 Ford GT 40
majel replied to cobraman's topic in WIP: Other Racing: Road Racing, Land Speed Racers
This is a great subject and with the detail of the large scale it should be a great build. Enjoy the build!! -
1/12th Porsche 934 Vaillant
majel replied to majel's topic in WIP: Other Racing: Road Racing, Land Speed Racers
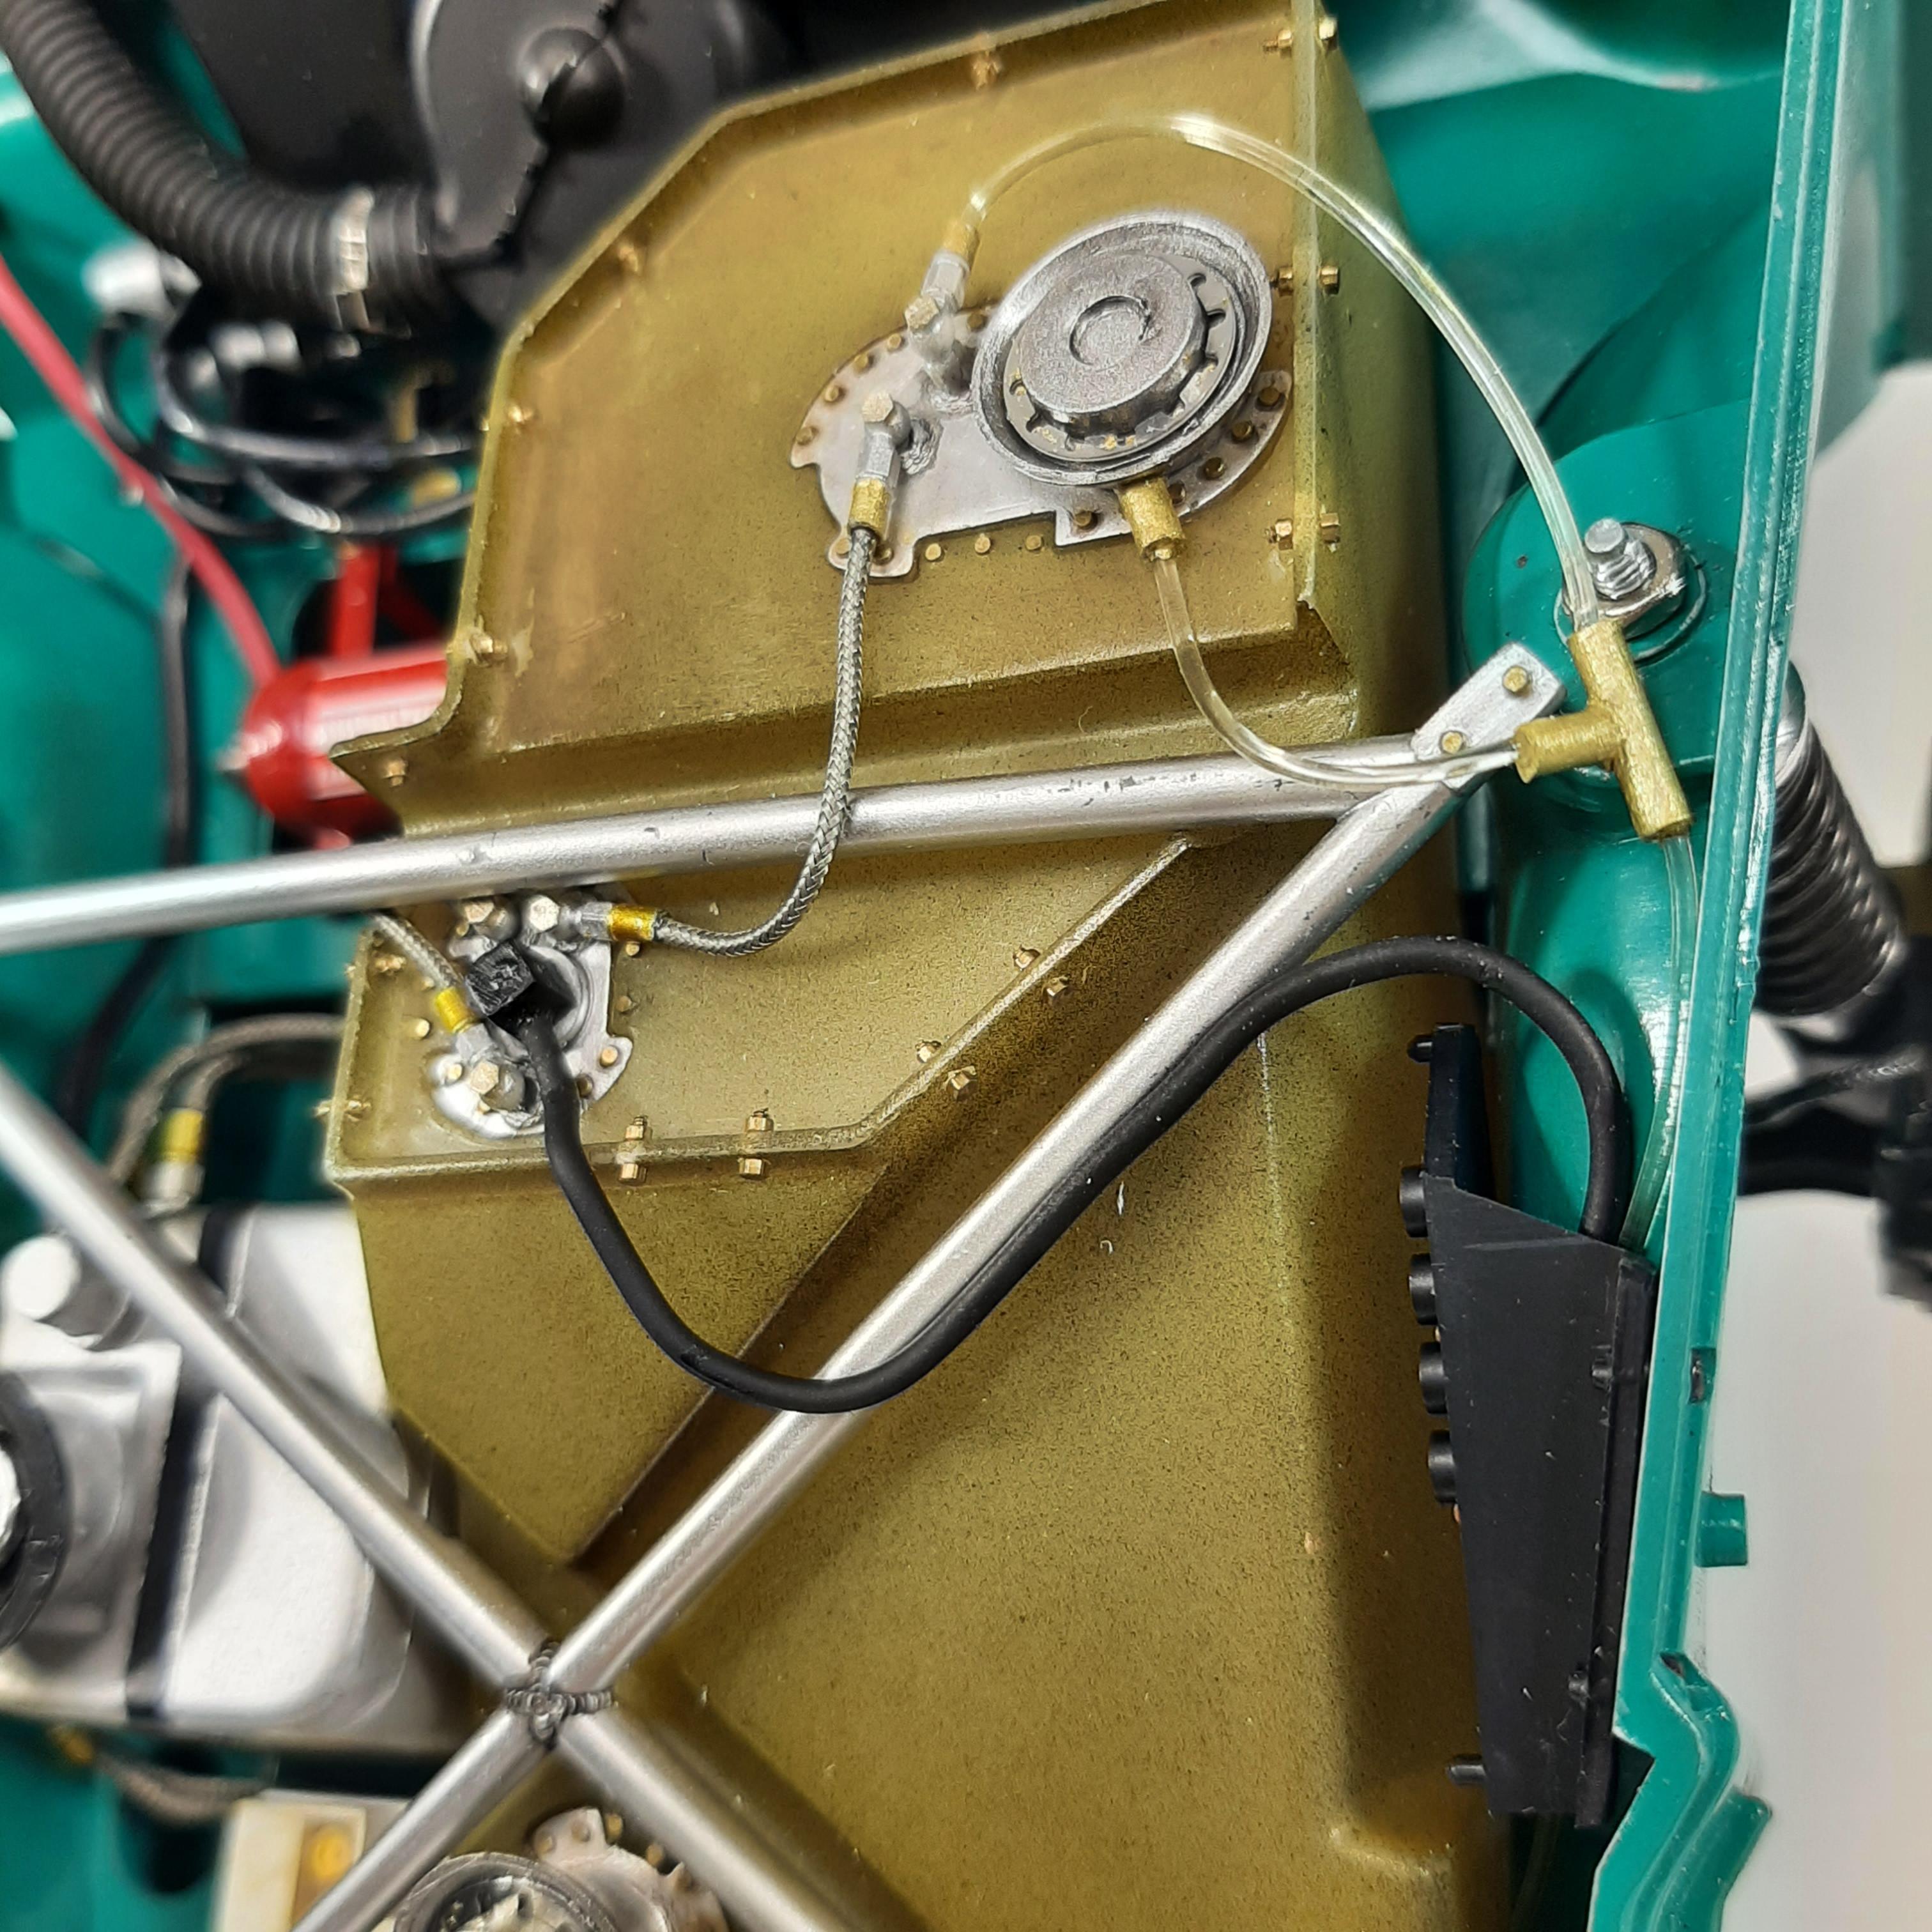
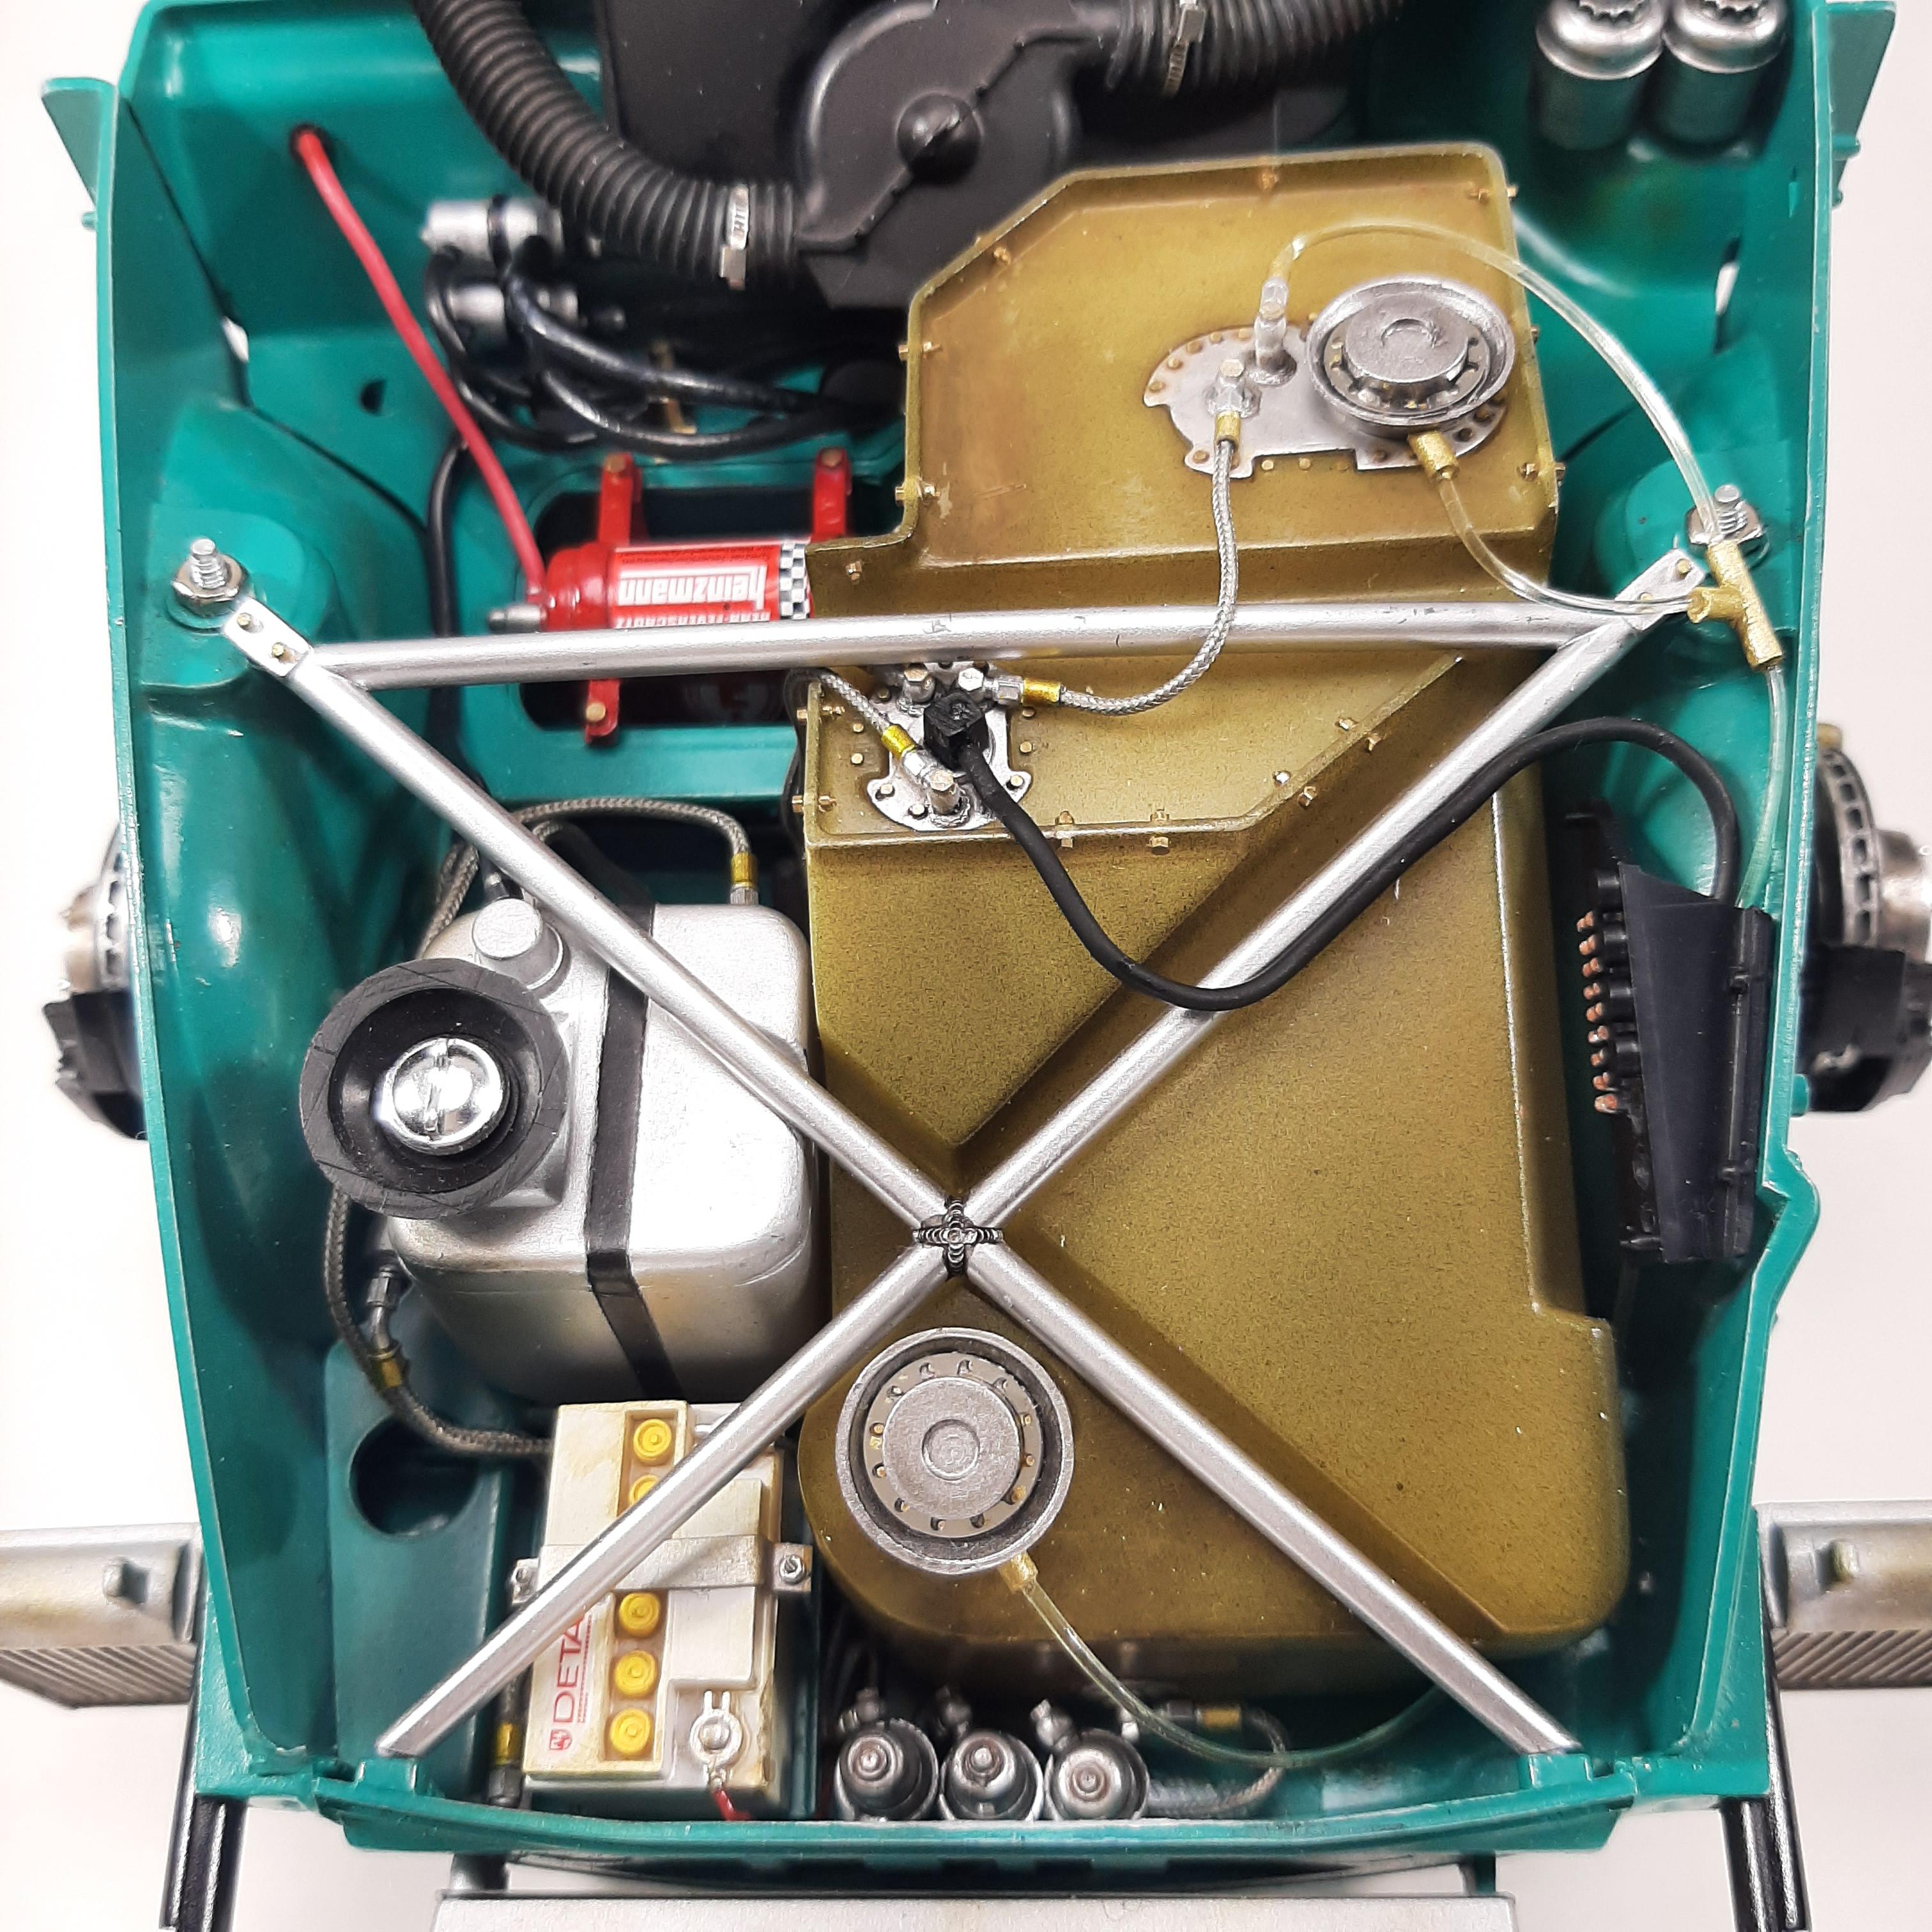
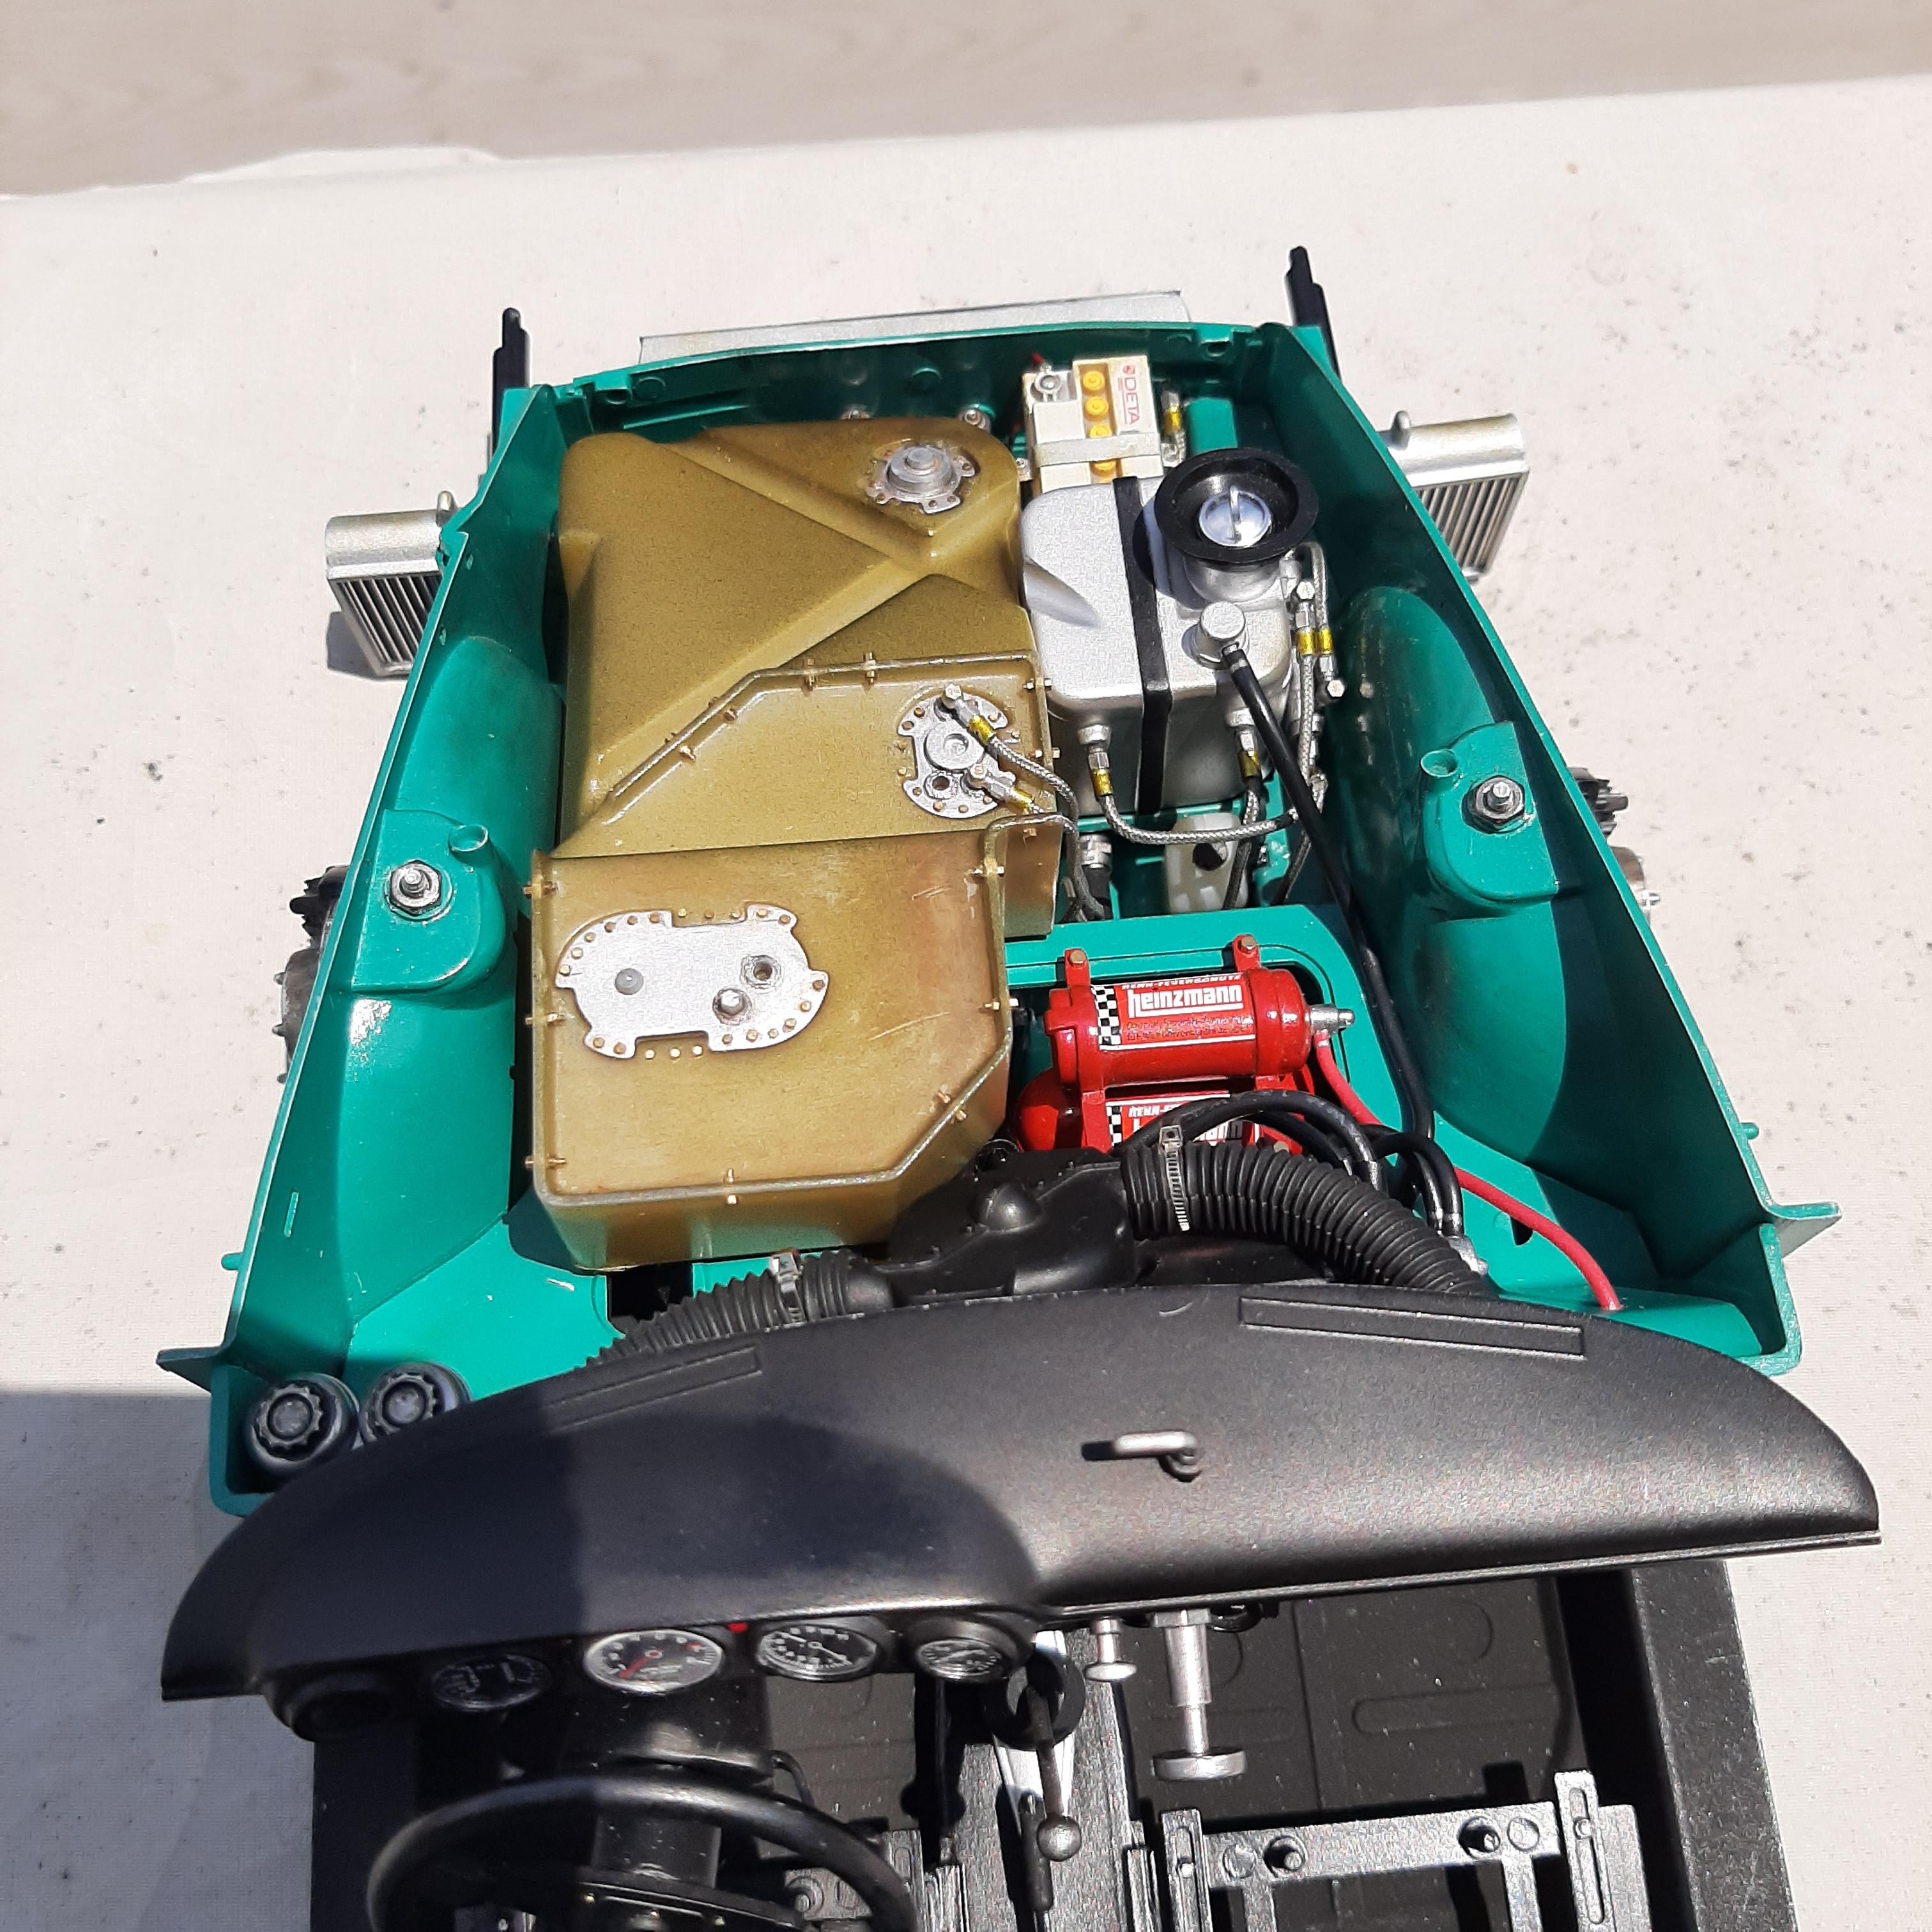
Other than some paint touch ups that will be done later the front fuel cell area is finally complete! I finished it up by adding clear .8mm stretch cord for the fuel overflow lines and 1/16th inch Evergreen styrene rod for the fittings and tee fitting drilled out to accept the clear lines. I think I made the tee fitting a little too large, it seems a little out of scale. I also made the electrical block for the fuel pump out of Evergreen square tubing and the wire is Cat6 phone wire stripped and covered with shrink tubing. Next will be the harness and installation of the seat.
-
1/12th Porsche 934 Vaillant
majel replied to majel's topic in WIP: Other Racing: Road Racing, Land Speed Racers
Thanks Jason! I was kind of afraid I would lose most of the details once the body goes on. At least I'll have the pictures to remind me what all went into it. -
1/12th Porsche 934 Vaillant
majel replied to majel's topic in WIP: Other Racing: Road Racing, Land Speed Racers
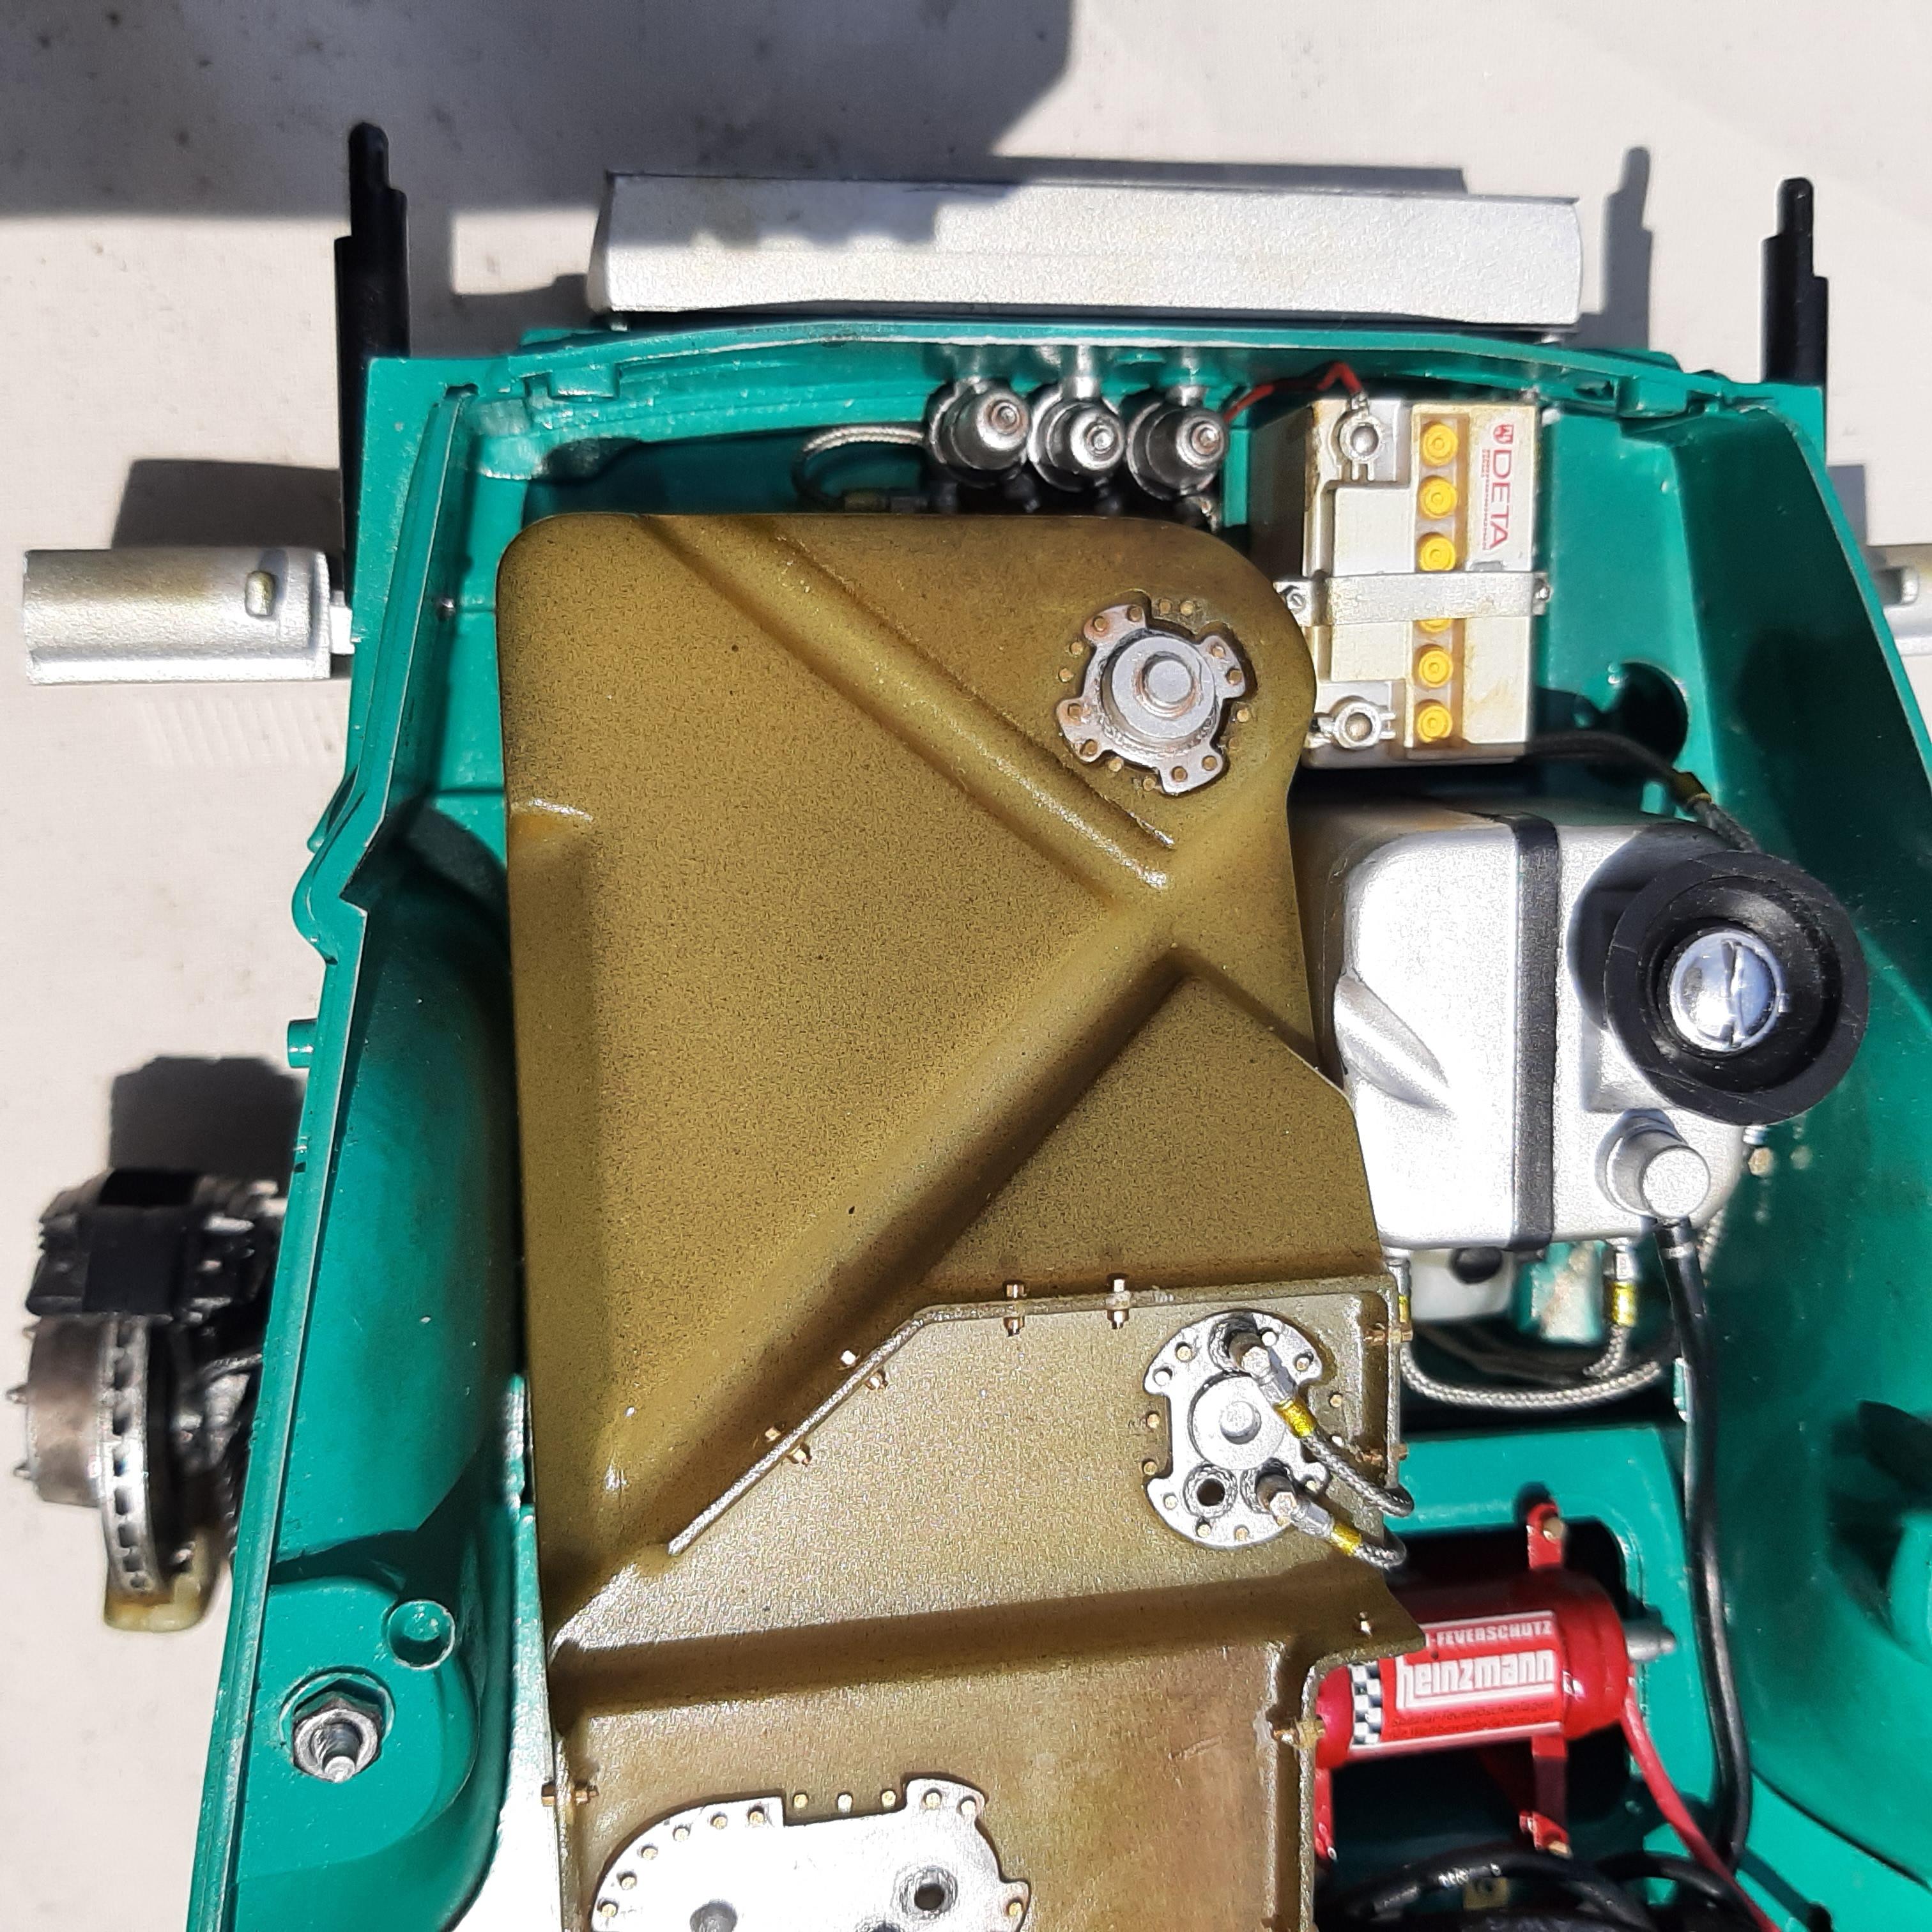
Installed the rest of the braided fuel lines and installed the fuel tank permanently. Realized that after finishing all of that the majority of it can not be seen once installed. I've got a few more things to finish up and the front "bonnet" will be complete.
-
1/12th Porsche 934 Vaillant
majel replied to majel's topic in WIP: Other Racing: Road Racing, Land Speed Racers
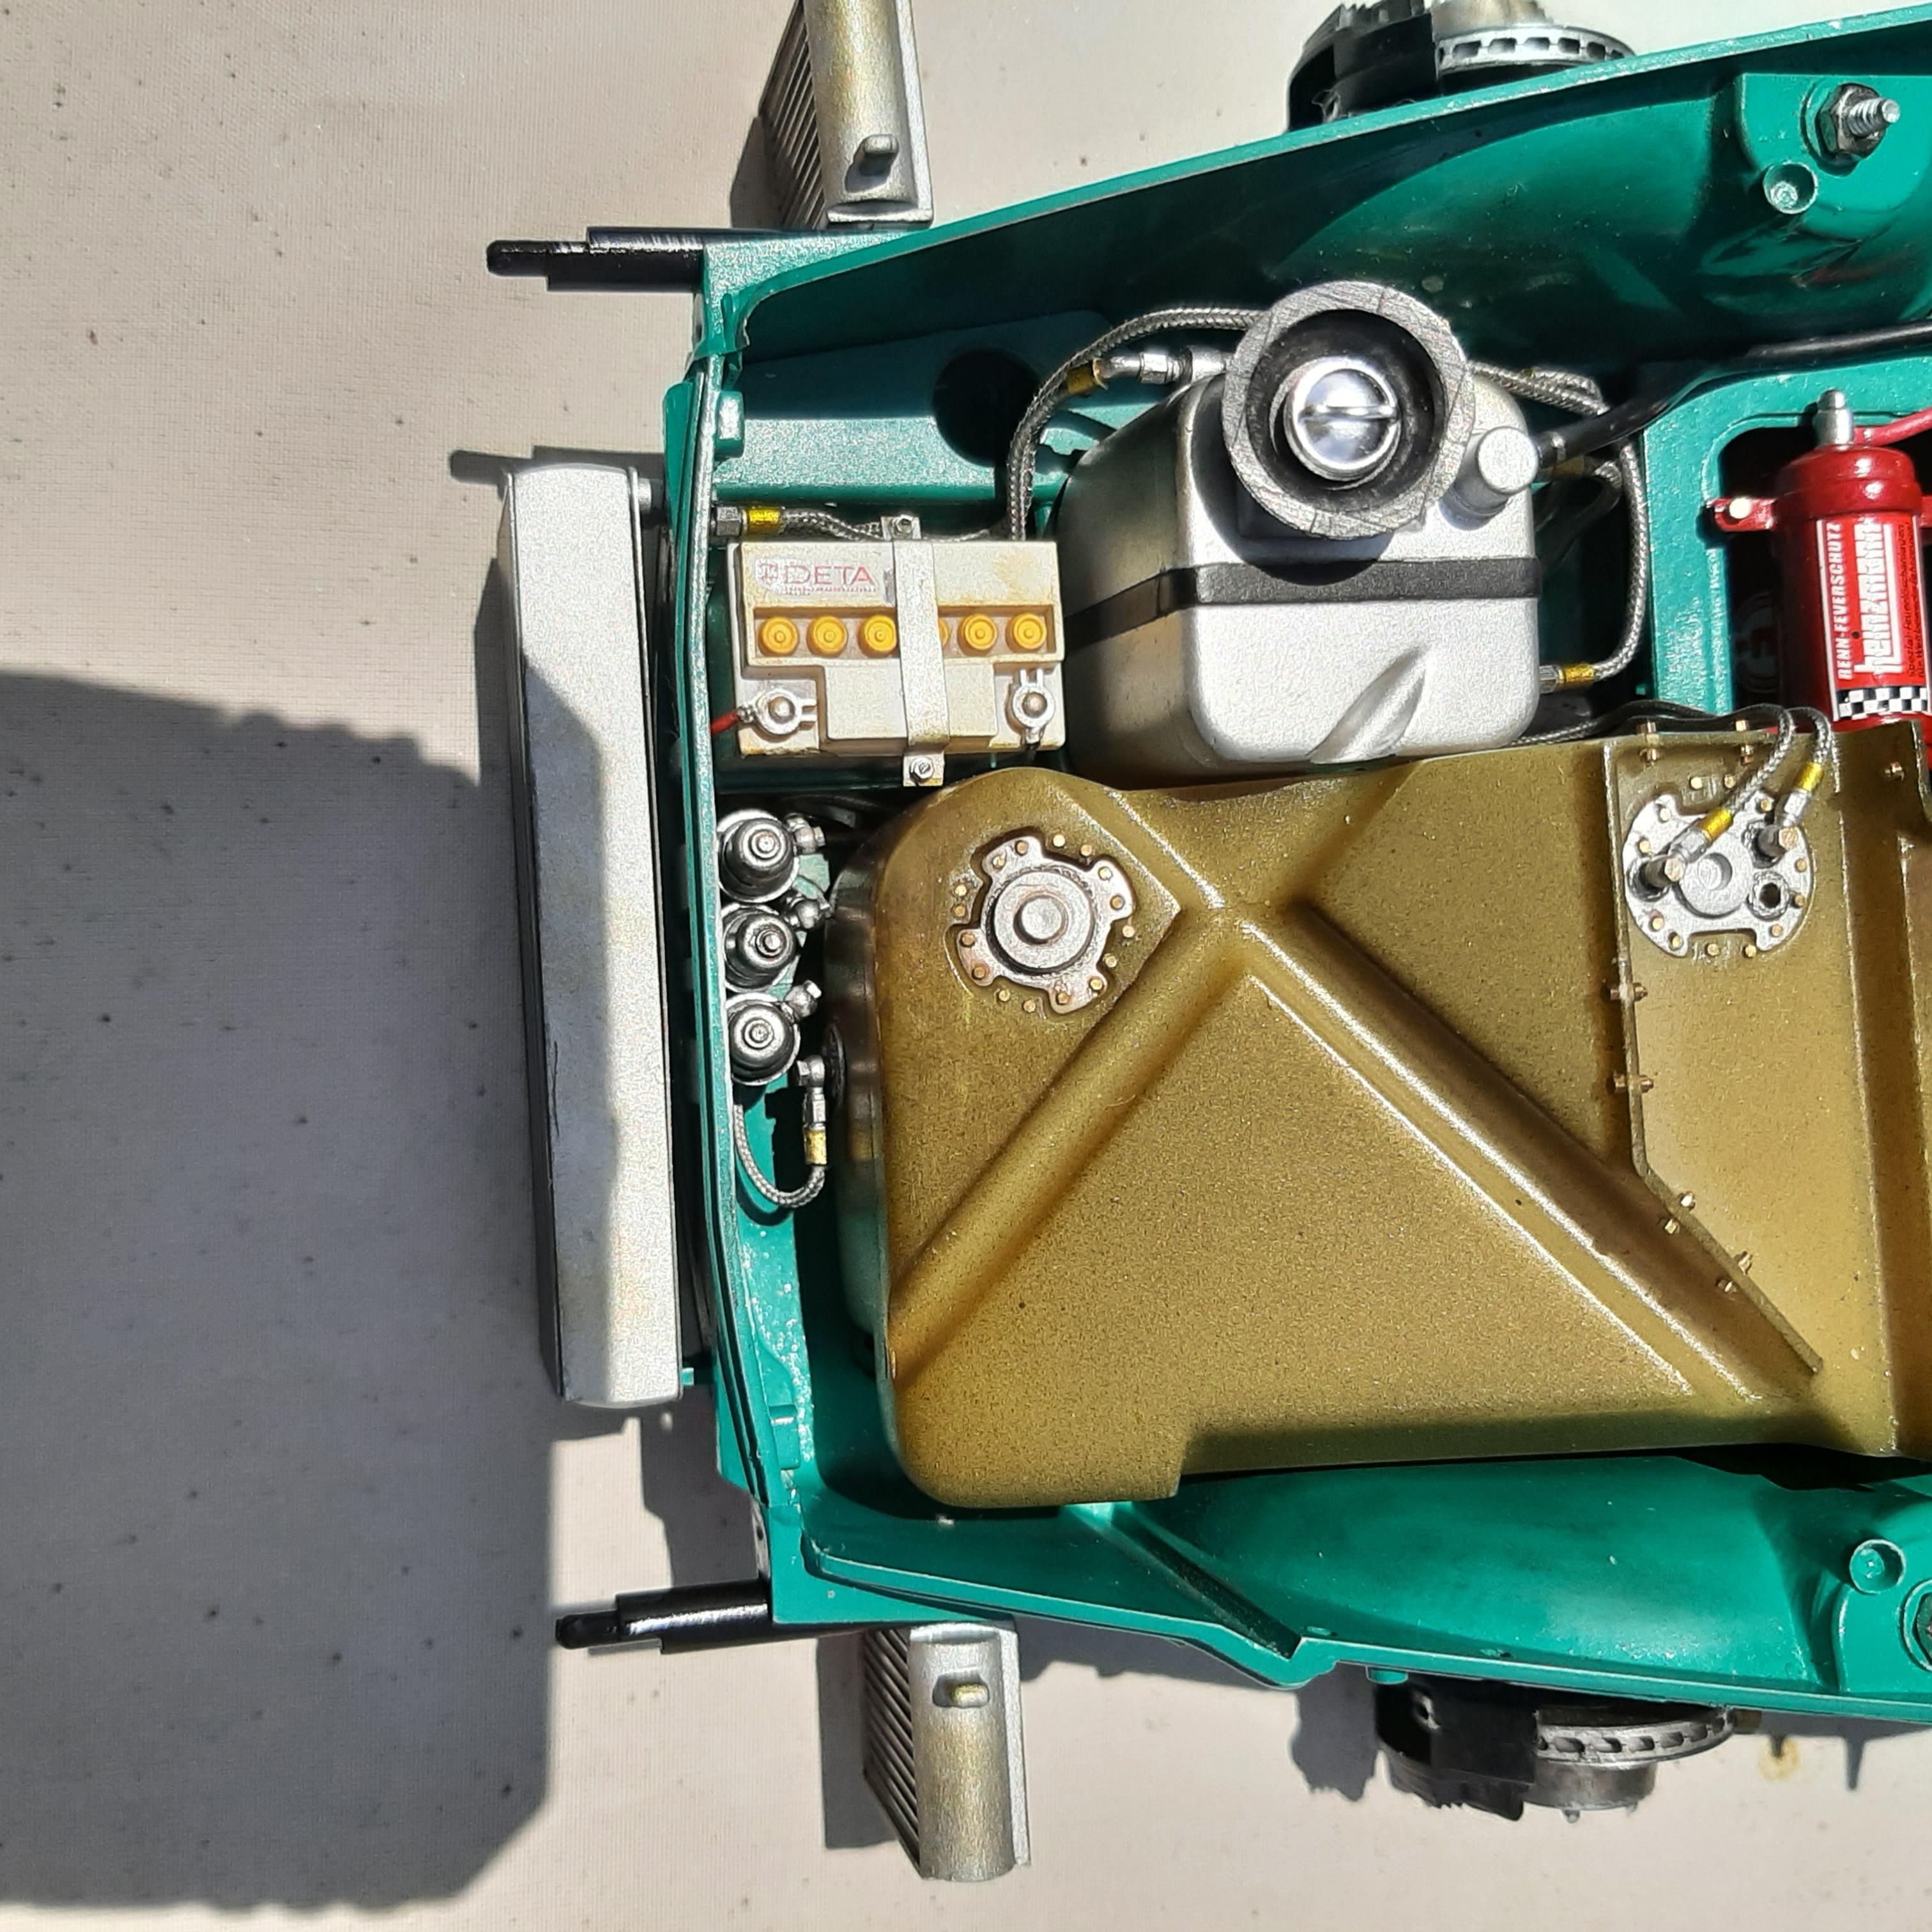
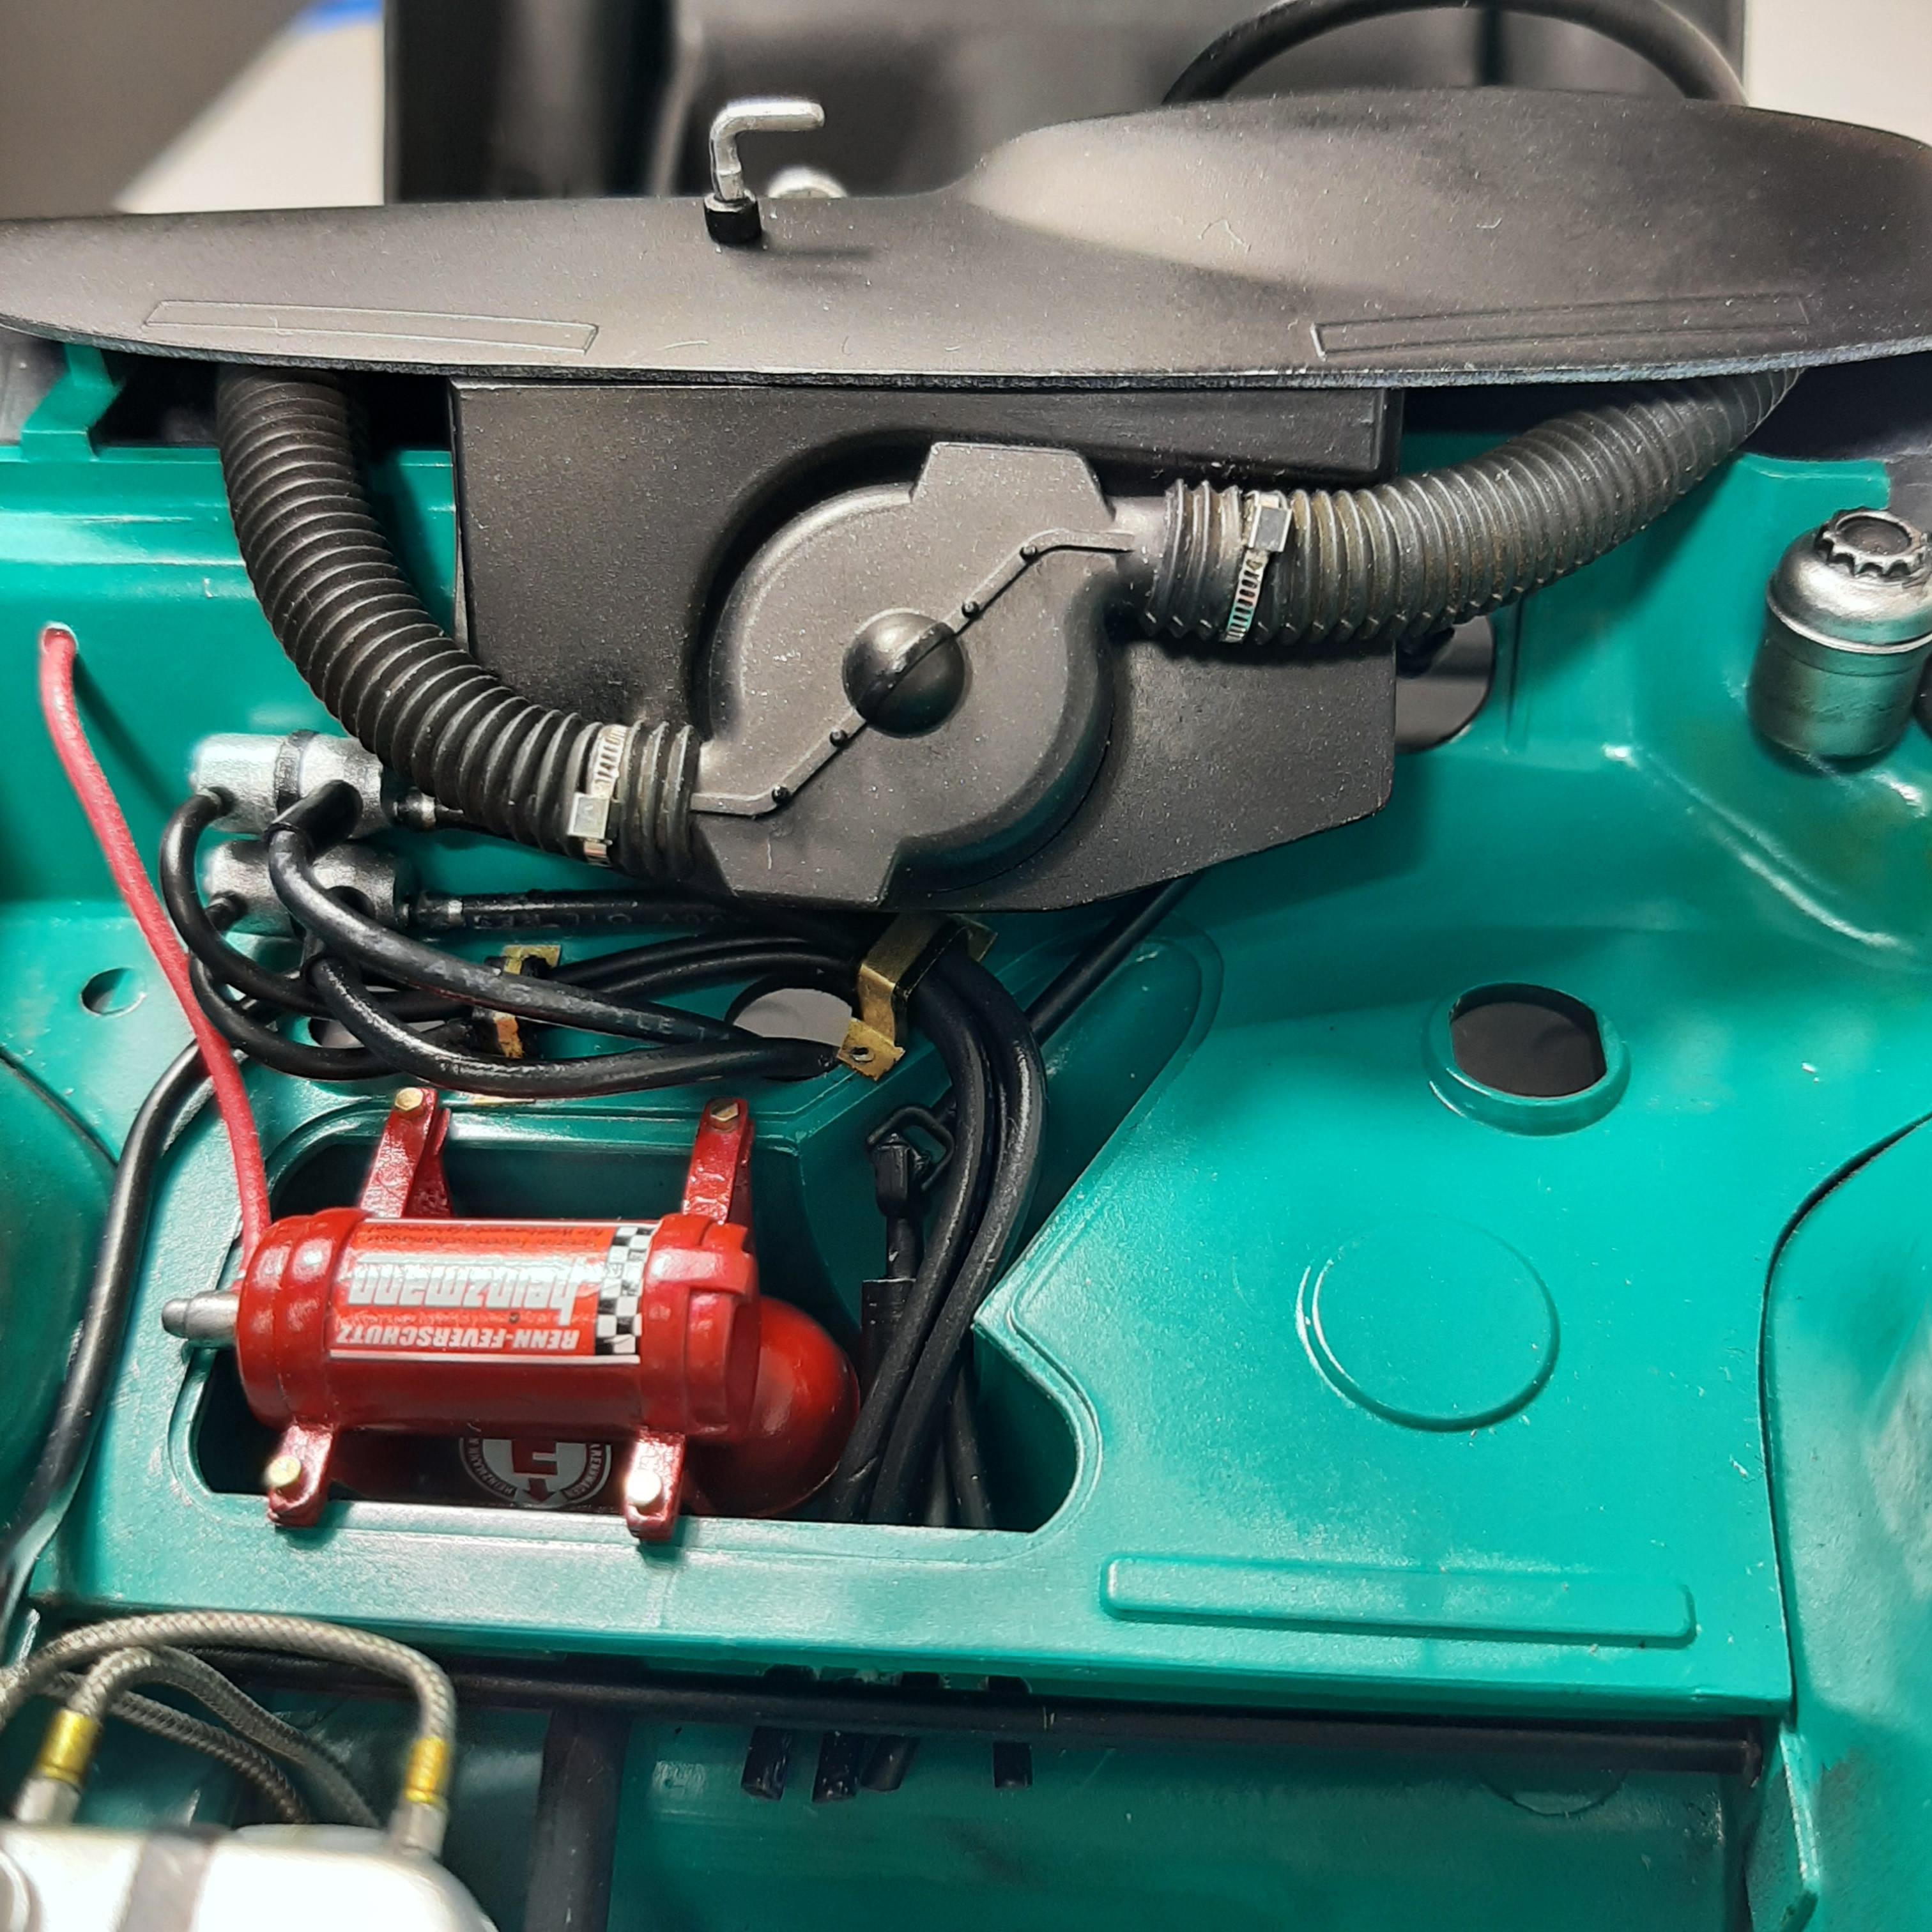
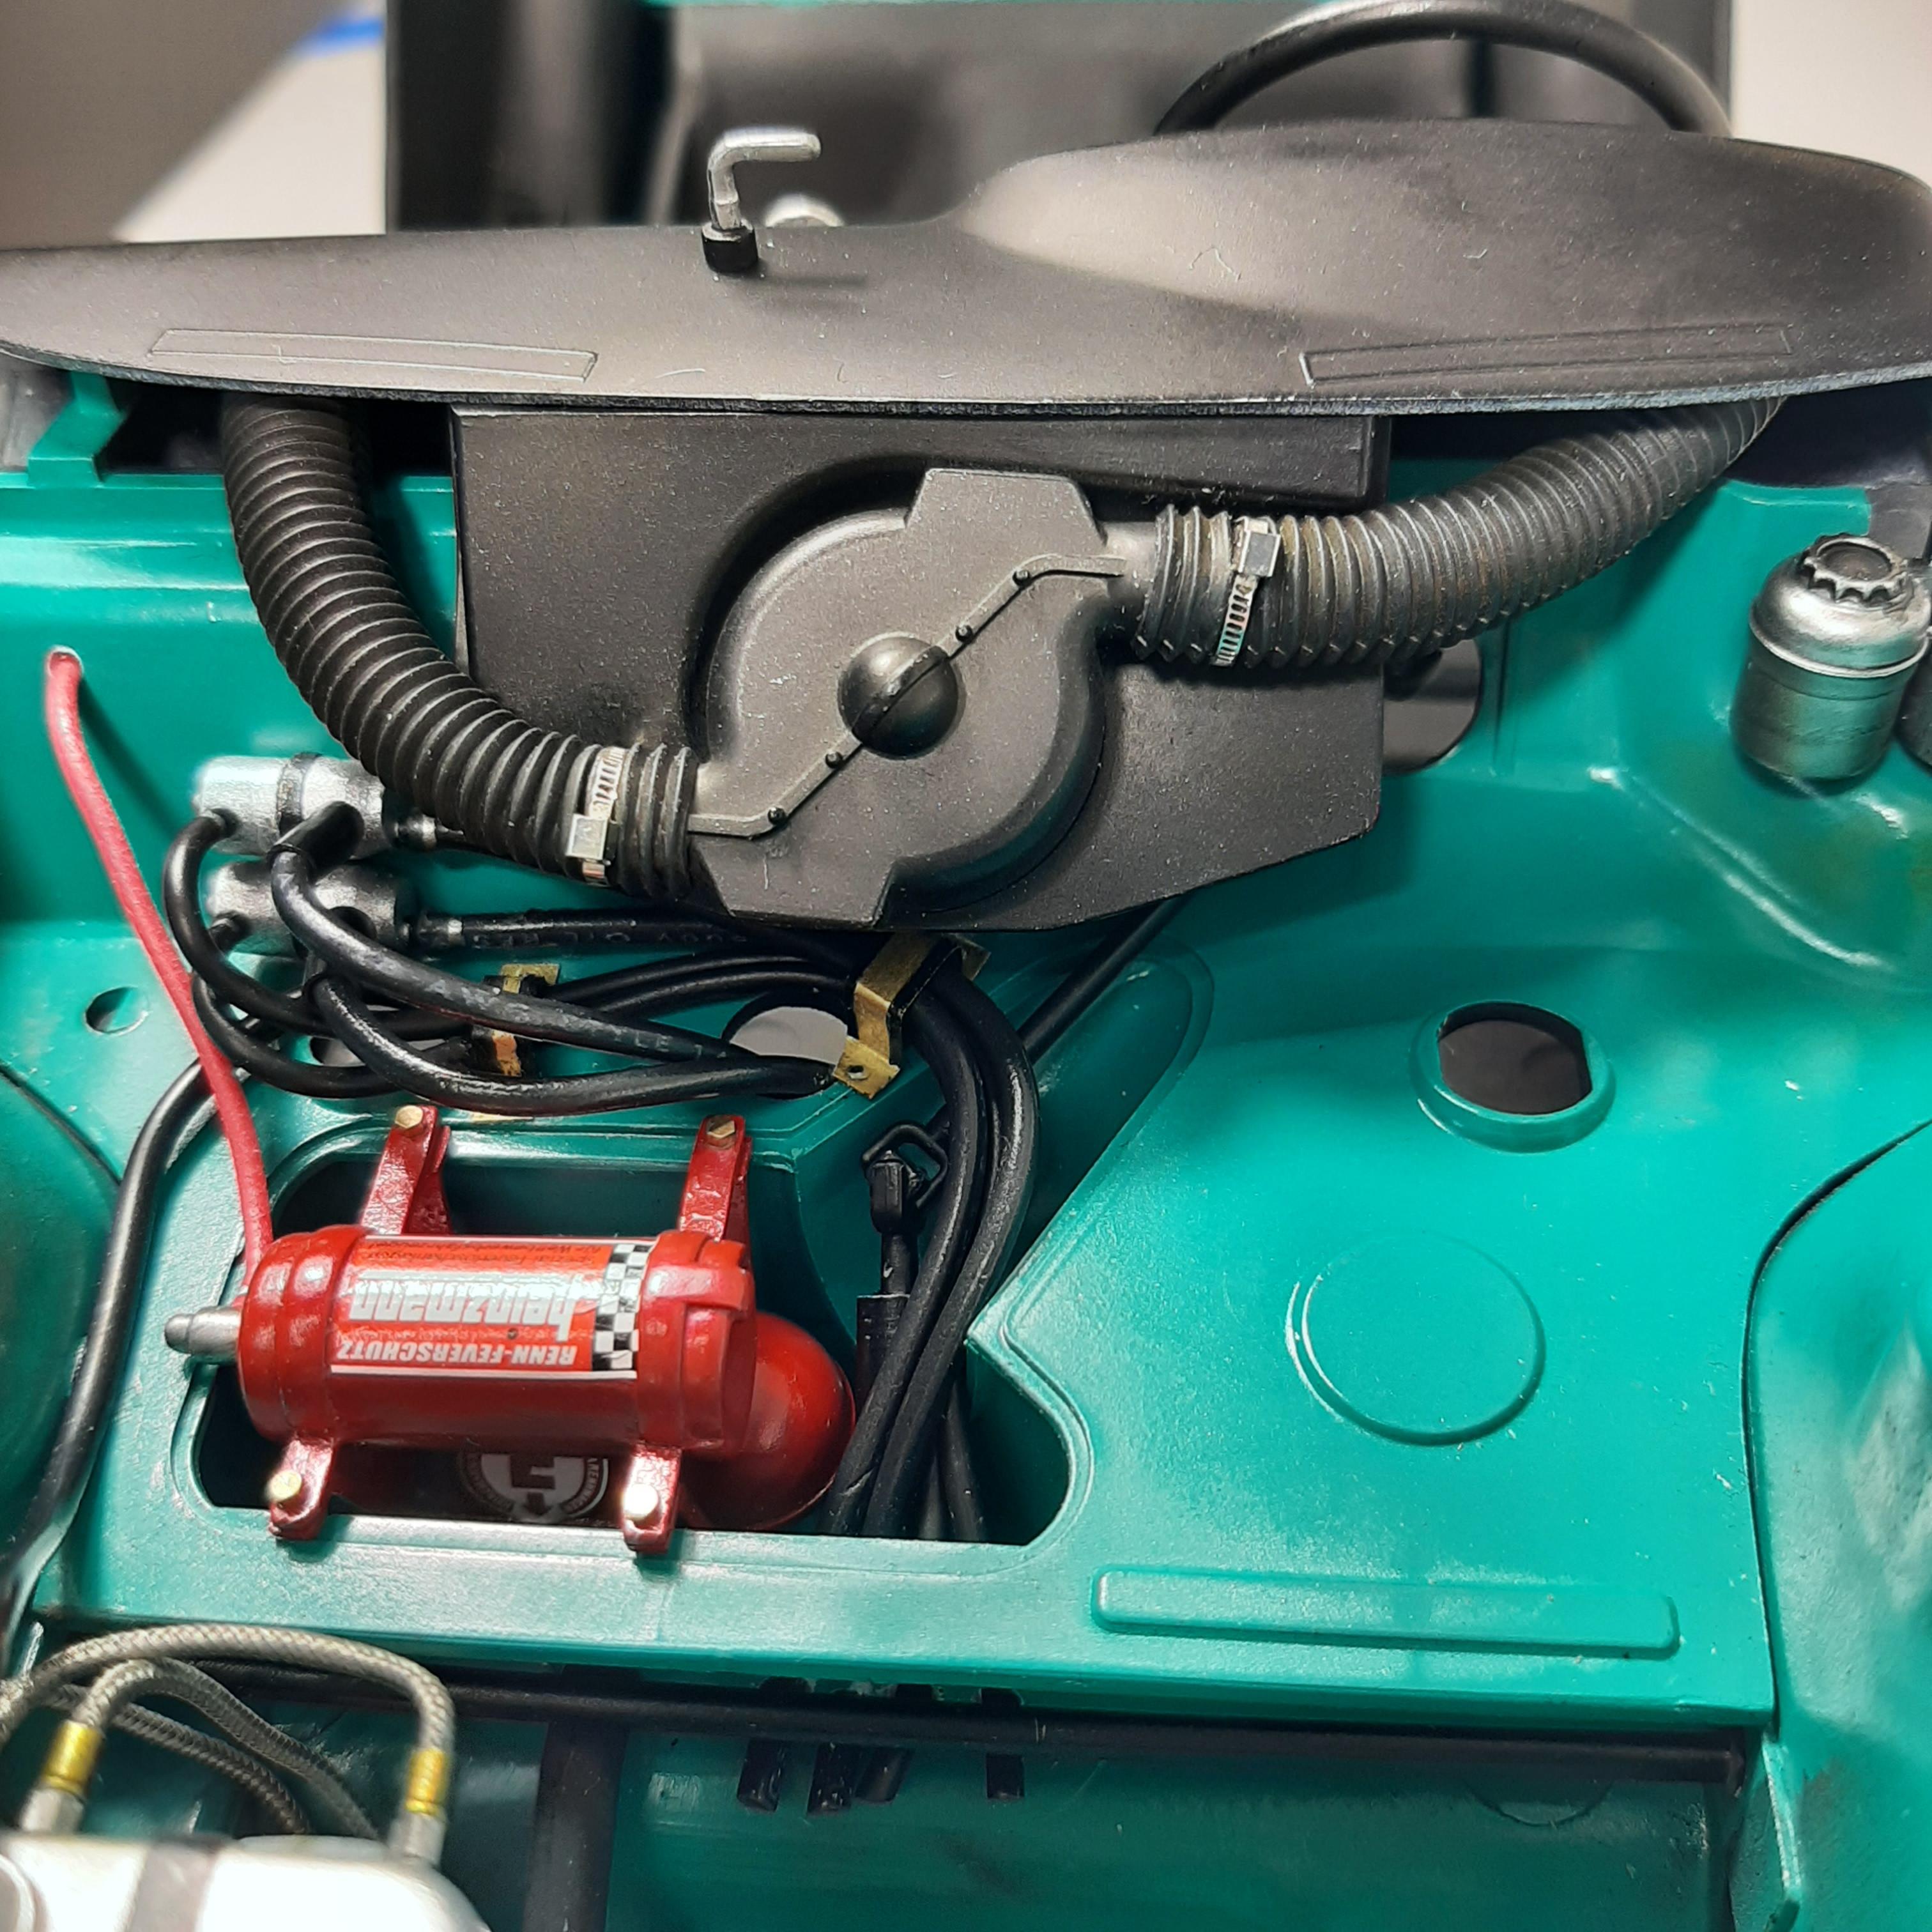
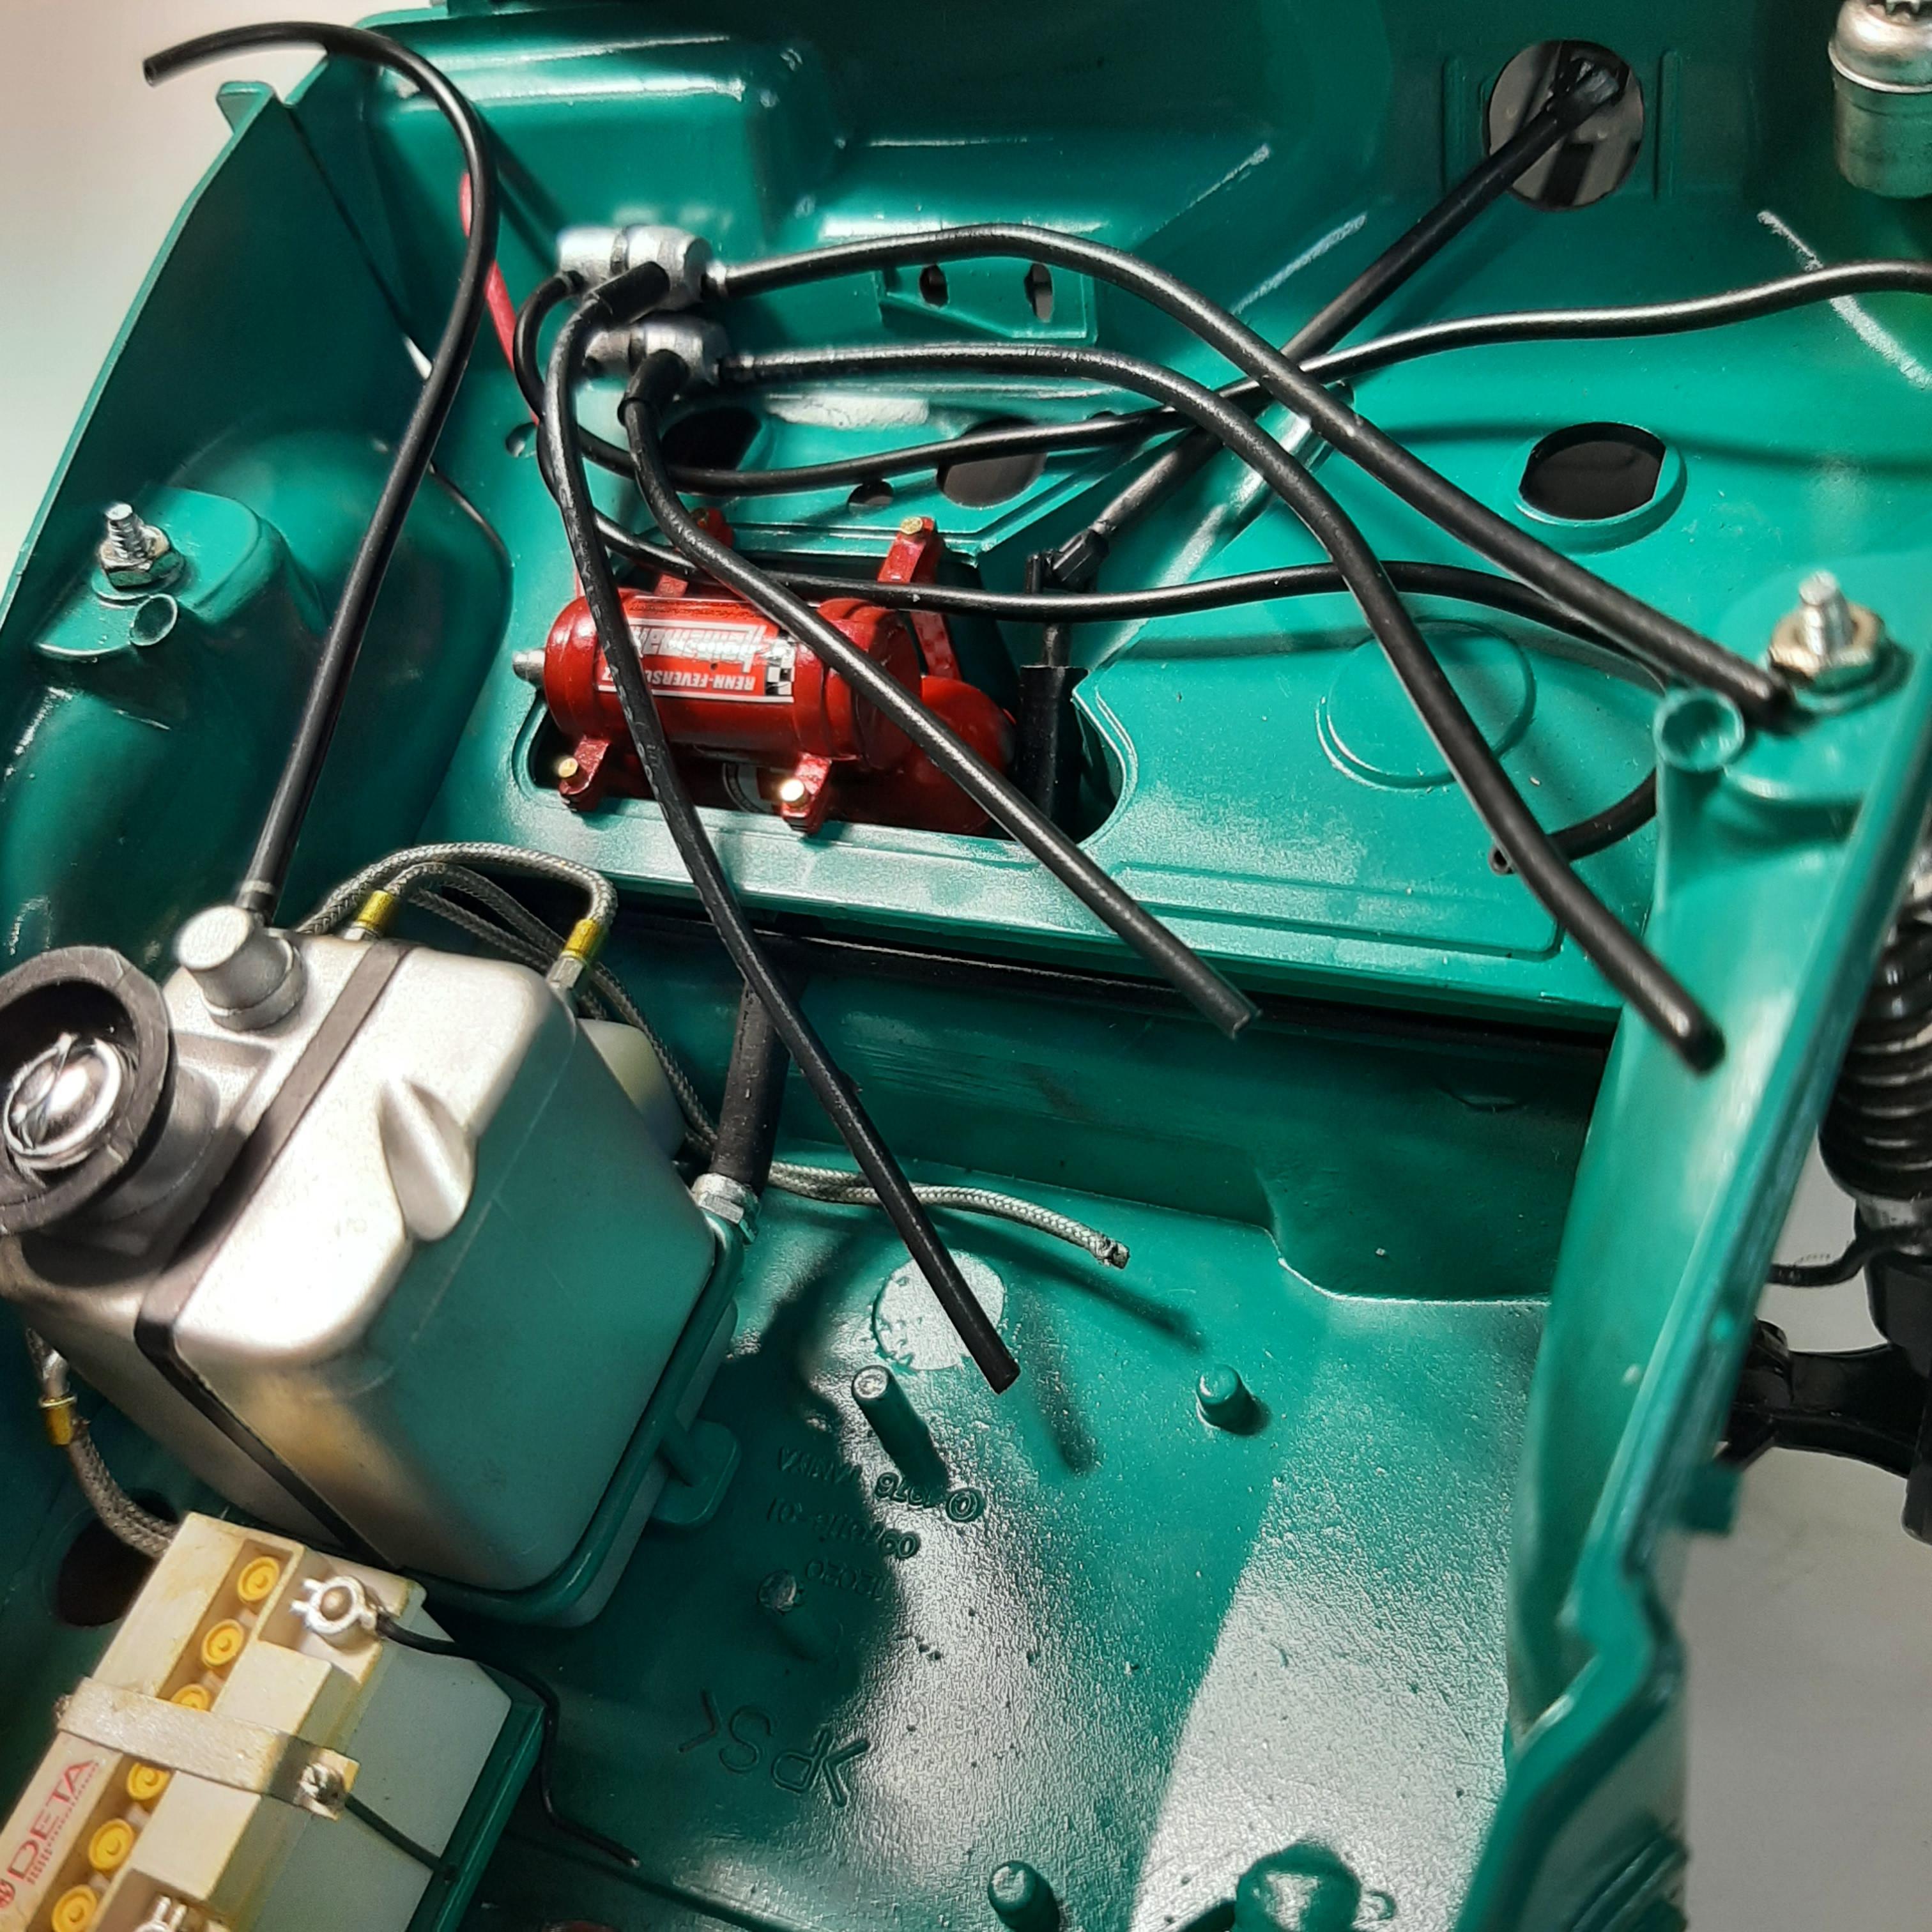
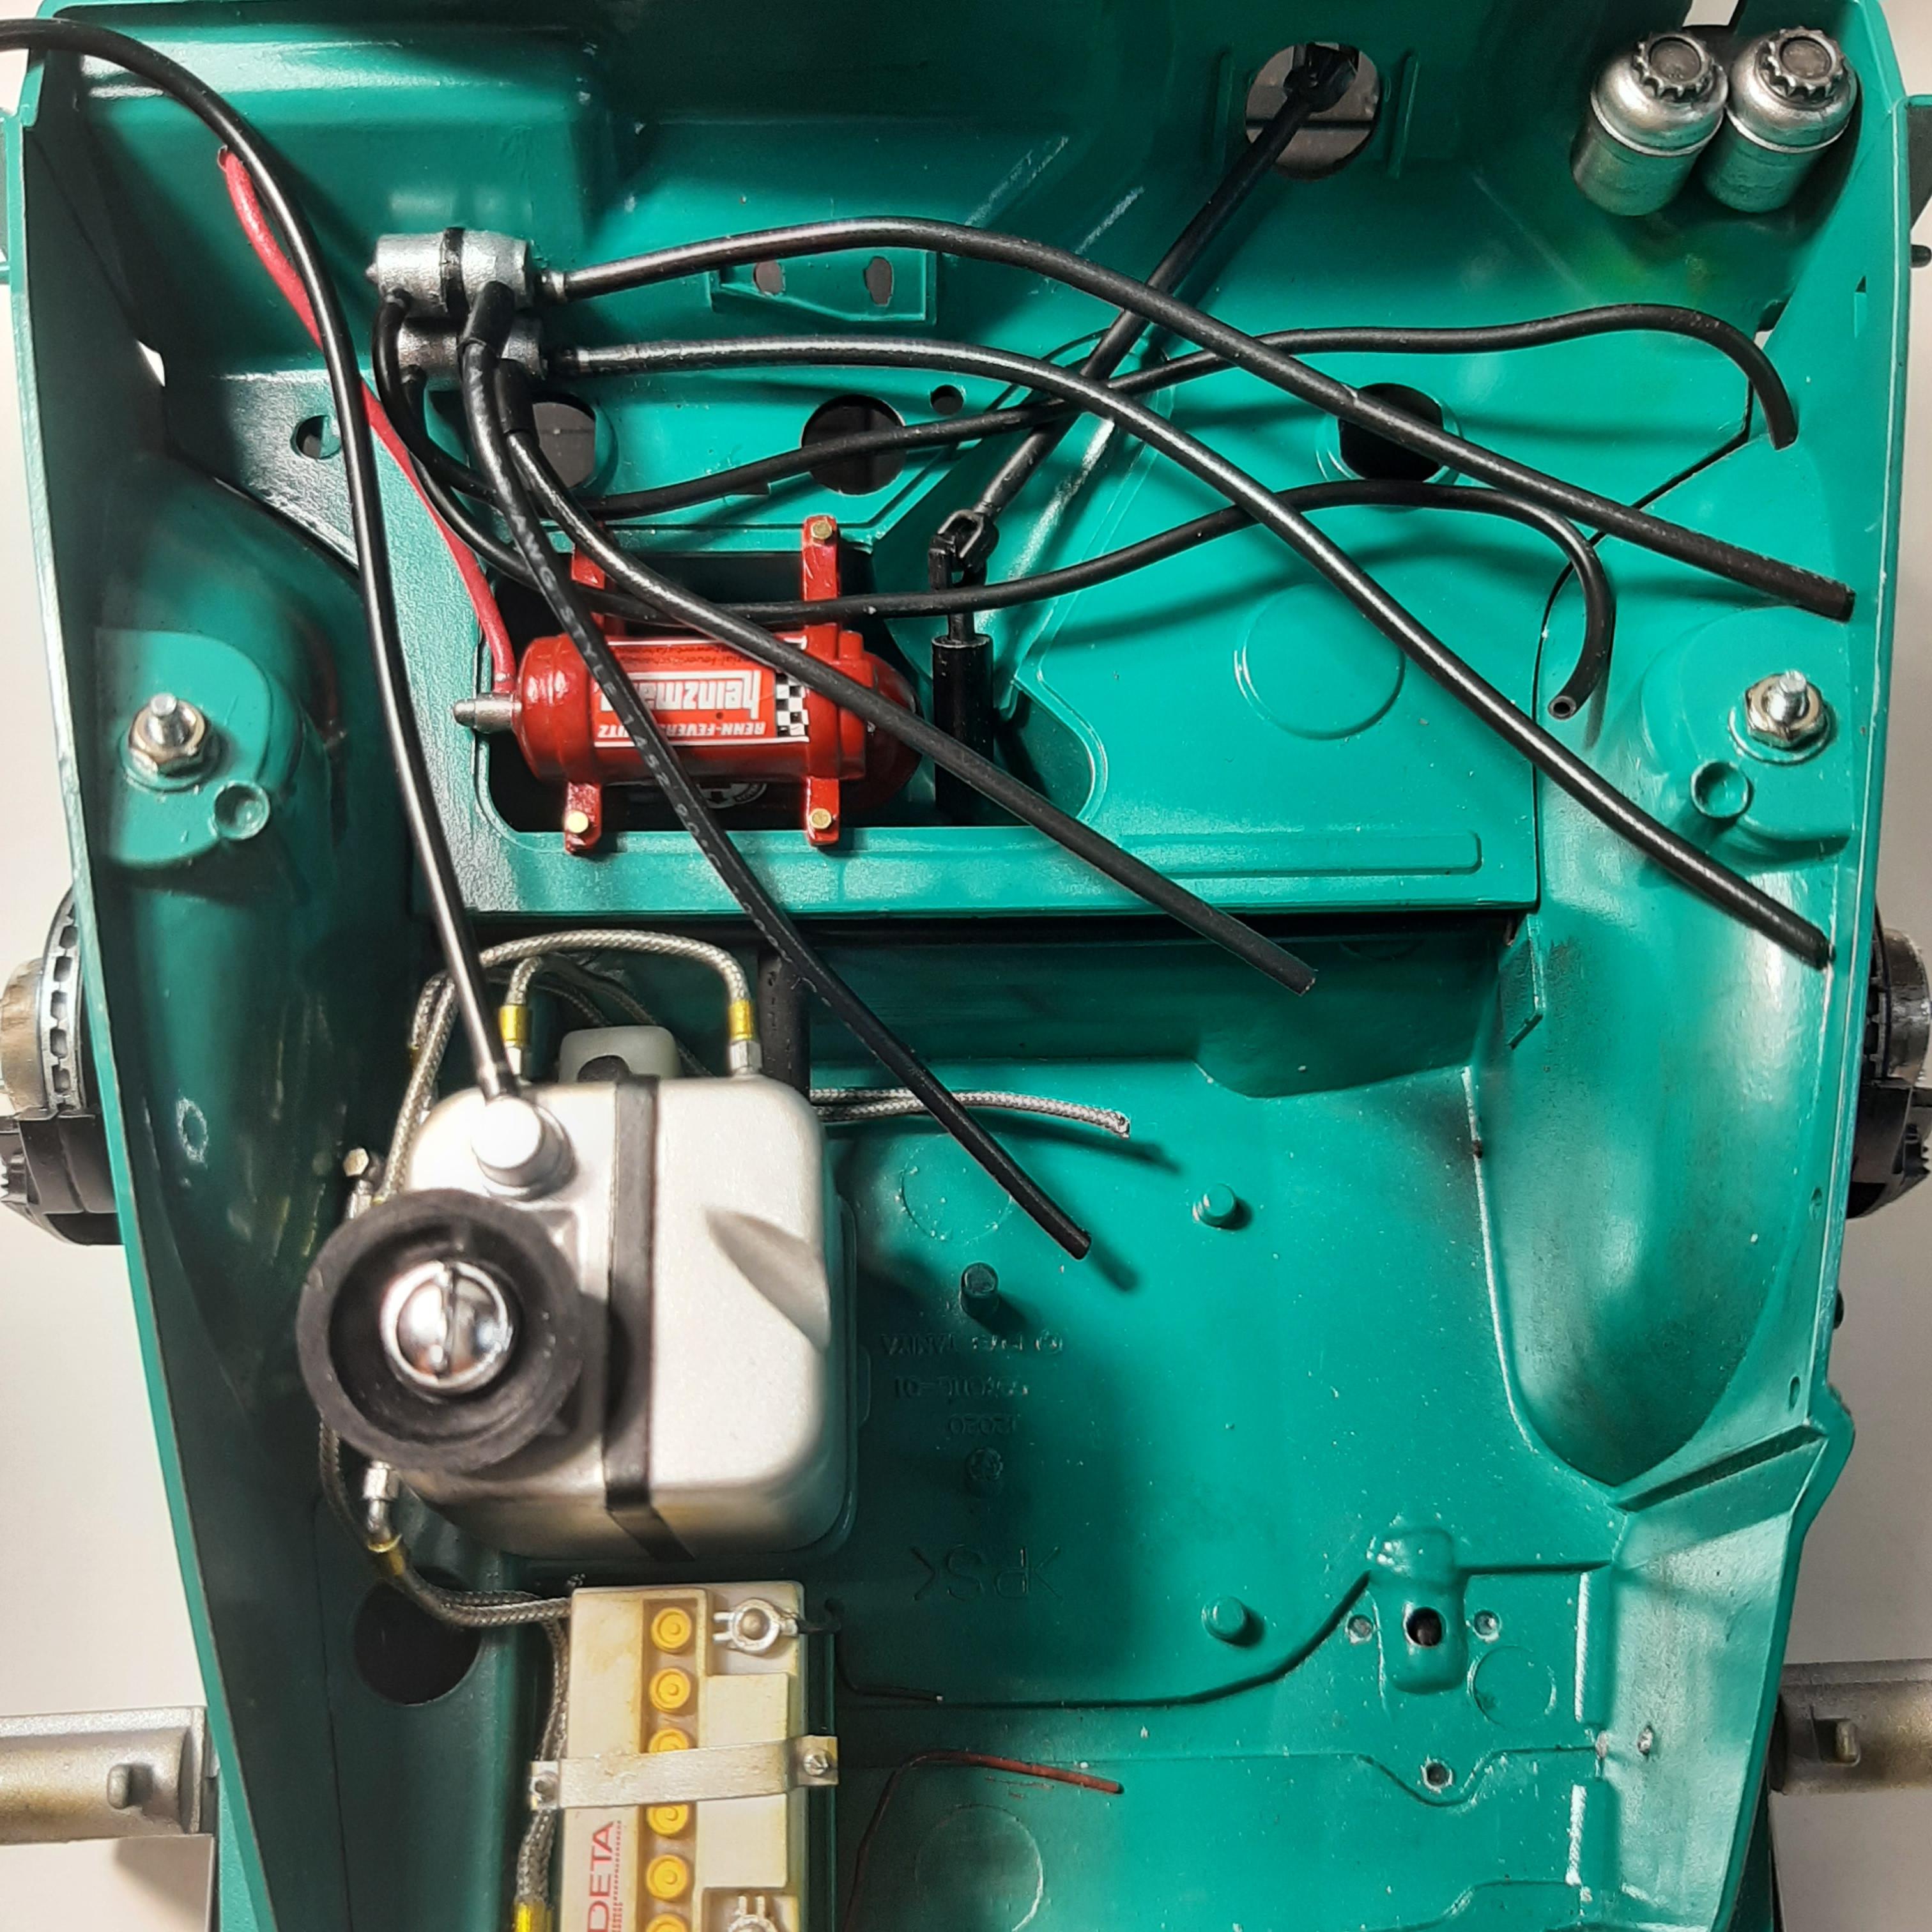
I made two brackets for the electrical wiring and hoses out of sheet brass. Used Detail Master nut and bolt heads on the brackets and glued the brackets in place. I'm not real happy with the outcome of the brackets, in retrospect I should have used some of the RB Motion nuts and bolts I had in stock. On the real car the brackets are longer and flatter, but I was really constrained by space. The four hoses were supposed to lay side by side but I had to stack them because of limited space. Luckily once everything is installed the brackets won't be quite as visible.
-
1/12th Porsche 934 Vaillant
majel replied to majel's topic in WIP: Other Racing: Road Racing, Land Speed Racers
Thanks for the tip David, I will definitely give that a try! Obviously i wasn't paying attention when I installed it, because i got the hose below it right. -
1/12th Porsche 934 Vaillant
majel replied to majel's topic in WIP: Other Racing: Road Racing, Land Speed Racers
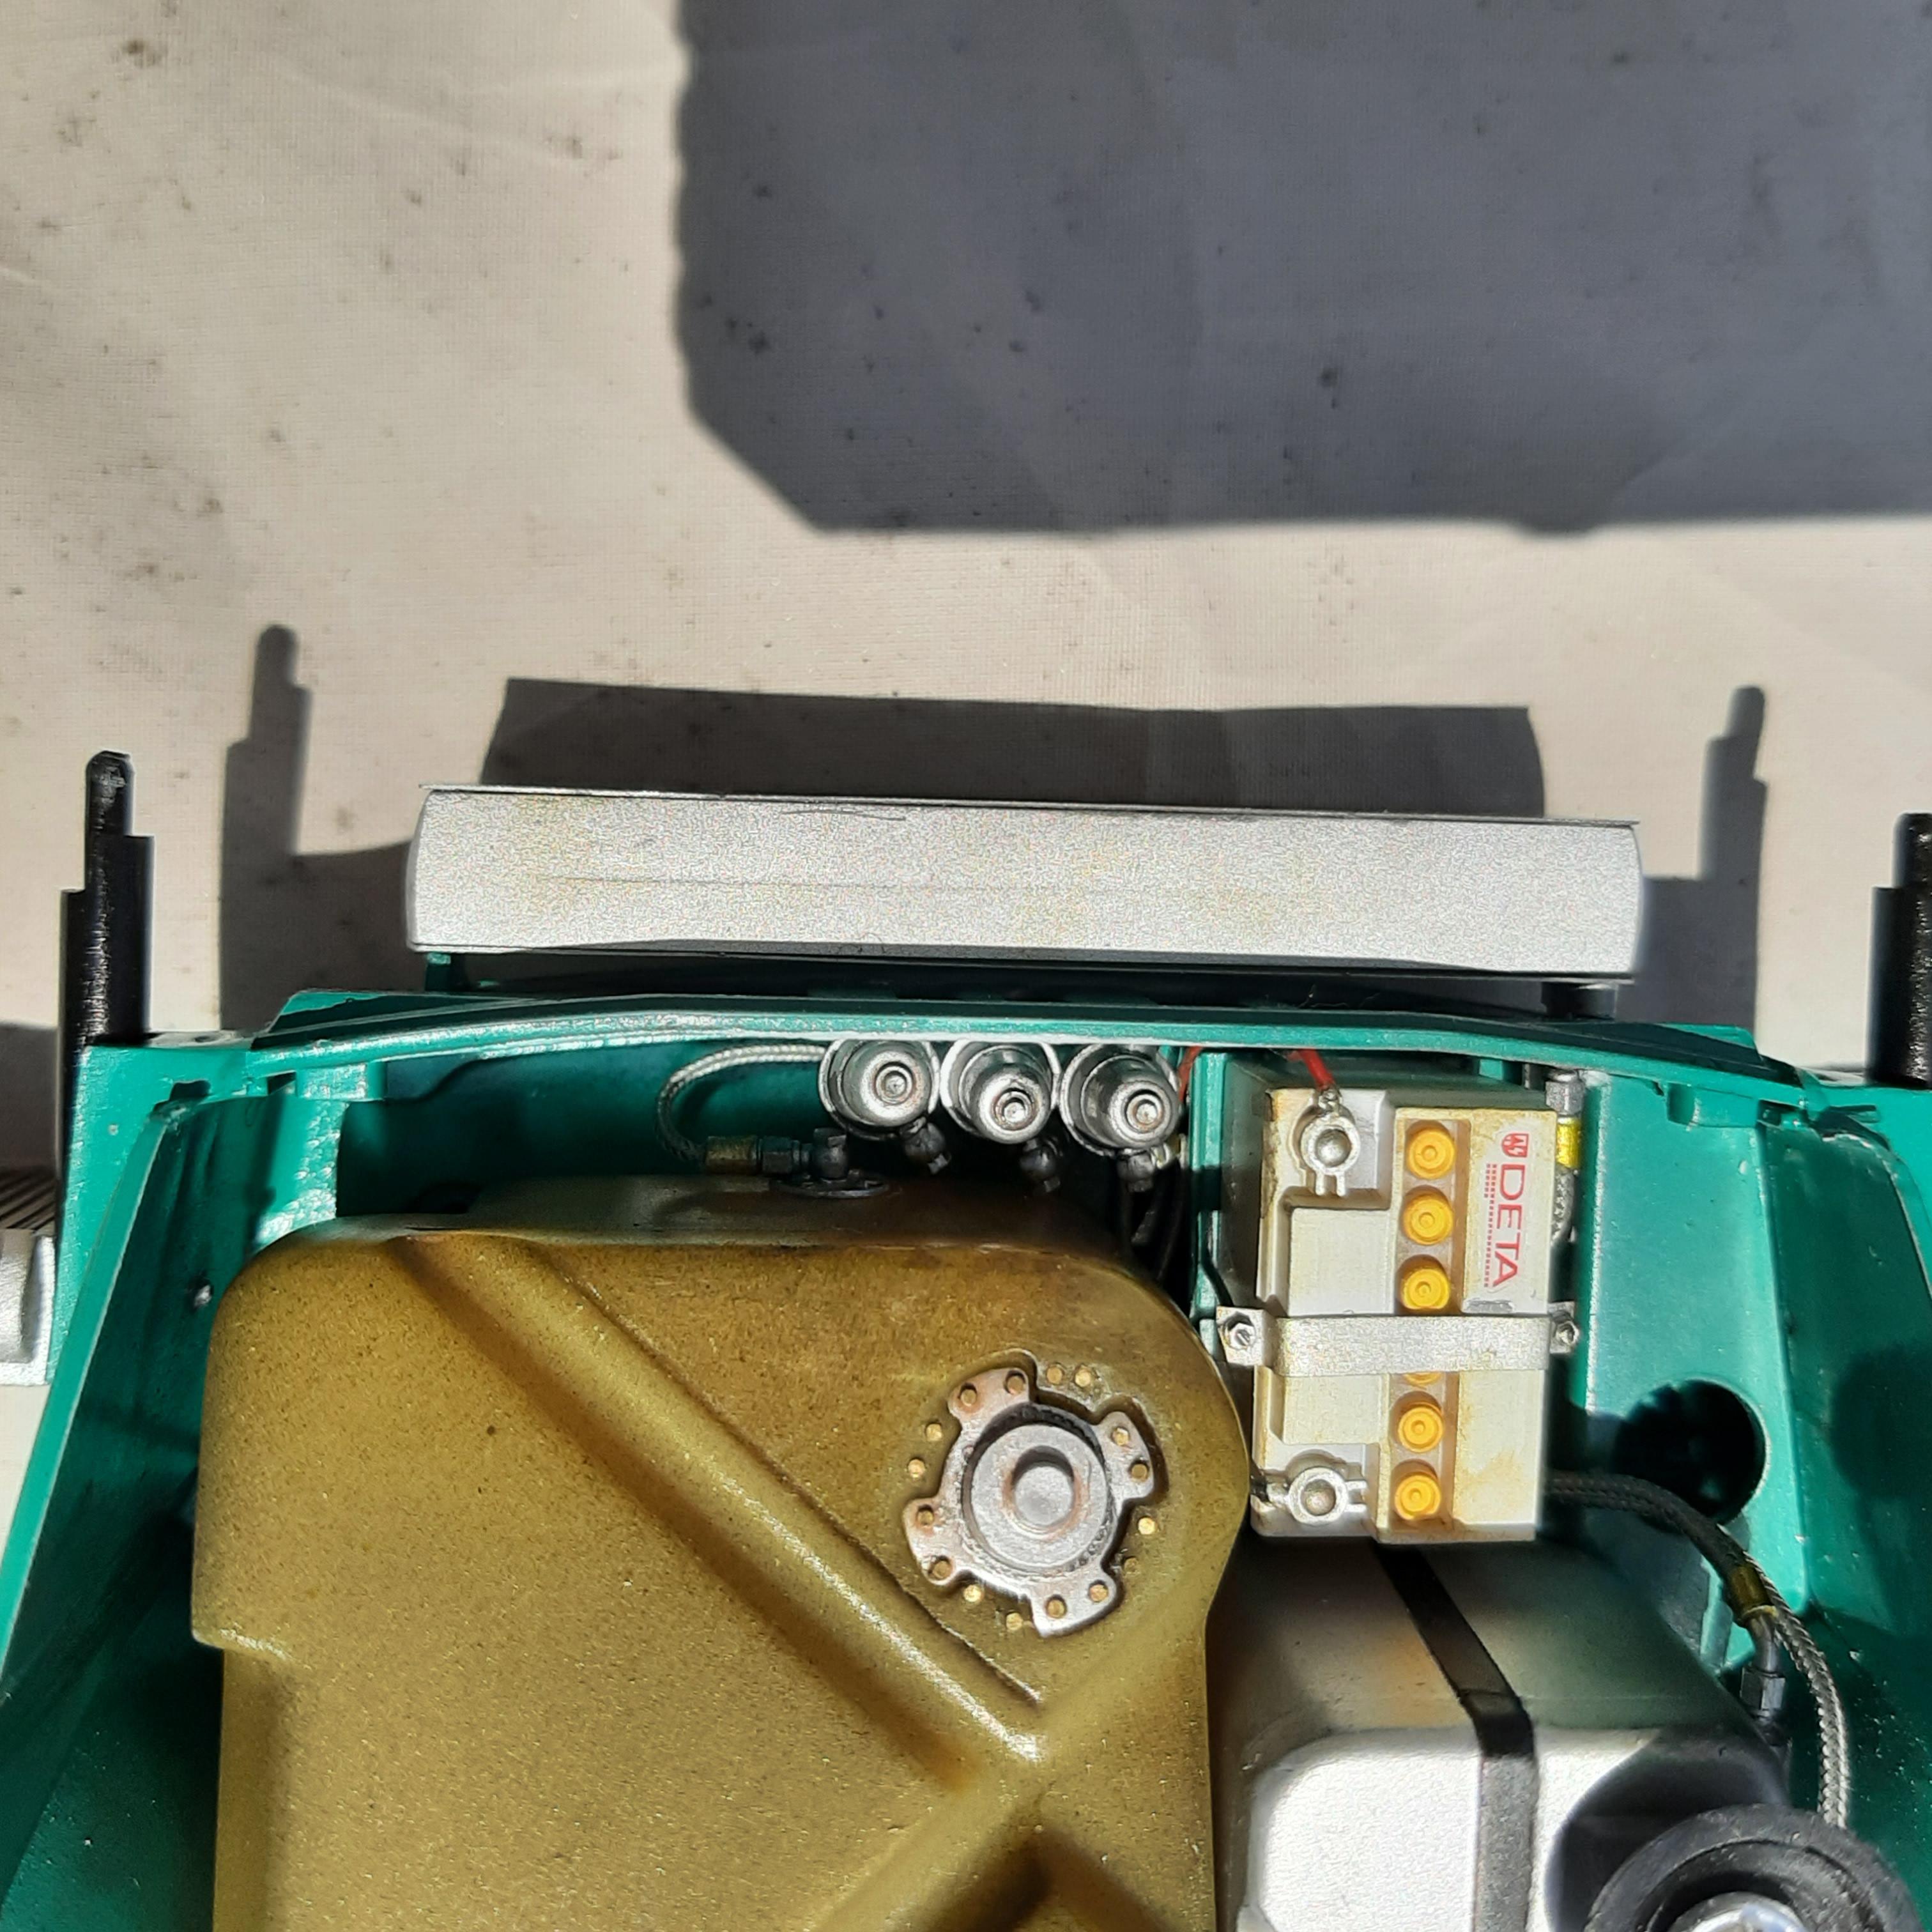
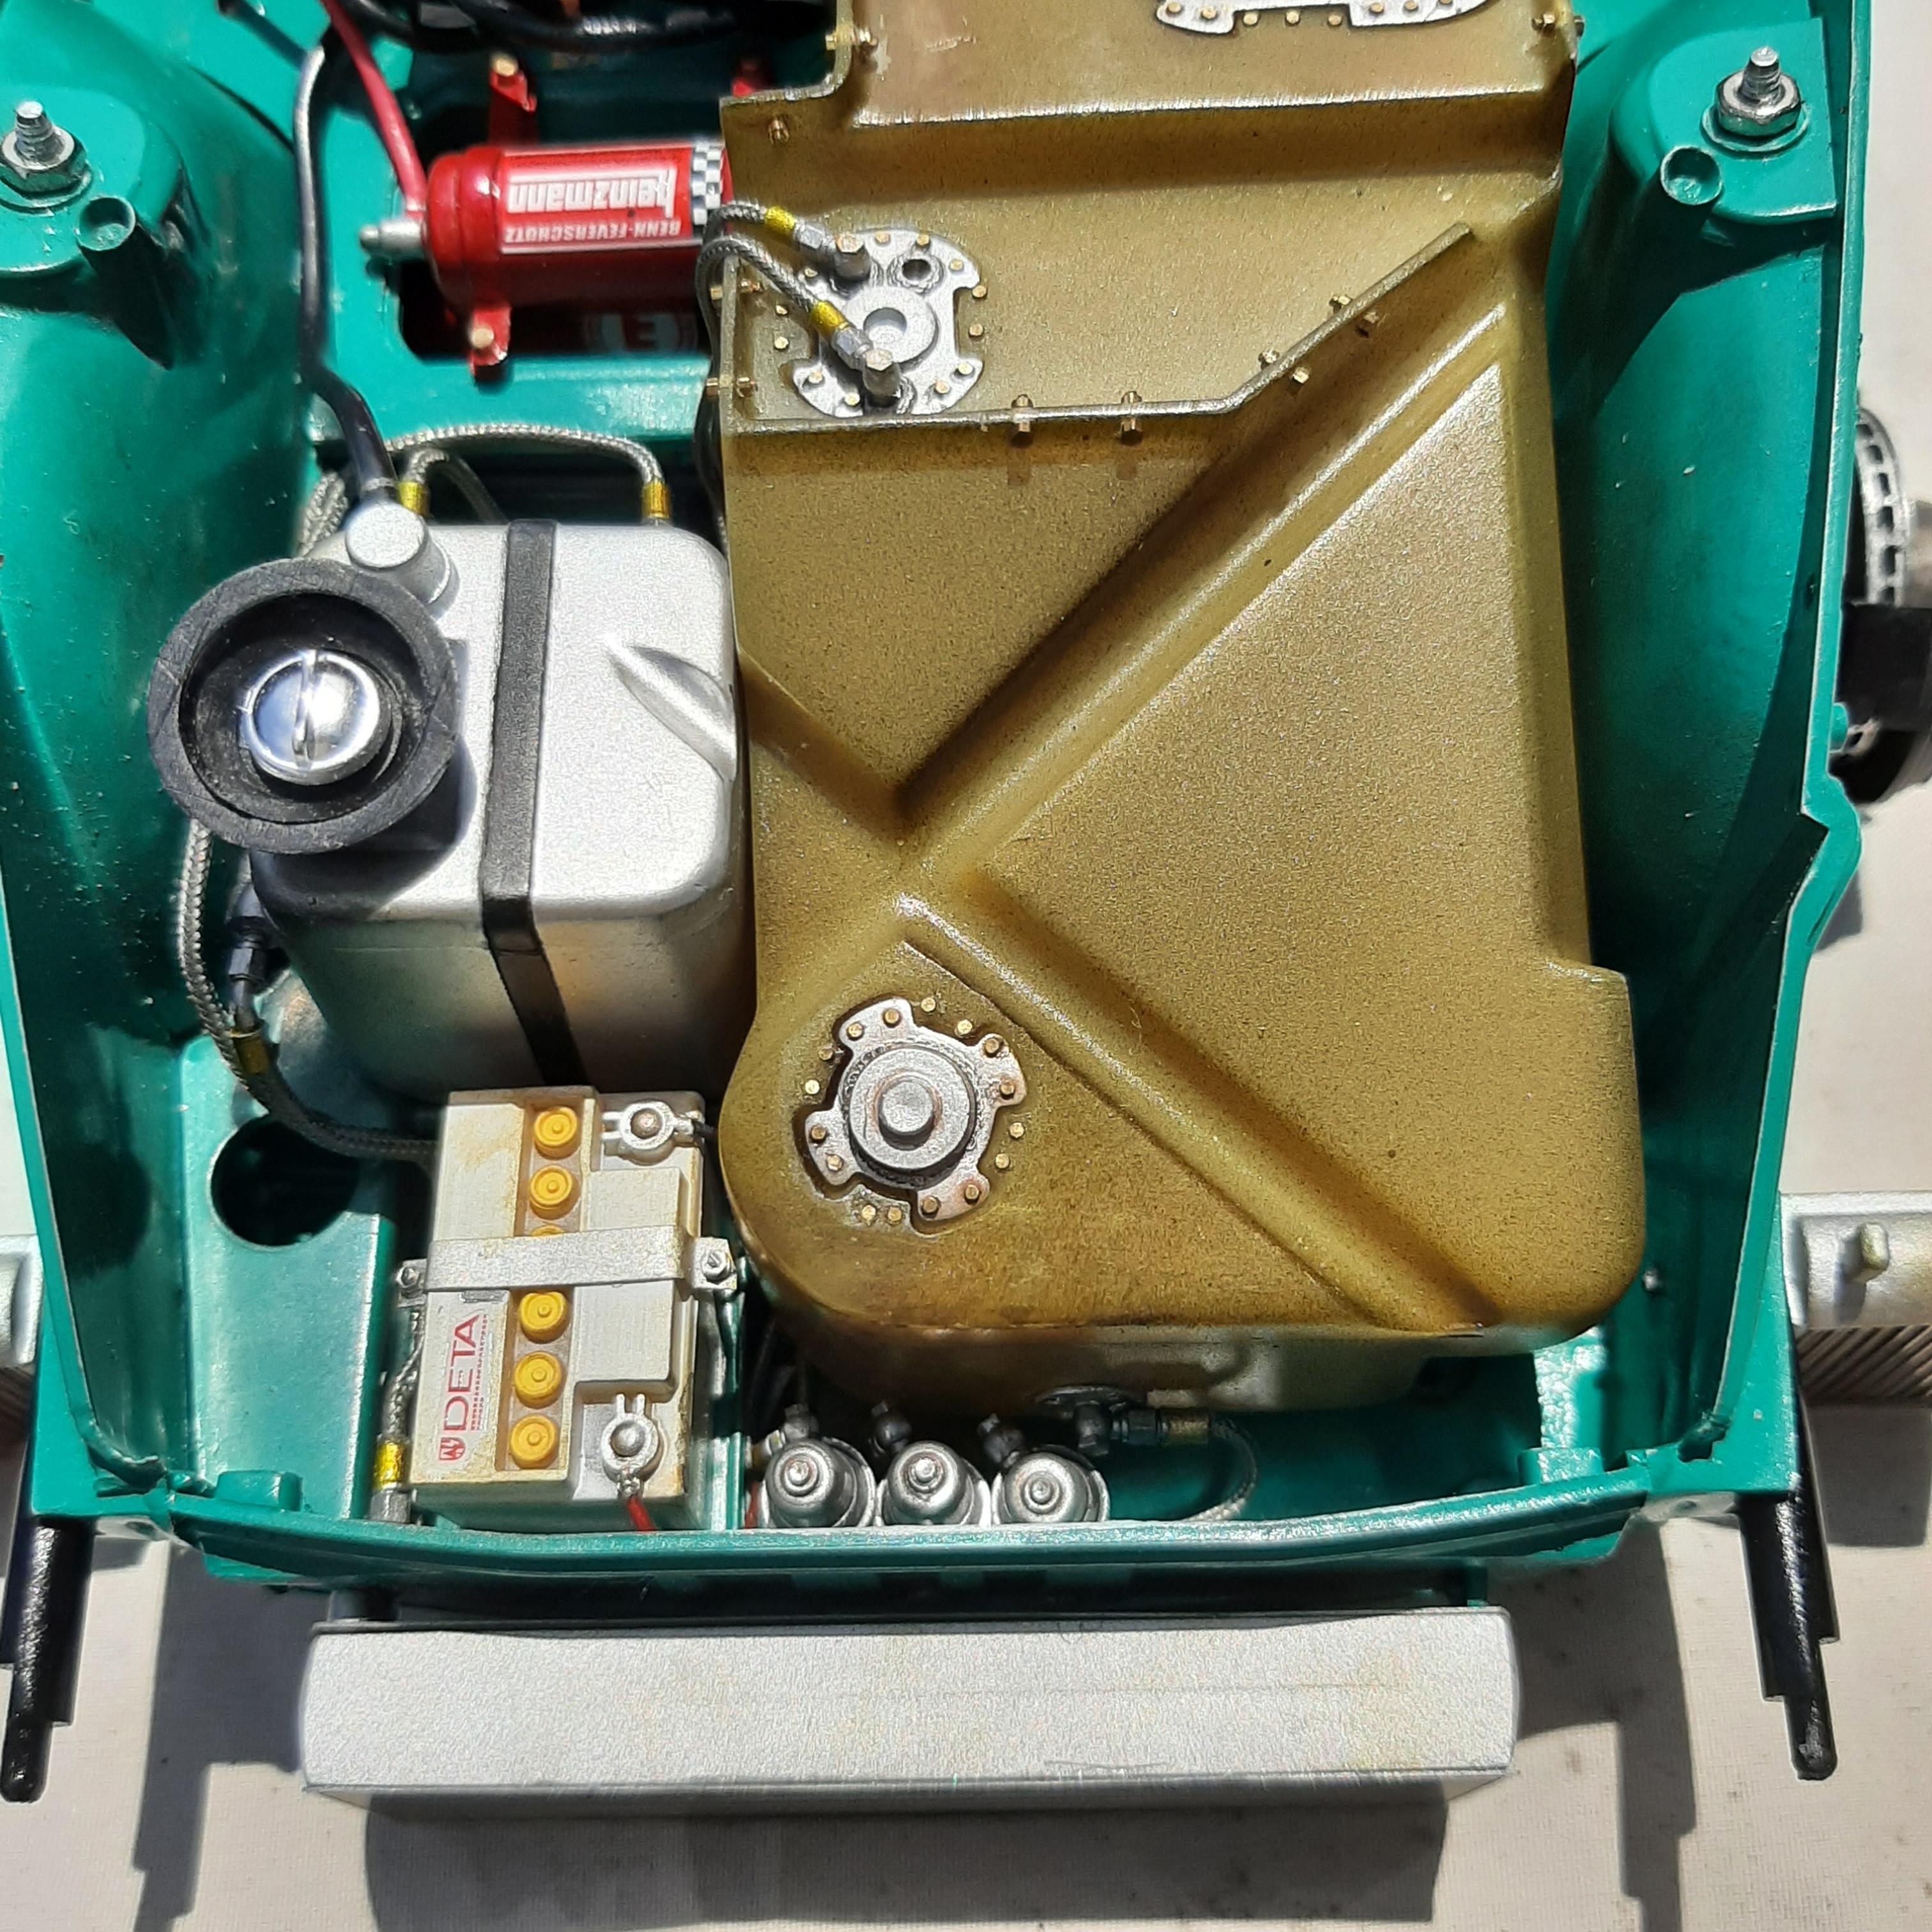
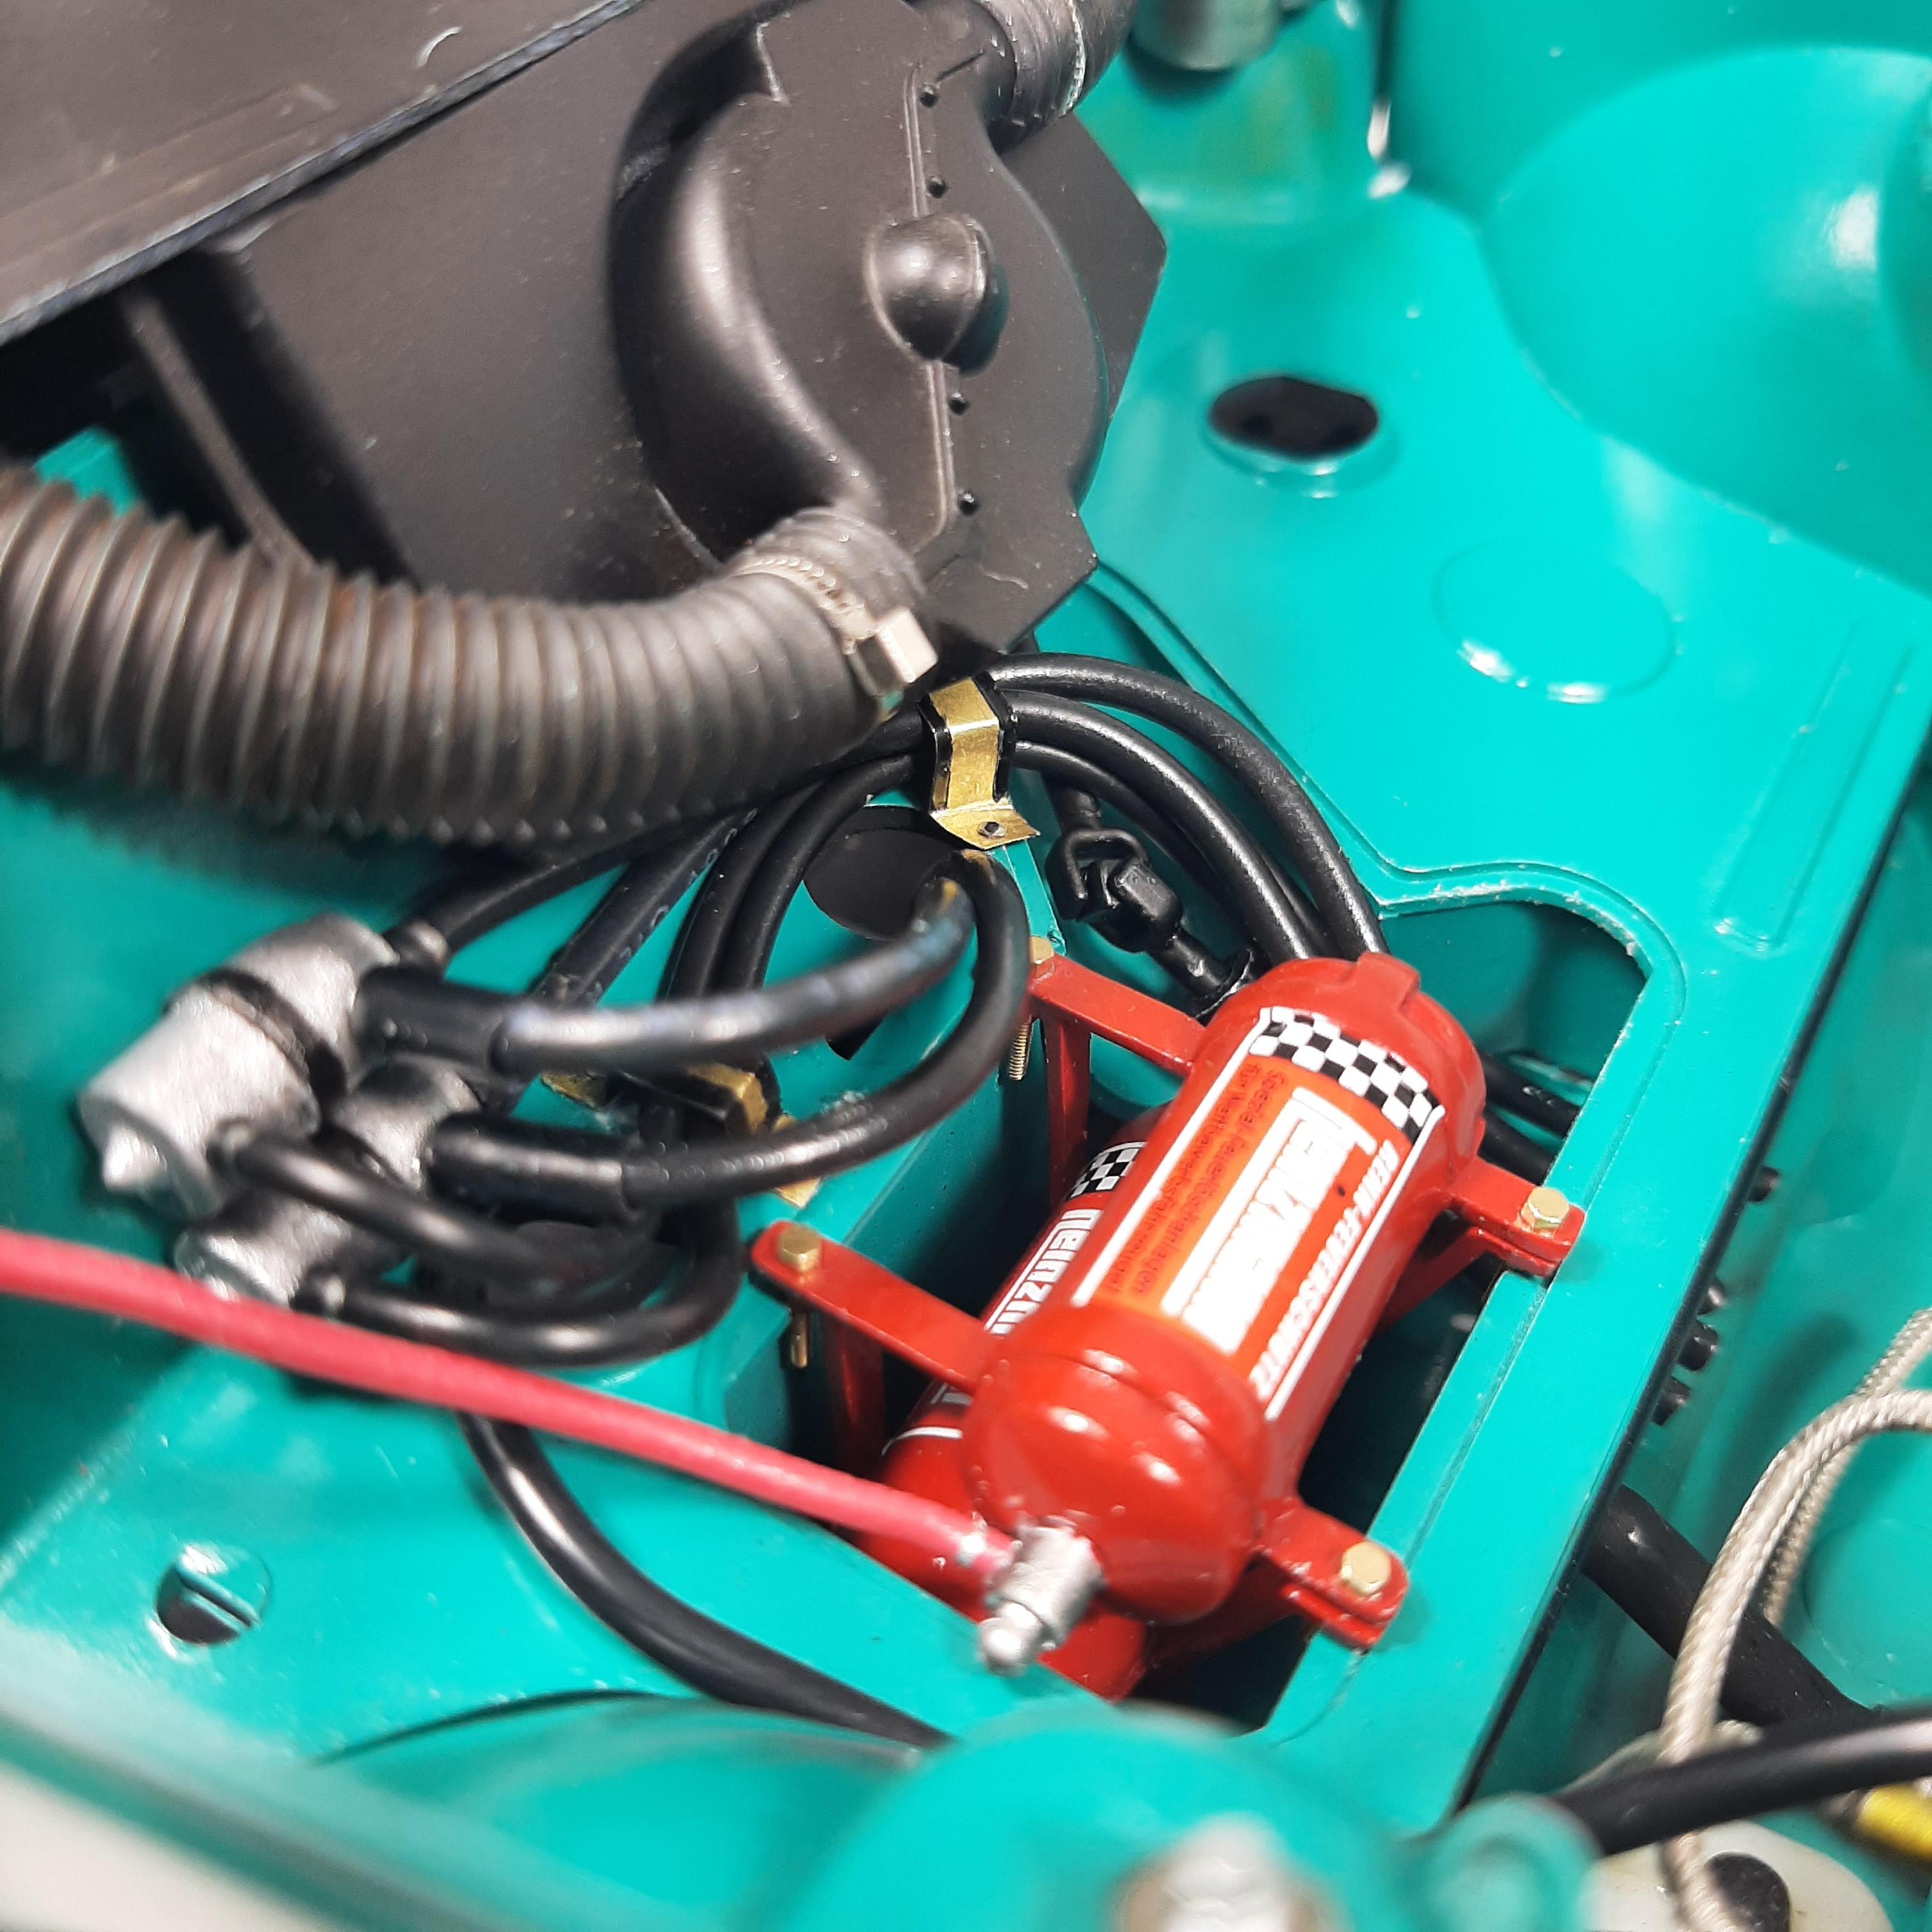
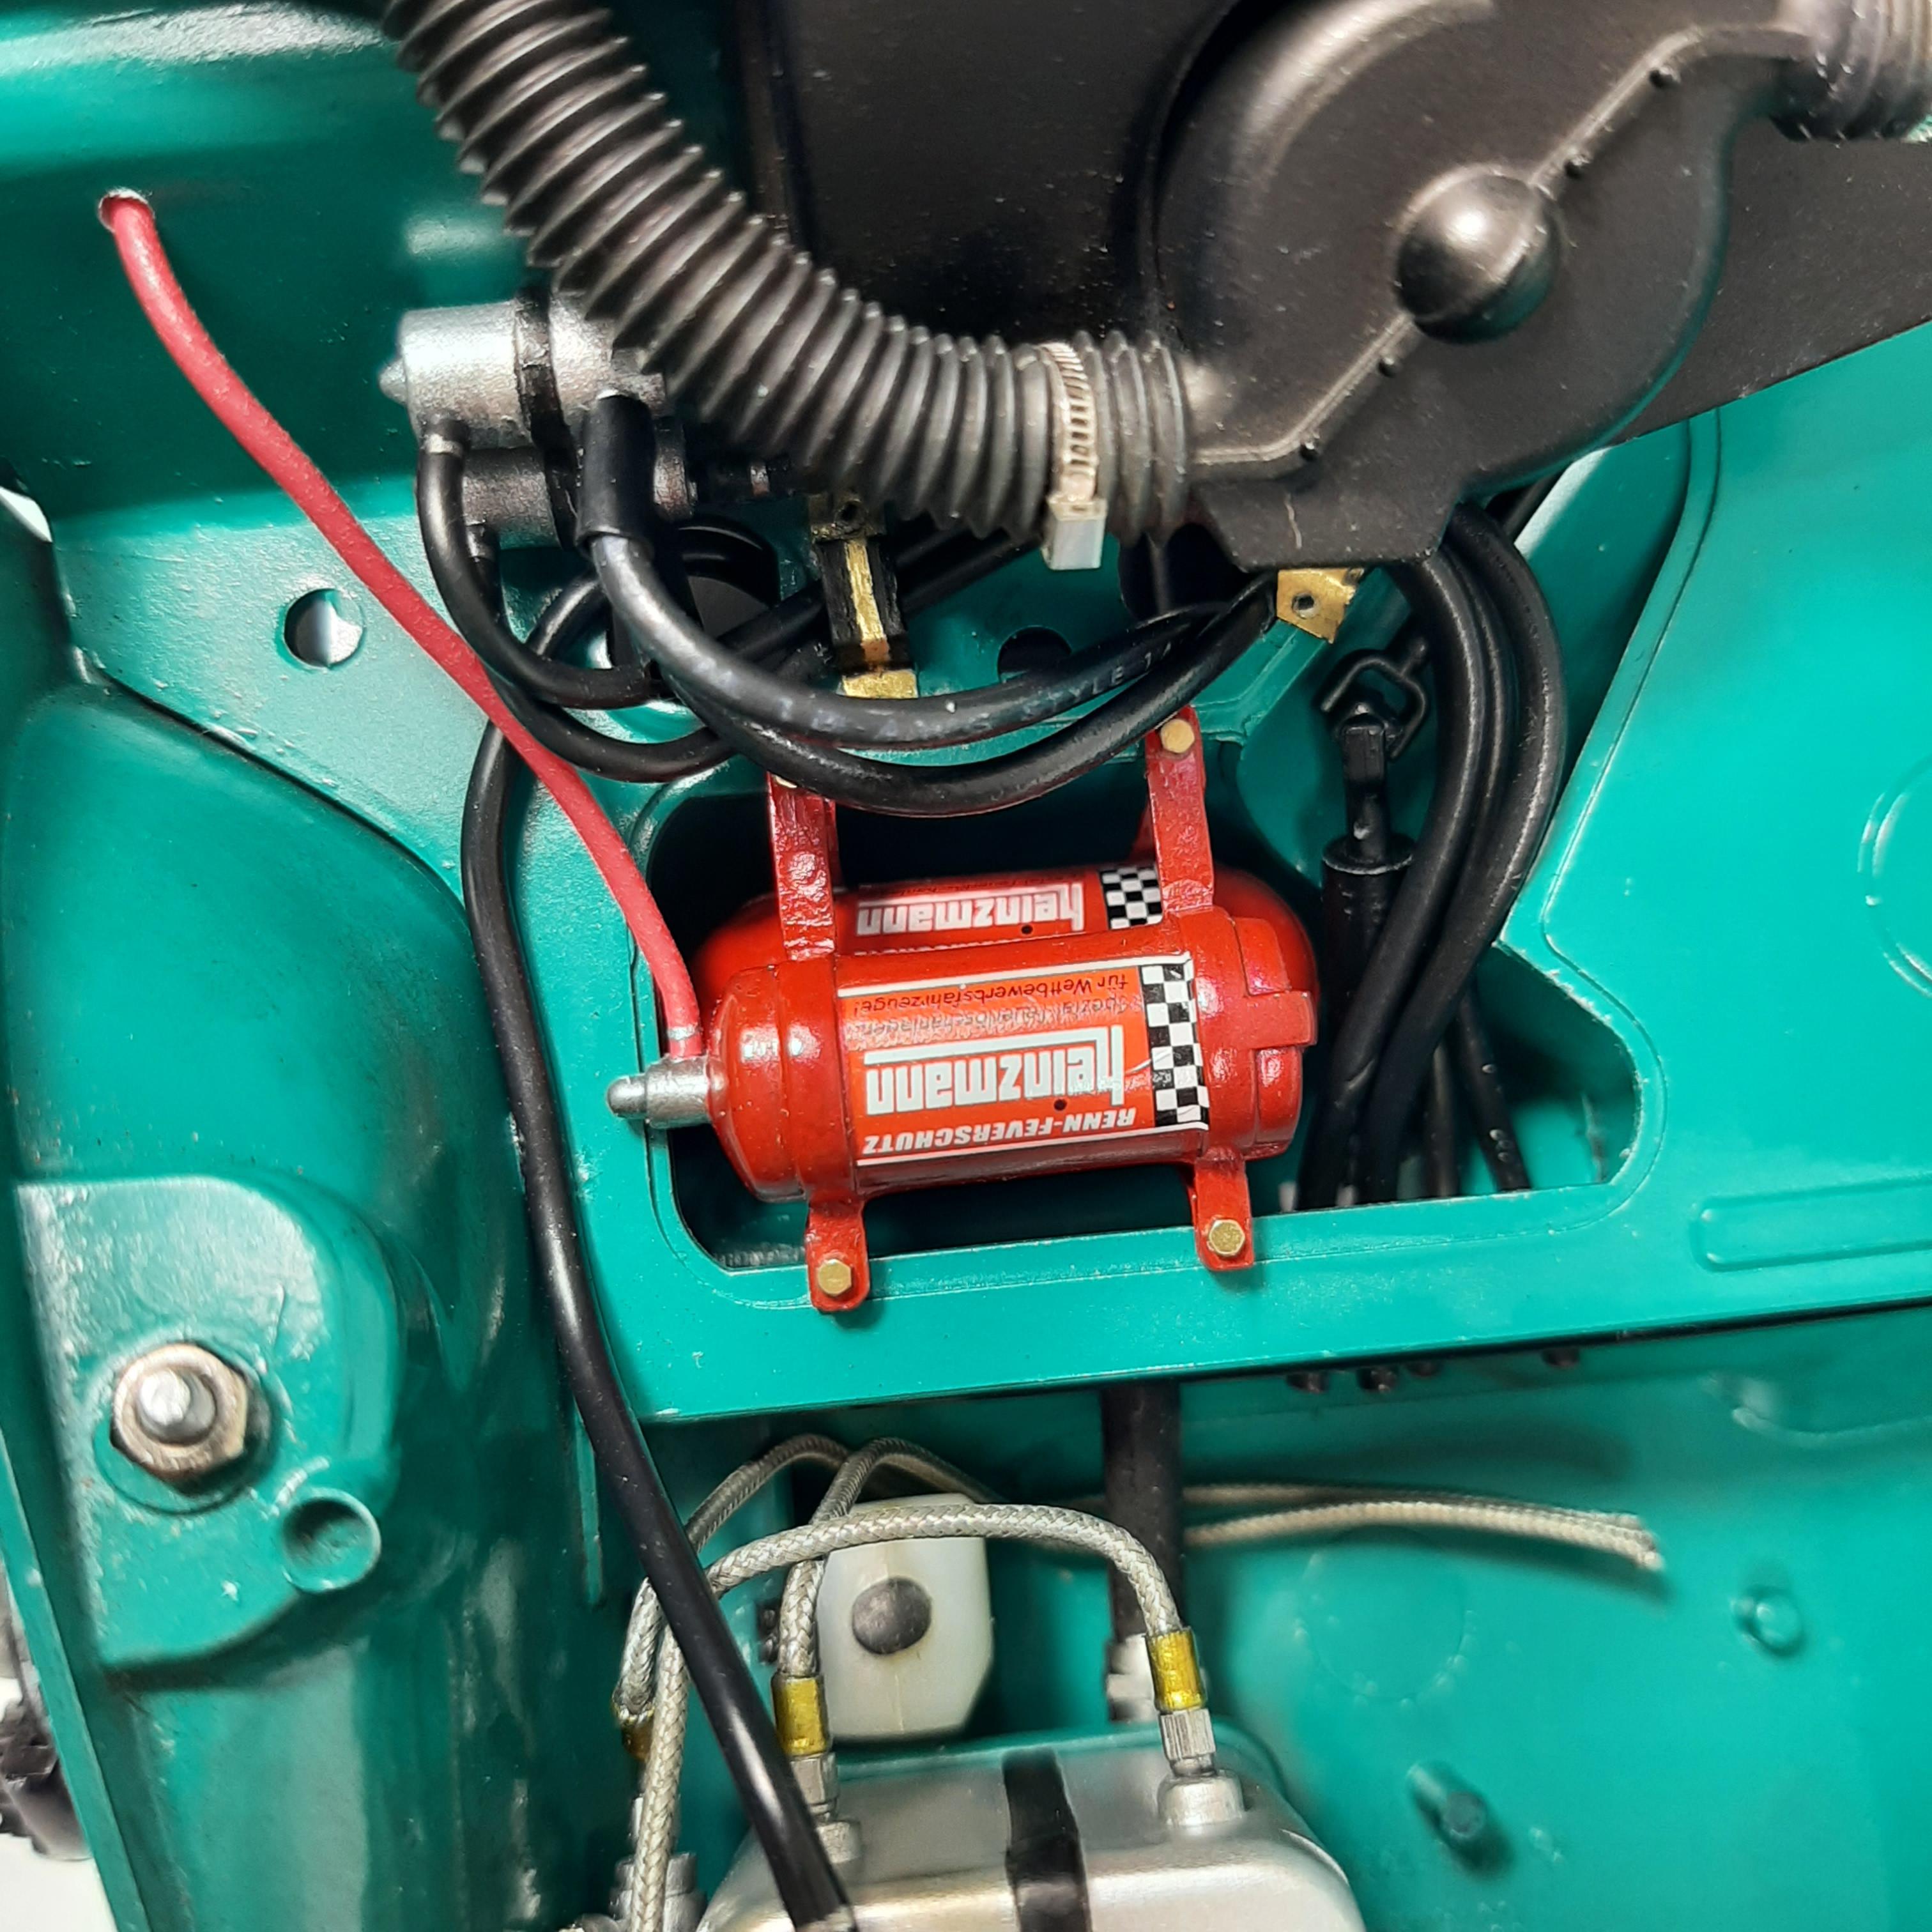
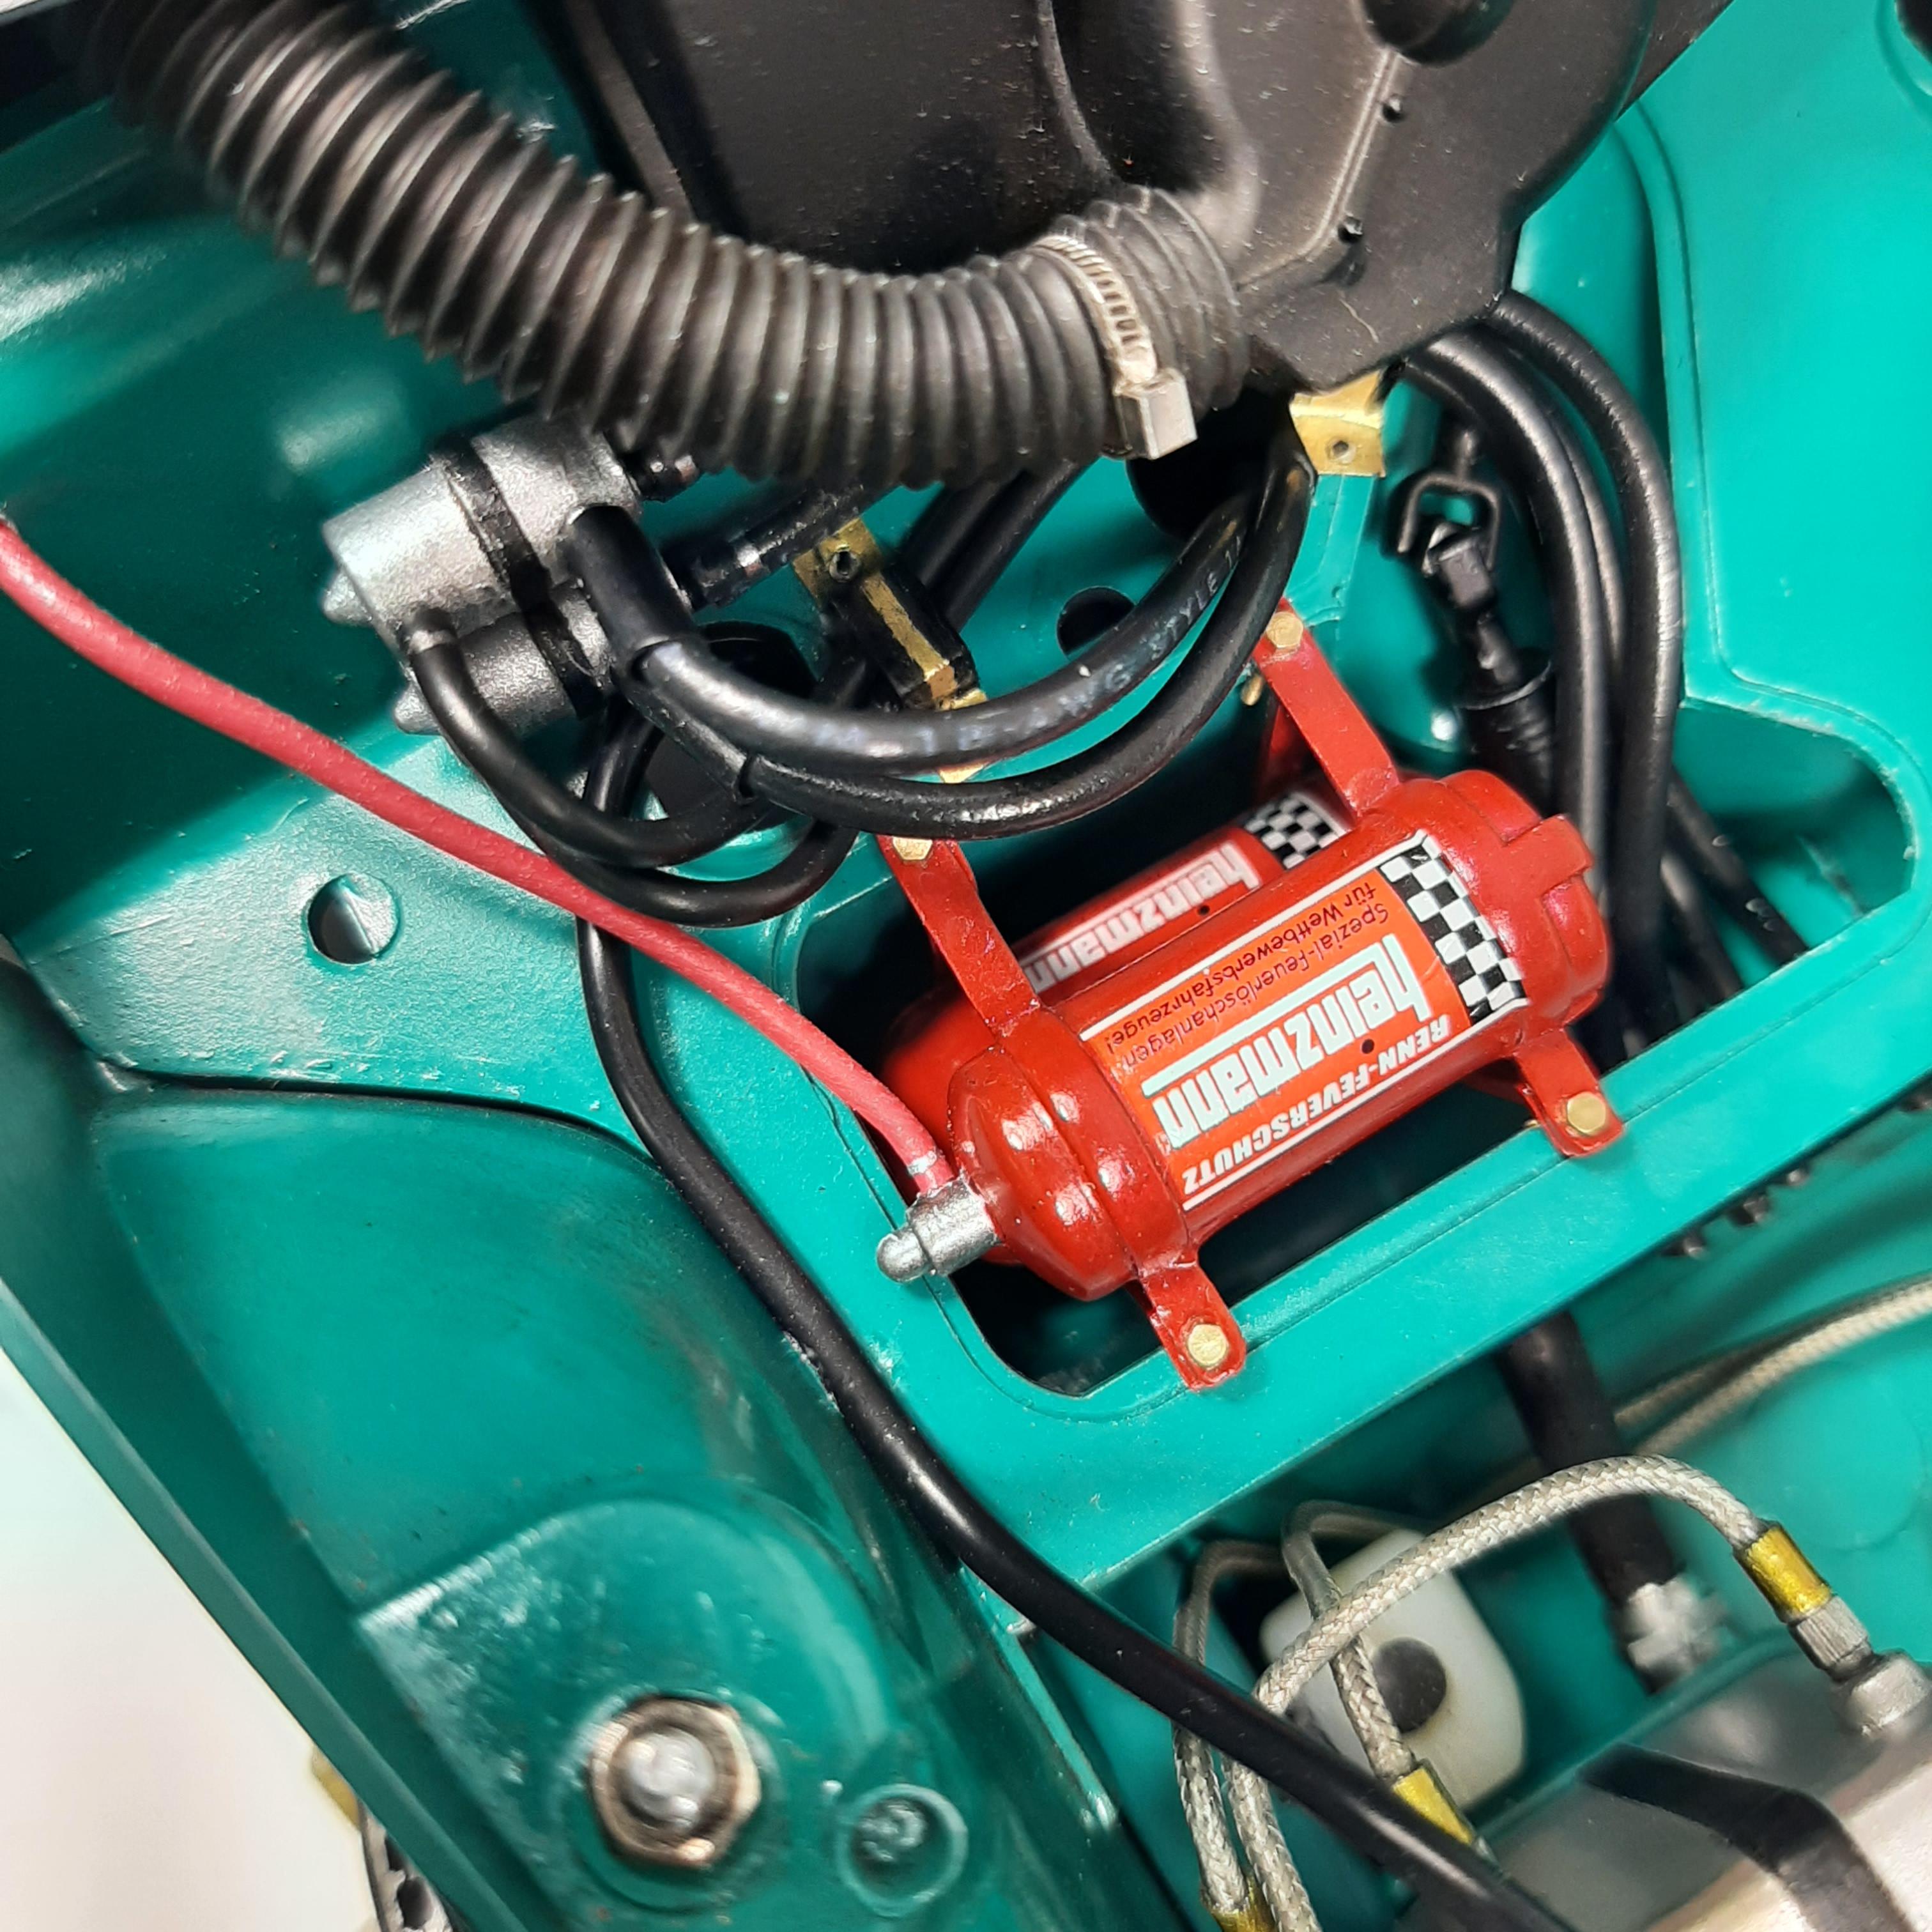
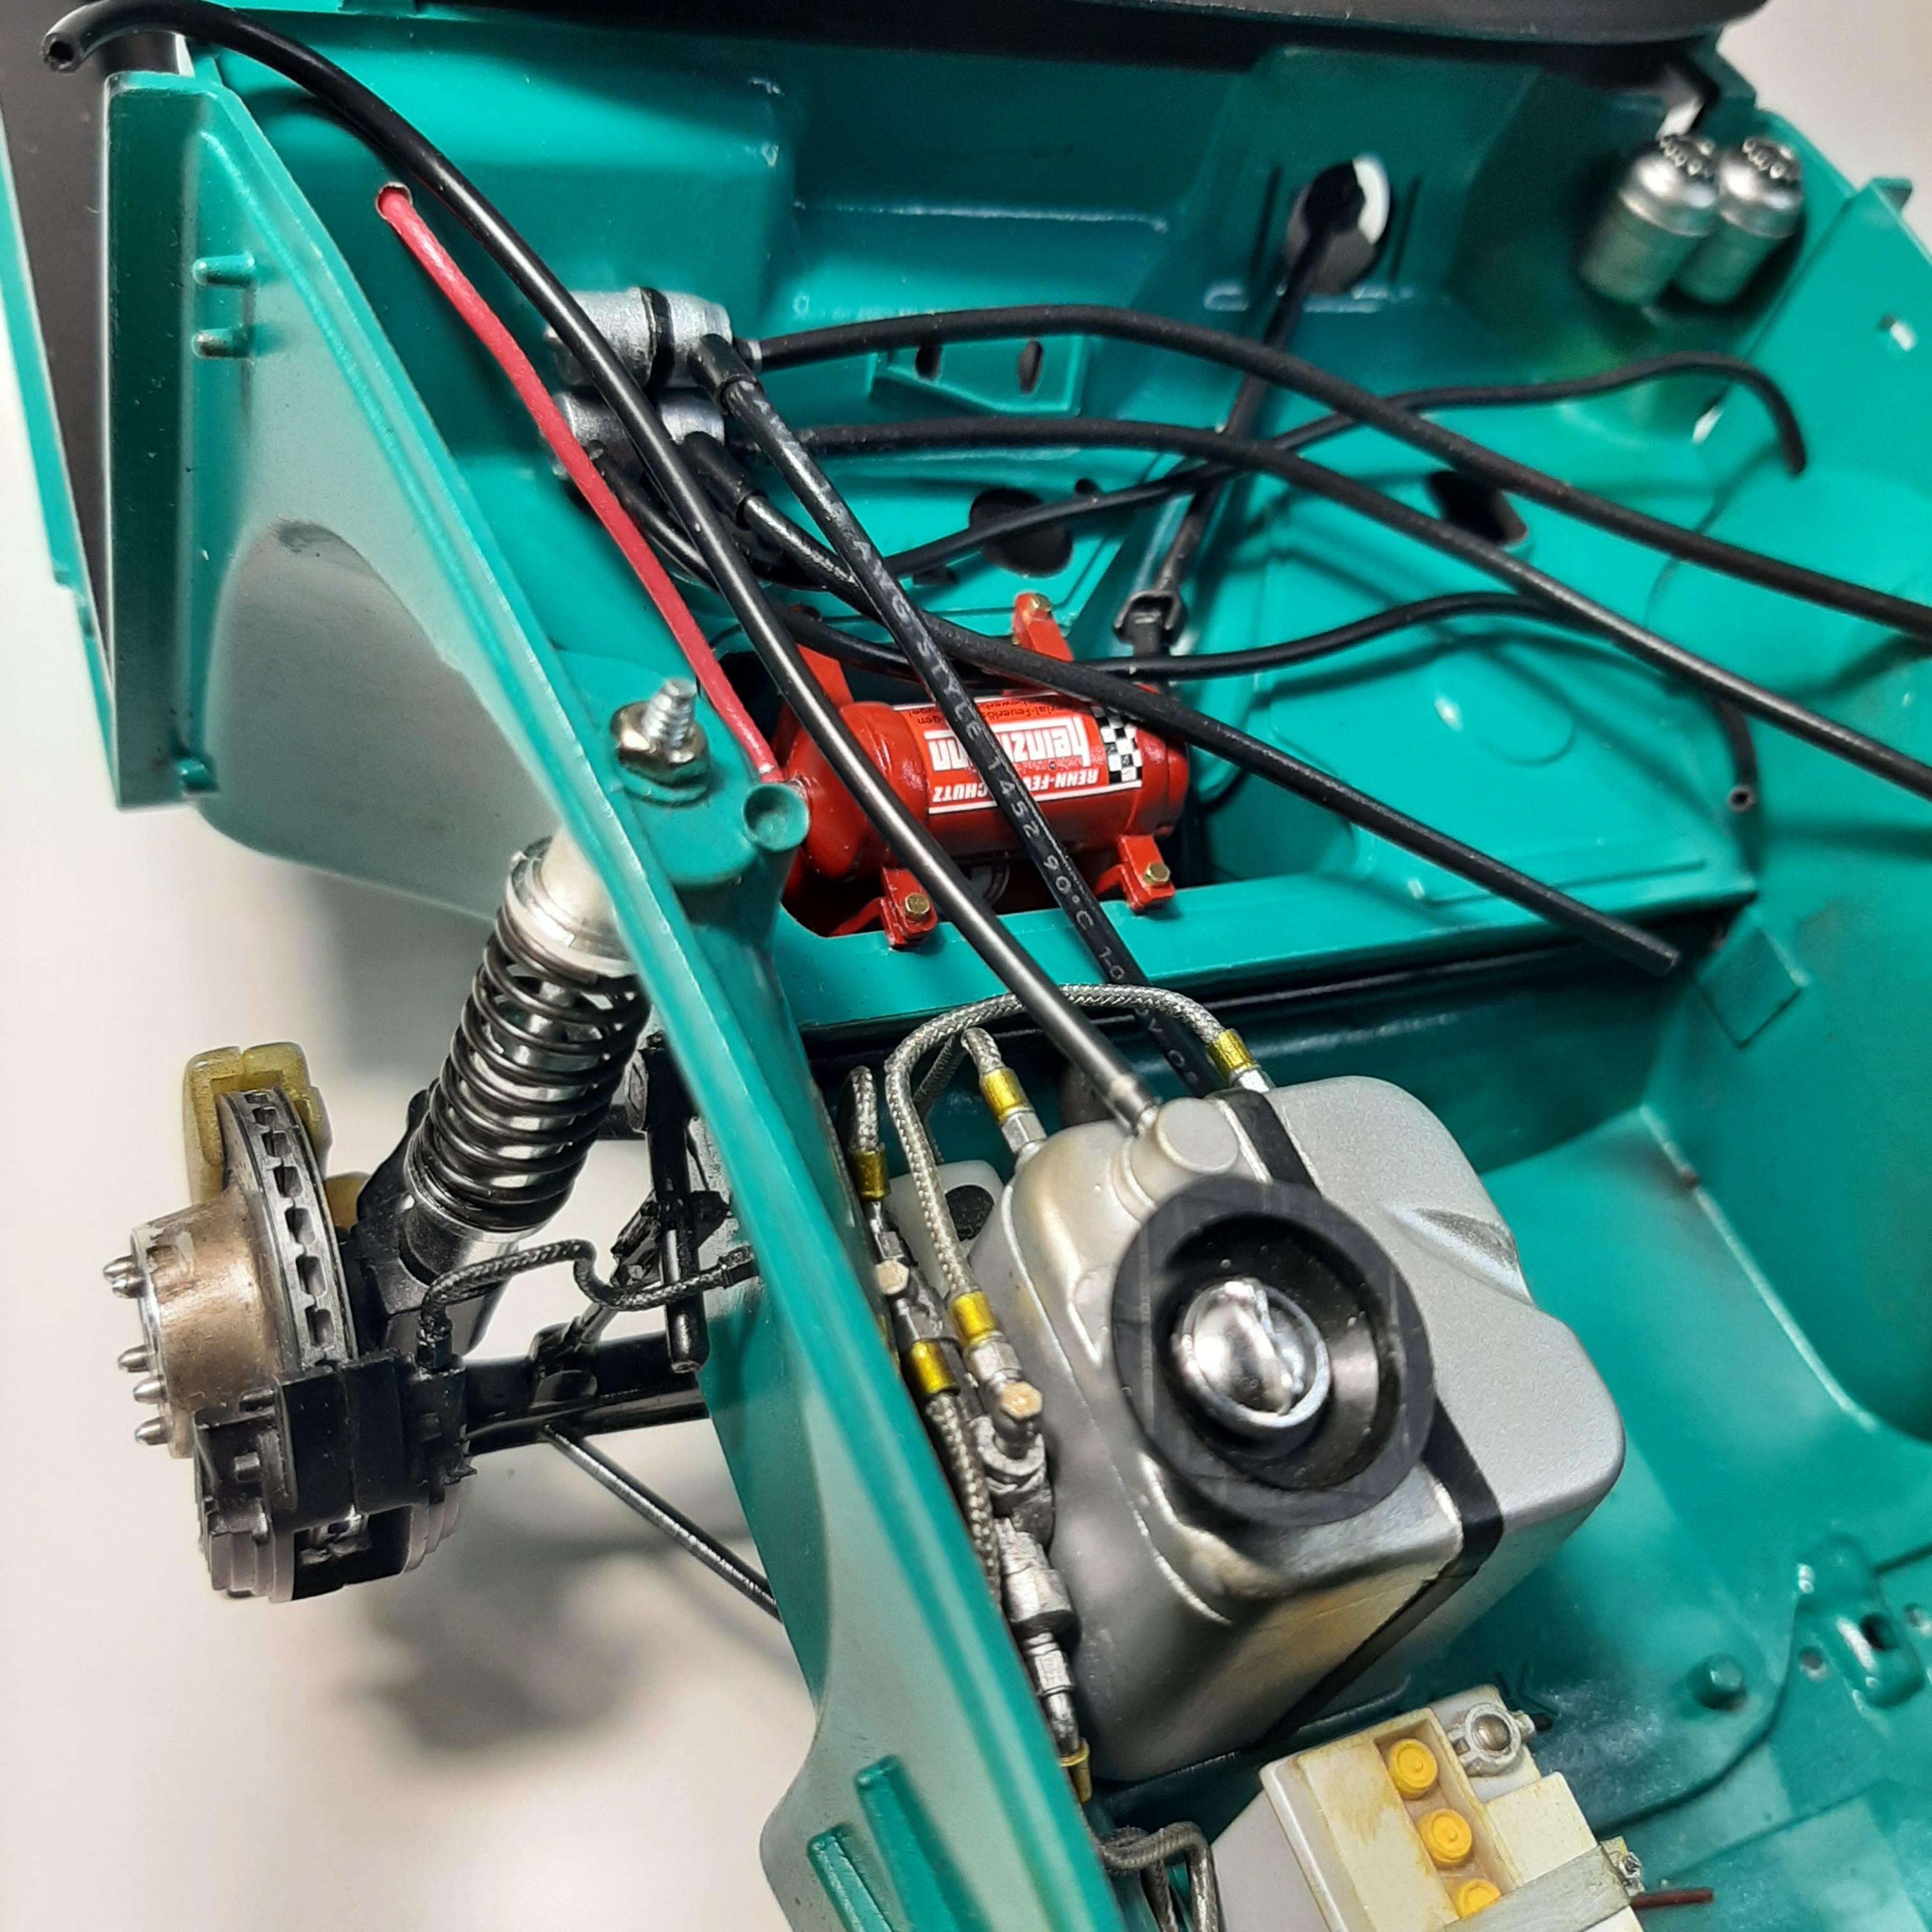
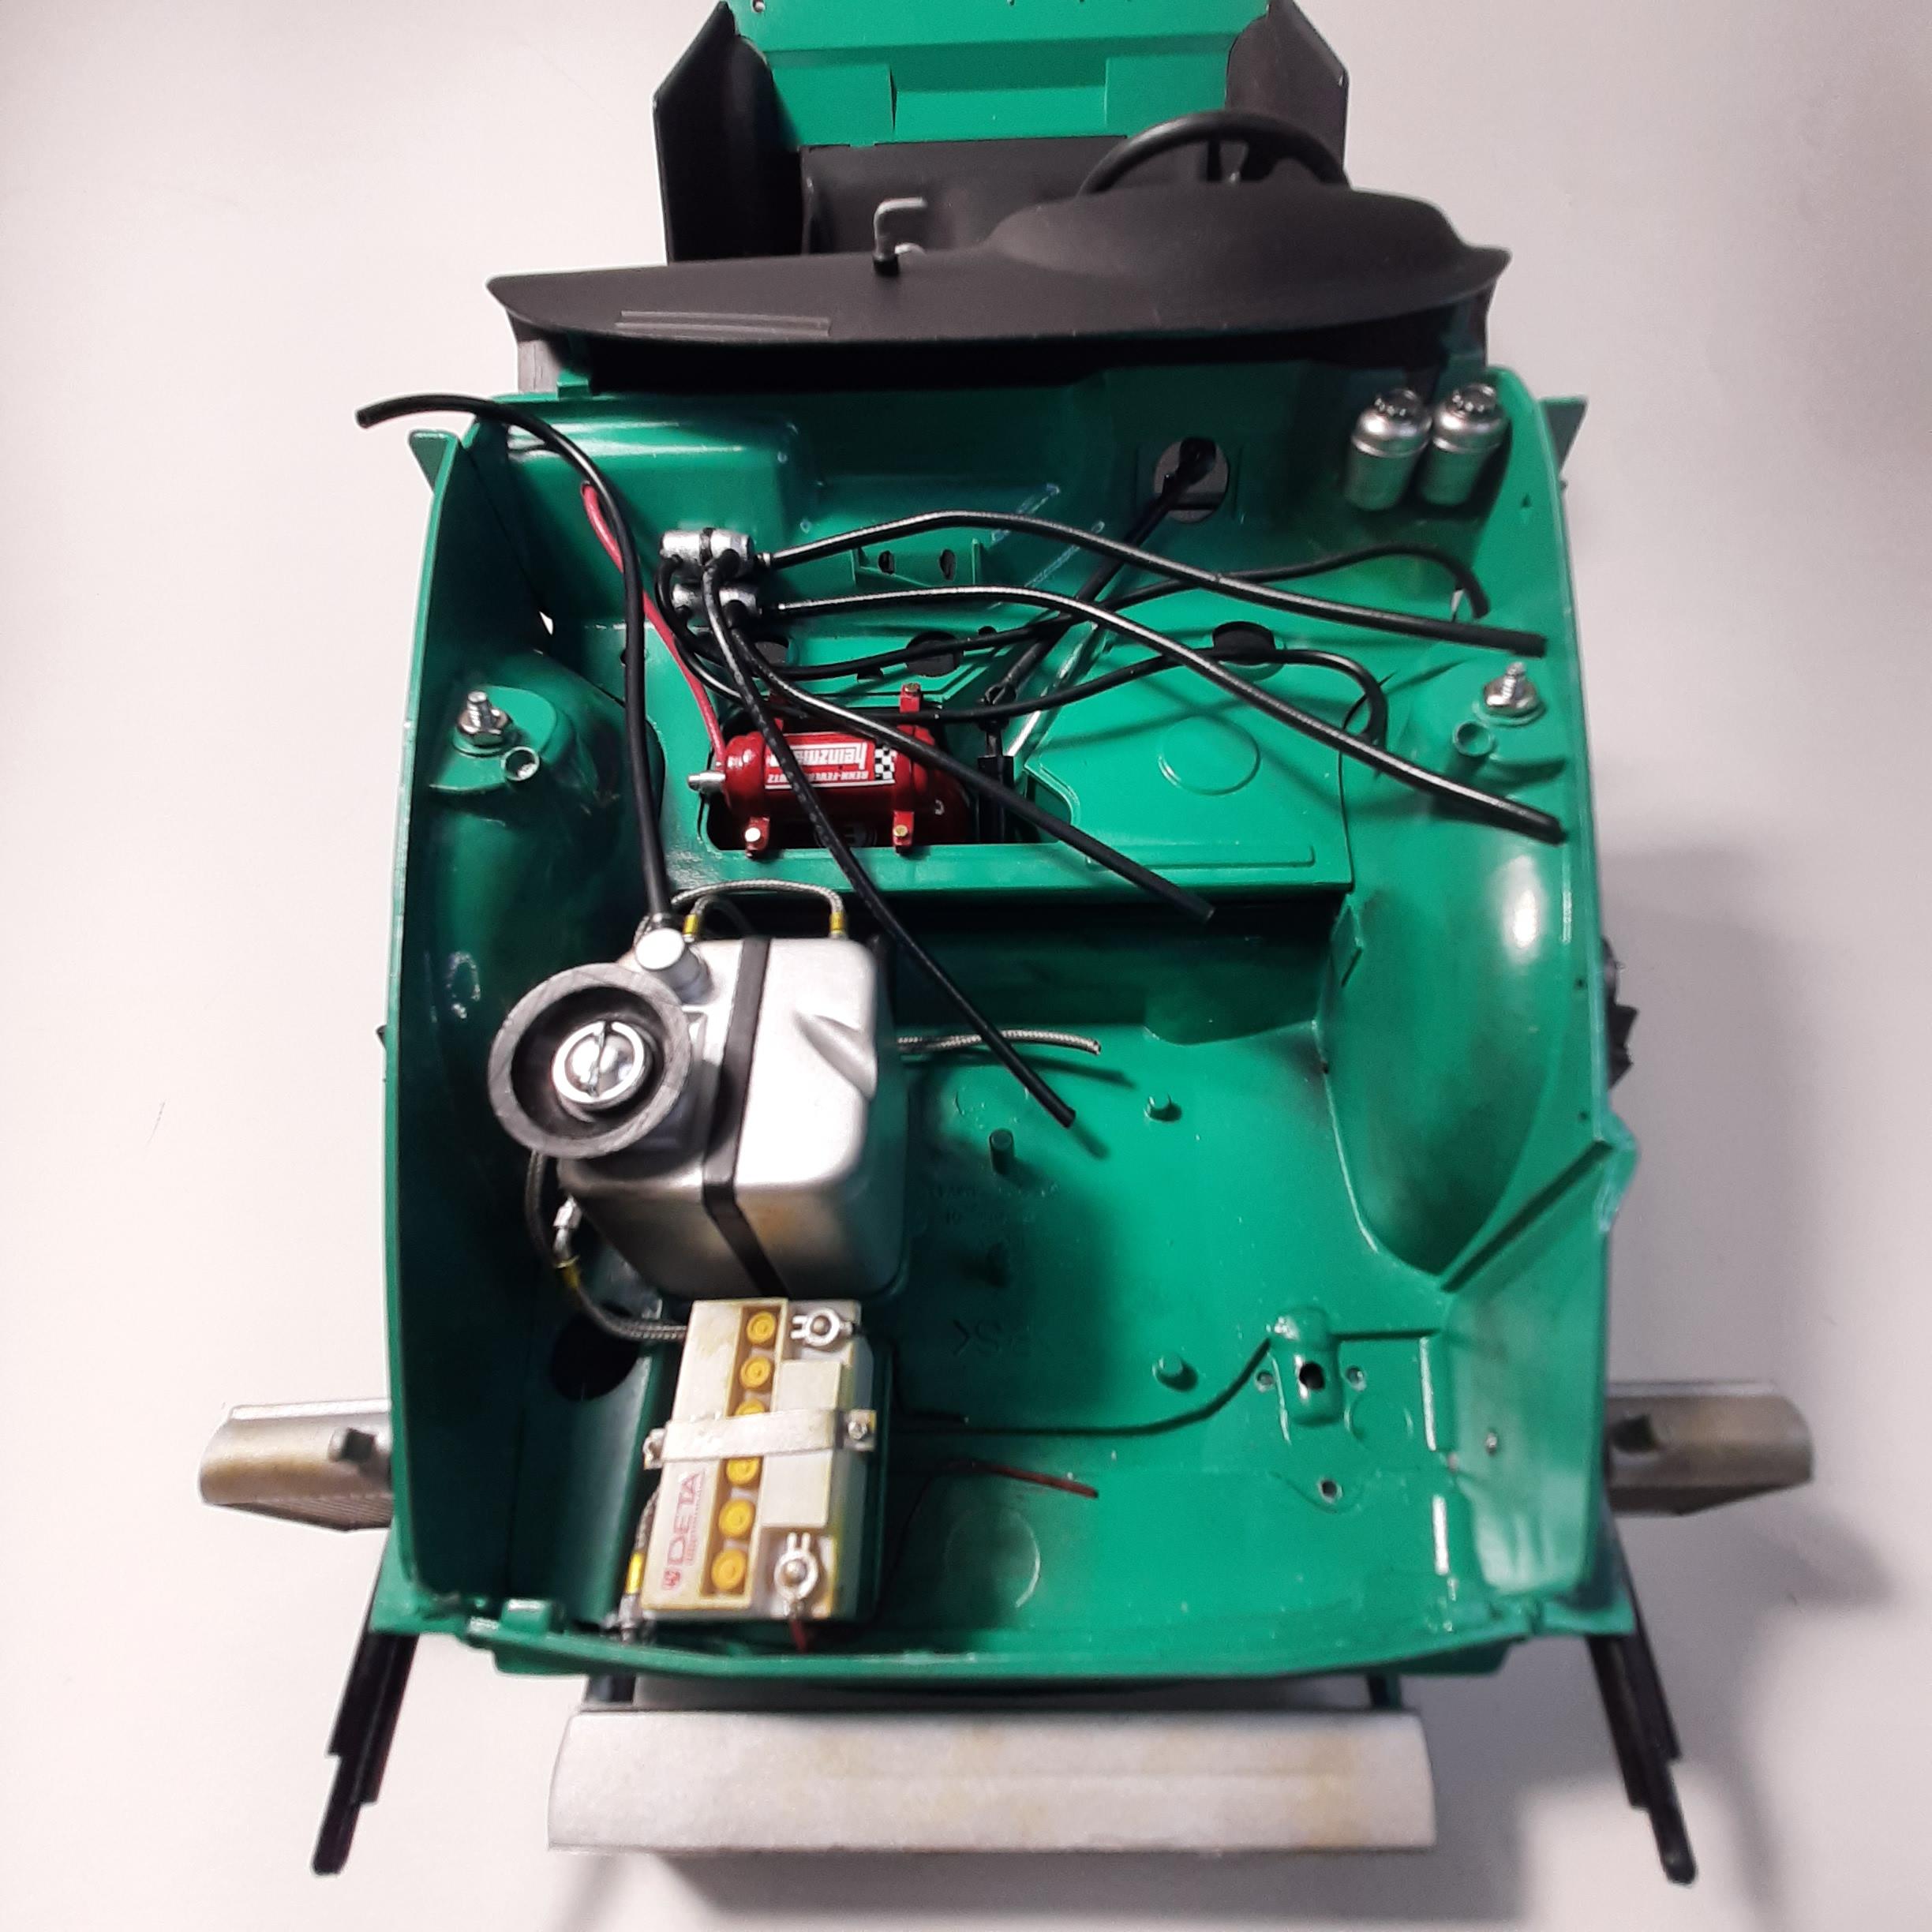
One step closer! Installed the fire bottles permanently and ran some more lines. I used some hose that I had in stock and also some #16 and #14 electrical wire casing. I stripped the wire and then cut the clear outer covering off of it which makes it more pliable. Unfortunately, I just realized that the stamping on one of the hoses is visible and you can read the wire size! Now I need to make two brackets to hold the hoses down. After that I'm hoping to figure out where the hoses actually go. All the pictures I have seem to show them running into the opening next to the fire bottles and then they disappear.
-
1/12th Porsche 934 Vaillant
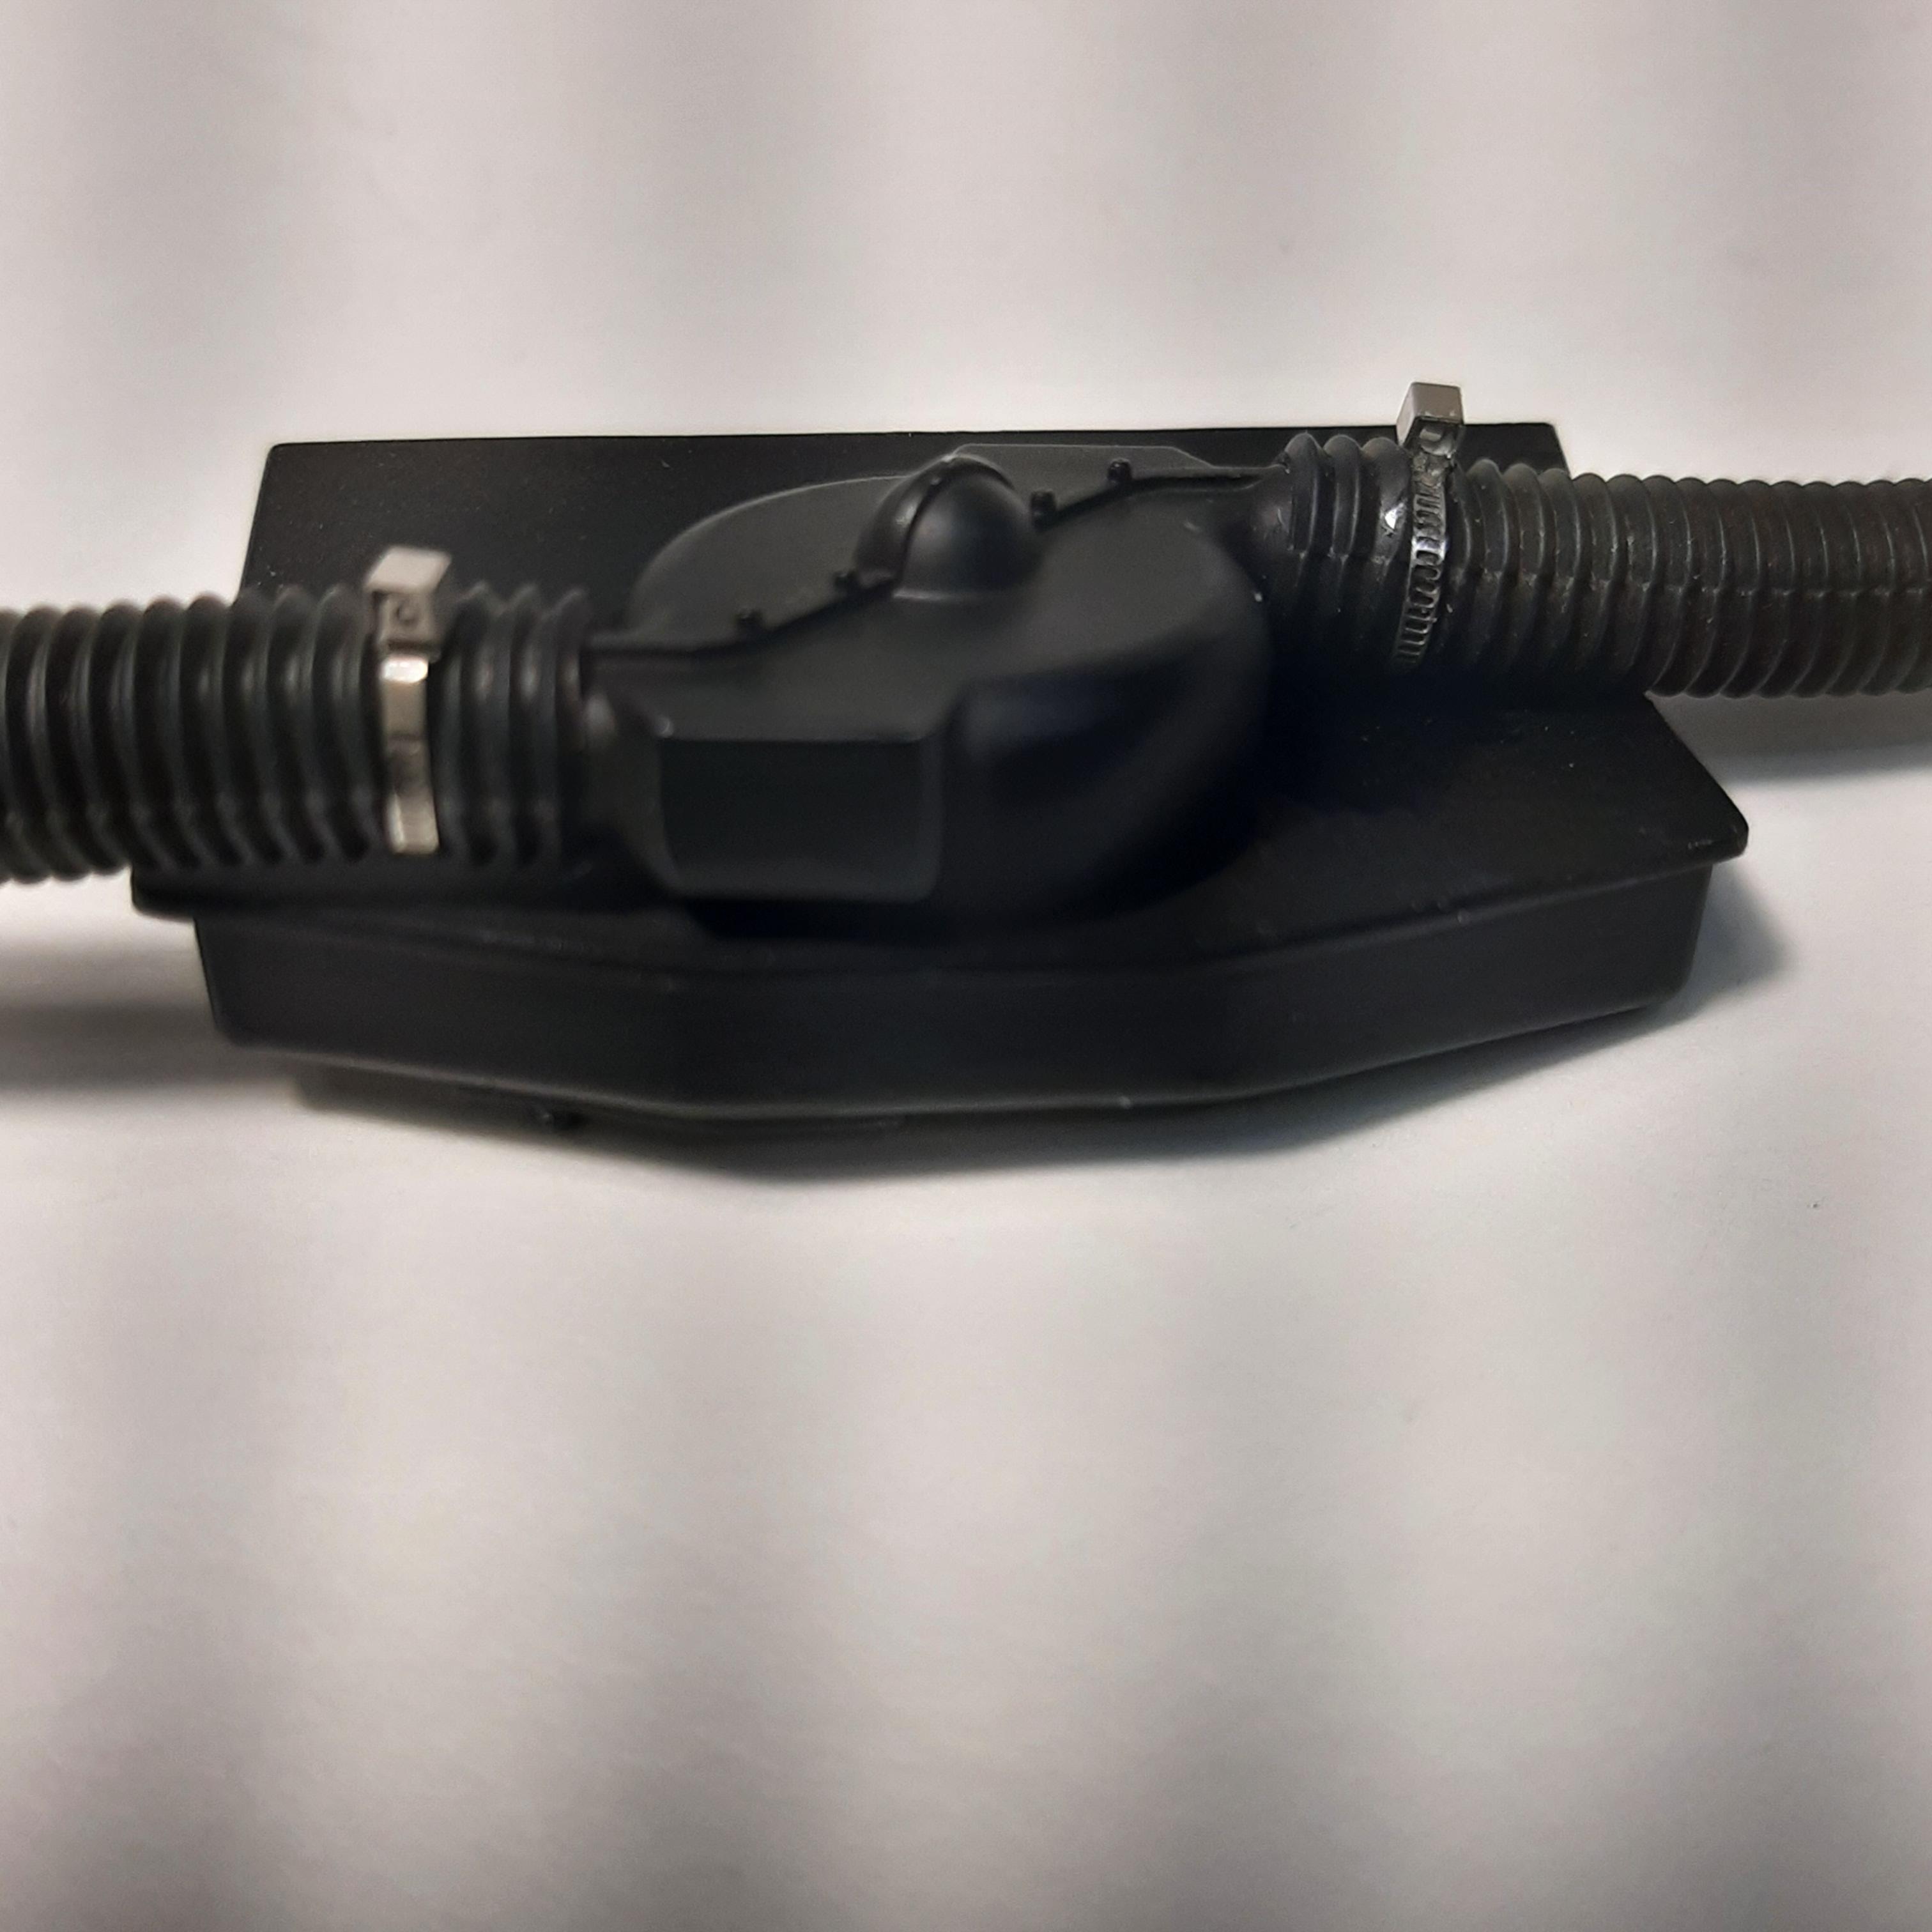
majel replied to majel's topic in WIP: Other Racing: Road Racing, Land Speed Racers
Just a small update. Having a hell of a time getting anything done because of constant shoulder pain, one hand constantly swollen and no feeling in the finger tips and the other hand constantly shaking. I did get the heater and hoses put together. Weathered the hoses and added KA Models hose clamps, they are made for 1/12th scale but due to the size of the hoses they are not exactly long enough. Still think they look better than chrome paint or bare metal foil.
-
That is a real beauty, fantastic job!!
-
I love "what if" models and this one is very nice. Well done!
-
That is a very cool build!! Excellent detail throughout, just a fantastic job!
-
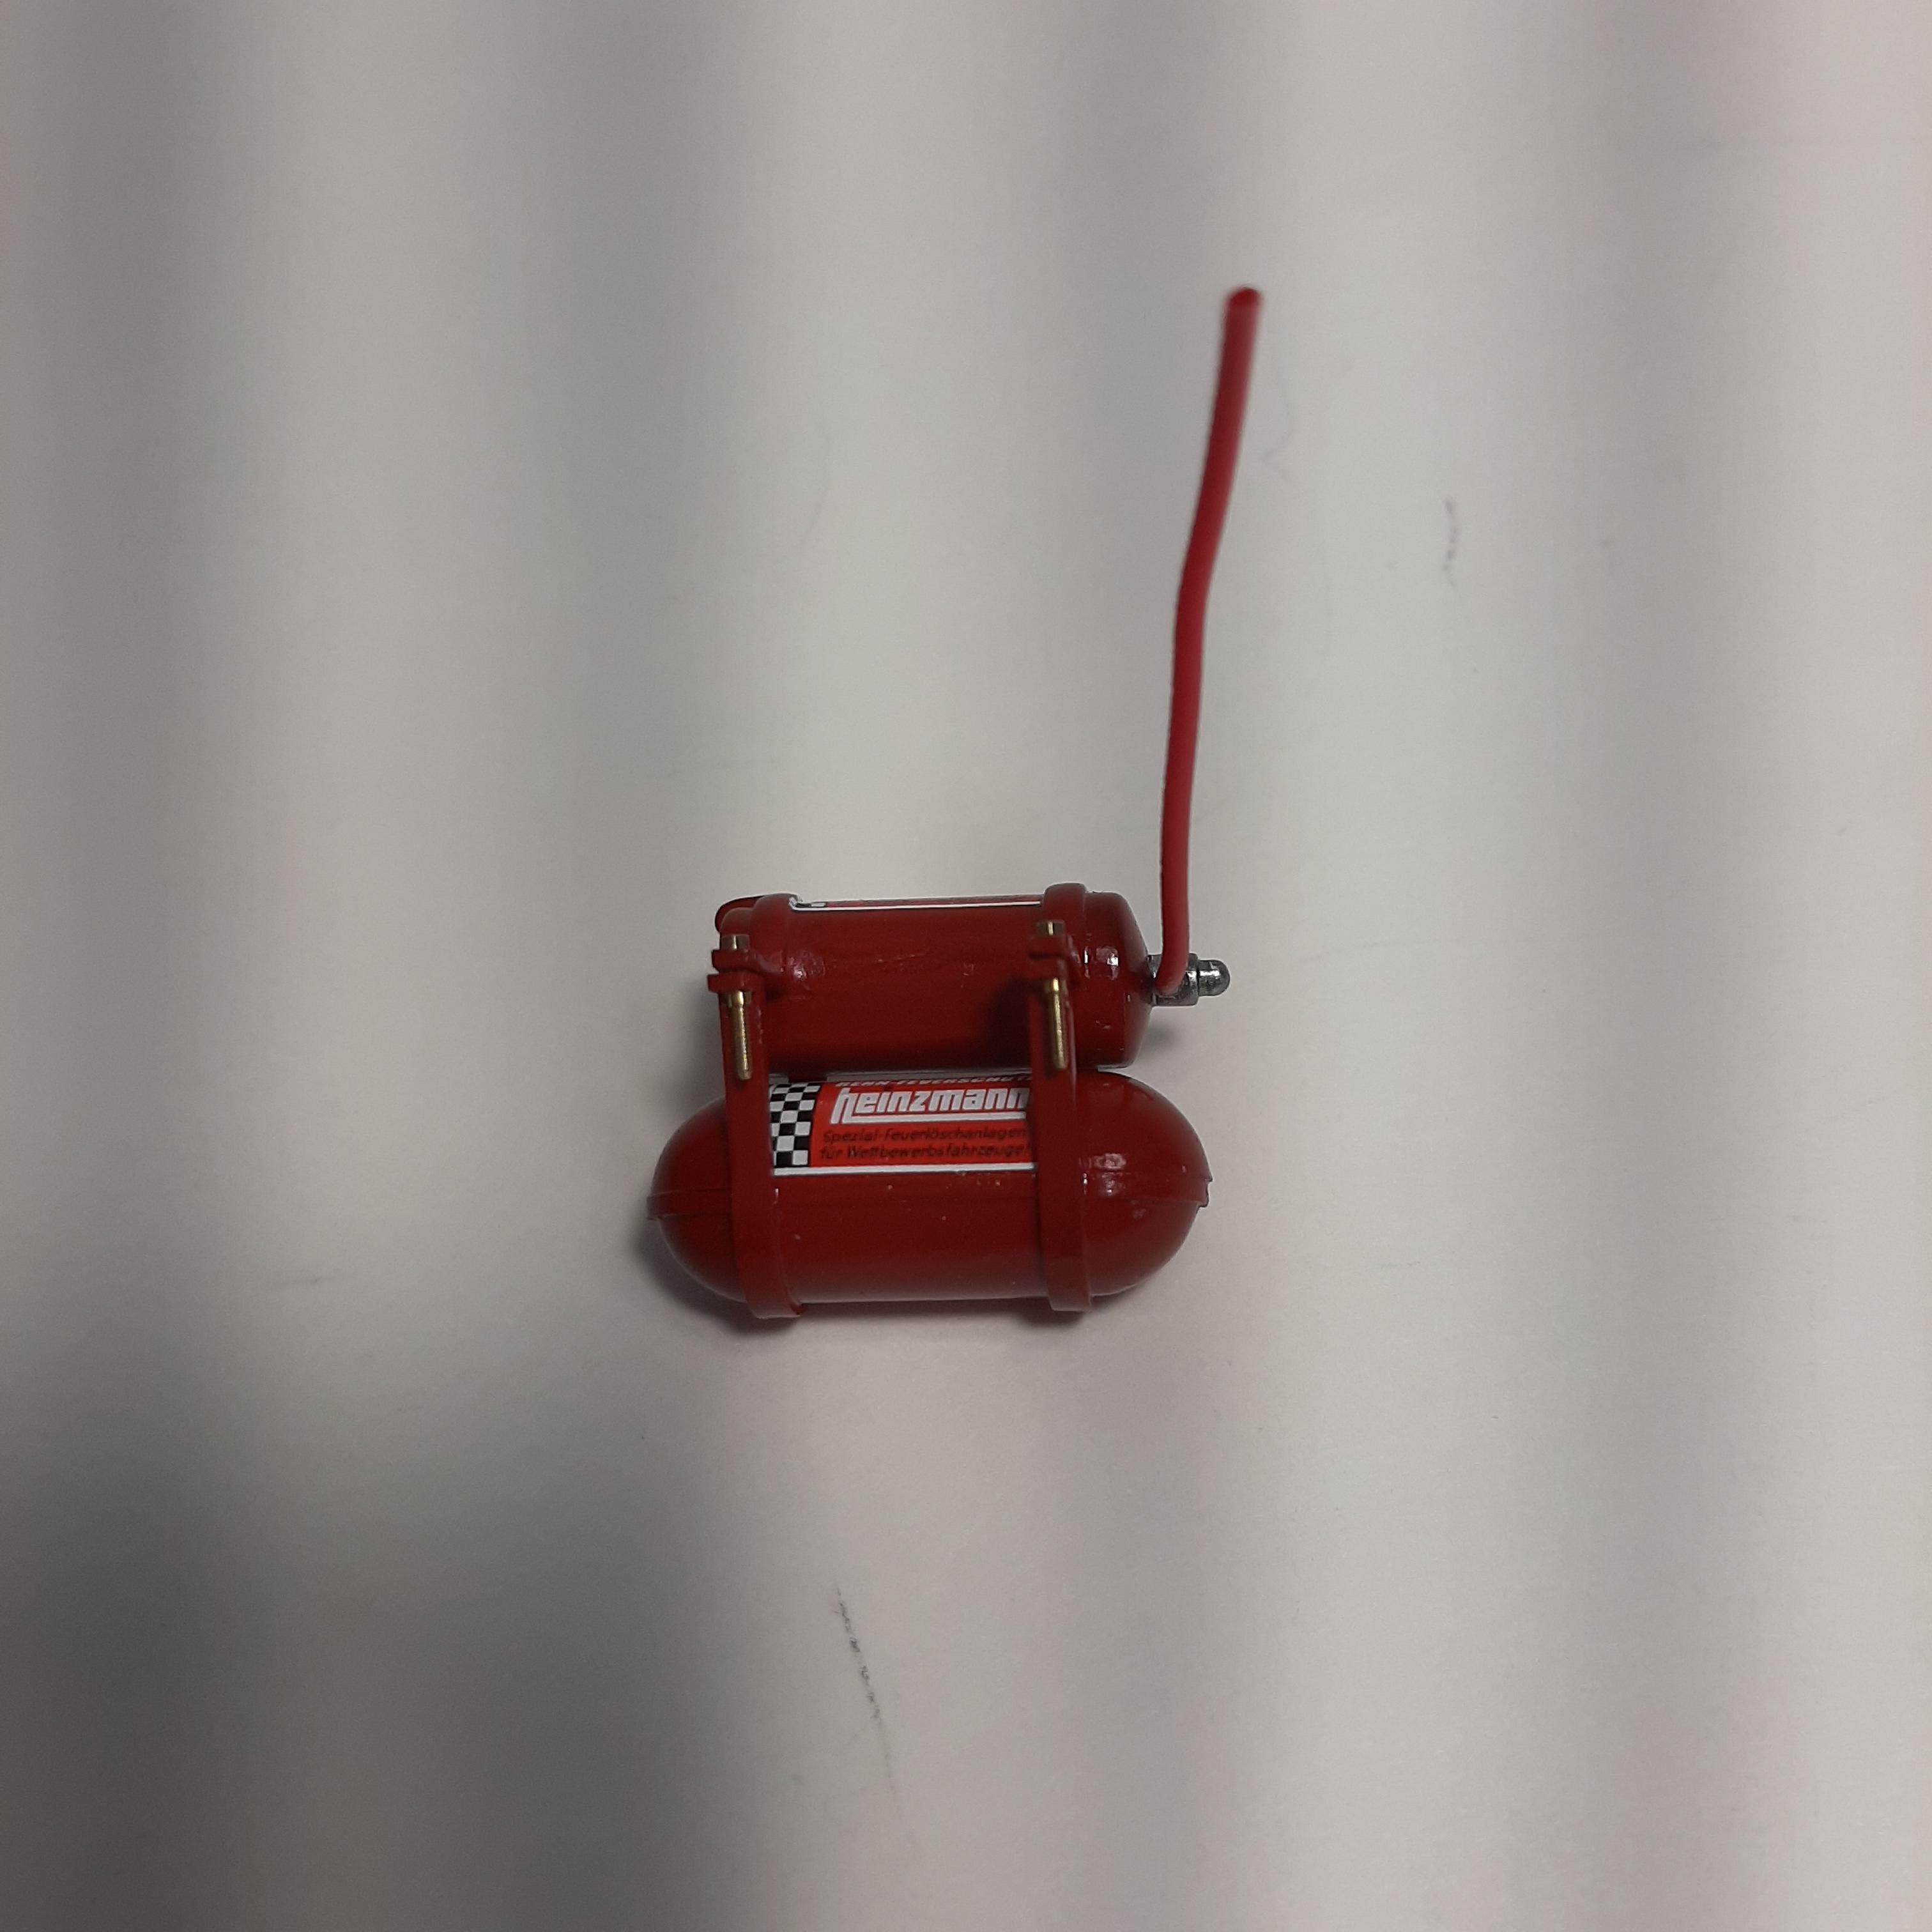
1/12th Porsche 934 Vaillant
majel replied to majel's topic in WIP: Other Racing: Road Racing, Land Speed Racers
I put the fire bottle system together and installed .8 mm nuts and bolts from Scale Hardware to held the brackets together. I left the bolts long because they slide perfectly into the mounting slots provided. I set both the fire bottles and the fuel tank in temporarily to see how everything fits together. I think the fire bottles look a little too new and could use a little weathering.
-
Very nice looking clean build. I really like the color combo.