Nacho Z
-
Posts
2,933 -
Joined
-
Last visited
Content Type
Profiles
Forums
Events
Gallery
Everything posted by Nacho Z
-

Hasegawa's Penthouse Porsche 962C
Nacho Z replied to Nacho Z's topic in WIP: Other Racing: Road Racing, Land Speed Racers
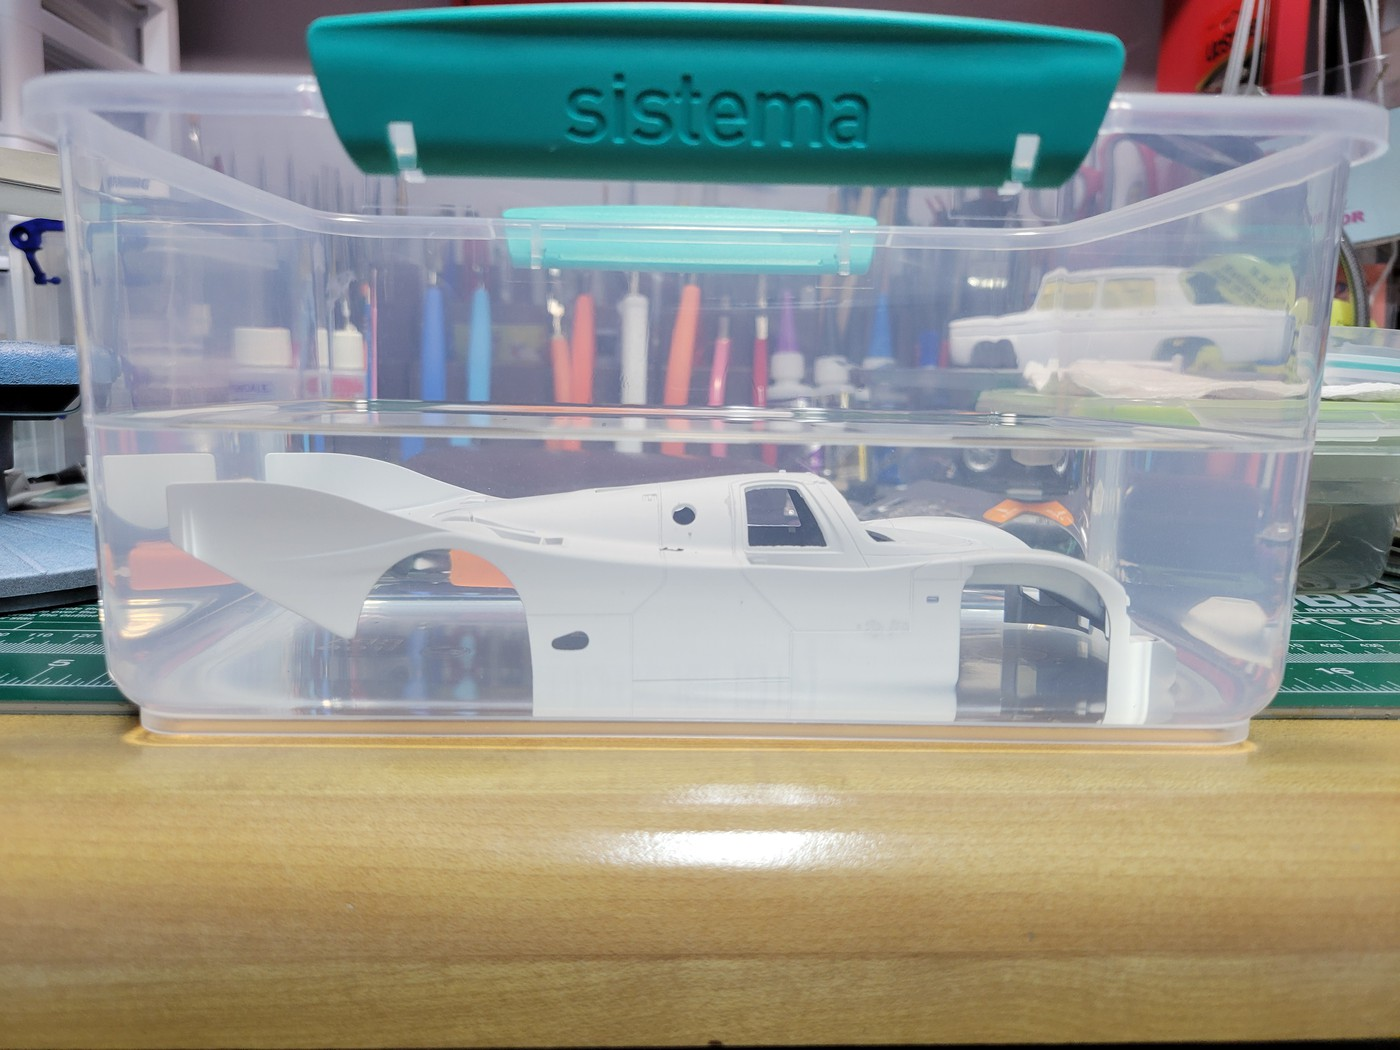
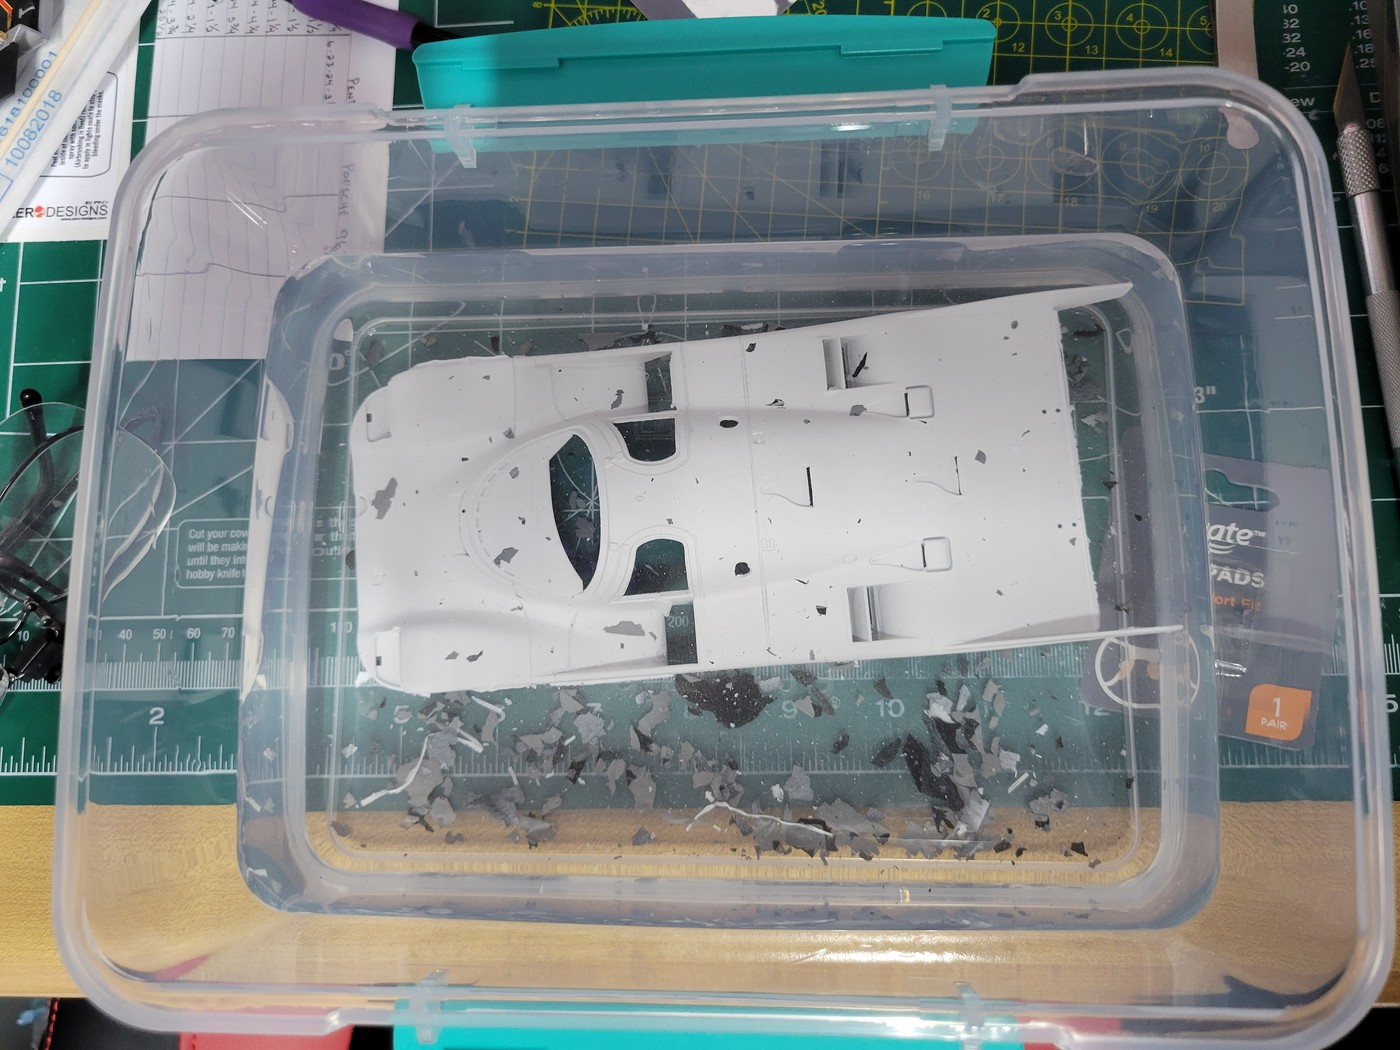
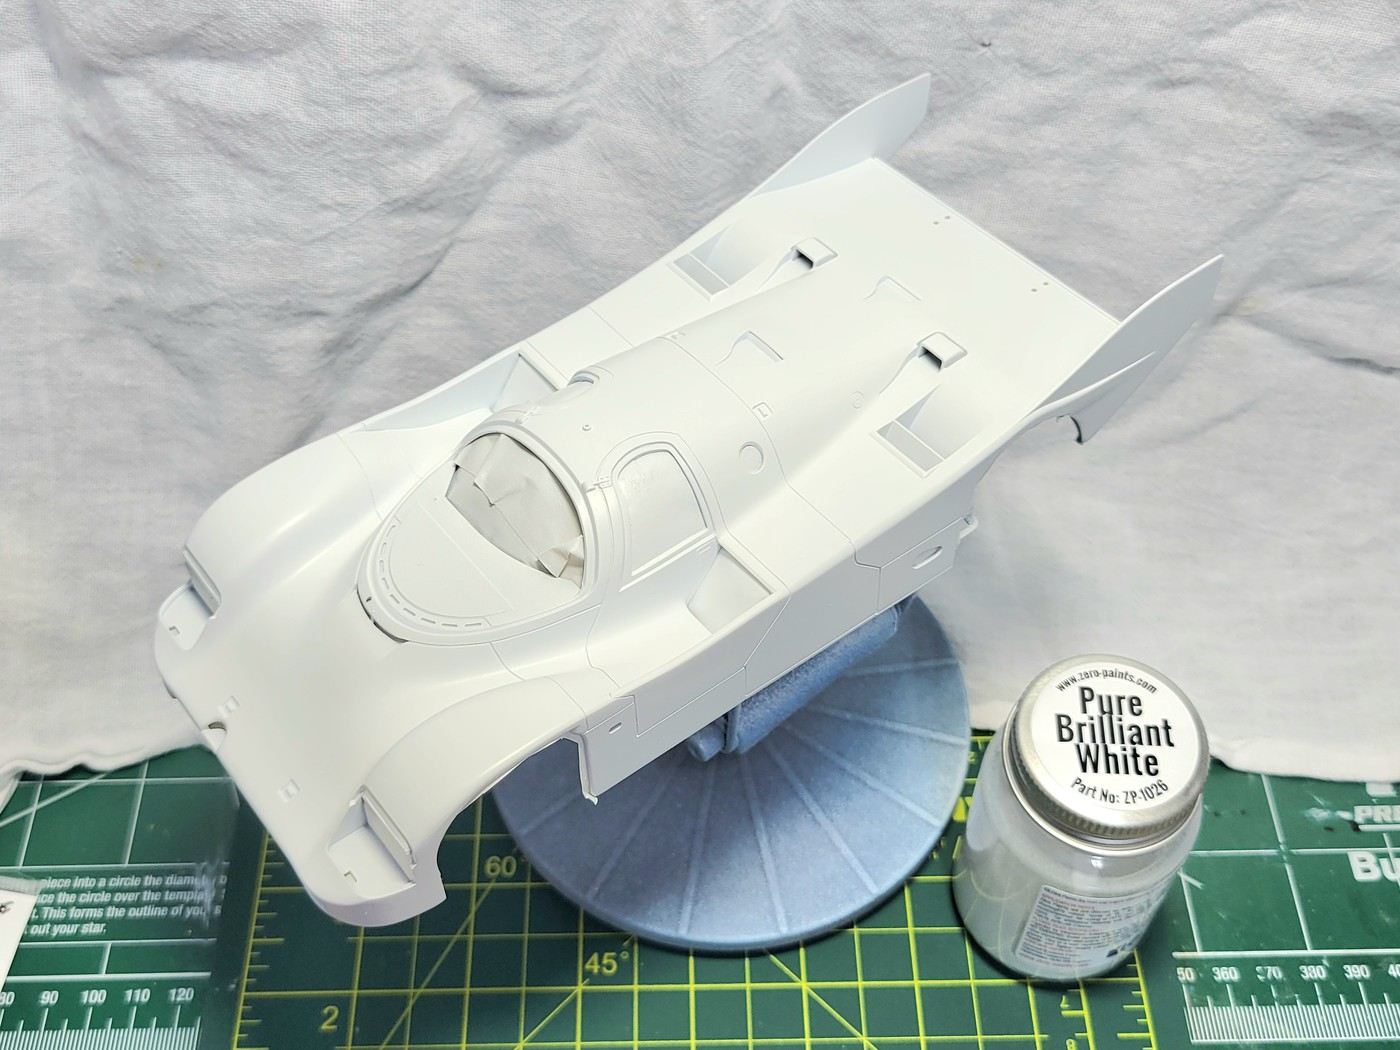
Time for an update. I have mentioned that I had a small disaster with the paint. Let me explain. I know that the airbrushed white paint layers are very thin. I managed to get a few dust bunnies in my paint and I needed to get them out. I very, very carefully began to rub out the paint, but still burned through the paint to the primer. No problem, I went ahead and got the dust bunnies rubbed out. I thought I would just go ahead and rattle can some Tamiya White on top of the LP-2 White and then I would have a thicker coat of paint to work with. This actually worked, but I hit a snag. My can of Tamiya White was almost empty and it spit. It spit bad. I grabbed another can of Tamiya White and shot it a little heavy in hopes of absorbing the drops of spit. This also worked, but I put it on too thick and it started pulling from the panel lines and I also got a couple of sags in the paint. I decided to strip it. I used 91%IPA and it stripped both the rattle can Tamiya White and the airbrushed LP-2 White. It did not hurt the Gravity Colors Primer. This is the body after approx. 30 minutes. I did nothing more than swirl the container around. Once the body was stripped of the Tamiya paint, I washed it in warm Dawn dish soap water and scrubbed it with an old toothbrush. I then basically repeated the entire process of masking and shooting the interior flat black and masking and shooting the exterior. The difference is I airbrushed the exterior in Zero Paints Pure Brilliant White. Here it is in a fresh coat of Gravity Colors Light Gray Primer. And here she is in Zero Paints Pure Brilliant White. Although it was a lot of extra work, in the end, the finish was better than what I originally had. Silver lining and all of that. I had no dust bunnies in the paint this time around. I let it cure and cleared it with Tamiya TS-13 straight from the can. I did this so that I had a smooth finish fof the decals. Thanks for looking. Comments are always welcome.
-
Hasegawa's Penthouse Porsche 962C
Nacho Z replied to Nacho Z's topic in WIP: Other Racing: Road Racing, Land Speed Racers
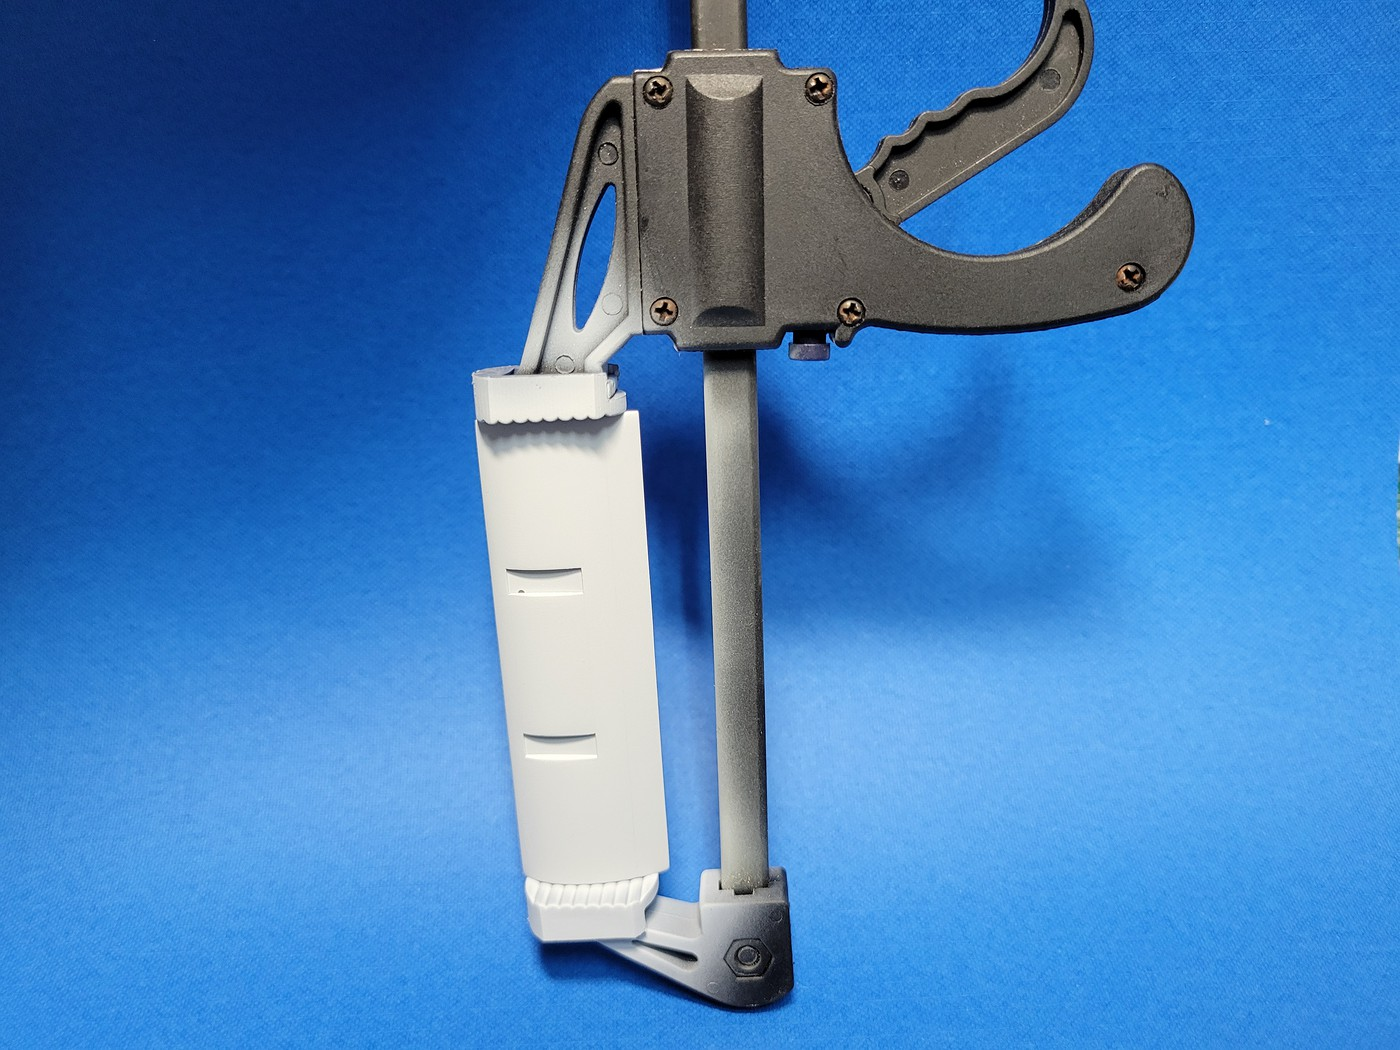
Thank you, Rich! The clamp works very well. I also use an old #11 blade taped to a wooden stir stick and I stick it up into the gap at the end of the wing. What I would worry about with the clamp is paint build up on the edges, especially if using a spray can. No issues when airbrushing. I hope that made sense. I can take a picture of what I'm talking about if that would help to clarify. -
Farm Floater Truck 1/24th scale
Nacho Z replied to Randy D's topic in WIP: Model Trucks: Big Rigs and Heavy Equipment
Holy cats!!! So very impressive! -
Very nice, Keith! That really is a great piece!
-
MARATHONMAN5962 from FRANCE
Nacho Z replied to marathonman5962's topic in Welcome! Introduce Yourself
Welcome to the forum, Damien! I've already enjoyed seeing your work and I'm looking forward to seeing more of it. -
Another great looking Porsche from your workbench, Damien. Well done!
-
Hasegawa's Penthouse Porsche 962C
Nacho Z replied to Nacho Z's topic in WIP: Other Racing: Road Racing, Land Speed Racers
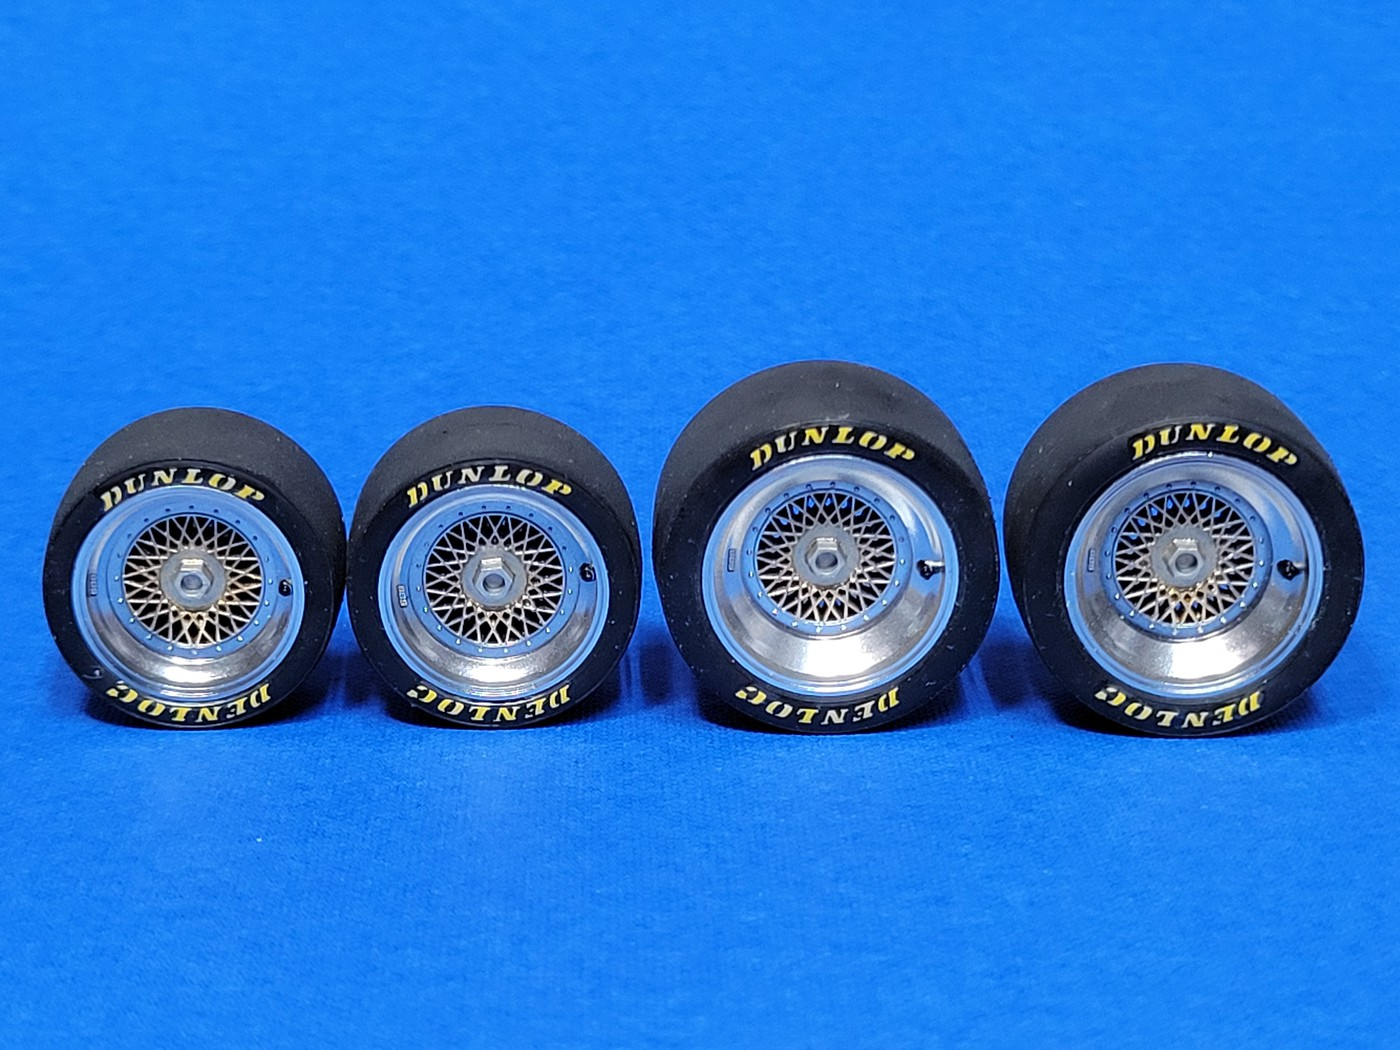
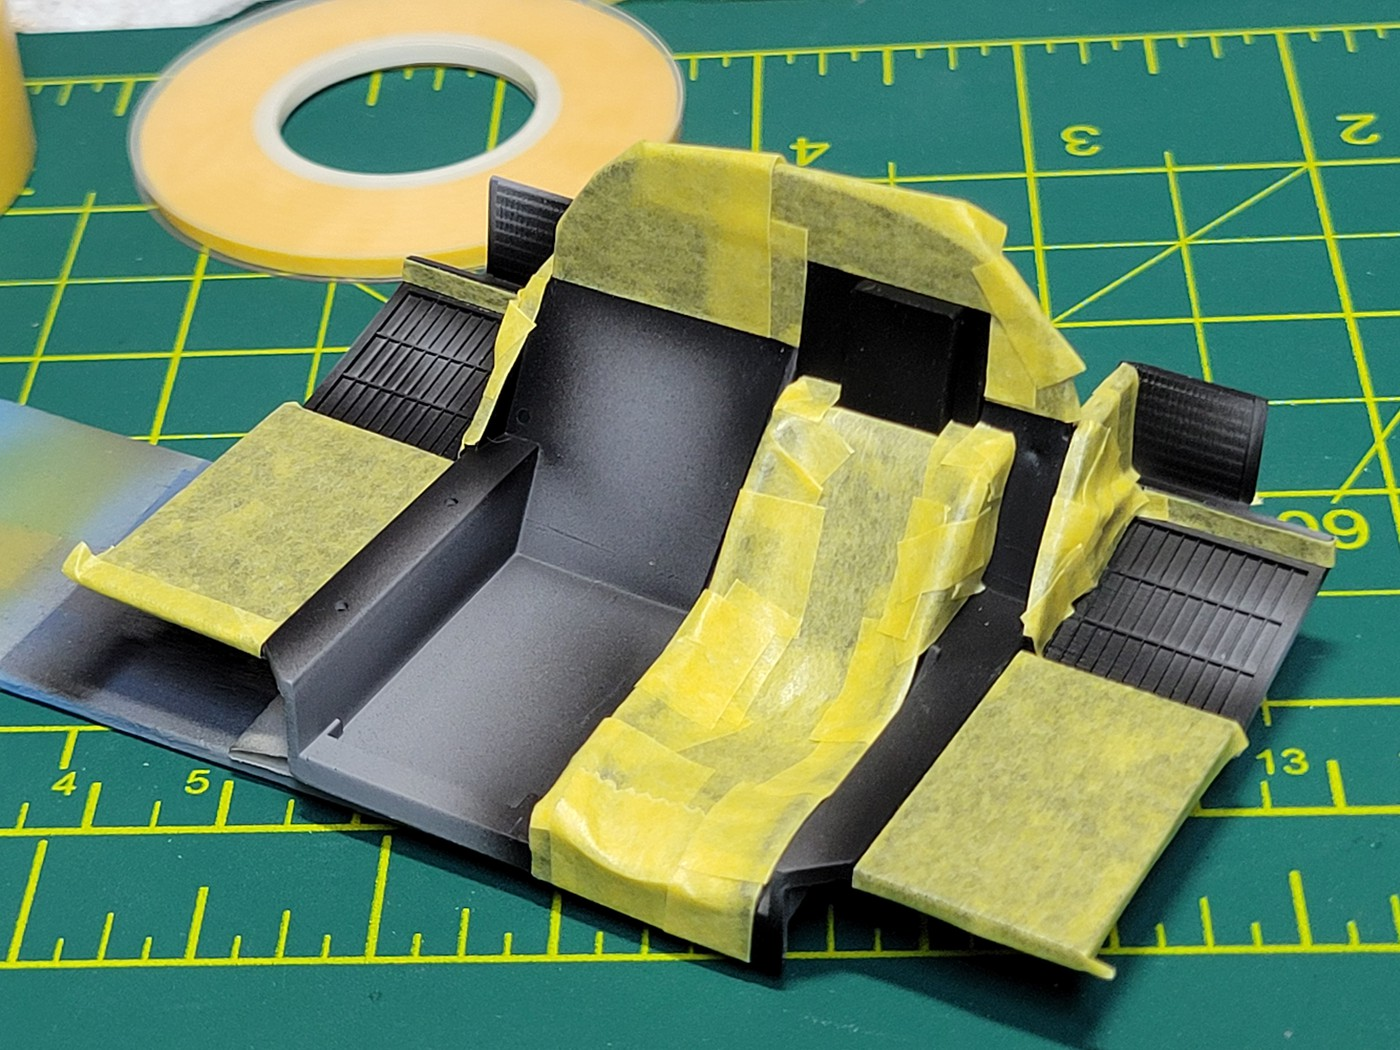
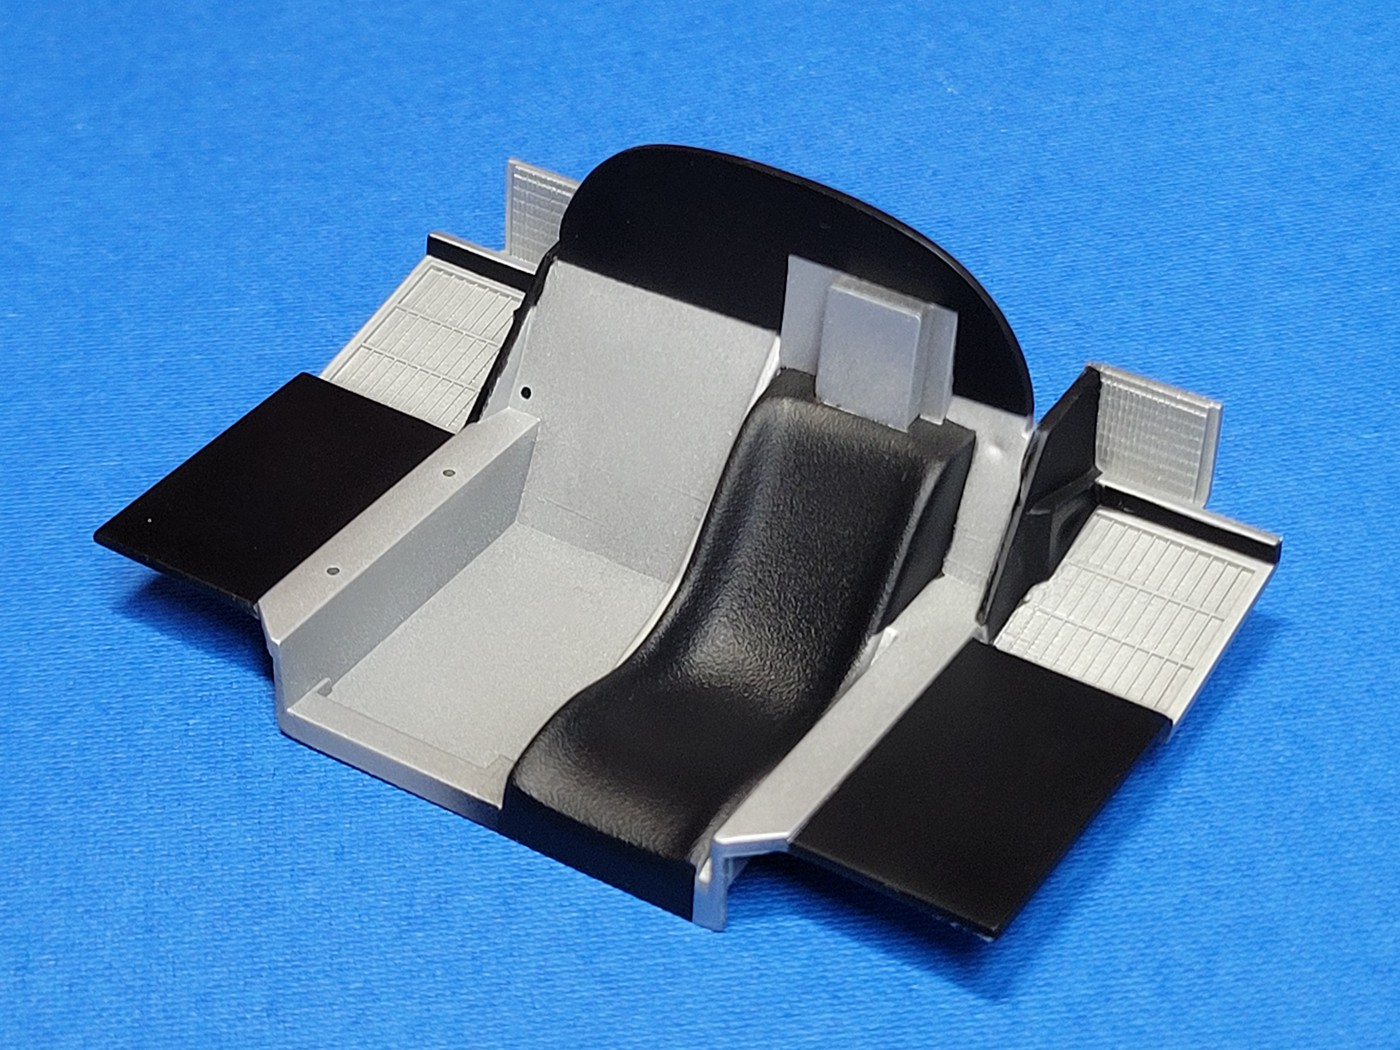
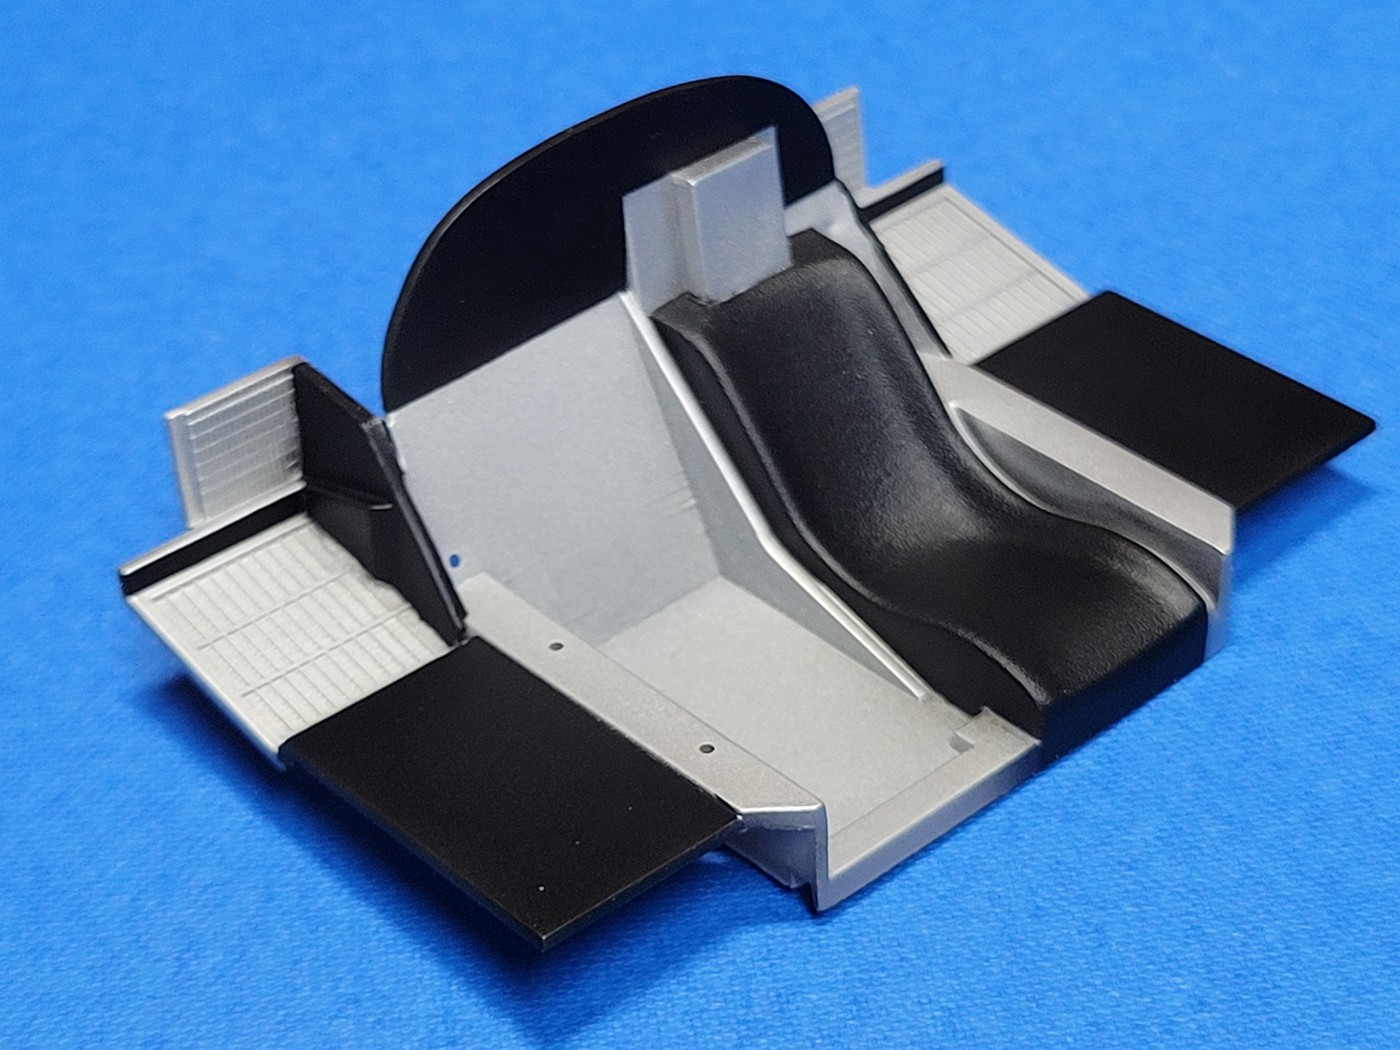
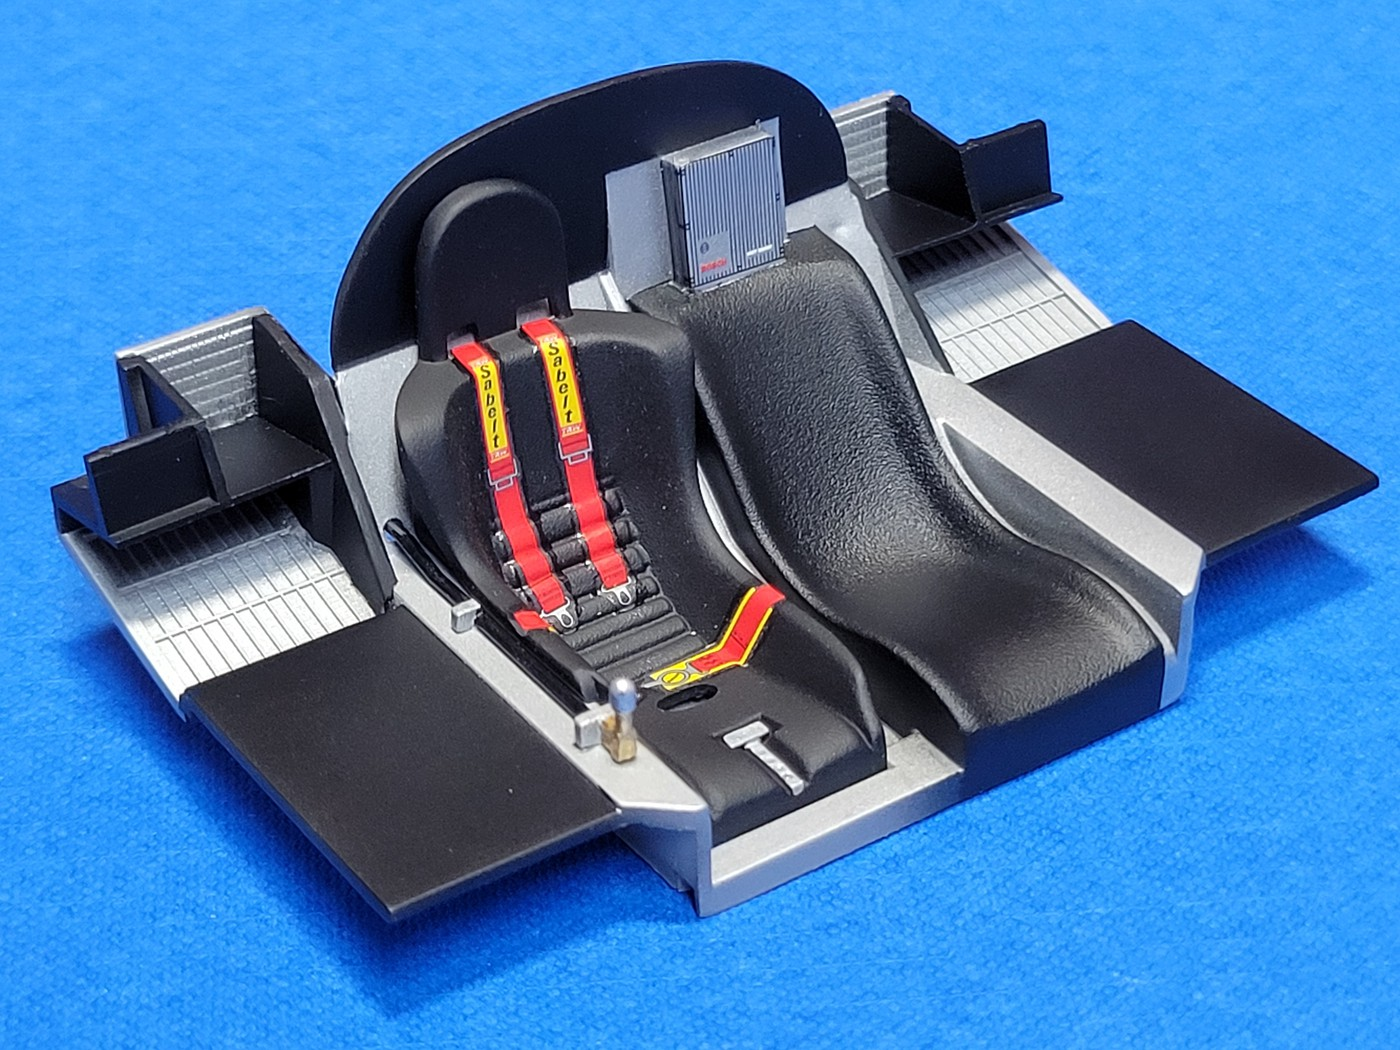
Time for another update. As with almost all of my WIPs, I am much farther along than what I am posting. I've never been one of those who post a ton of updates of minor progress. As I said in my first post, that rear wing is probably the worst fitting part of the entire kit. After the initial body work on it, I shot it in primer and found that there were still seam lines and sanding marks. I filled and sanded the wing again. Here it is before the second round of primer. And here it is after the second coat of primer and paint. Here are the wheels and tires. The wheels were airbrushed in Tamiya LP-1 Gloss Black. The bottle is not labeled "Gloss Black", just Black, but it is gloss. The chrome is Green Stuff World Chrome Metal. The centers are brush painted gold. Per the instructions, the interior tub was airbrushed in Tamiya LP-3 Flat Black. This would come back to haunt me. I masked off the black so I could lay down some aluminum paint. I shot the aluminum paint and couldn't figure out why it came out looking like silver instead of shiny aluminum. I tried another shade. Same results. Then it struck me that I was shooting over a flat surface and not a gloss surface. No way I'm redoing all of this. Silver it is!! To be honest, you really can't see inside these cars very well. Your eyes will be drawn to the red racing harness. I covered the decals with a clear flat to take the shine off. The next update will document the small disaster with the paint. Thanks for checking in! Comments are always welcome.
-
Hasegawa's Penthouse Porsche 962C
Nacho Z replied to Nacho Z's topic in WIP: Other Racing: Road Racing, Land Speed Racers
I agree with you, Damien. It would be nice to see more detail out back. I have done a detailed build of the 956 using the Tamiya kit and Studio 27's "Spirit of America" decals. That build has been posted here. I like these Hasegawa kits for a nice, easy, stress-free build. They look great on the shelf. Thanks for looking in. I really like yours, you did a great job on it! -
Hasegawa's Penthouse Porsche 962C
Nacho Z replied to Nacho Z's topic in WIP: Other Racing: Road Racing, Land Speed Racers
Thank you, and yes, that Gordini stares at me every time I’m at the bench…lol. Once this Porsche 962C is finished, I will work on the Gordini and I will finish it. -
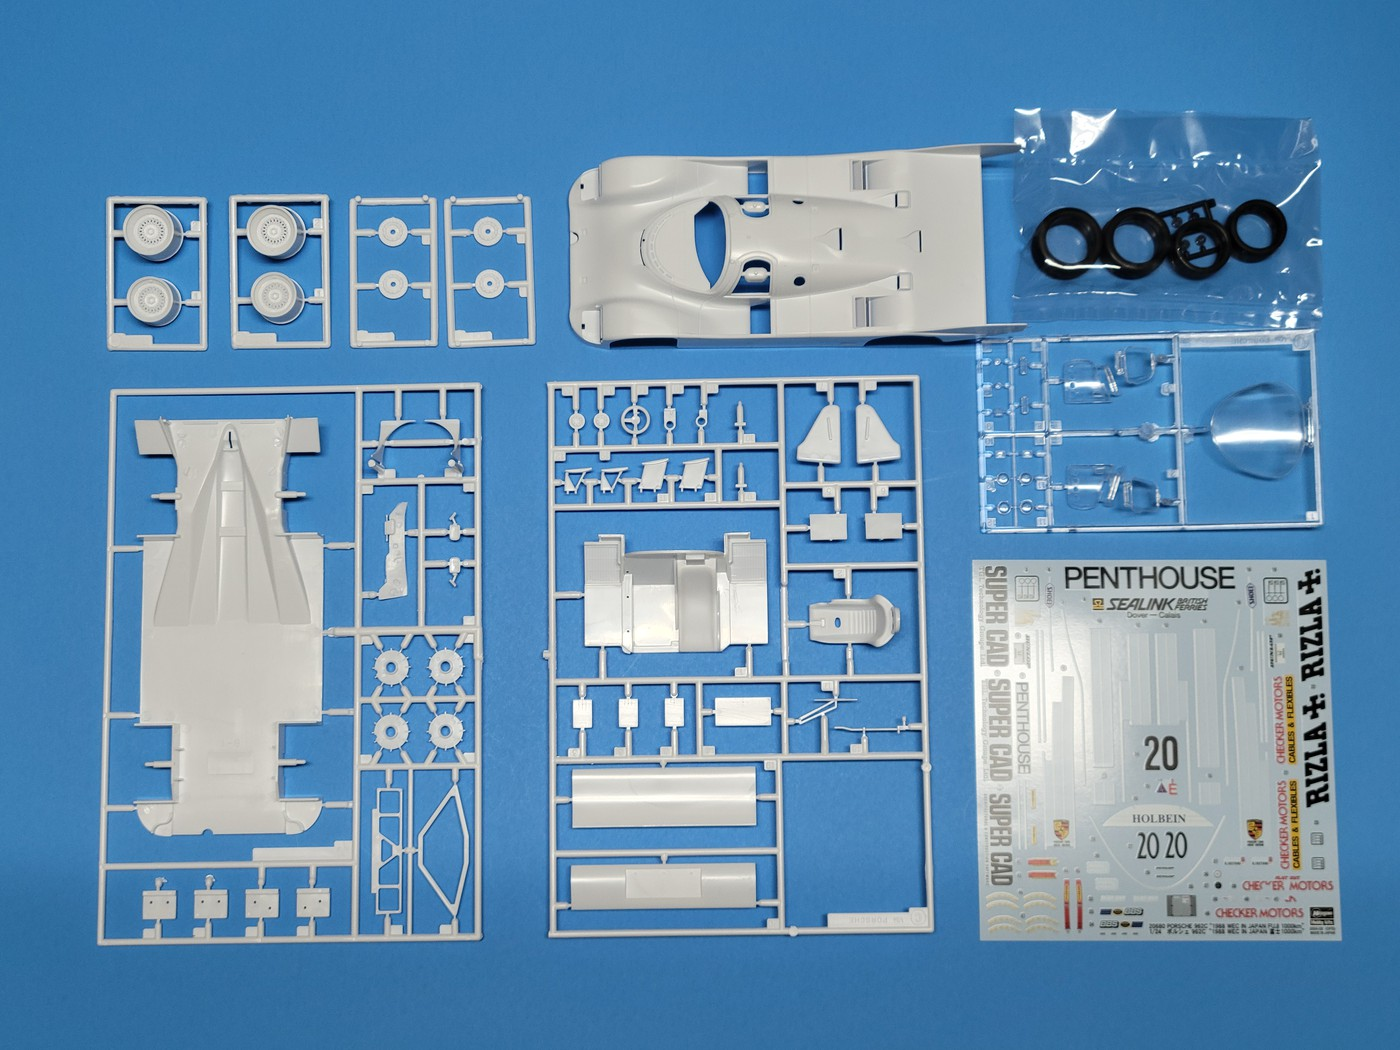
It has been a bit since I did a race car WIP. On my hobby bench at the moment is the venerable Hasegawa Porsche 962C. As of this post, I believe this is the latest offering of the kit. This time the livery is Penthouse / Super Cad / Rizla. I honestly do not know which one is the primary sponsor. They all have prominent graphics, just in different places. If I had to guess I would say they split the sponsorship three ways. I have built the Hasegawa Porsche 962C kit several times. It is a nice, simple kit that looks great on the shelf. I do not add a lot of extra detail on these kits. I use them as a quick, fun, stress-free, build. That is what this one is. As I do with all of my WIPs, I will caption each picture as needed. The kit box art. The kit contents. I always start by highlighting seam lines and areas that will need work. I use a Sharpie to do this. Generally speaking, the kit is nice. Things fit well. Except for that rear wing...lol. It is made up of three pieces and they just don't fit together very well. Once the body prep was done, I got it ready for primer. The interior is black. Although you can only see a small portion of the interior, I wanted to paint the entire interior flat black, with the thought that the exterior white will be a uniform shade. I masked off all of the openings, (and there are a lot of them), in order to eliminate black overspray on the exterior of the body. Here is the interior airbrushed in Tamiya LP-3 Flat Black. Now that the interior is finished, I basically reversed masked the body shell. I masked off all of the openings to prevent white overspray getting on the interior. Here is the body. First picture is the exterior airbrushed in Gravity Paints, Spain, light gray primer. I used light gray so that it would contrast with the white that I would be painting. The second picture is the exterior airbrushed in Tamiya LP-2 White. That is enough for this update. Unfortunately, it goes downhill from here. I will update my problems in the next update. Thanks for looking. Feel free to comment.
-
Brabham BT45
Nacho Z replied to Chris Smith's topic in WIP: Other Racing: Road Racing, Land Speed Racers
This one, somehow, dropped off my radar. I’m glad I found it again. Really wonderful work going on here, Chris! It is always a pleasure to see your updates. -
This is gonna be good!…..
-
That is a great looking model of a great looking race car!
-
That is such a nice looking Porsche, you did a great job on it! The 956 and 962 are among my favorite race cars.
-
Unbelievably amazing.
-
What a fantastic looking model! You knocked it out of the park!
-
Fandamntastic!!!
-
That is a great looking Ferrari!
-
1965 Honda RA272 F1
Nacho Z replied to 1hobby1's topic in Other Racing: Road Racing, Salt Flat Racers
Very nice, Steve! I love these old cigar cars. -
I think this is just fantastic!! What an absolutely cool looking rig! Great job, Gary.
-
Rain-X Camaro 1993 Champ Scott Sharp
Nacho Z replied to Rich Chernosky's topic in Other Racing: Road Racing, Salt Flat Racers
She really is a good looking race car. The model is just as nice. I have come to understand that these are tough kits to build, so my hat is off to you for building all three! Sweet looking trio! -
Salvinos JR Newgarden Dallara
Nacho Z replied to mgbdriver's topic in Other Racing: Road Racing, Salt Flat Racers
I’ll be following this one, Mike. You have already given us a good description of what you are finding with the kit and I sure do hope you will continue doing so. There has been a lot of hype about these kits. Generally speaking, and I do mean generally, reviewers of advanced copies of new kits put their rose colored glasses on when talking about them. It would be nice to get a full disclosure type of description. I wish you good luck and much success on your Newgarden kit! Looking forward to your next post! -
66 Chevy C-10
Nacho Z replied to Just Jim's topic in Model Trucks: Pickups, Vans, SUVs, Light Commercial
Very cool old Chevy, Jim! -
71 Olds 442 W30 (replica of my brother in law’s car)
Nacho Z replied to Steve H's topic in WIP: Model Cars
Outstanding attention to detail, Steve! Wowzers! -
You nailed it, John!!