Funkychiken
-
Posts
2,662 -
Joined
-
Last visited
Content Type
Profiles
Forums
Events
Gallery
Everything posted by Funkychiken
-
Is such a beautiful car, your mods make it better, really nice finish too.
-
It's a lovely build, the paint on the body shell is superb
-
Very sharp and clean mustang build, and a lovely collection of mustangs through the ages too!
-
I don't think I've ever seen one of these cars in real life. Nice clean build!
-
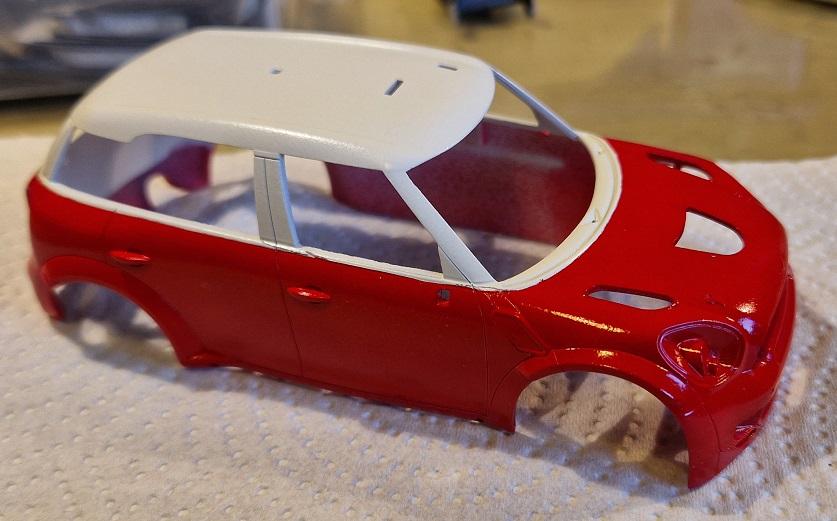
I normally paint the inside of the body shell too, this time, I just masked it, its never seen anyway. Masked with Tamiya masking tape, sprayed in Tamiya Red & Tamiya racing white aerosol cans...

-
I didn't take many interim shots, but this is the result of nearly 2 months of work. I tend to remove everything from the sprus, clean up, sand etc, wash, then mount for grey primer (Zero Paints) and then a mixture of Zero paints, or Tamiya Acrylics for painting. Mostly Airbrushed but some details are hand painted.
-
Trying to keep kits on the go, I started this about a month or 2 ago, and made reasonable progress. Its actually quite detailed for an Airfix kit. I've had some success with the Ford Fiesta, so wanted to give it a friend.
-
It's certainly impressive as you scratched the Eleanor bits!
-
A lovely pair of mercs. The flocking of the interior looks great!
-
Wow! Super cool mods.
-
Impressive scratch building!
-
Landie is looking great!
-
We'll will you along, brakes are looking good!
-
Fugimi Lamborghini Countache 5000 qv: WIP
Funkychiken replied to David G.'s topic in WIP: Model Cars
Looking great! Agree that the mods to the side of the lip spoiler is definitely worth it. -
Re-engineering Monograms Lotus Esprit...new update!
Funkychiken replied to Dann Tier's topic in WIP: Model Cars
Looking forward to it, this one is close to the finishing line! -
2012 Corvette C6R ZR1 Le Mans #73
Funkychiken replied to AJM's topic in WIP: Other Racing: Road Racing, Land Speed Racers
Superb build! It's just a great looking car in that livery and you've got the perfect amount of attention to detail.. -
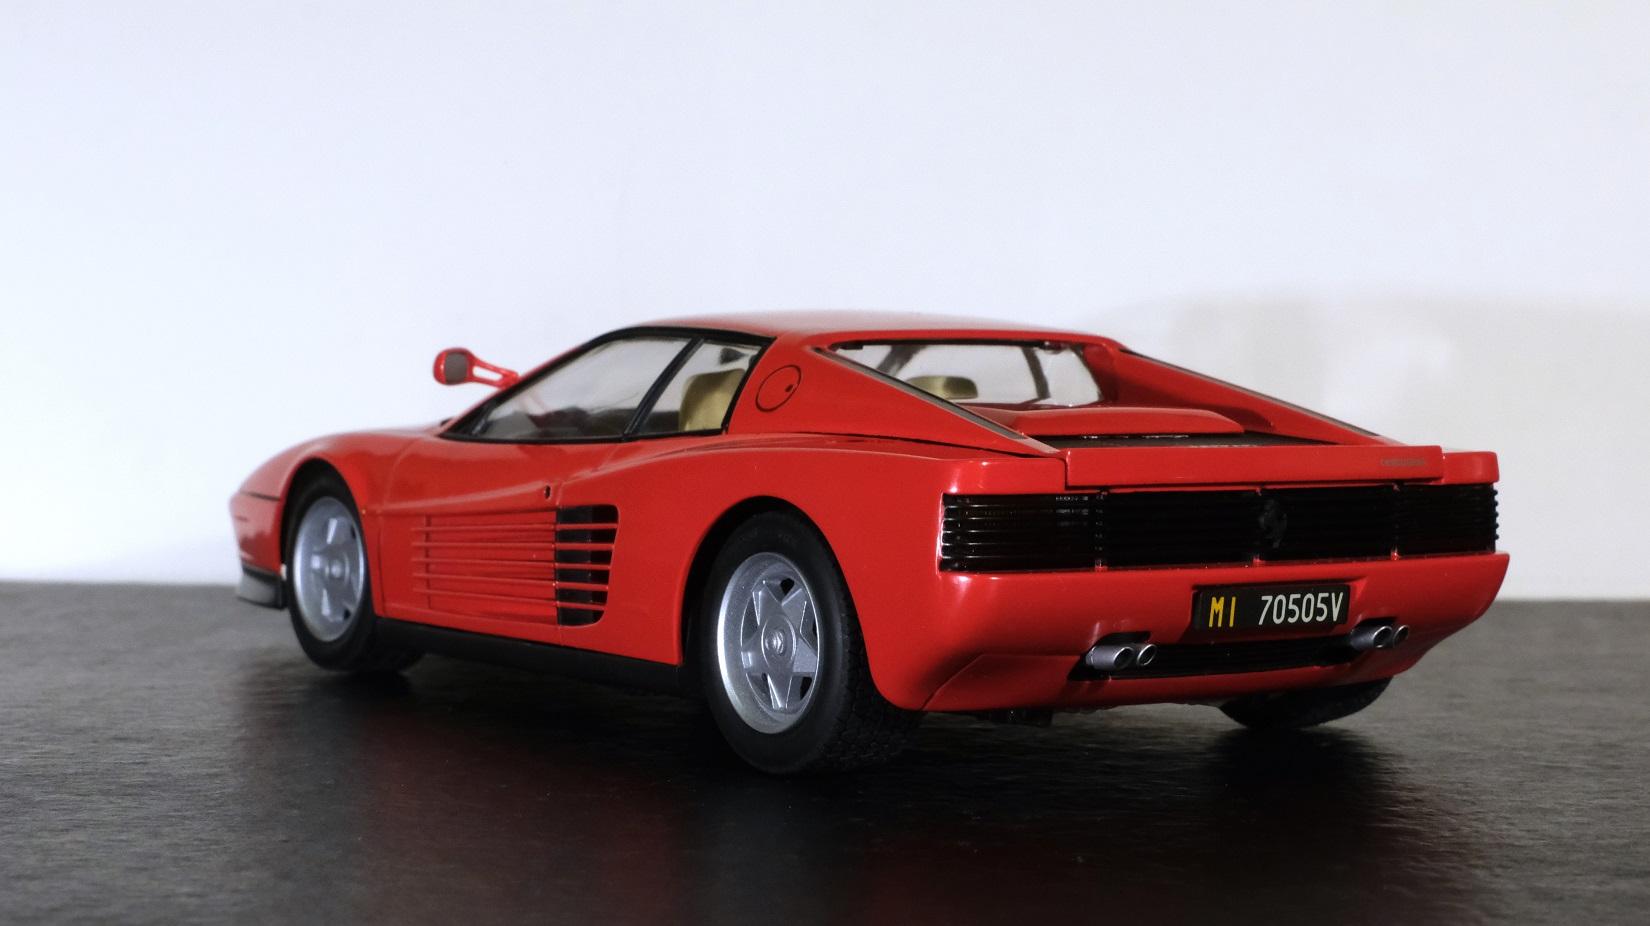
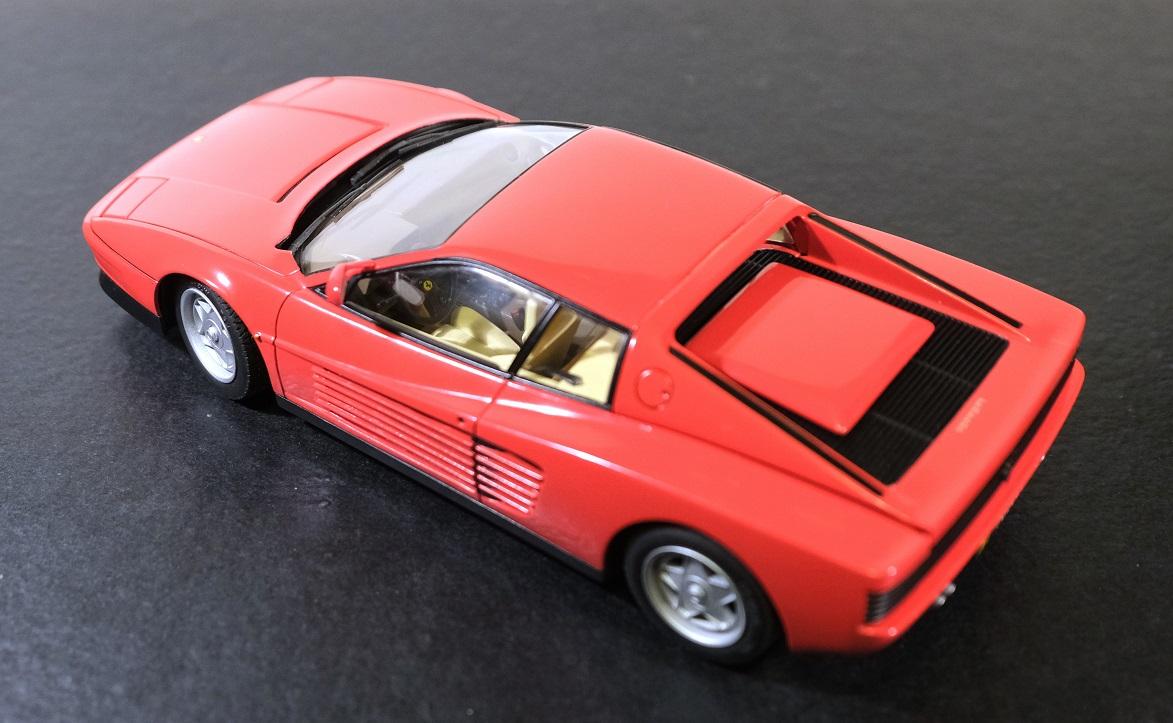
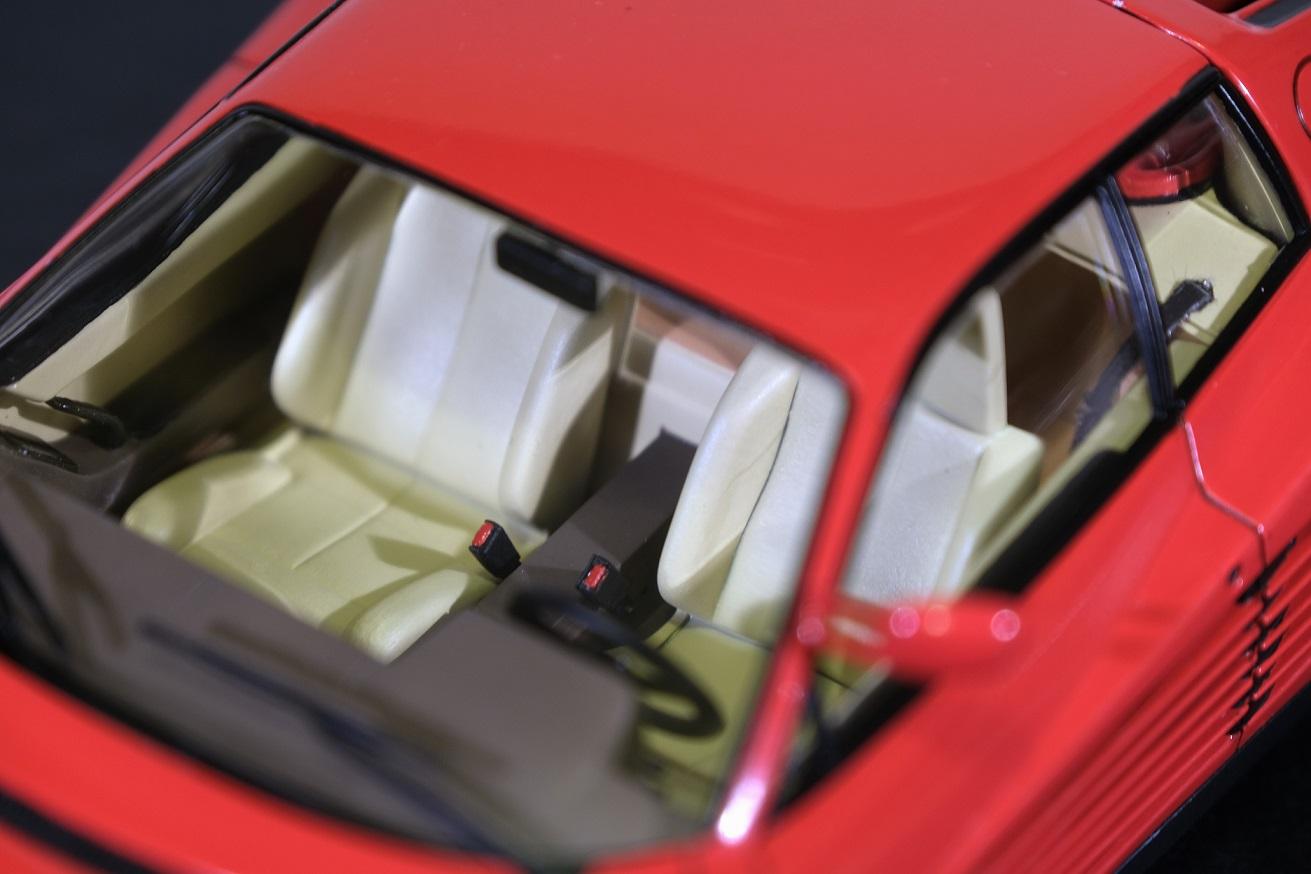
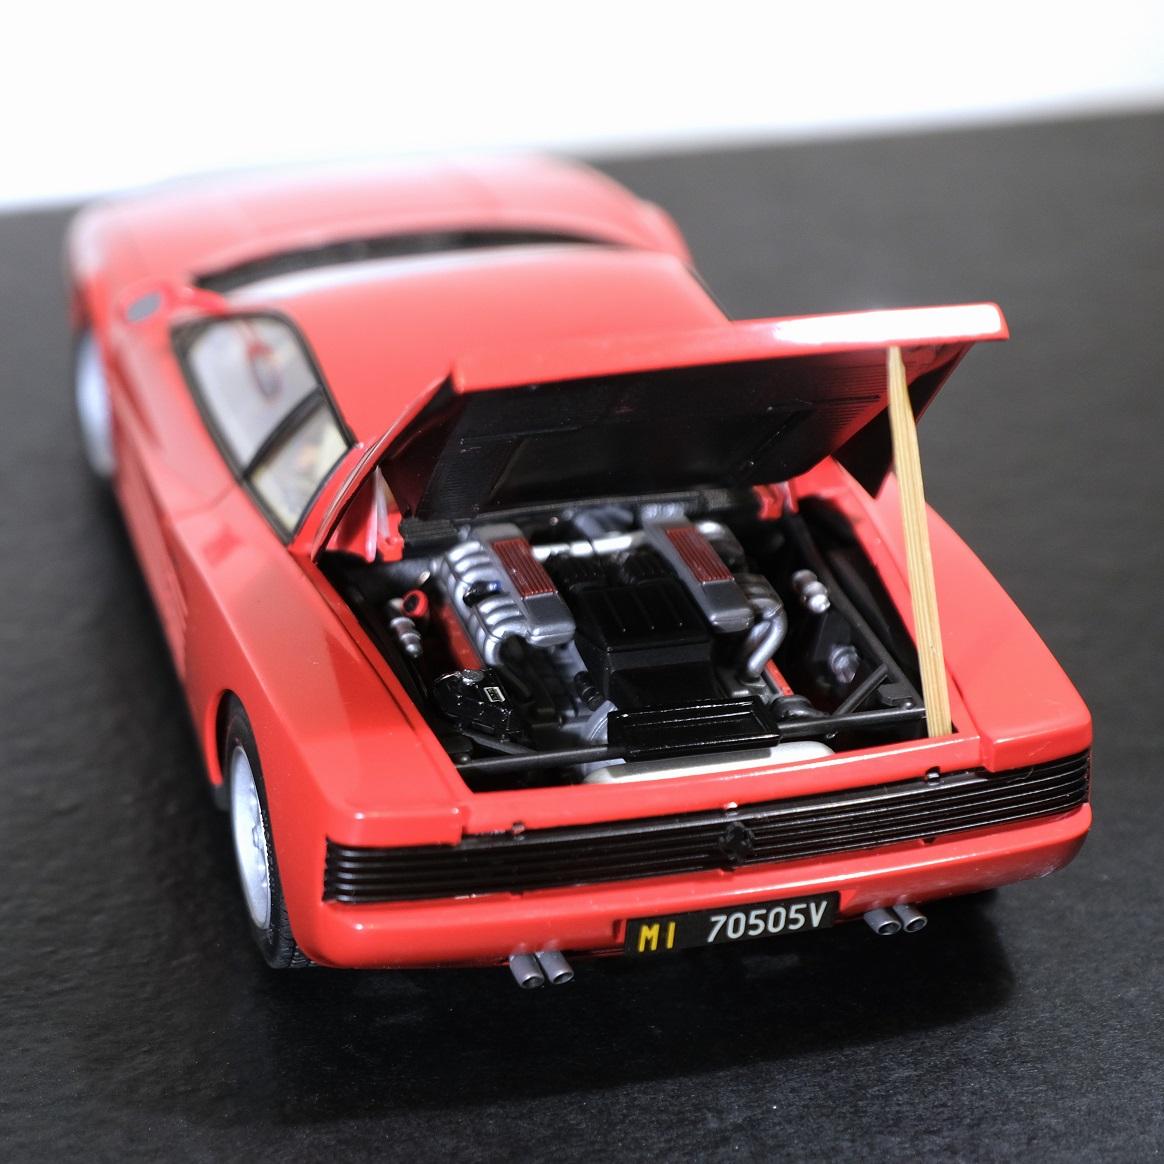
Typical gret quality kit from Tamiya, but there are some flaws. The clear parts were not so clear, had some mould stress marks and defects in them. The way the body shell attaches to the chassis means a bead of glue all the way around the front and sides, this is always a bad idea - 2 pins on the chassis with 2 tubes in the body whould have given more of a positive setting. When test fitting the body, it sat proud about 8mm at the front, but fine at the back, I test fitted multiple times and the rear engine cover sat perfectly, then after gluing together - annoyingly, the engine cover doesn't sit flush. I also messed up the panel line wash, I tried to clean it out with IPA & made a mess, then had to re-polish which ended up with going through to primer at the very front end of the bonnet. The photos highlight more issues than the kit in real life, it looks great on the shelf. finished in Tamiya rattle can red & clear, multple light coats of each with some minor sanding and polishing. There is a build log in WIP! Enjoy...
-
It's a piece of artwork! Love all the details
-
Great that you are back on this build Dann!
-
Looks like amazing progress, good luck! Did you create it in CAD yourself, buy the design, or backwards engineer from a 24th scale kit?
-
You make it look so easy, looks beautiful inside and out
-
Revell Ford GT LM
Funkychiken replied to RickRollerLT1's topic in Other Racing: Road Racing, Salt Flat Racers
And that Stealth look does suit it! -
Killer build, looks great in that livery!
-
Tamiya 2017 Ford Mustang GT4
Funkychiken replied to Jim B's topic in Other Racing: Road Racing, Salt Flat Racers
The tyre decals do make a difference, looks great! -
Honda Slammer
Funkychiken replied to Mad Slammer's topic in Model Trucks: Pickups, Vans, SUVs, Light Commercial
Keep 'em hanging low!