MeatMan
-
Posts
3,949 -
Joined
-
Last visited
Content Type
Profiles
Forums
Events
Gallery
Everything posted by MeatMan
-
 Nicely done! Looks like a nice project.
 -
Sweet!
-
Free 3D File sharing here? (Admin?)
MeatMan replied to Oldmopars's topic in Model Building Questions and Answers
Pity, I'd post a few. -
Well done!
-
Awesome craftsmanship!
-
Nicely done!
-
Hi Stefano. I don't know the process, but it can be done in Blender. There is at least one person in the forum that knows it to a better degree. Perhaps they can be of help. If you don't have Blender it is a free download so just Google it. Good luck.
-
Welcome Dave!
-
3D Scale has a similar product at about the cost of a kit. https://www.3dscaleparts.com/product-page/1-25-speedway-19-shallow-and-deep-wheels-on-big-and-little-vintage-tires
-
Nicely done!
-
I just remembered. I had a late 60's Ford Econoline van that I bought in the eighties. I bought it as a project after I sold my Chevelle, as vans were popular then. After driving it about a month I took it back. It was grossly underpowered and kind of swayed around corners. Sound bounced around the empty interior and it always seemed cold. Some people loved them, but it moved me away from vans forever.
-
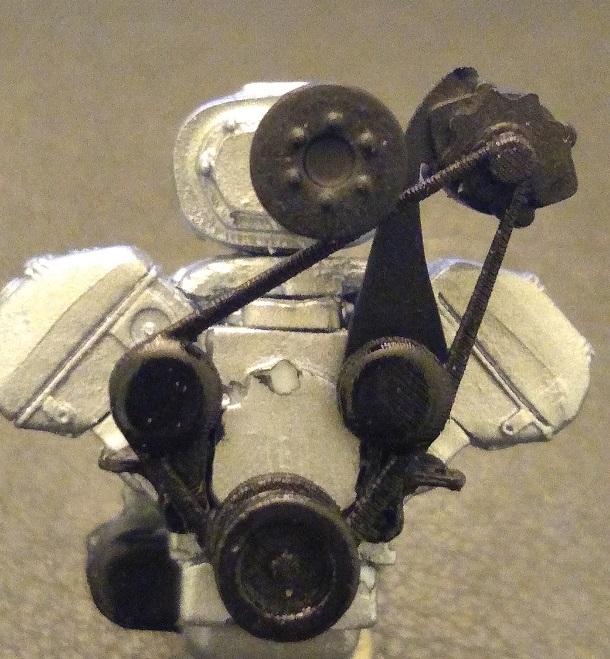
Info for those using water washable resin. I had been using what was locally available from Microcenter which is eSun and Inland. The results were brittle parts that limited me to what I could print, so I decided to try something else, and while searching I came across a result for Phrozen water washable model gray resin. It was touted as non-brittle so I bought a bottle. The result was great. I was finally able to print a pulley and belt setup that I designed for my Ardun head flathead engine and finally had success. the thin belt section was pliable enough that I was able to cut the support from it and not break the belt. I could see the flex in the part, but it didn't break as it had before. The pic below shows the Sun and Inland resin usually resulted. The pic is in white resin but I also tried grey but I didn't save any for pics. The second pic shows the assembly on the engine. So although water washable resin is overall more brittle than alcohol washable resin, there are differences between water washable products.

-
Beautifully done!
-
Top notch fabrication!
-
Beautiful work Scott!
-
Nicely done vintage gasser!
-
Nicely done! That is a great kit as a slump buster. I enjoyed very much building mine.
-
Great looking build!
-
Nicely done!
-
Beautiful build!
-
Nicely done!
-
Sweet!
-
Nice fabrication!
-
Very nicely done! Awesome work.