Straightliner59
-
Posts
5,809 -
Joined
-
Last visited
Content Type
Profiles
Forums
Events
Gallery
Everything posted by Straightliner59
-
Oh, yeah! The Tubes wrote a song about this part. It ain't "White Punks On Dope", either! ?
-

Mr. Surfacer Question(s)
Straightliner59 replied to Straightliner59's topic in Model Building Questions and Answers
Thanks, Gerry! I think I know which I will order, now. -
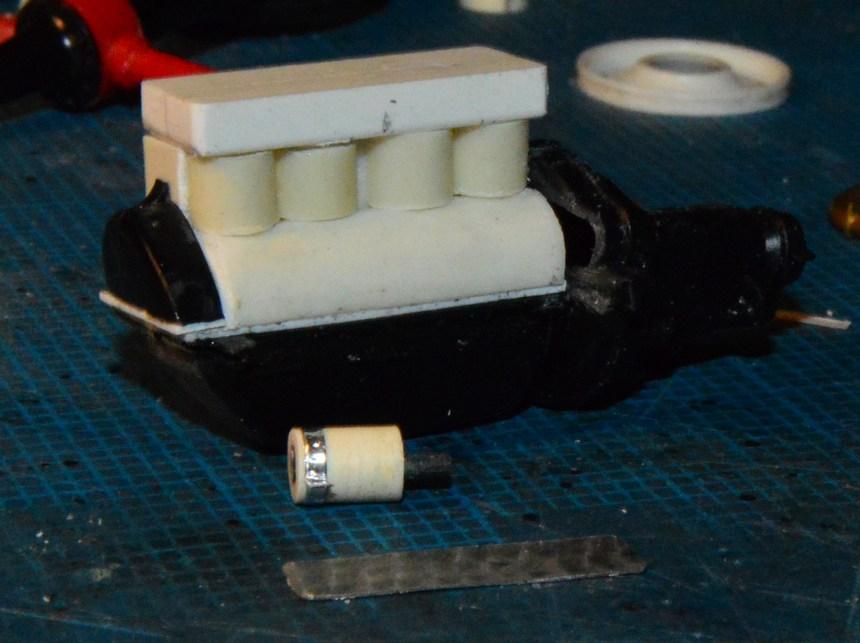
At some point, back in the late '80s, I had a bottle of Mr. Surfacer primer. I don't remember which number it was, but it was a perfect viscosity for filling small joints, such as those seen at the tops and bottoms of the cylinders, in the attached photo. I want to use a brush, and kind of flow it in. Suggestions as to which Mr. Surfacer number would work best would be much appreciated! Do they go from thinnest (500) to thickest (1200) viscosity?

-
Thank you, kind sir. Well, that all fits! I don't know if it's a good thing, but, when the original kit belt/pulley casting is held up in front of my engine's pulleys, they all match, perfectly! Looking from the side, they all align for the belt, so, I think we done good! ? Comments, questions and critiques are always welcome! Thanks for looking!
-
Very nicely done, Tim! That looks to be a complex operation. Excellent work!
-
Don was the best friend I ever had. He was my mentor, as well. He was a prominent figure in this magazine's early years. His models made the cover of Model Cars and SA(E), multiple times. He never had a secret, when it came to building--he would share anything he knew, with anyone who was interested. I'd not be the modeler I am, without his influence and guidance. It's sappy, but, I call my workbench "The Don Fahrni Memorial Workbench", in his honor.
-
Sweet!
-
The issues with scratch building
Straightliner59 replied to IbuildScaleModels's topic in Tips, Tricks, and Tutorials
Nice work, Pete! I have one of the Monogram 35s. I don't foresee milling anything, for it, but I do want to sand off the molded-on wire on the body, and replace it with real wire and pegs/rivets/screws, or whatever they are. -
Thanks for sharing these, Doc! Hope all's well, with you.
-
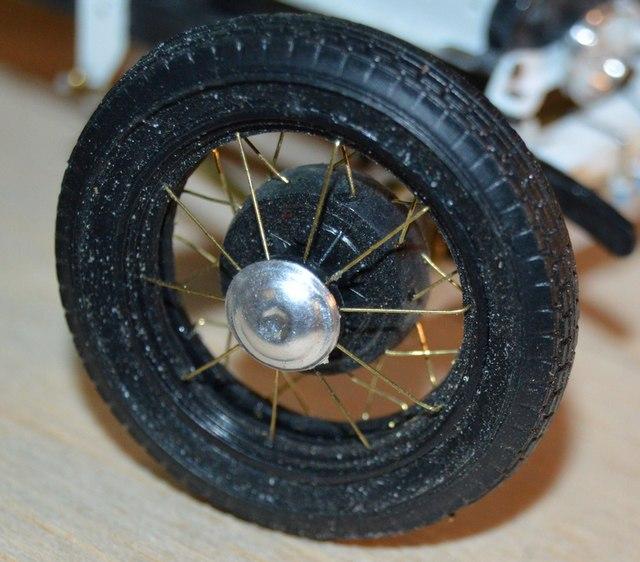
Thank you, Francis! I just thought the extra touch of color would be nice, on the wheel. I did, indeed, use a small gear. My late friend, Don Fahrni gave me a box of watch parts, a few months before he died. There are a lot of usable gears, etc., in it. Your kind words and comments are always very much appreciated! Thanks, David! I truly enjoy that aspect of the hobby. I like to have, and to give people, lots of stuff to look at!
-
Thank you, Mark! I made new pulleys, today, along with getting the generator sorted out. It's assembled in the wrong order, here. Of course, the mounting bracket should be against the front of the case. Duh! I just threw it together, to get the photos, so none of it's attached.
-
What an excellent, ingenious idea! It looks great! Nice work!
-
I put together a banjo steering wheel. I turned the hub part that mounts to the column on the lathe. The horn button is just a disc, punched from tooling aluminum. There were photo-etched cross-braces with the wheel kit, but, to add a little color, I annealed and hammered some fine gauge brass wire. Thanks for looking!
-
Thank you, Tim! It's much appreciated. Glad you stopped by!
-
The issues with scratch building
Straightliner59 replied to IbuildScaleModels's topic in Tips, Tricks, and Tutorials
I couldn't agree more, an all counts. There have been periods of my modeling "career", in which I really didn't work toward completing projects--just trying new stuff! When you push your own boundaries, whether or not it works the first time, you've learned something. And, best of all, you had a good time! -
Absolutely! They should be last!
-
I had one of these when they were brand new. I remember the paint, the trailer, that badge. I am almost positive I still have the decal sheet.
-
"Bring Out Your Dead" Completion Build--ROUND 2 Is On!
Straightliner59 replied to Snake45's topic in WIP: Model Cars
Do you mean like in the second photo you posted? ? That car is gorgeous! -
Francis, first, thank you for your kind words. I am flattered, to be sure! Two things that mean the most to me, as a modeler, are when I can inspire others to try something new, and, when a craftsman, such as yourself, compliments my work. Thank you, kind sir! To attach the metal sheet (whether this tooling aluminum, or the flashing I use), I generally use contact cement, because it remains somewhat flexible. If it begins to thicken in the bottle, a little acetone or naptha will thin it out. I've had success using contact cement, for many years, now!
-
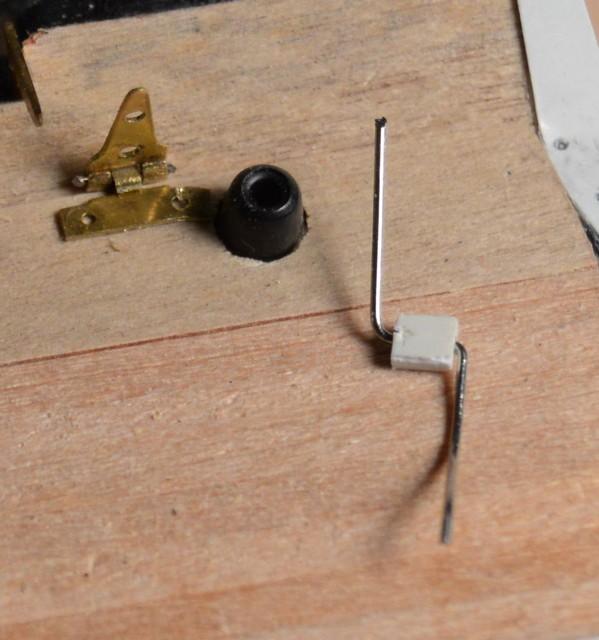
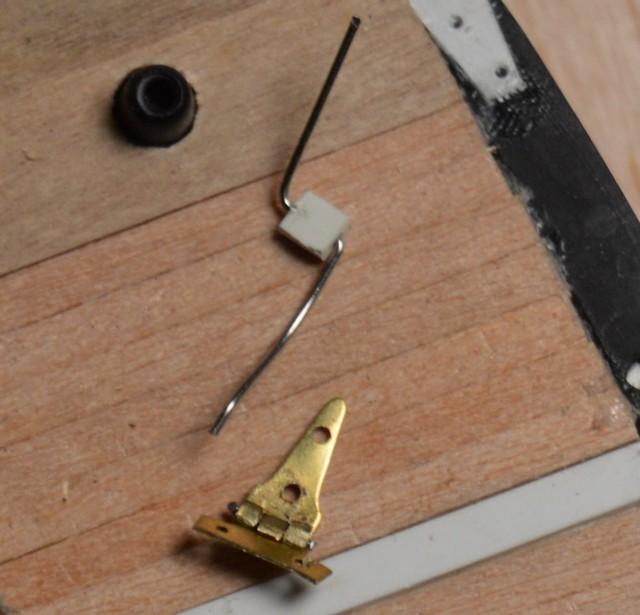
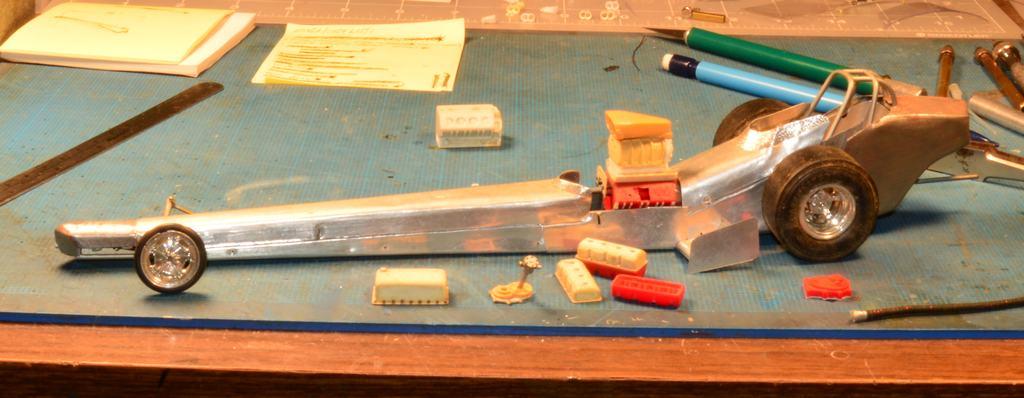
I used parts of two photo-etched hinges to make this gate hinge throttle pedal, and some .040"X.080" Evergreen strip and some nichrome wire to make the arm that would rotate the rod running across the inside of the firewall, where the throttle linkage to the engine would attach. Except, there will only be these pieces, and the linkage running toward the carbs, exiting the firewall, somewhere behind the carbs. I feel like I might be close to the point of taking this all apart, and preparing it for paint and detailing, and reassembly.
-
Somebody mentioned Pactra's old Hot Rod Primer. I loved that color, too. This is the closest thing I have found to it.
-
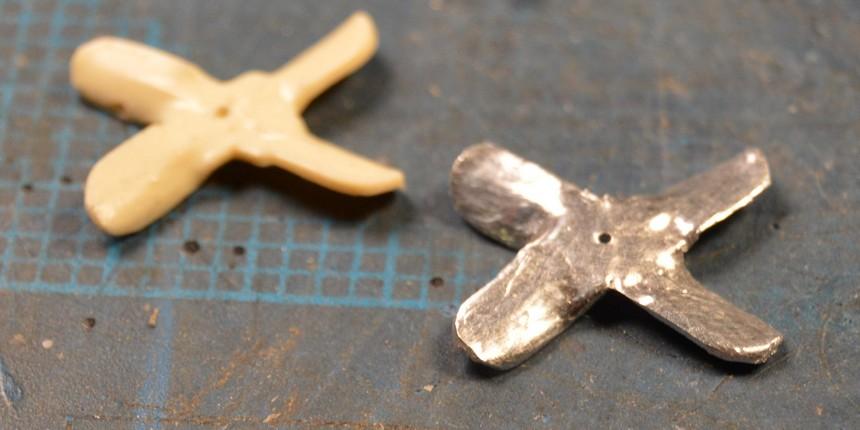
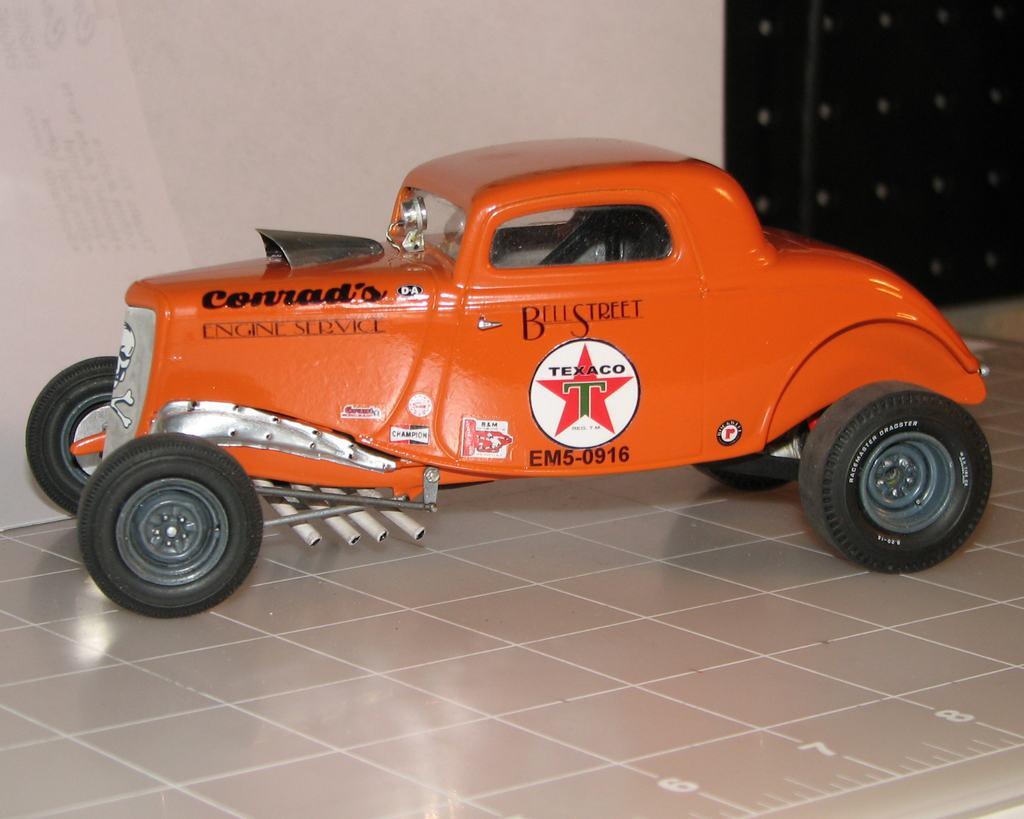
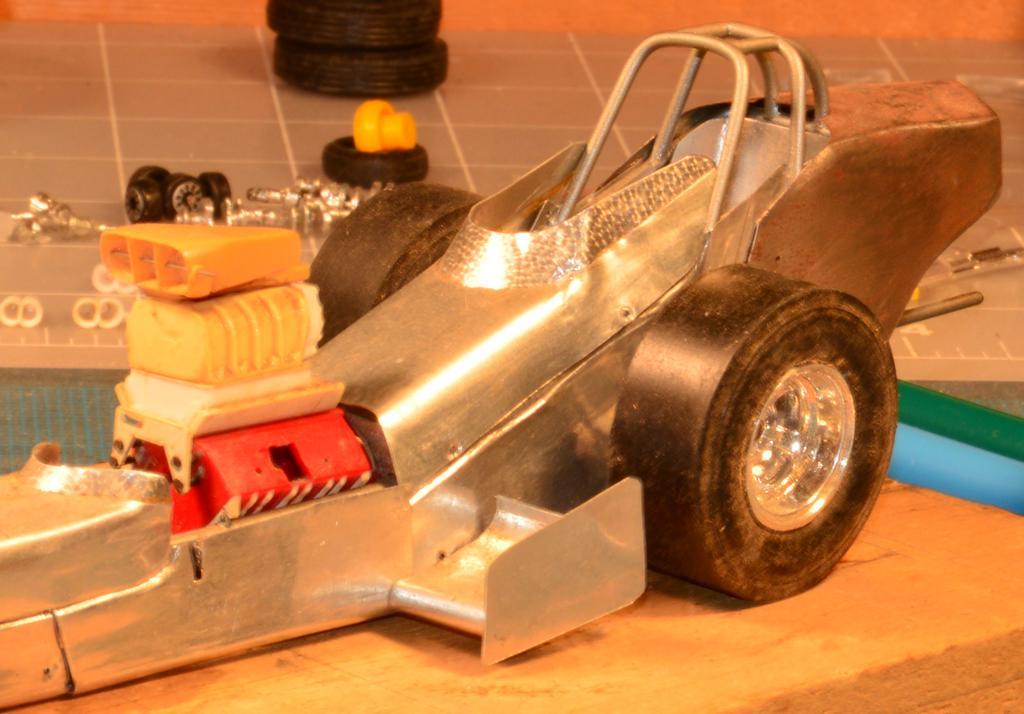
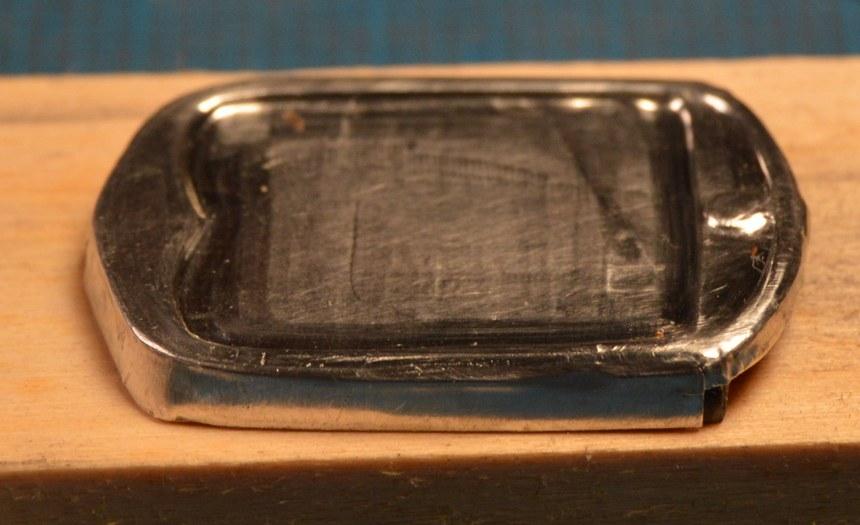
Thank you, Francis. I really appreciate it, coming from as fine a craftsman as yourself. I use that tooling aluminum, A LOT! it's very versatile, and easy to work with. Below are a few examples of things I've done with it: This is just a piece of it, rolled around a plastic tube. Of interest, here, is the "weld seam". It was created by using a straightedge to guide a ball-ended stylus over a cutting mat with a harder, pebbled surface, thus creating the texture in the metal. Next is a fan I'm fiddling with for this project. Simply burnished over the kit part, alongside. I made both the front and rear hubcaps for this project. I used various sizes of tubing as dies, to create the contours. I used it to make the splash pans for this '34 coupe. While it's not best suited for it, all but the nose and tail sections of this body is built with Maid-O-Metal.
-
Thanks, David. Glad you're liking it! There's no need, for that! ? For the last couple of days, I've been playing around, making a new, improved grille shell. I think the new one (the one that isn't opened up, yet) is looking much better than the original. I'm using Maid-O-Metal 36 ga. tooling aluminum, and forming it over the kit piece. I glued some sticks together, to fill the void on the back side of the kit's radiator/grille shell. This time, before beginning the great rub-down, I sanded the Ford badge from the shell. I found some elliptical punches online that will be small enough to use to make a new one, with printed enameling. It's not difficult, at all to do this, it just takes some patience to develop a rapport with the metal. These photos show the old shell and the new one, alongside each other. The lines and details are much crisper, now. I have some of Detail Master's radiator mesh, to sandwich whatever I decide to fill it with. Critiques, questions and comments are always welcome! Thanks for looking!
-
NHRA GT/AA '96 Firebird Slammer
Straightliner59 replied to Straightliner59's topic in WIP: Drag Racing Models
Thank you, Dave! Much appreciated! I used foil from a cigarette hard pack, for the reflectors in the taillights. I printed the hexes, because the alternative was straight, horizontal lines==BORING! ? -
NHRA GT/AA '96 Firebird Slammer
Straightliner59 replied to Straightliner59's topic in WIP: Drag Racing Models
Thanks, re: the numbers. I wasn't sure how many digits I needed, and I was having a hard time finding photos that were clear enough to be sure. Thank you, sir!