Straightliner59
-
Posts
5,809 -
Joined
-
Last visited
Content Type
Profiles
Forums
Events
Gallery
Everything posted by Straightliner59
-

1977 1978 1979 Thunderbird progress
Straightliner59 replied to Paul Hettick's topic in WIP: Model Cars
You guys that can do this kind of conversion work amaze me! Hell, I don't ever see half the inaccuracies that you guys do, much less could I turn a '72 Torino into a '77 T-bird!. Nice work, for sure. It's gotta' be black magic! :-) -
"Bring Out Your Dead" Completion Build--ROUND 2 Is On!
Straightliner59 replied to Snake45's topic in WIP: Model Cars
Thank you, David! Speedy is one rapid rodent! -
NIce! Great work!
-
"Bring Out Your Dead" Completion Build--ROUND 2 Is On!
Straightliner59 replied to Snake45's topic in WIP: Model Cars
I'm in for round 3! Still plugging away! Created some cowl art. Driver will be "Don", to honor my great friend and mentor, Don Fahrni.
-
I've never seen it, but, that sure would be nice!
-
Butch Leal California Flash Duster color ?
Straightliner59 replied to Mr mopar's topic in WIP: Drag Racing Models
I agree with Snake. It's orange. I have always thought it to be orange. Every photo of that particular Duster shows the "California" text to be red. It is obviously darker in color than the rest of the car. Also, compared to the Sox and Martin car, in the opposite lane, which we know is red, Leal's car looks orange. Here's another photo from the Petersen archives in which the car appears to be orange. The later Duster also appears to be more red, than this car. Them's my thoughts! Dammit, I have been wanting to build this car, forever, and, this has my interest piqued!
-
I use aluminum duct tape for hose clamps. Just cut a this strip, and wrap it around the hose, and you're done!
-
Butch Leal California Flash Duster color ?
Straightliner59 replied to Mr mopar's topic in WIP: Drag Racing Models
I have a Cady sheet for that car. It just says "red" for the car color. The red lettering on the sheet is very close to Testor's 1203. I agree with folks who said it looks orange, in some photos. I think that may be a white balance issue. Of course, I have no scientific evidence of that! I love the early pro stocks. This makes me want to use the AMT Duster I have and do one to go with my 'Cuda! -
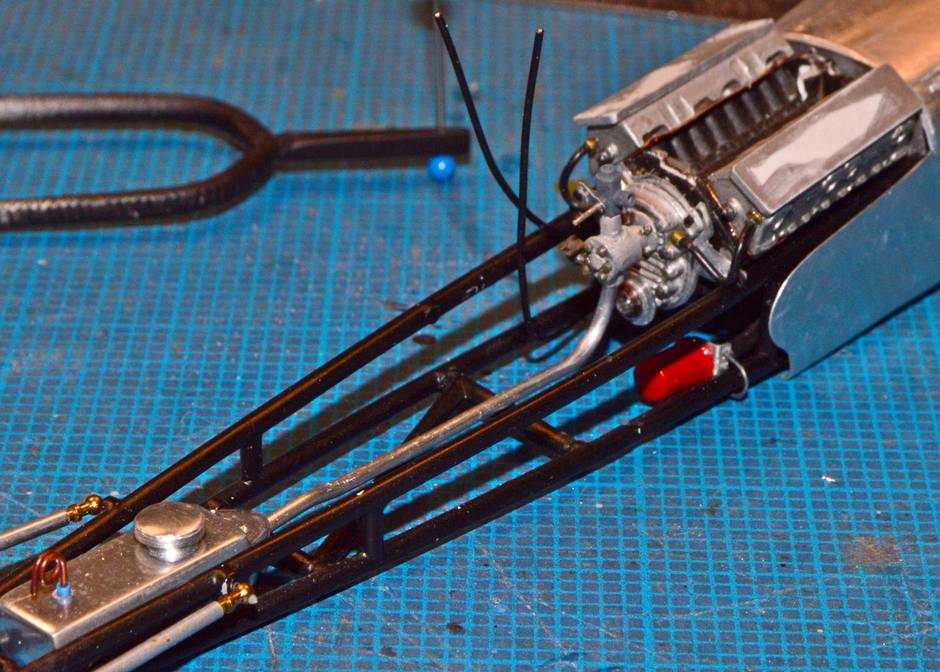
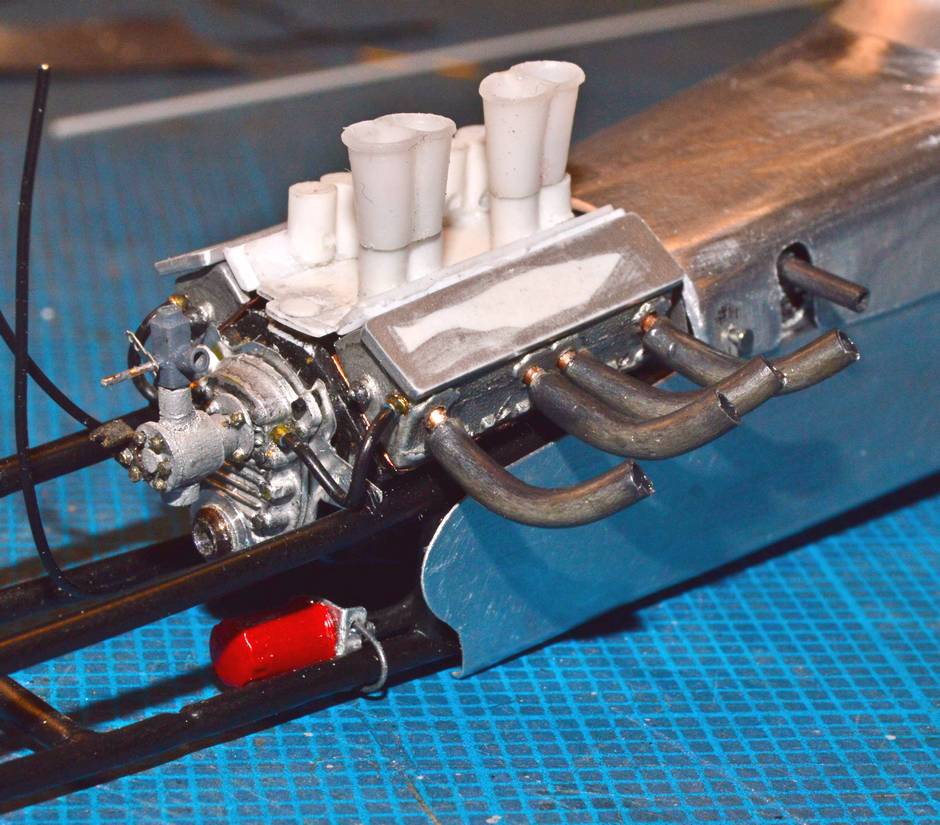
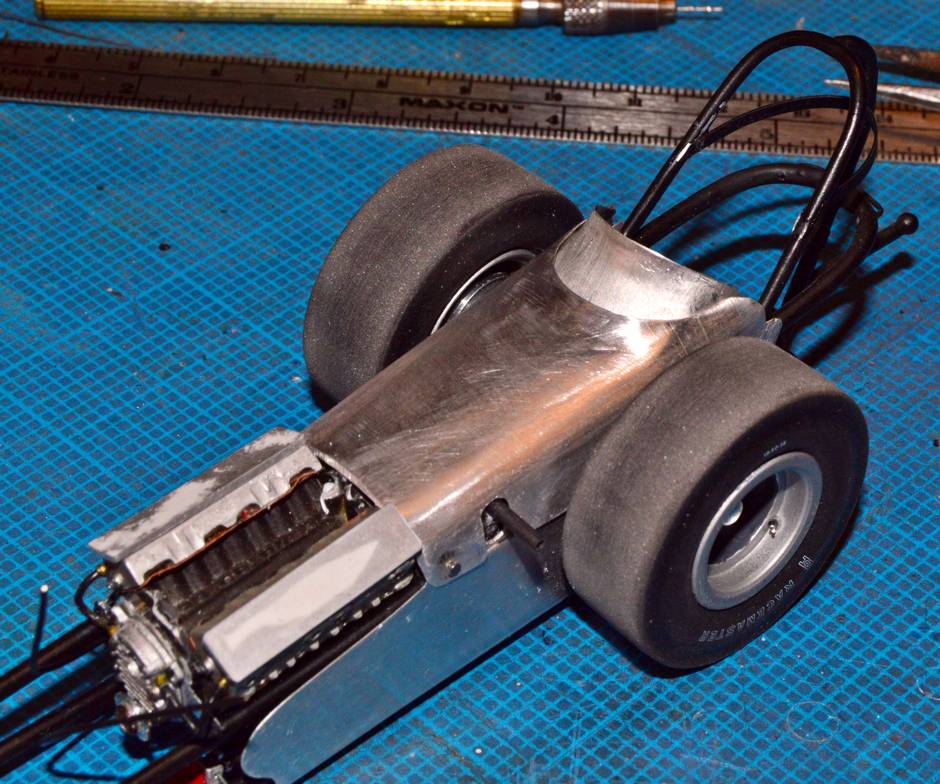
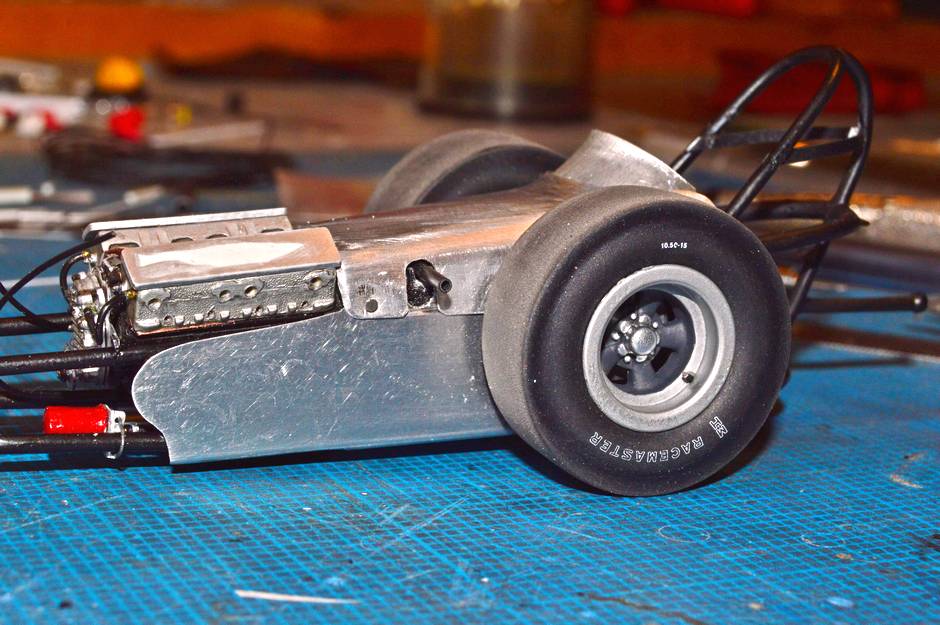
I have recused myself from round two of "Gitter Done!". I just have too much left to do. I am already in, for round three, should it happen. I didn't have aluminum wire in the proper size, for the main fuel line. I ordered two lengths, one in '040" diameter and the other in .052". I opted to use the .052". I soldered the three-way return/shutoff valve from four pieces of brass, and added a lever/linkage from an unknown photo-etched set. The shutoff "cable" has been stripped, and is ready to attach to the valve, once I have permanently mounted it. I need to make the fittings for the main fuel line, then, it can be attached. I am going to make a small manifold for the return lines, so that I can use a single, rigid return line back into the tank. I also started playing around with the headers. I'll be fabricating a flange to mount them to. Over the weekend, I will have this part of the fuel system done, and will, once again, remove the body, so that I can finish up, in the cockpit, and get the body mounted permanently. I also plan to write and shoot a proper tutorial on making scale zip ties. Questions and comments always welcome! Thanks for looking!
-
"Bring Out Your Dead" Completion Build--ROUND 2 Is On!
Straightliner59 replied to Snake45's topic in WIP: Model Cars
If there's a round three, I'm already in! Thank you for your understanding. -
"Bring Out Your Dead" Completion Build--ROUND 2 Is On!
Straightliner59 replied to Snake45's topic in WIP: Model Cars
I have regrettably come to the conclusion that my dragster isn't going to make it, before the deadline. I am glad that I threw in, because it kept me pushing, sometimes, even when I maybe should have stepped away, for a day or three--but, I have been, and continue to be inspired. Thus, work will continue until this baby is completed. So, I'm in for round three, should that happen! I didn't have any aluminum wire of the correct size for the main fuel line, so, I ordered two small rolls, on Monday, of .052" (16 ga.) and .040" (18 ga.). Those arrived, today. I opted for the .052". I got it bent and fitted. It's not installed, yet, because I need to make the fittings. I also soldered up the three-way shutoff valve. I need to strip the "cable" for the shutoff and paint the valve, then I can put all of that together. Then I will get back to the cockpit and rollcage. I'm disappointed I can't finish, but, I am happy with the model, and that's more important!
-
1926 Mack AC Dump Truck
Straightliner59 replied to Jim B's topic in WIP: Model Trucks: Big Rigs and Heavy Equipment
Michael's, Hobby Lobby and Walmart should all have pastels. That's what I use for weathering. Just shave some off with the edge of an Xacto blade, or some coarse sandpaper. Works great, and much cheaper than hobby specific products! -
That's a real beauty! Love the wheels and tires! Great work!
-
No doubt!
-
Very nice, to finally have a good model of such an iconic, if not hugely common engine.
-
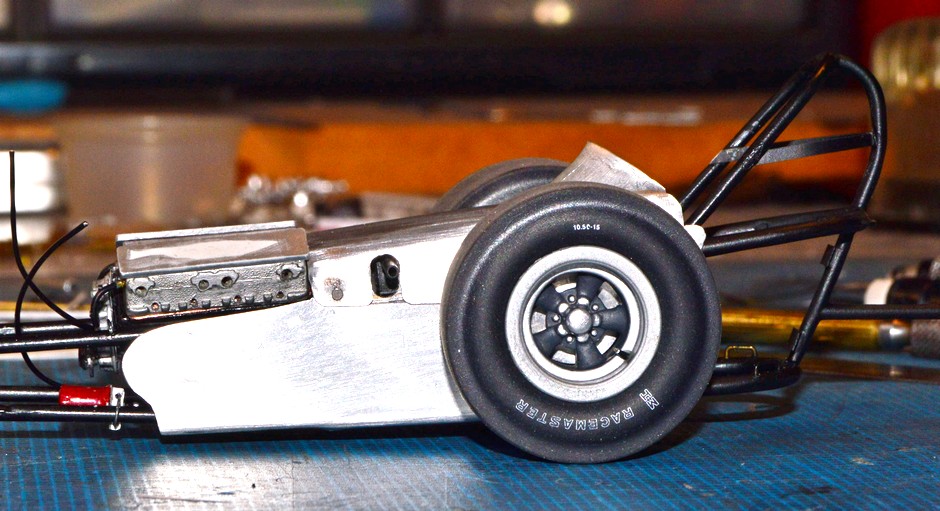
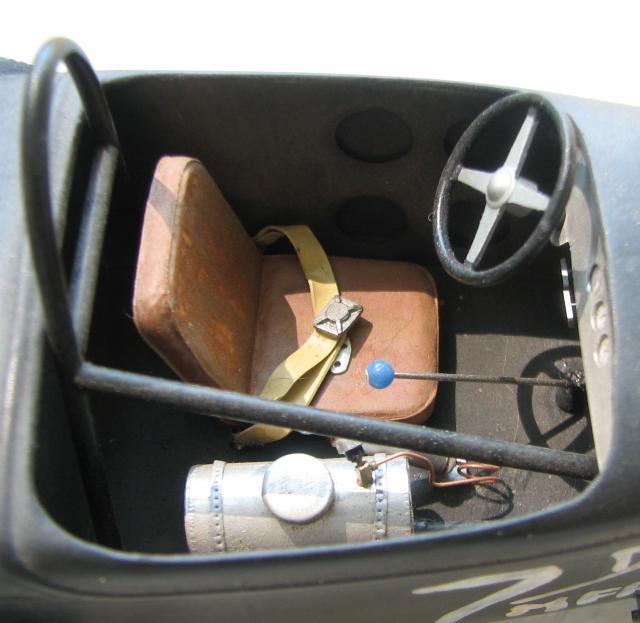
I got the body back on, and fitting correctly, again, after installing the steering box/shaft/arm assembly. Never found the issue, I could see that none of it was interfering with the panels, so...Anyway, i did a bit more shaping on the windscreen, and it now fits perfectly! It's being held in place in these photos, only by pressure from the brake handle (which will have to be tweaked, a tad--no biggie). I'm going to attempt to get the seat finished and installed, tonight, and tie up the rest of the loose ends toward mounting the body, permanently. Questions and comments welcome and appreciated! Thanks for having a gander!
-
I am going to have to pick up one of those kits. That engine does look great. No more need to cobble together parts from 15 kits to build a decent one!
-
"Bring Out Your Dead" Completion Build--ROUND 2 Is On!
Straightliner59 replied to Snake45's topic in WIP: Model Cars
Quick update on the digger: For some reason, after I installed the steering box/shaft assembly, the body decided it didn't want to fit like it had, up to that point. I couldn't find anything that was interfering with it, so, I kept moving it forward and backward, until I found the sweet spot. I hope it's easier, when I am ready to permanently mount the body. I got the seat covered with kitchen parchment and got a coat of paint on it (no photos, yet, but, I may get it installed, later on tonight). I also did a bit more hammering on the windscreen. It, and the cowl fit so nicely together, that, in these photos, only pressure is holding the cowl down, and the only thing holding the windscreen, is the pressure the brake handle/know is applying against it, and the cowl! That works! A couple of shots of the progress...
-
Very nice! Looking killer!
-
Krylon Premium Original Chrome
Straightliner59 replied to NOBLNG's topic in Tips, Tricks, and Tutorials
Well, obviously, we're not going to be spraying chrome from a can, anytime soon! -
It is VERY forgiving! Good point about using a Q-tip to avoid contamination--that's what I'll be doing, from now on.
-
Well, I guess if I won, I wouldn't have to worry about a daily driver, so, I'd maybe go for this one, and go hang out at nostalgia drag race events.
-
Let me guess. A Corvette!
-
Microscale Super Decal Film (I think that's what it's called) should fix the problem, as well. You can just swab it on with a big brush, and it'll lay down virtually invisibly. It's great stuff!
-
Thank you, Ray. Not to worry. Although I would like to make the deadline, unless it meets my satisfaction, it won't move forward. I don't generally mention all the things I've done two or three times, just so they're acceptable to me. If I hadn't, it might be done, already, but I wouldn't be happy with it!