Straightliner59
-
Posts
5,809 -
Joined
-
Last visited
Content Type
Profiles
Forums
Events
Gallery
Everything posted by Straightliner59
-

IMSA Porsche RSR 3.0
Straightliner59 replied to afx's topic in WIP: Other Racing: Road Racing, Land Speed Racers
Very nice! -
Got the new blower bag mostly made, and turned some butterflies for the injector. They'll need some adjustment, and I need to make a cross shaft. Thanks for looking!

-
1/25 Revell Peterbilt 359
Straightliner59 replied to cifenet's topic in Model Trucks: Big Rigs and Heavy Equipment
Steve, you did a fantastic job, with this. It was a joy to watch its progress. Finished, it's no less stunning than expected. Excellent work. -
Rust-oleum Issues?
Straightliner59 replied to Anglia105E's topic in Model Building Questions and Answers
Boy, that's the truth! Hell, most of 'em smelled like they'd destroy the plastic! -
1969 Nova F/SA NHRA Stock Eliminator
Straightliner59 replied to R. Thorne's topic in WIP: Drag Racing Models
Or just how esoteric rules can be. ? -
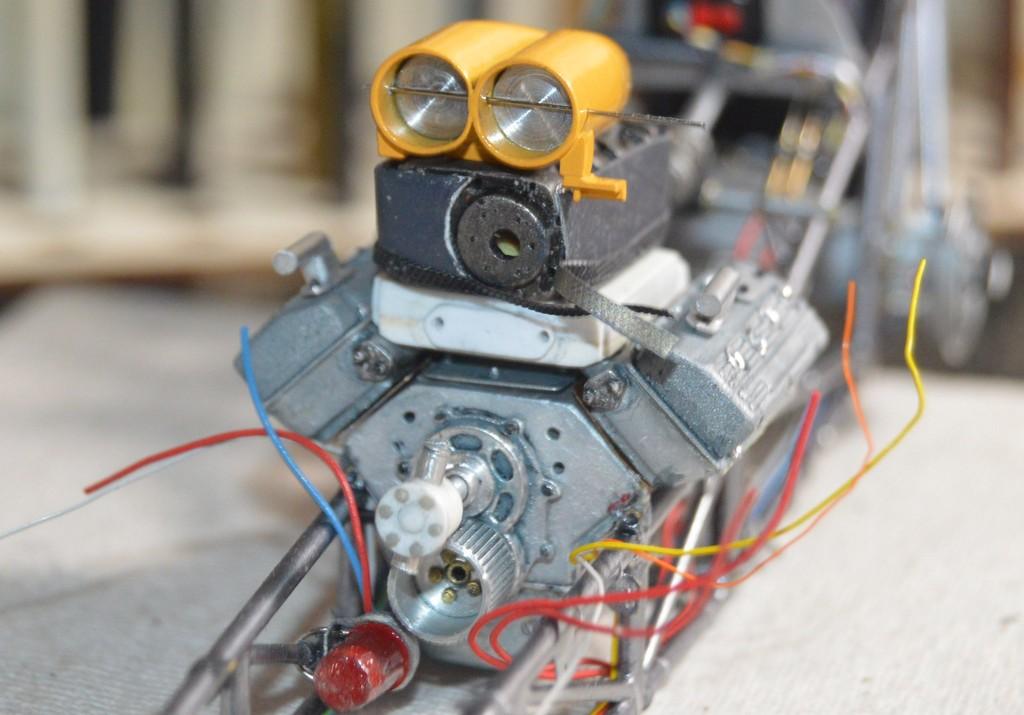
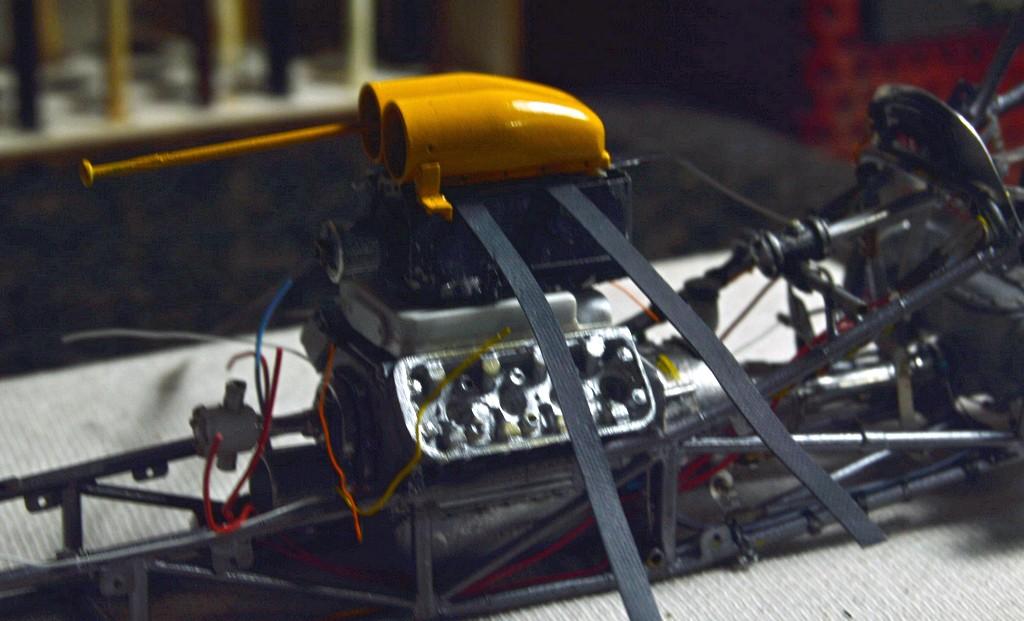
Thanks, Ian. I'm always glad when I can help out my fellow modelers! I knew I wanted those holes to be uniformly drilled, and figured that was about as good as any way I could think of. It worked out, well. I spent my day off, today building the valve covers. There are twenty-one pieces in each assembly. I used some tiny Precision Scale hex NBW castings (brushed with Testors Burnt Metal Metalizer) for the breathers and block-offs and Tichy's (shot with Krylon Original Chrome) for the valve covers, themselves. I shot them with a cast aluminum paint I mixed up using Testors Chrome Silver and a light grey enamel I don't recall. I cut it with standard lacquer thinner. Once that had dried, I used a mixture of Vallejo washes to bring out some of the detail I then used a small section of Pink Eraser dabbed in Testors Metalizer Buffing Aluminum to highlight the ribs, the block-off plates and the nameplate on the cover. The spark plug tubes are 1/16" aluminum tubing. I haven't been happy with the blower blanket. The paint wasn't sticking to the material, and, I generally just didn't really care for its appearance. I noticed that , recently, the inner wrapper of Pall Mall cigarettes had been changed from the long-used foiled paper to a white paper that is similarly textured. It is also much more flexible and easily workable. Earlier, I shot a section of that paper with the same paint I'd shot on the initial bag. After 30 minutes, or so, I was able to handle it. It was twisted, folded around corners, and fairly tortured. The paint stuck and the paper retained its shape and its integrity. One new blower bag, coming up! Anyway, the valve covers are completed and installed! Your questions and comments are always welcomed. Thanks for looking!
-
I appreciate that, JC. Thanks, much!
-
1/25 Revell Peterbilt 359
Straightliner59 replied to cifenet's topic in WIP: Model Trucks: Big Rigs and Heavy Equipment
It's getting close! Looking excellent, too! I am still in utter admiration of your metal finishes. -
What a gorgeous color.
-
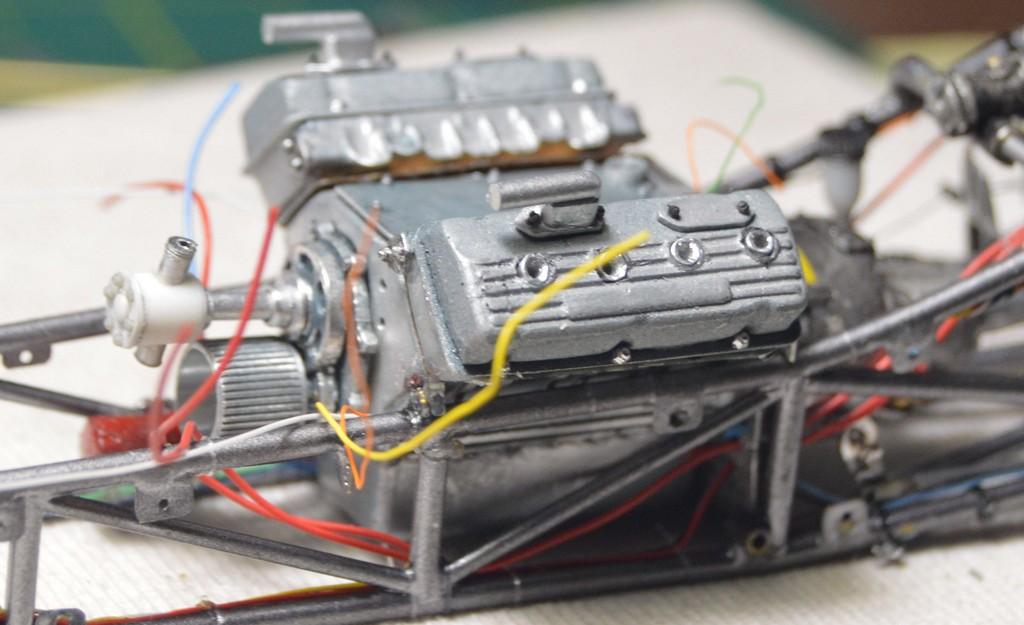
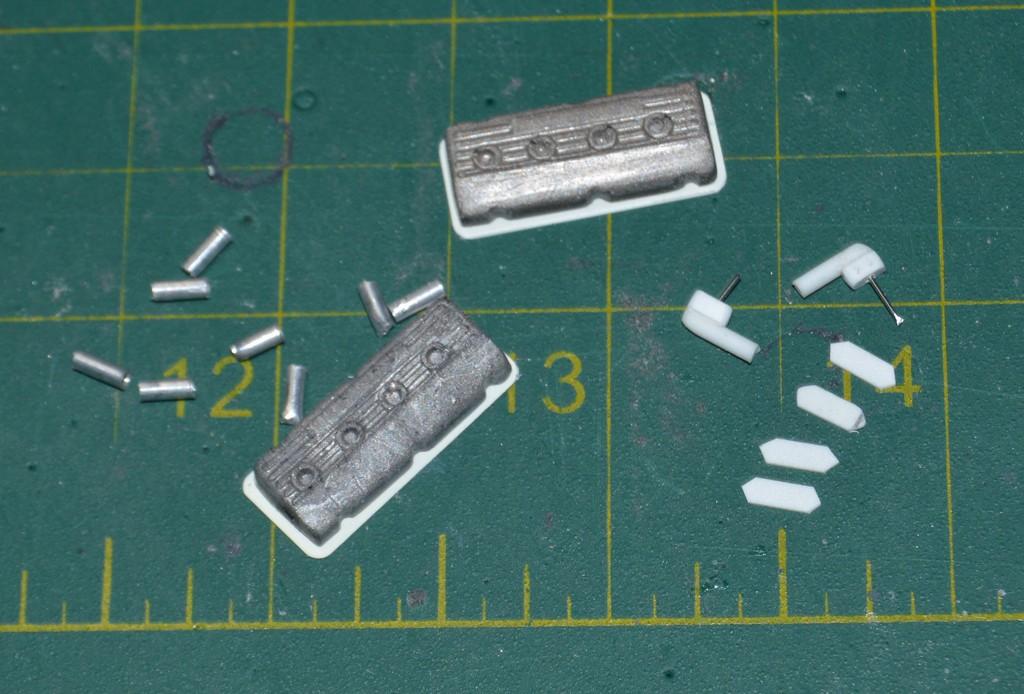
I've been working on several different things arund the engine. The blower restraint bag is kitchen parchment soaked with diluted tacky glue. It's painted with Krylon Chalky Finish" Anvil Grey. The plate for the restraint straps is from an old photoetch sheet (S&S Specialties?). I like to use wine bottle foil or lead foil to make any kind of straps. I generally leave it untextured for harnesses. Since the blower straps are made of coarser material, I added texture by placing a strip of foil on my anvil, and placing fine-toothed file atop the strip, then striking that several times with a neoprene mallet. That gave me a texture similar to fabric tape, but with the control of lead foil. I finally succeeded in making a new fuel pump drive. Yay! I found some things that weren't making me happy with the valve covers, so I began working on a new set. This set of Donovan covers are a tad too small for the heads I'm using (Mark Brown castings from Miss Deal). I cast a new pair of valve covers (the color is mixed-in metal powders--always experimenting). I was able to place them in the mill vise, and mill them accurately flat. I then filed off the cast-on flanges, and rounded the reliefs for the bolts to the bottom of the cover, with a file. Then I added-back a flange of .010" styrene. I used a short bit of 3/64" tubing to space the drill for the bolt holes, equally in each relief. I held the tubing in place with the tweezers, to drill, but determined it impossible to photograph that operation! Anyway, I just wanted to give an update. As always, questions and comments are welcomed and appreciated. Thanks for looking!
-
Good call. I've been considering experimenting with that, as well.
- 19 replies
-
- 1
-

-
- alfa romeo
- heller kit
- (and 1 more)
-
Nice work on that engine block! Check out the different chassis manufacturers sites. Often there are drawings from which you can extrapolate needed dimensions--for instance, pretty much any modern top fuel chassis is going to have a 300" WB. You can base your plans from there, as I am sure you are aware, given that engine block you just made! I know that Mark Williams sells blueprints for $90, but...
-
IMSA Porsche RSR 3.0
Straightliner59 replied to afx's topic in WIP: Other Racing: Road Racing, Land Speed Racers
Most definitely! -
IMSA Porsche RSR 3.0
Straightliner59 replied to afx's topic in WIP: Other Racing: Road Racing, Land Speed Racers
This is really looking great, JC. Extra nice work with the injection! I must really like the RSRs. I have a built Monogram curbside kit and a mint one in the box, I bought fairly recently. -
How to get a good white paint job?
Straightliner59 replied to Sonorandog's topic in Model Building Questions and Answers
I painted this in about 1986 or so. I don't remember the manufacturer, but the paint was called "Bright White Tint". It had a blue tint, to it, to combat yellowing. It was clear coated with Floquil Crystal Cote. You can see yellowing of the epoxy I used to install the windshield, and of some of the decal adhesive, but the white is as white as ever.
-
Yep! Hard to disagree!
-
Well, that looks better than anything else i have seen. Nice job!
-
1/25 Revell Peterbilt 359
Straightliner59 replied to cifenet's topic in WIP: Model Trucks: Big Rigs and Heavy Equipment
It is! -
That was a great place! Classic old hobby shop!
-
Nice! That's always been a tricky thing to replicate. I don't recall ever coming close. What did you rub the powder over?
-
I sincerely appreciate that, John. I didn't remember that he was German. I think Pleuger and Pulde had something to do with making the body. I need to remember who told me, so I can clarify. It was someone who'd know, for sure.
-
Another unique, and interesting idea from your bench! I'm trying to remember who had the Mercedes FC, back in the '80s. They made the body molds from a rental car! It's not urban legend, either. Your Porsche is very cool! One suggestion, when you redo it--Everything at the front of the car that is below the bumper should be at least as far forward as the bumper. The bottom edge of the front of the car should be the farthest forward part of the body. It's definitely sweet looking!
-
A wise investment!
-
1/25 Revell Peterbilt 359
Straightliner59 replied to cifenet's topic in WIP: Model Trucks: Big Rigs and Heavy Equipment
At the end, this hobby really boils down to getting self-enjoyment out of the activity, pursuing inner satisfaction, and most importantly, spending time on something you take pleasure. I could not have said it better! I really love some of the techniques you are using. The wire hose clamps are excellent! I might suggest a roll of aluminum duct tape. That's what I use for hose clamps. Yours look great, but I have found the duct tape to be easier to work with. Just a thought. I really am enjoying watching this come together! Great work! -
1969 Nova F/SA NHRA Stock Eliminator
Straightliner59 replied to R. Thorne's topic in WIP: Drag Racing Models
Nice save! Those look beautiful, now.