peteski
-
Posts
9,229 -
Joined
-
Last visited
Content Type
Profiles
Forums
Events
Gallery
Everything posted by peteski
-

What scale and manufacturer are these????
peteski replied to grant_3250's topic in Model Building Questions and Answers
I suspect that those "barn find" models spent some time in a rather hot environment (like an attic, or a shed exposed to sunlight). Heat seems to deform and dry out the material those are made from. My Lambo is packed in the cool basement and I suspect its tires are still fine. -
What scale and manufacturer are these????
peteski replied to grant_3250's topic in Model Building Questions and Answers
Otaki also had a Lamborghini Countach in 1:12 scale. I've built it, and the Corvette. I don't have either anymore, but I do have unbuilt Countach kit (reboxed as Testors). -
To be honest, I never tried Polytek resins or RTVs. I only infrequently make some simple castings and I started off couple of decades ago using Alumilite (back then they only sold the fast-set urethane and Dow Corning RTV). Then I moved onto SmoothOn. But I thought I heard some good things about Polytek, and yes, they also own Alumilite. Interesting
-
I wonder why they let the stickers run out before ordering more? Hmmm . . . They also don't seem to be stocking any of their resin/rubber kits (they all show out of stock). I hope this is not a bad omen. This is not a rumor - I'm just thinking out loud.
-
You're right Mike, model building often requires making compromises. And don't worry, I was just pulling your leg.
-
LOL Mike, there is just no way to make you happy. In smaller scales the spark plug wires are too thick, and in even smaller scale, the fan belts are too thin! And thanks!
-
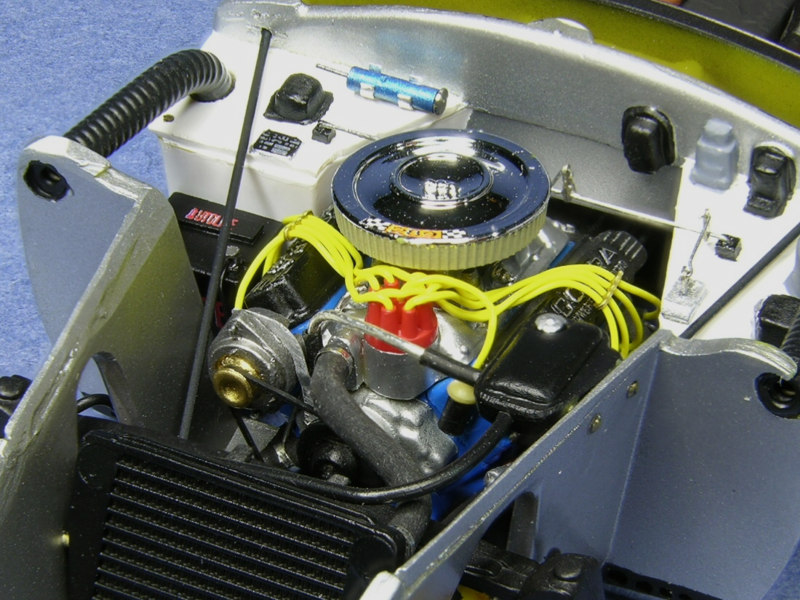
Aren't we exaggerating a wee bit Mike? 2" spark plug wire in 1:24 scale would have 0.083" diameter. Most modelers use either 0.016" or 0.012" diameter wire (Detail master or ProTech). That scales out to 0.38" and 0.288". Nowhere near 2". Now I also model in 1:43 scale and that gets a bit tricker. On my 289 Cobra I used 0.012" wire (scales out to 0.516"). While oversize, it doesn't look too bad (and still not 2"!). Remember, this is 1:43 scale. Having said all that, I have built models in scales ranging from 1:6 to 1:220, and I also miss the separate large scale section where I could easily get my large scale "fix".

-
Yes, CAD and 3D printers are the way of the future, it is not an easy task. Plus (at least with the current technology), to get the surface finish that you guys achieve, the sandpaper and primer/filler are still needed, even on 3D printed items.
-
How about using the kits original decals - while a bit cheesy, I think the graphics are pretty cool (and could represent graphics that were on vans back in the '70s). And G-rated. Maybe besides the decal, do some custom paint effects too.
-
Unhappy with chrome results...is it me?
peteski replied to GoodbuildNY's topic in Model Building Questions and Answers
What is worrisome is that this type of problem is happening in the first place. I would have thought that the parts would be handled in a seasonable dust-free environment. I'm not expecting a surgical-suite cleanliness, but clean enough to minimize any "dust accidents". -
I understand, but that could have been a trick clue. Plus that vehicle looks very European. It would have made more sense if it was made in one of the South American countries which often use European designs.
-
Wow! American made? No idea. But does "American" mean USA, or North, Central, or South America?
-
Same here. I would *NEVER* use baking soda and CA. Not only what Bob mentioned, but the baking soda can cause the super glue to heat up and bubble up uncontrollably. Especially when used with the thin CA glue. IMO, there really is no reason to do this - accelerators work just fine, and are designed for the job. Baking soda works well for baking cookies.
-
It is really not that complicated. You can clearly see that the hardener comes in a smaller size tube, so it would make no sense to dispense a full (smaller) tube of hardener, to a partial tube of putty (to get equal amounts of each). What Jon meant was to dispense equal percentage of each tube. So 1/3 tube of hardener and 1/3 tube of putty. If you read the actual instructions, it gives you more info about the mixing ratio. It is really not difficult.
-
It removed the metalization, but the shiny clear undercoat is still on the plastic. But maybe that was your goal.
-
Paint Strippers - What to Use?
peteski replied to pbj59's topic in Model Building Questions and Answers
DOT3 brake fluid attacks some urethane resins and also makes some polystyrene brittle. Same family of chemicals that is in brake fluid is used in commercially available plastic-safe paint strippers: Floquil/Testors Easy Lift Off (or ELO), and Scalecoat Wash Away Paint remover. I'm sure both of these have beem already mentioned several times in the previous few hundred of posts in this thread. -
That Cougar - WOW! But I expect, like the T-bird, it will be too rich for me. Does this mean that the T-bird master has been modified, or was the Cougar master made from a T-bird body casting? Speaking of the T-Bird, Paul's beautifully built-up T-top version of the T-Bird is currently on eBay, bid up to $810 (reserve not met yet).
-
Yes, while CA sets instantly, it takes some time to fully harden. It is easy to sand within few hours of application, but eventually it gets harder than styrene (basically it becomes as hard as Acrylic), so sanding it surrounded by softer styrene will become difficult.
-
I have become very happy user of Bob Smith Industries (BSI) line of CA adhesives. Those are often sold as Hobby Store's own brand glue. Their odorless CA glue does not fog clear plastic. I have also read that dipping the clear parts in Future (or whatever the current name for that floor finish is) will inhibit CA fogging. To me CA glue and accelerator are an inseparable pairing. I use both all the time. Each manufacturer of CA produces their own version of accelerator, but each uses a different formula. Some brands use acetone as the solvent in accelerator, and those will attack paint and plastic. The BSI accelerator is very mild, and does not attack plastic or paint. Again, good reason to use BSI brand. BSI accelerator also works with any brands of CA. Actually the CA glue itself (especially the thin viscosity glue) can dissolve some paints. Either way, it is not recommend to use CA over paint. I never spray the accelerator onto the glue joint area! I apply very small amounts using Microbrush disposable brushes. I would be lost in my hobbies without CA glue - that's a fact!
-
Interesting, According to https://3dinsider.com/plastic-lubricants/ and https://readingplastic.com/choosing-the-right-lubricant-for-plastic-parts/ mineral oil is ok to use. In my other hobby (model trains) I use Woodland Scenics Hob-E-Lube white grease. It is plastic compatible.
-
Well, any acid or alkaline solution will dissolve the thin layer of aluminum "chrome", and Coke contains Phosphoric Acid. https://www.familyhandyman.com/list/50-things-you-had-no-idea-you-could-do-with-coca-cola/ https://www.hunker.com/13727284/surprising-uses-for-coca-cola https://www.lifehack.org/articles/productivity/20-unusual-uses-for-coca-cola-that-youve-never-considered.html and many other examples - just Google for "100 uses for Coca Cola".
-
Rare Kits... prices.
peteski replied to Brutalform's topic in General Automotive Talk (Trucks and Cars)
What exactly do you mean? I don't understand. -
Bleach will not remove the glossy clear undercoat that the "chromed" parts are sprayed with before metalizing. Sometimes the clear coat is laid on fairly thickly. To fully strip the parts to bare plastic, it is important to use stripper that will handle both. Any Sodium Hudroxide (Lye) based products will work well.
-
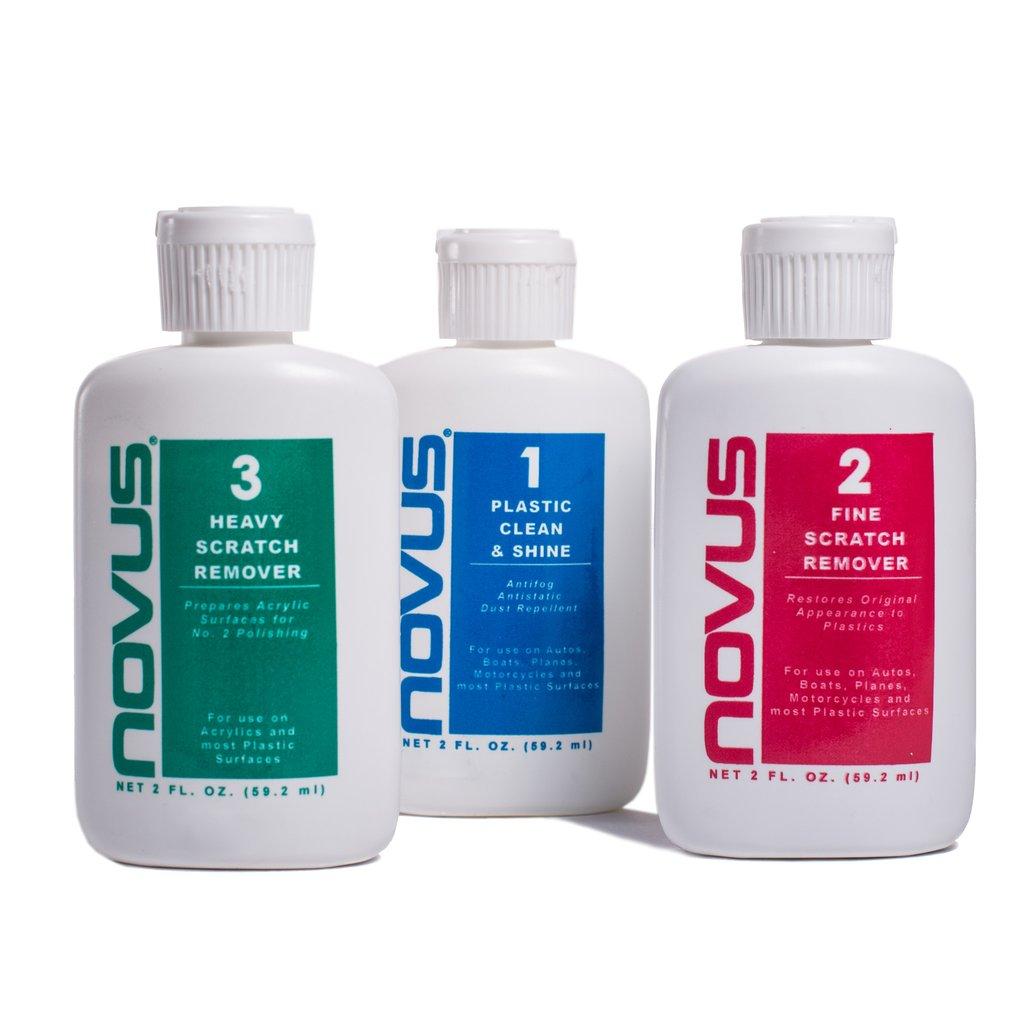
Repairing clear plastic window scratches
peteski replied to Nelly's topic in Model Building Questions and Answers
NOVUS polish system was specifically designed to remove small scratches and polish plastic surfaces.
-
If you are looking for flaws, why use clear? Primer is usually good for finding defects. I believe any solvent-based paint (enamel or lacquer) should be safe to use. I don't use water-based acrylics, so I can't comment on those. Before the parts get metalized, they are sprayed with very glossy clear coat anyway, then another clear top coat is usually applied after metalizing (to protect the few-atoms-thick layer of metal). If you want to be 100% sure, contact the company that does the metlaizing, and ask them.