

mr68gts
-
Posts
1,462 -
Joined
-
Last visited
Content Type
Profiles
Forums
Events
Gallery
Everything posted by mr68gts
-
My 1/12 scale 57 Chevy gasser build
mr68gts replied to ShakyCraftsman's topic in WIP: Drag Racing Models
Coming along nicely Ron! Making want to get back to my 1/6 Chevelle pro mod. Alas...gsl and vacation first! Then maybe things will settle down and get back to normal! Good call on the roll cage btw. I didn't see that till you mentioned it. Paul -
Injector manifold for SOHC Ford
mr68gts replied to twopaws's topic in General Automotive Talk (Trucks and Cars)
You can try one from one of the ford powered afx kits amt did.(awb Comet or Falcon come to mind) It may fit but Im not totally sure on that. I think speed city does one in resin also. -
Mark at M&S Hobbies can get you pretty much anything you need also. And he is West coast local...(Az to be exact) so shipping is quick. And Randy is now a dealer for hrm so all is good!
-
Gunze Cobra Daytona Actually 1/25 scale?
mr68gts replied to afx's topic in General Automotive Talk (Trucks and Cars)
All the notes I believe went with the Cobras so if it was part of his cobra notes then Mark has it. I concure that it should be scanned in. Or at the very least someone take pics of each page! Paul -
Gunze Cobra Daytona Actually 1/25 scale?
mr68gts replied to afx's topic in General Automotive Talk (Trucks and Cars)
Here's another site with some interesting information here and there. http://www.chuckcobra.com/index.html Edit! After clicking through the website this is the one I was refering to! -
Gunze Cobra Daytona Actually 1/25 scale?
mr68gts replied to afx's topic in General Automotive Talk (Trucks and Cars)
https://www.shelbyguy.net/single-post/2016/04/17/Paul-Martins-Daytona-Cobra-Coupe Not the one I was looking for but I beautiful replica! -
Gunze Cobra Daytona Actually 1/25 scale?
mr68gts replied to afx's topic in General Automotive Talk (Trucks and Cars)
Could be a wives tale or rumor but wasn't the chassis based off the 289 Cobras? There is a guy that built his own from measurement I think of one and used a Cobra chassis as it's foundation. Modified of course. It looked fantastic all in raw aluminum! Paul -
A house full of Plastic & Die-Cast
mr68gts replied to Quicksilver's topic in General Automotive Talk (Trucks and Cars)
Talk to Mark Gustavson with the Model Car Museum too. He may be able to help "unload" some of it and it is a non profit I believe. -
Many of us do this very thing. Usually a bunch of contest go'ers will get together for lunch or hit up local shops ect. Makes the long day go a bit better. It is one of the things I like about GSL. With all the seminars and such it really breaks up the monotany of just sitting around at the contest. Verynice models btw.
-
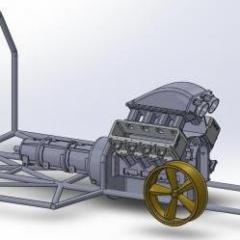
You talking about the air cleaners in the 57?
-
paint help needed
mr68gts replied to l88 chevelle's topic in General Automotive Talk (Trucks and Cars)
Good to know! I was getting ready to try this very thing here in a couple days! Saved me the headache -
Tim, What are you using for oil? I've just been using cutting/tapping fluid in a spray form. Works pretty good but the clean up.... lol Paul
-
My 1/12 scale 57 Chevy gasser build
mr68gts replied to ShakyCraftsman's topic in WIP: Drag Racing Models
I must repeat what Dave has said. I too can appreciate the time spent drawing up the chassis and such! Looks awesome btw! Just beautiful work so far. Looking forward to your progress. I will definitely be following along with this one! Paul -
69 pro mod chevelle, chassis started mock ups
mr68gts replied to mr68gts's topic in WIP: Drag Racing Models
A little bit of an issue..... There are some issues with the body as far as how it all fits together. I've come too far to turn back now so I will push ahead but there are some proportion issues with the body. Probably part of the problem with scaling something from a photograph. There's no guarantee that the photographer took the photo dead square which will mess up much of the dimensions as you scale it. Not much of a way around it and not worth having a new body printed after changes. This is a TDR body and not of my design so I am going to have to work within the constraints of the body. The first issue is the wheel base is off a bit. Not horrible but I can work with it. I just need to open up the wheel wells some to make it work.....more body work. lol. The other issue is the front tire clearance. There simply is not enough clearance at the hood to clear the tire as the suspension collapses. I know this is just a model but this like this erk my ocd lol. Scale, scale, scale! It's not hard people....jeesh! Ok, enough rant. I've got a solution however it is not one I want to look at because I think it would mess up the lines of the car. That would be to add wheel humps into the top of the fender to clear the tires. That the easy option. The other option is to bow the whole top of the front clip. That is going to take some serious work to make happen. I may be able to draw up a new front clip but my Solidworks skills would be put to the test! (read as lack of skills....lol) I will keep forging ahead however and see what I can make happen once I get to that point. Paint and body work is a long ways off at this point anyway! Paul -
69 pro mod chevelle, chassis started mock ups
mr68gts replied to mr68gts's topic in WIP: Drag Racing Models
Been a busy week learning autocad.....I like Solidworks better but I am doing the Autocad for a possibility of a job change. If I can get in anyway. I have managed however to get some done on the rear end this morning while the Ms. was sleepin....lol The rear end fill cap. I've got some smaller end mills coming and one of them is a ball end mill so I can machined the relief in the middle and not be so large. I used an 1/8" end mill to cut the grip reliefs after turning it on the lathe. (unscrewed the chuck right off the lathe and onto the index head after I re-assembled the mill lol. I remove the mill head if not going to use it any time soon so it's not in the way) Came out pretty good and I am happy with the results other than the wrong end mill for the middle relief. And the rear end itself is getting closer. I started making all the spacing material to tie in the 4 link plates to each other for strength. (like the real cars are) Still have one side to do but I did manage to get the other spindle done also. I think I am going to machine the caliper boss for the spindle rather than 3d print it. Hopefully it comes out. -
40 Willy's Gasser Pick Up......Office build
mr68gts replied to Davewilly's topic in WIP: Drag Racing Models
Very nicely done! The color really looks good on that body, especially with the decals in place! The fact that it was built at work is pretty cool too. I too build some at work. Mostly chassis building but it keeps my mind occupied while I am bored at work. Paul -
Tamiya 1/12 Porsche 935
mr68gts replied to Dirtracer22's topic in WIP: Other Racing: Road Racing, Land Speed Racers
Works pretty good using this technique. Haven't tried it with typical out of kit decals but it just may work. It softens up the decal pretty good making it pliable enough to conform, even the thicker high def decals so kit decals may like it also. Just be easy on the heat or you will ruin the model underneath.... Paul -
Pretty nice 63 you got there! When I used the CMG kit for my 62 I cut the lip off the firewall to make it fit better and remove the gap. (just a tip for next time) Those carbs from Fireball are a work of art. I need to get my hands on some one of these days. The Lindberg kits while nice never really looked right for me and they always looked clunky in my eyes but they are still nice kits, that build up with few major problems and are great parts kits. I wonder how the new Belvederes fit the bill now that Mobius has them out compared to them though. I have a 63 kit that I plan on doing this very thing to, very nice job sir. Paul
-
69 pro mod chevelle, chassis started mock ups
mr68gts replied to mr68gts's topic in WIP: Drag Racing Models
Rear end print showed up last night so I started by adding the inner 4 link plates to it. Then machined one of the tube insert/spacers this morning. I'll do up the other one tomorrow hopefully. I may have to move a couple bars in the back half to fit the rear end properly but it's not much. Just going to have to see once it's mocked up. -
69 pro mod chevelle, chassis started mock ups
mr68gts replied to mr68gts's topic in WIP: Drag Racing Models
Randy, Thank you! I managed to get the main rear structure done. Just needs all the bracing and tabs for the shocks to mount to. Also need to locate the sway bar somewhere in this mess! And.... I decided to sit in front of the lathe for a minute tonight giving me a break from trying to learn Auto-cad 2017! So I machined the Penske reservoirs. -
69 pro mod chevelle, chassis started mock ups
mr68gts replied to mr68gts's topic in WIP: Drag Racing Models
Tyrone, Thank you sir! Chris, thank you. I actually dug through my drawer of bar stock and found about half a package of .080 on the bottom. Must have fallen out over the years. I might have to go through and organize the drawer again lol. I've been slowly filling in the gaps in my supply of Evergreen so that I don't have to worry about holding up on projects due to lack of materials. Thank you for the offer though! Much appreciated! Dave, Thank you sir! It's coming along. One tube at a time.....lol Scott, Thank you. I need to get with you in the next day or 2 about some stuff. I'll email you later. So, no real photographic update. Just keep adding more and more tube to the chassis. The rear end housing is on it's way from Shapeways. That's the major hold up on the rear end at this point. I've got the parts for it other wise beside the Penske shocks. Looks like I am going to have to buy some tooling to make some of it. Mostly micro end mills. Started saving up for the rotary table also. There are a few things I need to make that require it over the indexing attachment. I think the only part that will be 3d printed is the main upper base. Maybe.... I say this because I might be able to machine it out also depending on how adventurous I feel but it too will require the rotary table anyhow. For now and for GSL the rear end will have mock up shocks in place. Updates may come slow for a while as there are a few things getting in the way of this and other model work at this time. I will update as I can though! Paul -
The shocker outlaw camaro.DONE.5/24/17
mr68gts replied to Jmaracing's topic in WIP: Drag Racing Models
You really got to hand it to Chief. He's done all he has with Poncho power. That says a lot considering there are easier ways to make as much or more power. He's stuck by it even though he has come close to changing over. Even the Dart has a BBC in it. I watch the show mostly for the entertainment value. It is what it is and being that I have been at the street races I know what it's like. The show is there to entertain and make people money, bottom line. Kye sees it as such I think also. Although not my favorite person, you can't deny his skill as a driver and how bad A the car is. People may call his Camaro a pro mod but Chiefs GTO was just the same. The only stock panels on the car were the main shell. Everything else was glass. Back on subject, Nice work thus far. Look forward to you progress. -
i can just picture how that conversation went....haha. Mostly because I know how mine go....lol
-
69 pro mod chevelle, chassis started mock ups
mr68gts replied to mr68gts's topic in WIP: Drag Racing Models
Thanks Chris. I did pick up some more. They didn't have the .080 but I think I have enough of that to get by. I was scraping up bits of .100 though lol. I ordered the fab rear end Thursday so it should be on it's way in a few days. Then I can start getting the 4 link together! I'm just going to use mock up bars for shocks temporarily. Wait till you see the shocks.... It was fun hangin out. Next time we need more time though lol. Gsl...well...Ive just about got both models done for gsl so I may just actually make it and not have to build on the way up like I have in the past. No more of that lol. If it is not done then it is not going! I do hope this Chevelle is done for 2019 though. Paul -
1/16 Scale Army Vega Funny Car - Finished 10/14/2018
mr68gts replied to Mooneyzs's topic in WIP: Drag Racing Models
Chris, I've had good luck so far with Fotki but it is a subscription site. The first month or so is free then after that is pay per month or annually. Just a heads up. And I have yet to be able to post from the app. Hope you get the issues figured out! Paul