Dann Tier
-
Posts
8,151 -
Joined
-
Last visited
Content Type
Profiles
Forums
Events
Gallery
Everything posted by Dann Tier
-
Nice save indeed!!!....Love your progress, bud!!!!
-
...Wait!! -is this what you carved out of that wood??!!!!
-
SO COOL!!! were you gonna make a buck out of the wood eventually?, and is that seat covered in real leather?
-

Ford GT40, Meng, 1/12
Dann Tier replied to Matt Bacon's topic in WIP: Other Racing: Road Racing, Land Speed Racers
OUTSTANDING, Bud!!!!.....cant stop looking at it!!! Question: what are the two empty boxes beside the exhausts? i've never actually known. -
LOL...Danke!...Its great to hear from you again, Bud!! i'm 50, and i will be getting back to the Isdera pretty soon here....Looking forward to yours coming to life -its FANTASTIC!!!
-
VERY nice work
-
Love the kolor!!!
-
Me either...lol
-
SOOOO close!!!!!
-
Lancia Beta Montecarlo
Dann Tier replied to afx's topic in WIP: Other Racing: Road Racing, Land Speed Racers
NICE!!...really looking forward to it, Bud!!!! -
Very much appreciated, Bud!!
-
Thanks!...it sure is, but it was FUN to do it!!!
-
Thank YOU!, i'm glad you enjoyed it!
-
I've seen this Masterpiece somewhere before!.....Hmmmmm -i could look at it ALL DAY!!!!
-
So COOL!!!! Love the subtle muscled-up look!!!
-
What a BEAUTY!!! Love the displays as well!!!
-
Man thats BEAUTIFUL!!!!
-
STUNNING!!!....Well done!!!!
-

-
Otaki 1/12 Lamborghini Countach Twin Turbo...Mission Statement
Dann Tier replied to Dann Tier's topic in WIP: Model Cars
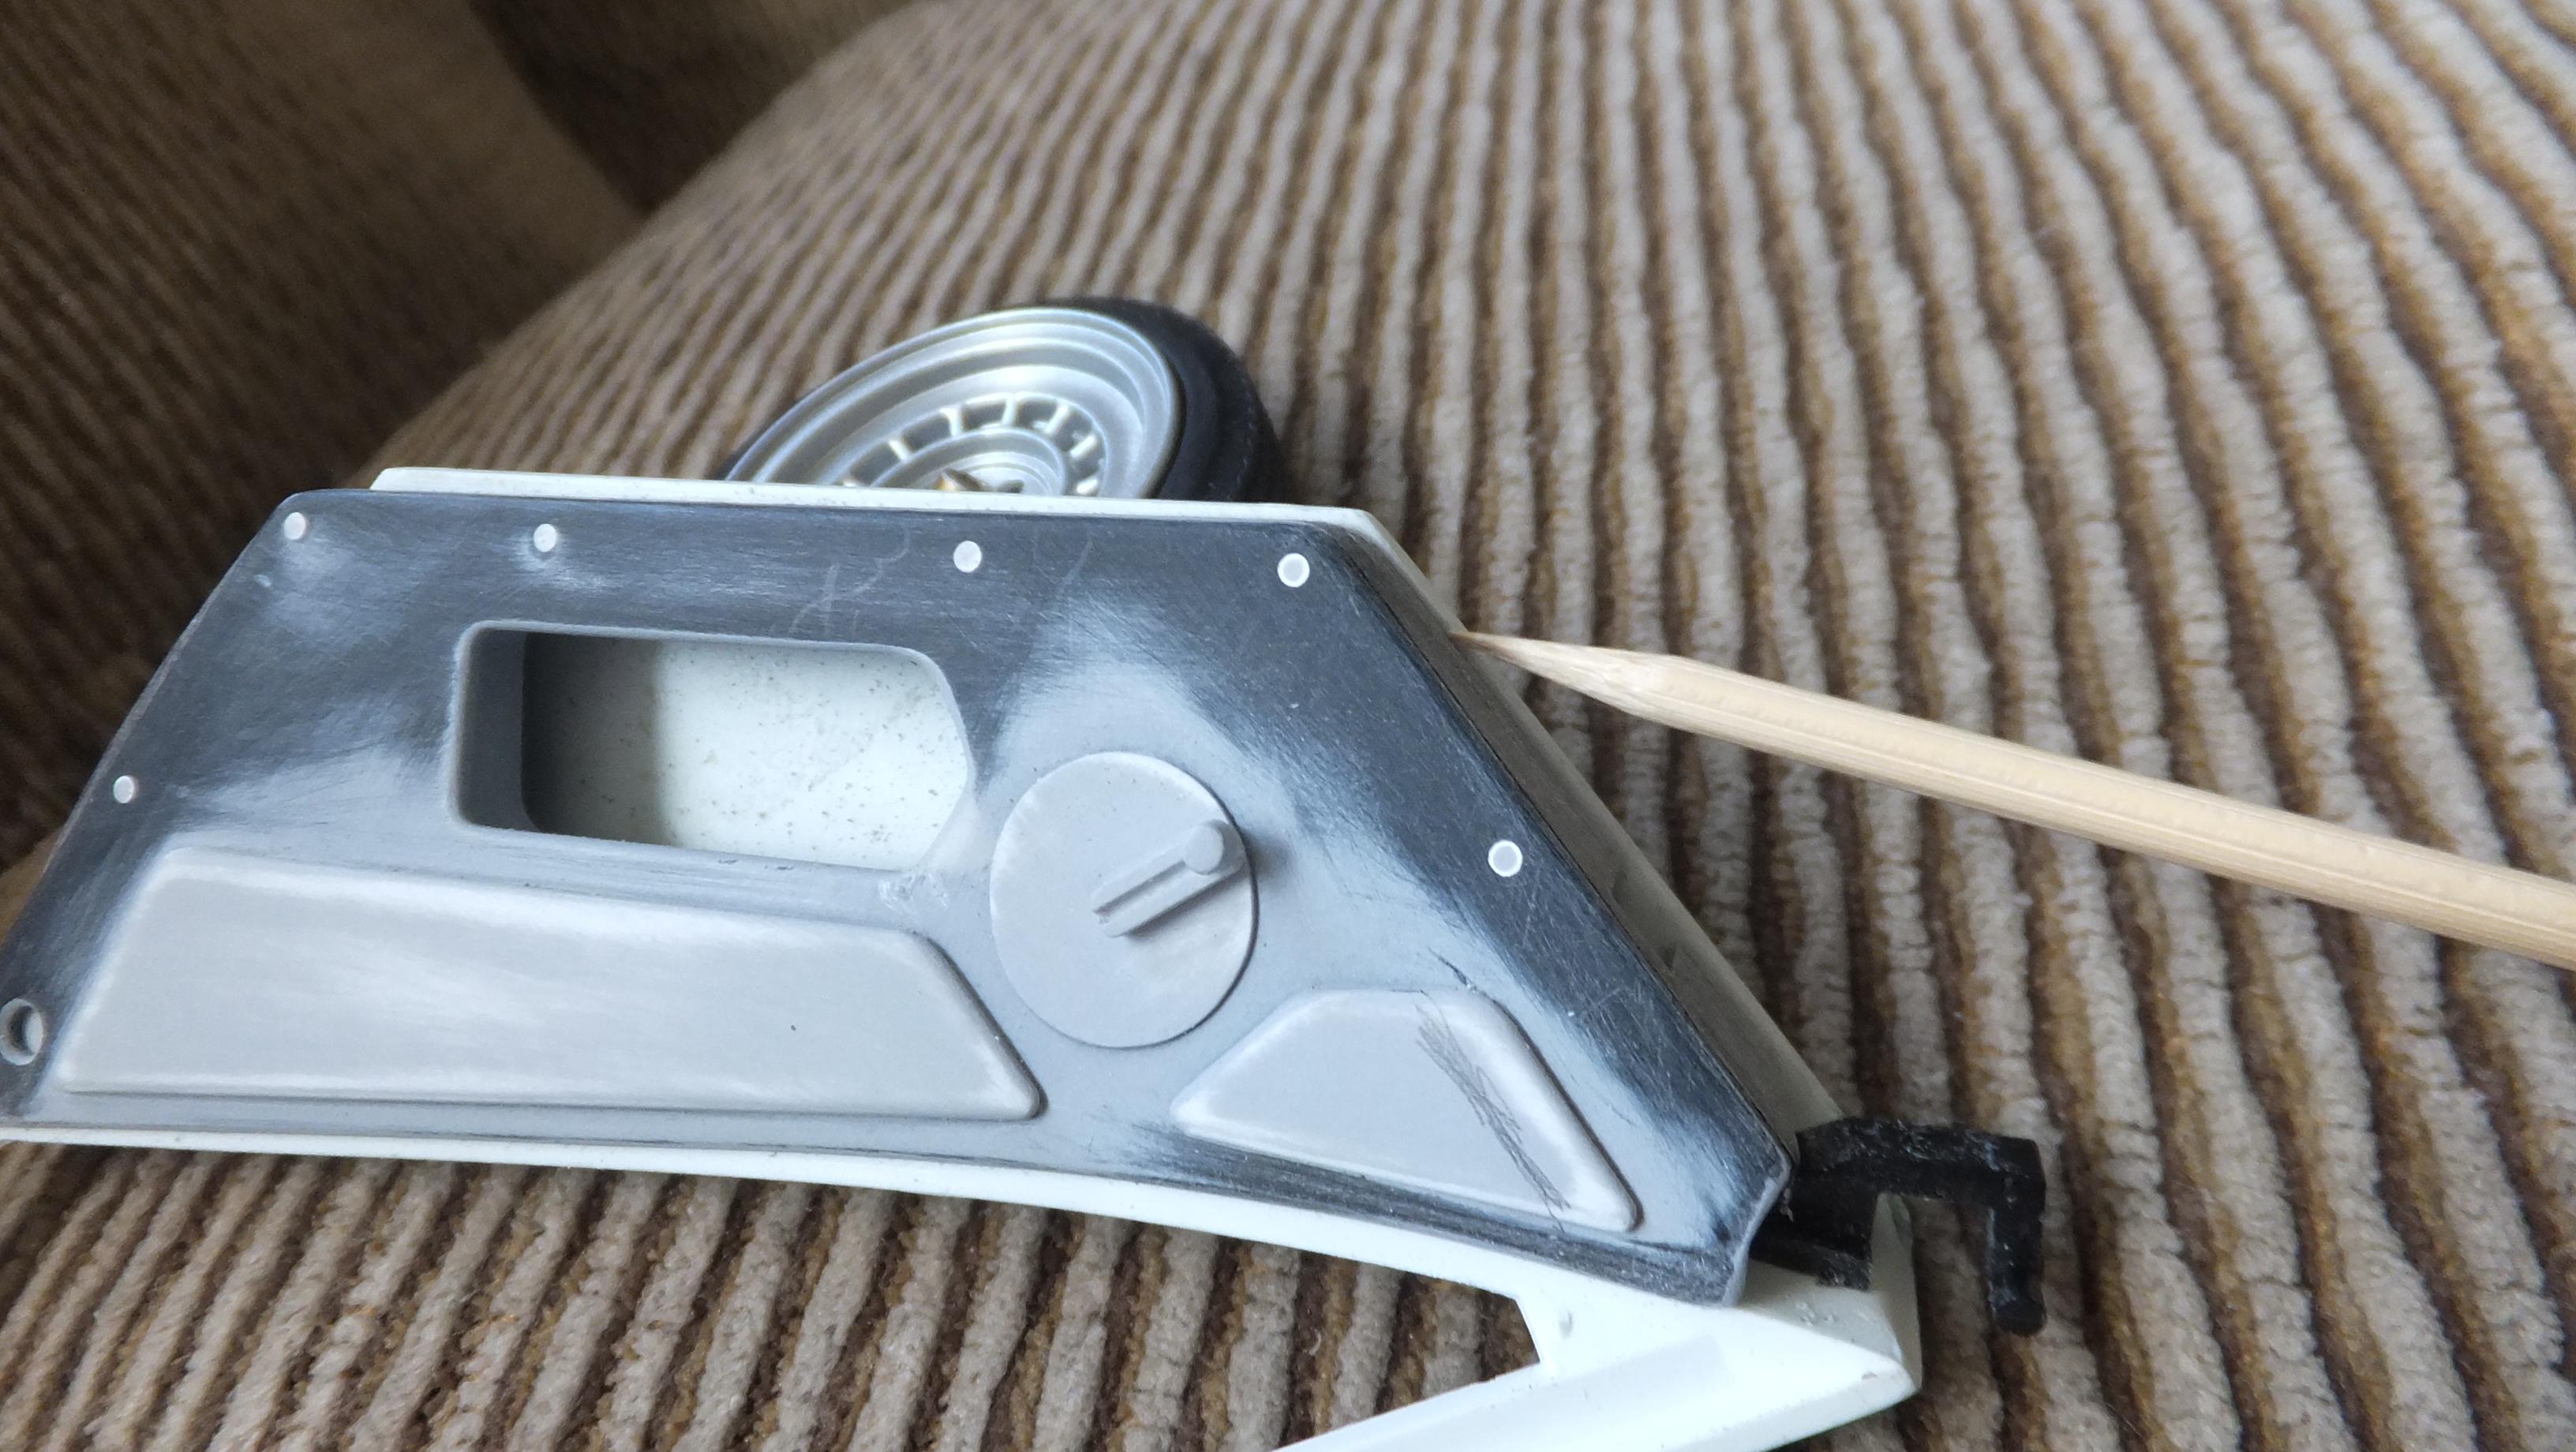
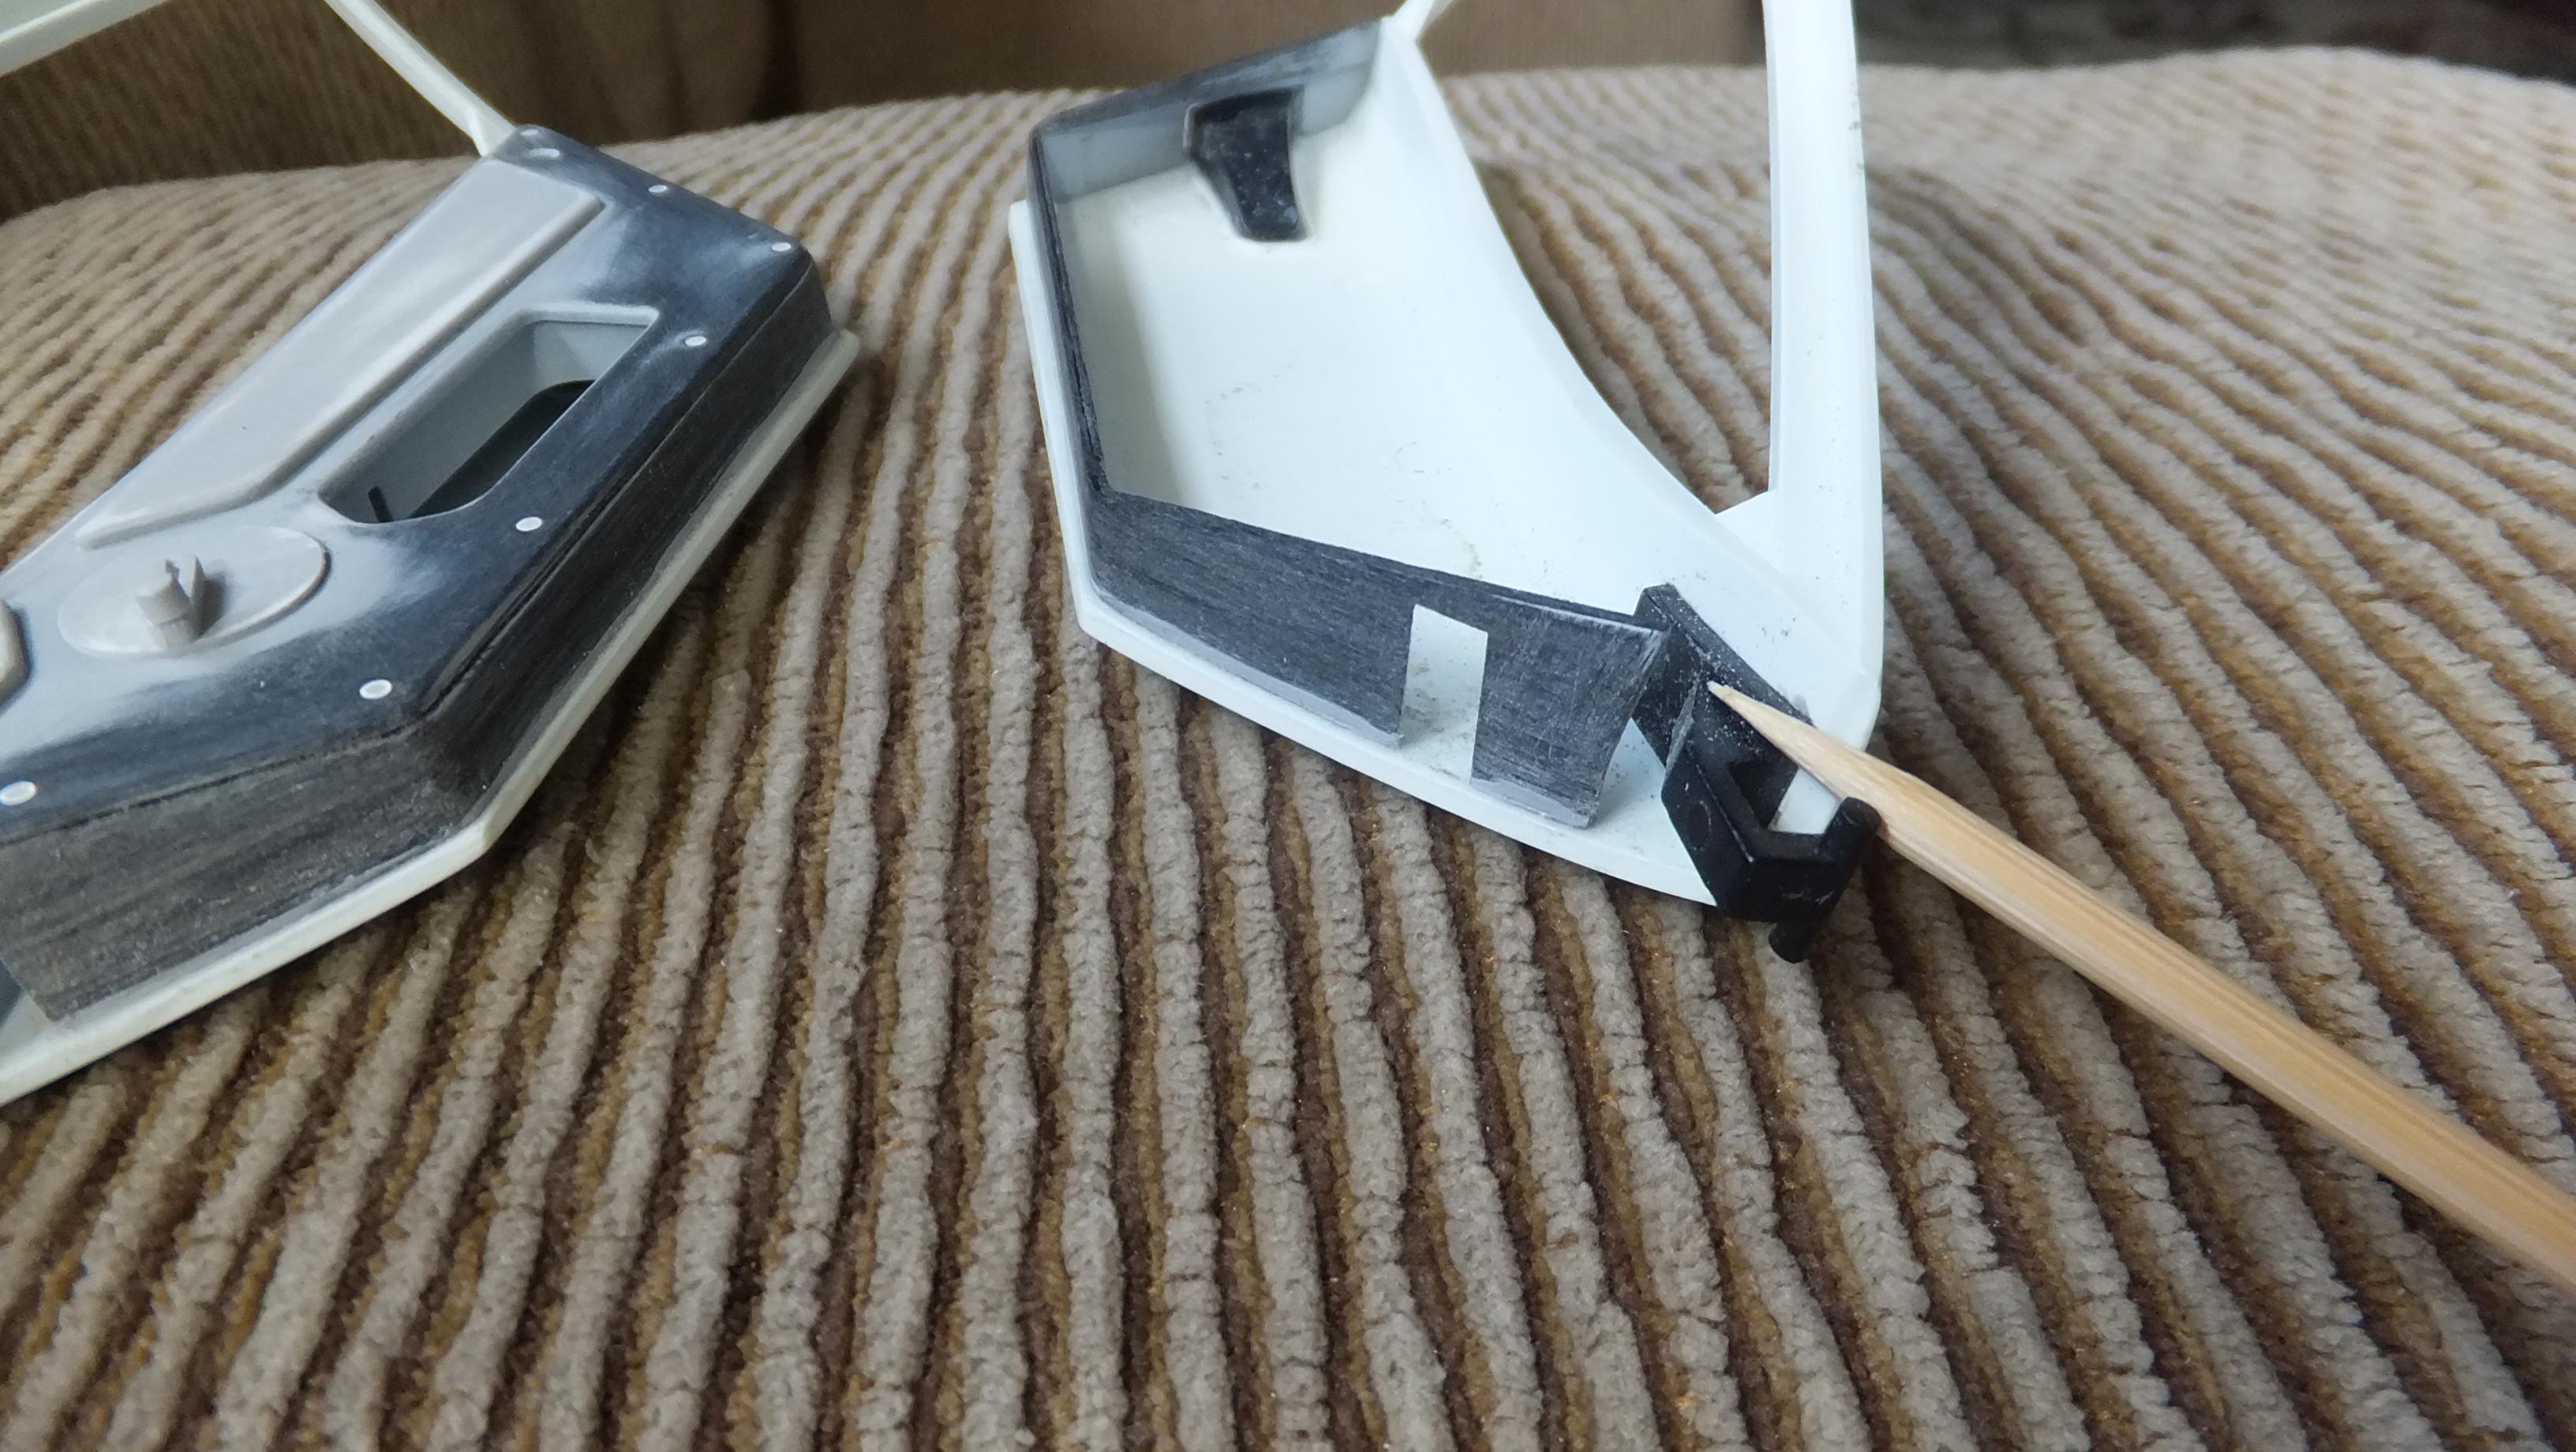
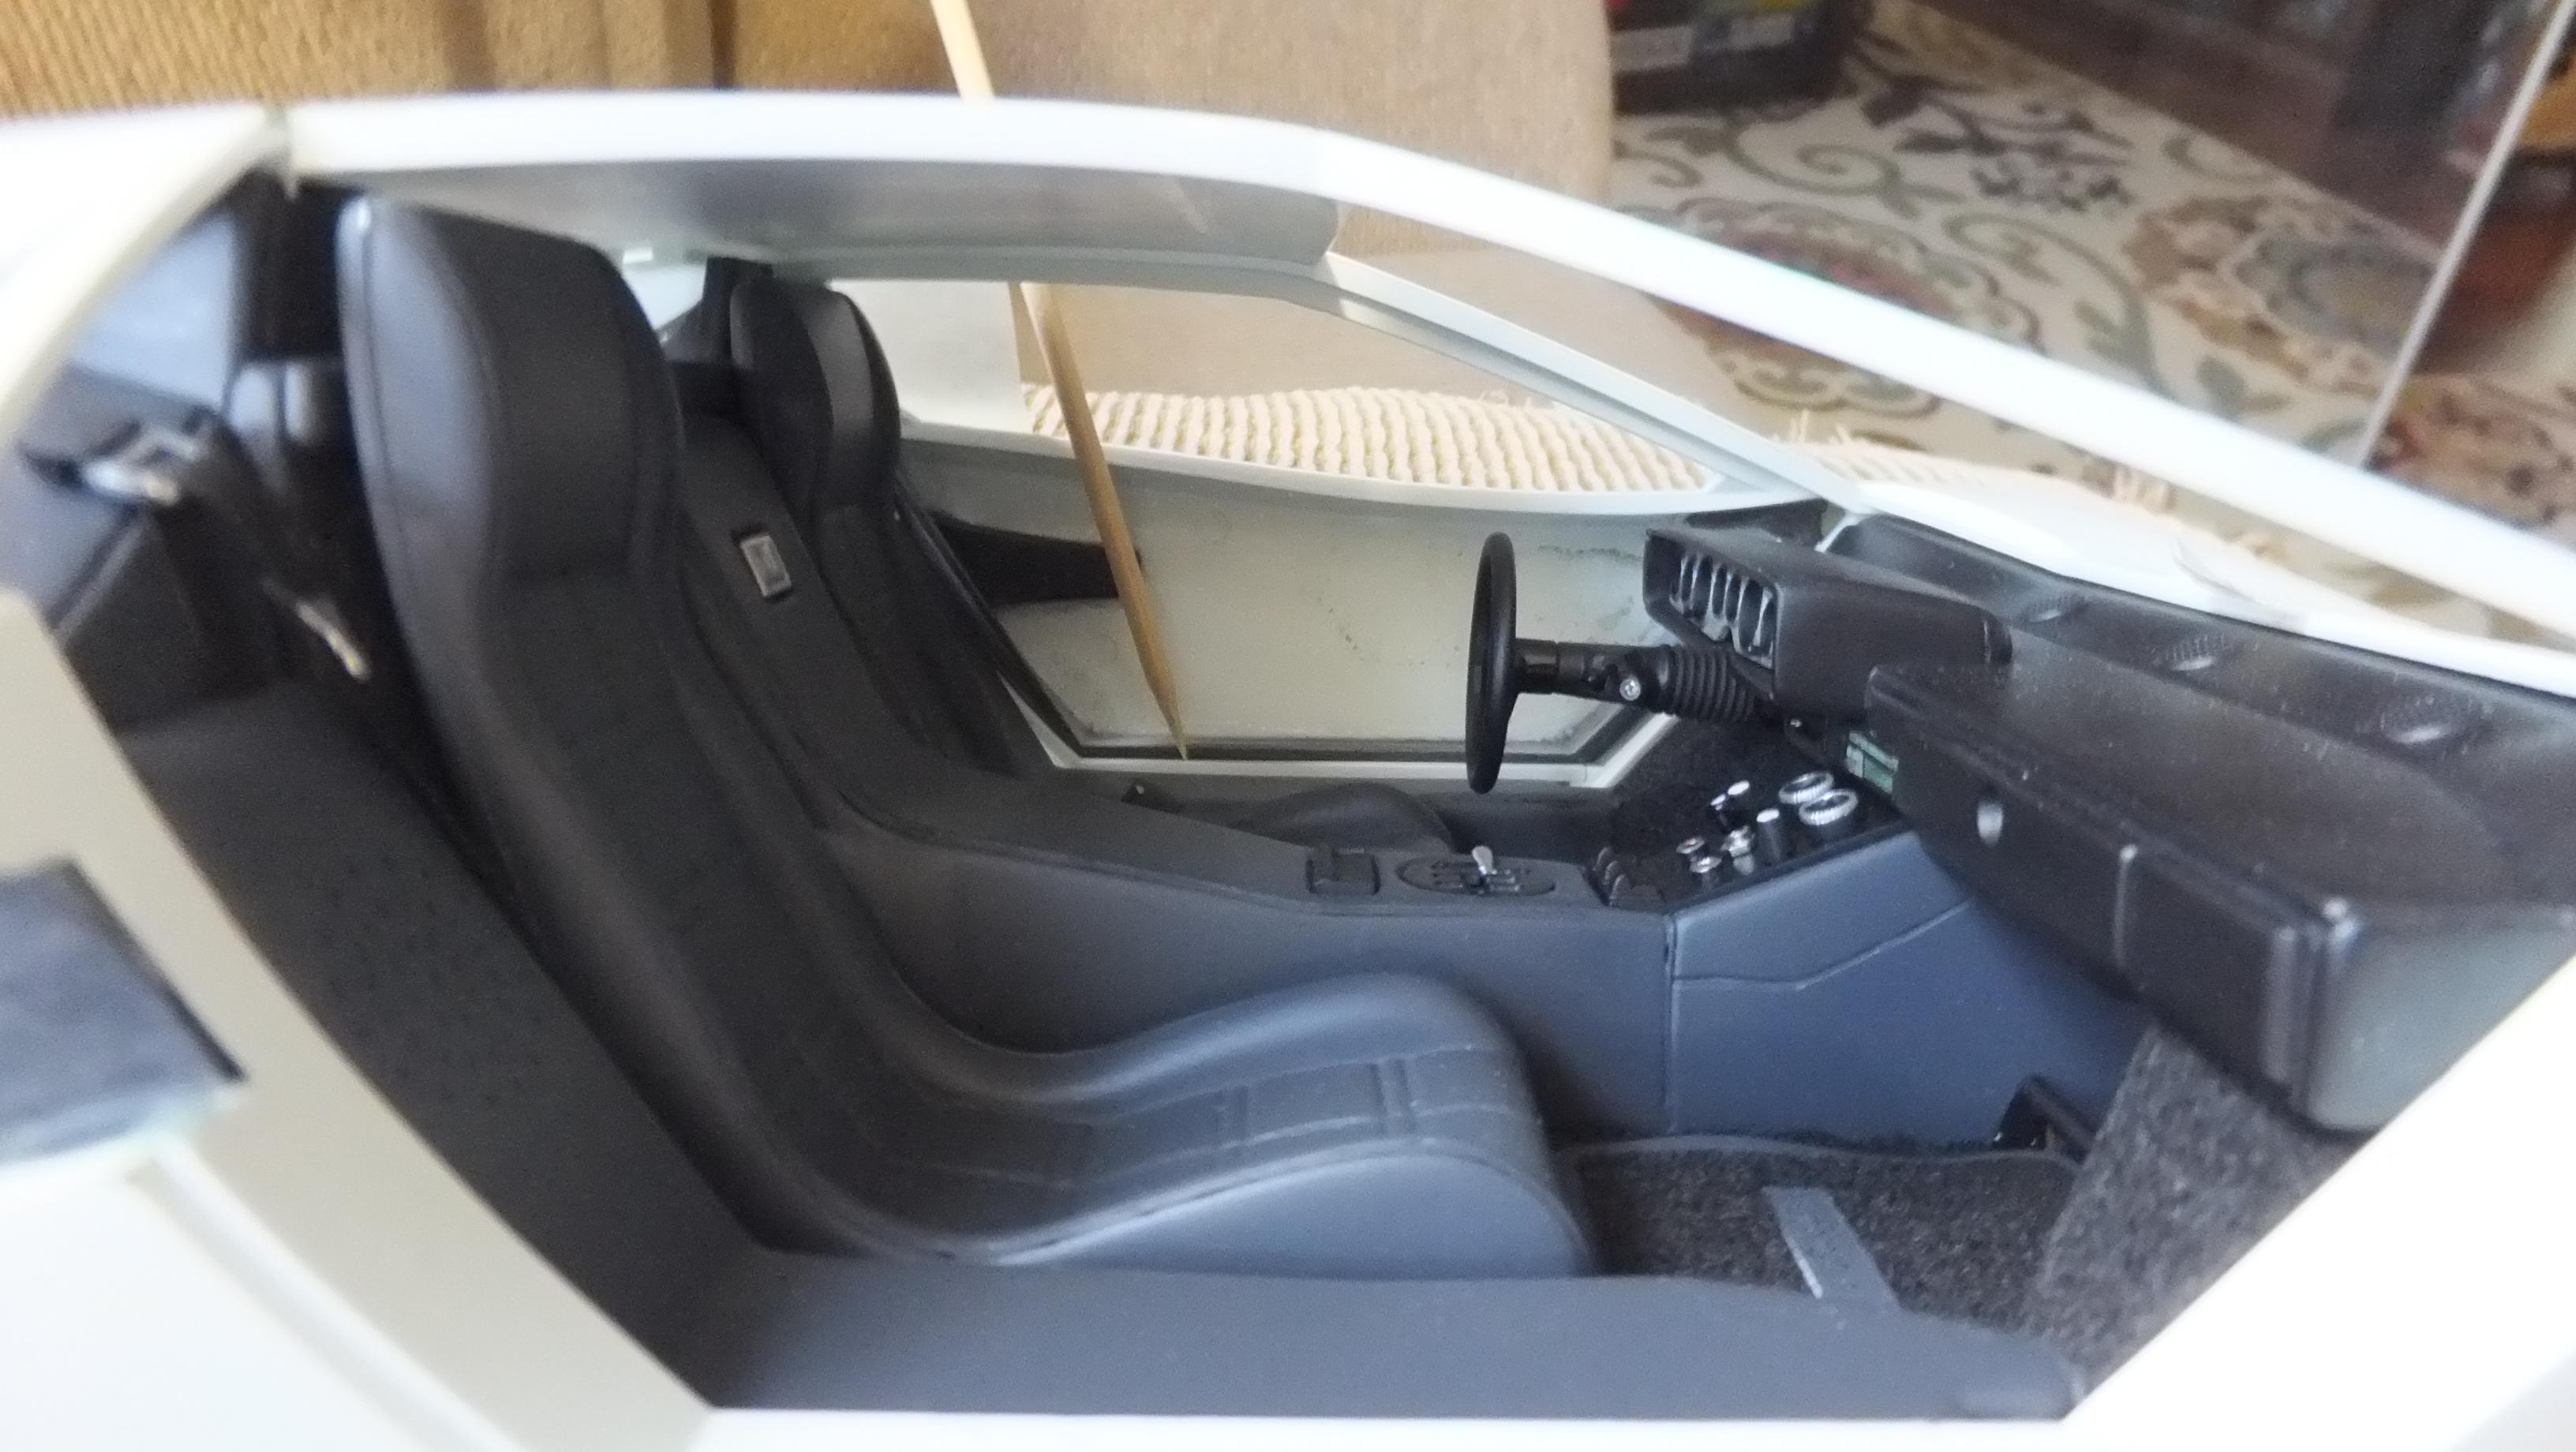
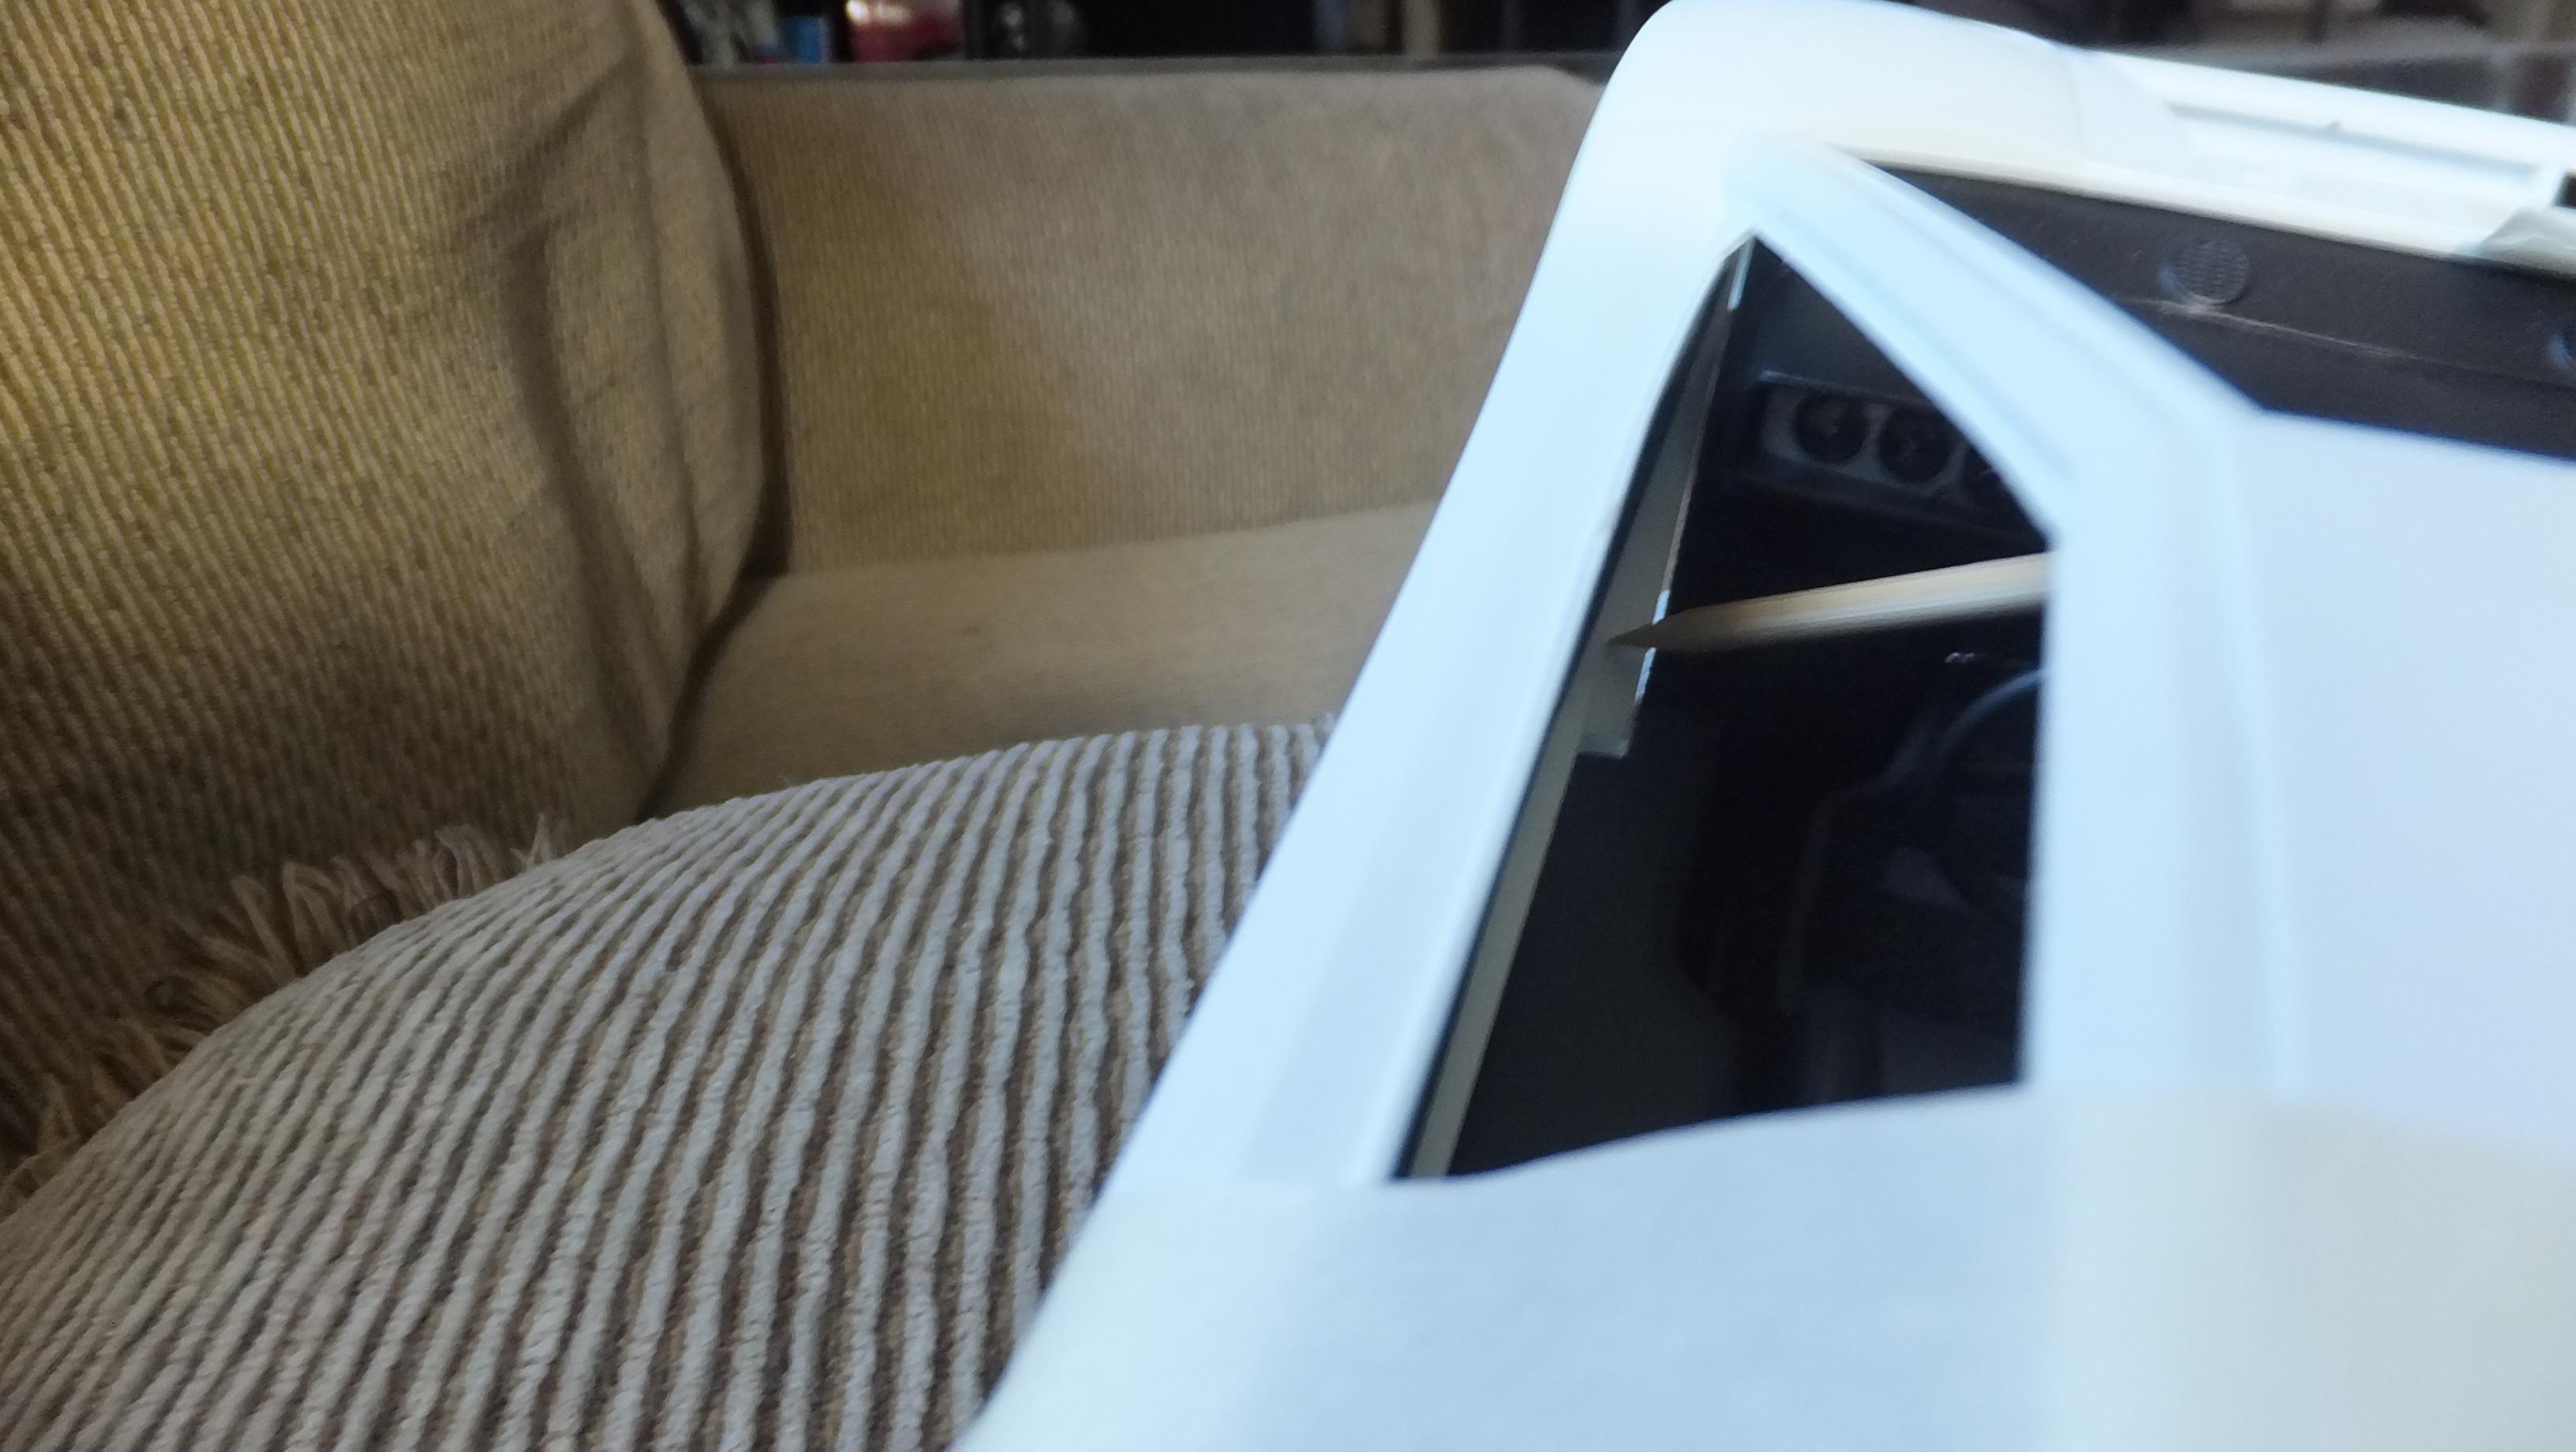
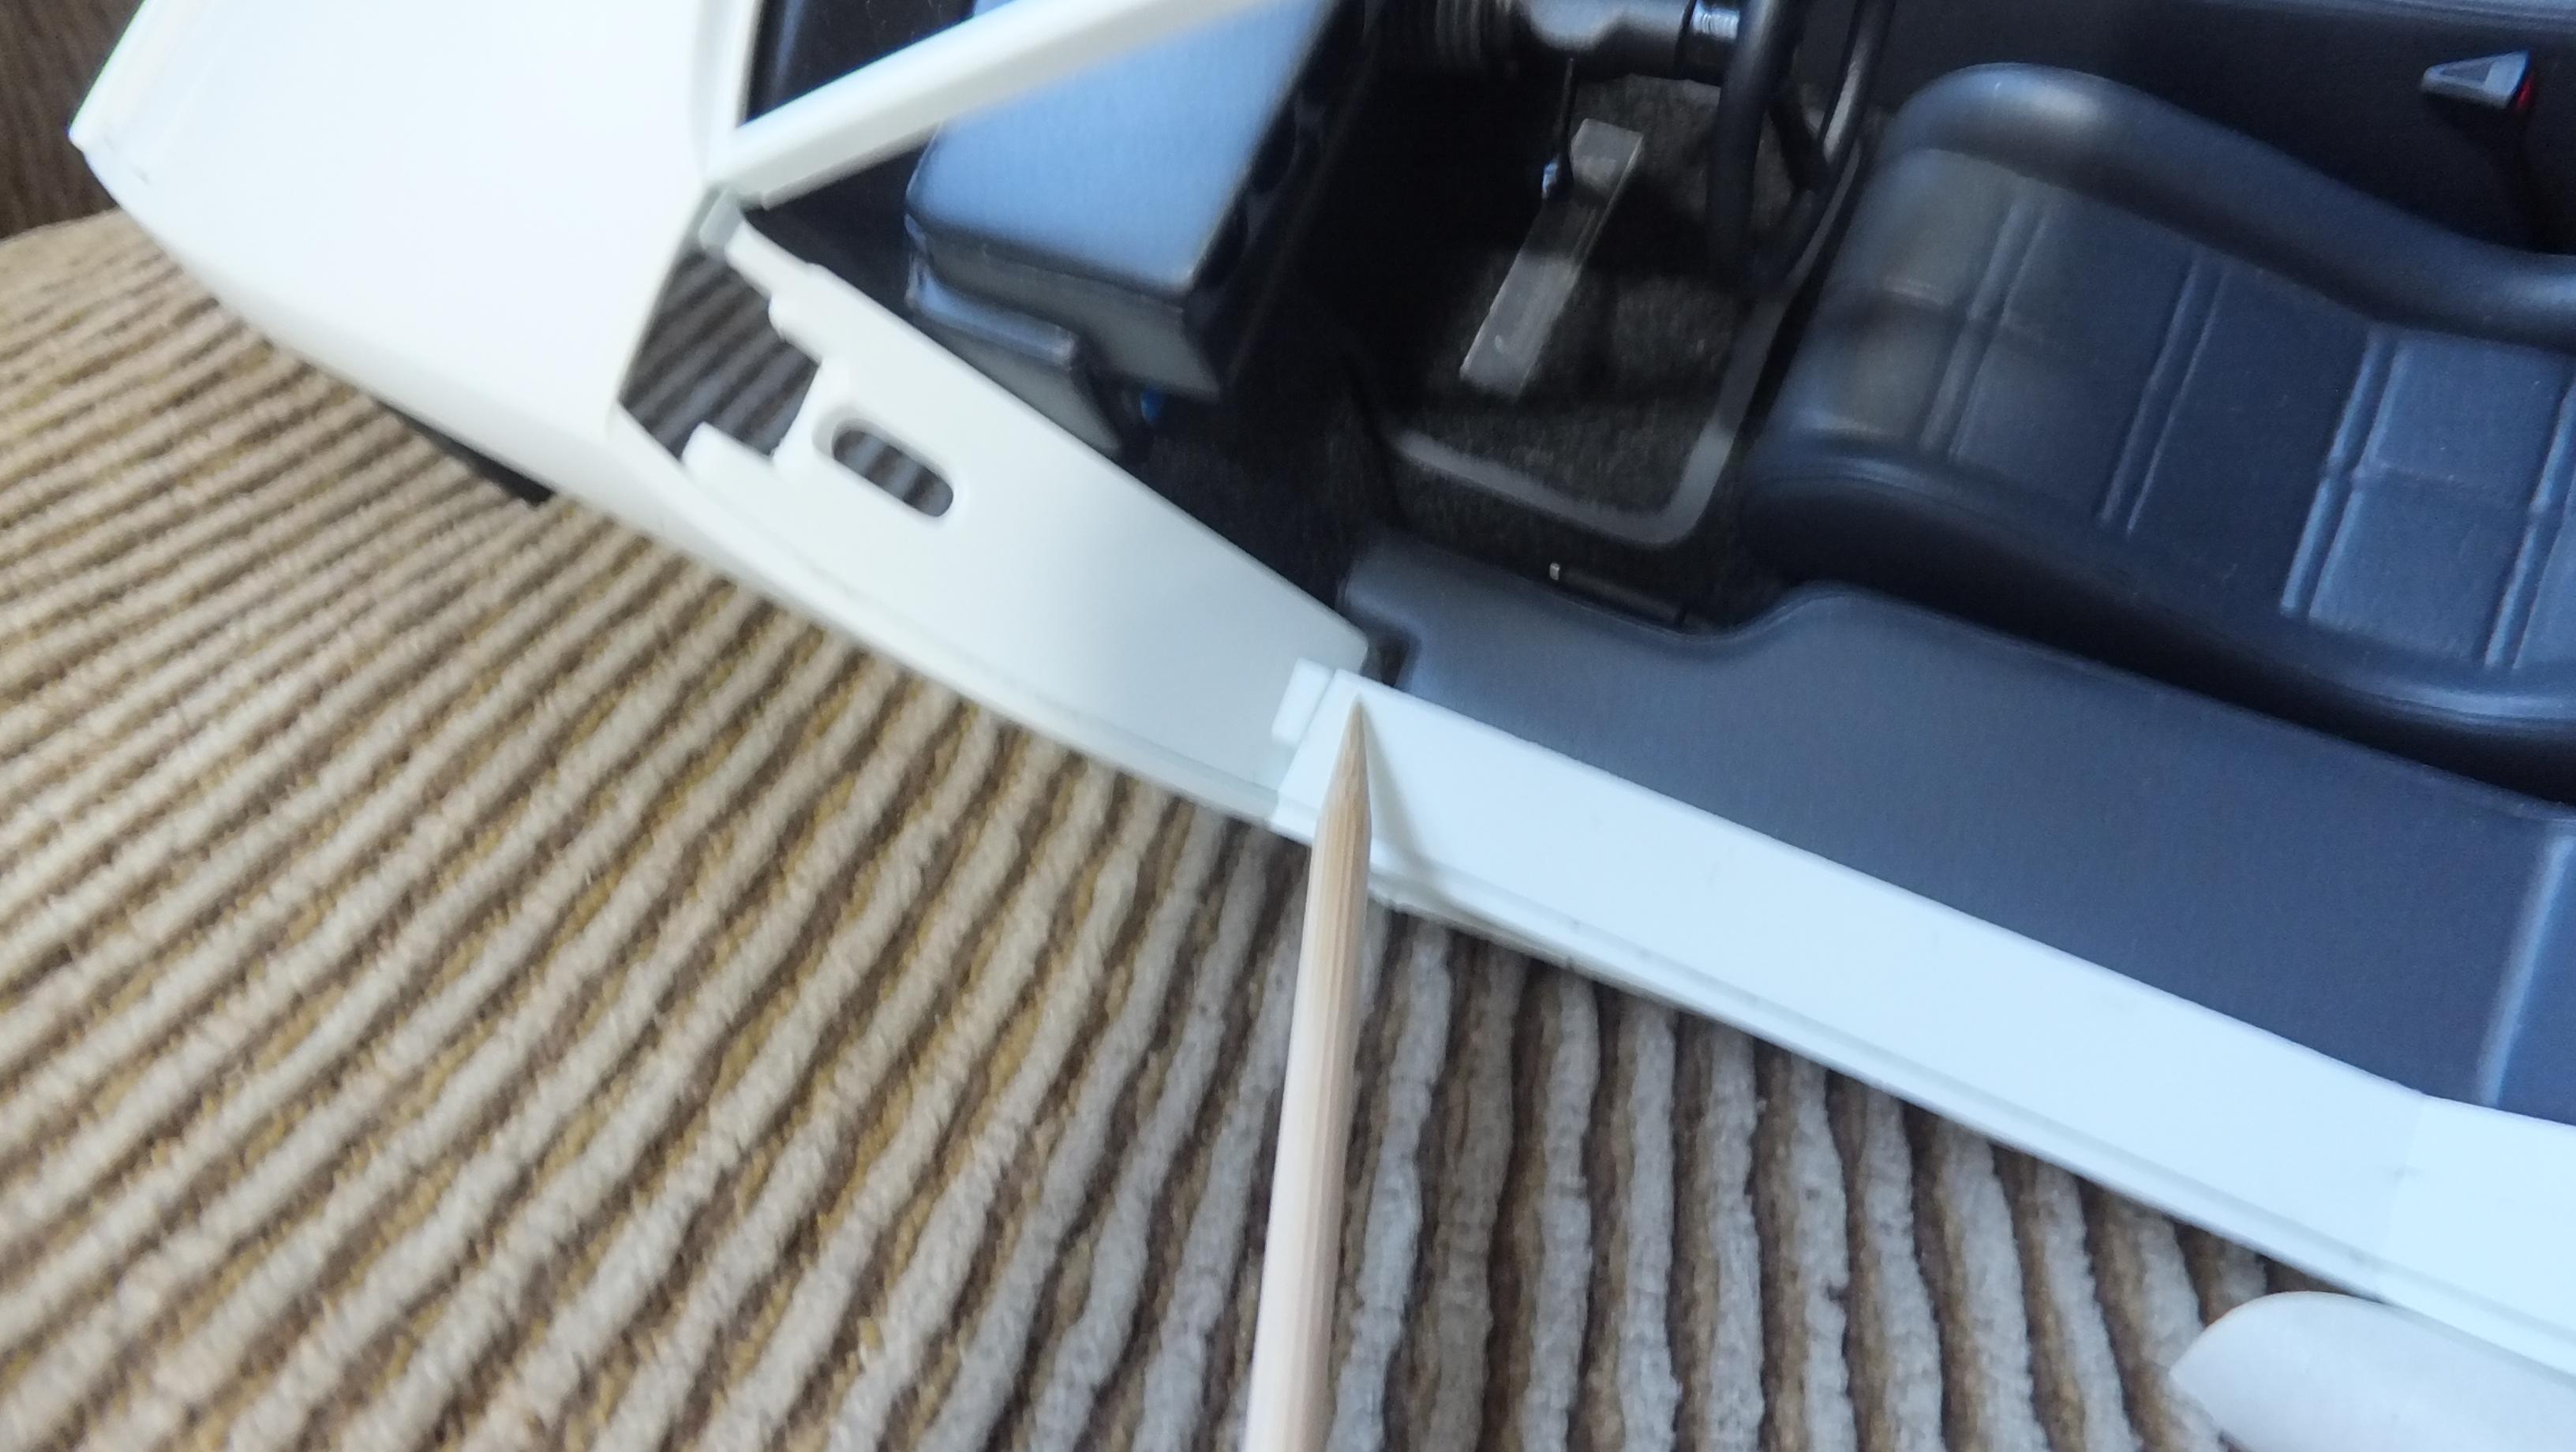
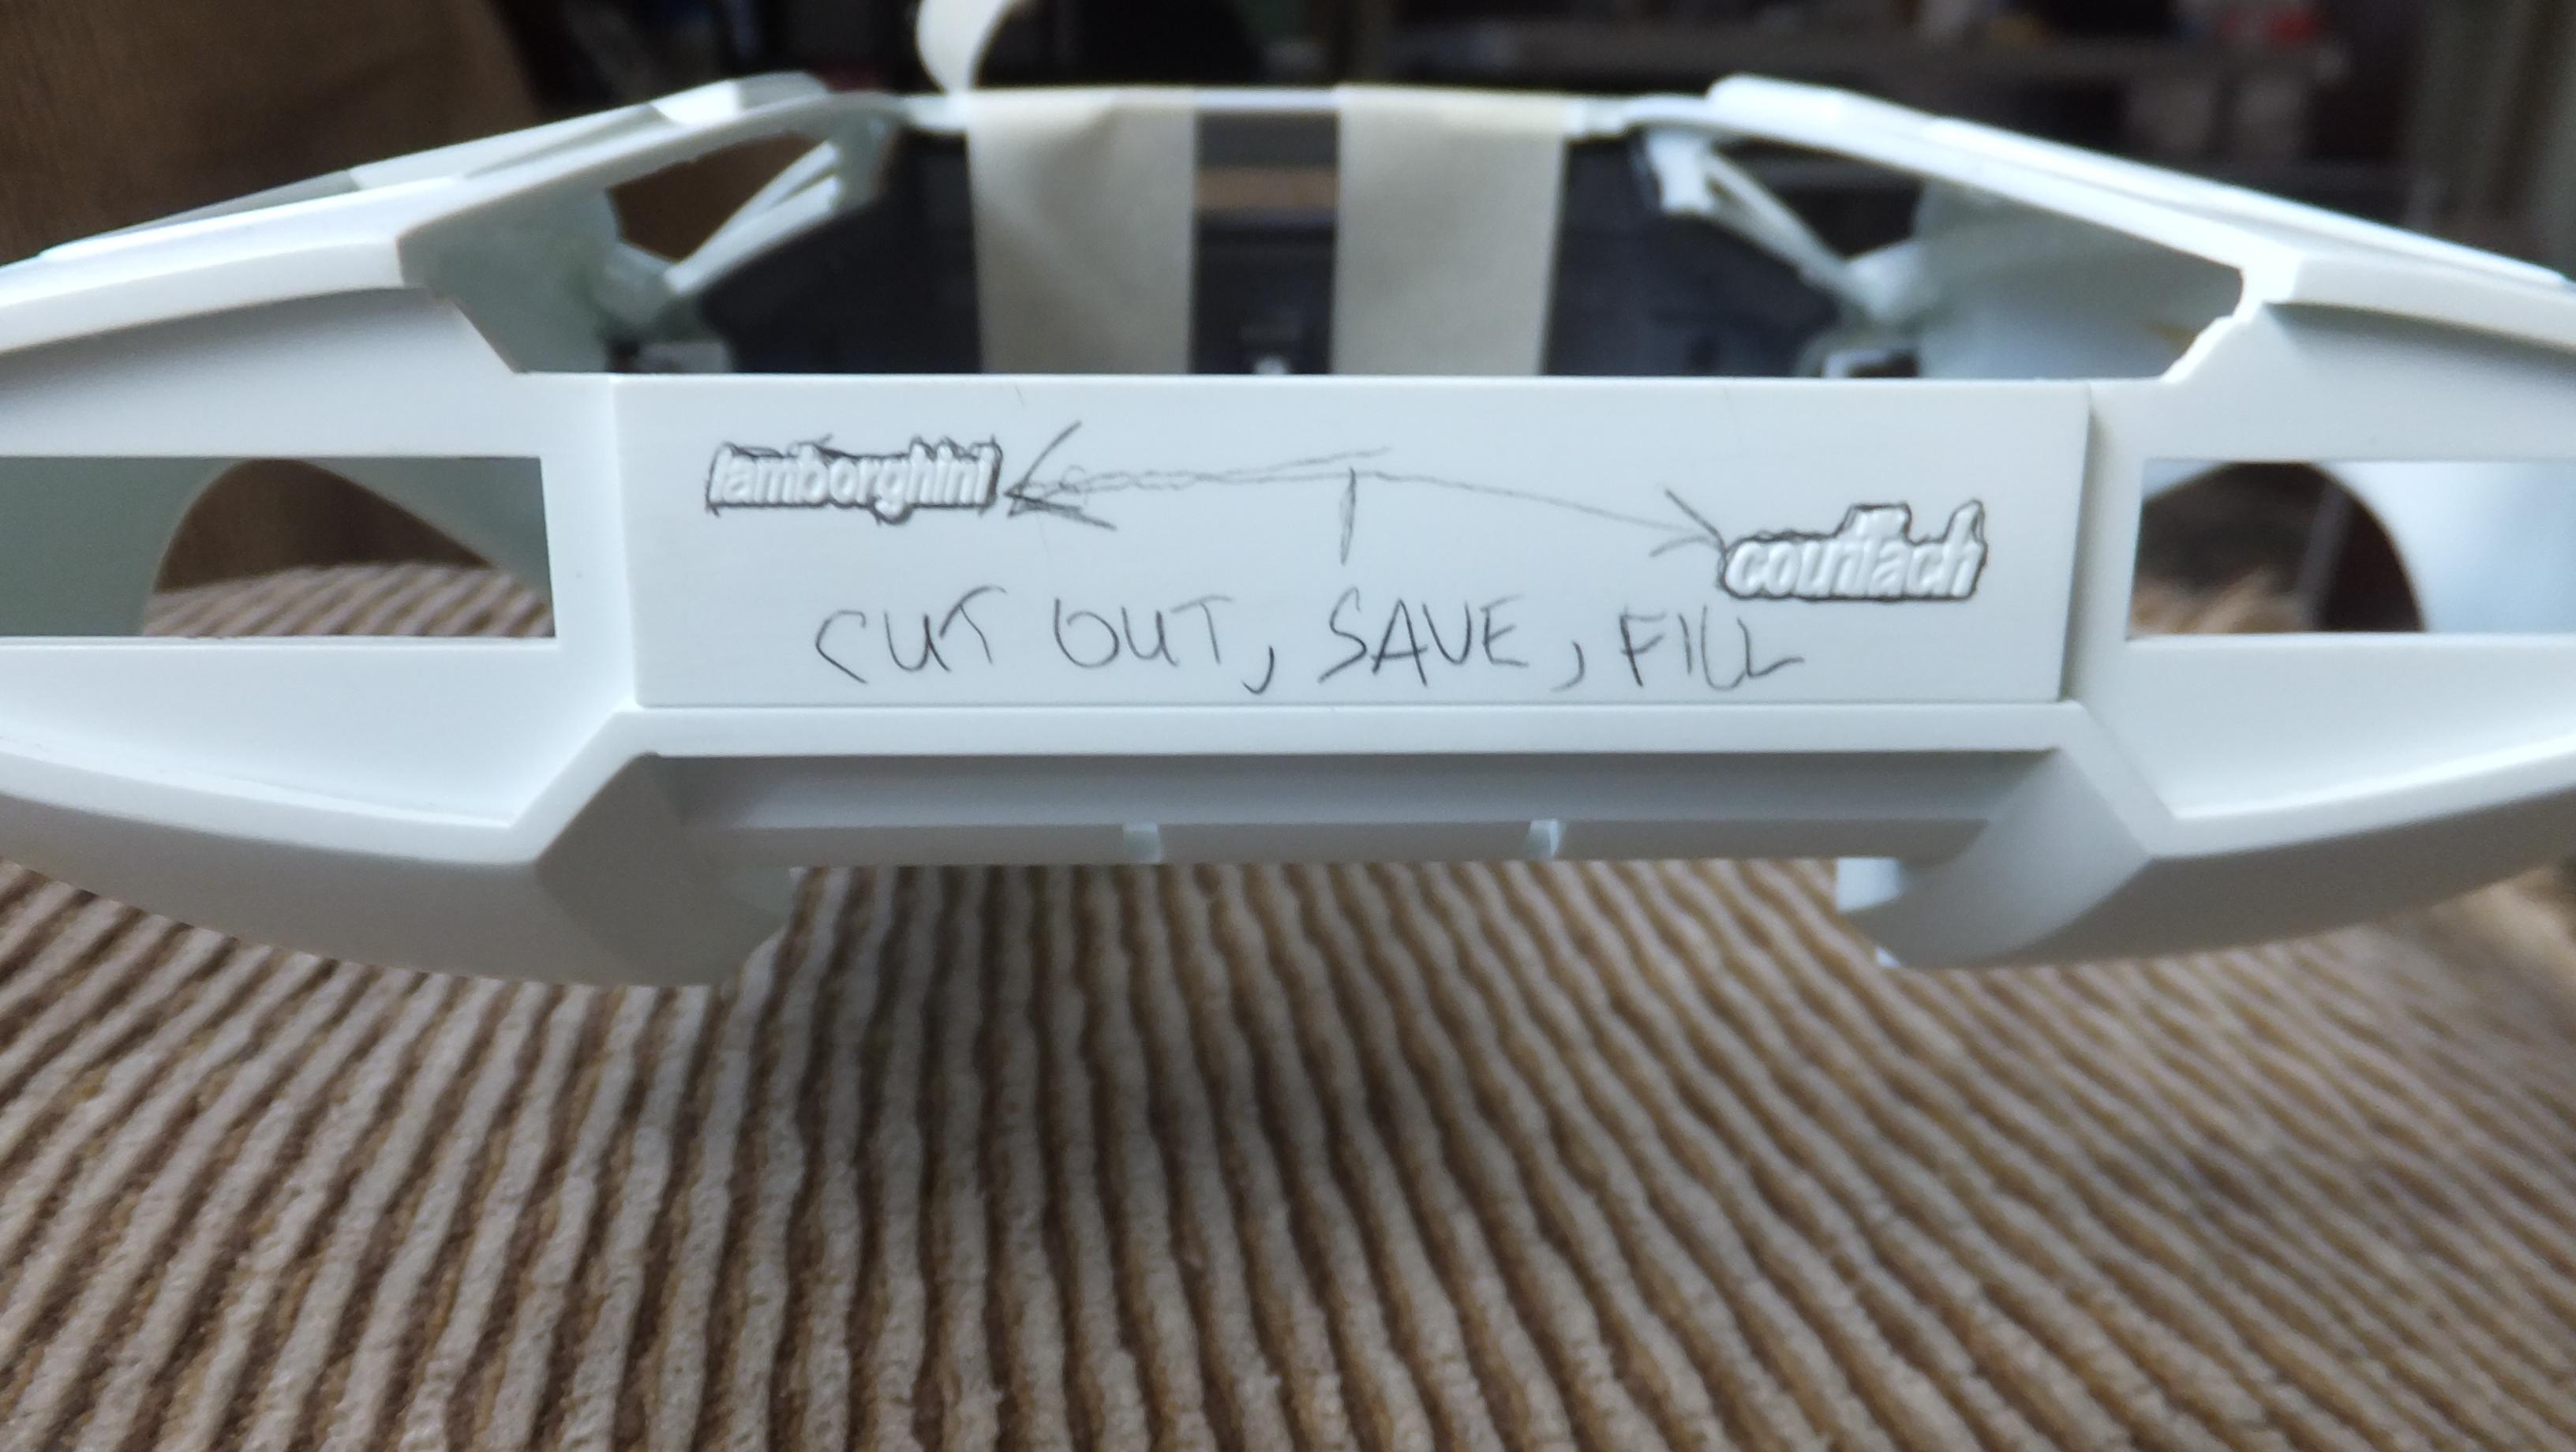
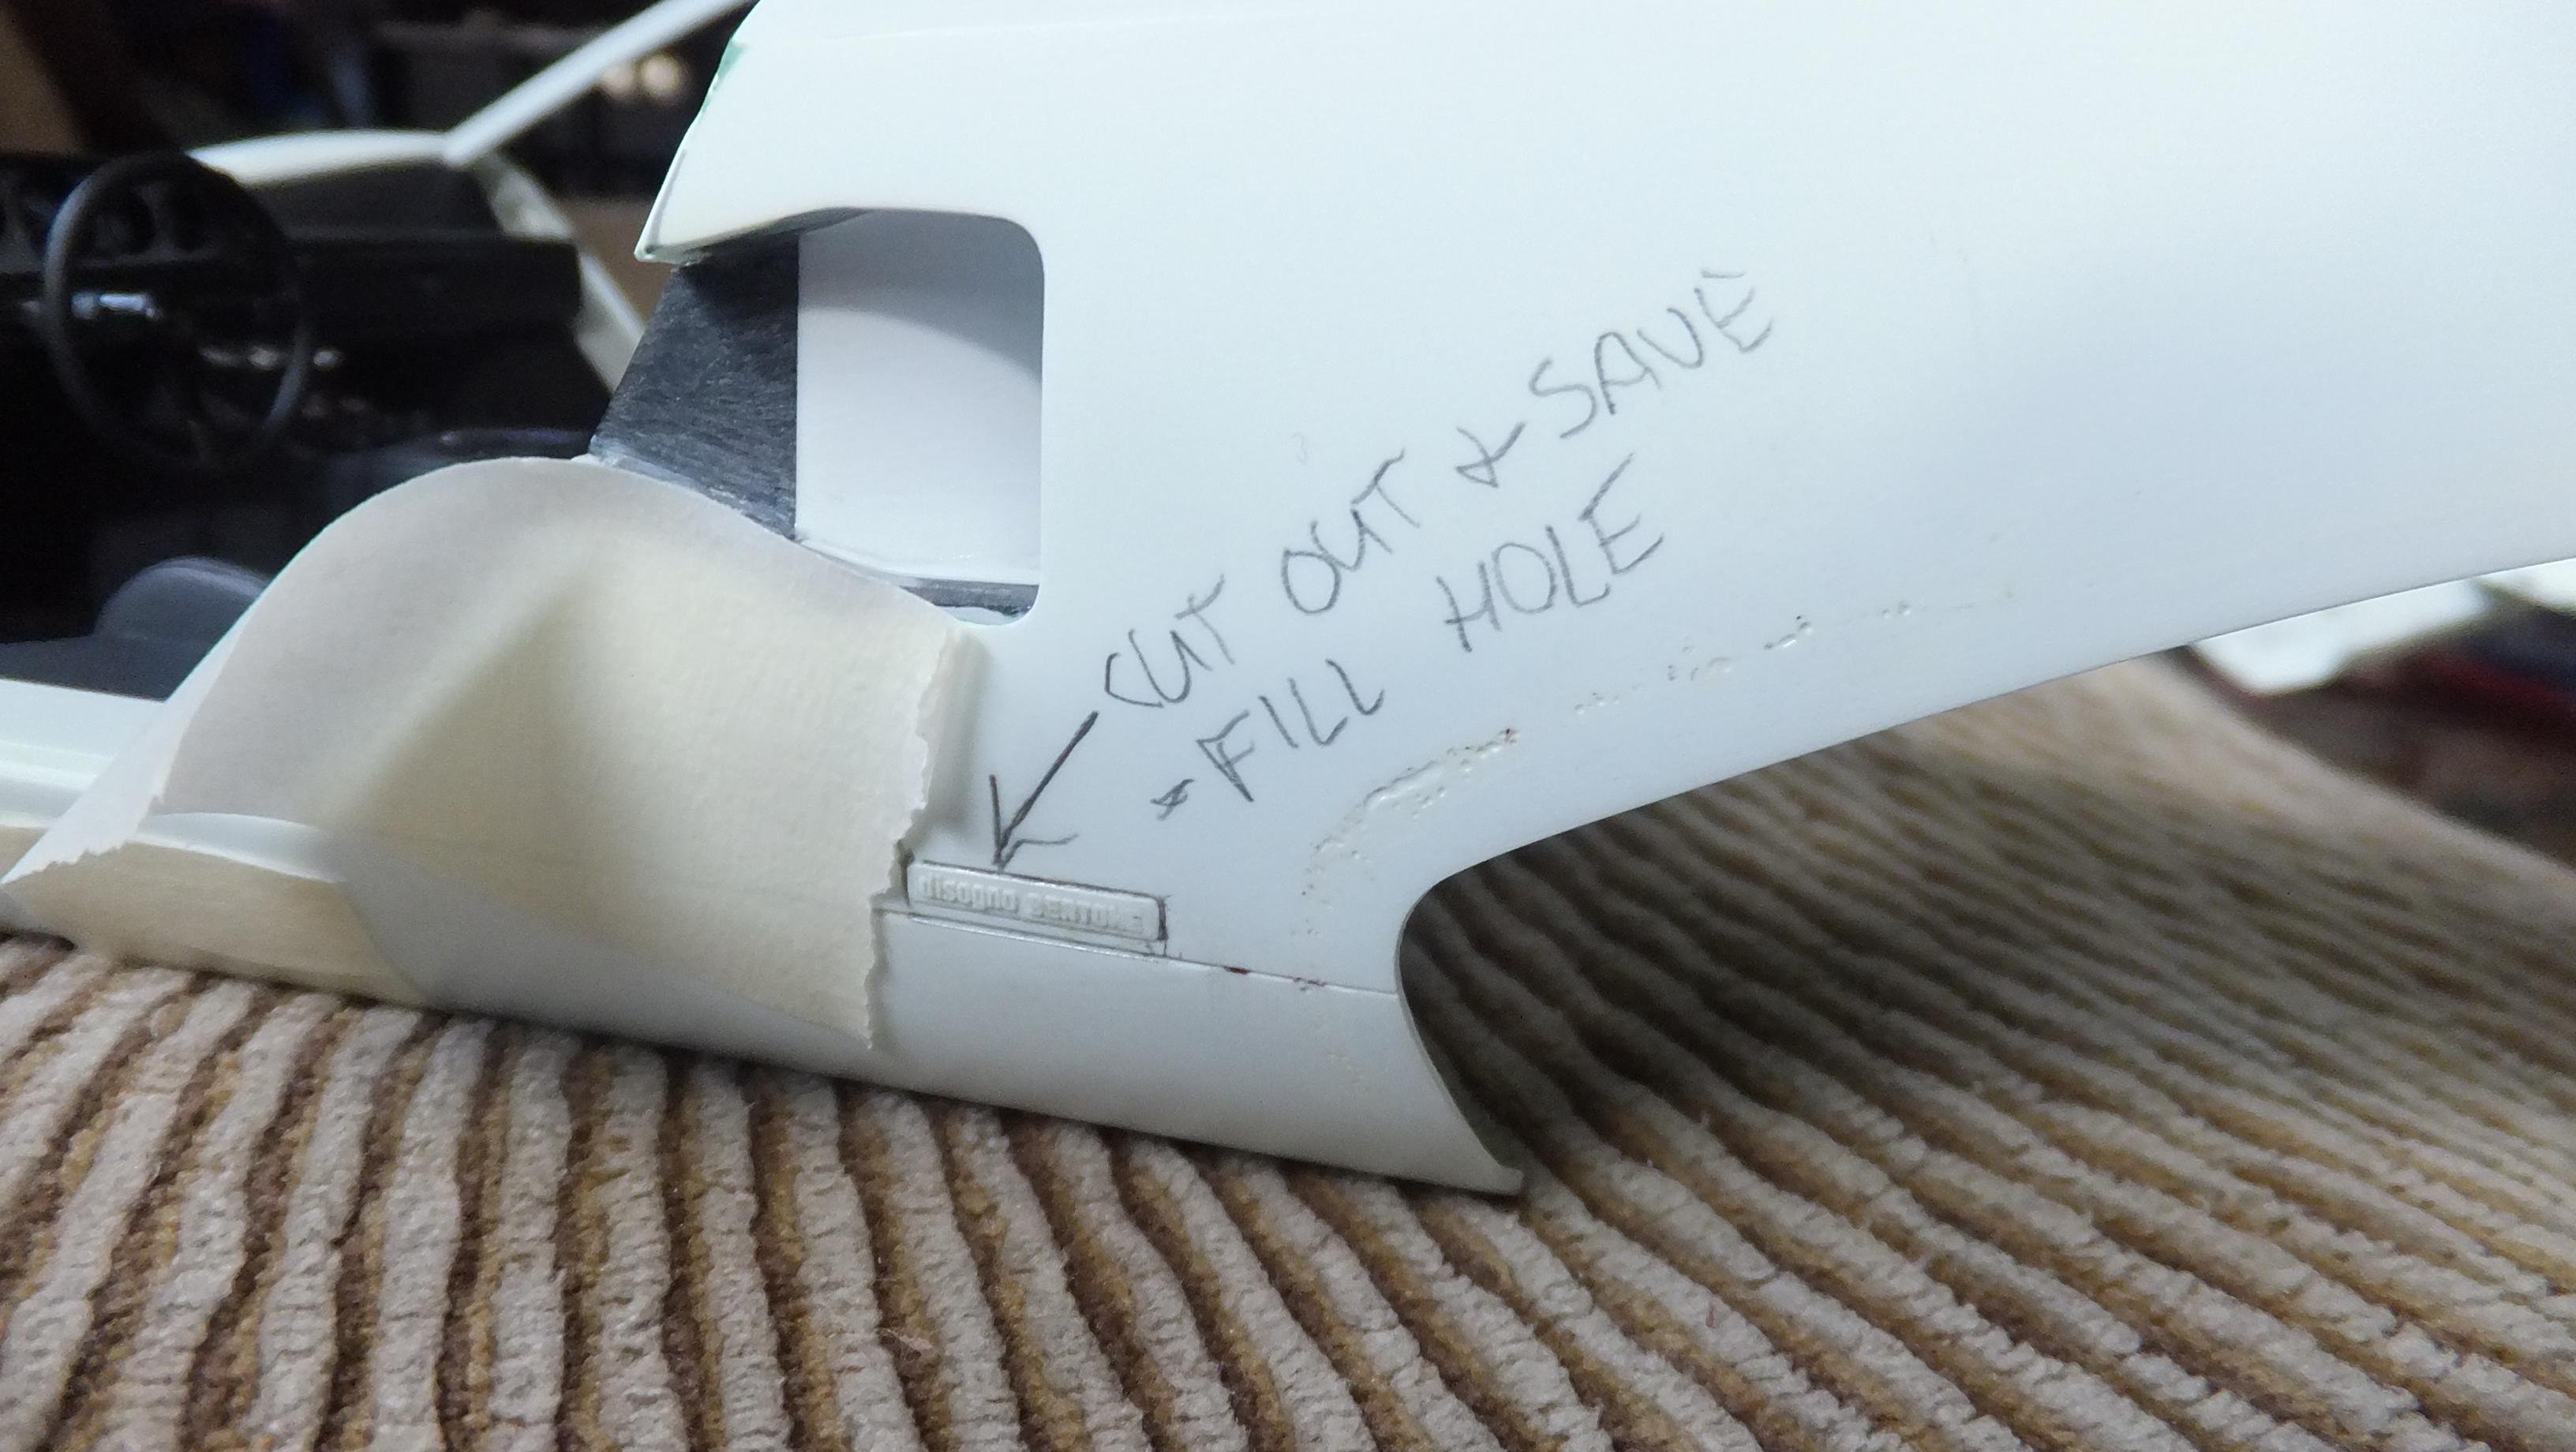
Hey, everyone!, i decided to switch things up a bit for a while, and work on the body parts. Most of the main work was done a long time ago, so it would be nice to get it under primer. I dont know about everybody els's experience with the fitment of the interior tub to the chassis, then to the body, but this kit has something off about it. It first started when i had to remove one of the locating pins under the tub because they were too close together. It fit properly to the chassis, but when you put the whole assembly up into the body (per the instructions), the fit was horrible! -dash top was at an angle...and gaping gaps everywhere! So, like i quite often do, tossed aside the instructions, and started to fit the interior assembly to the body -without the chassis. With a few tweaks here, and there, its all lining up into place waaay better. Dont know how final assembly will be by doing it this way, but the interior will meet the body the way it should, and thats all i care about. -Photo 1; I decided the best way to do the doors, was to glue in the interior bit, then cut out the door pad, and work them as the separate bits they are. -Photo 2; This corner edge on both doors is too shallow, and causes finished door seatment issues. -Photo 3; These two huge openings will need to go away. -Photo 4; Test fit of the door to sill fitment, shows that the two surfaces touch too much, and not only doesnt allow for paint thickness, but either needs tape to hold them down, or your finger pressure -neither is an option, so i will need to sort it out. - Photo 5; This front sill contact has far too much space, and wont work when i make my own factory style-hinges. -Photo 6; Even though the tub is in its best position, there are tiny gaps here on either side -a bit of styrene to each door sill will fix that issue. -Photo 7; The whole door edging is at the wrong angle, which causes them to be too narrow. Its a very drastic angle that i'm pointing too. -Photo 8; This area of the tub was squared, but had to be cut at an angle in order for better roof contact, as well as clearing an area for me to mount the factory hinges i will be making. -Photo 9; Here is the off-angle of the back sill/door edge area. -Photo 10; The way the kit goes together would leave a huge square hole here, but since the front sill there needs to be pulled back, it will close it up nicely. -Photo 11&12; I tried to find decals, or PE for these scripts, but found nothing. Then i tried different ways of making molds of them -no success. The only option left, is to cut those buggers out...thin them...fill the holes with styrene, then i will be able to paint them separately without worry of losing crisp detail due to the painting process. Sounds like alot of work, but it isnt really, and will look waaay better!, as well as using more of the original kit. Outcome: The easiest way for me to fix all the door issues, and to get more realism, is to remove the door edges...make new ones, and make all new door cards, so thats all next -AFTER i install the brakes, and wheels/tyres.
-
Lancia Beta Montecarlo
Dann Tier replied to afx's topic in WIP: Other Racing: Road Racing, Land Speed Racers
Its looking Fantastic, Bud!!!!....whats next for it? -
Otaki 1/12 Lamborghini Countach Twin Turbo...Mission Statement
Dann Tier replied to Dann Tier's topic in WIP: Model Cars
Thanks, Bud! -I know...i know, lol....hopefully soon... -
Otaki 1/12 Lamborghini Countach Twin Turbo...Mission Statement
Dann Tier replied to Dann Tier's topic in WIP: Model Cars
Thanks, Bud!, i hope you can get back into full swing as well!!! -
FANTASTIC bumper, Bud!!! killer approach angle!!!!
-
Looking GREAT!!!!