Chariots of Fire
-
Posts
2,788 -
Joined
-
Last visited
Content Type
Profiles
Forums
Events
Gallery
Everything posted by Chariots of Fire
-

M-20 Prime Mover
Chariots of Fire replied to Chariots of Fire's topic in WIP: Model Trucks: Big Rigs and Heavy Equipment
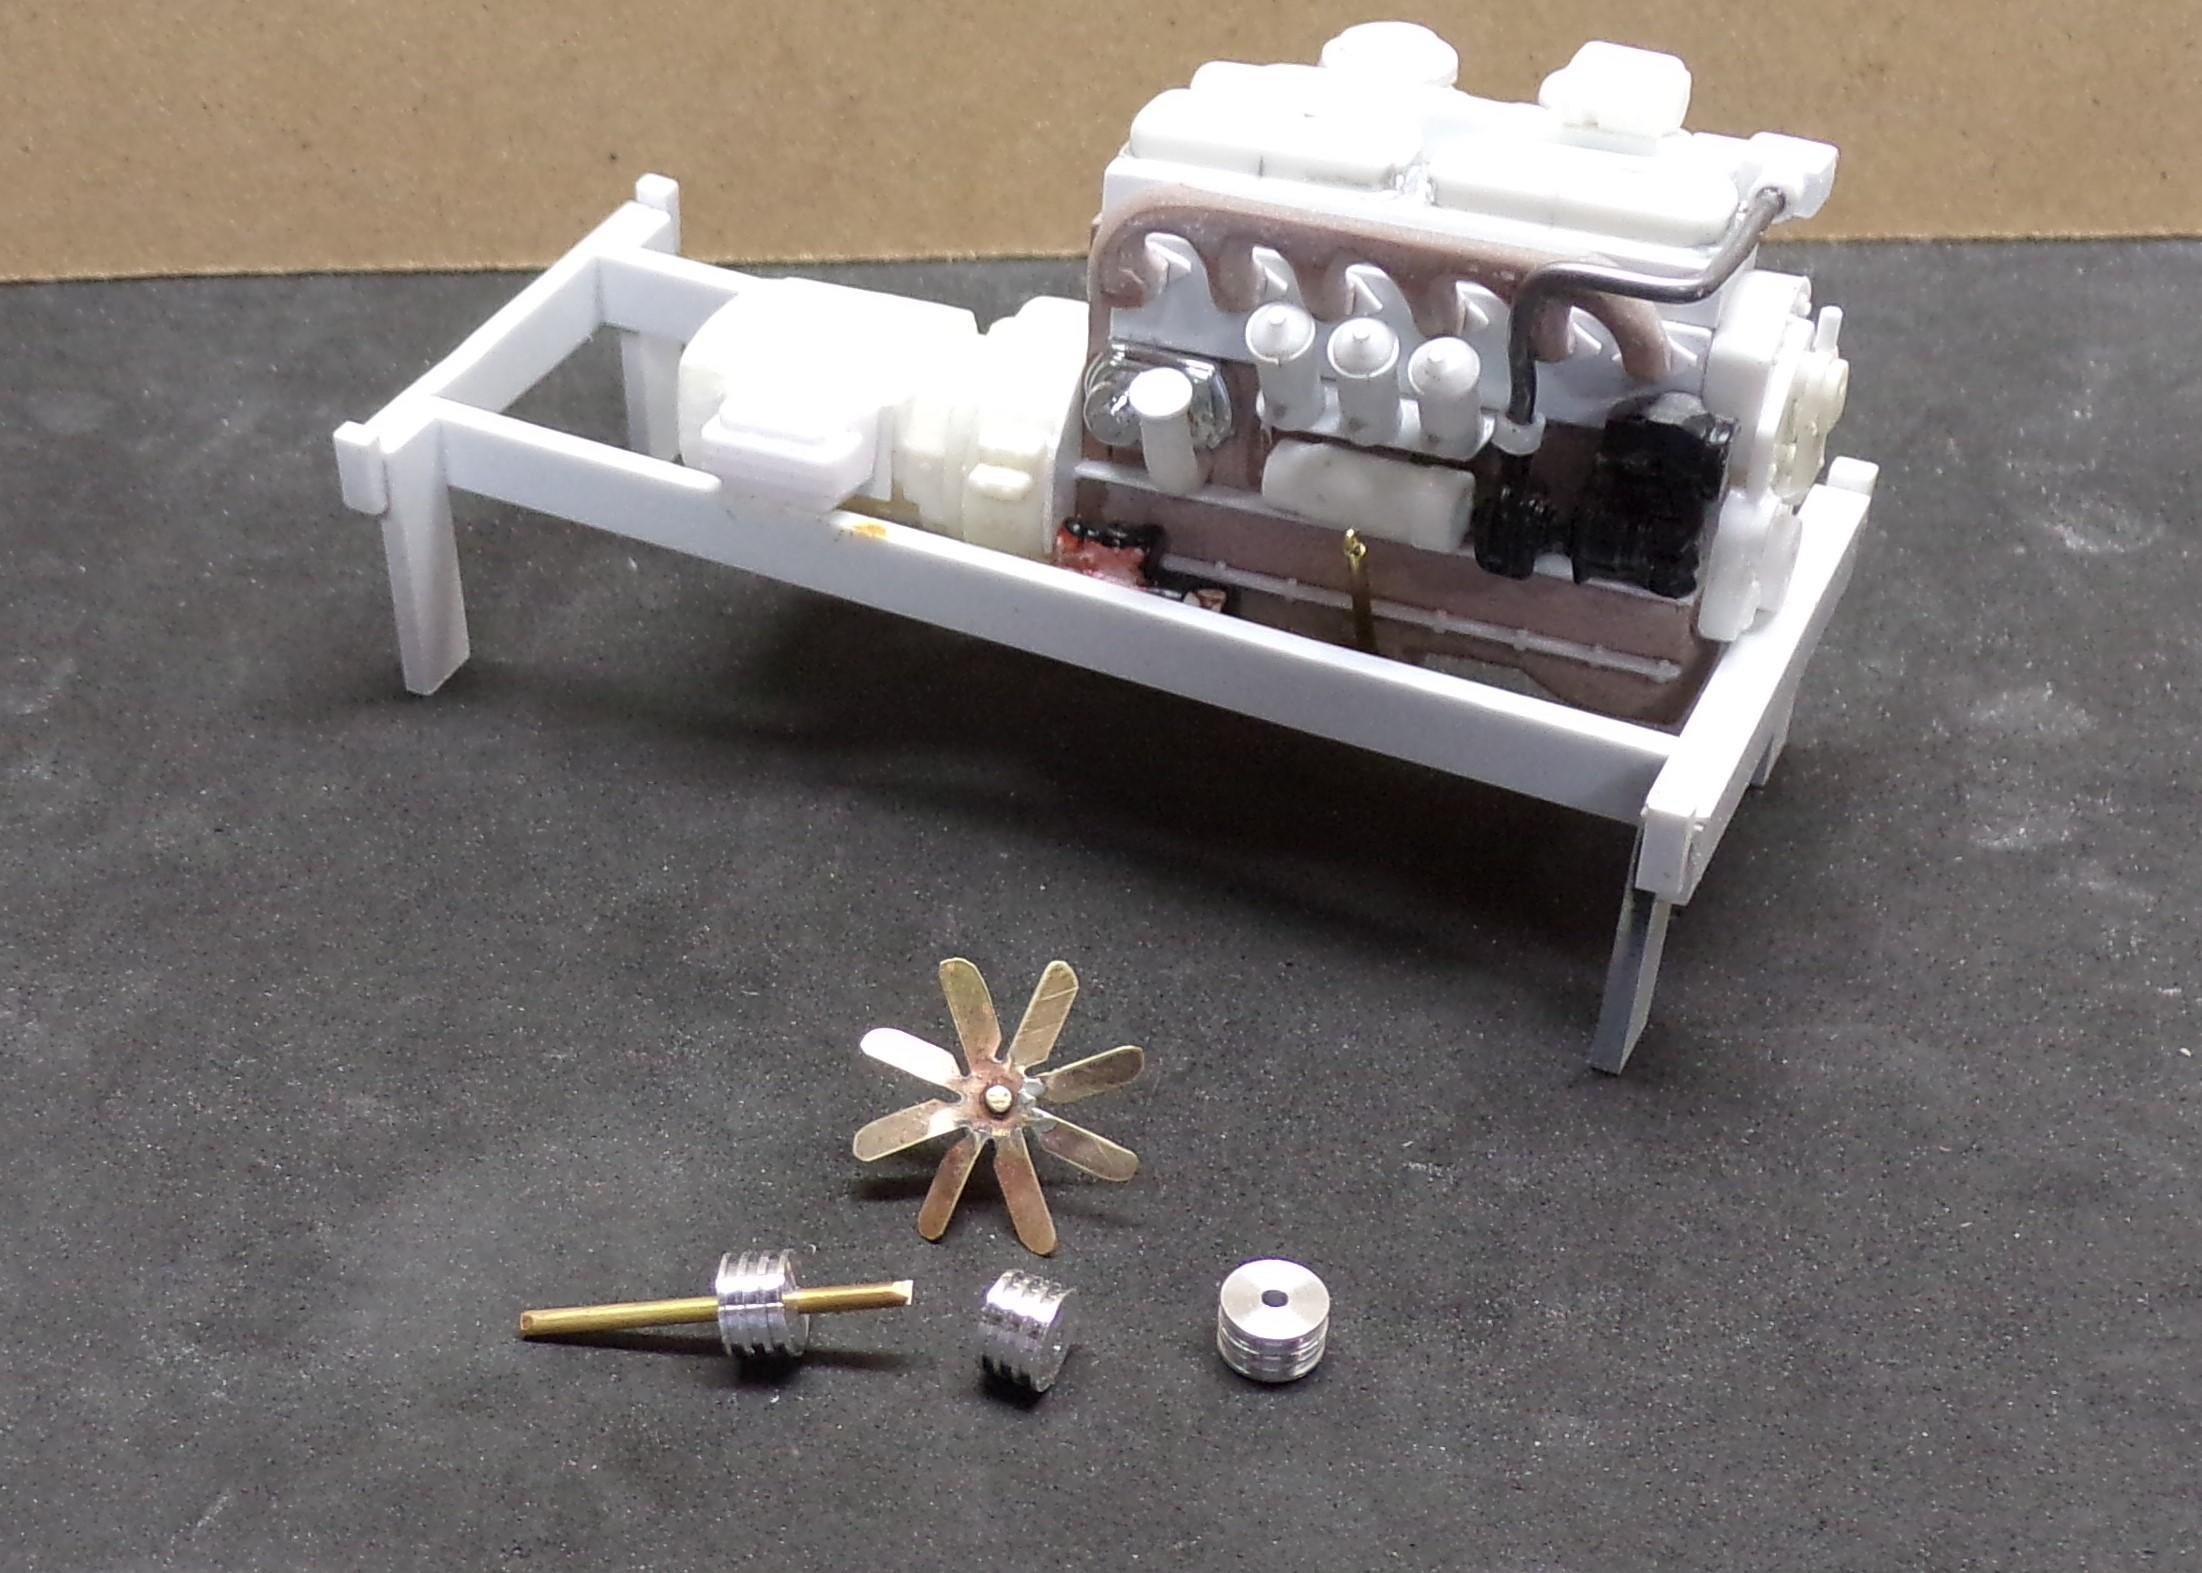
Got the 8 blade fan and pulleys done today. Made a paper template of the fan and taped it to thin brass sheet stock. One cut on the long side of each blade and a cut on the opposite side of each blade did it. Ends were just rounded off. After cleaning up the edges, a twist with a pair of pliers on each blade and it was done. Pulleys were made of aluminum and turned to shape.
-
M-20 Prime Mover
Chariots of Fire replied to Chariots of Fire's topic in WIP: Model Trucks: Big Rigs and Heavy Equipment
Glad you like it. Got to try and make up an 8 bladed fan and some triple pulleys for the fan belts. -
M-20 Prime Mover
Chariots of Fire replied to Chariots of Fire's topic in WIP: Model Trucks: Big Rigs and Heavy Equipment
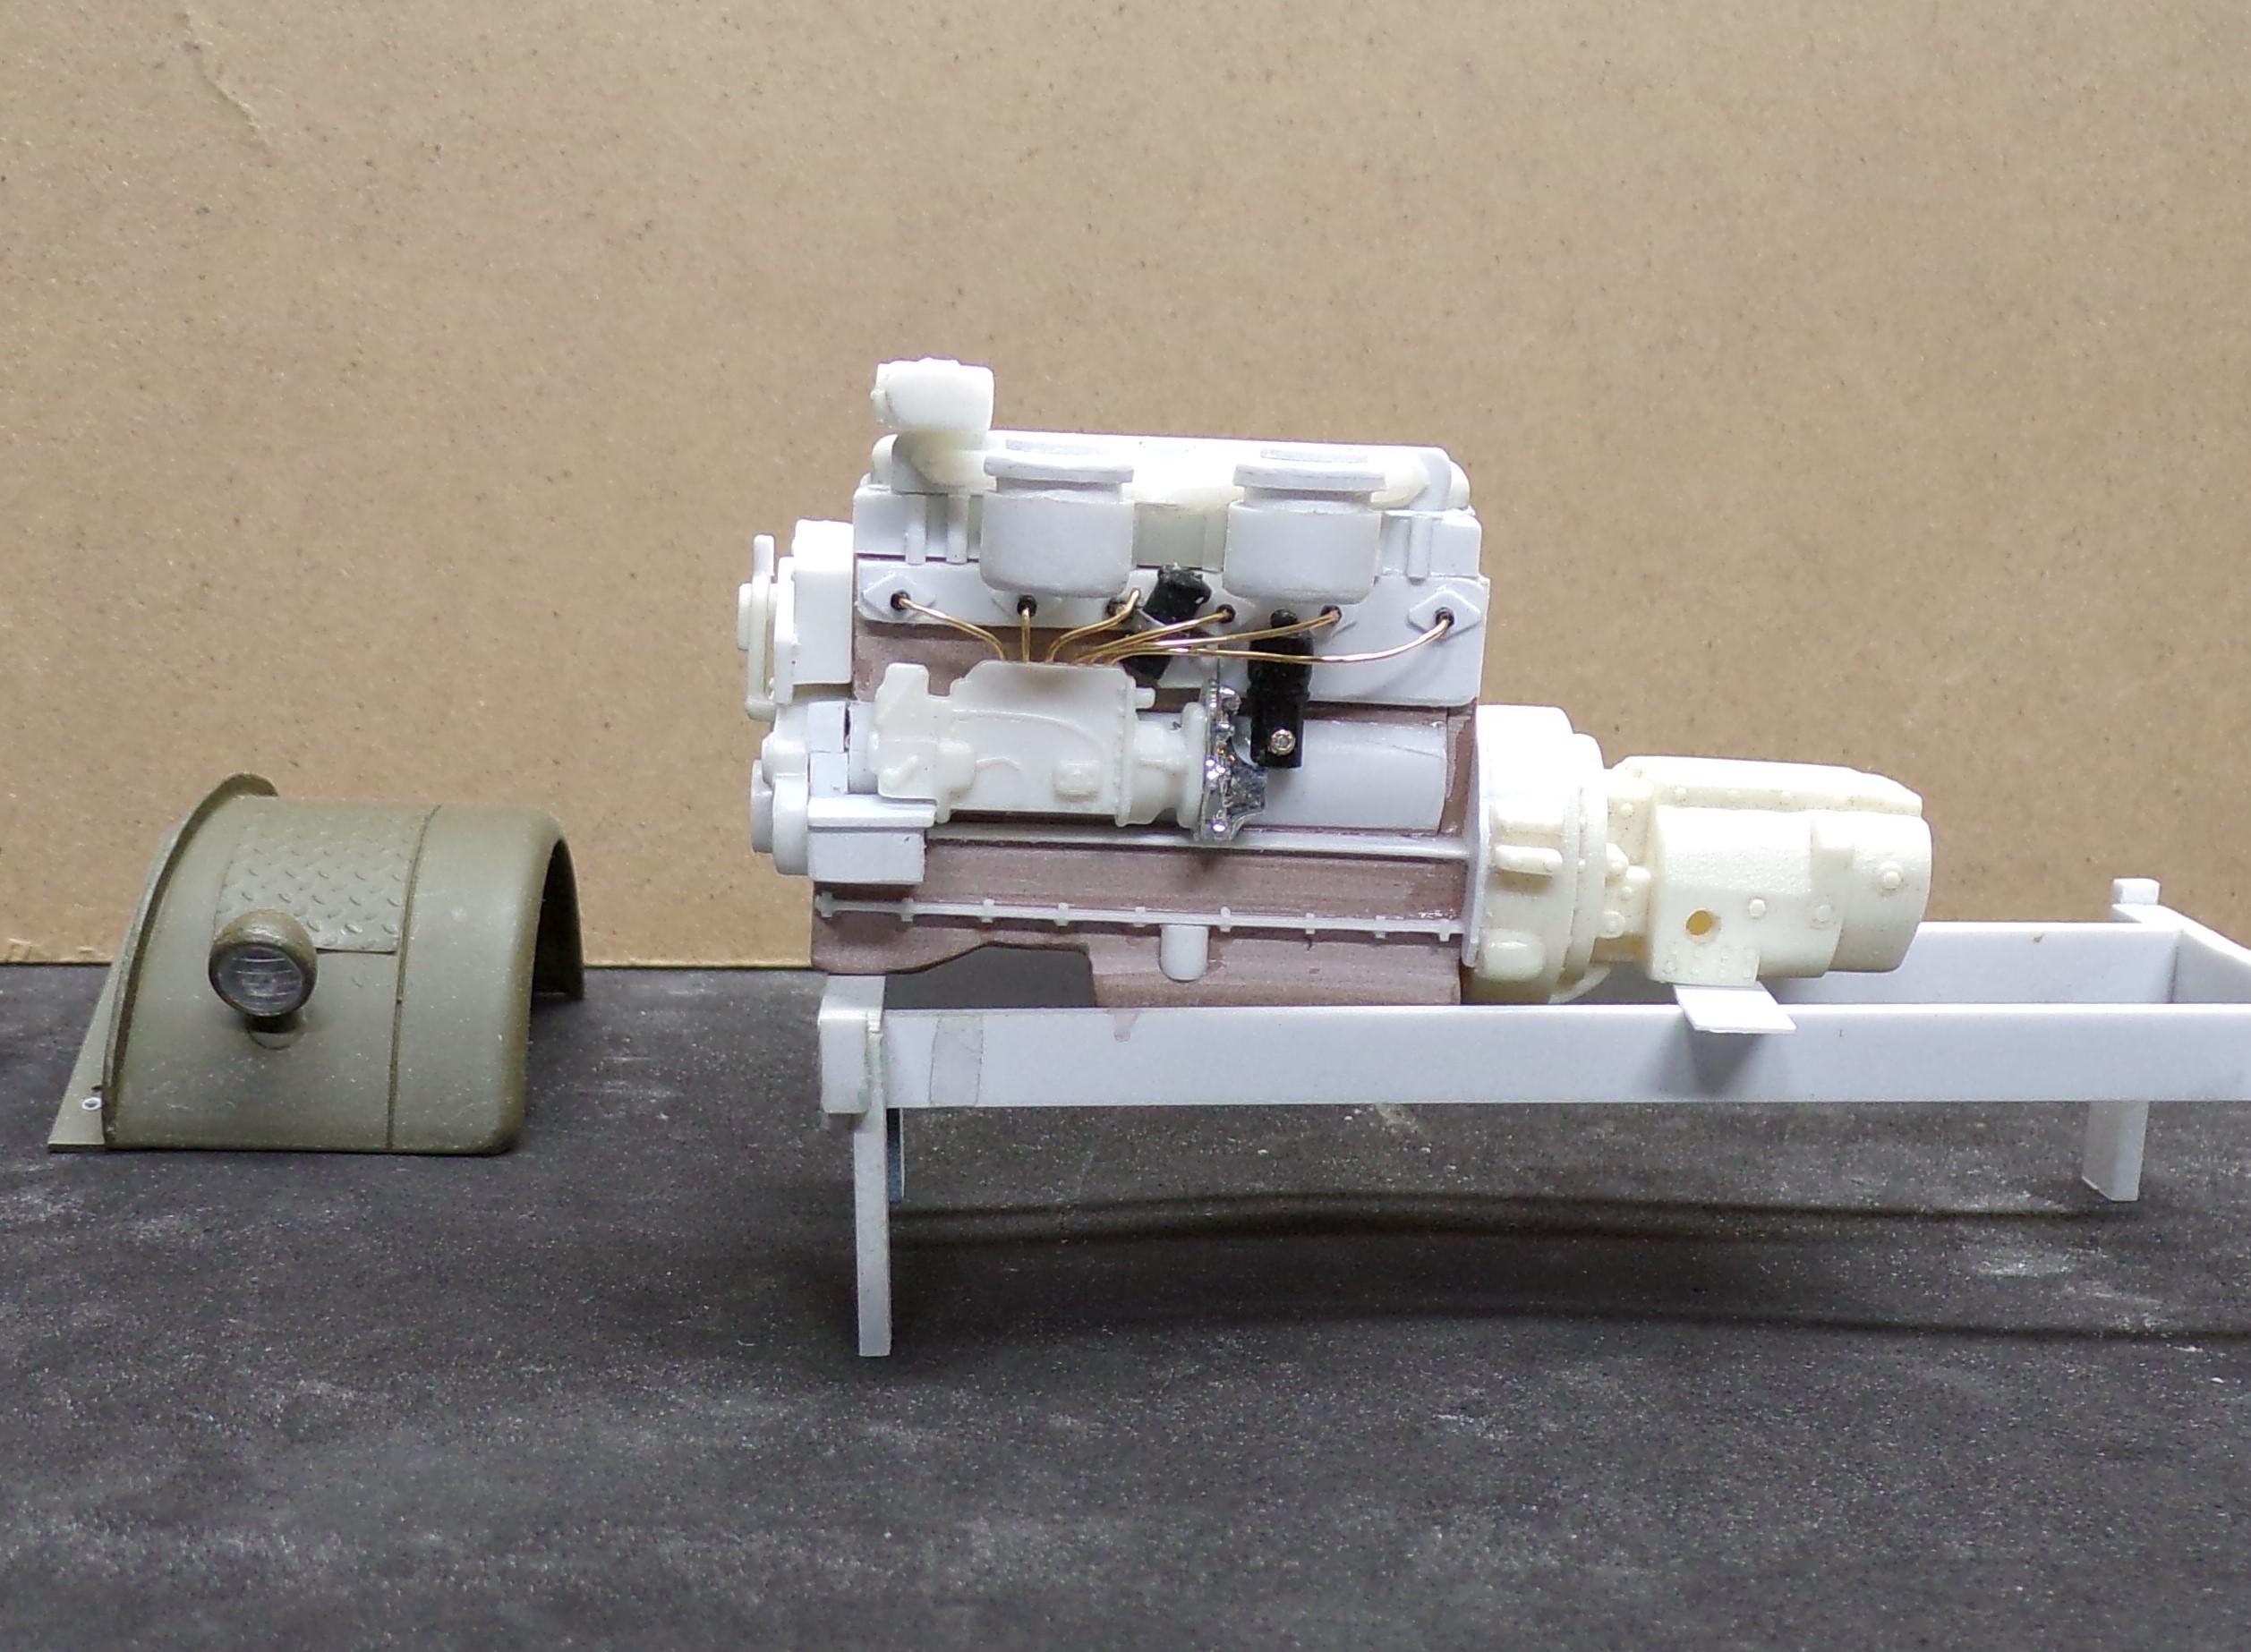
Couple of pix to show progress in the Hercules DXFE diesel. M-20 publication has some good photographic detail to use as reference. It's no where near the perfection of a 3D printed engine that is posted elsewhere on the board but a lot of it will be hidden behind the long hood of the M-20. Still has a fair amount of work to be done.
-
Nice and neat production, Jeff. A unique rig that you don't see every day.
-
Oh, Man! What a beautiful engine. I am about to start a Hercules Diesel from the 1940's. You've moved the bar way up for me! Love what you have done.
-
M-20 Prime Mover
Chariots of Fire replied to Chariots of Fire's topic in WIP: Model Trucks: Big Rigs and Heavy Equipment
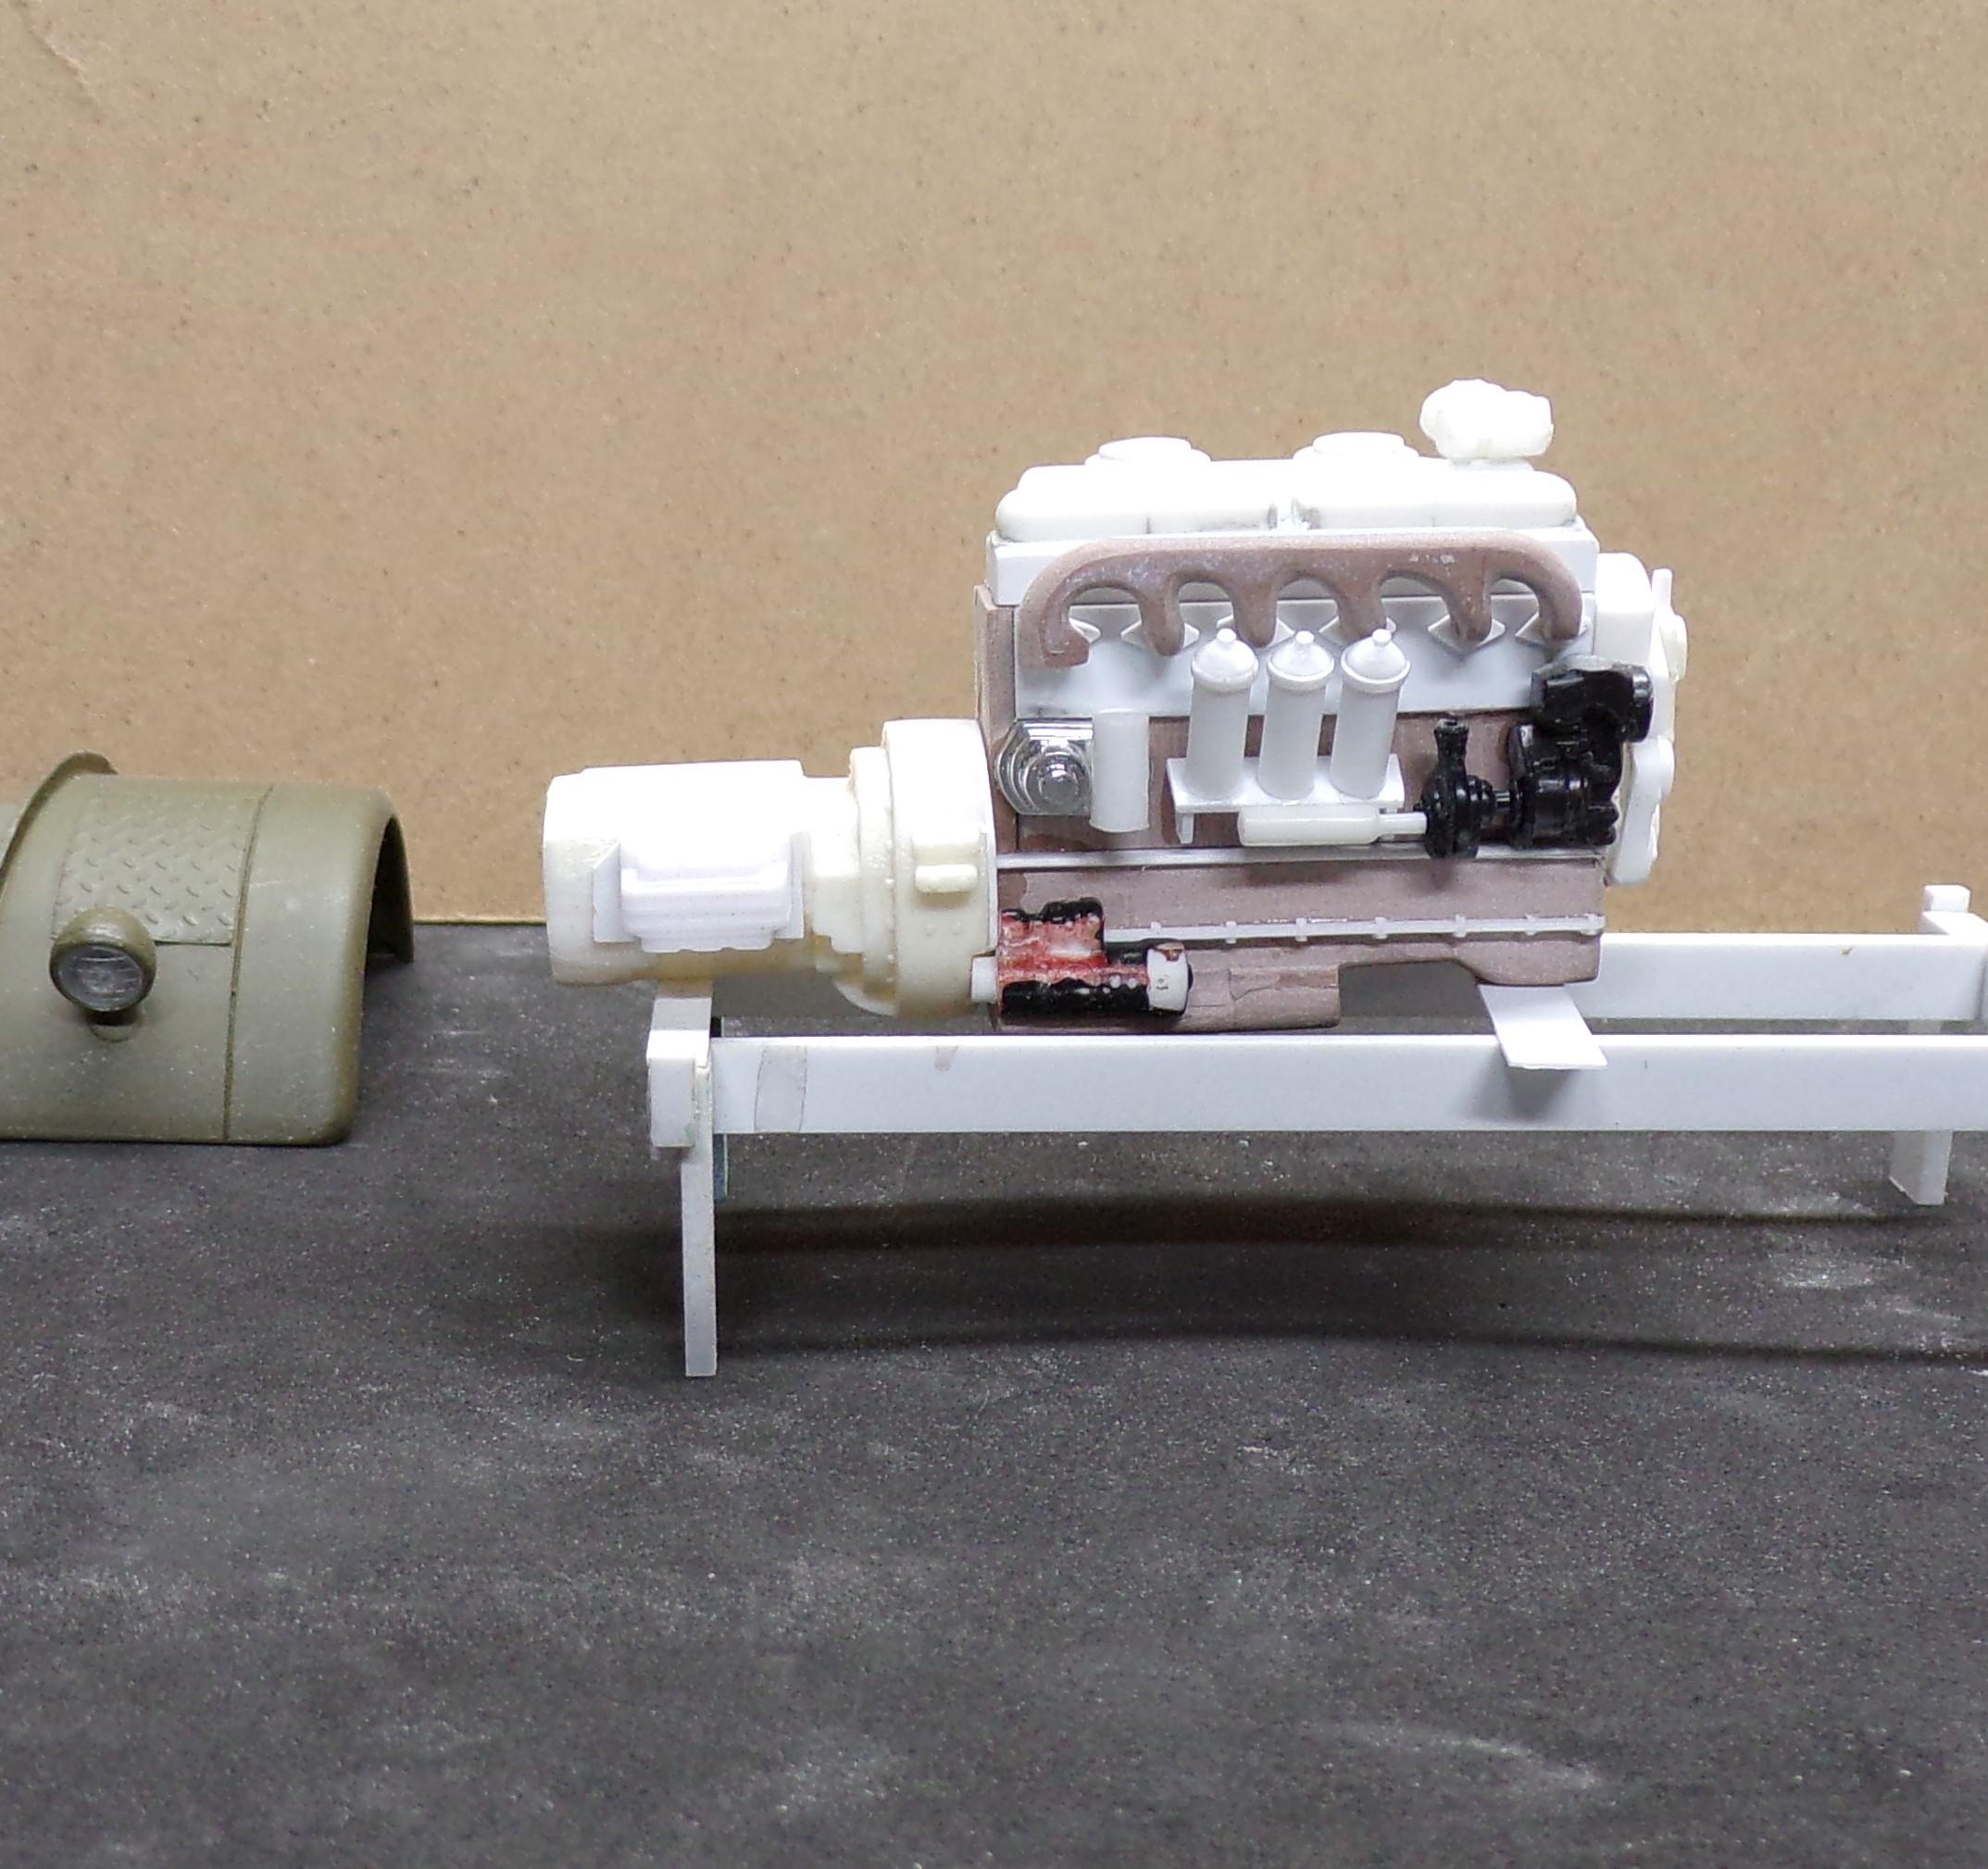
Here's a look at it with some paint. Beginning to look like something.
-
That's just a film that should polish out quite nicely after the paint has really dried. Don't clear over it. That won't do any good. The polishing will remove the film and the shine will be there for sure. Been there, done that many times when painting on a humid day. Oh, yes. I use Duplicolor all the time so I speak from experience.
-
I use both an electric dremel on a long shaft and a cordless one for some things but when it comes to pin vise size drills I go back to the pin vise. Lots more control in small difficult areas to drill in. I use carbide drills that have a 1/8" shank for the pin vise. Very, very sharp but they are brittle so it pays to be careful when drilling to keep things lined up properly.
-
G,day from an Aussie modeller
Chariots of Fire replied to STU111's topic in Welcome! Introduce Yourself
Welcome aboard, Mate! Nice work on the Camaro. This is a great place to exchange ideas and see all kinds of builds. -
M-20 Prime Mover
Chariots of Fire replied to Chariots of Fire's topic in WIP: Model Trucks: Big Rigs and Heavy Equipment
Thanks be to God for a steady hand and reasonably good eyesight!! The ALPS decal was a good alignment "tool". -
M-20 Prime Mover
Chariots of Fire replied to Chariots of Fire's topic in WIP: Model Trucks: Big Rigs and Heavy Equipment
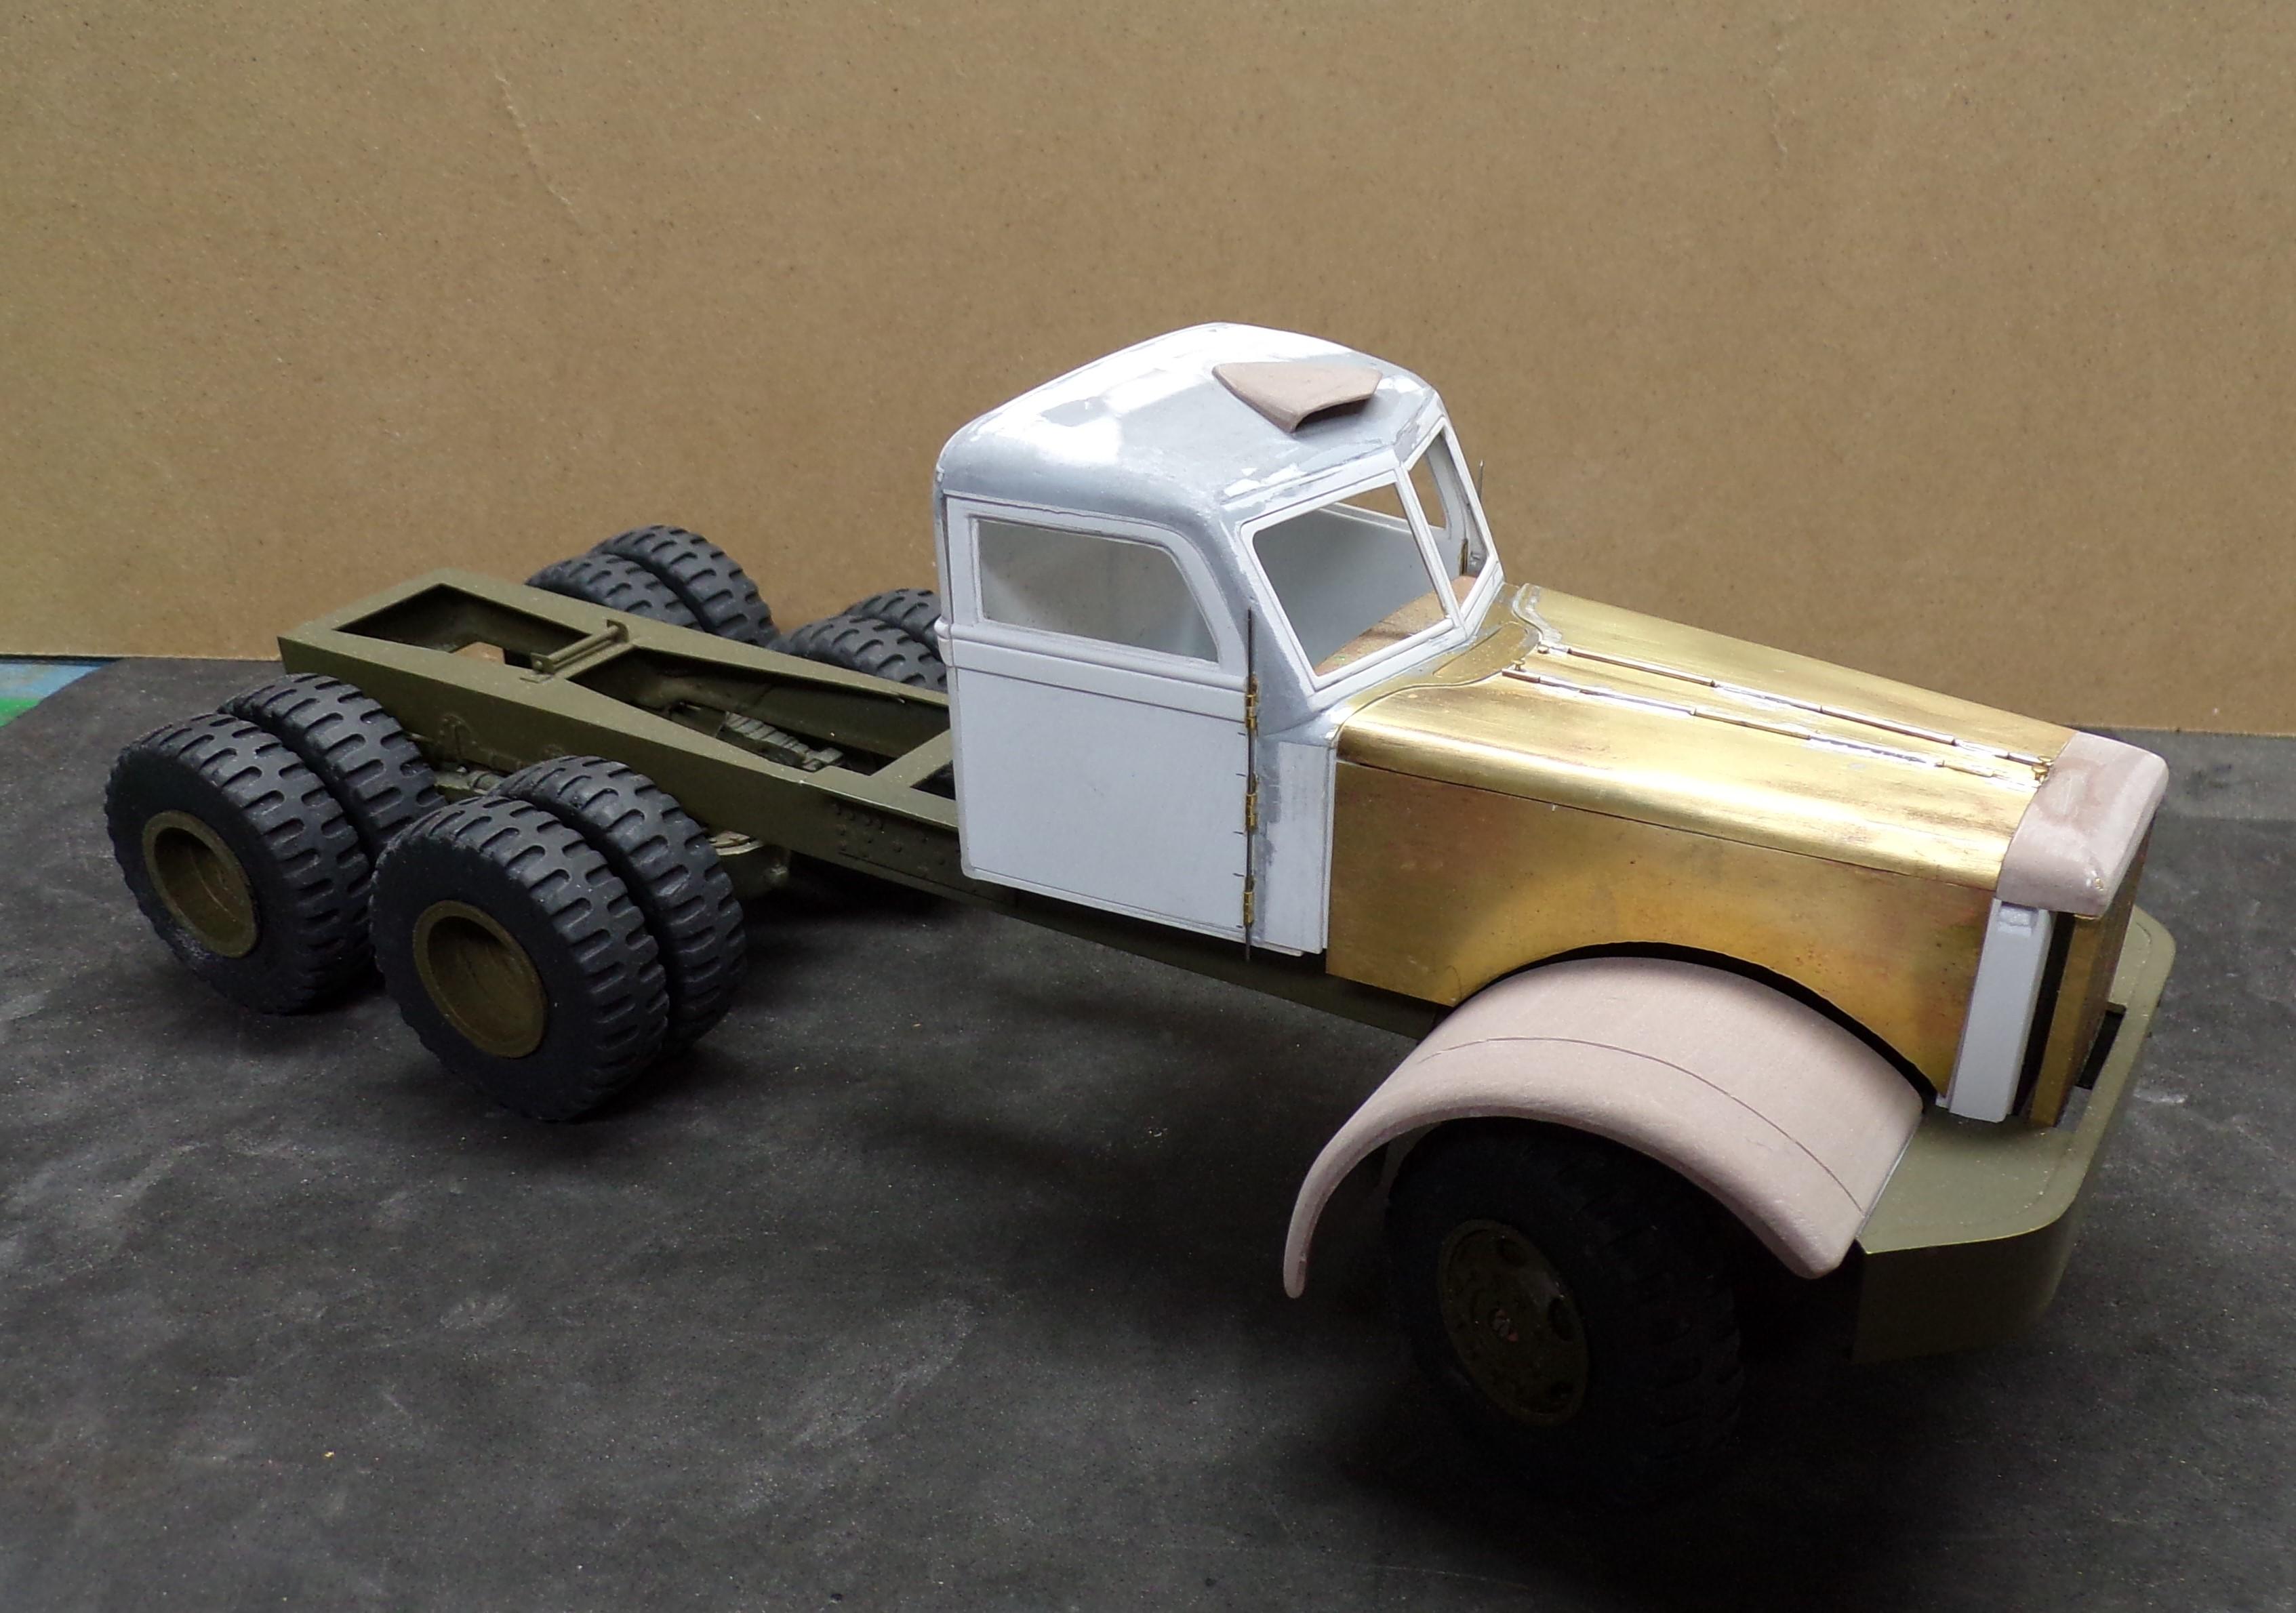
Did some adjusting last nite. Fixed the passenger side windshield, added the wipers and the strip around the fenders that fits against the hood.
-
M-20 Prime Mover
Chariots of Fire replied to Chariots of Fire's topic in WIP: Model Trucks: Big Rigs and Heavy Equipment
The cab finally got some paint and the dashboard is in place. Still work to do on the inside of the cab with seats, pedals, levers and steering wheel. The louvers on the hood sides are done and the hood is now set for latches that will hold it down in final position. Progress is slow but progressing. Windshield glass is in place but the right side piece needs to be removed and reset. Photos really reveal flaws that are not apparent to the eye!!
-
The ALPS works pretty good as well. Have made dozens of plates for several of my builds. Fire and police plates are sometimes different and neat to do.
-
M-20 Prime Mover
Chariots of Fire replied to Chariots of Fire's topic in WIP: Model Trucks: Big Rigs and Heavy Equipment
I'm not doing the windshield swingarm bracket. But I did do the cowl vent and will do the wipers. -
IH Conco
Chariots of Fire replied to Jürgen M.'s topic in WIP: Model Trucks: Big Rigs and Heavy Equipment
Will be interesting to see the printout. -
M-20 Prime Mover
Chariots of Fire replied to Chariots of Fire's topic in WIP: Model Trucks: Big Rigs and Heavy Equipment
I love a play on words! One of those things which tickles my sense of humor! -
M-20 Prime Mover
Chariots of Fire replied to Chariots of Fire's topic in WIP: Model Trucks: Big Rigs and Heavy Equipment
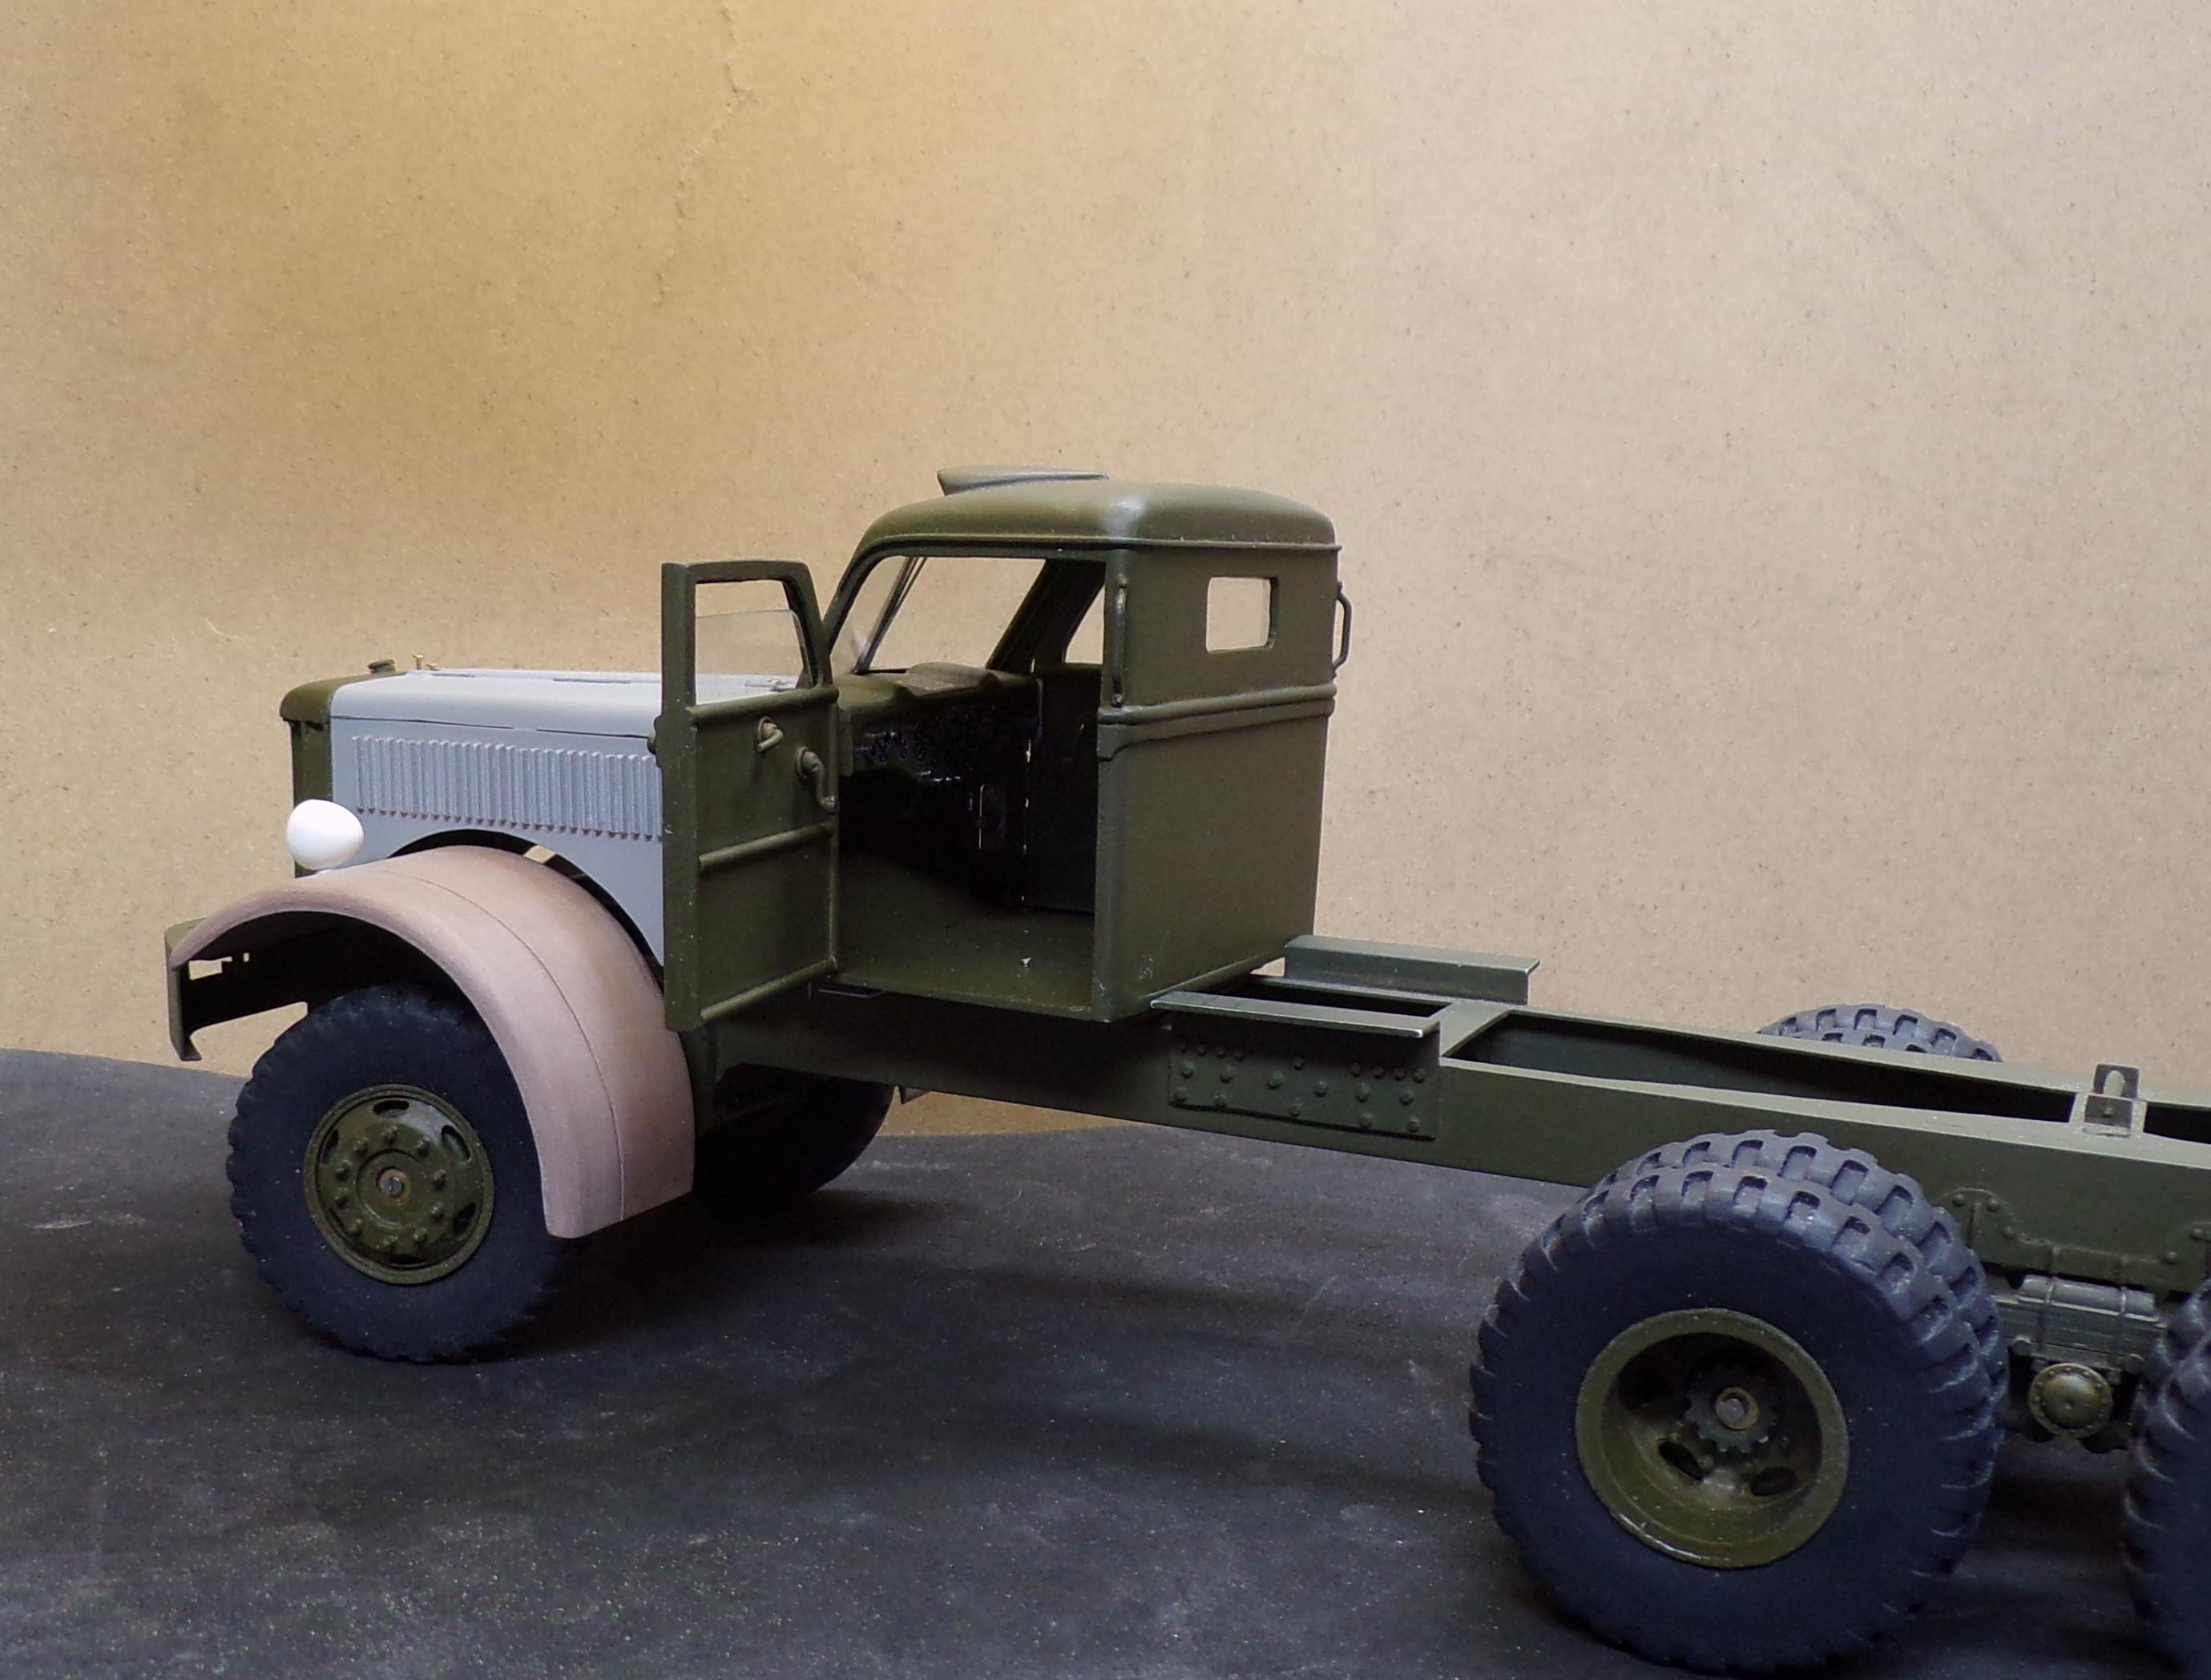
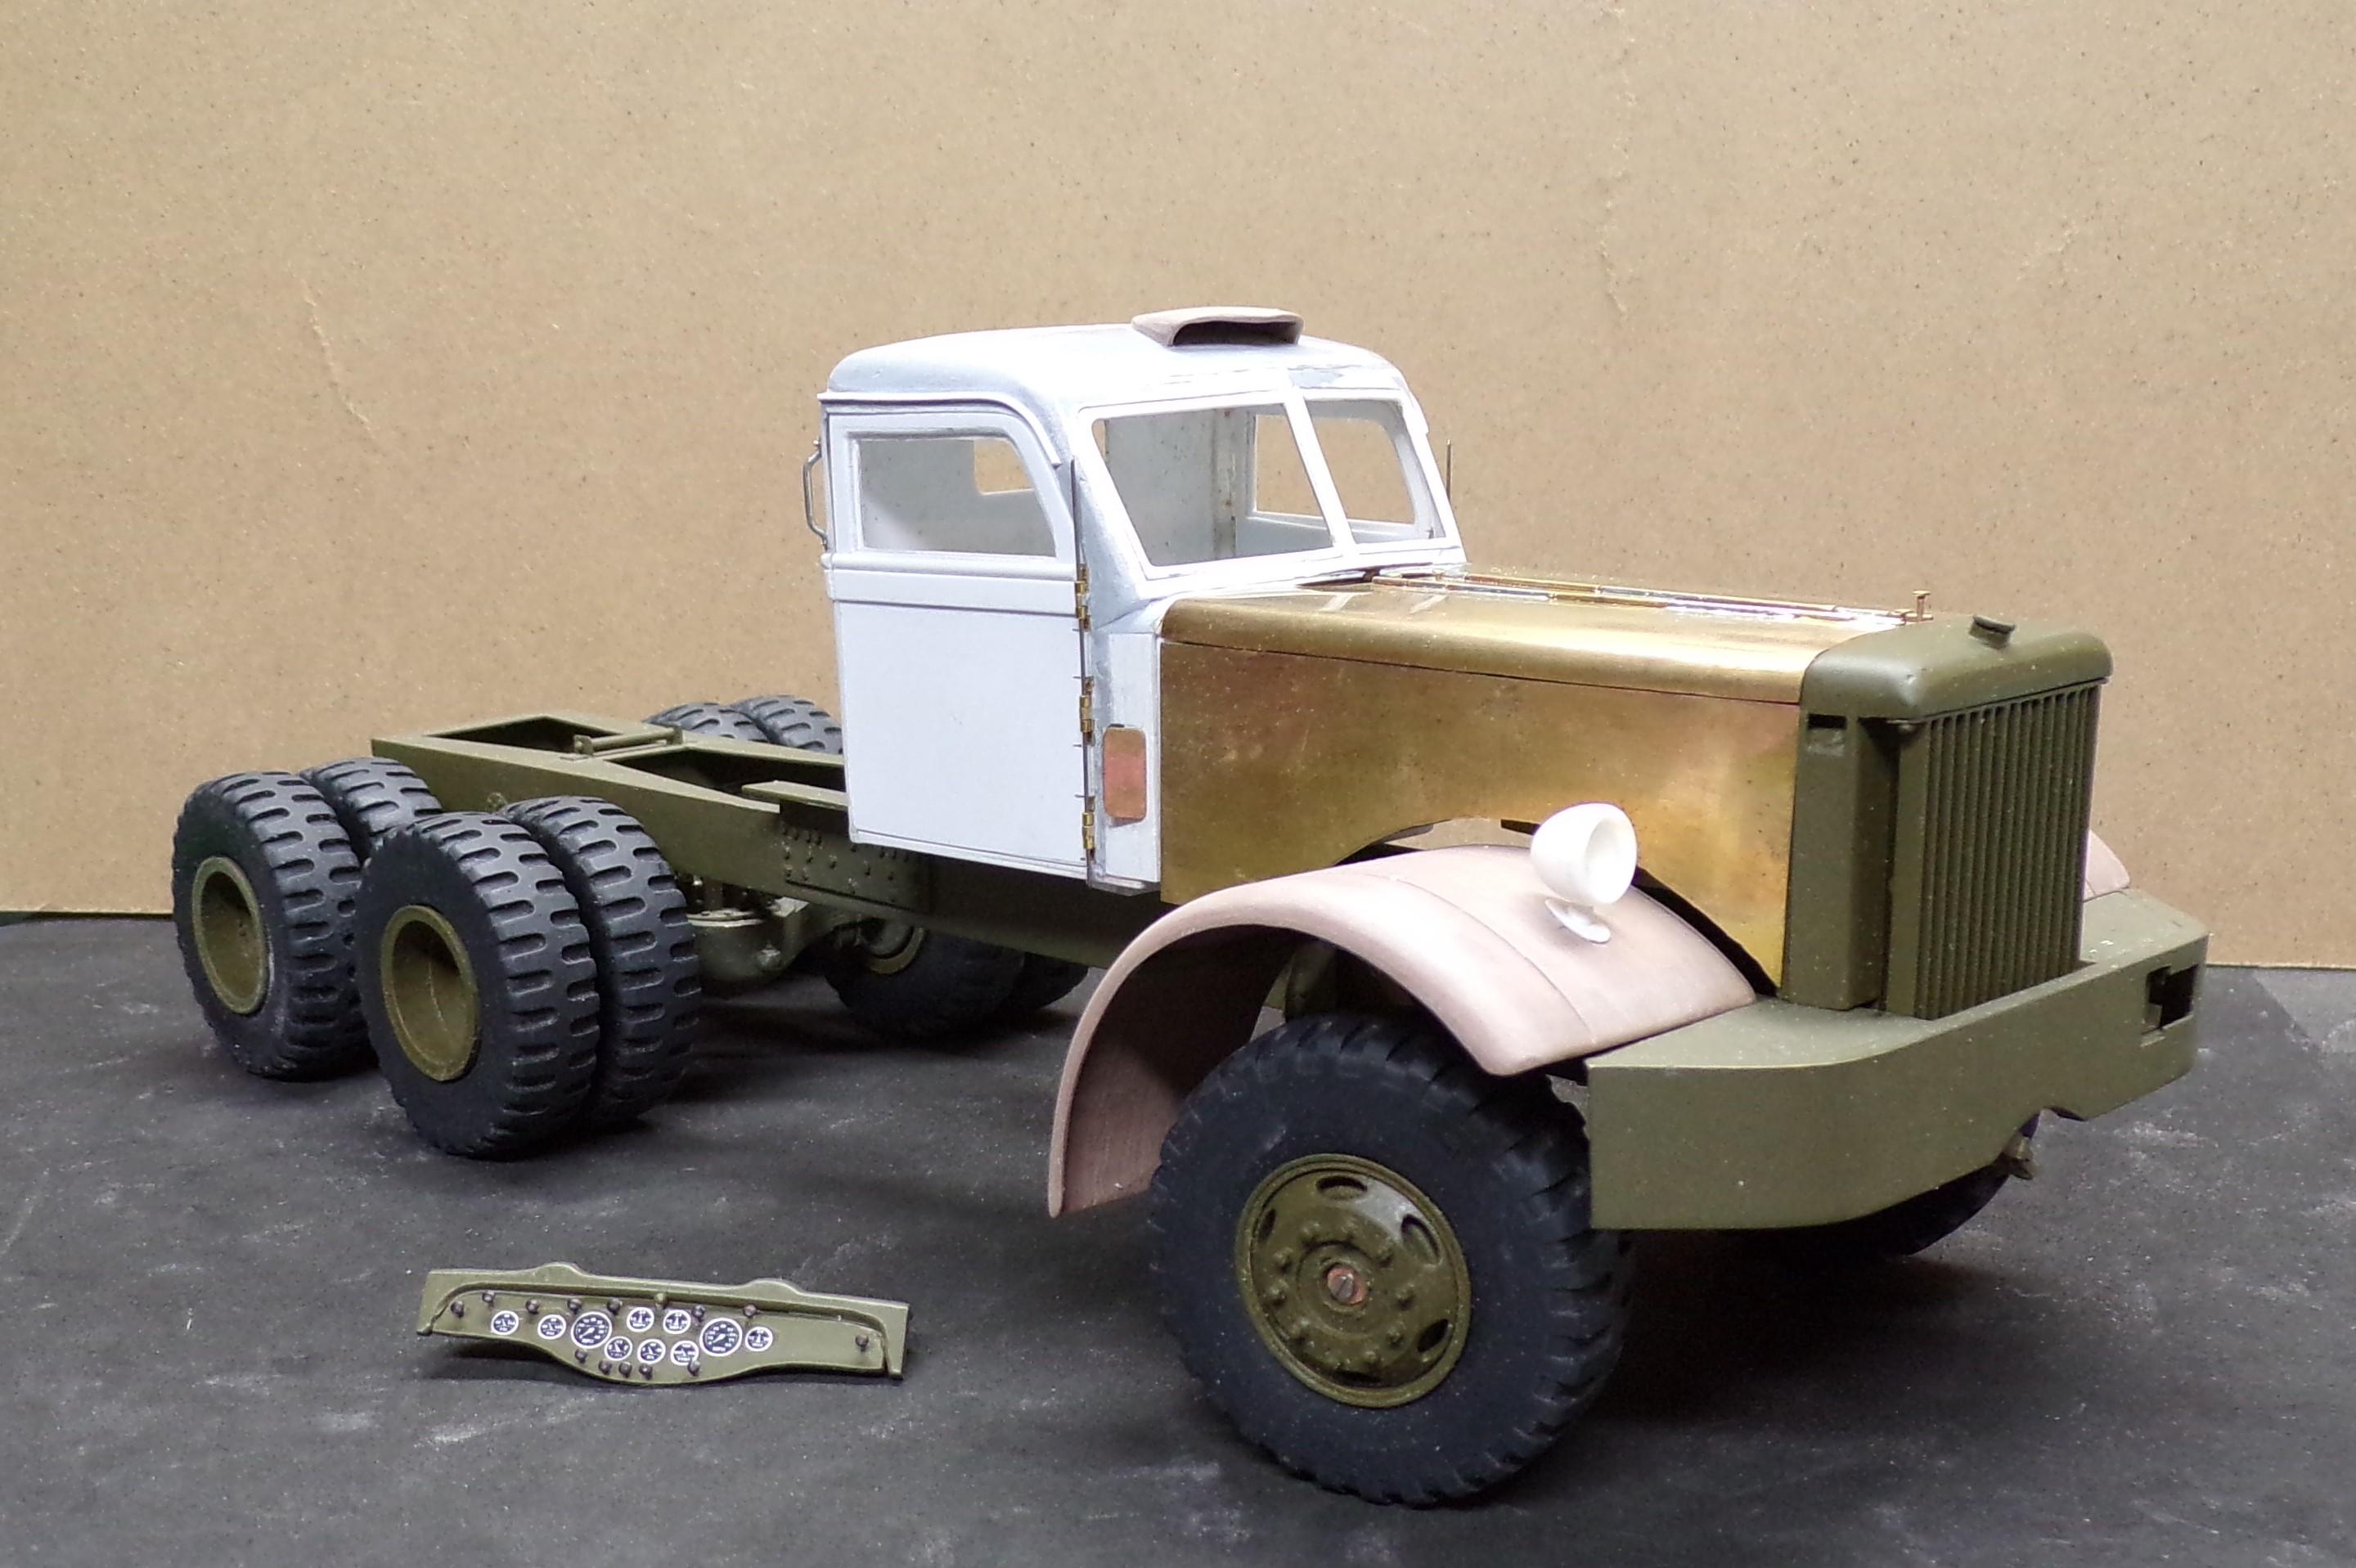
Work continues. The side vents for the cab were finished and installed. Hinges are soldered to the inside so that they can be opened or closed. It seems strange to see the direction that they open in but that is what was done. I would have thought they would open from the back so fresh air would get to the cab as the truck moved along. No so according to the publications I have. The drip edge on the cab was done as were two grab handles. The dashboard was painted and the gage cluster was done on a decal. Common pins used as knobs and switches. Headlight buckets were cast and pinned for mounting. Little things have been adjusted as the build goes along. I found out that the hood only is hinged at the top and not at the sides, even though every photo shows a clear line of separation. So I have to put in some interior braces to keep the sides from folding. (wasted some small hinges making them fold!). Every time there is a new learing curve!!?
-
M-20 Prime Mover
Chariots of Fire replied to Chariots of Fire's topic in WIP: Model Trucks: Big Rigs and Heavy Equipment
I have the dash gage layout done in decals. The instruction plates will be separate. Knobs and switches will be made from common pins. Almost ready for installation but right now I'm working on the side cab vents. One is done and opens and closes. Other side tomorrow (maybe). Cowl vent also opens and closes. -
Very nicely done! Does the Ford emblem on the hood sides get BMF? Great wheels, stance and color choice.
-
M-20 Prime Mover
Chariots of Fire replied to Chariots of Fire's topic in WIP: Model Trucks: Big Rigs and Heavy Equipment
That last photo is quite like the dash that is in the military version except for the windshield cranks. The way the military opened the windshield was by the use of knobs and slotted bars that were attached to the cab A posts and the center windshield post. The other difference is in the gage layout and the number of switches used on the M-20. Thanks for posting the pics. They help clear up what is not mentioned in the publication. -
M-20 Prime Mover
Chariots of Fire replied to Chariots of Fire's topic in WIP: Model Trucks: Big Rigs and Heavy Equipment
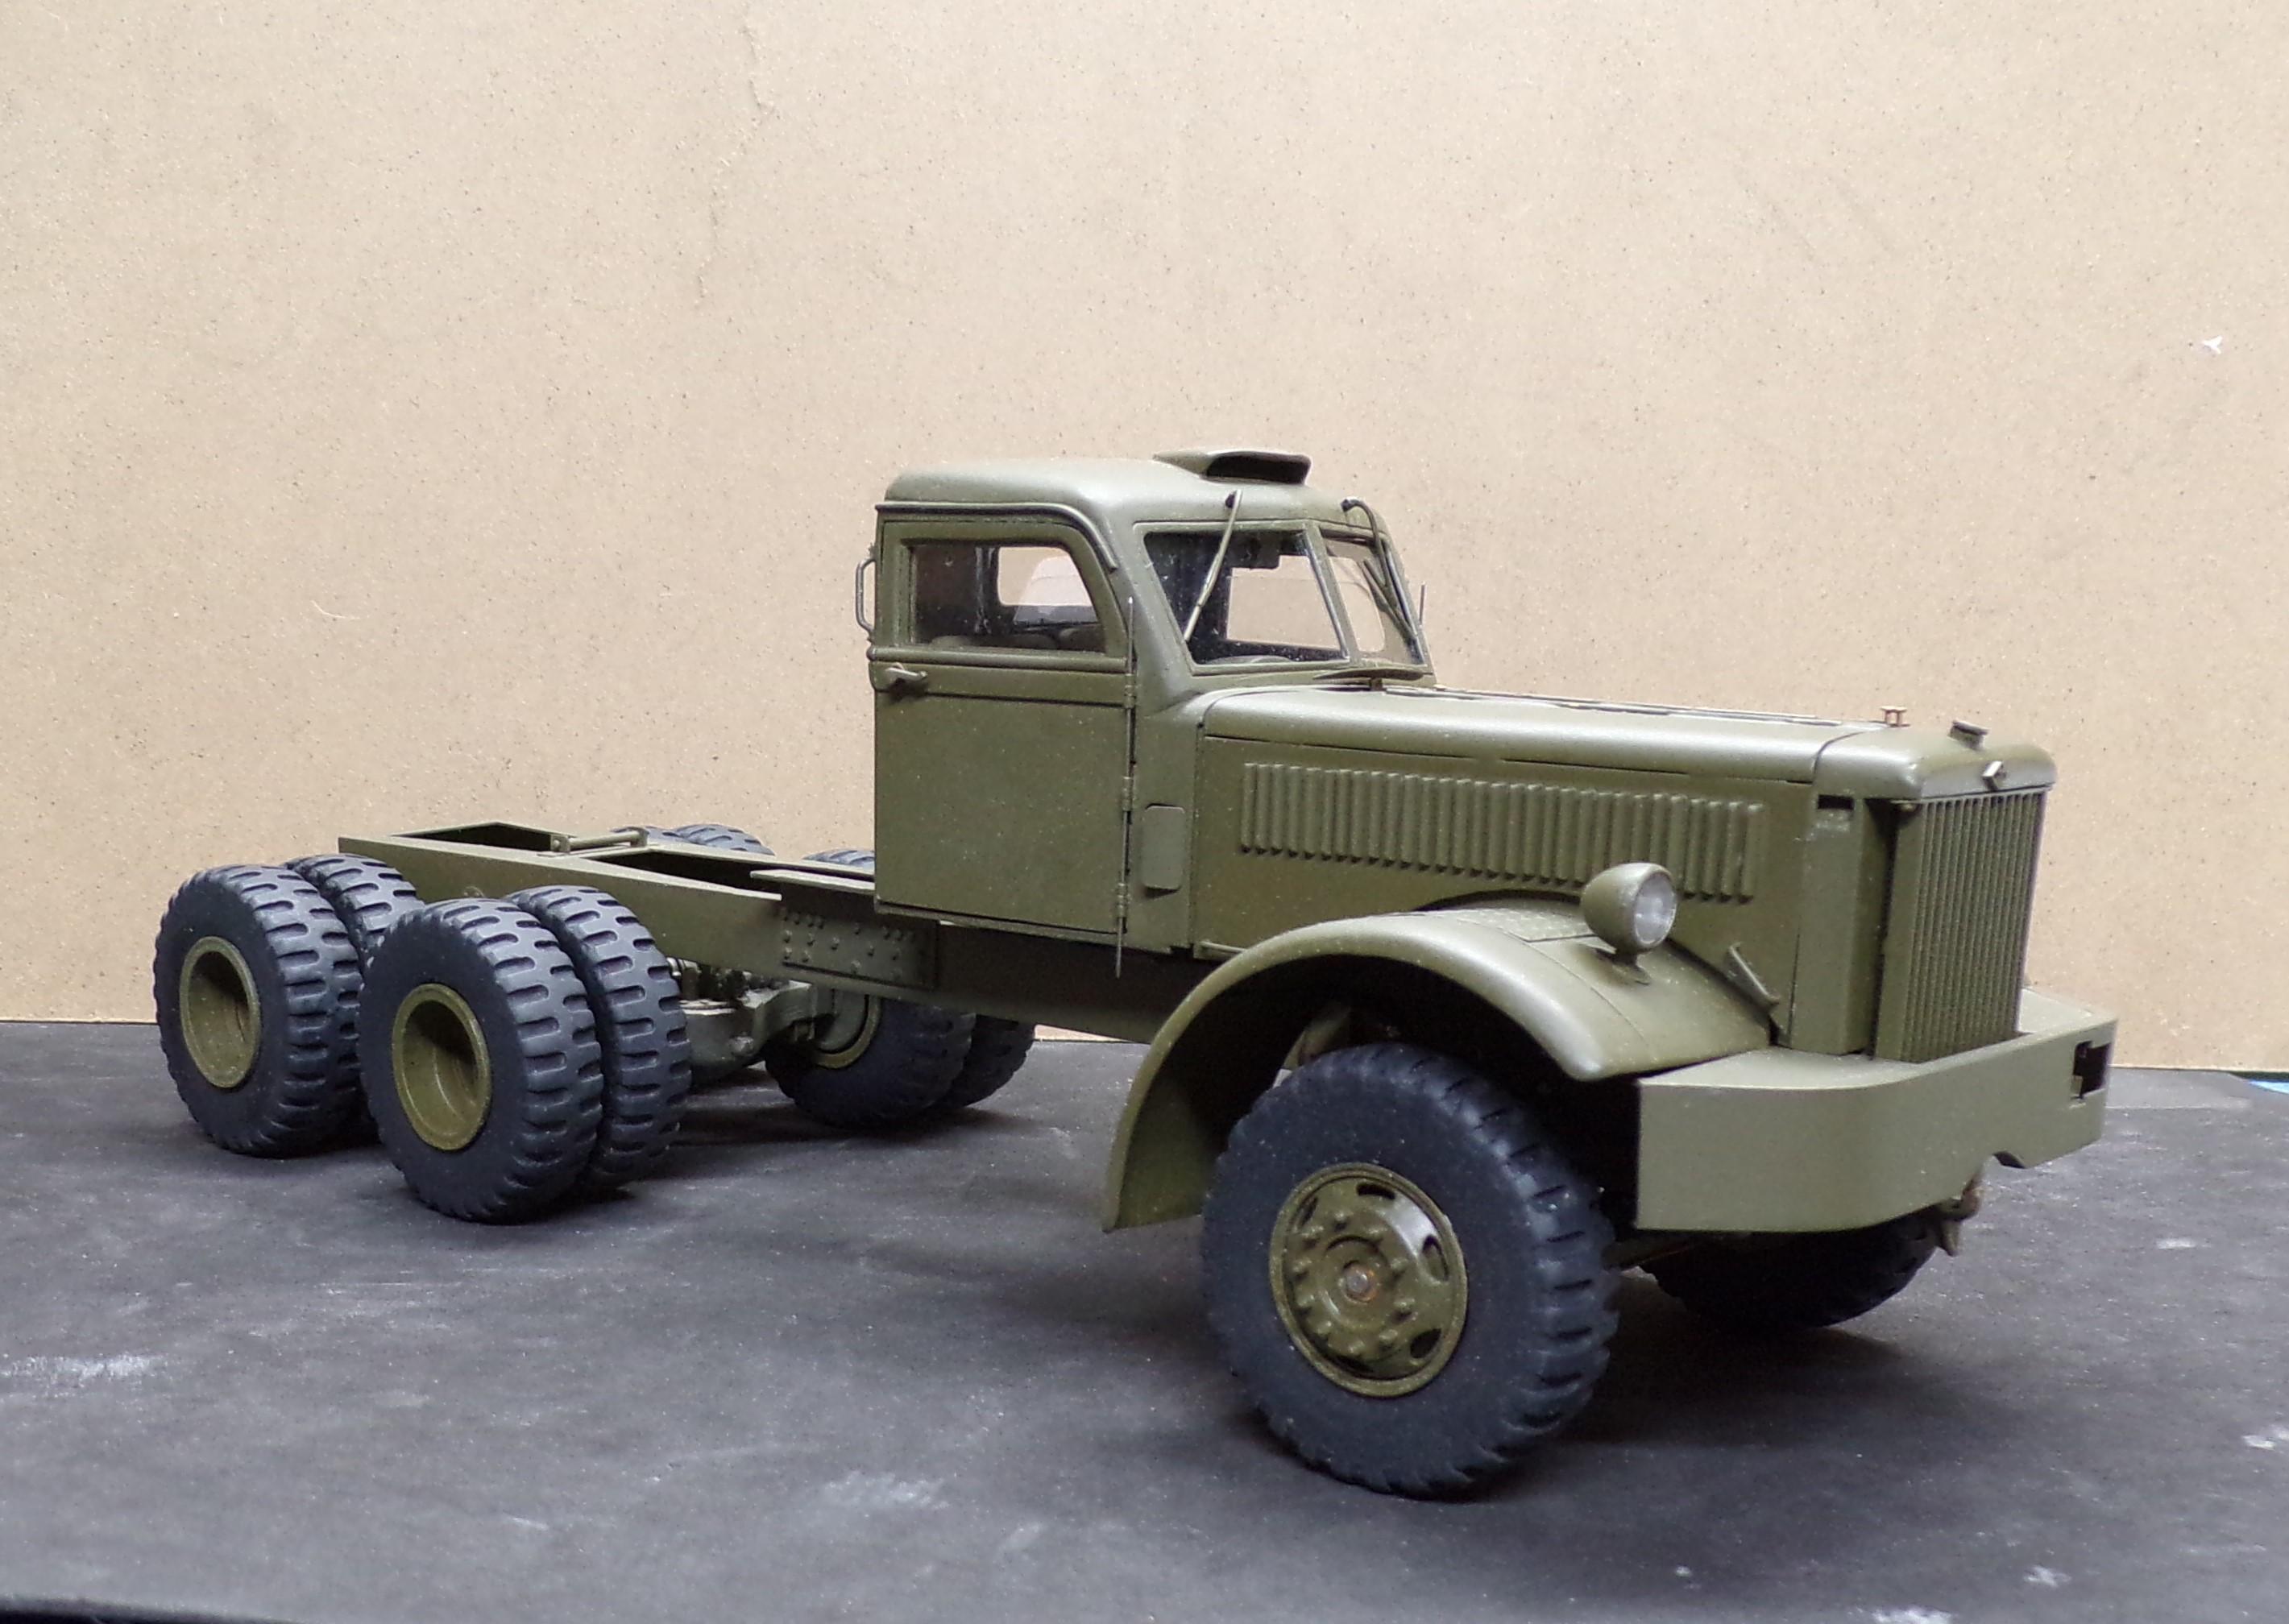
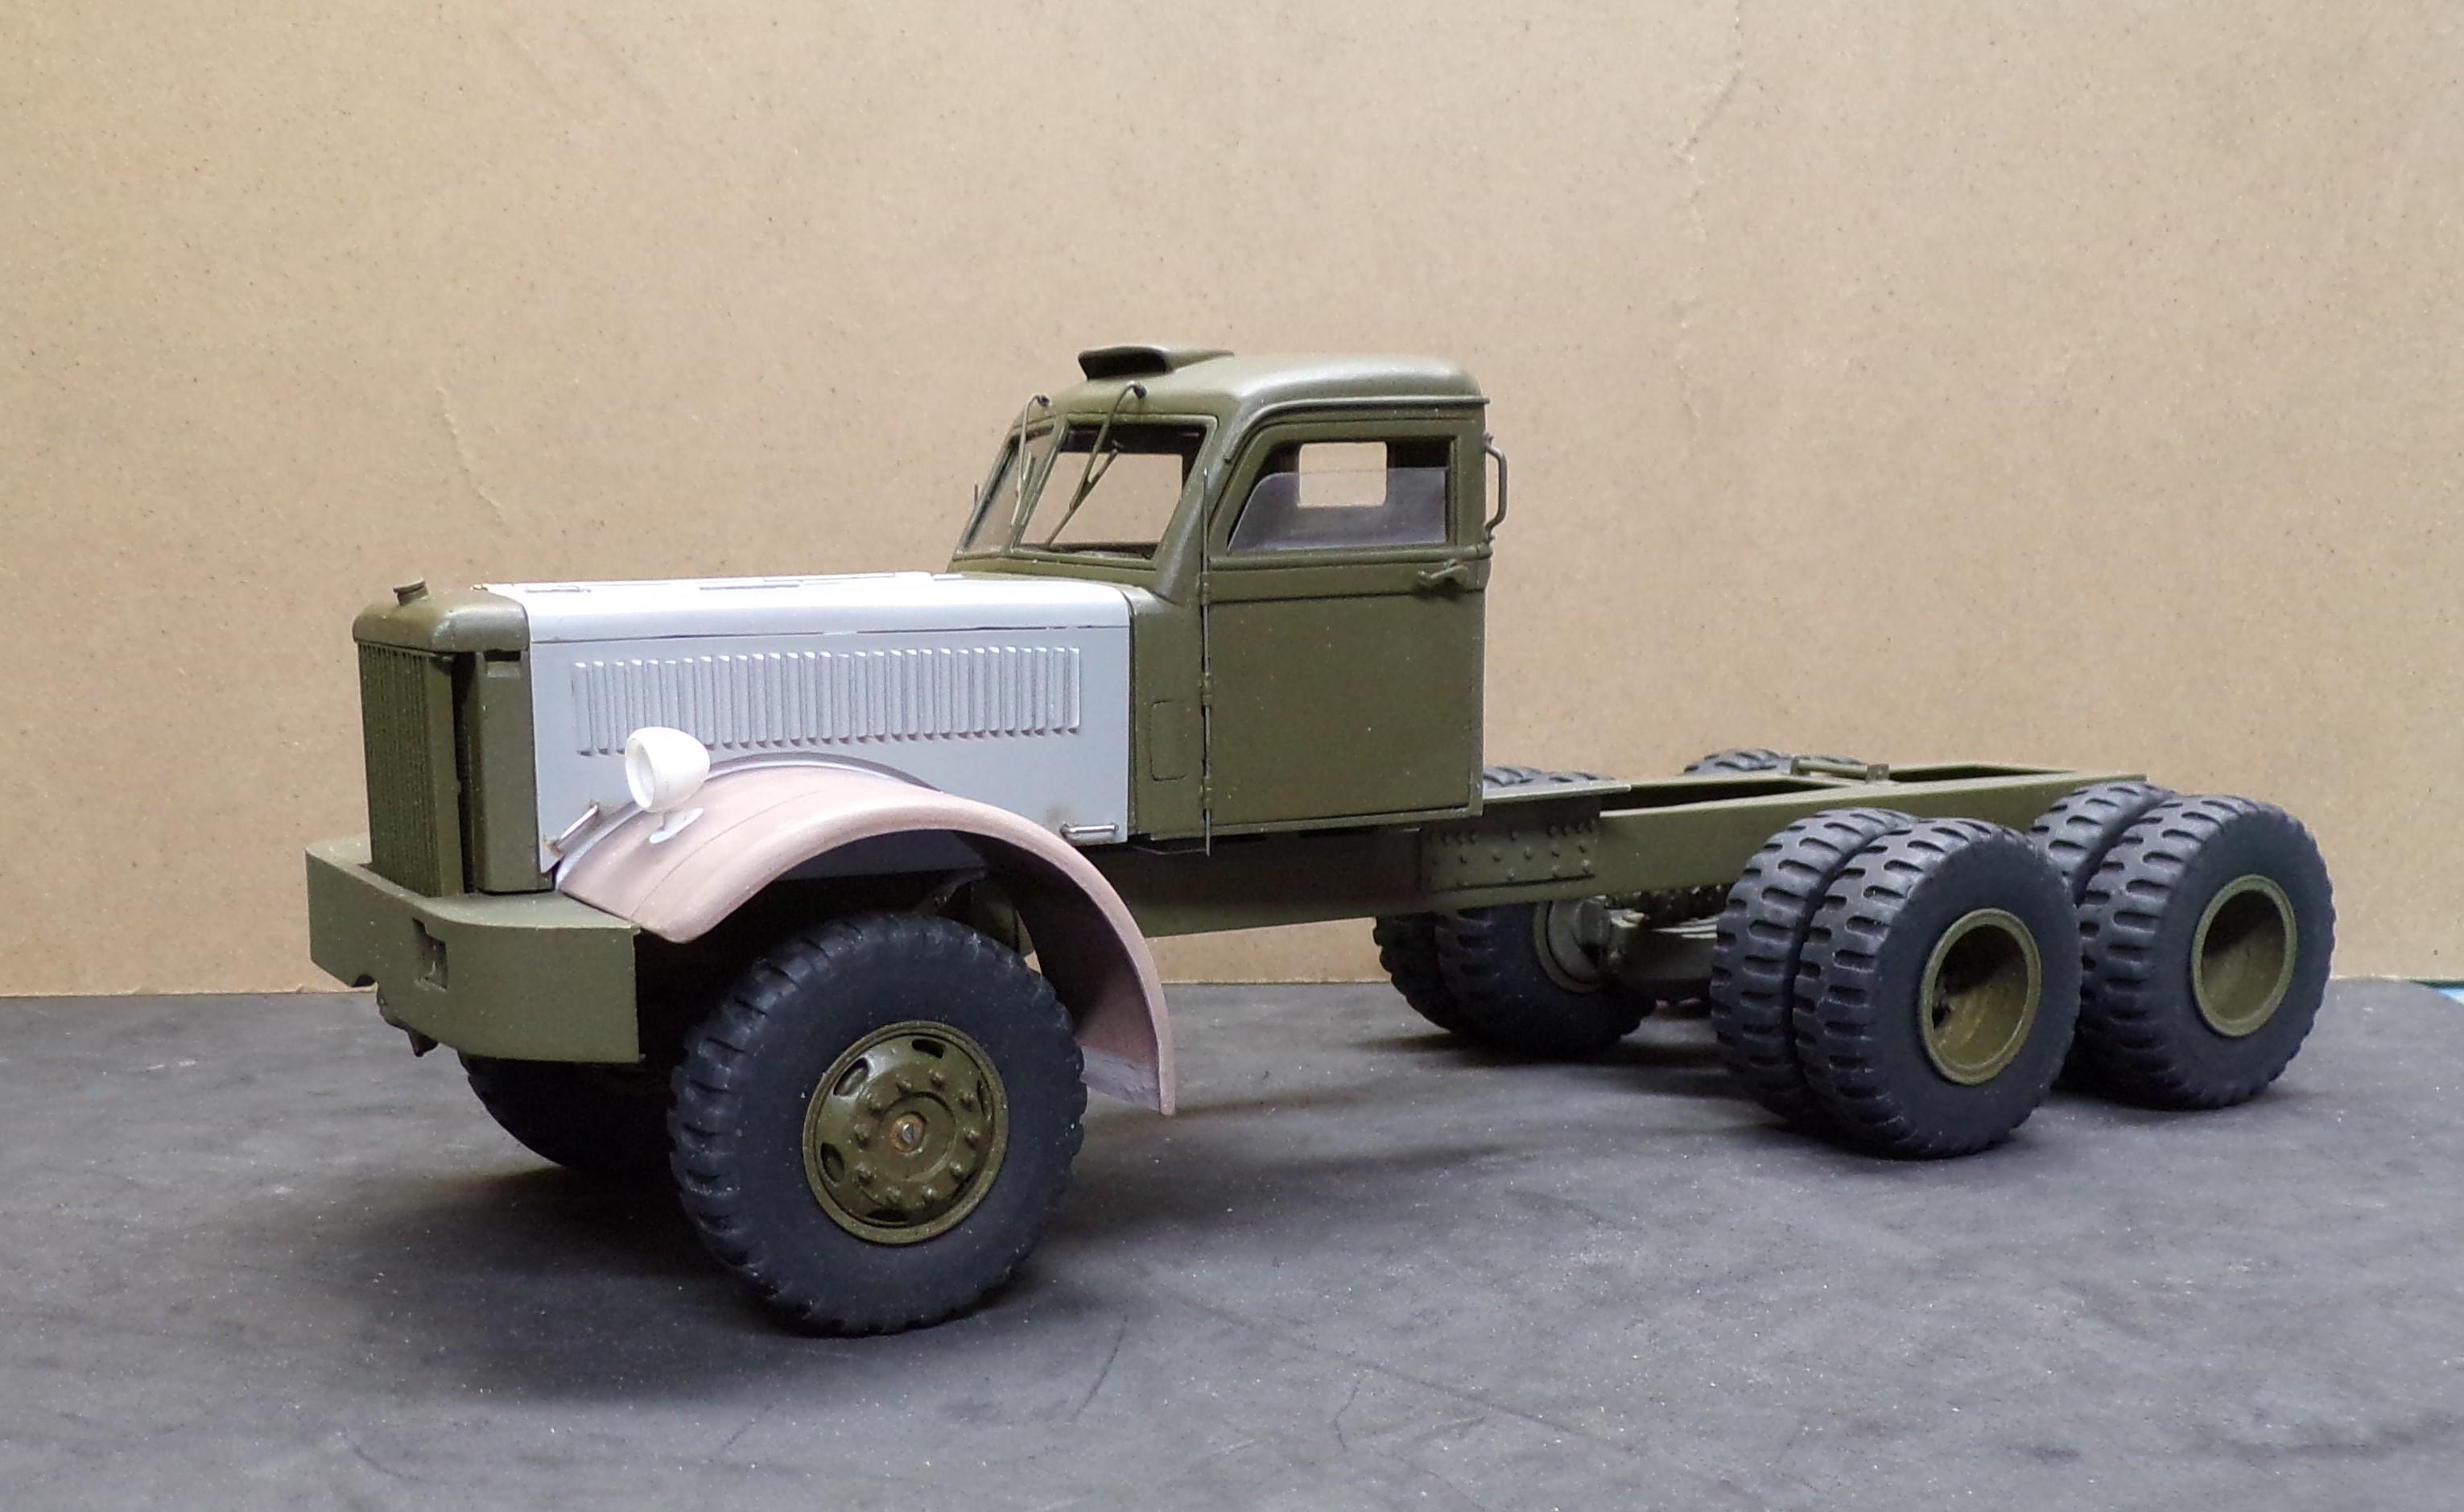
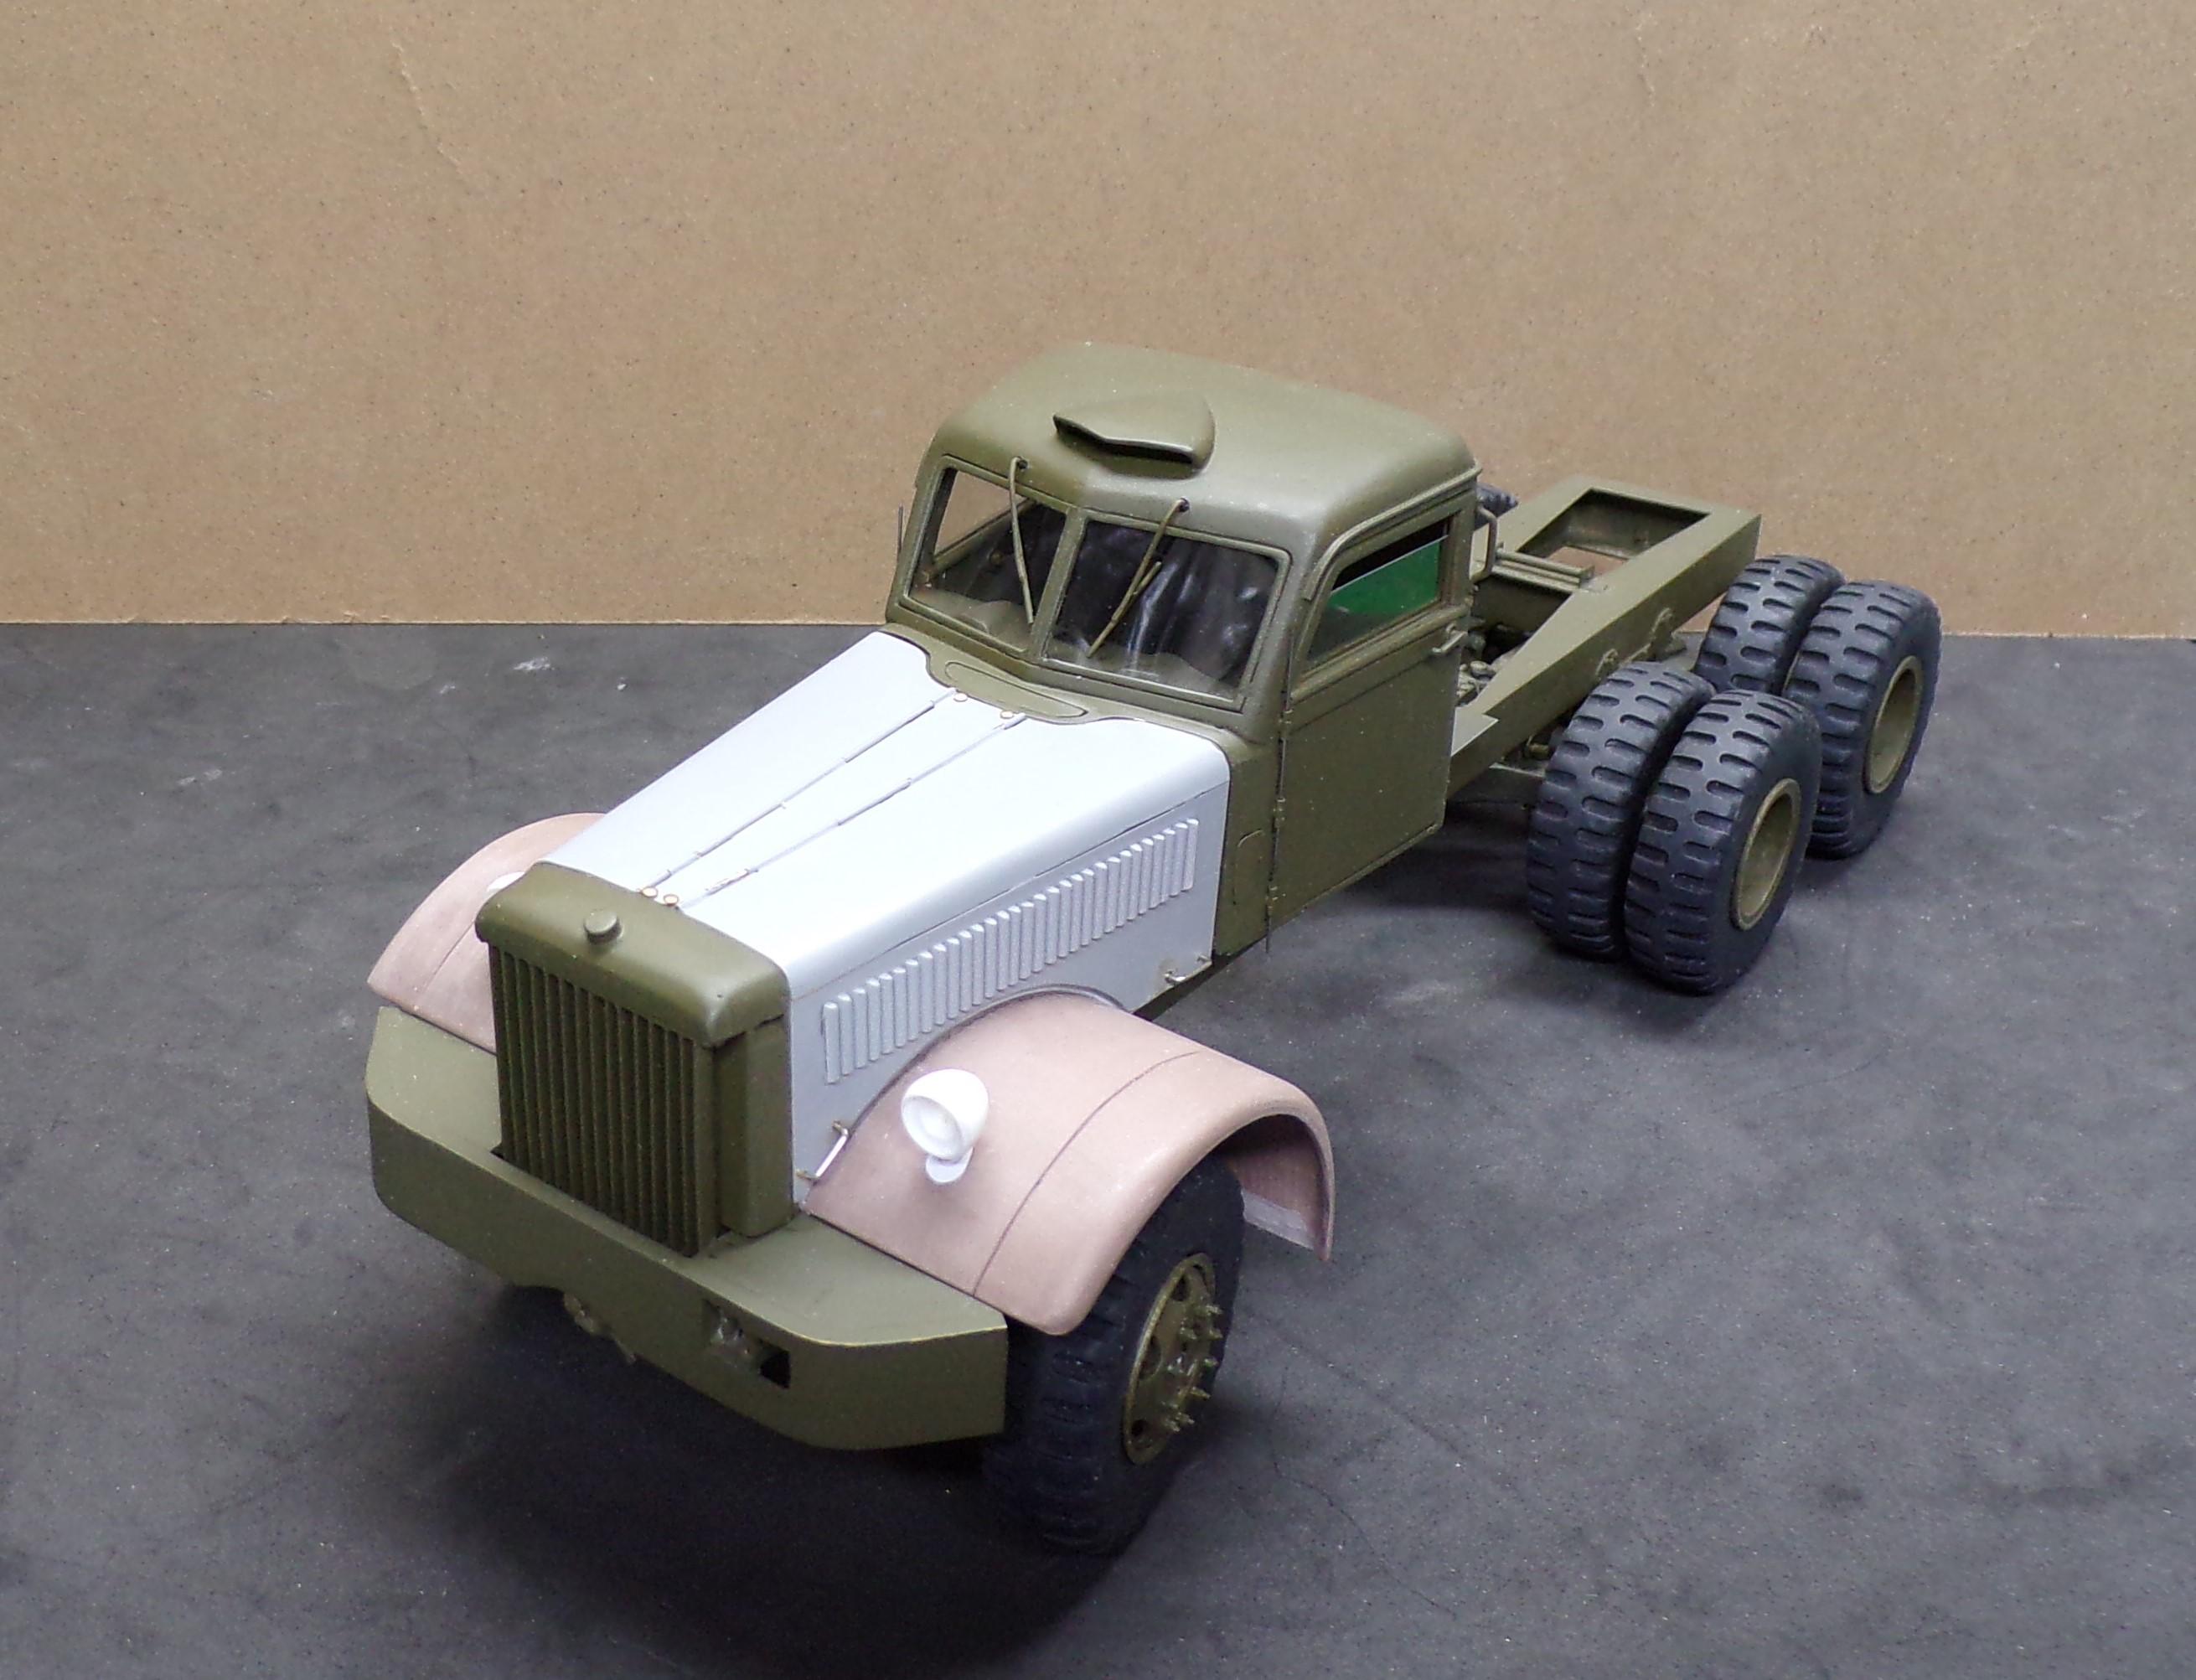
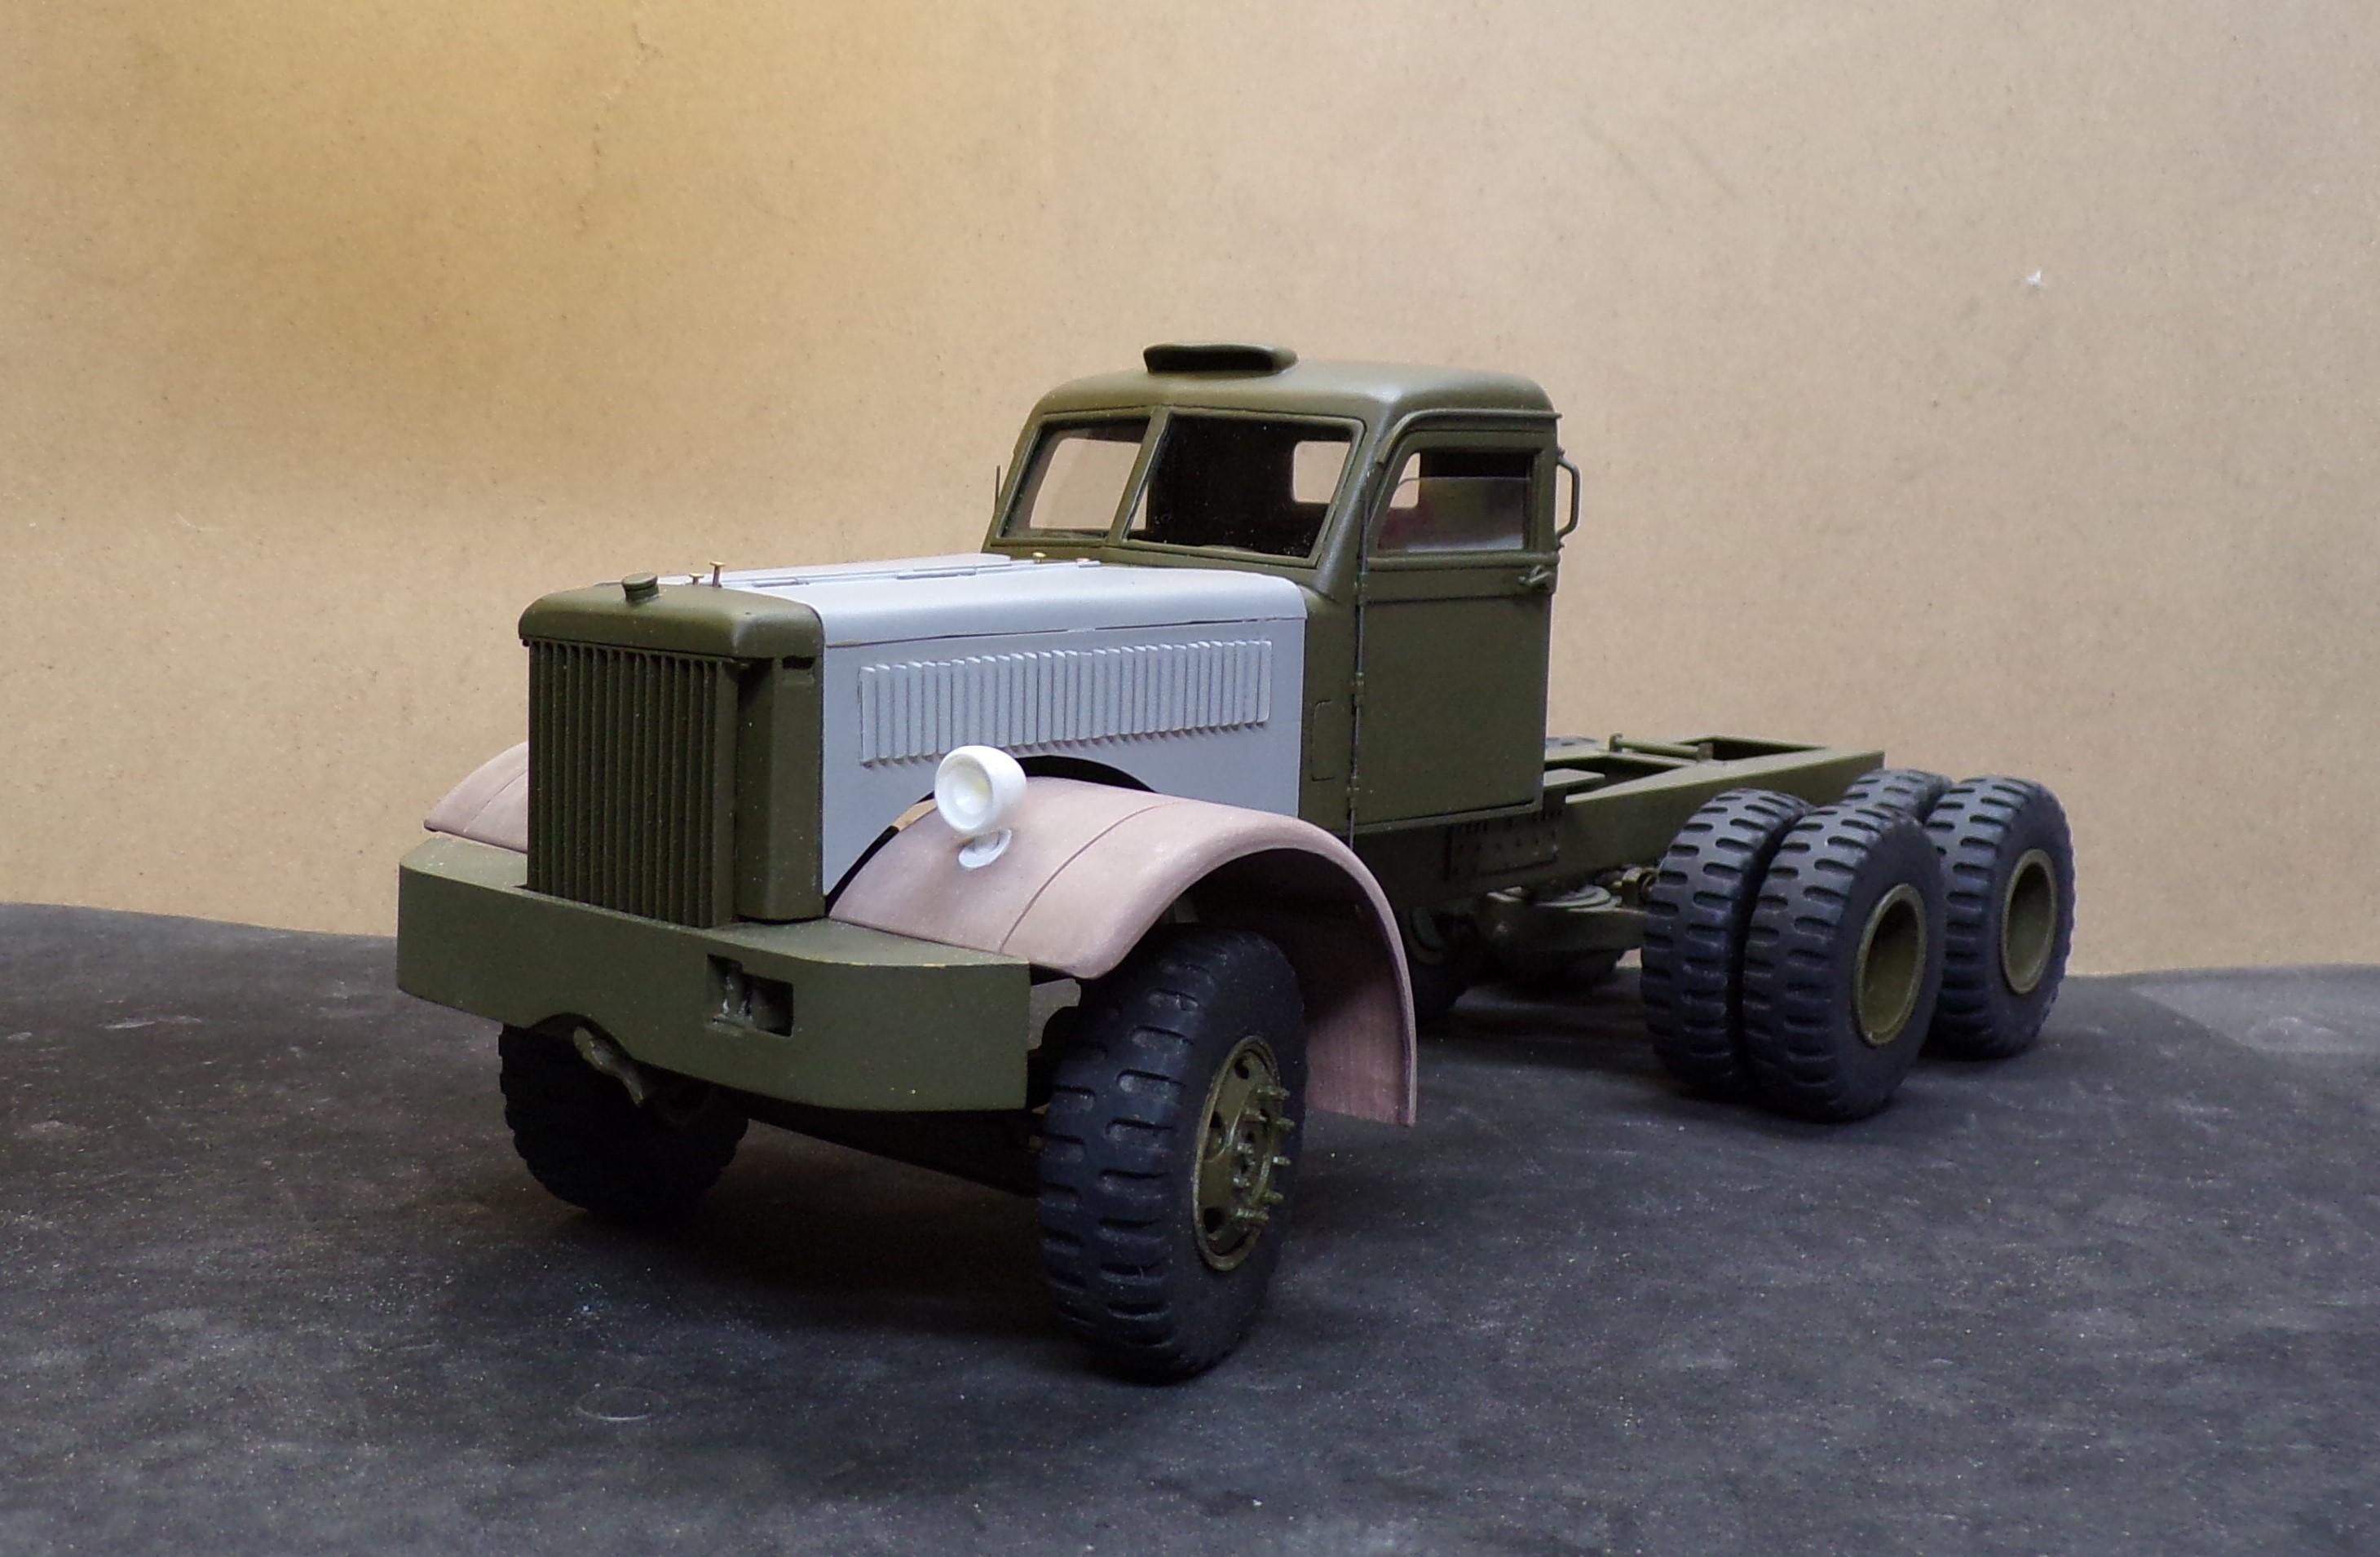
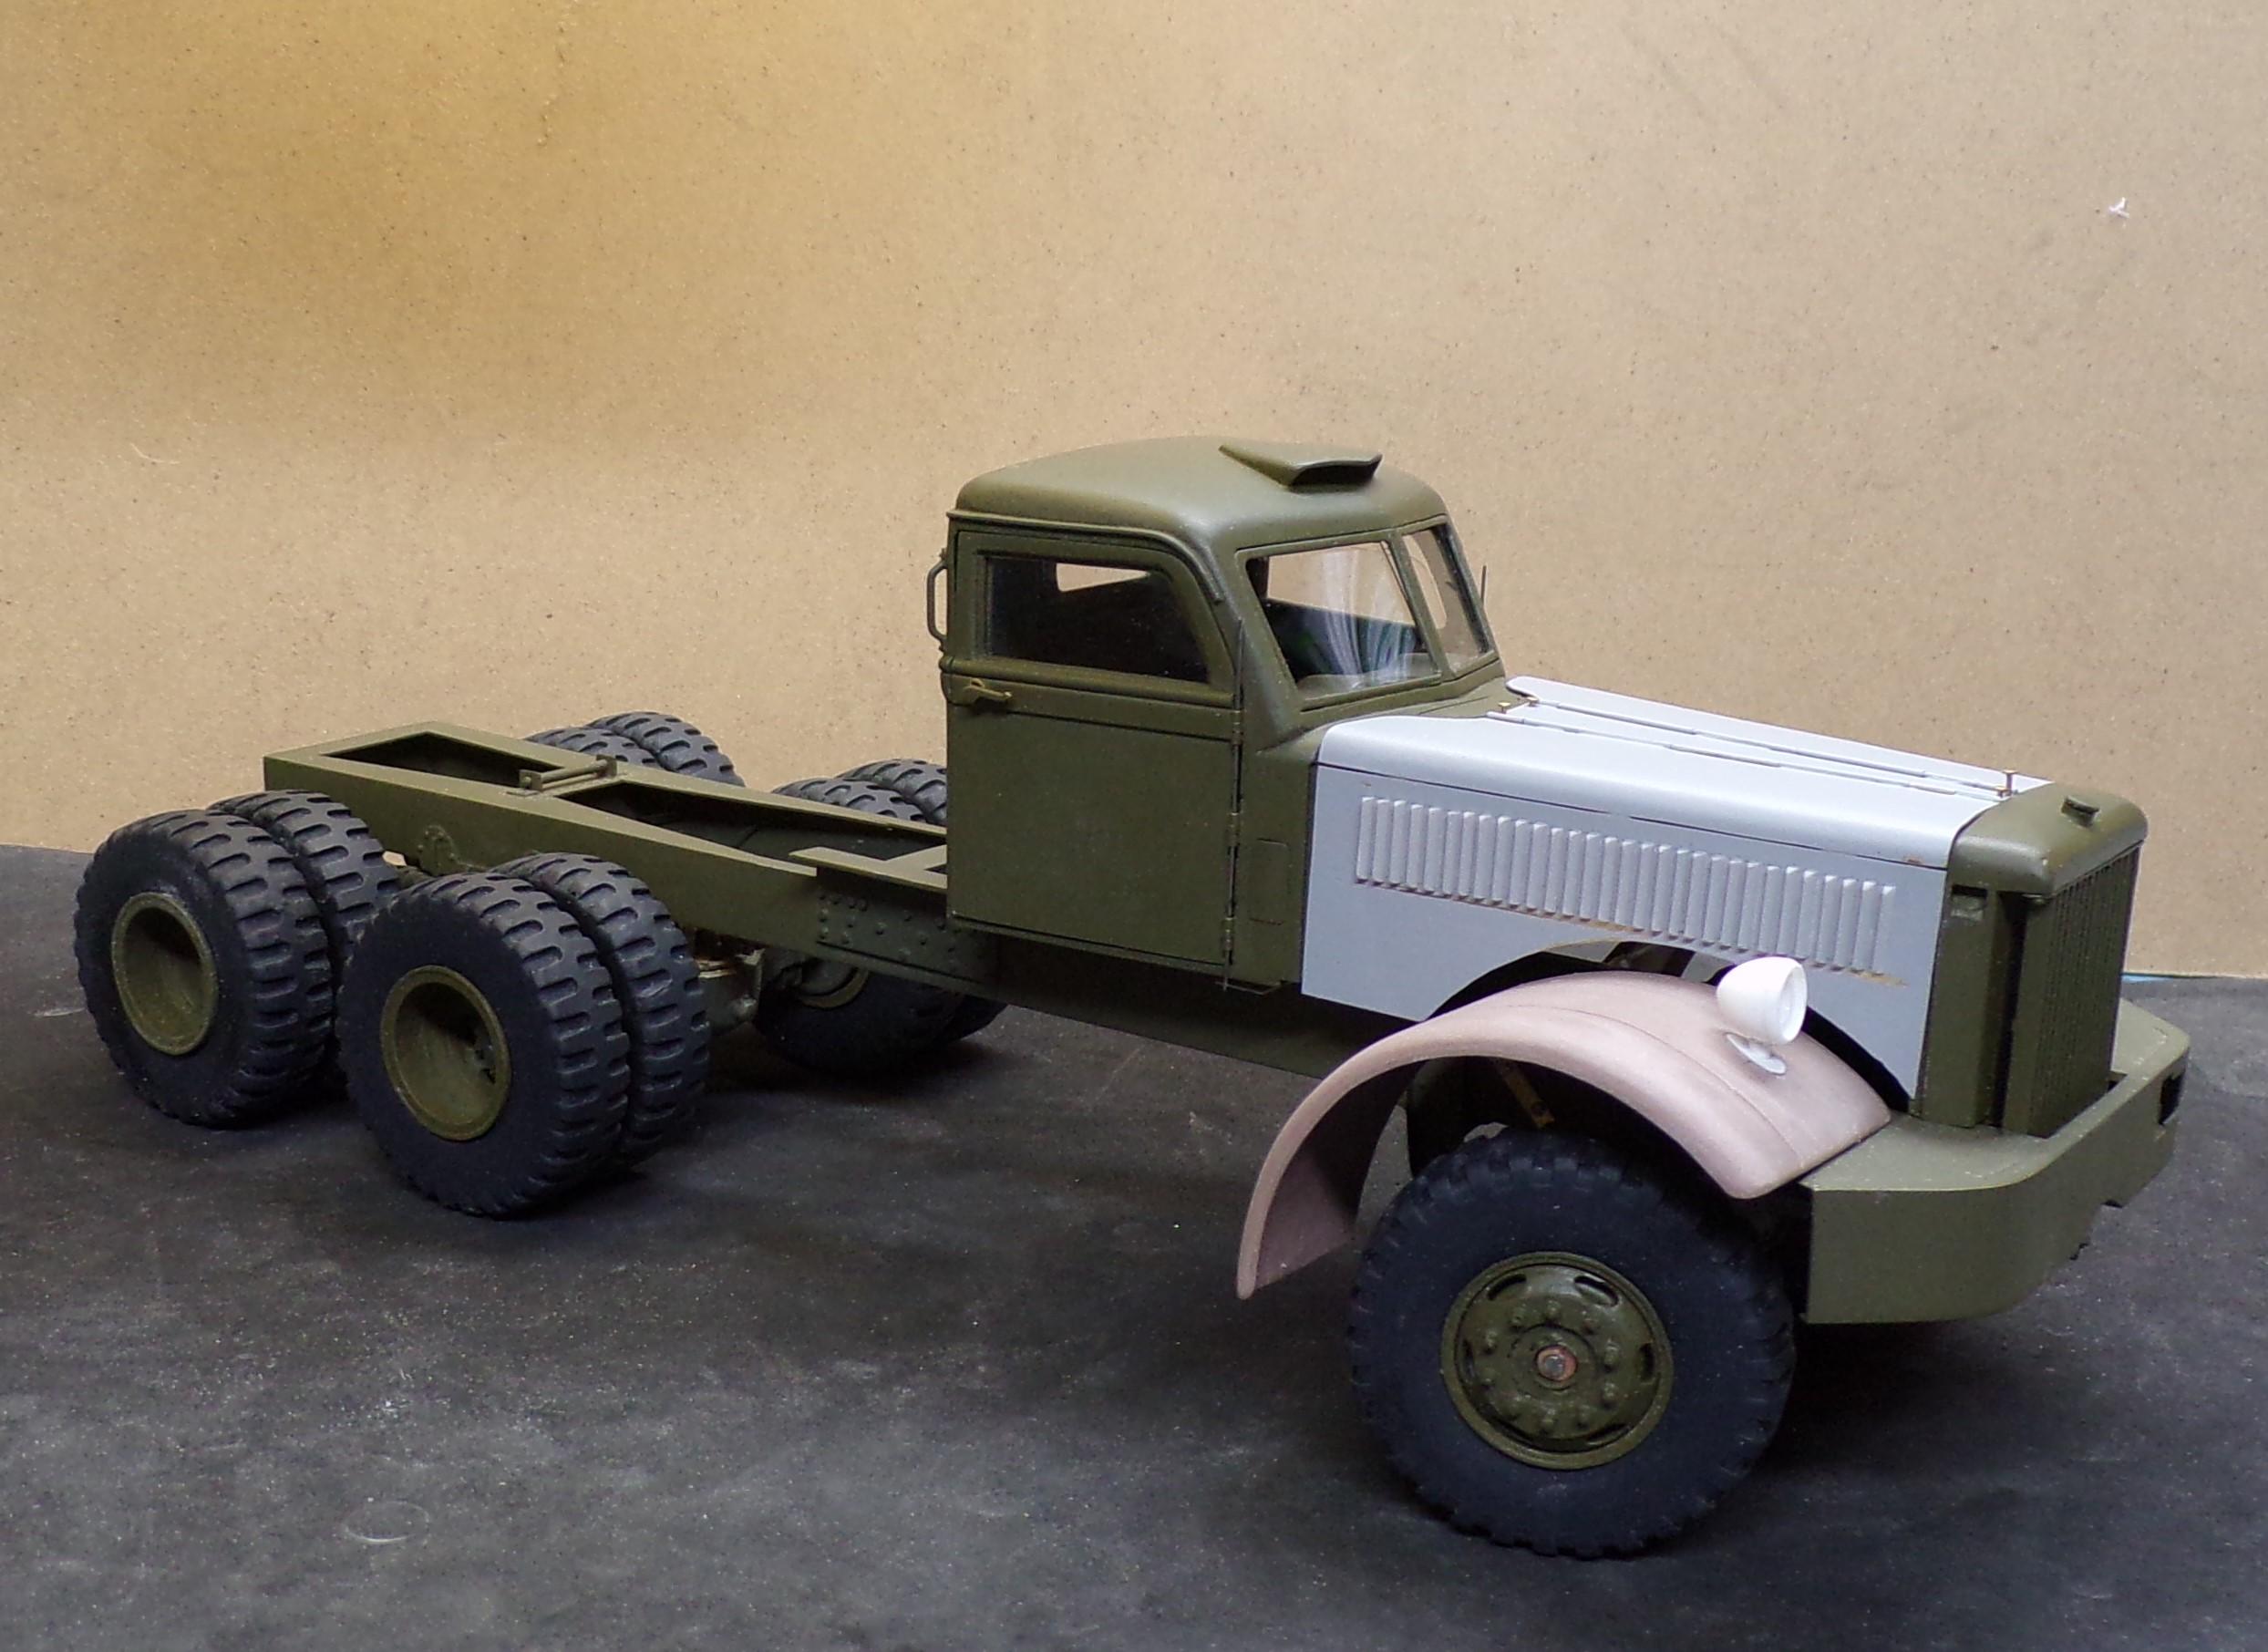
Same comment from someone on the other board about the wide fenders. Specs say 100 inches overall width. From all I can tell it was straight from front to rear and it's good to remember that this is a 45,000 lb vehicle without a load! It's big! -
It's a real treat to see the work you are putting into this. Nice and neat, clean and smooth! It's a tribute to good preparation!
-
M-20 Prime Mover
Chariots of Fire replied to Chariots of Fire's topic in WIP: Model Trucks: Big Rigs and Heavy Equipment
Fenders are mounted temporarily. A piece of brass strip stock was used for a bracket that bolts to the frame to hold up the top rear of the fender. The front sits on a thin shelf glued to the underside of the bumper. I need to add a stiffener to the bracket to keep it nice and square.
-
M-20 Prime Mover
Chariots of Fire replied to Chariots of Fire's topic in WIP: Model Trucks: Big Rigs and Heavy Equipment
Hi, Randy. Thanks for the compliment. Renshape is wonderful stuff to work with as well. Easy to carve, easy to sand, it's strong, glues up well with CA and takes paint very well after primer. -
M-20 Prime Mover
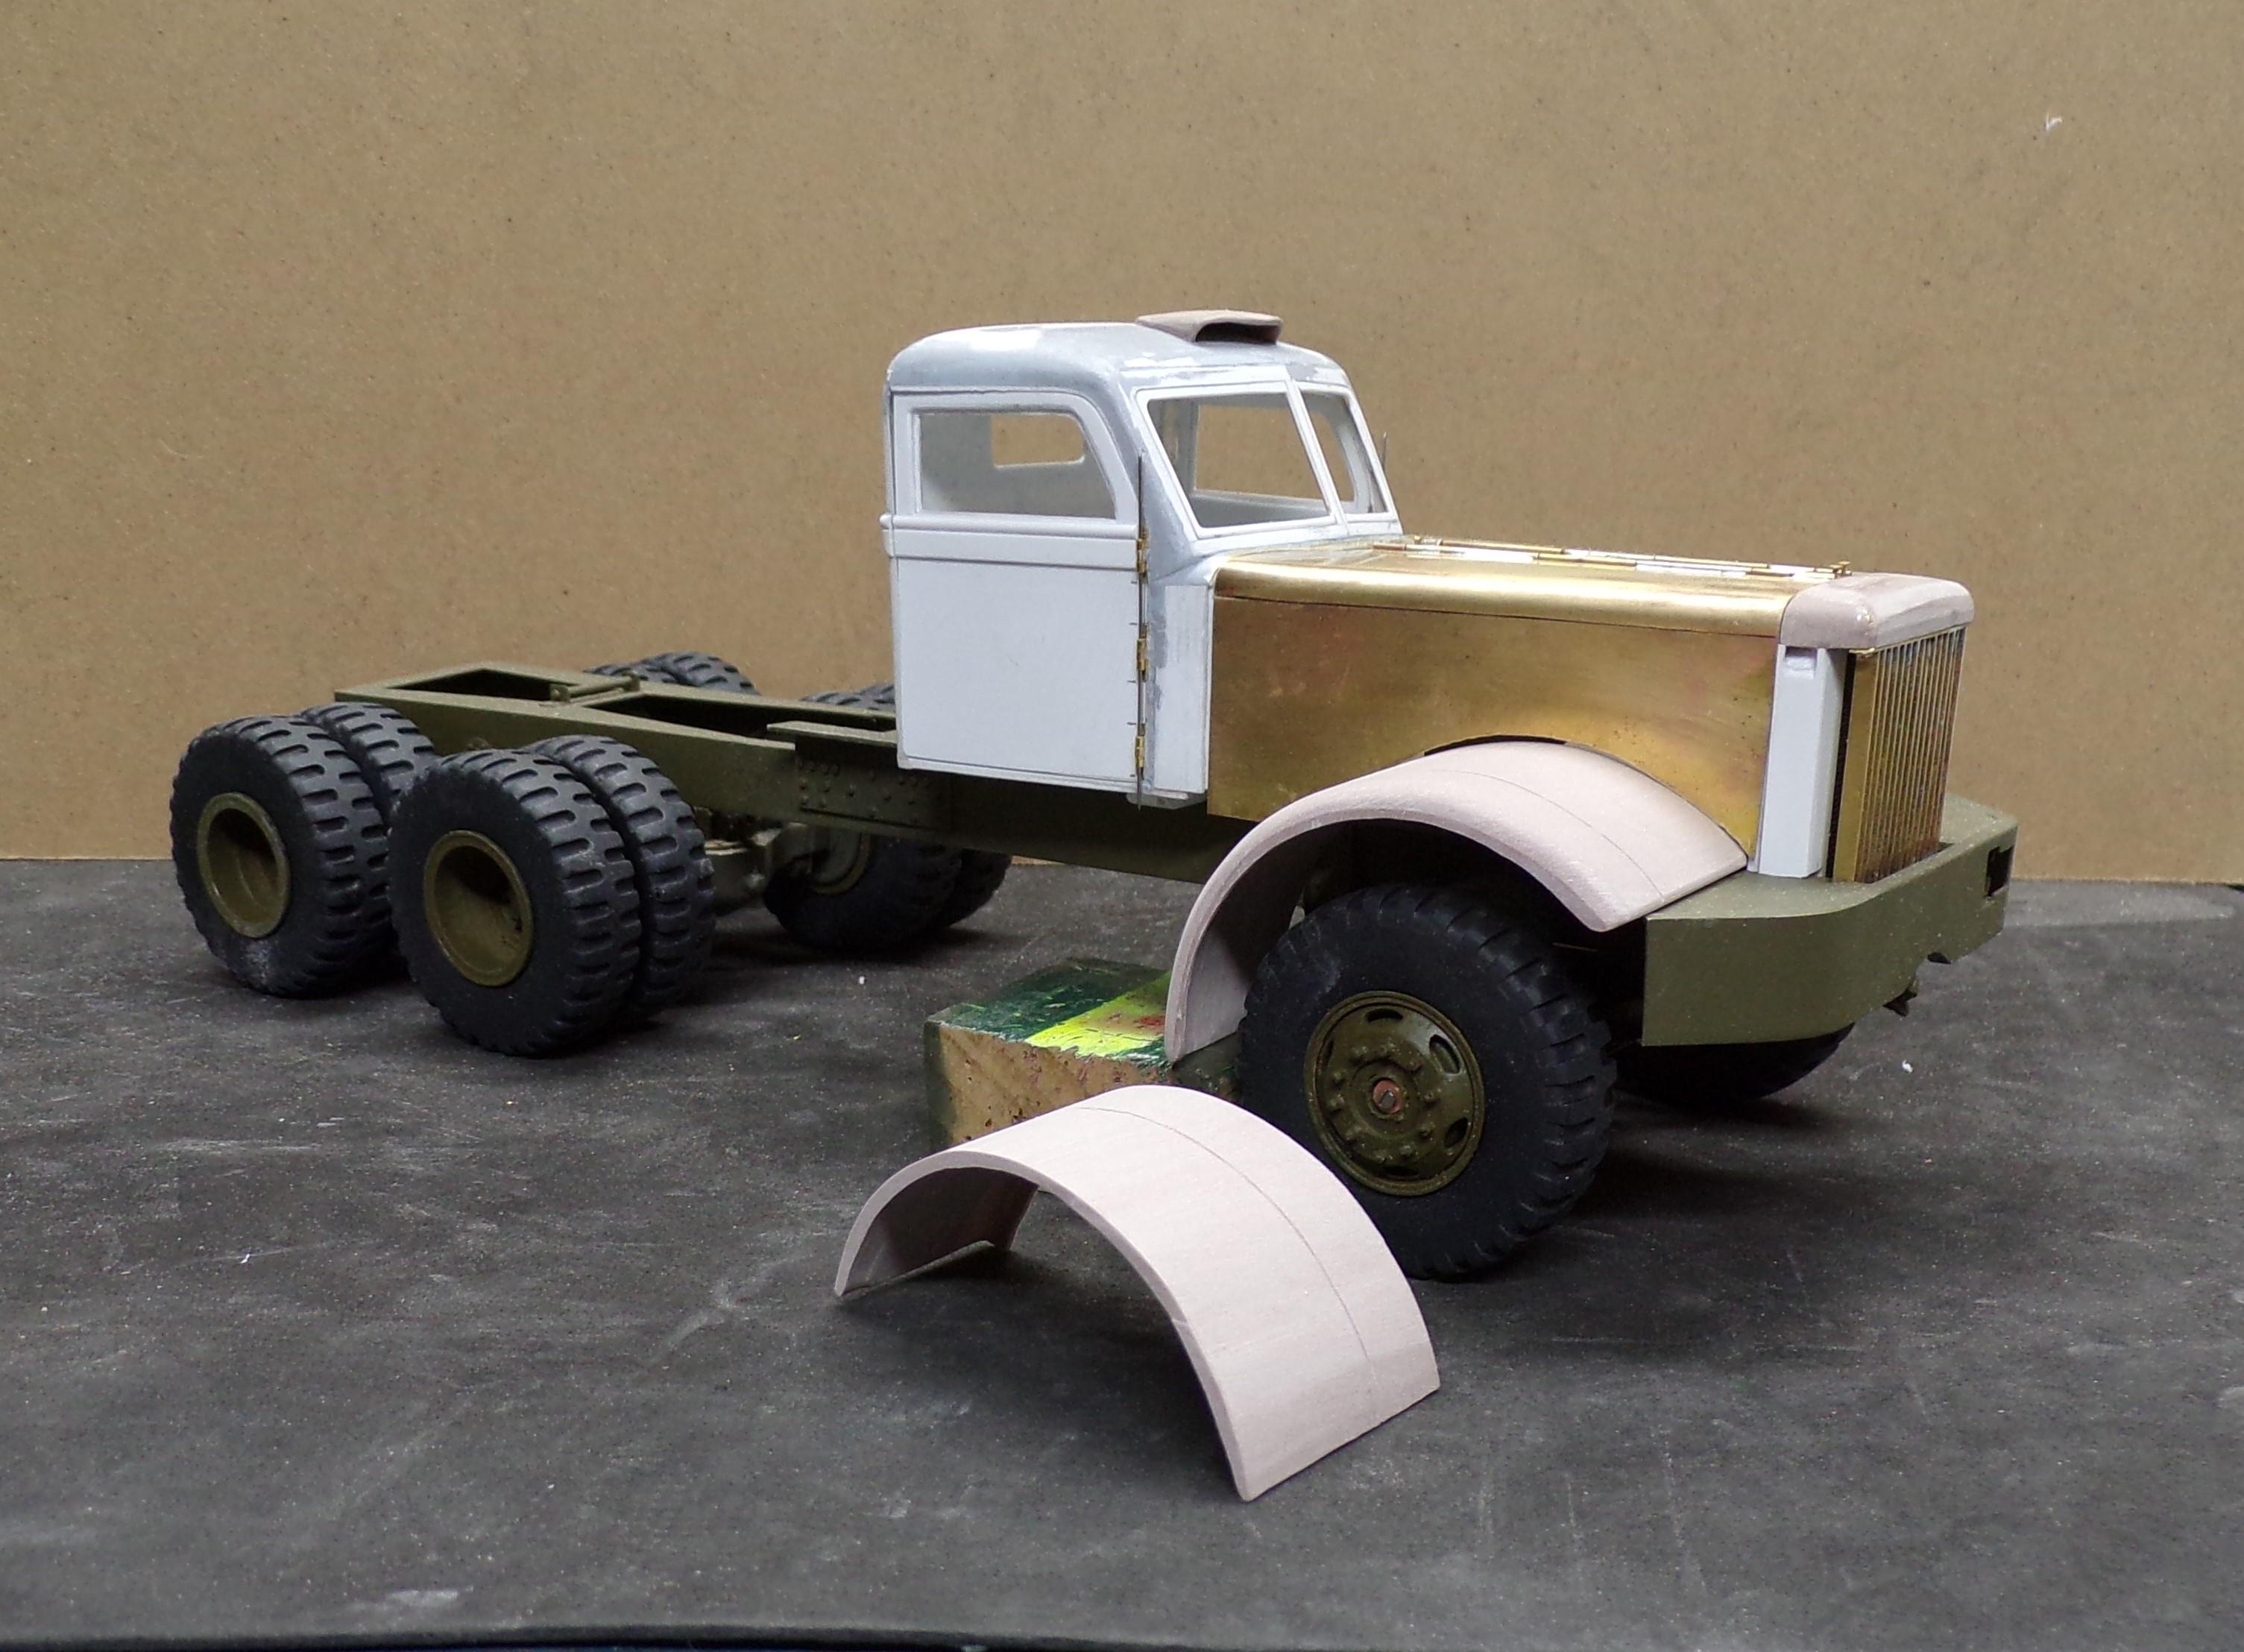
Chariots of Fire replied to Chariots of Fire's topic in WIP: Model Trucks: Big Rigs and Heavy Equipment
Work commenced on the fenders today. To start a fender outline was prepared and glued to the face of a block of Renshape. One for left and one for right. A bandsaw was used to get close to the top line of each fender and to rough cut the material from the bottom. Then a disk sander was used to smooth out the top surface. Next was to scribe a line front to back for the two sections of the fender. I used a sanding drum in my Dremel to sand away the rough underside and to create a lip at the edge. With this done the edge was sanded round by hand. The right fender is done. The left one needs the edges rounded off. I had to trim the curve of the hood side some to better fit the fender contour. Little things like this are almost a given in scratch building.