Chariots of Fire
-
Posts
2,781 -
Joined
-
Last visited
Content Type
Profiles
Forums
Events
Gallery
Everything posted by Chariots of Fire
-
 The first go around with this resin piece was not too bad. It painted up well with just a cleaning with some detergent and warm water. Getting the windshield to fit after painting was a bit troublesome and trying to keep in place with some two part epoxy was only partially successful. I'll know better next time to be more patient on fitting the windshield so that I won't have to secure it at all. It was intended to pop in place by itself.
-
I'm working on one using the green painted cab that is posted above. Some sort of rack body perhaps, maybe a wrecker. I have some photos of Holmes 600 wrecker bodies that I might just incorporate. Was working on the engine last nite. Ground off the automatic transmission from the IH Scout engine and substituted a 5 speed standard. Have some detailing to do on it. Will post some up to date photos in a bit. For a second build it will definitely be a brush rig modeled after one that is in the next town over from me.
-
I think you will have to provide your own engine. The IH Scout has the IH 345 engine that was used quite a bit. I do have some castings of it but they are not the best. Needs some cleaning up.
-
We're ready now. AITM has said it is ready for ordering! Just go to their website. The kit number is KC-94. It includes what you see here along with headlights, decals and templates for windshield and rear window.
-
AITM is ready for orders on International Loadstar kits. The kit will sell for $80 and includes what you see in the photo. Just got the info from Dave Natale today. If you are interested in ordering you can reach AITM at: orders@aitruckmodels.com Here is the ordering info. CK-94 International Loadstar conversion kit includes cab fenders ,separate hood, complete interior with door panels, bumper, cab steps, mirrors ,turn signals, airhorn, clear headlite lenses, wipers, grab handles, decals, detail sheet with glass patterns and clear window material.
-
Since there are 25.4 millimeters in one inch that comes very close to being 1/25 scale. So of you use a metric ruler and you want 312 inches in 1/25 scale just measure off 312 millimeters and there you have it. The error is not really noticeable unless you are an exactness fanatic. For example: 312 inches divided by 25.4 millimeters is 12.283 inches. 312 inches divided by 25 is 12.48 inches. So the overall difference in a long length like that is only 0.2 inches. Most 1/25 scale stuff is a lot shorter than 312 inches so the difference gets even less. Example: Most trucks have a maximum width of 102 inches. Divide that by 25 and you get 4.08 inches. Divide 102 by 25.4 and you get 4.01 inches. so the difference is only 7 one hundredths of an inch. Can't measure off much closer than that! That is why I use a metric ruler so there is really no conversion necessary at that scale. Remember: It only works for 1/25 scale.
-
That is awesome work! About how thick were the hull planks? What was the glue you used to secure them? At an IPMS show a year ago May I found an old Bluenose kit and Only paid $10 for it. But I have a full set of plans that I picked up from Model Shipways. Looking forward to starting the work. Planks and bulkhead design. I may have to ask you some questions on tapering the planking toward the bow and stern! Although I have built a couple of ship models in the past it's not my forte so there is a learning curve or two on the horizon!
-
I built up an engine from the castings of the 345. It barely fits between the modified firewall and the grill. Waiting for the rest of the castings to be done of the firewall and floorboard so I can put it all together.
-
Just for kicks I laid on some nice dark green paint to the Loadstar mainly to see how good the casting was. It showed up a couple of small places where some touchup would be in order but all and all I think the result is ok. The International in the hood sides is a decal that was made from an image scanned into my graphics program and printed on the ALPS printer. The hood ornament was coated with Molotow chrome and then painted with black and red for the IH symbol. Molotow chrome was used on the headlight trim rings with regular Testors silver in the center portion. A clear lens will be added later. Never fails! I thought I got all of the dust off before taking the photos!!
-
Bill Geary's solution looks pretty realistic. I just might look for some of that paint. The alternative, of course is to drill the headlights out and put in some clear lenses. The only kicker is that you will have to figure out a way to back the lenses up with other stock so that they look right. The stock can be painted with silver paint. After the paint is dry use clear epoxy to set the lens. That way the silver paint will not soften and run.
-
If you ever get down the Lawrence Mass. way there is a model show on October 6 (if that's a Sunday as I don't have the calendar in front of me). You could bring your roller and the truck it's loaded on. There'd be plenty of oohs and ahhs over them for sure!
-
I have two projects. One involves a brush truck model with the bars and all and the other will be a wrecker that was a local feature back in the 60's and 70's.
-
That was a lot of work! Thanks for taking us through it. It was fun watching it come together.
-
Just finishing up the reconstituted firewall/floorboard. It will be sent to AITM tomorrow. That concludes all of the pieces for casting. Now it's up to AITM to tell us when he is satisfied with all of the pieces going together. When he tells me he's good with it the details will be posted.
-
Rat Rod Pete 359
Chariots of Fire replied to Darren B's topic in WIP: Model Trucks: Big Rigs and Heavy Equipment
Darren: Take the spacers out and use the glass as a base to clamp the separate frame rails on. Clamp some strip stock to the glass to act as a guide for placement and spacing of the rails. Then reattach some new spacers that just fit inside. The frame rails will have to be level if you cut all of the strips the same. Hope this helps. Trying to force it to become level just won't work. -
Rat Rod Pete 359
Chariots of Fire replied to Darren B's topic in WIP: Model Trucks: Big Rigs and Heavy Equipment
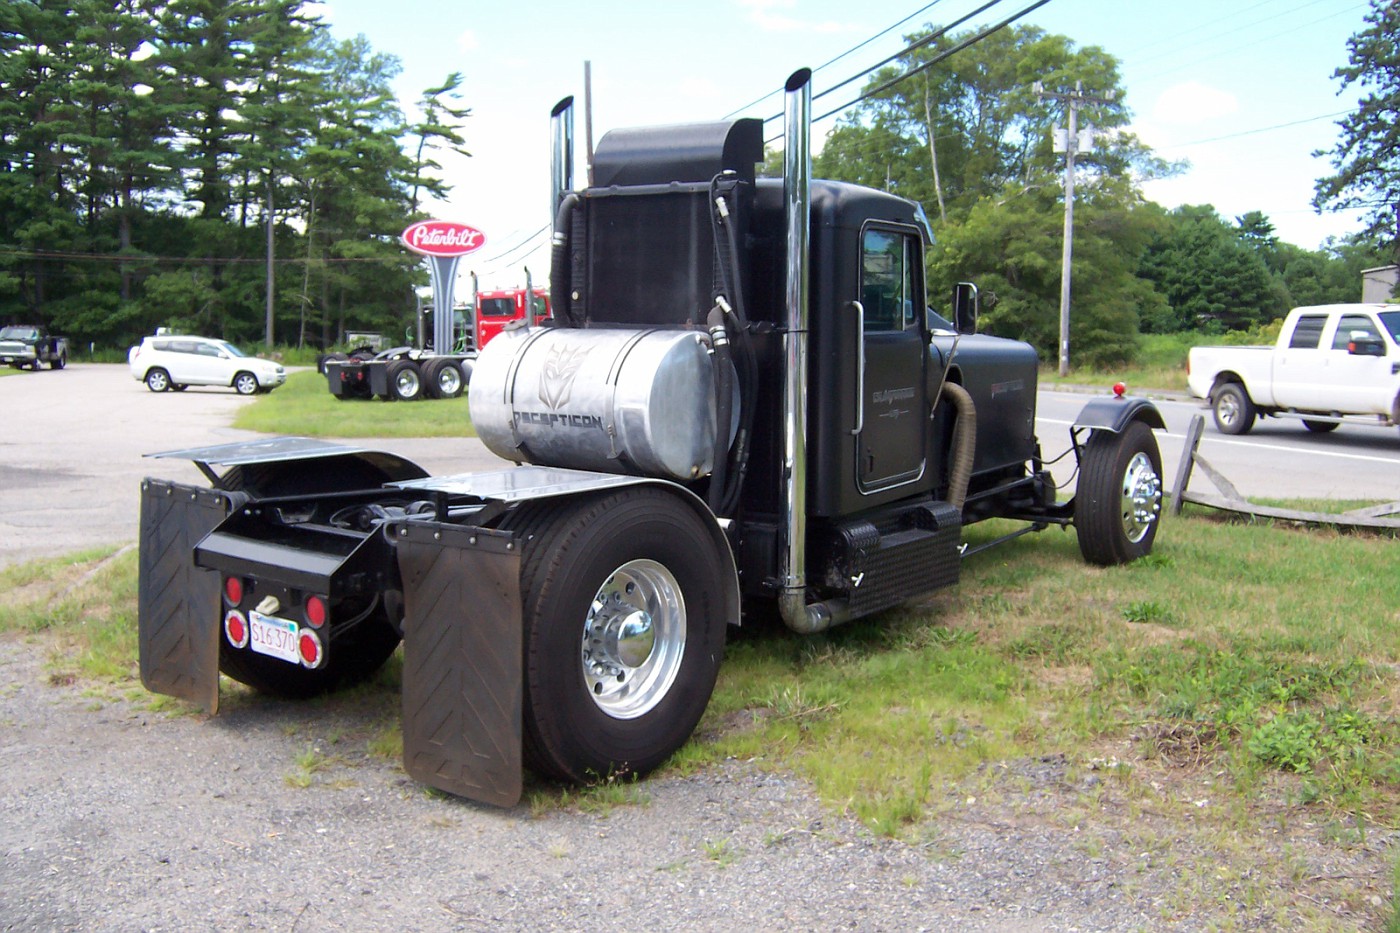
Here's a real one I took photos of a couple of weeks ago. Only difference: It's a KW!
-
Much of the casting has been done but I ran into a slight glitch. In order to get an IH 345 V8 under the hood the firewall has to be moved back some and reshaped. That means the floorboard as well. Working on that now. Other than that things should be good to go soon.
-
New IH Casting In The Works
Chariots of Fire replied to Chariots of Fire's topic in Truck Aftermarket / Resin / 3D Printed
I don't know about that, Tommy. The IH fills a void for sure but the Chevy or GMC I might have to leave to someone else. -
They will be available through AITM and I will announce when they become available. There are still some parts to be cast and they have been sent to AITM for that purpose.
-
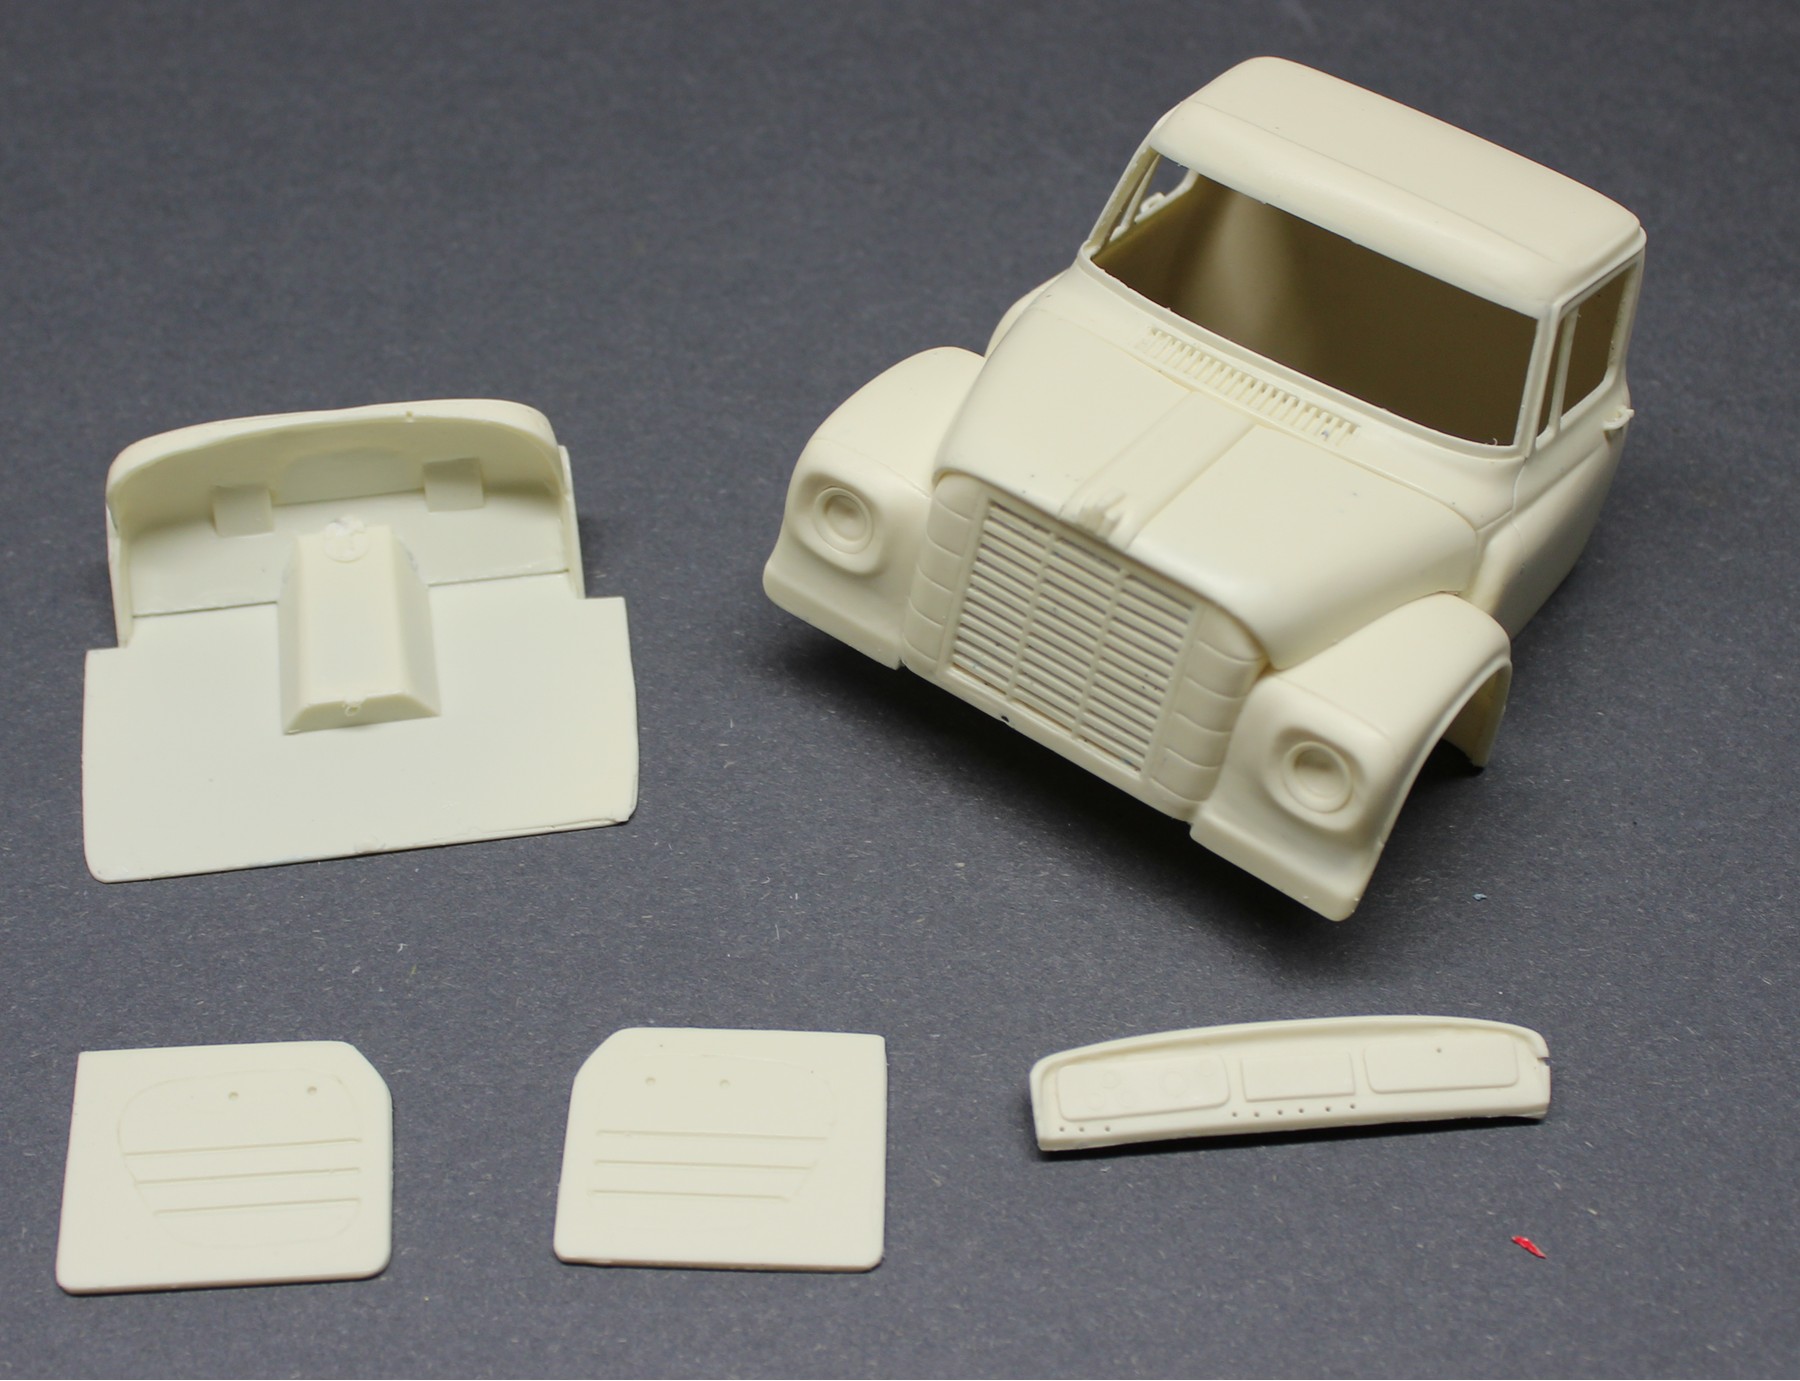
First two castings came in today. They are nicely done. AITM was able to do the windshield trim without any trouble so that the glass fits right up against the thin trim surround. After painting the truck you will just have to swipe a black felt marker around the edge and it will be done. The glass just pops in without any gluing. Still to come are the bumper, running boards, and steering wheel. I'll be working on the seat and platform for it in the next few days.
-
TRANSTAR 4300.
Chariots of Fire replied to Andrew Howard's topic in Model Trucks: Big Rigs and Heavy Equipment
Nice clean work! Well done! -
New IH Casting In The Works
Chariots of Fire replied to Chariots of Fire's topic in Truck Aftermarket / Resin / 3D Printed
I'm expecting to receive the first castings later this week for inspection. Will post pics as soon as they arrive. -
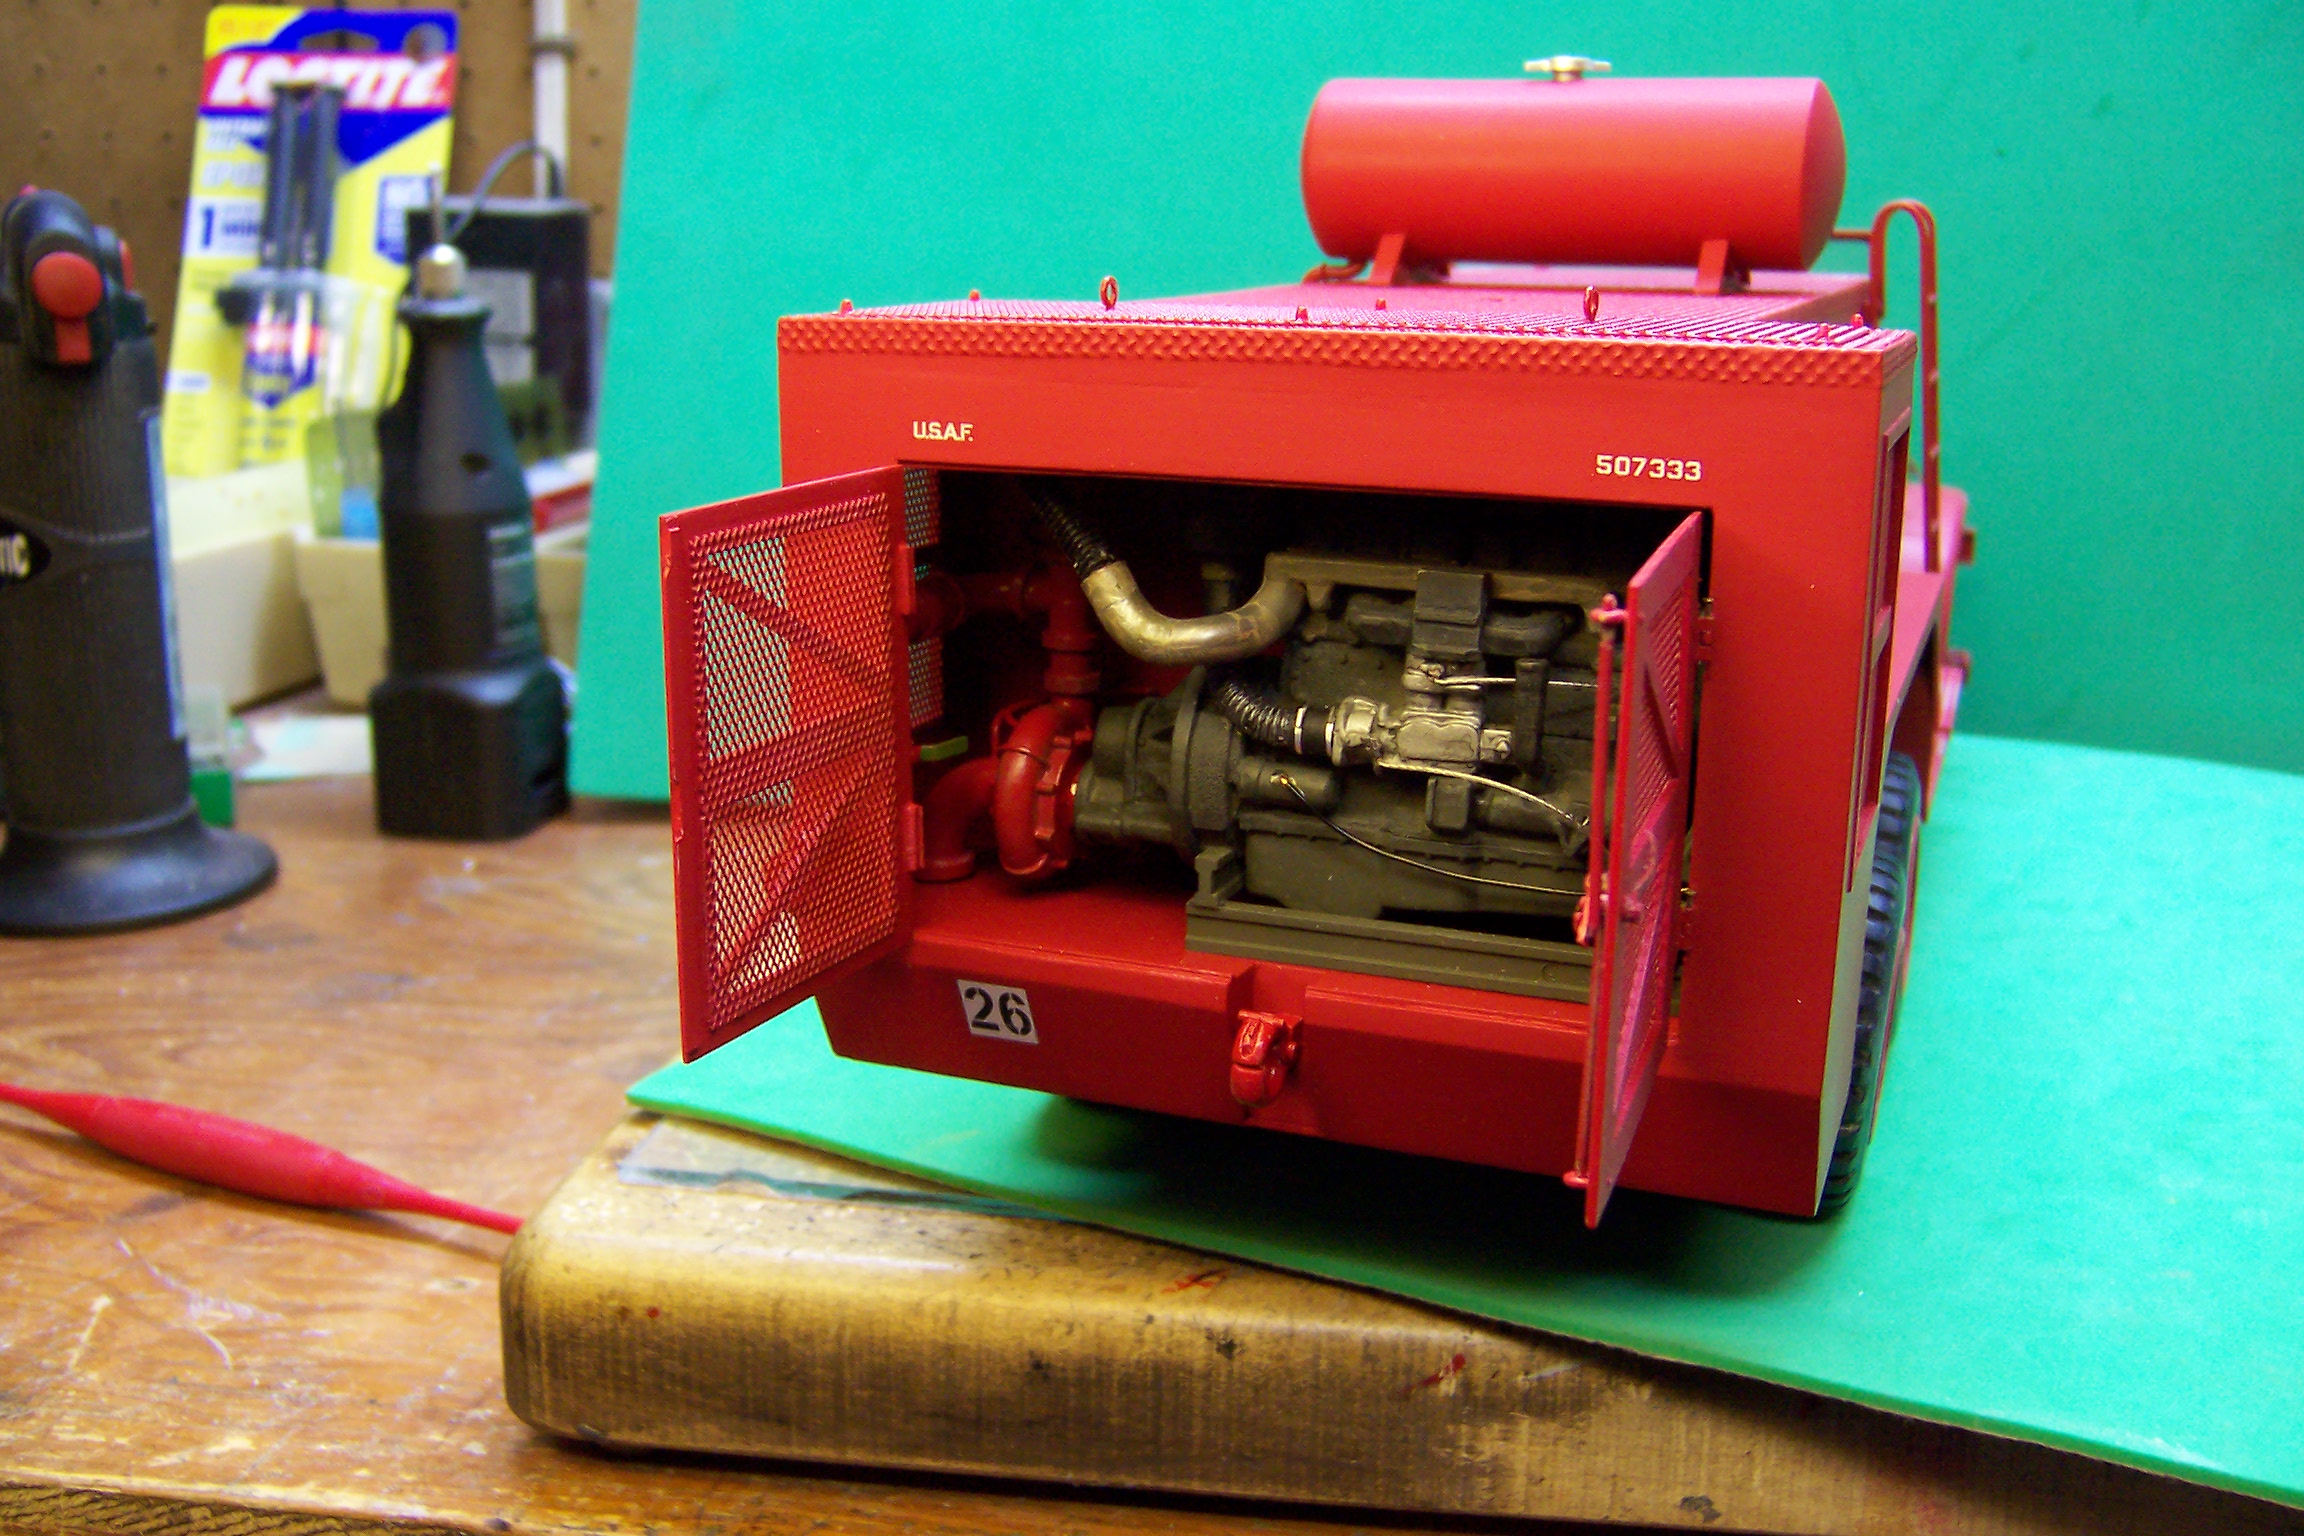
A little hint about painting the inside. It may be a pain with the engine in place but paint the inside with a brush using the same color as the outside. Then when you paint the outside if there is any overspray that gets inside you will never know the difference. Done that on a couple of pieces and you don't get all of that extra spray paint. Little places get paint that otherwise would not. (Just my two cents!) An example of what I mean. Interior of the rear pump compartment was brush painted. in the first photo. In the second photo is the finished paint job of the same area.
-
Here's Dave's first pop of what I sent him.
-
Nice photos, Bill! I see you captured the push button drive in one. I had a '57 which I drove until it wouldn't start anymore.


.JPG.c7f707671f063a278282143a25fed0ff.JPG)
.JPG.79df2b9fb3e90507bd7dd870eb77f51e.JPG)


.JPG.7ad5660eb314500fa2620981fe062e3e.JPG)