Chariots of Fire
-
Posts
2,781 -
Joined
-
Last visited
Content Type
Profiles
Forums
Events
Gallery
Everything posted by Chariots of Fire
-
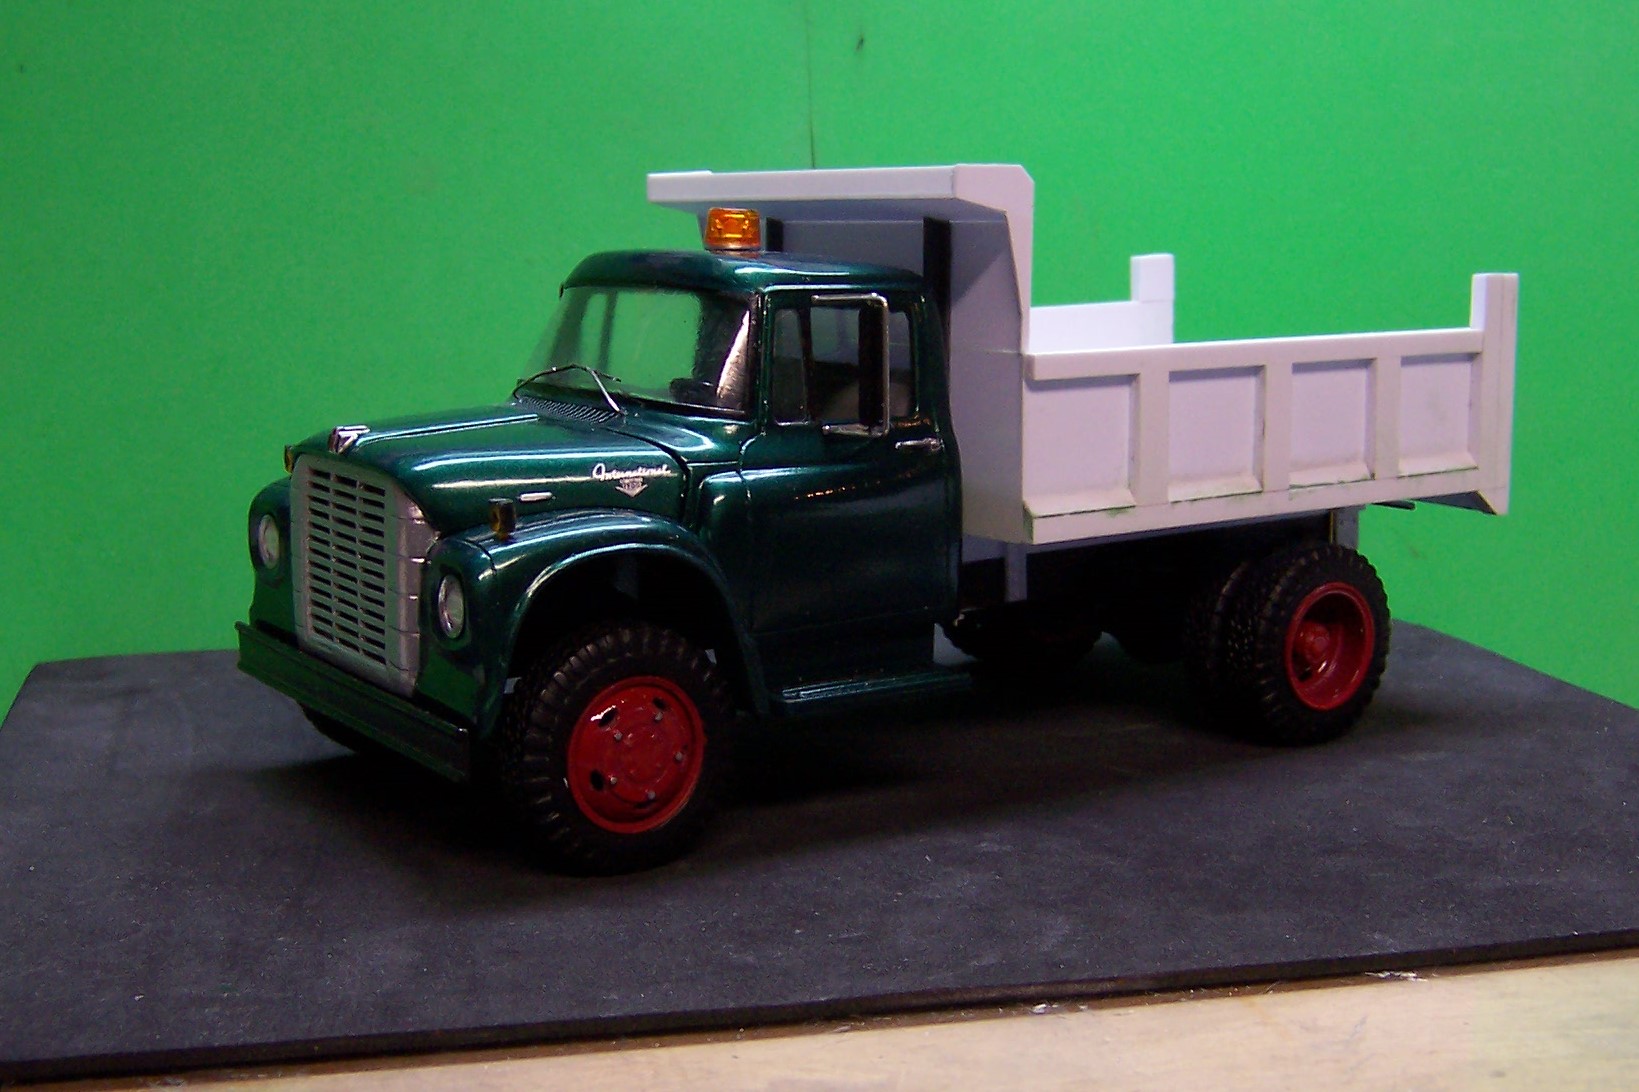
 Now for the stake body with individual pieces.
 -
I've done some HO scale trucks and I thought those were a bear to work on! I can't imagine trying to work on something that is only half as big! One thing I know! I would not try and plumb the engine!
-
You've done some amazing work, Mike. Thinking outside the normal modeling box for sure!
-
Coming along nicely. Those LED's are really bright! Where did the new grill come from?
-
Kalmar Ottawa Yard Tractor
Chariots of Fire replied to hct728(Bob)'s topic in WIP: Model Trucks: Big Rigs and Heavy Equipment
CPIF!!! (Cutting plastic is fun!) -
1955 IH RDTC 405
Chariots of Fire replied to DRIPTROIT 71's topic in WIP: Model Trucks: Big Rigs and Heavy Equipment
Strange that the springs are not centered on the axle. -
Warning Lights
Chariots of Fire replied to Warren D's topic in Truck Aftermarket / Resin / 3D Printed
Usually you can find that sort of thing at model shows. Look in the parts boxes that some vendors have. They typically separate it all out so you might find just what you are looking for in quantity. -
Ideal Glue for Resin bed
Chariots of Fire replied to kmc3420's topic in Truck Aftermarket / Resin / 3D Printed
What they said! Superglue. You might try minimum superglue in the gaps as well and then sand right away. The sanding particles will mix with the glue to fill the gap solidly. Epoxy may not set up hard enough for you to sand it well. -
Actually got that tip from a while back on this board as I recall. Glad to pass it on.
-
NOOOOO! Andy! PULEEZE! That's too early for snow!
-
Is the tank elliptical? If so I have seen a solution for it. Take a piece of thin wall pvc pipe slightly smaller than the largest width. Inside it insert a piece of wood that is slightly larger than the diameter of the pipe. This will push the round shape into an oval. Secure the ends with some sheet stock and you have an elliptical tank. All the other stuff is essentially window dressing. Another option is to modify the tank that is in the Monogram AC Mack kit. The tank is old fashioned but it can be modified with a bit of TLC and some scratch building.
-
Autocar Sleeper Cab
Chariots of Fire replied to 20dakota04's topic in WIP: Model Trucks: Big Rigs and Heavy Equipment
That is some nice work, Ray. It's obvious that you know a lot about the truck and where things are supposed to go. All that detailing sure looks nice. -
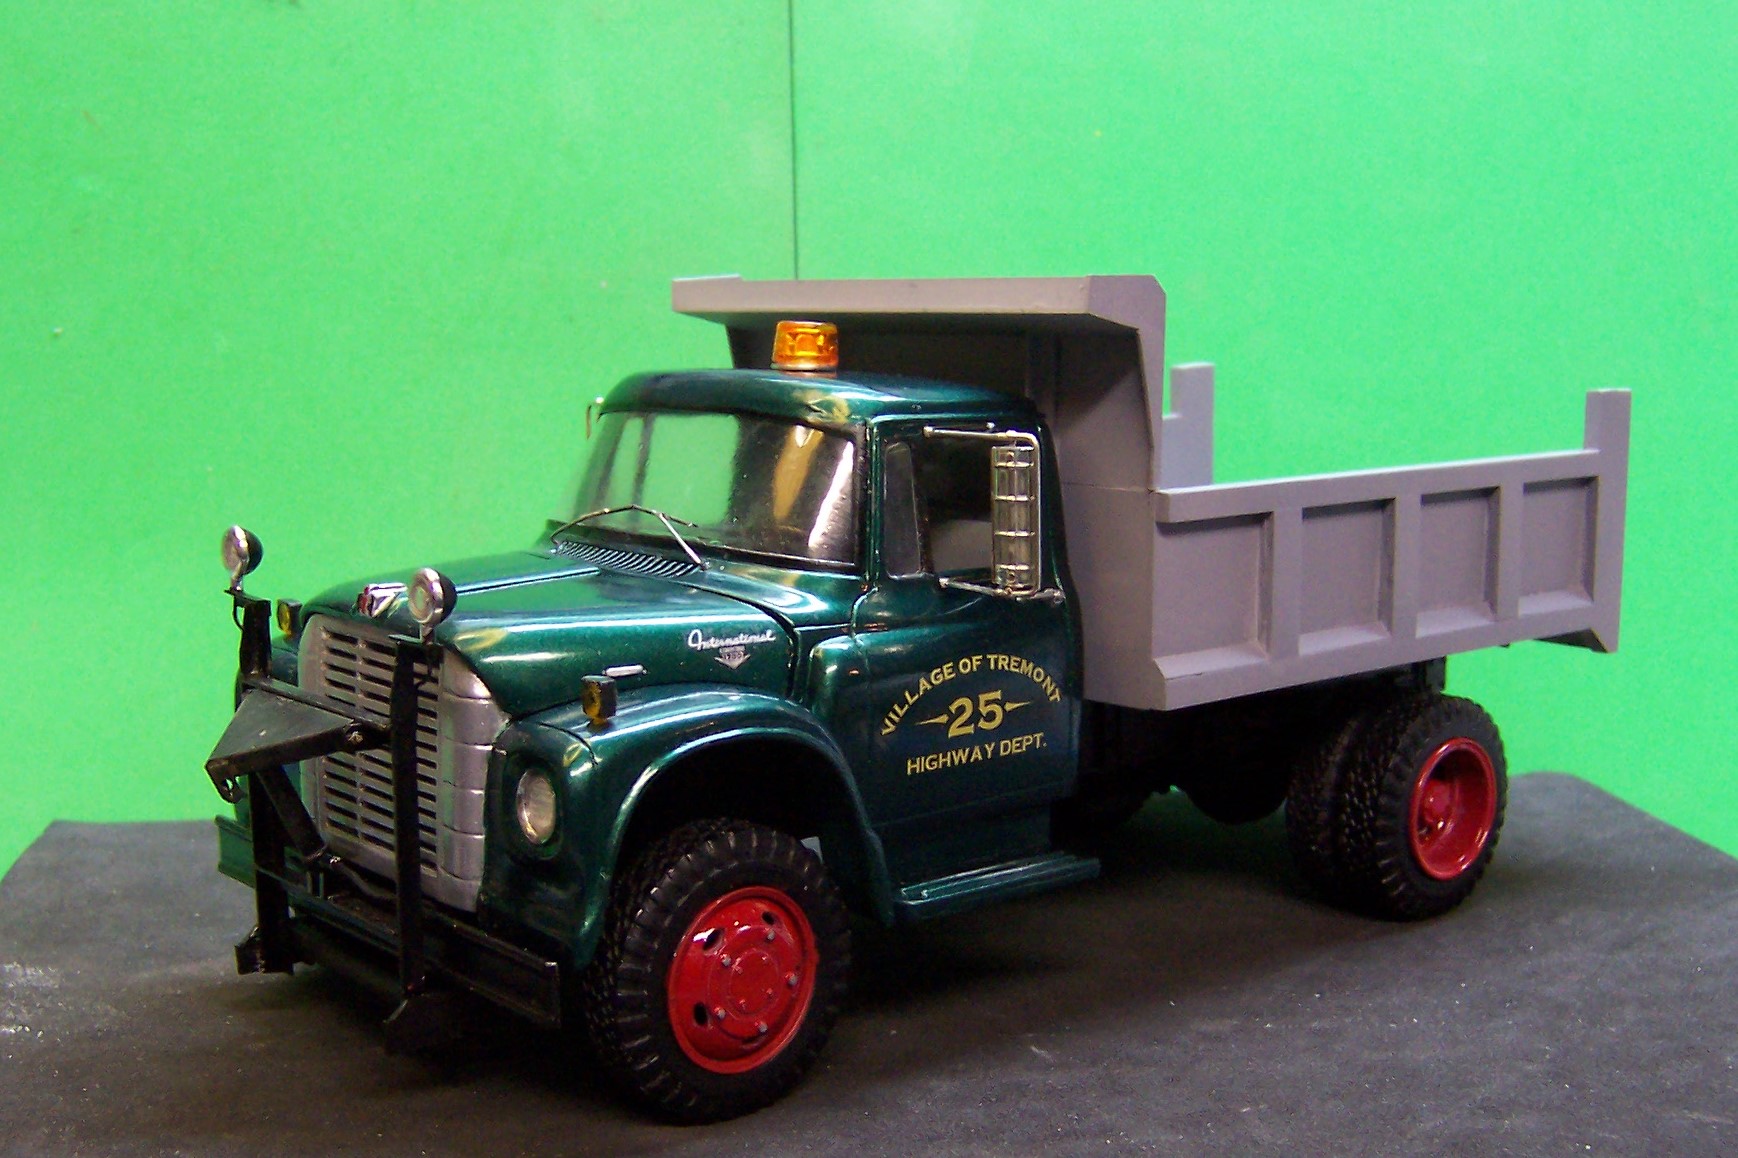
Got into the details a bit. A snow plow frame was built up of 1/8" angle stock, sheet stock and some tubing. A hydraulic "pump" and belt were added in the engine compartment and a tow plate with pintle hook were made up for the back. Will concentrate now on the lift mechanism for the body, the tailgate and the lever that unlocks it. The rear view mirrors also got changed.

-
International 9300 SBA
Chariots of Fire replied to cargostar's topic in Truck Aftermarket / Resin / 3D Printed
That's pretty nice! Is that a photoetched IH emblem on the front? -
Thanks, Tom! I guarantee you the next one you see will be red!! Town of Marion has one that was built by Maxim as a brushbreaker. It has been refurbed with new bodywork and an up-to-date paint scheme. That is what is on the project table after the dump truck is finished. After that.... there will be something that is completely different but as for now it is under wraps with very tight security!
-
Revell Bronco.....
Chariots of Fire replied to cruz's topic in Model Trucks: Pickups, Vans, SUVs, Light Commercial
SUPER CLEAN build!! Awesome work. Neat as a pin! Love it! -
Snowman truck
Chariots of Fire replied to keone2013's topic in Model Trucks: Big Rigs and Heavy Equipment
I guess it did turn out ok!! The color scheme and graphics are just great! -
The problem is that the front springs in most kits are way too long. That puts the axle in the wrong place for such a short hood. The grill sits right at the end of the frame and that is where the front spring bracket is also.
-
Check out the AITM home page. Look under "Shop" then "Conversion Kits" then "Internationals". You will find a built up Loadstar as a single axle tractor. Pretty cool.
-
SBIF!!!
-
Thanks, Bob. Marion still has one that Maxim built into a brushbreaker. It has since been updated but the IH is still there. That is the one I will be building when I go back to red!
-
They probably have a family resemblance but I don't think it is exactly the same cab. Got me guessing though so I should check it out! So I did! The mid '60's IH pickups had a similar windshield and the bulge in the door is similar but the roof is not. So I'd say that they were two different trucks and did not support the same cabs. If anyone has more particular info I'd be interested in hearing about it.
-
Got an update for the Loadstar. I decided to go with a medium duty municipal highway dept. truck with a dump body. Eventually it will have a snow plow frame attached. Still plenty to do to get it to a finished state but we are making progress. Still to go are the dump body hydraulics, mud flaps, rear tail lights, tail gate and some detailing. Just a fun build for a change. We will get back to a Loadstar fire apparatus later!
-
Don't forget that there would be a timber rail between the frame and the bottom of the dump body. That would make the body sit at about the right height.
-
I started with the Louisville chassis but it has issues fitting with the IH cab. The front springs on the Louisville are way too long so that the cab will not sit over the tires. So I made the frame from Evergreen strip stock and used a set of shortened up front springs from an Ertl ALF kit. The rear springs did come from the Louisville since they come with helpers that I have seen on many of the IH chassis photos I checked out. The frame is a bit long for a wrecker body but that is easily cured by cutting out a section, bringing the rear axle closer to the front and then splicing the frame back together again. The tires are resin castings that I made from a tire that I mastered a few years back. The wheels are also resin castings that were slightly modified from a set that came with a Modelhaus '66 Chevy C60. Right now I'm awaiting news from a 3D guy telling me that the road tread tires I asked him to do are ready at Shapeways.