89AKurt
-
Posts
8,426 -
Joined
-
Last visited
Content Type
Profiles
Forums
Events
Gallery
Everything posted by 89AKurt
-
single file, ultimately
-
 Cool, thank you. I got the Italeri kit of the Camionetta AS 42 Sahariana that also has a resin engine and figures, plus the extra photo-etch parts. I got a vacuum-formed kit last century of this vehicle, so it's like Dark Ages vs. this century. I have also acquired other subjects, but better refocus on this project. Started the tracks. Got smart and made a jig. 2.25 hours just on this, but that includes making the wood form. Have two ends not glued, of course. ?
-
Thanks for the information. Squadron sells all those, have considered the 6 axle armored car, but already have the AFV Club Sd Kfz 231 8 wheel kit that someone gave me. I did get the BV 141 airplane, with Hobby Boss box. I would say this Pz1 is very good kit, the parts are amazing, but the assembly results make or break your patience. Will not whine about doing plug wires ever again!
-
I looked at the Dragon kit after I admitted having it. There is a bag of loose track links. No engine/transmission or interior hull detail. Interesting kit there, never heard of that brand. Yes it is. ?
-
Too many pictures?
89AKurt replied to BigTallDad's topic in Forum News and Questions (formerly: How To Use This Board)
You've had a charmed life. Flickr ****ed up their site, effected *everyone* paid or not. -
fried to understand
-
Too many pictures?
89AKurt replied to BigTallDad's topic in Forum News and Questions (formerly: How To Use This Board)
For what it's worth.... due to inflation my two bucks. I've seen the Photo*ucket debacle, glad I never used that site. I have used Flickr for several years, they went through a tech upgrade that pissed off many members, me included. But it seems to have settled down, so once in a while I will link a picture (testing now). I've been using my Nikon lately, so been downsizing the pictures to 1920 x ___. I noticed one topic where someone posted a truckload of pictures, it spazzed out for a minute, really annoying! Trying to not abuse the host. -
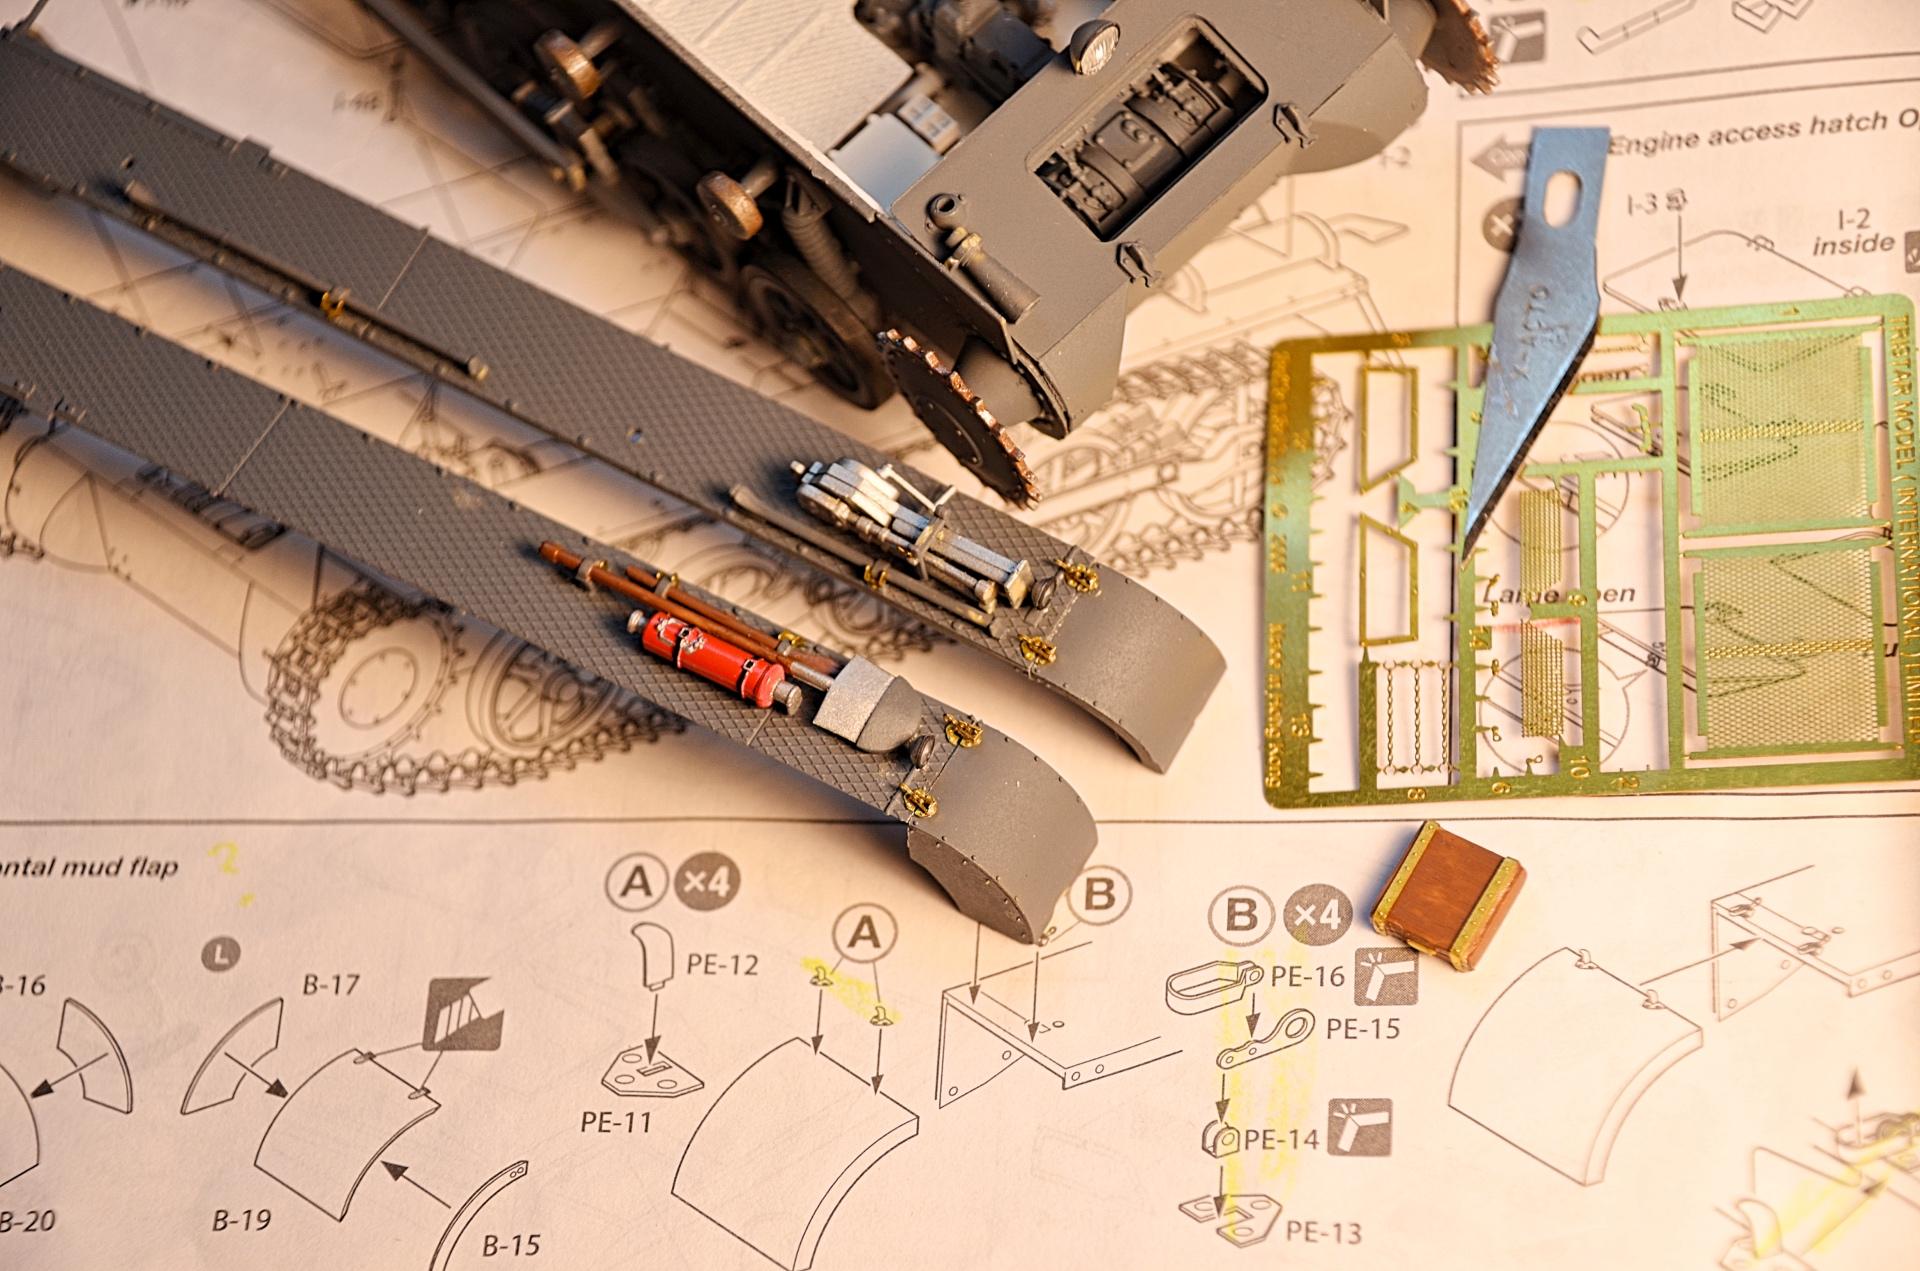
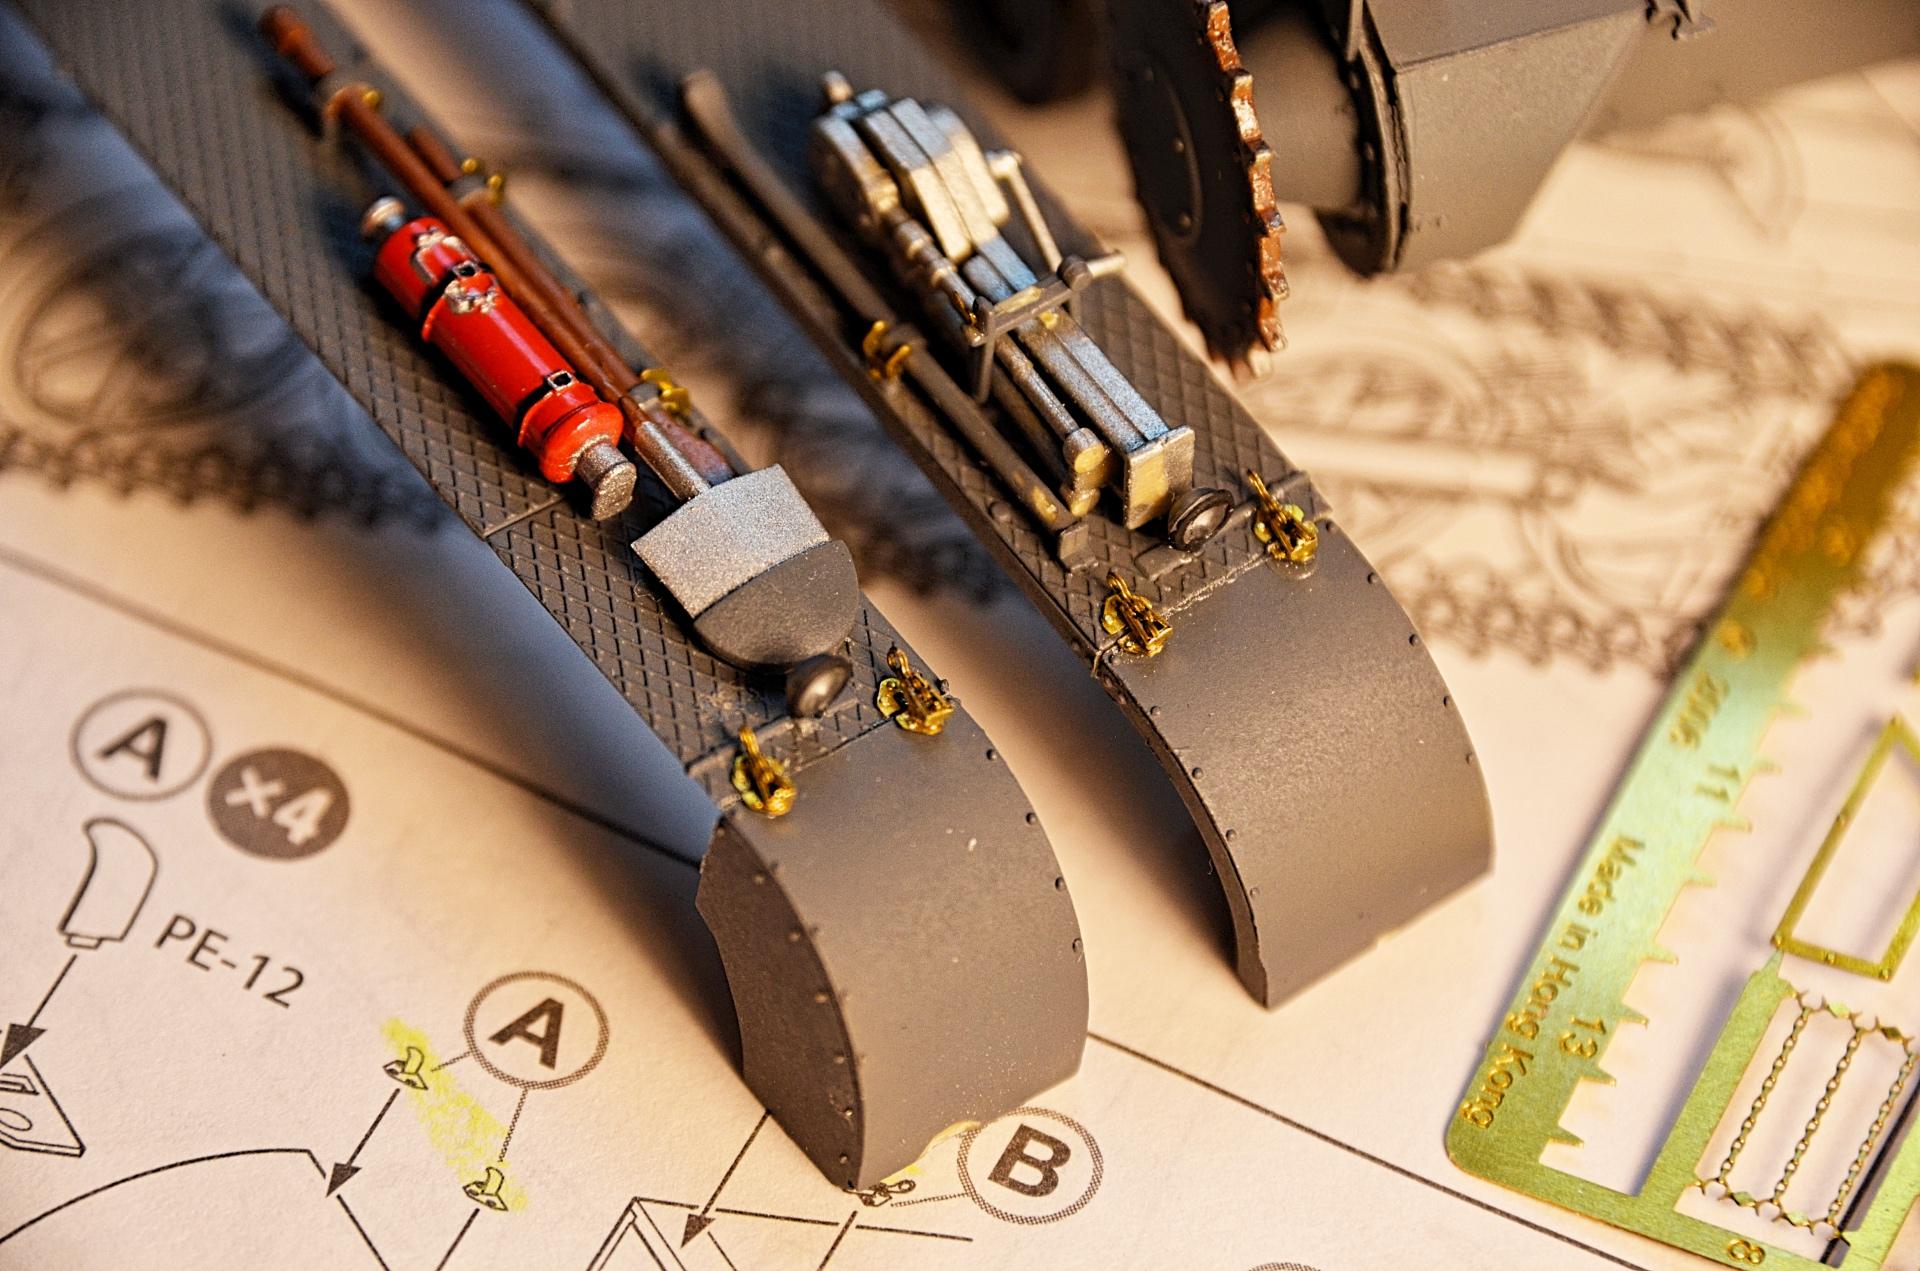
Thank you! I know the feeling. Thanks. Sorry to scare you, but I can't help it. ? I know Tamiya did the Pz2 long ago, also Bandai never did the Pz1, so those who scratch-built theirs must have been bummed when these came out. I have the Dragon Smart Kit of the Pz1 tank, looks as detailed. The photo-etch got done. What a stupid waste of technology to create microscopic detail that nobody will see! I lost the first PE-14 part when I was trying to bend it, decided it was a waste to sandwich and bury in superglue anyway. The tools have a part, that I rotated so it would glue down. Brush painted all these after gluing on, which hides the atomic size detail. The only p-e to put on is the muffler shields, which ought to be a cake walk; will need to airbrush after bending. Tracks are next, 87-88 links per side. ?
-
of psychedelic Bus
-
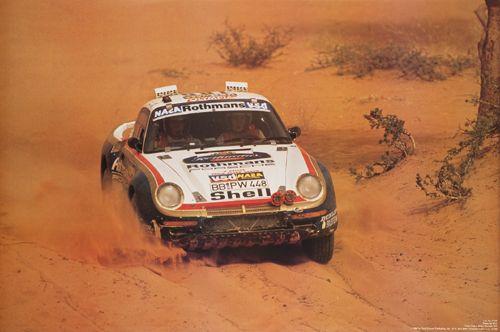
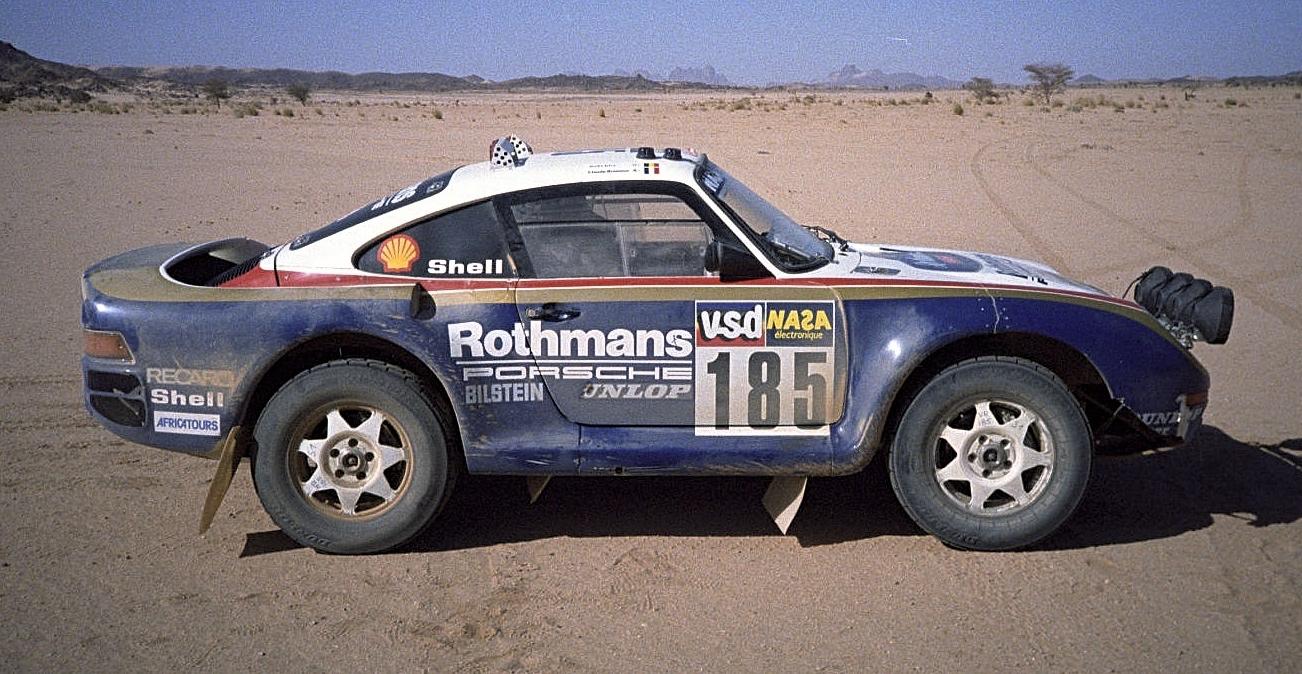
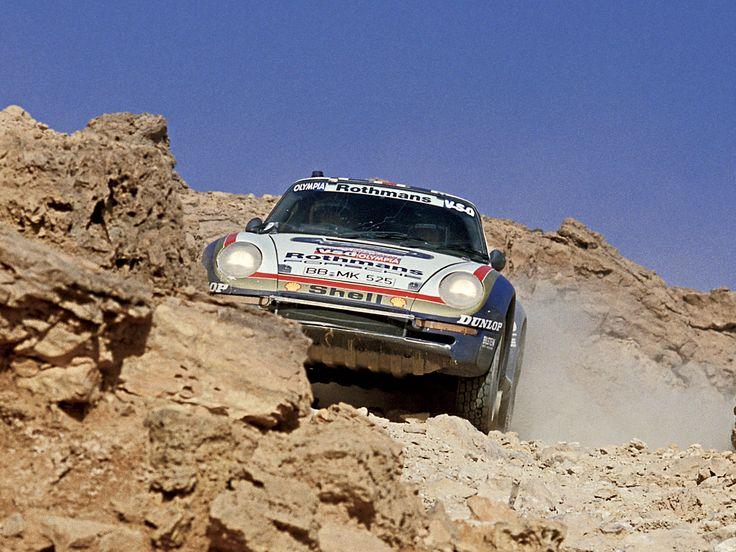
Porsche 959 Paris-Dakar - rode hard and hung up wet
89AKurt replied to 89AKurt's topic in Model Cars
LOL That car really was. Thank you too! Thanks my freind! -
Porsche 959 Paris-Dakar - rode hard and hung up wet
89AKurt replied to 89AKurt's topic in Model Cars
Thanks so much! -
night stand marathon
-
Pfalz DXII
89AKurt replied to Southern Fried's topic in WIP: All The Rest: Motorcycles, Aviation, Military, Sci-Fi, Figures
Looks great! Fascinating camouflage on these WW1 fighters. -
Really nice looking model, and you did a bang-up job! [...] It goes together with an electrical system for all the lights ,etc. but I have yet to find and install the correct batteries to check that detail out. [] Can't resist, must be Lucas electrics, Home Before Dark! ?
-
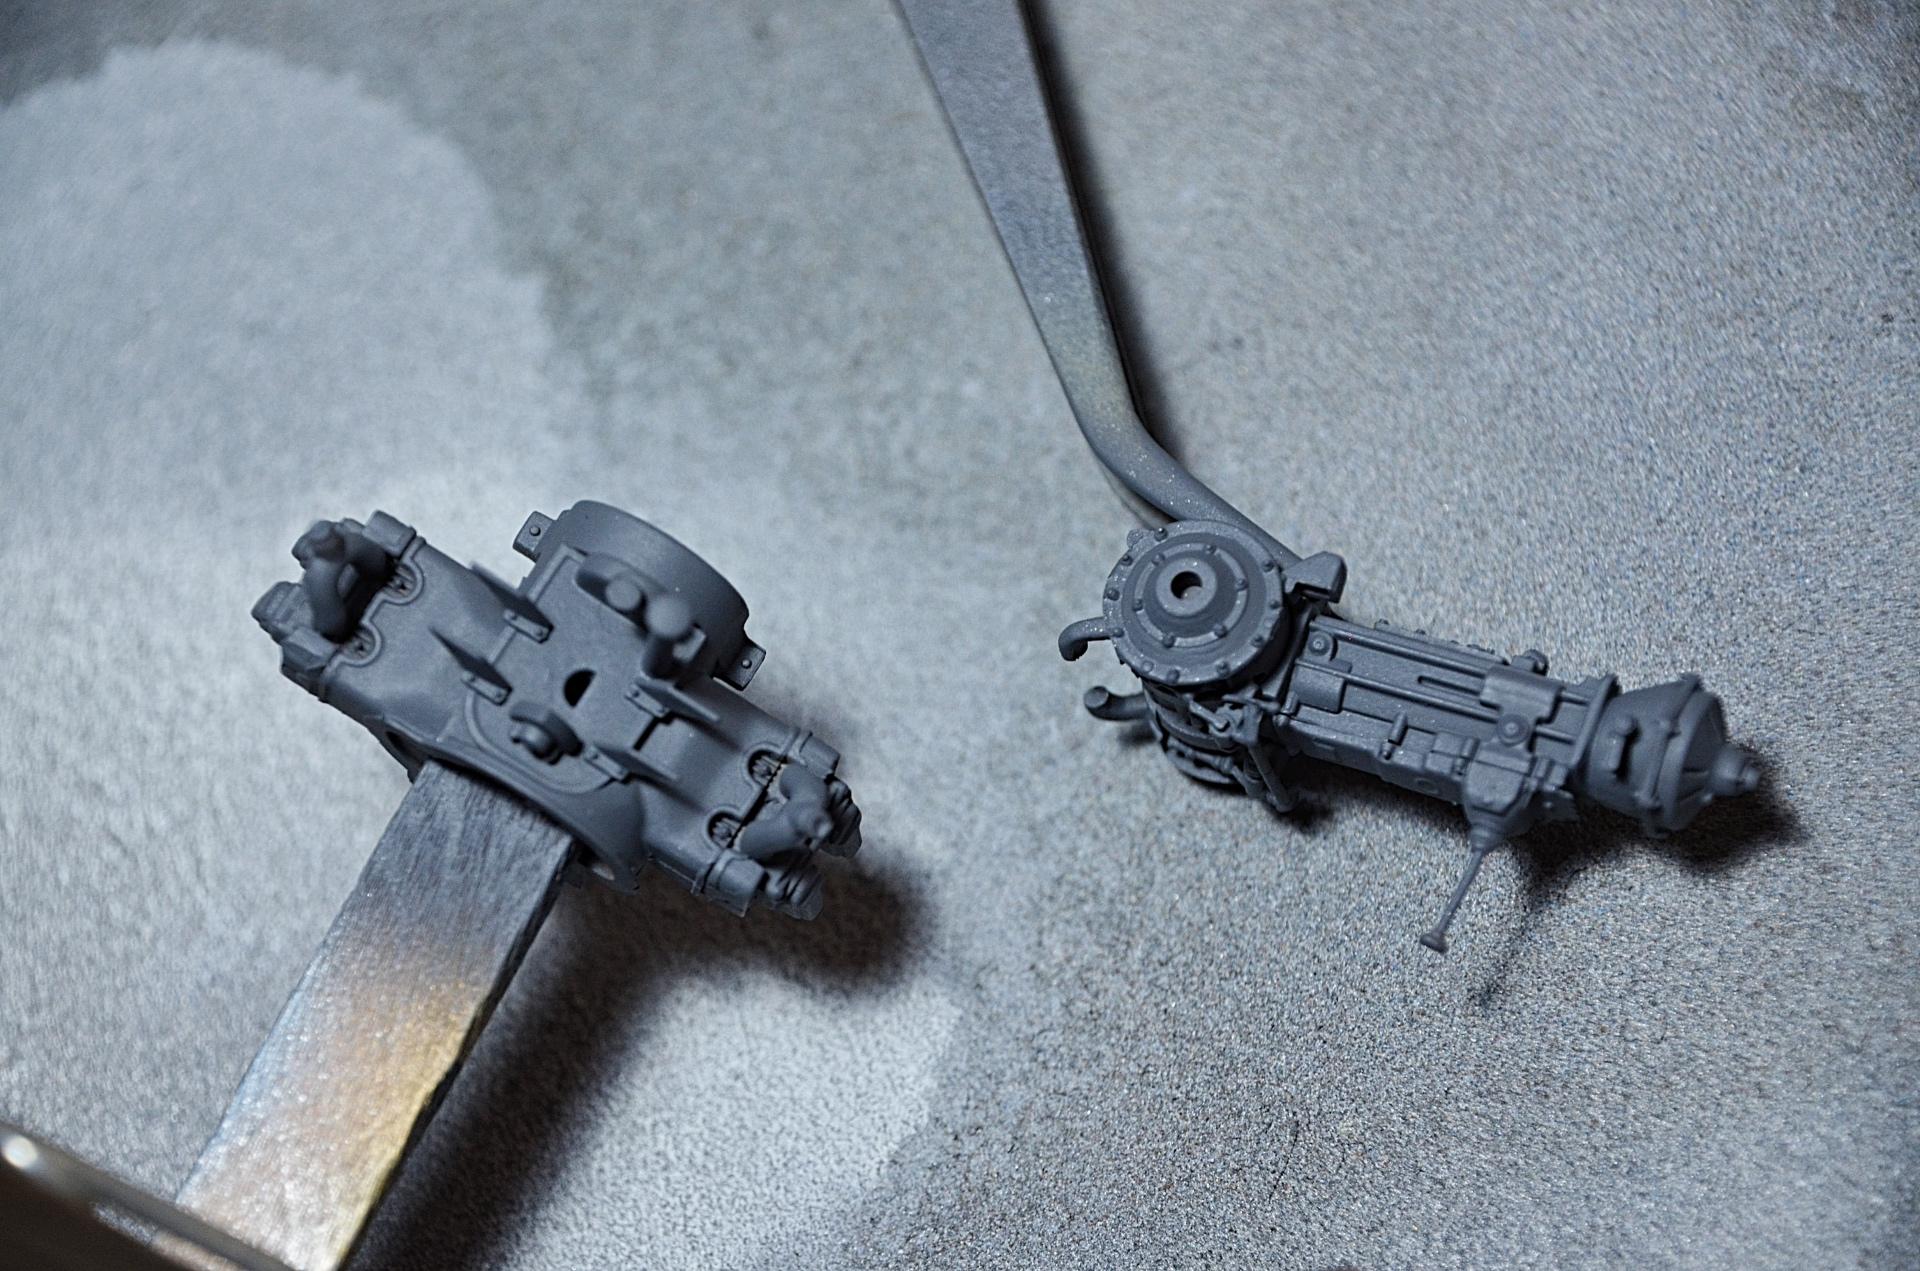
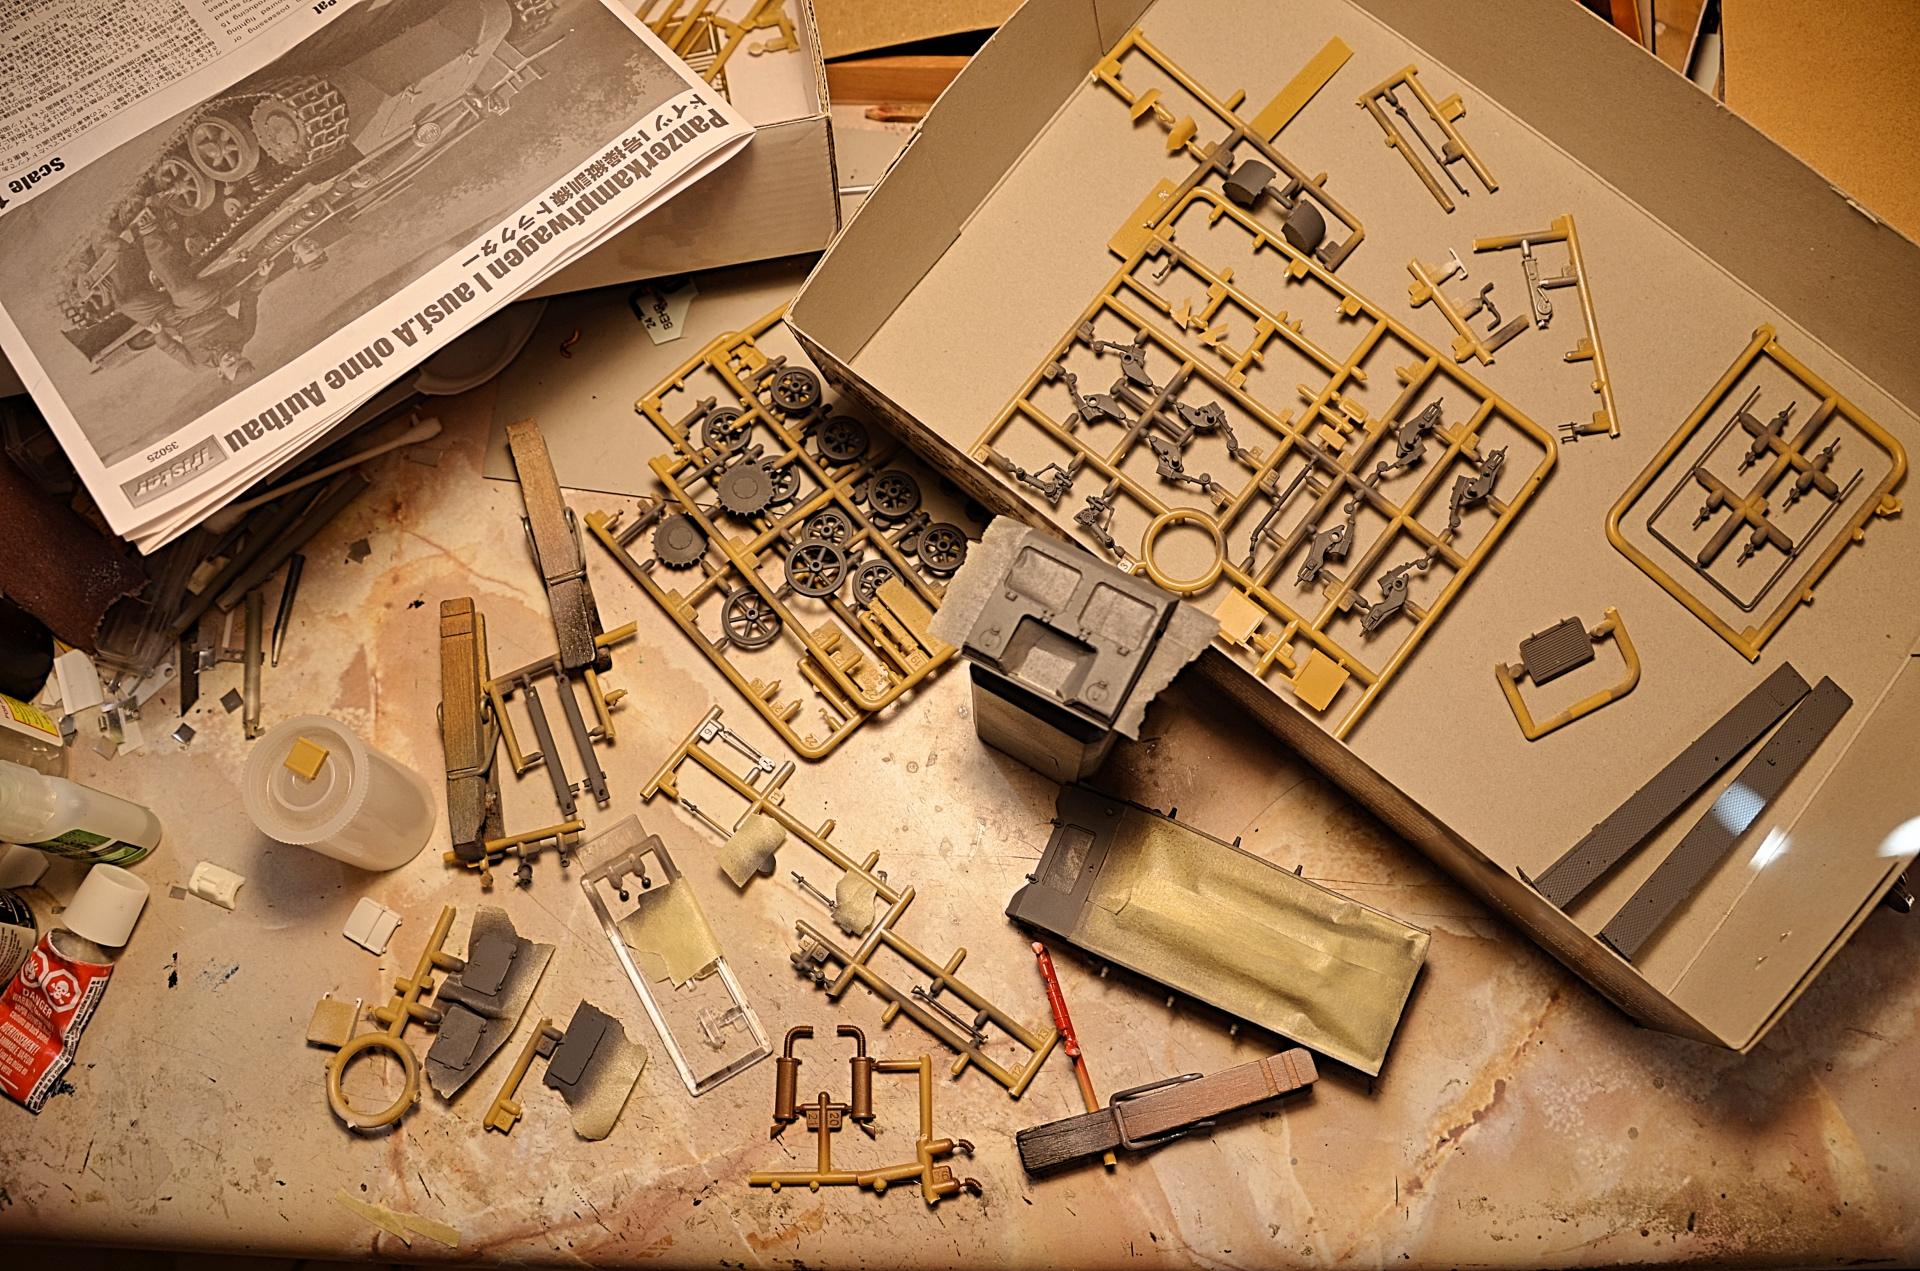
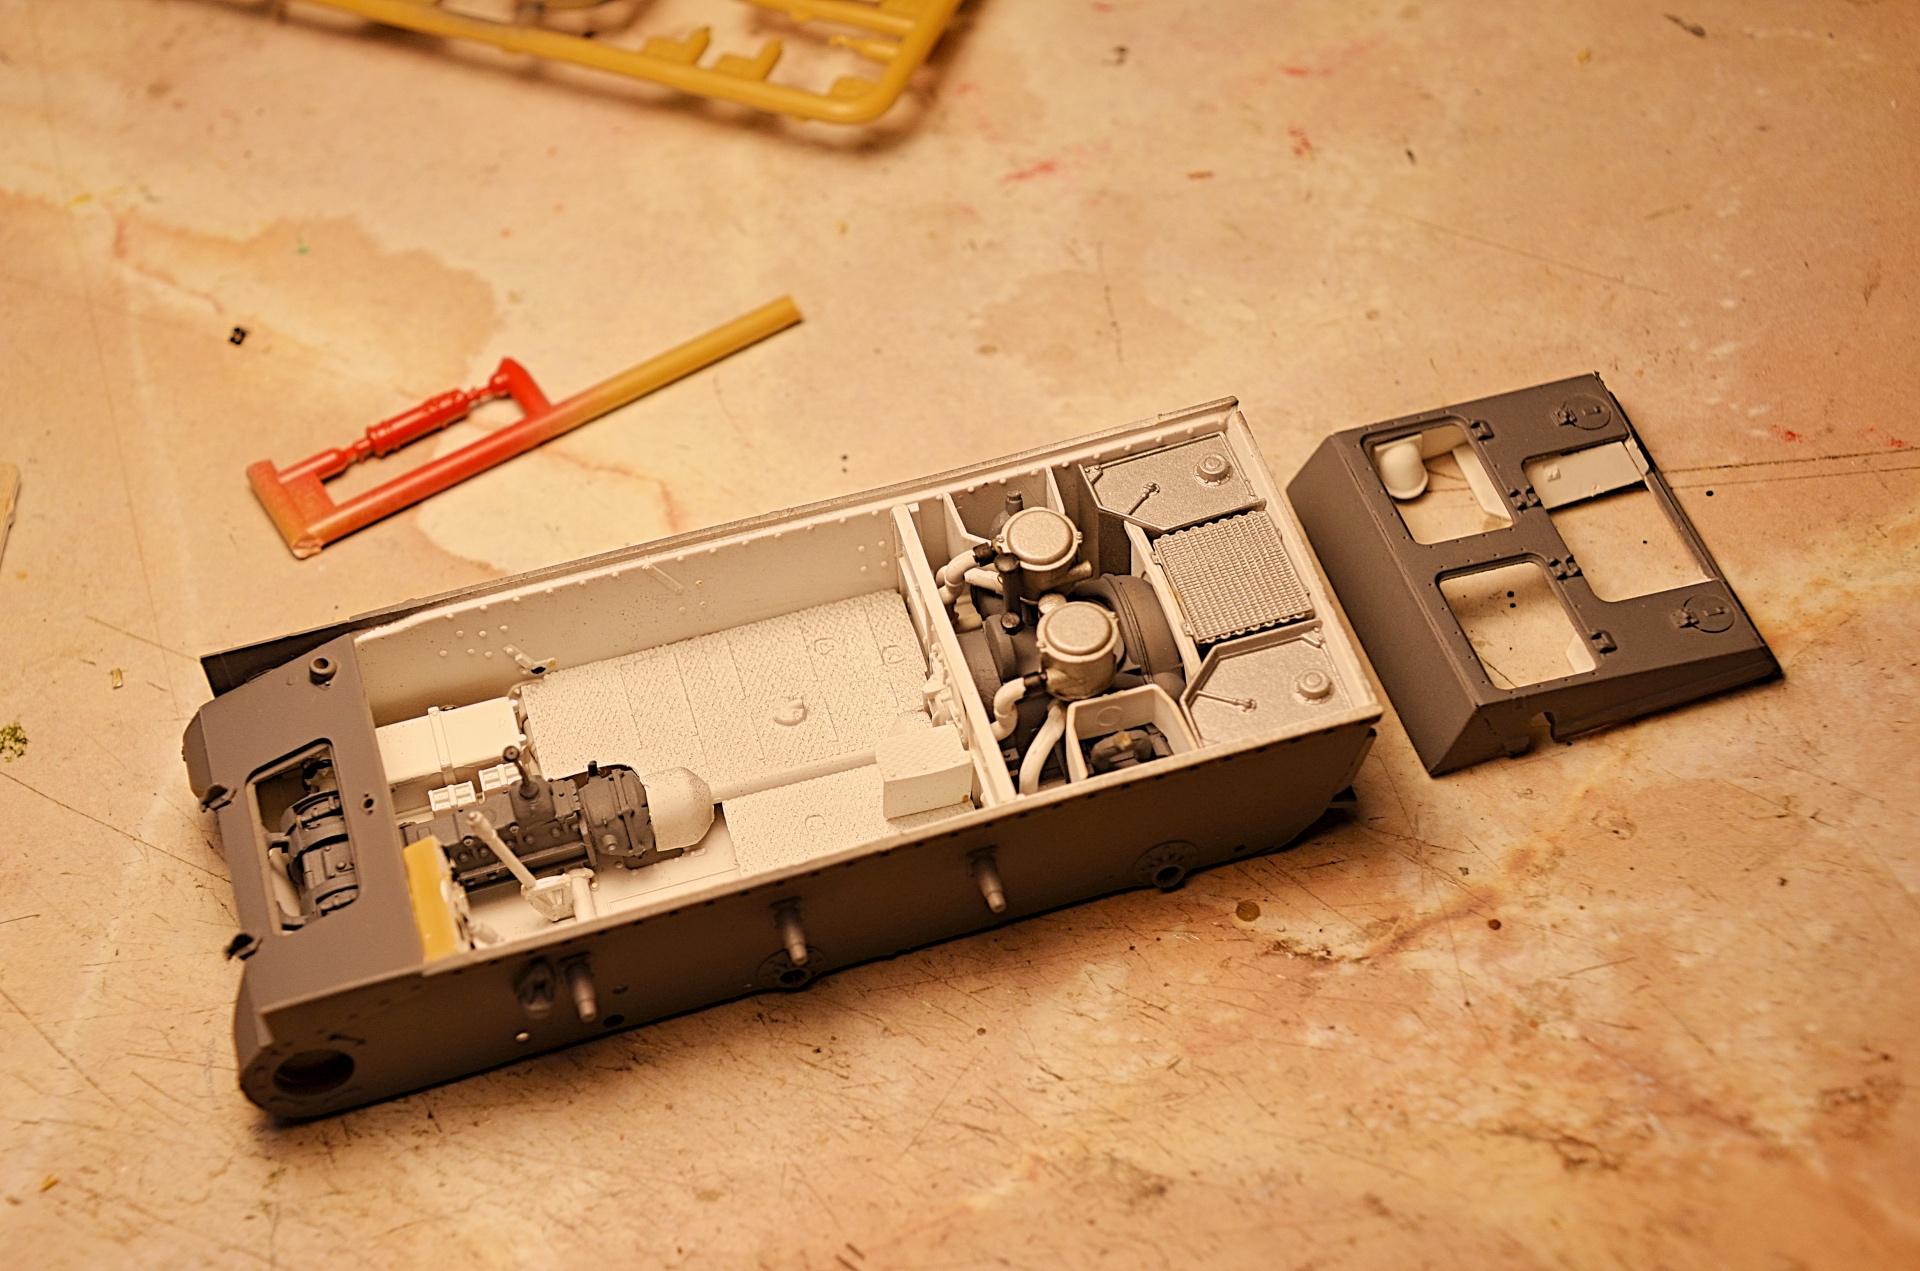
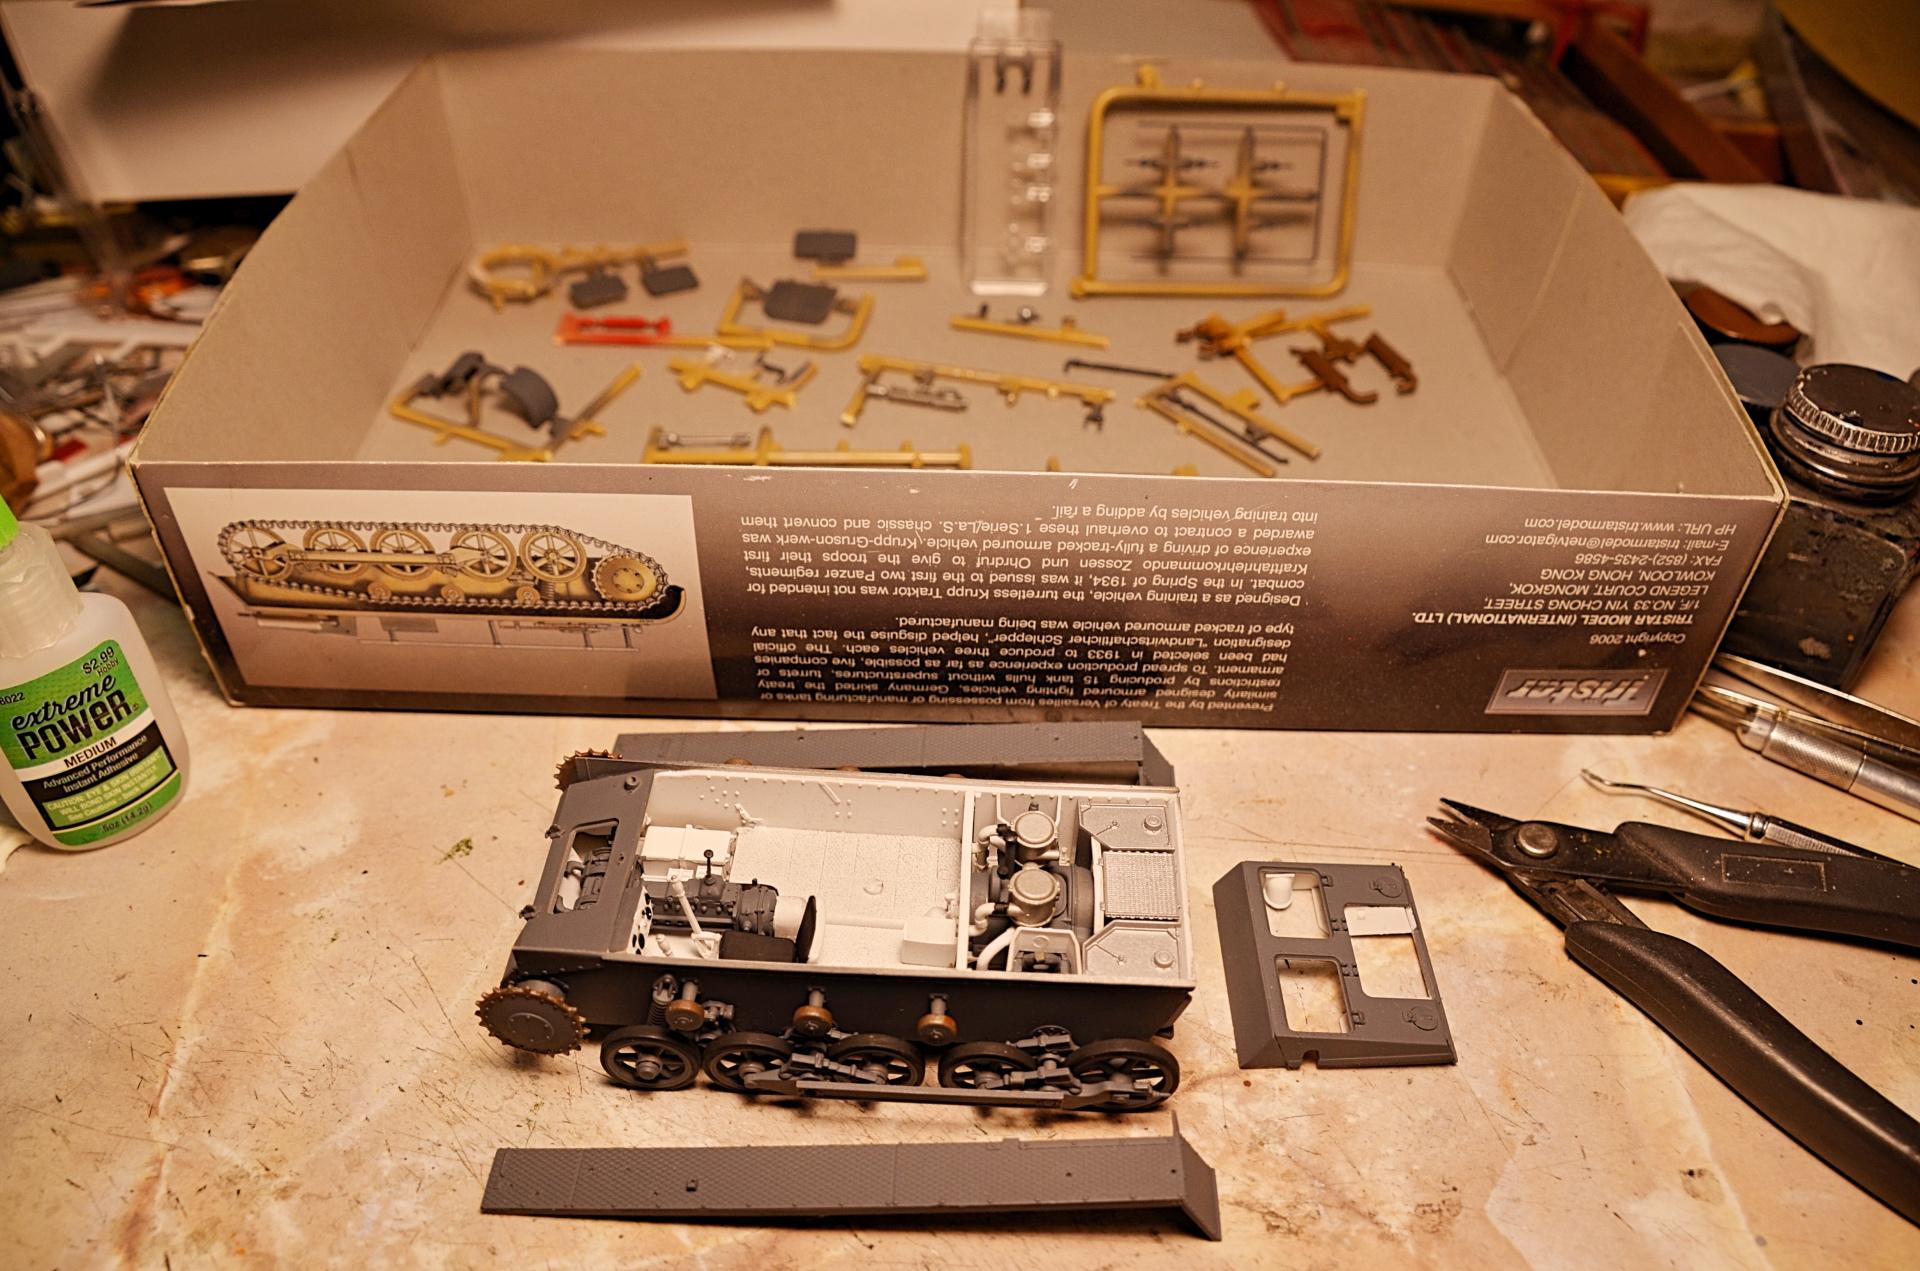
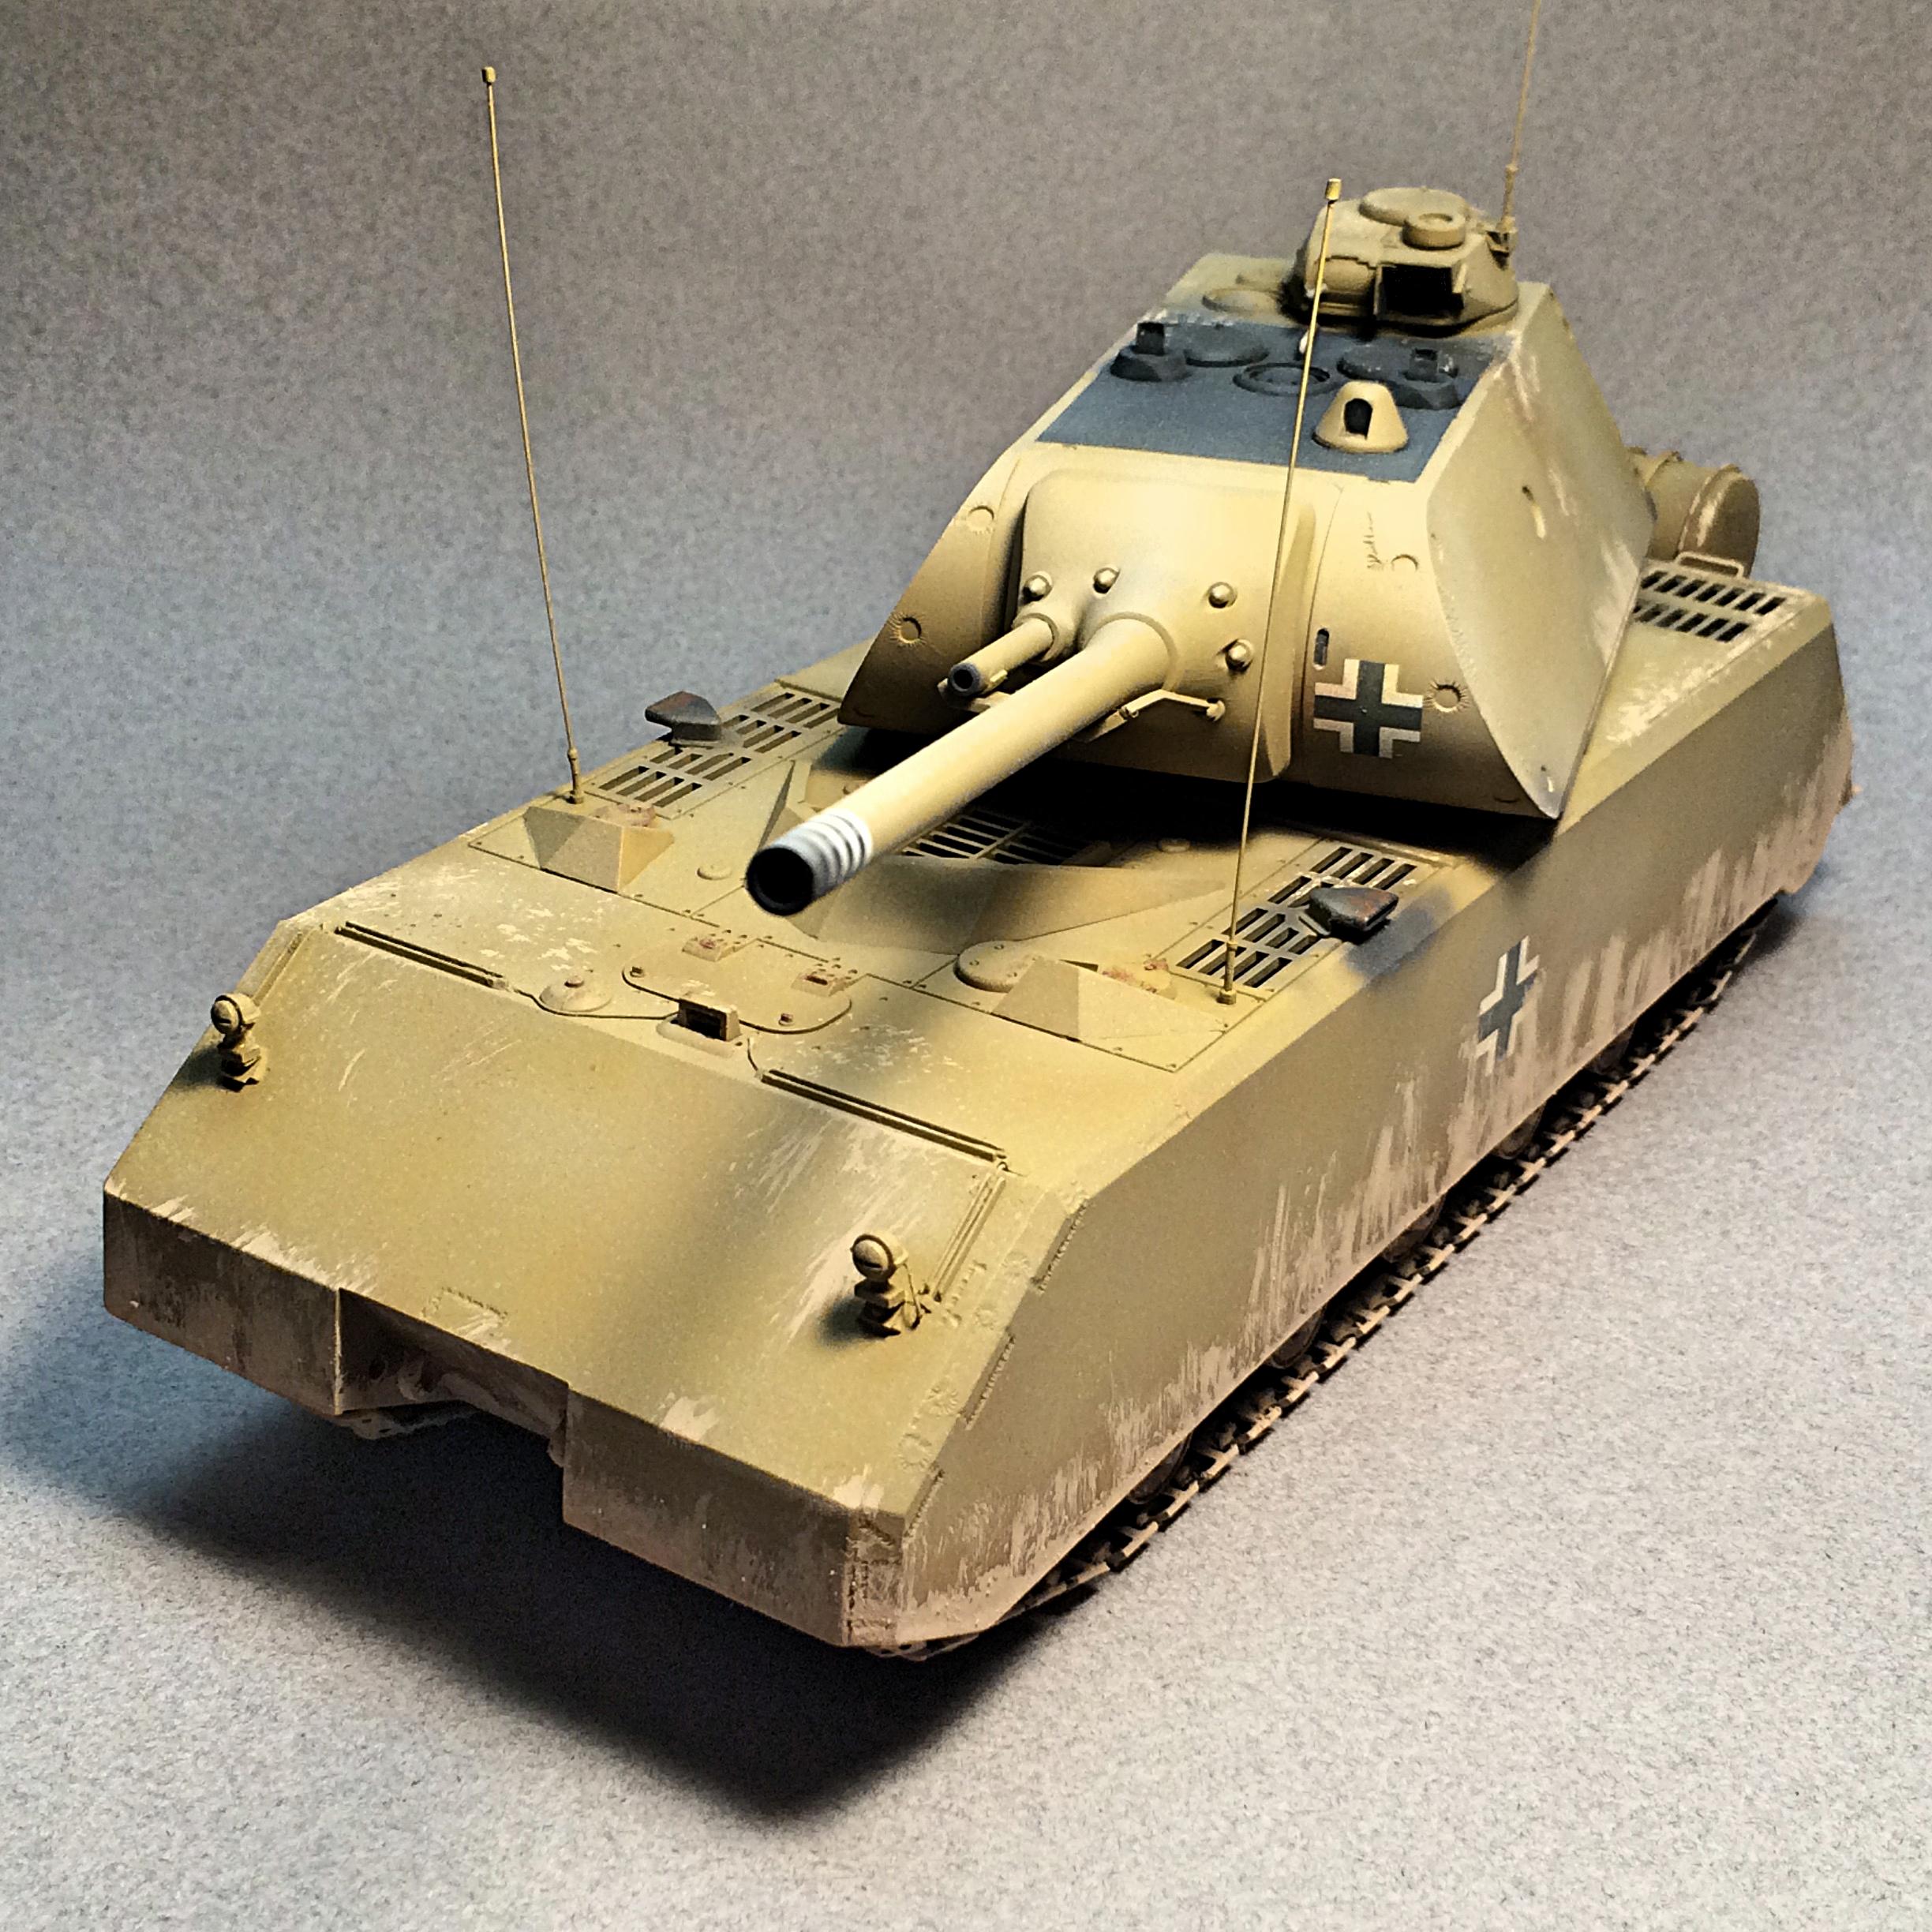
I call it the Panzer 1.0, the very first version without a turret or armament because of restrictions set after WW1. I built Bandai 1/48 military models when I was growing up, mostly German, really liked having interior and engine detail. When I got into 1/35 Tamiya kits, was disappointed there was no interior at all, felt ripped off. Fast forward about 45 years, so many interesting subjects being produced by numerous companies, in this case Tristar is the brand. The sophistication of the mold process is amazing, several parts have a third axis. Teeny tiny parts, almost no mold lines, zero flash. Includes photo-etch. And to drive you insane, individual track links, for the whole track (some kits have the flat sections as one part). I have been wanting to build a tank, so picked this because it had been started, there are extra parts such as the turret that I added to the Maus that I built in 2016. I've always been fascinated how the evolution of tank size grew during the war, the Maus turret is bigger than the Pz1 and could weigh 20 times more. The number of parts is ridiculous. Check out the engine block, with the third axis mold technique. Some parts are not used, will be handy for scratch-building. The three trees lower right are the track links. I skipped around the instructions, glued together sub-assemblies before painting. There was the option of two colors for the interior, grey or white. I understand everything was one color, but I wanted the engine/transmission to contrast. The flat four air-cooled engine, and transmission, have detail on the bottom that won't be seen. I masked, then airbrushed more grey. Because I don't like brush painting unless it beats crazy masking, I do things like the fire extinguisher. Most parts installed inside. Some parts were a tight fit, didn't need gluing. There are many parts that get hidden, the engine has a beautiful fan inside the air shroud, two pumps or distributors, that are under the oil cooler. Going to allow the engine deck to be removed, could glue hatches open, or really go nuts and use photo-etch hinges but then it wouldn't be Box Stock. Got the bogey wheel/suspension done. I did hand paint the tires, easy to spin on a sprue. ? I cut the sprue trees to reduce clutter (looking at my bench is another story ?) Getting the fenders and tools on will be a cinch. The tracks... ?
-
I've seen some Things that were tricked out. Wish there was a kit of it. For now, the Hasegawa Kubelwagen will have to do. BTW: Love the creativity on this, the hood hinge is cool, and the choice of colors is nice.
-
You could put REALLY long skis on the back! ?
-
Bf 109 F-4
89AKurt replied to Southern Fried's topic in WIP: All The Rest: Motorcycles, Aviation, Military, Sci-Fi, Figures
That's pretty sharp! Subtle weathering looks good. -
Knowing a couple of shows are having their last events, I should consider this. I have one model that ended up on a cover, should double check my magazine collection. I've never been to Ohio.
-
colored acid wash
-
Very cool ?, I *love* the weathering! Wish more people would try doing it, gives realism that no factory die cast can ever hope for. I have one of those kits, but don't recall the funky mirrors, am I going senile?
-
with dashed clowns
-
Porsche 959 Paris-Dakar - rode hard and hung up wet
89AKurt replied to 89AKurt's topic in Model Cars
Thanks. It's not hard at all, really. I'm thinking of looking around Sedona, sandstone and volcanic rock looks similar to this photo: South of Phoenix on the Gila Indian Rez looks like this: I know the Laughlin area along the Colorado River looks like this: Thank you! Thank you too! It's WAYYYYYY down on my priority list, if ever. ?
-
?
-
Porsche 959 Paris-Dakar - rode hard and hung up wet
89AKurt replied to 89AKurt's topic in Model Cars
Thank you! ? Moocho appreciated. Saw this on Flickr, and I'm resisting thinking about it.....