Steamboat
-
Posts
826 -
Joined
-
Last visited
Content Type
Profiles
Forums
Events
Gallery
Everything posted by Steamboat
-
Beautiful job! You made it prettier than Plymouth could ever do. Some would say that Virgil Exner was already experiencing dementia when he designed it.
-
BTW, the distributor that came with my kit was about the same size in scale as a golf ball. I used one from my parts box!
-
I just built an AMT 66 mustang coupe which has the same engine instructions. Part #35 is a combination of the oil filler and the mechanical fuel pump.
-
Very nice! I'm currently finishing up a '75 myself. Where did you get the wheels?
-
Absolutely stunning! The best model I have seen this year! I don't chime in often but this one deserves applause.
-
I'm beginning to like the Revell versions more and more. The oil pan is what makes it realistic. The chrome one on that 392 is pretty sweet.
-
I feel your pain. The pre-painted body is nice, and the Torque-Thrust wheels are awesome. I could never get the twist out of the body, though, no matter how hard I tried. The left front wheel doesn't touch the ground.

-
I think it was the snapper. It was pre-painted. The detail on the transmission is surprising.
-
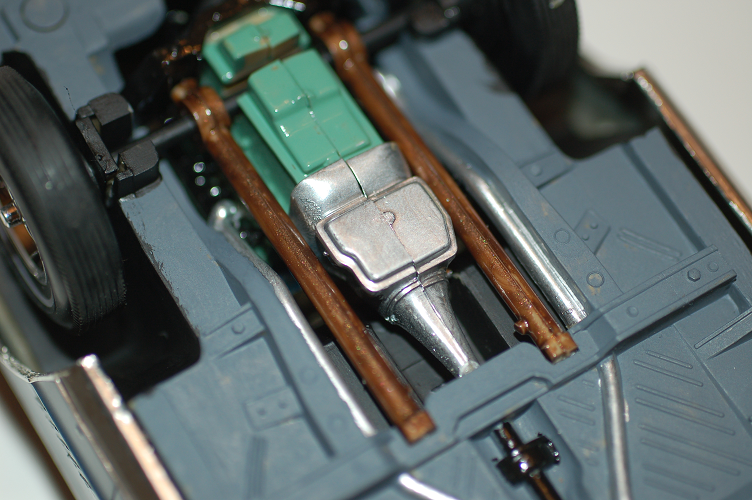
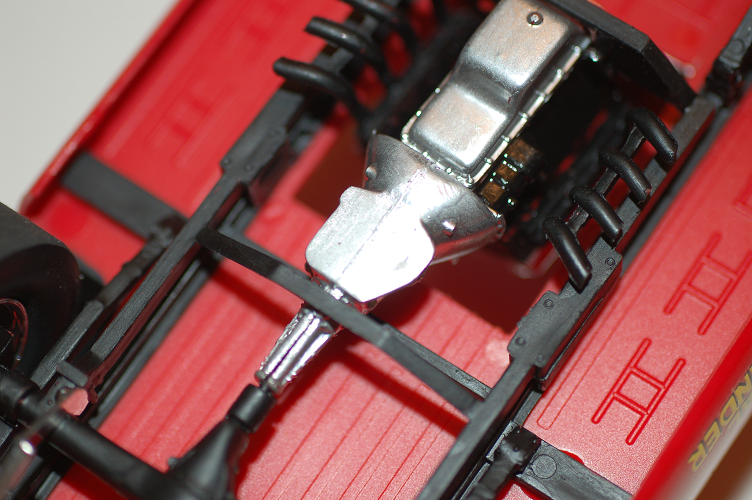
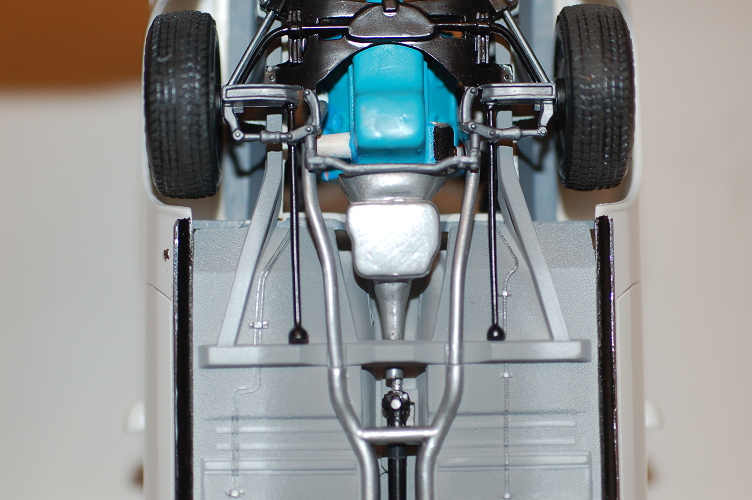
I went through all my built models trying to determine which has the best 727 Torqueflight transmission. Here are the results: #1 - Polar Lights 1965 Dodge #2 - Revell '69 Dodge Dart (on right, MPC on left, sorry for the bad focus) #3 - Johan Chrysler turbine car The rest - Lindberg '64 Dodge Johan '68 Chrysler 300 (nice torsion bars too! - NOT) Lindberg Little Red Wagon If anyone knows of others that have more detail, feel free to add.
-
The Last 'Cuda Convertible - transmission update
Steamboat replied to Steamboat's topic in Model Cars
727 Torqueflight transmission - Here's a pic of the chassis. I really can't identify which kit this transmission came from. I'll start a separate post in tips, trick and tutorials showing all the transmissions I've looked at.
-
The Last 'Cuda Convertible - transmission update
Steamboat replied to Steamboat's topic in Model Cars
I wish I could pinpoint where the torqueflight came from. The best I could find was a 1/25 scale tranny which is a bit small. I bought about 50 engines from eBay a while back and saved anything that looked like a Mopar. No idea what kit it came from. I'll take a pic when I get a chance. Maybe someone on the site can identify it. -
Very nice job. That was always a fun kit.
-
The Last 'Cuda Convertible - transmission update
Steamboat replied to Steamboat's topic in Model Cars
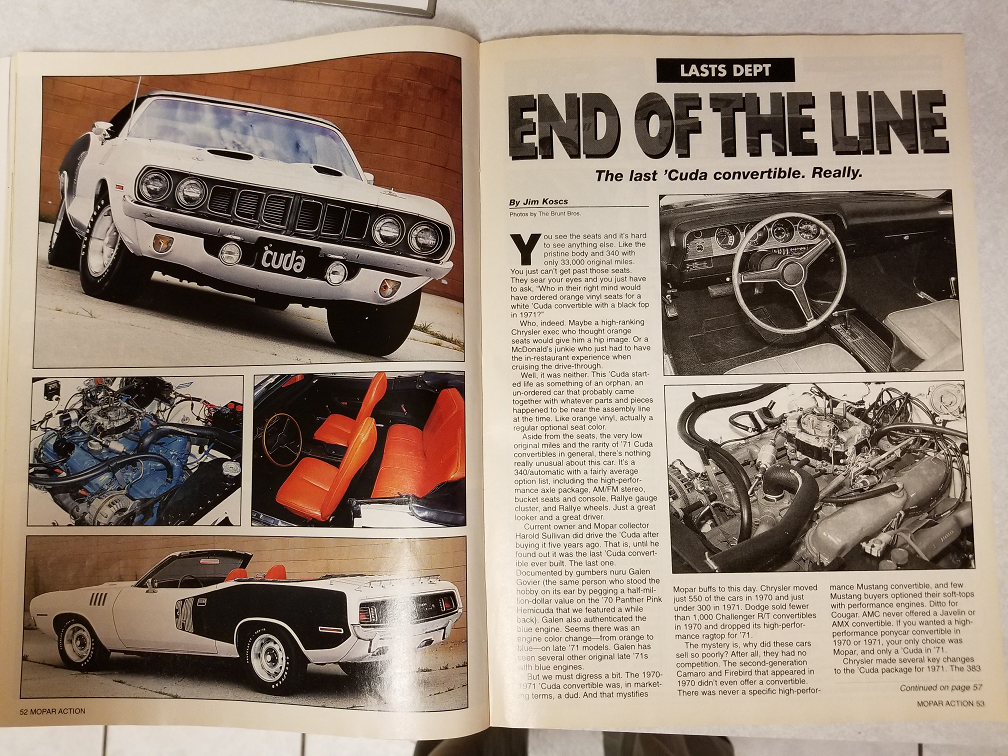
Here's the article, from Mopar Action magazine, February 2011
-
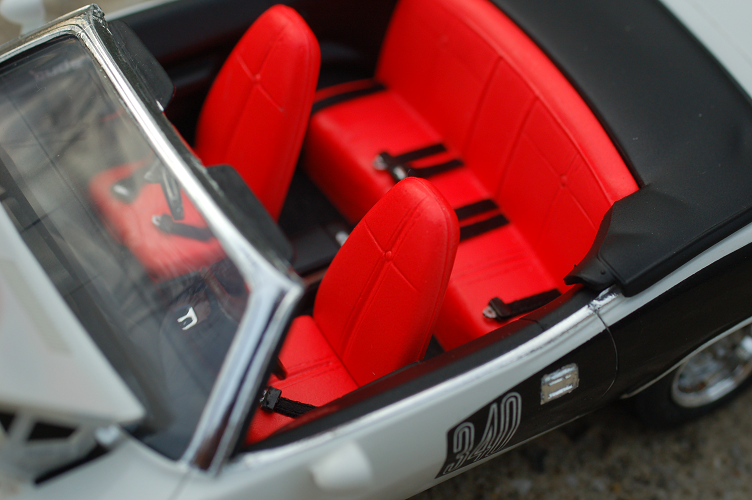
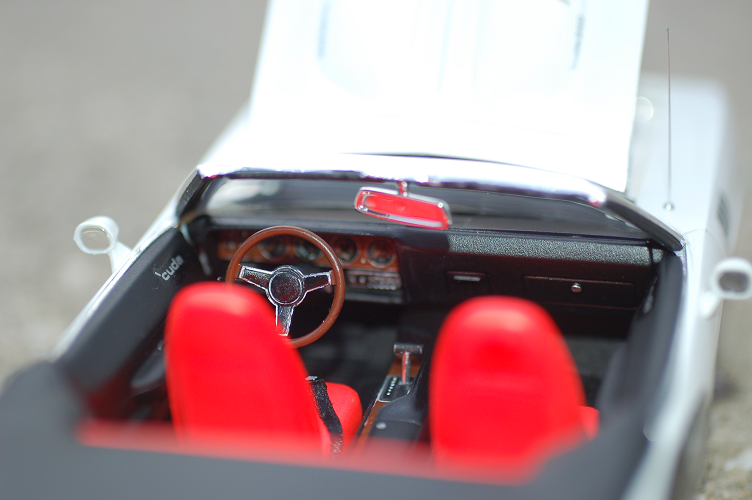
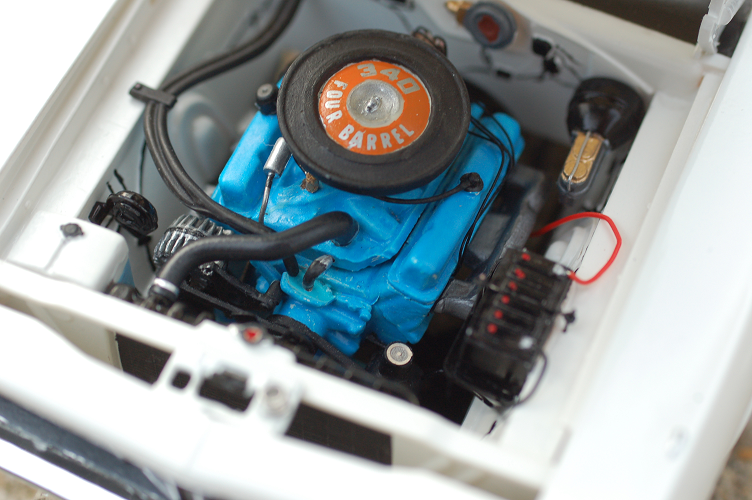
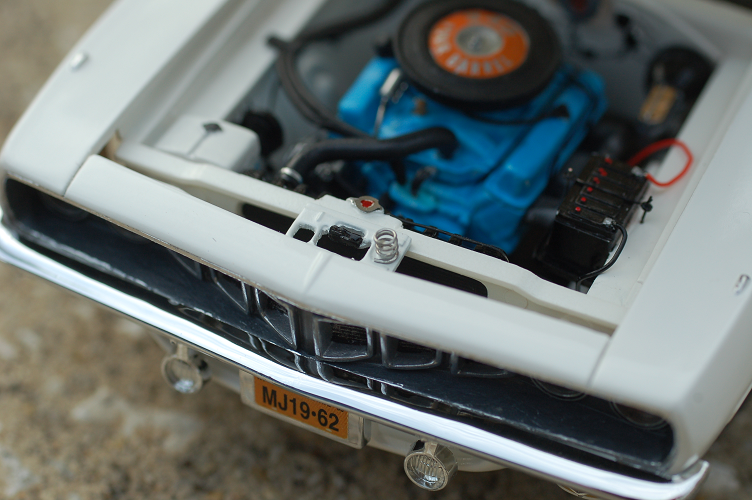
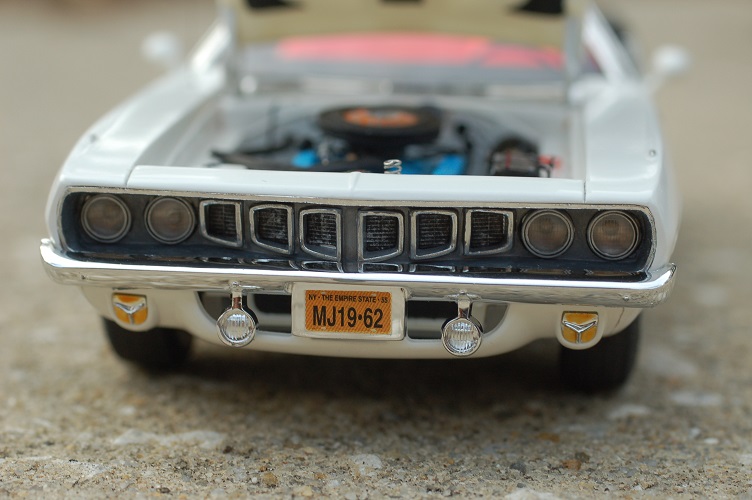
I just finished this one after a 5+ year build. It's is a representation of the documented last 'Cuda convertible to roll off the line. There is much conjecture as to why it ended up with the non-matching orange seats! I used a seat from the AMT Duster kit, and re-scribed the pattern on it to represent the base trim level 'Cuda seat. I then cloned that seat in resin to make the other seat. The pattern is carried over to the rear seat. The dash has a Rallye instrument cluster grafted in from an AMT kit. The steering wheel is modified from a Coronet. The engine was borrowed from the Monogram Challenger T/A, changed over to 4-bbl carb. Feel free to comment. I hope you like it!
-
That is a BEAUTIFUL build! I like the pictures where the car is reflected in water. How did you do that?
-
Can't wait to see how this one turns out. I've got a '69 that is patiently waiting to be built.
-
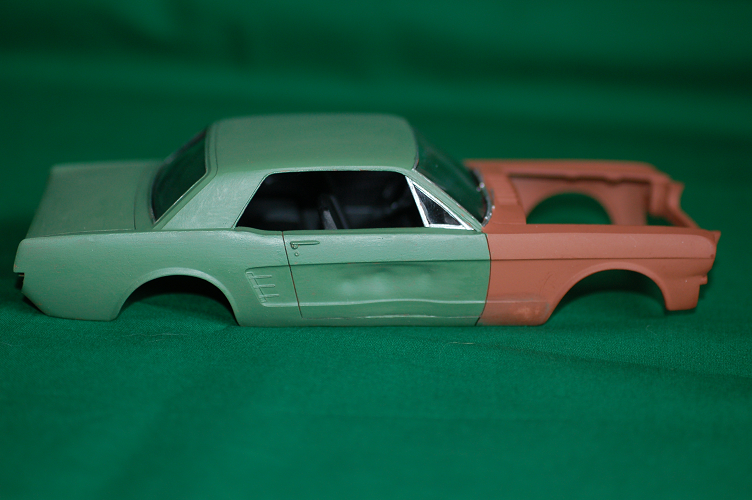
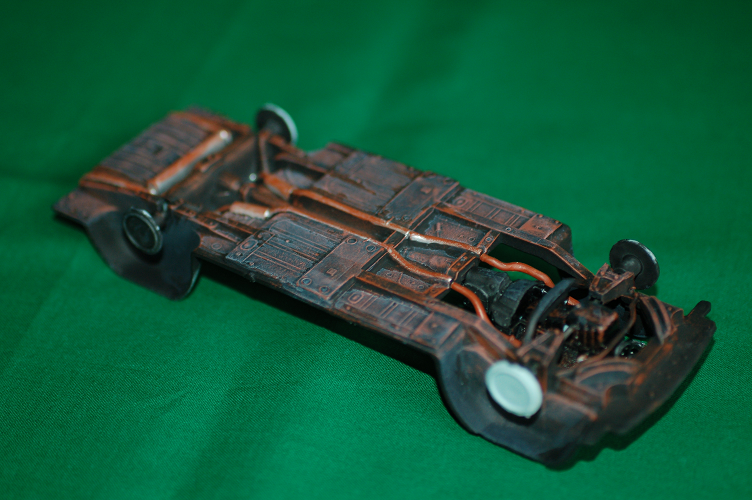
Progress on the Mustang: The body was primed with Rustoleum primer and partly top coated with Testor's flat green. The Rustoleum went on smooth and thin and I am very happy with the finish. The 1:1 car was painted flat green with a brush before I got it. This model represents the car partly through the restoration. Chassis with engine and exhaust, weathered and ready for final assembly: Hope you like. I'll post more progress pics soon.
-
Nice work! I like the blue streak on the tires. Nice detail, Is that a decal?
-
I've used Tamiya lacquer, Model Master clear enamel, and Future for clear coat. I've gotten yellowing decals when using the Mode Master enamel, but never with the Tamiya lacquer. With both Tamiya lacquer and Future, I've had problems with the decals wrinkling, but only occasionally. It's still too early to tell whether Future allows yellowing as I've only been using it for about a year.
-
I've always loved the XJ12's. Nice work on the distributor. I'm sure having 12 wires to deal with really added to the fun!
-
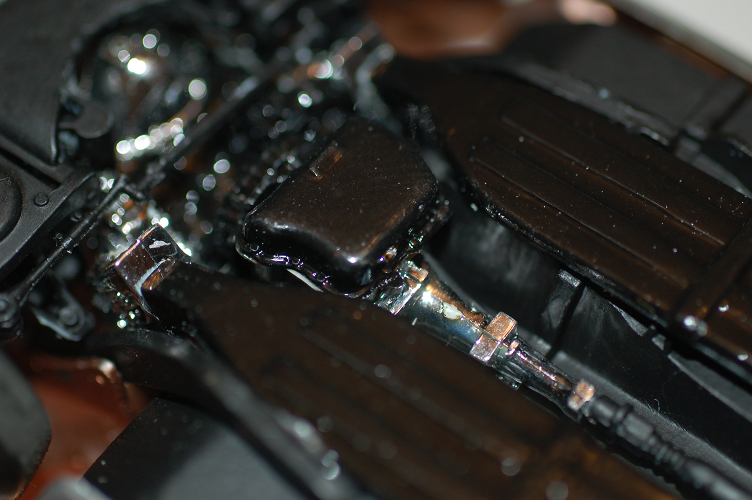
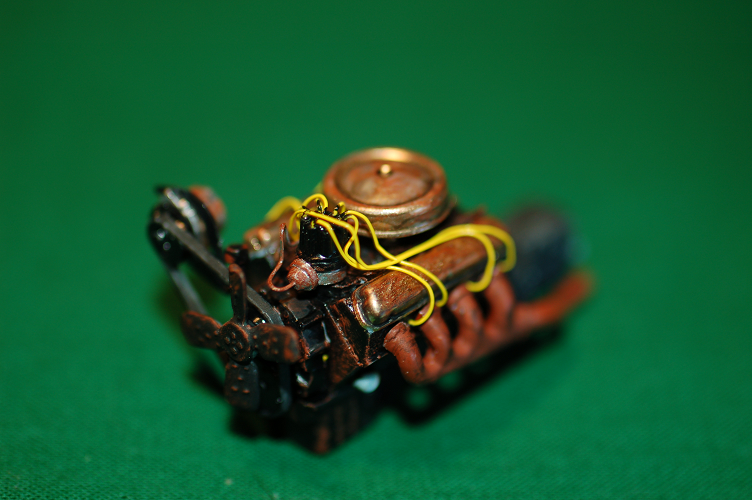
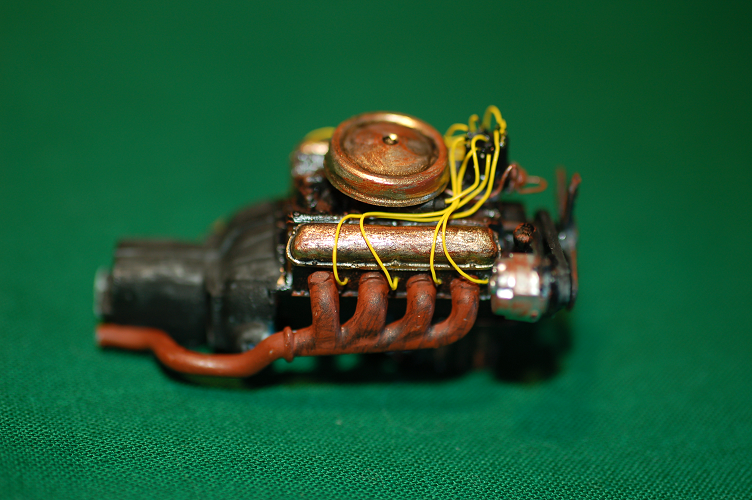
Completed the engine today. It's as rusty and crusty as it was back in 1976. Paints used were Testors black acrylic and gold. It was then washed with thinned flat black, and dry brushed with Testors rust. Once in the car, it'll get an overall wash of thinned gray too.
-
Looking good. A comment on the air cleaner: if you want ultimate accuracy the snorkels should be absent for '69. The air comes in from underneath. It's a taller air cleaner with a smaller diameter. The one from the 383 should be pretty close.
-
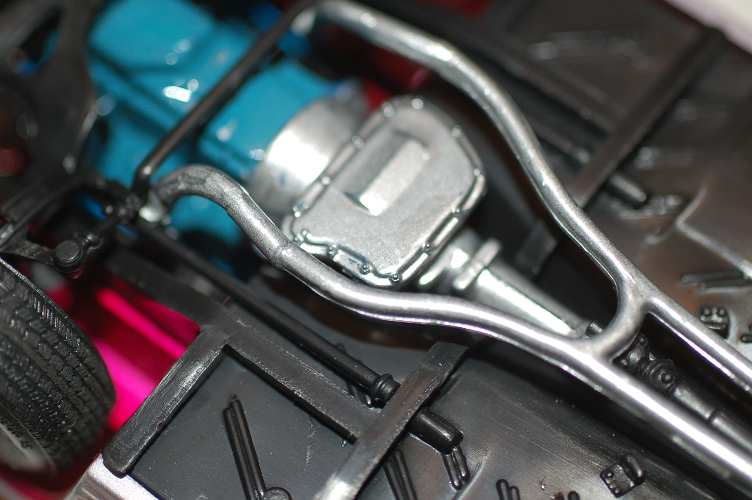
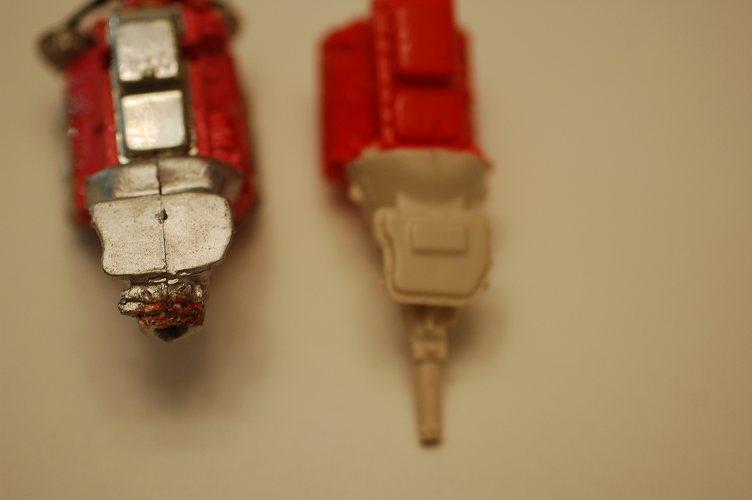
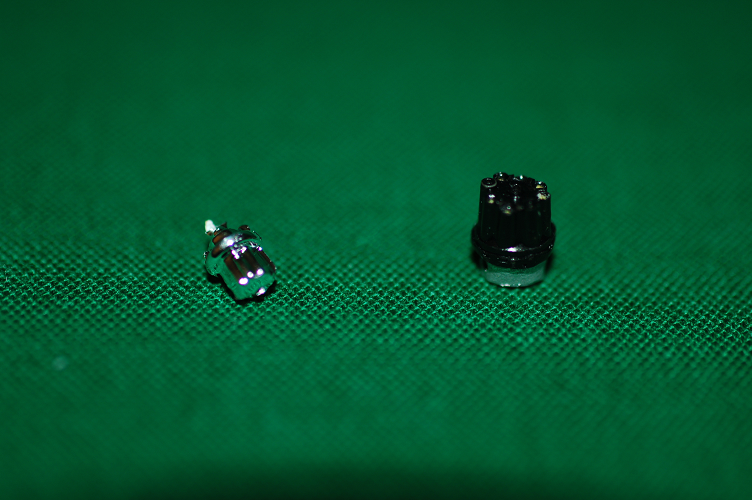
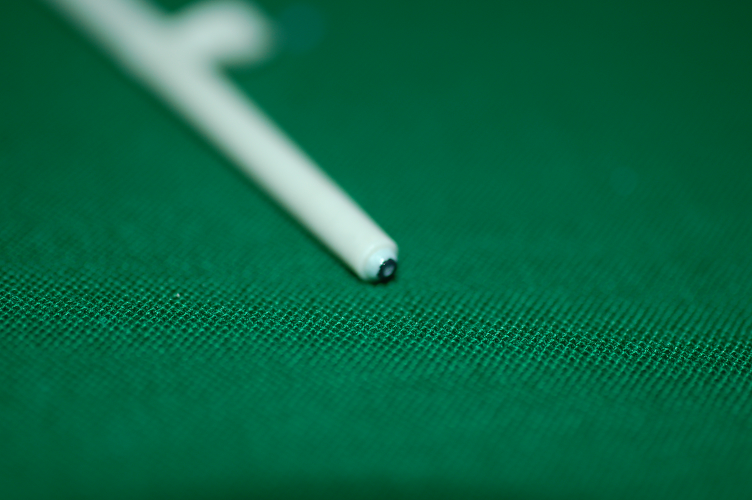
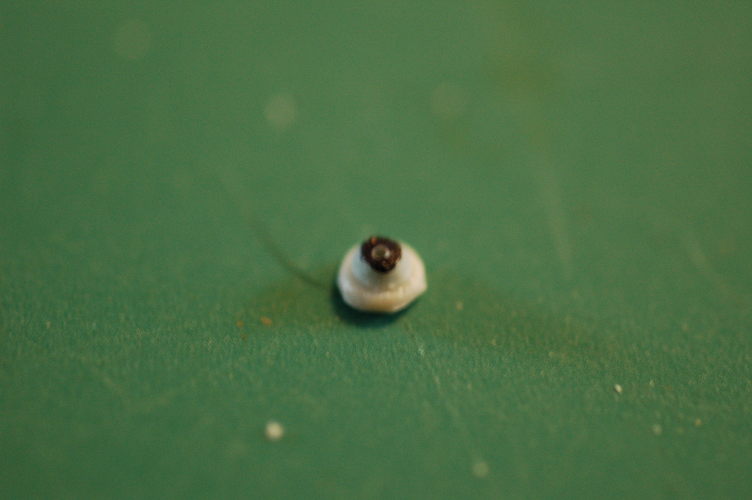
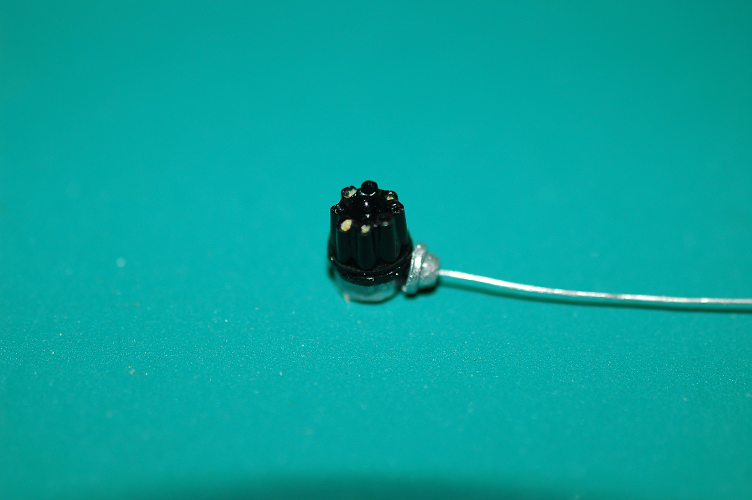
This is going to be a build of the first 1:1 car I owned. I bought it for $100 when I was 16, and yanked out the worn-out 6 and swapped in a 260 from a Falcon. It was a learning experience! The dents in the door are where I kicked it continuously. I was an angry young man! Ride height adjusted in the rear for the worn-out leaf springs. You've got to love metal axles! Chassis detail is not a priority on this one. The 4-lug wheels remained on the 1:1 car after the engine swap. I cast these in resin, cloned from a Tamiya Lotus Seven kit, thanks to fellow modeler from this site for the tip. The distributor on left supplied in the AMT kit is meager to say the least. Thanks to this site for a tip on casting your own distributor, I cast some pieces of wire insulation into a resin copy of a distributor from my parts box. The distributor vacuum advance sits right up front for all to see, so I thought I would add one. The following pics show the process of making one from some old pieces of sprue and a piece of wire. More to come..
-
Very nice build. Don't know about the seats, but the engine scales very well to 1:25. I did some research for a friend who was looking for a 427 cammer for a race car he was building, and he ended up using this engine. I'm building a 1:25 Mustang and a 1:24 Barracuda right now, and I've been meaning to check the scale accuracy. The Mustang seems impossibly small compared to the Cuda, even with the scale difference.
-
Super nice build. That color looks great on one of my all-time favorite cars.