Steamboat
-
Posts
826 -
Joined
-
Last visited
Content Type
Profiles
Forums
Events
Gallery
Everything posted by Steamboat
-
That's cool! It looks so right that it belies the amount of scratchbuilding you had to do. Nice photography as well. Bravo!
-
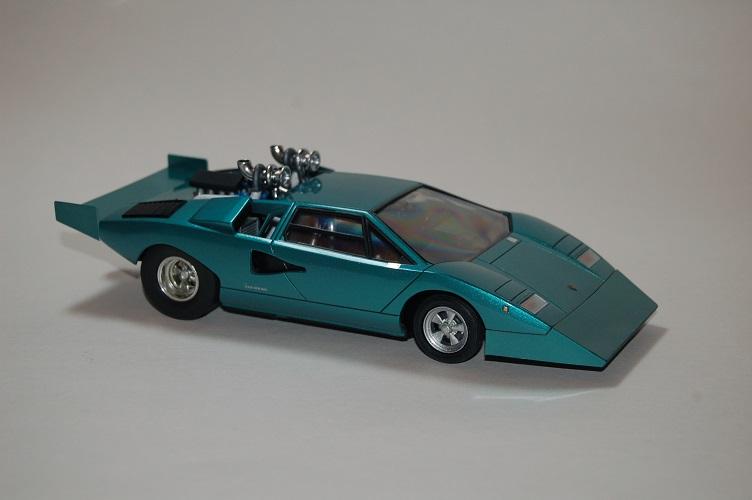
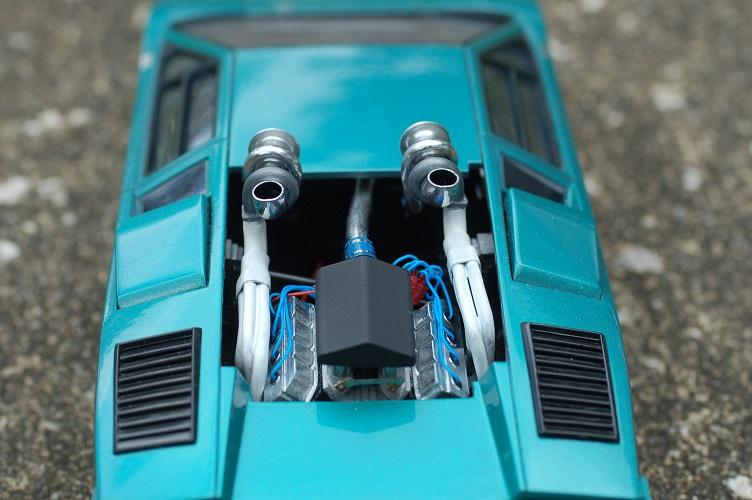
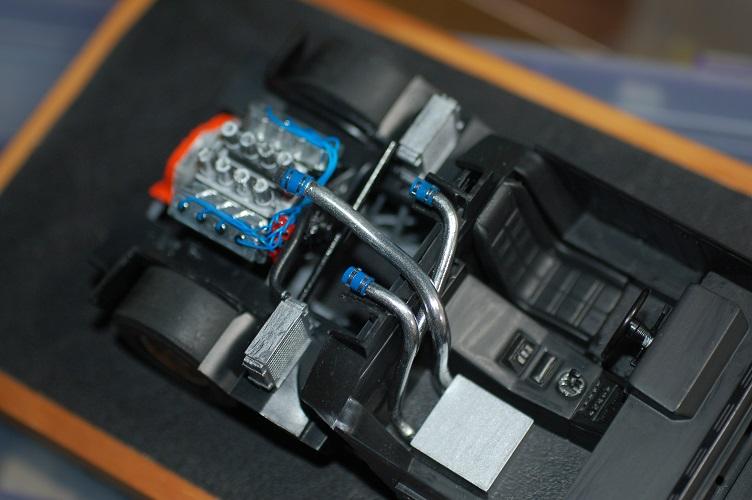
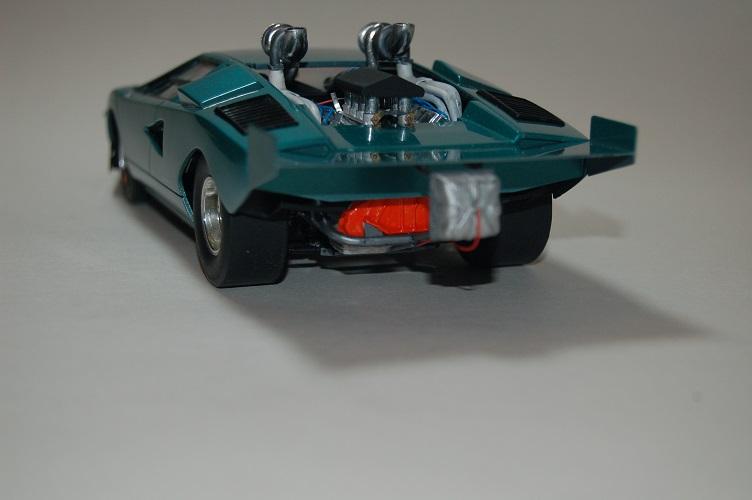
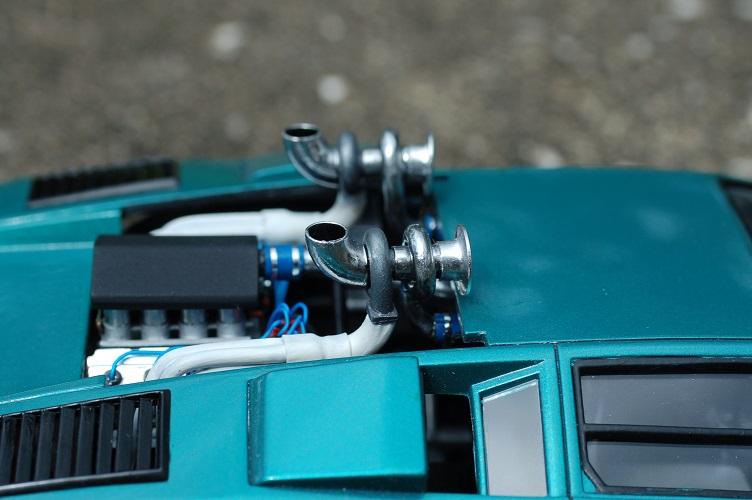
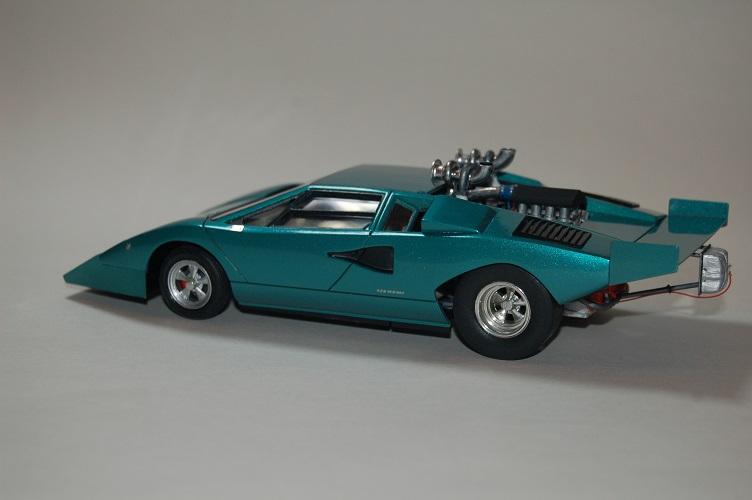
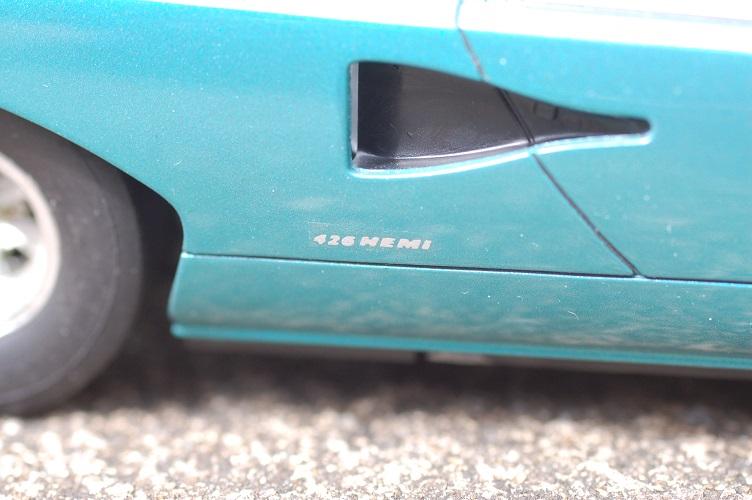
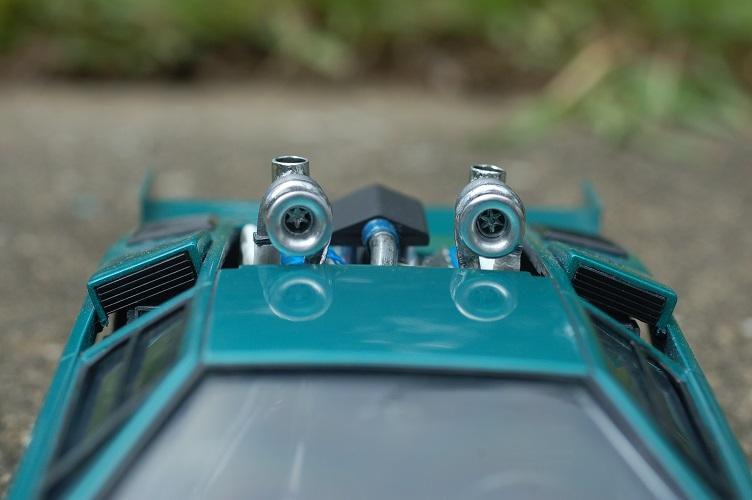
What if Roadkill built a Lamborghini Countach with a Toronado transaxle and a twin-turbo 426 hemi mounted over the rear wheels? This is my take on it. I picked up a bunch of Countach's in a package deal on eBay. This one was missing the drivetrain and the front and rear bumpers, so I had to improvise. Paint is nail polish with Testors (ugh) clear lacquer, which dries rock hard with a lot of orange peel and is a pain to polish. If anyone can recommend a good clear that goes with nail polish, I'm listening... Hope you like the car. My first try at scratchbuilding a set of headers. I used aluminum welding wire. They came out OK, but it was extremely hard to make them match, especially in an area where they are highly visible. Other scratch built items are the turbos, turbo plumbing, ice box and parachute/wing mount. Also my first time using 3d printed parts which I made with my Anycubic Photon S. The valve covers, intake manifold, turbo exhaust outlets, and intake "hat" are all 3d printed. Steamboat

-
I like the reversed flames. Very cool!
-
72 Plymouth Roadrunner 426 HEMI 8 Pack
Steamboat replied to AmericanMuscleFan's topic in WIP: Drag Racing Models
That's nuts in a good way! Totally incredible! -
The Cuda hemi will probably look better in the Engine bay, as it is 1:24 scale as well. I like the Revell 1:25 street hemi (GTX, Coronet) for the best detail, but it might look too small. Haven't built a Moebius hemi yet.
-
Well done! Awesome work on the conversion. The paint is gorgeous.
-
Wow! They are all stunning! That crazy pickup with the bike in back intrigues me. Do you have WIP pictures of it?
-
Gorgeous paint!
-
Well done! I like that you put the emblem from the 1:1 car in the photo too. Nice touch!
-
Don't shoot, but I wouldn't do a thing to it. It's near mint except for the missing tail lights. They're only original once.
- 68 replies
-
- 1
-

-
- vintage amt
- pickup
- (and 1 more)
-
XL 350 one-lunger. I can't remember what year. It would be way cool to build it in 1:25 scale though.
-
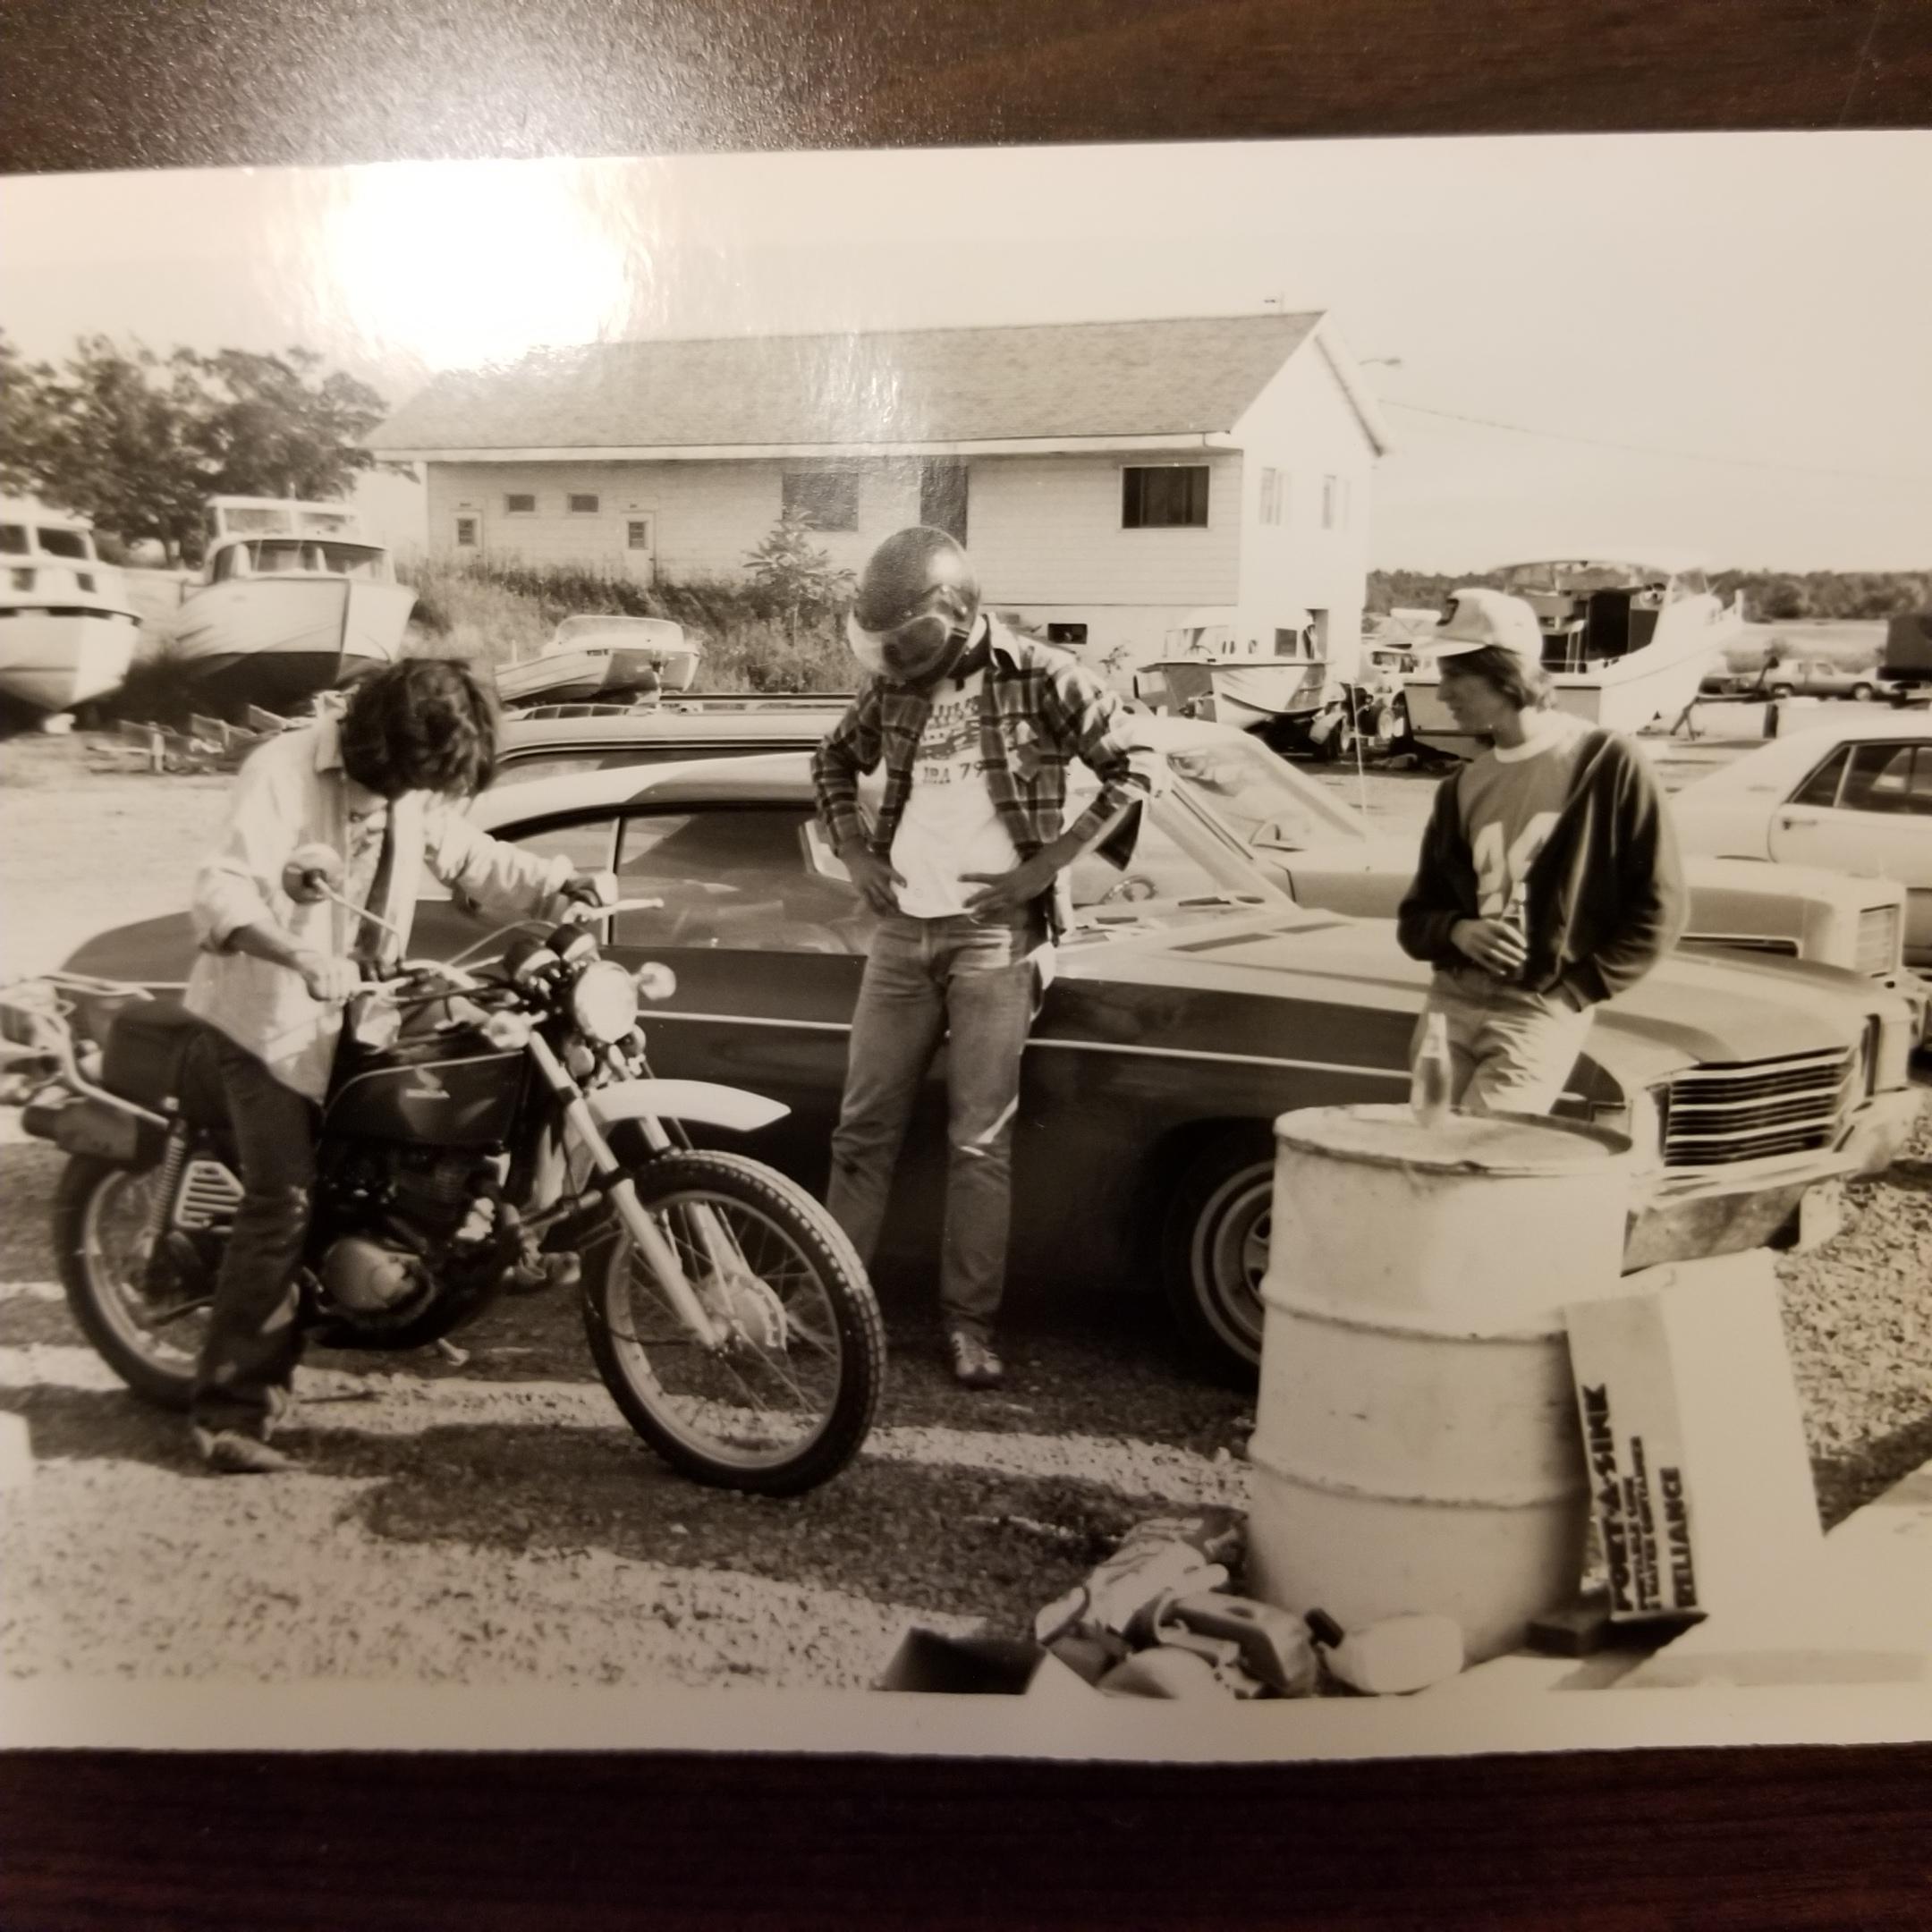
Here's a picture of a picture of the 1:1 car. Check out the unique half vinyl top and the white side molding. That's me trying to get the Honda started.
-
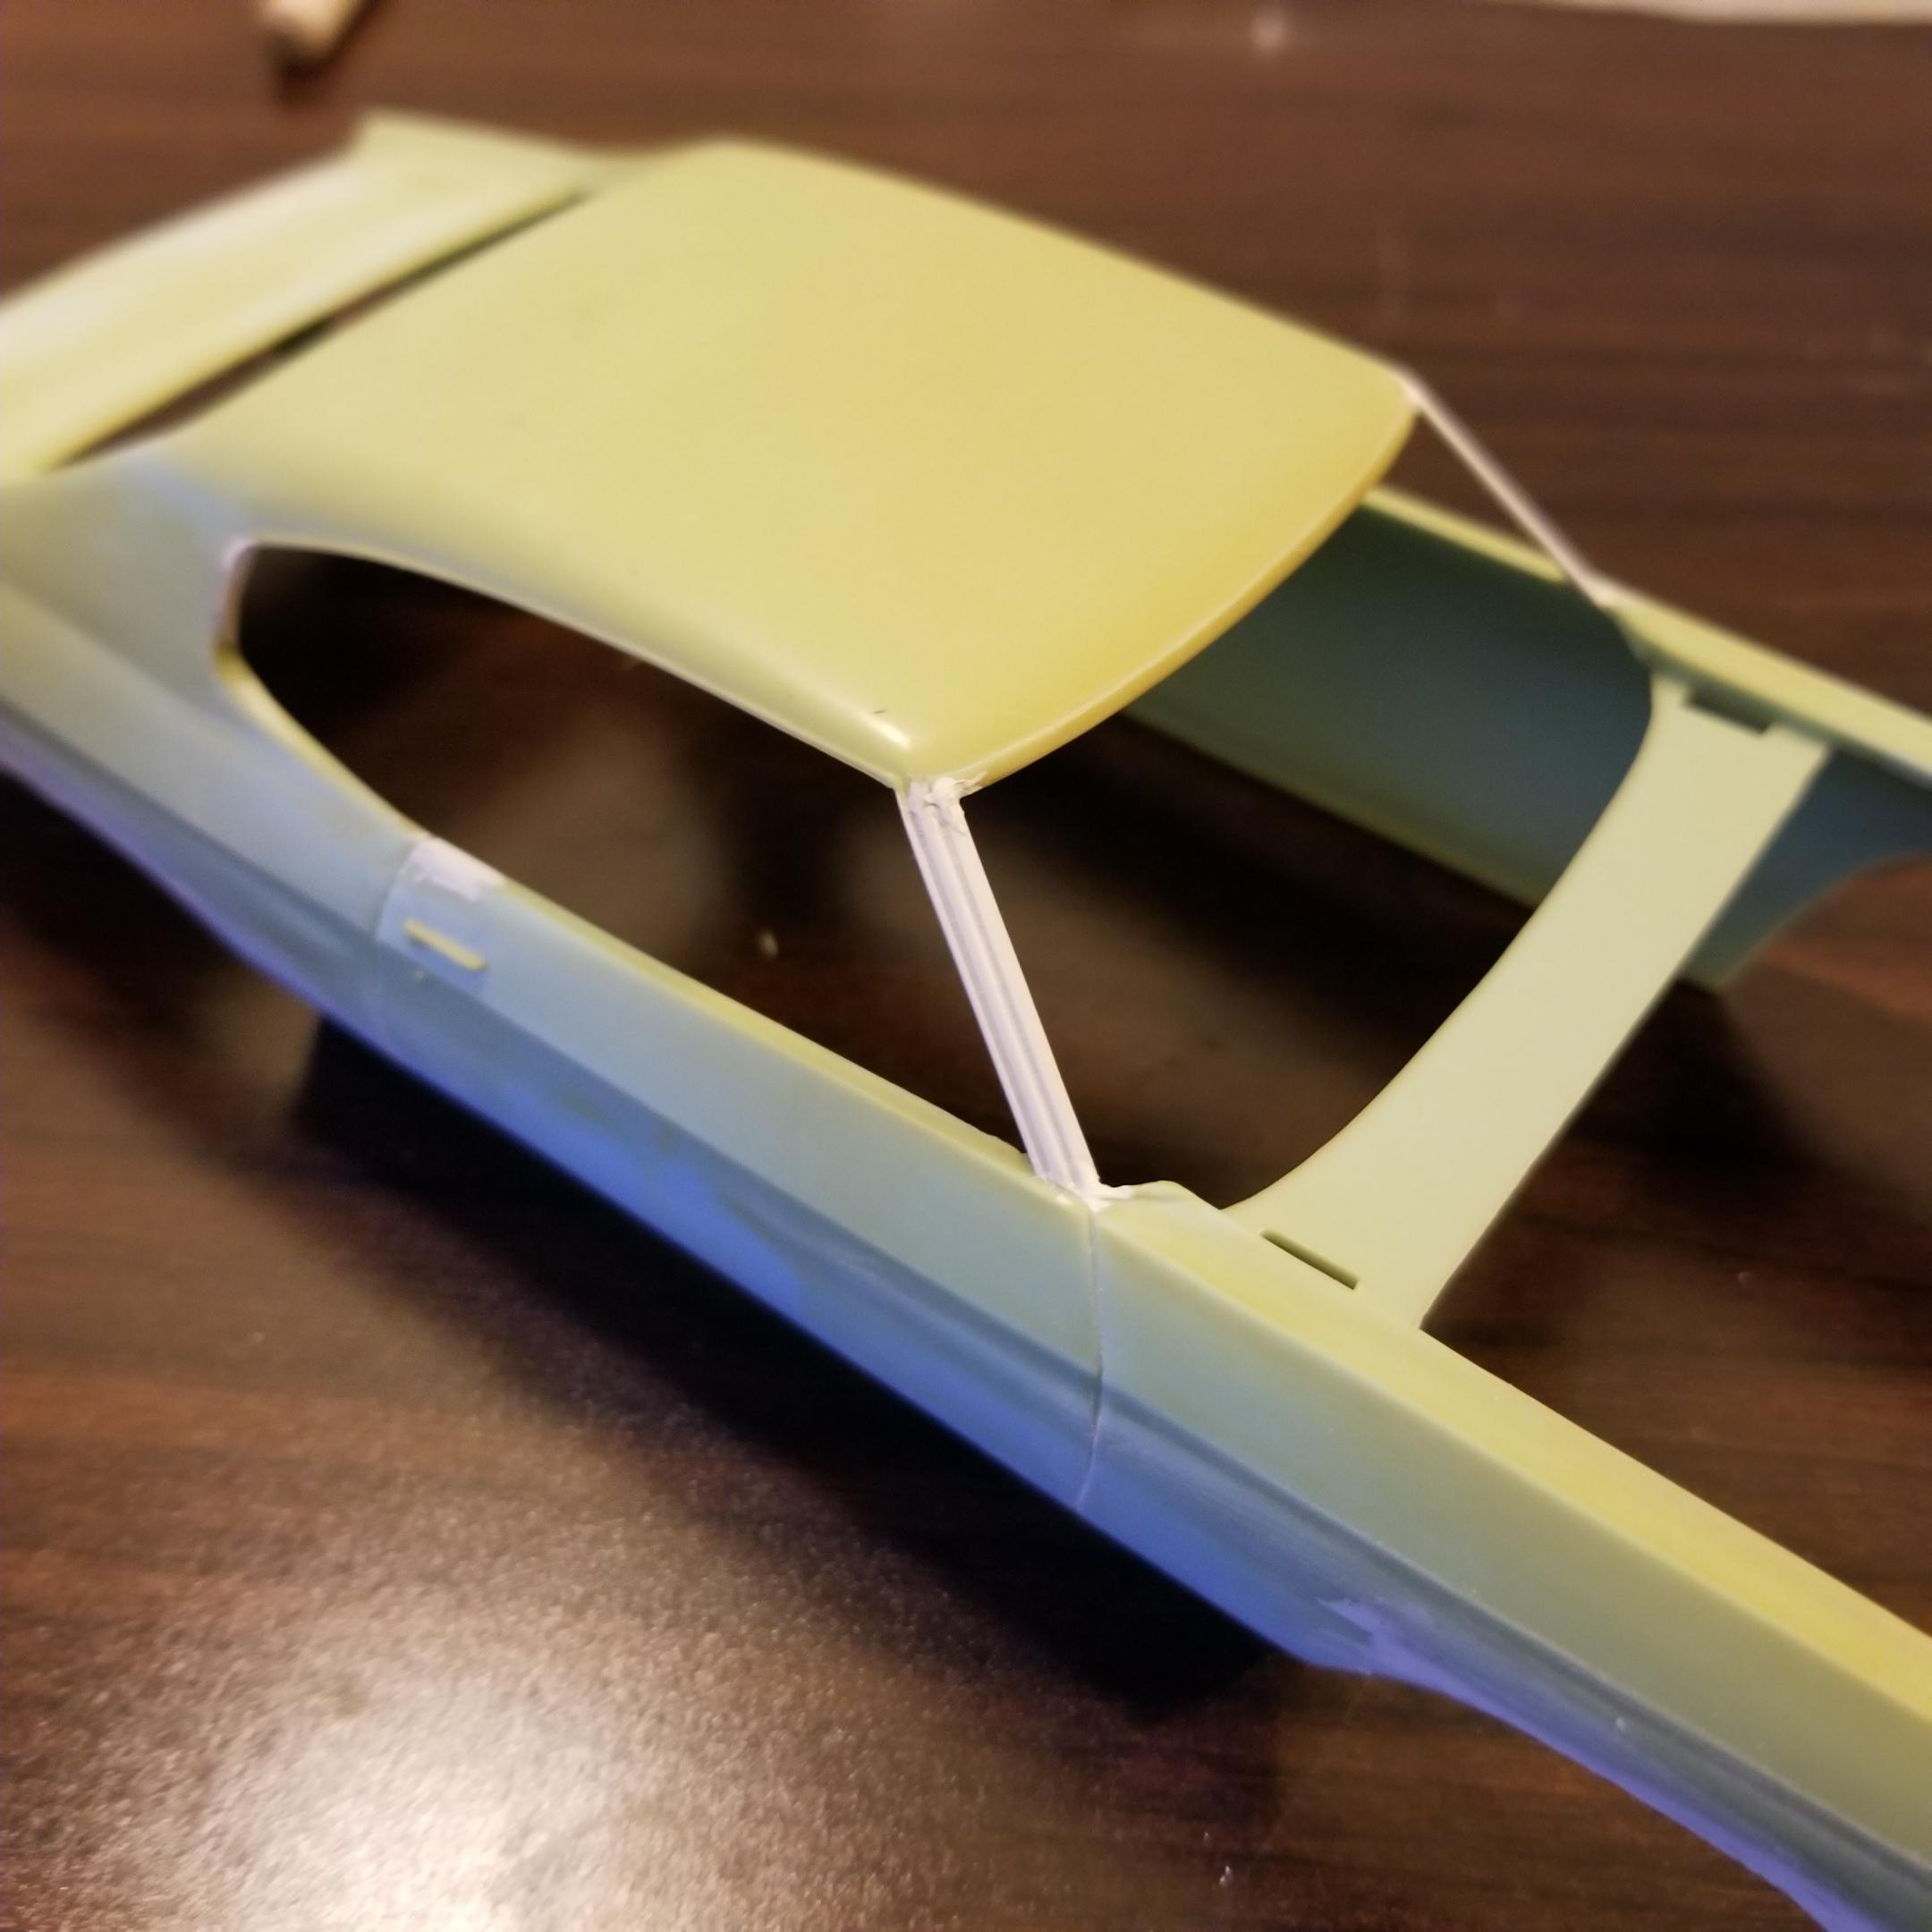
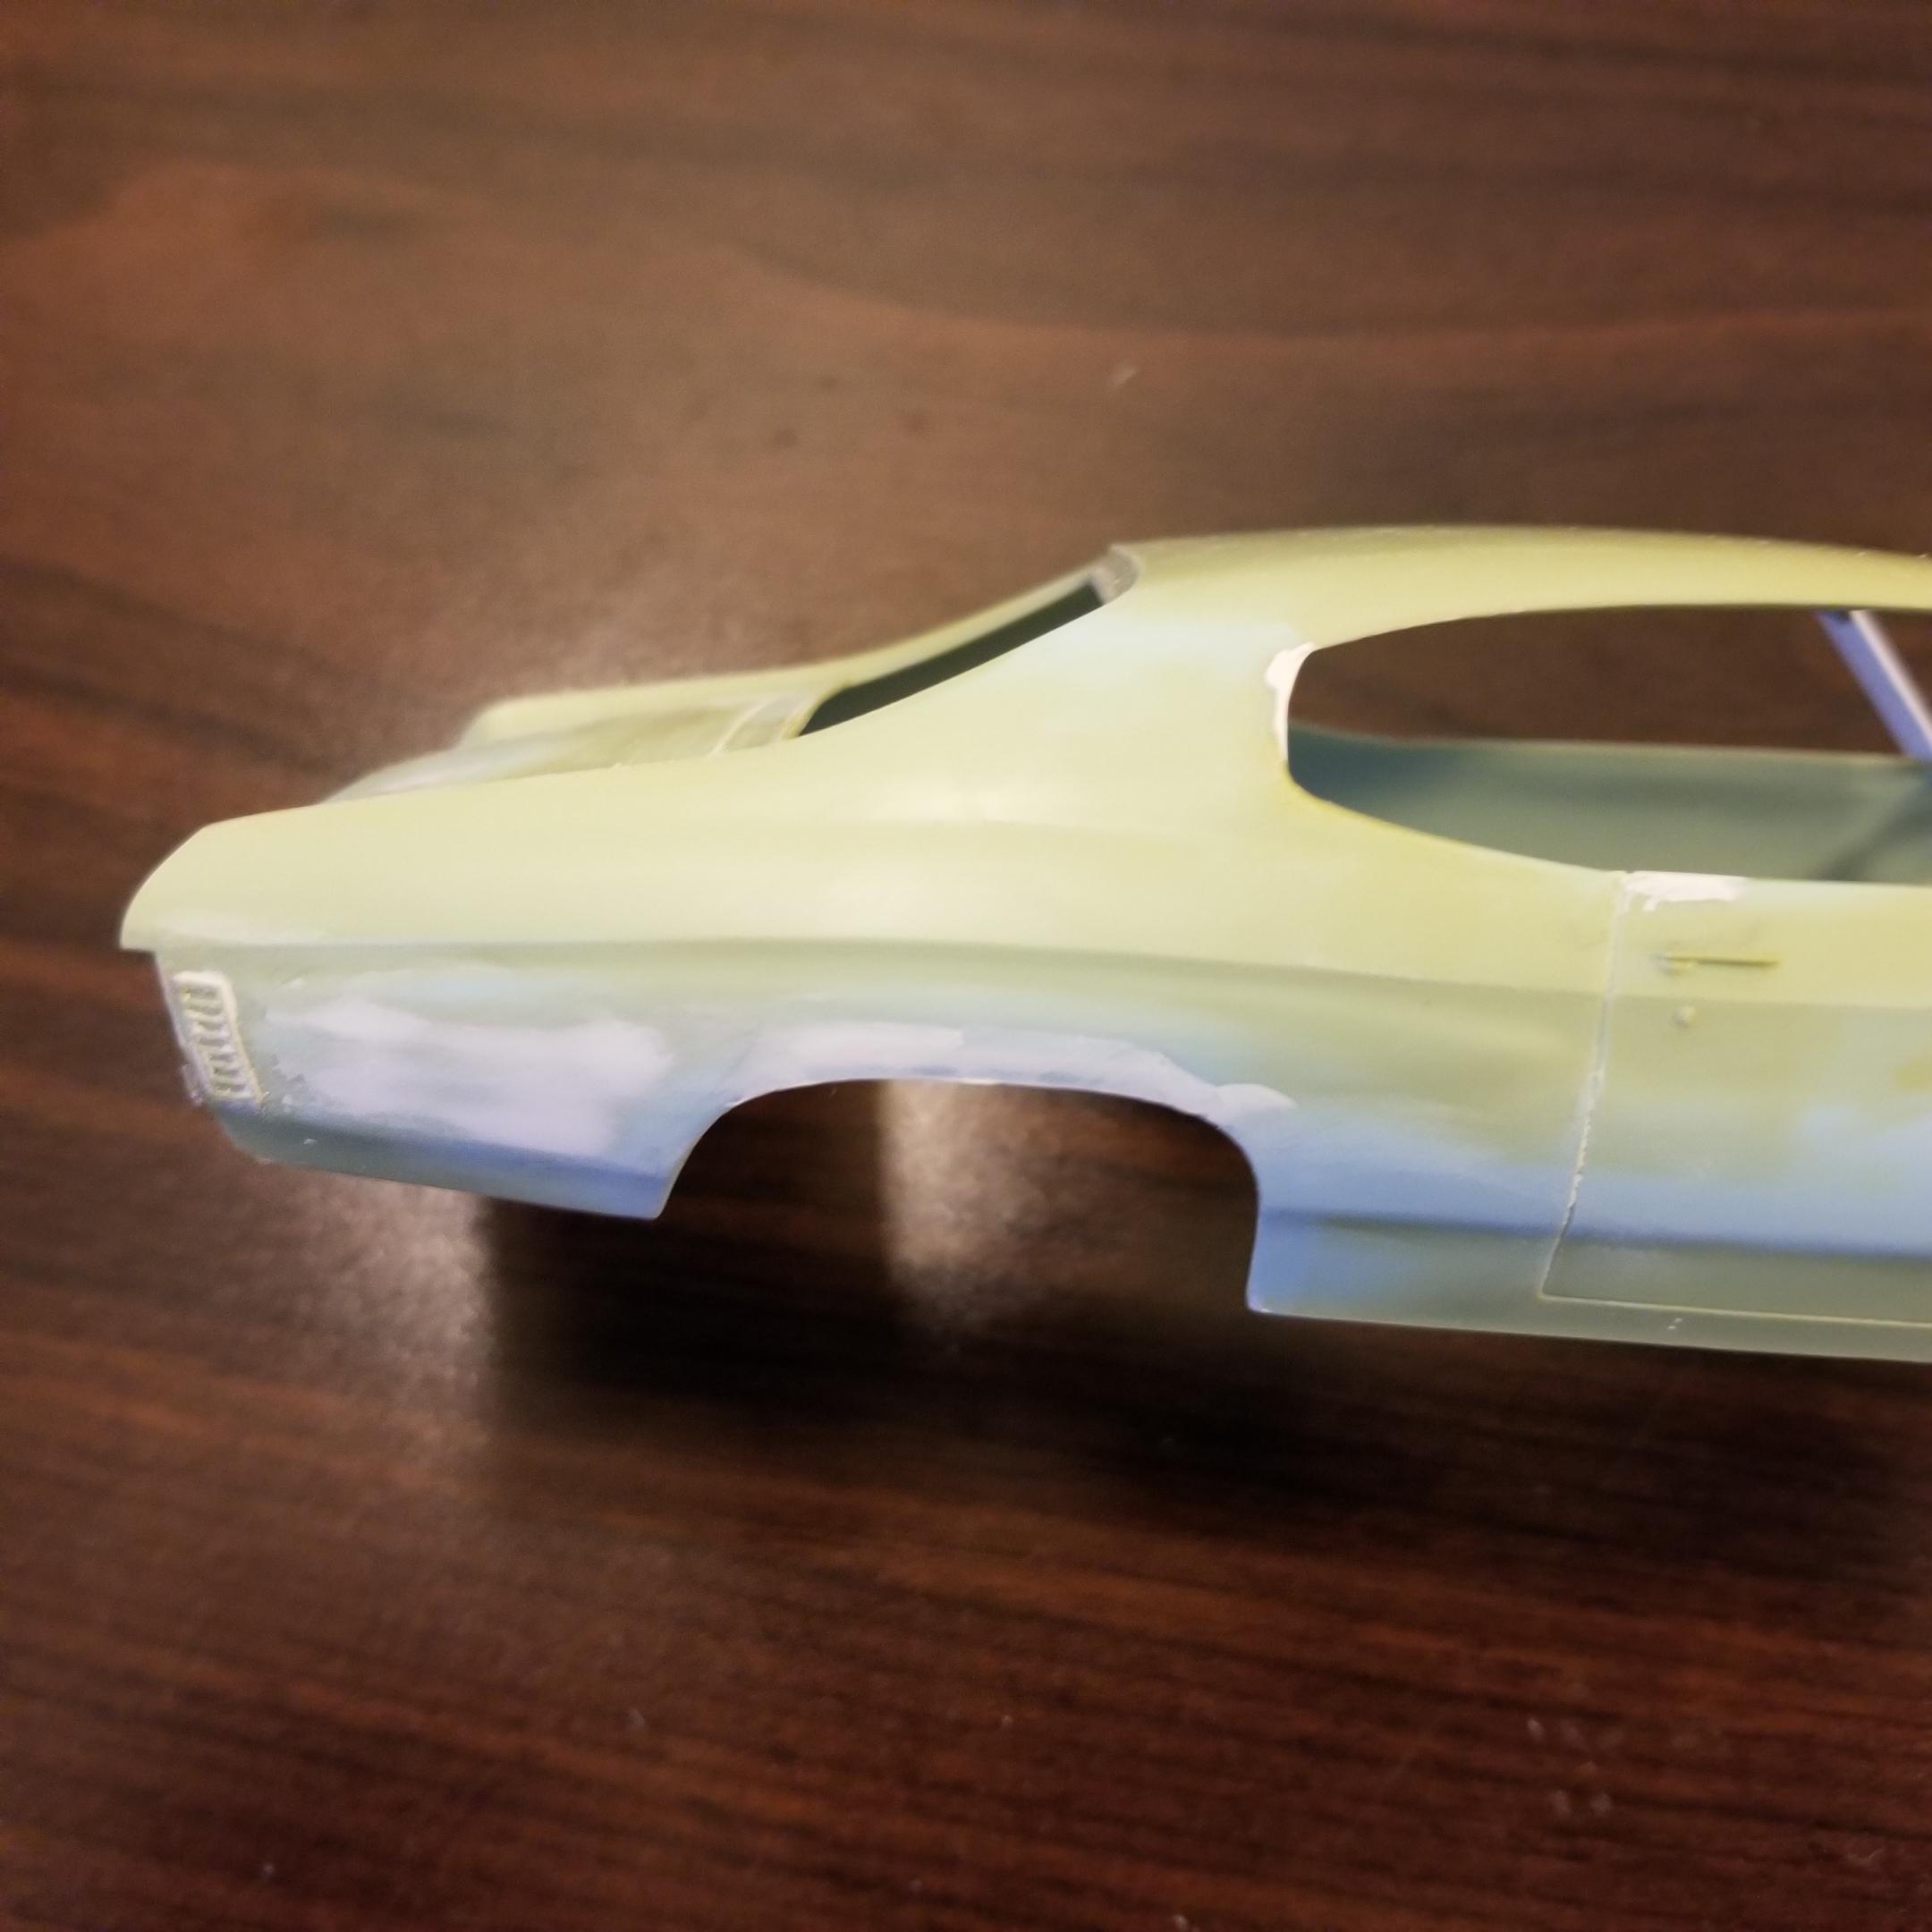
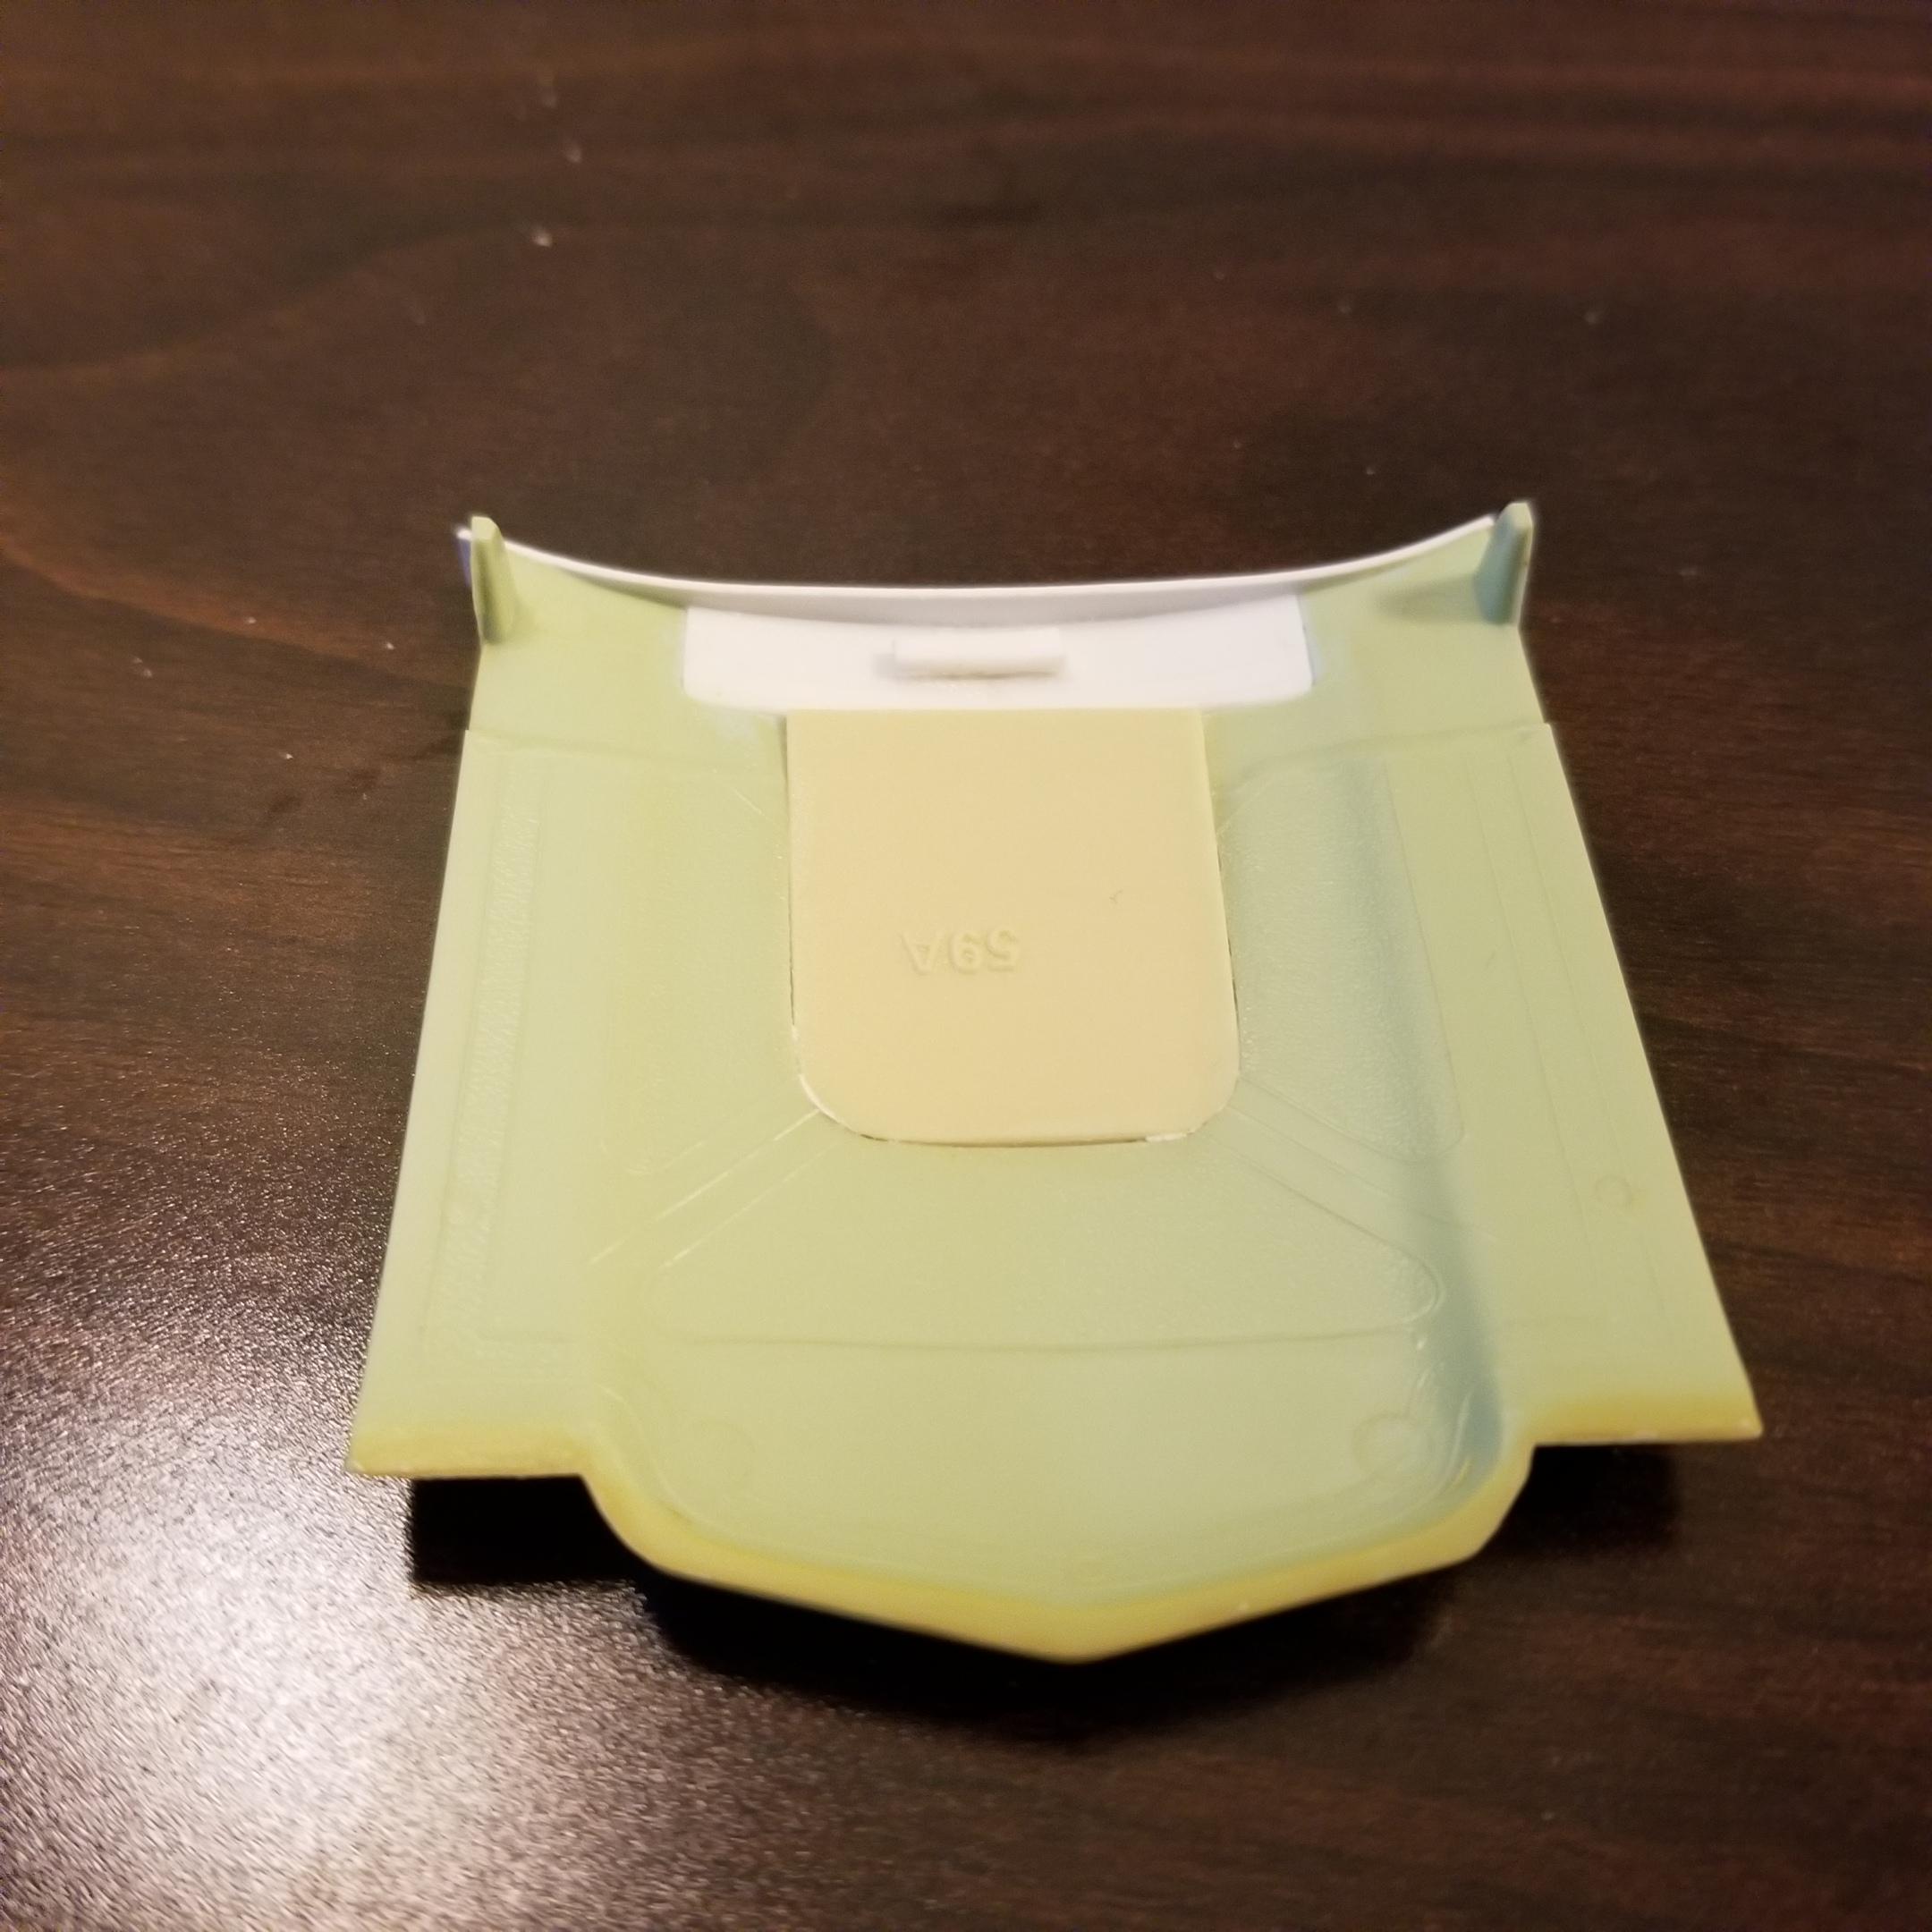
This one is going to be a recreation of my first car. It was a 72 Chevelle, non-SS, non-Malibu, with a 307-2bbl engine which had a whopping 130 hp. It was Hugger Orange with a white vinyl top. Wish I still had it! I started with a glue-bomb AMT kit. Both a-pillars were broken. Here is the progress after making them from evergreen strips. I removed the wheel molding chrome. It will still need a little filling to get them right. The car had a flat hood. I've never seen on a 1/25 kit, so I'm making one. Here you can see the inserts from the bottom. And progress from the top: Lastly, it had the base model dash, not the SS gauge cluster. Still working through this. I'm thinking gauge decals from a Nova or Impala would be pretty close. Rallye wheels and a small-block and I'm there!
-
Super clean and sharp build. Very realistic.
-
Excellent job. The paint looks awesome!
-
Nice work as always! How in the world do you build these beautiful one of a kind models so quickly?
-
Source(s) for P/E hose clamps?
Steamboat replied to Monty's topic in Car Aftermarket / Resin / 3D Printed
I have been cutting up a piece of tinsel from the Christmas tree. Then I glue on a small piece of guitar string for the screw. It works great. -
Awesome paint!
-
Beautiful! It looks like you could jump in and burn some rubber!
-
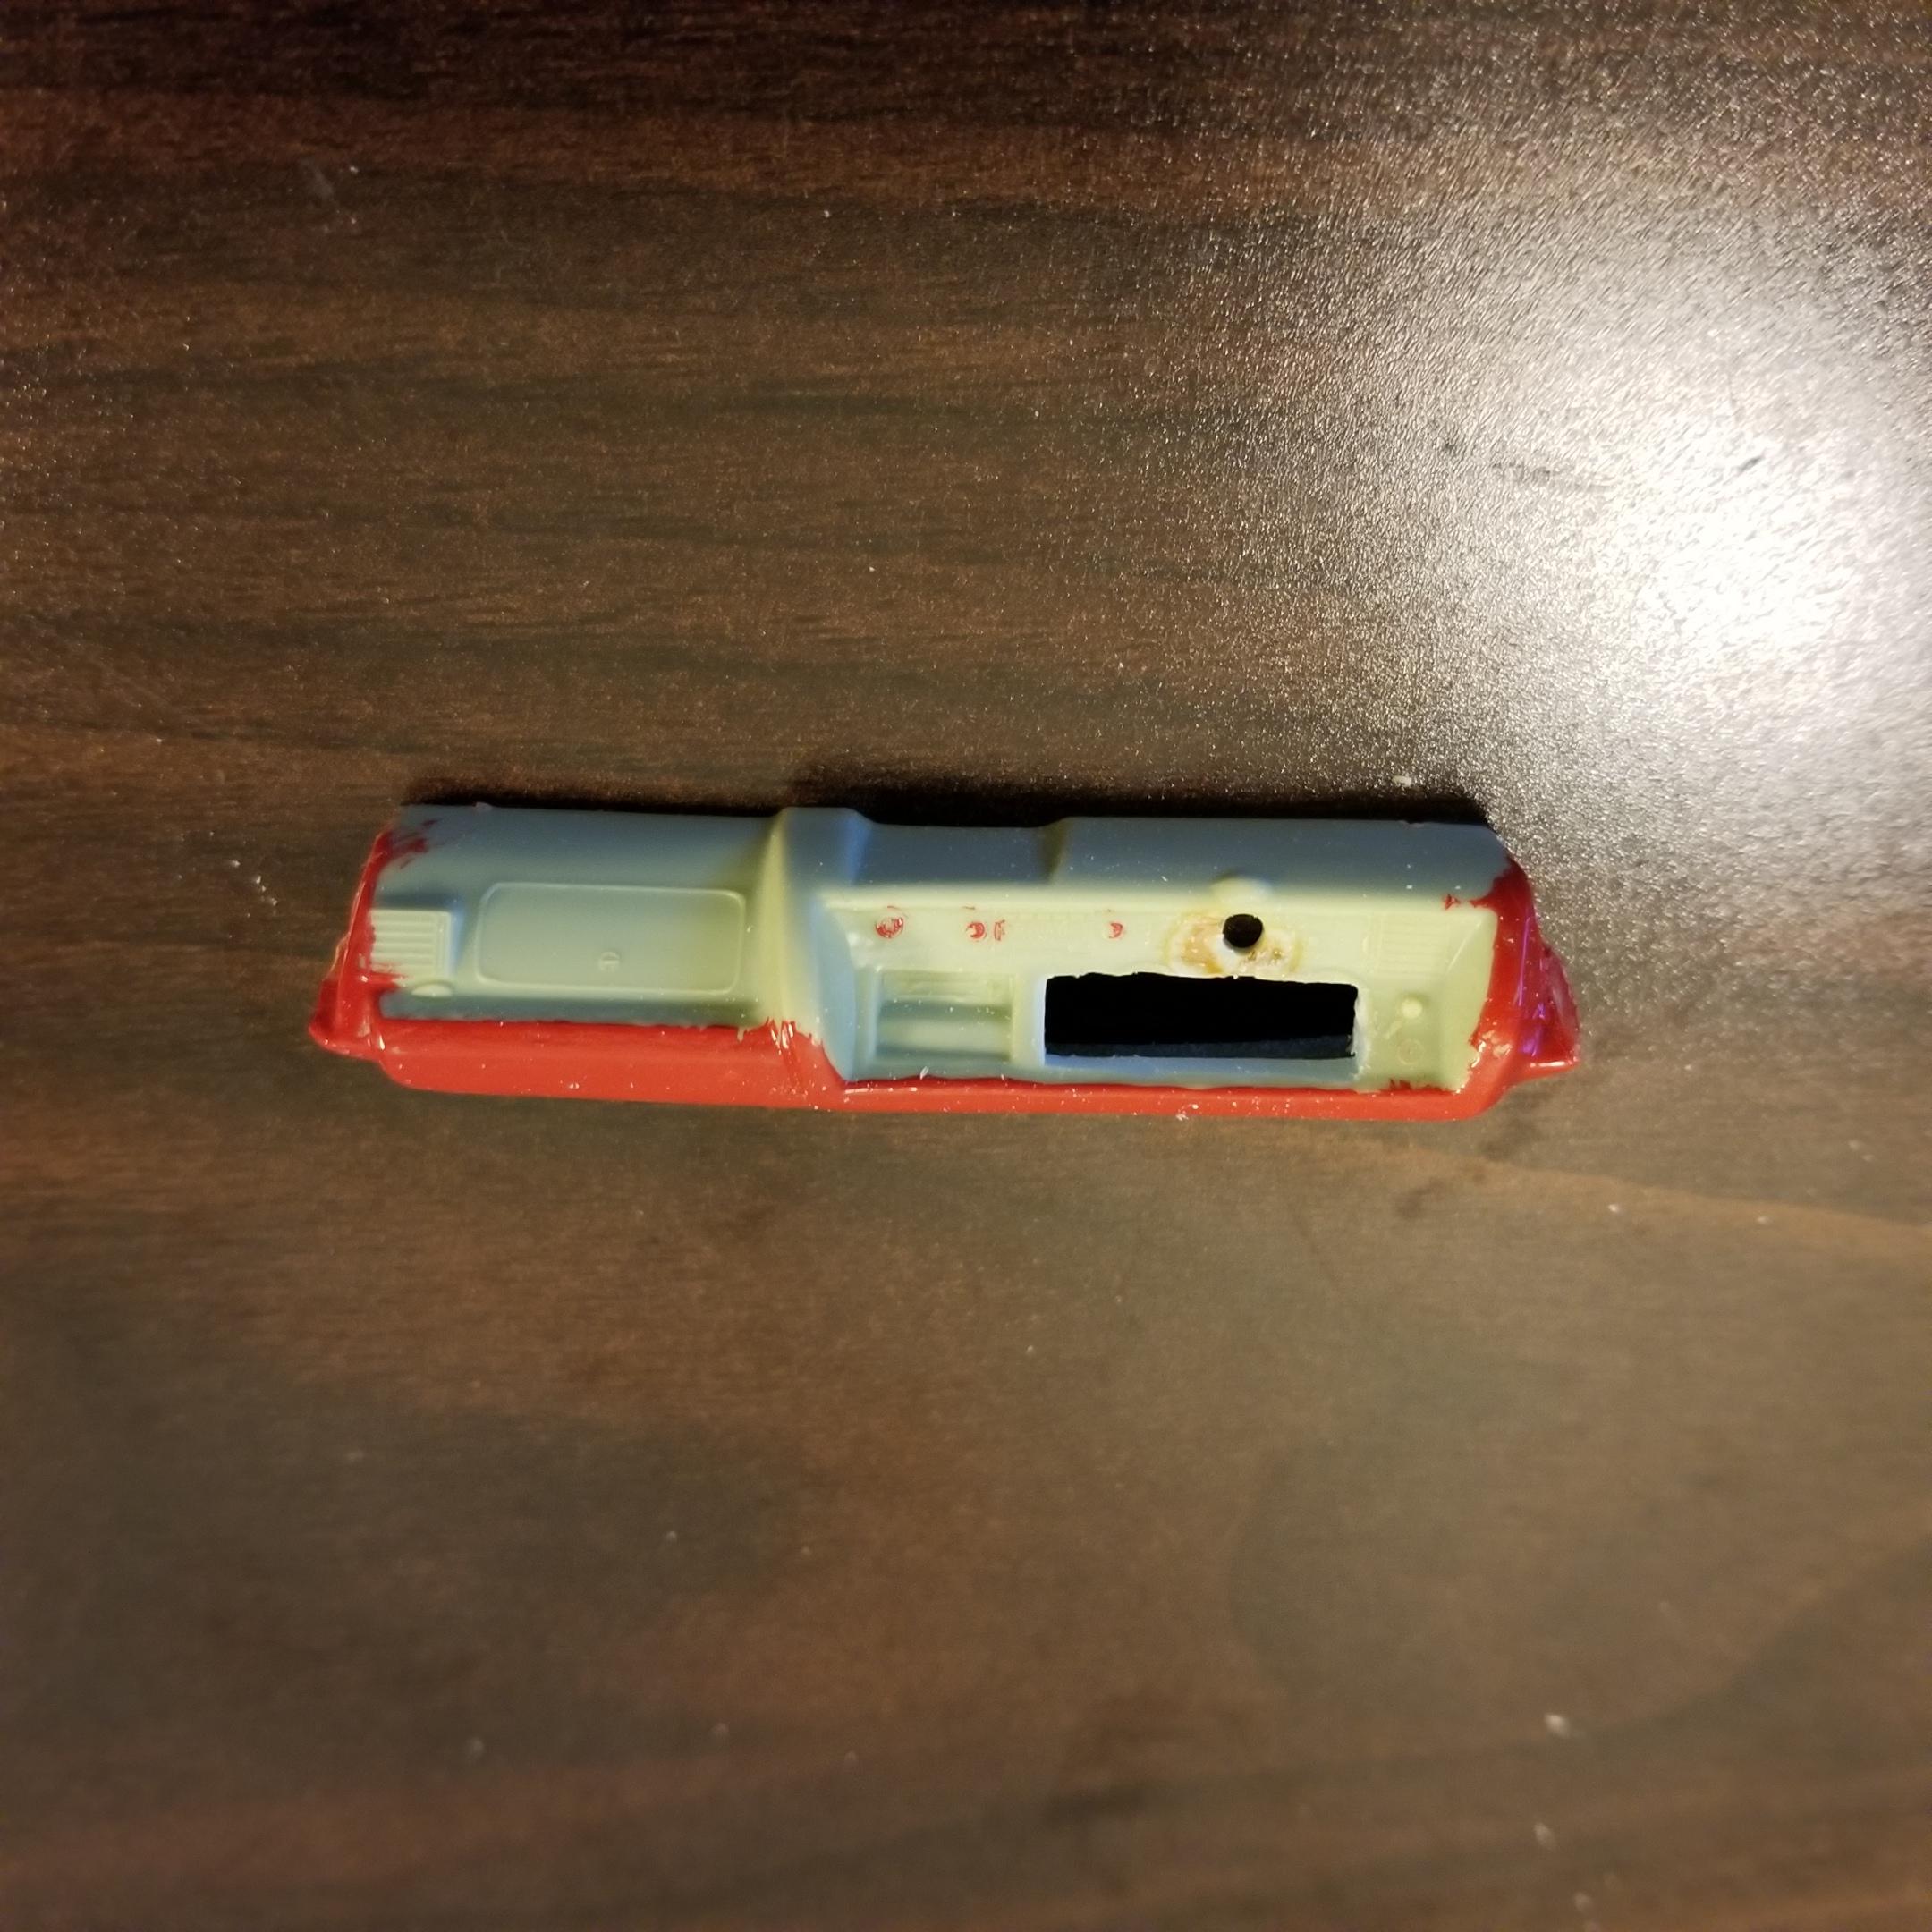
LOL! I completely forgot about back-up lights! The tail light lenses weren't salvageable from the built-up that I started with. They were covered in glue. So I had to make them from some sections of the light bar from the Rescue 911 kit. The curvature was just right, but I forgot the white section. Good call!
-
Steve, this is genius! I have always wondered how to eliminate "squeeze out" when using the 2-part epoxy!
-
The engine on the Willys looks really good. You did well using the wash to bring out the detail.
-
Overall, they look pretty good. One thing I notice is the windshields, which all look scratched. Be very careful handling them. If they don't come in their own wrapper in the kit, I put them in a baggie immediately so they don't get scratched. Minor scratches can be eliminated by going over the glass with a super light coat of Future floor polish. I also use either Testors windshield adhesive or 5-minute epoxy to glue them in. I haven't used regular styrene glue on a windshield in years! Hope this helps.
-
Very nice. The chassis looks very real.
-
Very nice build. I have the convertible which I built long ago when they first came out. One of my favorite models, and it has the Torq-Thrust wheels. As I remember, it had a huge warp in the body that was nearly impossible to get right. It sits on 3 wheels to this day.