Dragonhawk1066
-
Posts
3,932 -
Joined
-
Last visited
Content Type
Profiles
Forums
Events
Gallery
Everything posted by Dragonhawk1066
-
That's some mighty fine work on those!
-

Primer for Createx or Craft Paints
Dragonhawk1066 replied to Miatatom's topic in Model Building Questions and Answers
I mostly only use craft paints and Createx anymore and always use primer first. The craft paints especially do not adhere well to bare plastic in my experience, and rub off fairly easily. I'm not sure if sanded plastic would make them adhere better or not, and I've not really tried Createx over bare plastic. To save myself from any problems, I have used primer over pretty much every part and body I have ever painted these last 5 years I've been back in the hobby, whether it's under enamels, lacquers, craft paints, or Createx. The only way to truly know is to try it on a spare body or hood. -
Very nice! The outdoor pics are fantastic!
-
Very well done! I really like the body color/stripe combo!
- 15 replies
-
- 1
-

-
- ford
- polar lights
- (and 1 more)
-
Very nice, Bill! I can hear the theme music in my head right now, lol.
-
Excellent!
-
Nicely done!
-
Hobby Lobby
Dragonhawk1066 replied to Mike 1017's topic in General Automotive Talk (Trucks and Cars)
WOW! That's getting out of control! -
Nice looking T-bird, that one is on my to get and build list.
-
Hobby Lobby
Dragonhawk1066 replied to Mike 1017's topic in General Automotive Talk (Trucks and Cars)
I take no real stake in these inflation calculators nowadays, as inflation has gone crazy since Covid, especially this past year with the Russia/Ukraine conflict being the top excuse for that. Last week for instance, my wife and I bought eggs for baking by the 1 1/2 dozen package for $3.69, which was previously $2.99 a few months ago and $1.99 pre-covid. That same carton of eggs today is now $5.09, so no "inflation calculator" can be taken seriously right now. Kit prices are where they are right now because they can be and we, as general hobbyists, are still buying them, although I'm not at regular retail. -
Very nice, and very realistic with your background!
-
It does, Thank you! I was hoping it might have a bird for the hood included, even though one wasn't offered from the factory. Doesn't change how bad I want this re-issue, though!
-
Any chance we can get a pic of that decal sheet? Many thanks!
-
Nice looking Beetle! I really need to build mine one of these days, lol.
-
Very nice!!
-
Outstanding! I love the color!
-
Very nice Pantera, well done!
-
Very cool custom, nice work!
-
Revell 1969 Chevelle SS396 in Fathom Green W/Green Vinyl Top.
Dragonhawk1066 replied to Dragonhawk1066's topic in Model Cars
Thanks guys! -
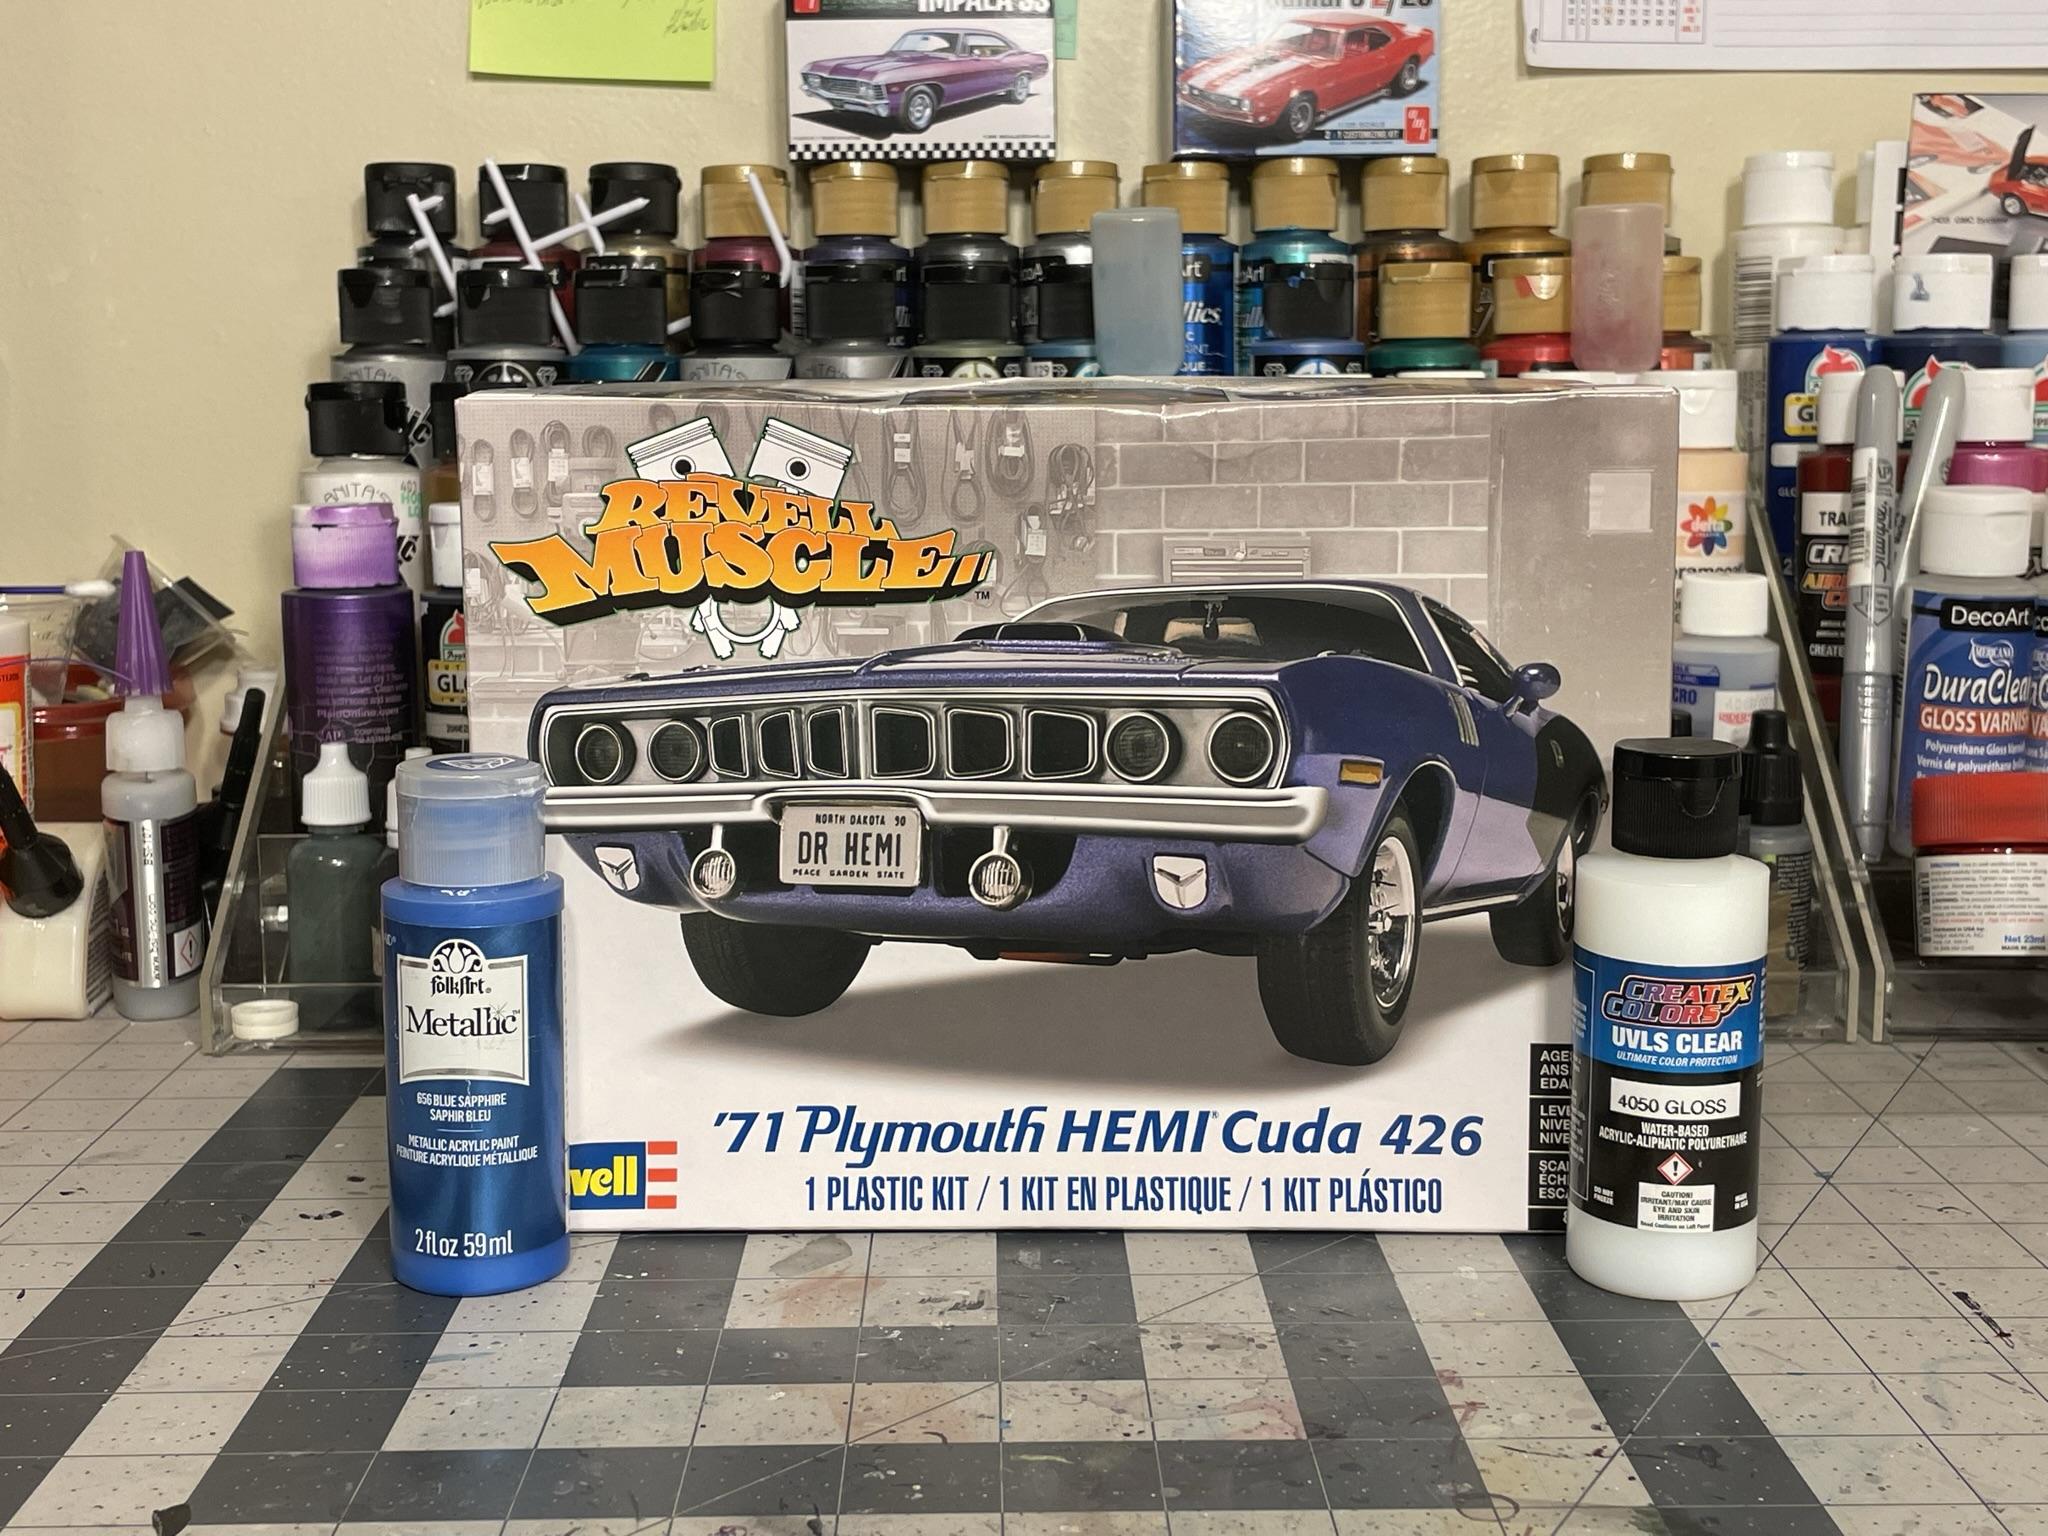
Revell 1971 Hemi Cuda in Gold Metallic, 1/24 Scale.
Dragonhawk1066 replied to Dragonhawk1066's topic in WIP: Model Cars
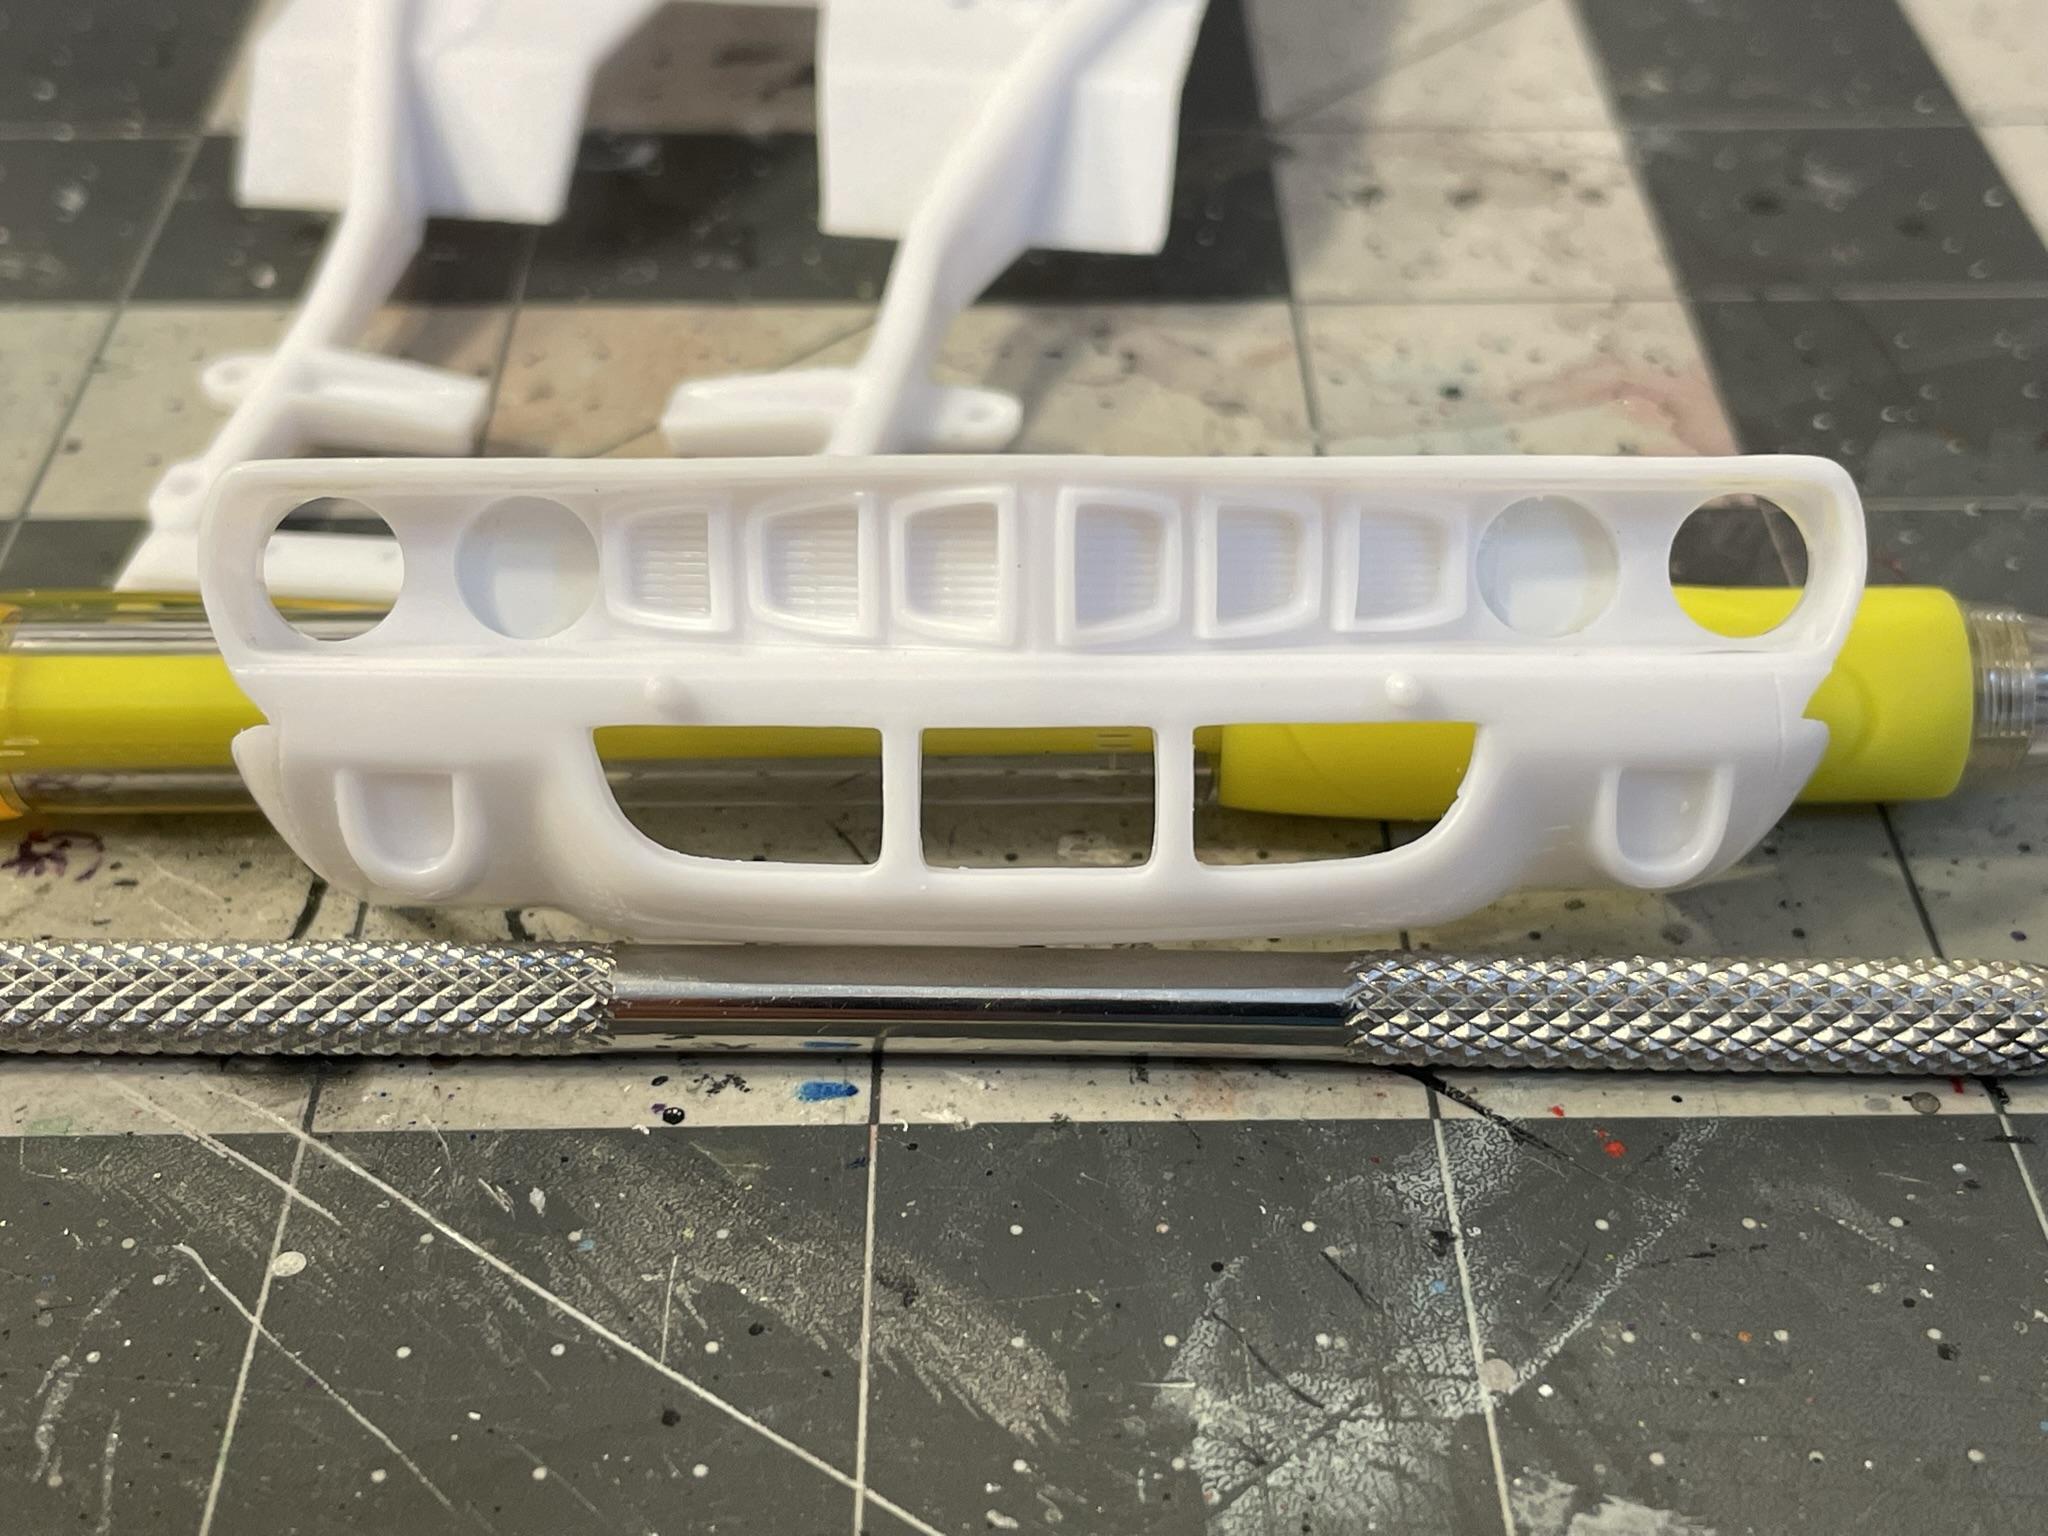
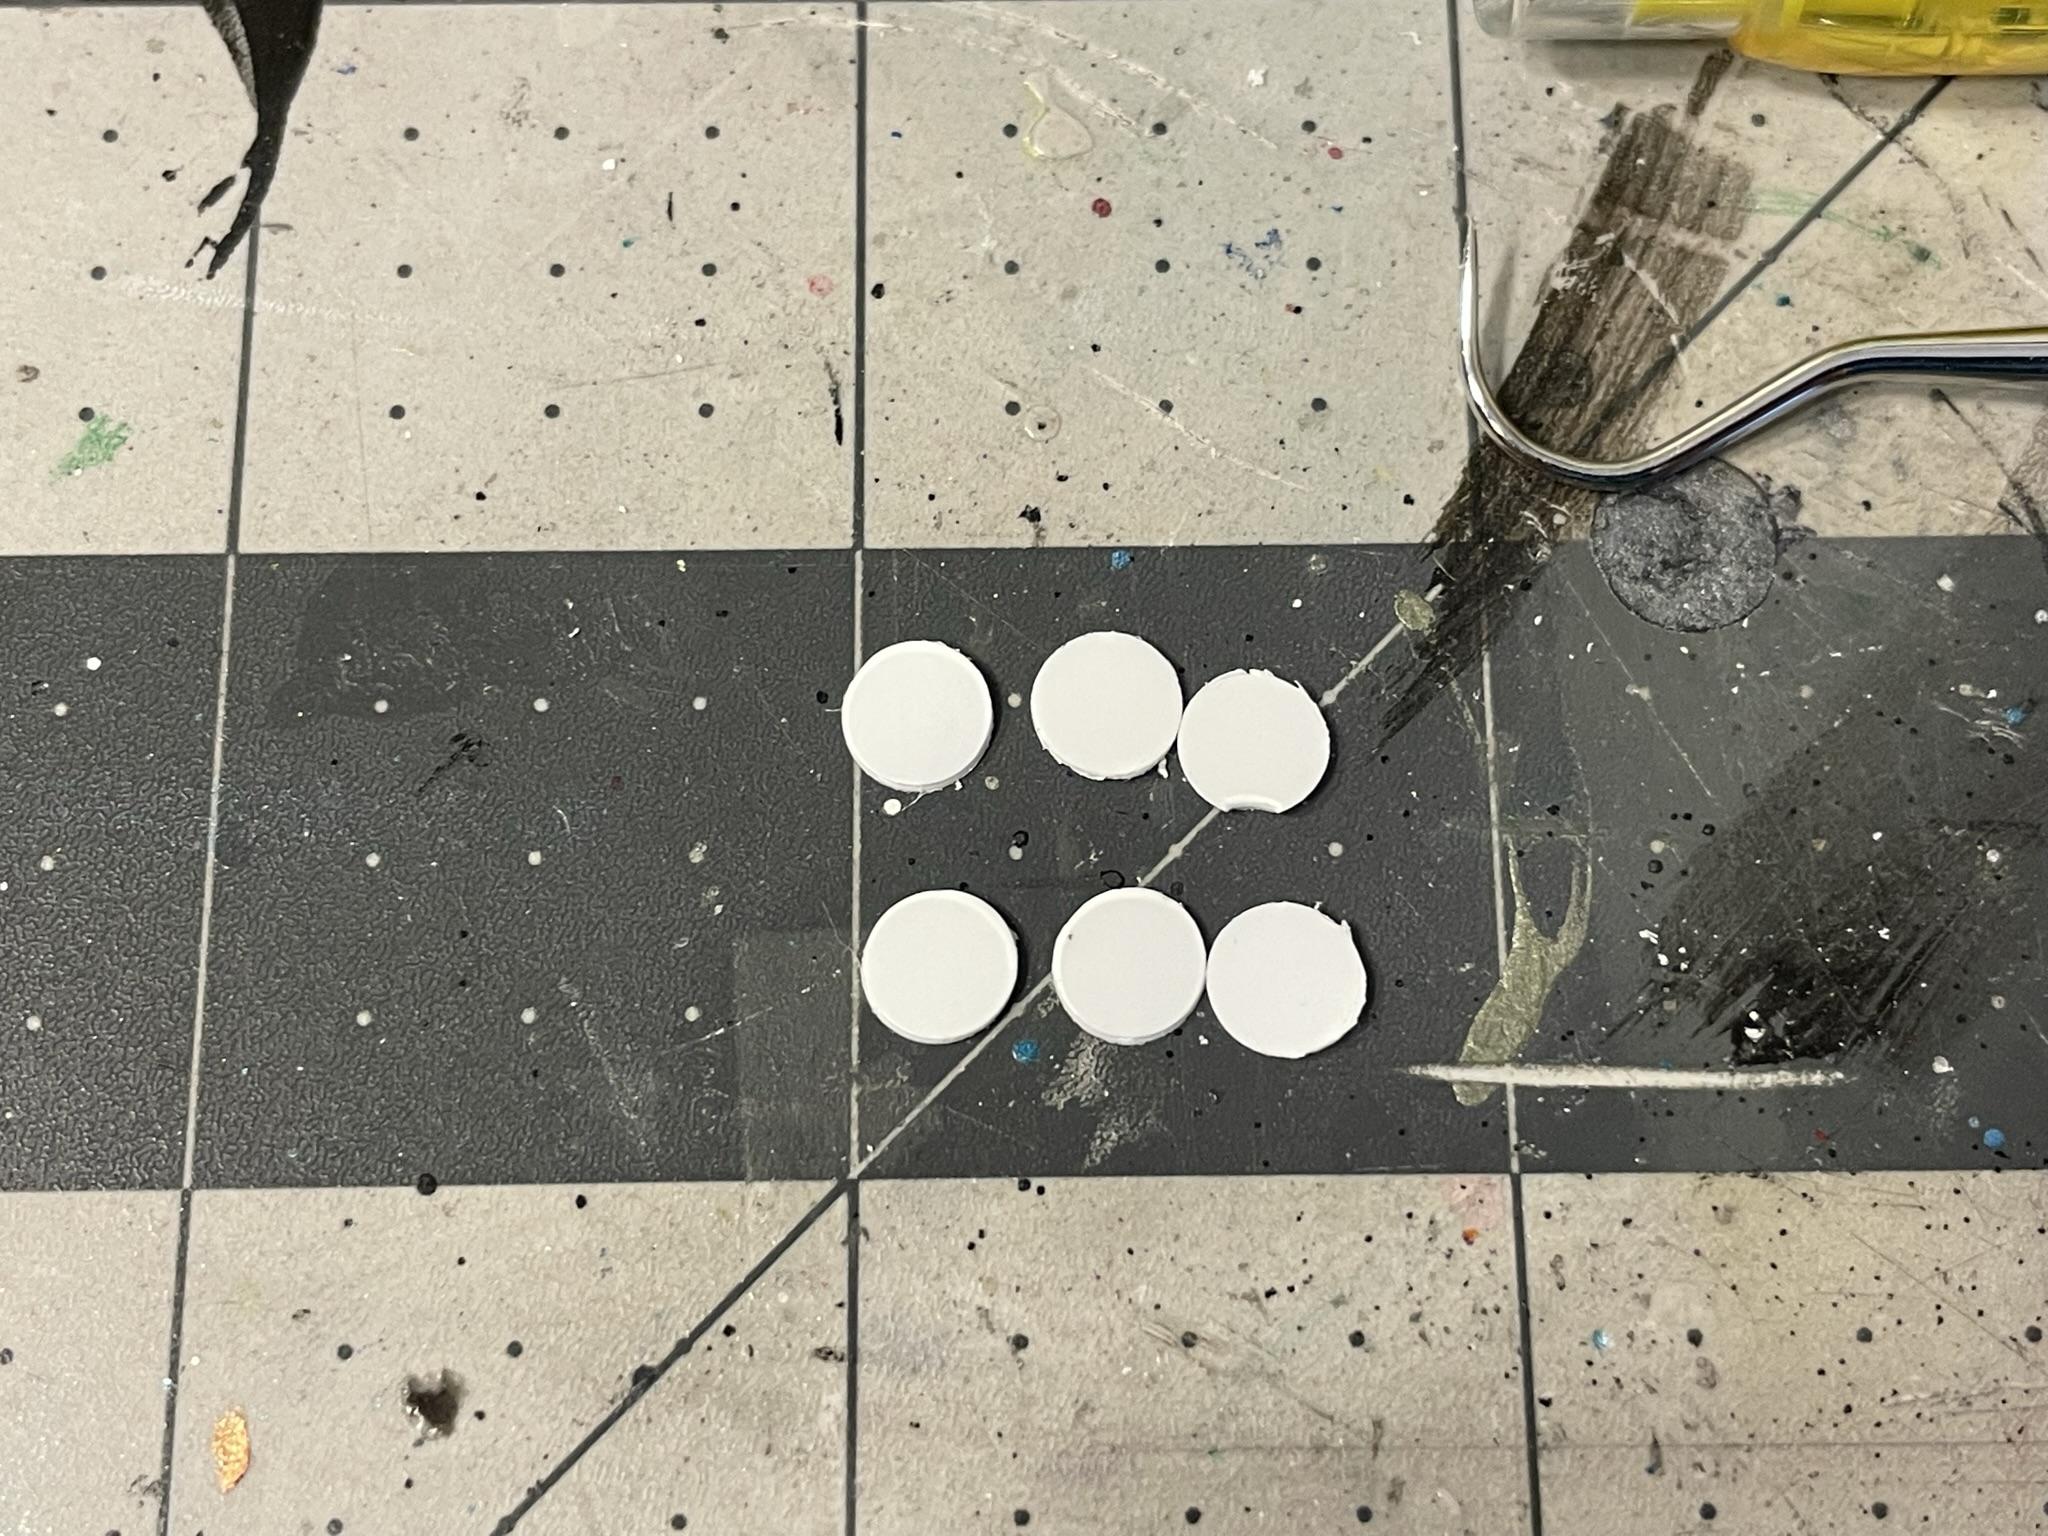
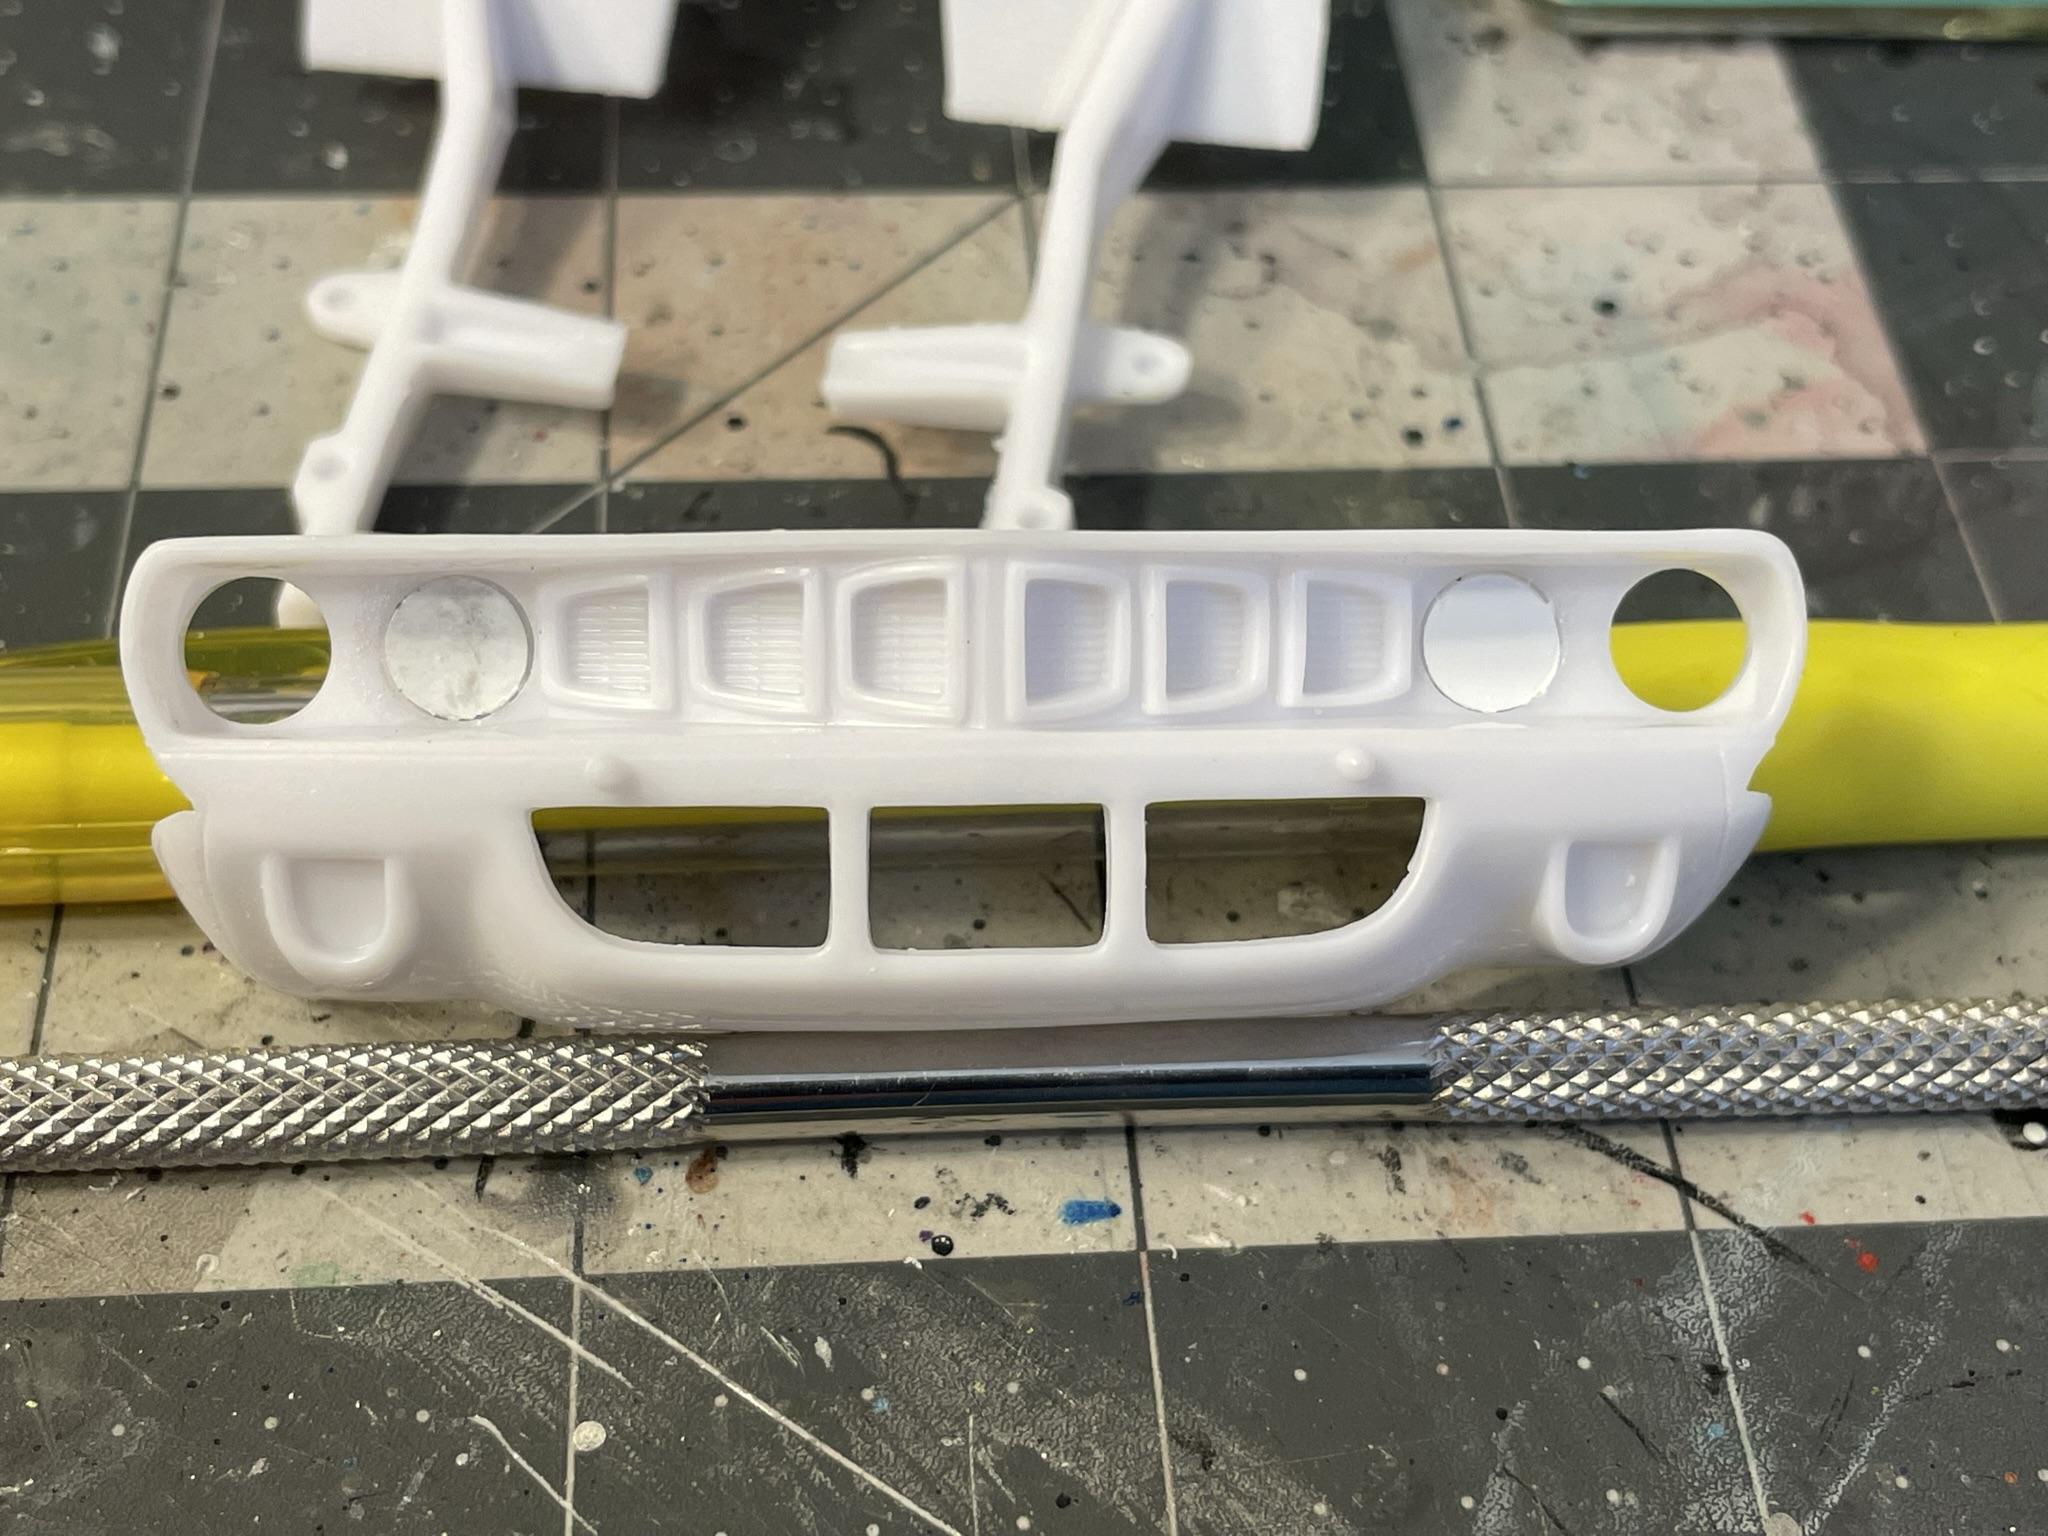
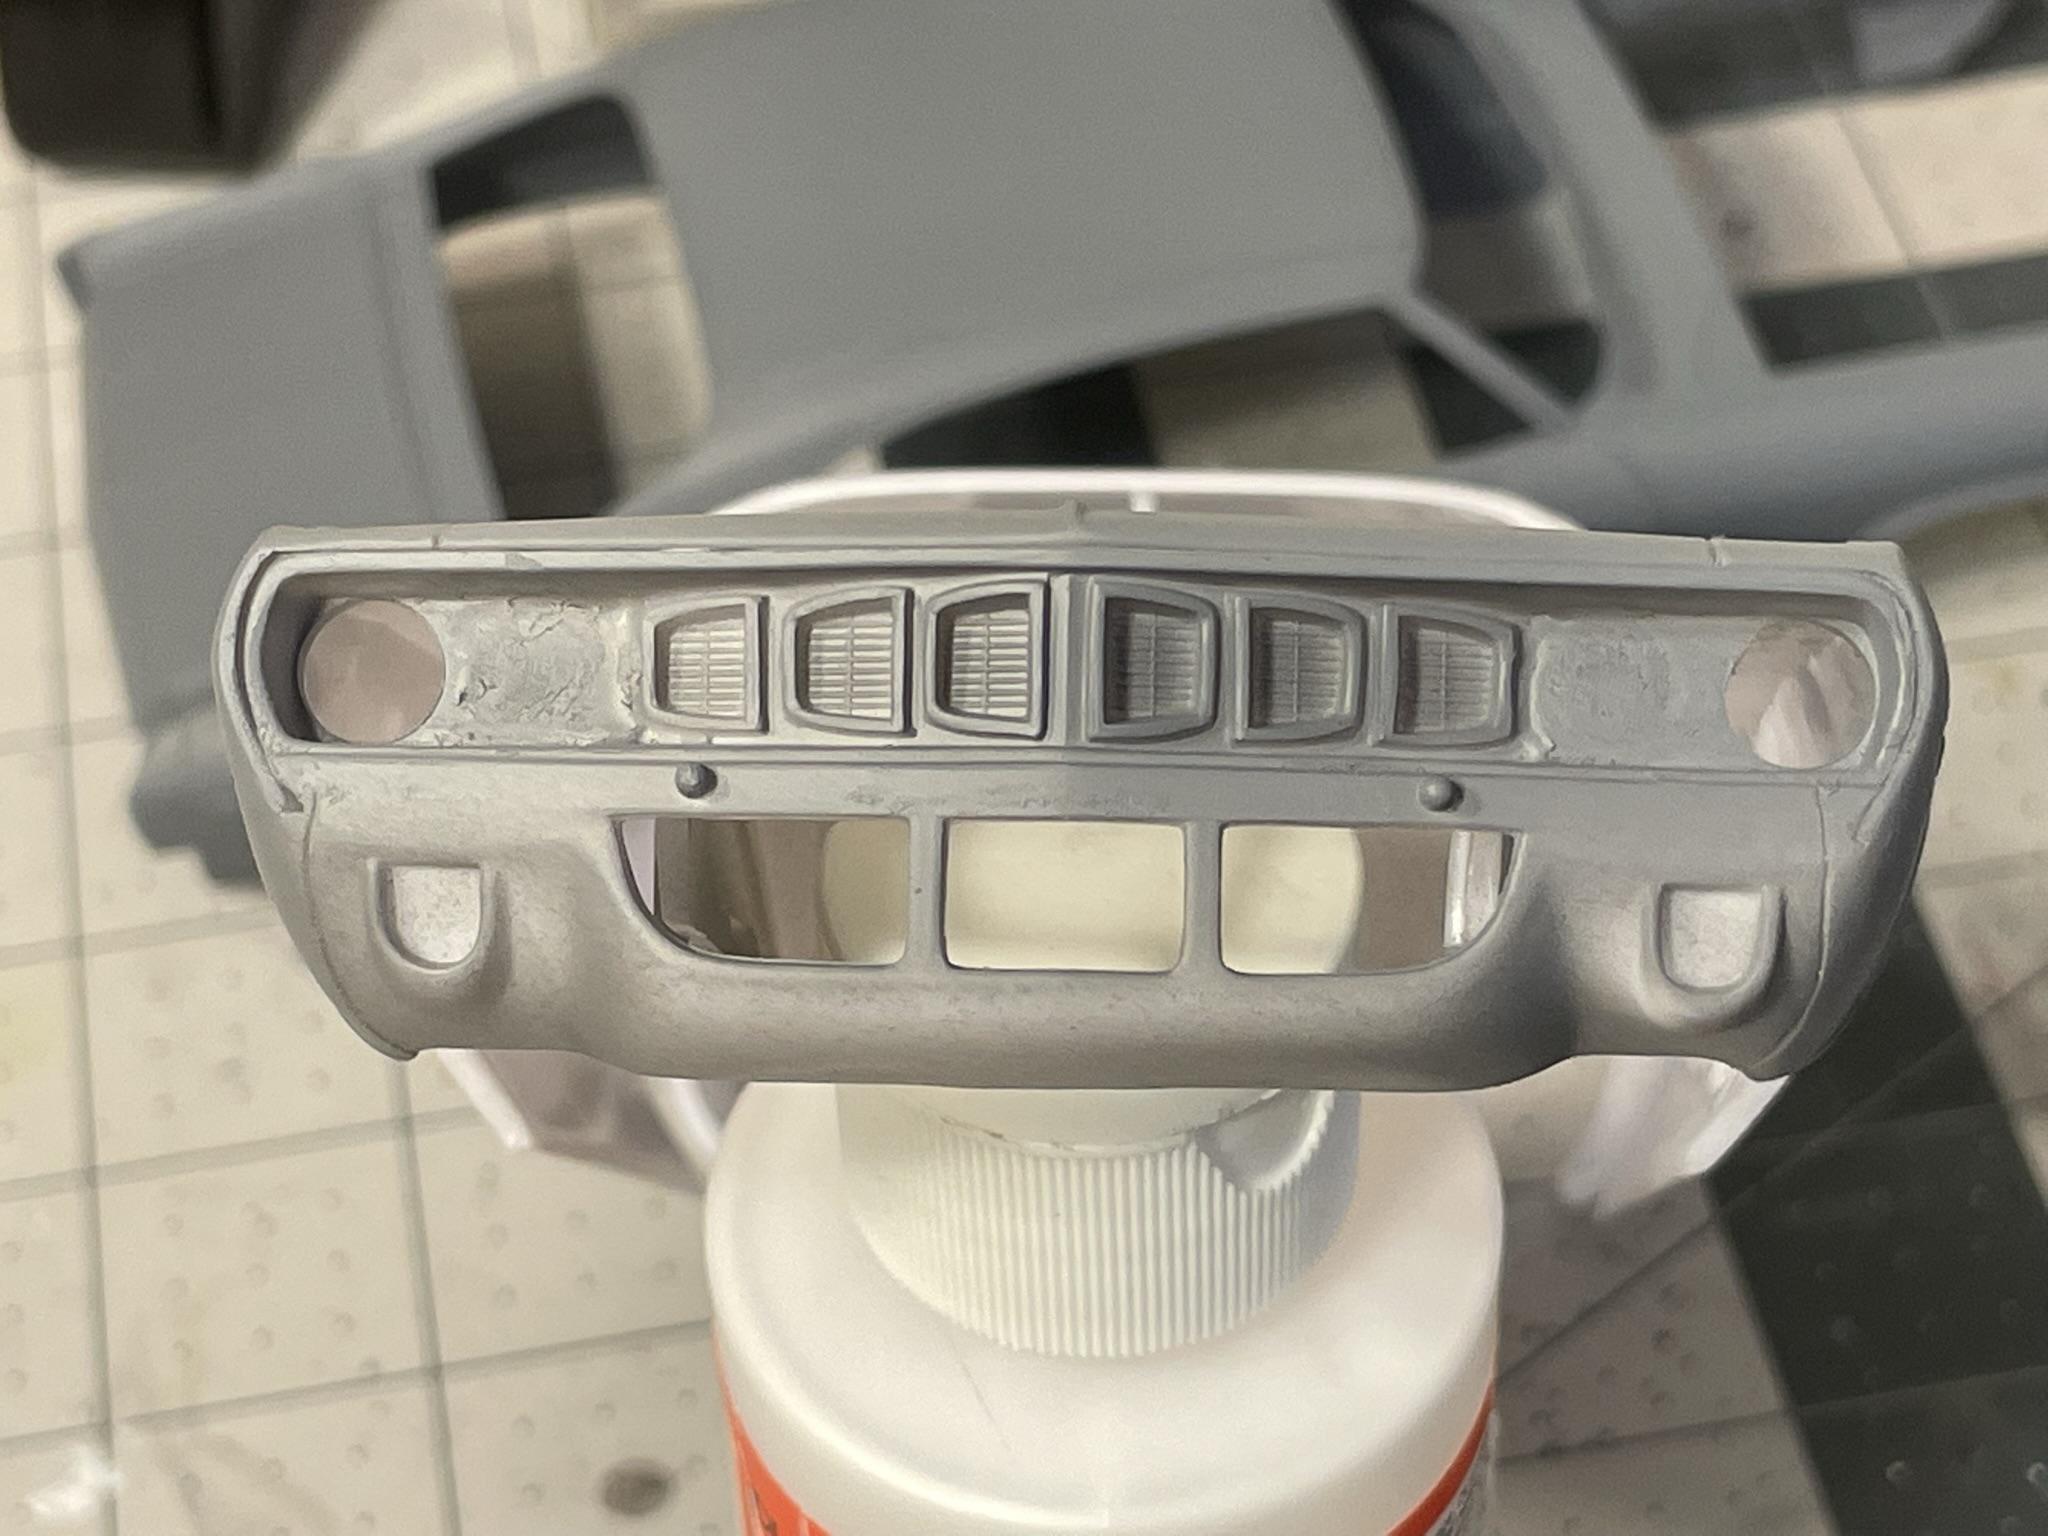
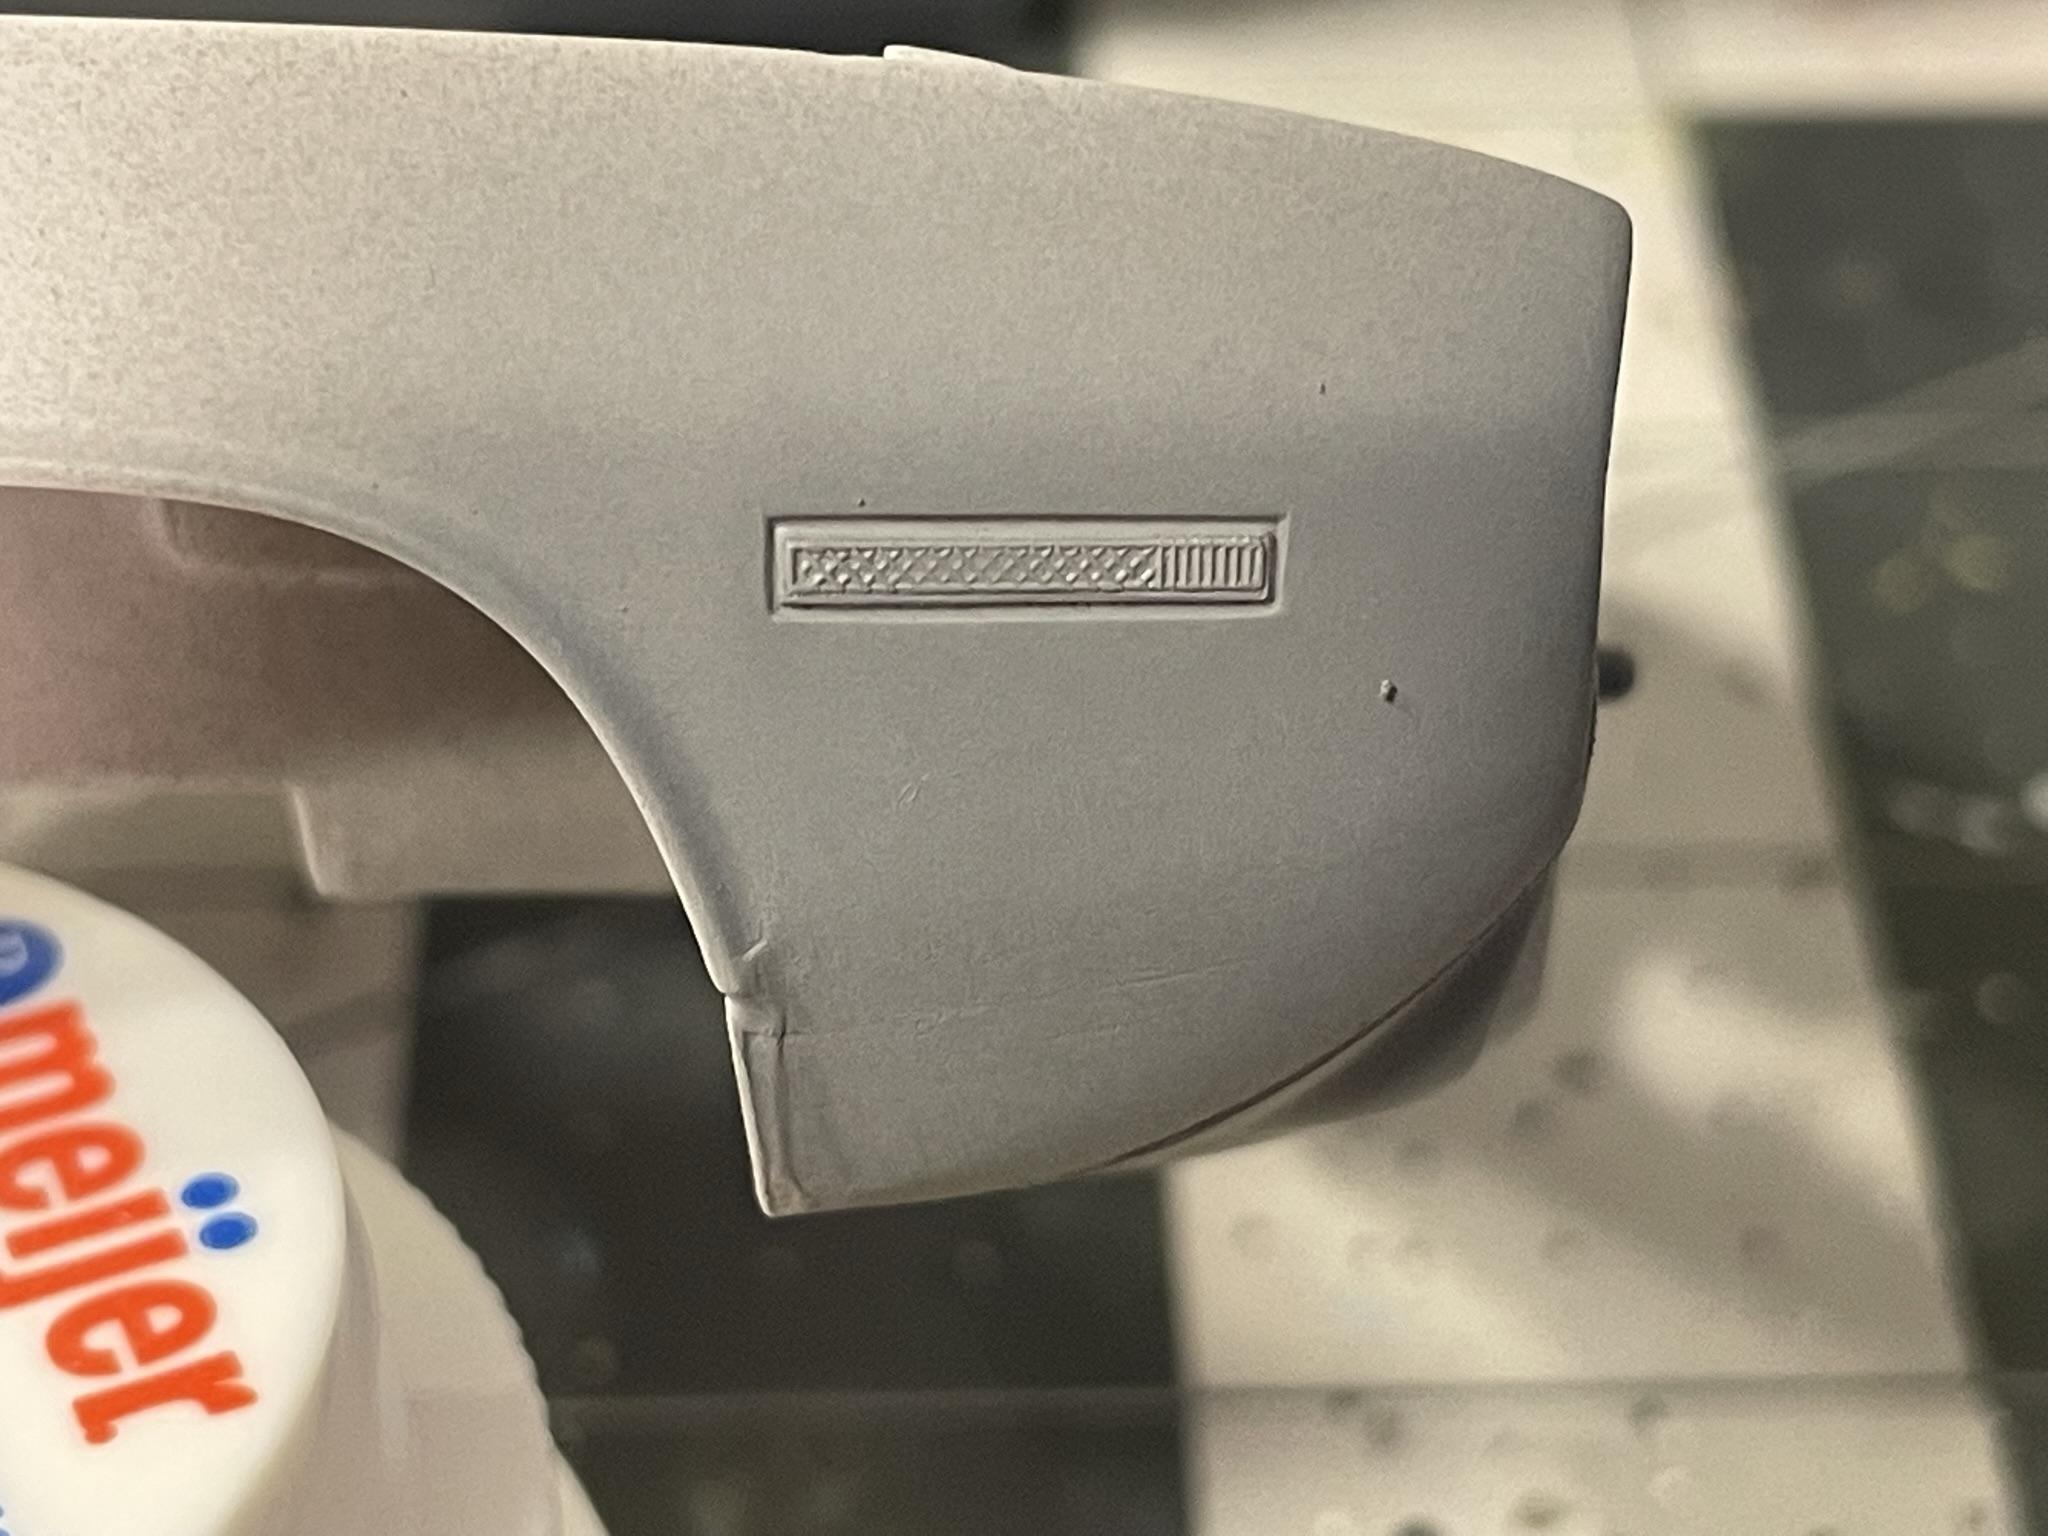
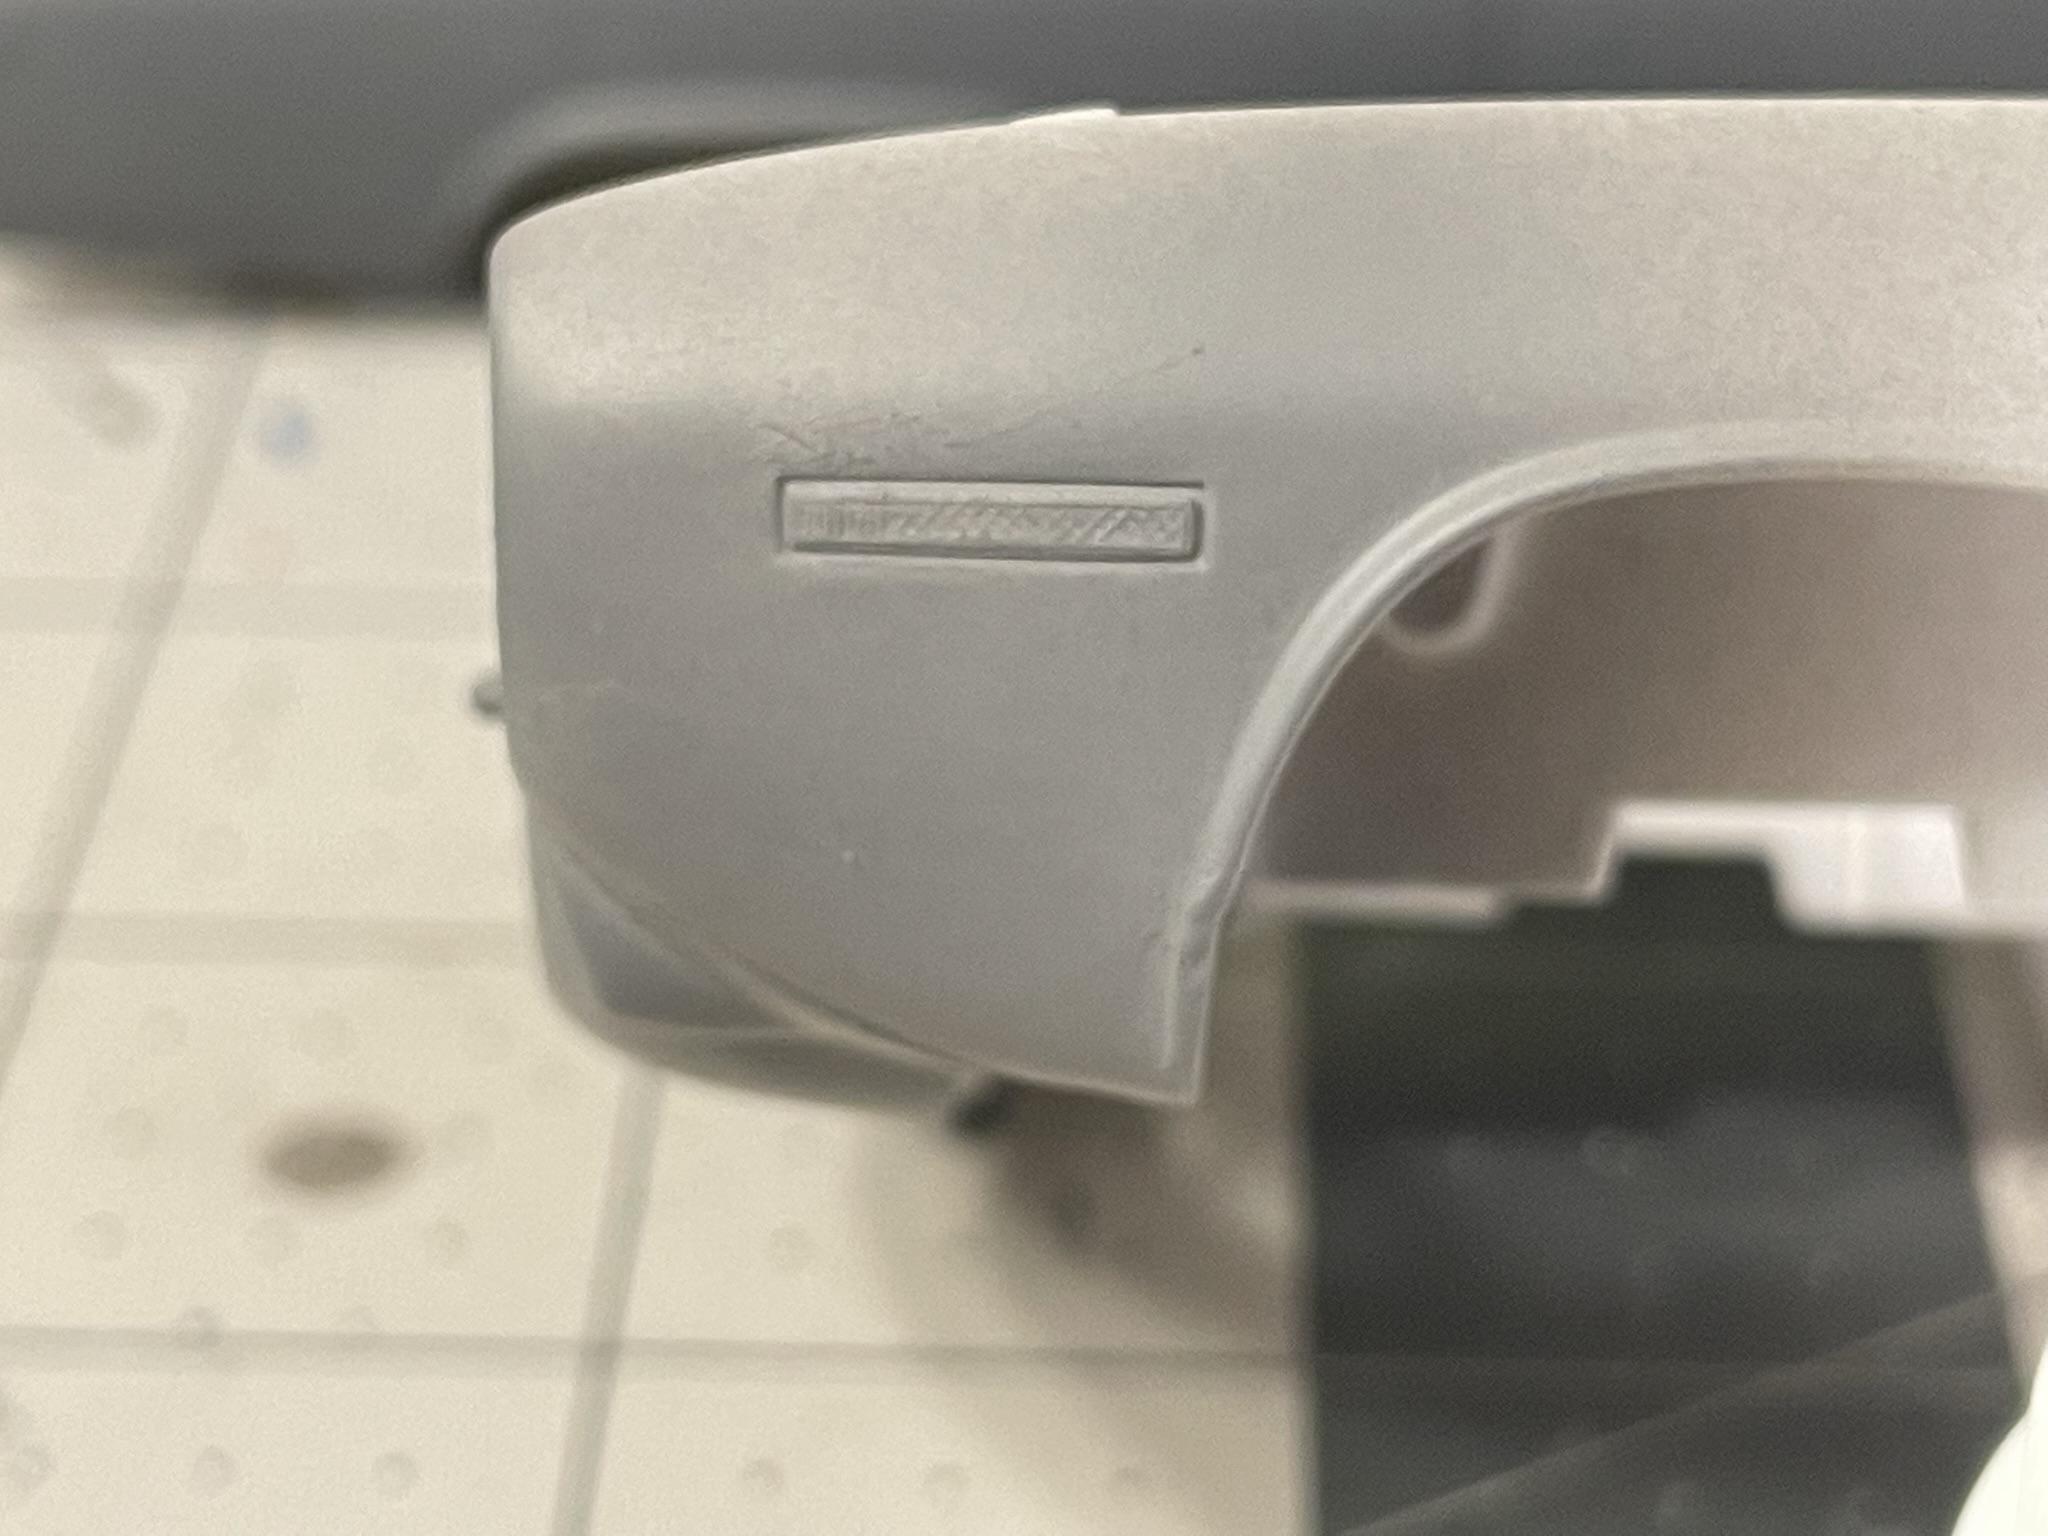
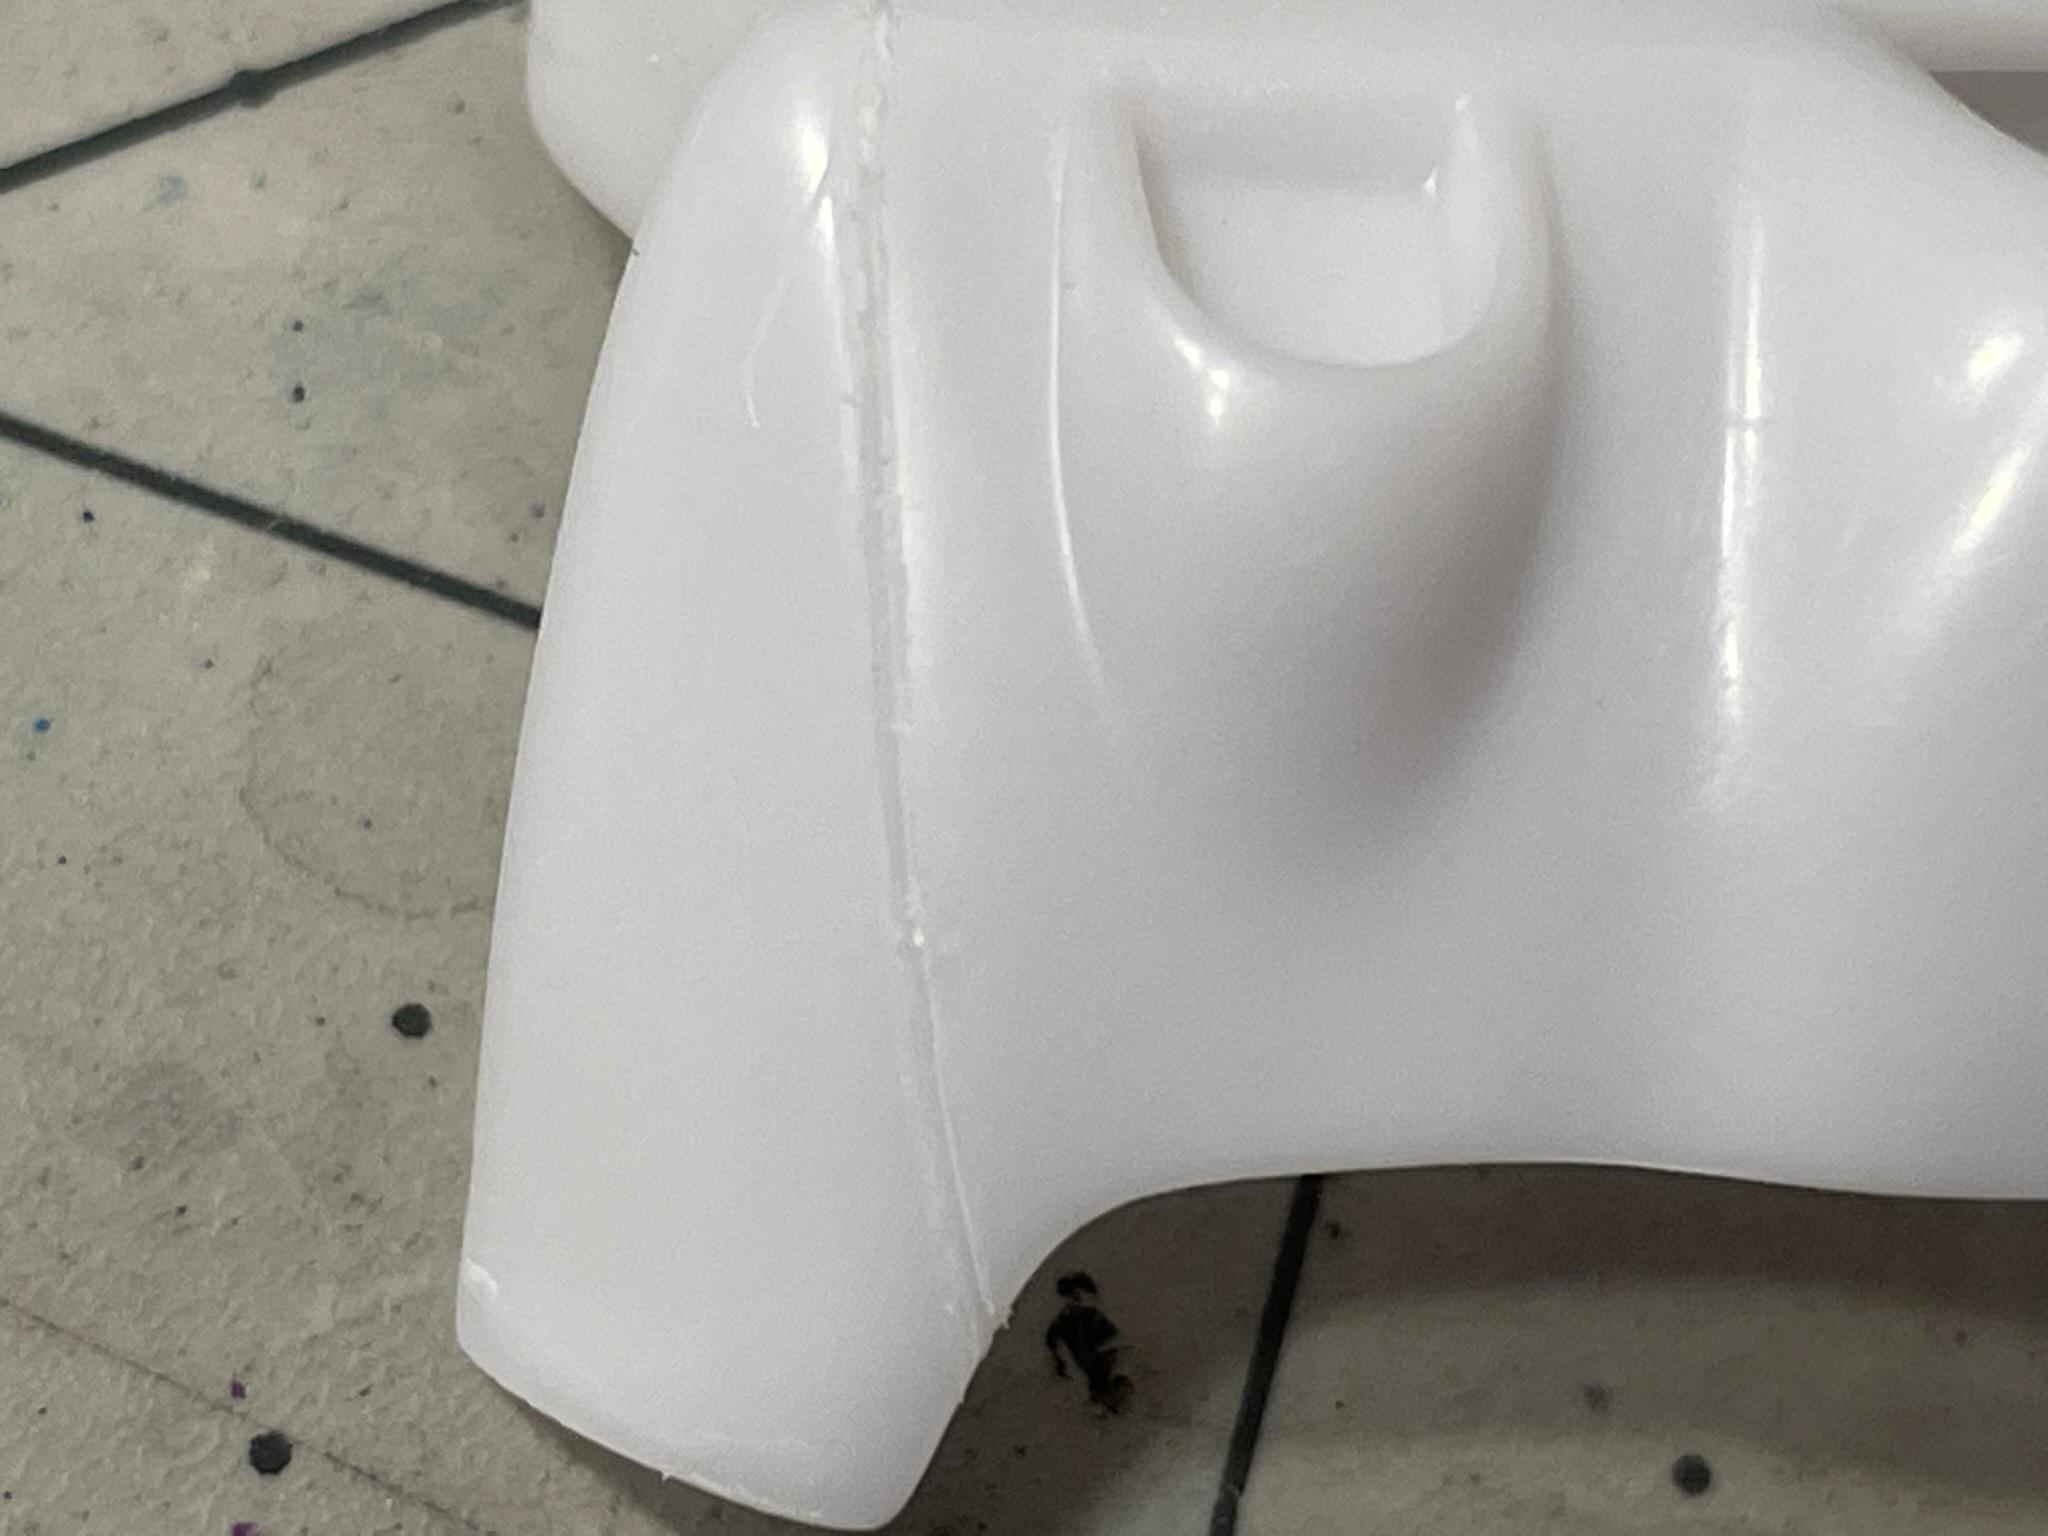
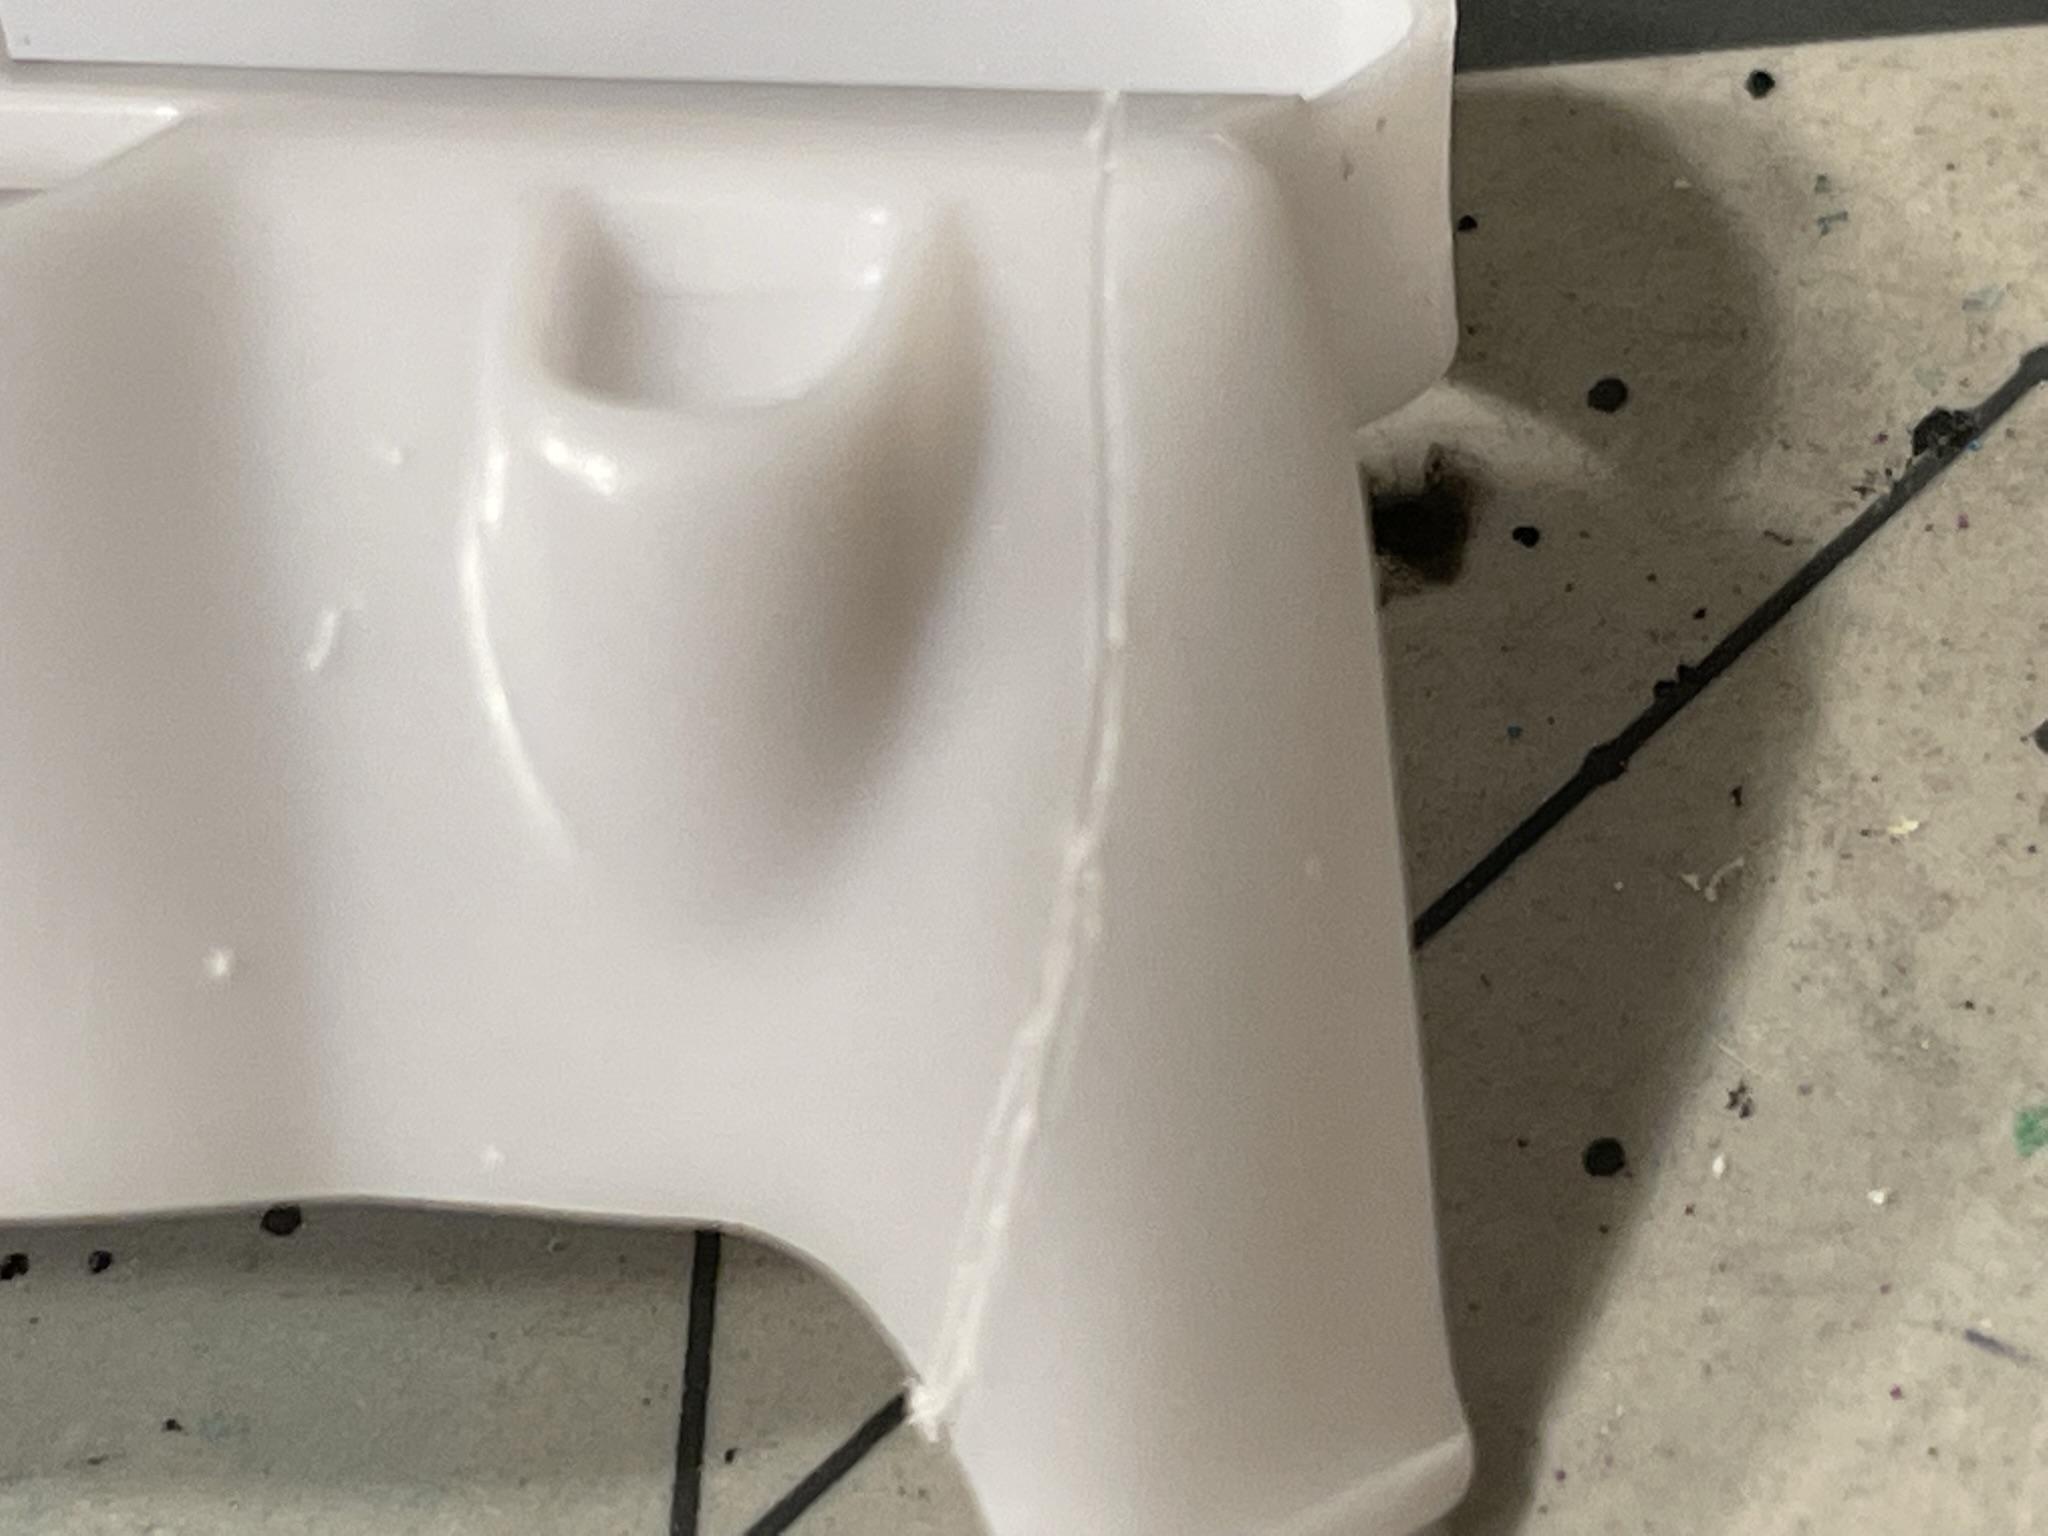
My next step was to fill in the inside headlights in order to re-drill new ones closer to each other. I cut a couple pieces of .010" sheet styrene to cover the holes from the inside. Then I used a hole punch to cut out several circles to fill in the space. Three on each side pretty much did the trick, followed by some "sprue goo" as a filler. Some quick sanding and a coat of primer to see where I'm at, and not too bad. Probably some more sanding and then the scary part of drilling new holes in the correct spot, lol. The next step was to glue the front end piece onto the body. I did one side at a time to line everything up correctly. I applied more "sprue goo" along the seam and sanded it down after it dried. A coat of primer shows it looking pretty good.
-
Revell 1971 Hemi Cuda in Gold Metallic, 1/24 Scale.
Dragonhawk1066 posted a topic in WIP: Model Cars
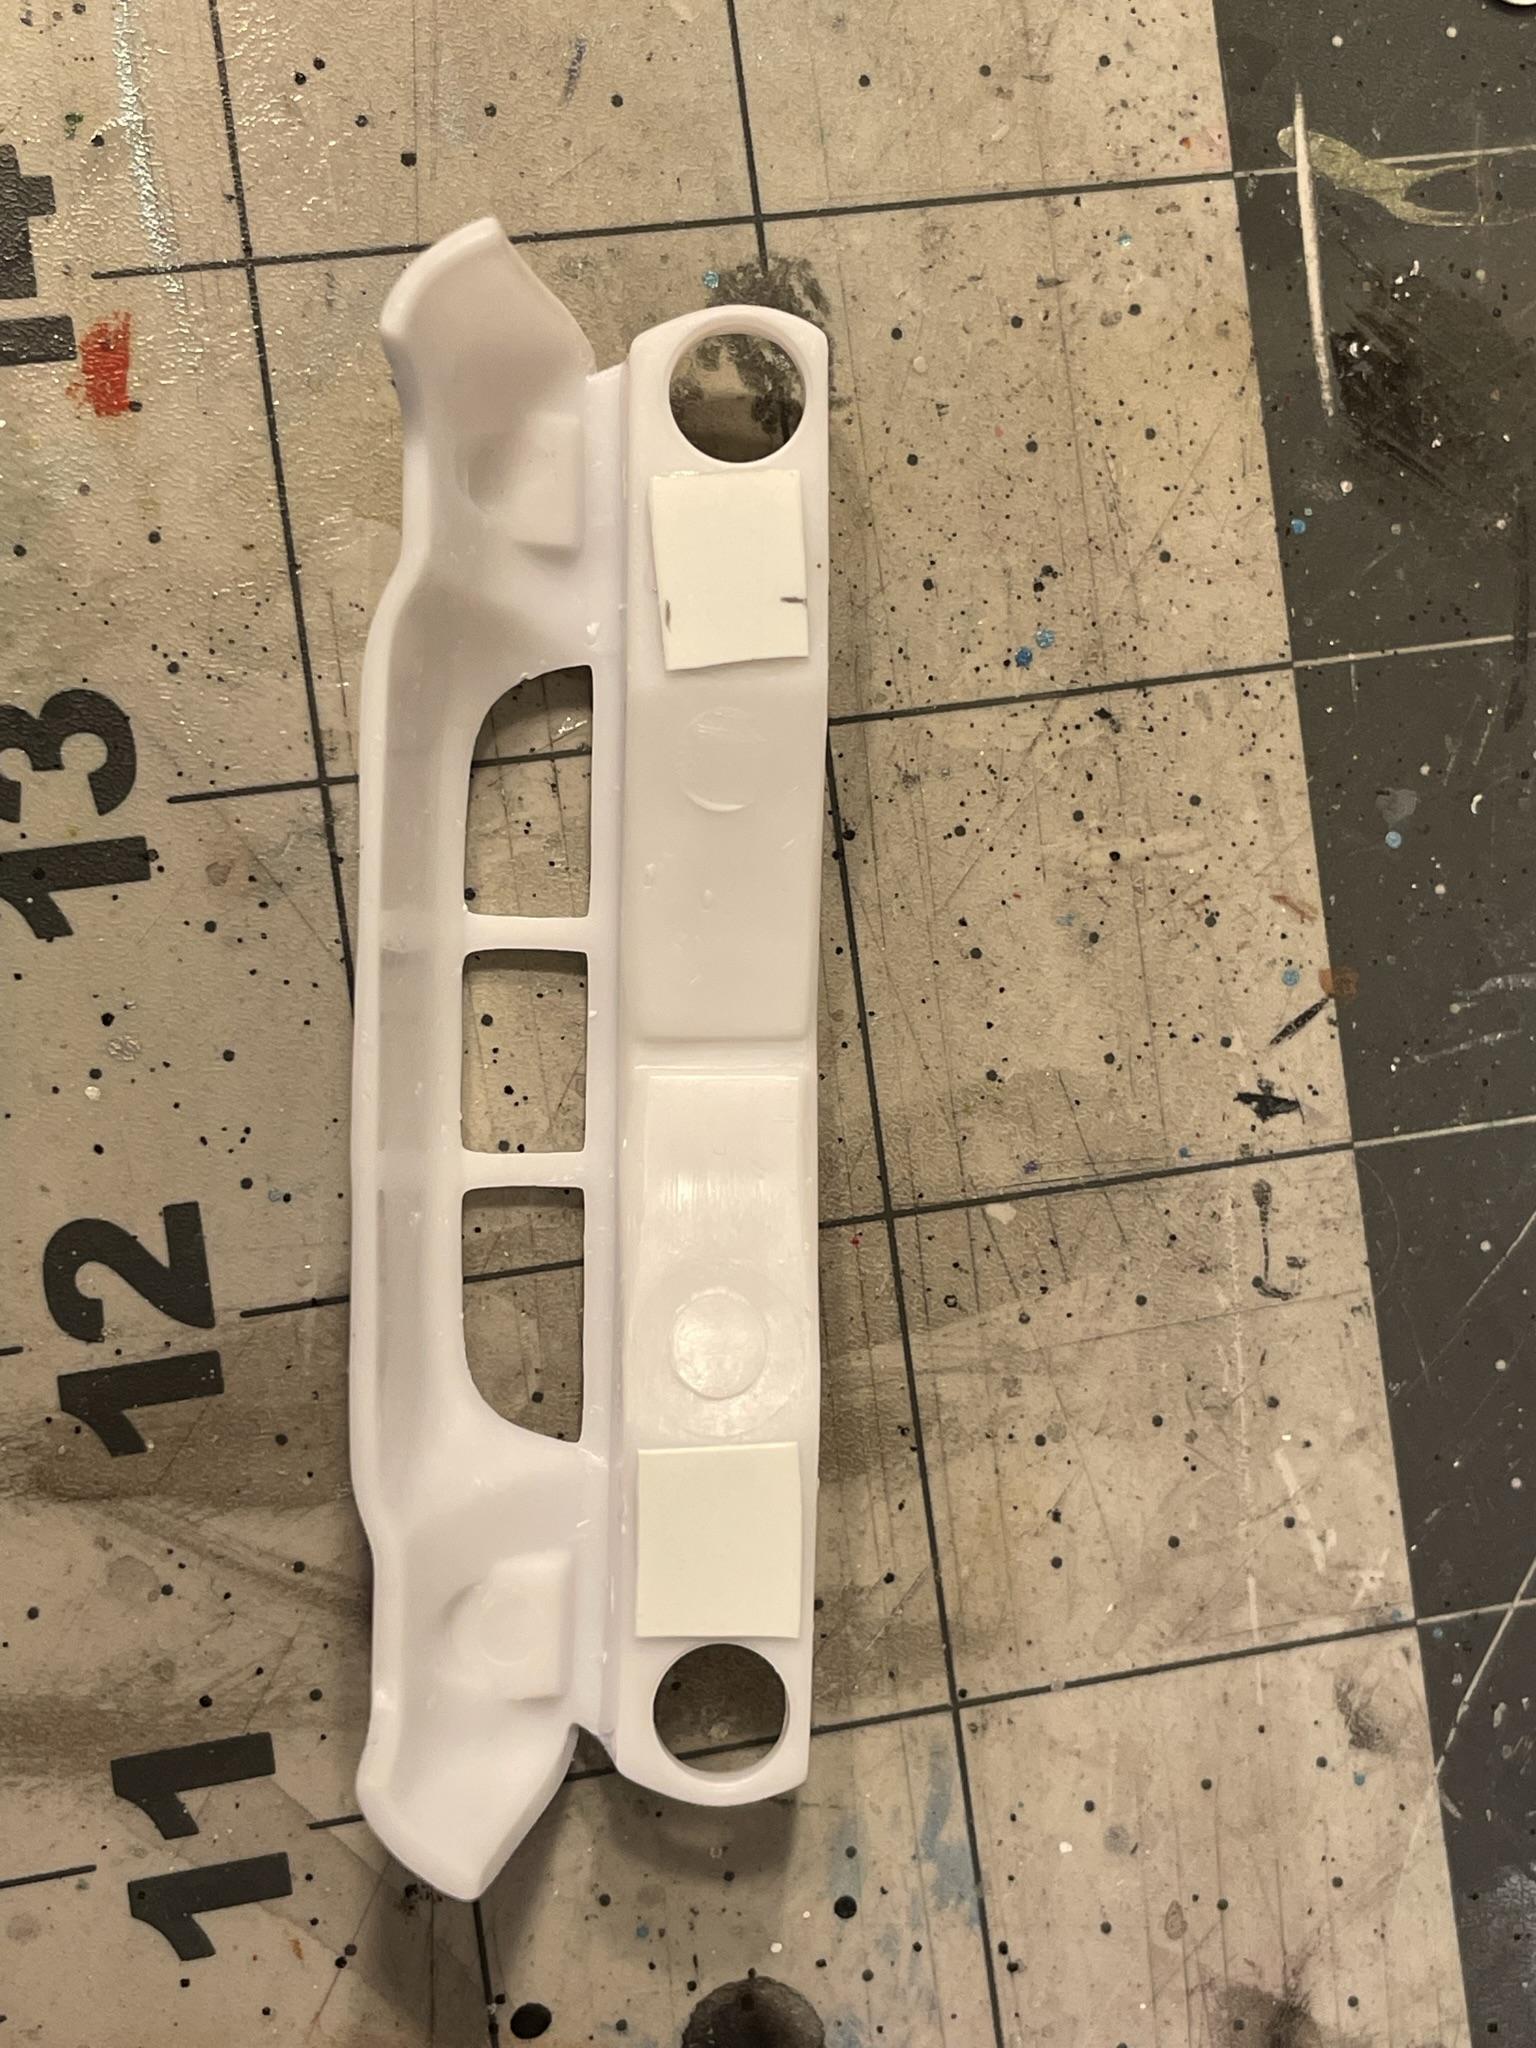
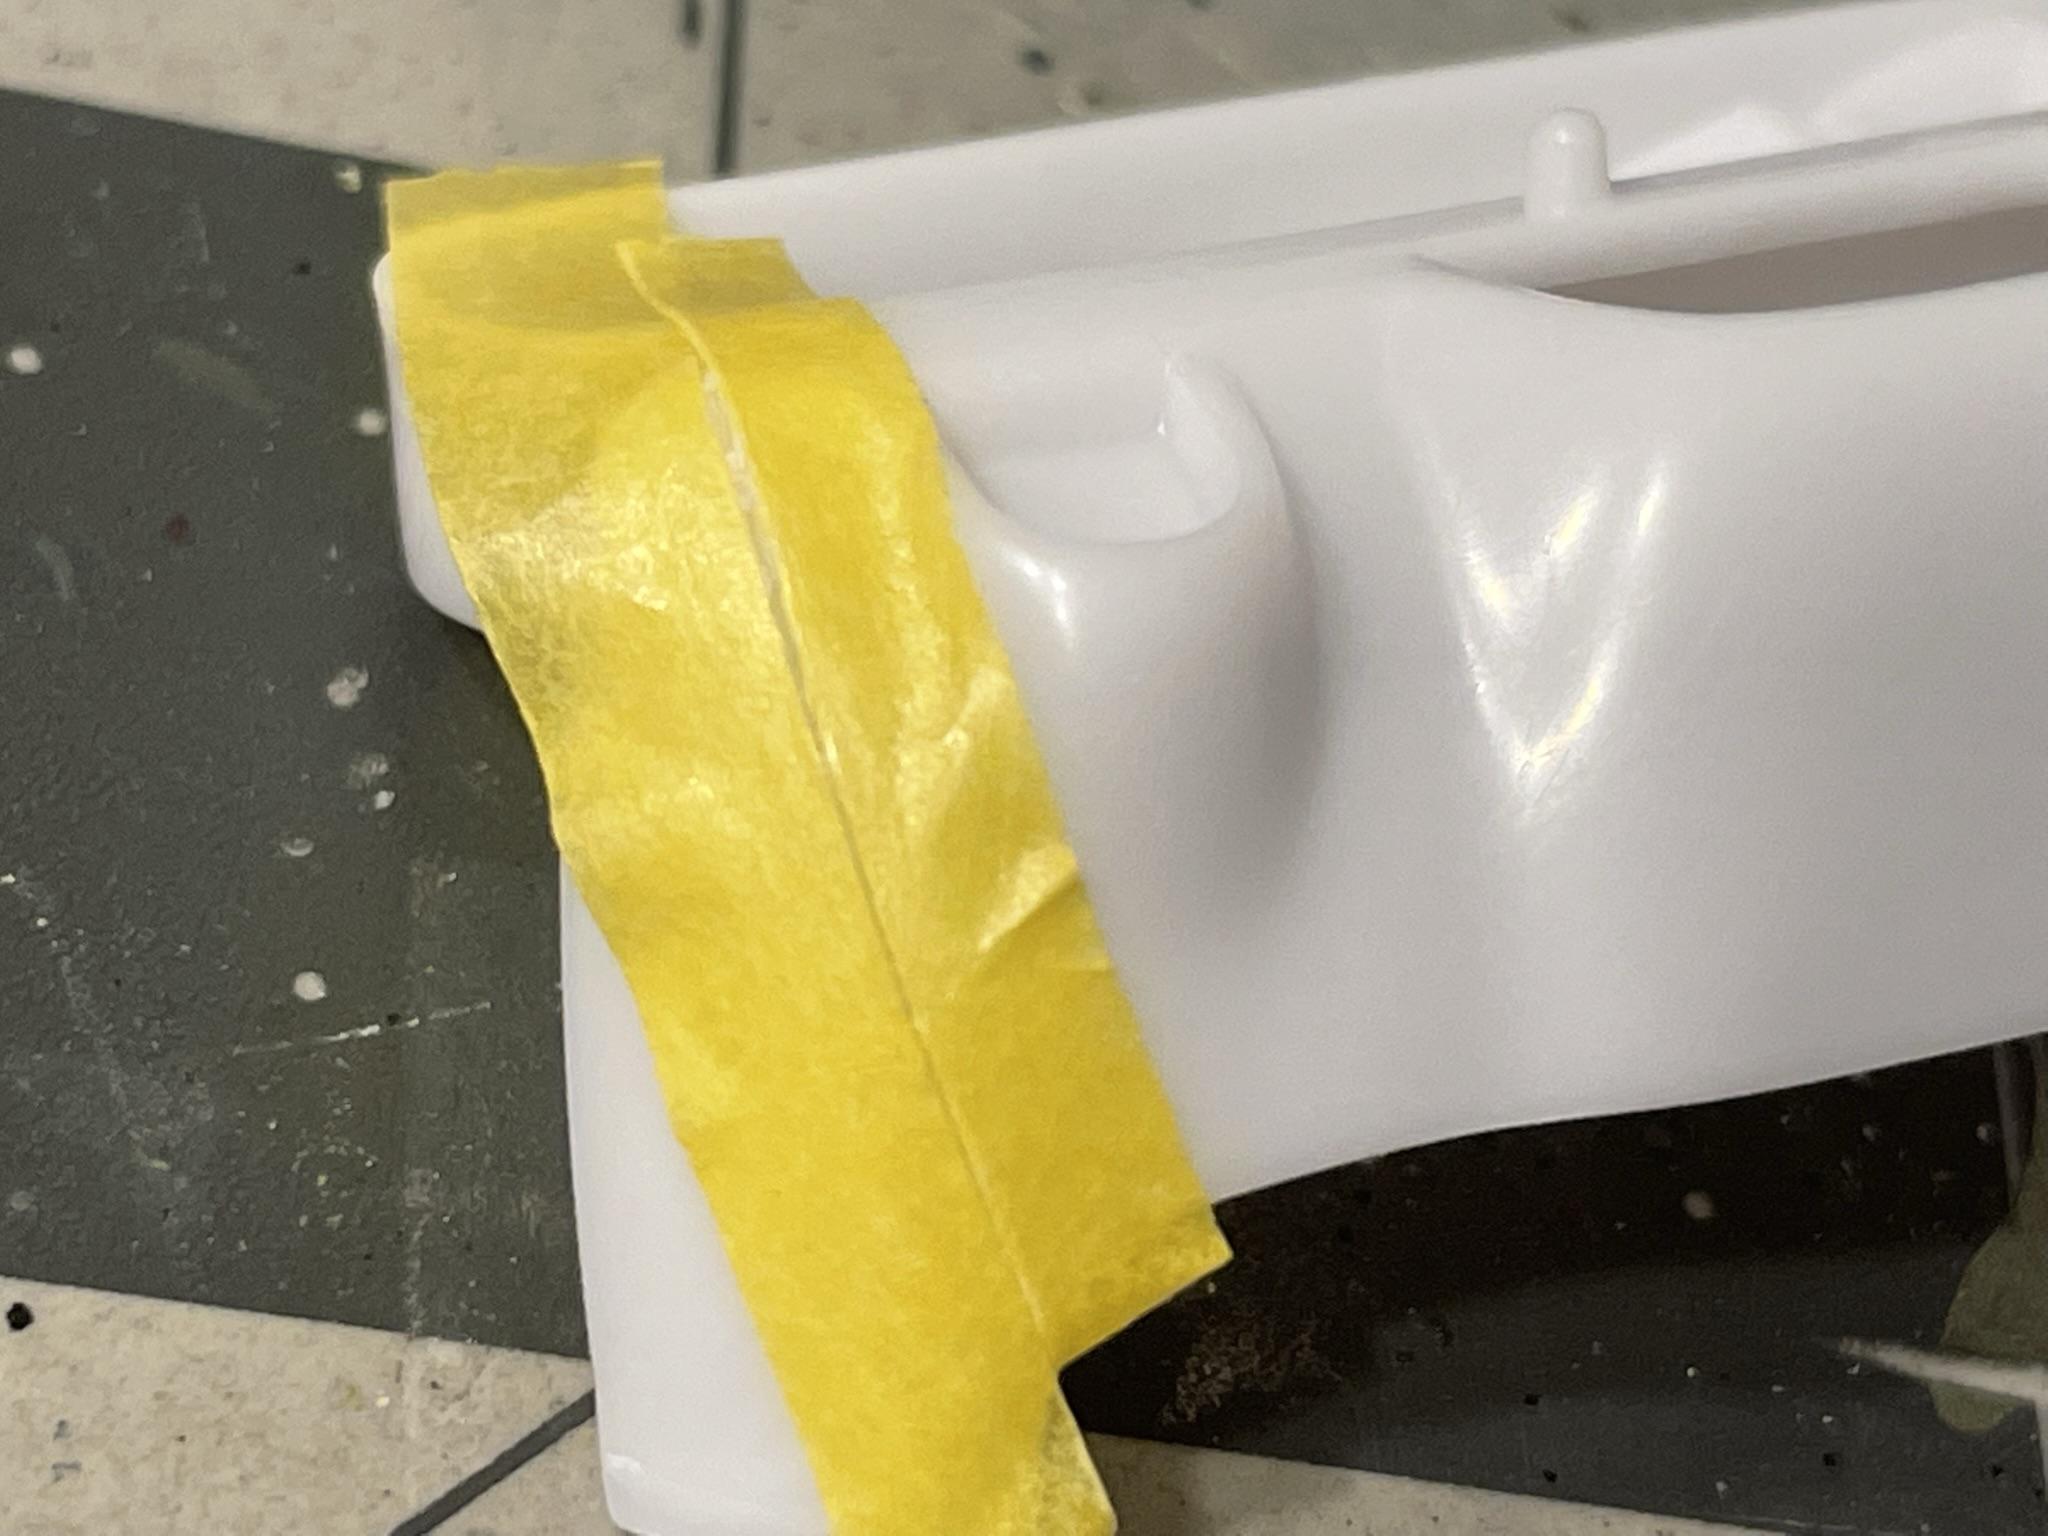
My next project is the Revell 1971 Hemi Cuda. This one will be painted in Sapphire Blue Metallic to match the first pic. I had already started it a few weeks ago before building the 1969 Chevelle. I did the usual trimming, sanding and panel line deepening before a Dawn dishwater bath. I'm a little put off by the way the front ends of this and the '70 Challenger T/A front ends attach, but built one of each already without addressing that issue. With this one I decided to see what I could do to correct the front end and also the headlights, which are spaced too far apart on each side. I saw someone else in this forum do the same fixes (I can't remember who though), which inspired me to do the same. The first thing I did was to use some Tamiya Tape as a guide for scribing the accurate front panel line. It's not the greatest, but it'll do.
-
Very nicely done and a great looking paint job!
-
Very cool, well done!
-
1966 VW Beetle with some minor "tweeks"...
Dragonhawk1066 replied to SpikeSchumacher's topic in Model Cars
Outstanding Beetle! Well done!