Jantrix
-
Posts
11,225 -
Joined
-
Last visited
Content Type
Profiles
Forums
Events
Gallery
Everything posted by Jantrix
-
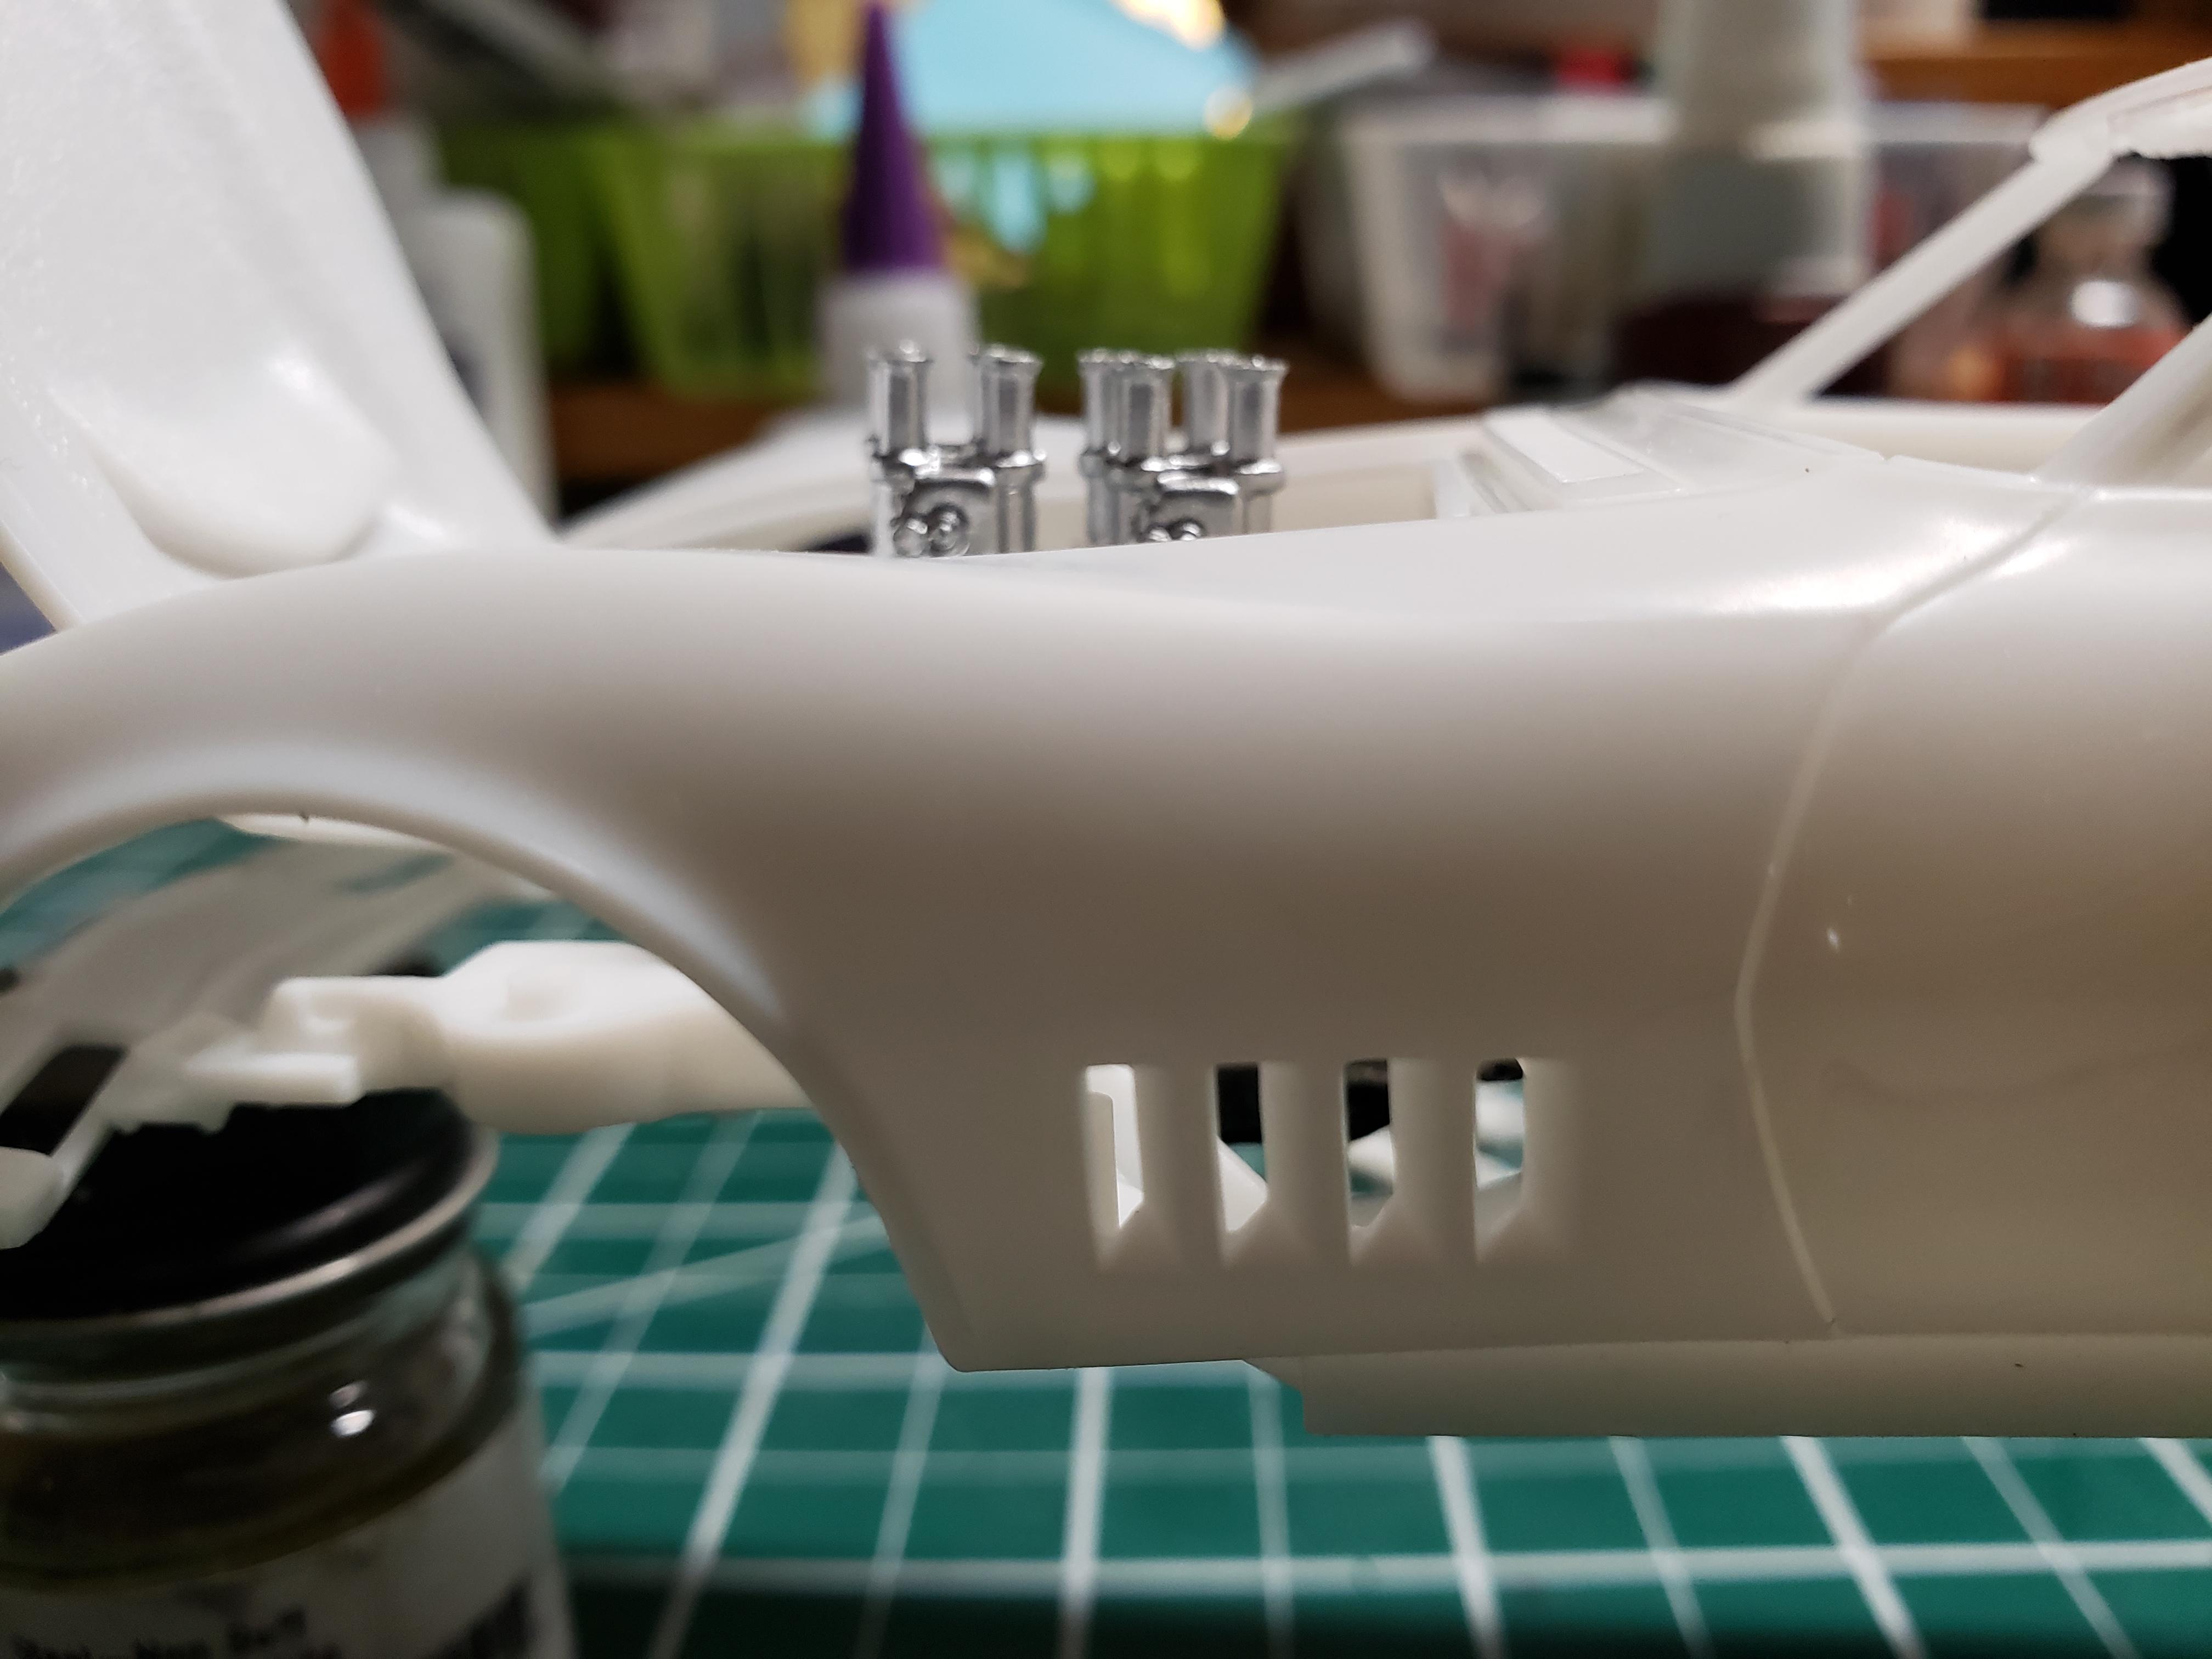
My wife surprised me with an Anycubic Photon Mono resin printer for Fathers Day and I've been perusing the most popular sites for model car .stl files but I've found almost nothing. And when I do it's very slanted towards the import car enthusiast. Does anyone know of a site site that might have more of a selection? I'd like both free and pay-for sites. Once I get good with this thing, I'm happy to pay for good files. BTW, whatever I print will be for personal use only. I've no interest in selling parts, I've little enough to time to devote to the hobby as it is. I'm interested in hot rod and muscle/sports cars.
-
I've finally got a finish on the body that I'm happy with. A smooth flat black is harder to accomplish than I thought. I'll let it flash for a few days and get it finished.

-
Very very nice. With some cool paint choices, you turned a somewhat dated 80's billet pro-street , and given it a modern twist. Well done.
-
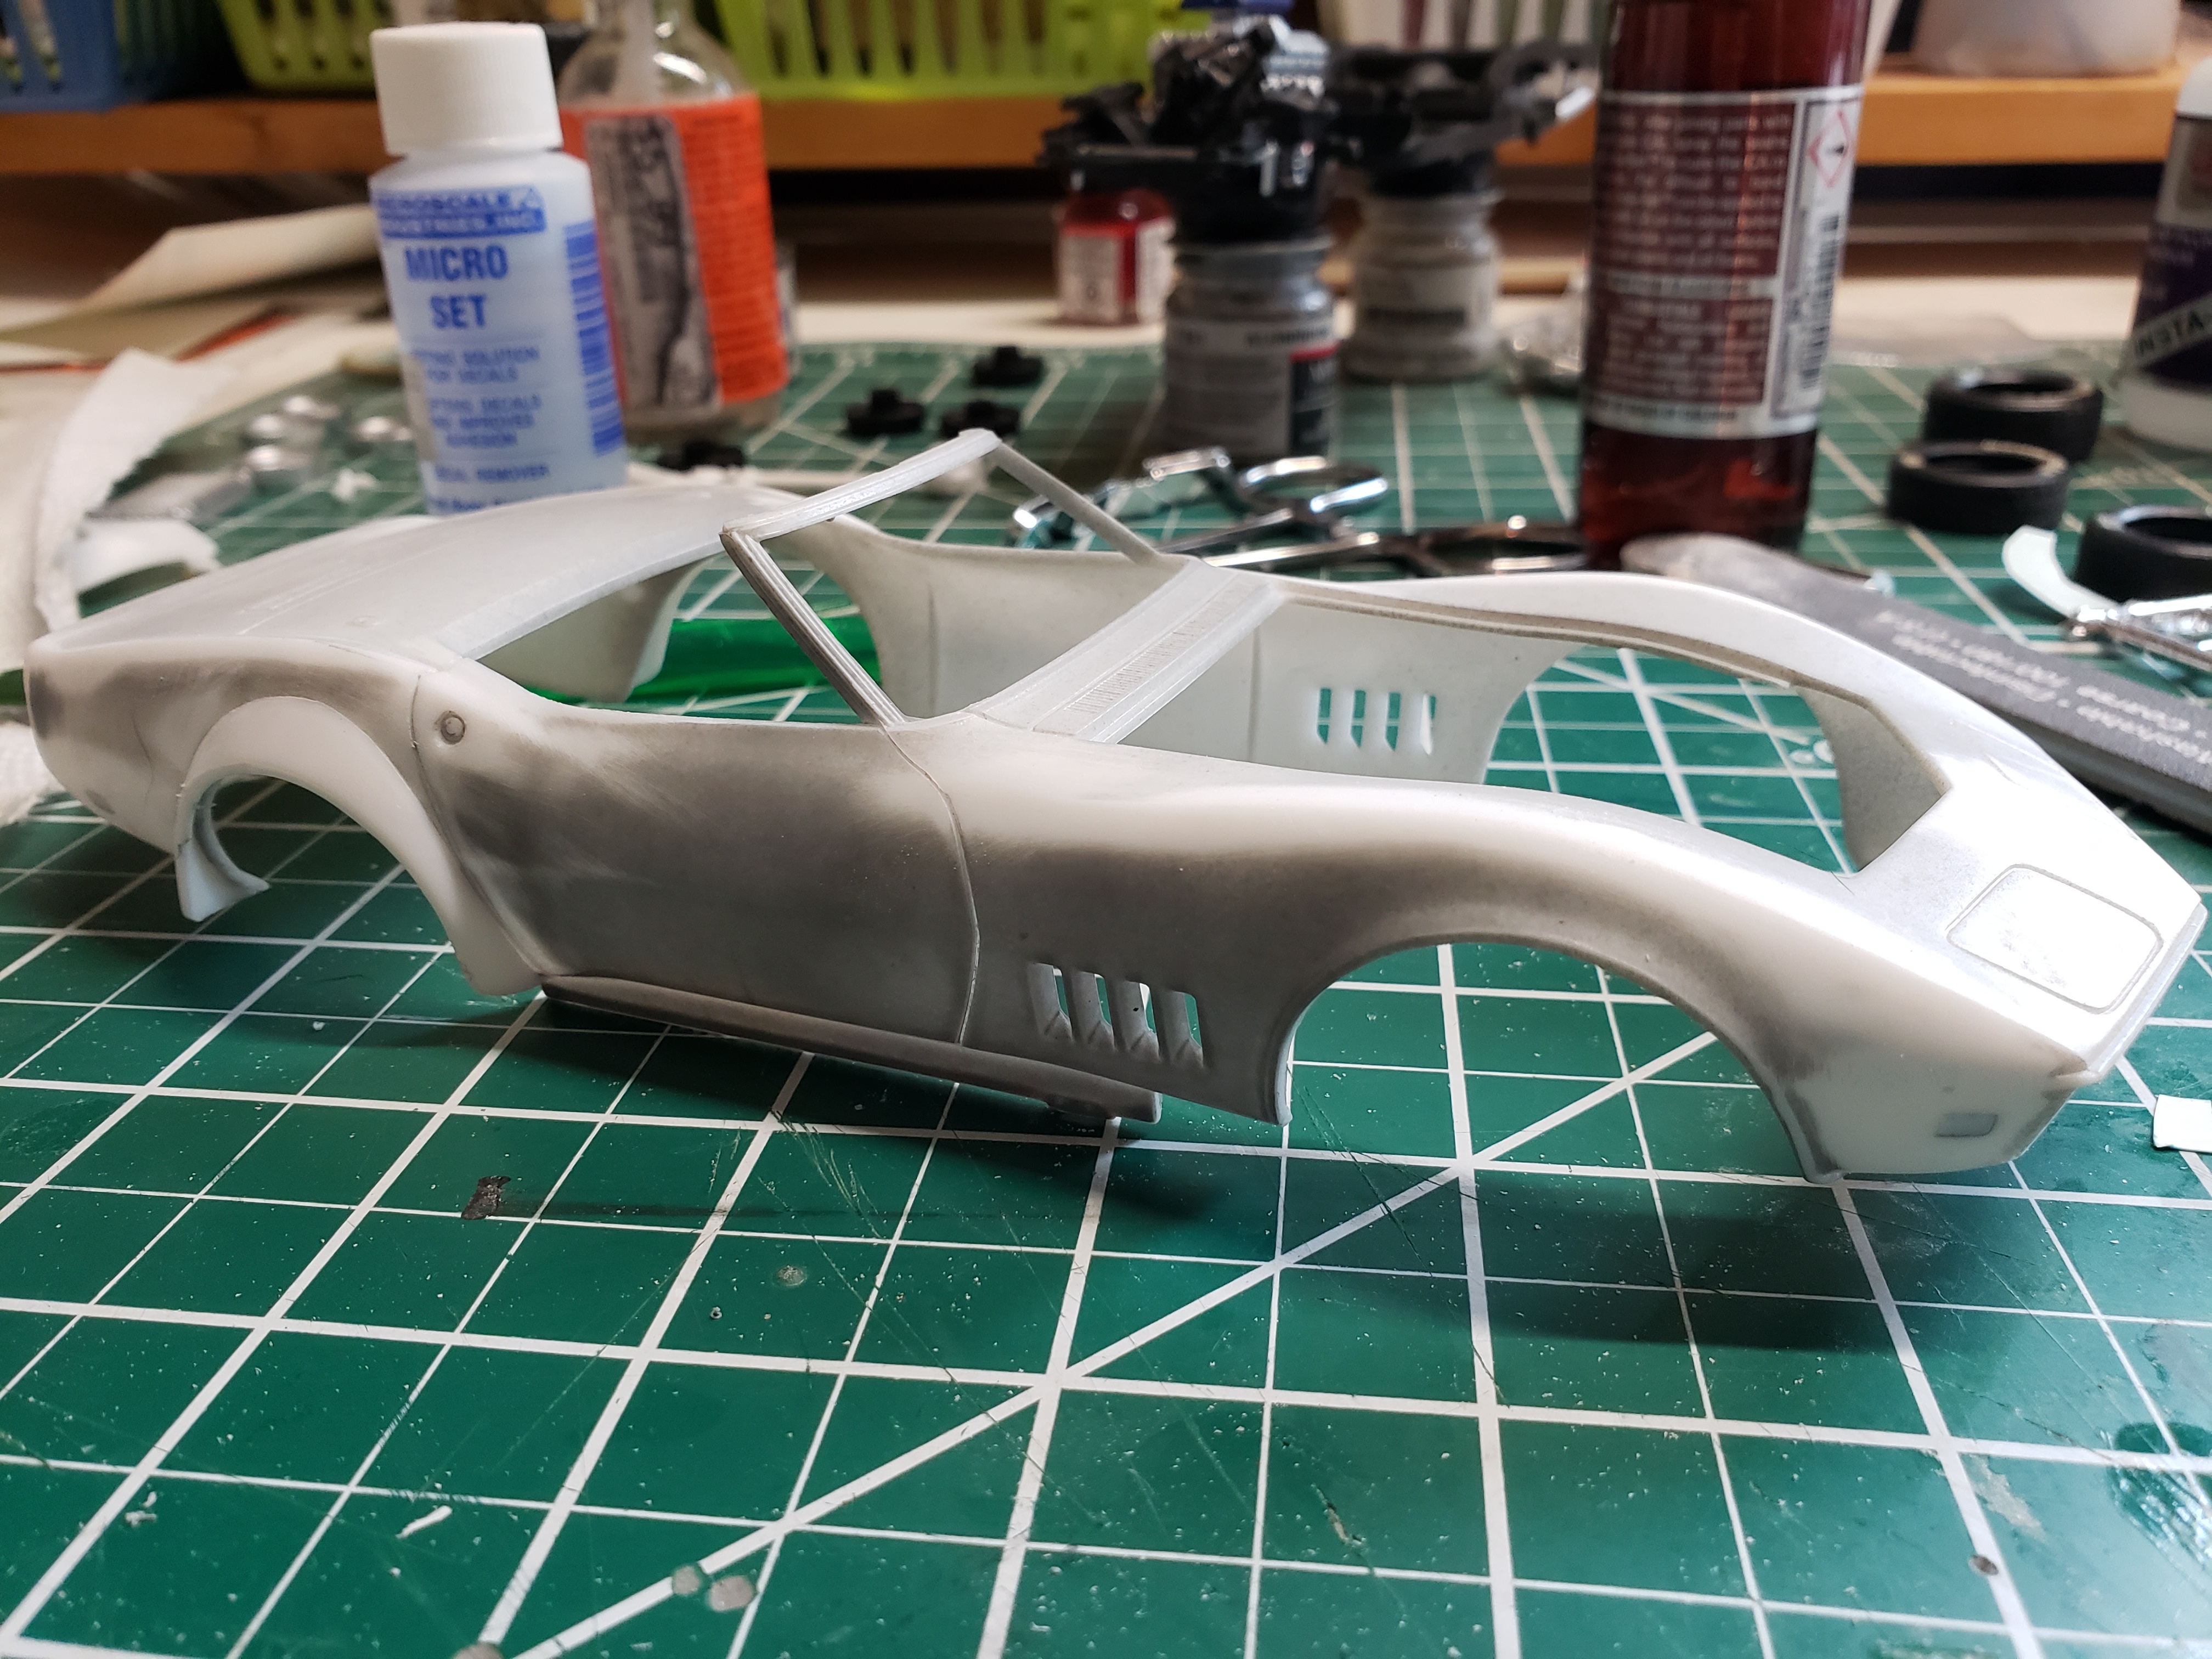
Hi guys. Spencer that red rocket is just amazing. As I've progressed with this Corvette, as I've never built one, it's sort of turned into, "if I was going to built a C3 Corvette for myself, this is how I'd do it". So lots of body smoothing. No side markers, no reverse lights, no bumpers, no door handles, no scripts or badges. Custom air cleaner. The color will be suede Testors De Ja Blue. Enjoying the build.
-
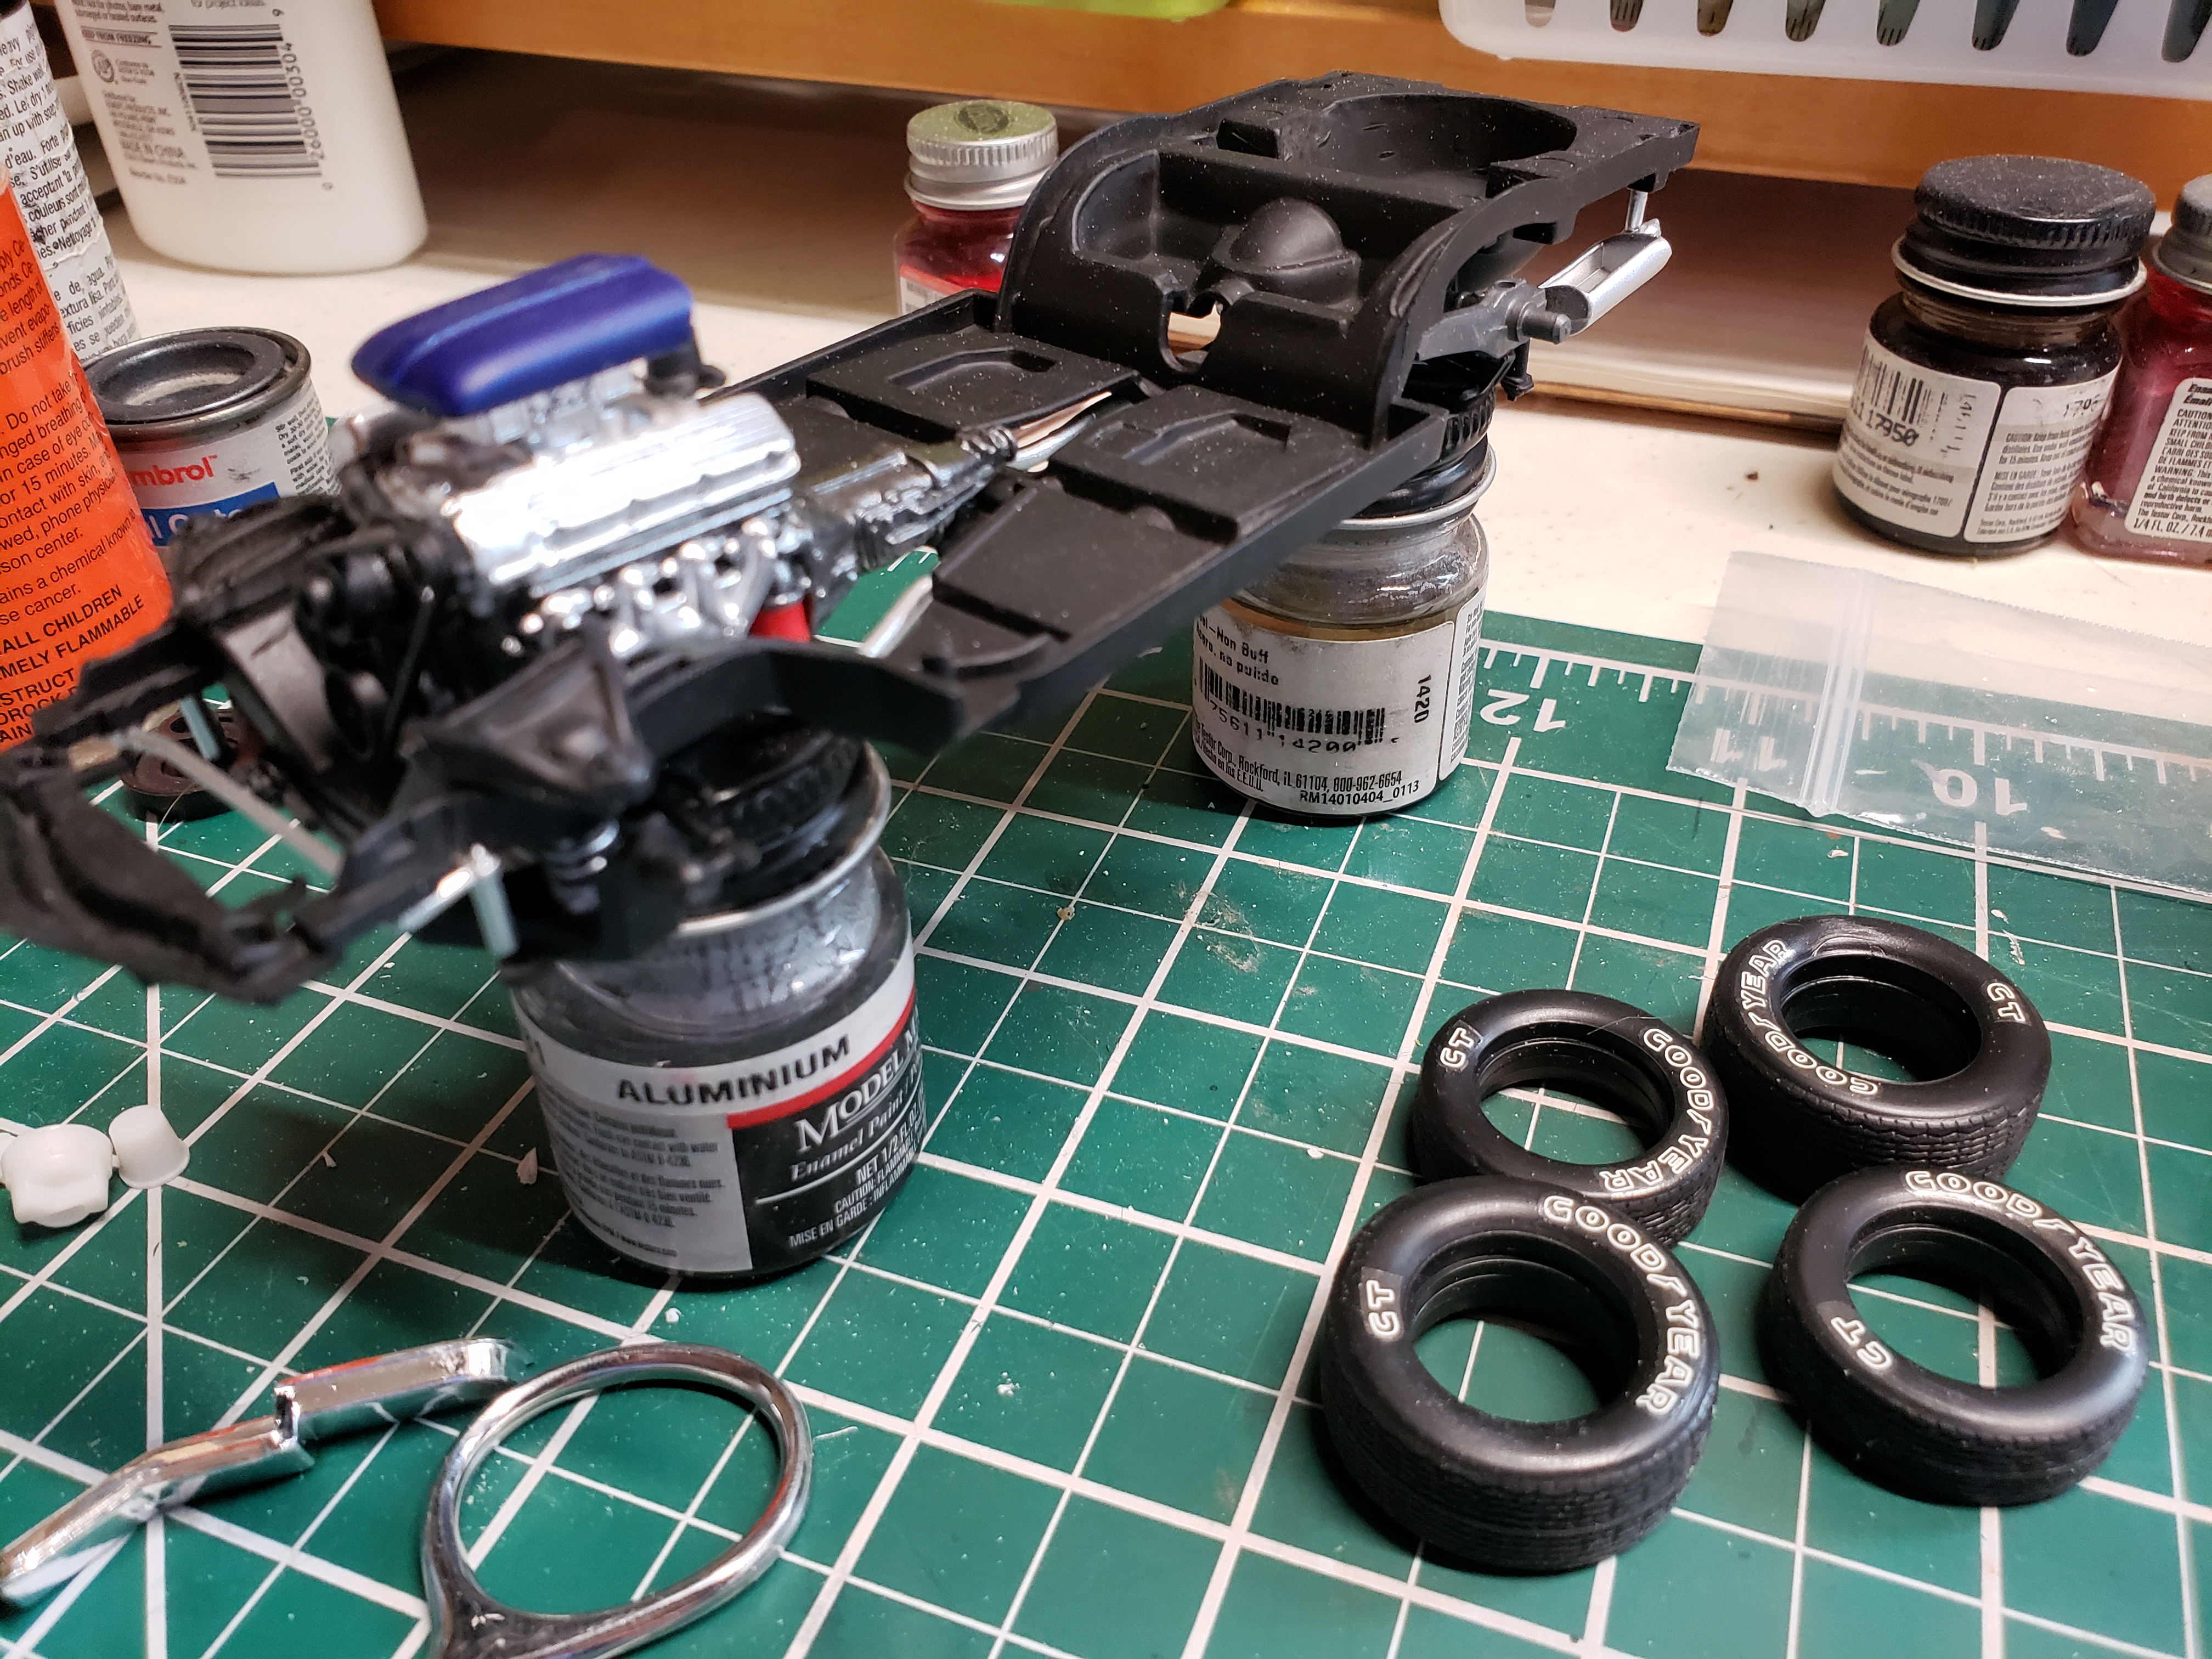
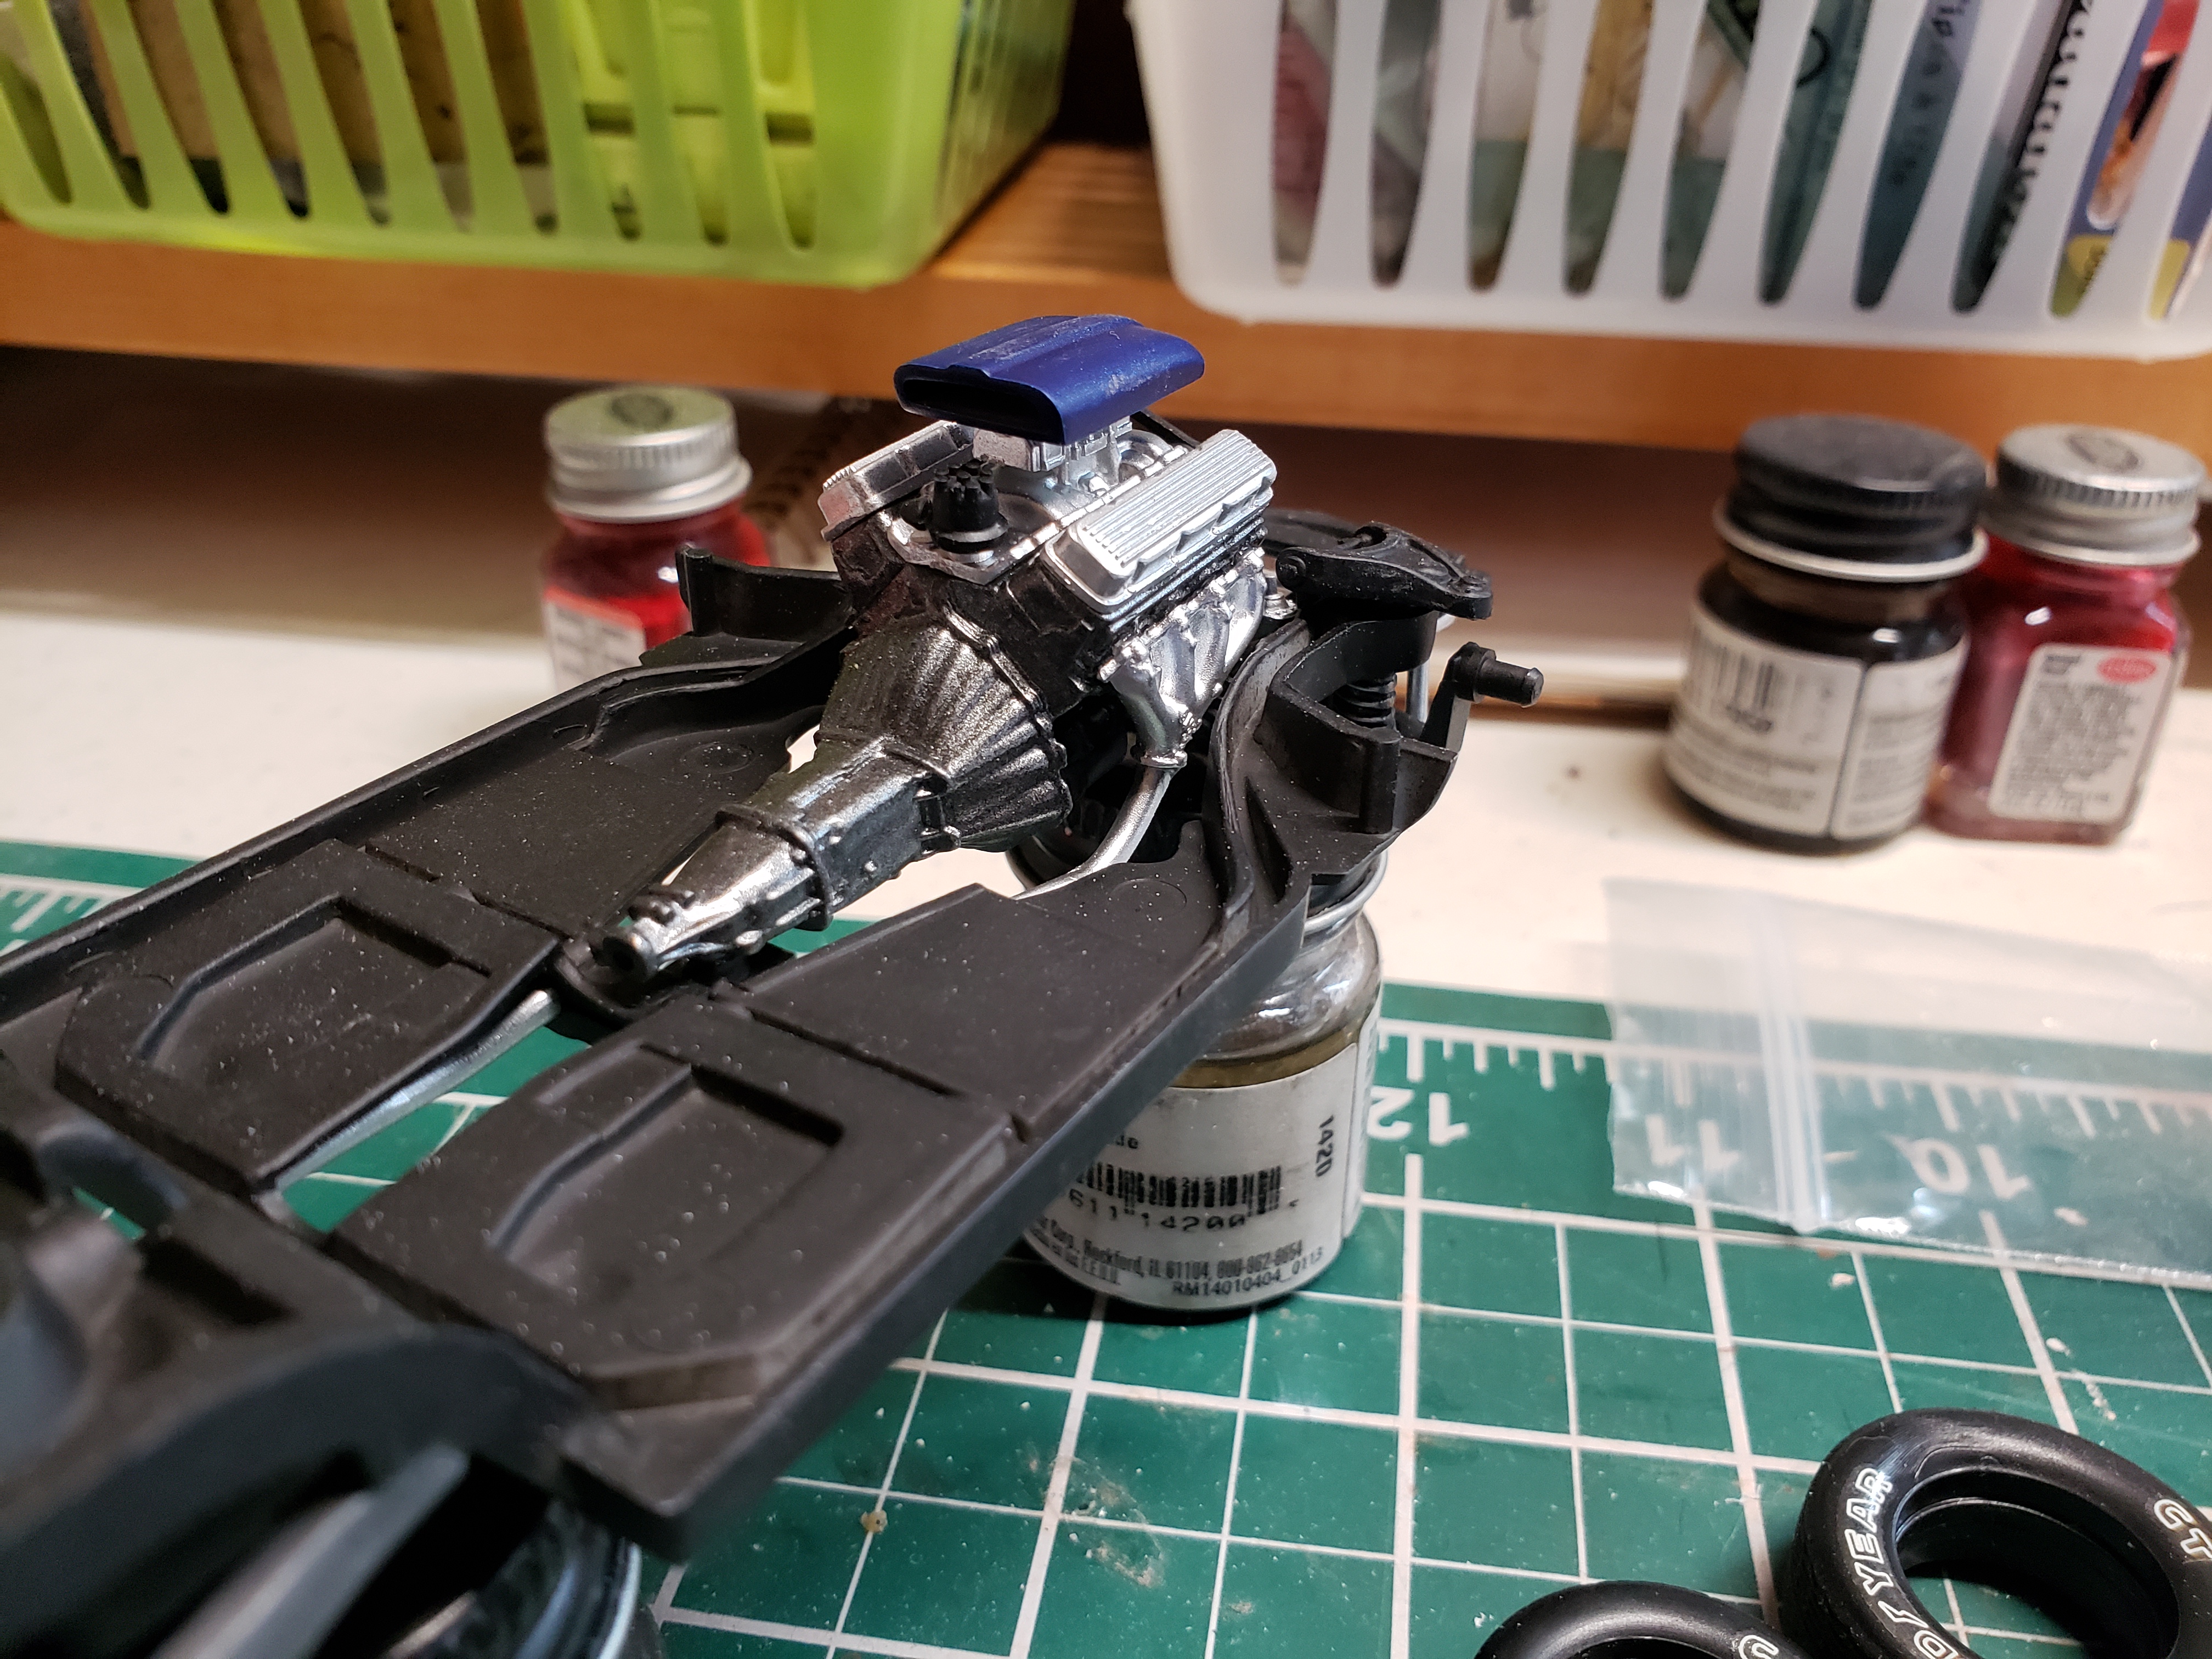
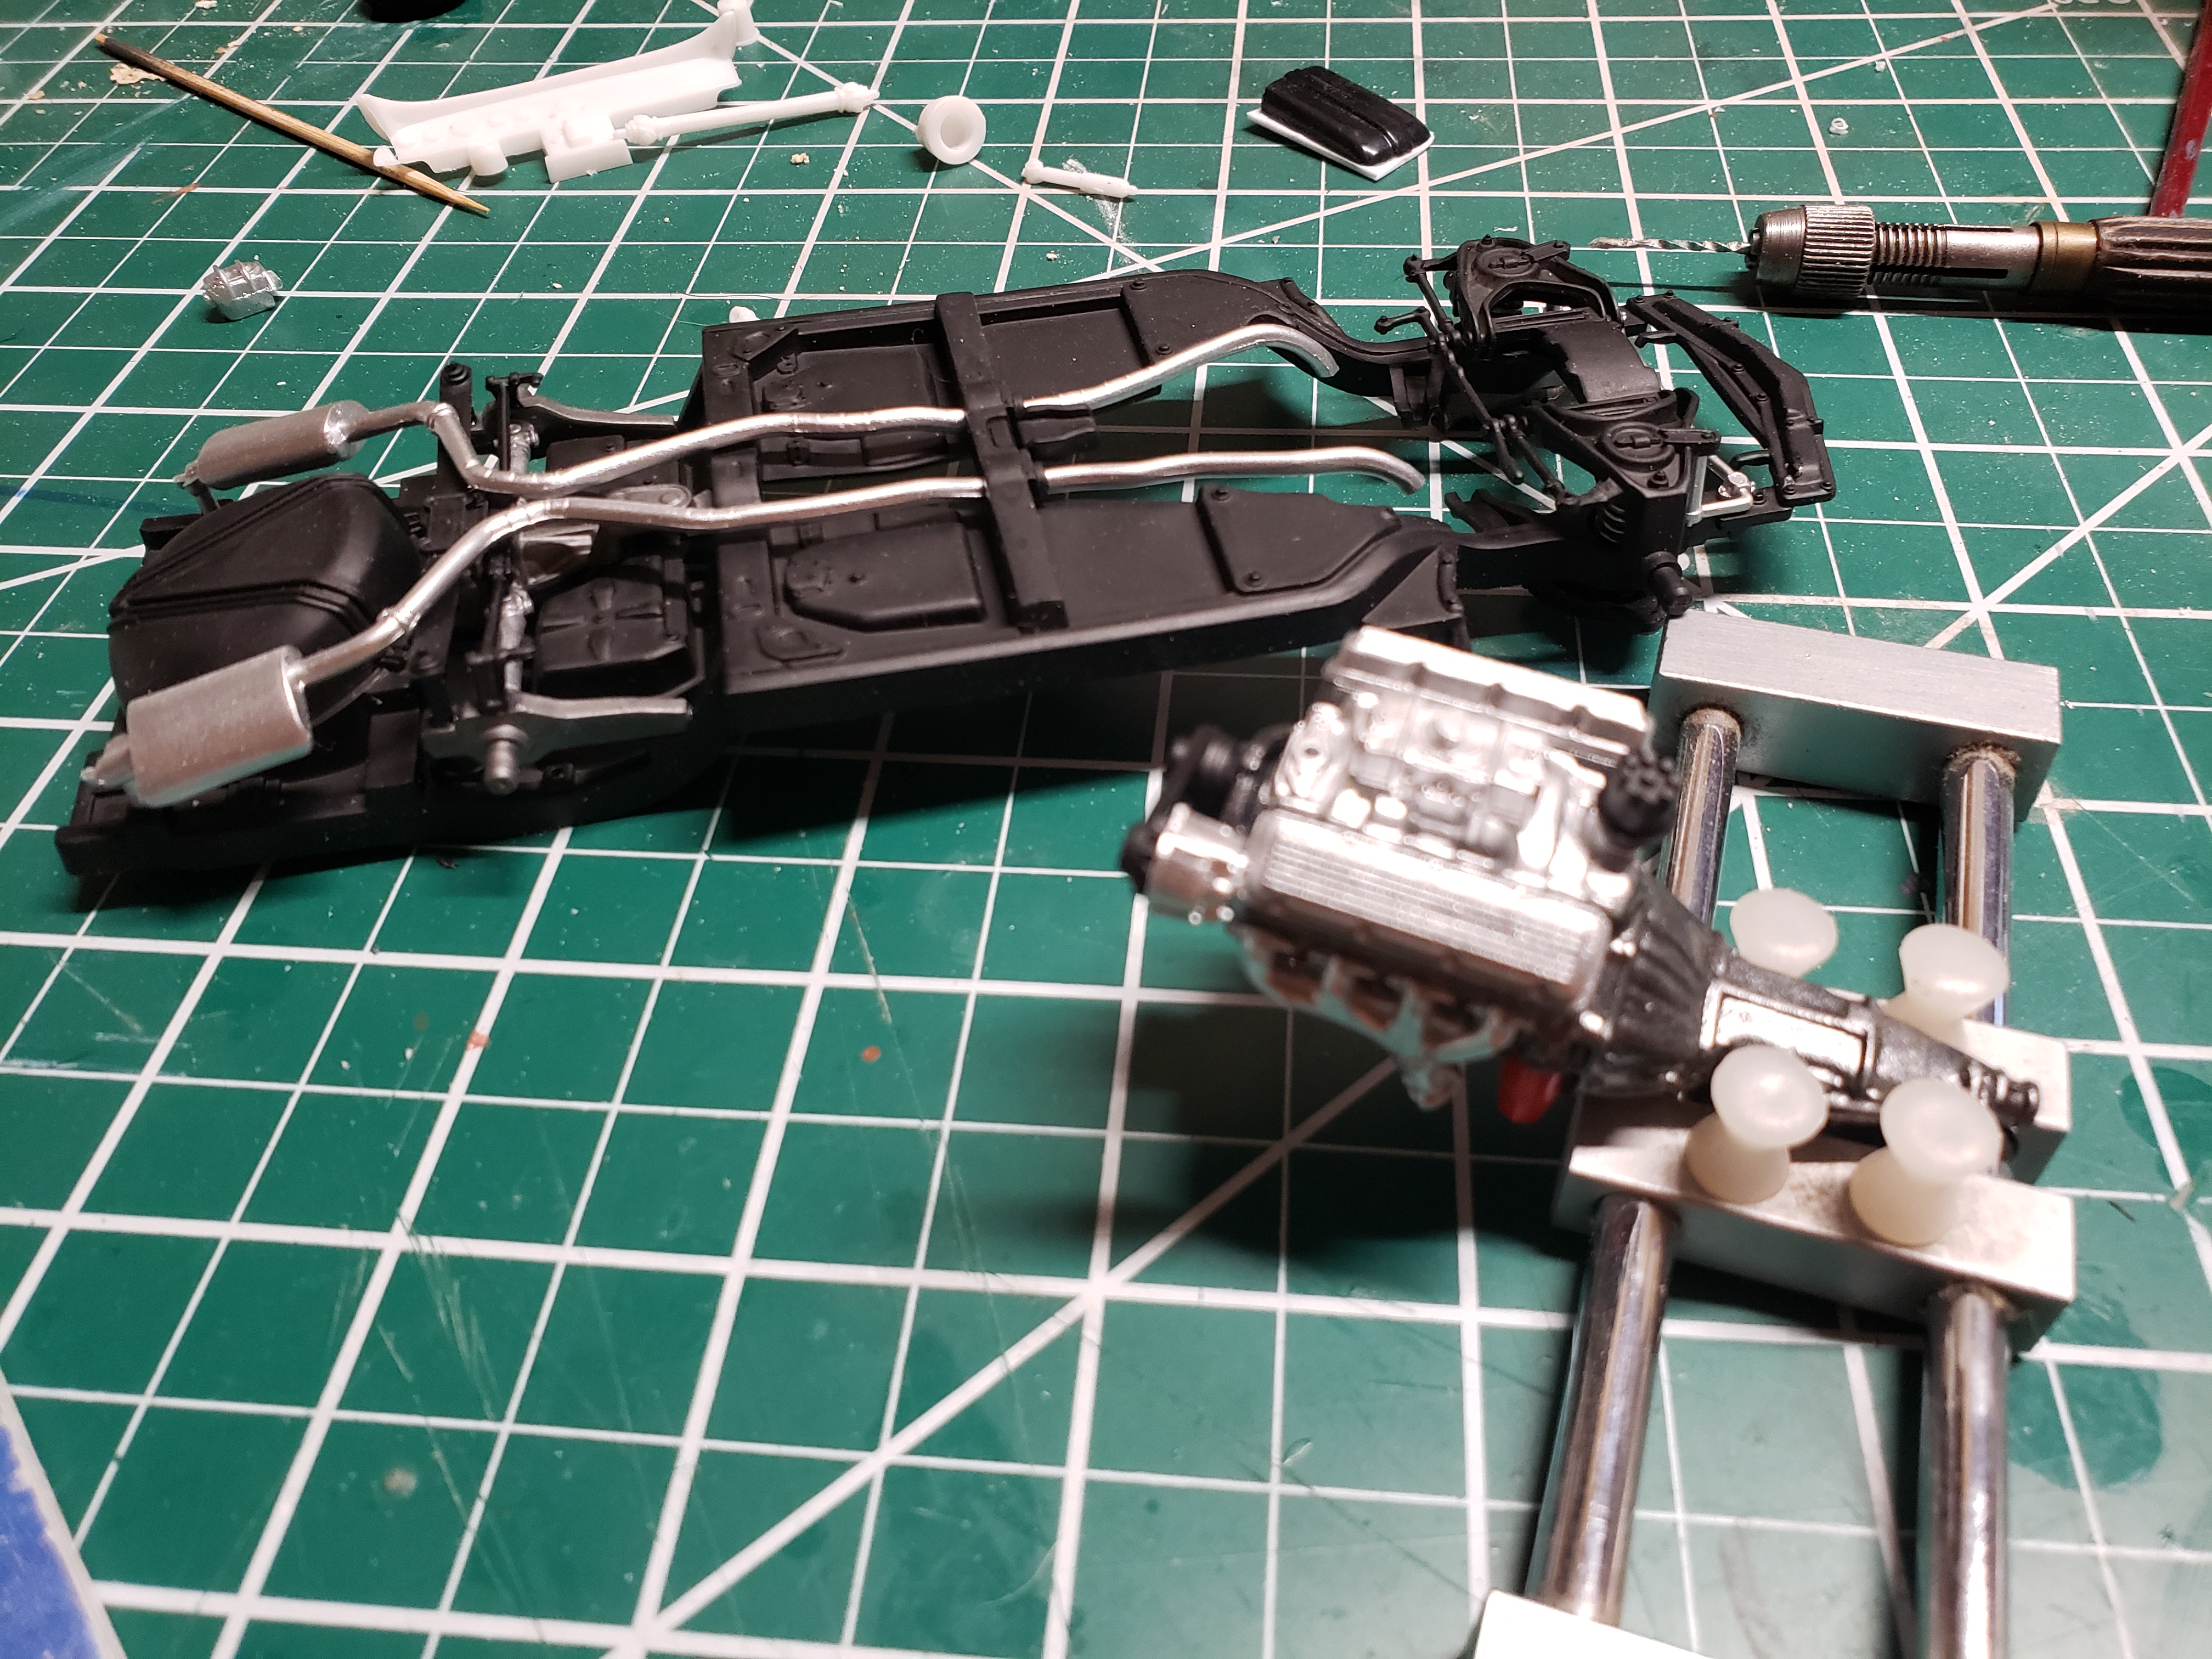
My Vette is coming along very well. Happily, the racer kit comes with some of the stock parts, so I've added a stock exhaust system. I've debadged the body and got a lot painted. The body will be blue suede. I'll do some mild weathering just to show she's got some miles on her.
-
Well the weber intake isn't gonna do it. Not exactly low profile.
-

Speed parts for a Model A 4 cyl,
Jantrix replied to Jon Haigwood's topic in Car Aftermarket / Resin / 3D Printed
At least one of the Revell Model A releases included OHV Riley head and covers. A dual carb intake and a header. -
Thanks Dann. Here's the finished thread.
-
That looks just terrific. Well done sir!
-
Thanks guys. I appreciate the ataboys.
-
I am ready to start my Cannonball Vette. I'm looking forward to this one. Although I have cannibalized many Corvette kits over the years, I've never actually built one. The John Greenwood '68 lends itself to this CBP very well. The interior is pure racing, and the engine is set up that way as well, BUT, the kit is based on the Revell '68 L88 2in1. So my Lee Greenwood '68 comes with the stock exhaust, bumperettes and a few other things, left over from the 2in1 kit. I'm going for a day 2 muscle car look. Paint finish is likely going to be a stealth matte.
-
That's cool Pat. I like it.
-
Thanks guys. I'm glad you like it.
-
I think it would take a hell of a driver to keep this on the track. ? Glad you like it, Oliver.
-
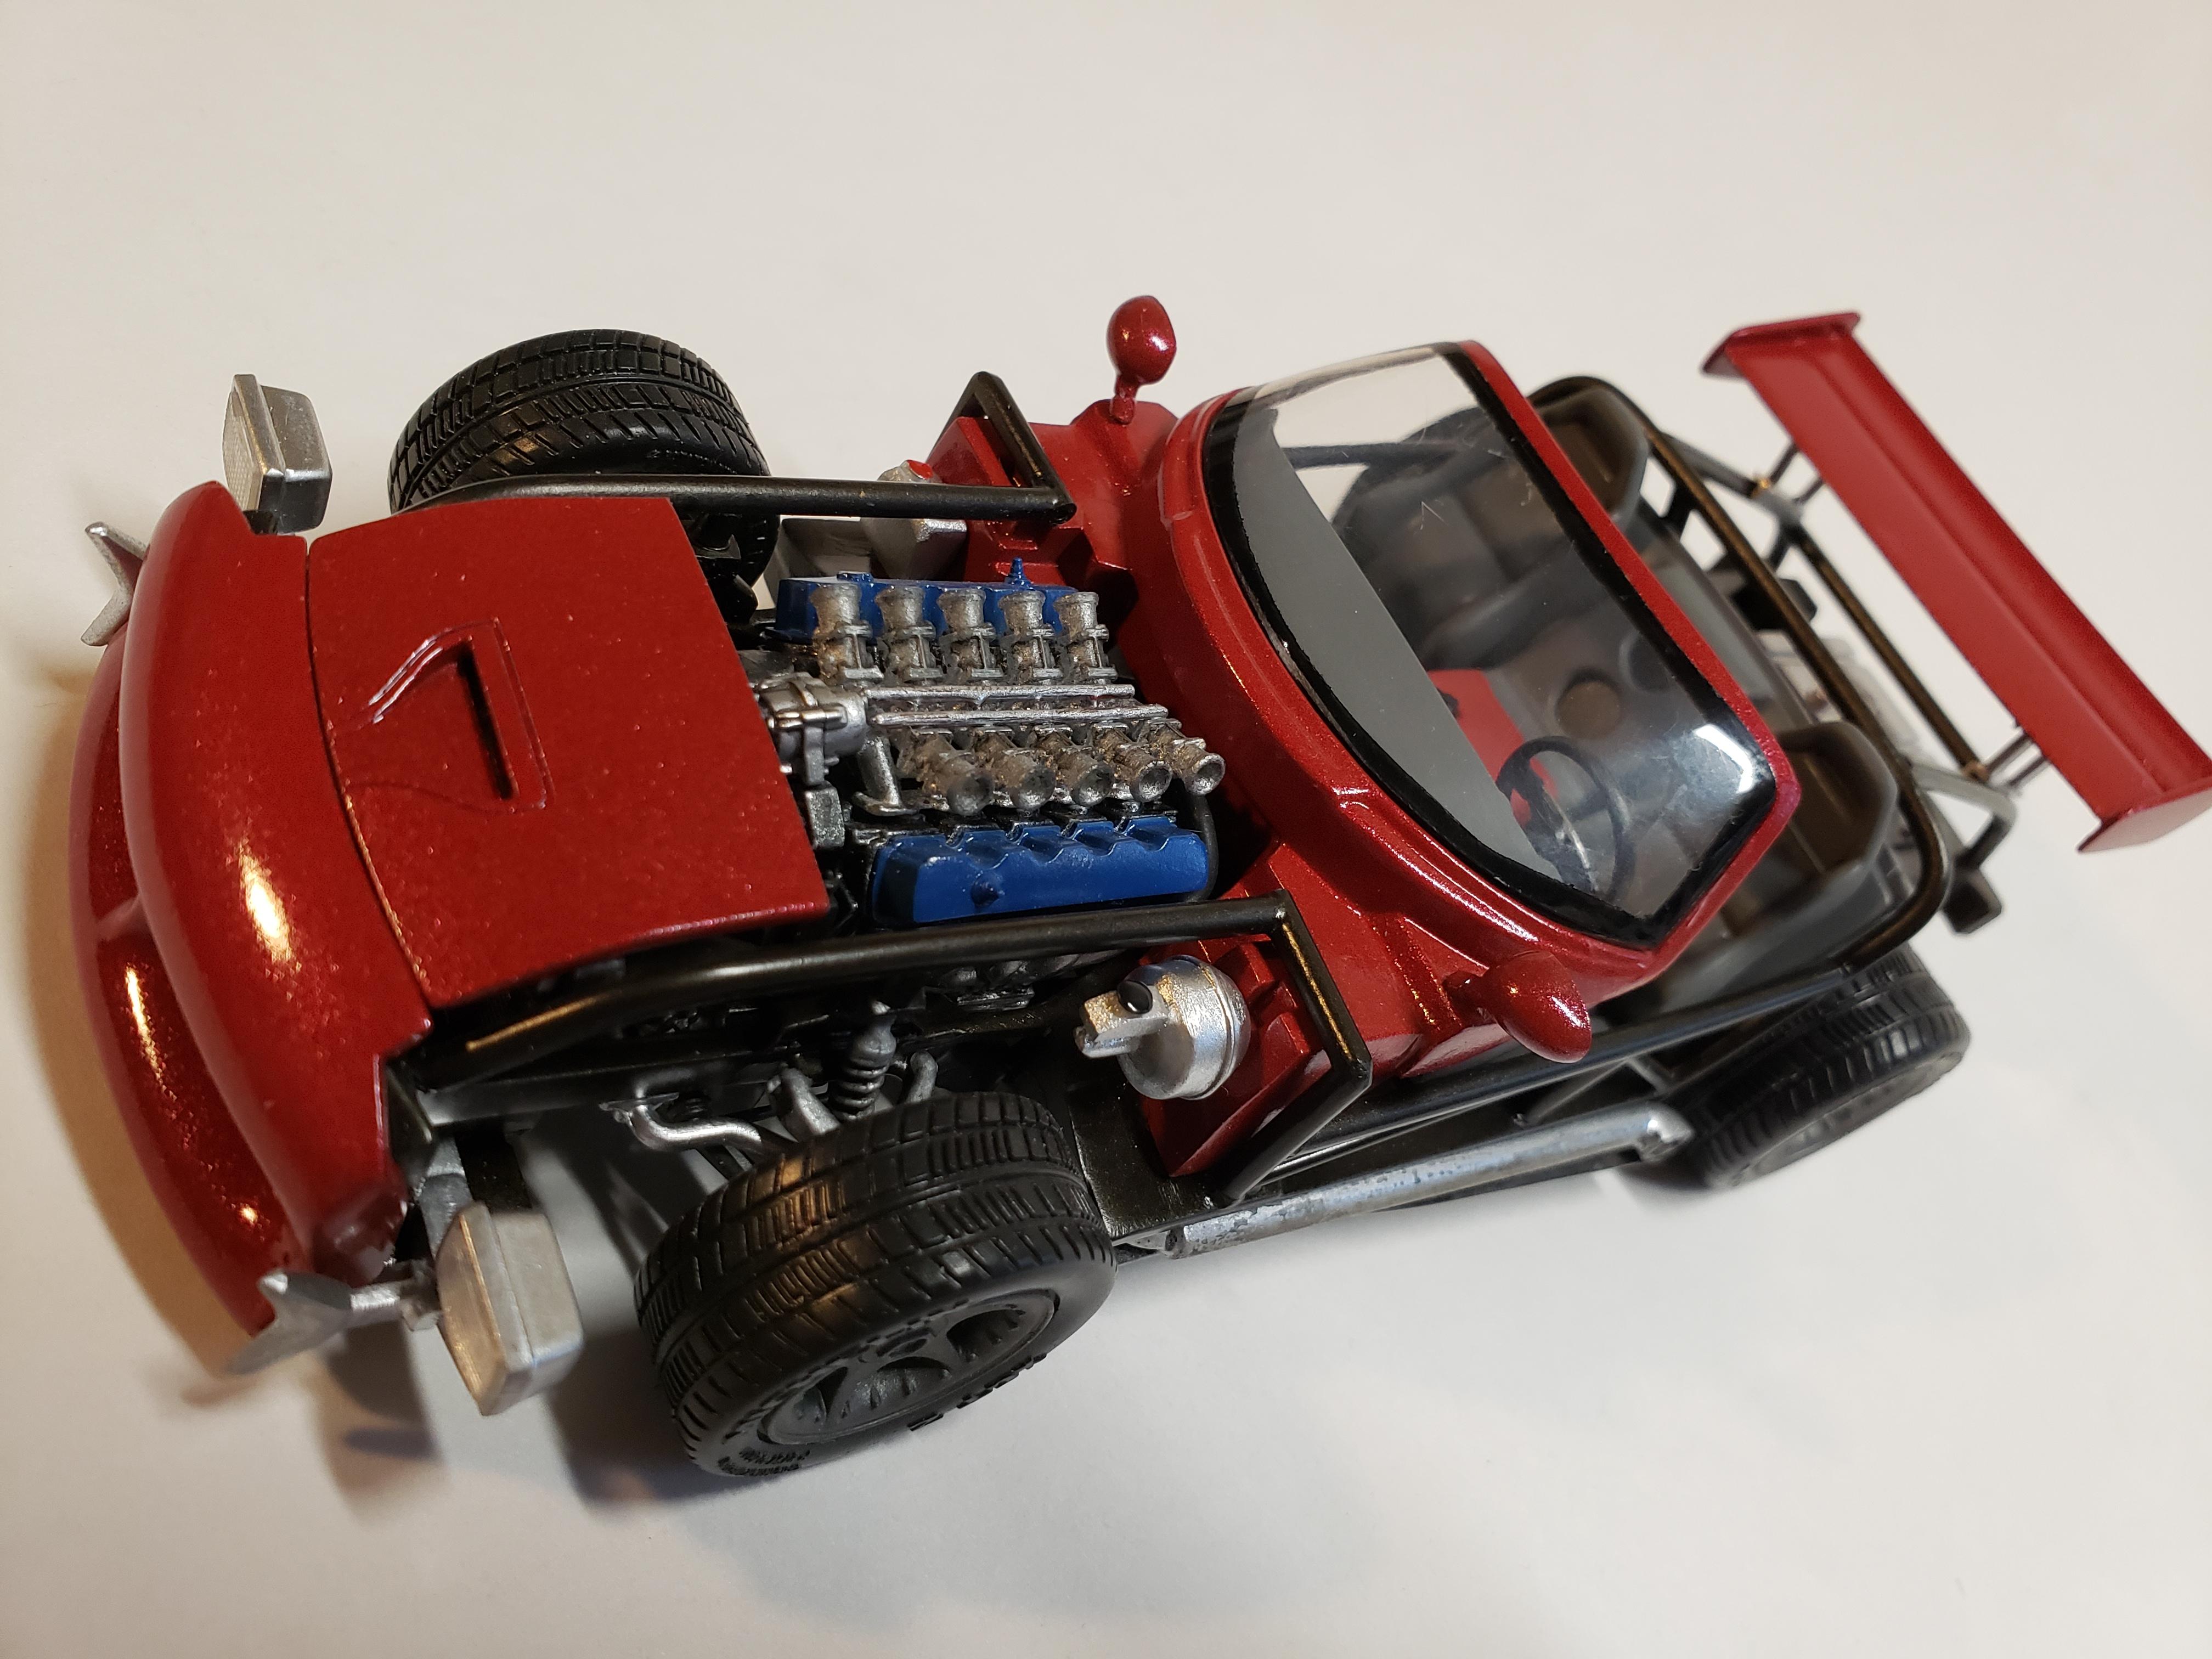
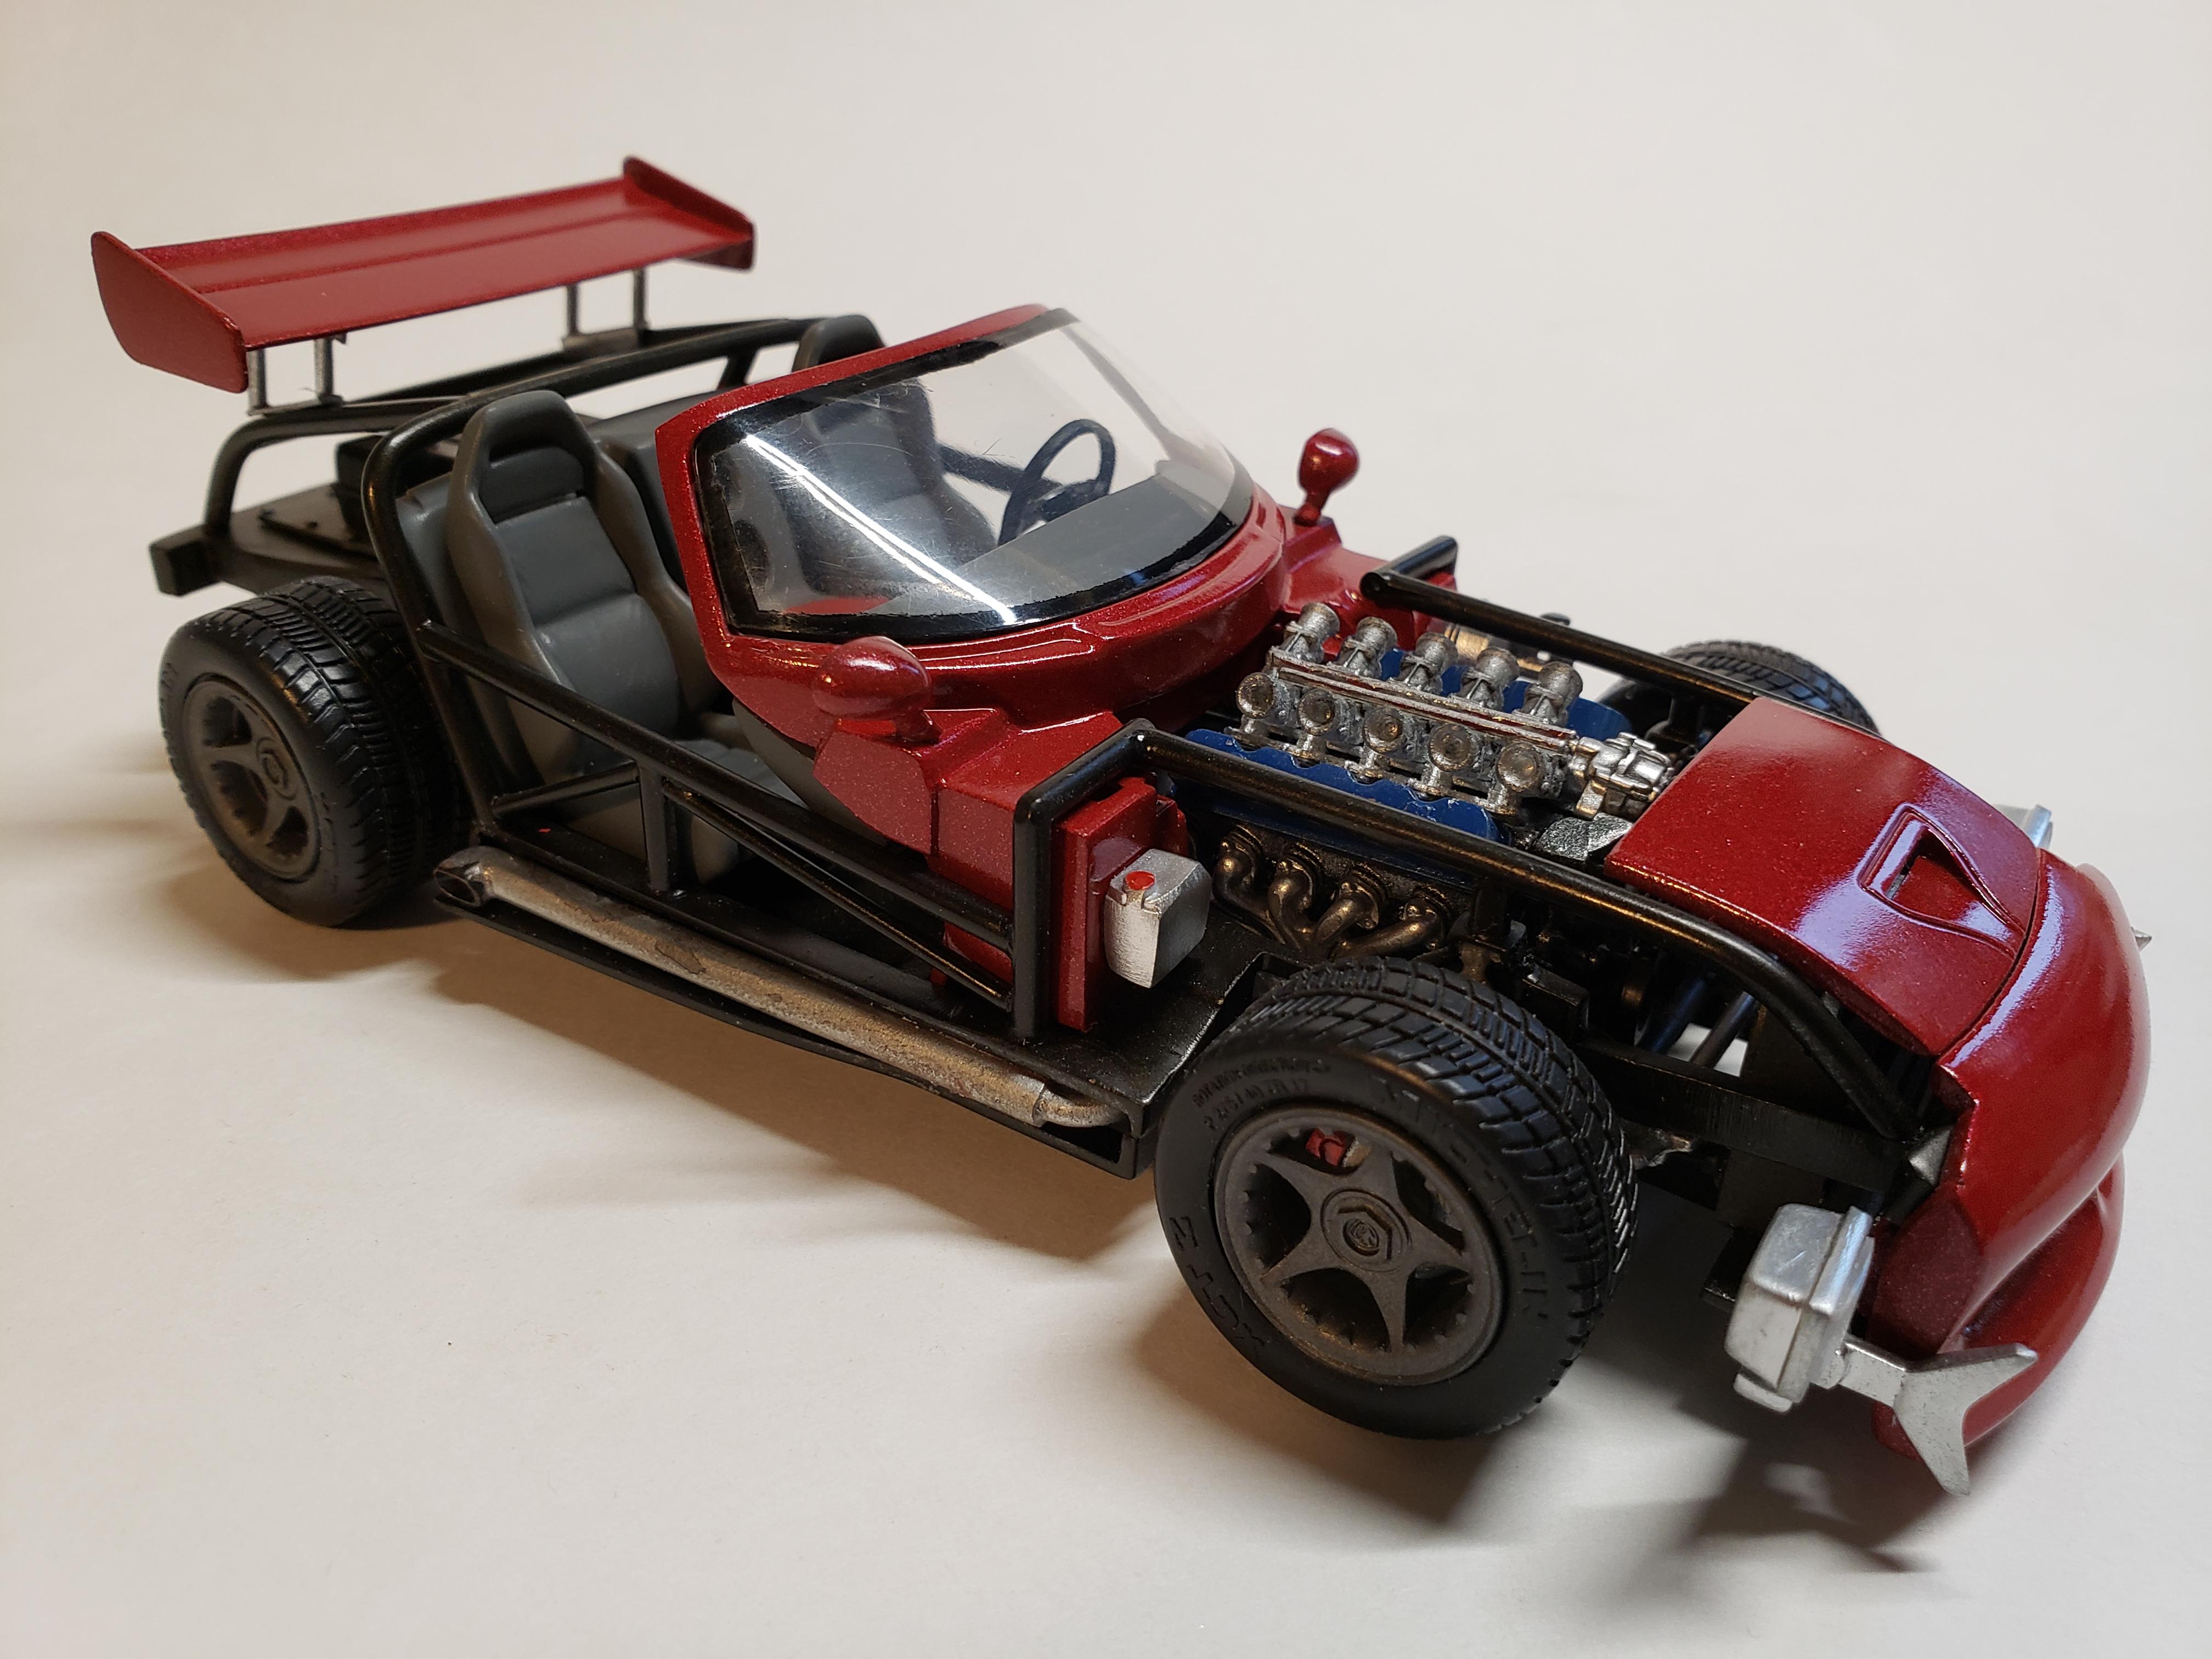
If you haven't seen my WIP thread, this might need some explaining. Lately there has been a 1:1 trend called Vette Karting. They are usually a stripped down C5 or C6 Vette that has zero collector value. They strip it down to it's bare essentials, add a roll cage, some aftermarket lights and go tear it up. Roadkill did one as I recall. Inspired, I decided to build one in scale. At the time though, I didn't have any Vettes kits that were manufactured in such a way to make this possible. But the Revell Viper GTS was perfect for it. I hade a great time with this one and I've never seen another like it. There are a couple of extra details that I wanted to add, but decided against it so that I could finish this while I'm looking for a job. The intake is a 3D printed piece from Shapeways that was a V12 piece, cut down. Once trimmed of the extra two cylinders, it fits the block like a glove. There are details here like the headlights, that look a little unplanned, a little weird, but that's the way most of the real ones look. Off road lighting is commonly used as headlights on these karts so that's where I was headed with that. It should look like Mr. Joe Can Weld built this in his garage. As always comments, criticisms, and insane ideas are cordially welcome.
-
Hopefully the new version looks less like a 4x4.
-
This is back on the bench and will be done soon! Like my '37 I have decided against some of the extra details I planned to add so that I could actually get the model done. Under Glass soon!
-
Inspiring. ? I like that. The decals were very good. The pieces on the sides needed some trimming to fit the '37, and setting solution is always the thing to do, but they really weren't any trouble.
-
Yes Claude, those decals are from the Revell '66 El Camino, though they were the only part of that I kit I own. I'm glad you like the design but I can't take credit. Years ago, I spotted a photo online of a late 30's fenderless rod that was built this way, and days later, the image was still rolling around in my brain. I've tried to find the photo, but no matter the keywords I've tried, Google can't find it. Like this one, it had all the rat rod audacity, but was a finished gleaming hot rod.
-
Here's the simplest way to get a surface rust style weathered paint job. Grey primer, red primer, color A (thin), color B (thin). I like to use two colors, because it makes the car looks like it's been resprayed at least once (like most race cars) and can give a cool contrast. So I alternate light to dark or vice versa. Let the paint dry well and then sit down with some water and some 600 grit and start gently sanding through in all the places the paint gets worn from use or sees the most sun/weather. Stop when you get to red primer. After that, apply a wash of rust colored acrylic craft paint and water. Don't be afraid to use too much, because a wet brush can clean up areas where you feel it's too much. The cool part about this step is that the wash finds all the minute scratches from the 600 grit and settles in there. It gives a very realistic surface rust, look. I sometimes add a mist of grey of red oxide primer in certain areas. I think you are on the right track, but the blue paint is very thick. Some 70 or 90% isopropyl alcohol with a old tooth brush, will help thin that out and help with the weathering. 70% takes a while and 90% sometimes works too well ? so do it at the sink so you have water handy to wash off the alcohol. I really like the project.
-
I really love this. I wasn't a fan of the windshield angle at first, but it is growing on me. But seeing the side view - my minds eye keeps seeing a flat black spear from the front of the front wheel arch to where the body line does the jog down, mid door. Just for some contrast.
-
Thanks everyone. I'm glad you like the model. And no, that's the kit stock interior.
-
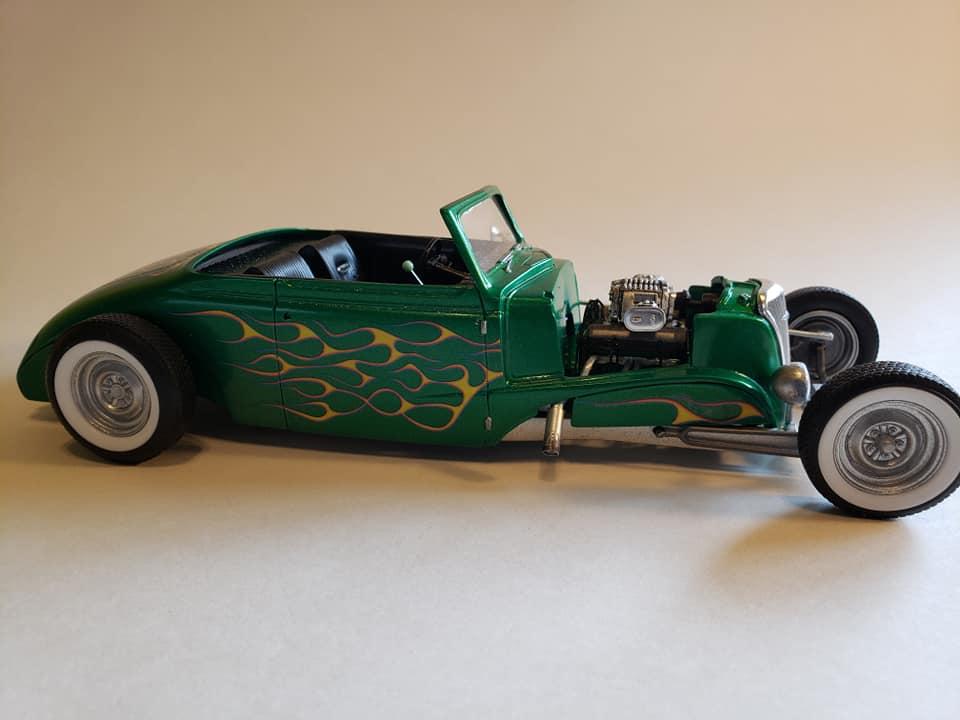
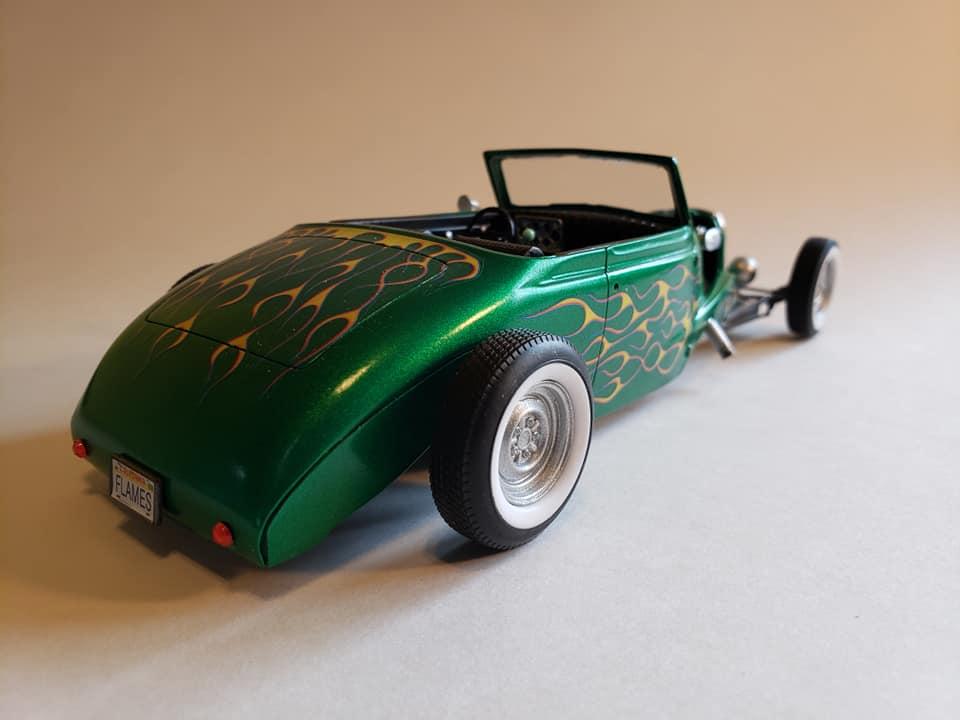
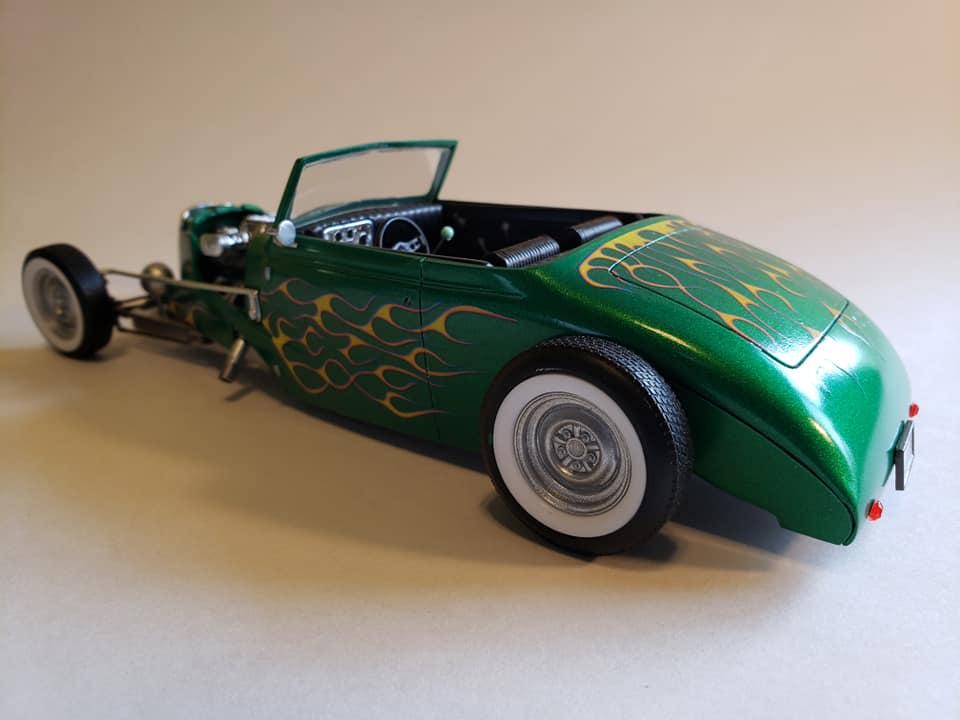
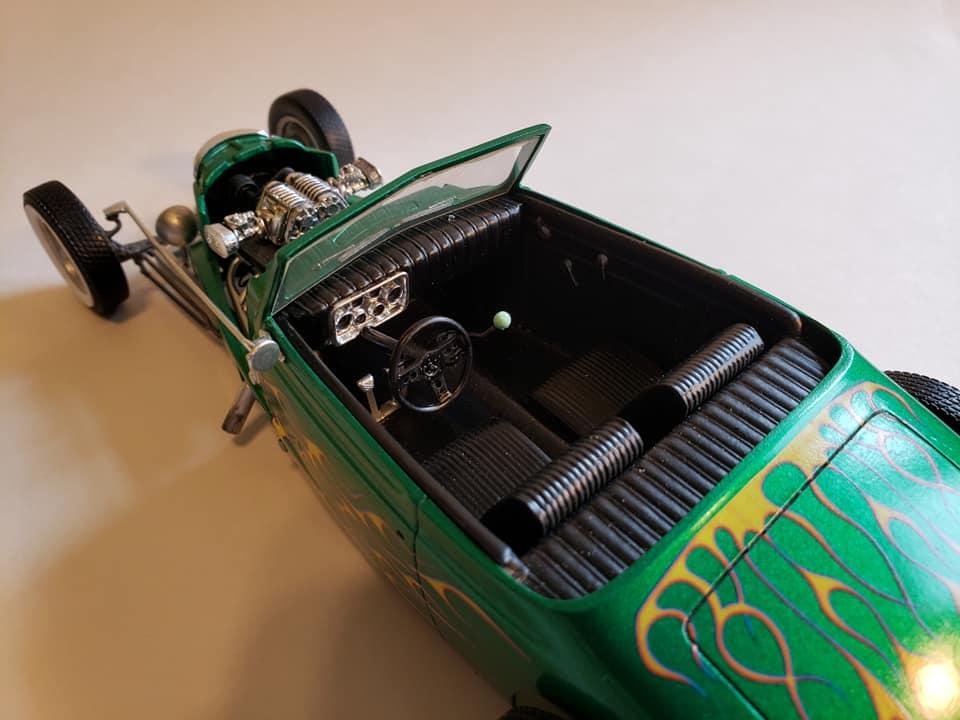
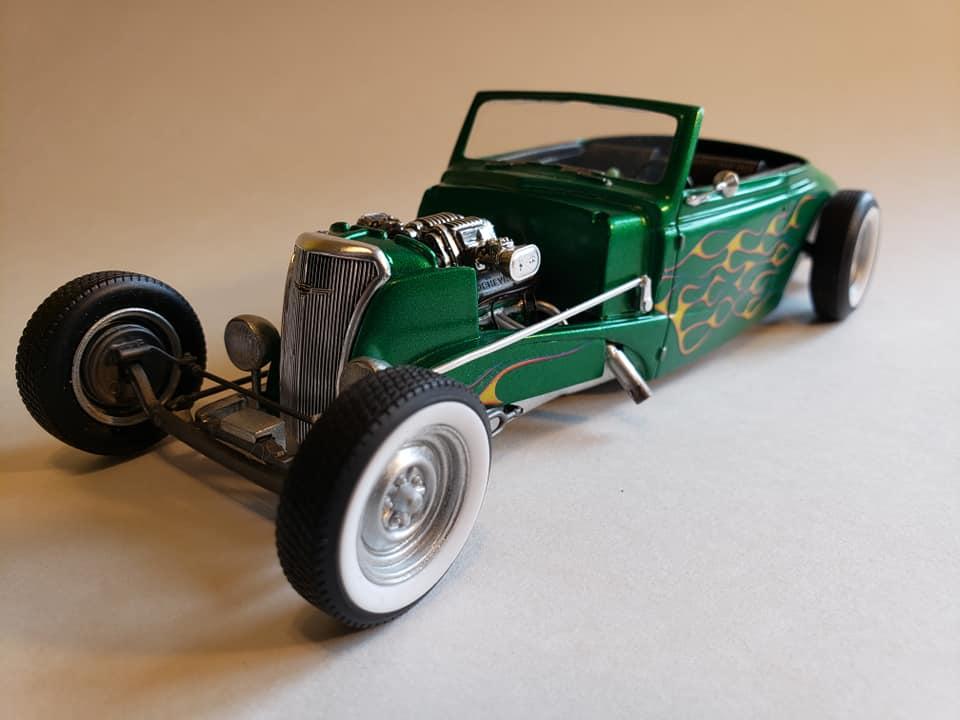
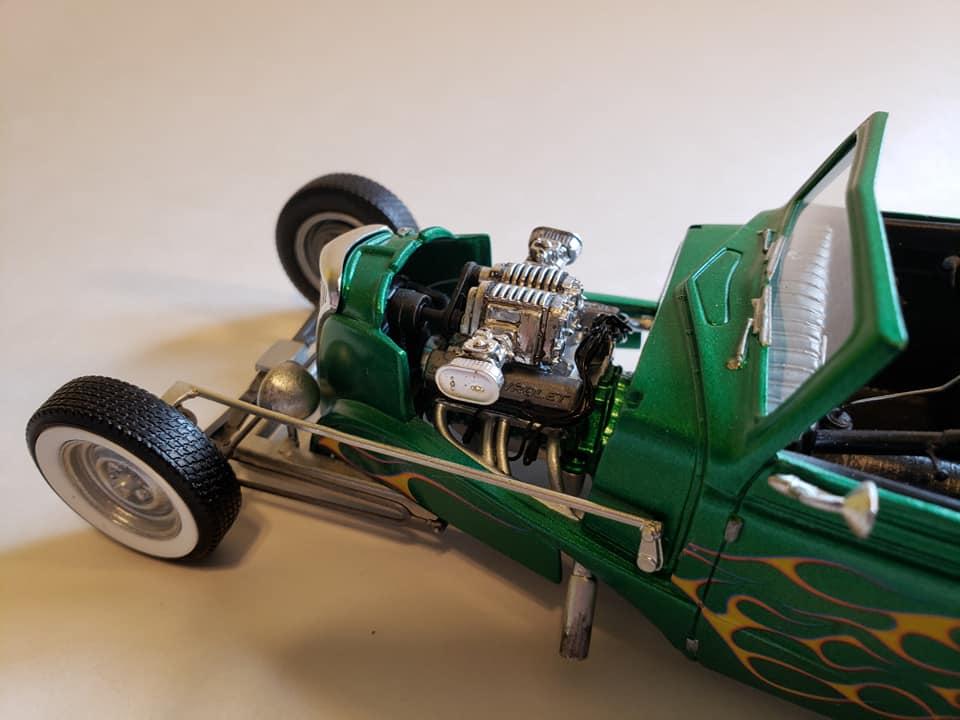
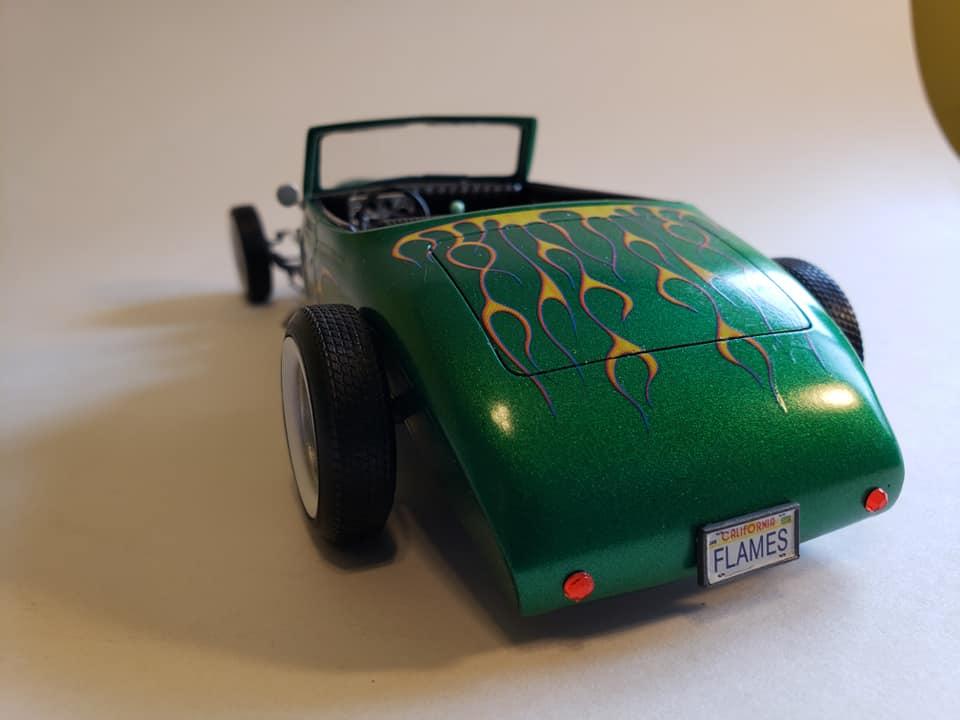
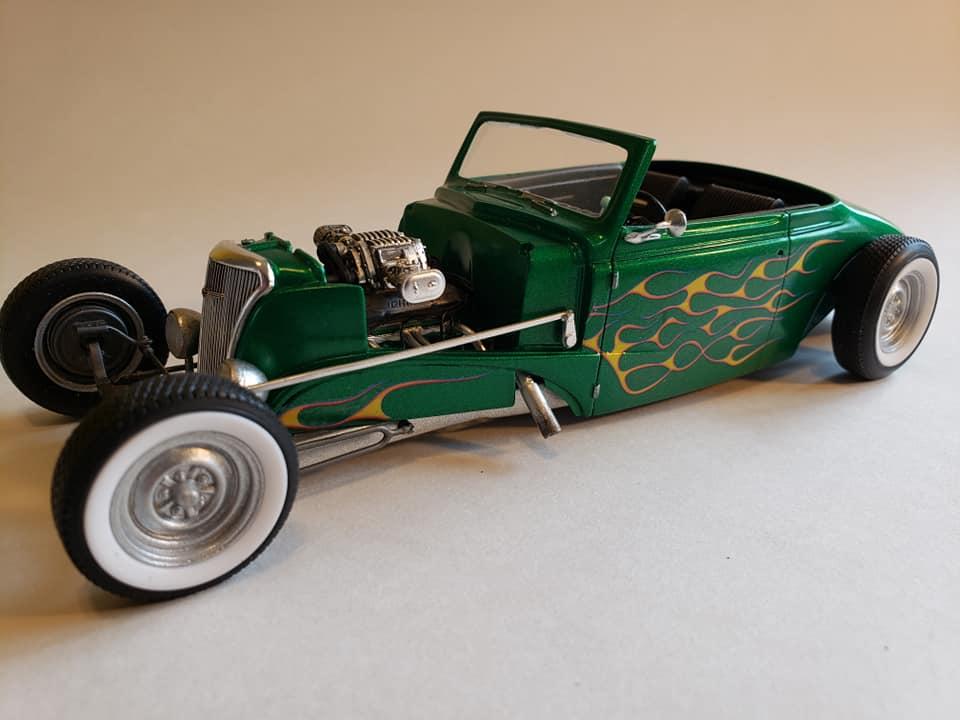
One advantage to unemployment, time to finish up a few things. This poor '37 has been languishing for near four years now. It waiting for me to more stuff to it that I'd planned, but at some point you have to choose between on the shelf or still in the box. And now's the time to do so. The engine is from the Beretta pro-street, the seats are '67 Charger rear buckets, the chassis has been lengthened and suspension dropped. Paint is Testors lacquer Mystic Emerald. I was a fun build but I'm real glad to get it done. One issue I noted right at finally assembly was the passenger side valve cover is on upside down. If it wasn't for the Chevrolet engraving, you wouldn't even notice on a small block Chevy. I did add the door handles. ? I may try carving up the clear hood to fit this one. As always, comments, criticisms, and insane ideas are cordially welcome.
-
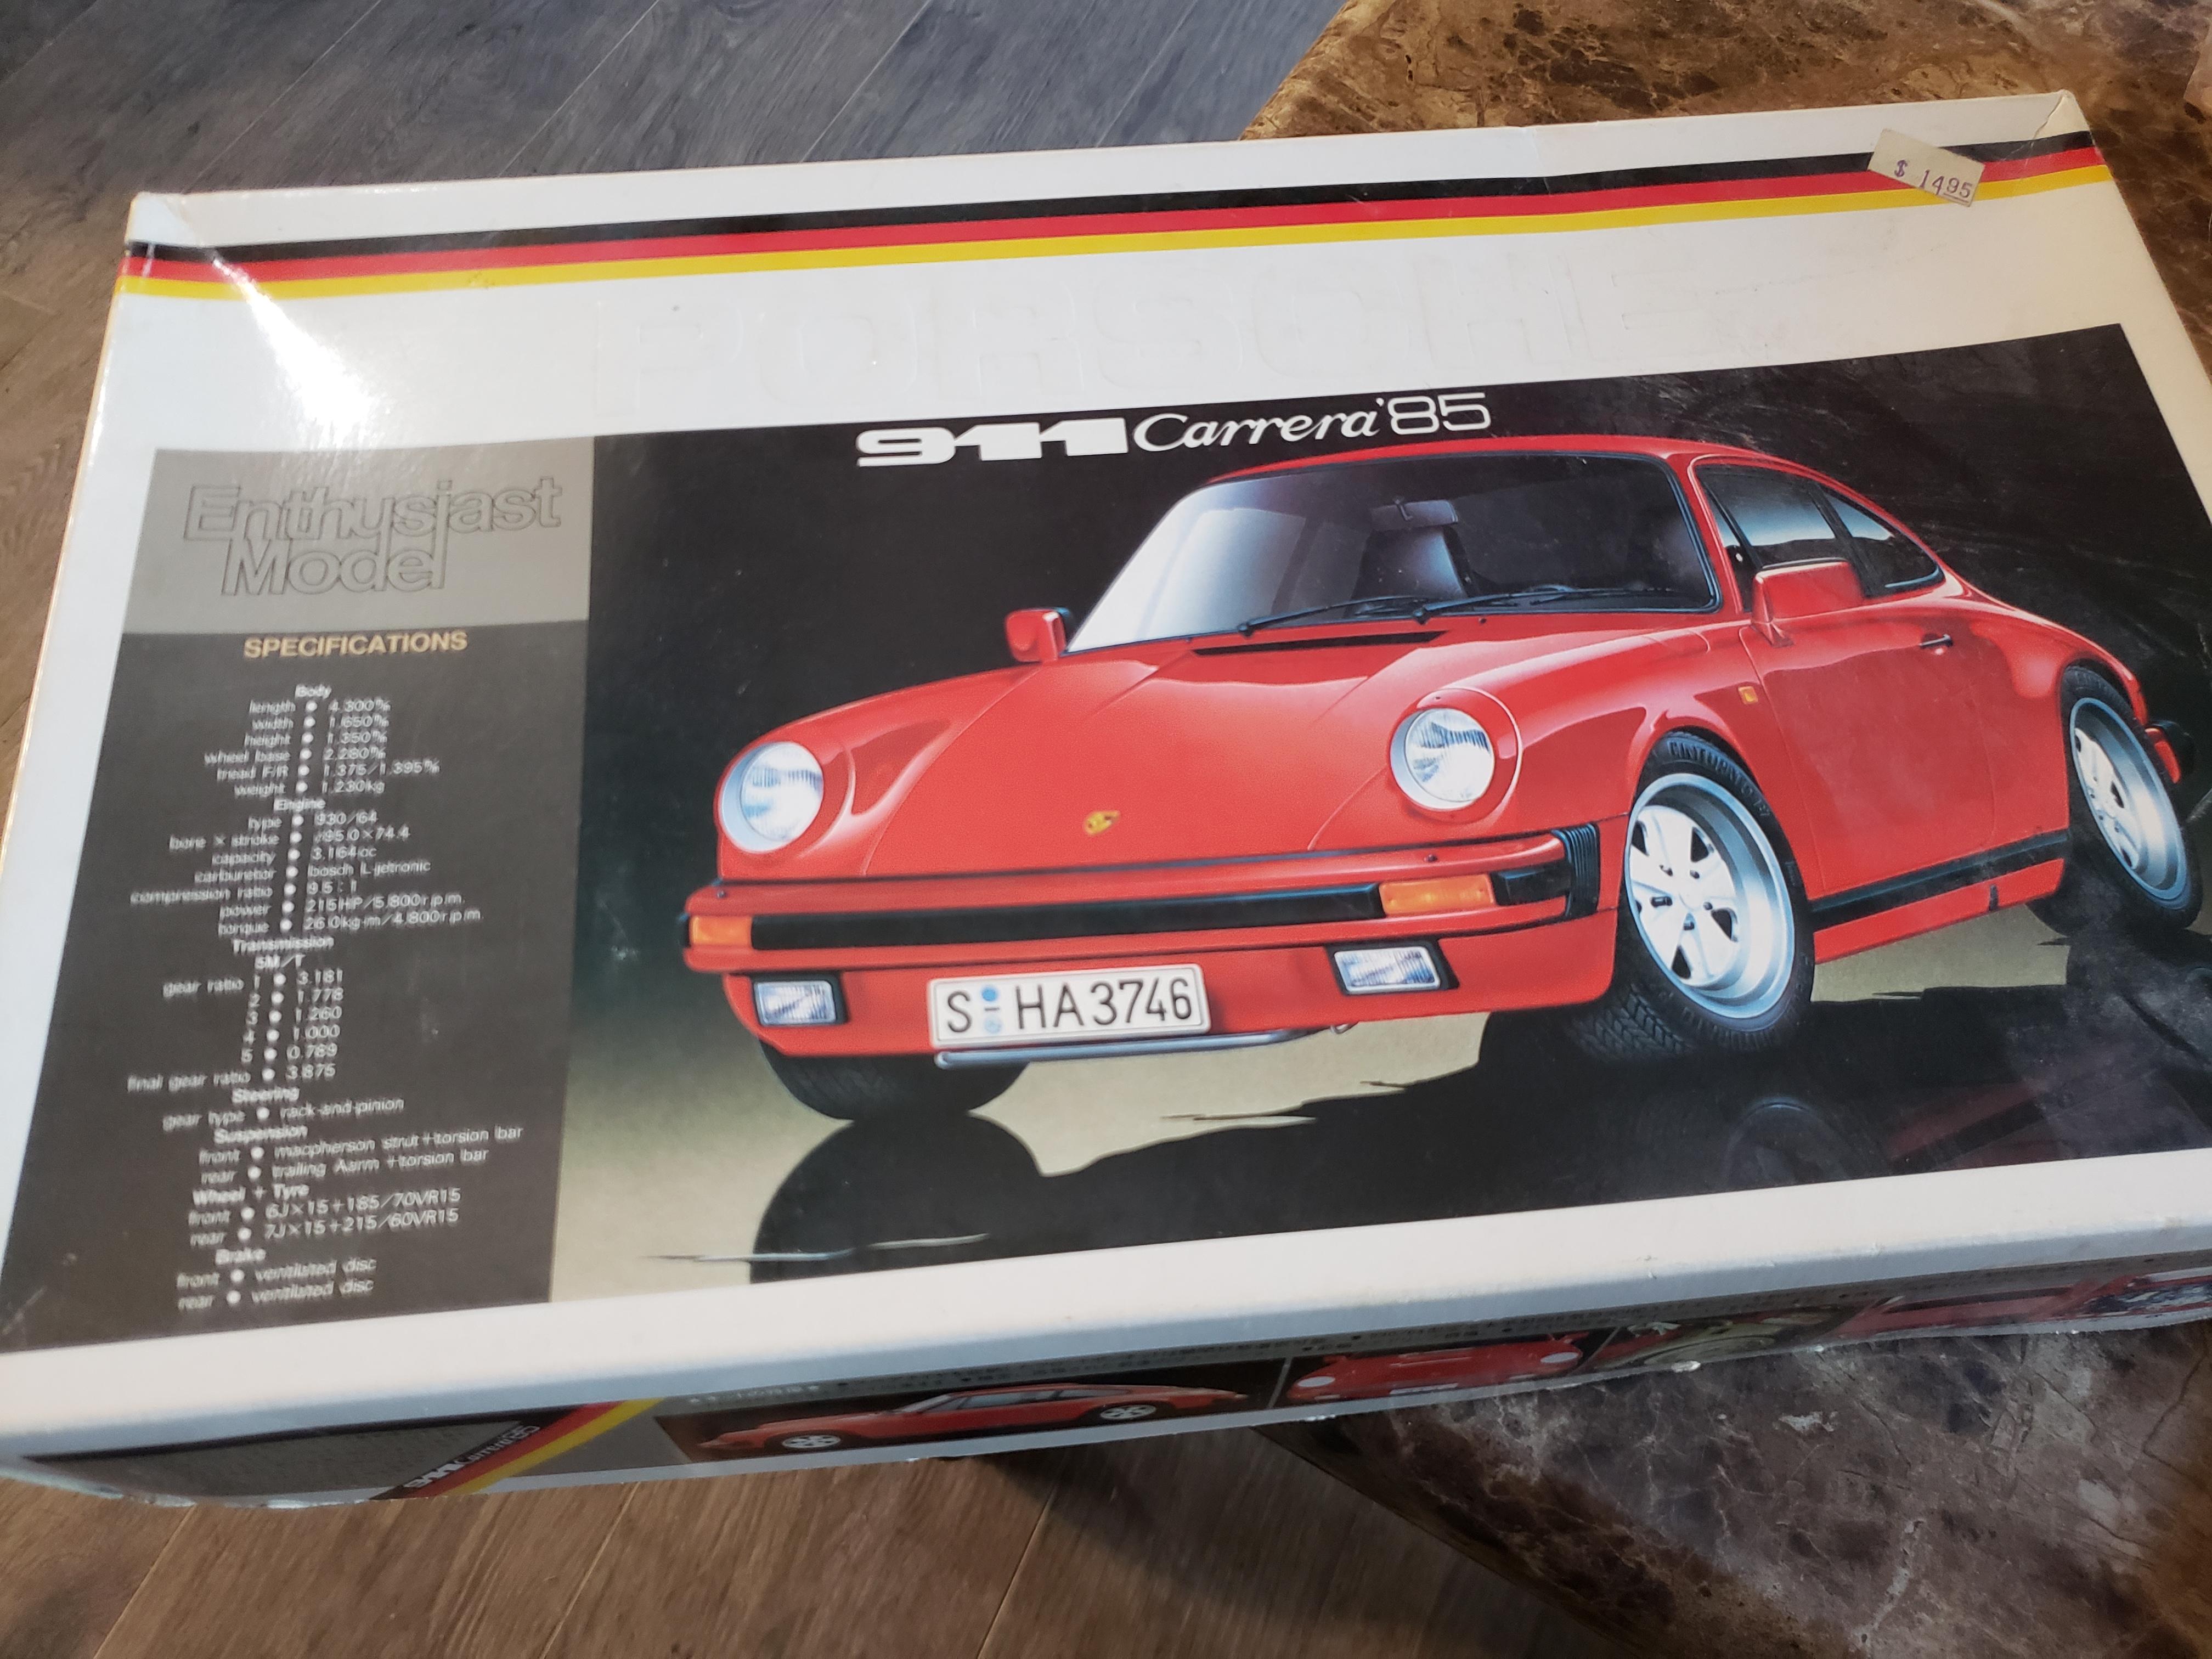
Any Fugimi builders out there have tangoed with this '85 Porsche? My son gave me one and I'm wondering if it's got any aftermarket mojo. I'd love to do some outlaw stuff to this. Fender flares, ground effects, farings etc.
-
This is back on the bench. I should have it finished soon. The tail lights are proving difficult to select.