NOBLNG
-
Posts
10,231 -
Joined
-
Last visited
Content Type
Profiles
Forums
Events
Gallery
Everything posted by NOBLNG
-
A good pair of scissors and a soda can?? I have never made them, but have been tempted to try this.
-

best beginner amt truck model
NOBLNG replied to Constructiongeek's topic in General Automotive Talk (Trucks and Cars)
Are you wanting a highway tractor or a 1/2 ton? The only truck I've built is a Revell '65 Chevy stepside...nice kit. -
Looking GREAT! I love that color combo.
-
If you do the site:modelcarsmag.com subject search on google it can dig up some pretty old threads also.
-
Nice work on the door! Strange coincidence...I was walking the dog this morning and found an 8" piece of that stuff just lying on the sidewalk. Hmmm, what to do with it?
-
COOL!
-
Painting white plastic white
NOBLNG replied to NOBLNG's topic in Model Building Questions and Answers
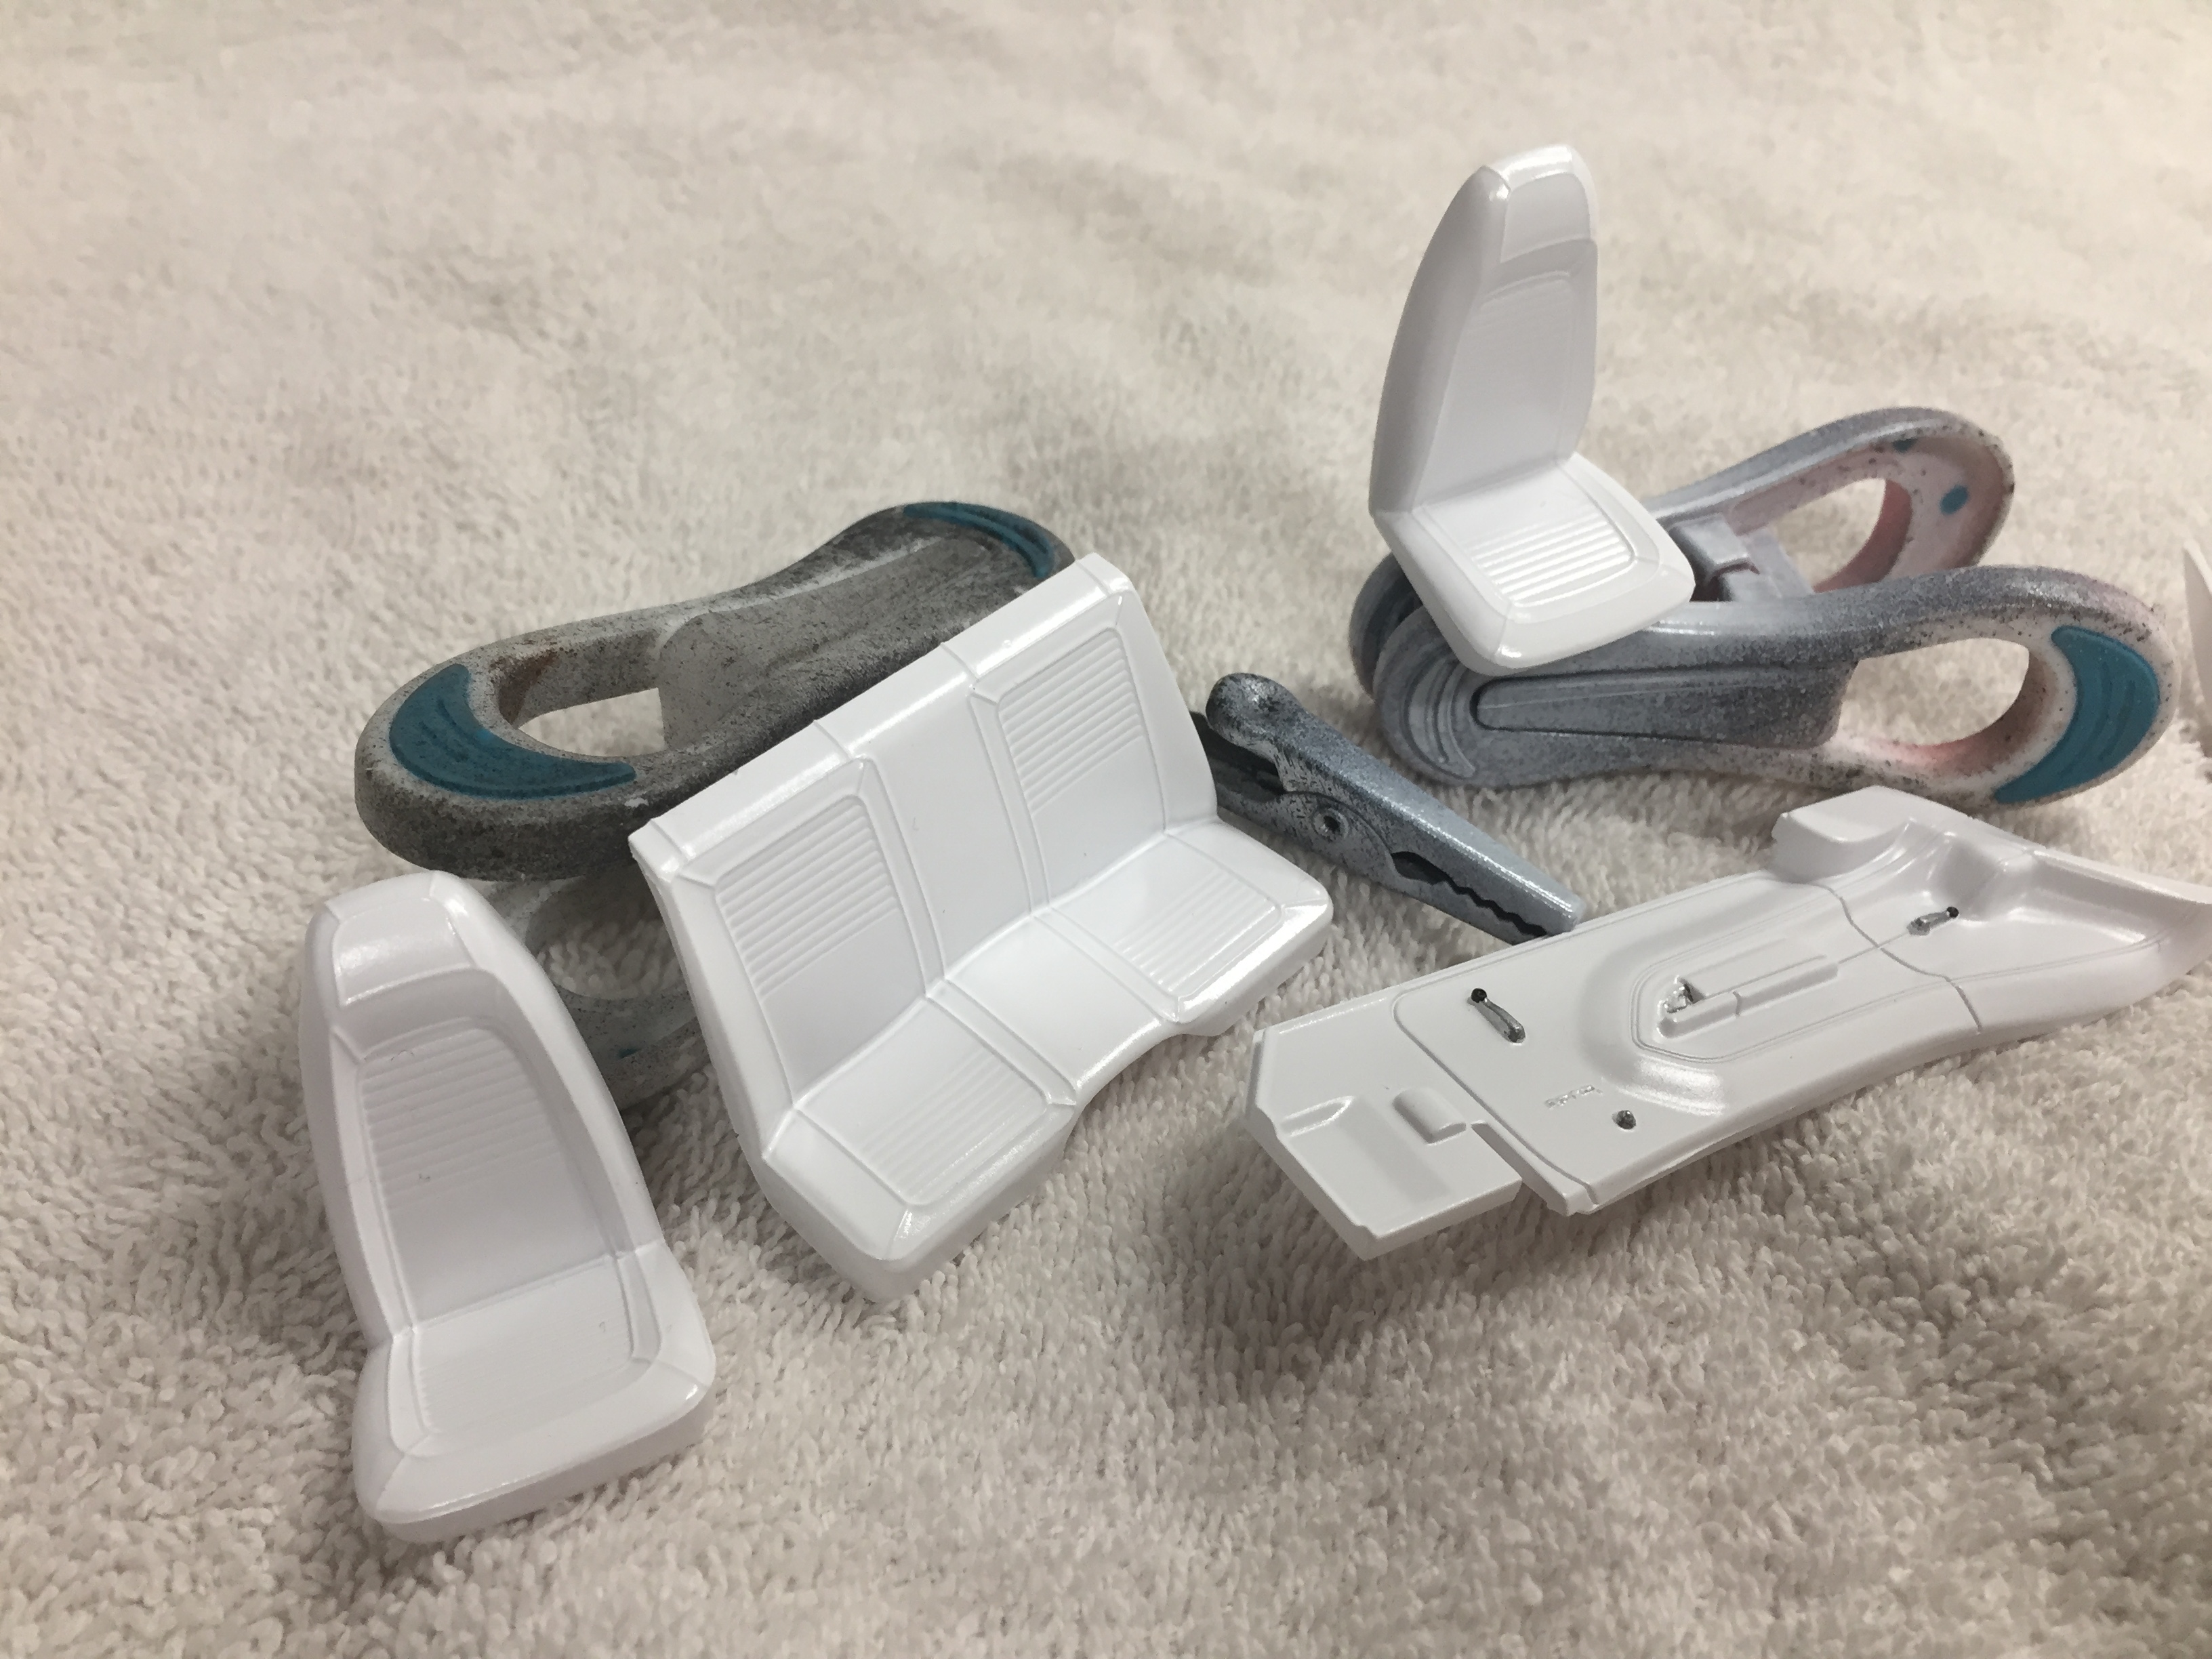
Thanks for all the tips everyone. I did paint them and although I didn't try any of the highlighting techniques, they do look better than plain plastic. Obvious seams where the seatbacks join are one of my pet peeves also.
-
Really fine work! I love watching the body-work-sculpting going on.
-
Thanks for the tip. I am more of a "work with what I've got" (read cheap) kind of builder. I put a touch of turn signal amber on the backs of the kit lens and put them in the only nice soft jawed clamps I have to dry in the dehydrator with some other parts. Well the clamps managed to crack both lens! So I made a reasonable replacement set (I think) out of Bondic. I little touch of future on the outside will help to clear them up a bit maybe?
-
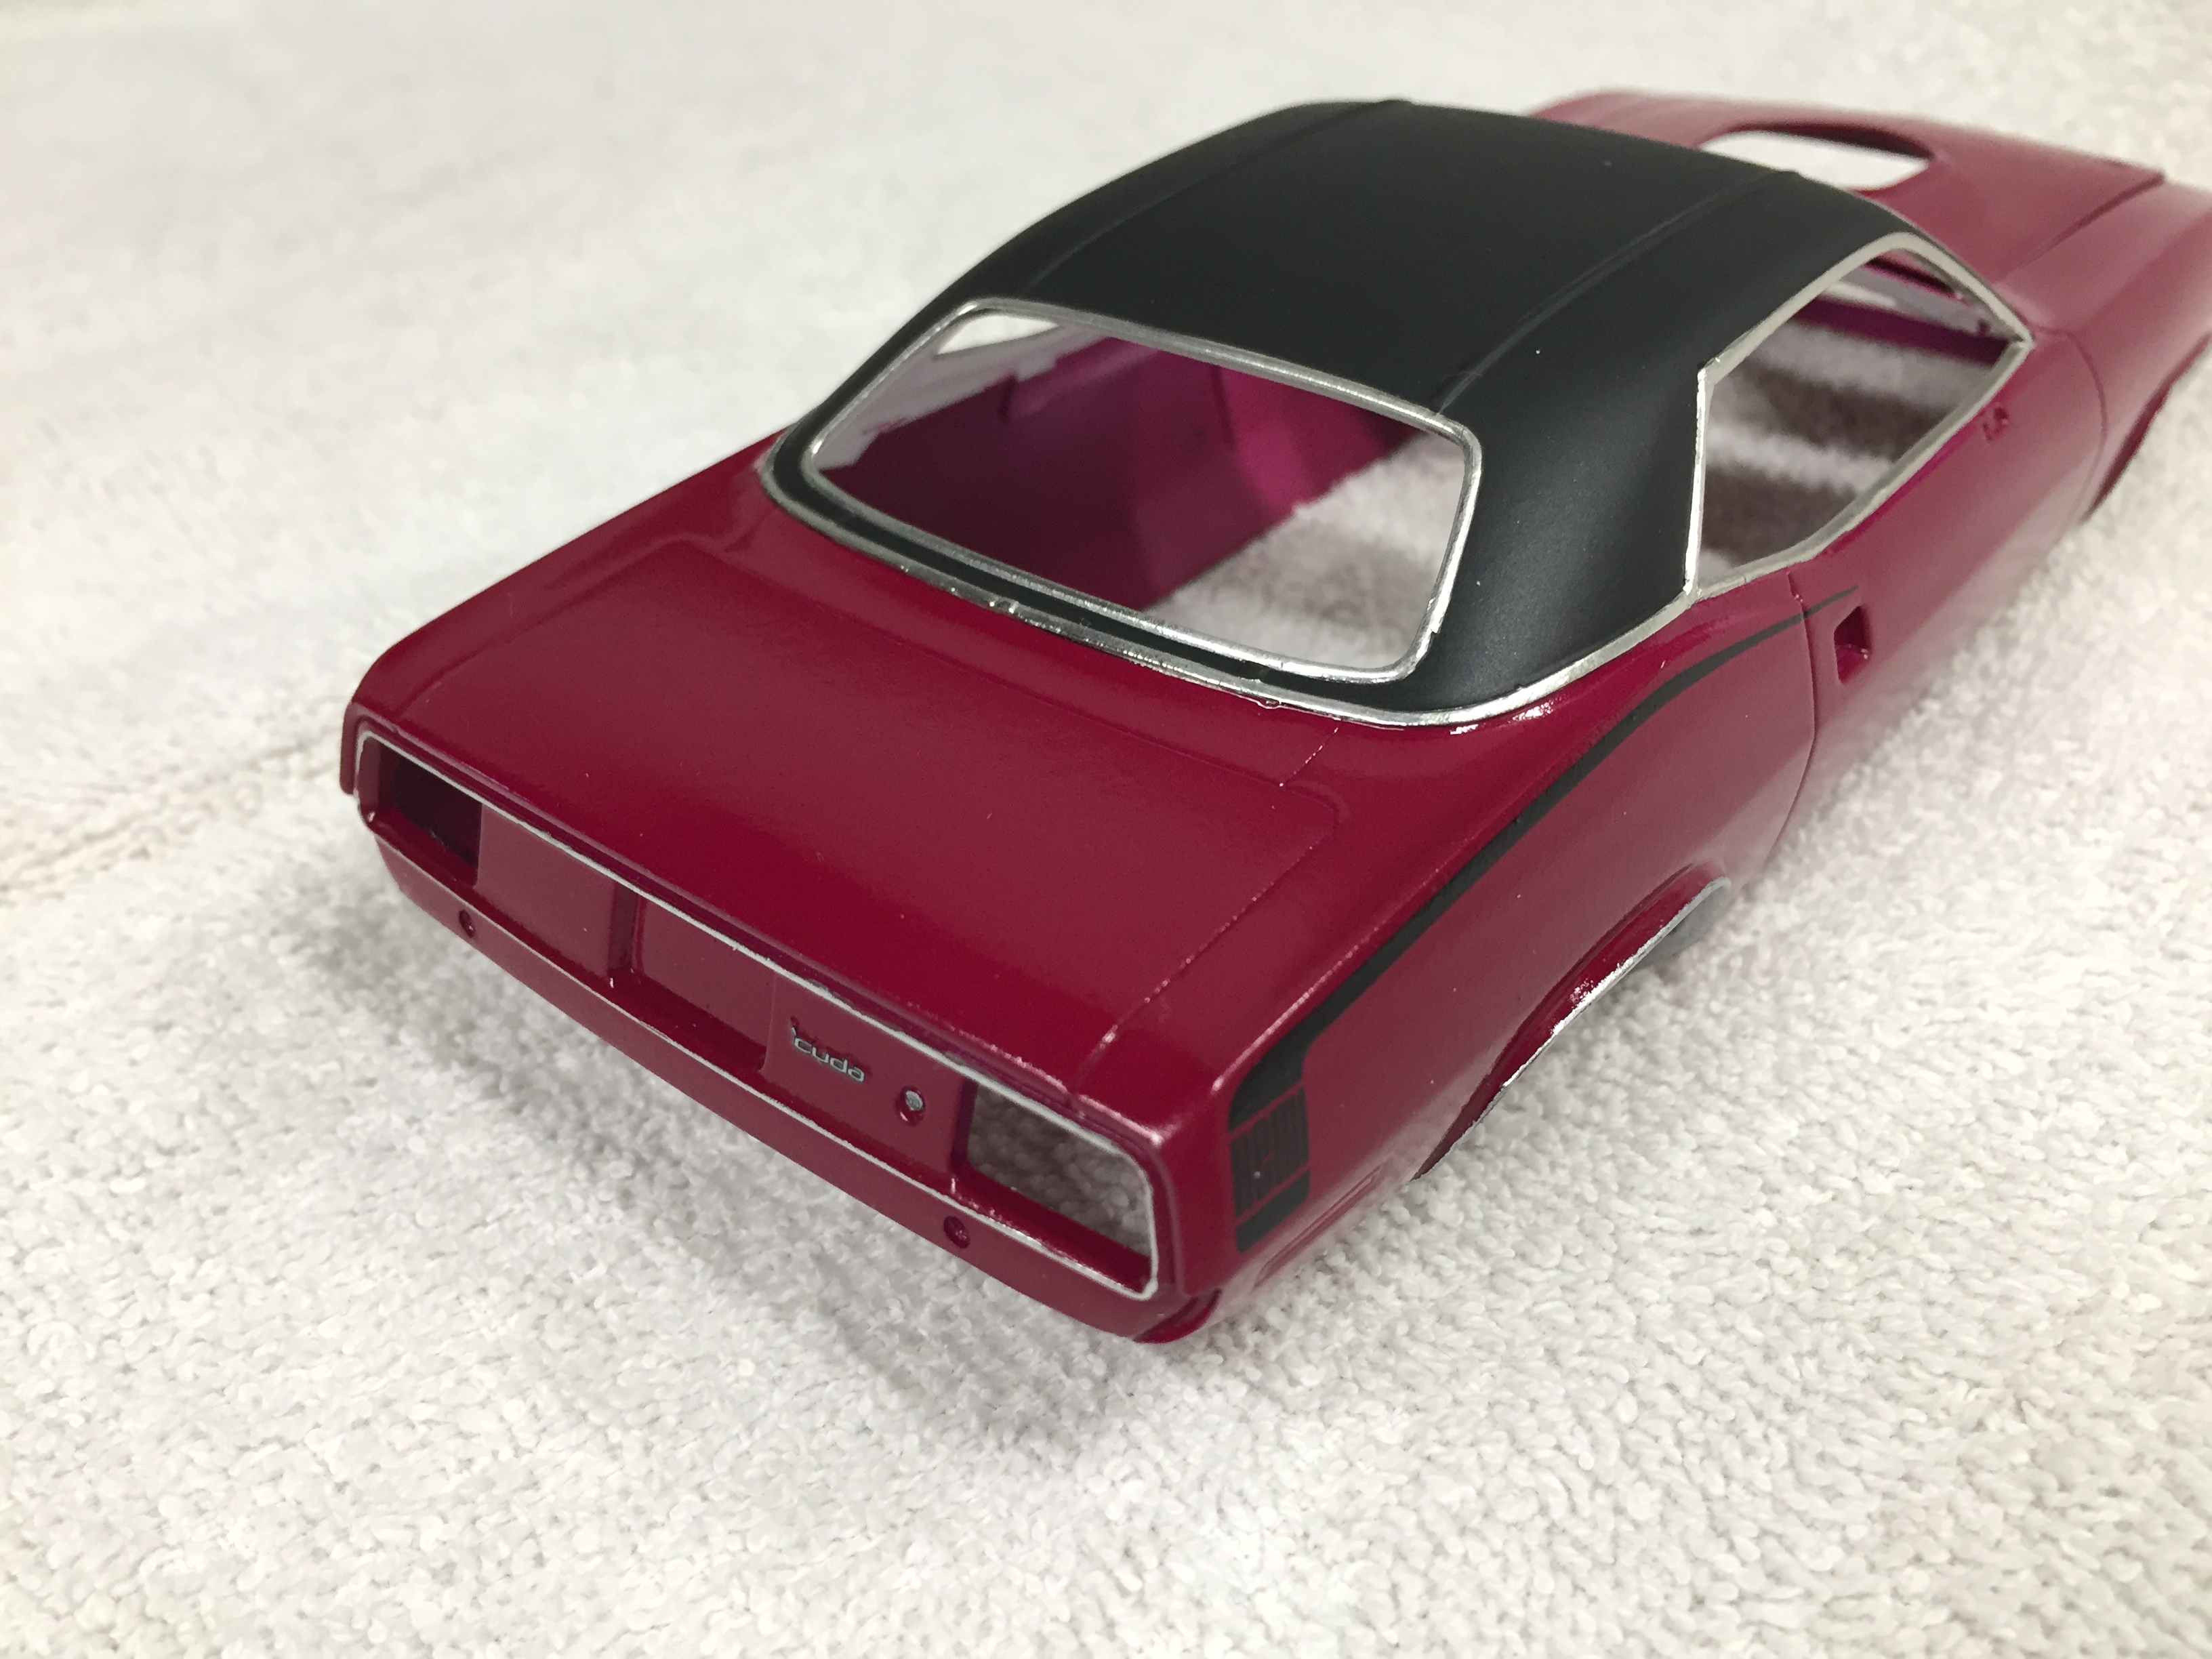
I detailed the wheels to look as close to factory as I could. I clear coated the body with Createx 5620, sanded with #3000 and applied the decals and foil and re-coated with more 5620. I was hoping that the second round of clear would go on smoother than the first...It didn't. I was thinking that I would have to sand again and then clear it with something else, but I think I will leave it alone rather than risk ruining it completely. I did manage to sand through the paint a bit on the hood edges so I will have to touch it up and re-clear that. Lessons learned for the next one. The roof has one coat of Tamiya XF-86 flat clear
-
Pantera Gr.4 hillclimb car
NOBLNG replied to Ace-Garageguy's topic in General Automotive Talk (Trucks and Cars)
It didn't pop up as an option...but here it is, Good on him! https://www.youtube.com/watch?v=XzUWJDQw3F4 -
57 Chevy Wrecker
NOBLNG replied to mchook's topic in Model Trucks: Pickups, Vans, SUVs, Light Commercial
What they all said! One of the nicest weathering jobs I've ever seen. -
You won't be disappointed! My first airbrush was an Iwata Eclipse and although it works great it is a pain to keep clean. The H is my second airbrush and I have not touched the Iwata since getting it.
-
Pledge over Createx Problems
NOBLNG replied to Harpo's topic in Model Building Questions and Answers
Have you or anyone else tried the 5620 clear? I can not seem to get it to lay down nicely. If I spray it light at a higher pressure, it will be smooth but not glossy. If I spray it heavier at a lower pressure it will be glossy but not smooth. Light at lower pressure doesn't want to come out of the airbrush at all. It seems to want to coagulate in the airbrush tip and is a real bear to clean out. I'm glad I only used this in my external mix air brush and not my eclipse! PS. I loved the way the Wicked Colors paint went on. -
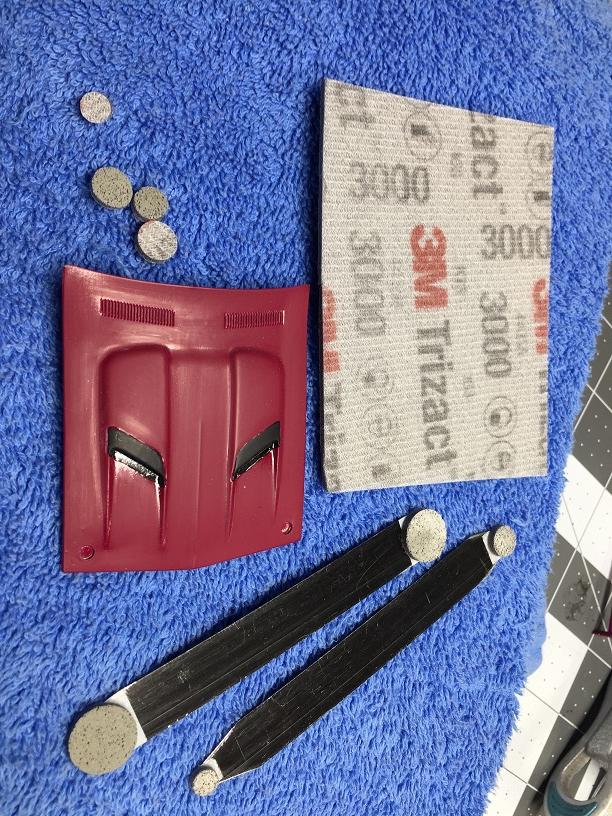
I made these sanding sticks from a 3M Trizact sanding pad, double faced tape and metal strapping. A popsicle stick would work just as well. I like the fact that I can punch any size circle I want. This 3M stuff is nearly 1/8" thick, so it can get in between the ribs on this hood.
-
If you have a dehydrator you could try putting the cans in there to warm them. I started doing that this winter and it definitely makes a difference.
-
I use Tamiya acrylics for small items and clean my brushes with lacquer thinner also. I recently bought one of those little badger paint mixers because I was tired of all the lids getting glued onto the bottles from shaking them. It works great! I keep a little 2oz. bottle of thinner on the bench and after mixing the paint I clean the mixer in the thinner too.
-
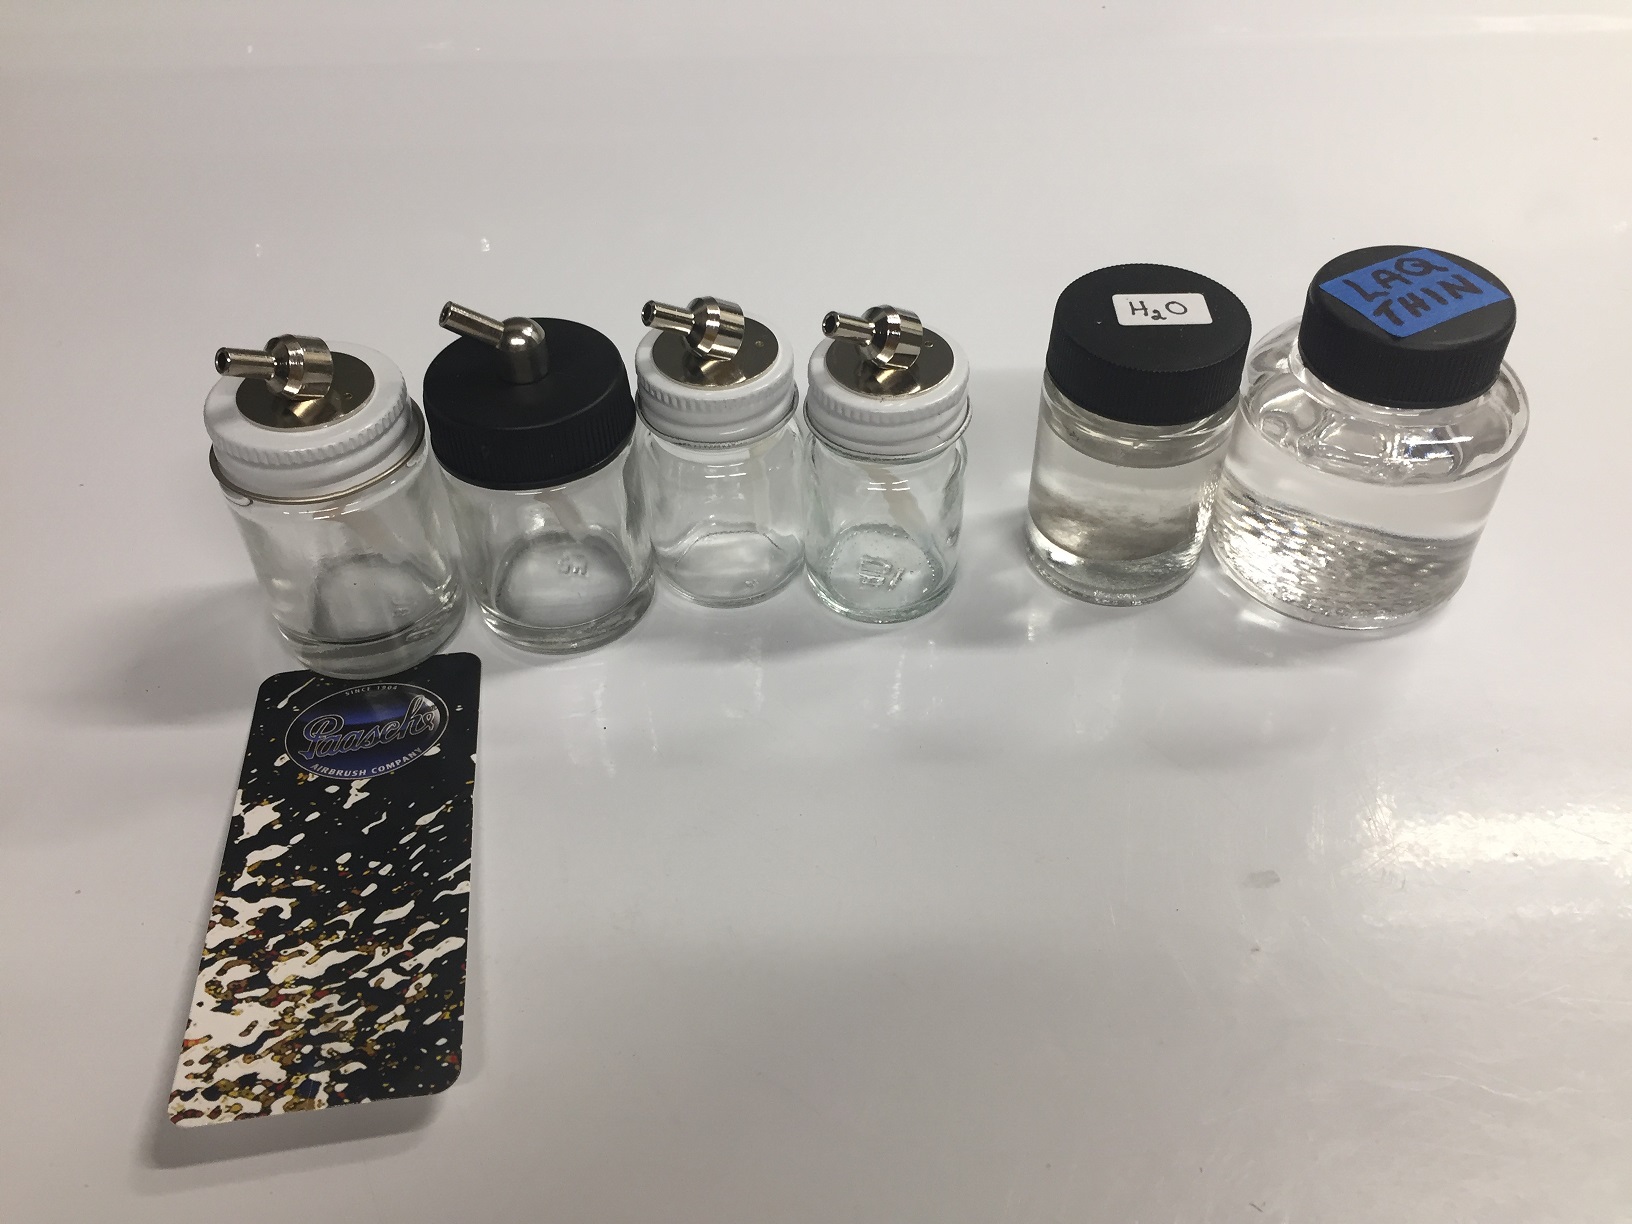
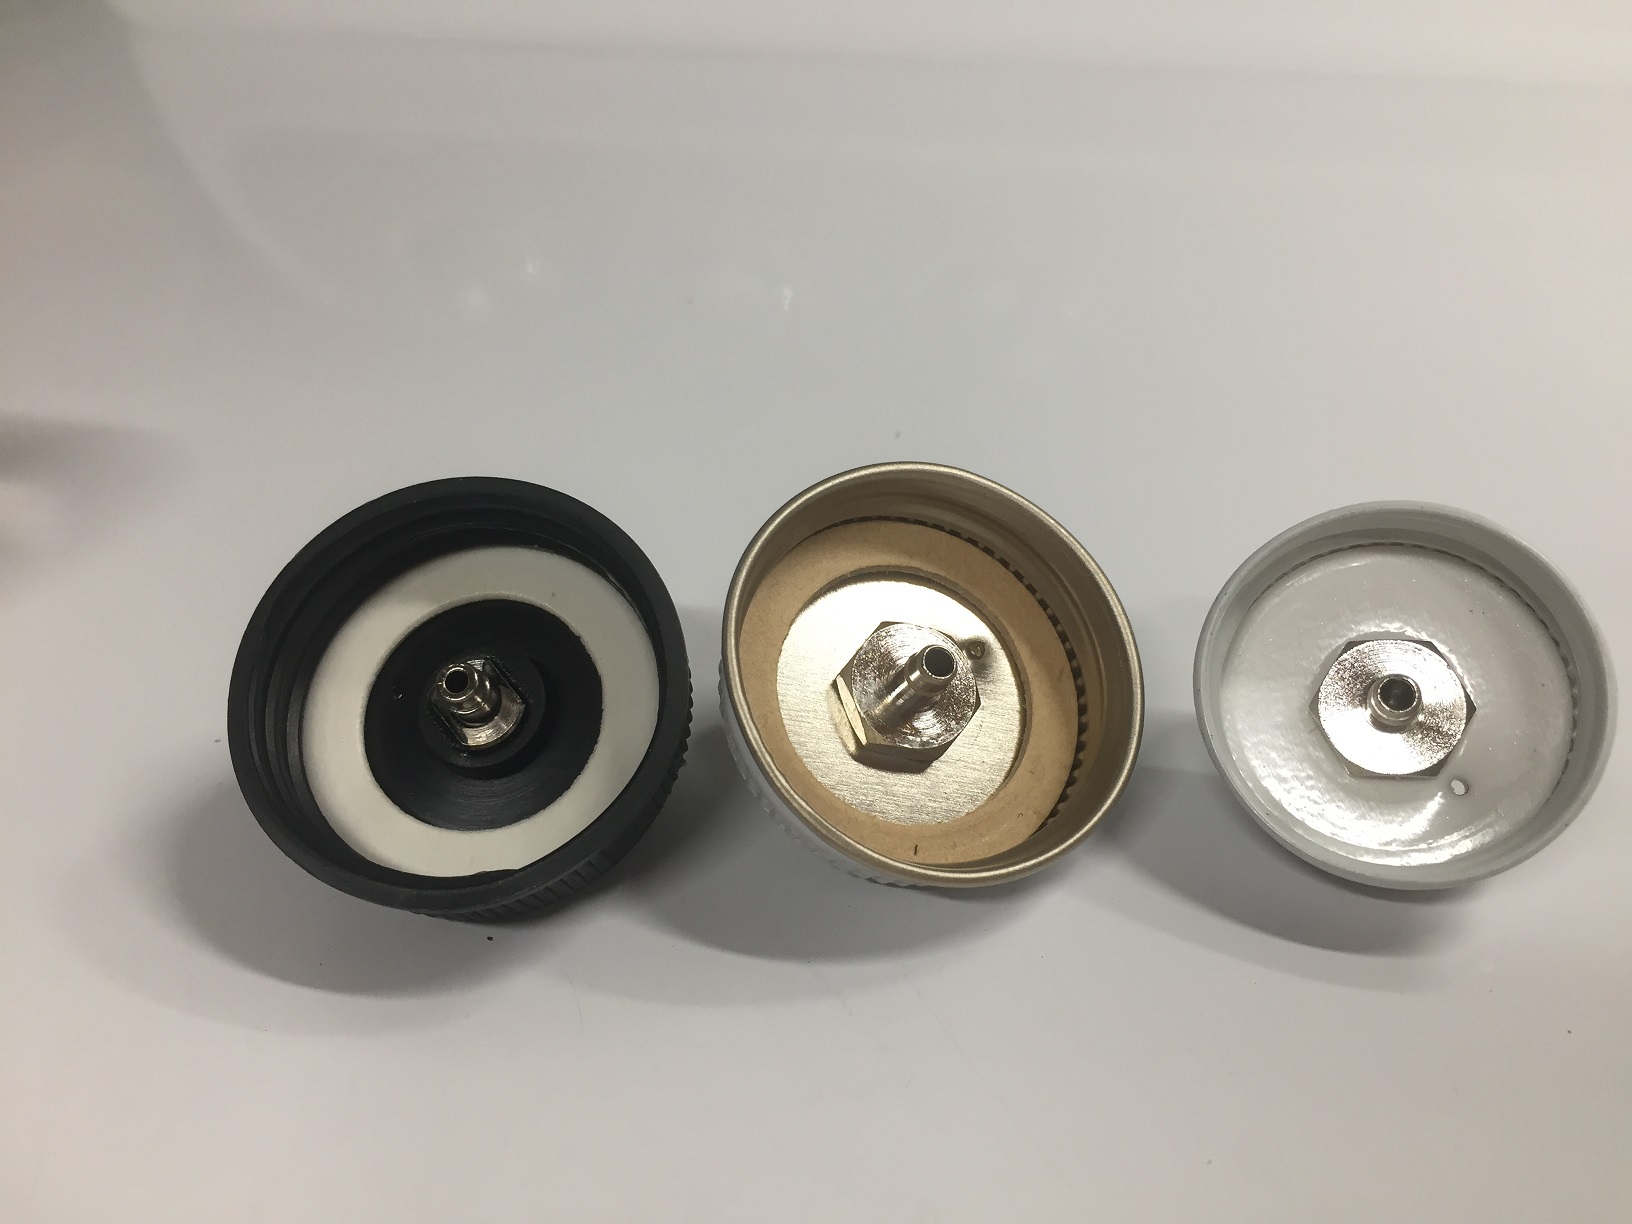
I got the Paasche bottles yesterday. The metal-capped ones all look like they have a nut on the inside, so I should be able to transfer the fittings to the Michaels bottles if the need arises. Crappy looking gaskets in the metal lids. I will replace those with Teflon ones.
-
Nice job on those stripes! It's tedious and nerve wracking trying to get those long skinny decals arrow straight and parallel to the body lines. Looks like you aced it.
-
Need info on '32 Deuce Coupe
NOBLNG replied to john66's topic in General Automotive Talk (Trucks and Cars)
This build is also on my to-do list. I will be watching! -
List is $7.99 CAD and then 40% off for 4 of the 1-ounce bottles or $4.99 (-40%) for 2 of the 2-ounce bottles. I have ordered 2- Paasche 1-oz and 2-Paasche 1/2 oz bottles from amazon. The 1/2 oz bottles have metal lids, so maybe those nipples can be transferred? I would like to cap the paint bottles with a solid cap if I am going to leave it for a while. Edit: The Paasche ones from Amazon are $7.50 each.
-
This is my first serious attempt at a vinyl roof and I am little unsure as to the best order to do things. I figure I need a glossy surface for the foil so I laid down a coat of gloss black on the roof. I think I will put a couple coats of gloss clear over everything before foiling and decals. Then a few more coats of clear to seal the decals and the foil. Then carefully mask the foiled trim and the rest of the body and put the flat black texture on the roof.
-
Great product for replicating Vinyl tops!!!
NOBLNG replied to cruz's topic in Tips, Tricks, and Tutorials
Any pictures? -
Looking real nice Jason. I have this kit in my stash and you're making me want to dig it out!
-
Congratulations, so you're not all talk after all!