NOBLNG
-
Posts
10,227 -
Joined
-
Last visited
Content Type
Profiles
Forums
Events
Gallery
Everything posted by NOBLNG
-
Actor be acted upon.
-
 Photo-etch razor saws like Tamiya makes are great for separating parts that need to cut apart. They are very sharp, can be used in tight spaces and remove almost no material. I think they come in both 0.010” and 0.015” thicknesses. Once separated most parts can be drilled and re-pinned with either styrene or brass rod.
 -
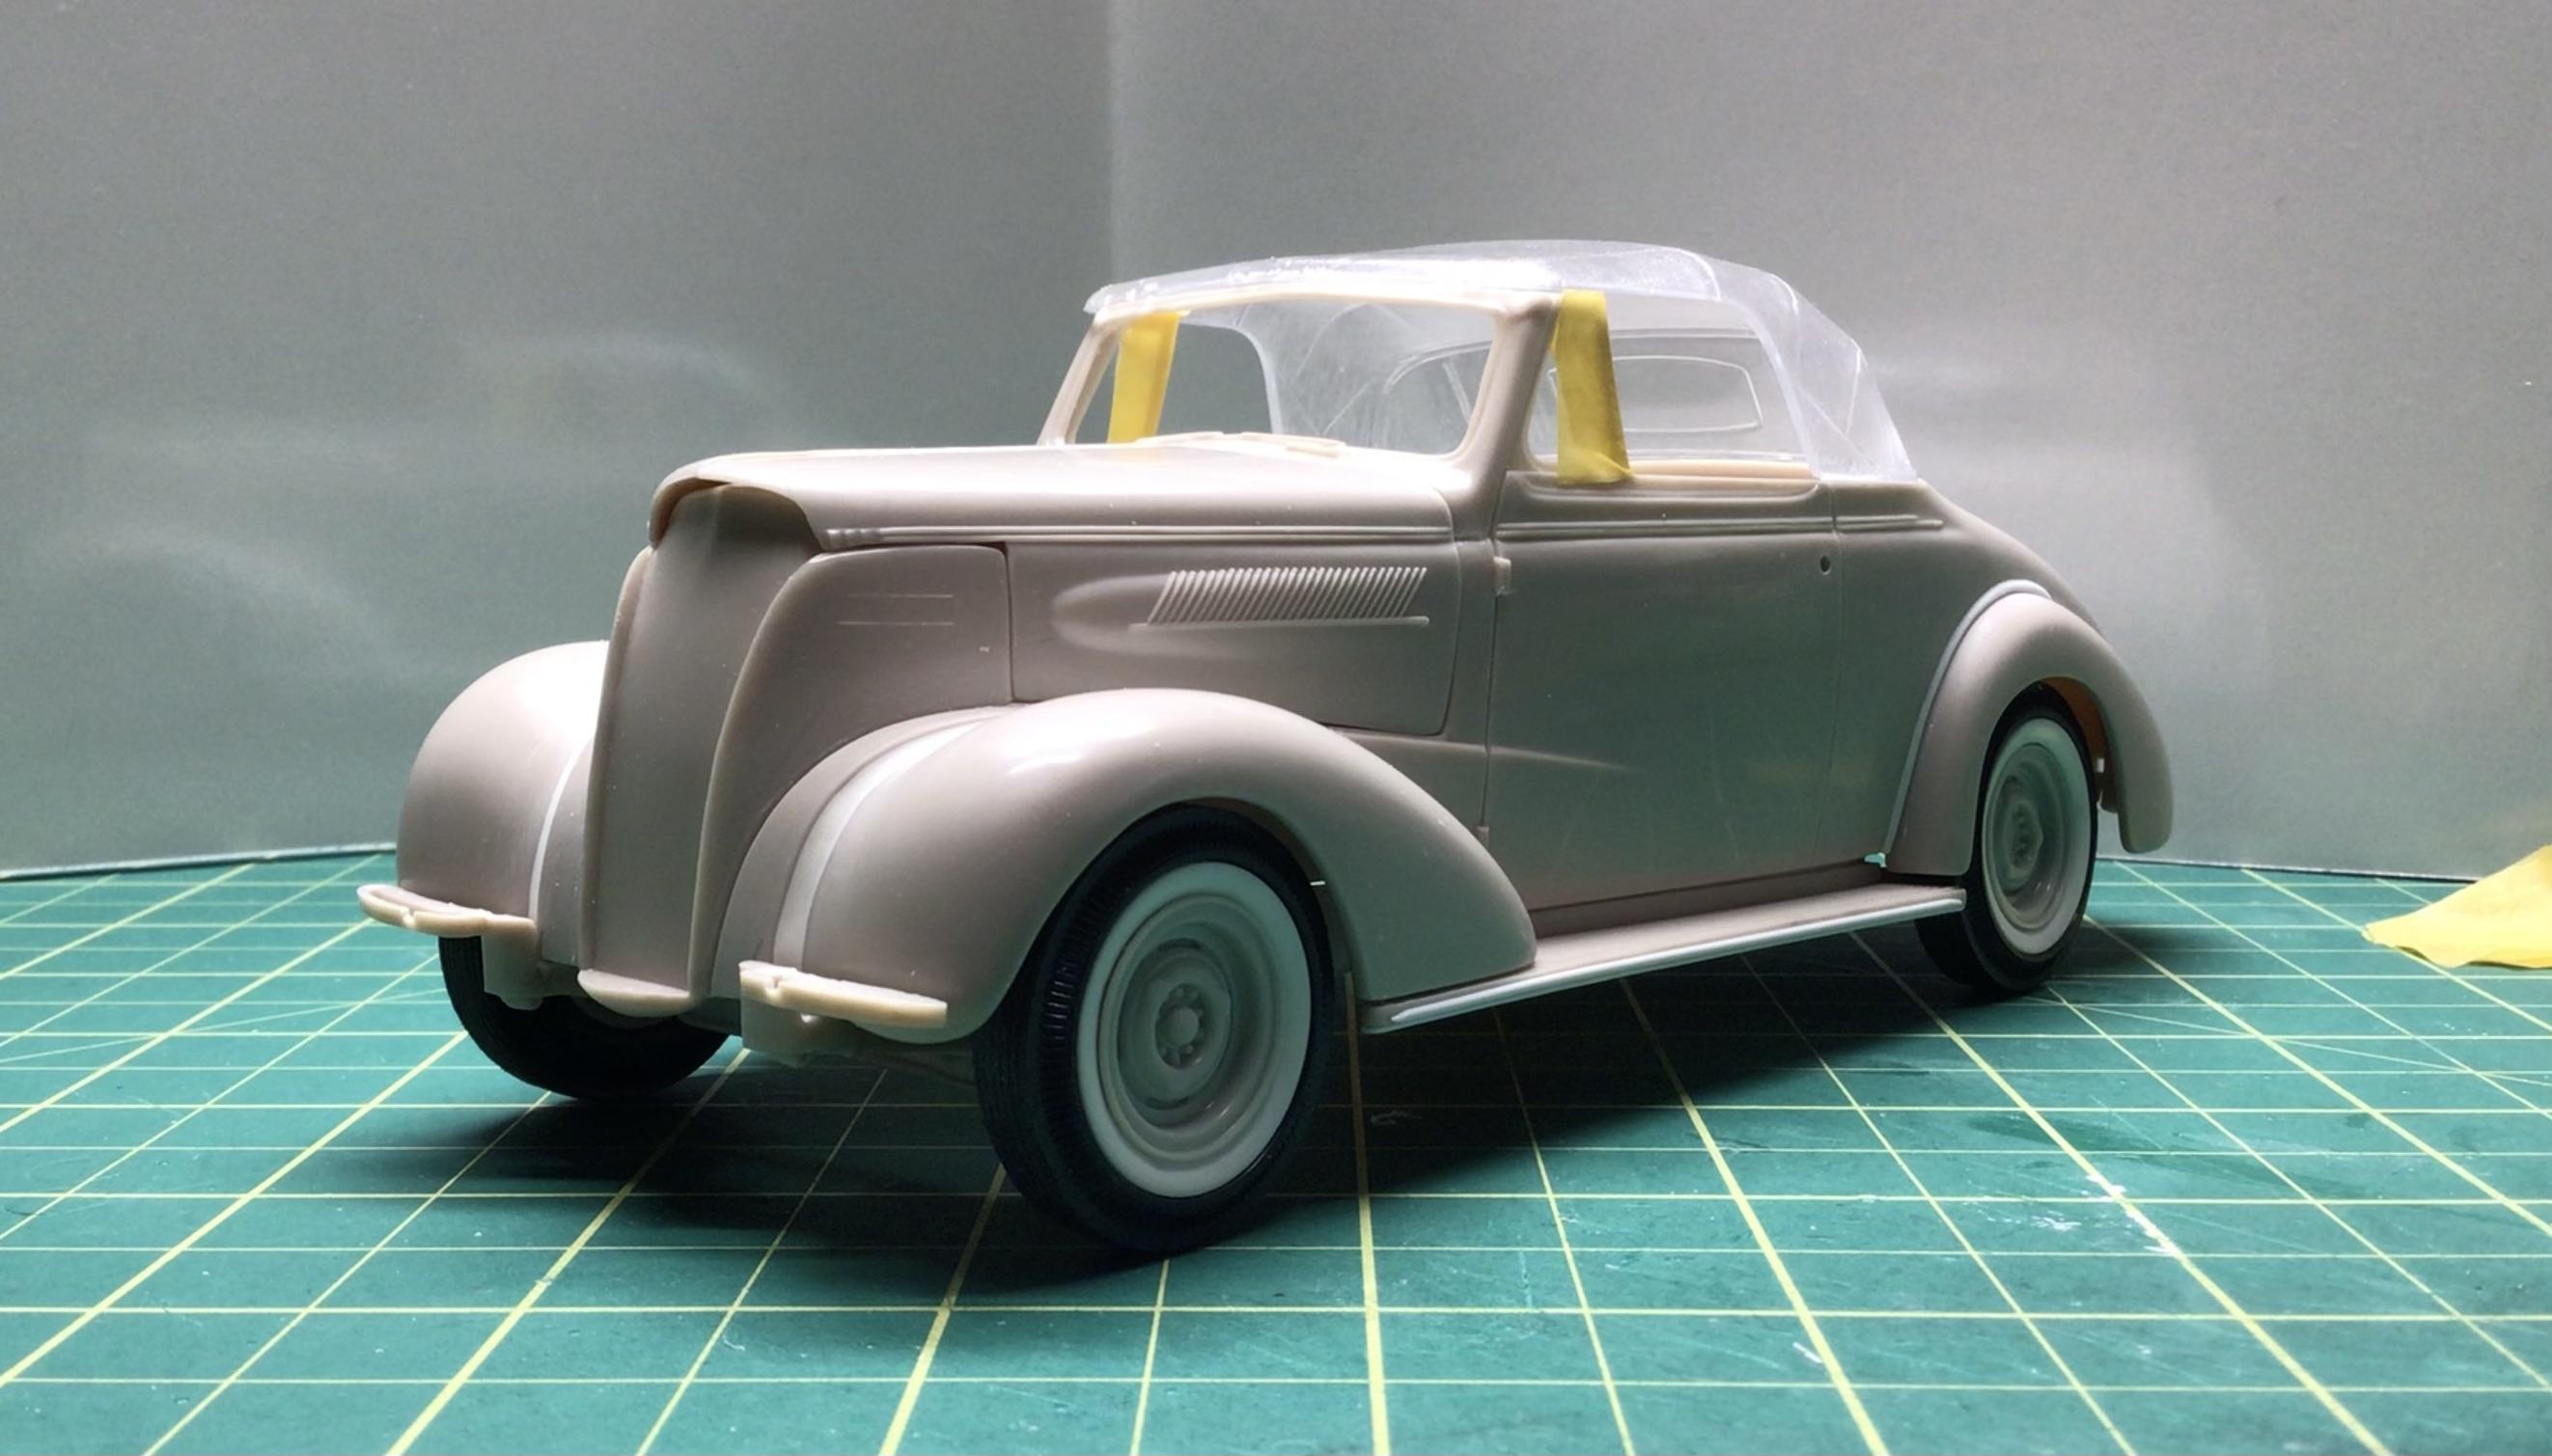
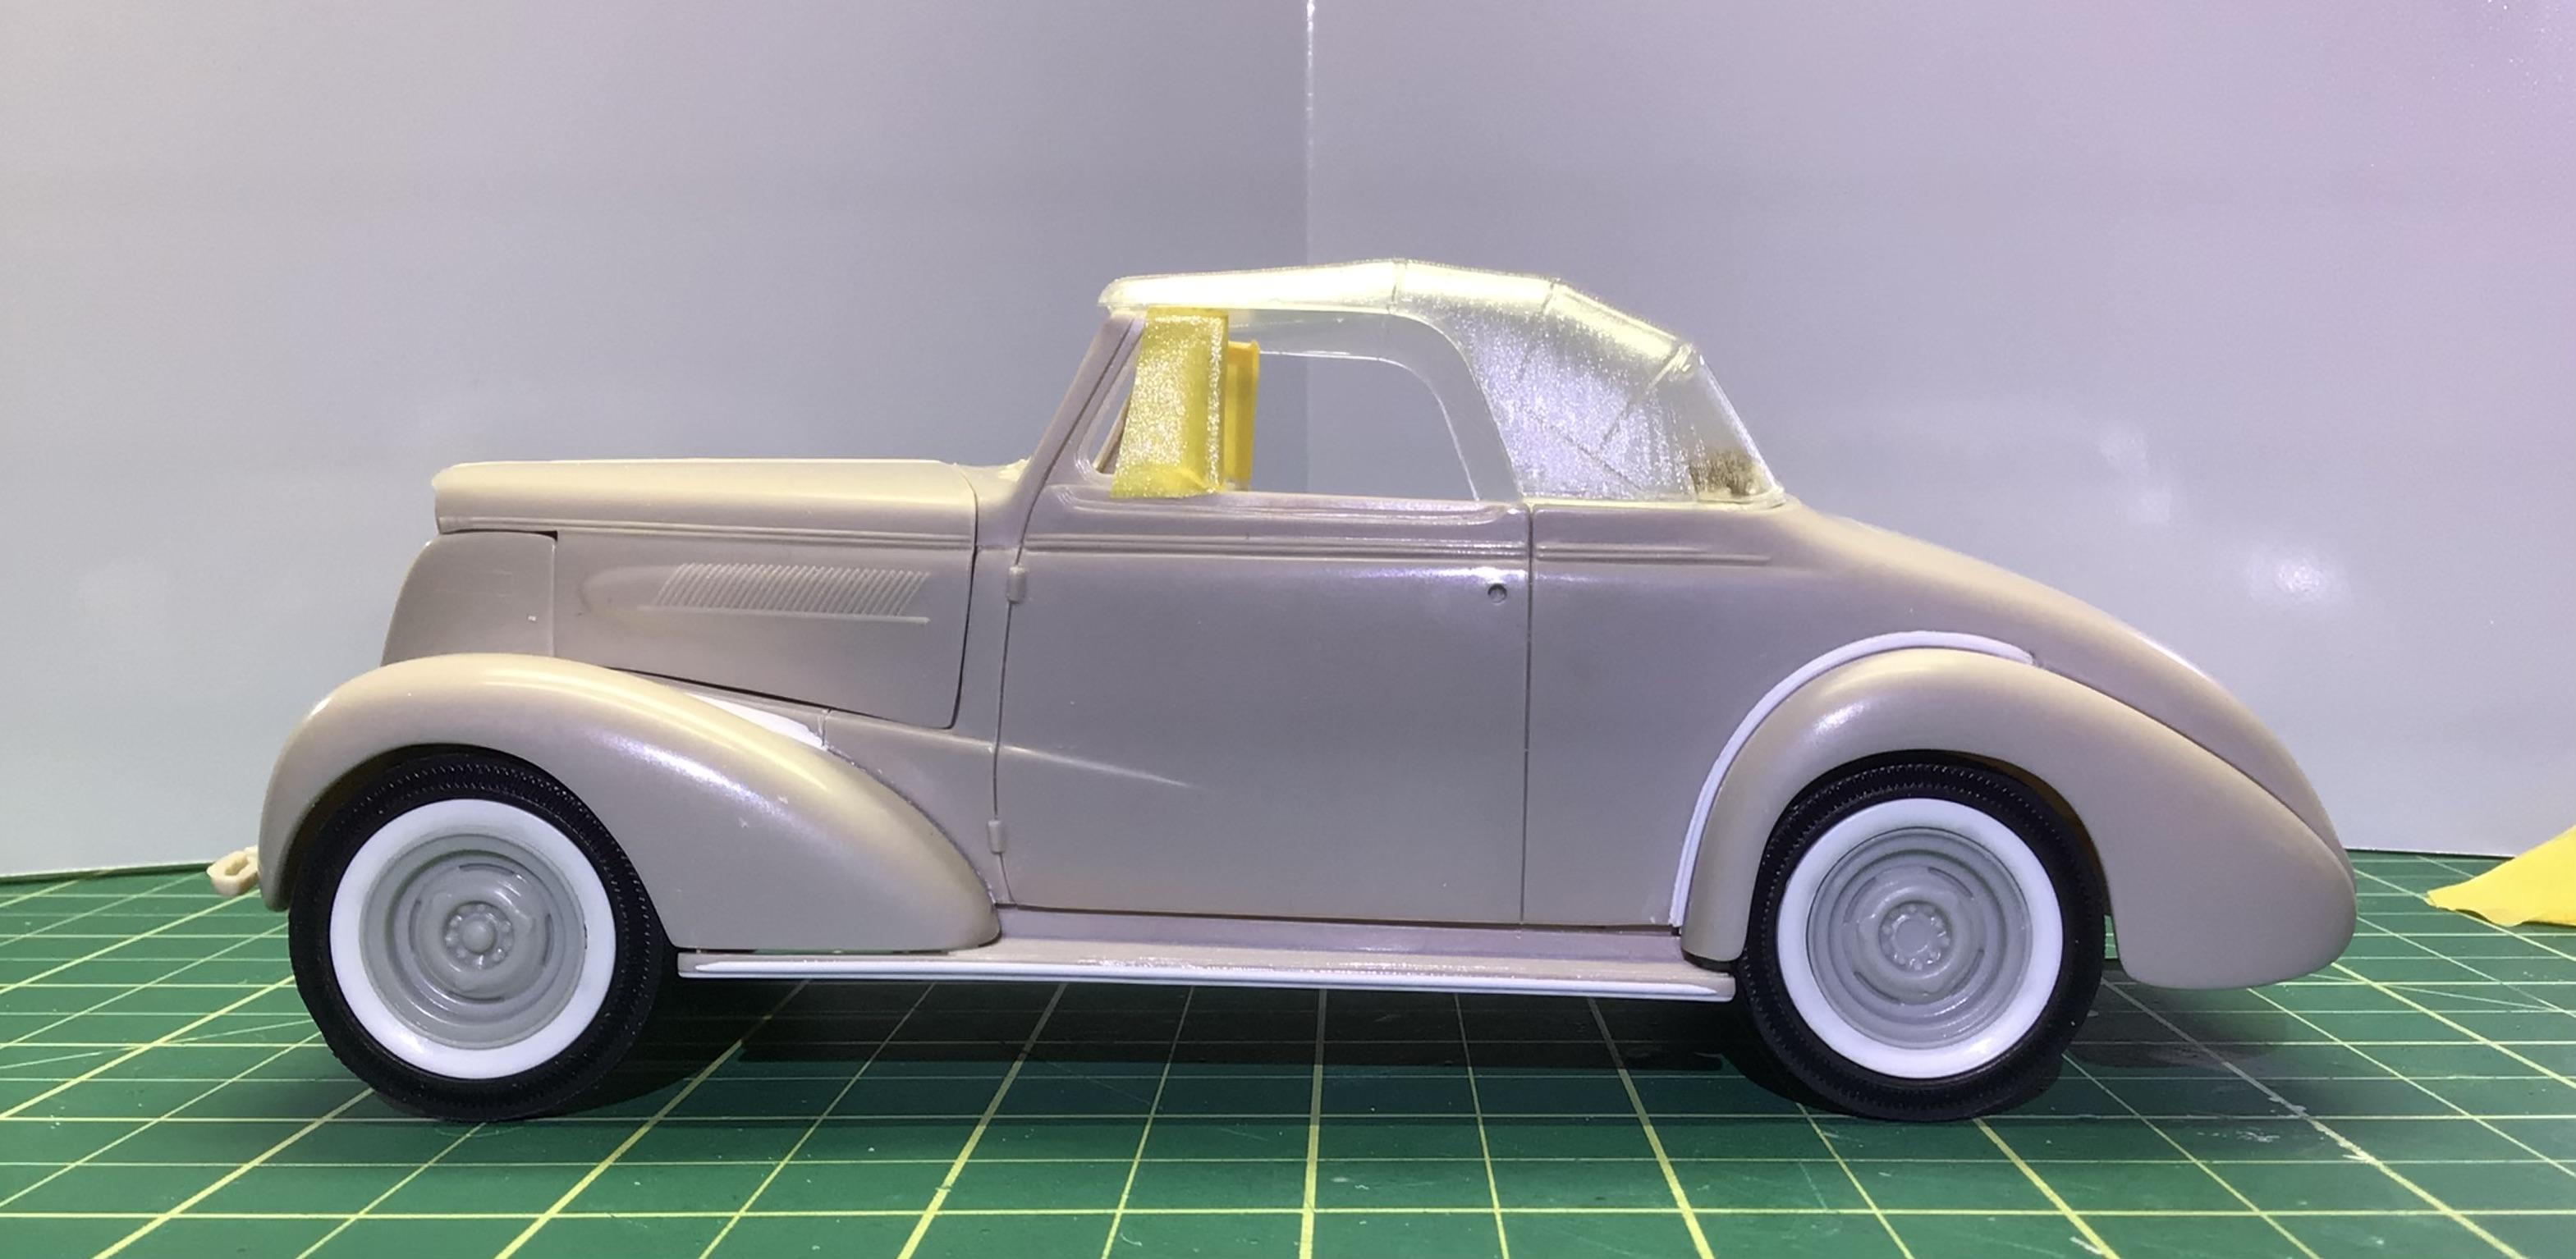
Thanks. I raised the rear back up to the kit level. I don’t have the original wheels and tires, so for now I am mocking up with these parts box steelies. I might dig through the parts box again for some mags just to see if anything tickles my fancy since the kit hubcaps are too large for these wheels.🙂
-
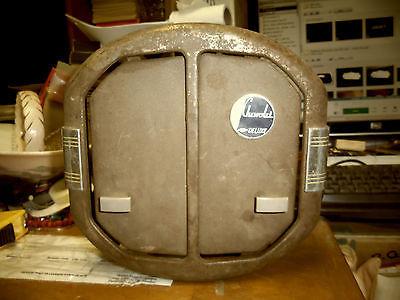
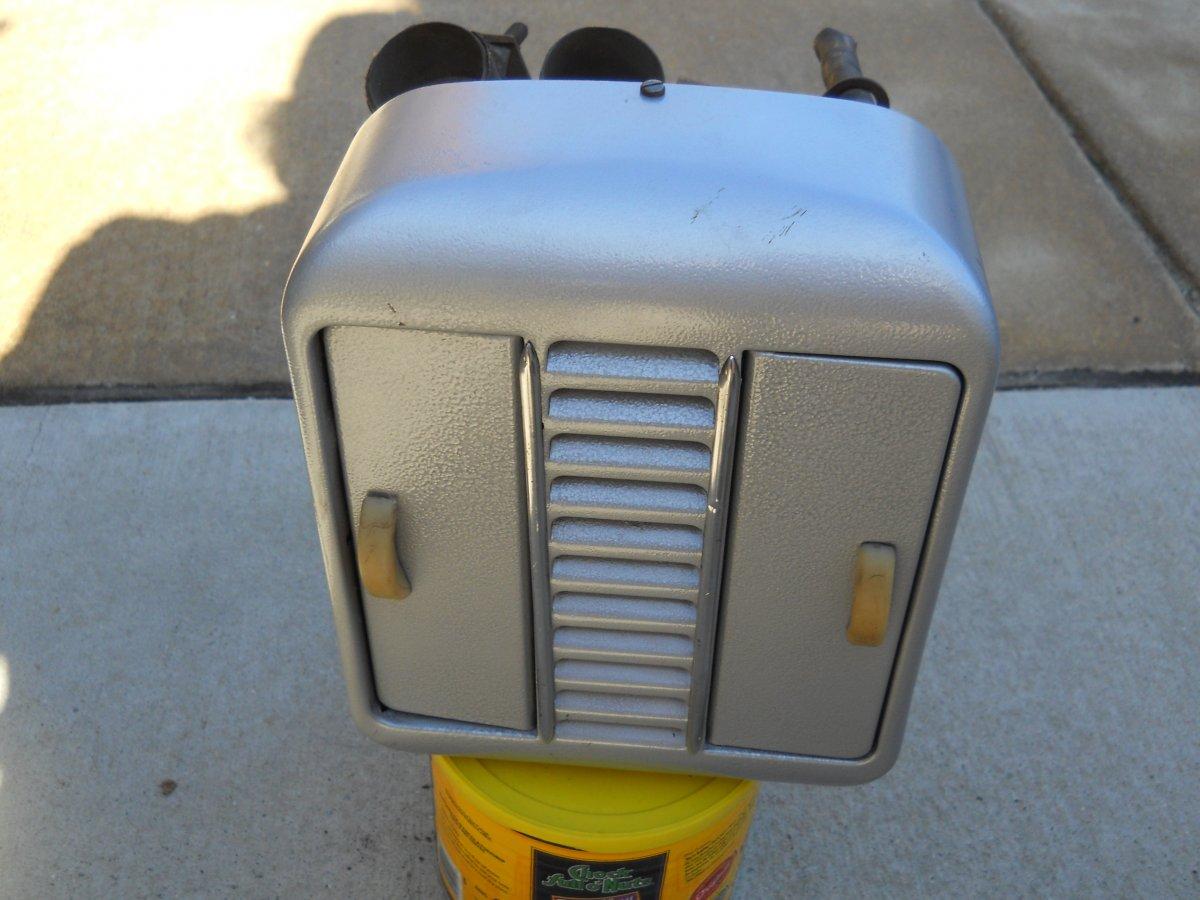
I’m thinking it might be Ford only? I believe Chevy used Harrison heaters back then.🤔

-
So, is this heater a FOMOCO unit or an aftermarket unit that might also be found in a Chevy or others?
-
Thanks Guys! The rad looks more like the ‘40 ford.👍😎
-
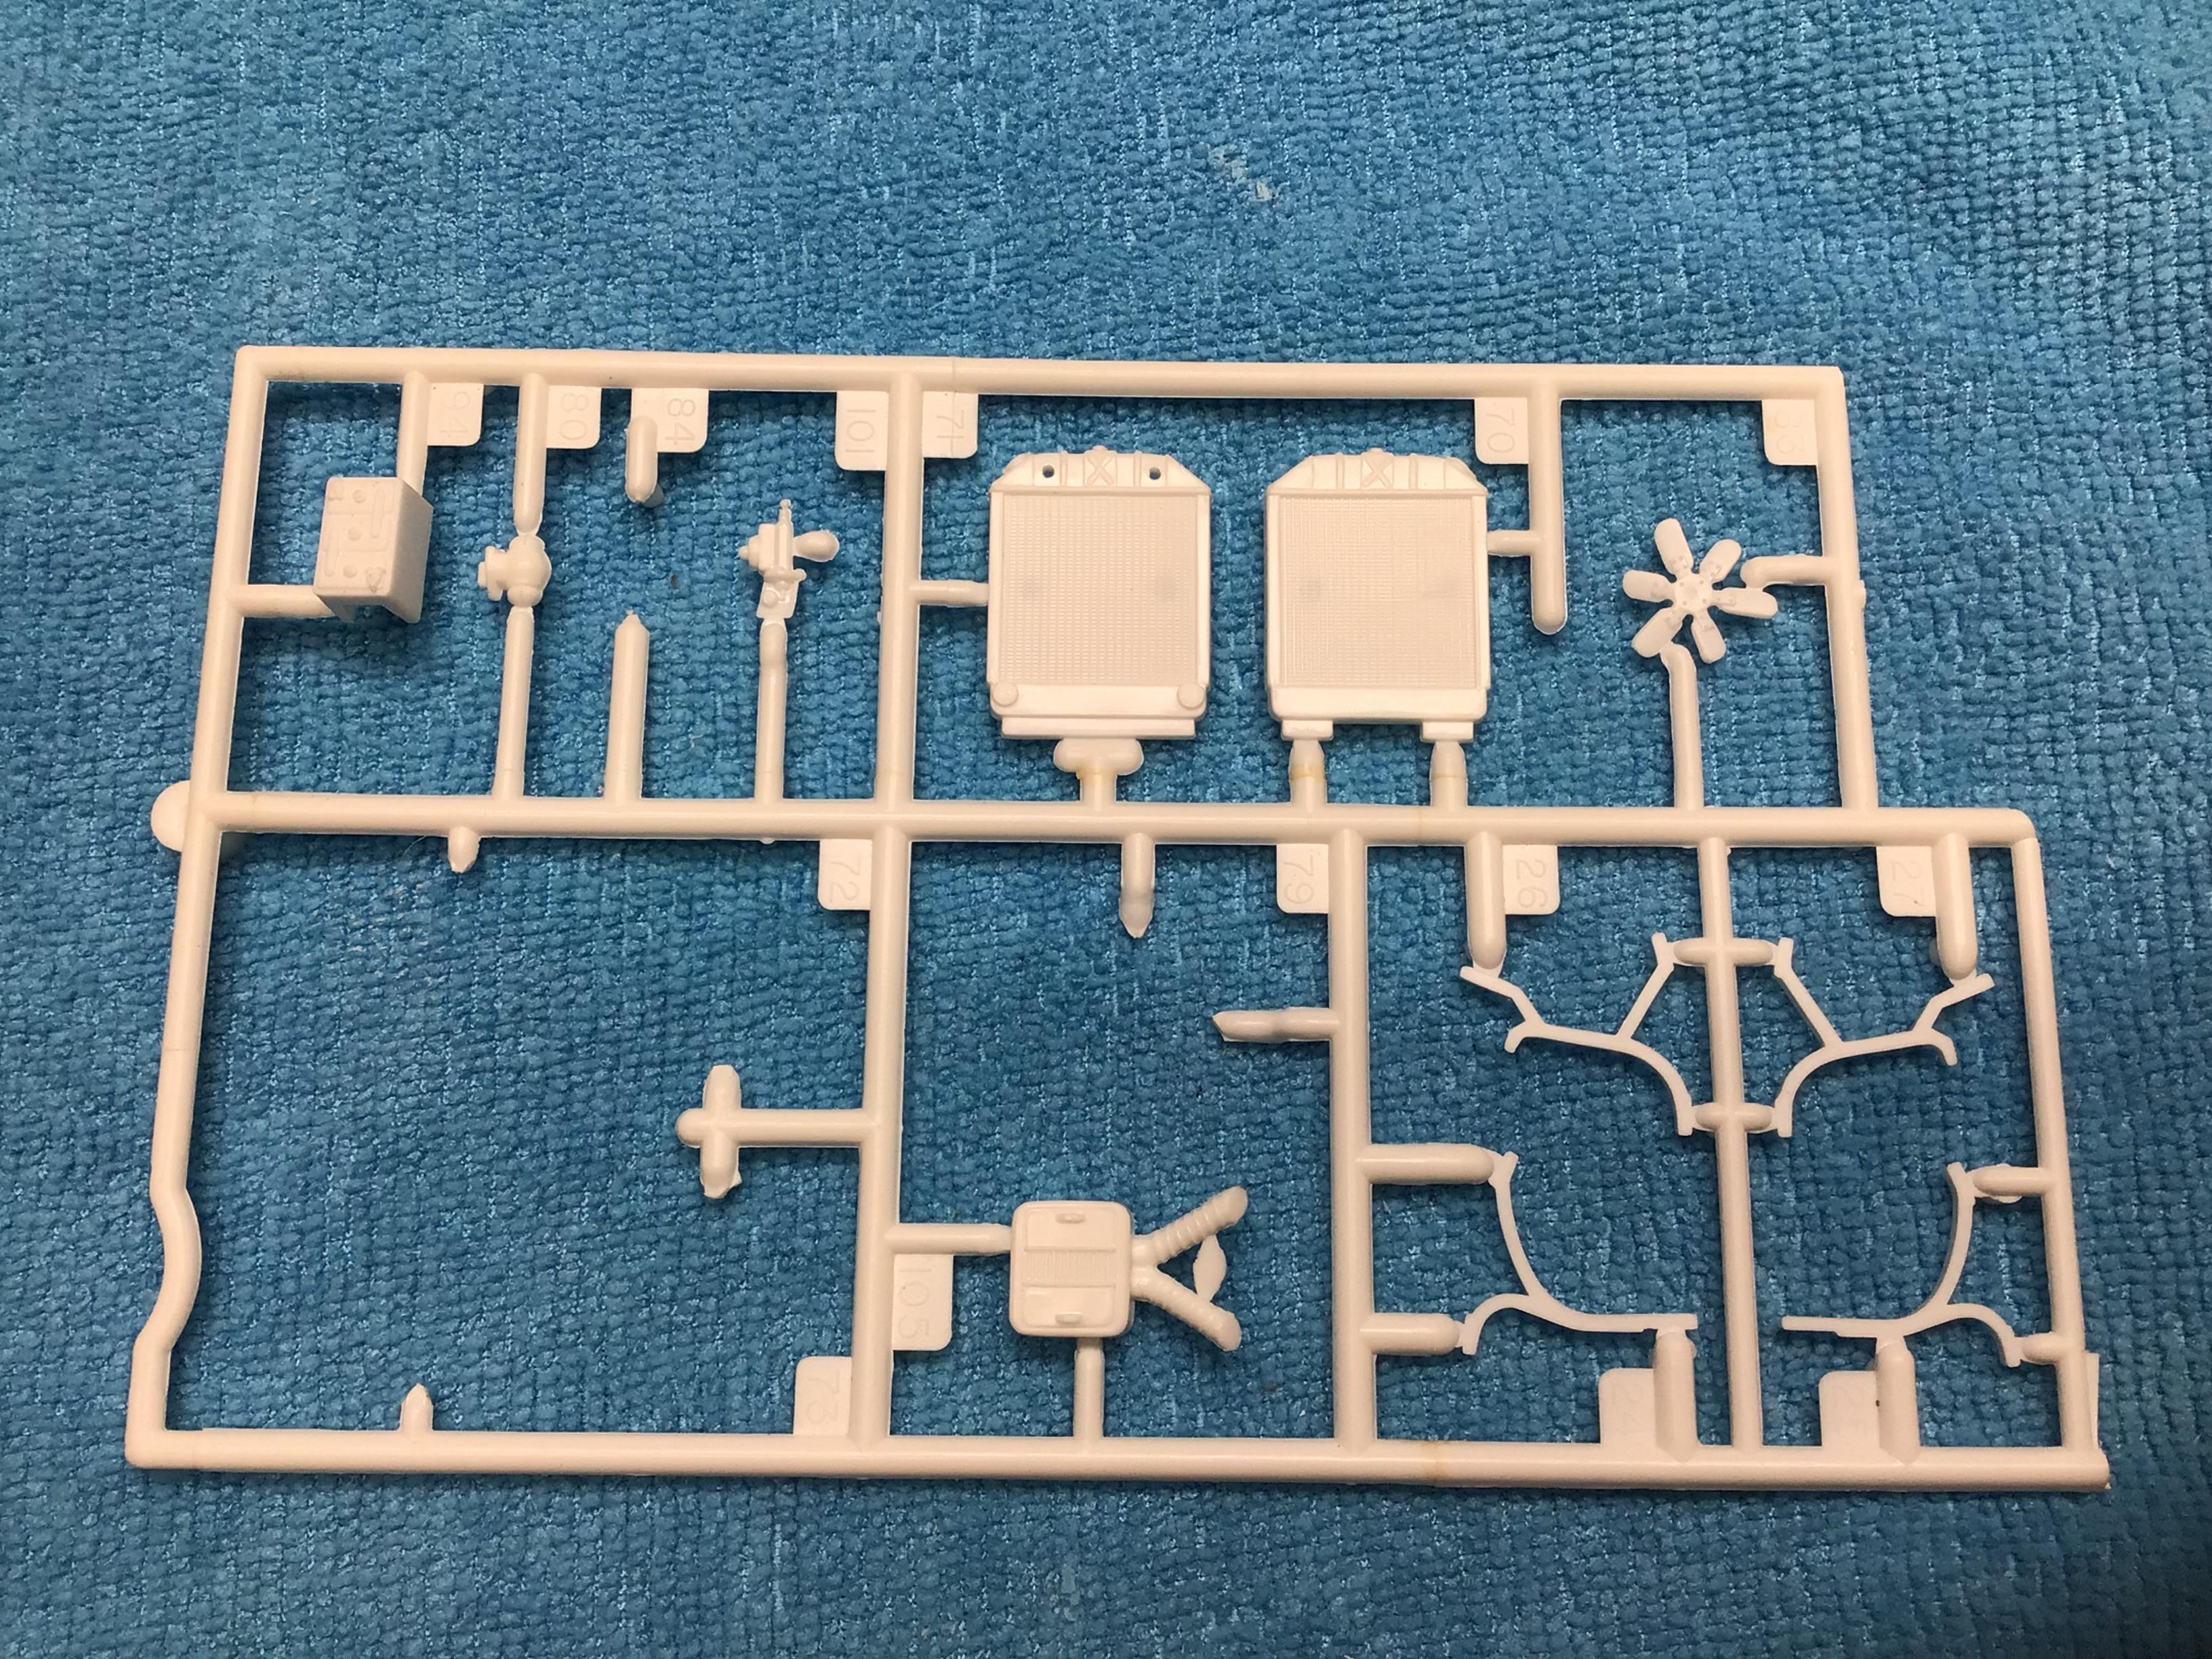
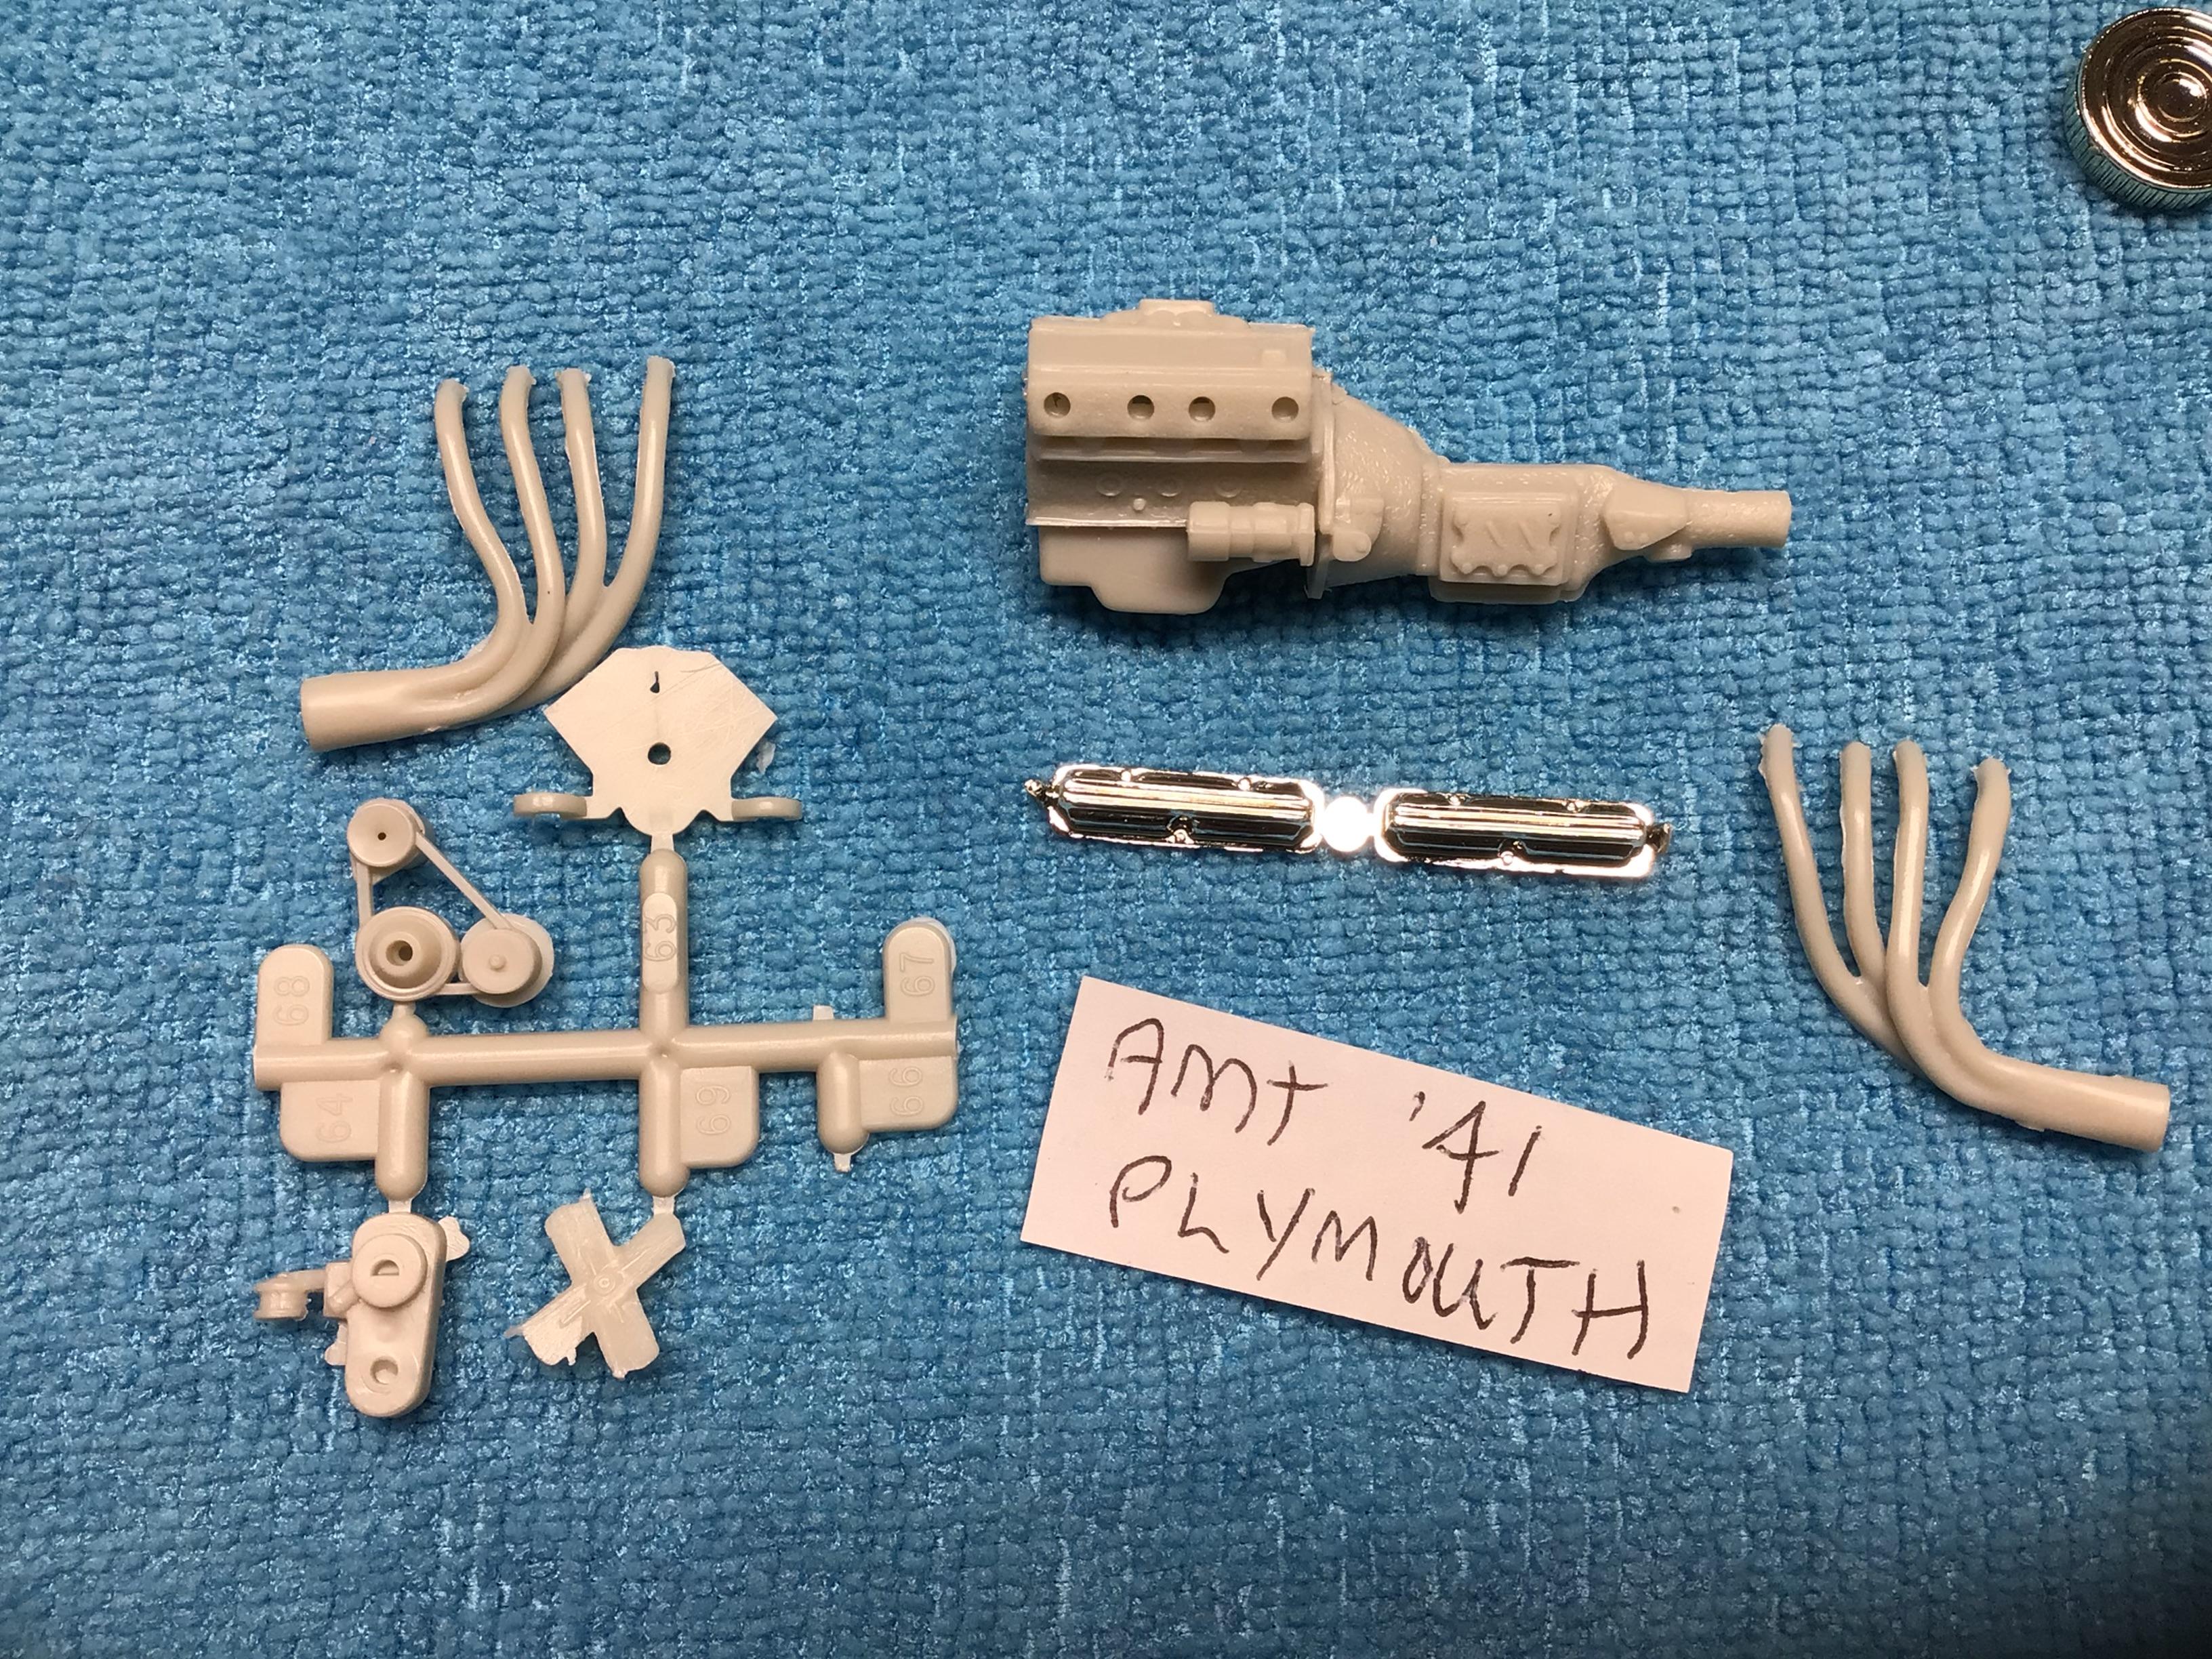
What kit would this tree be from? It was in a box of parts I acquired. Thanks, Greg
-
Spelling errors can be avoided by proof reading before submitting.
-
Gone are those tiny parts that get launched by my tweezers.
-
Who doesn't love a mock-up? Let's see yours!
NOBLNG replied to Belairconvertable's topic in WIP: Model Cars
-
I might drop the front end about the same as the rear or may leave it like this.🤔
- 104 replies
-
- 10
-

-
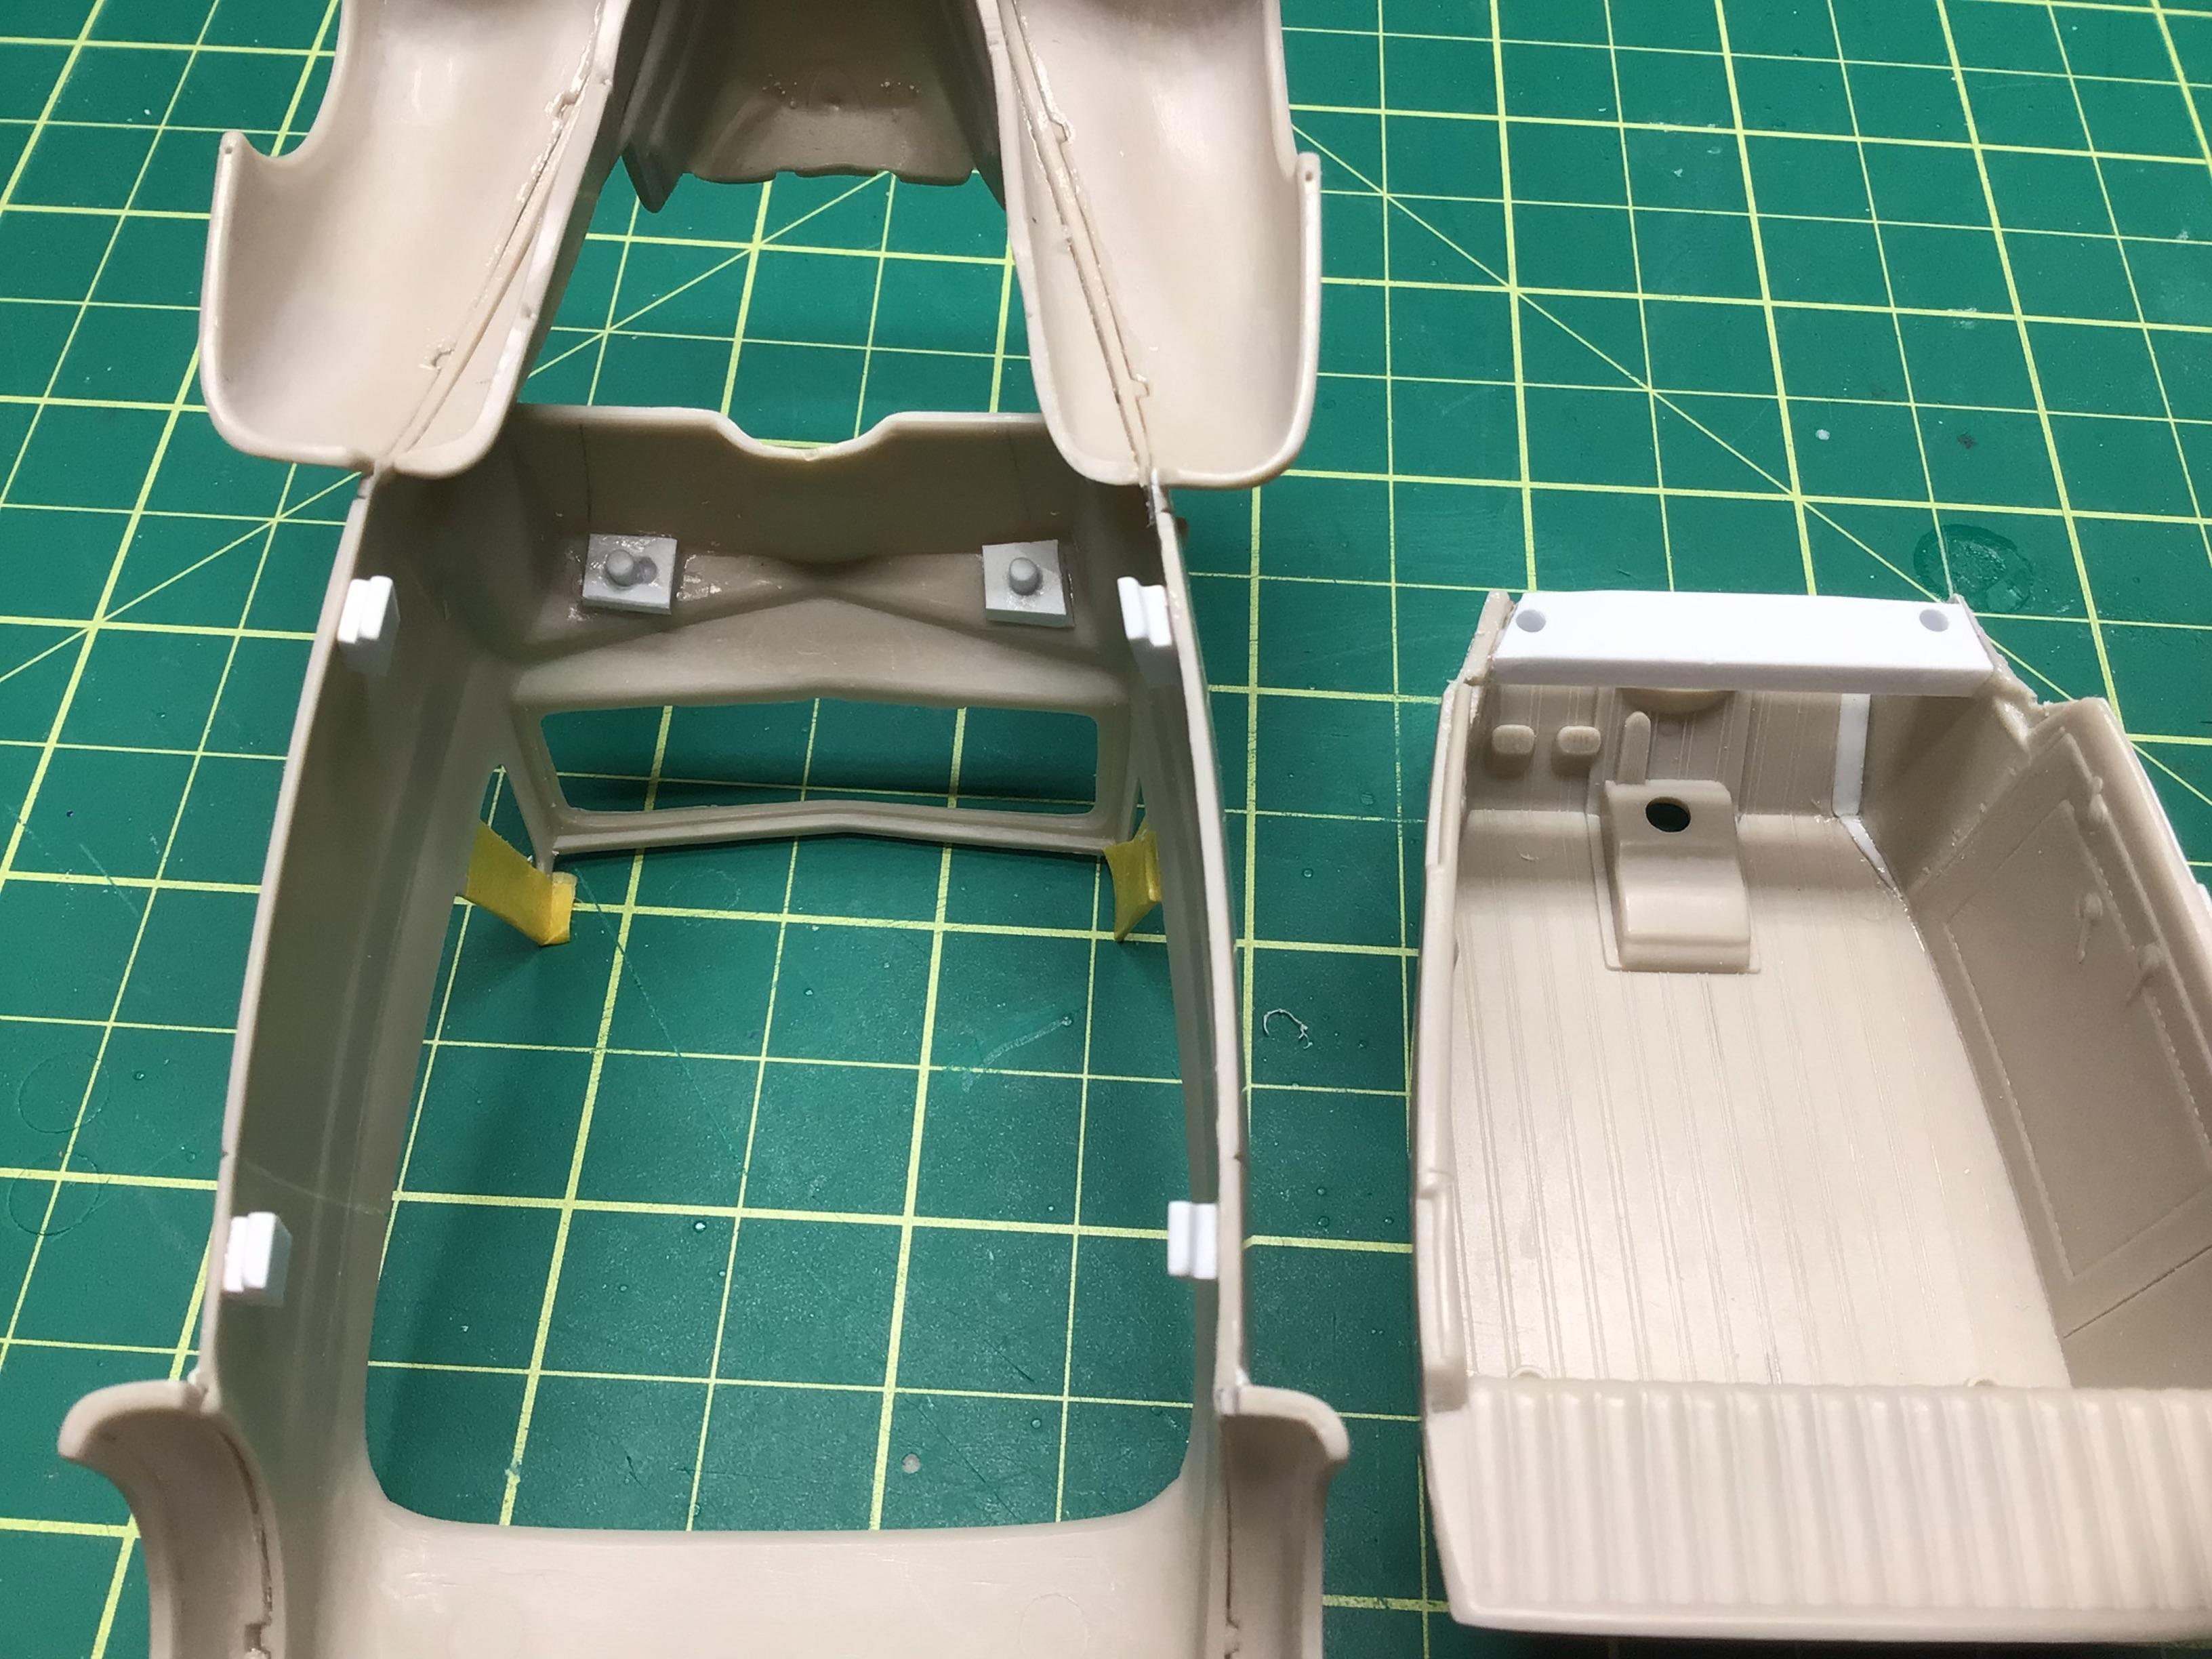
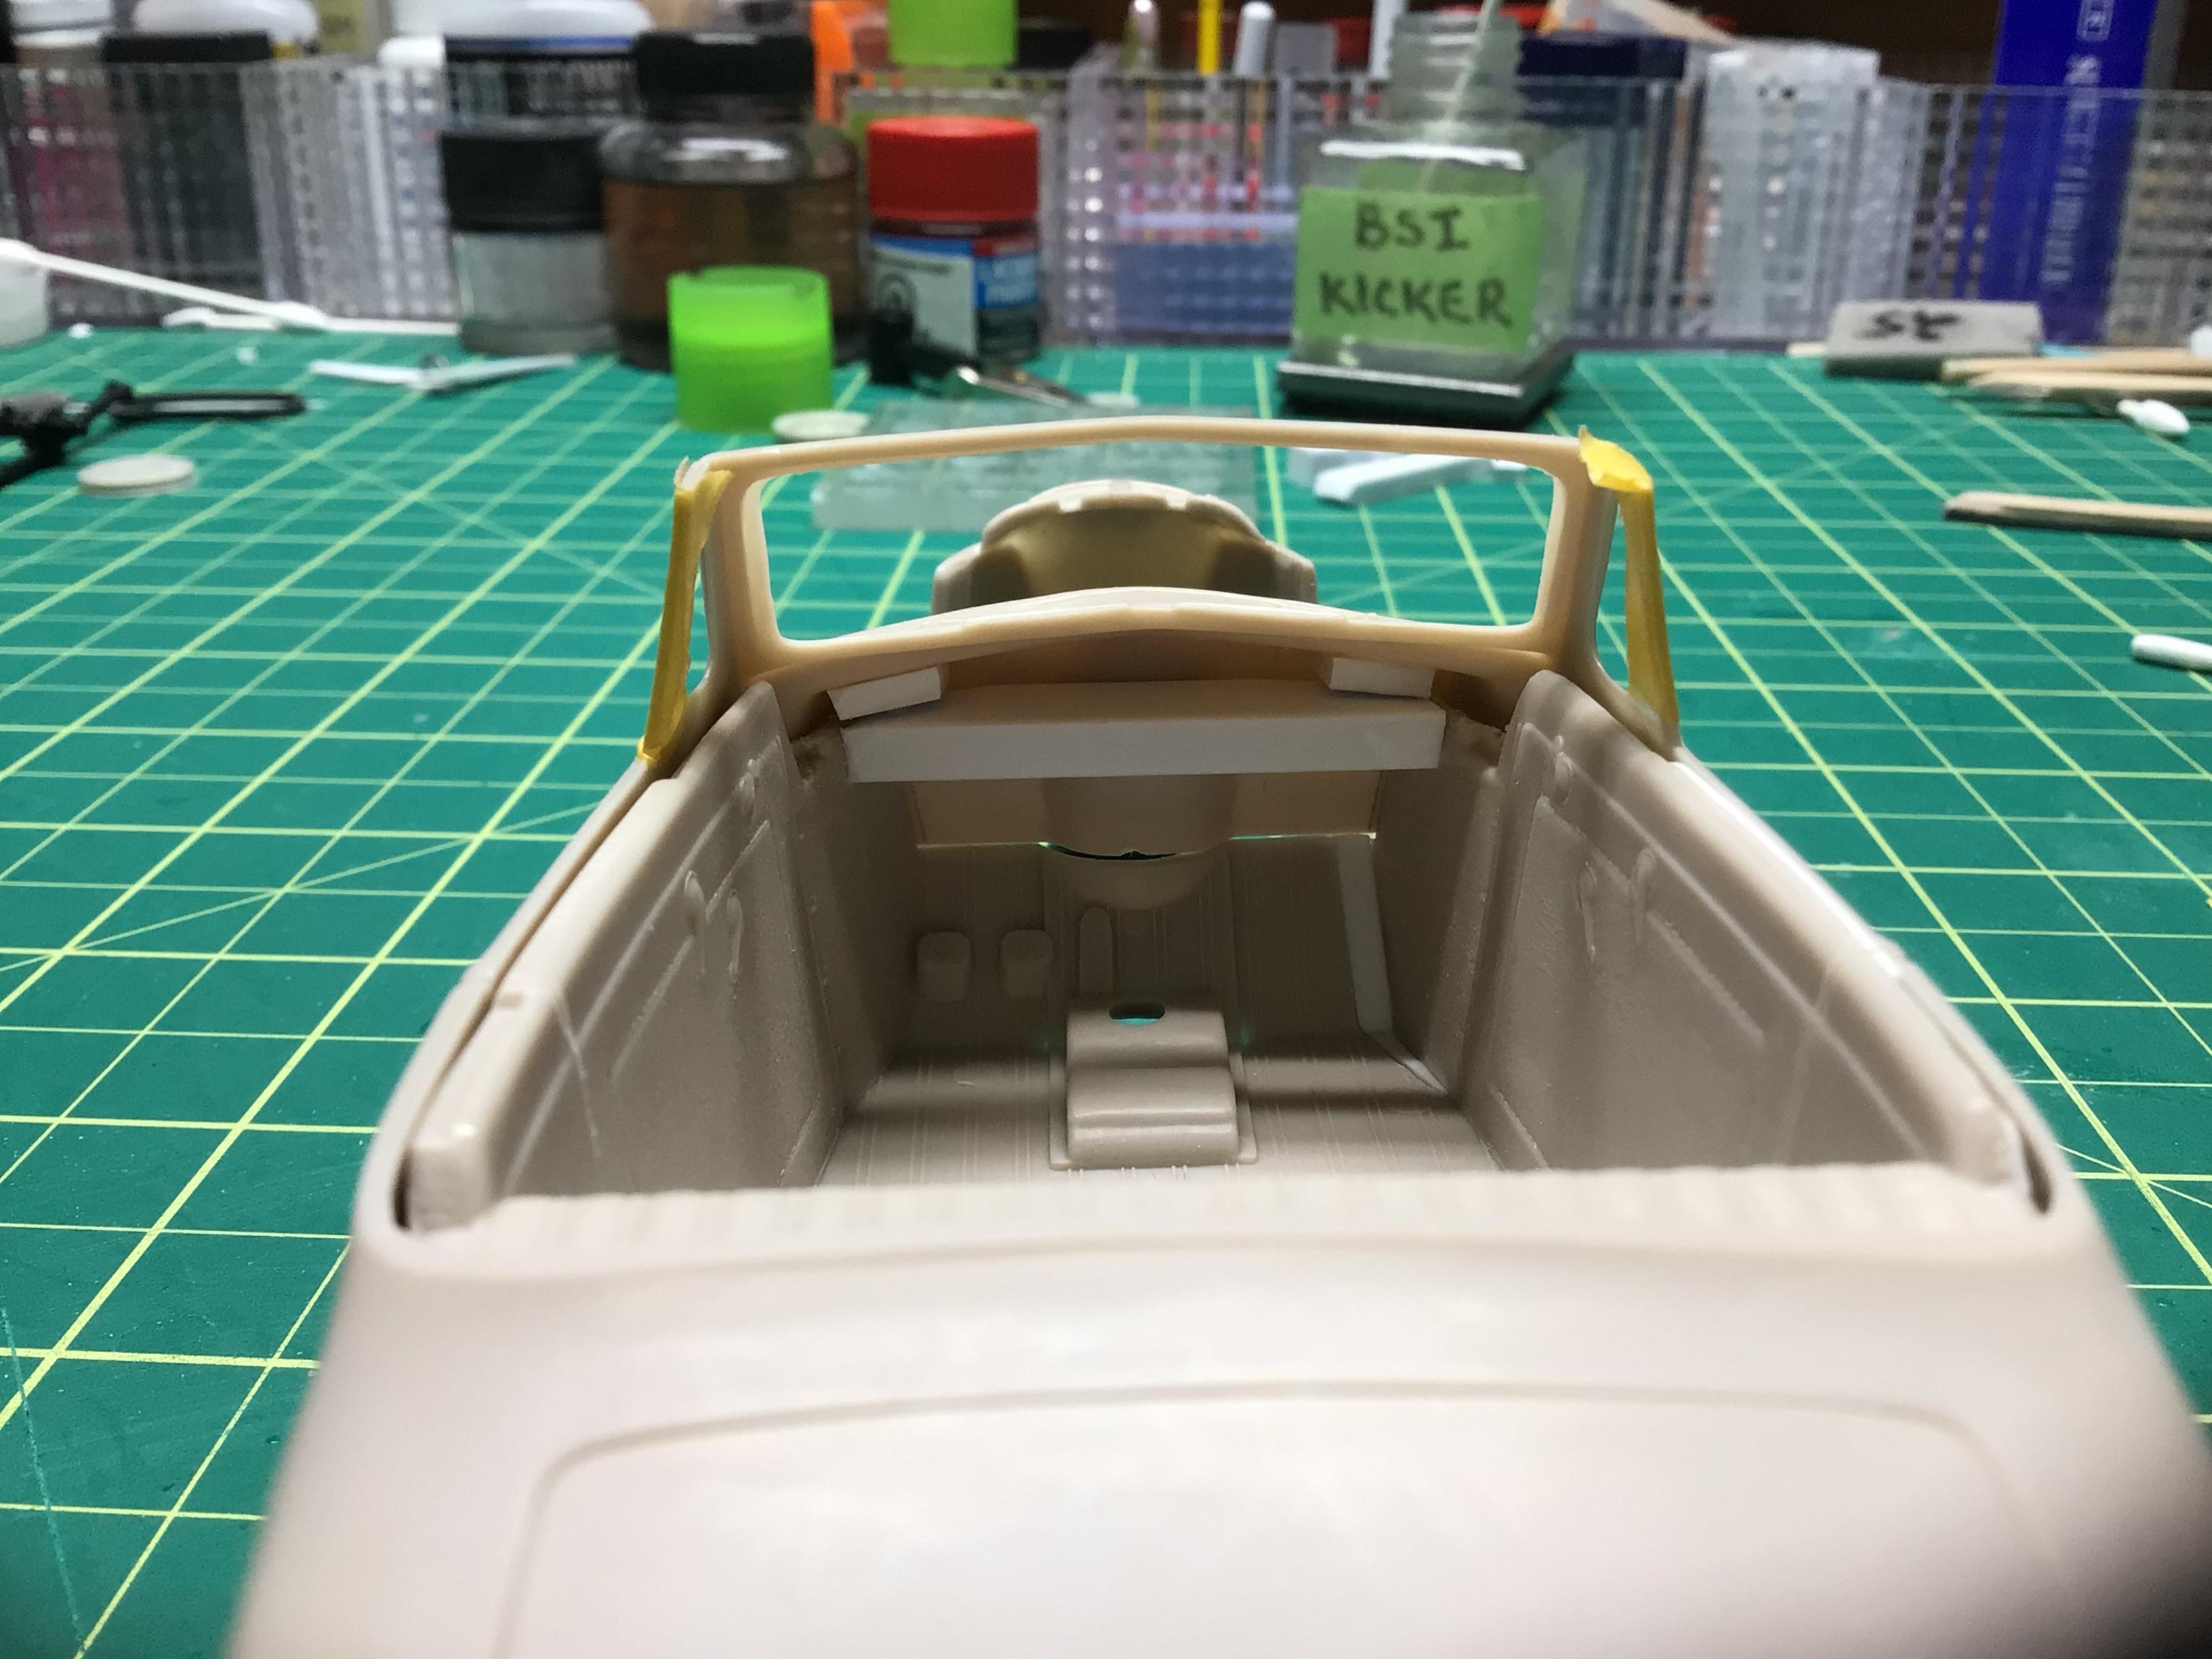
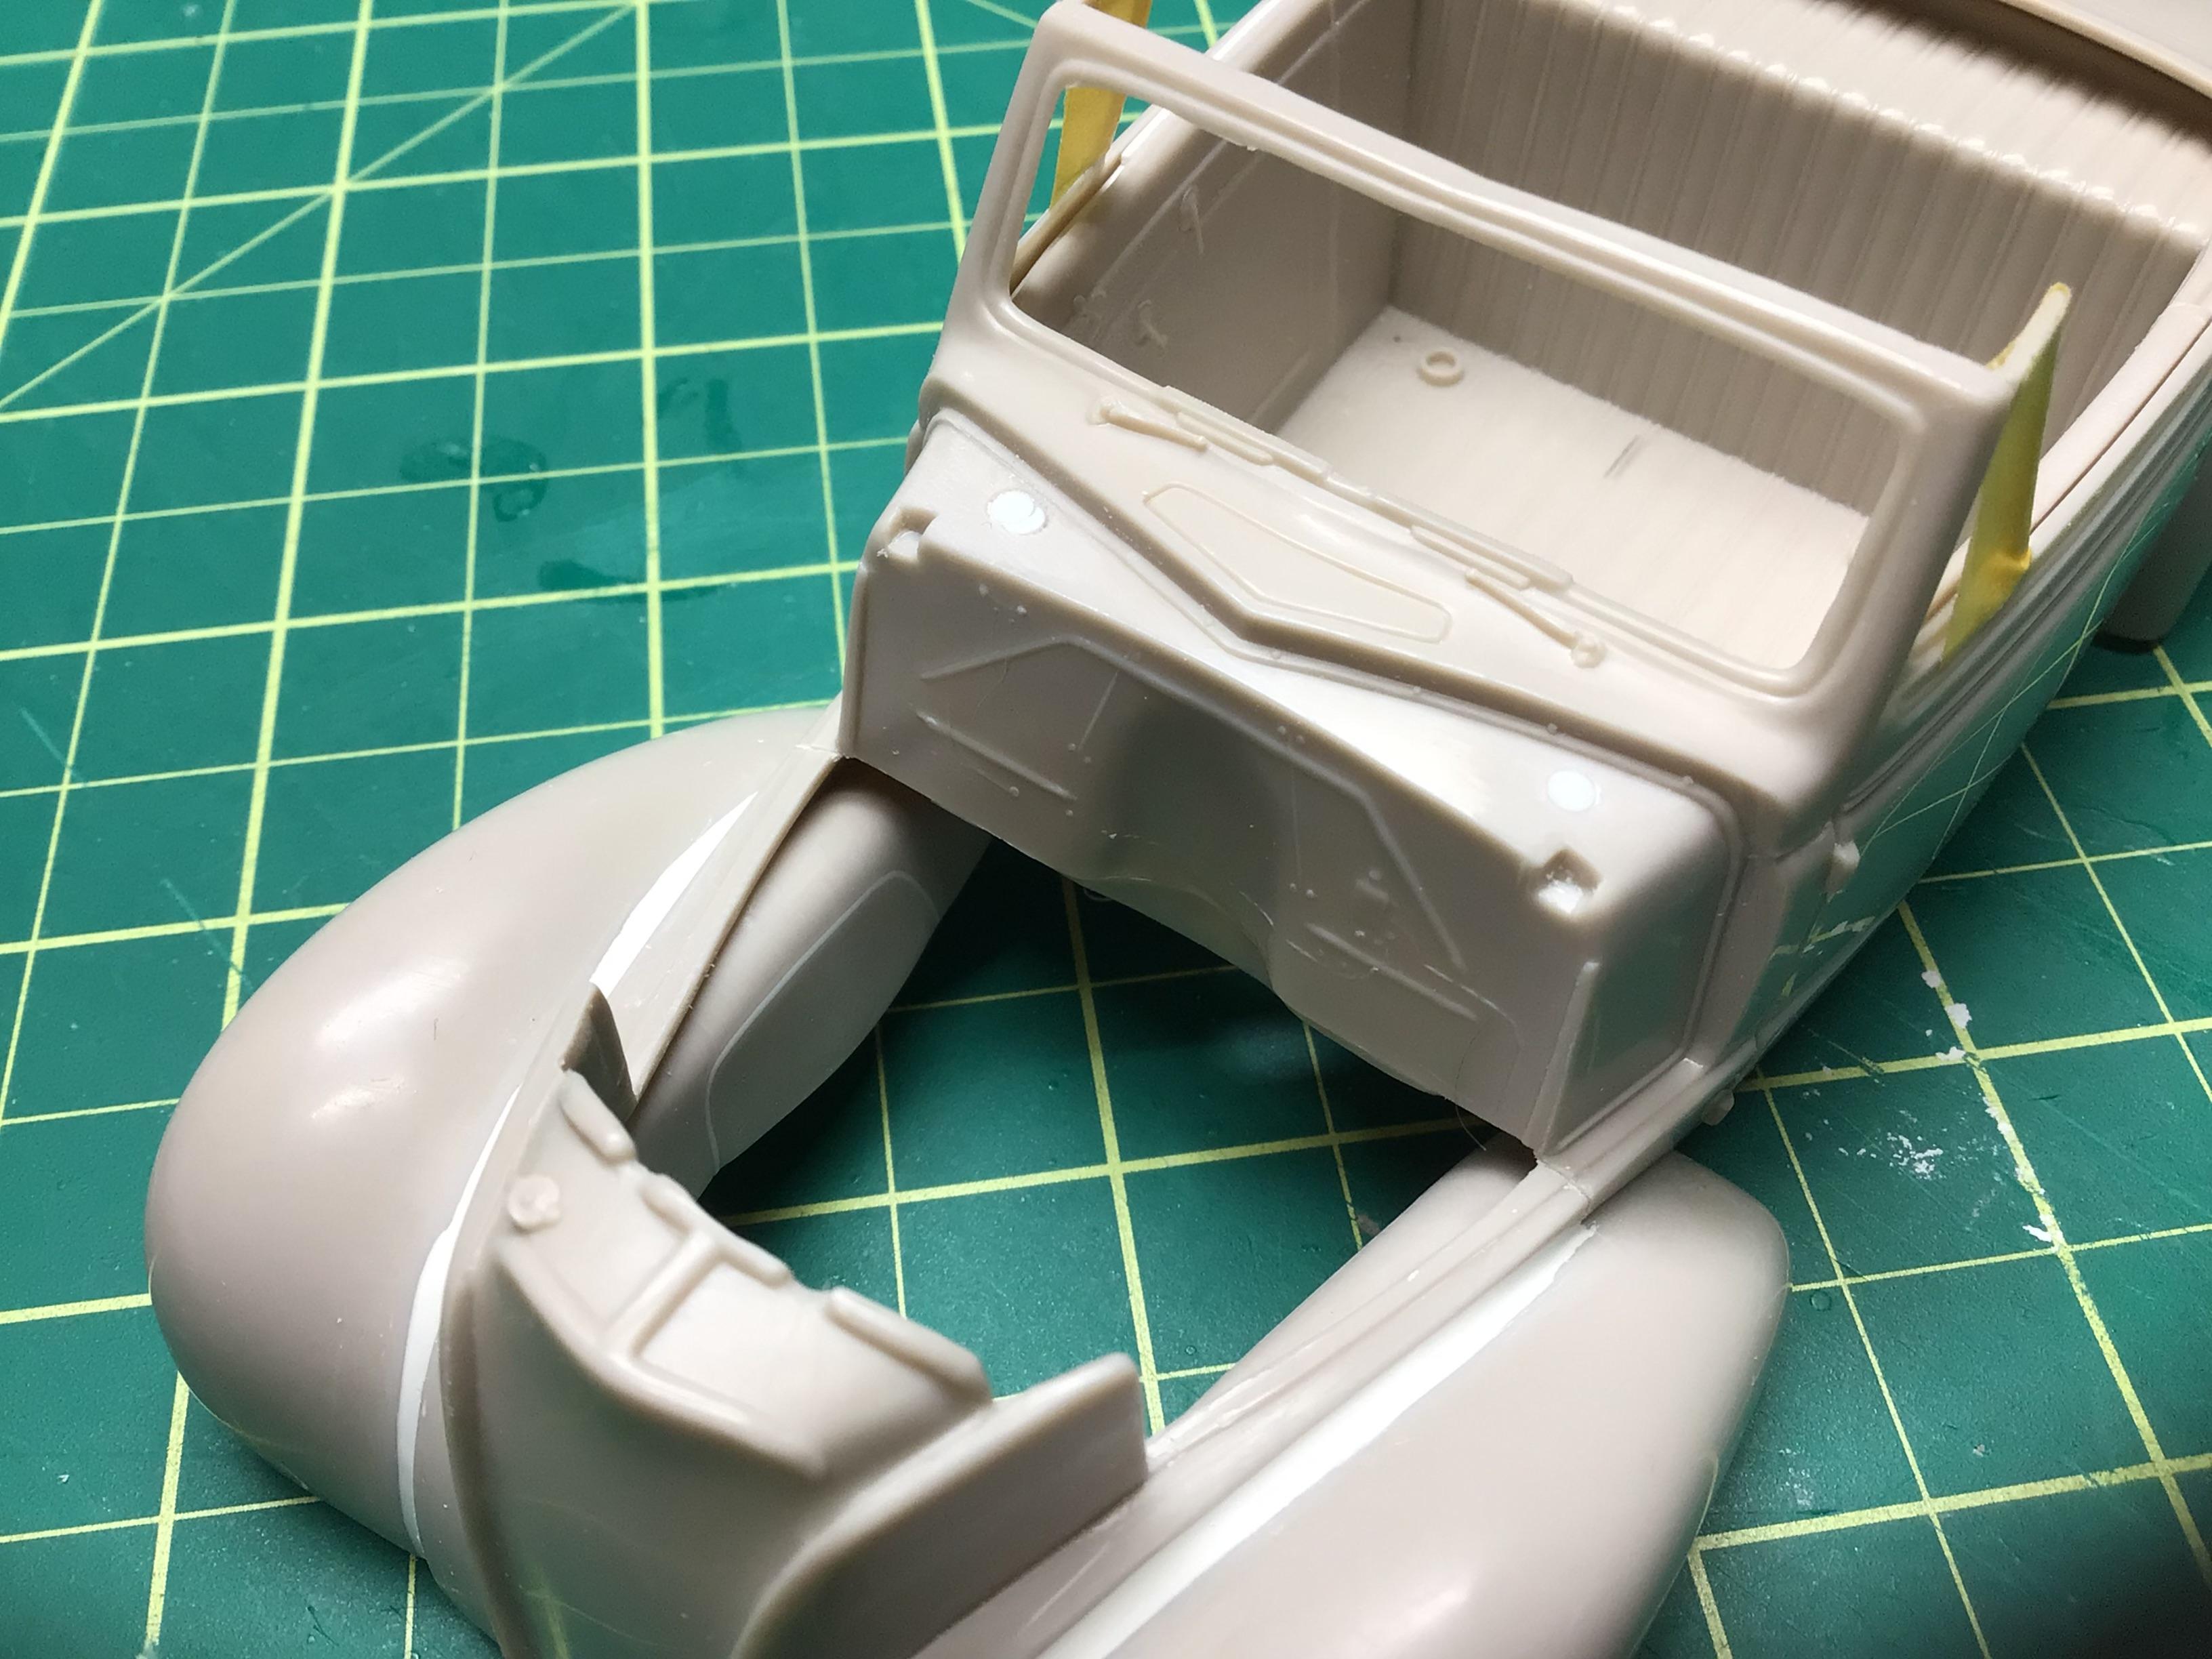
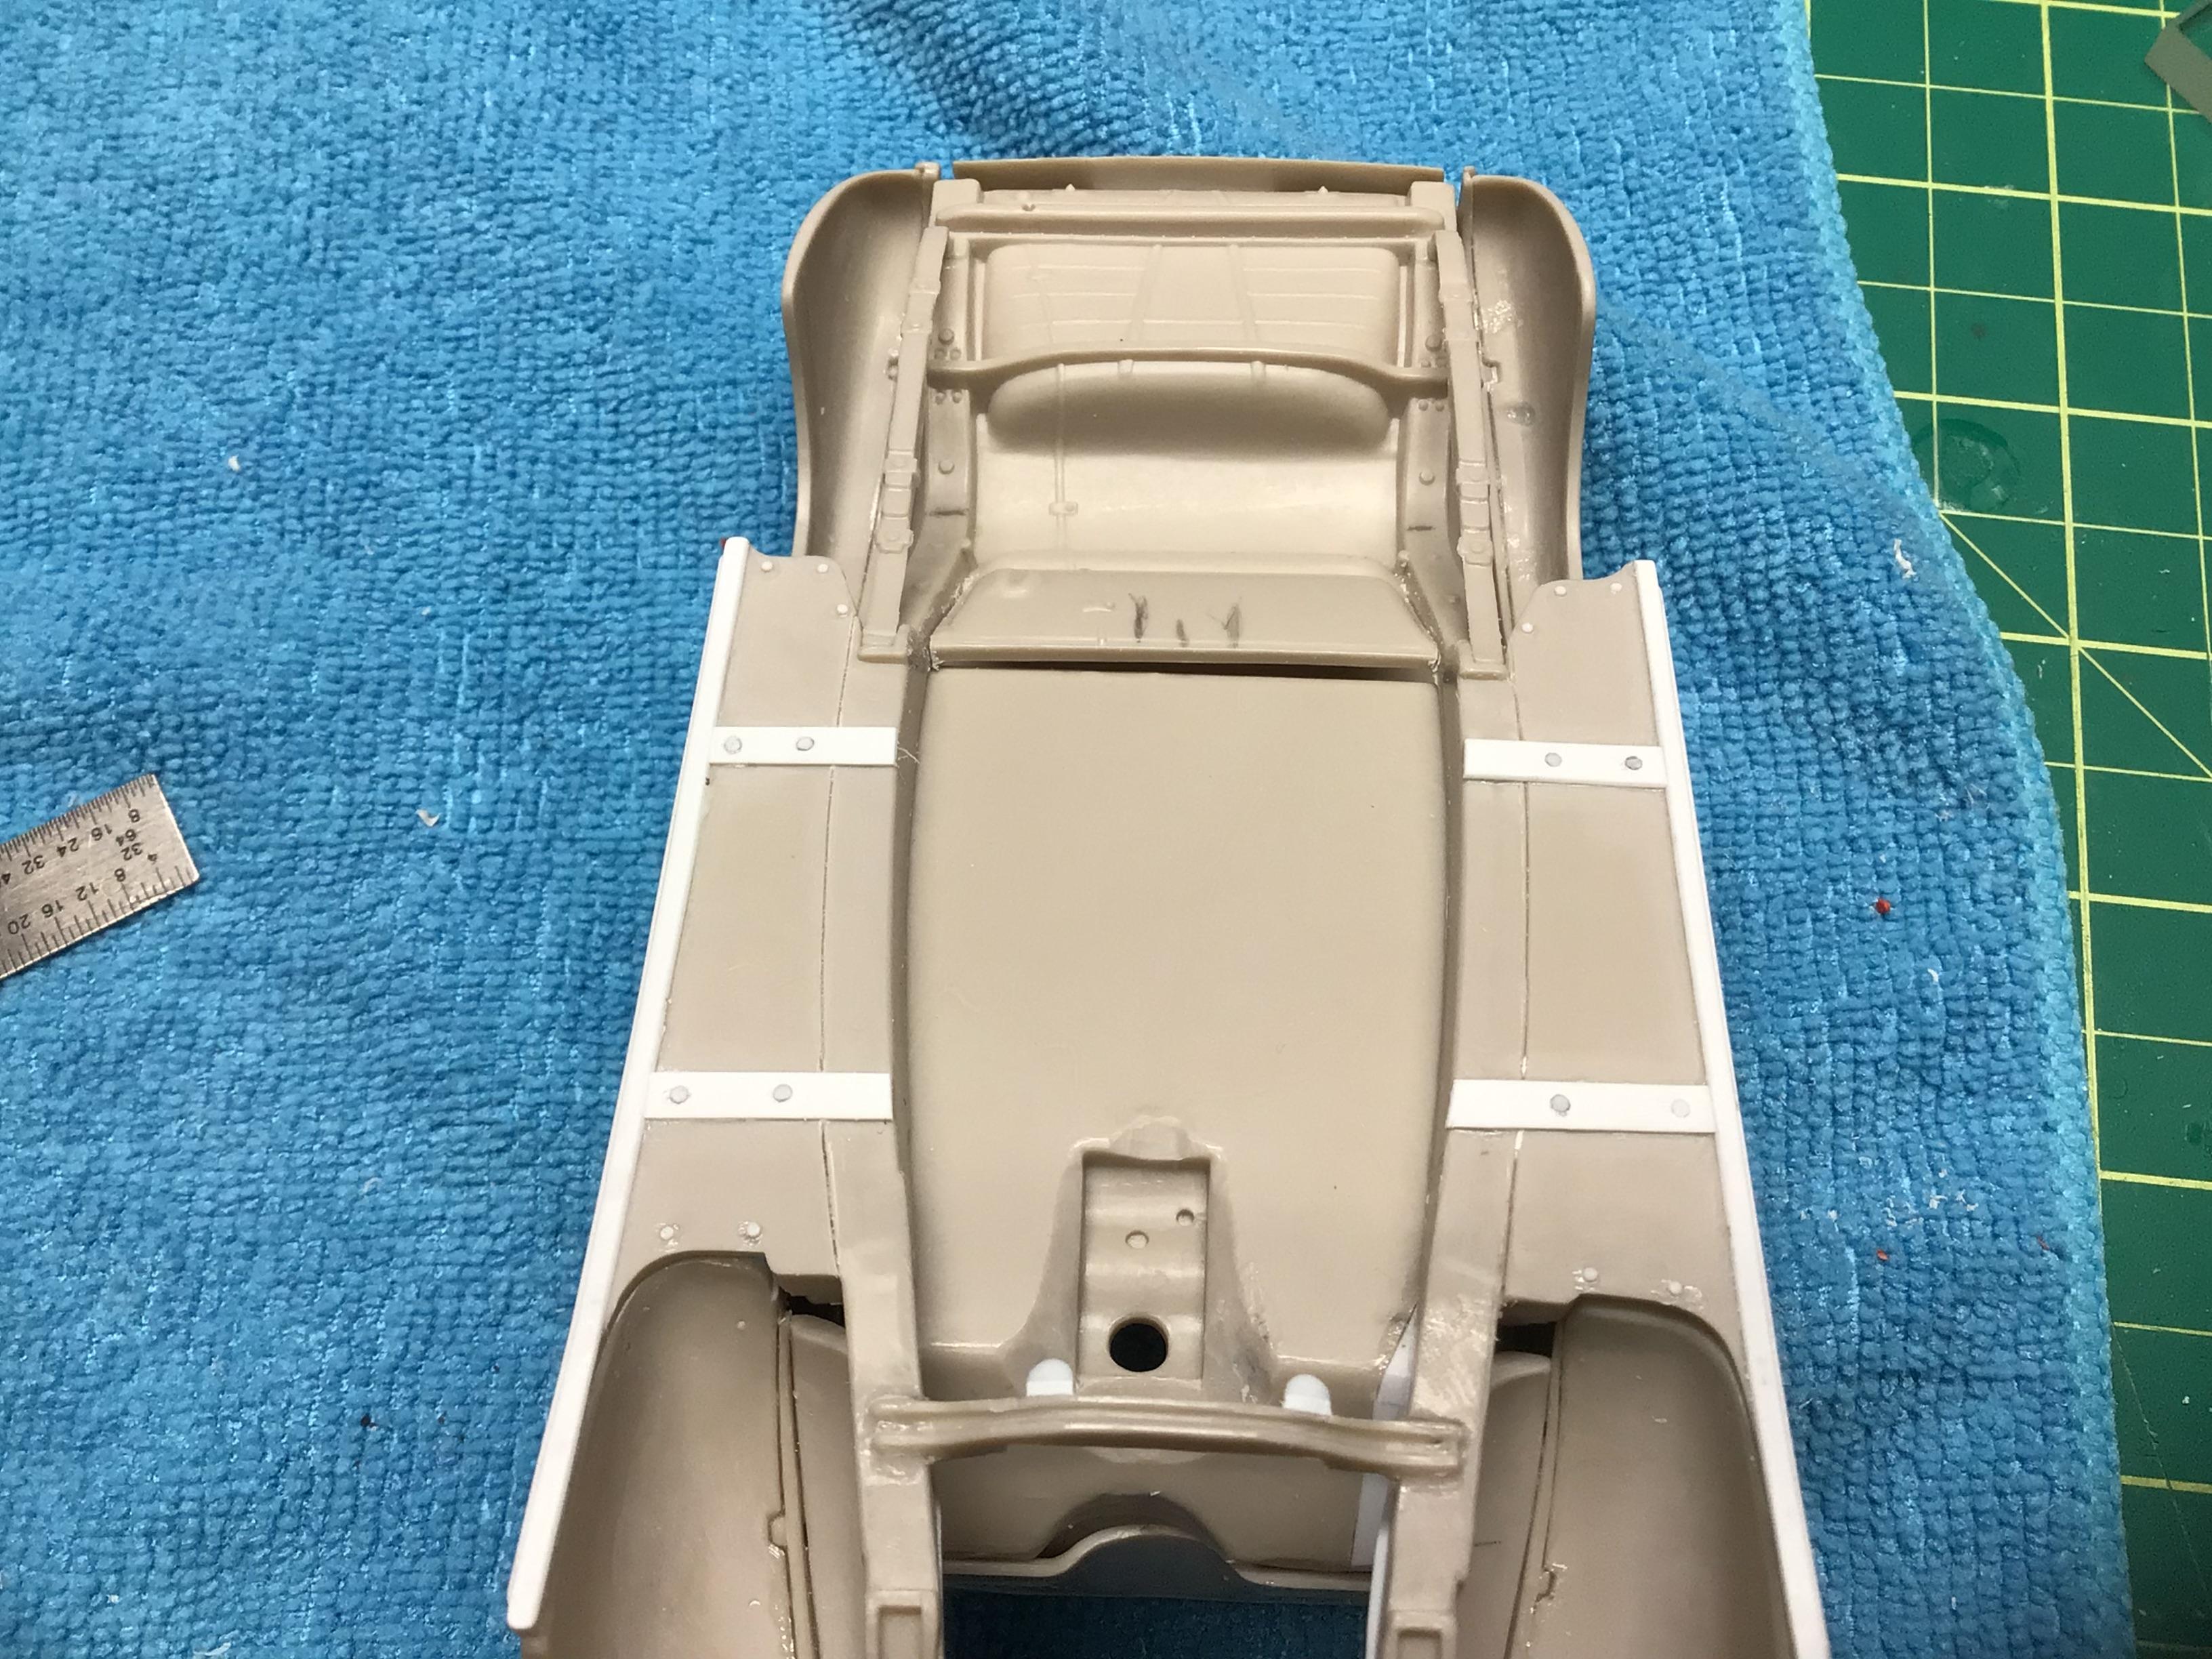
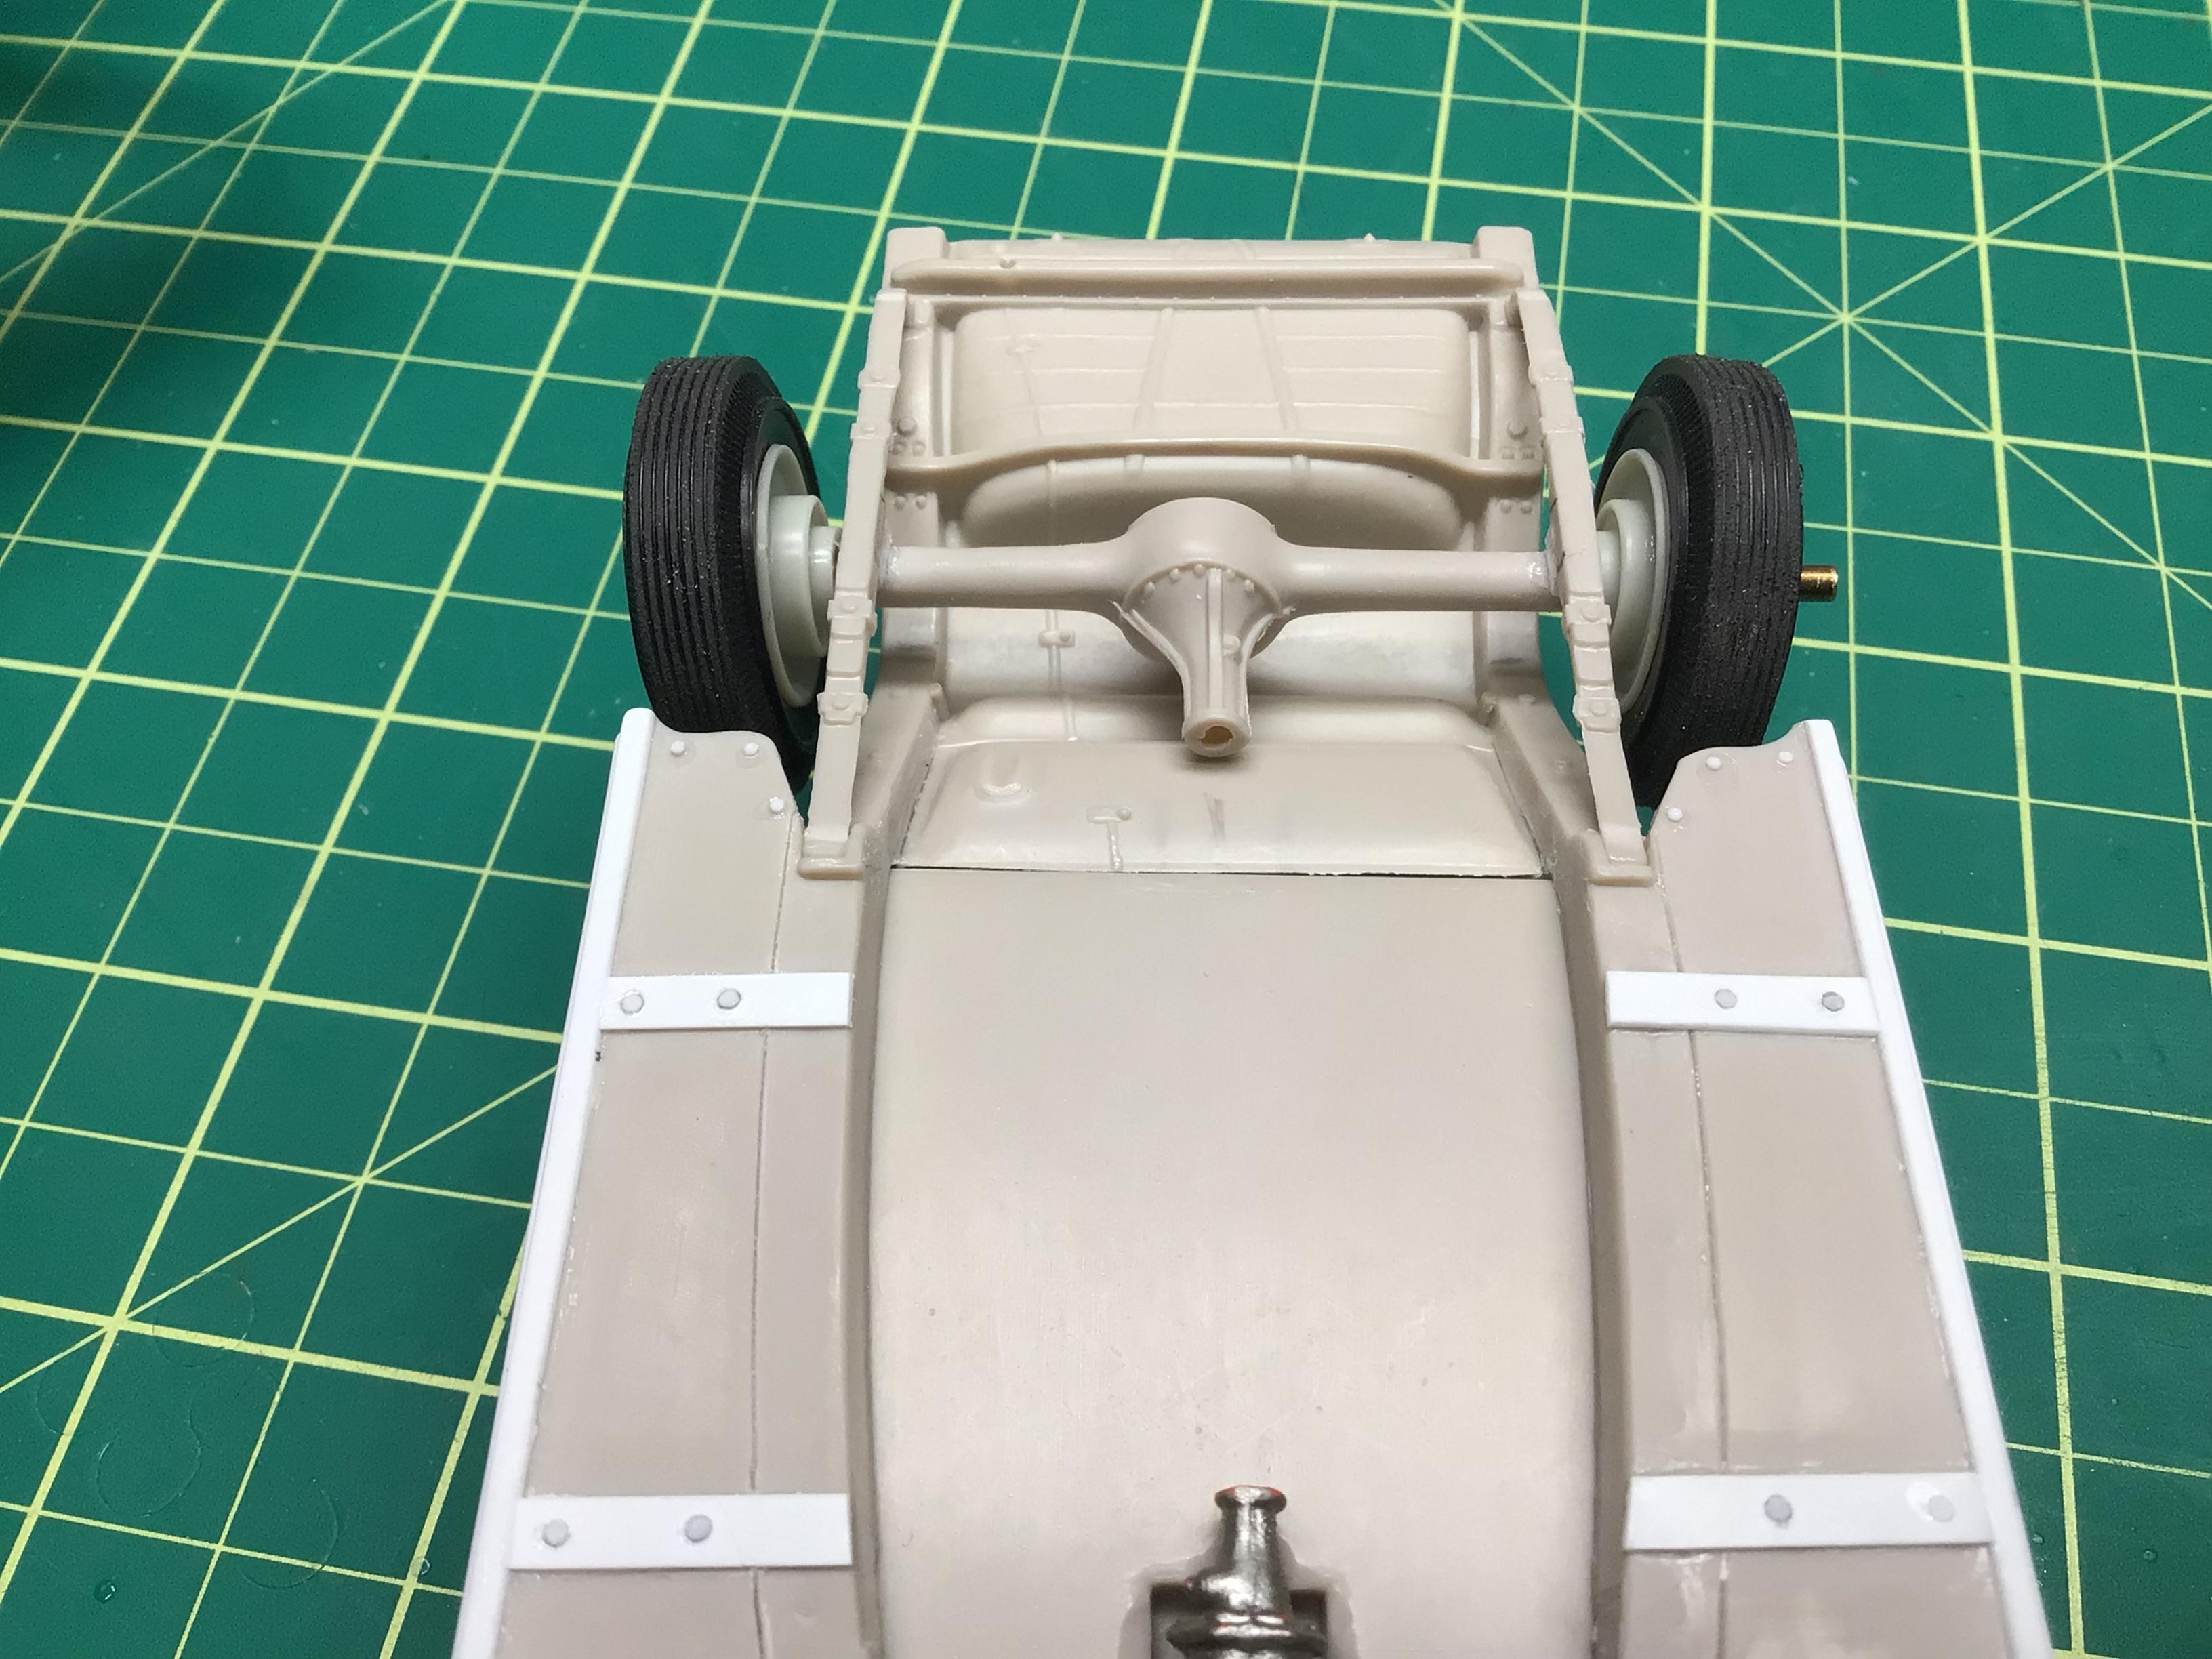
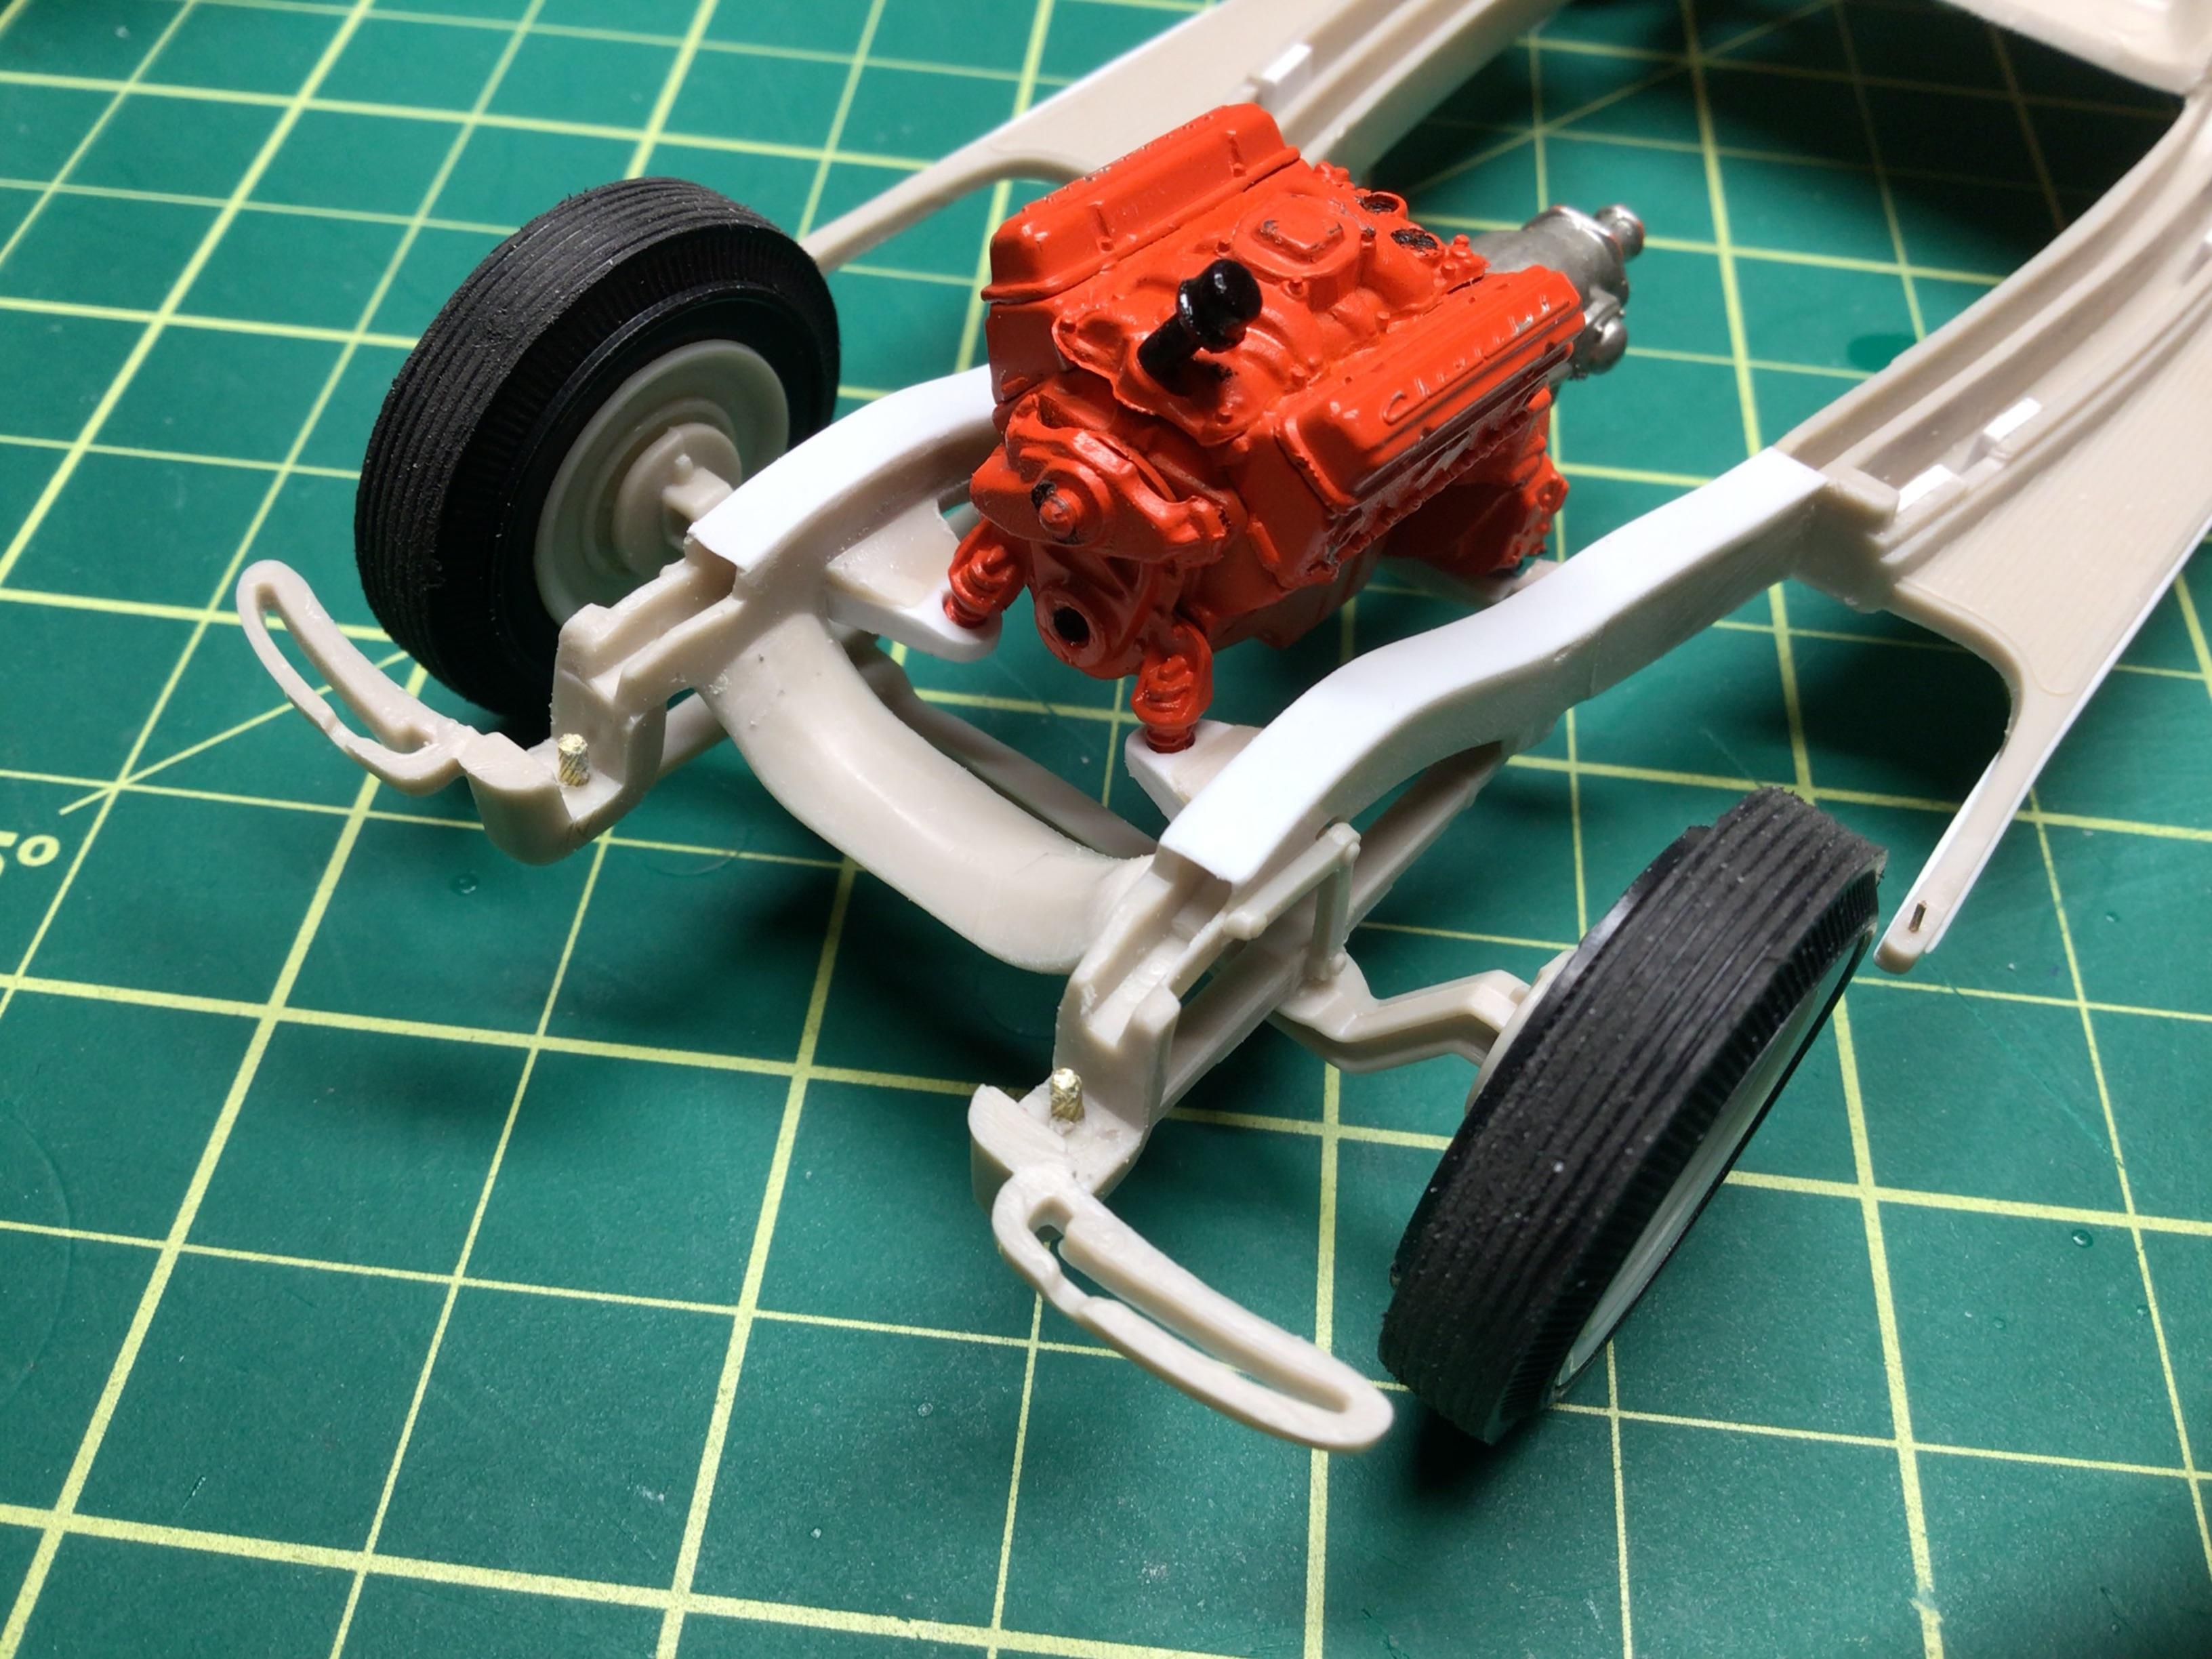
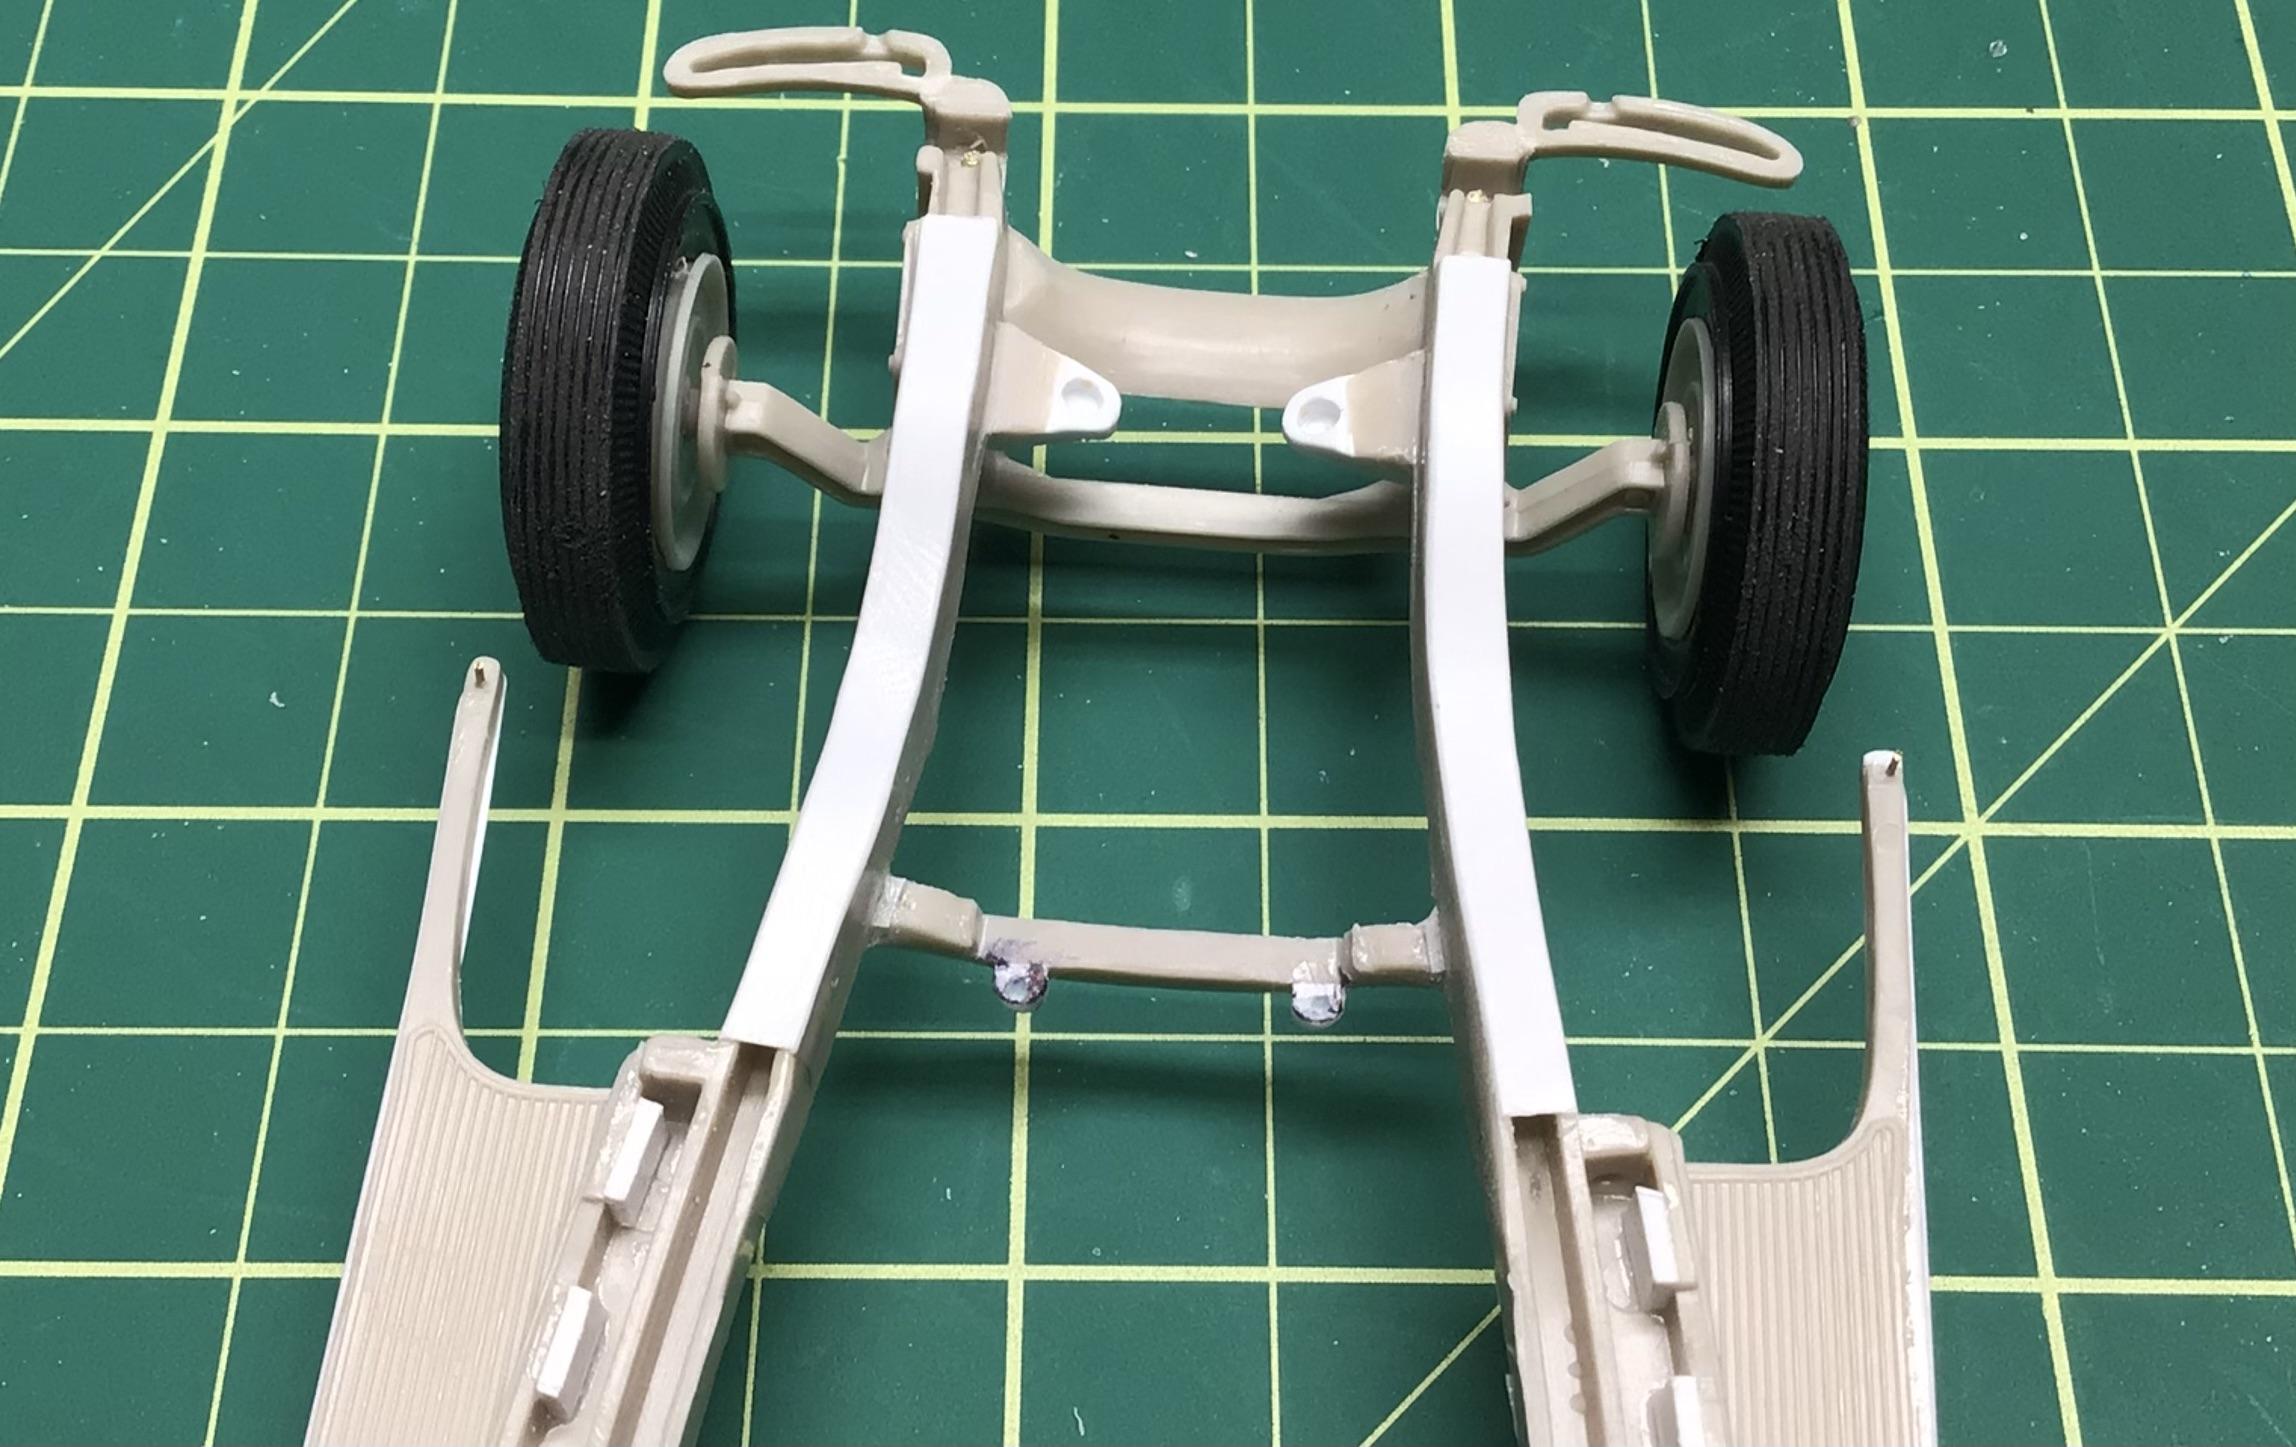
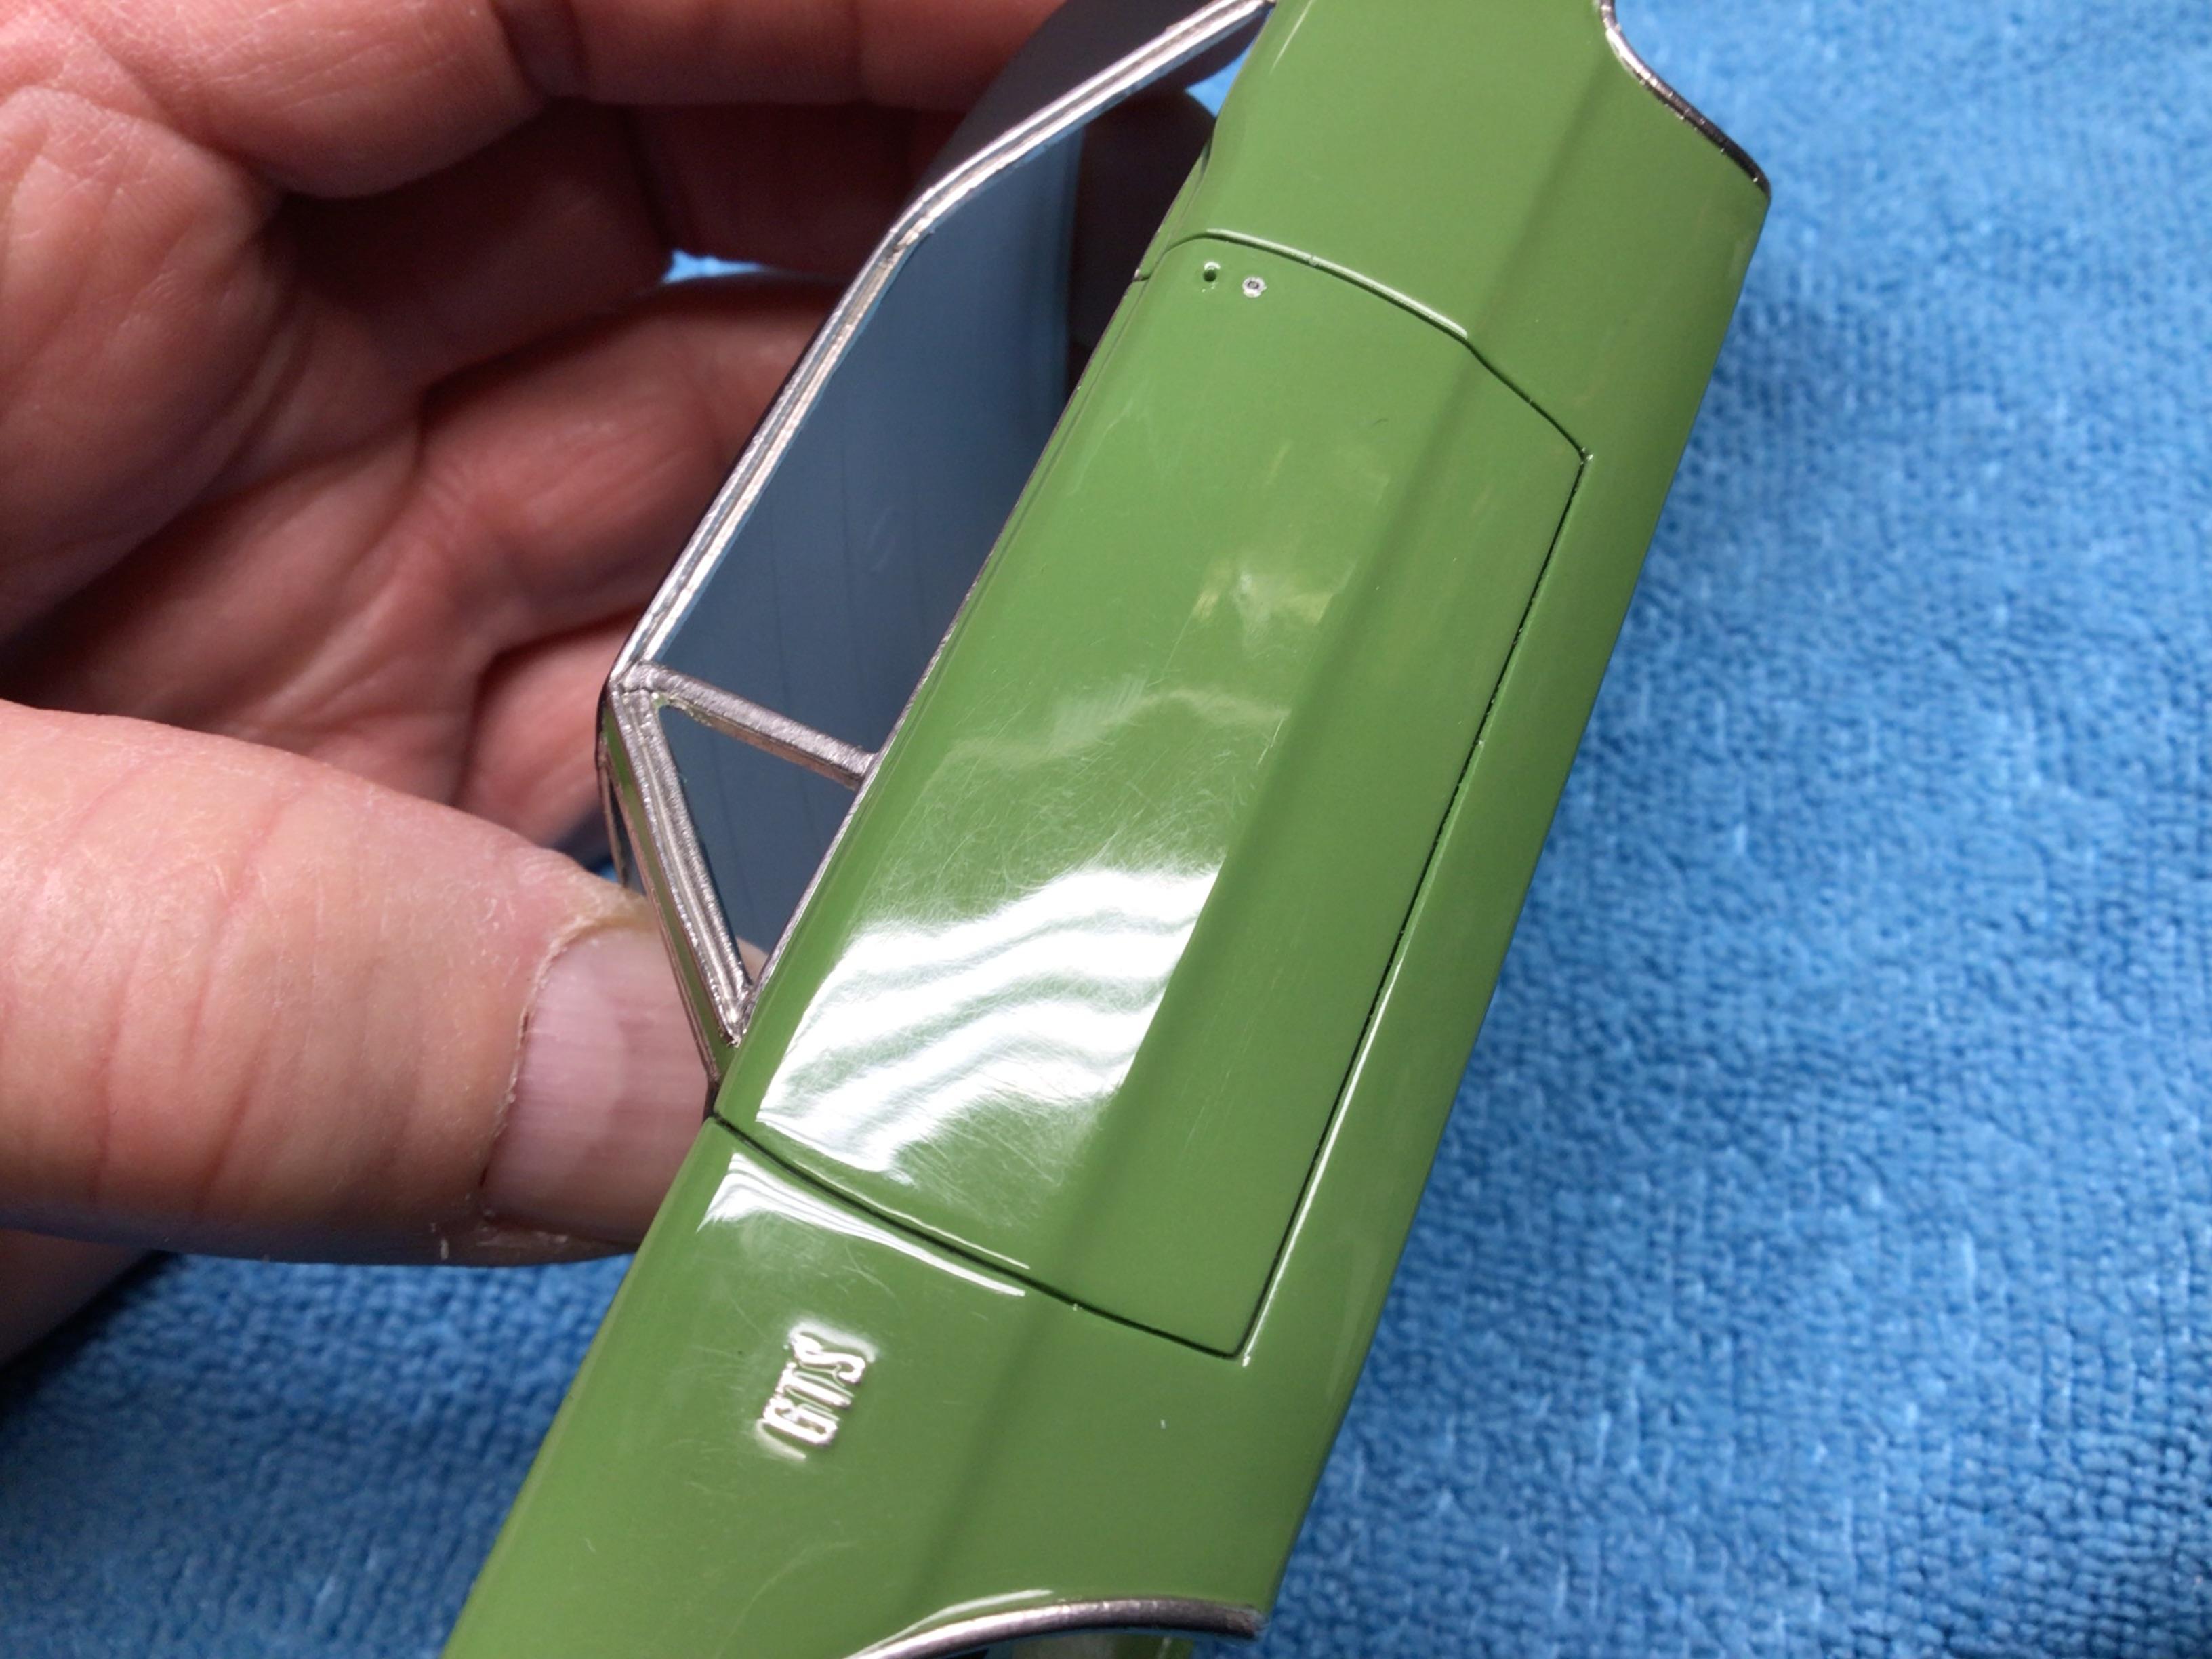
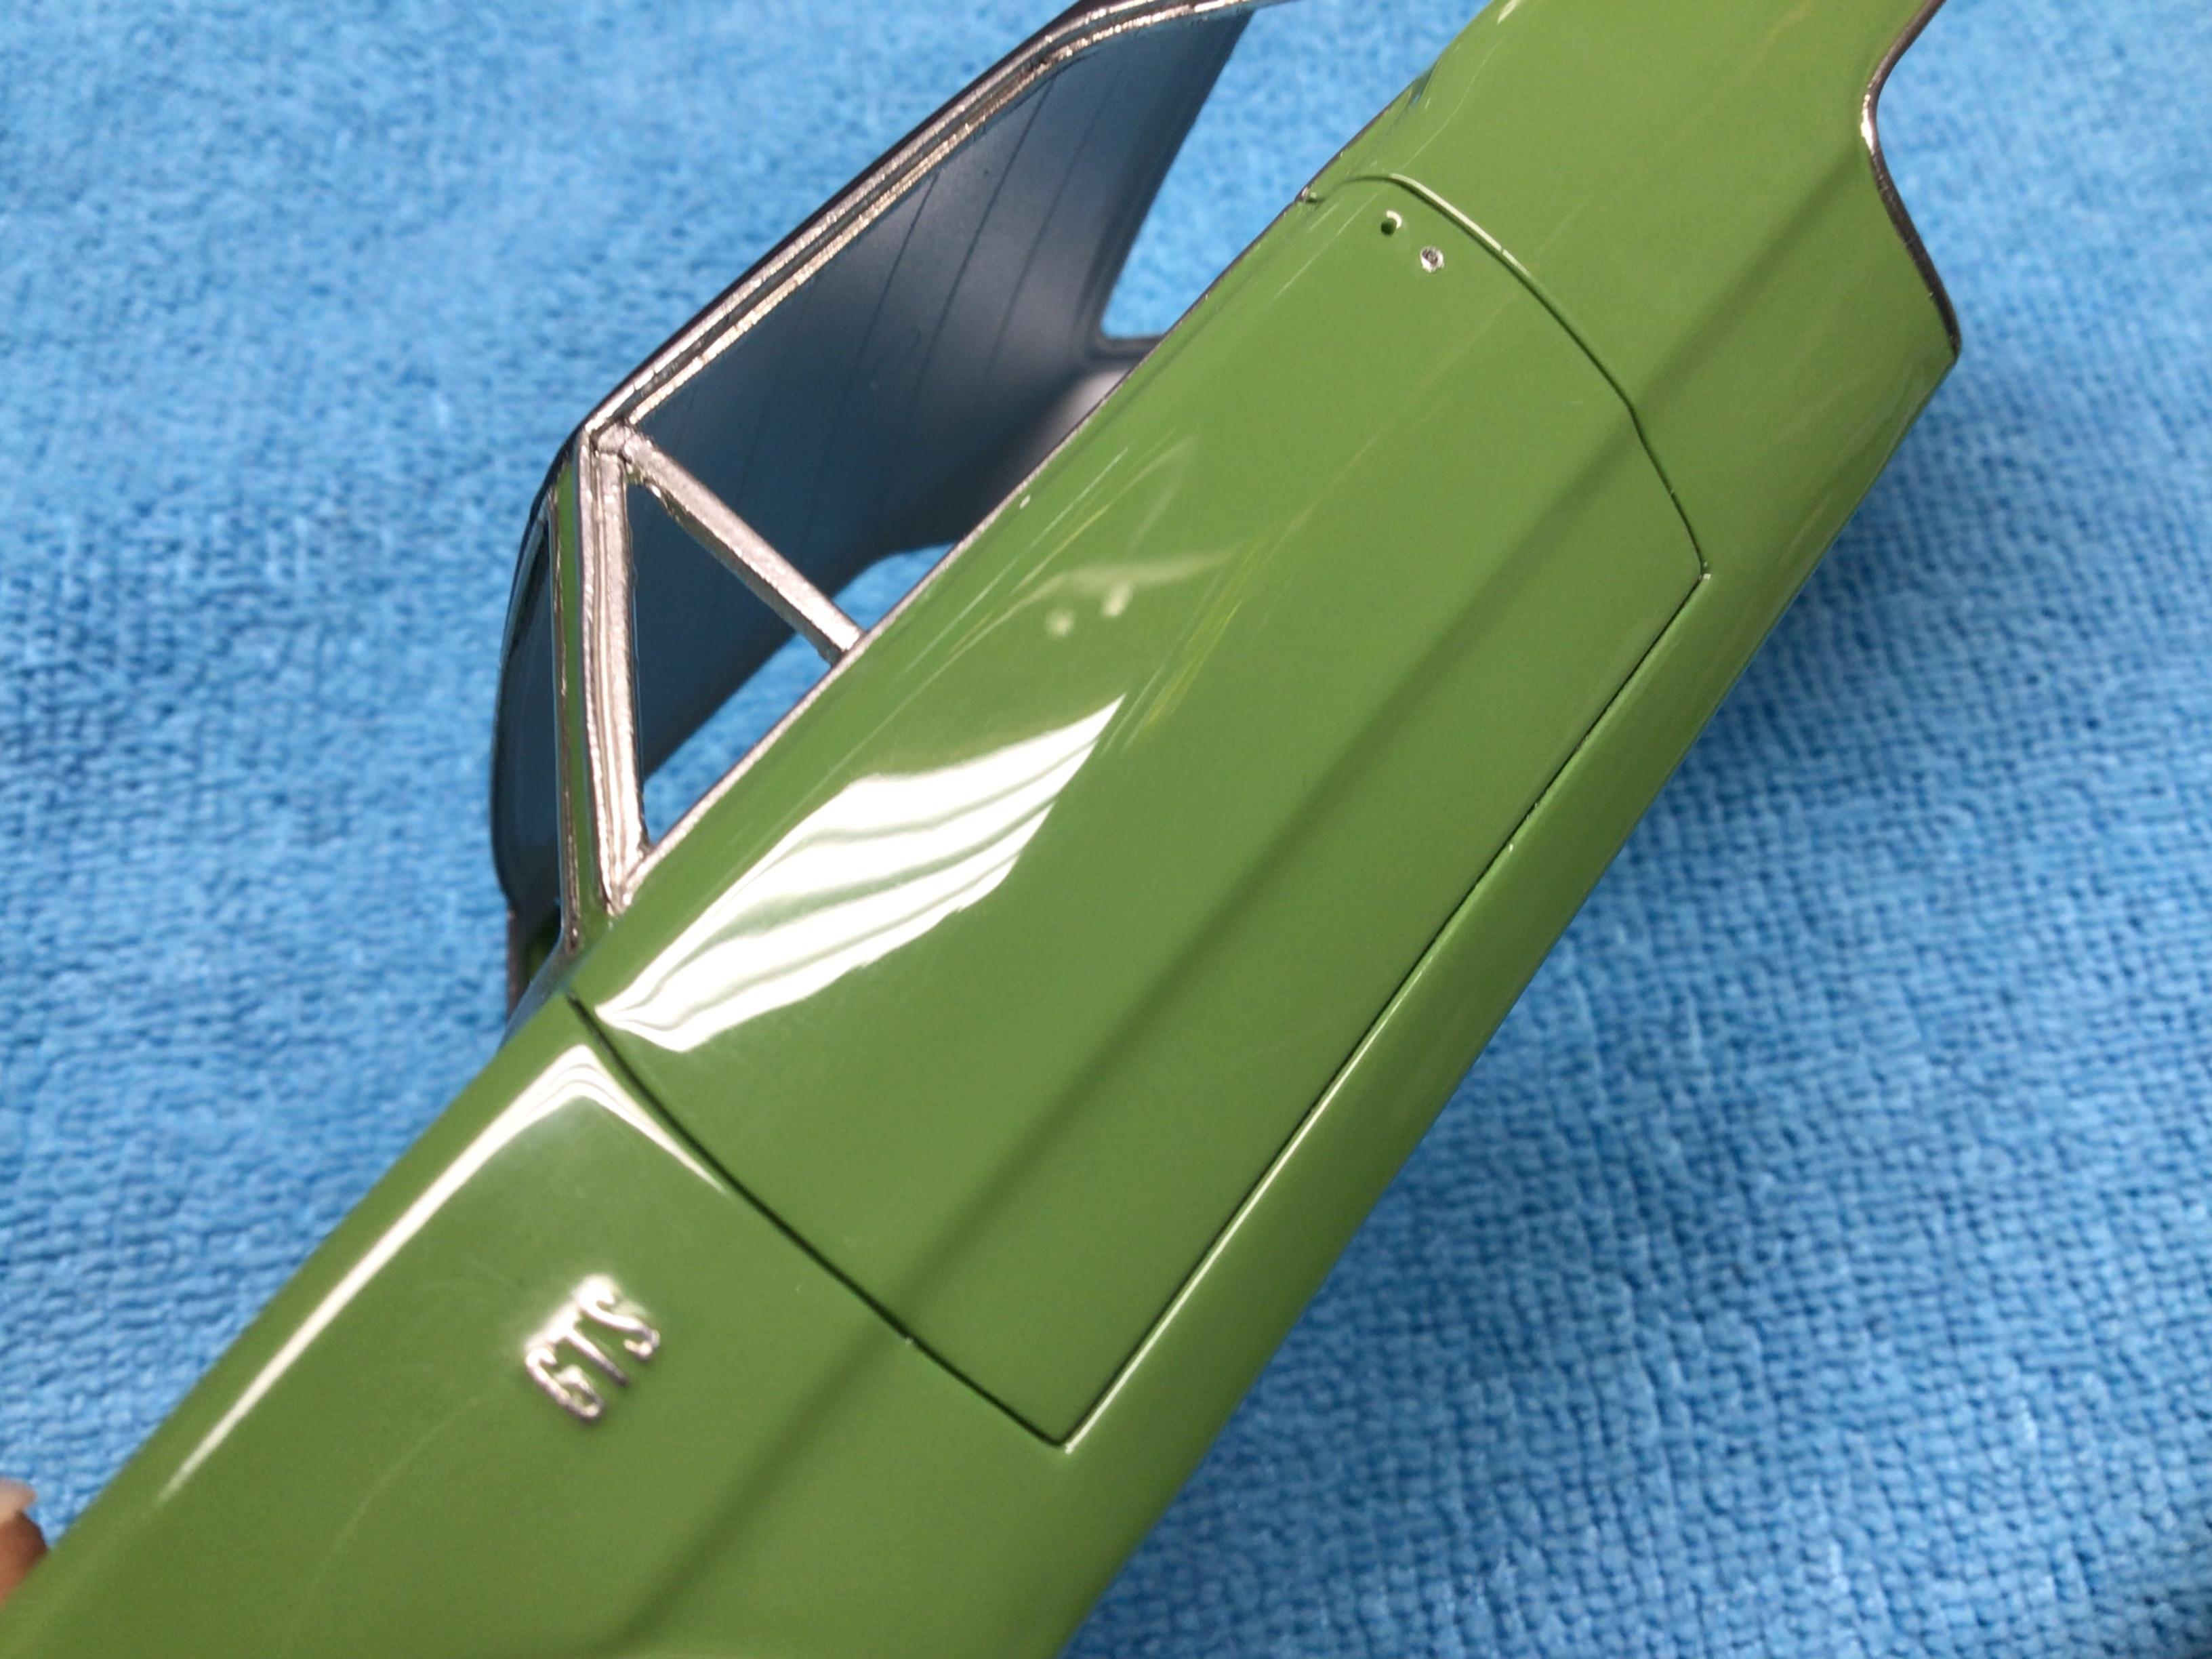
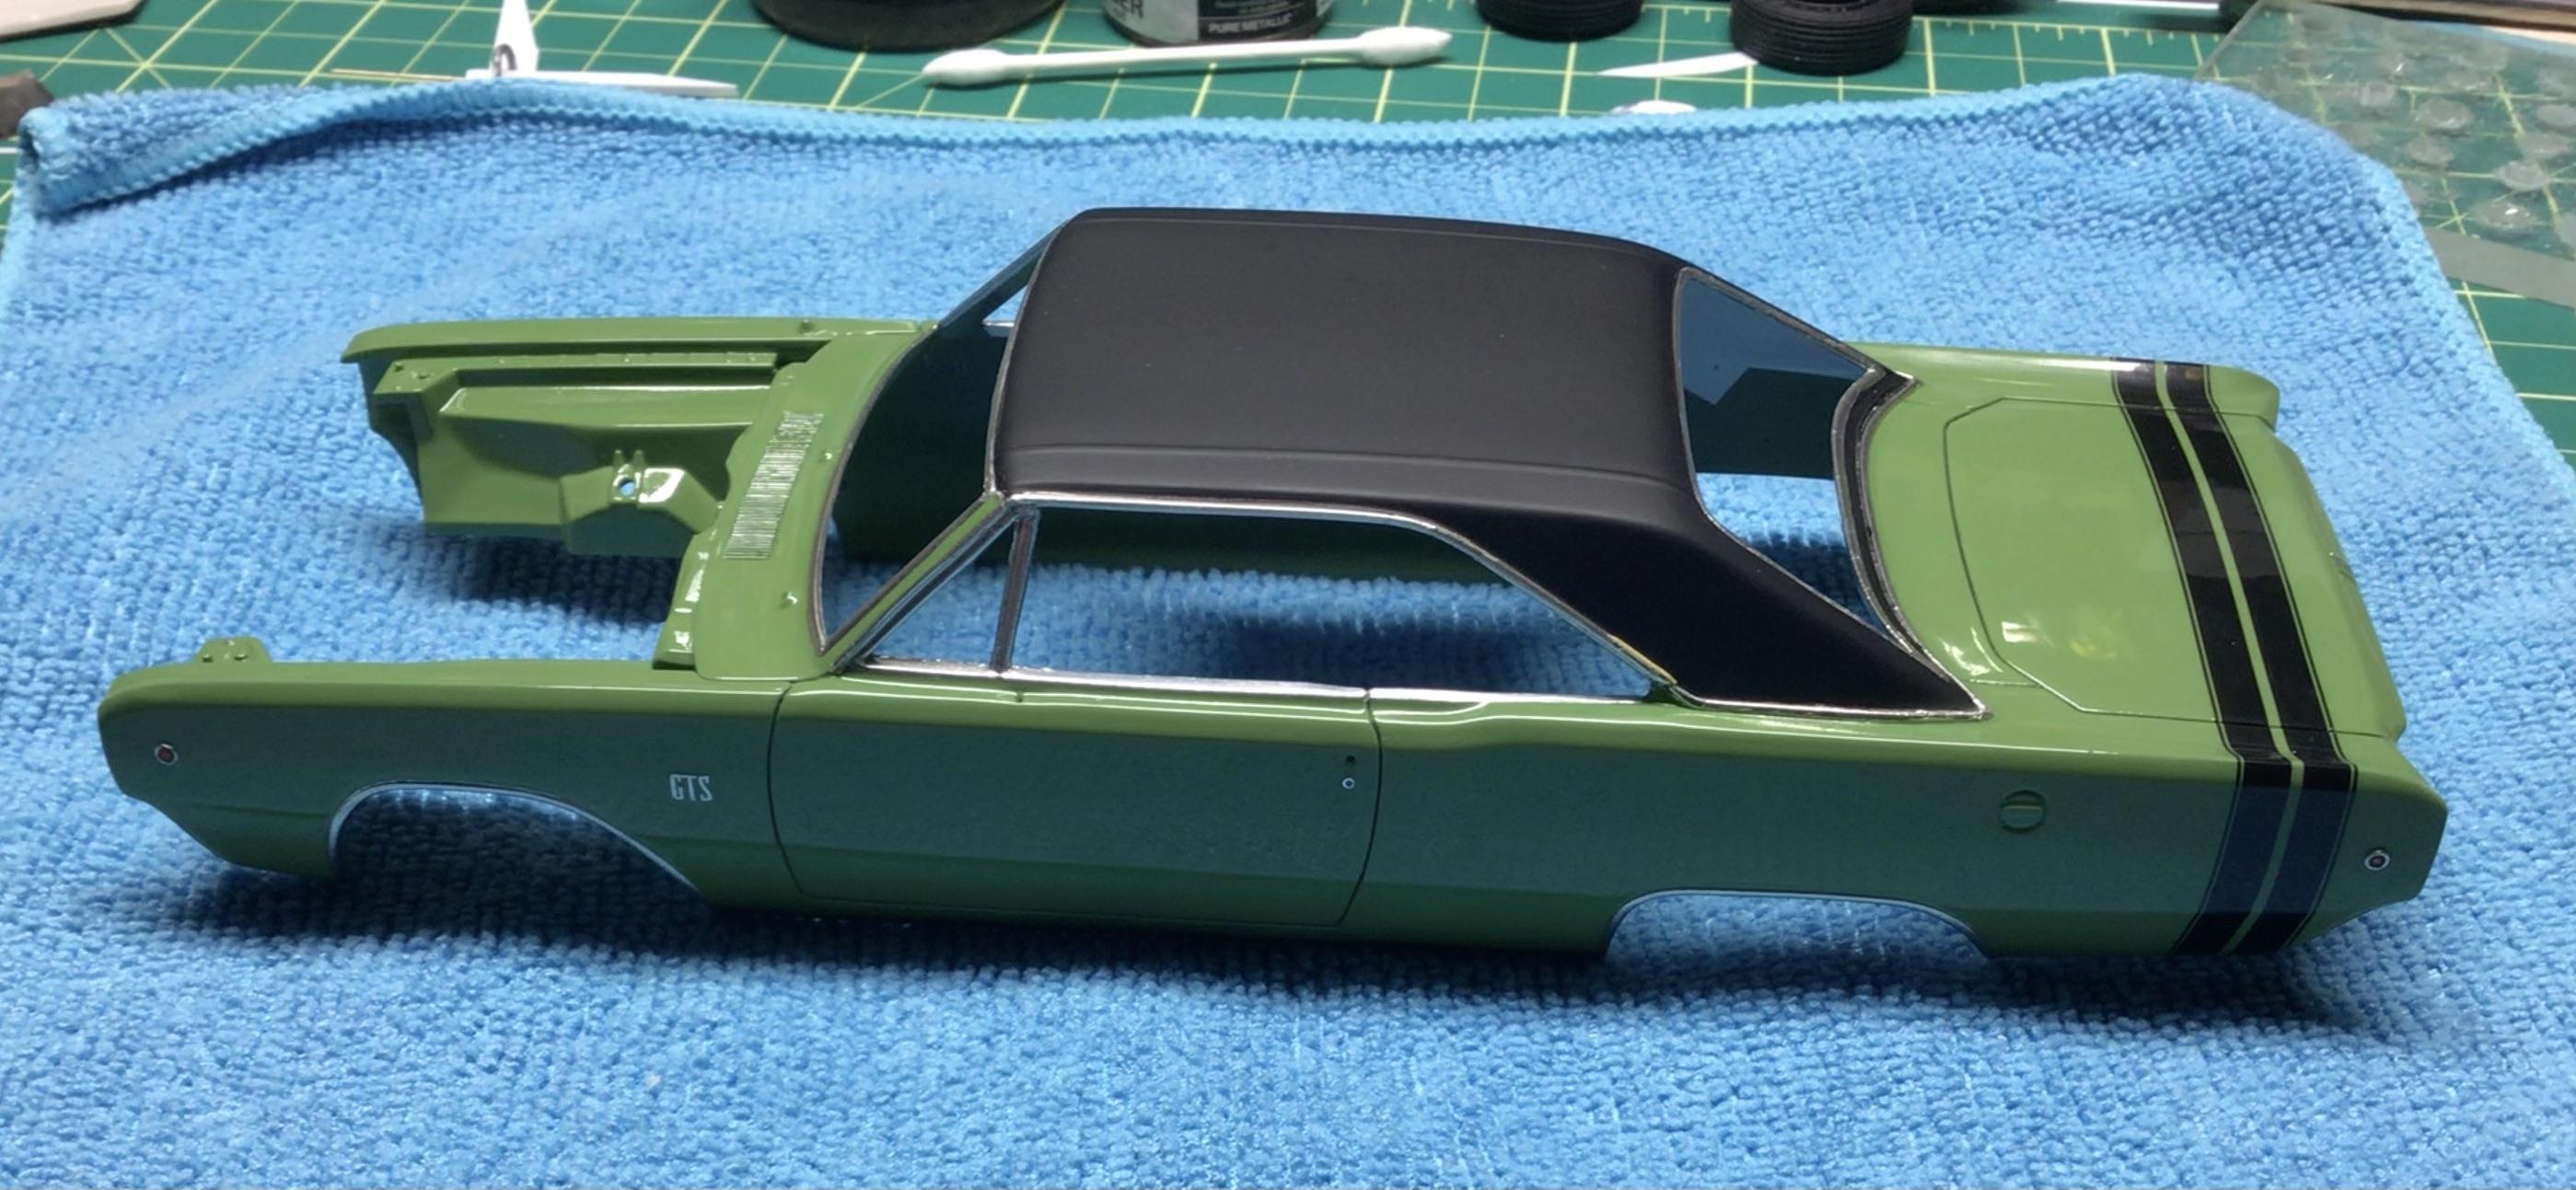
I’ve got the interior bucket positively located now. 🥵 I slit the floorpan and bent the center section up to close this gap, which also helps with driveshaft clearance. AMT already upgraded the rearend somewhat from the OE torque tube setup so I’ll keep it. I separated the diff from the leaf springs though and added some 1-3/4” lowering blocks. I still have to fabricate some shocks. The front suspension I will just use the kit parts as is. I capped the visible portion of the frame rails and have the engine mounts finalized.
-
i wasn’t aware of the change (i switched to ford trucks) so I googled it.🙄 gotta include those folks that either don’t know how or refuse to use capital letters.🤯
-
Pastimes were the good times.
-
I have no problem with the vehicles themselves…it’s the badging that I have an issue with. It may be a fantastic car (?) but it is NOT a Mustang or a Camaro. Are these designers so void of imagination that they can’t come up with a new name for their completely new creation?
-
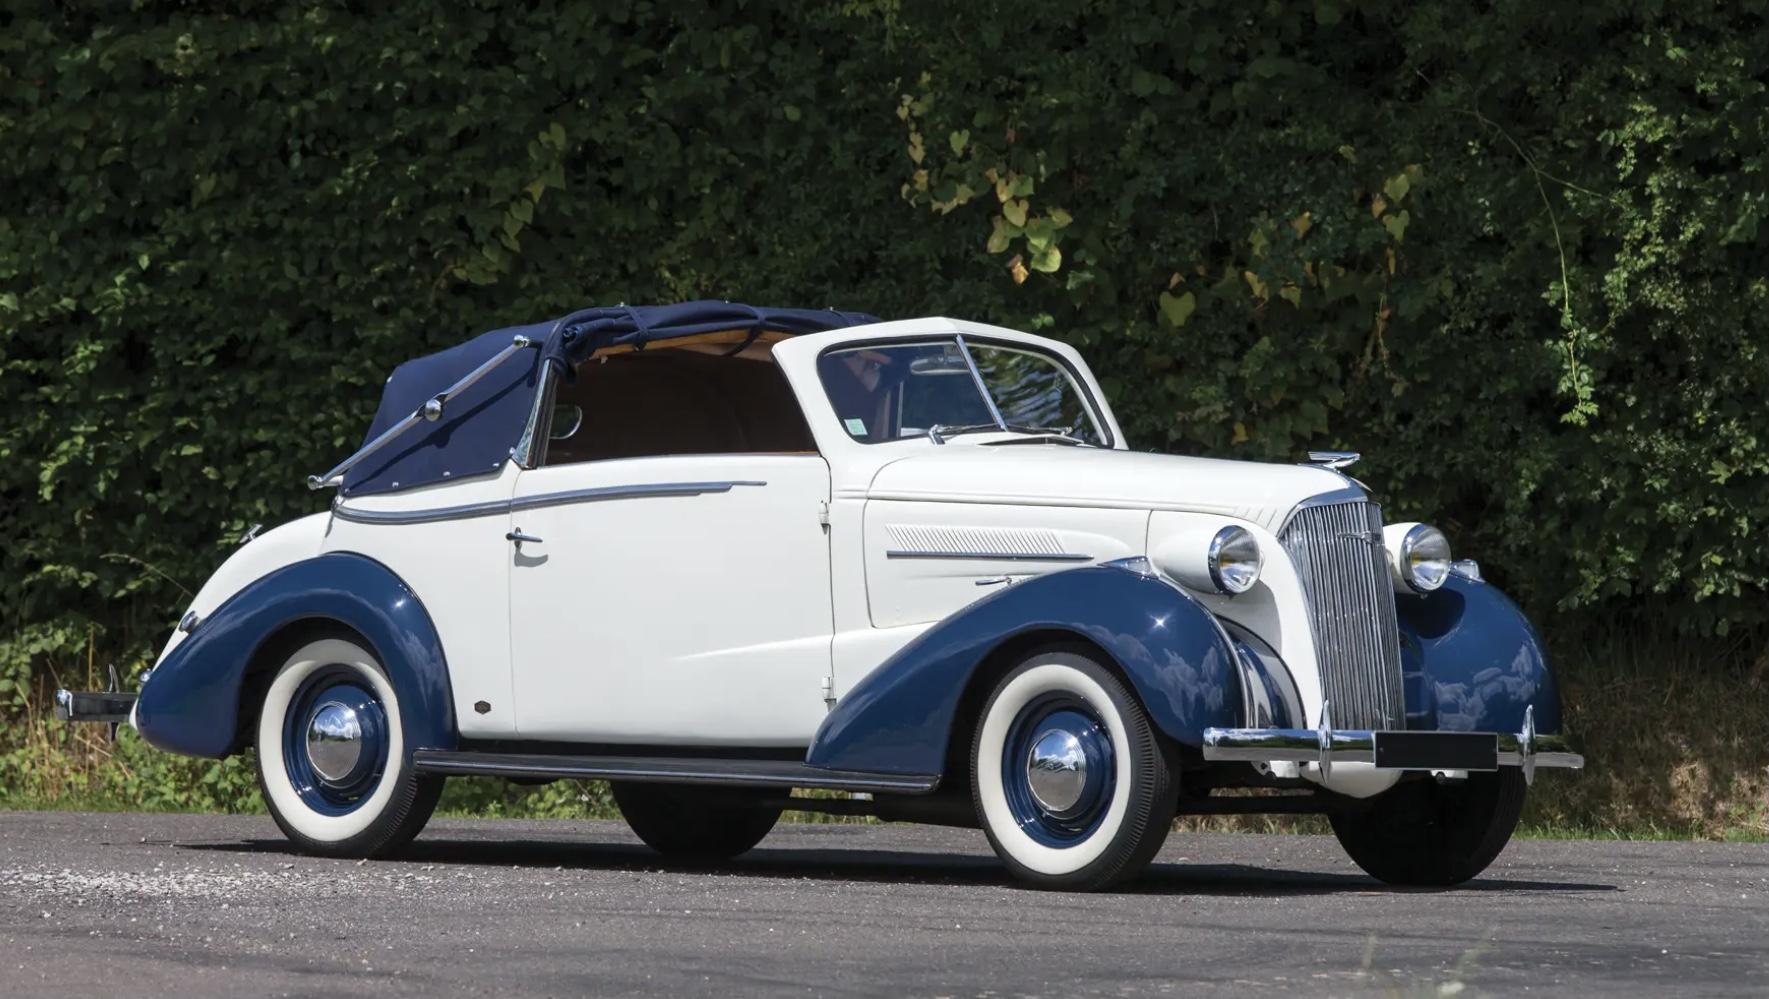
While researching pics for, my ‘37 Chevy Cabriolet build, I ran across this beauty.😬 Disclaimer: I have no intention of trying to replicate it, I don’t care for the roof, but I do like the color scheme. https://rmsothebys.com/auctions/pa18/lots/r0045-1937-chevrolet-master-cabriolet-by-duval/
-
My favourite generation of Chevelle! Outstanding work so far Sir!👍😎
-
Looks better without the flames.😎
-
I know how you feel about needing a break. I tend to get obsessed with stuff and after a while it becomes counterproductive. Then I switch to another of a few I have on the go…or maybe start another.🥴
-
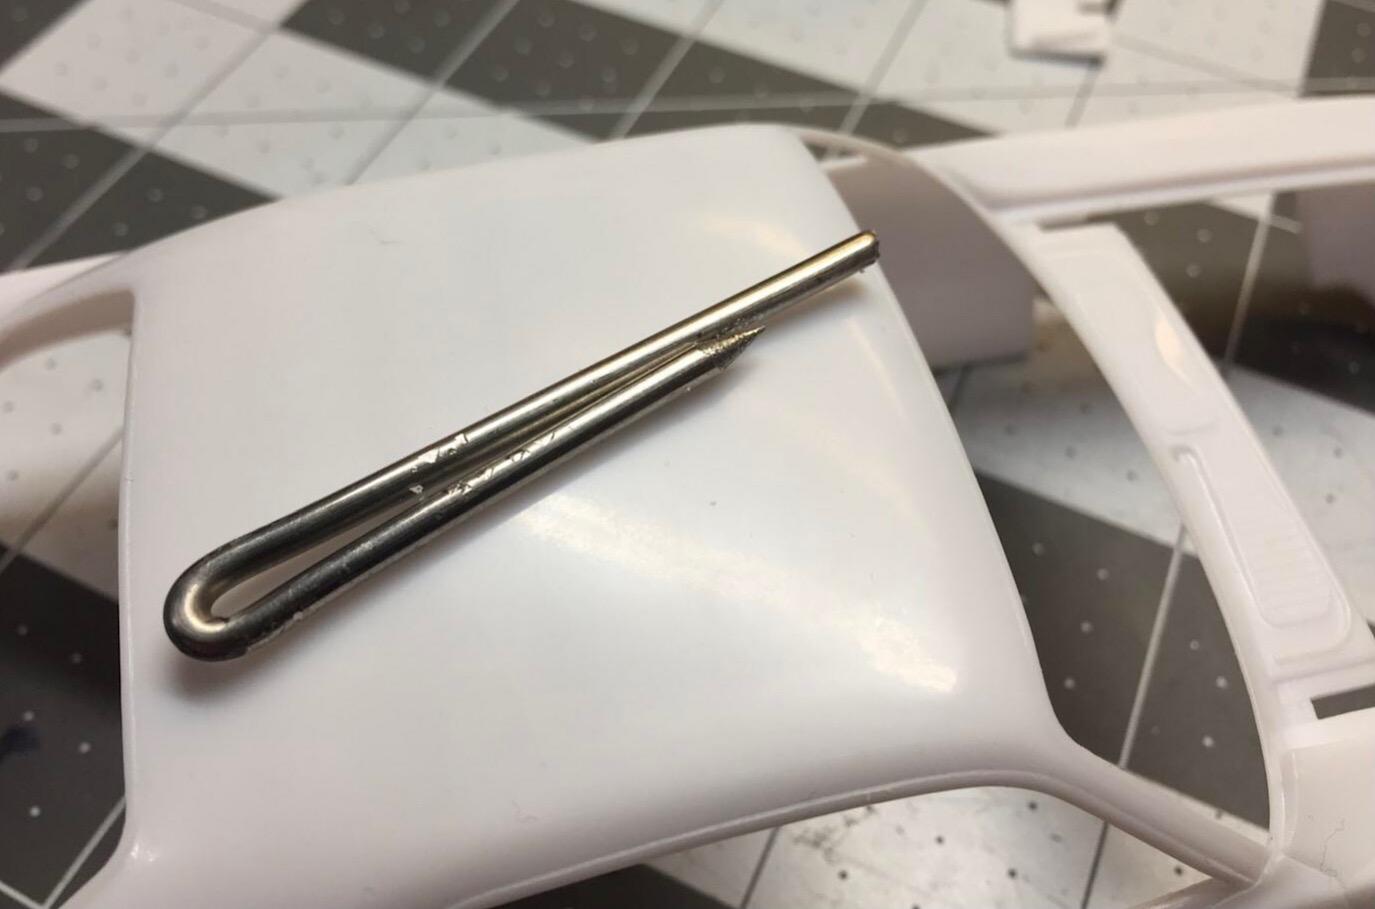
Truly inspiring work you are doing here Jon. I like the new fender trim termination.👍 For gauging the width of stuff like that and especially window trim, I made a scriber out of a piece of stiff wire. It can be spread to whatever width is required.
-
Monogram '32 roadster: a red-headed step-child.
NOBLNG replied to customline's topic in WIP: Model Cars
Nice work on the headlight bar Jim. I think a nice turquoise blue or olive-ish green would look nice with the black fenders. -
Mopar 318 poly engines
NOBLNG replied to junkyardjeff's topic in General Automotive Talk (Trucks and Cars)
According to this article the early versions had the scalloped valve covers and later ones did not. I believed it was a poly because of the (sorta) equal spaced exhaust ports and valve cover bolt arrangement. Probably much better 3d printed stuff available anyways. https://www.motortrend.com/how-to/mopp-0109-chryslers-poly-head-engine/ Edit: OK, it’s just a lump…the valve cover bolts are NOT correct for a poly…my bad.😕
-
Tamiya polishing compound question
NOBLNG replied to NOBLNG's topic in Model Building Questions and Answers
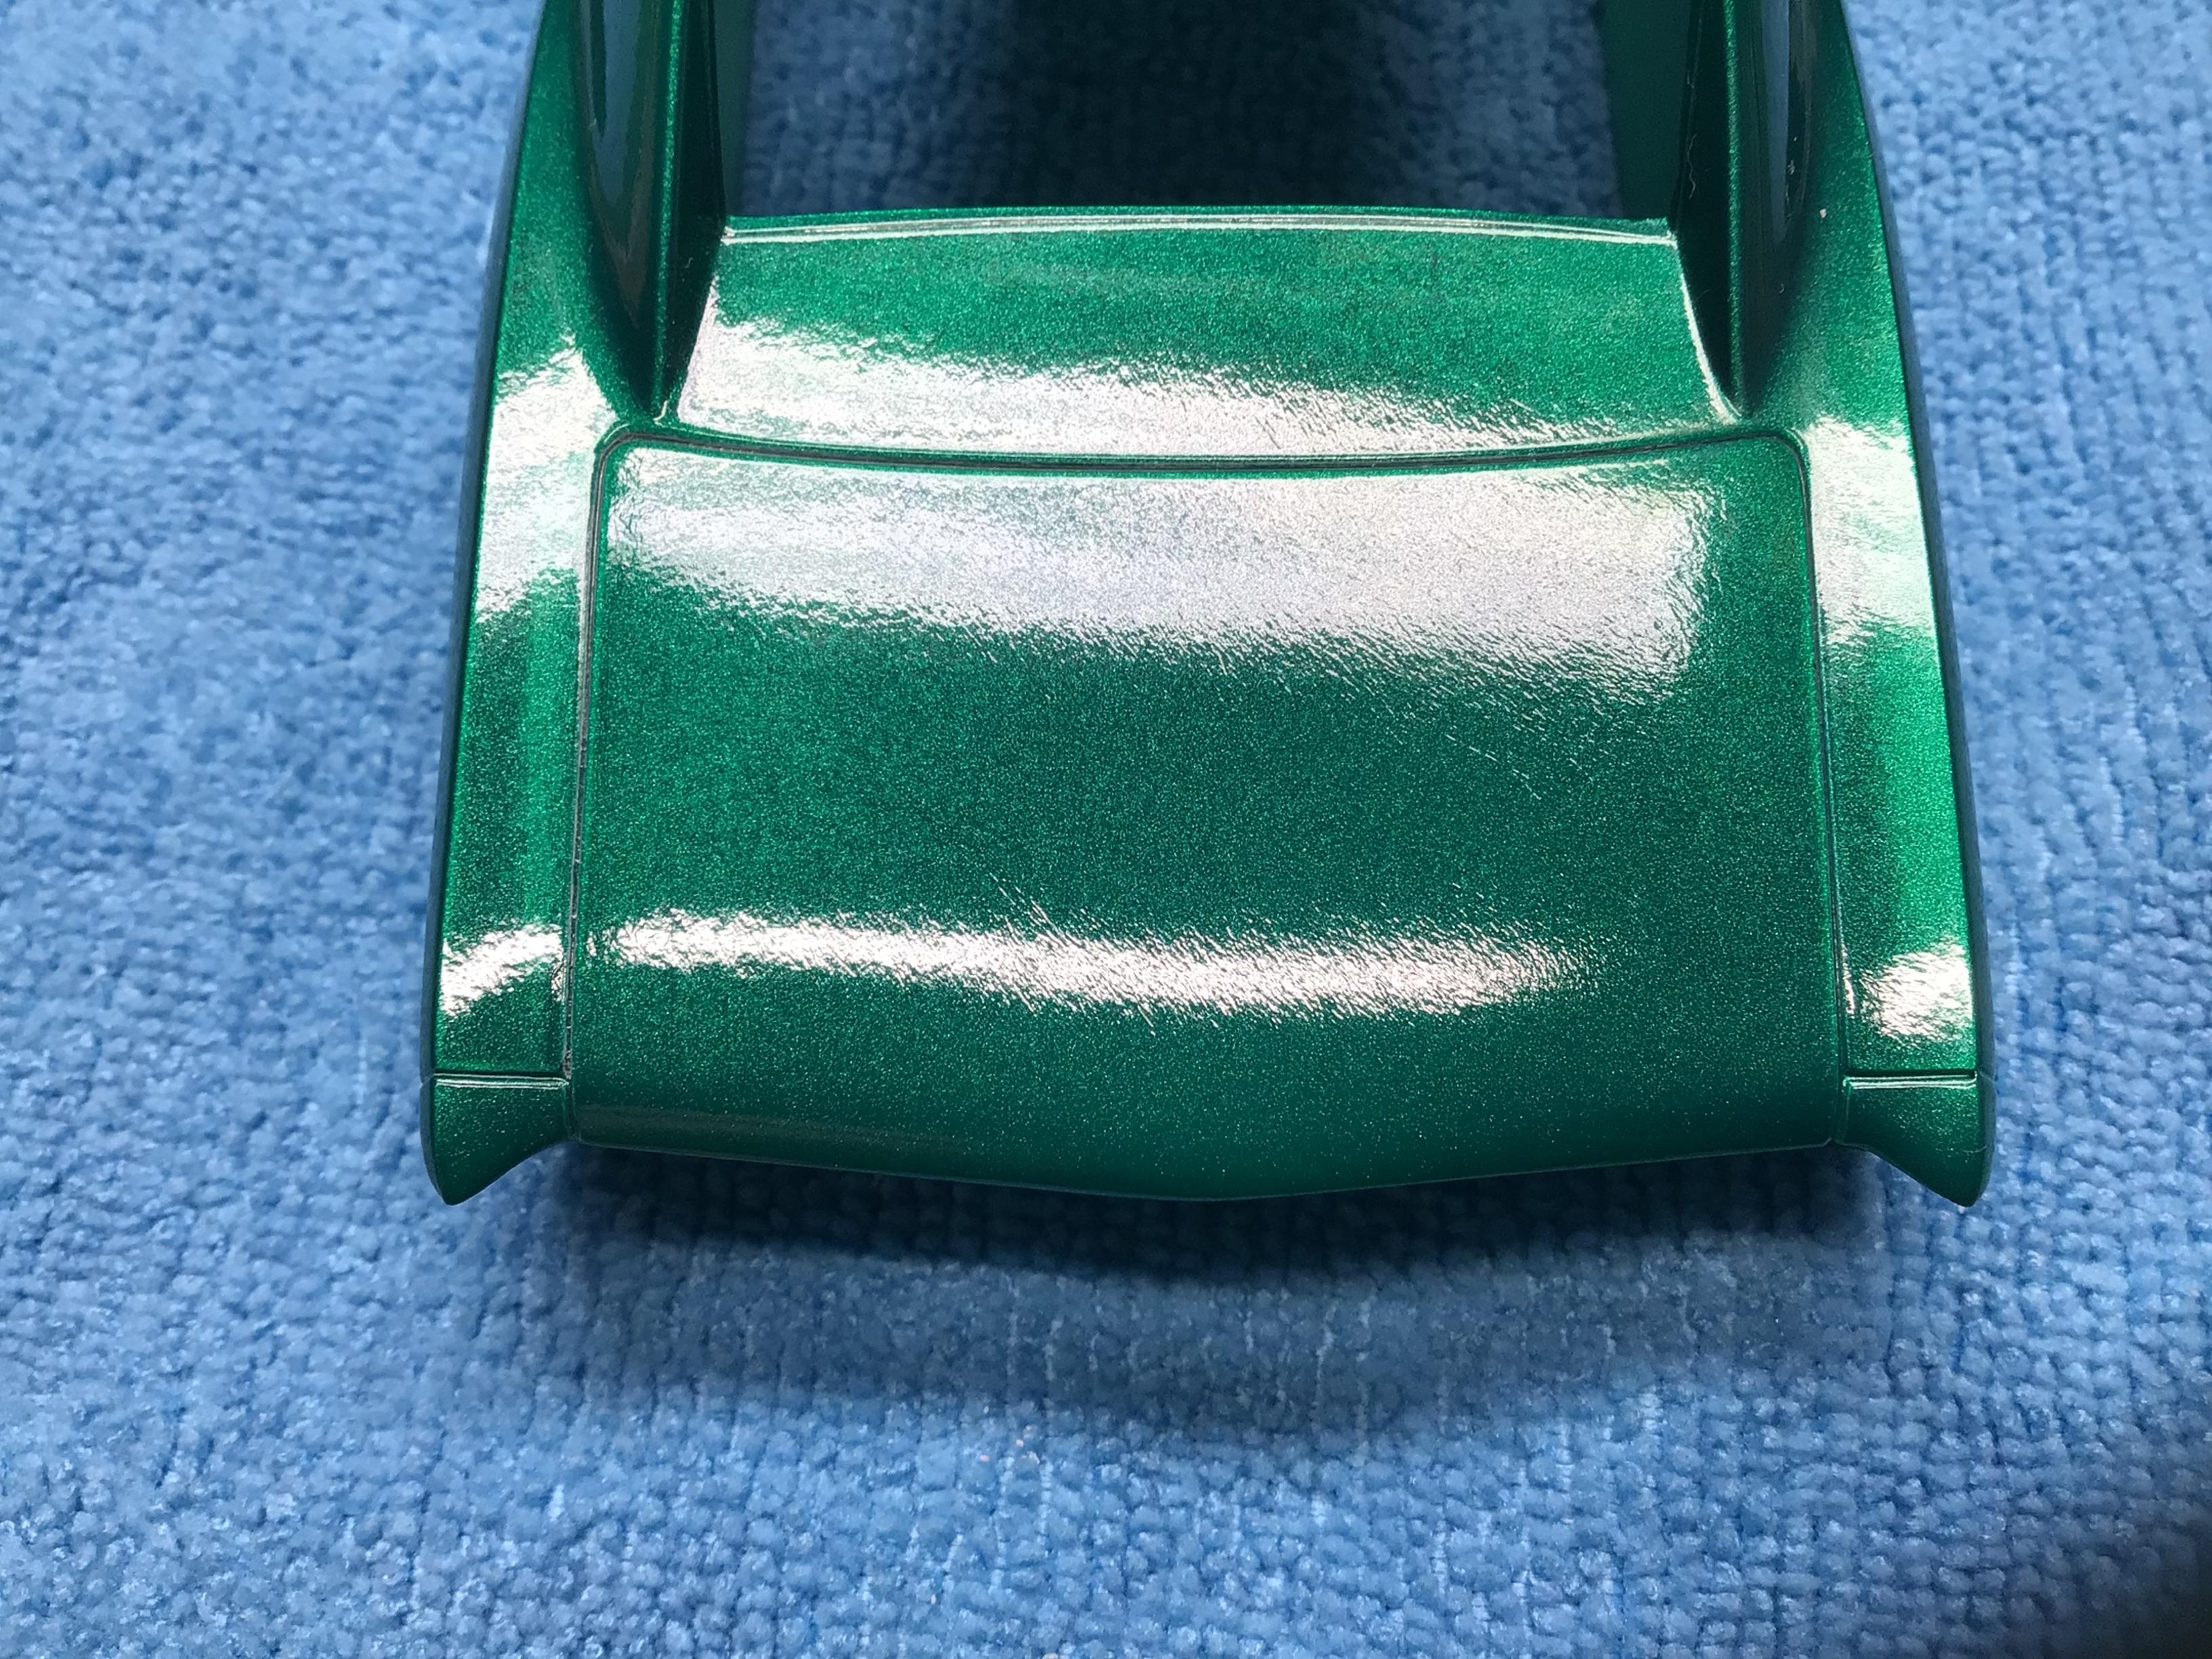
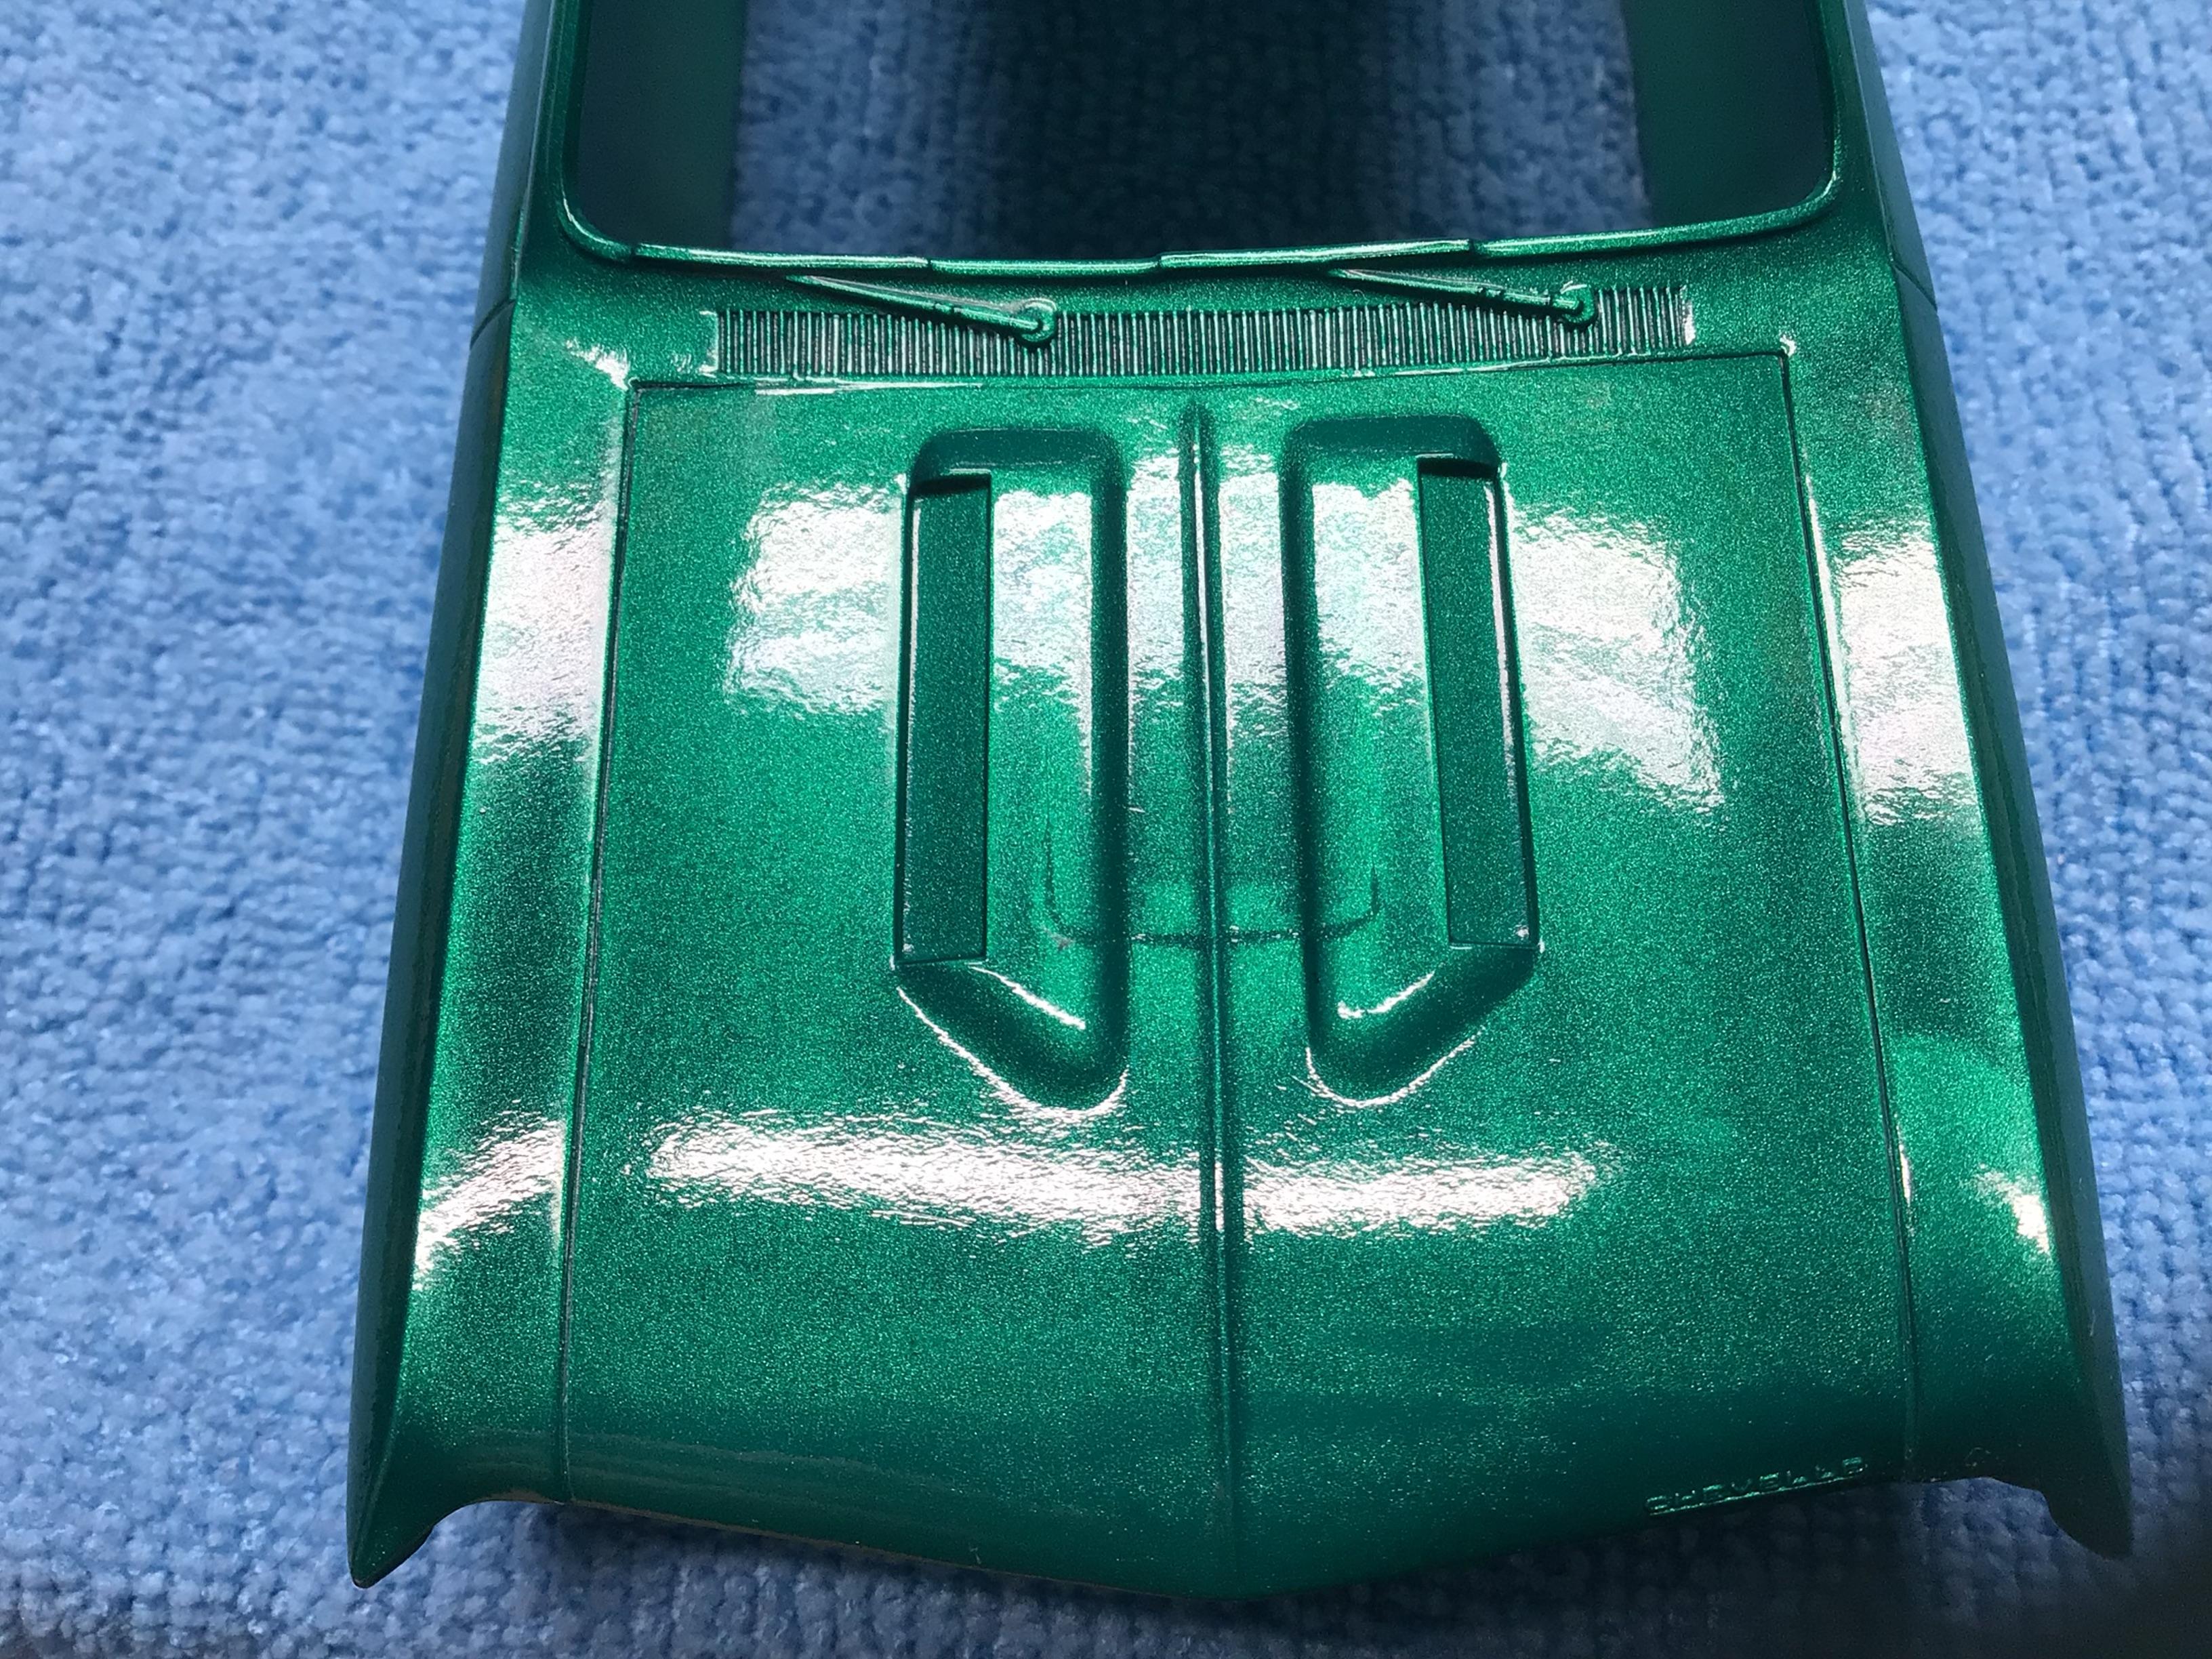
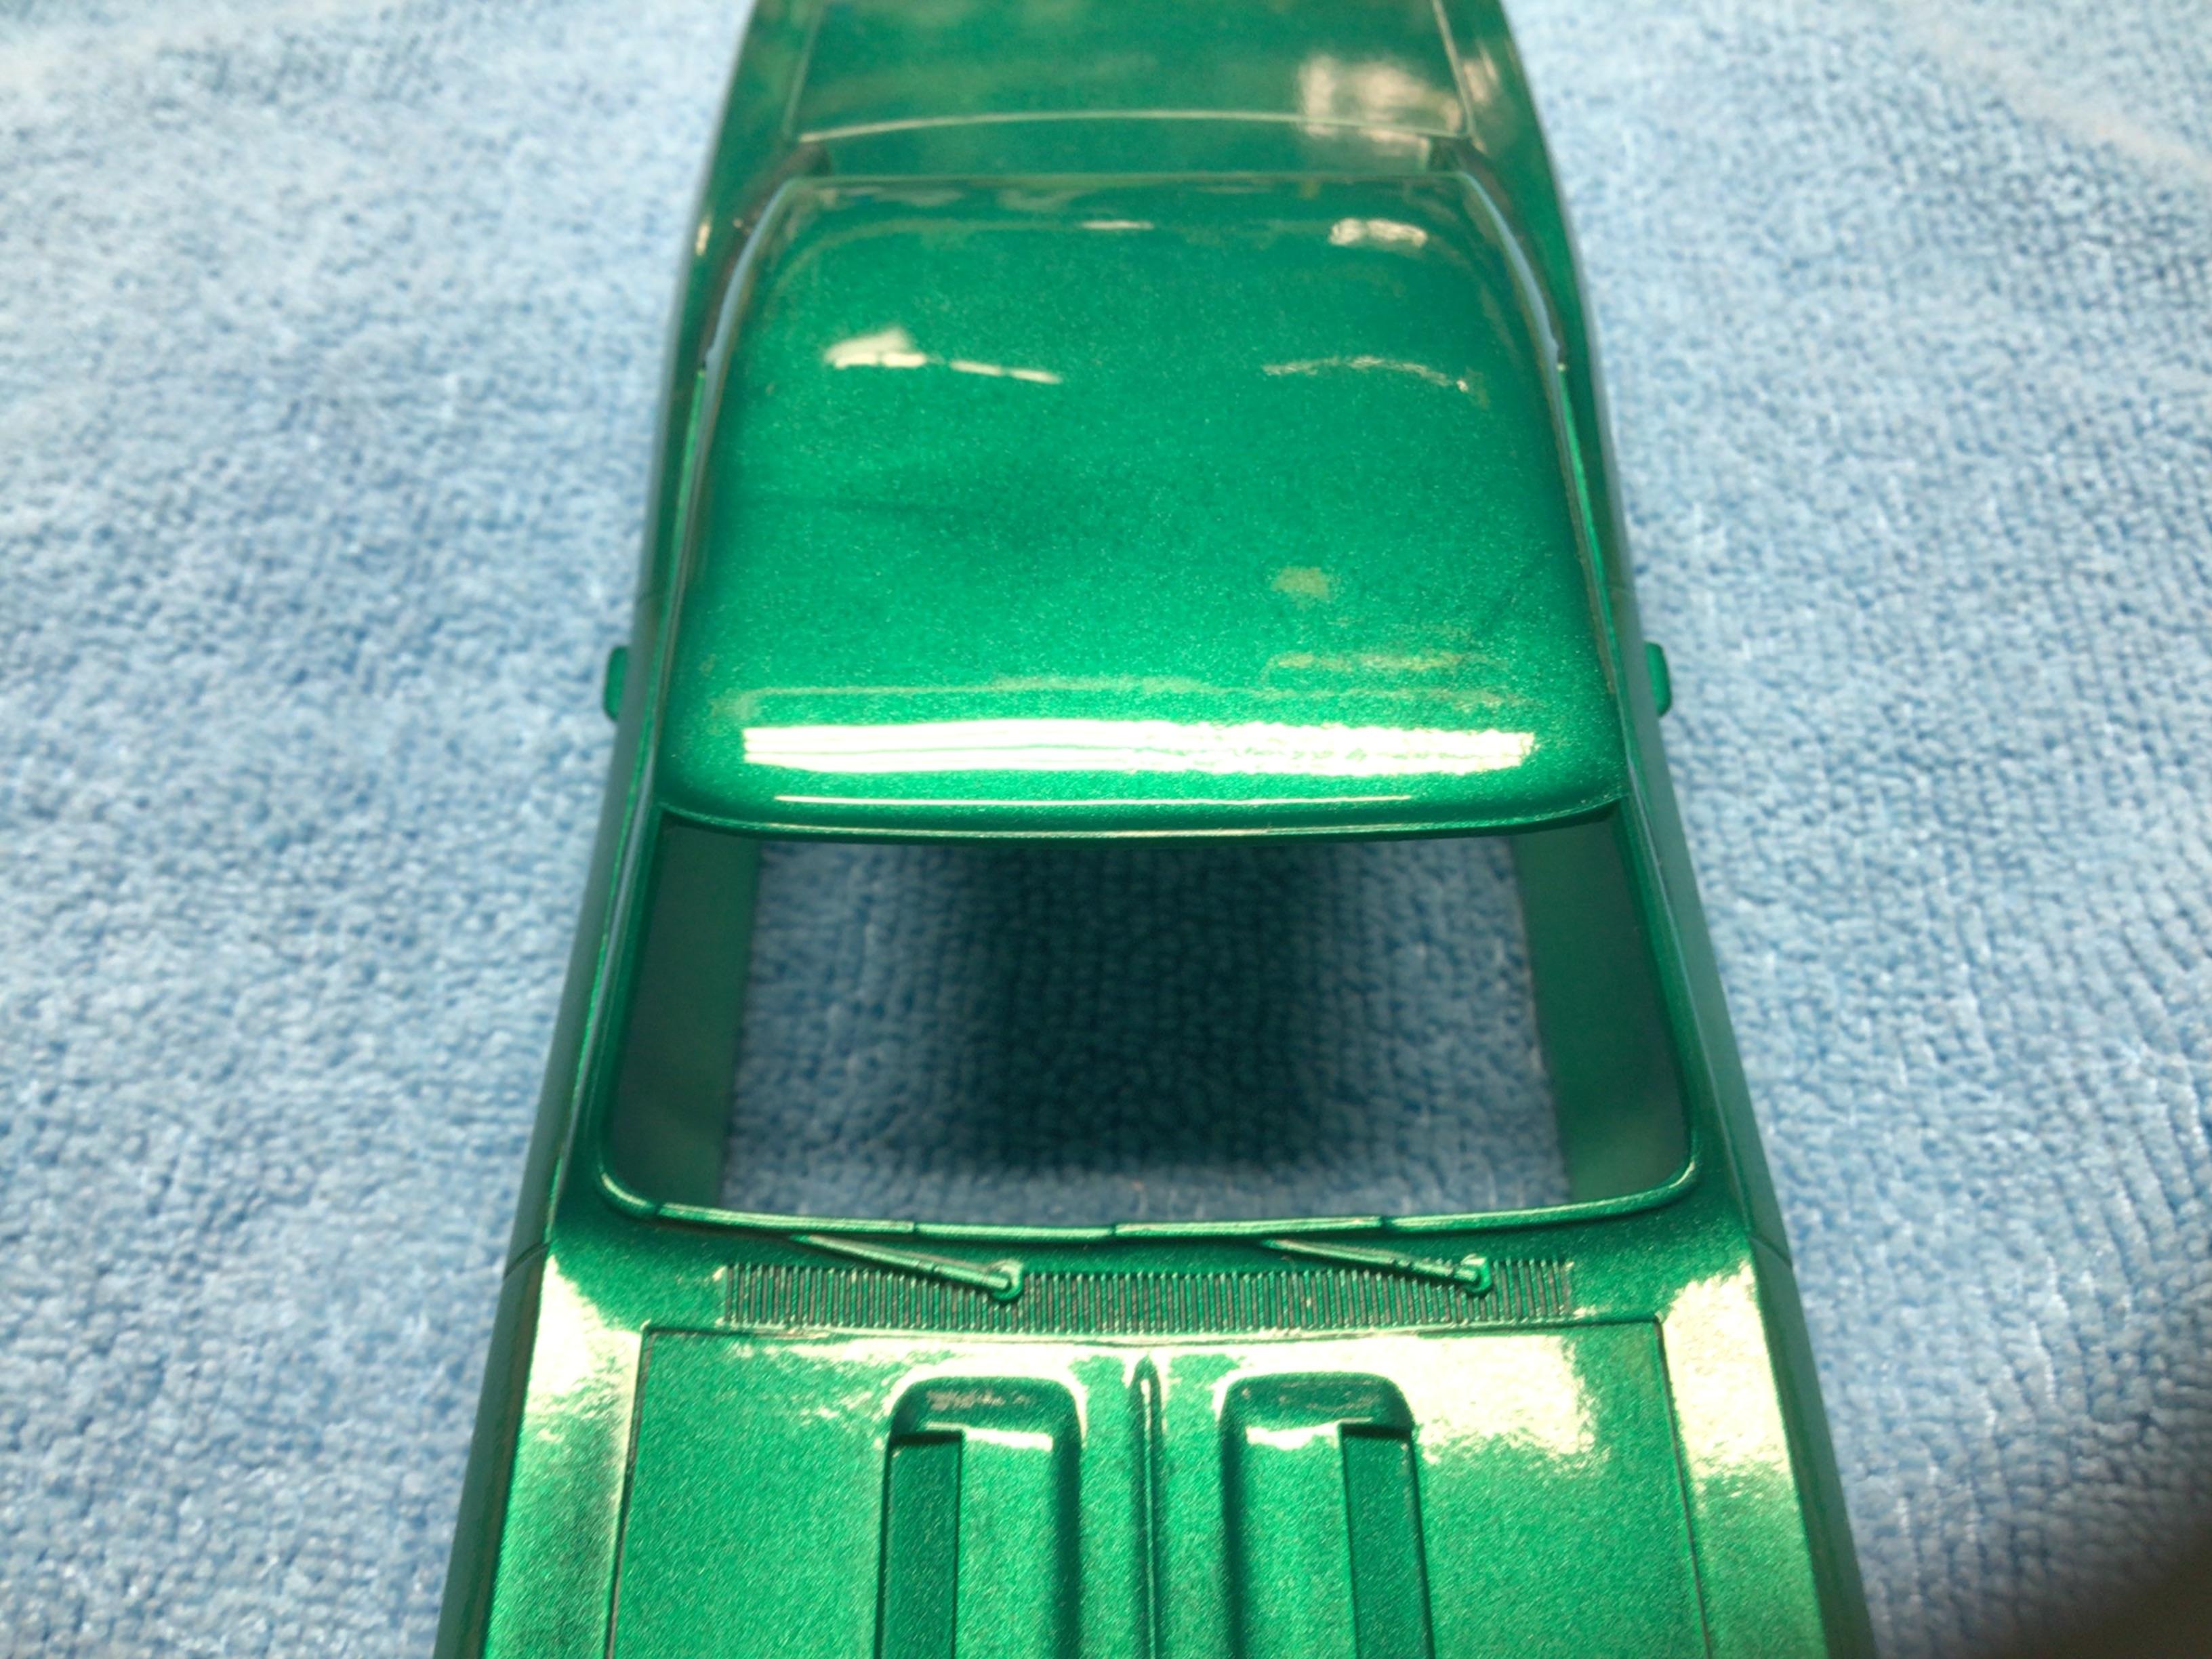
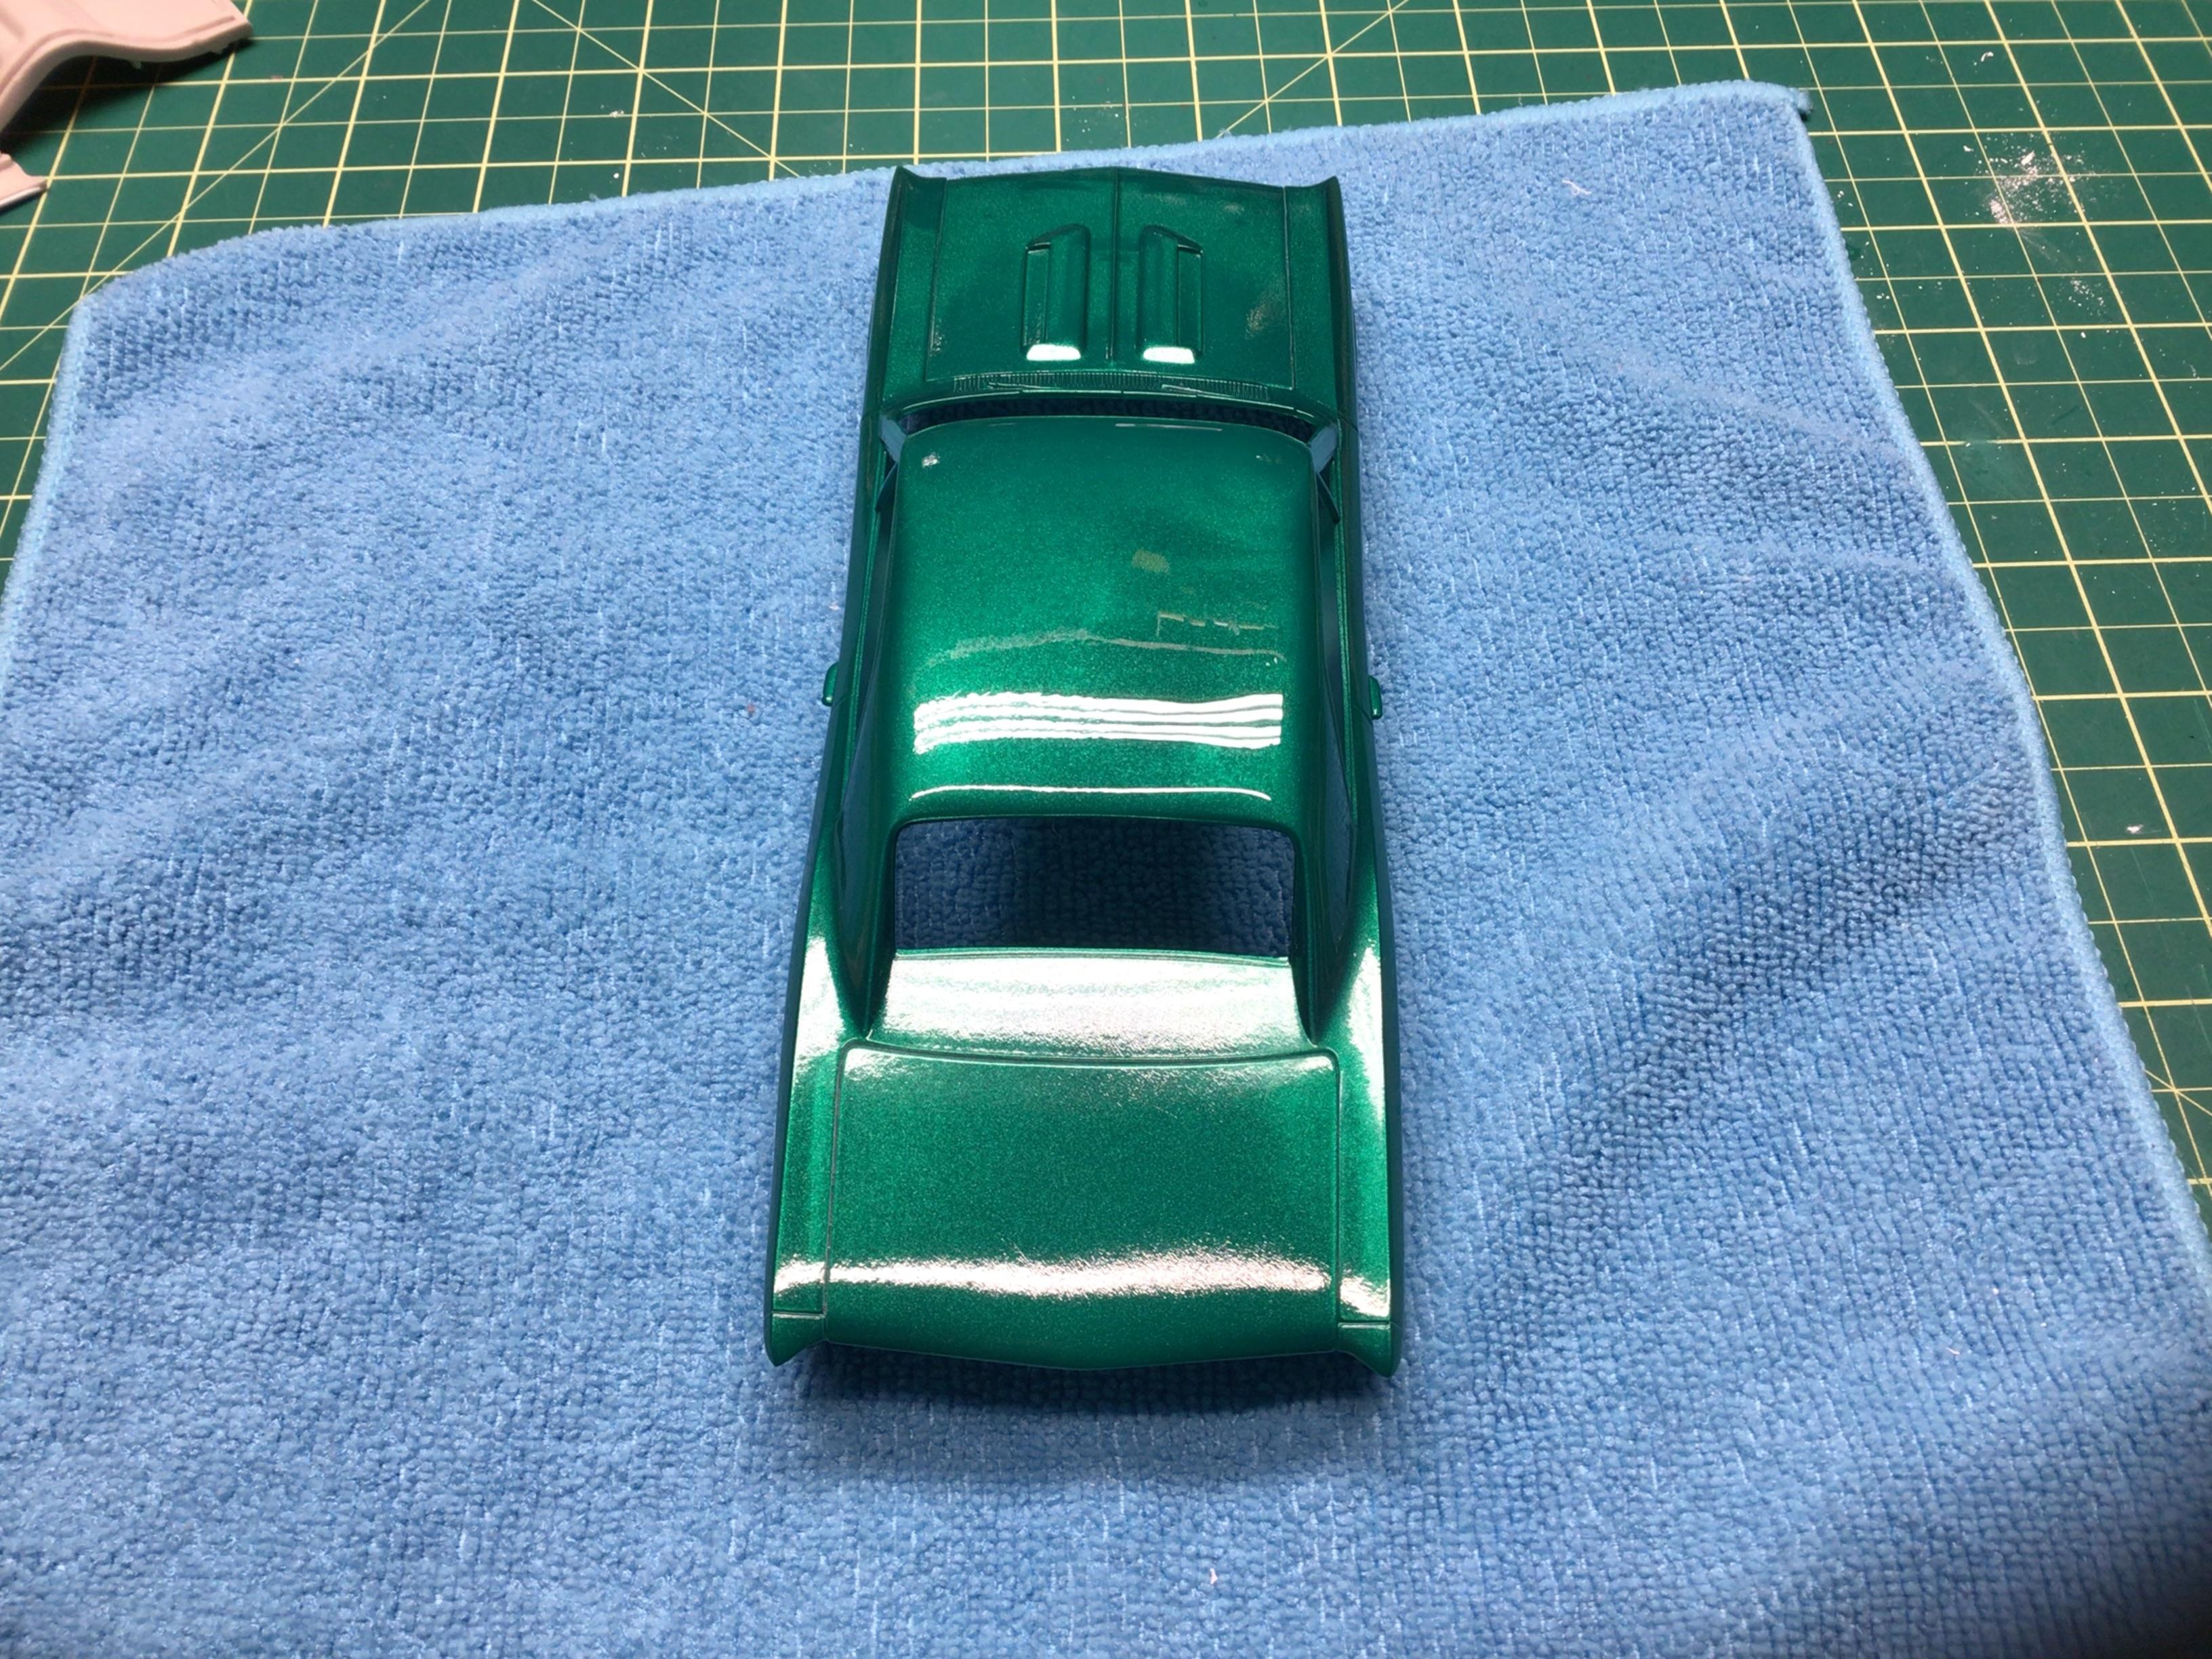
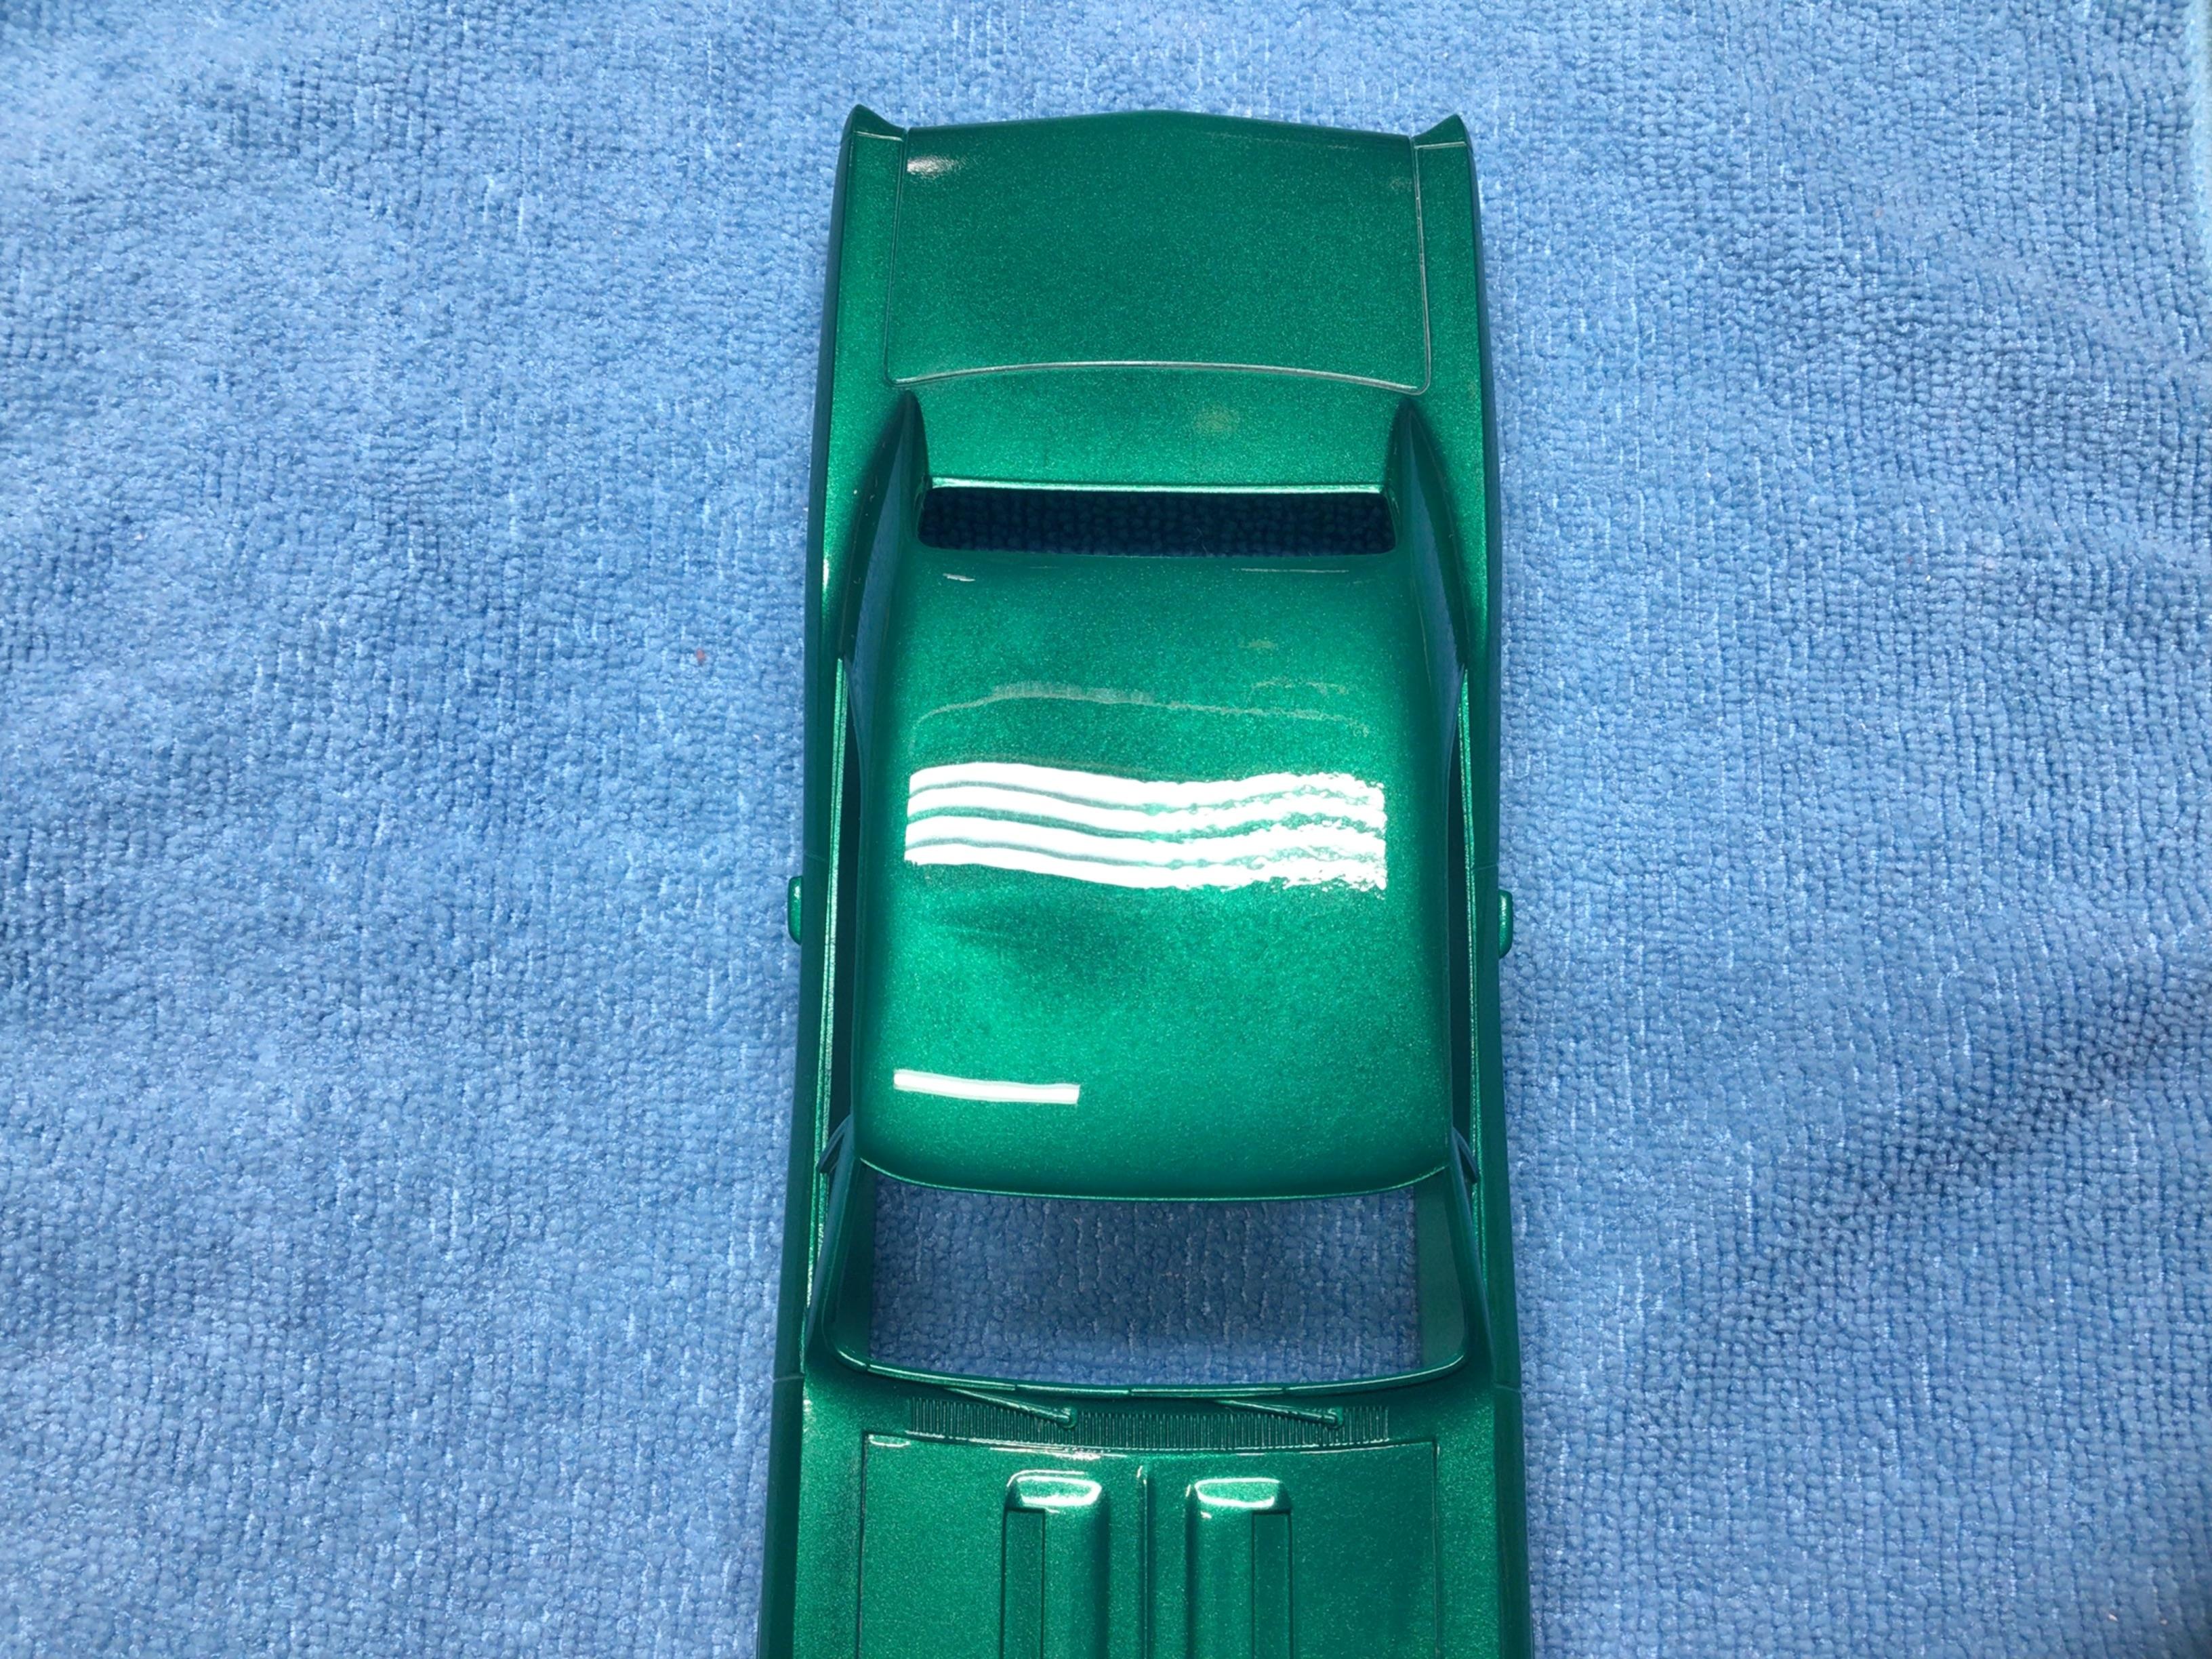
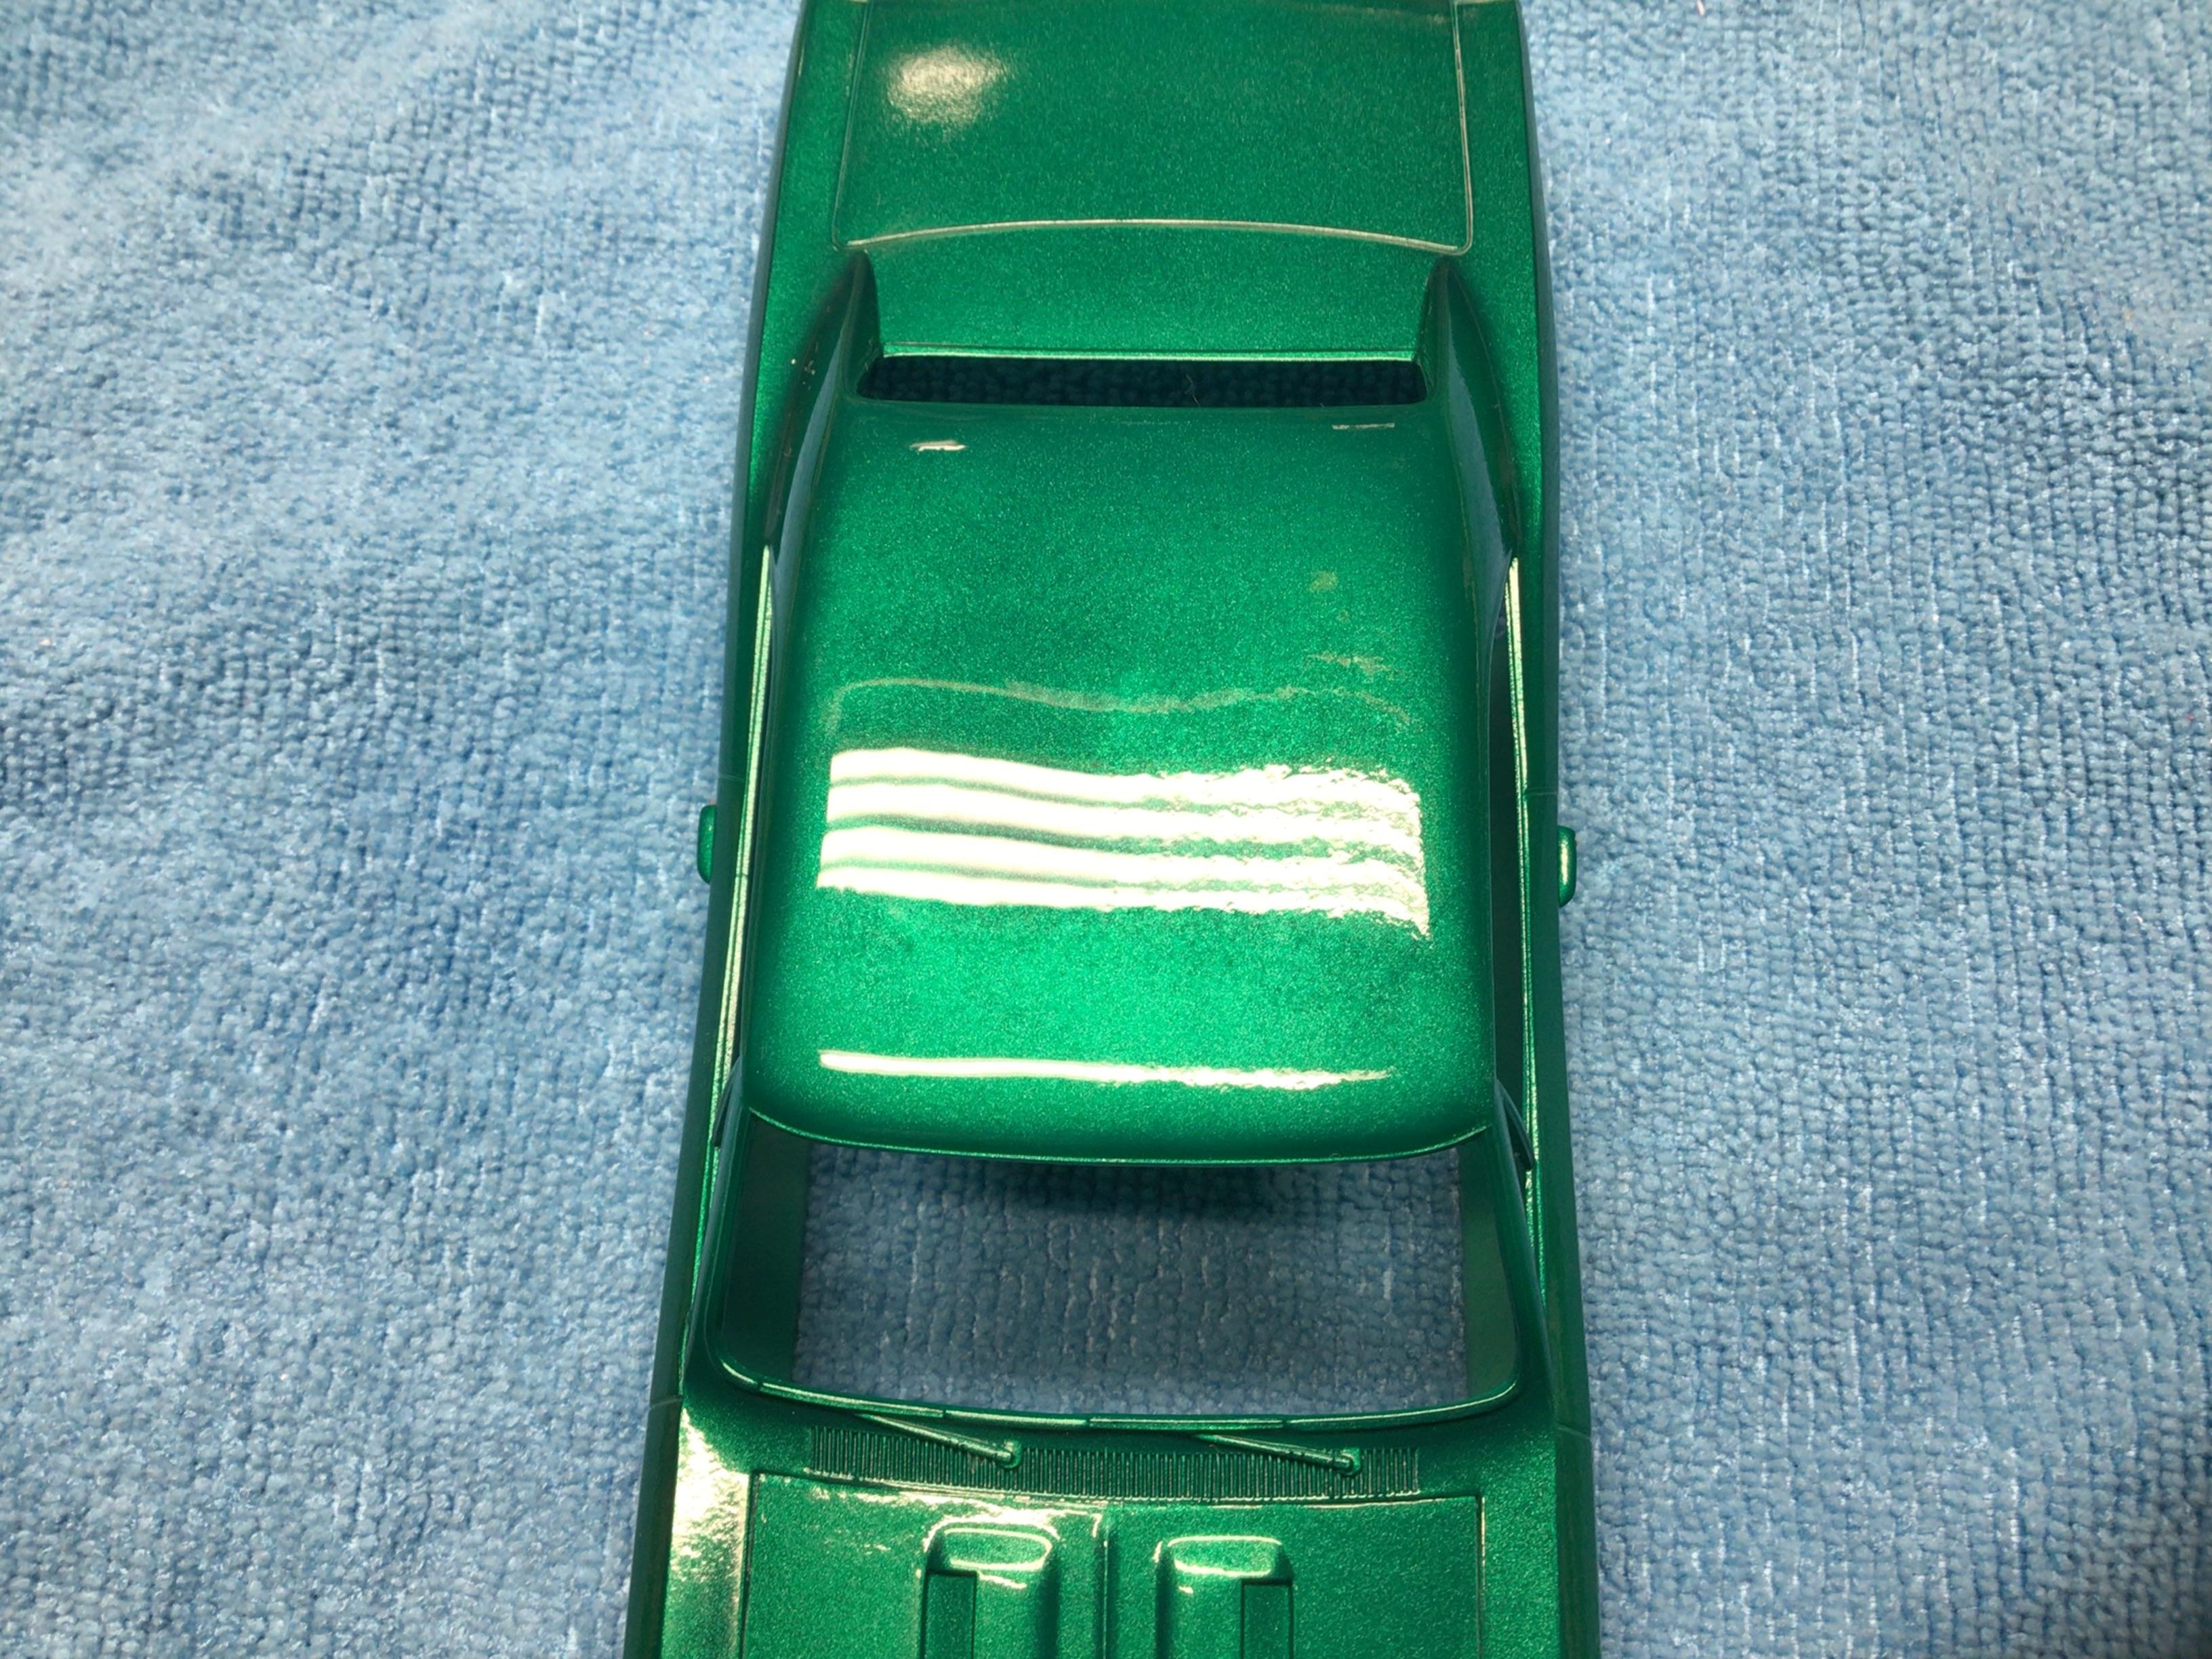
Thanks Trevor. Good to know that this is how the compounds are supposed to behave. I polished this Dart and thought it looked good after wet sanding with 4,6,8 and 10,000 then the three grades of polish. But when I took a second look there were a lot of swirly scratches that I hadn’t noticed. So I went over the drivers door again with 8 & 10 then the polishes. I think I may just be rushing the process.🥴 I’m happy with the drivers door now and I put quite a few coats of clear so hopefully I can get the rest of it smoothed out.
-
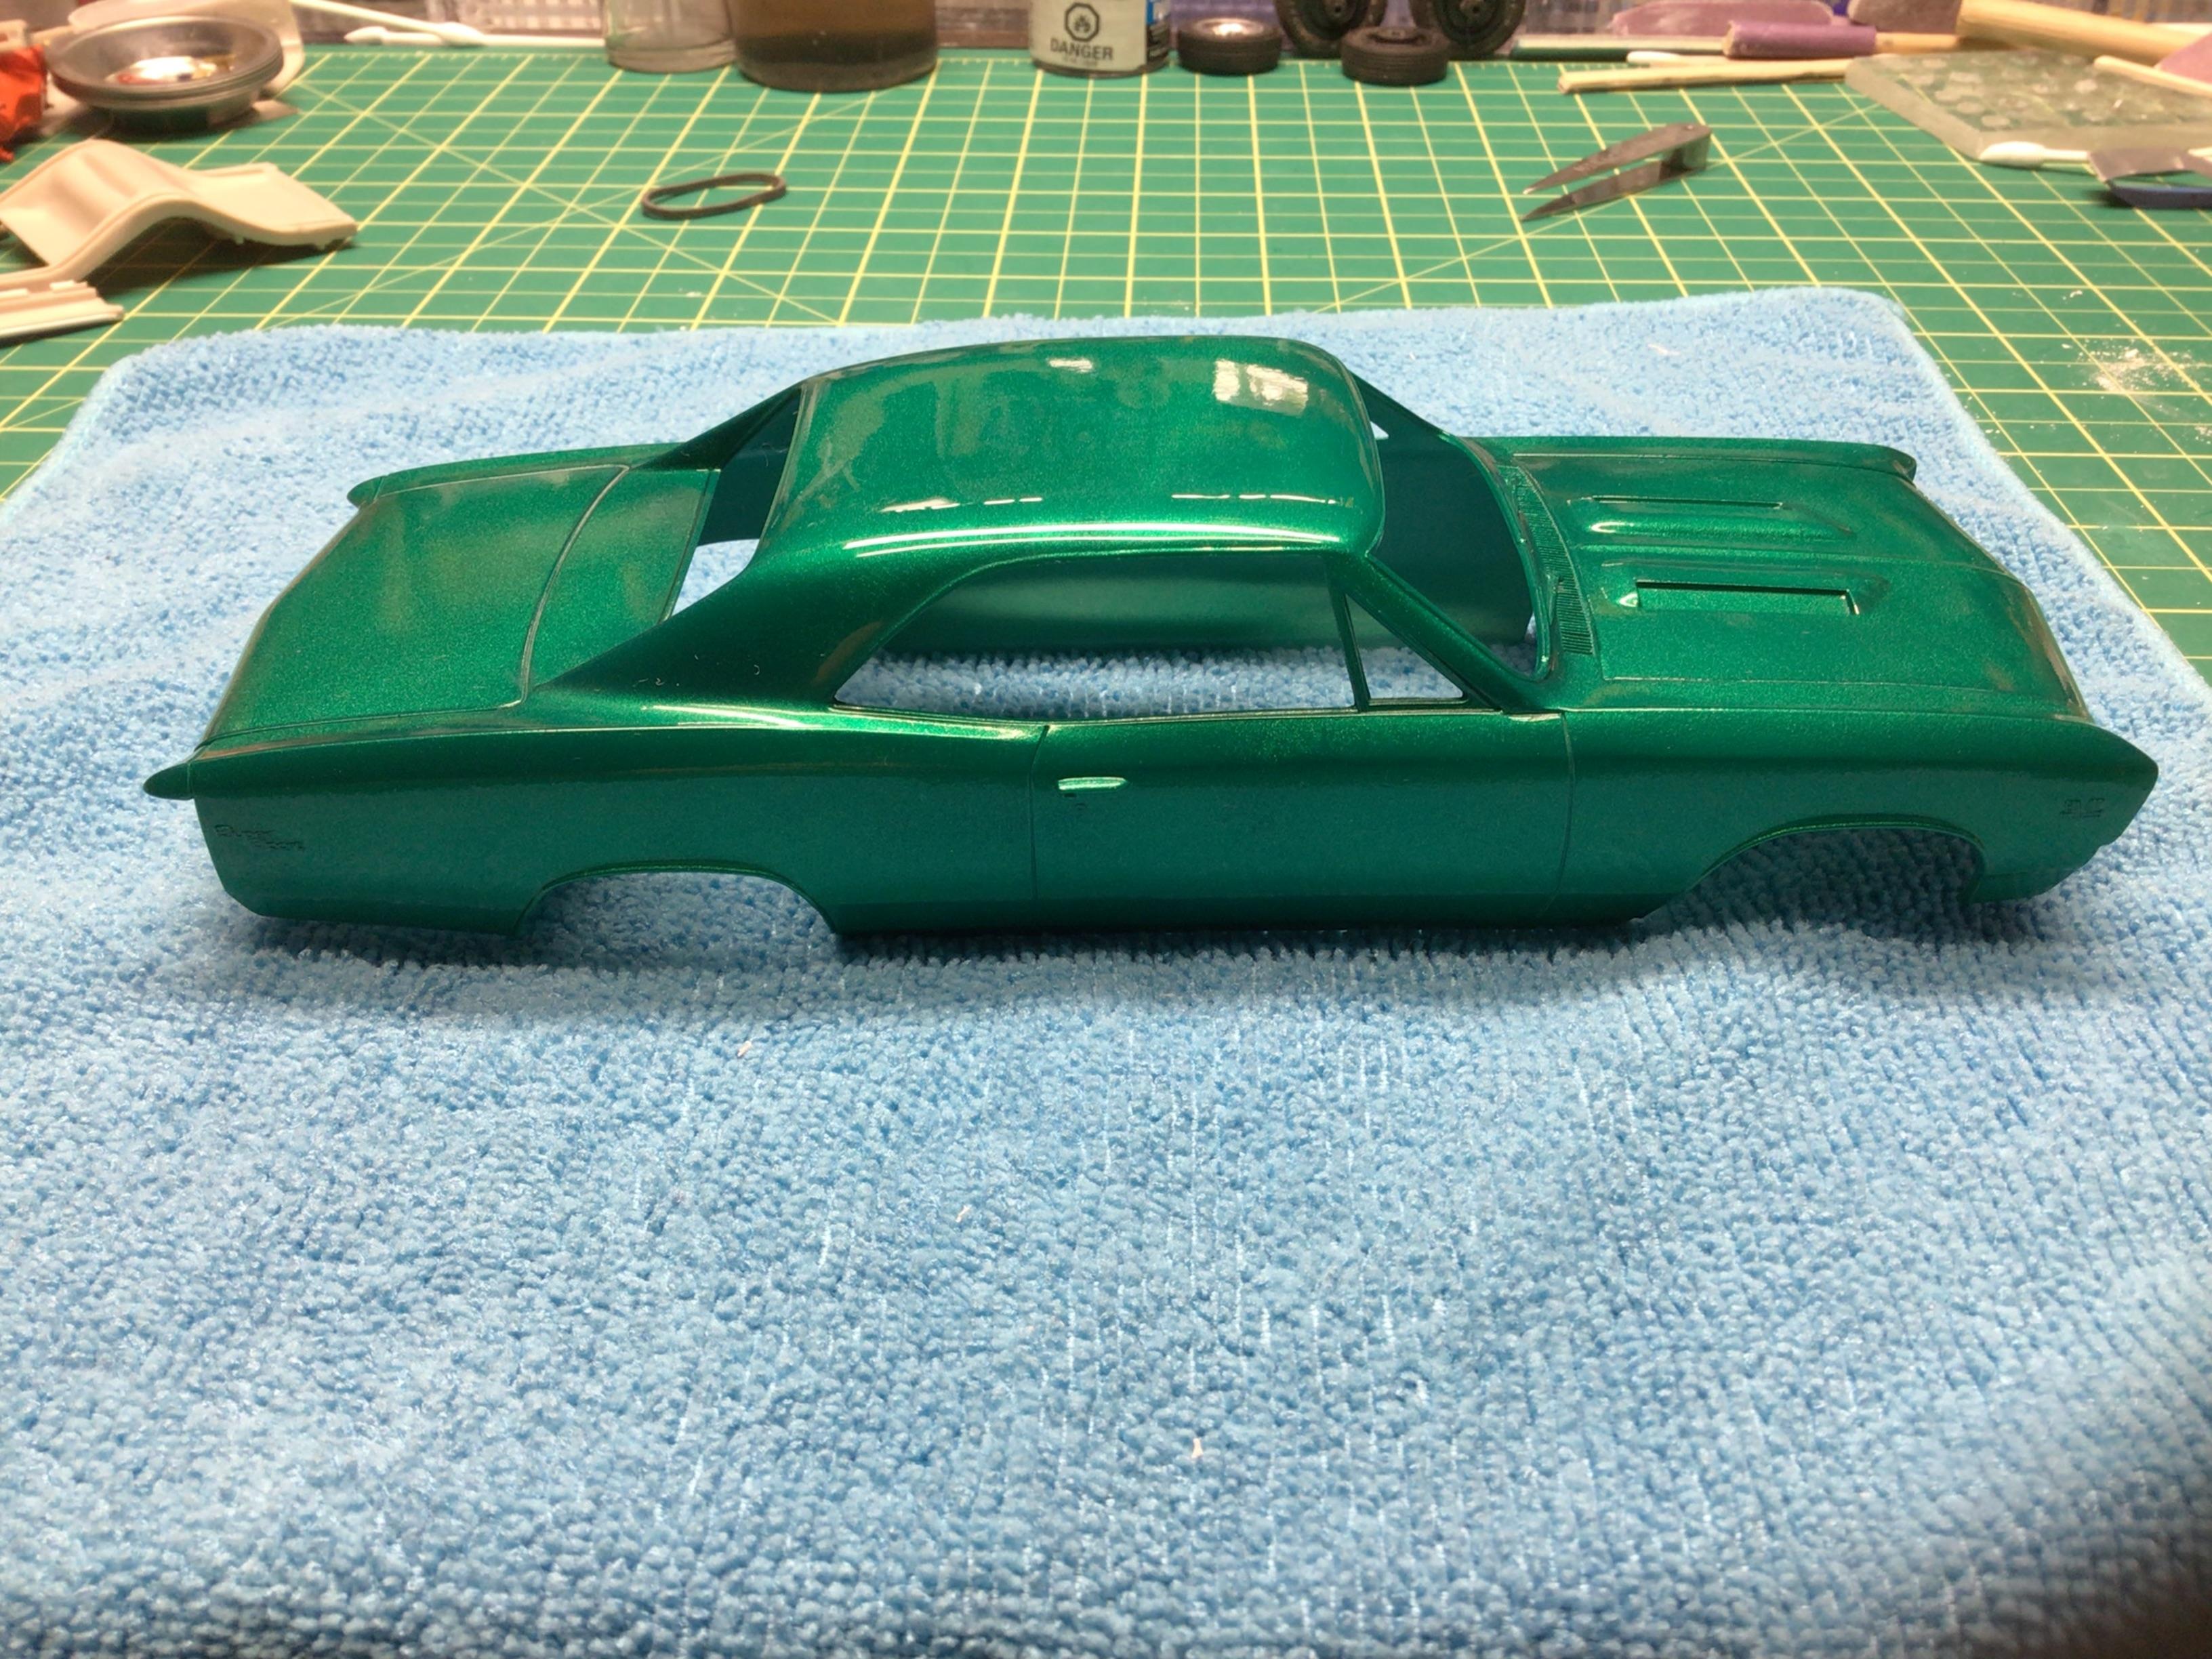
I am trying to learn better paint and polishing techniques. I elected to use this body for a test mule. I primed it with Tamiya grey then painted it with Mr. Color #77 metallic green. I very lightly rubbed a spot on the roof and trunk with #3000 trizact to remove some boogers. Then I cleared it with three coats of Duplicolor perfect match gloss. I suspected that the sanded spots would show since it is a metallic paint…and it does. However, this is only a test mule so now I know better for any future project.🤓 I then wet sanded the right half of the roof with 4,6,8 and 10,000 and polished it with the three Tamiya compounds.
-
Tamiya polishing compound question
NOBLNG replied to NOBLNG's topic in Model Building Questions and Answers
Thanks David. The coarse definitely exhibits this behaviour the most markedly, but the two finer grades also go clear after a brief rubbing. Fwiw, I am using some eyeglass cleaning cloths for polishing since I got a bunch of them cheap on Amazon.