NOBLNG
-
Posts
10,227 -
Joined
-
Last visited
Content Type
Profiles
Forums
Events
Gallery
Everything posted by NOBLNG
-
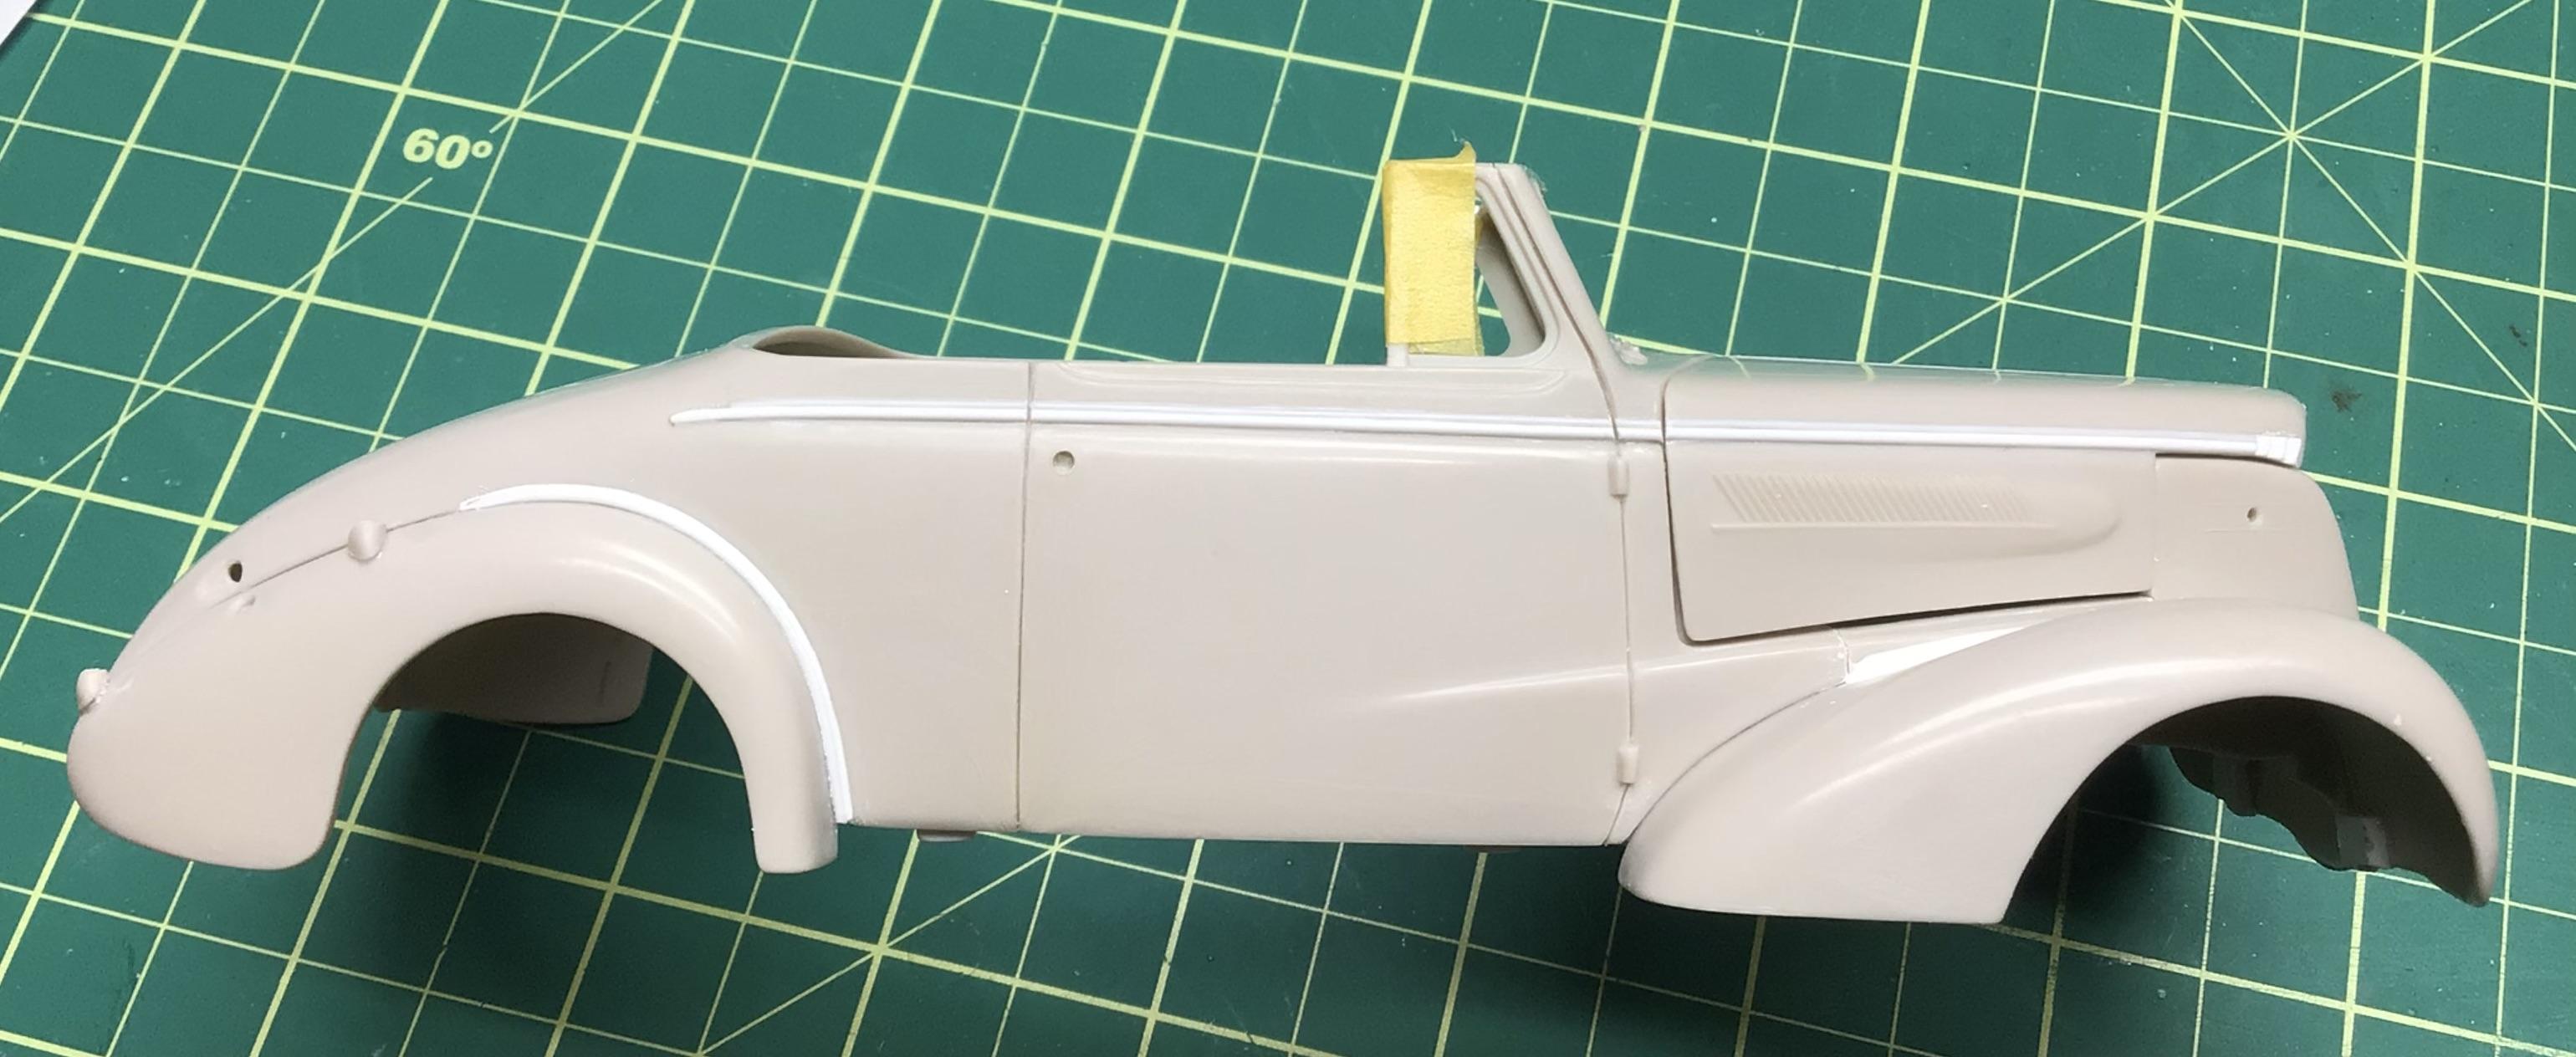
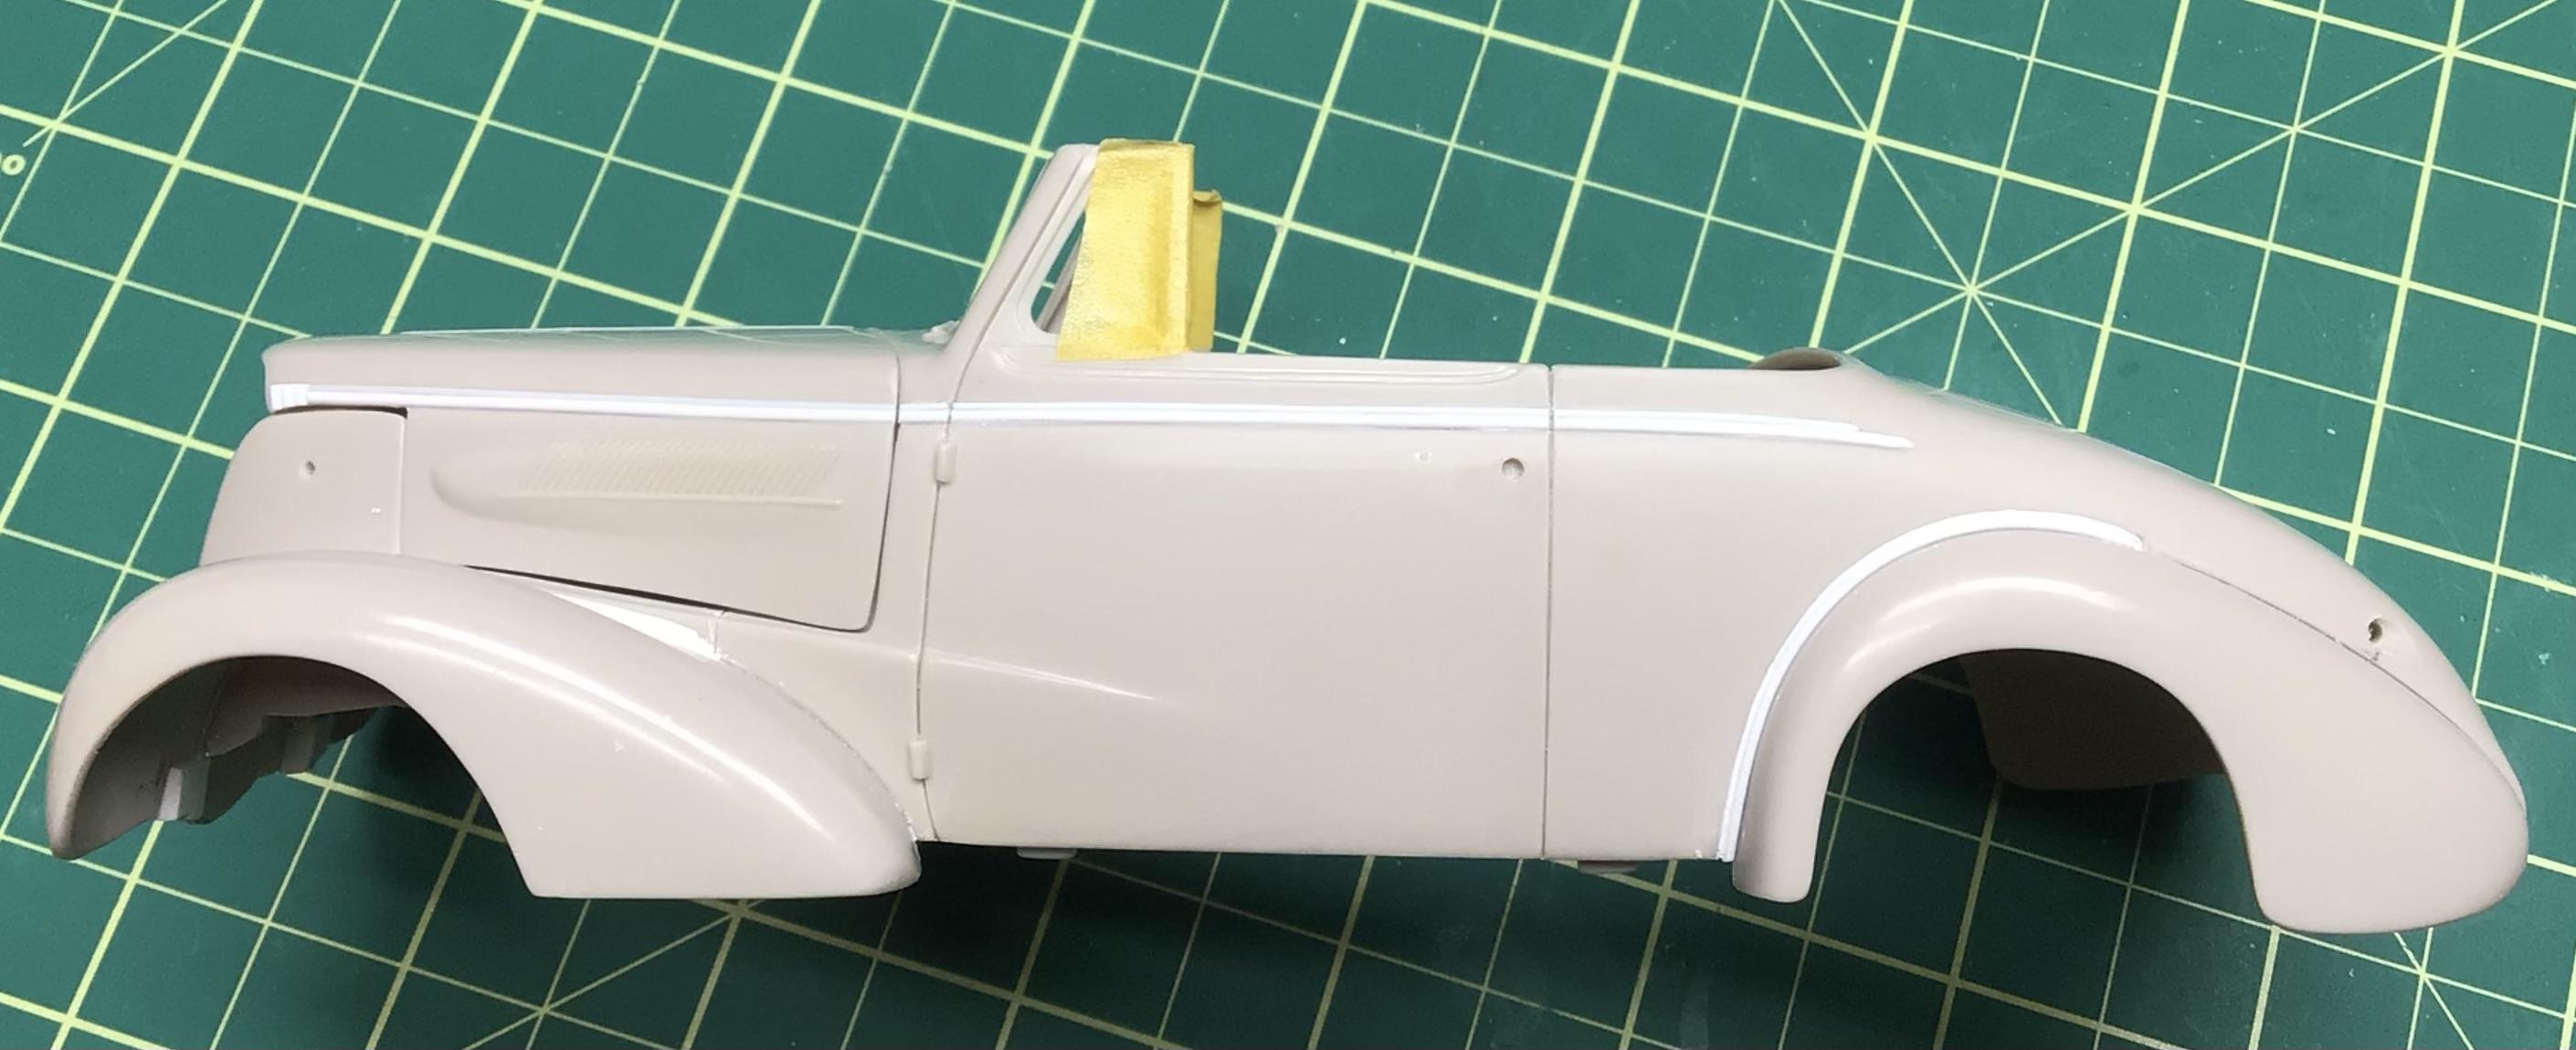
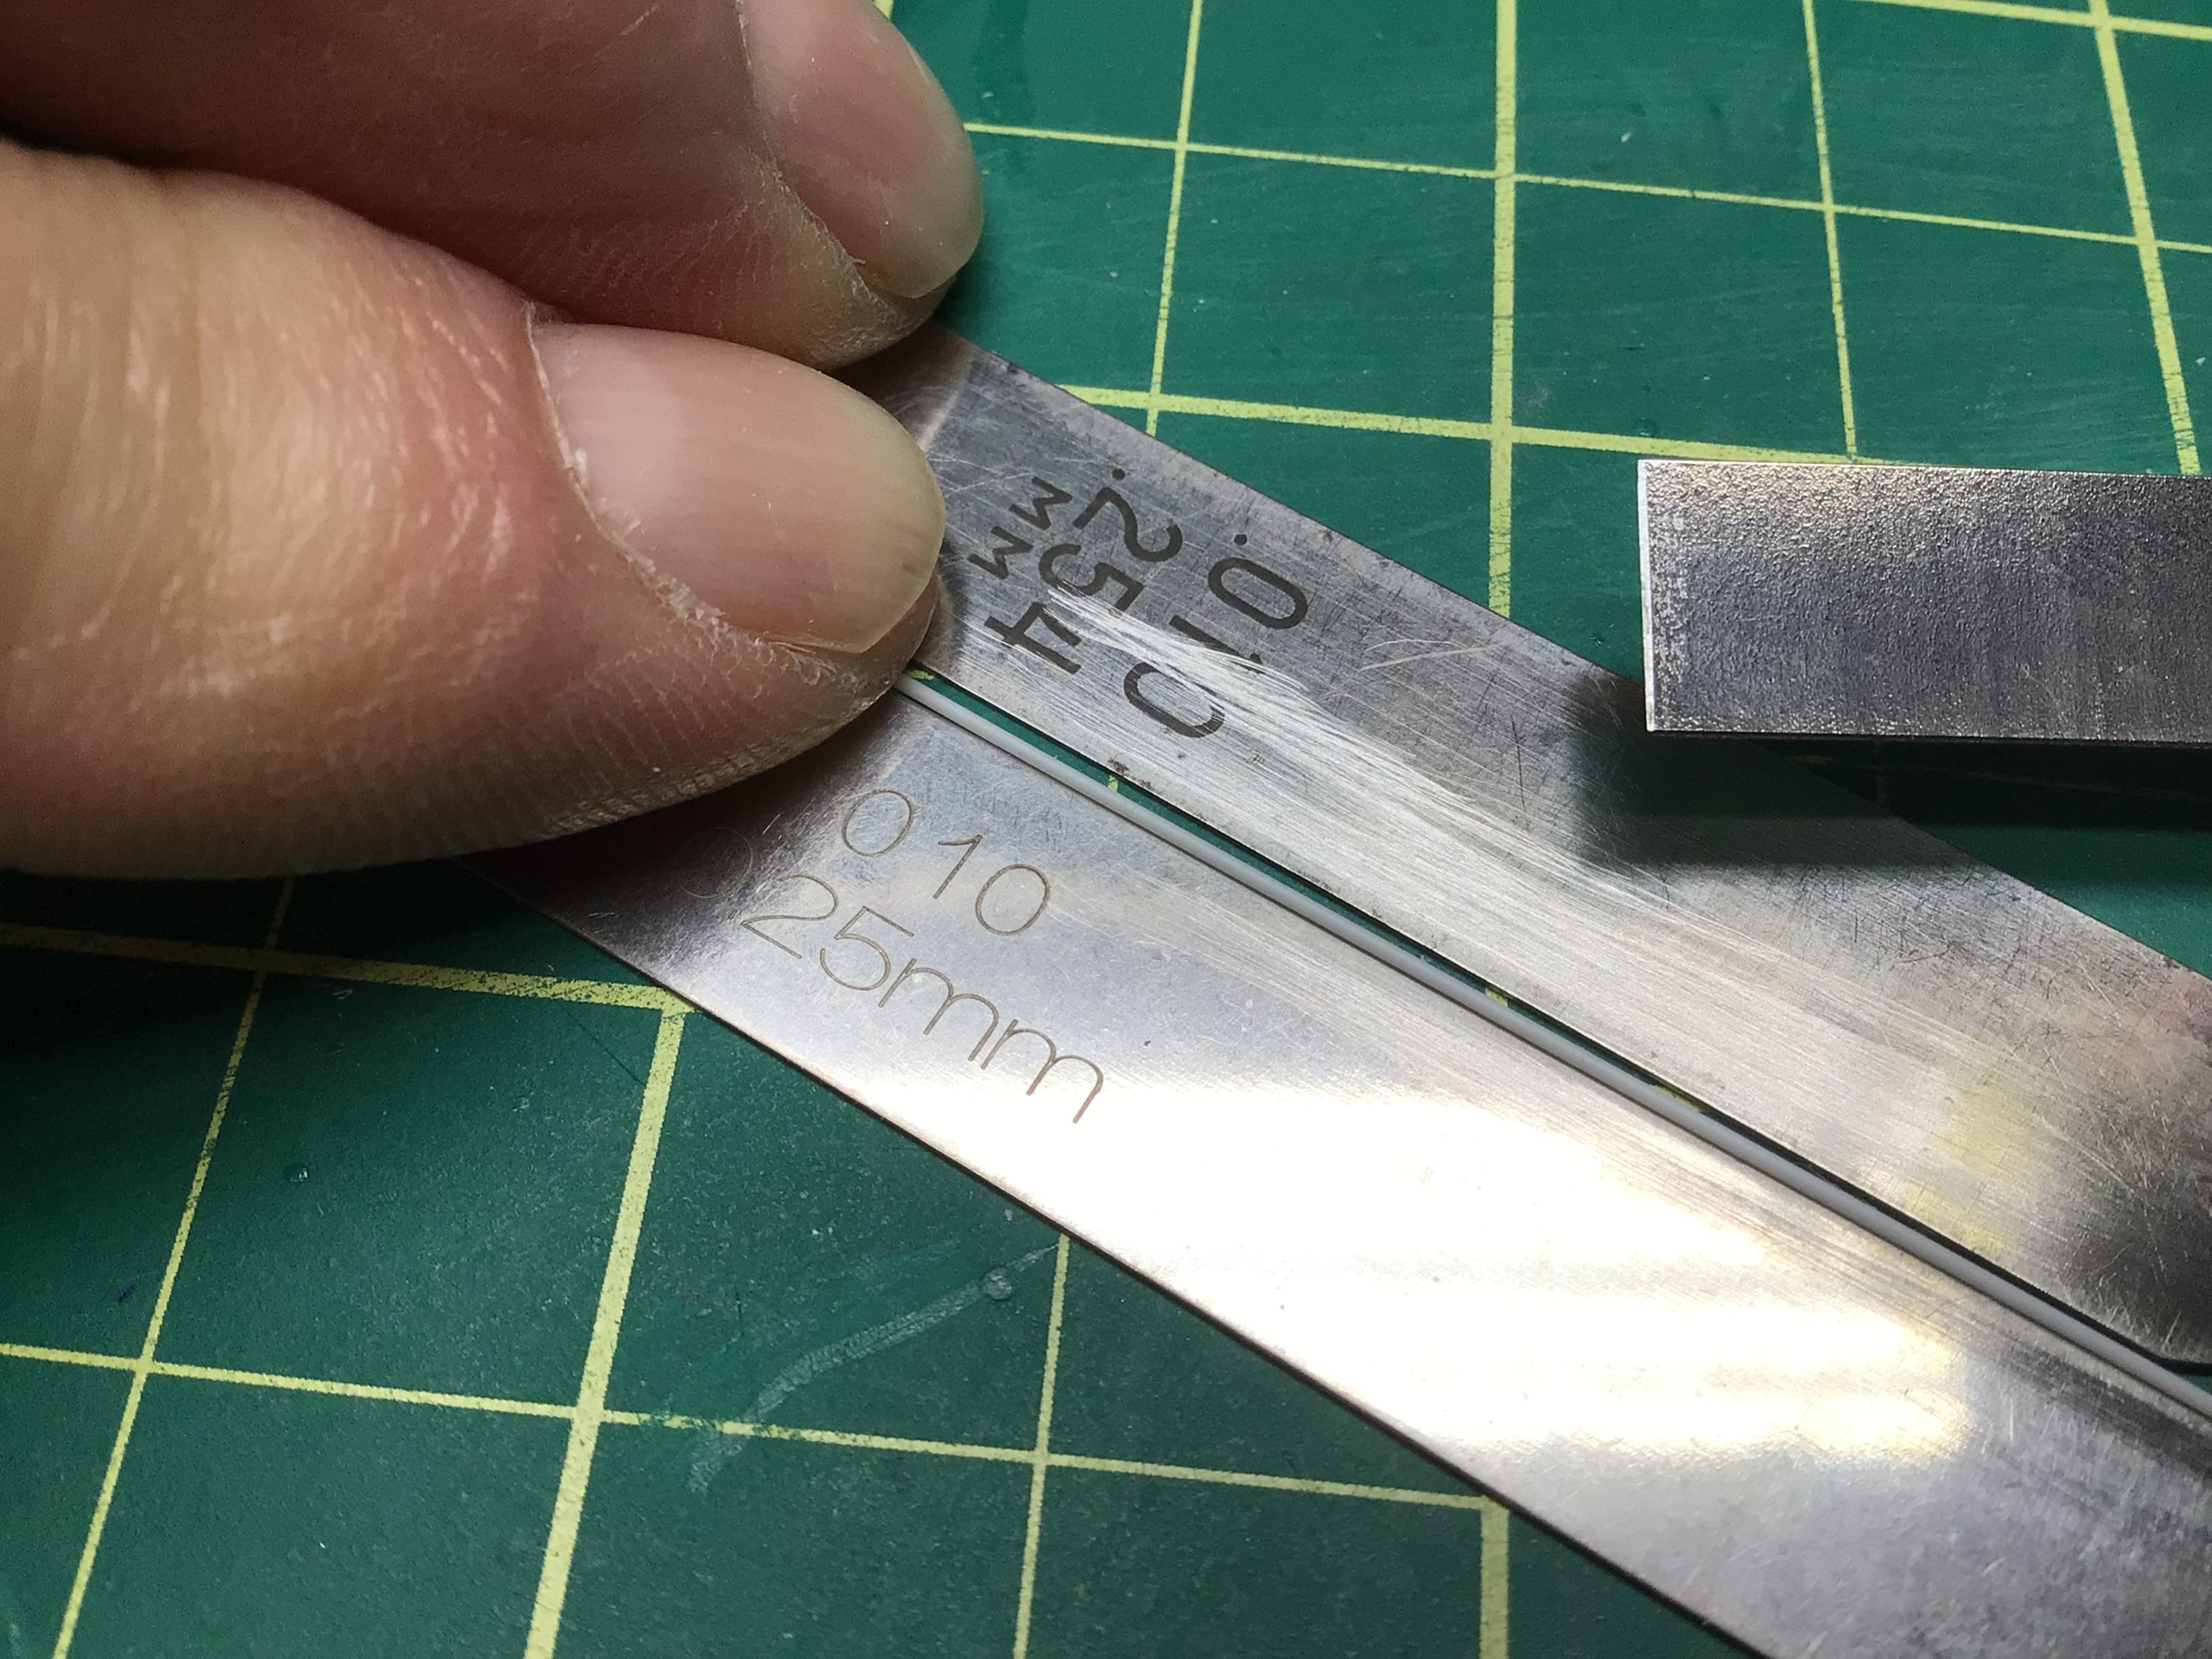
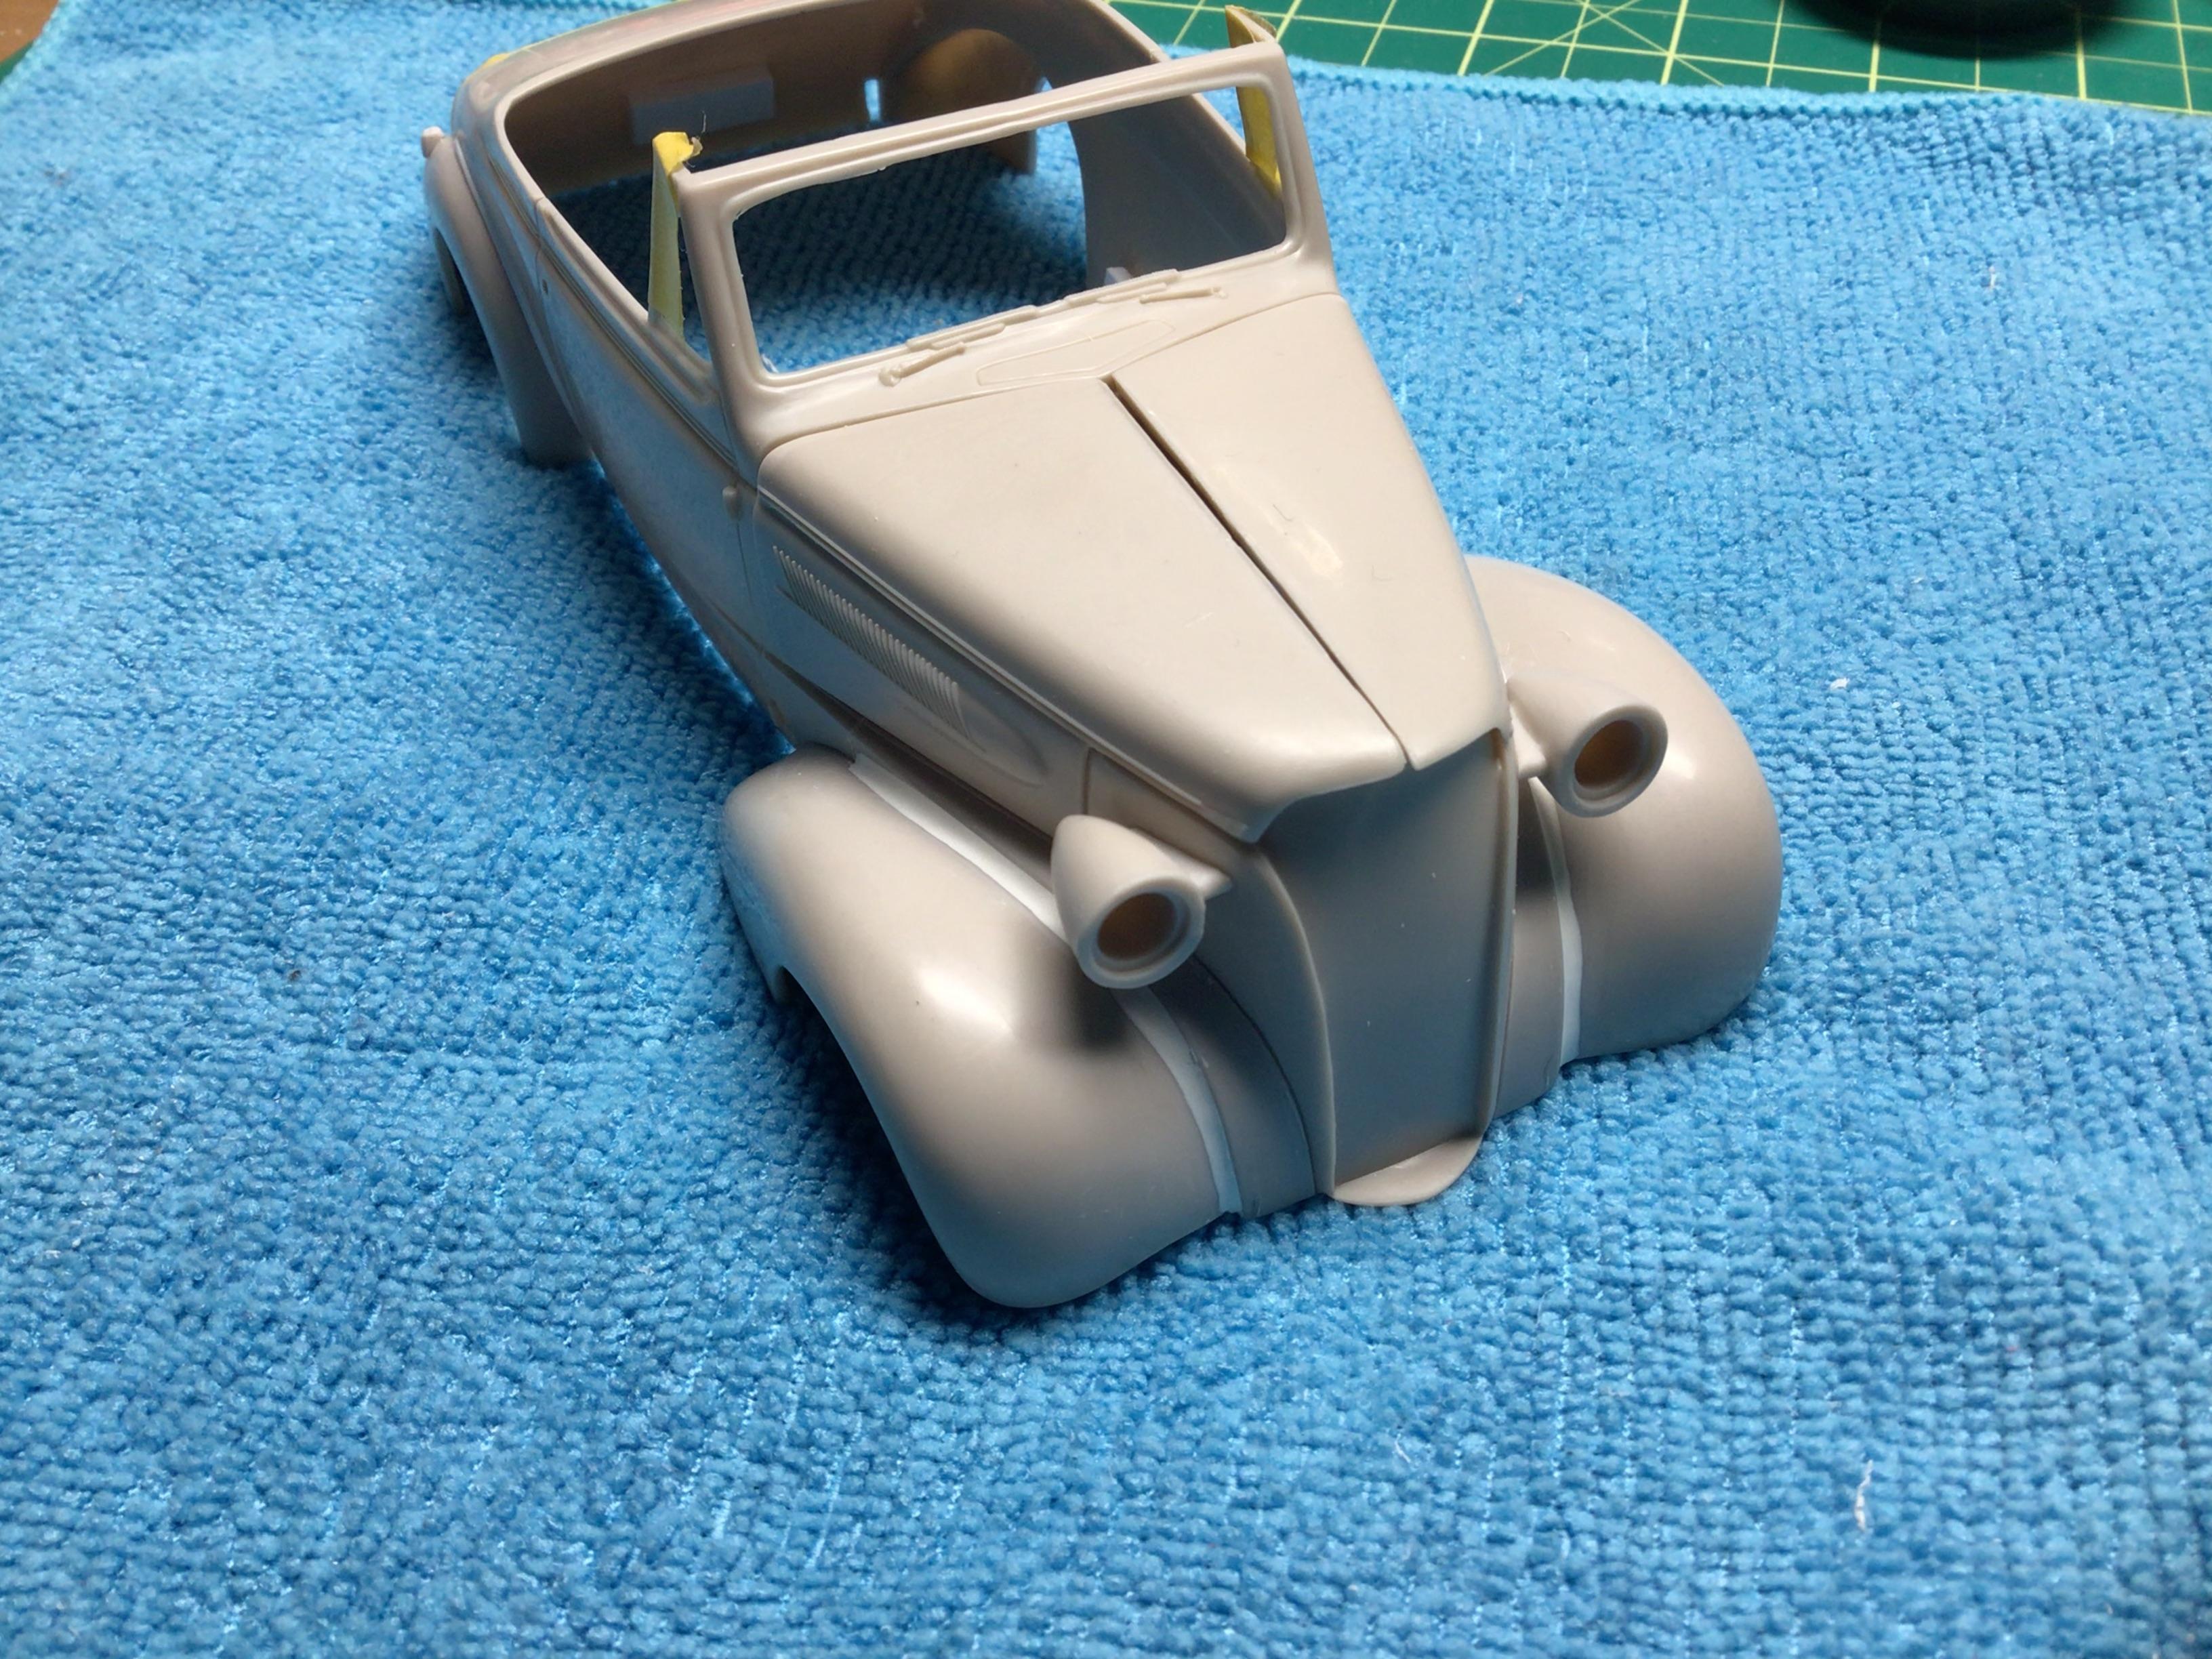
I’ve replaced the side beads with some 0.030” and 0.020” half round Evergreen. I had to make the smaller size by scraping it down to half thickness. It needed a bit of light sanding to get rid of the rough edges. I carefully pulled it through a folded 1500 or 2500 grit sanding pad to smooth them. Once glued in place with Tamiya thin and the edges smoothed a bit I think it looks better than the original in my eye.🤓 And I re-made the detail at the front edge from some thin Evergreen. I see the headlight pods are not quite correct. They should have a 2/3 football shape instead of a 1/2 football shape if that makes any sense. I think I will leave them as they are though.😕

-
A bit of primer and it will look like it was part of the plan from the get go.😎
-

DUESY: A 34 Duesenberg RWD V12 LOOOOOW MODERN MONOCOQUE STREET ROD
NOBLNG replied to Claude Thibodeau's topic in Model Cars
You have quite the imagination Claude…and the talent to showcase it with incredible builds!👍😎 I love your hood hinging systems.👍 -
Nice work on the chop!👍😎
-
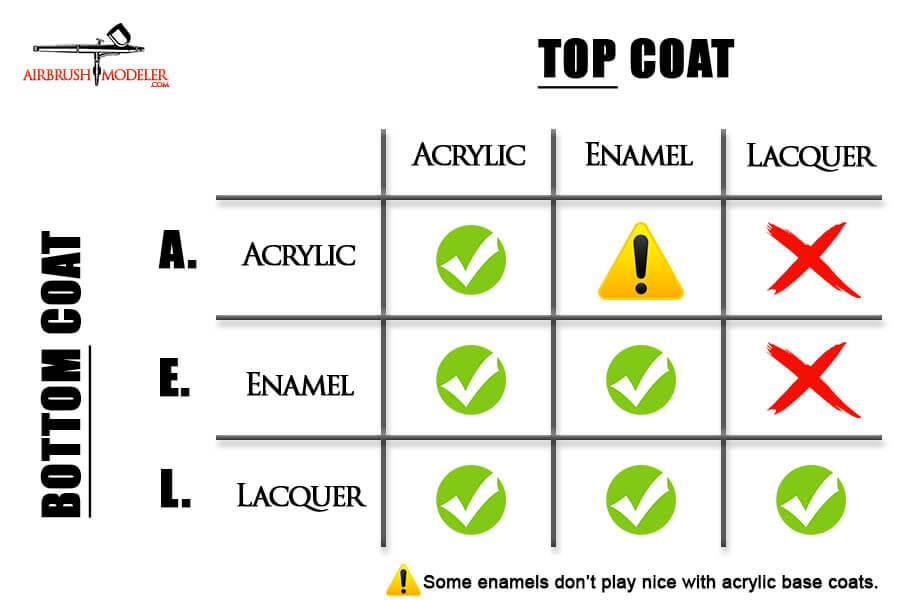
Unless you are doing a white or otherwise very light color, I would use their light grey primer as it will help to reveal mold lines and imperfections better than the white. I have had good luck with Mr. Hobby clears….both the UV Cut and their premium topcoat in the green can. I recently did a test paint job with Duplicolor perfect match clear and it worked very nicely over Mr. Hobby paint. It is a lacquer though, so can’t be used over enamel. It may work over water based acrylics, but do a test first.
-
aluminum rod inside styrene tube
NOBLNG replied to fiatboy's topic in Model Building Questions and Answers
What wire bender are you using? Can you post a picture of it? Thanks.🙂 -
aluminum rod inside styrene tube
NOBLNG replied to fiatboy's topic in Model Building Questions and Answers
I bent up some 3/32” plastruct tubing for a roll cage with some soft wire shoved inside. It bends beautifully, but the moment I touched the bend with some Tamiya quick set, the styrene split. I eventually used CA for my cage which does not cause a problem. But then I tried another test. After bending I just quickly passed it over the flame of a butane lighter. The flame took all the tension out of the styrene. The middle bend has also had the quickset applied…but no cracking at all. I imagine it would work for solid rod also if it is prone to cracking.
-
You are pretty well set. Now jump in with both feet and start building.😜 You will ALWAYS need more stuff. Remember this applies to both paint and primer.
-
Thanks Dan. I haven’t even looked closely at the grill yet. Thanks for the heads up on it. Thanks, Yes, they supply a clear hood also, which I won’t be using. I have raised the rear back up to the original height too. Thanks. It certainly won’t be any showstopper.🙄 Hopefully just a little nicer than what AMT produced.
-
Cool!😎 It looks good in that dark red.👍
-
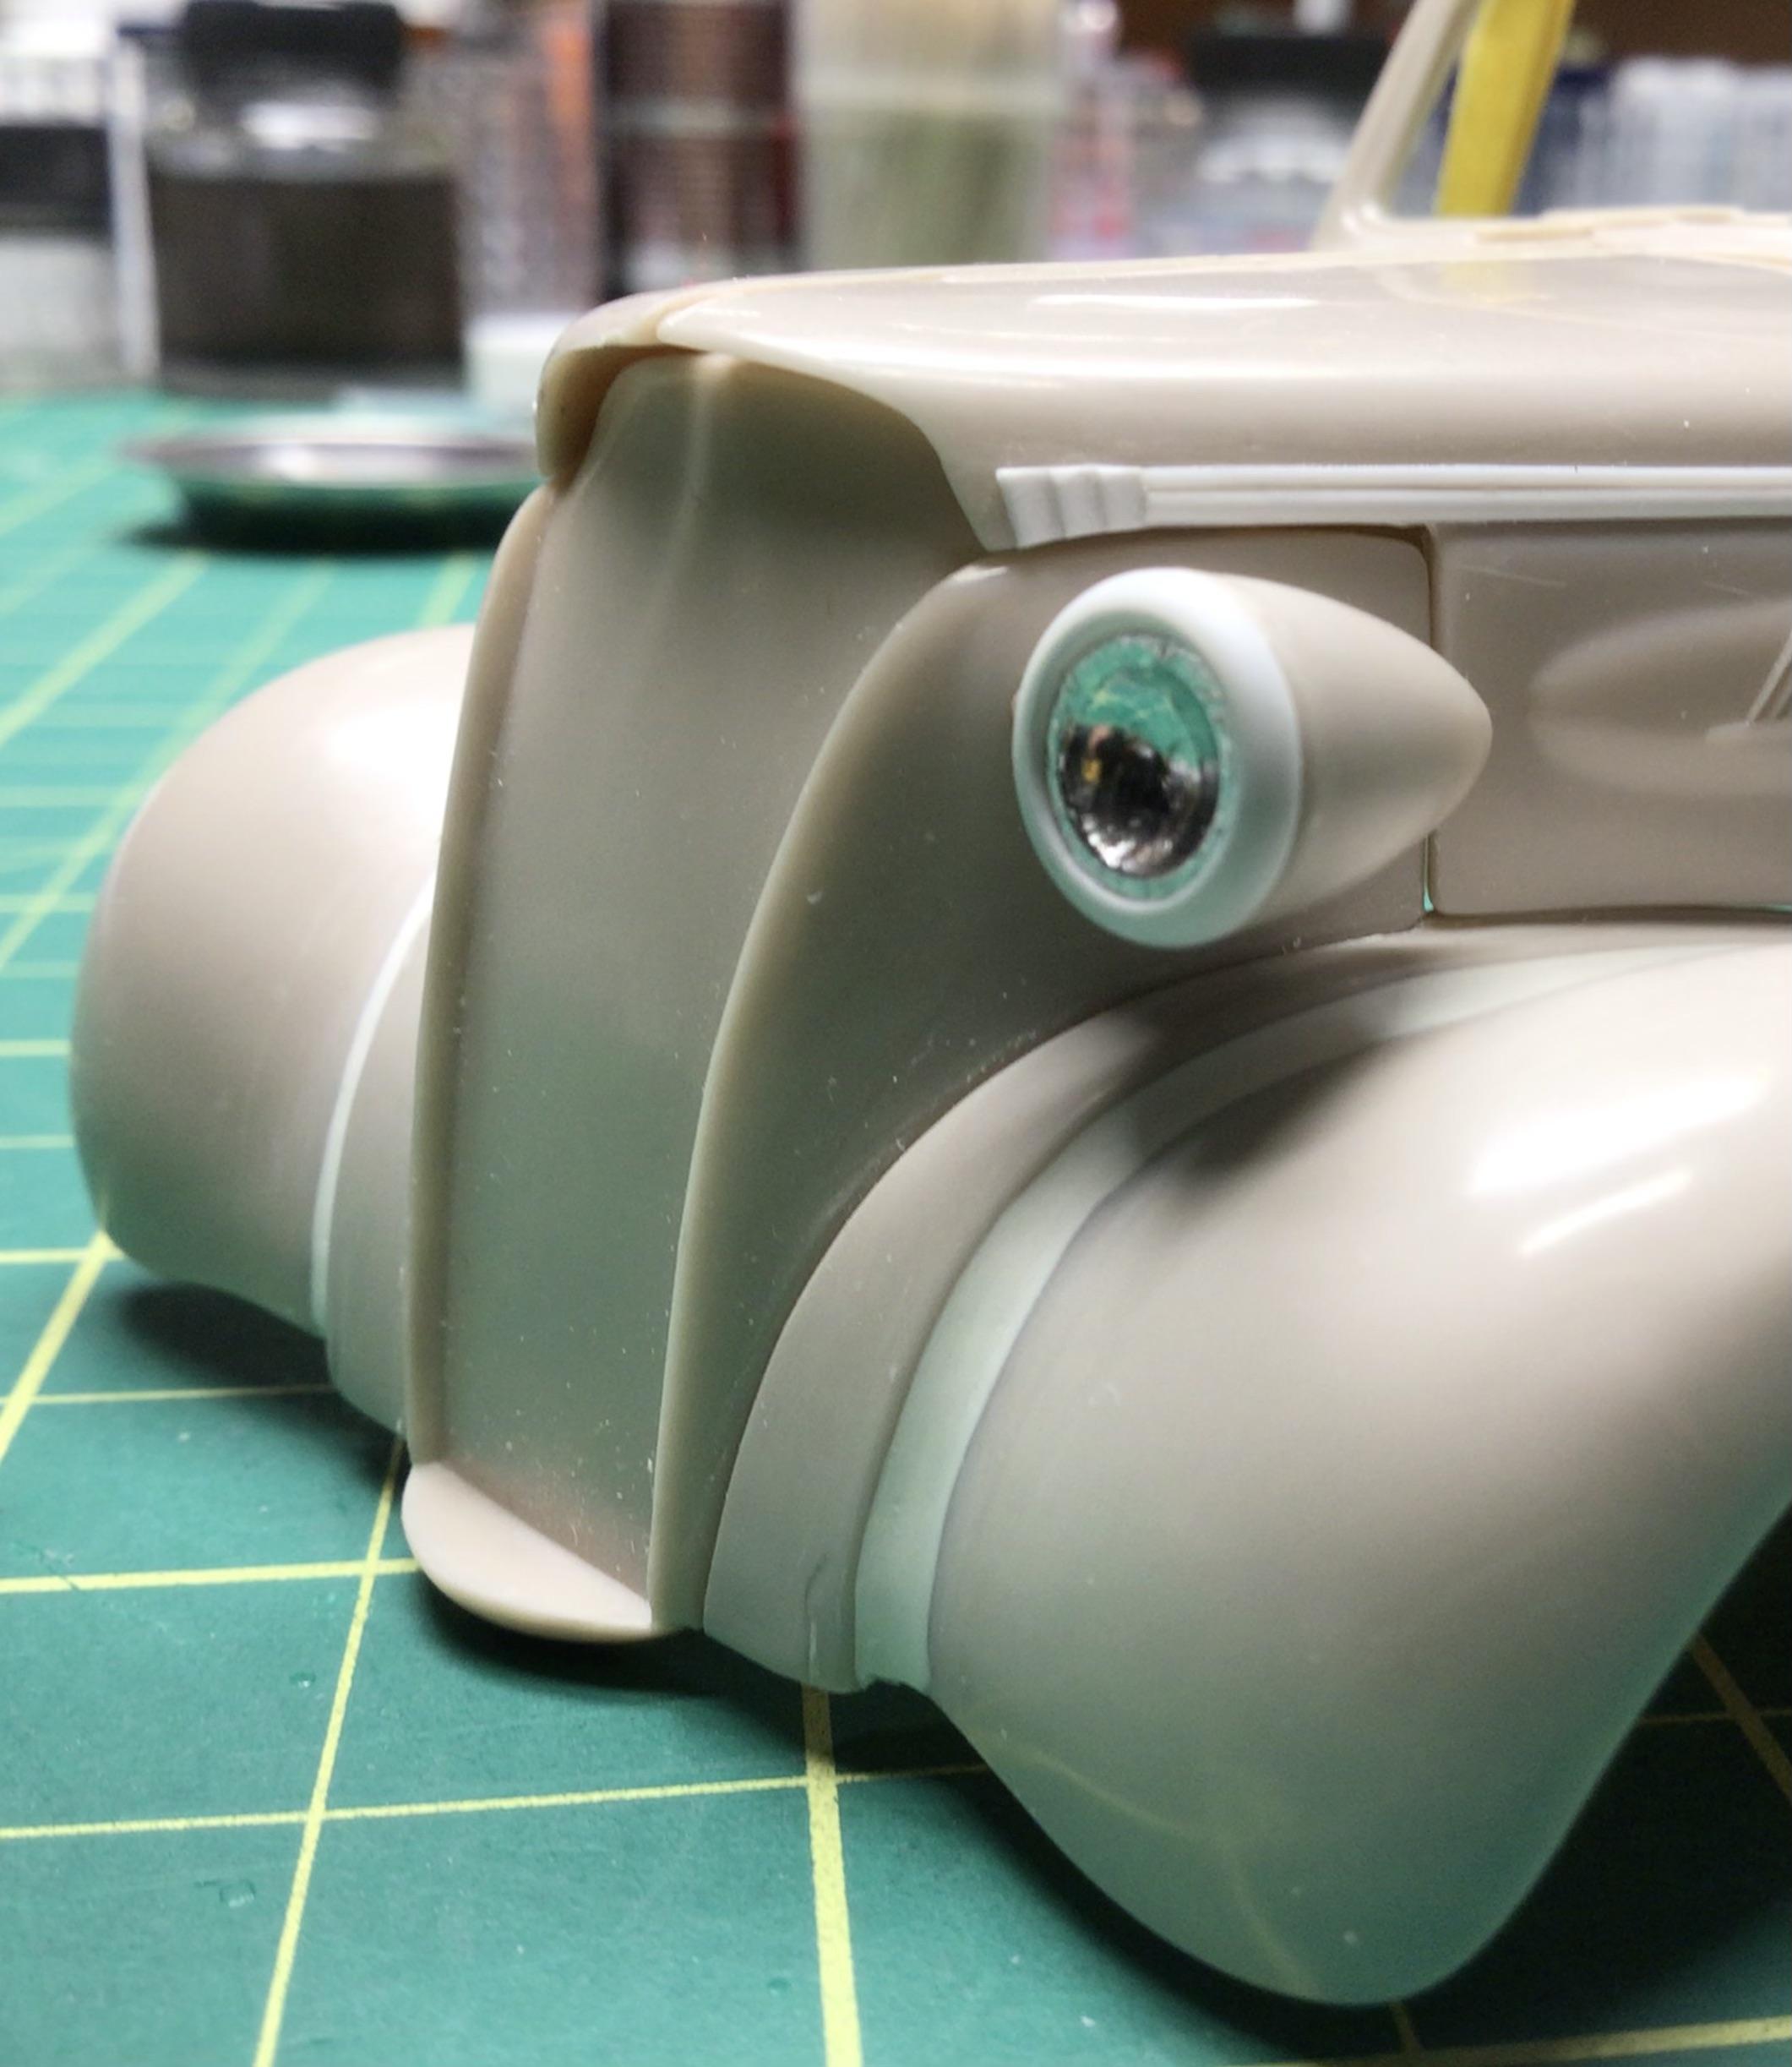
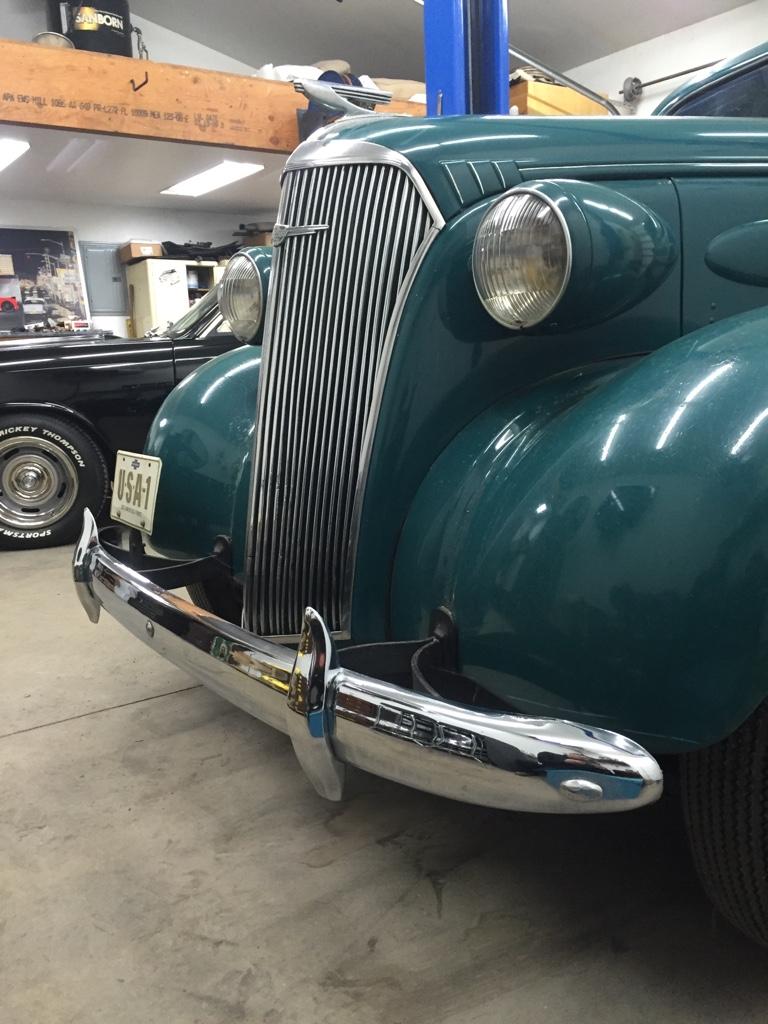
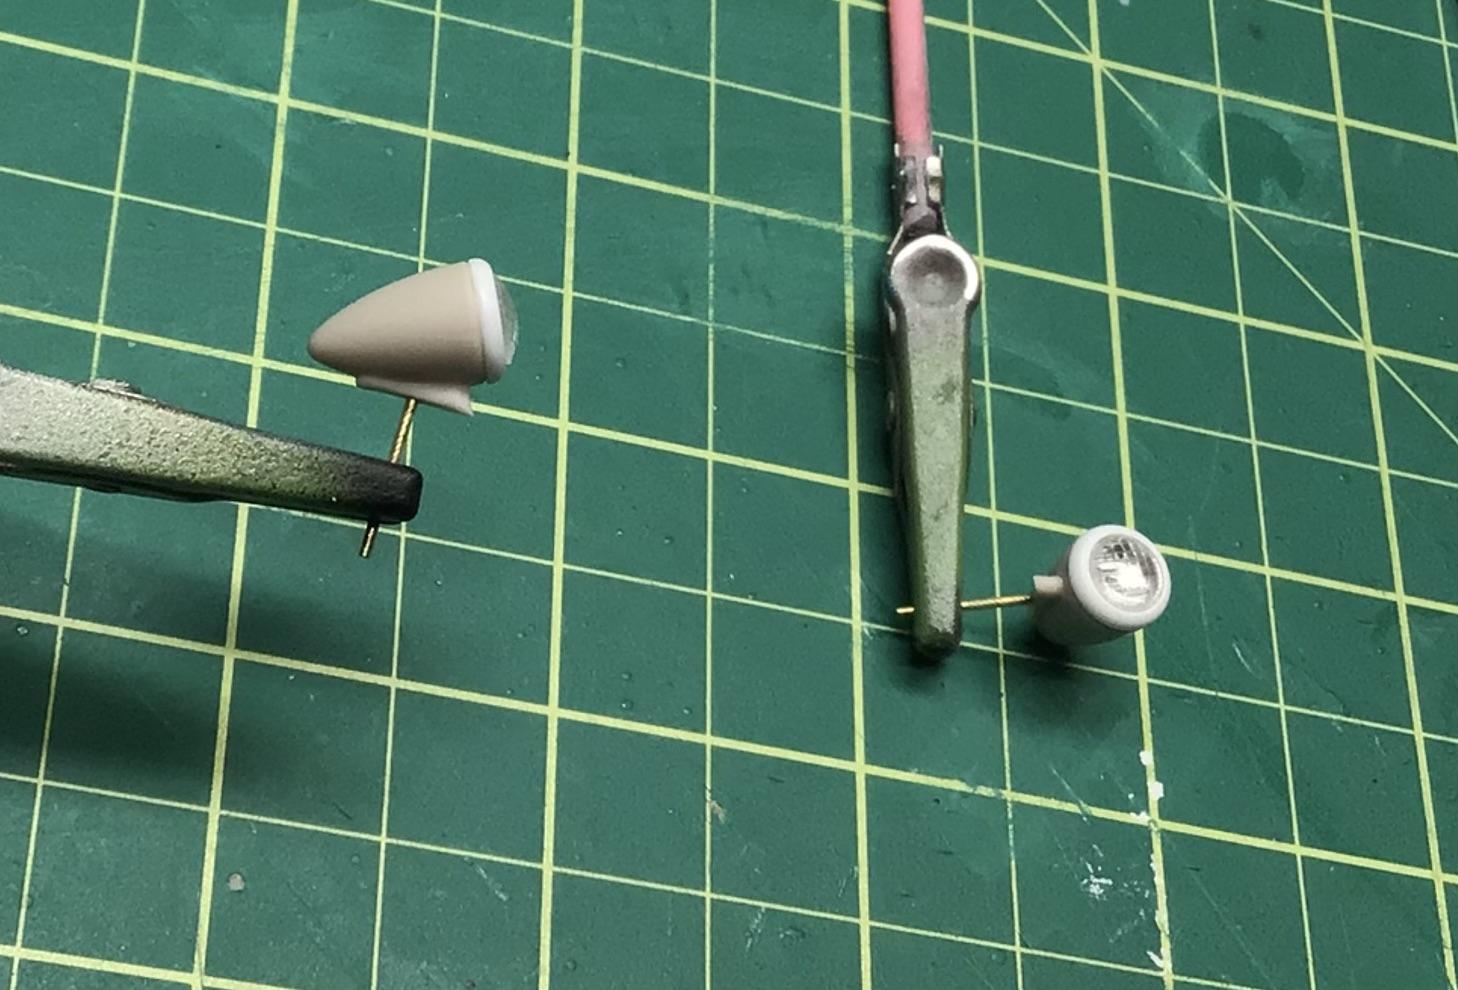
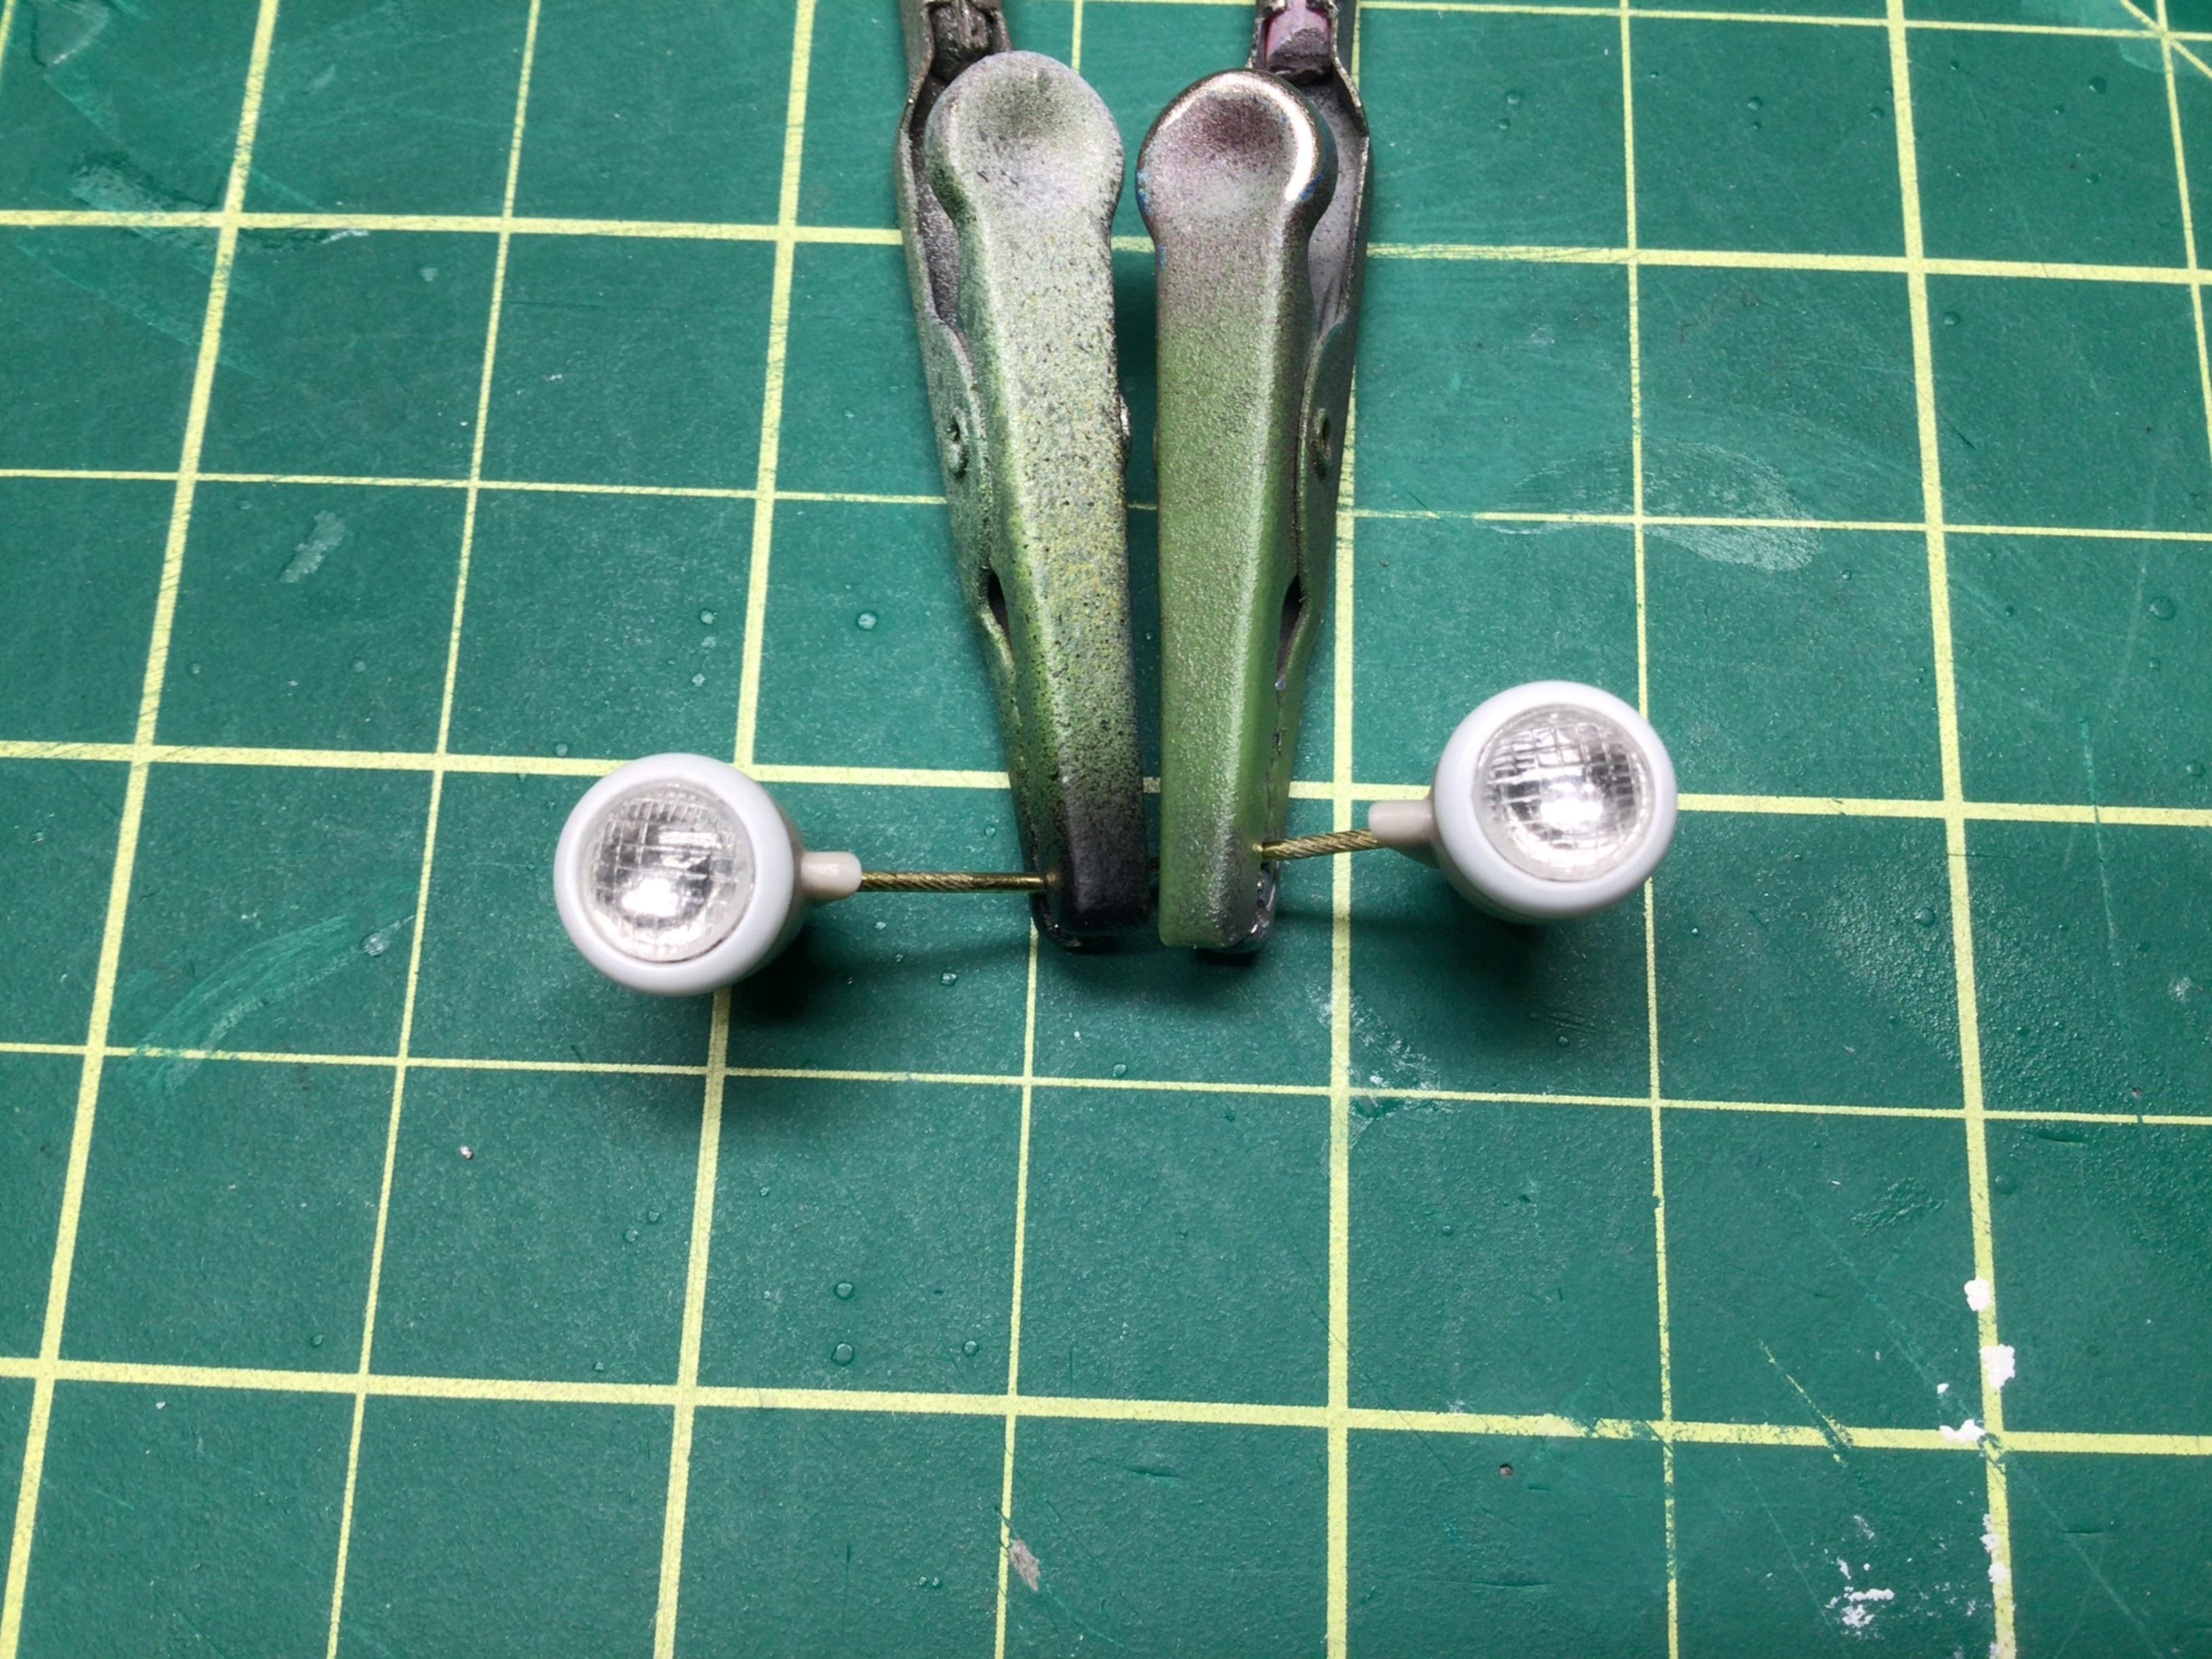
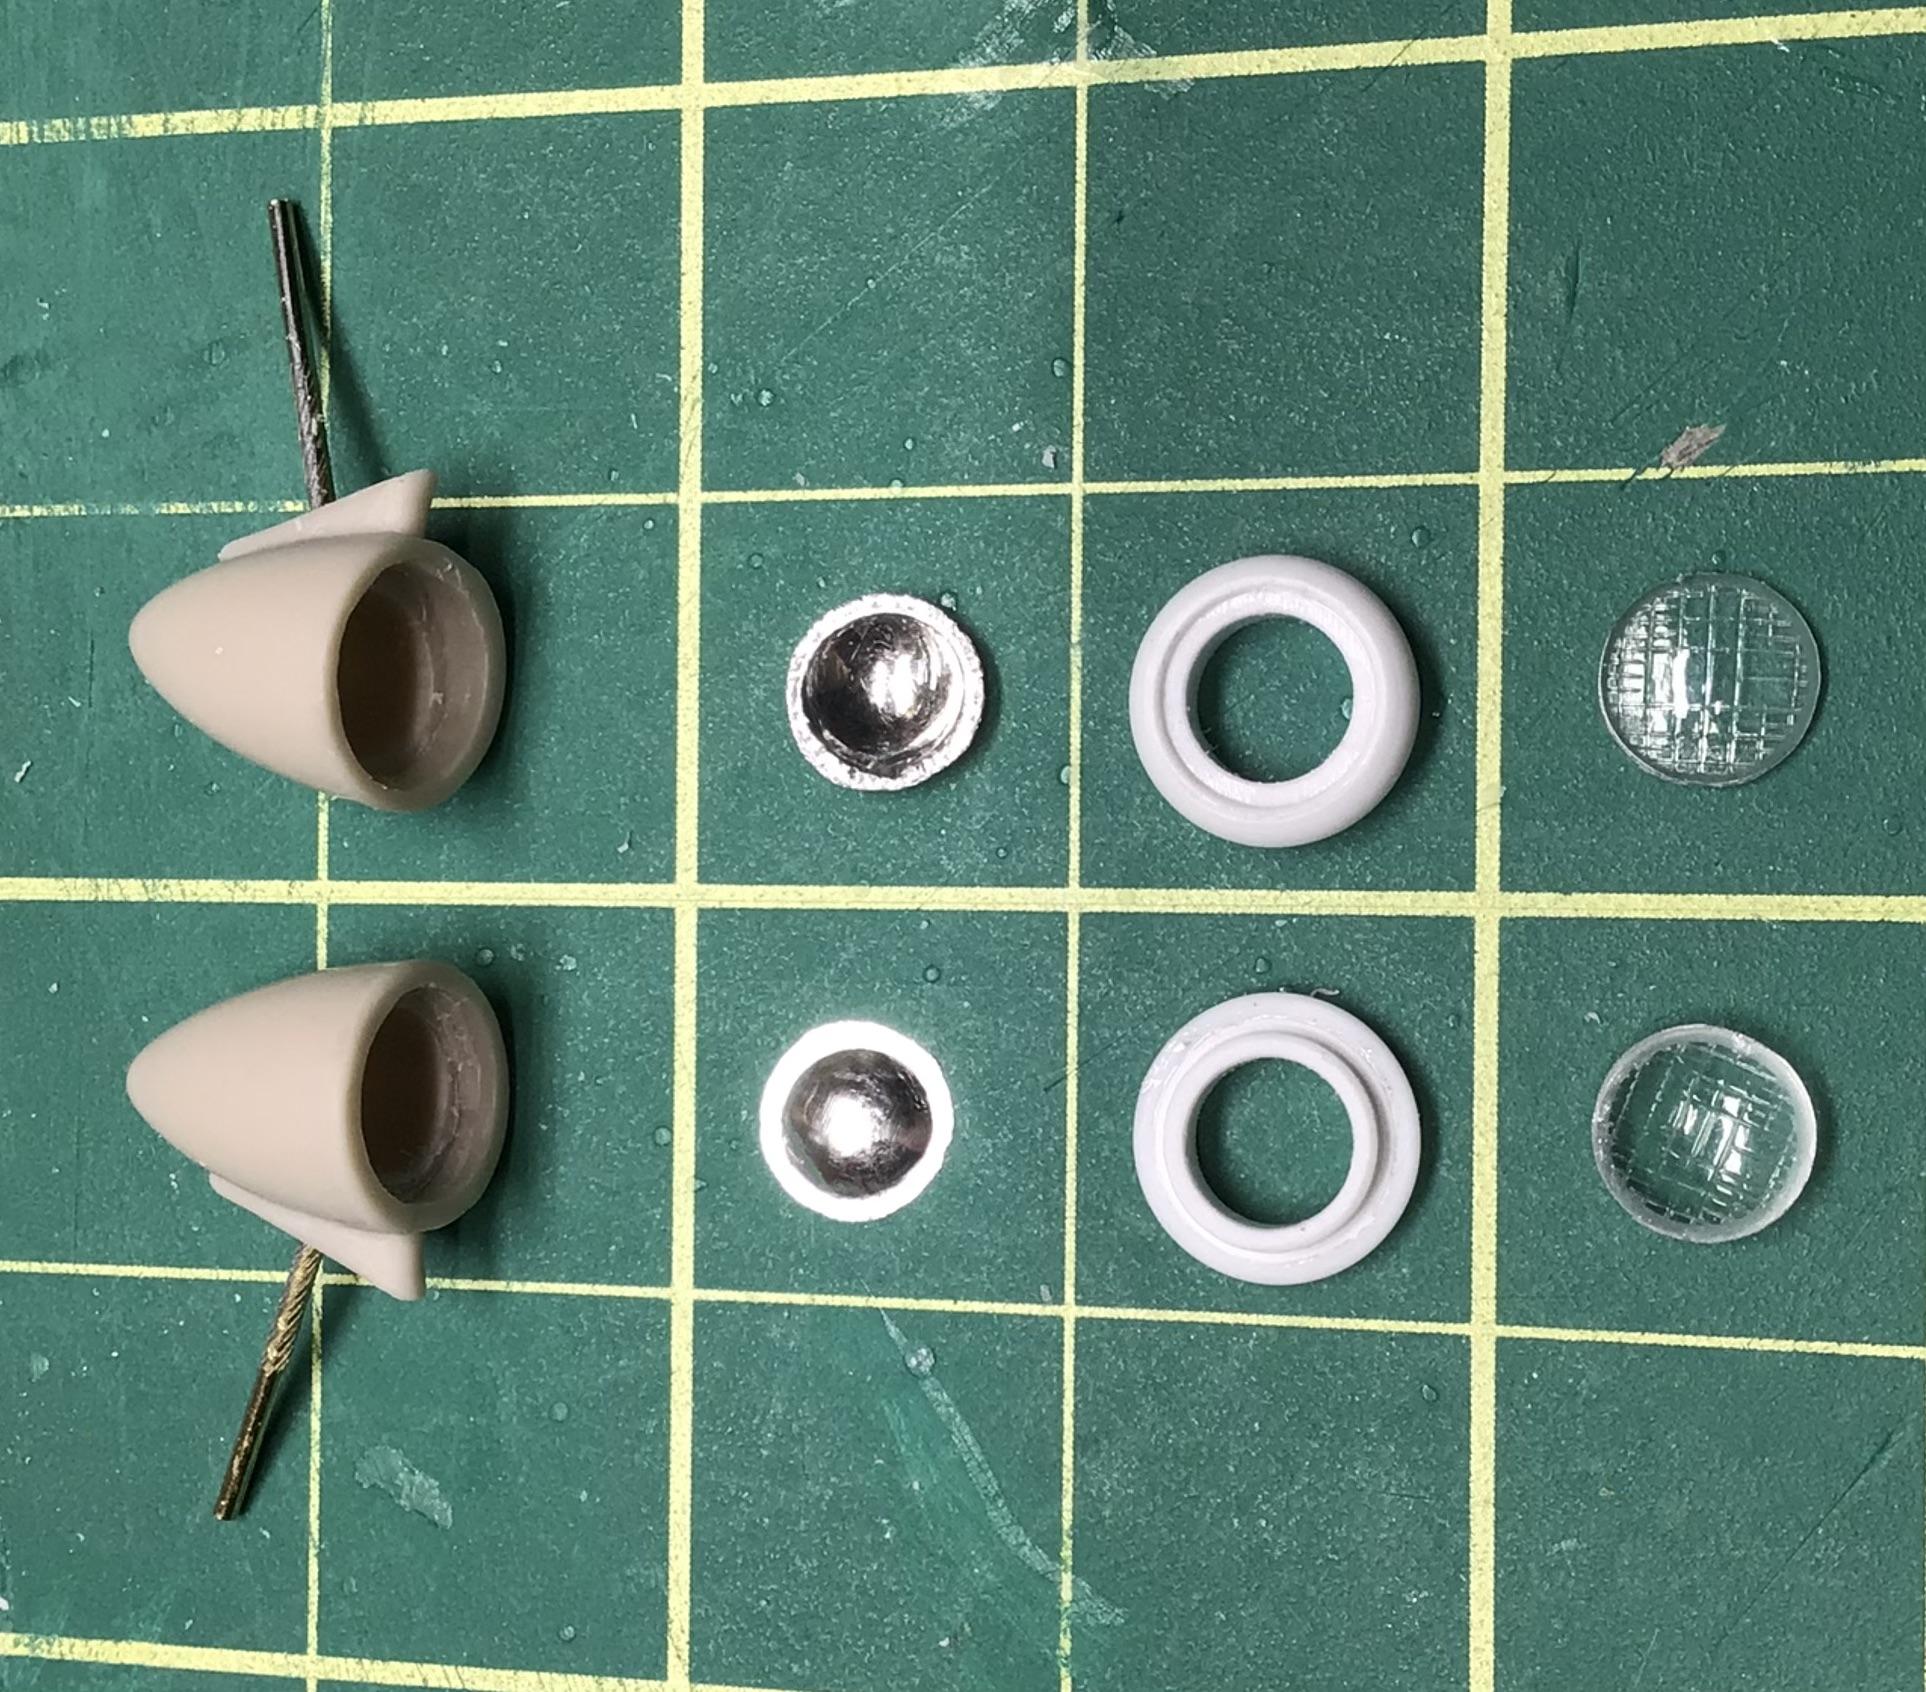
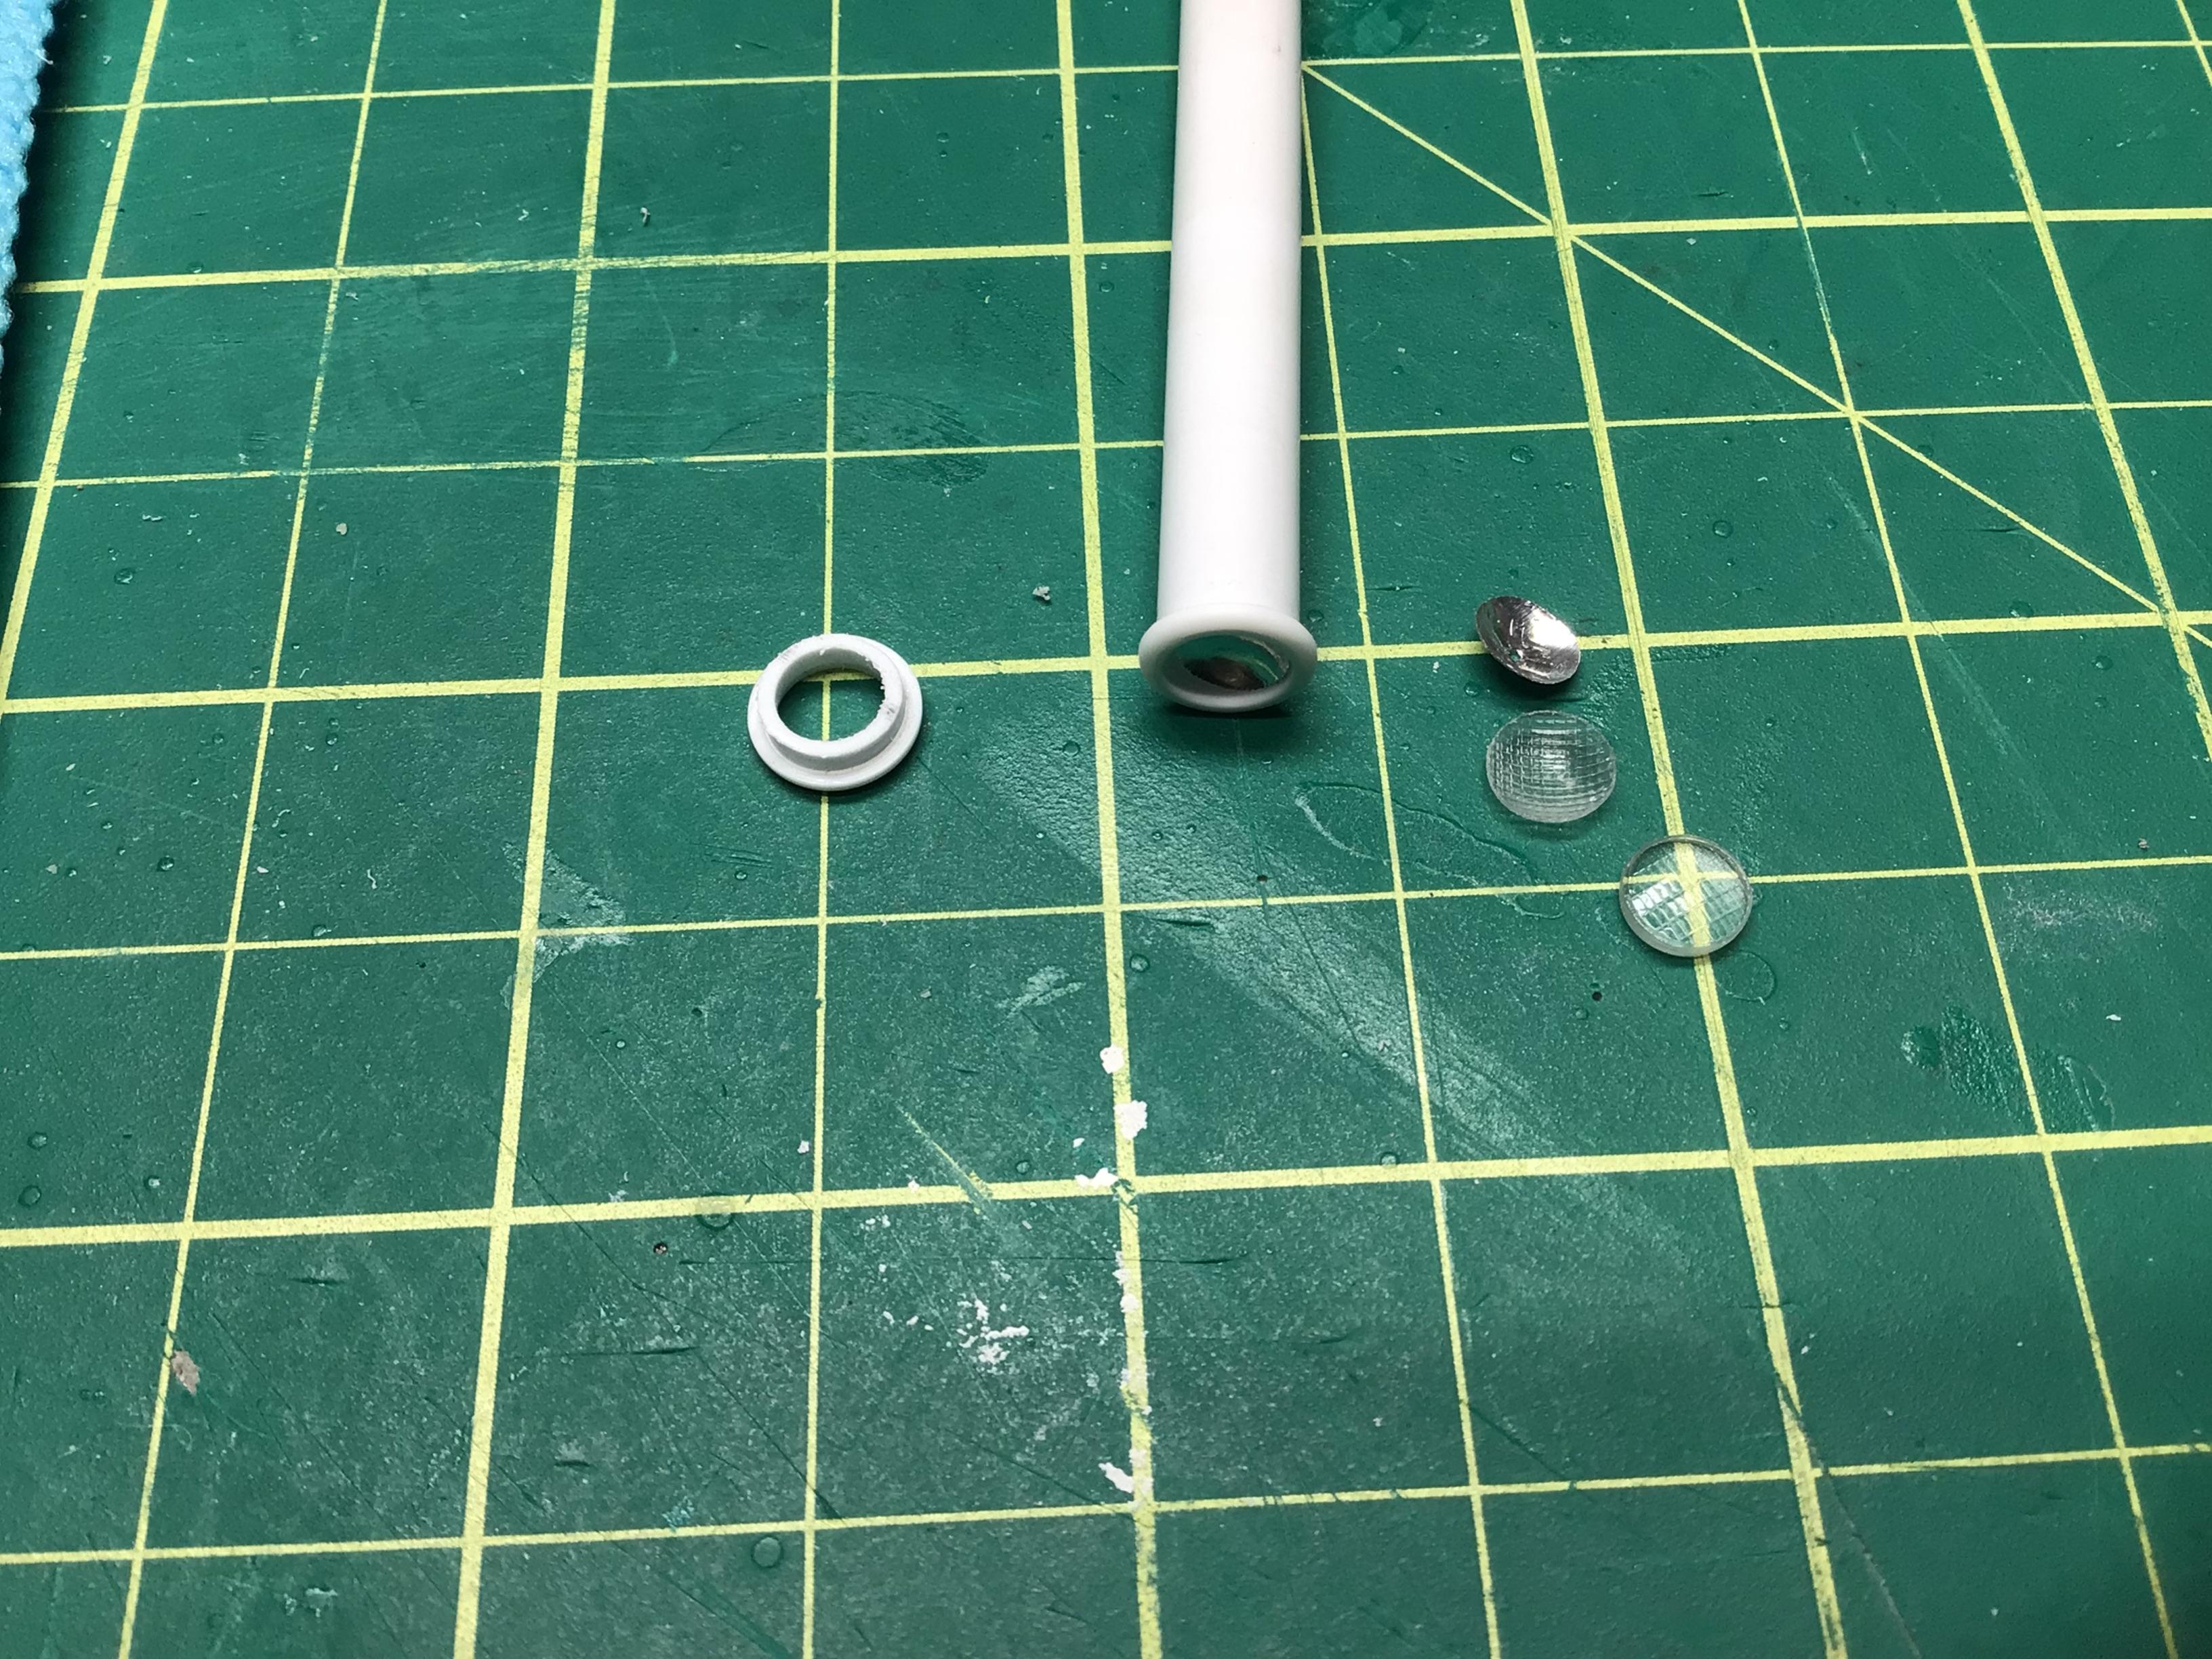
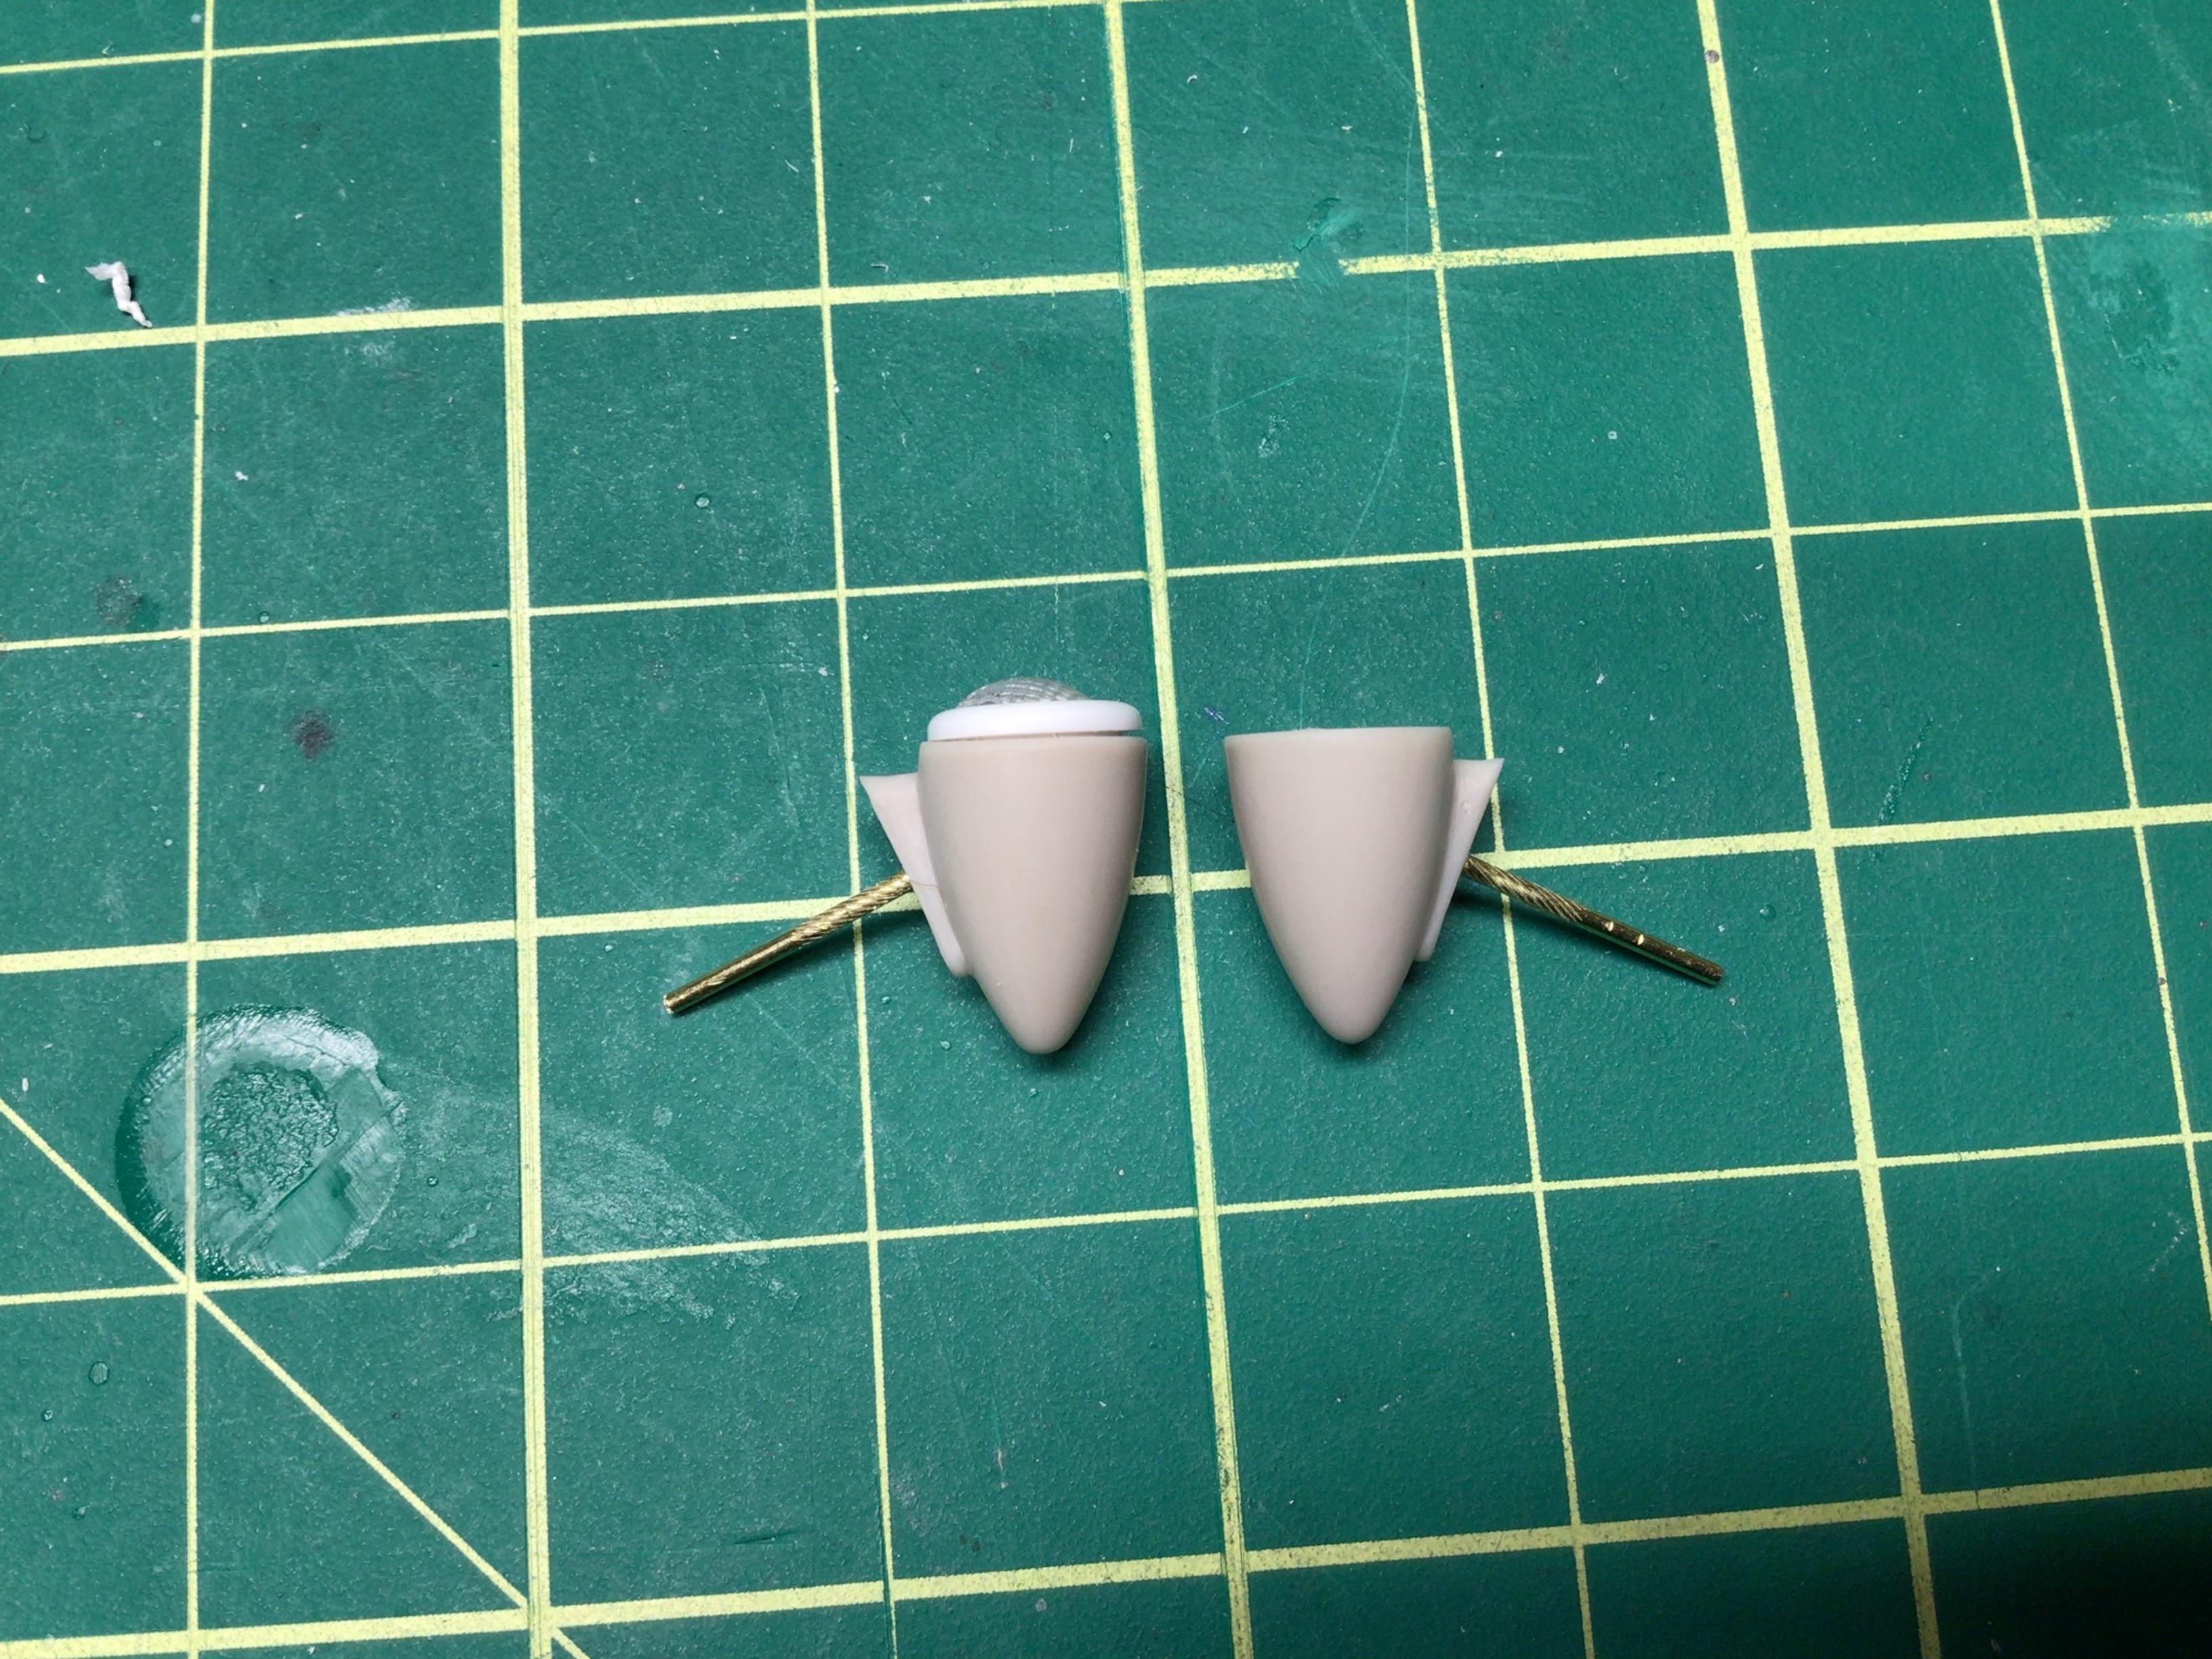
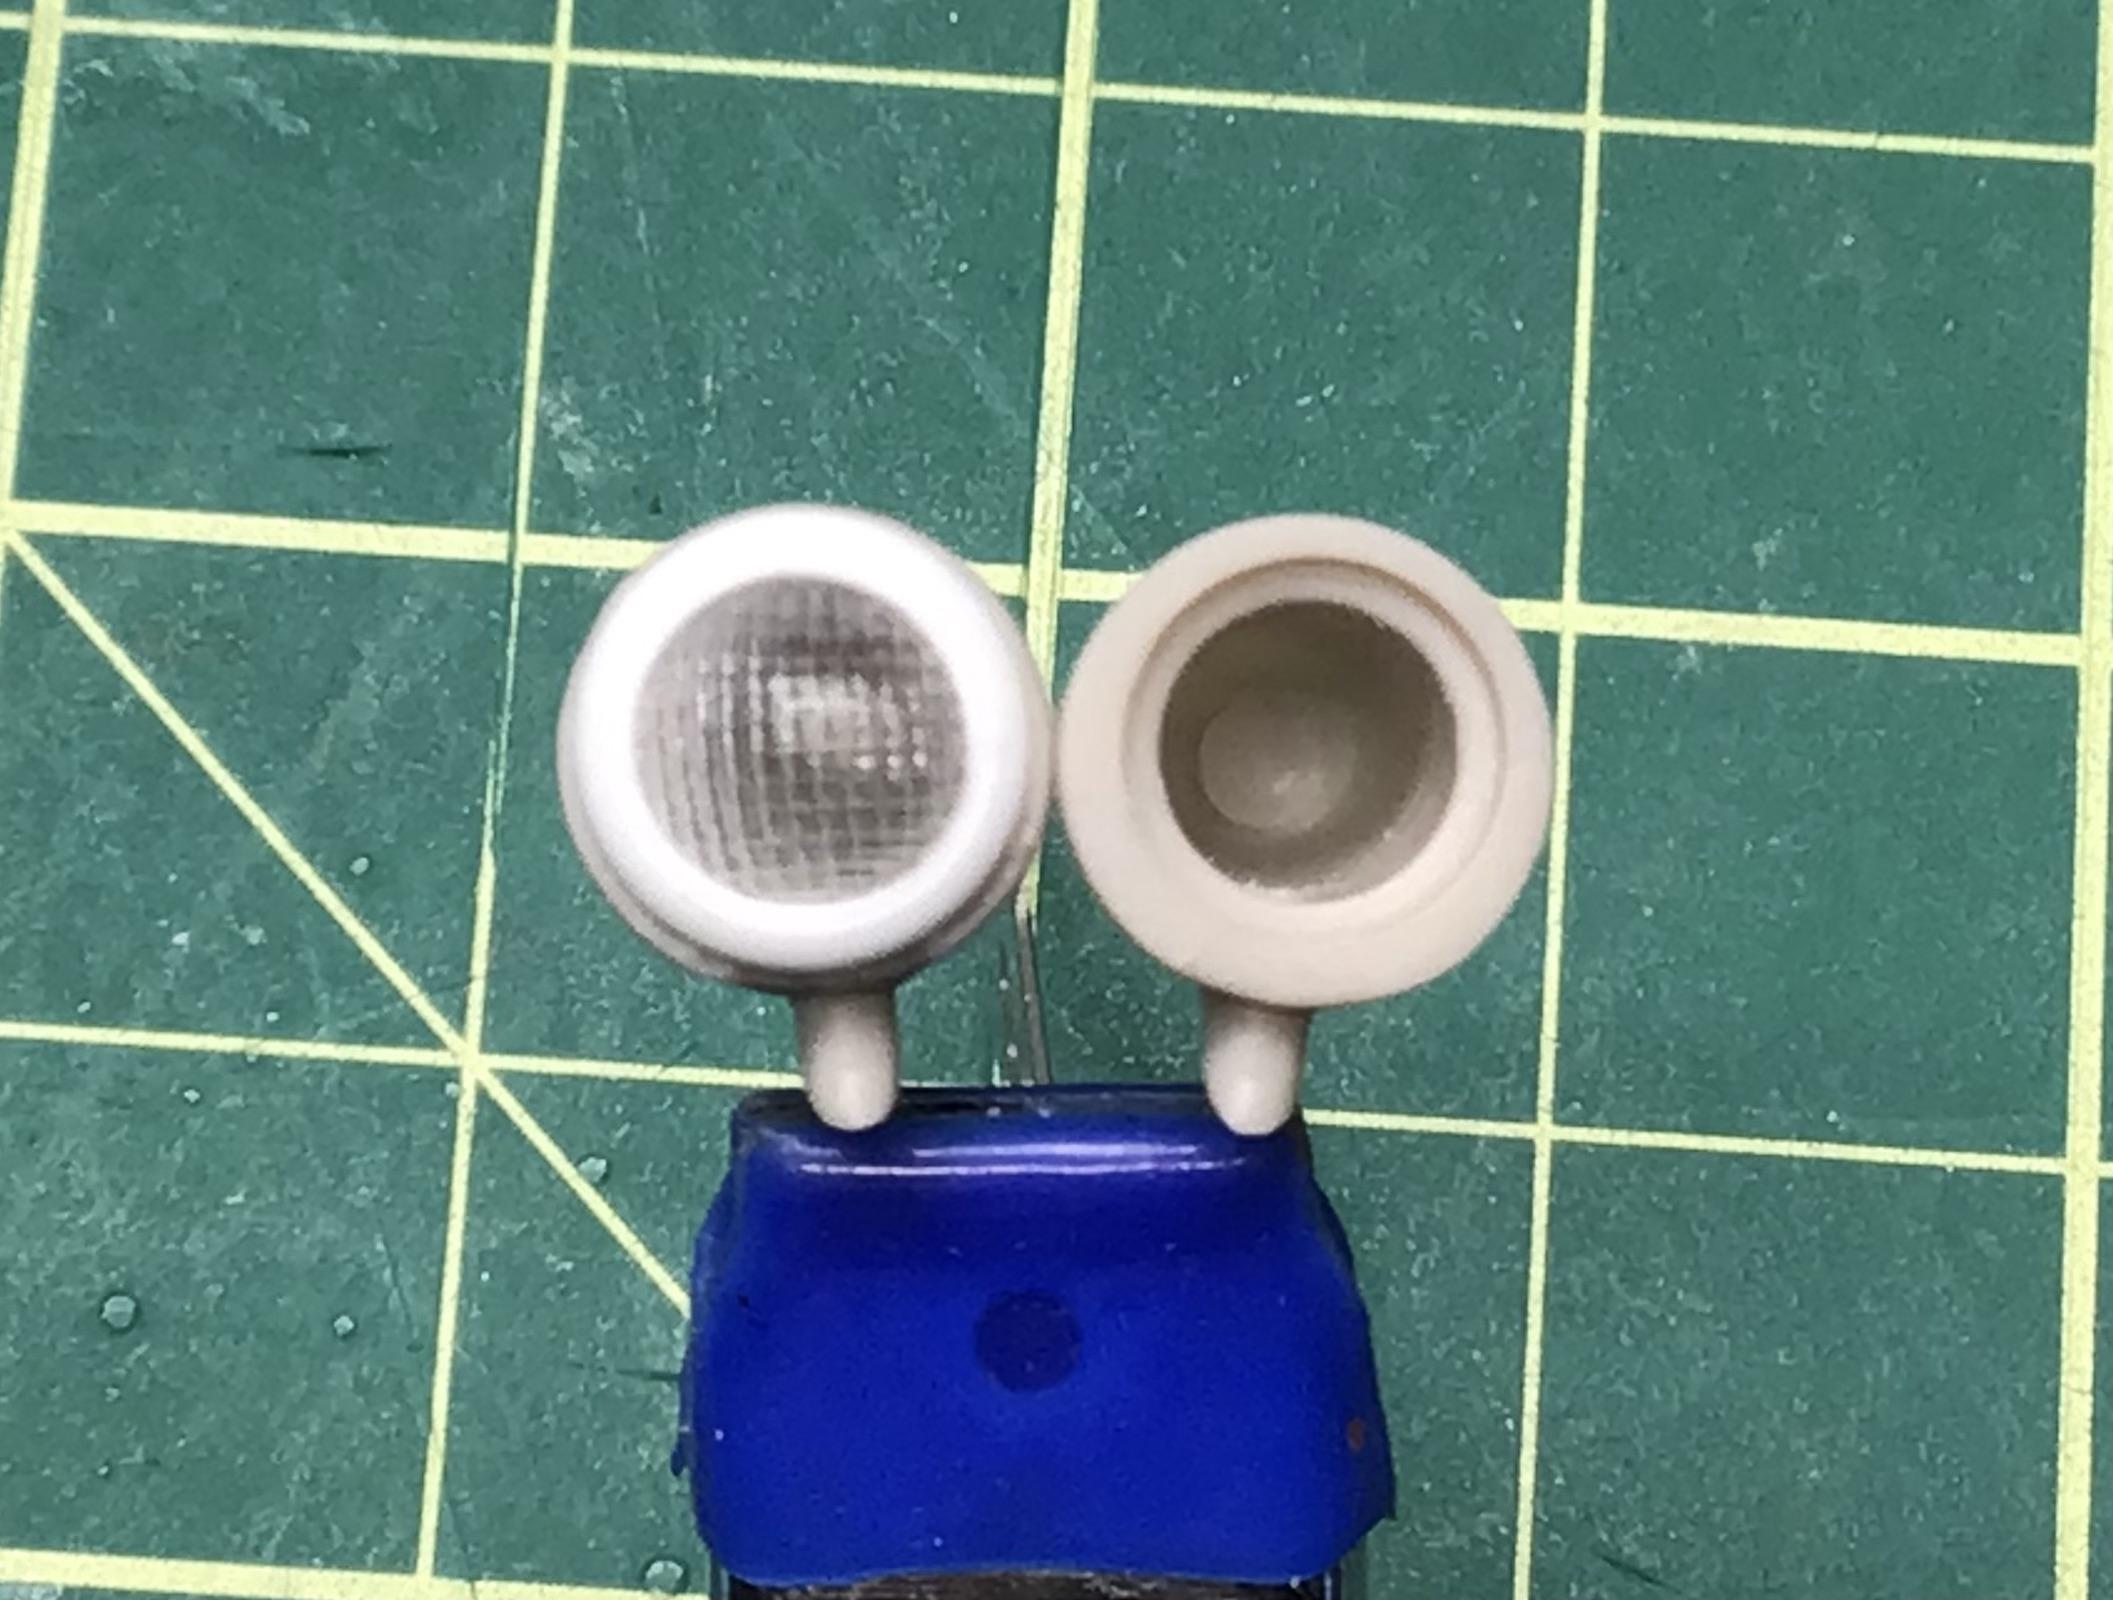
I have the headlights finalized. Bezels are glued in place. The reflector I made from an aluminum pie plate. Lens are parts box pieces.
-
Outstanding work Dave!👍 Any more pics of that engine bay?😎
-
What a cute little car.👍😎
-
Mmmmmmaybe not.😎
-
That will allow a bigger lens too. Right now it scales out to only 6-1/2”.
-
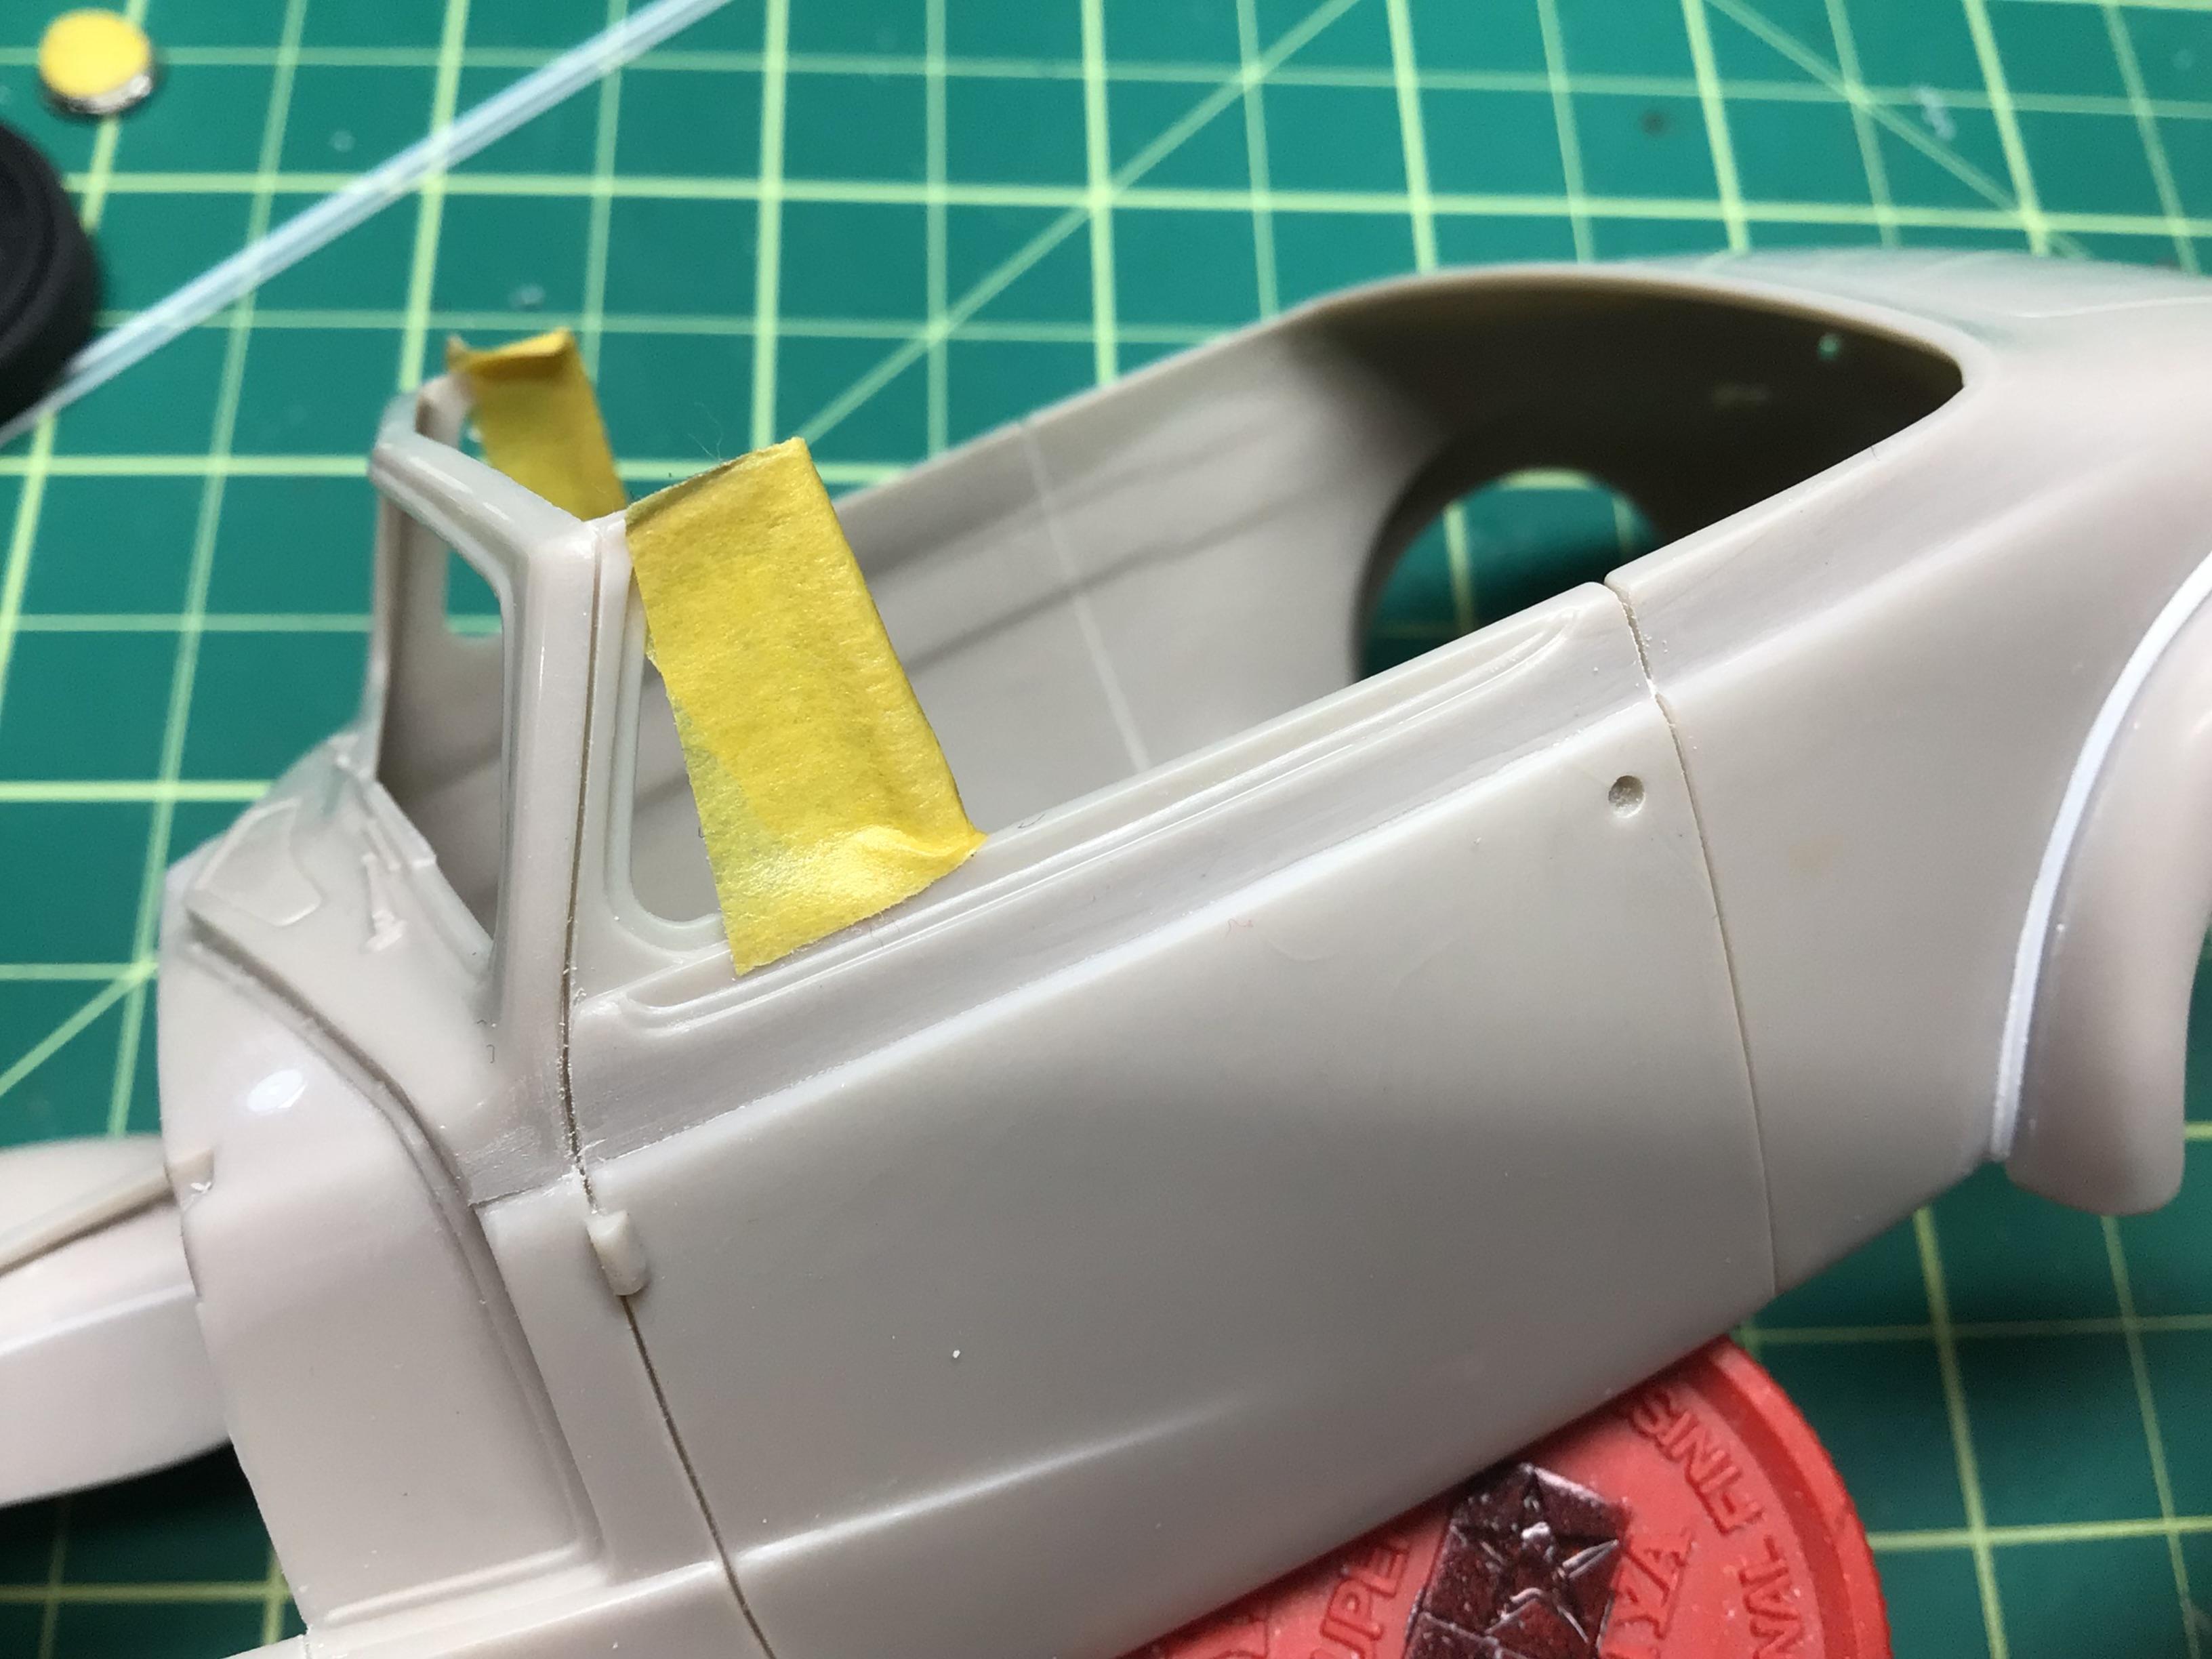
Yep! By sanding them down I may get an uneven contour.🤔 I am also missing the hood ornament so I’ll have to scratch one out. I would really love to hinge the hood, but I have experimented a bit and don’t think it’s feasible without some huge ungainly looking contraptions. So it will just be located by magnets.
-
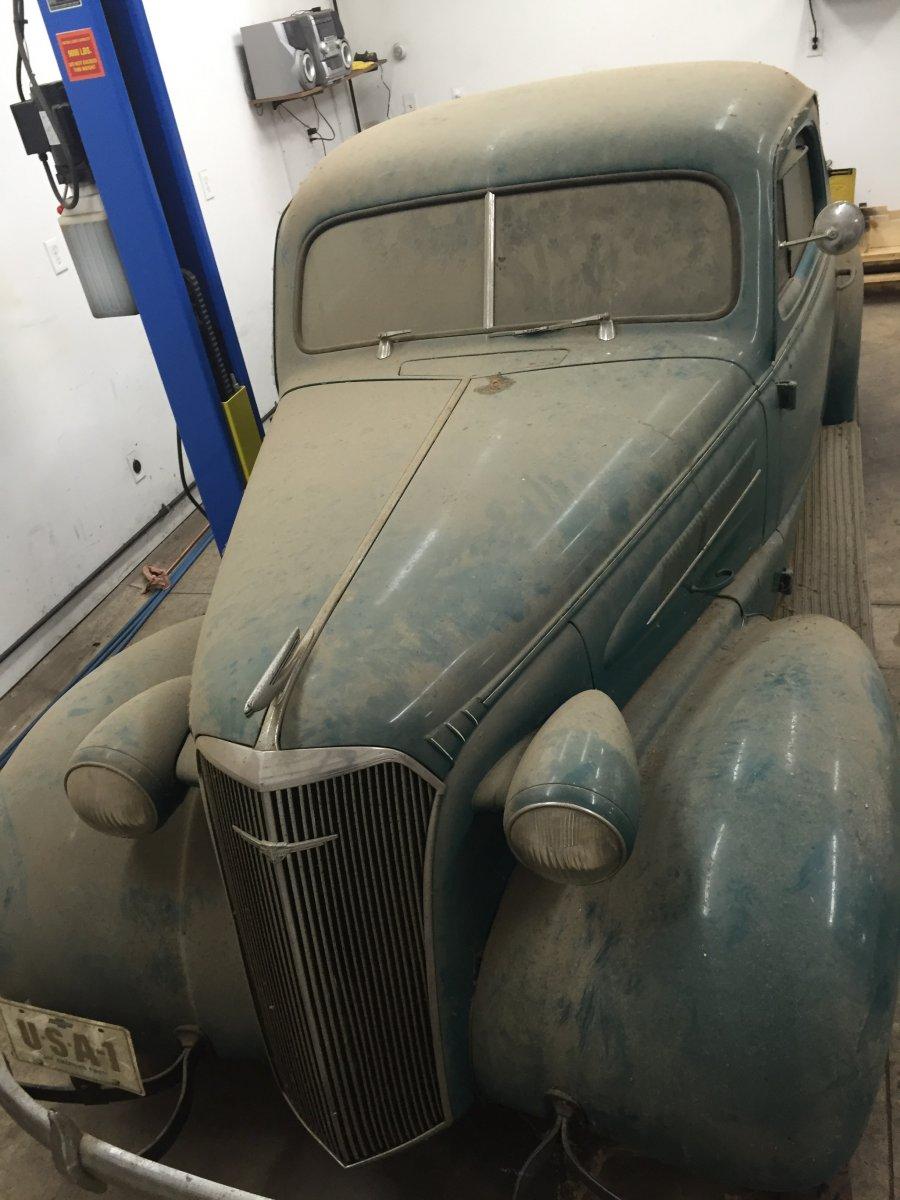
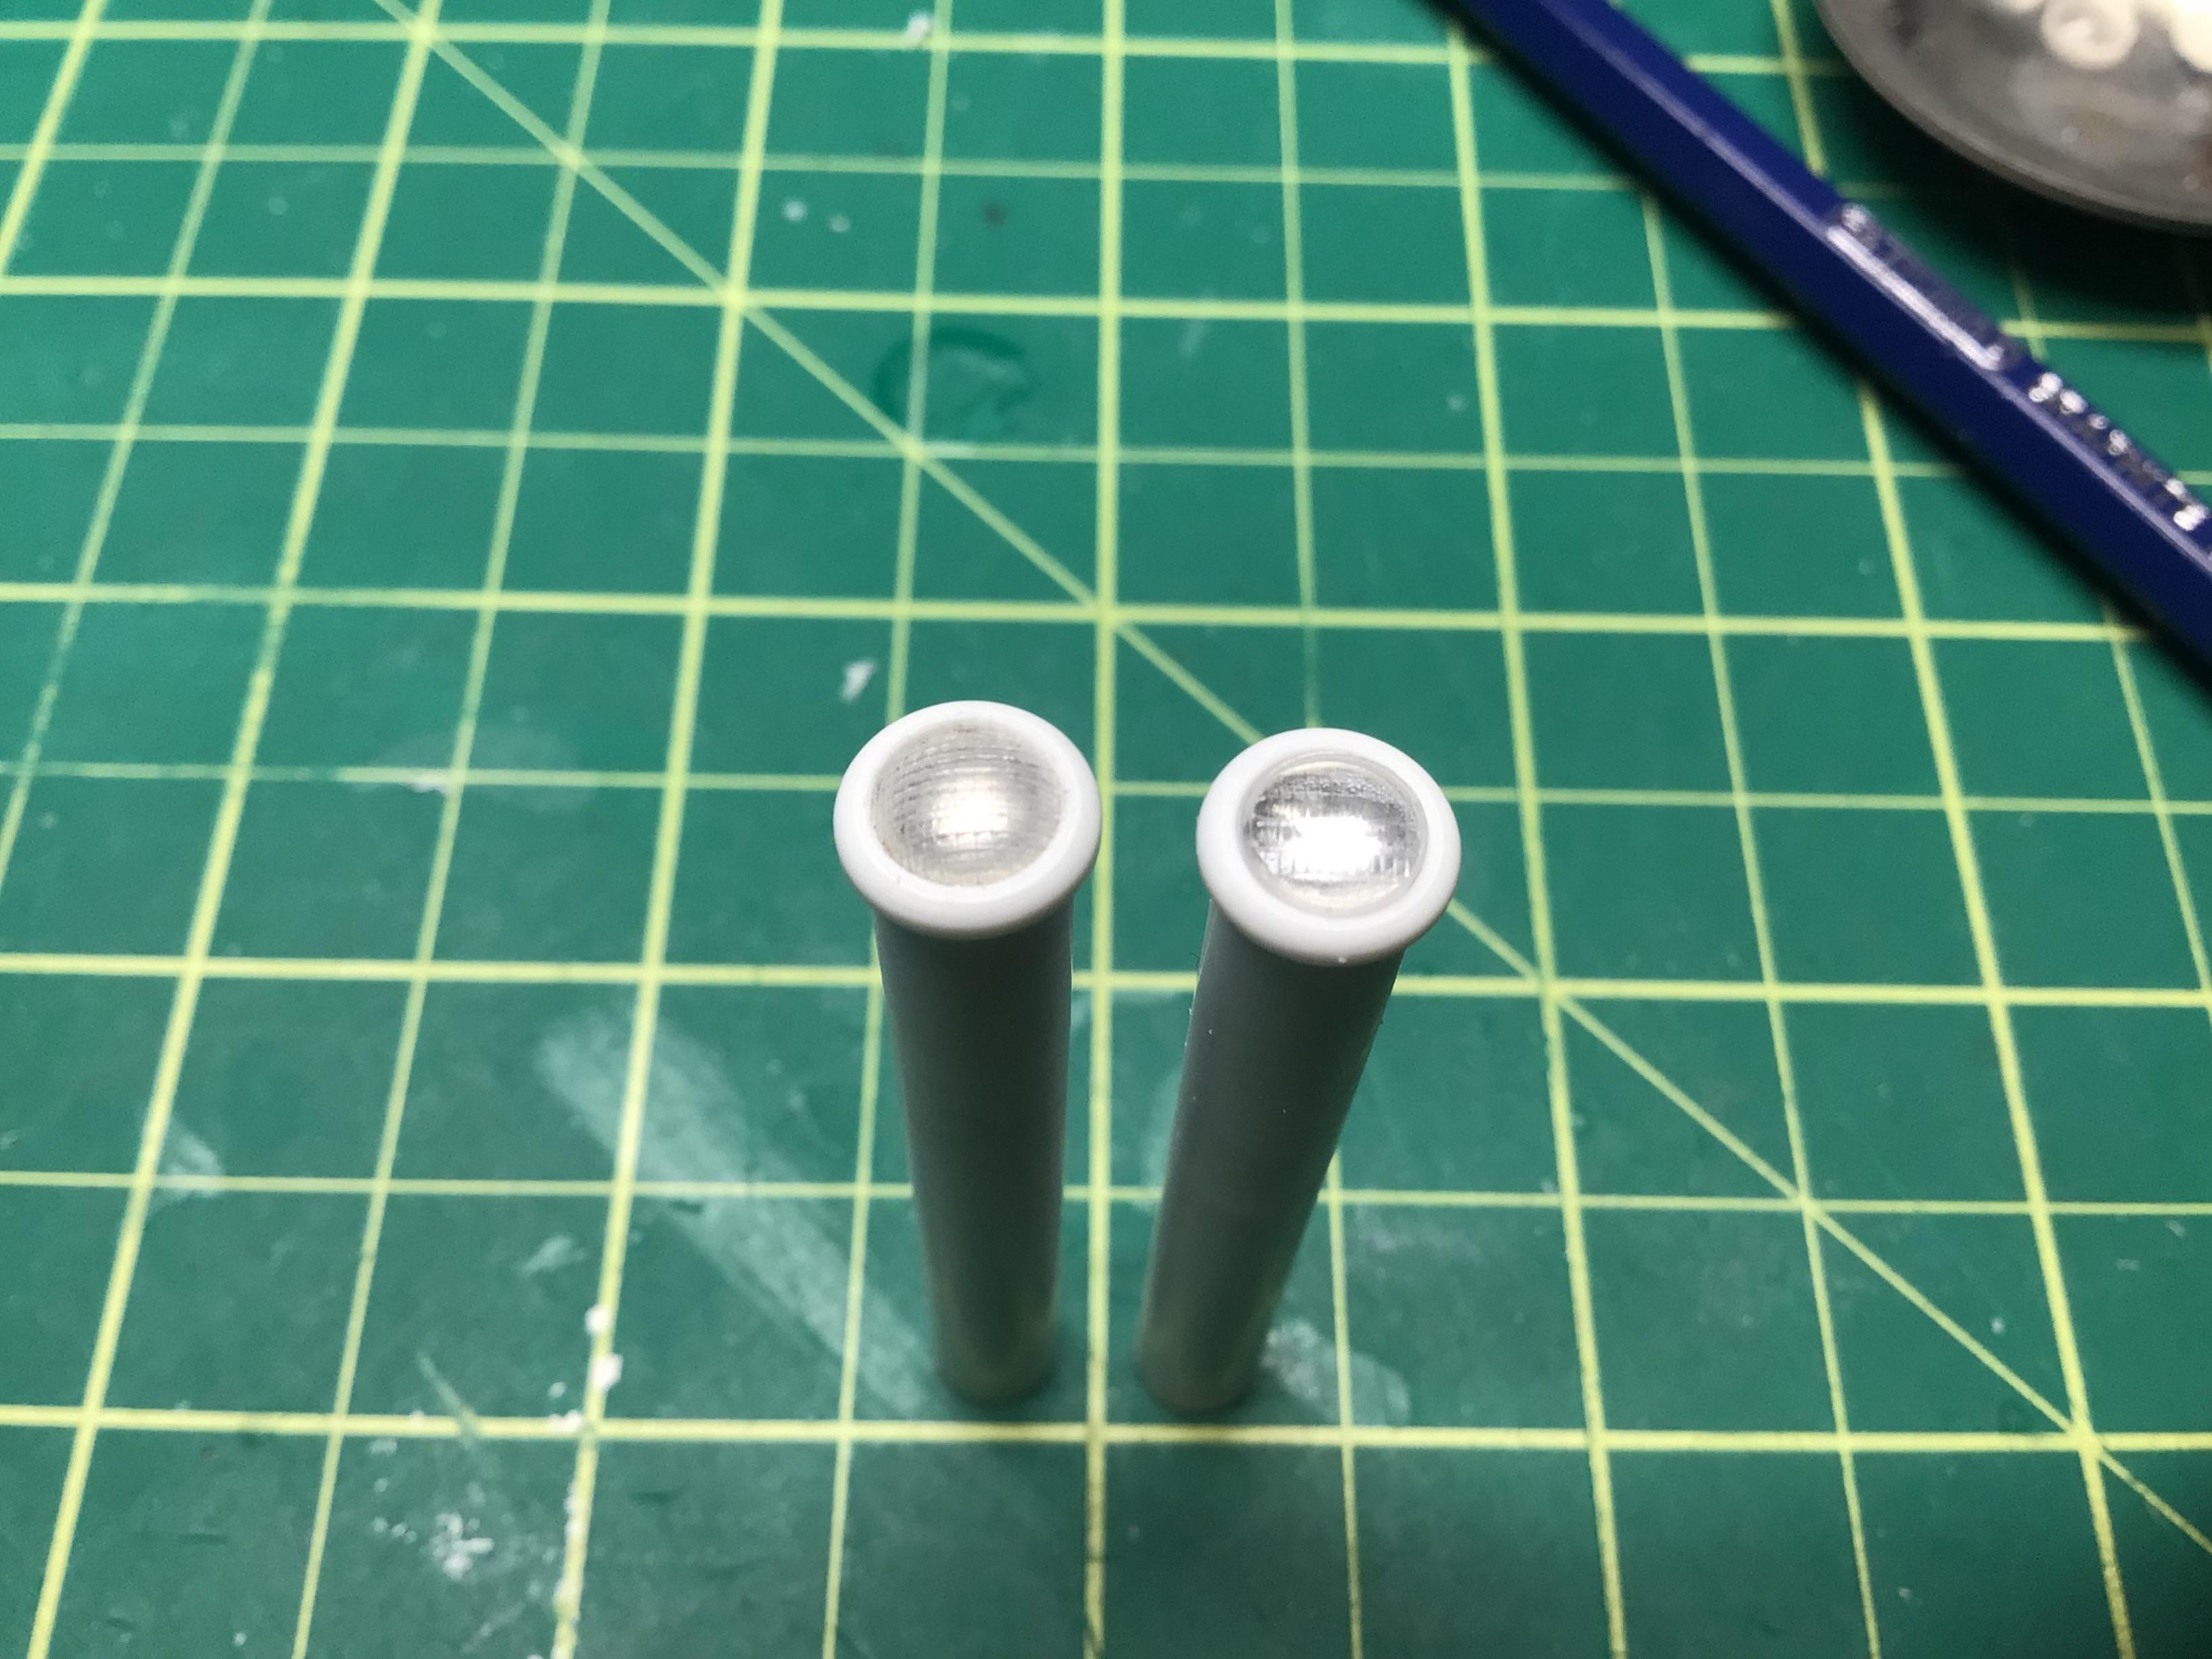
I added pins to the headlight buckets for easy installation after paint. The headlights themselves and the bezels are missing, so I am fabricating some from tubing. The ‘37s did not have sealed beams so I think my home-made lens will look OK. I’ve scratched a couple from 5/16 tube but they are a tad smaller diameter than the buckets. The buckets are actually the correct diameter (8-1/2” by my research). I could sand them down but I am waiting for a local hobby shop to open…if they have the 11/32 tube, I will get some of that and try again. Thanks for lookin’. 🤓
-
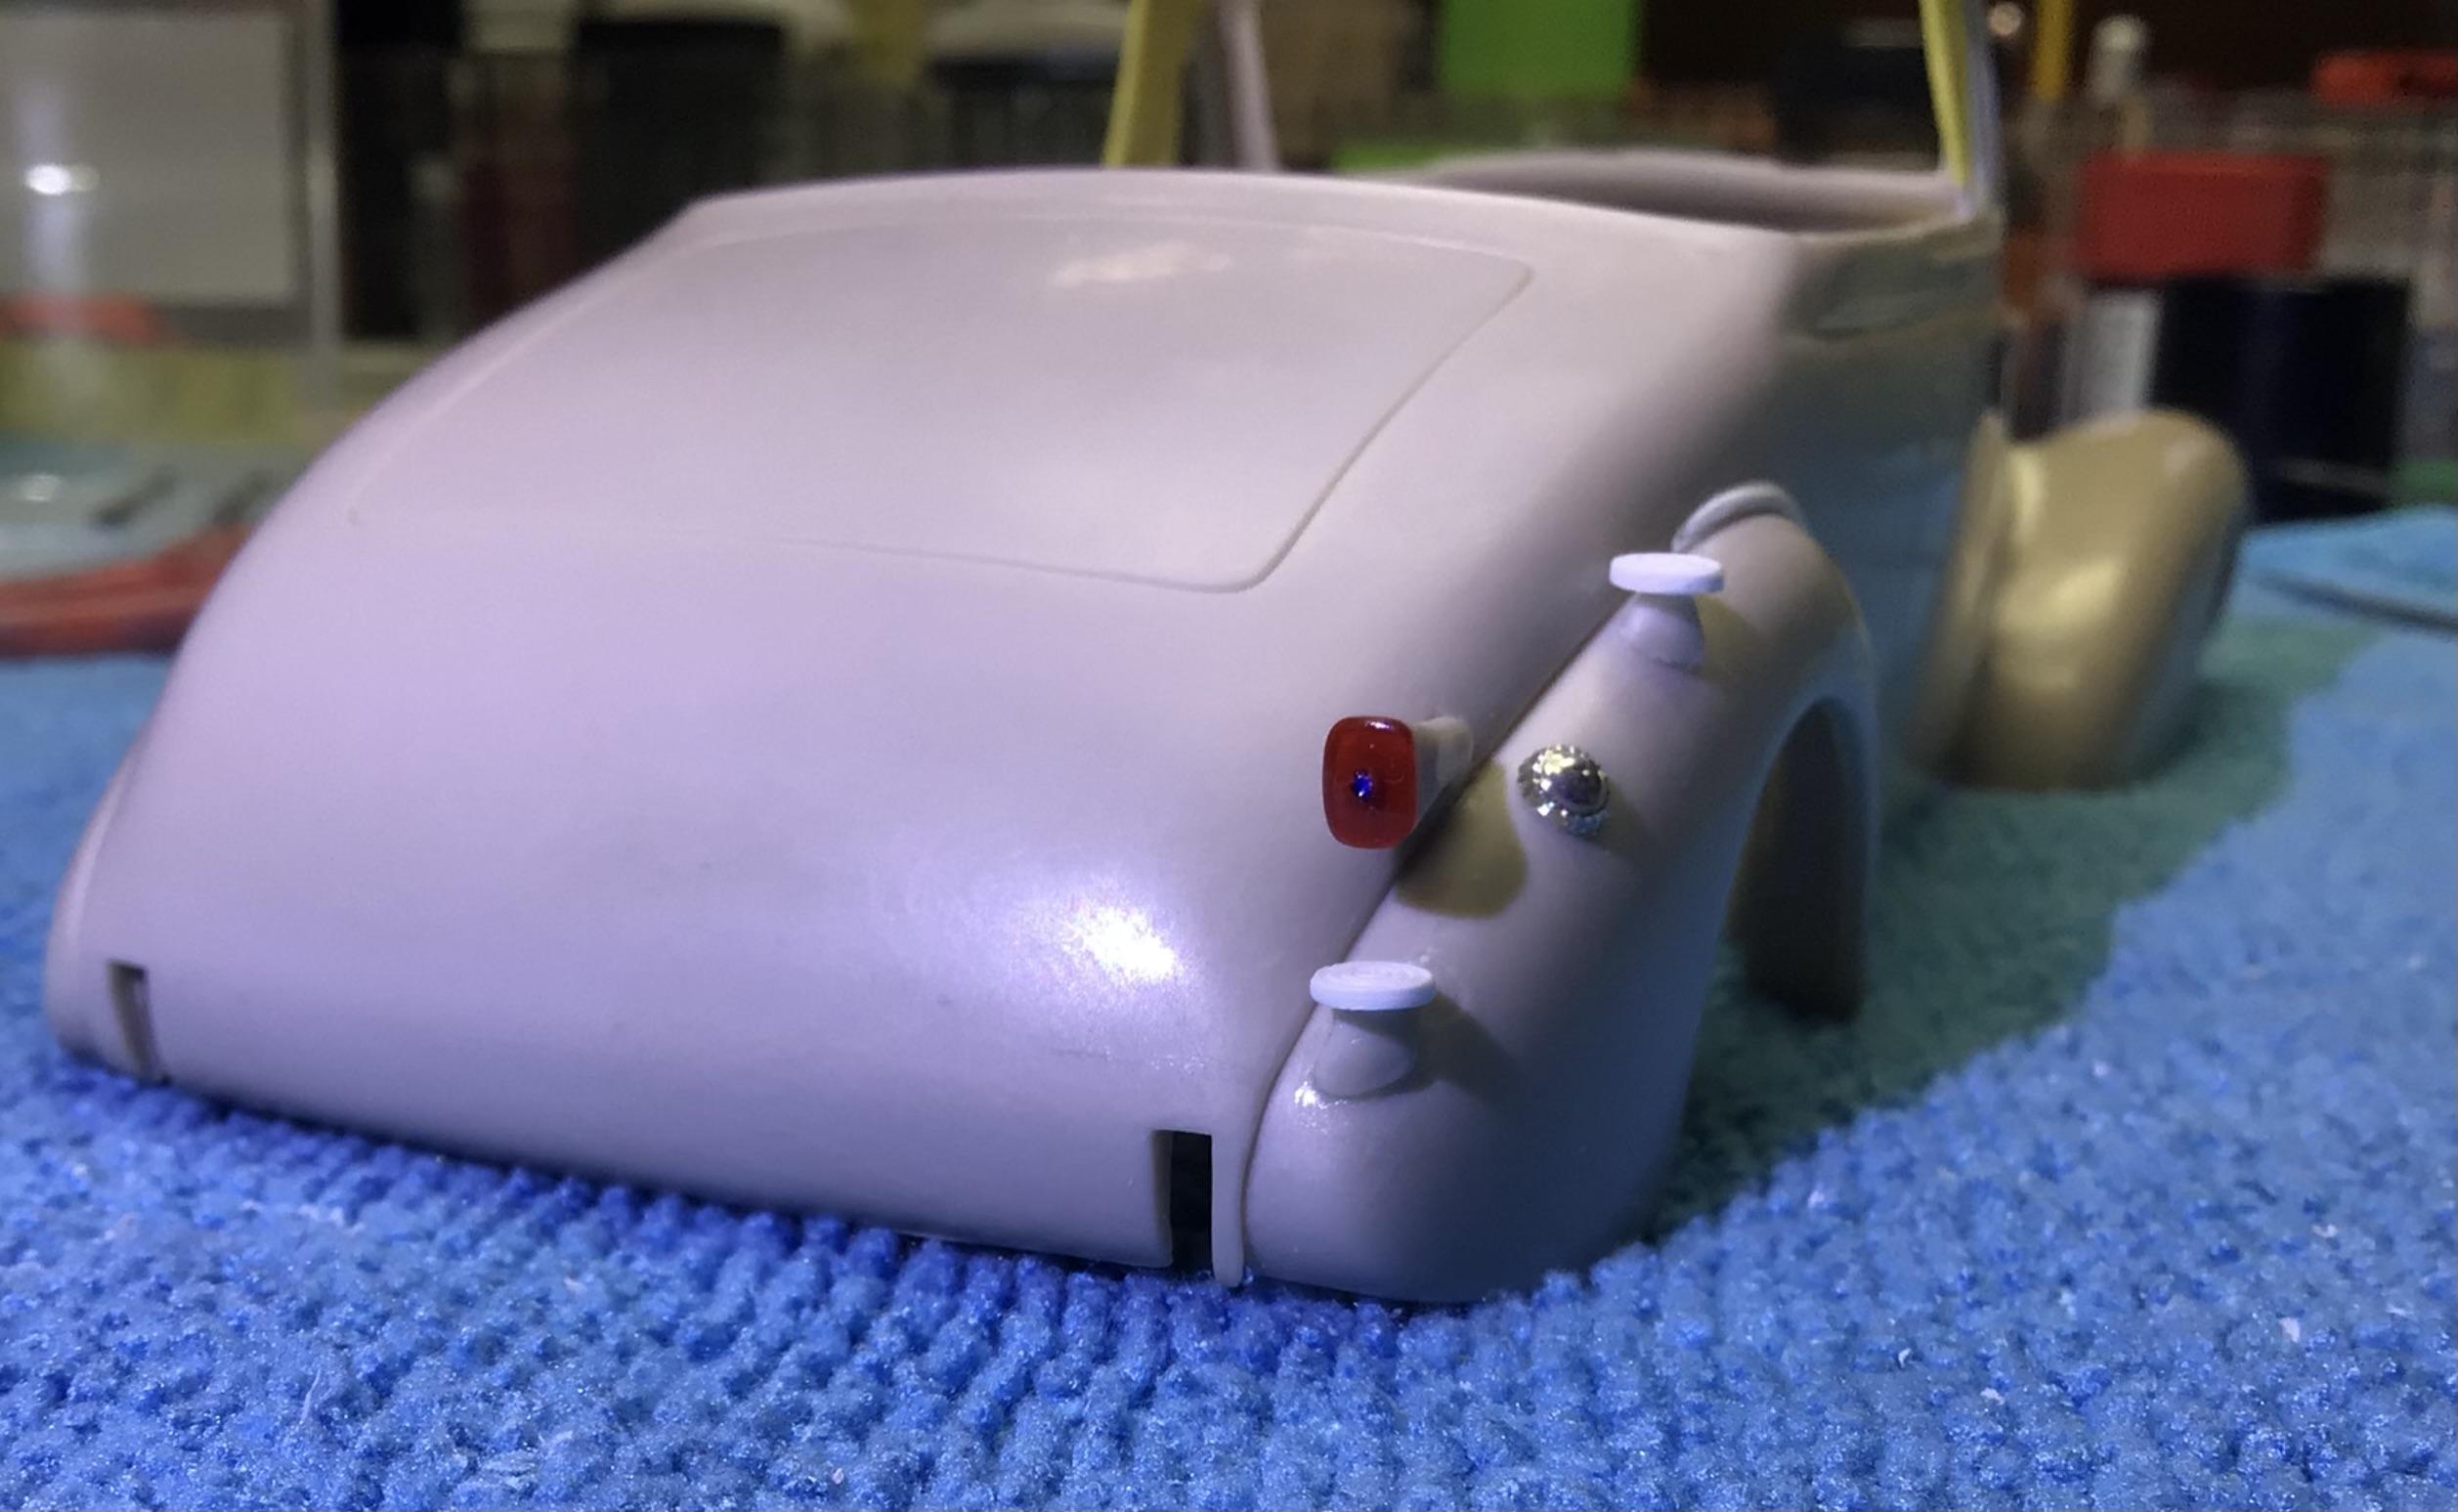
Thanks for the kind comments Guys!🙂 The blue dots I made by drilling right through the red lens that I made from red sprue and pinning it to the standoff with 0.025” Evergreen rod. I countersunk the pin just a touch and added a drop of clear blue.
-
Now…it’s back to the bench.
-
Who doesn't love a mock-up? Let's see yours!
NOBLNG replied to Belairconvertable's topic in WIP: Model Cars
Wow. Impressive undertaking…especially if you are just now learning how to solder. Good Luck with this and future projects.👍 -
Noce work so far. That chassis weathering looks very realistic.👍😎
-
Monogram '32 roadster: a red-headed step-child.
NOBLNG replied to customline's topic in WIP: Model Cars
I agree that a solid color would look better. Is is a nice blue though and not worth stripping…I’d just start another one.🤓 -
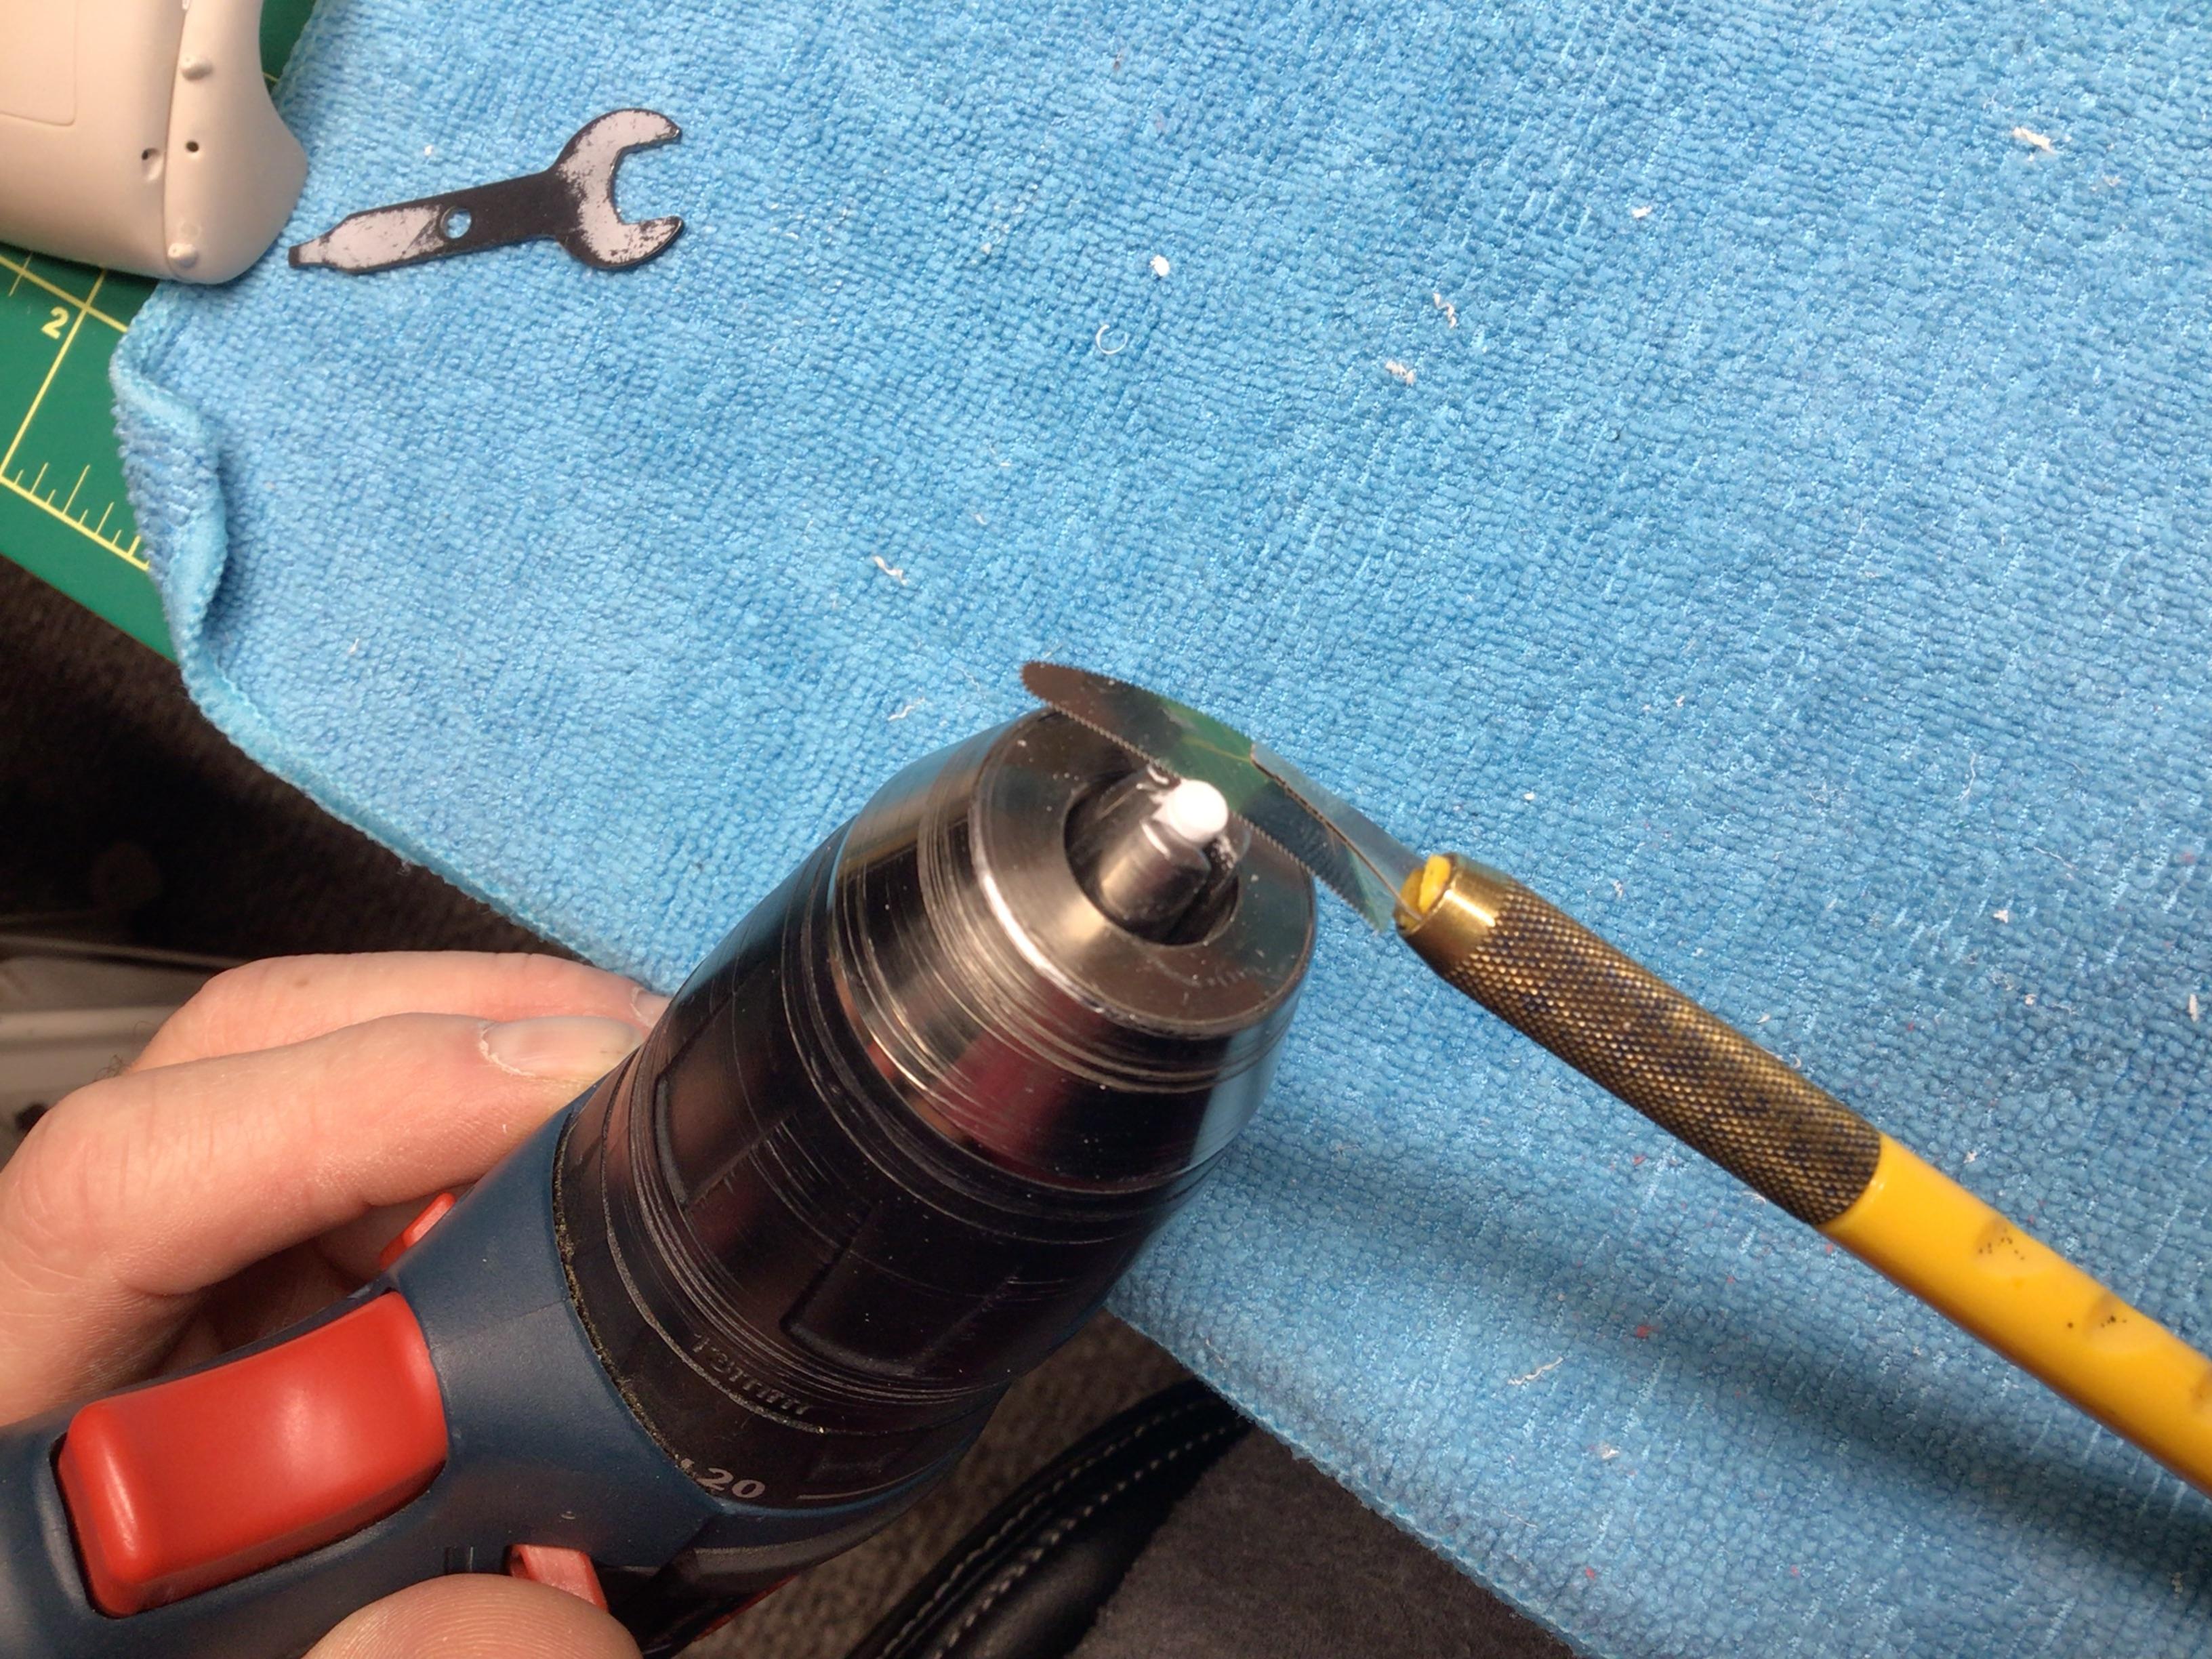
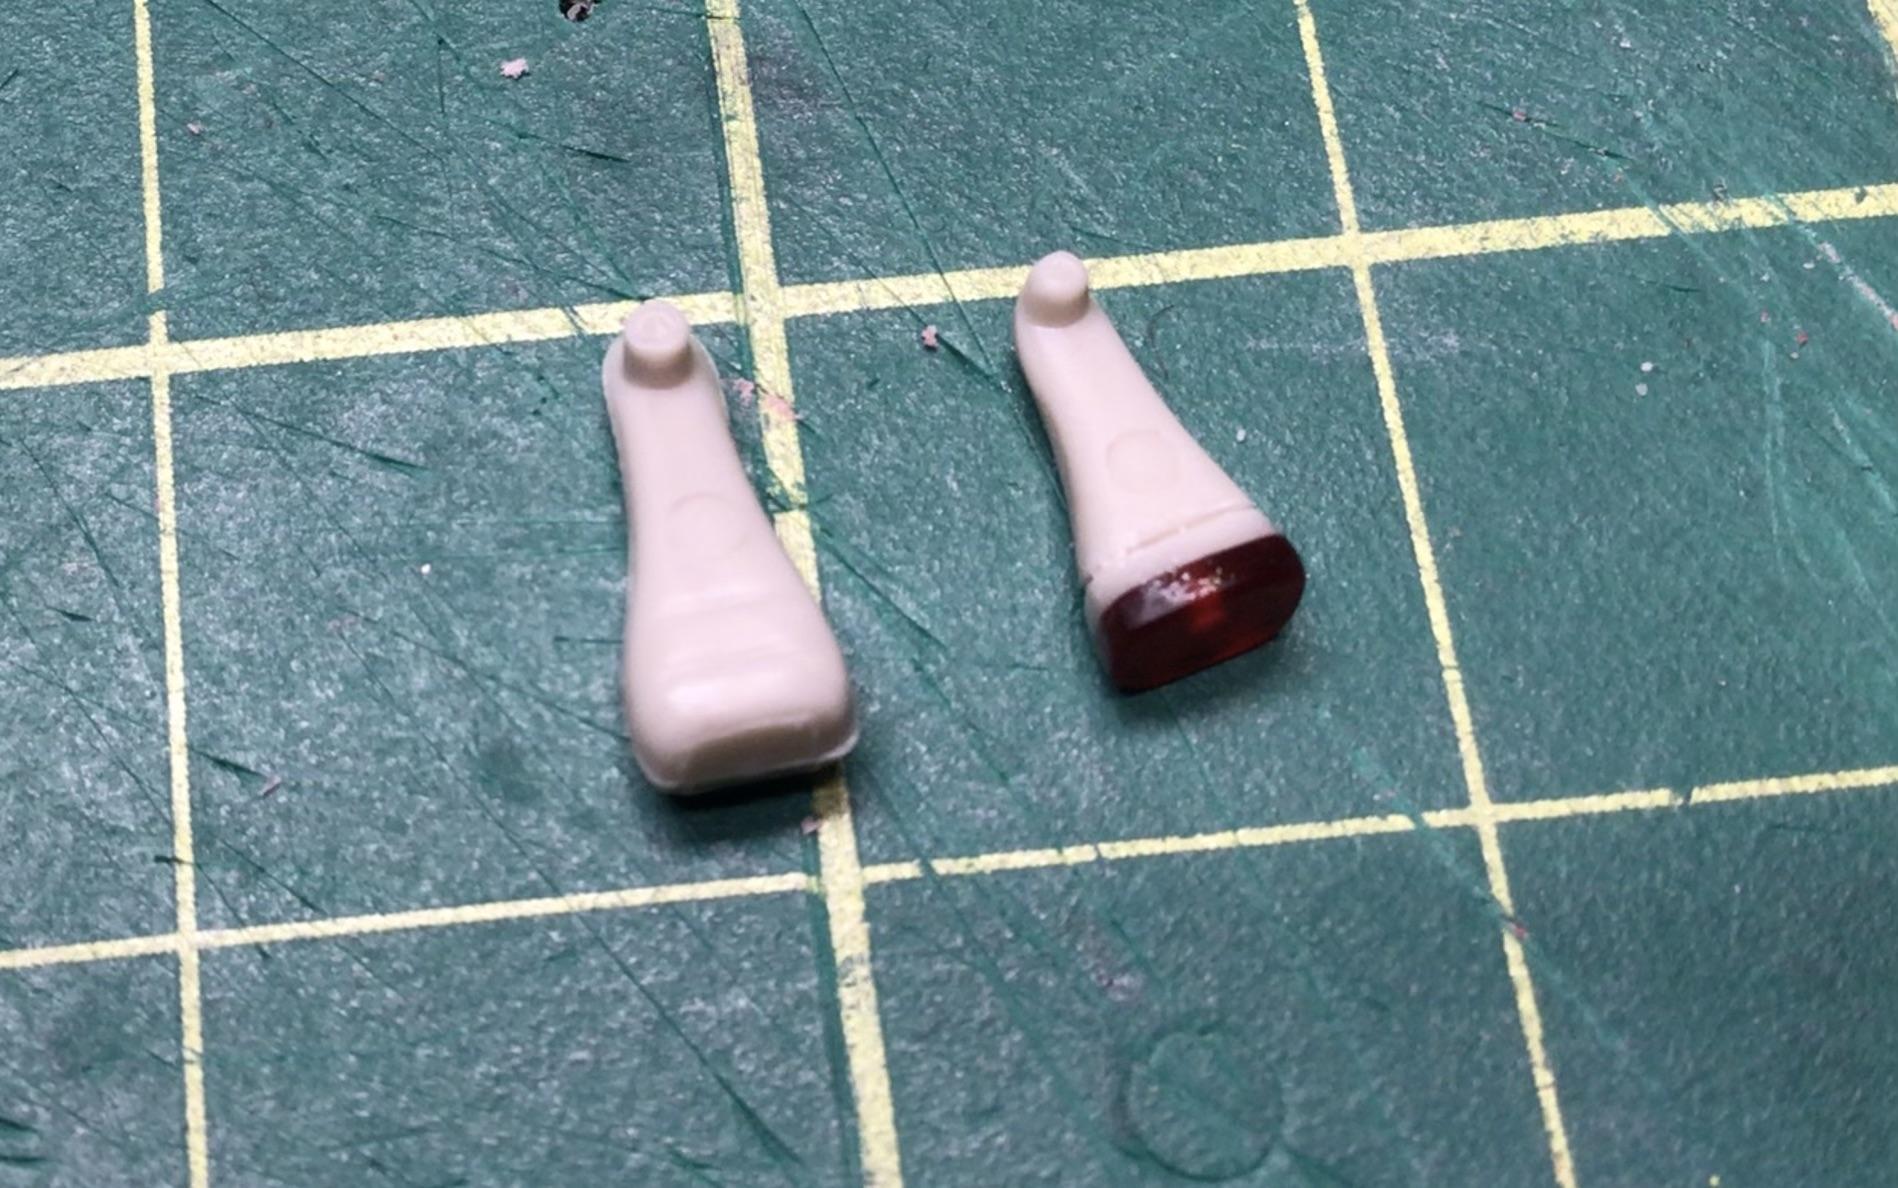
It’s not what you think!😜 I made these for my ‘37 Chevy Cabriolet from some 0.156” Evergreen rod. I clamped a short section of scrap photo etch saw blade in a pair of forceps and just pushed it against the spinning Evergreen to scrape the circular pattern on the end. Then used the jaws of the drill as a guage for cutting the pad loose. Edit: You could make vintage brake and clutch pedals like this maybe.
-
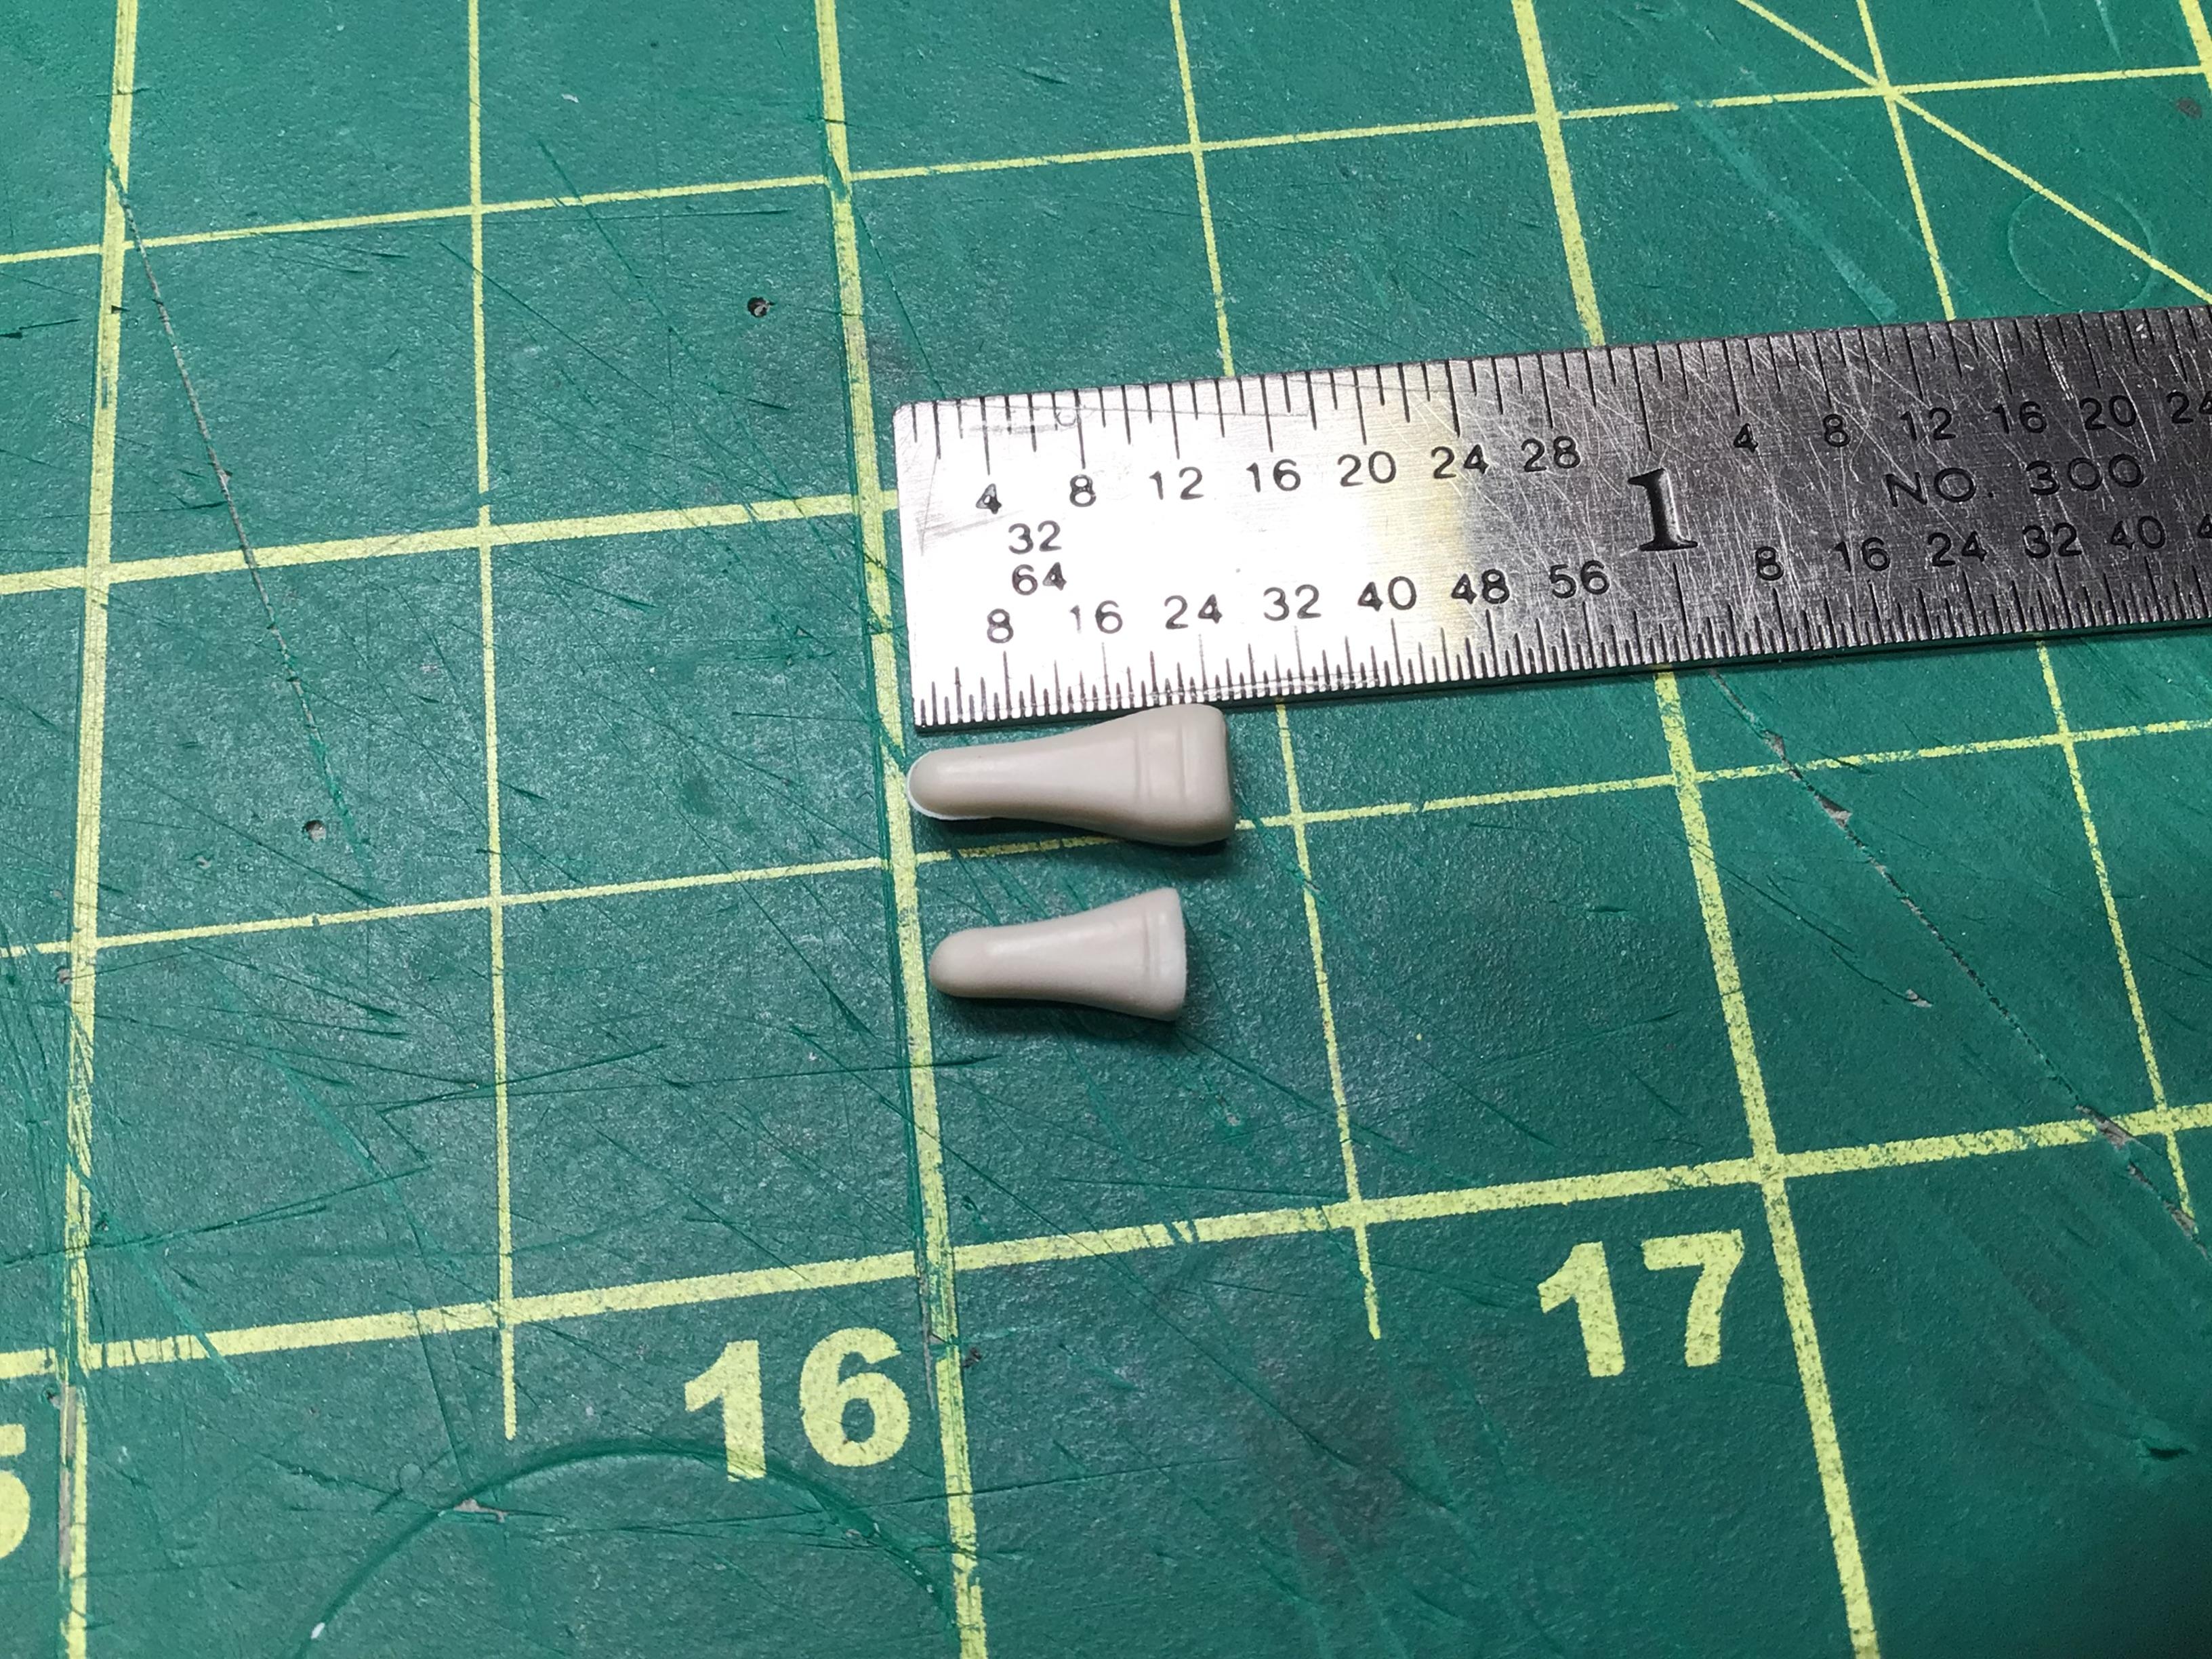
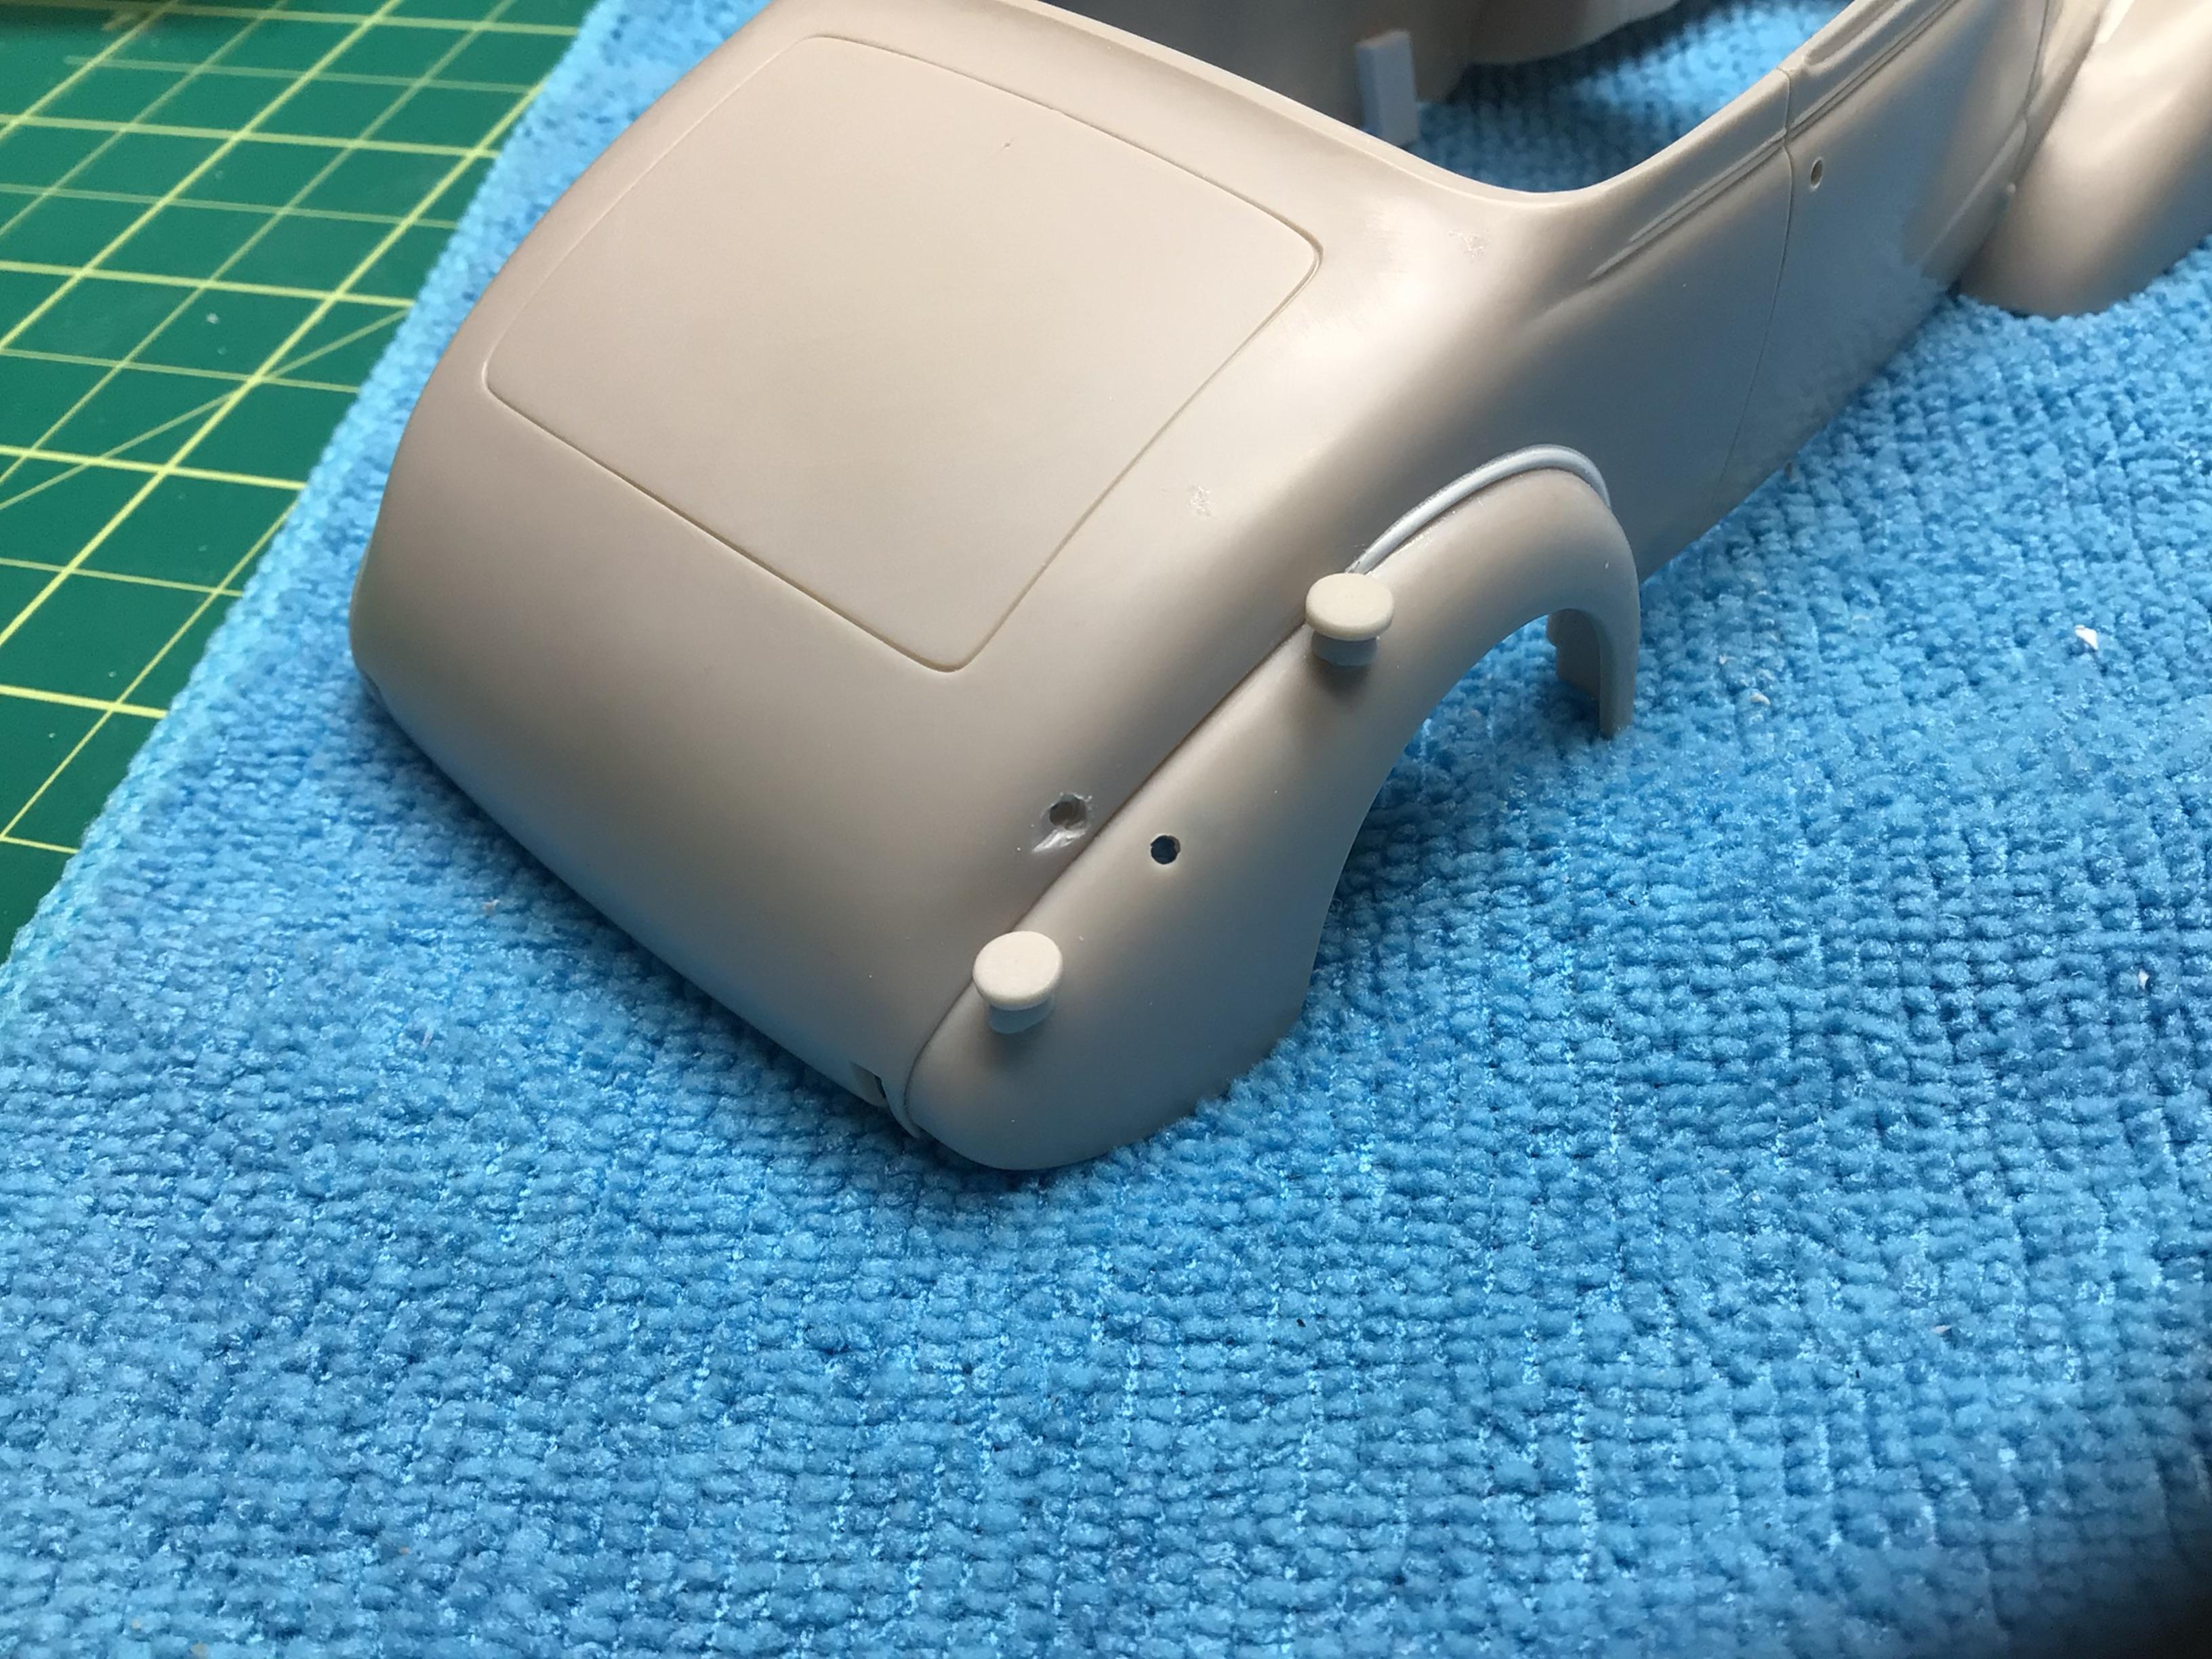
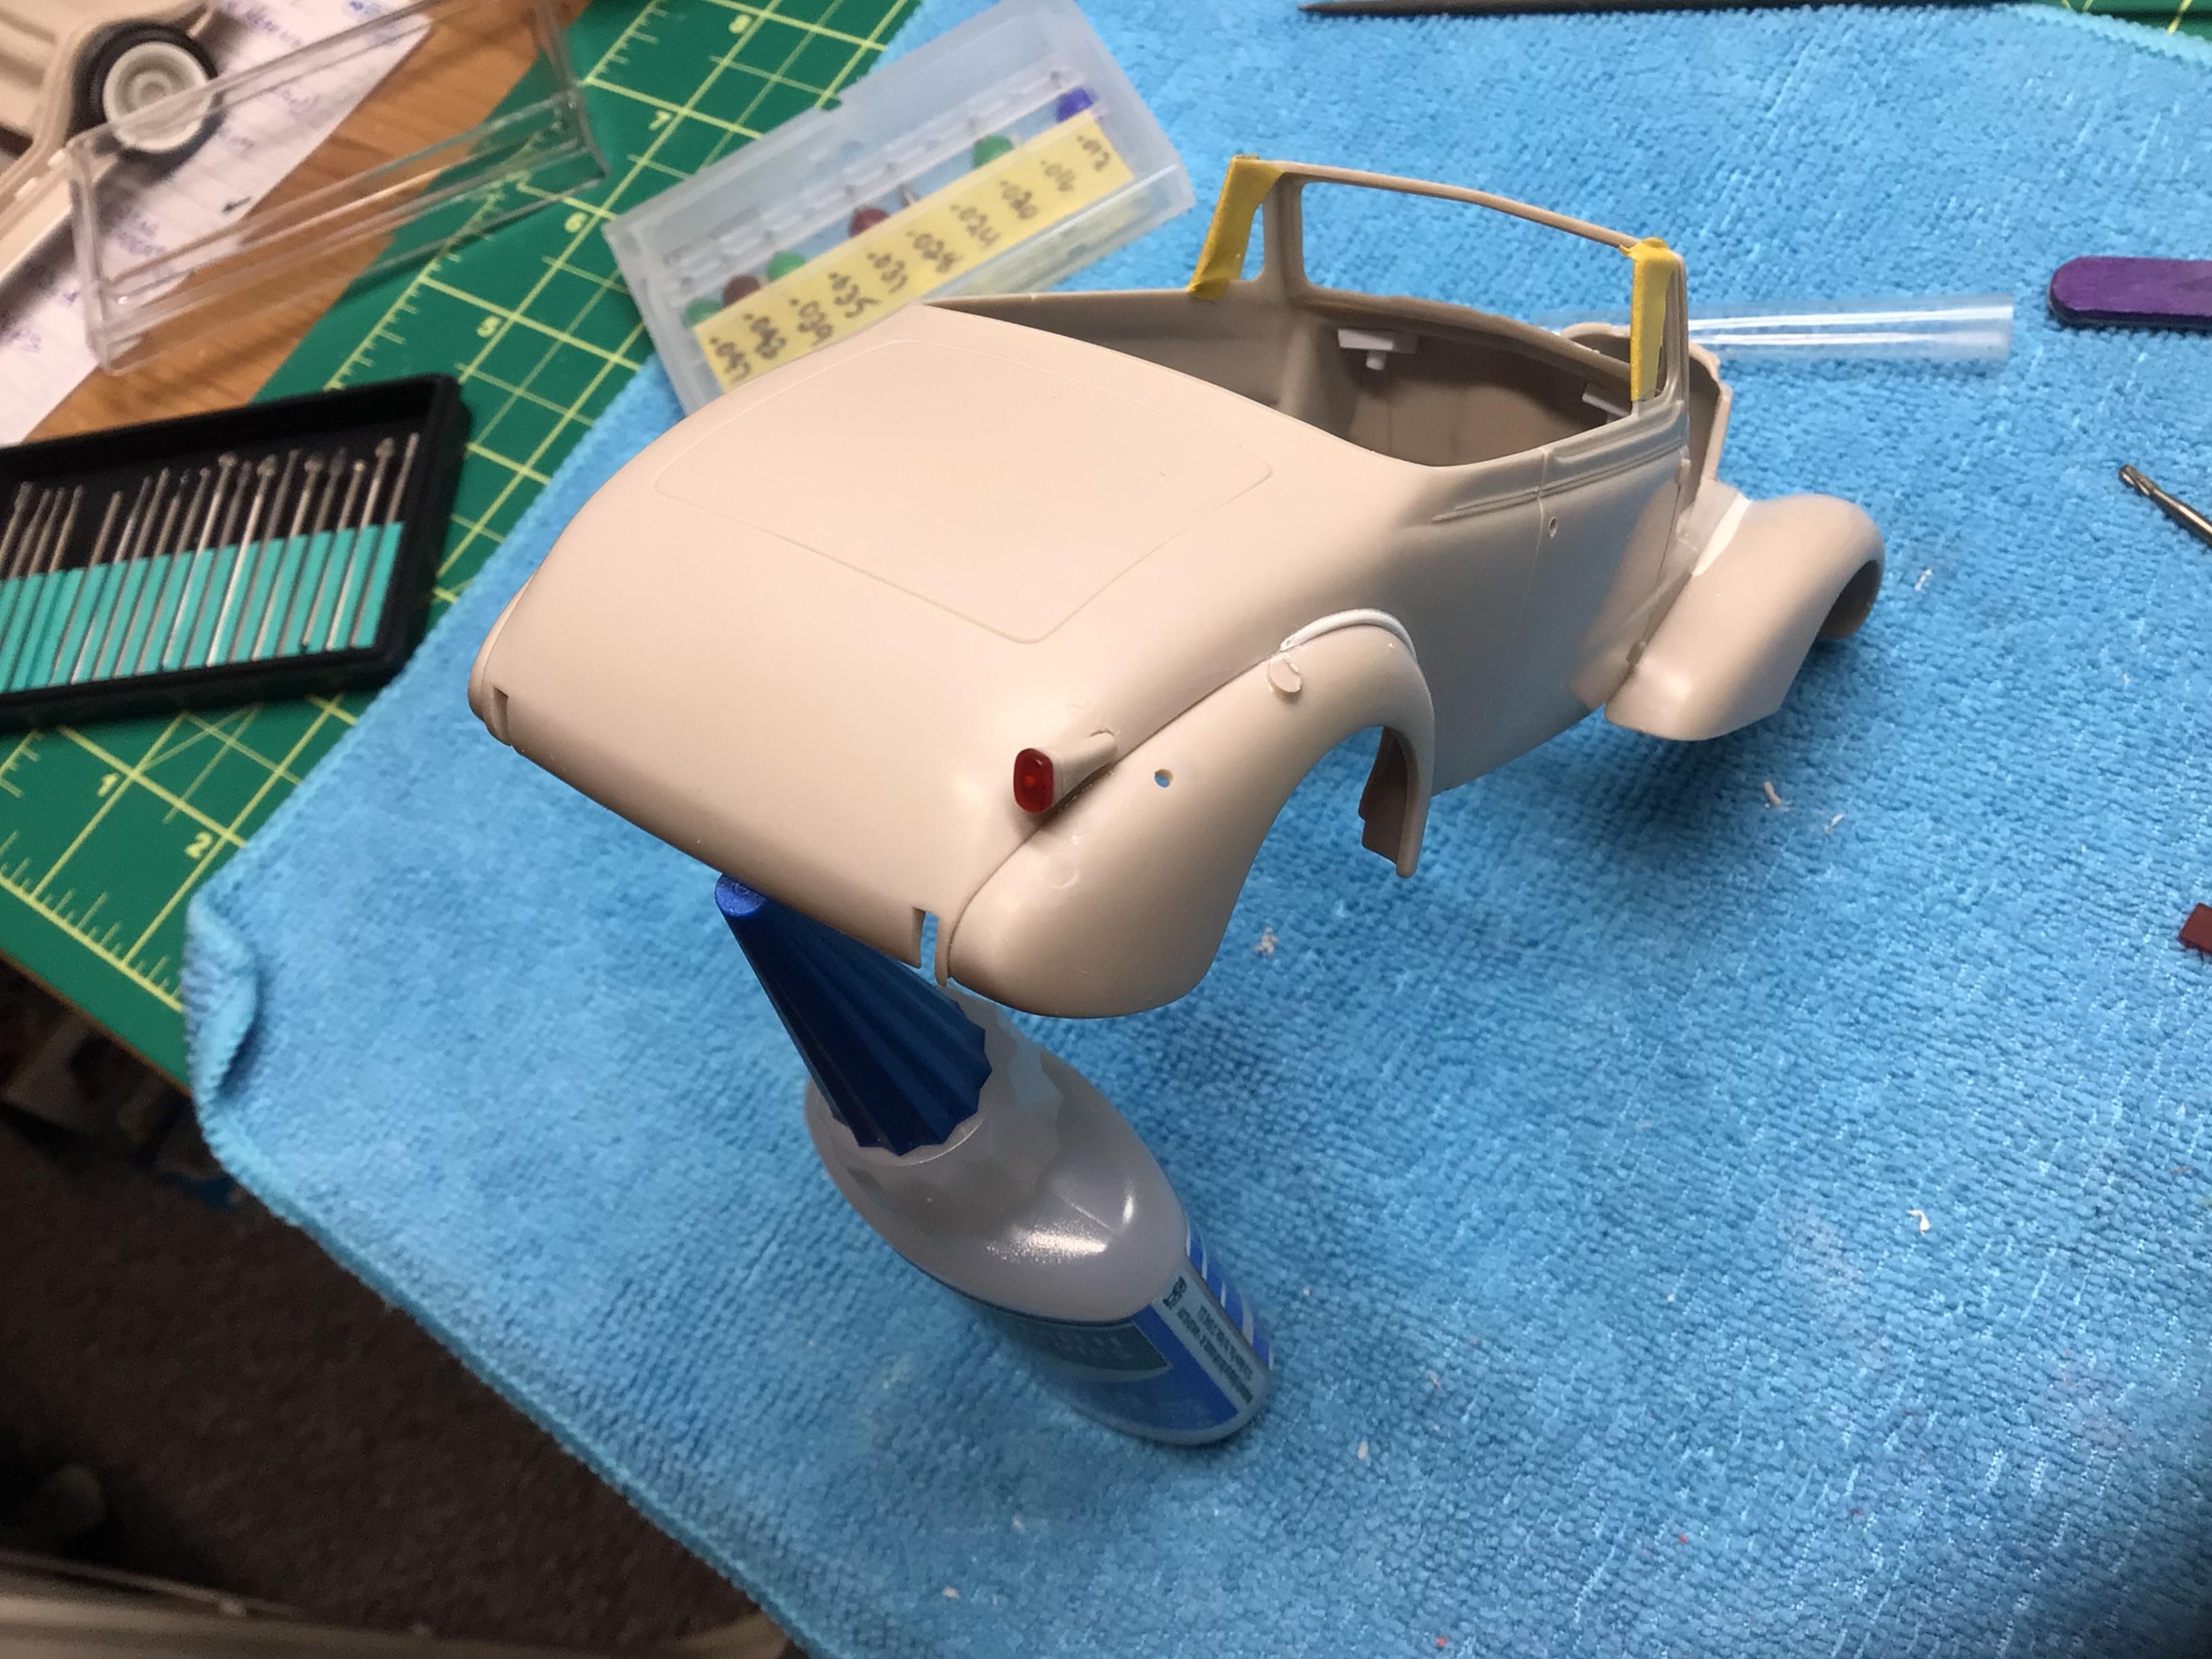
…on that note, I think the kit pieces are a little large so I chopped them back a tad and added some red sprue lens. I added brass pins to the rumble seat steps and drilled holes in the body at the locations that were marked with a very faint raised ridge. I wasn’t happy with the location after mounting the tail lights, so I plugged the holes with stretched sprue. The pads have a big sink mark in the center and were not sitting perfectly level where the standoffs had the best fit on the fender. I remounted them lower on the fender and cut the pads off. Drilled and pinned the gas cap too.🙂 I made some new pads from 0.156” Evergreen rod and added pins so they can be installed after paint.
-
Thanks Ulf. I researched it a bit and one source says a passenger side taillight was standard equipment on a Cabriolet, and another says it was a dealer installed option.? Anyways this kit does come with two tail lights and the instructions notably say “right side optional”. So I am going to install them both.