bill-e-boy
-
Posts
910 -
Joined
-
Last visited
Content Type
Profiles
Forums
Events
Gallery
Everything posted by bill-e-boy
-
That is very RED and good luck with the clear. This is an excellent kit too.
-
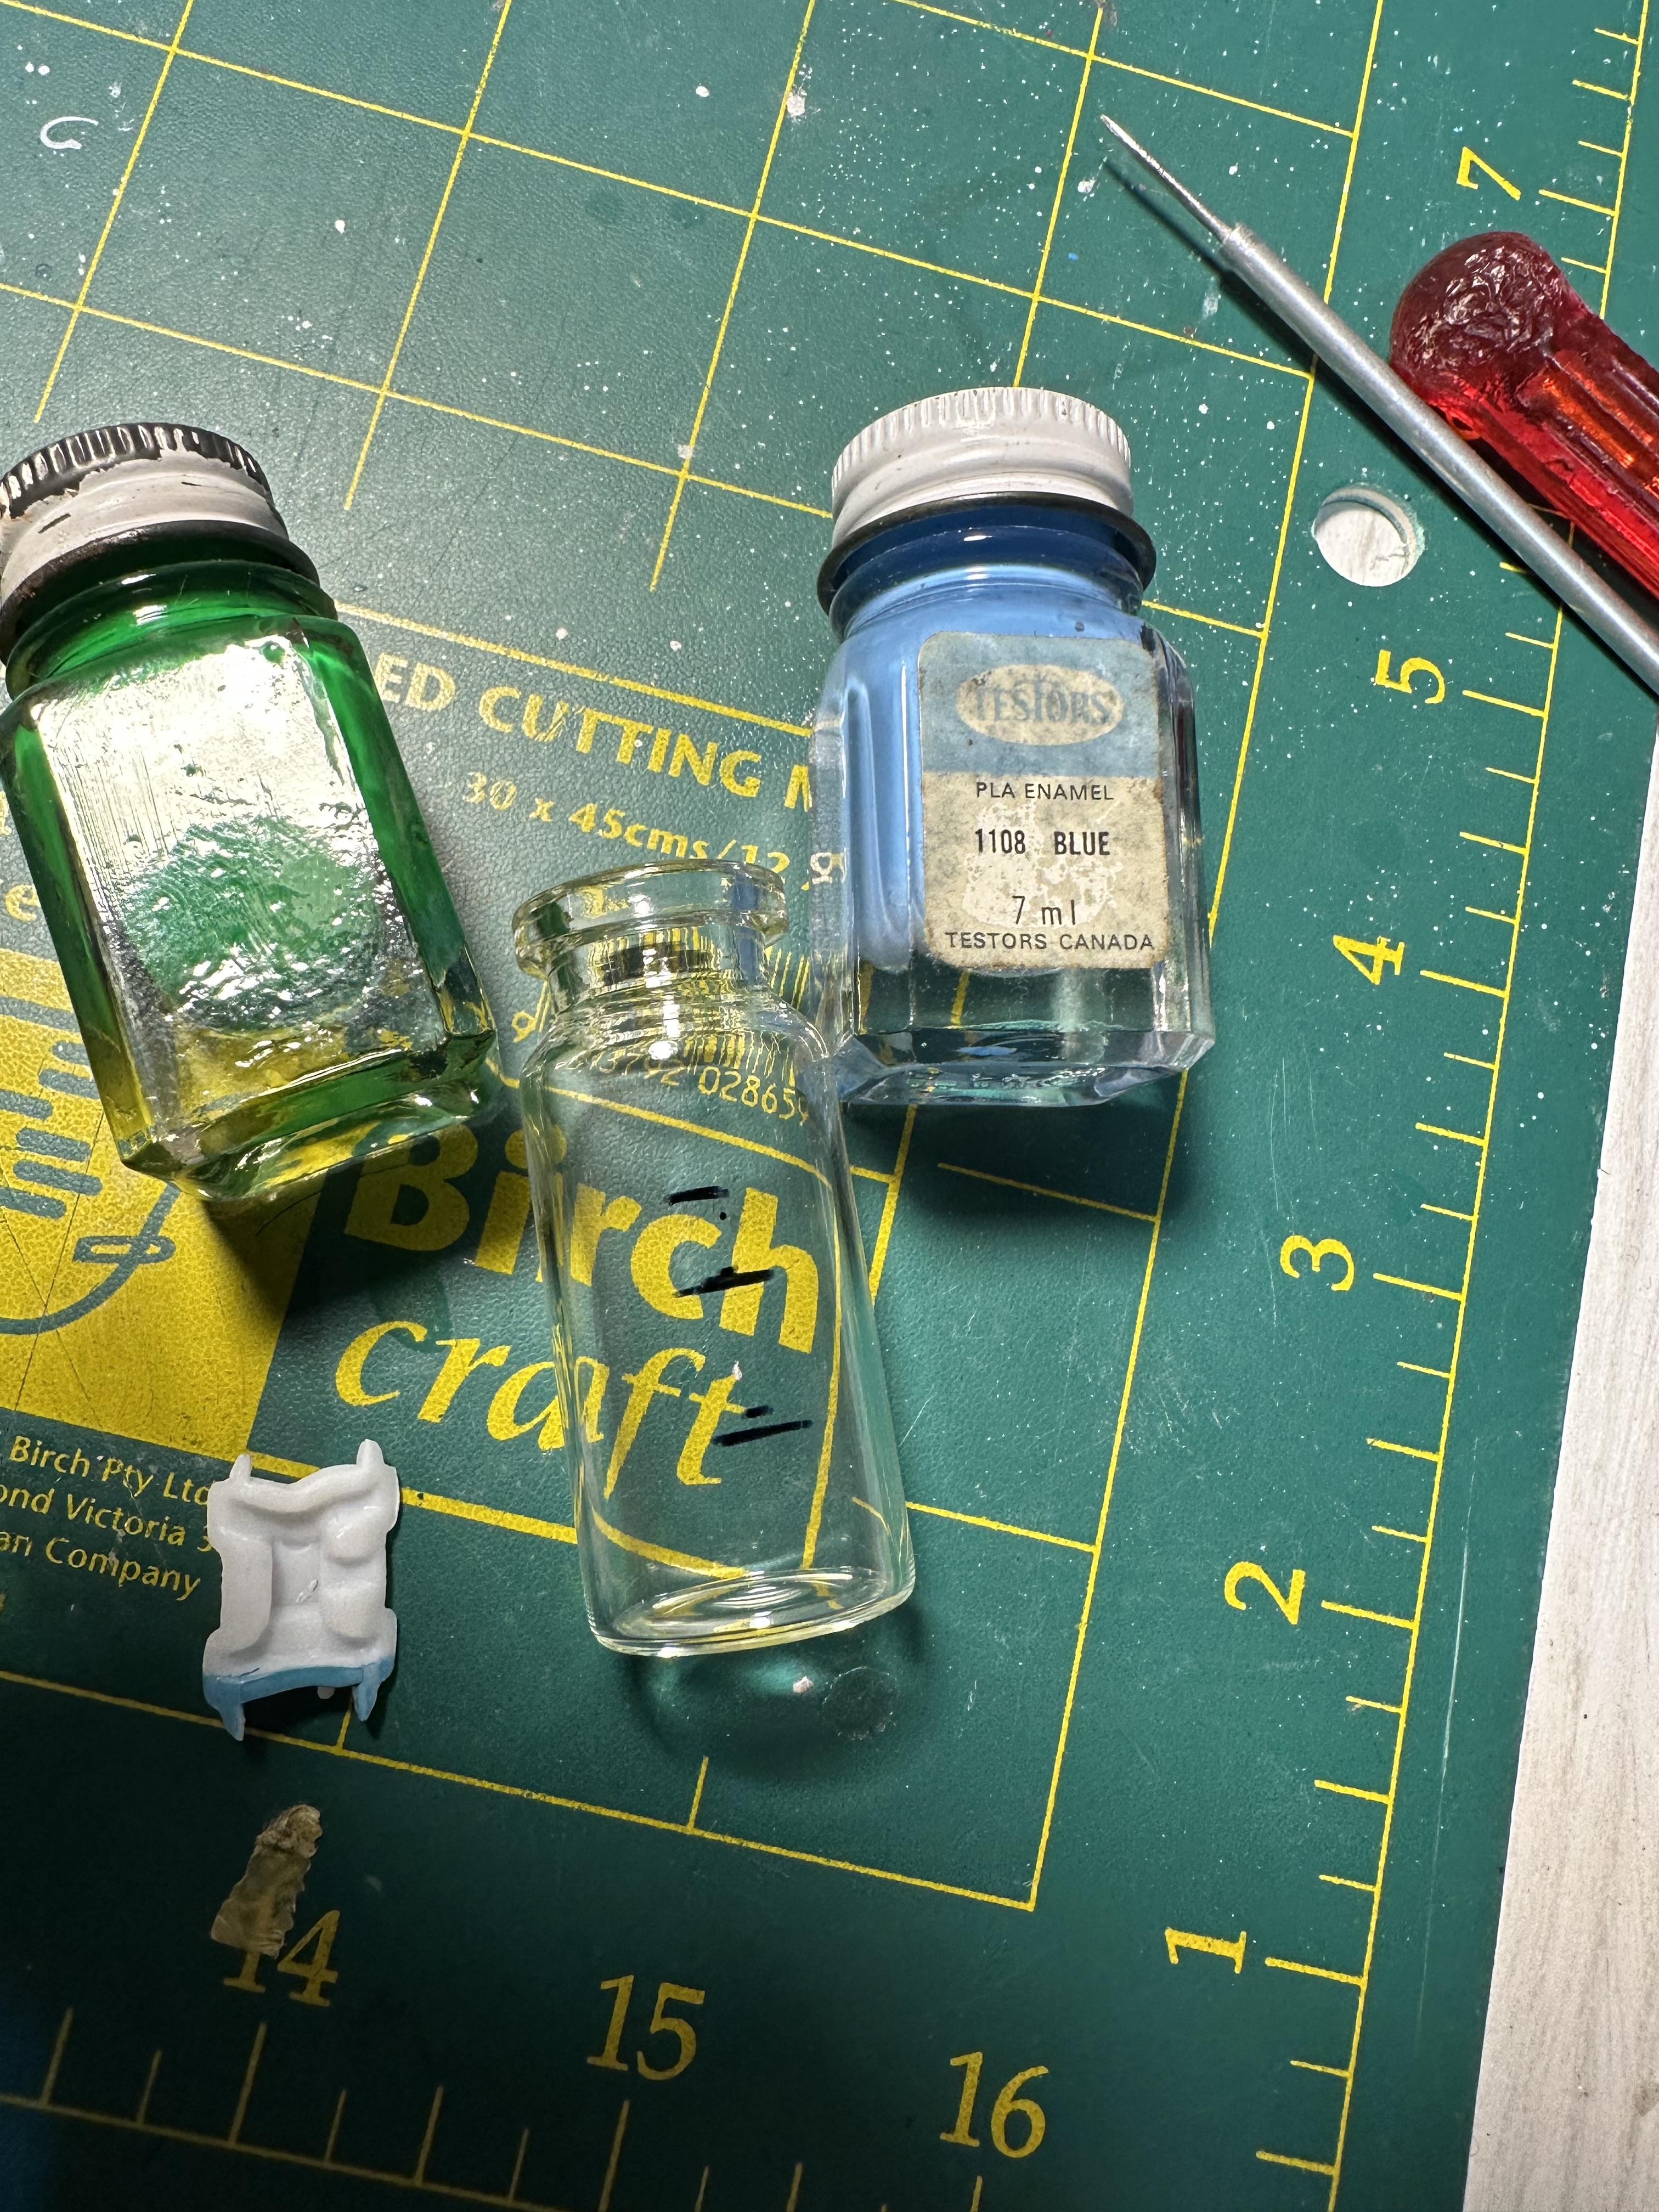
The small jars have not been available for a long time down here in New Zealand so I snatched quite a few when they were disappearing of the shelves. NZ stopped importing the big jars too for some reason - most probably Rustoleum saw NZ as too smaller market although we see some of their other products on the shelves.
-
Loosen the lid on Testors enamel square bottles.
bill-e-boy replied to R. Thorne's topic in Tips, Tricks, and Tutorials
I mean that the little square jars have not been available in New Zealand for a very long time. I stocked up when they were being specialed out after they stopped being imported into NZ, And got a bunch from another modeler too, so I have a stash of small square bottles. I did the same when the big jars were stopped being imported into NZ. So I have a stash of these too. -
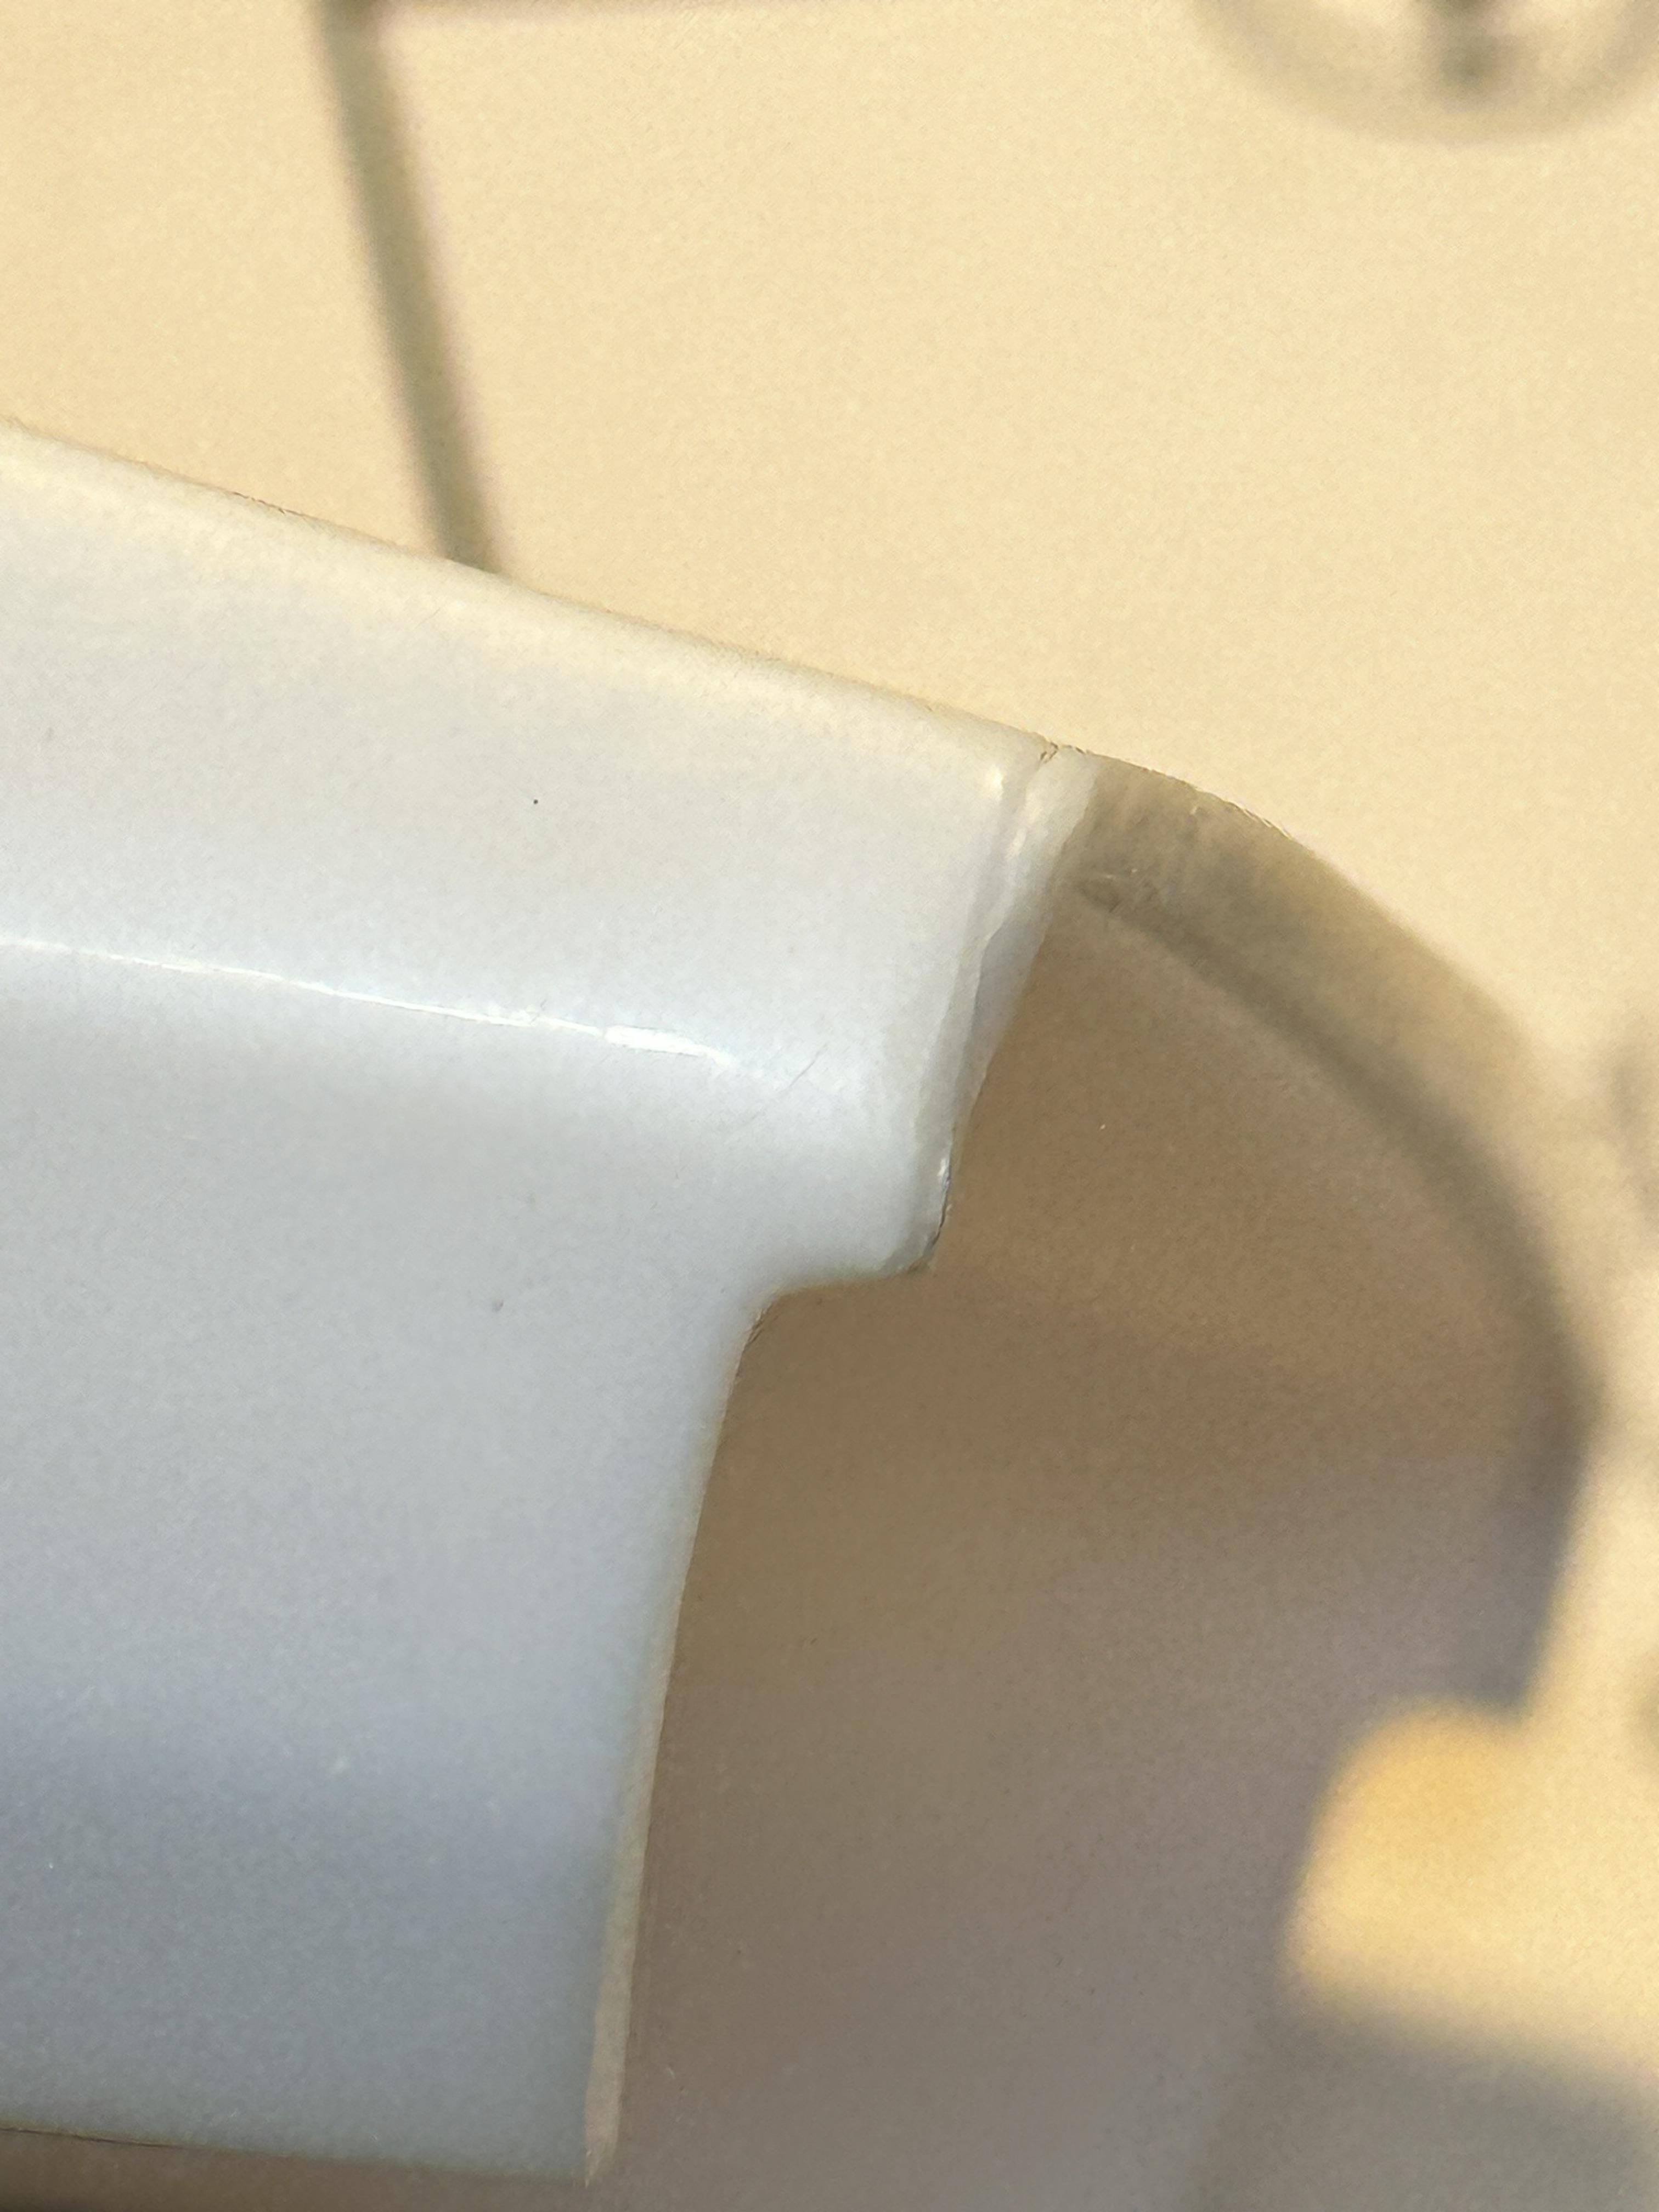
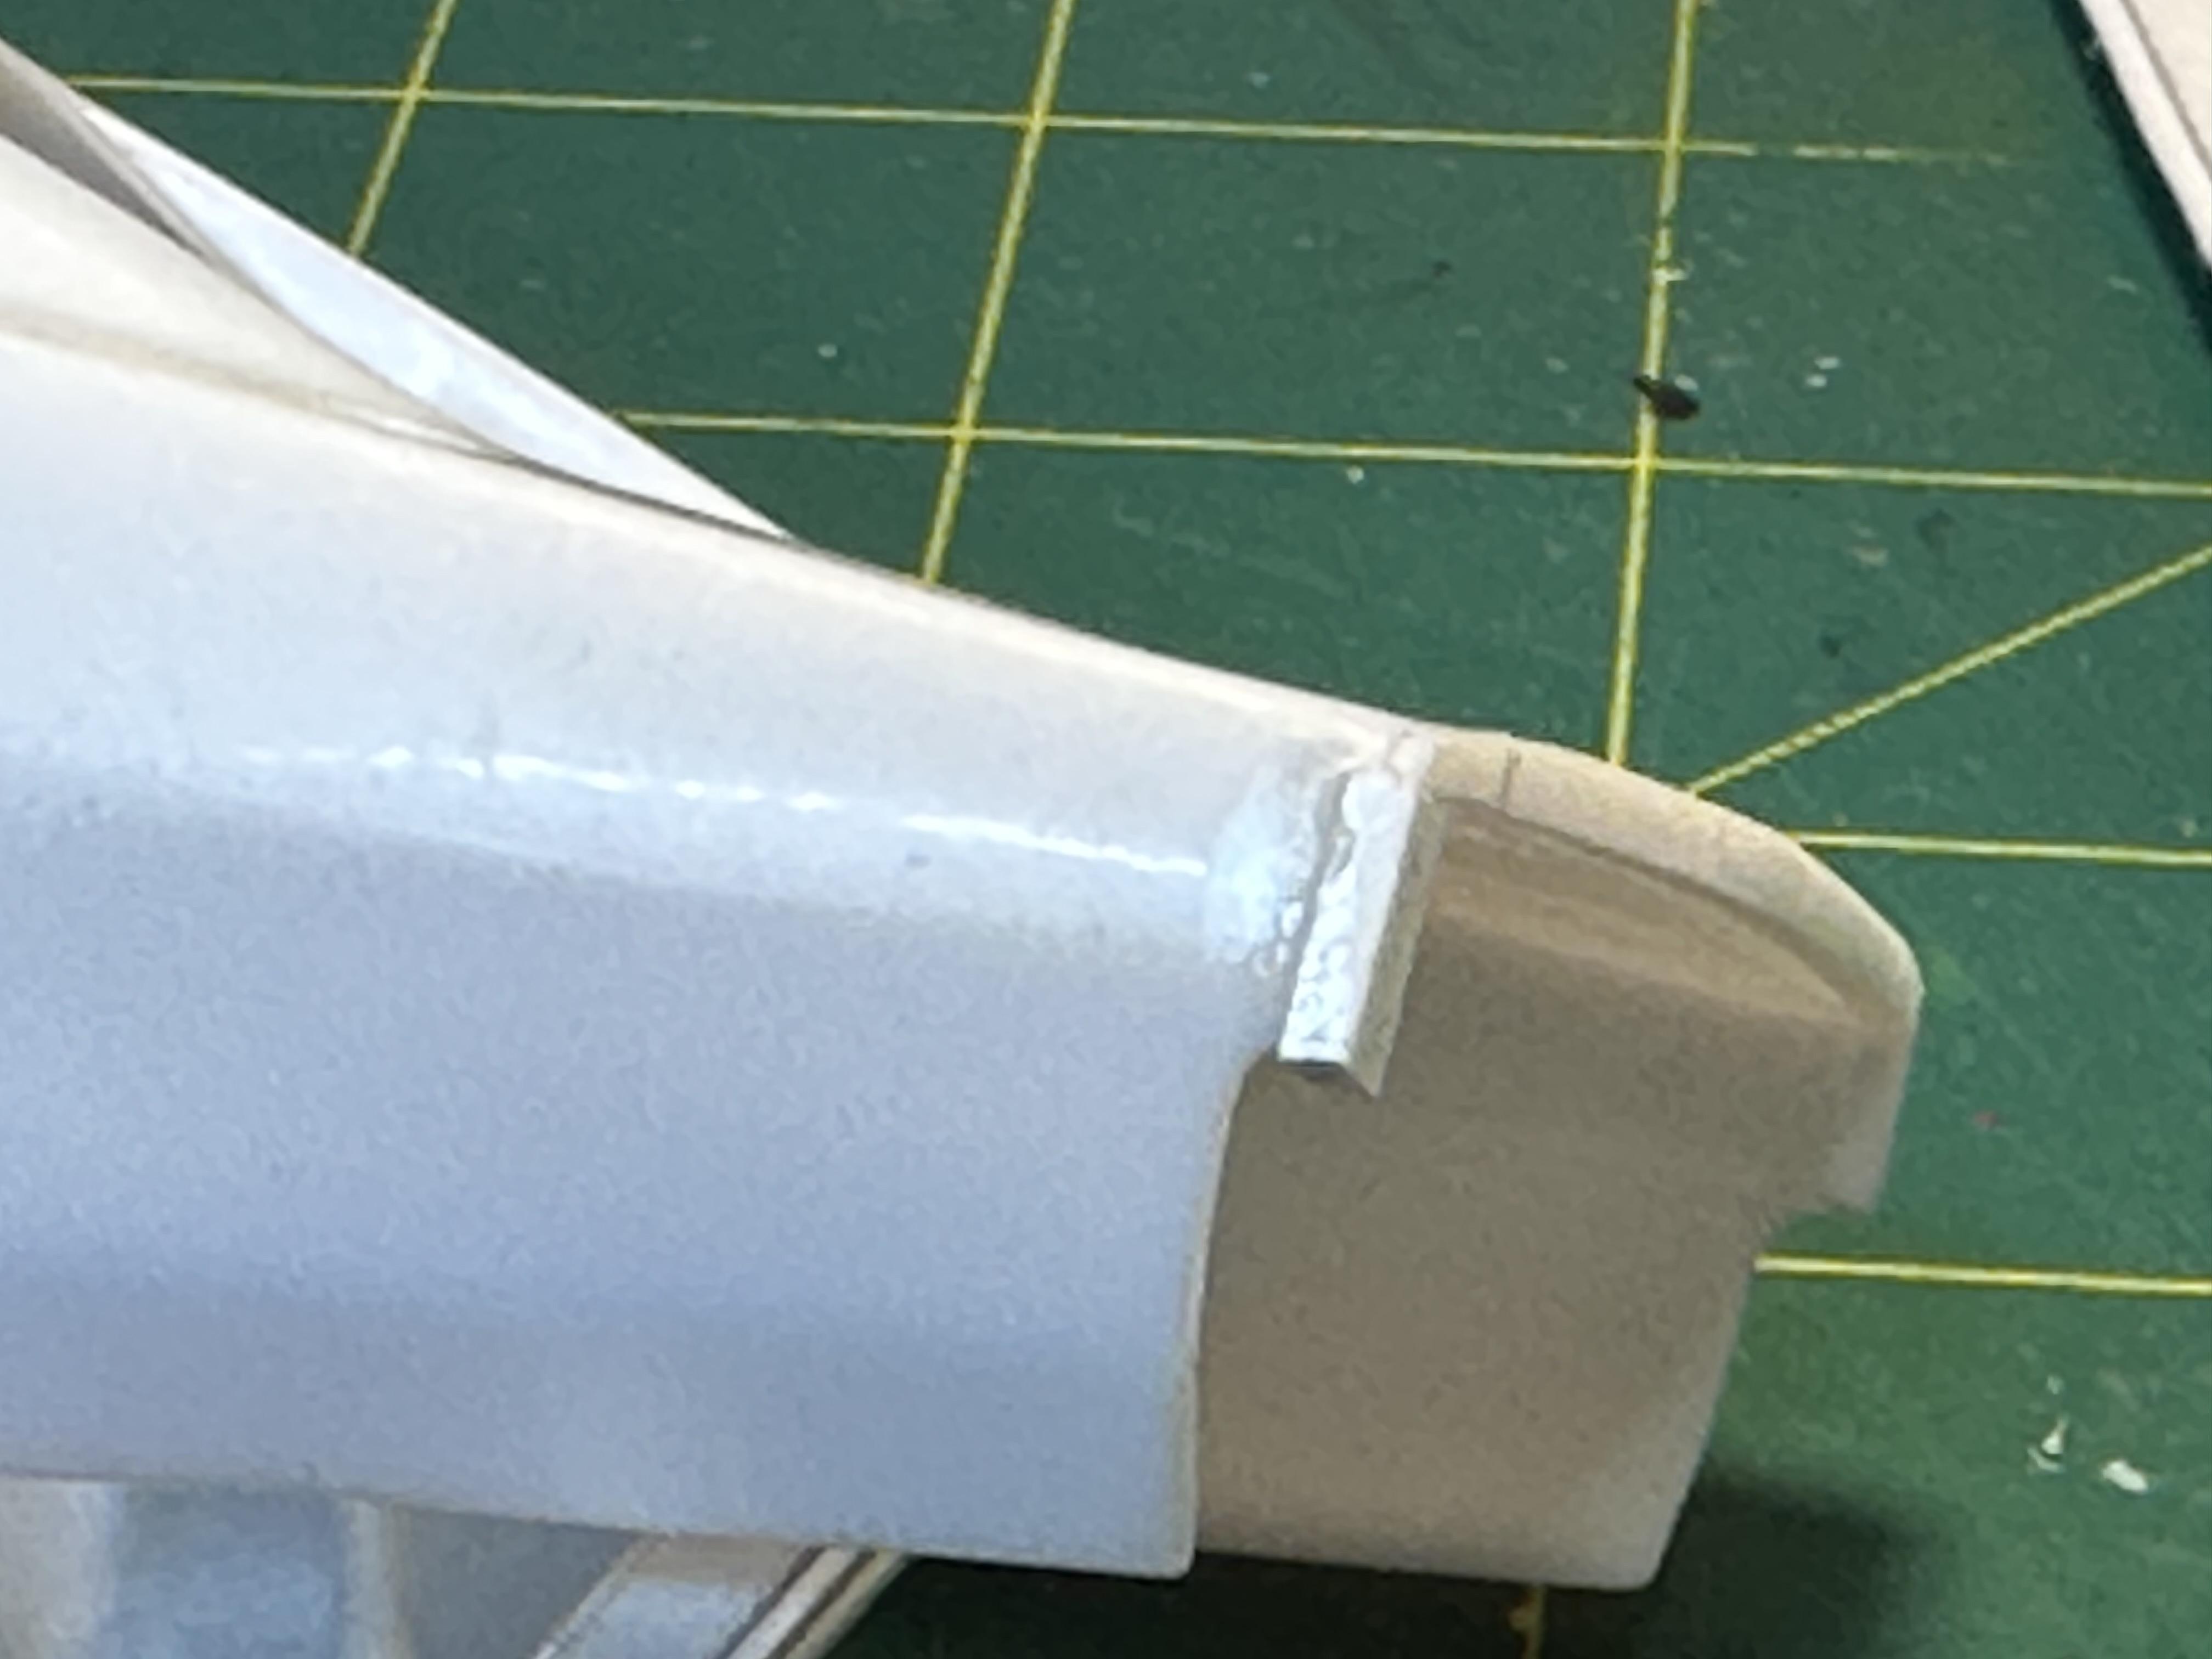
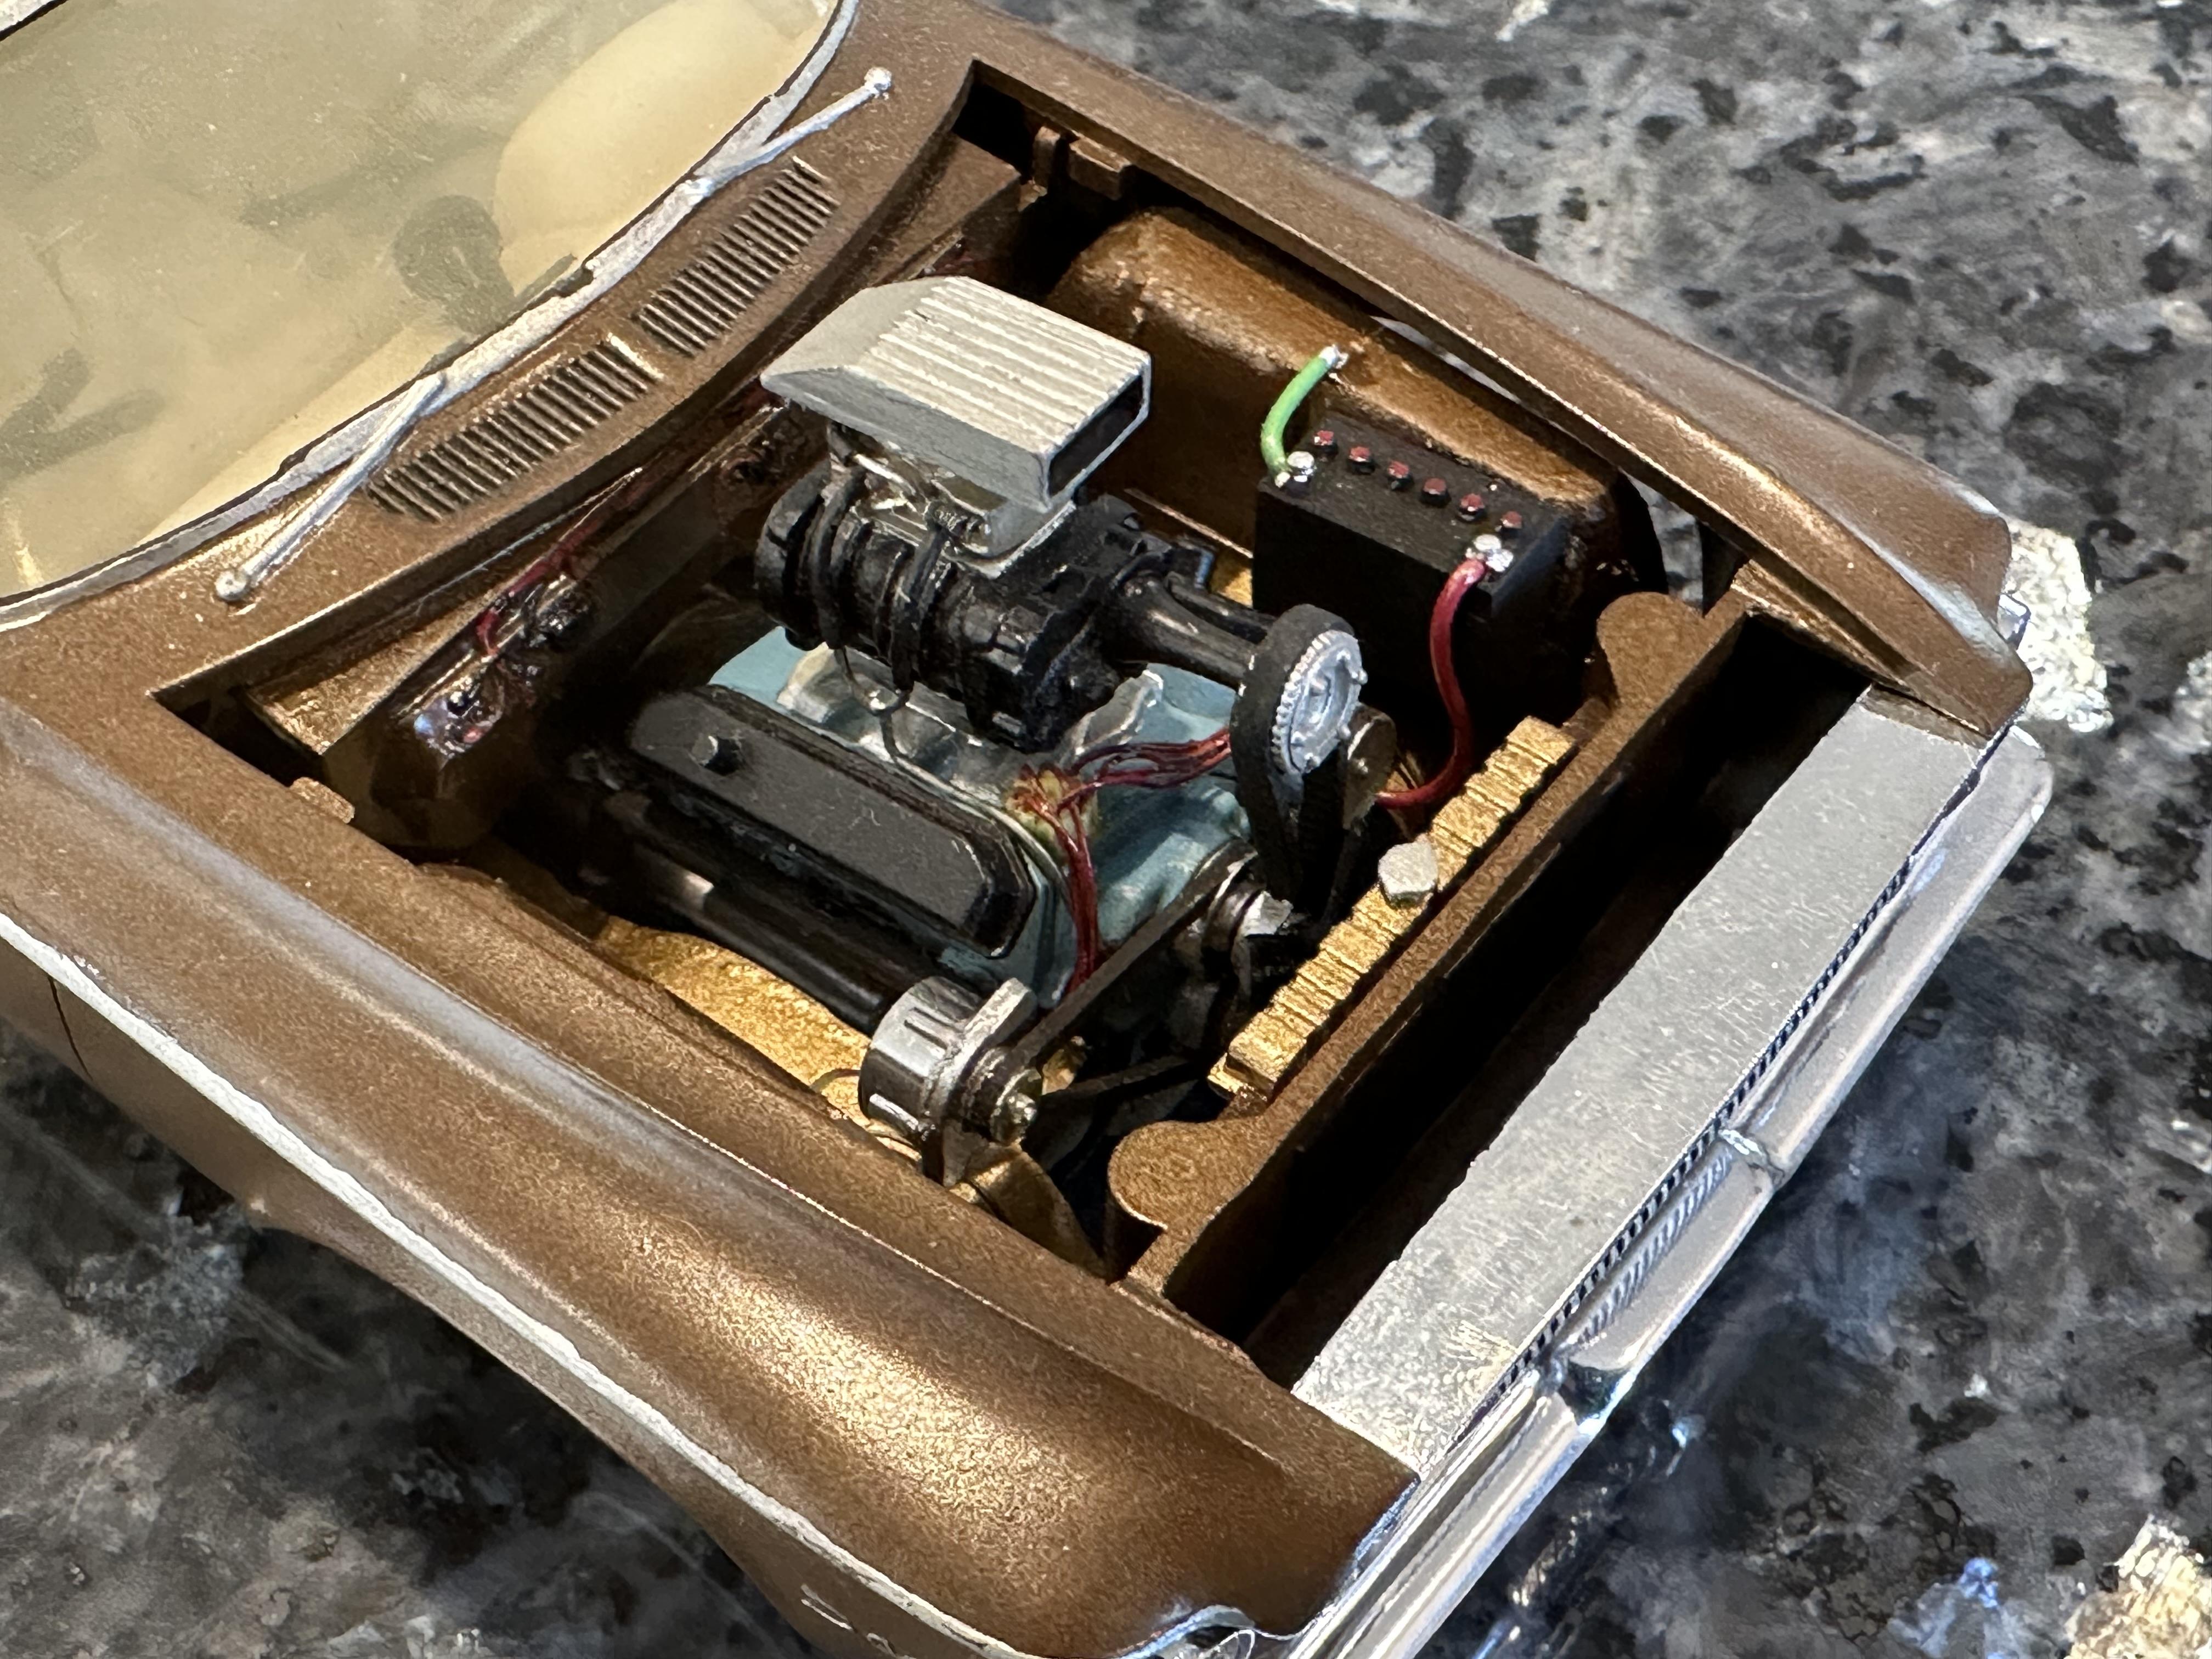
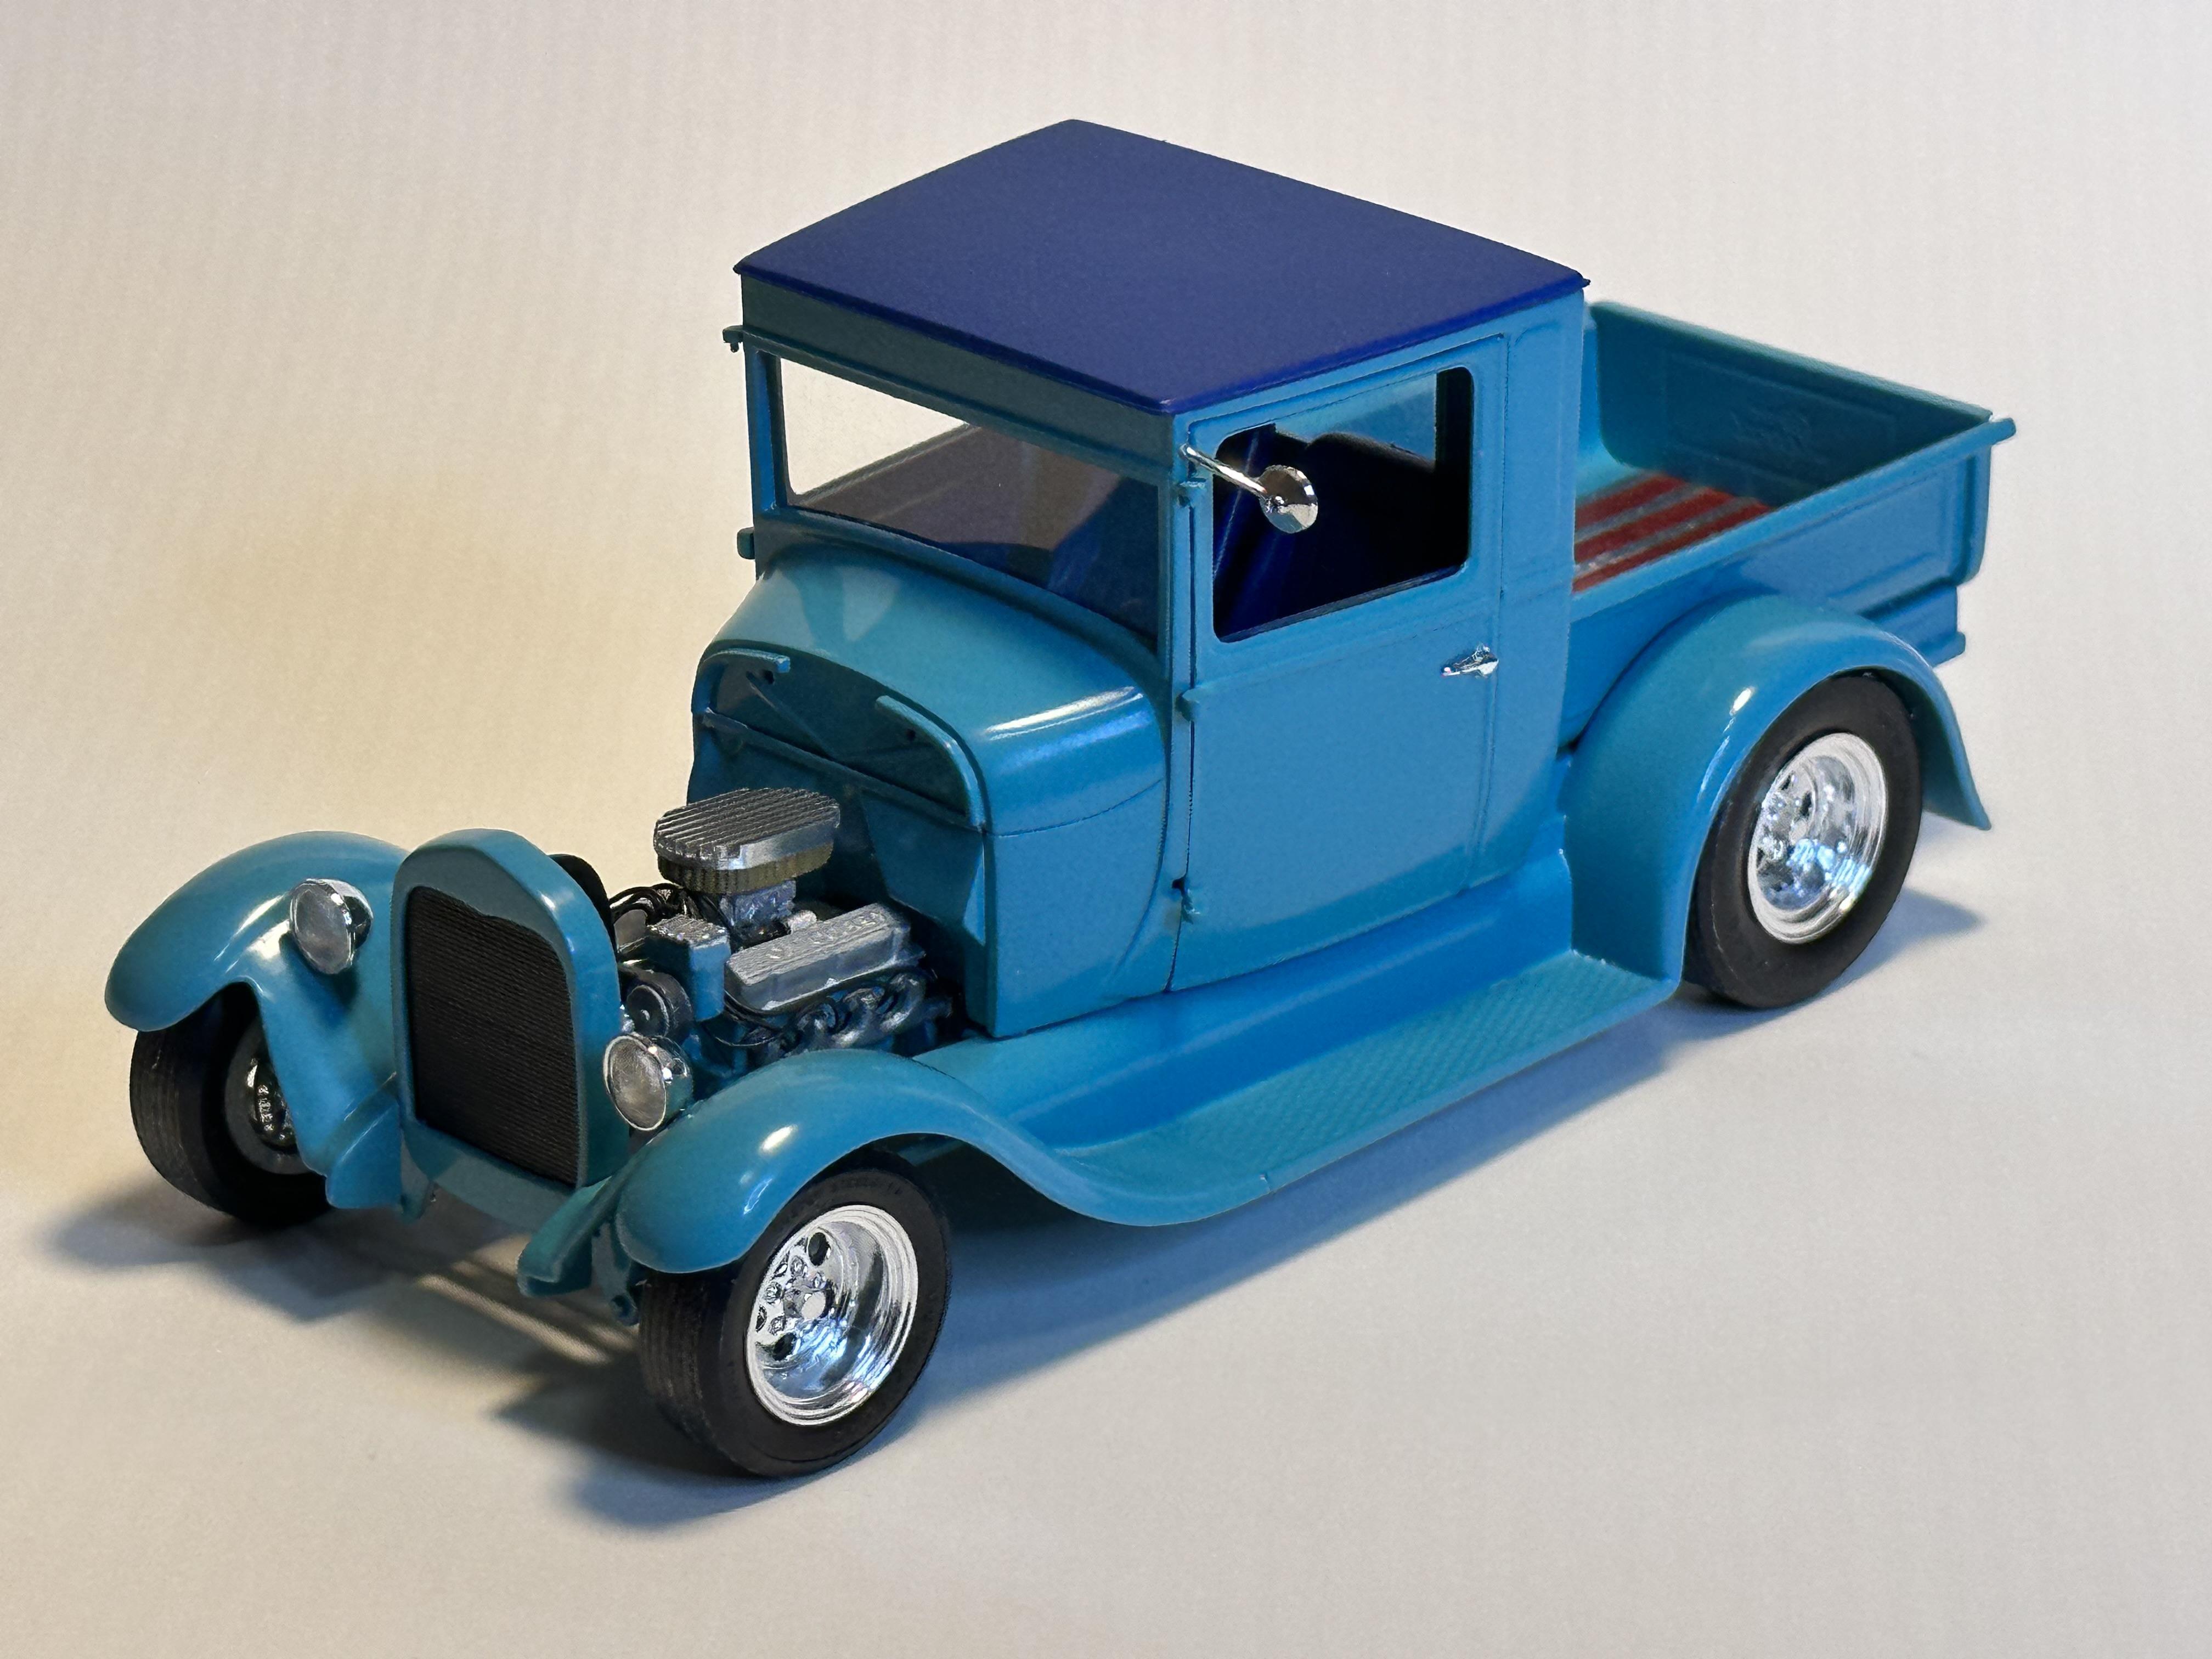
Thanks for the kind comments guys. Greg - I will use the tip to cut the fan shroud in half as I get a bit testy when things don't go together well especially when you are at that stage of a build. The last installment left things hanging a wee bit. I mixed the green into the blue one or two drops at a time. I thinned the paint first as this made the mixing a lot easier. This is the result - Looks a little lighter in the pix but I am happy with the results. I moved on to the manual trans and painted that with Testors xxxx and sealed with a little clear shot from a distance so that it is not tooo shiny and I can handle it without the paint rubbing through- gee I love these paints, just a pity they are no longer available. I painted the 440 exhausts too. While the paint was drying I started on the body. I thought this would be a quick tidy up of the mould edges but I found some alignment issues at the left rear wing and passenger front door to cowl junction. Took quite a lot of clean up with some filler needed on the passenger door - cowl area Worst of all was a short shot on the drivers side rear corner This was filled back and a filler piece added that is now awaiting some shaping Thanks for looking

-
Loosen the lid on Testors enamel square bottles.
bill-e-boy replied to R. Thorne's topic in Tips, Tricks, and Tutorials
I use nutcracker pliers and occasionally need to tap the top of the bottle too. the nutcracker pliers work on all of the bottle jar sizes and brands as Tamiya paints can be hard to open at times. Have not tried loosening with lacquer but will remember that for the next time I have a stubborn bottle cap. Interesting to see so many people have a stash of the Testors little square paint bottles - I must have about 50 left in my stash -
This the cleanest you will see my bench. House for sale and open to view so the powers that be dictate a clean space. Gear comes out between viewings though
-
Nice build and impressive bright work. I would not strip it and repaint - just get another kit and redo it with your increassed skill levels to show how you have progressed since that was built.
-
Ugly duckling 62 Dodge Dart built about 1978 and way before bare metal foil And a little off the car page but Johan none the less. Built box stock and late 70's again
-
You are off to a great start Geg. I too found that the bumper sits a a long way forward and is different to the box art car where the bumper is tucked right into the body. I shortened it and tucked it into the body.
-
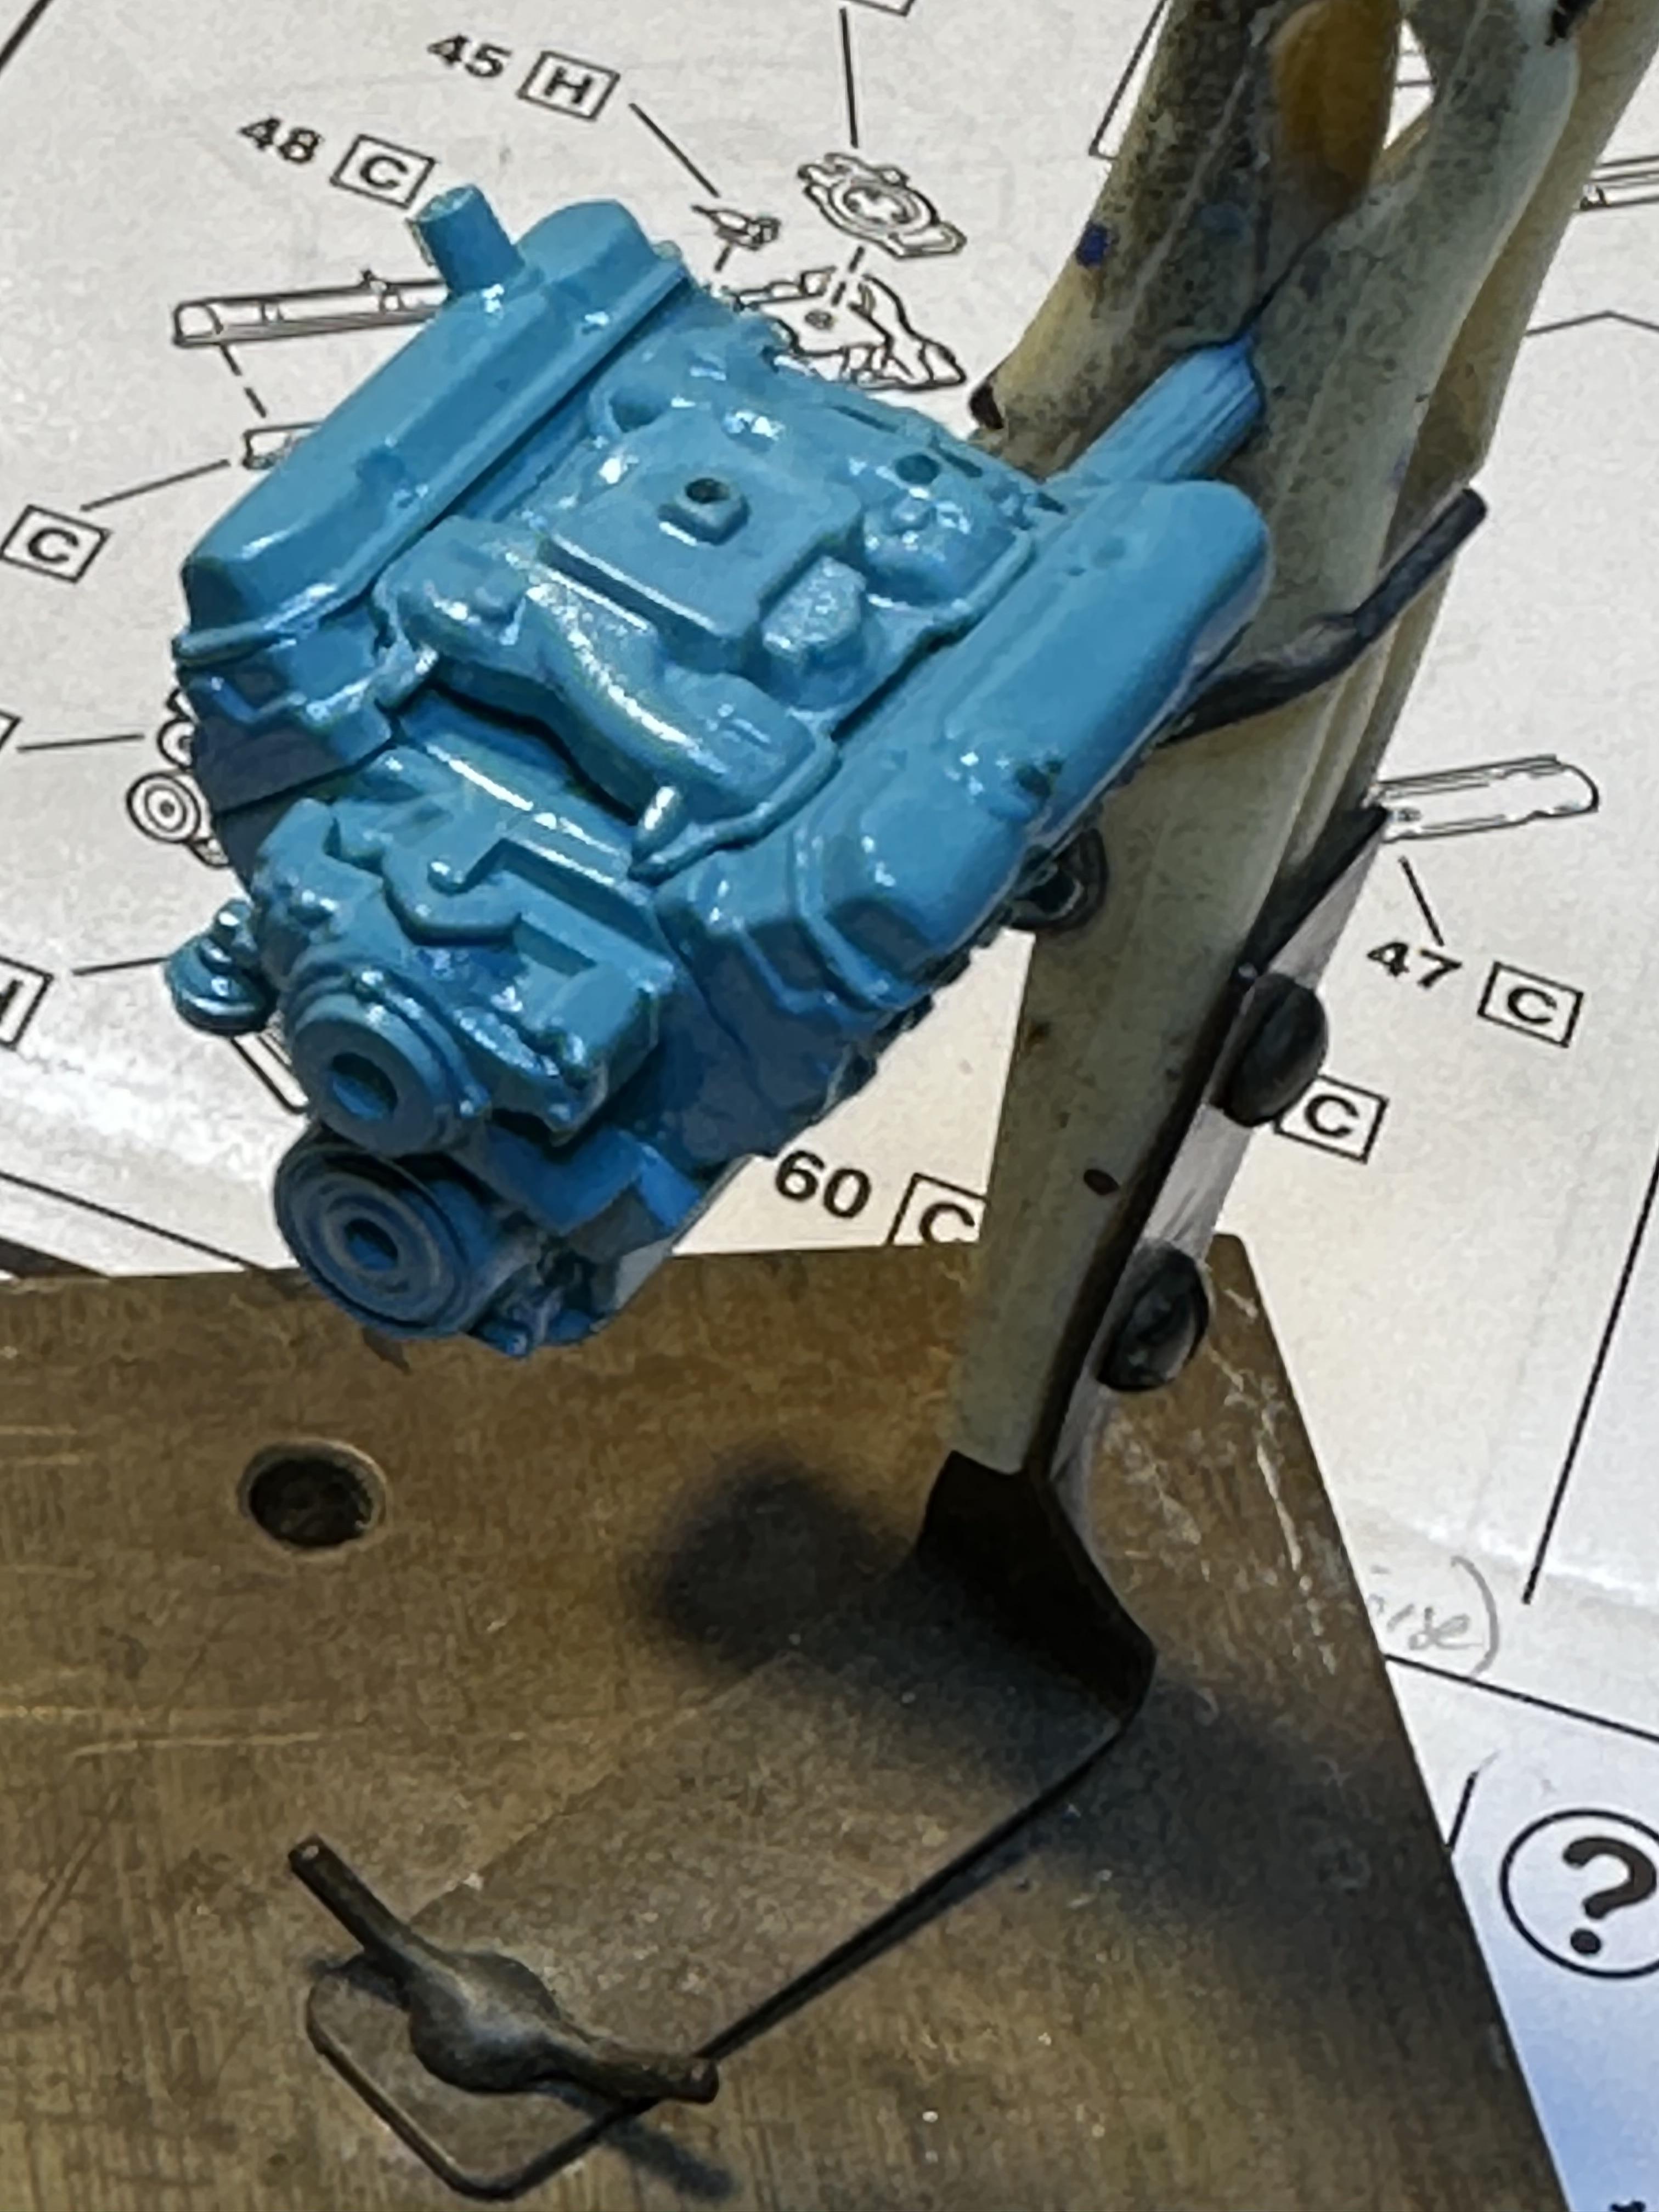
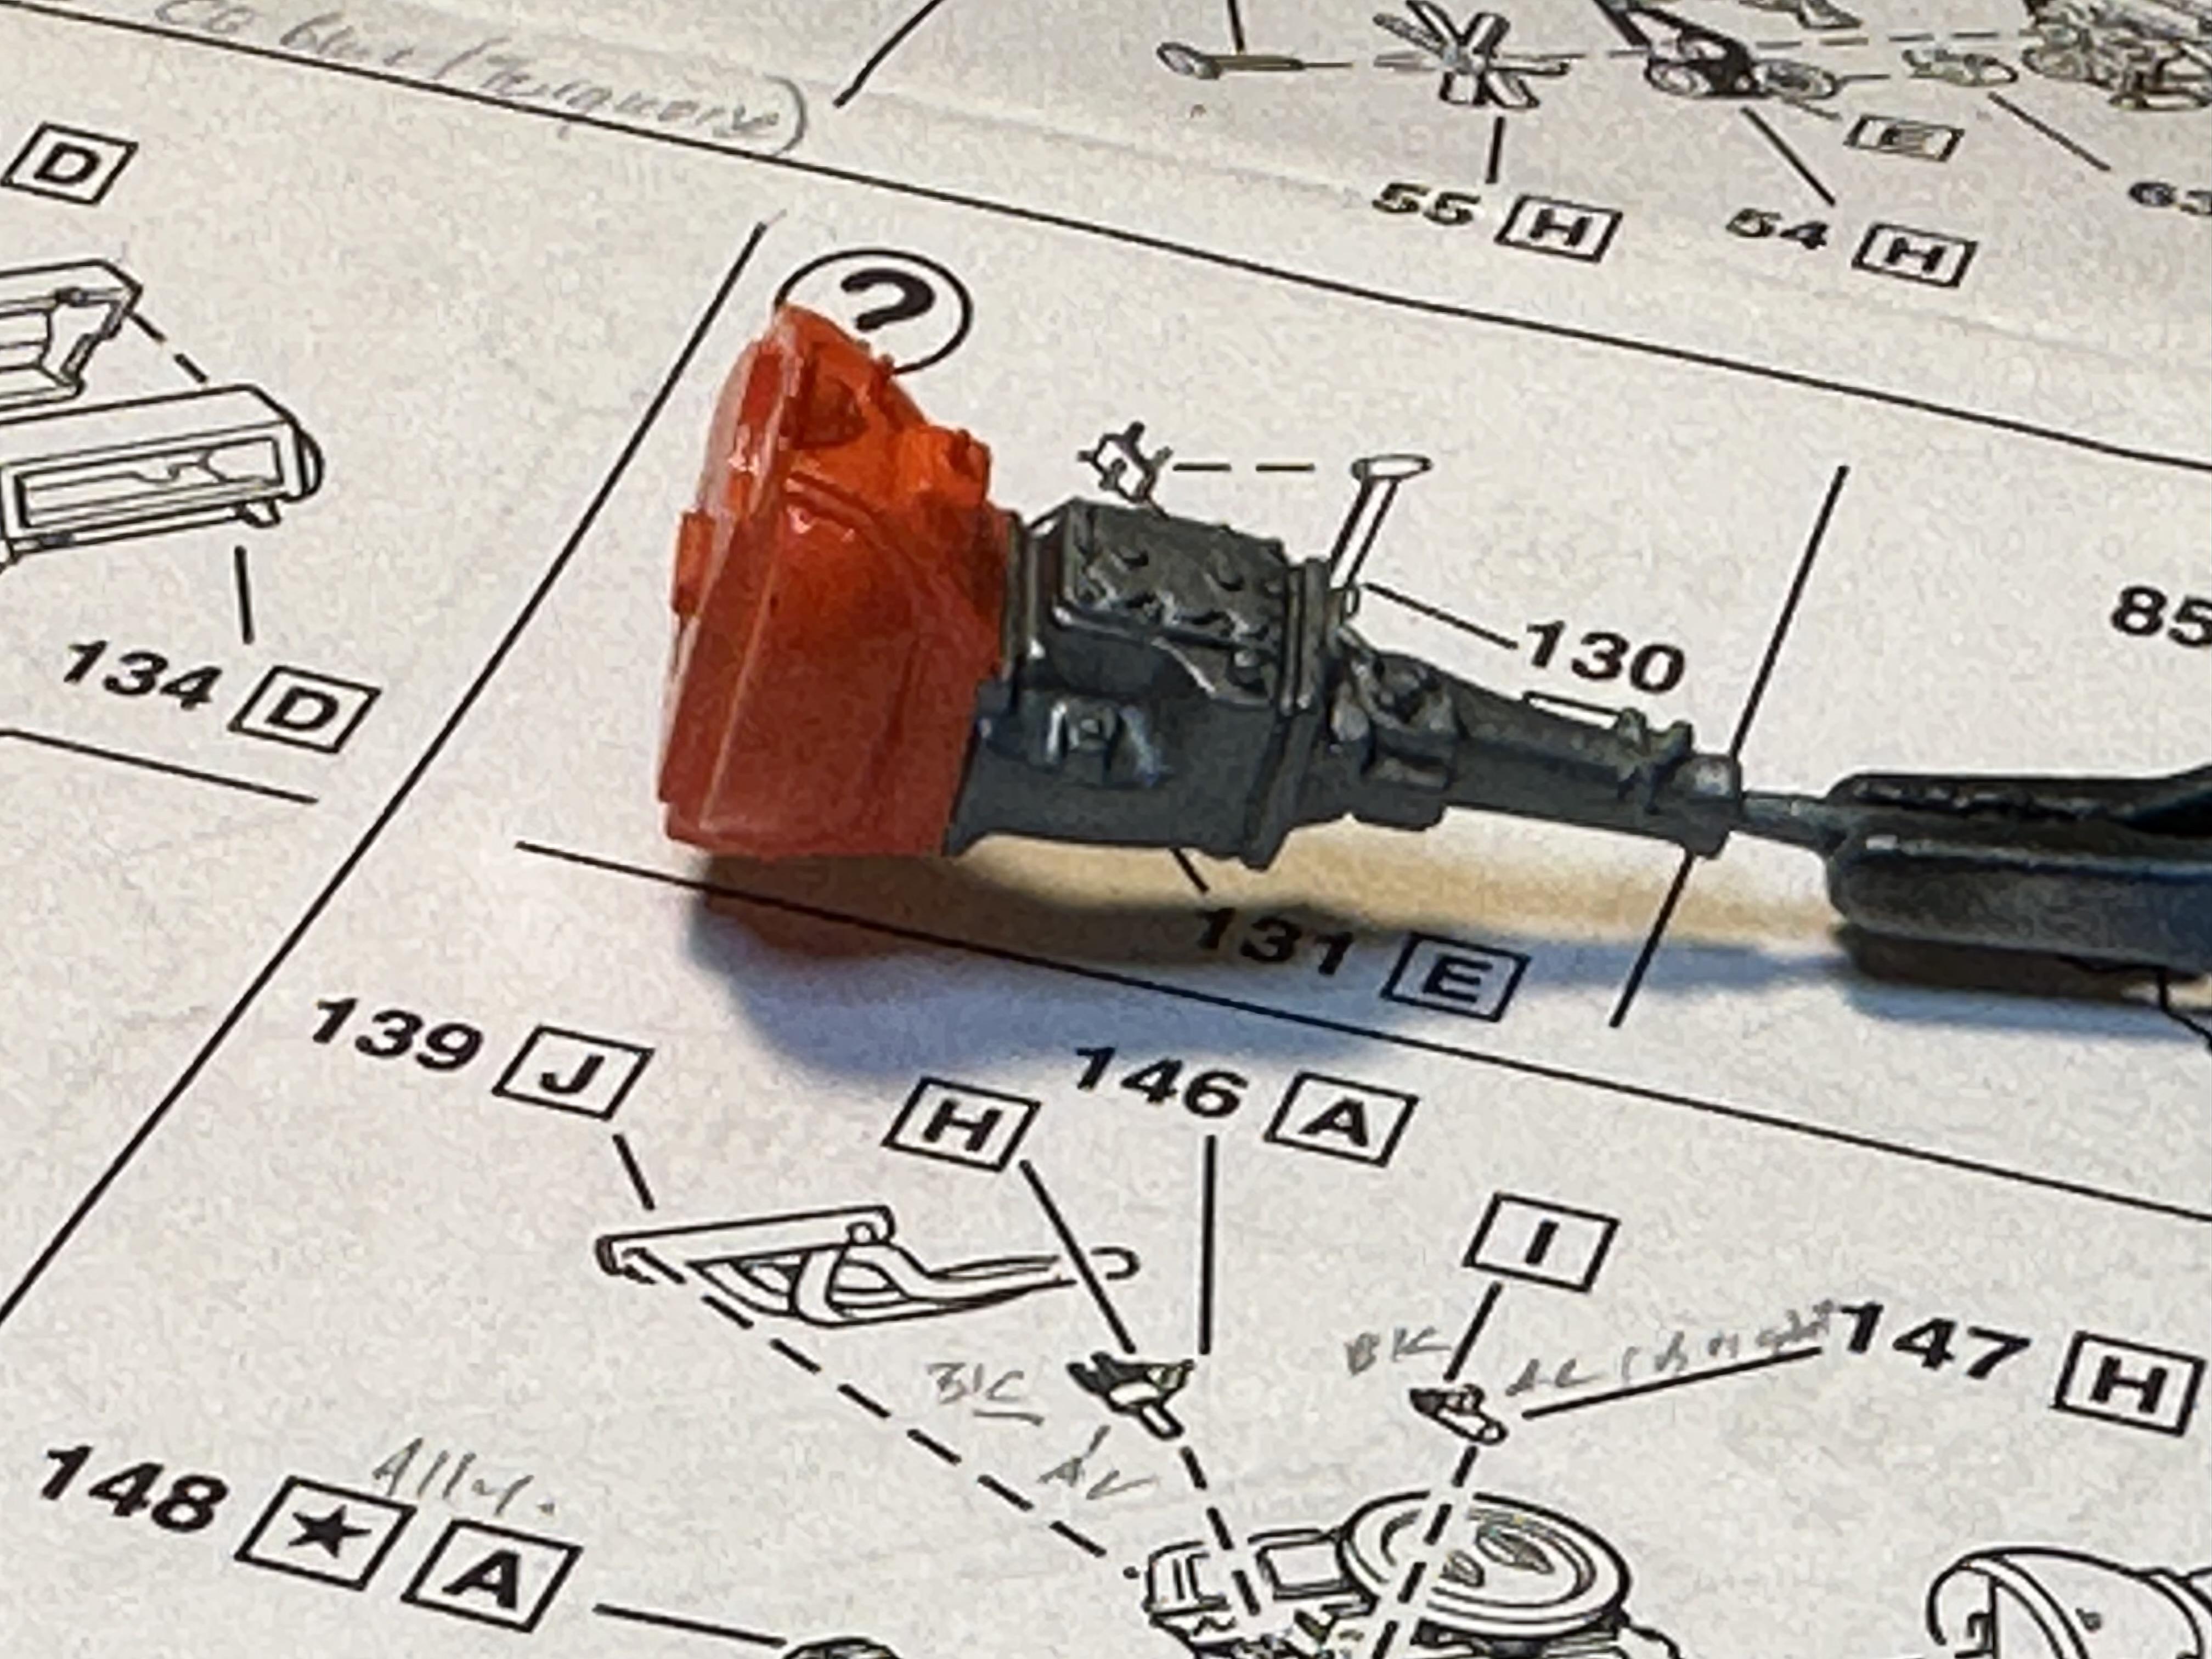
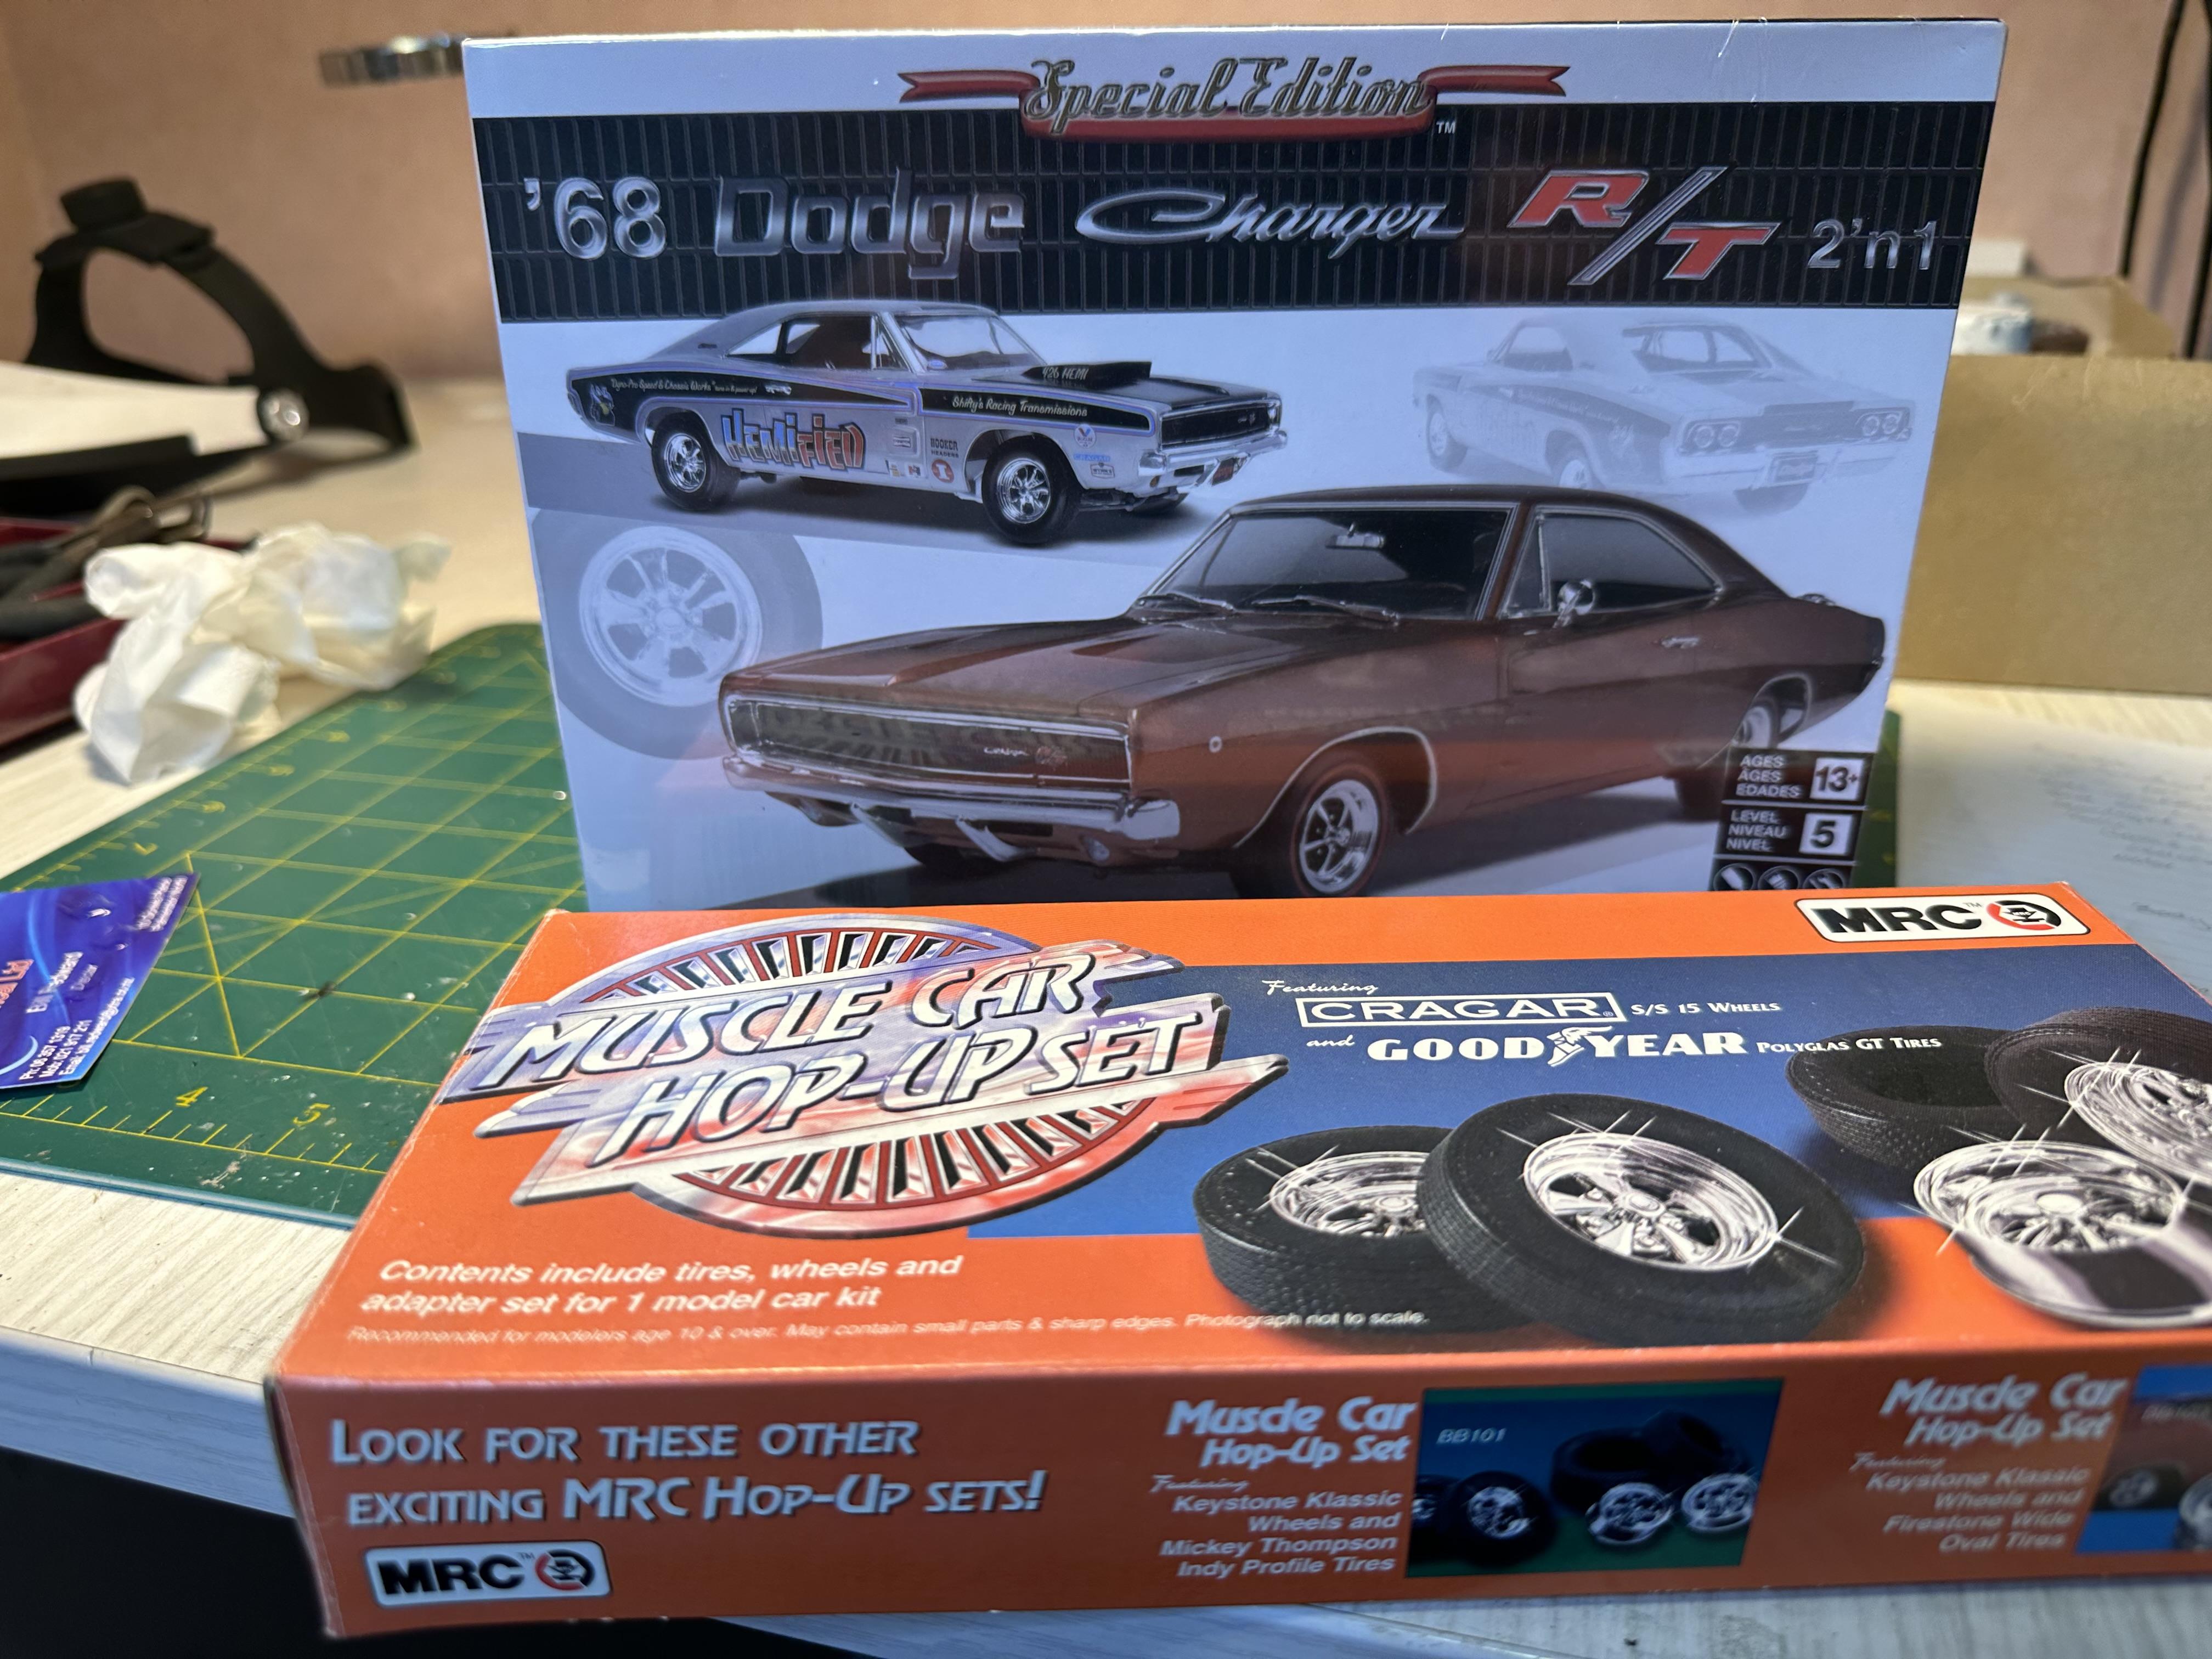
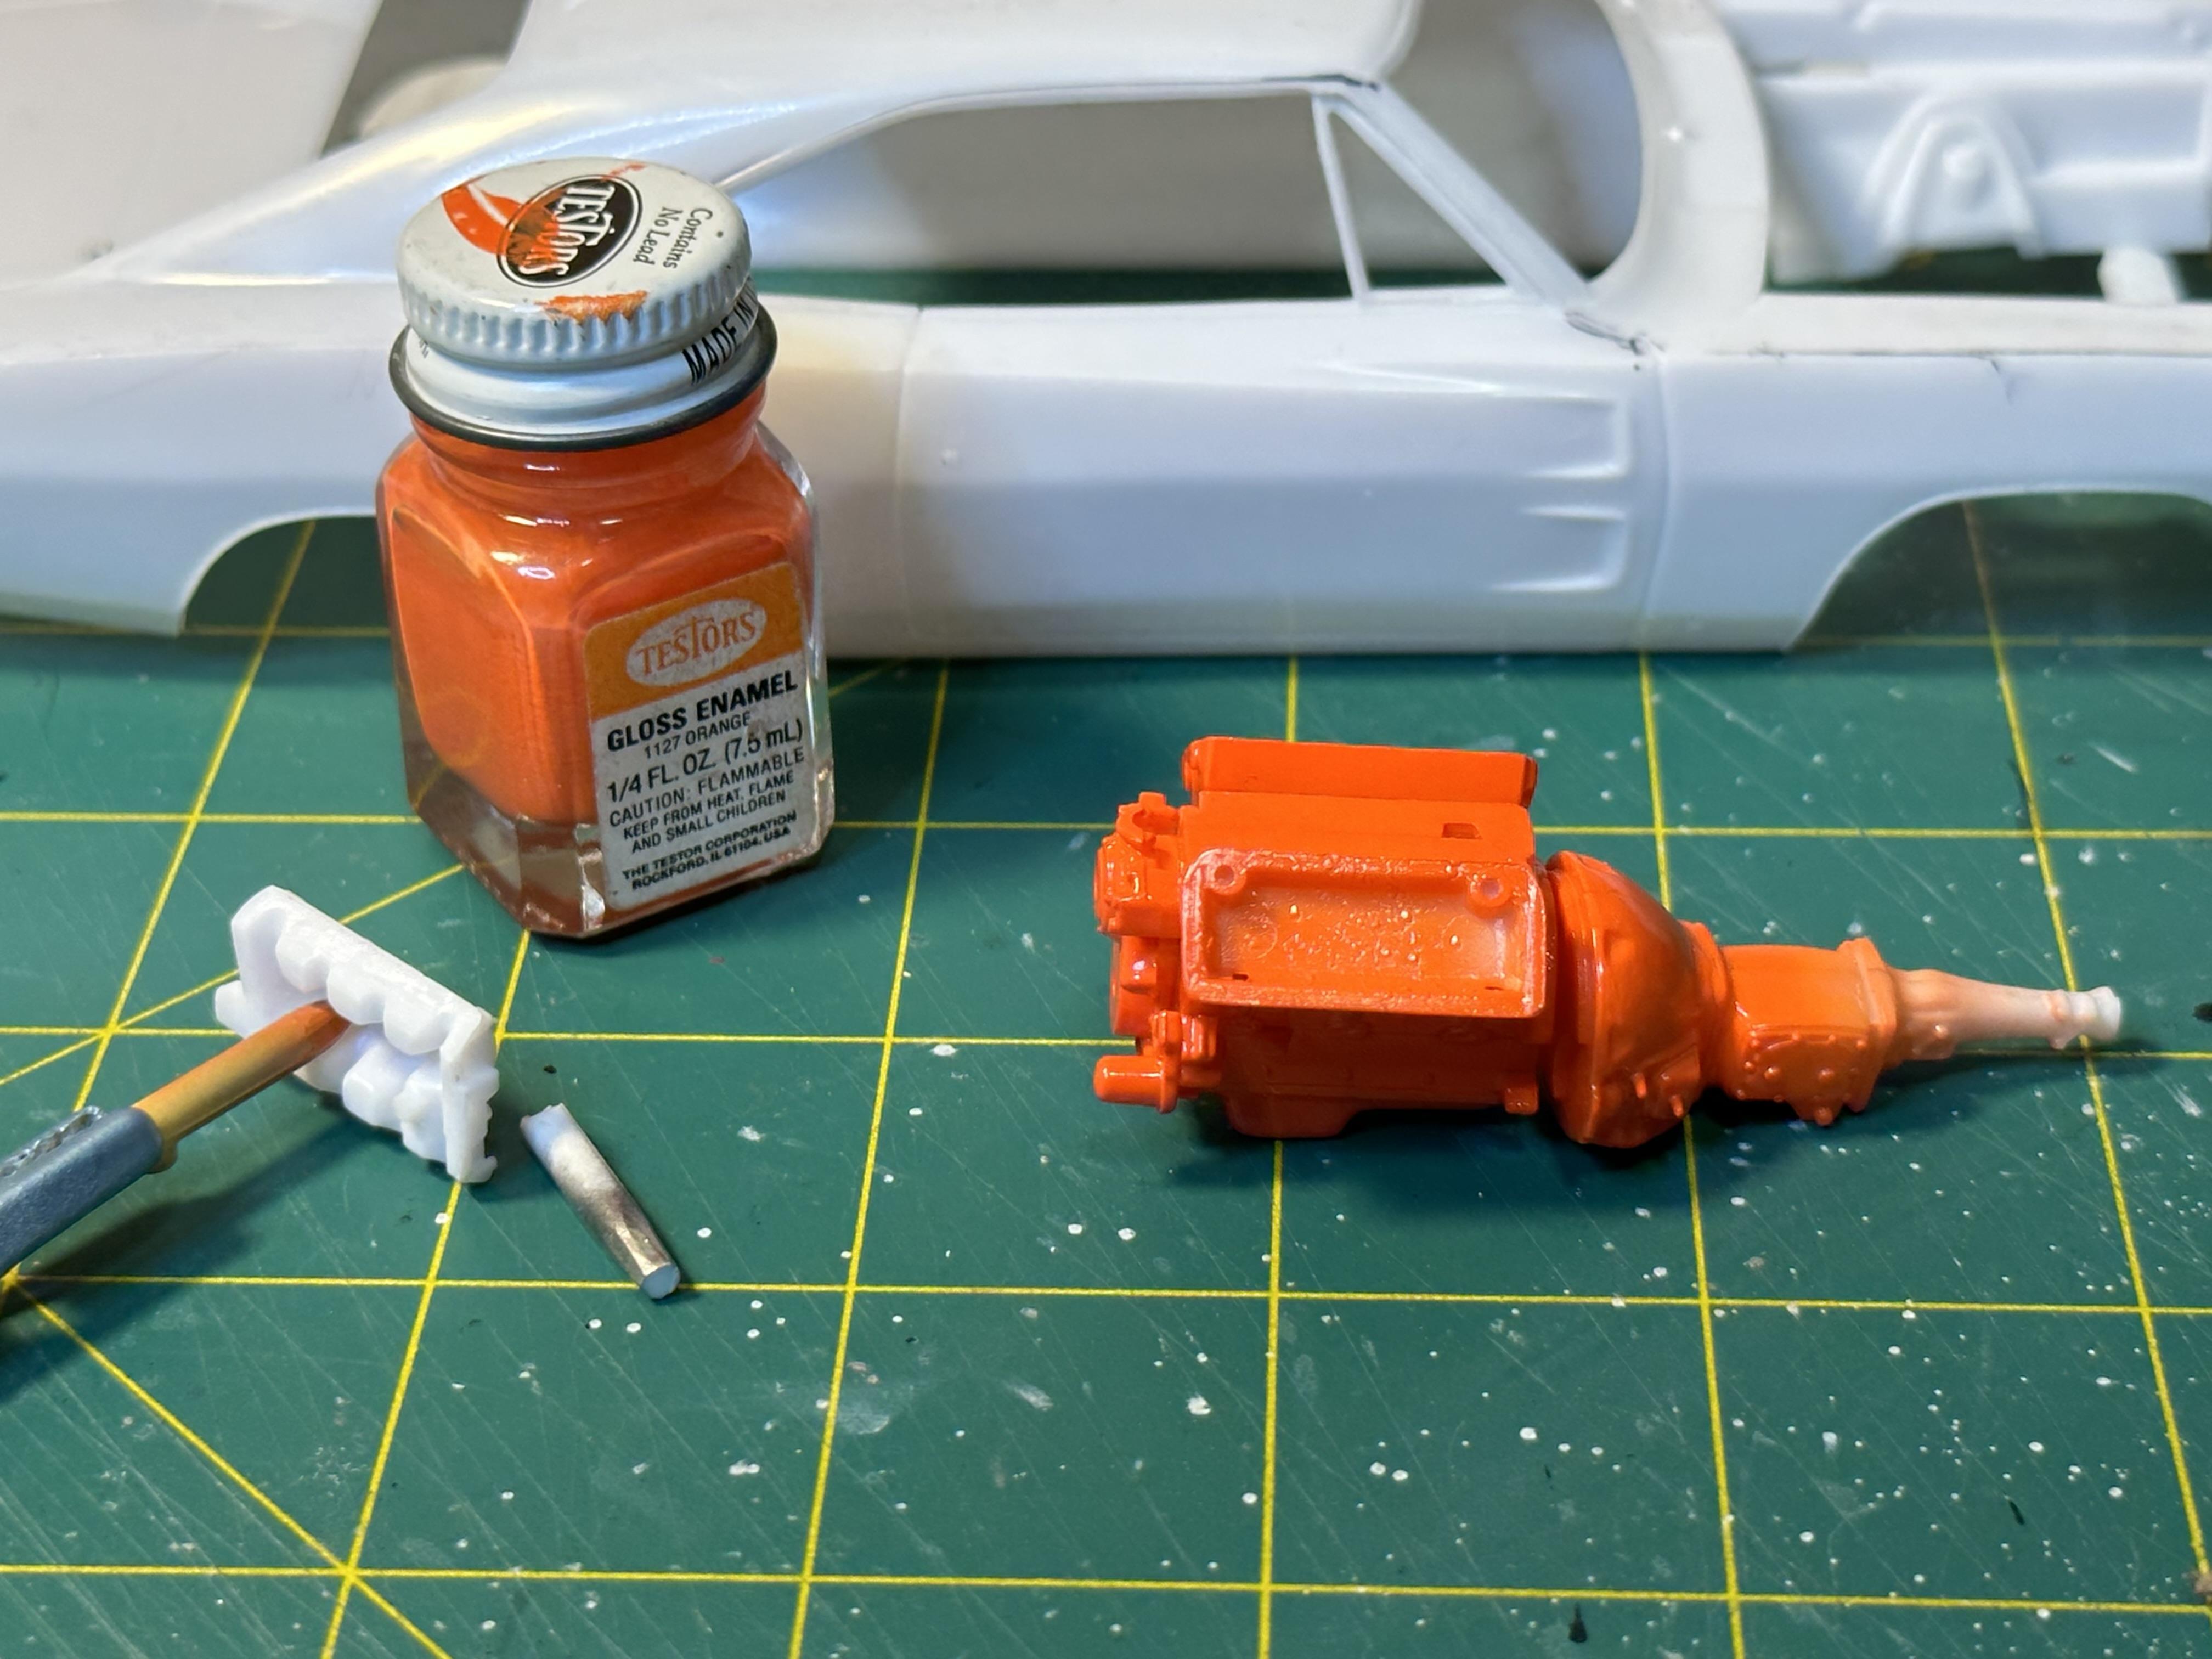
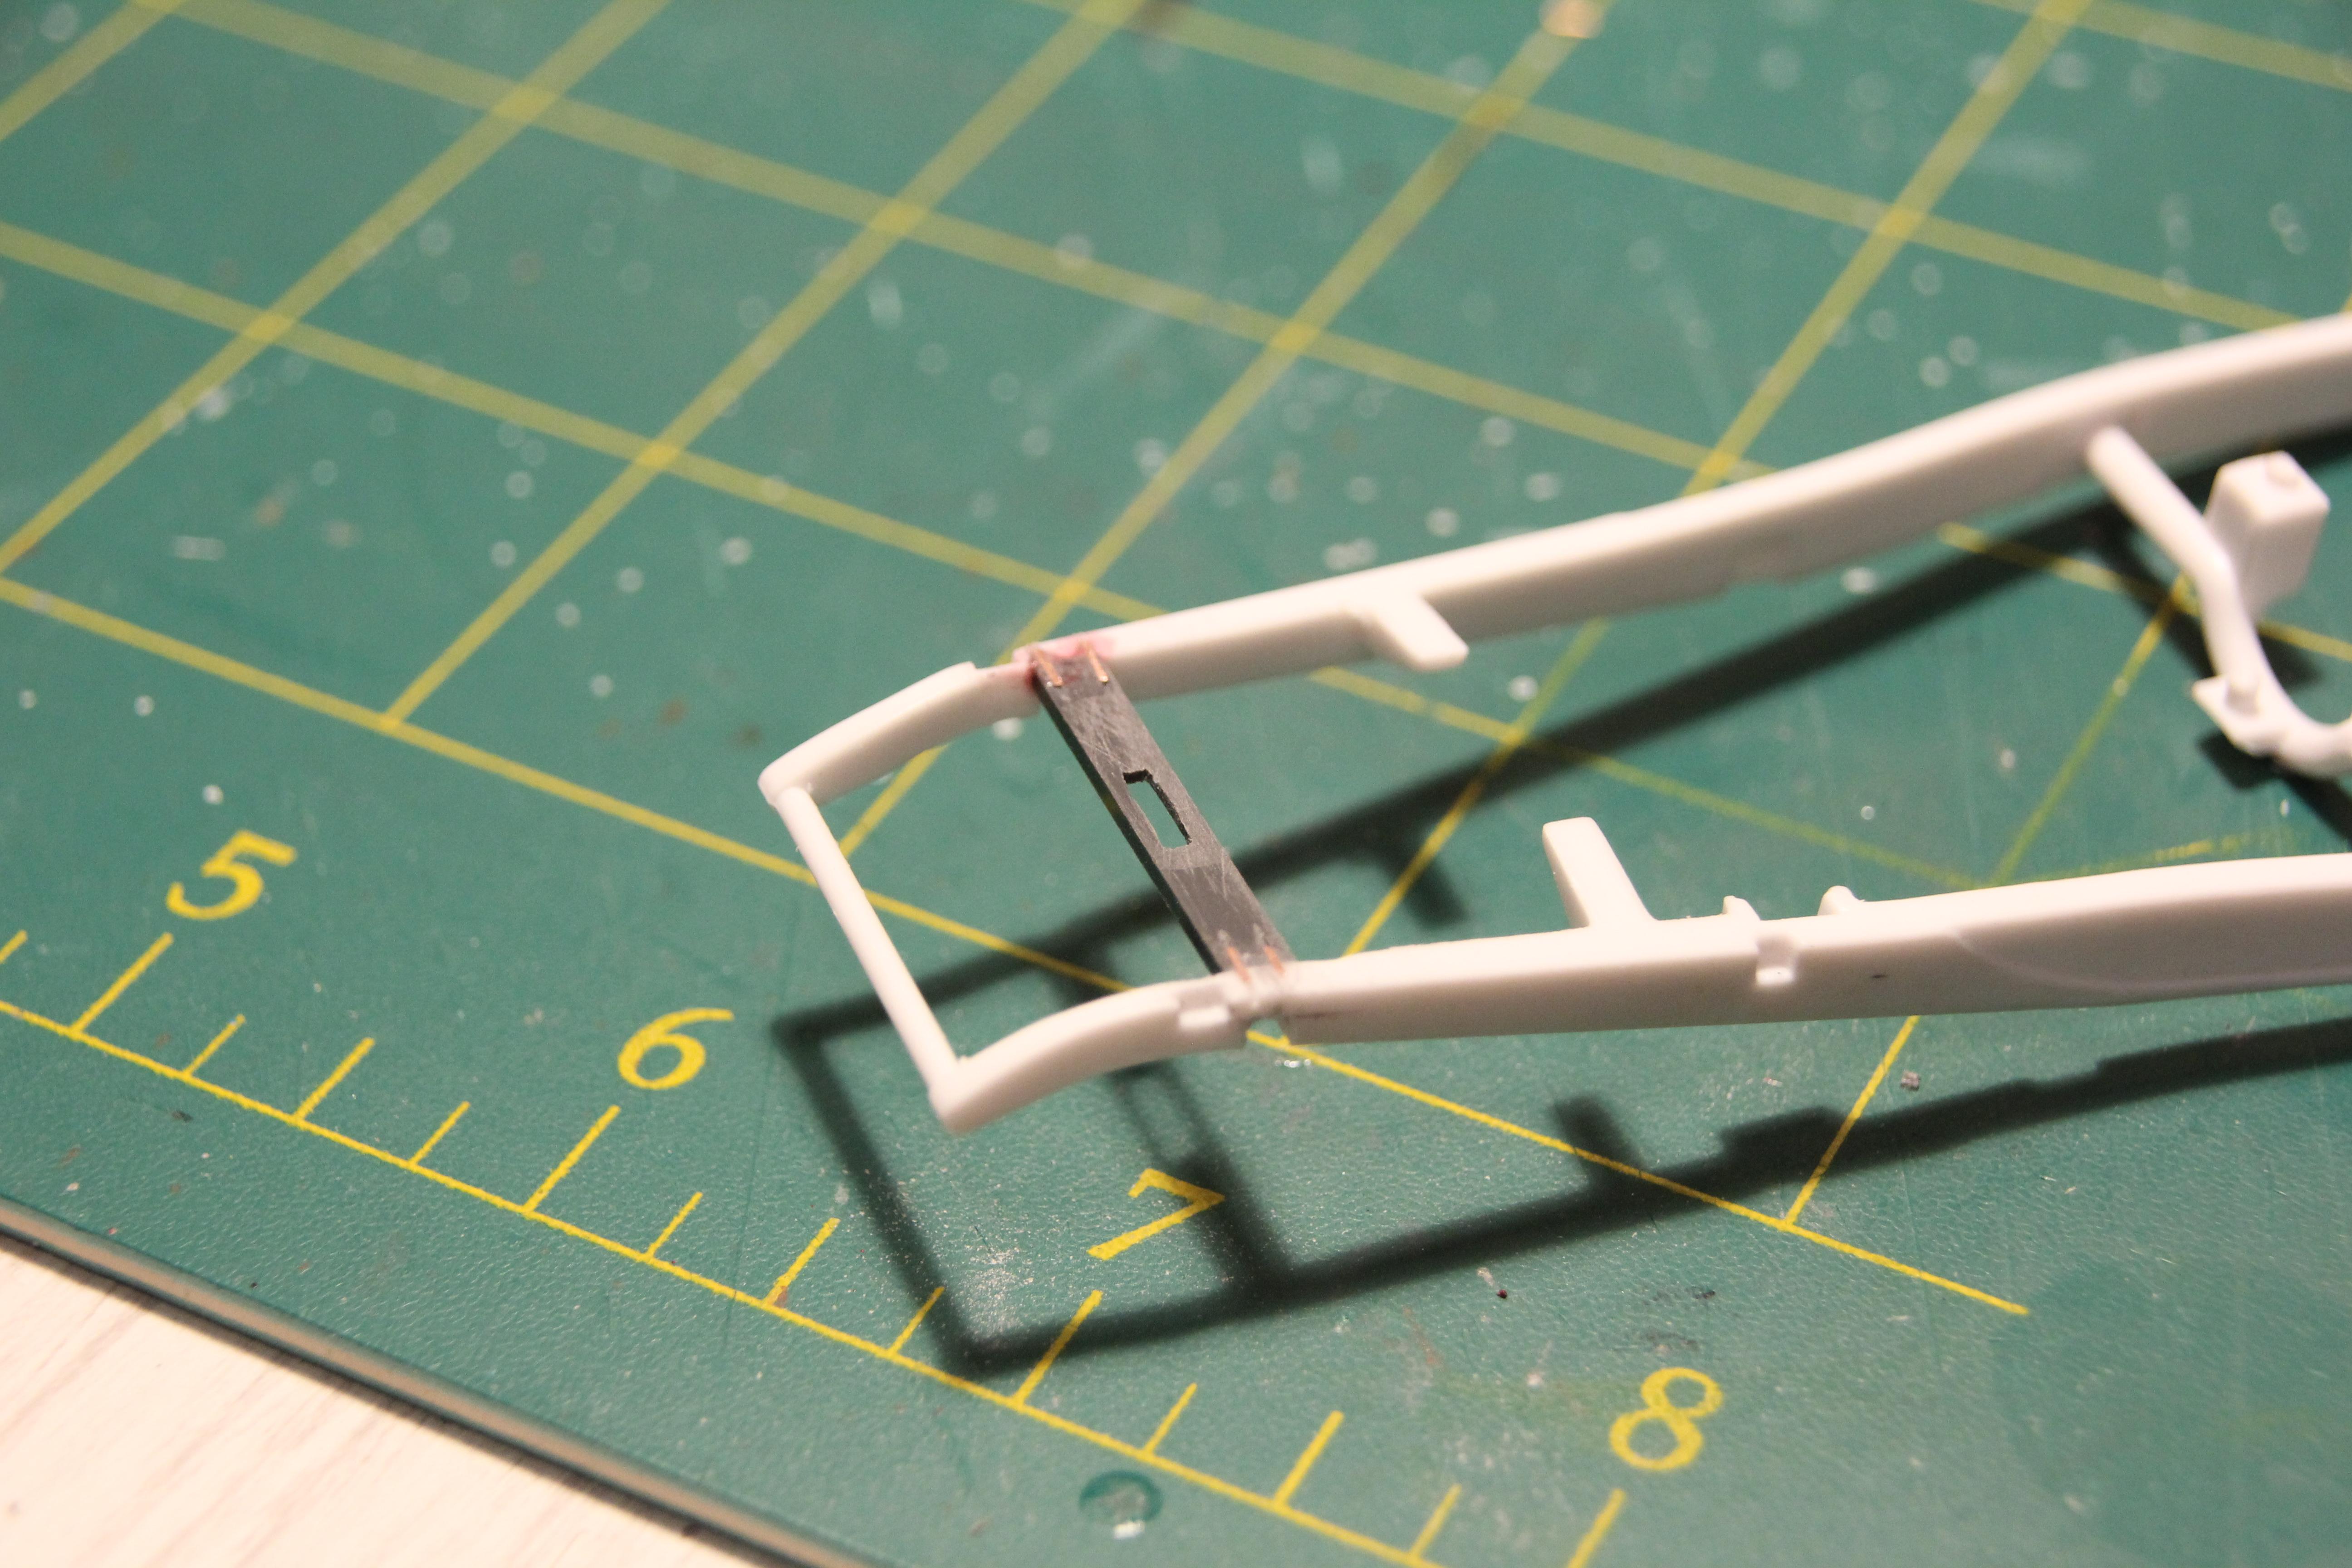
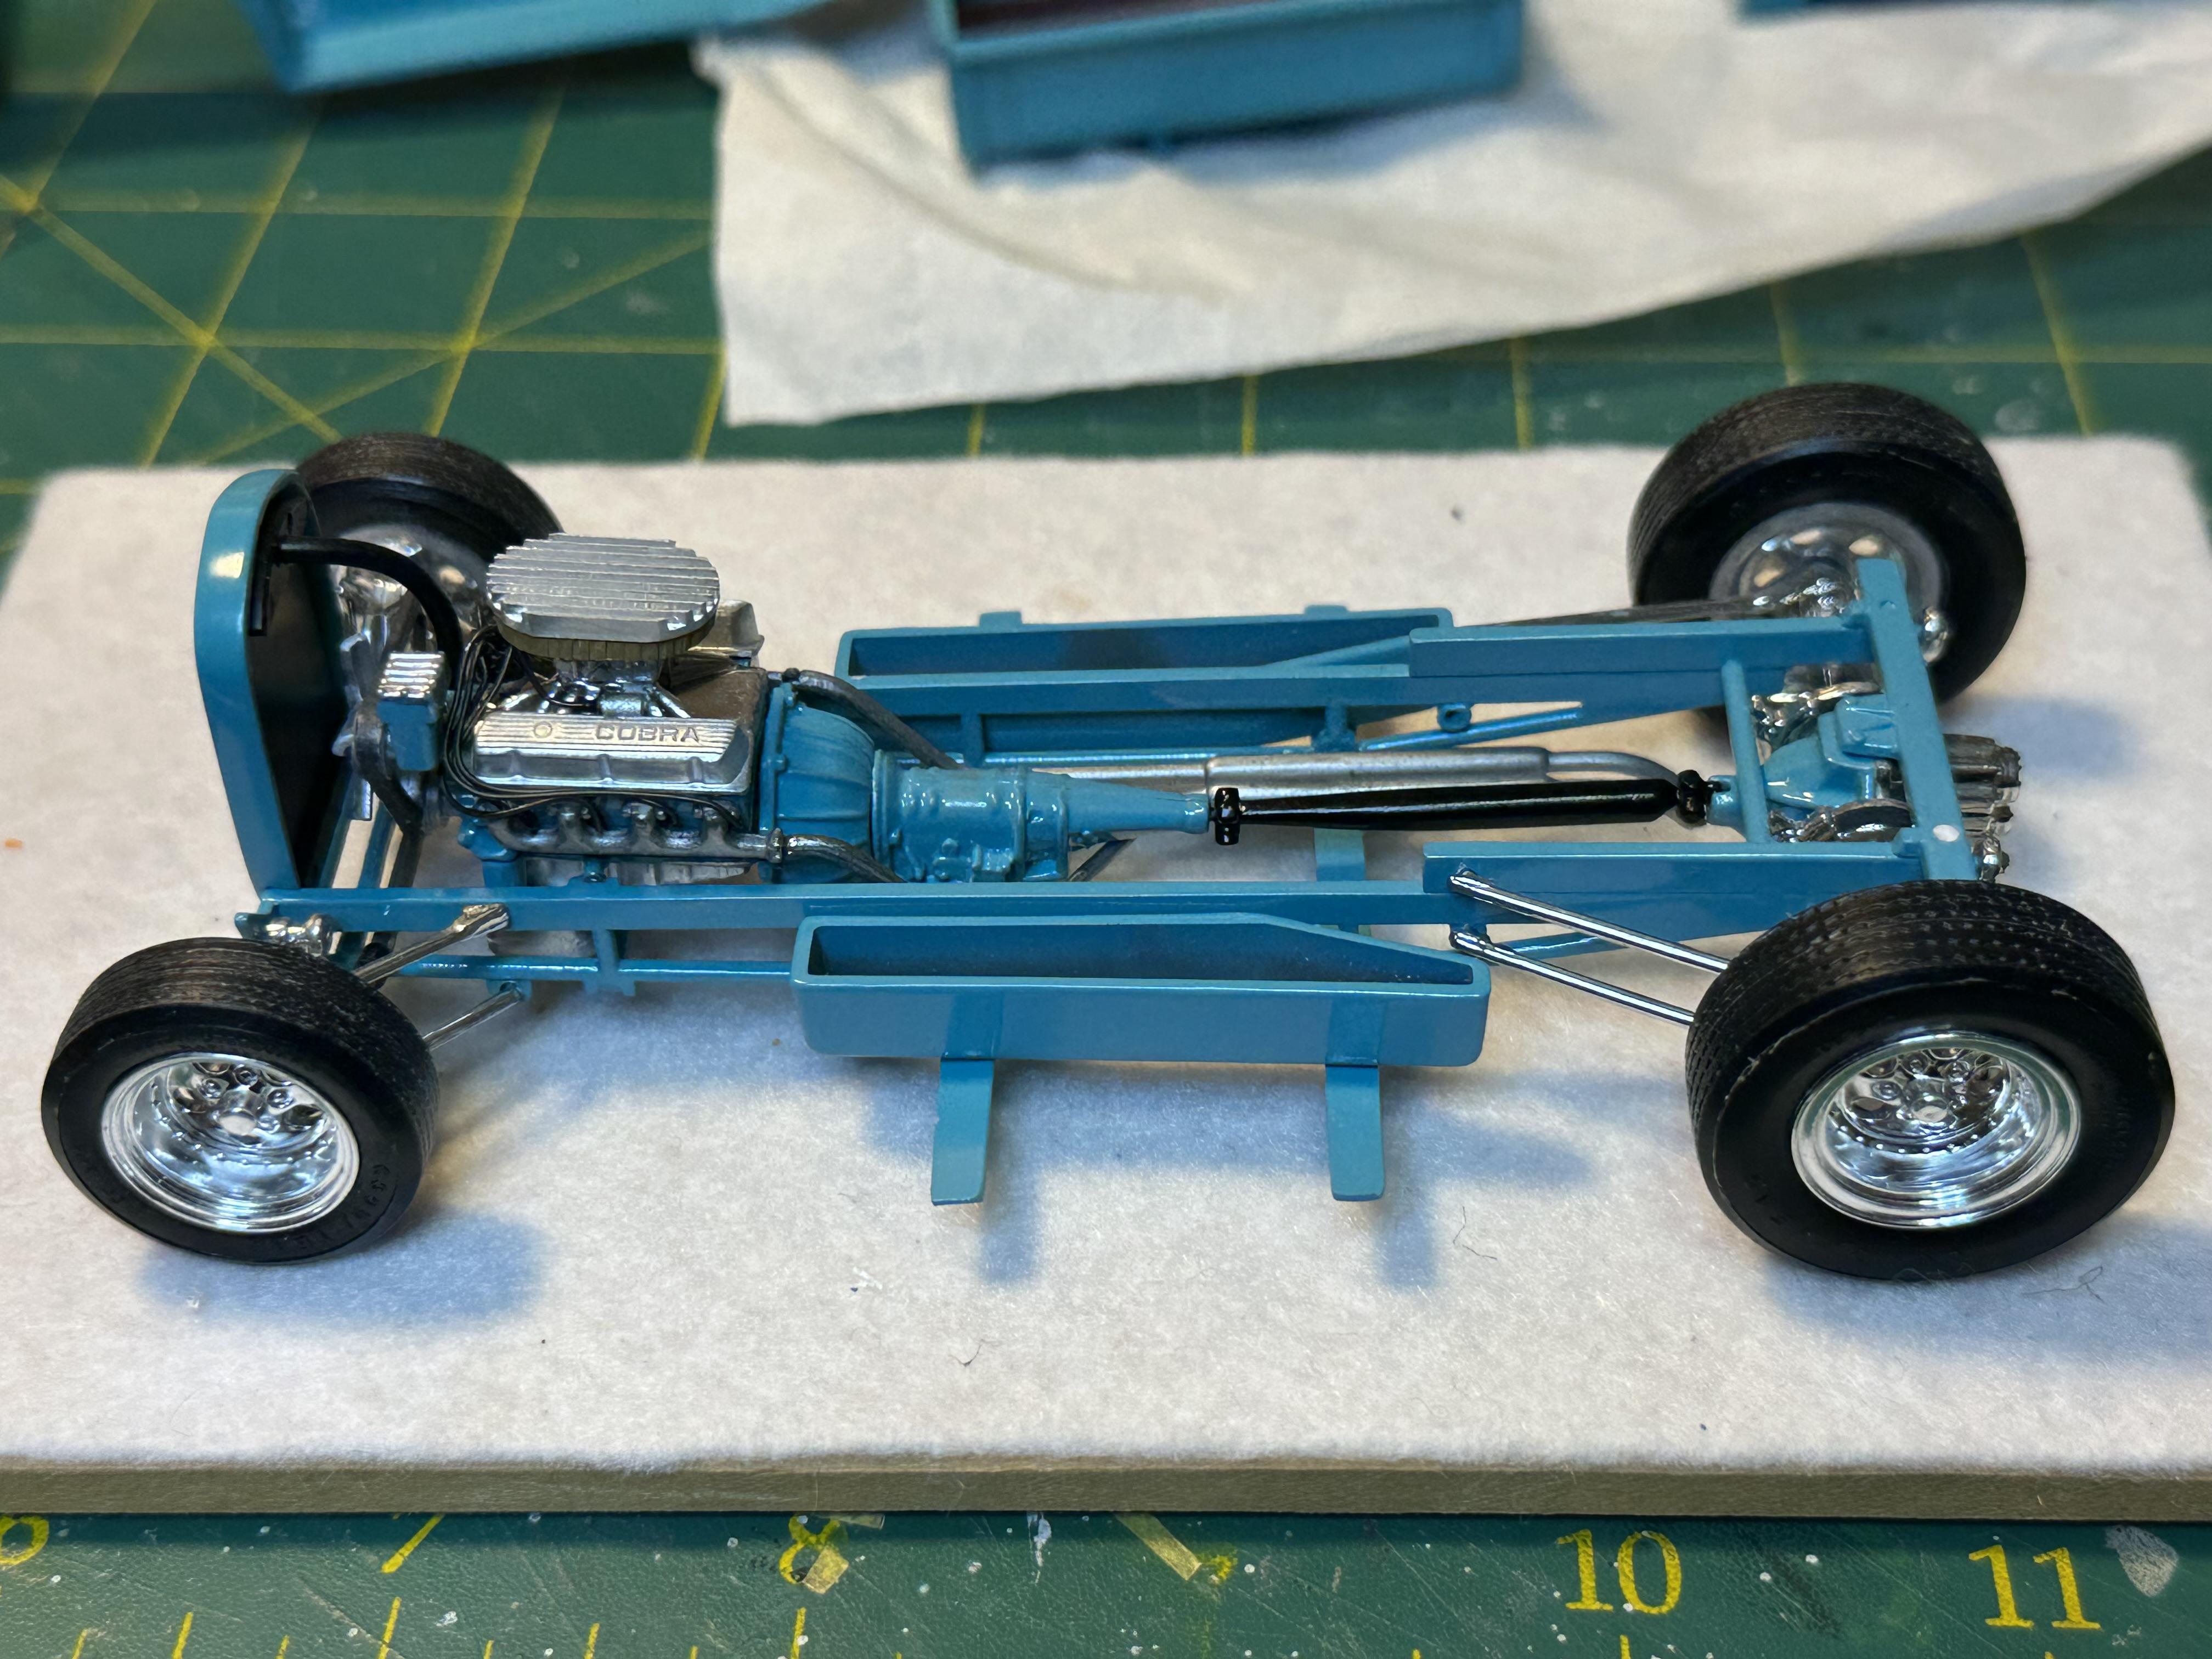
Now that the Chopped and channeled 32 Coupe and the Tim Boyd 29 A pickup tribute build are done and dusted and on the shelf I think to myself what next. One of my all time favorite cars is the 68-69 Dodge Charger. The only problem is that I have never got around building one -till now. The candidate is a Revell 68 R/T Charger. On opening the box it was a bit of a surprise to find so many parts espicially after working on early rods for a bit. This not to say that the Revell 32's dont have a lot of parts, they do have a good parts count but the 32's are a basic car so there are a lot less parts to work with. The Charger has an option to build a 440 or a Hemi which is correct for the R/T model. Choices, choices. I will build both up to see which I prefer but the bias is toward the Hemi. I spent an evening or three on the interweb researching things like component colours, interior options and what is peculiar to an R/T variant over the base car. I have a set of MRC Cragars and Goodyear white letter tires that I am considering for a day two car. Being of a hot rodding nature I have an issue with leaving things as it come in the box so the wheels may fly as the kit tires are rather blah. The colour choice is Tamiya LP47 Pearl Blue The Hemi motor and the manual have been cleaned up and shot with Testors 1127 Orange from the little jars that I have been hoarding forever Next up is the clean up of the 440 ready for paint. I could not find any turquoise in the paint stash so mixed some light blue with green as turquise comes somewhere between the two colours. When experimenting with a couple of drops of both colours I found I had to go easy with the green The marks on the side are for thinning - Testors enamels - 1:1.5 paint to thinner ratio for airbrushing has been my go to for a very long time I will post results of the outcome of the paint mix next time Thanks for looking
-
Revell 32 Ford roadster new release done the hard way!
bill-e-boy replied to Bullybeef's topic in WIP: Model Cars
This how I got the front end down on one of my 29 Roadster builds. The replacement flat crossmember and some work on filing the spring down to a mono-leaf spring
-
Revell 32 Ford roadster new release done the hard way!
bill-e-boy replied to Bullybeef's topic in WIP: Model Cars
Watching this -
Good save on the body. Test fitting is one of the most important tasks to do when building a model especially when you change things around
-
The Tamiya Lotus wheels and tires are nice representatives of the wheels you want. 13" and skinny with good detail
-
Yes. Was stolen and totaled by the thief. Ouch
-
69 Roadrunner built about 2004 in a restomod style before it became restomod. I have three more unbuilt in the stash along with a few others. I have a couple more Johan kits built but no pix yet There are some fabulous builds in the thread.
-
Thanks Steven and Steve for pointing the way. Went looking but could not find anything definitive until Gerrys post. Many thanks Gerry - is that you and yours? Bet you wished you still had it
-
When did the white letter tires first appear. I am building a 68 Charger and want to use white letter tires and mags as a day two car.
-
It has been a pleasure and an honor to be part of this tribute build. Thank you Tim Boyd for providing kernel in the first place with your article in the full size car magazine. I still have most of the Street Rodder magazines stashed away and I used to go looking for the column when I first opened the mag. Truly inspirational. All of the models built for the tribute build are all top notch models are a credit to all. Here is my take on the tribute build.
-
When I did one a while back I jammed four short wires from each side of the distributor into the front end of the tube and ran short lengths from the tube to the spark plug - I hope this makes sense. The 38 PU has the early dome type distributor where the crab style distributor is used on later models up to 1948. Back in the day as the spark leads were not as good as they are today a lot of early V8 owners got rid of the tube because of shorting of the spark wires to the tube.
-
Fixed the roof joint - although you cant see the gap here - is there an Under Glass topic been started yet?
-
Looks like I may have to revisit the roof joint - dang!!!
-
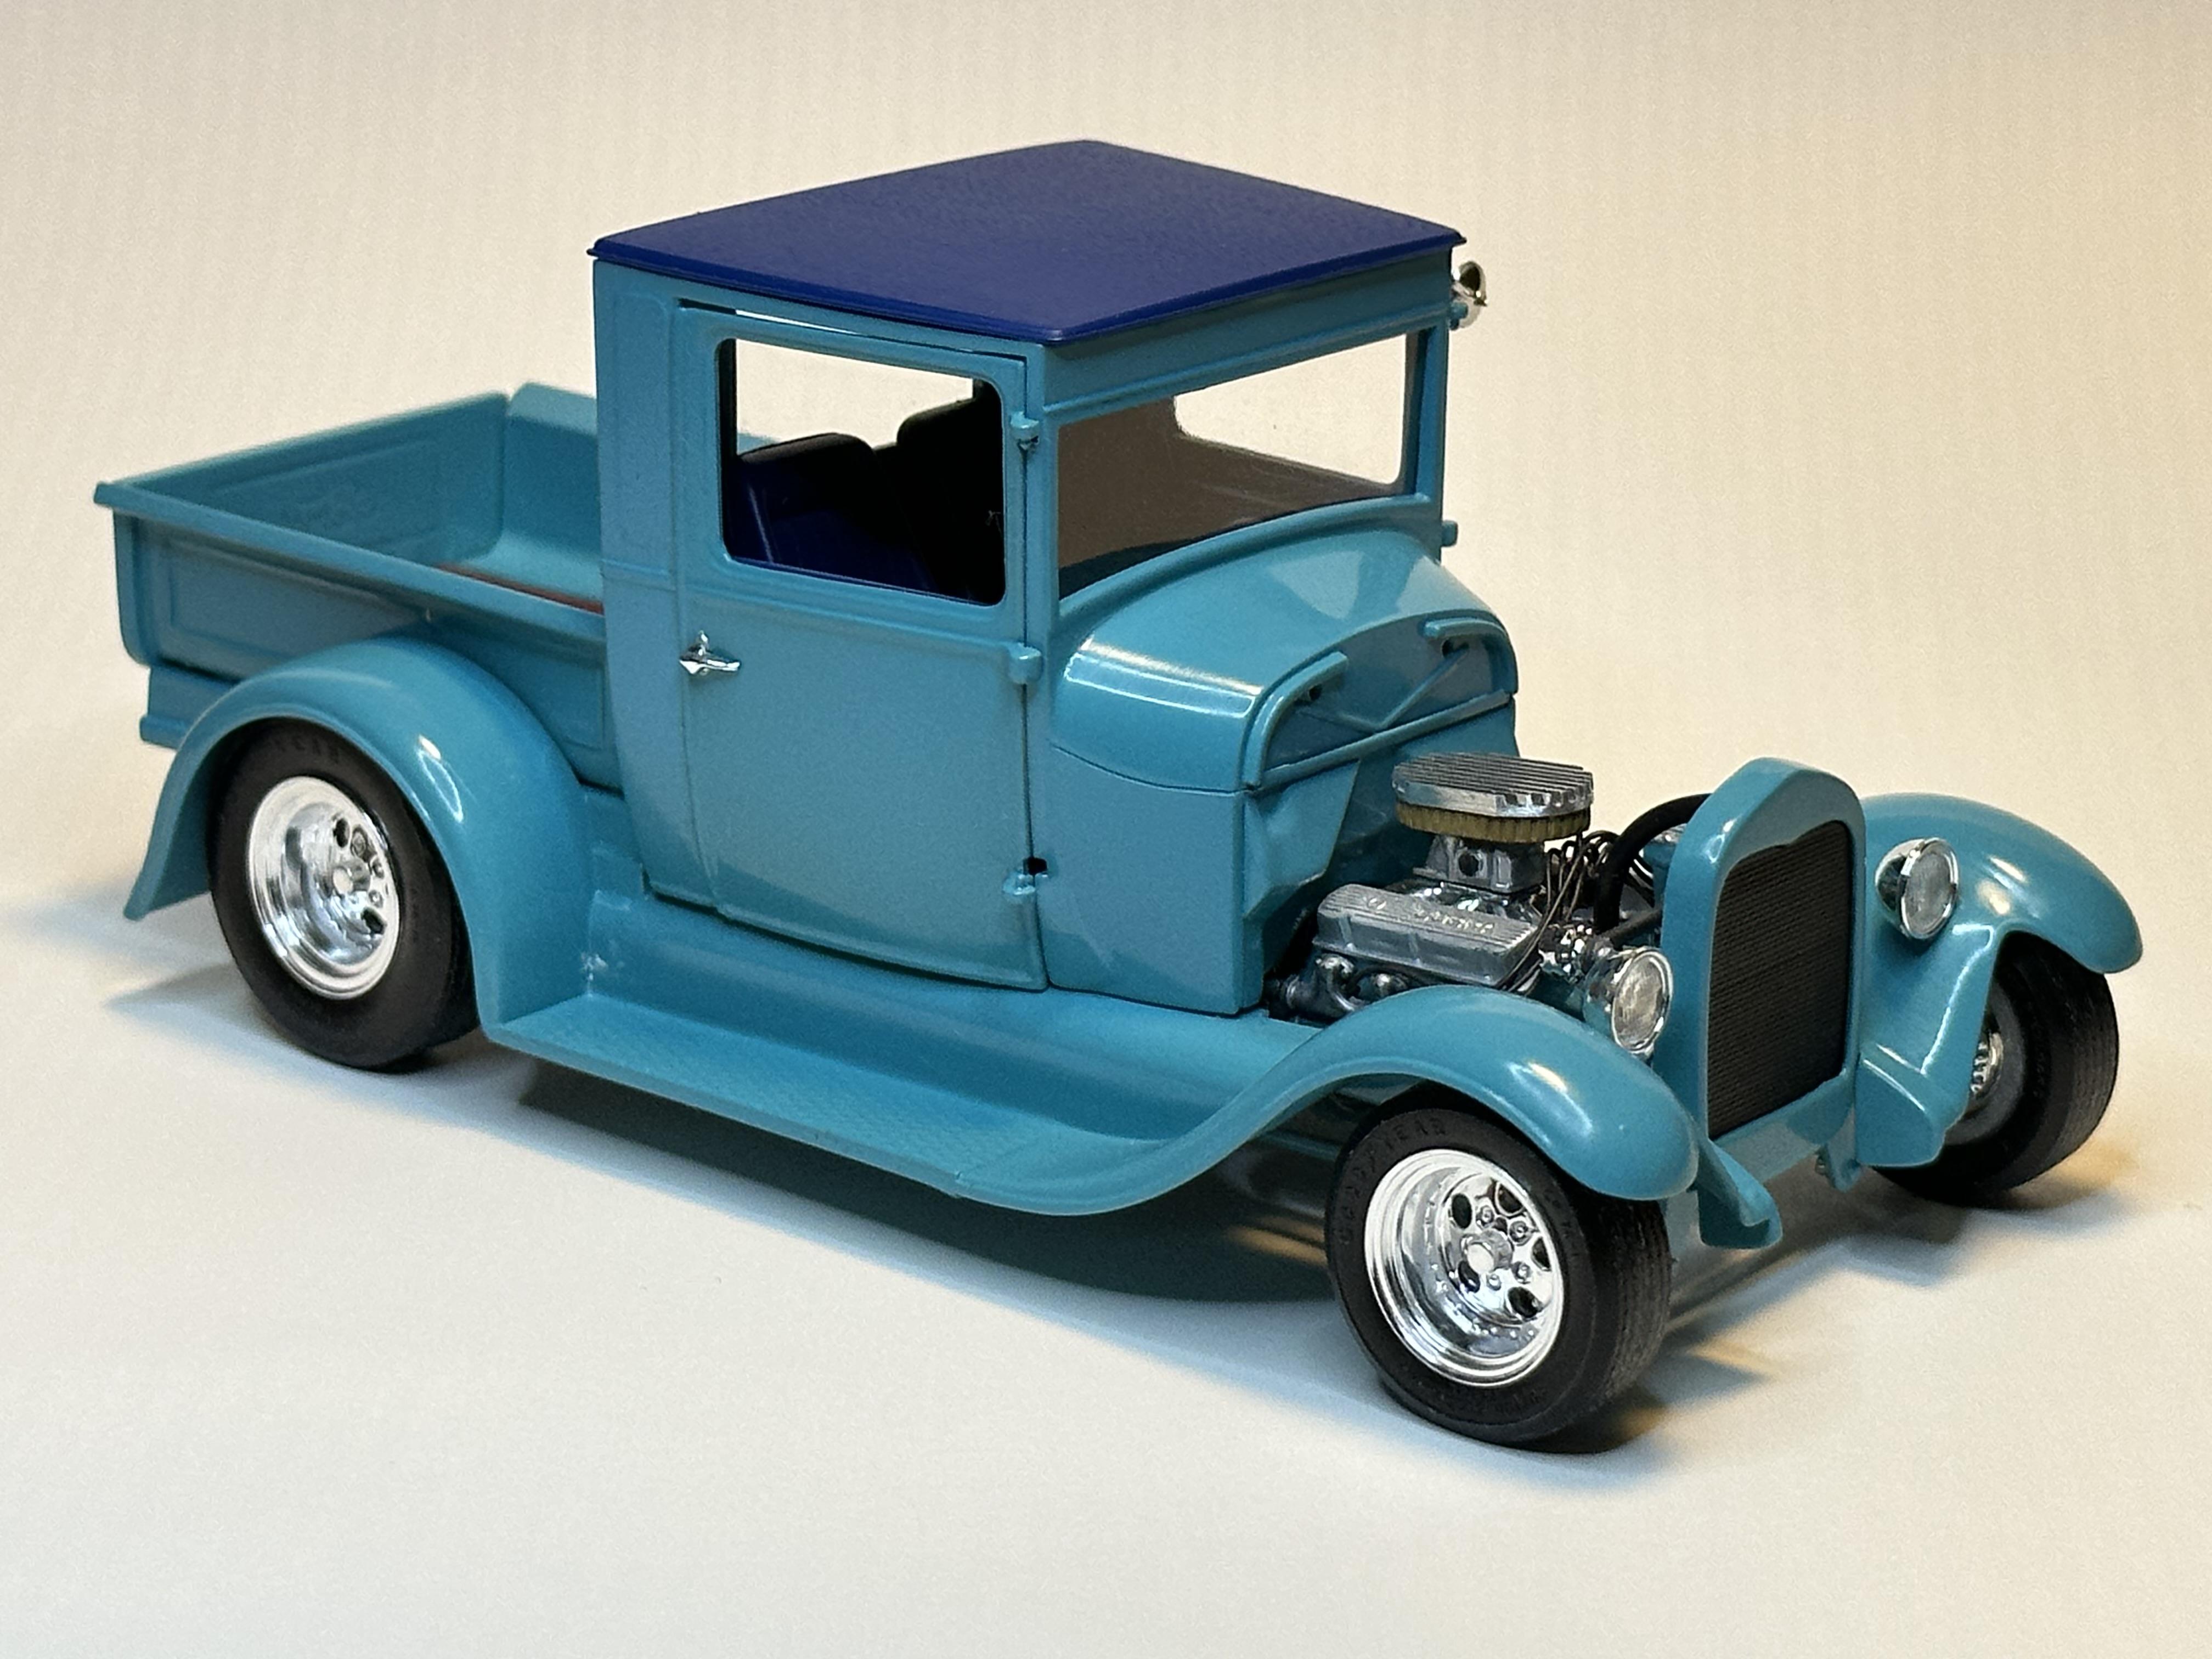
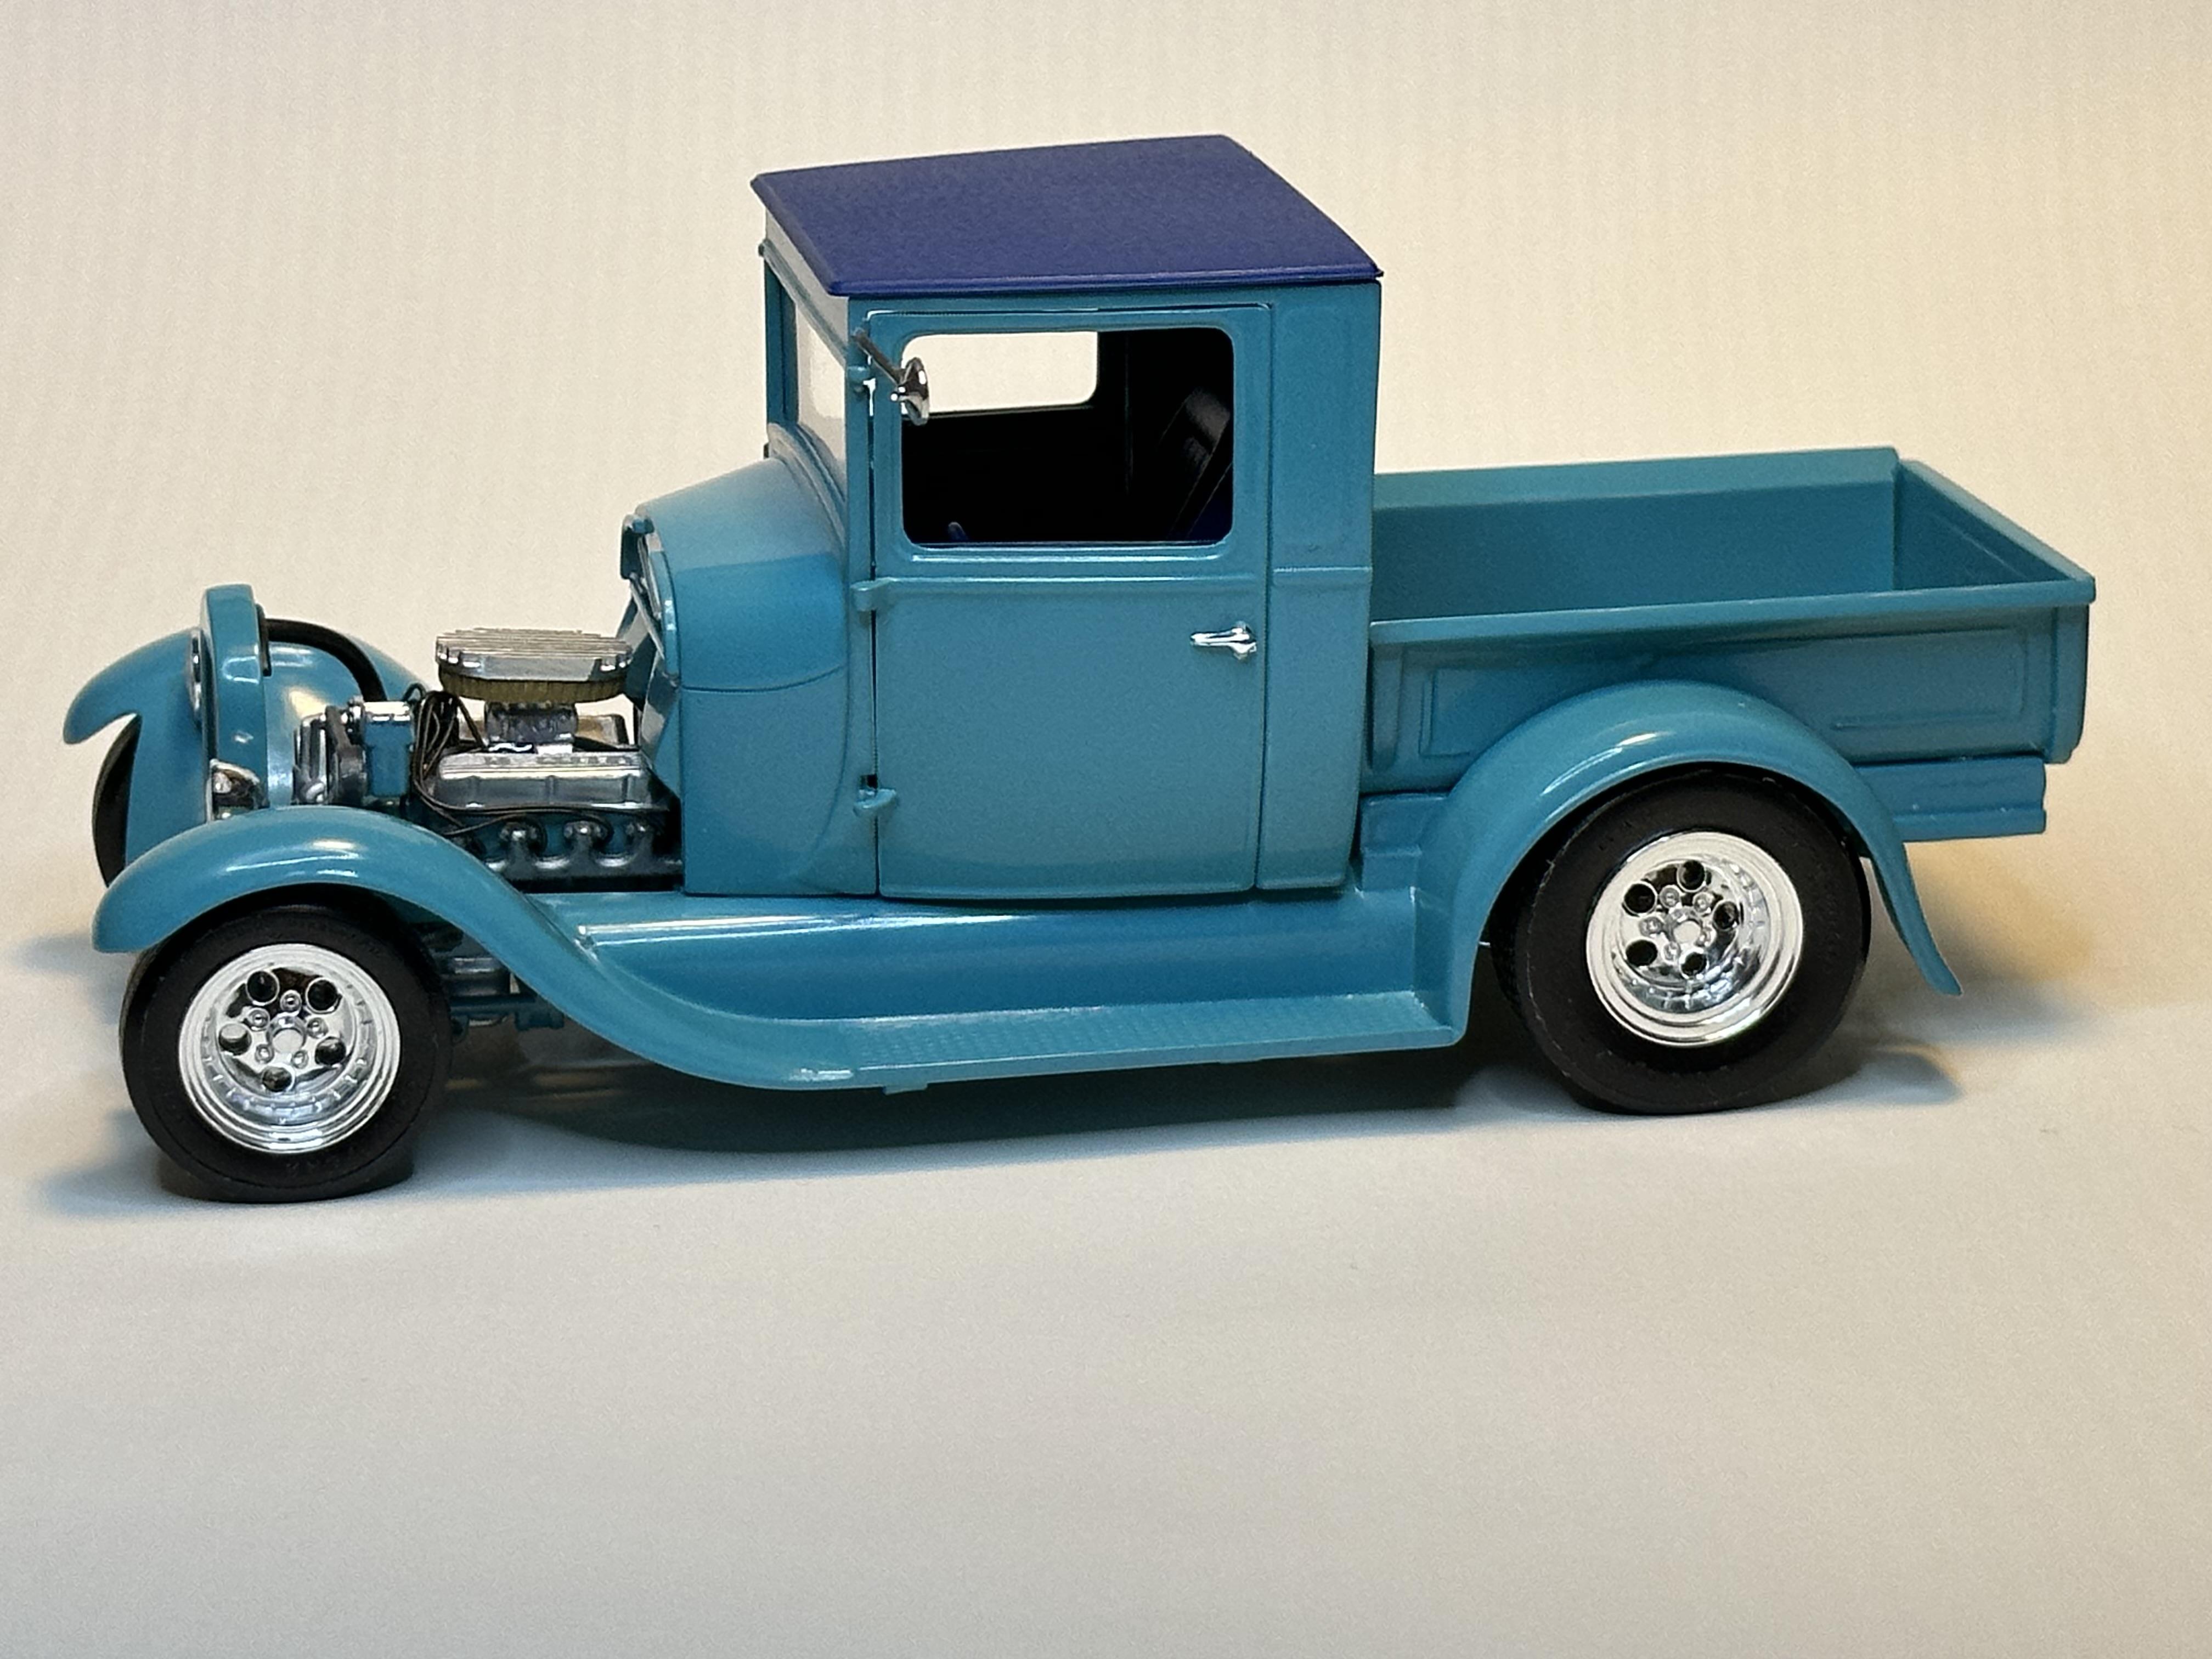
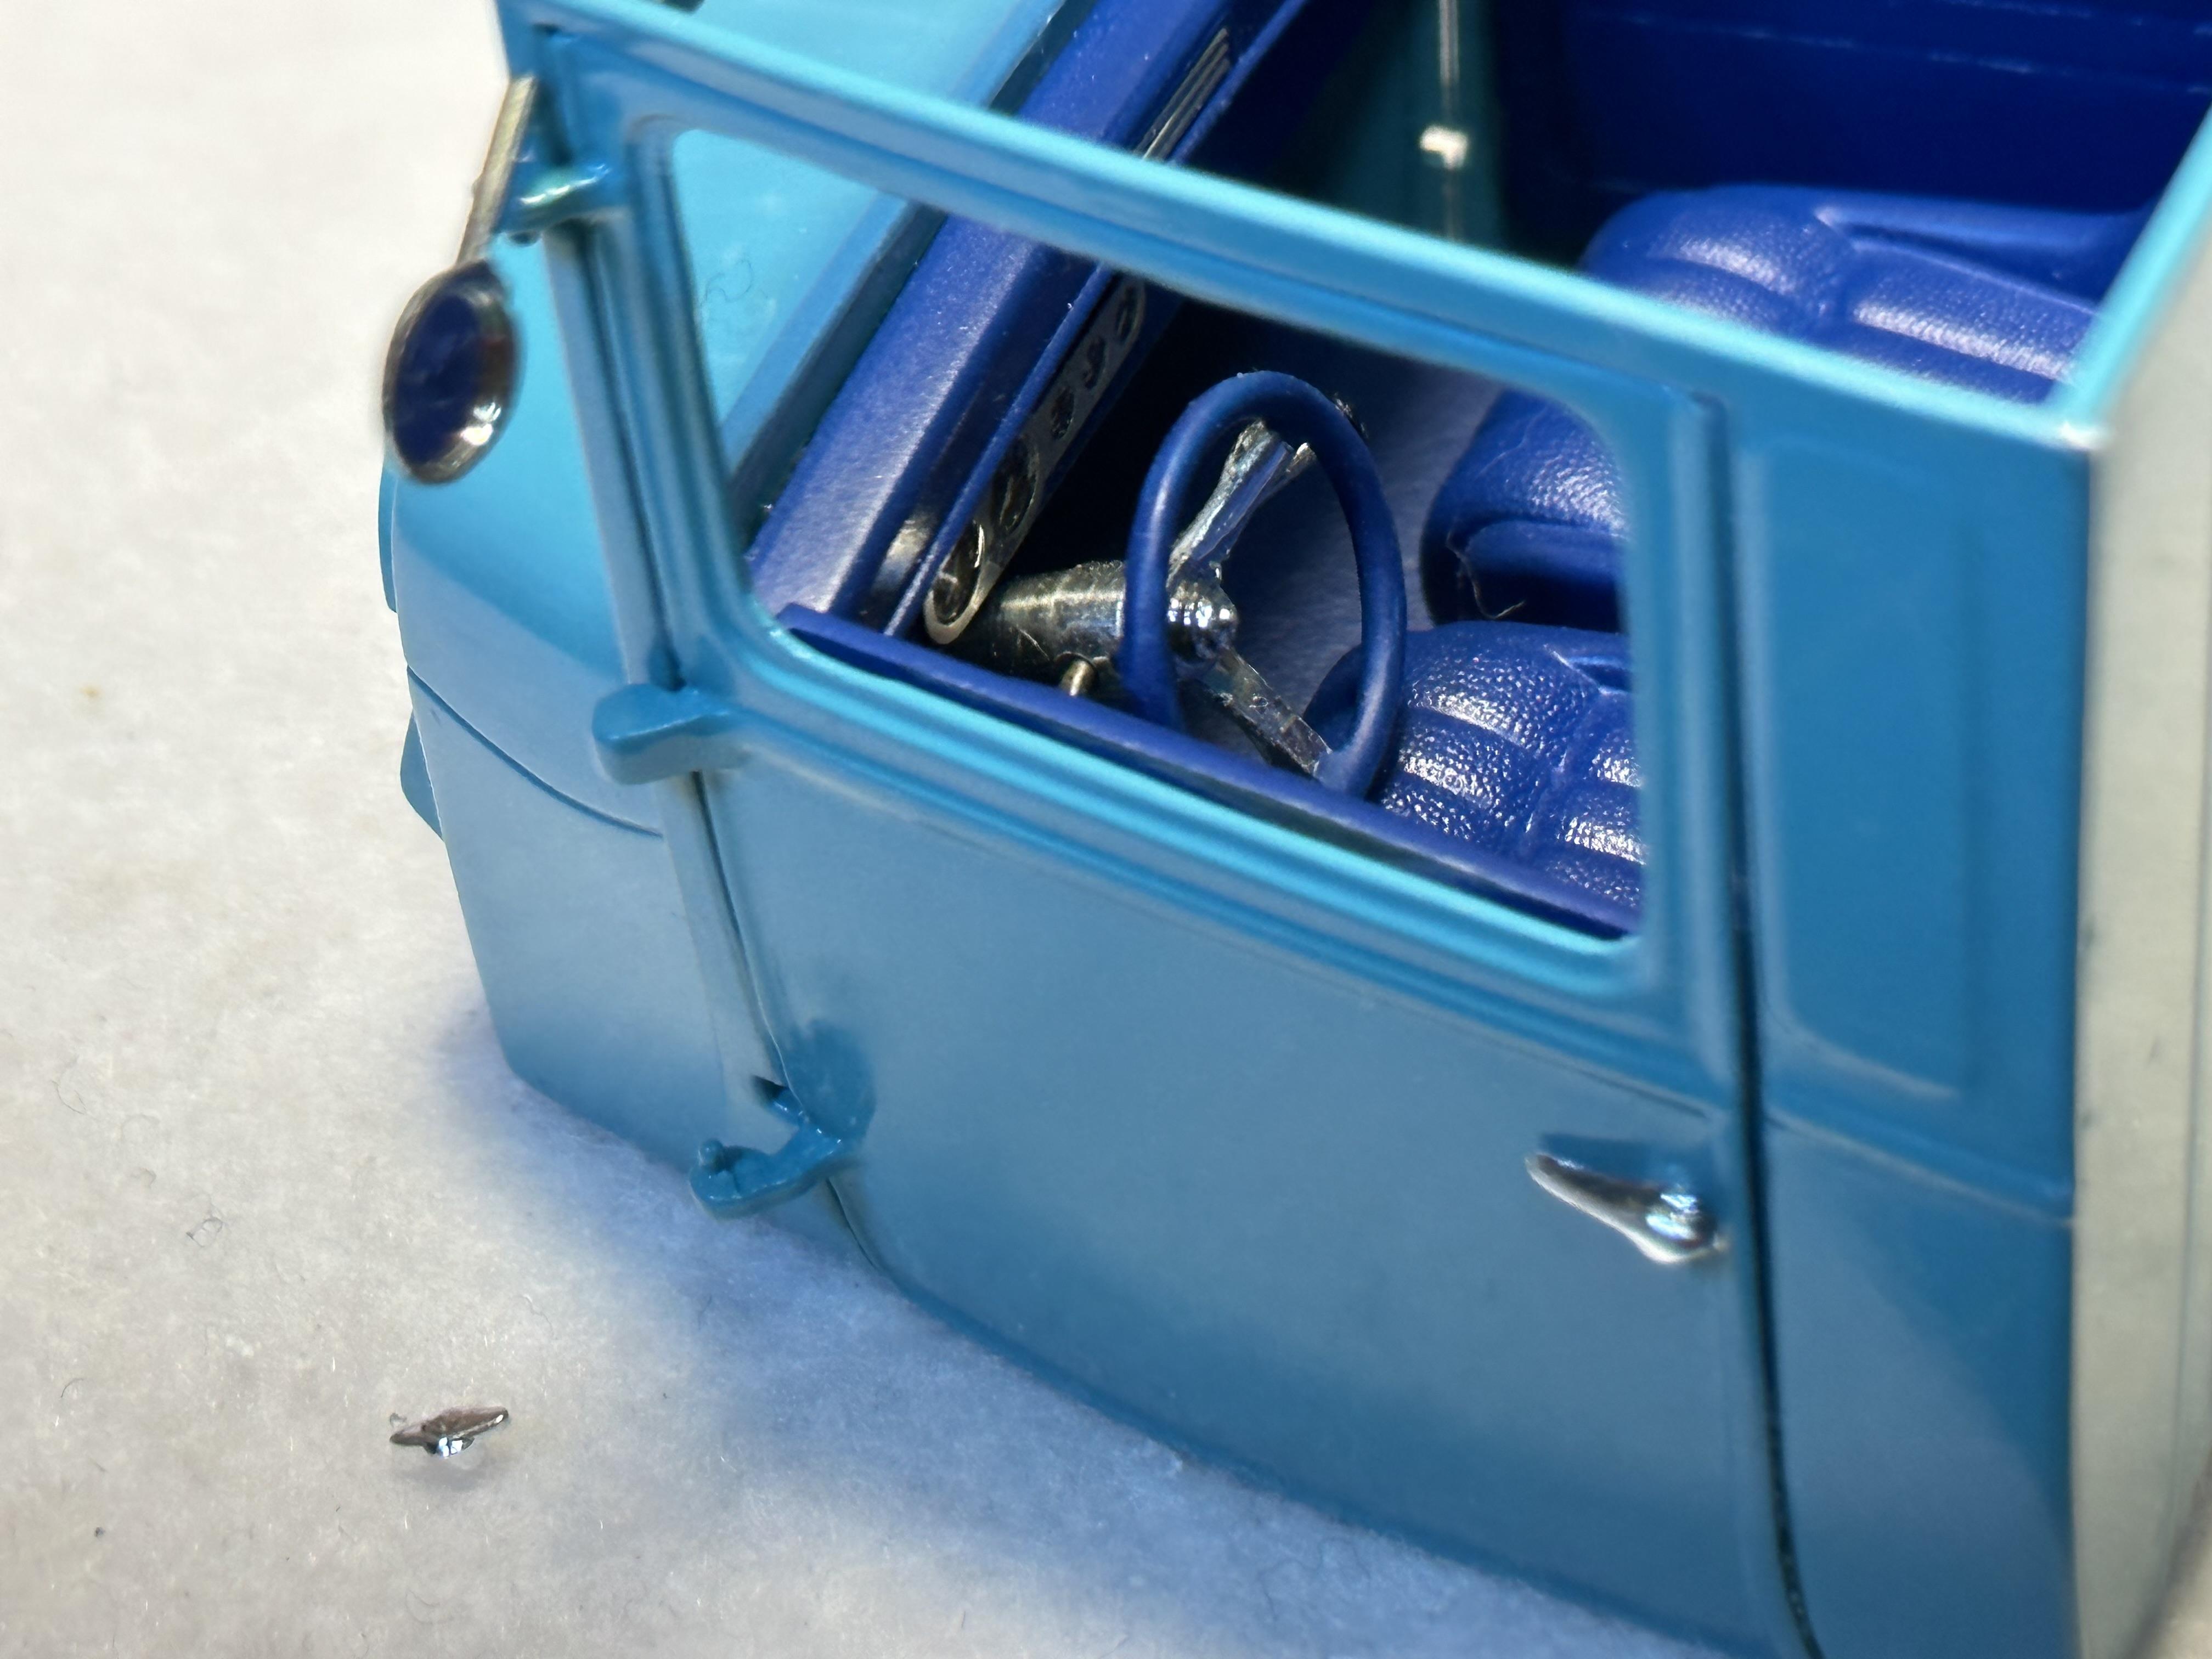
This has made get off my chuff and get it done - at last. The job made all that bit harder as we have listed our house and I have to keep the modelling space clear. Got the last of the little suff done Small diameter head lights from 32 Ford mounted direct to fenders with out headight bar, mirror from Lil John T on drivers side, AMT 32 Ford donated door handles. I will call it done - issues with Humbrol clear coat not drying fully and that means it is not quite as shiny as I would like. It has been a good project with lots of good ideas coming from all participants and of course we must not forget the work from Tim Boyd in Street Rodder (and Rod Action) who provided the genesis for the build thread - I feel honoured to be a part of the build
-
That is my philosophy as well. Also to make any changes that look like that is how they come in the kit - fooled a few punters along the way And yup you cannot have too may 32 Fords Nice colour by the way
-
A good looking build BMF can be protected by a fine shine up with carnuba wax