Hermann Kersten
-
Posts
595 -
Joined
-
Last visited
Content Type
Profiles
Forums
Events
Gallery
Everything posted by Hermann Kersten
-
 Hi Dennis, for lots of cars, truck, trailers and other equipment, this is a very good source.https://www.purplewave.com/. Just press the button for "past auctions", then select the years of the past auction and the results of detailed pictures will keep you off the modelling table for days.? Thank you for the compliment Gary! Thank you for the compliment Vince, and your German is perfect!?? Thank you for the beautiful compliment Ricky! Thank you Tom, and I am happy to read that this topic helps other people to solve some problems with their own scratch building projects.? Thank you Jeff, for the Bulmer cider plant i had to search, but there are indeed a few interesting ( English) trucks, to build one.? Hermann.
 -
Oshkosh snow plow
Hermann Kersten replied to gotnitro?'s topic in WIP: Model Trucks: Big Rigs and Heavy Equipment
You're welcome Jeff, my experience with this web shop is, that they are quick wit shipping, if it is in stock, and have a good service when something is wrong. The sets are of high quality and they are also selling the punch tools separately, in case if one is damaged. These days these sets are indispensable for me, because I'm not limited by the number and sizes of the rivets anymore. The largest polystyrene plate thickness that I used is 1 mm thick, which is no problem for these sets. It is also possible to cut from aluminum or brass plate. Hermann. -
you're welcome Scott.? Hermann.
-
Oshkosh snow plow
Hermann Kersten replied to gotnitro?'s topic in WIP: Model Trucks: Big Rigs and Heavy Equipment
In that case, maybe a Hexagonal Punch and Die set from RP TOOLZ is something for you. I have this one and and I'm very content with it, the sizes are from 0.7 up to 2mm, and helped me a lot with various models. The other punch and Die sets are also a big help, especially when you want to make bolts and nuts or........if you have have to rivet some cabs. Hermann. -
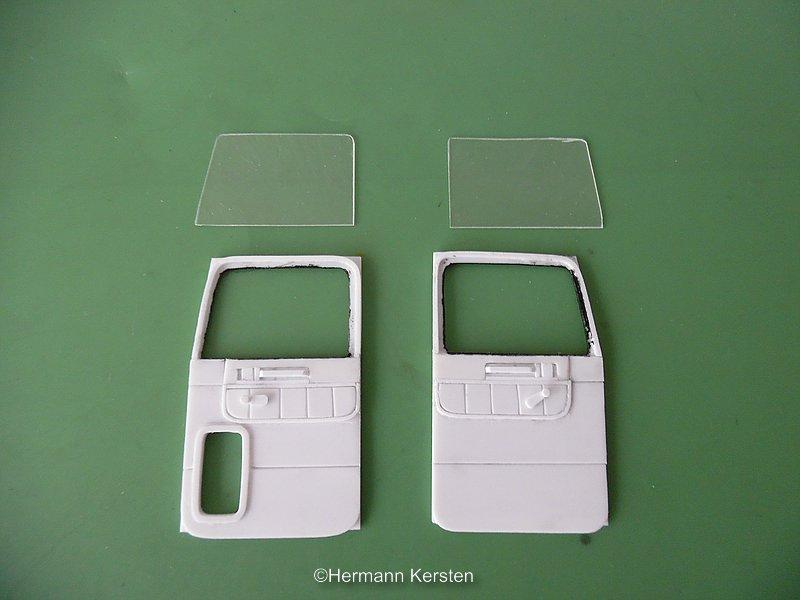
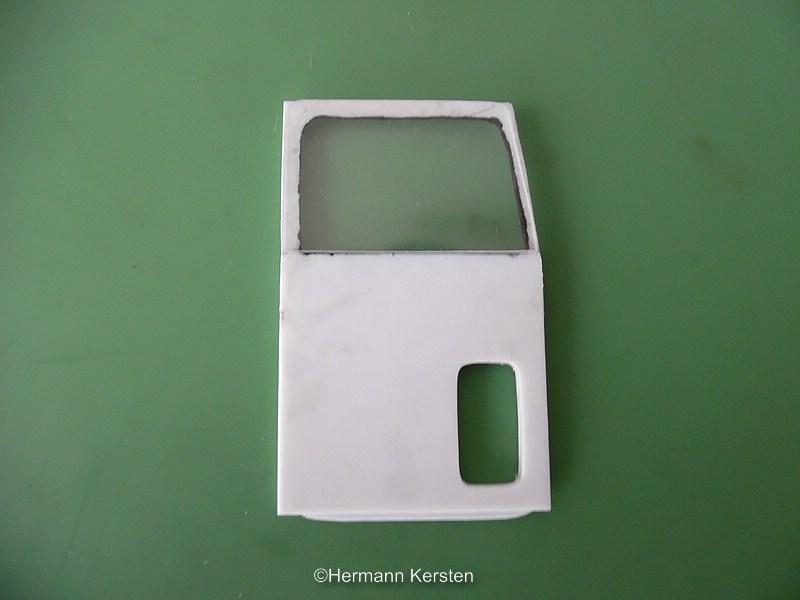
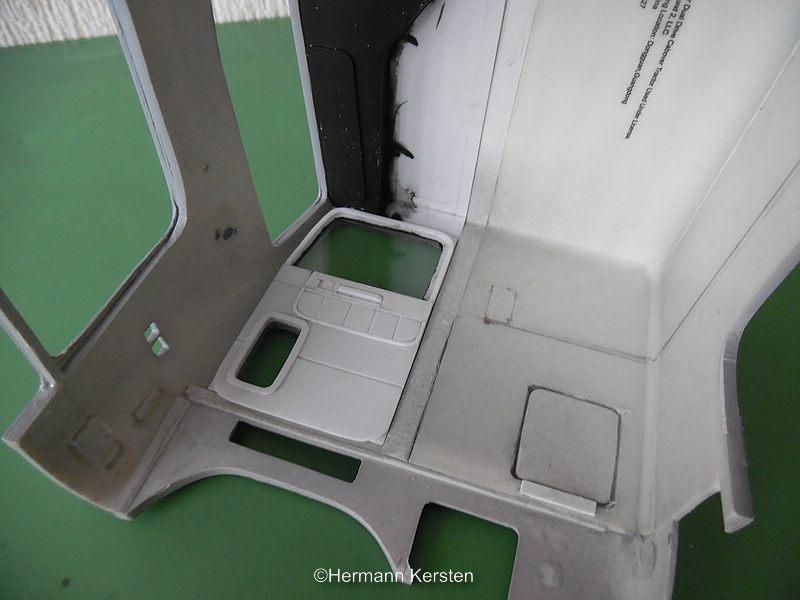
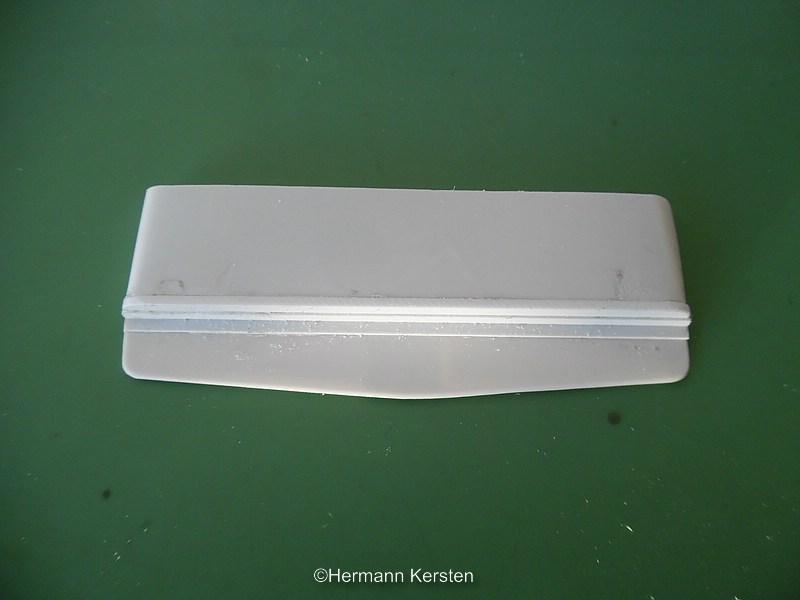
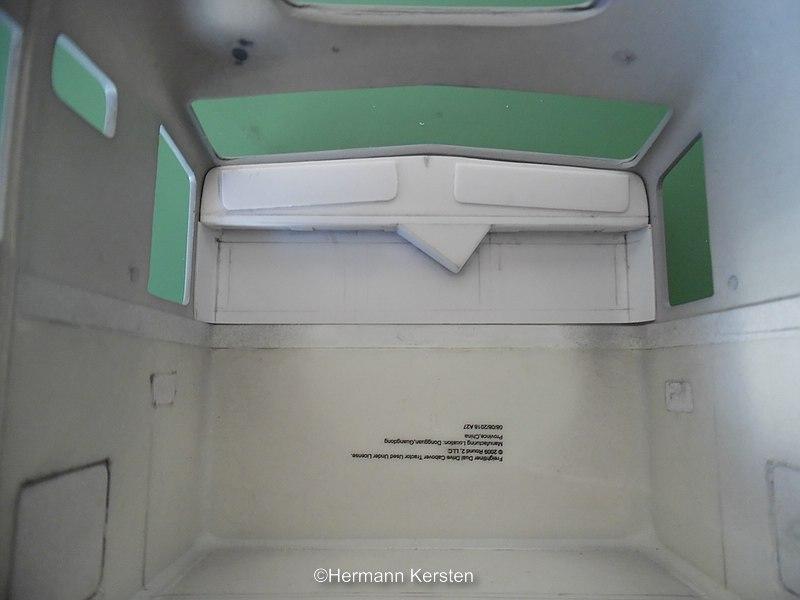
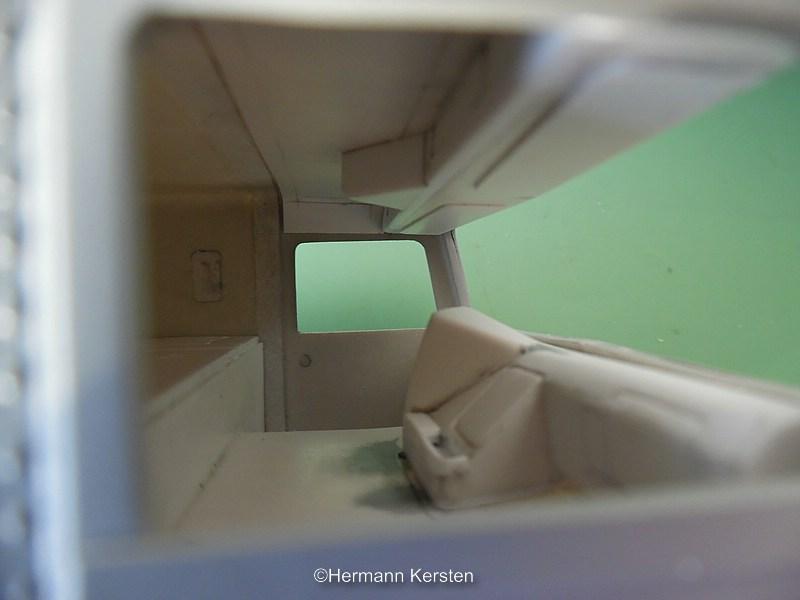
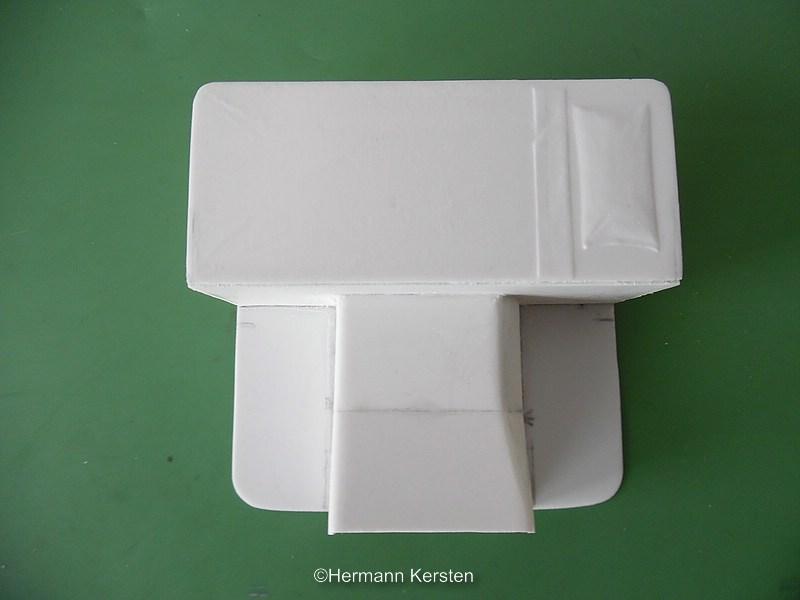
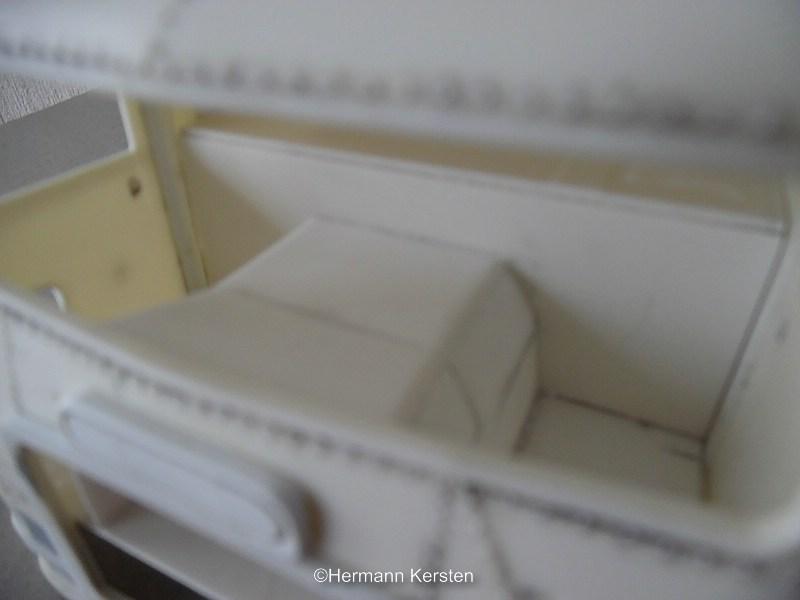
Vince, Tom and Brian, thanks for the nice comments! I am currently in the "building flow", with regard to the interior. I couldn't wait too long, and made a start to make the door panels. With some reference pictures from Purple Wave.com i made the door panels as realistic as possible. The panels are laminated by several 0,5mm polystyrene plates. At the back or the inner side of the panels, i left a space of 0,5mm, where later the transparent parts will be glued on the window frame. The transparent parts have the exact size of the upper part of the door panels, and in this way the door panels have all around the same thickness. And the transparent part loosely placed for the looks. And a dry-fit inside the cabin. The inner roof part is already partial painted, I'm already in the stage to paint some interior parts and started with the black paint accents. Yes guys, it is a short update, but one that i had to spent a lot of time in it. In retrospect, I'm glad I didn't put the old AMT interior in it, even though you don't see much of it. Let's say, it is the enthusiasm of the hobby and the urge for realism . See next round! Hermann.

-
Hi Scott, Thank you for explaining the construction of the "engines". The waterjet is a cool tool, but for 22K for a hobby.....no, in that case i have some other things on my wish list.? Anyway, i was searching for the sarge truck, because i was pretty curious, i found this clip, maybe you saw it already and if not, maybe it is nice to see the whole truck from the outside. The outside scene starts at 3.05 min.? Sarge's Truck Hermann.
-
International transtar 4300 eagle
Hermann Kersten replied to PierreR89's topic in Model Trucks: Big Rigs and Heavy Equipment
Very nice model what you presenting here, the paint job looks great. Hermann. -
28Ft. Rib side Trailer
Hermann Kersten replied to Semi Trailer Mechanic's topic in Model Trucks: Big Rigs and Heavy Equipment
Very nice done, look like real. Hermann. -
Hi Brian, as I said in your topic, i love this one. A really flawless and beautiful model with a nice back story. Did you get the tires from Scenes Unlimited, because the quality looks very good. Hermann.
-
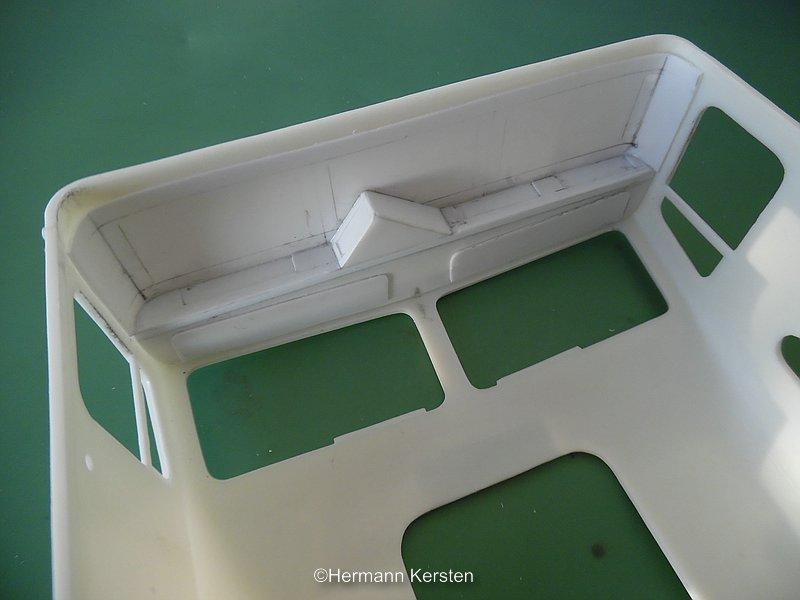
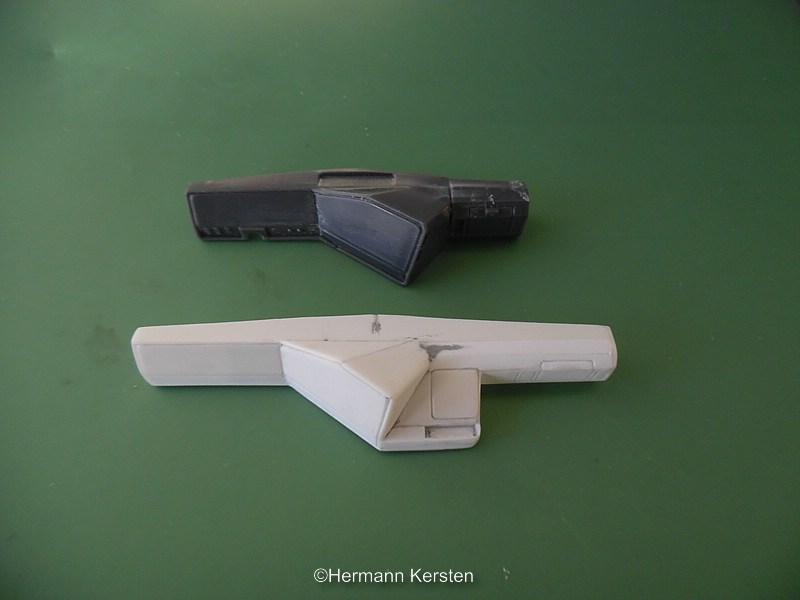
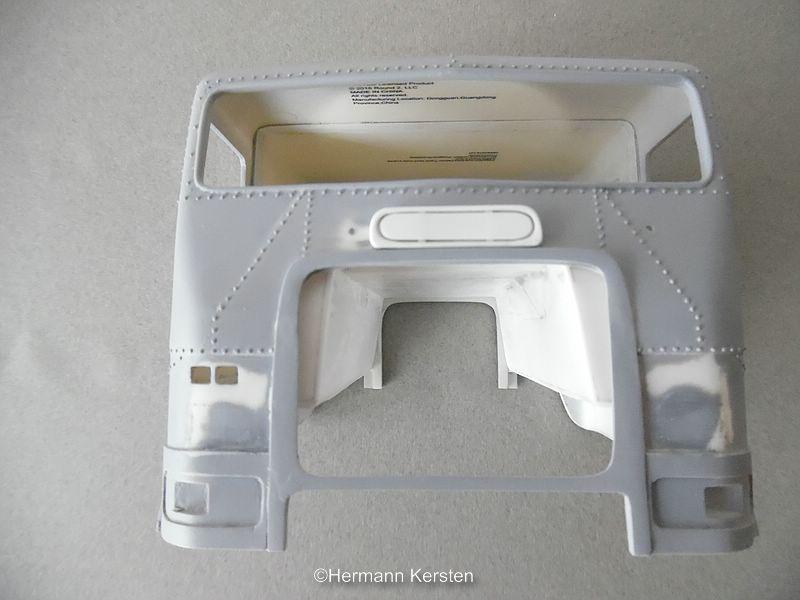
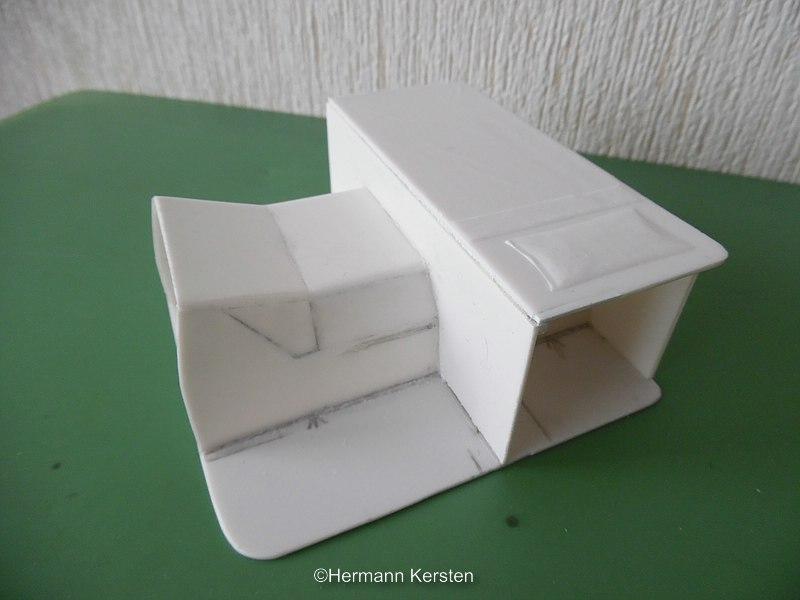
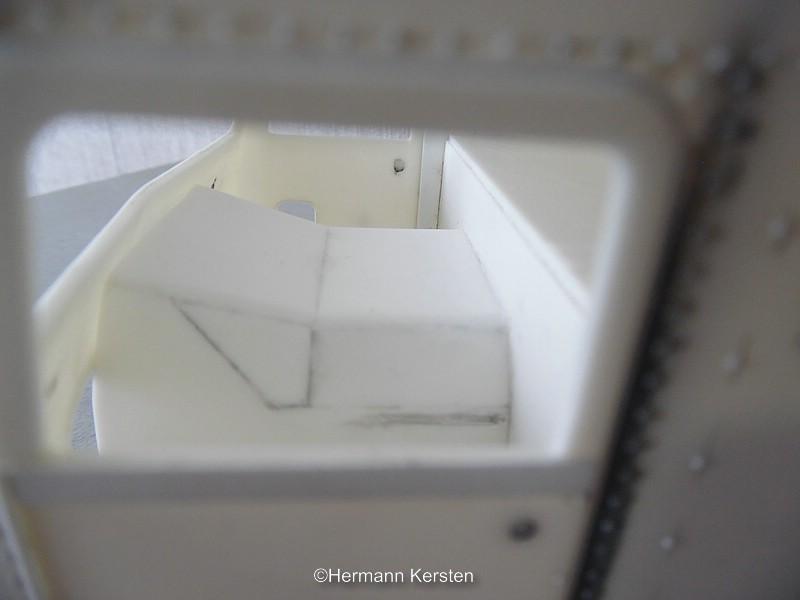
Hello everybody! Thanks for the nice comments guys! Good to know where these changes come from and the story behind it. Today i show you the new interior for this FLB. The dashboard is done now, and as you can see in the picture, it is made out of many different small strips that are glued together and at the last, i sanded everything smooth. In the next picture you can see the widening of the dash for the FLB, the upper dash is from the Italeri FLC kit. The next job was the ceiling cladding. This also had to be self made entirely, and I also threw this AMT part in the parts box, which is already growing with parts of the old Freightliner model. This part i used the front piece of the AMT cabin for the shapes and dimensions. And in the FLB babine.... And a dry fit with the new self made parts... Next job is to make the door panels, the hardest part with the dash and inner roofing are finally done. See you next round! Hermann.
-
Oshkosh snow plow
Hermann Kersten replied to gotnitro?'s topic in WIP: Model Trucks: Big Rigs and Heavy Equipment
This one comes really good together, the scratch work and details are outstanding. I see you use also the Meng bolts and nuts, i used them many times, they are fun and easy to use for a better detail. Hermann. -
Snap Pete day cab
Hermann Kersten replied to tbill's topic in WIP: Model Trucks: Big Rigs and Heavy Equipment
In times gone by, long long ago, I also made some of these snap kits, nice to see that they still be build. The start looks good. There are also a few nice cars in the background. Hermann. -
BRBO International K8
Hermann Kersten replied to landman's topic in WIP: Model Trucks: Big Rigs and Heavy Equipment
Hi Pat, Nice project, you always make beautiful elegant and interesting oldies, and this is also no exception? Great work as always. Hermann. -
Awesome project, and the outcome is great, even it is not finished yet. I don't know the movie, but the Pete looks really brutal. Did you scratch the engines with airplane parts on the top of the sleeper? Hermann.
-
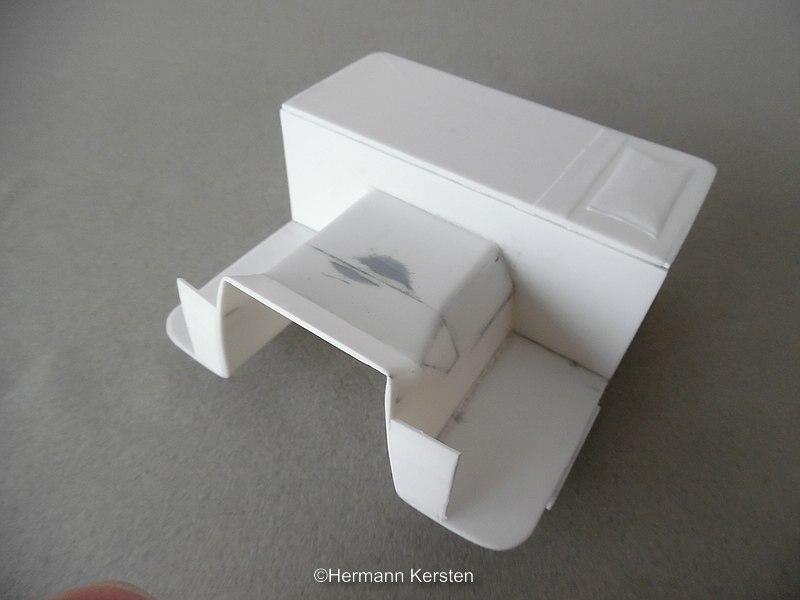
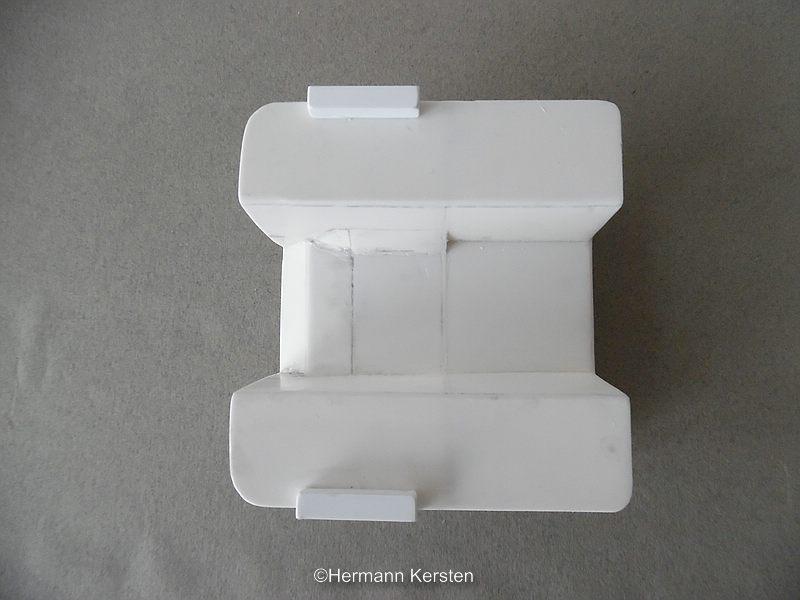
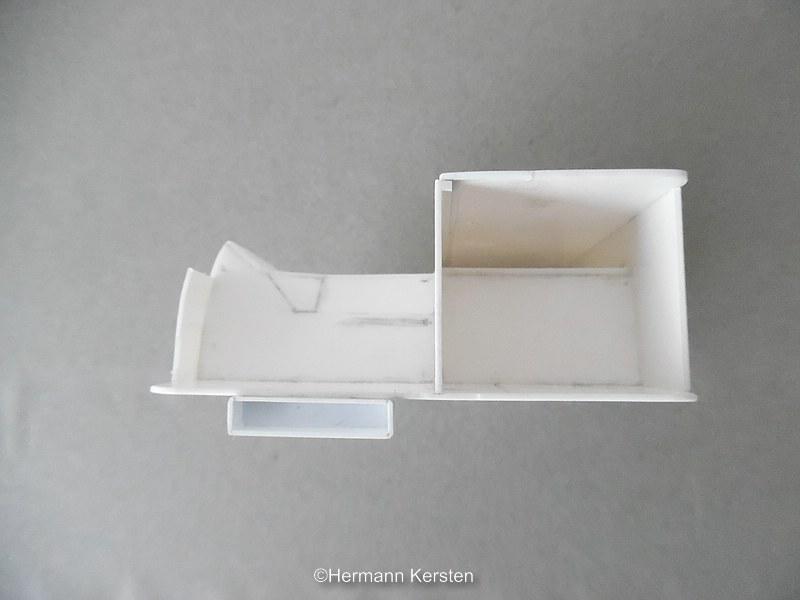
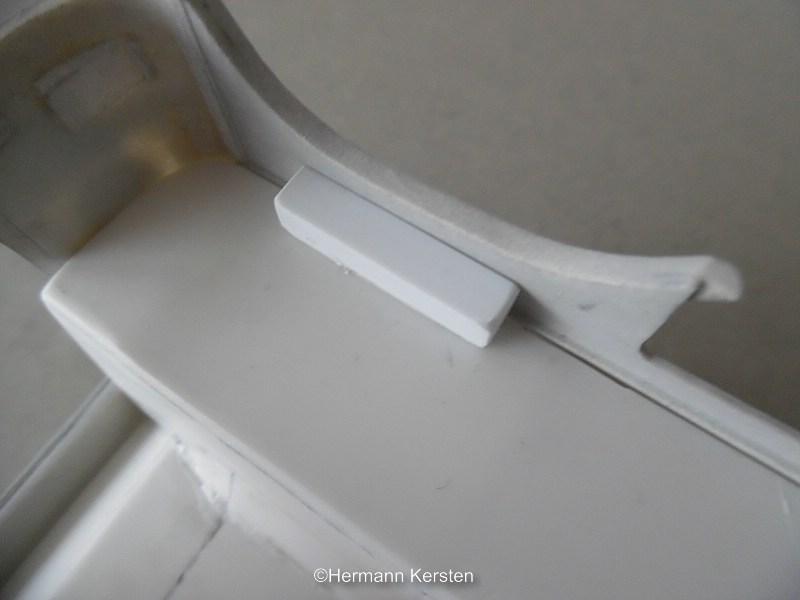
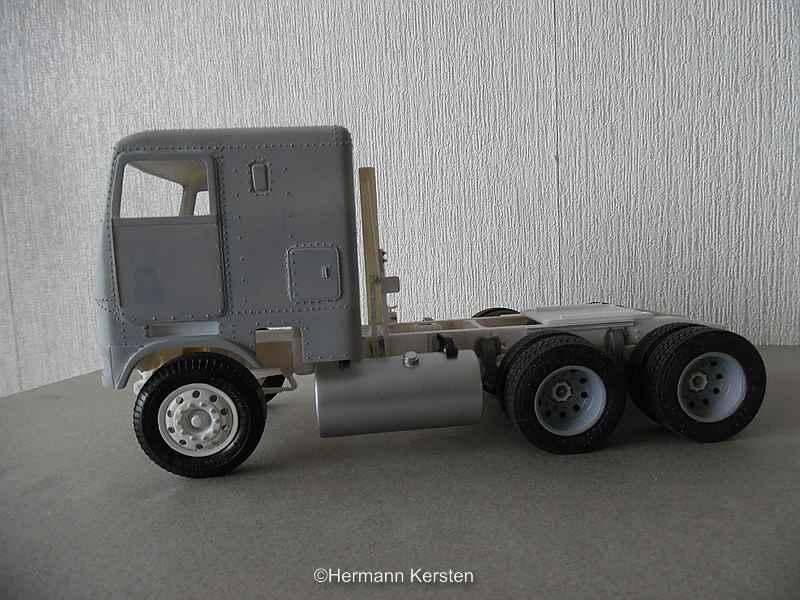
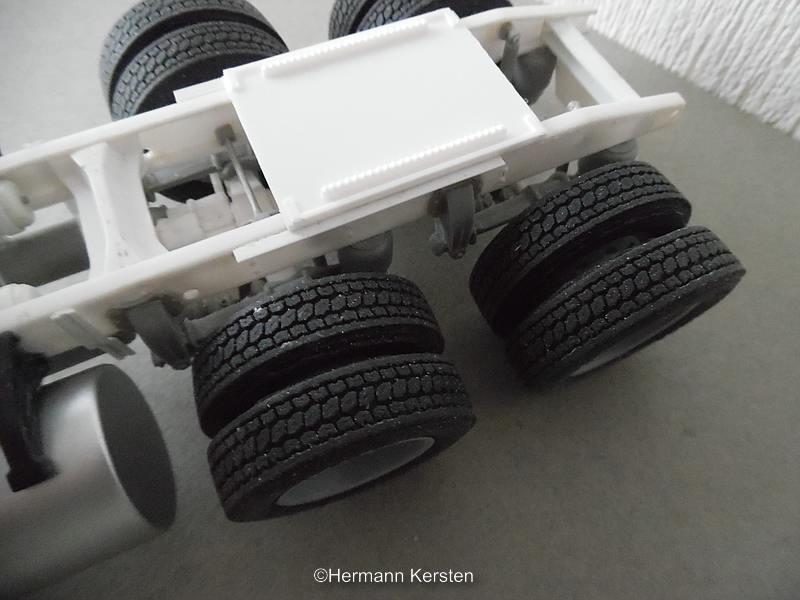
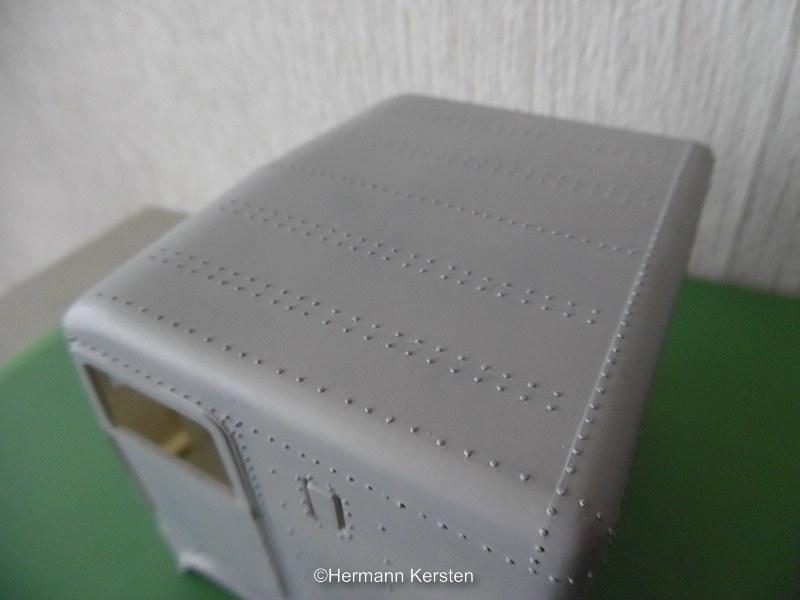
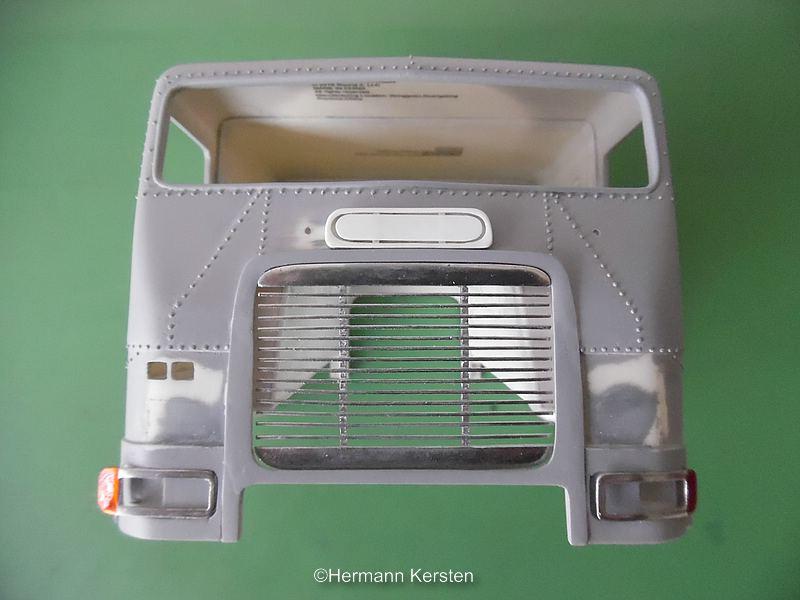
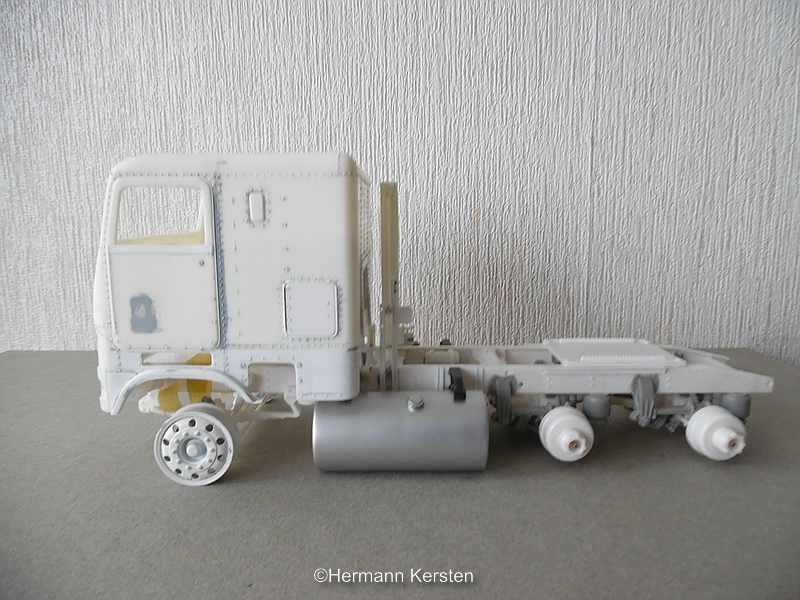
Hello everyone, Dave, Vince and Bill, thanks for the nice replay! Ok guys, today some progress on this one. First of all, i had to search for the dash of the Freightliner FLC kit, because this is the dash i need for this one. The dash is has to be widened, because this is a COE, and have to scratch an extra section in to the dashboard. First i cut off the right storage compartment and use this dash as an example to scratch build one for this FLB. This FLC dash will be used for another FLA conversion, the last of the 3 conversions. Now i have the shape of this dash, i saw that i had to reshape the engine tunnel, it had to be more straight in the front, and the angle to the top had to be more to the front end and a bigger angle. The seems are filled with superglue and sanded smooth, in this way it gives an absolute smooth result. The 2 strips on the front are closing the interior, when this interior is inside the cab. If i don't do this, then from the outside, then you can look through the radiator grill straight into the interior, and that will be looking weird. I also made the housings of the steps under the doors, these steps are a little standing out the cabin bottom plate, so when i put the interior into the cab, the steps will be stopped by the strips on the inside of the cab, and in this way the interior bottom plate stay at the right height. As everybody can see, i also cut out the section of the engine tunnel, and everything is open now. And the front side with the 2 strips that are closing the front. After i spray primer on the cabin, i found some parts what had to be filled and sanded a bit. Then a picture with the radiator grill and the 2 light housings loosely placed for the looks. And a picture to show you all that the seem of the roof is completely smooth. This time i did it with super glue, what gives a smoother result instead of putty, because putty can be sensitive for temperatures, with cold in the winter you can see slightly a seem, and when the temperatures are higher with spring or summer, then you don't see it anymore. Superglue doesn't have this reaction to different temperatures. New drives for the rear axles.... And some overall pictures. Note.....the front rims are not final, they are just placed in absence of the correct rims. The idea is to put the 5 hole rims on this one. Yep, that's it for today guys. For the cabin colors I'm still doubting, but for the main time there is still a lot of work to do. See you next round! Hermann.
-
BRBO 2020 Mystery build
Hermann Kersten replied to Vince66's topic in WIP: Model Trucks: Big Rigs and Heavy Equipment
You can buy wood decals, look like real and in that scale it will be this enough for that. I think mega hobby.com will have that kind of items, they have a decal section on their website. Hermann. -
White 7400
Hermann Kersten replied to DRIPTROIT 71's topic in WIP: Model Trucks: Big Rigs and Heavy Equipment
I love it, as always, clean build and nice colours. The details are awesome, as i said......i love this one! Hermann. -
Looks great, chassis and interior are nice painted. I like also the rectangle lights, gives this Freihgtliner another look. What you plan for the grill, the one from the kit or are you gonna scratch one? Hermann.
-
Nice project Jerry, i like the double drive/ day cab set-up. Indeed, as Lee mentioned, the air deflector looks good on this cab. Hermann.
-
Very nice project Tom, i like the detailed pictures to show us how you scratch this machine. The bullet casings using as a punch and die, proves that a modeler can be very inventive.? Hermann.
-
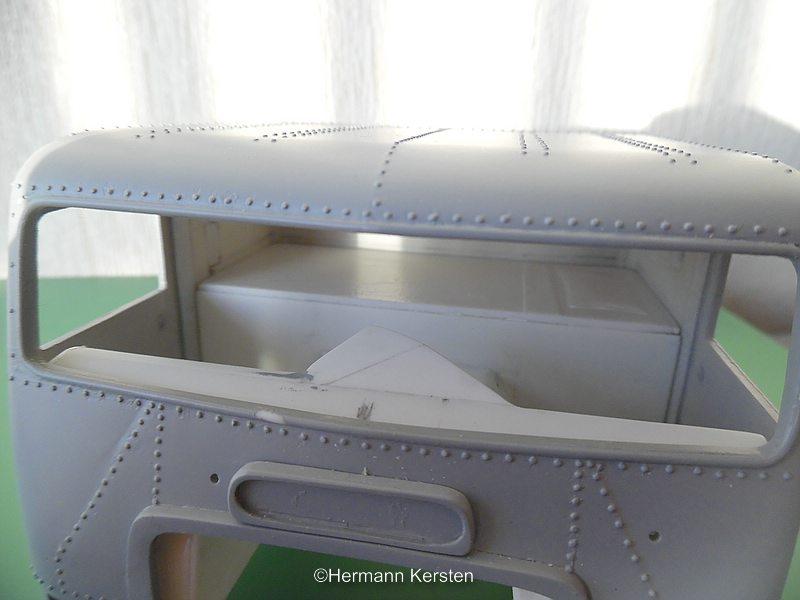
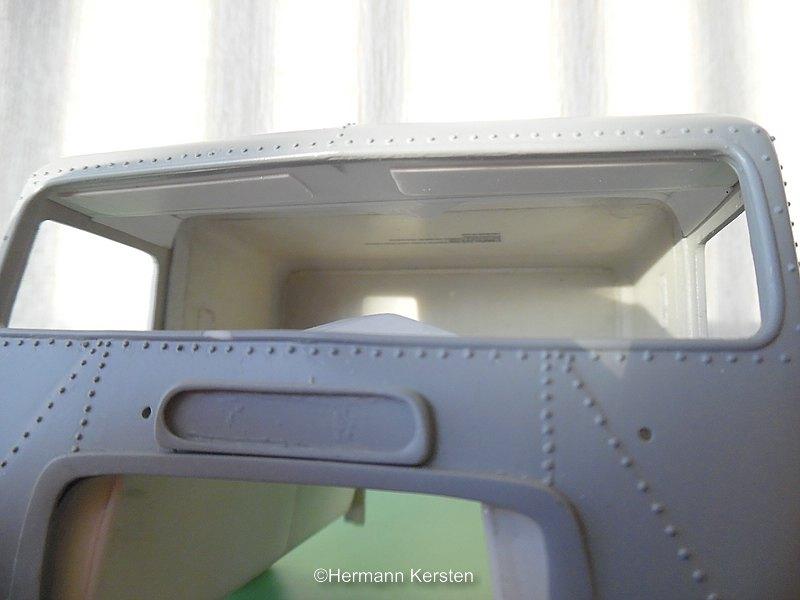
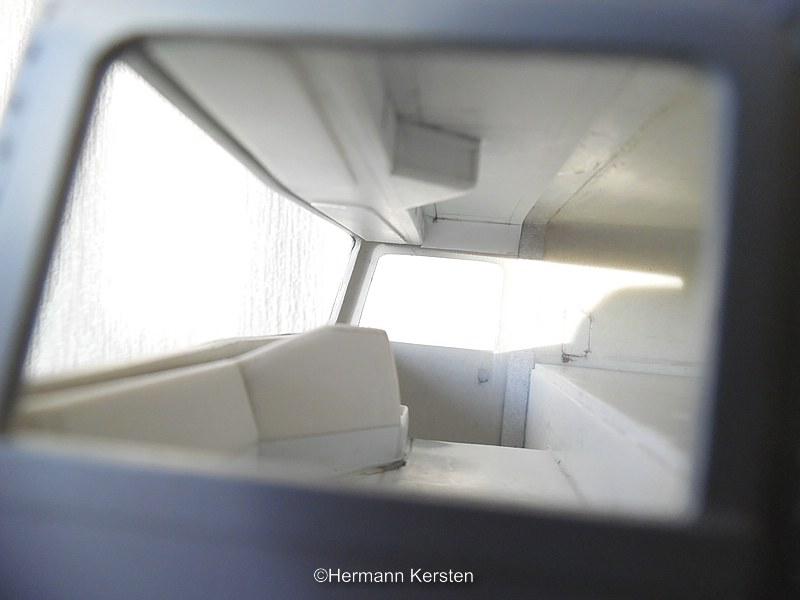
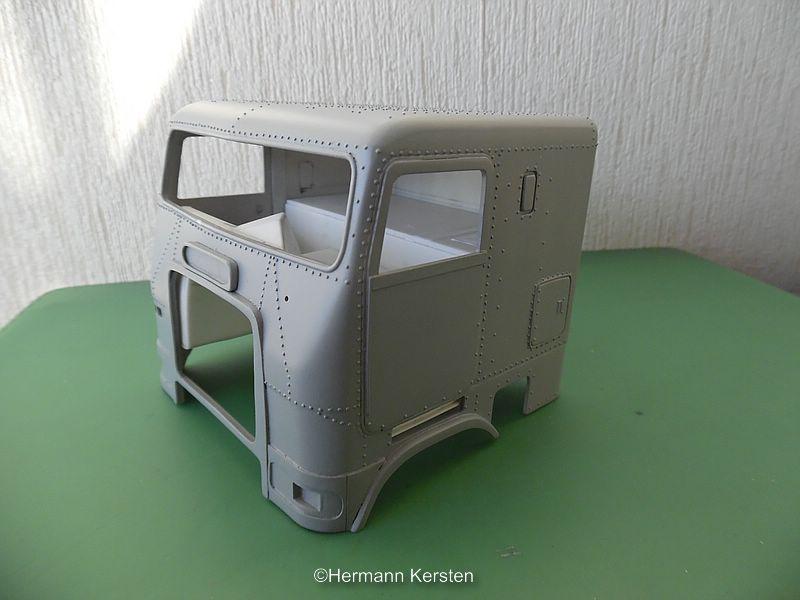
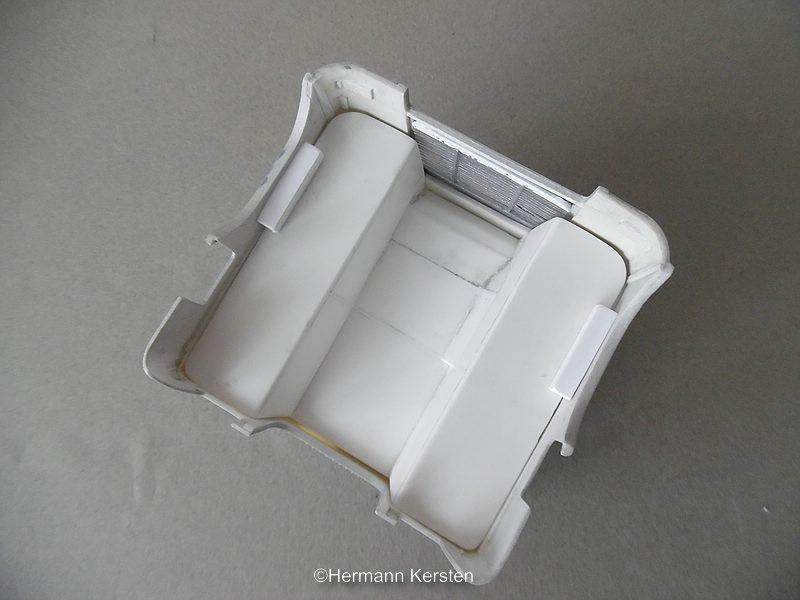
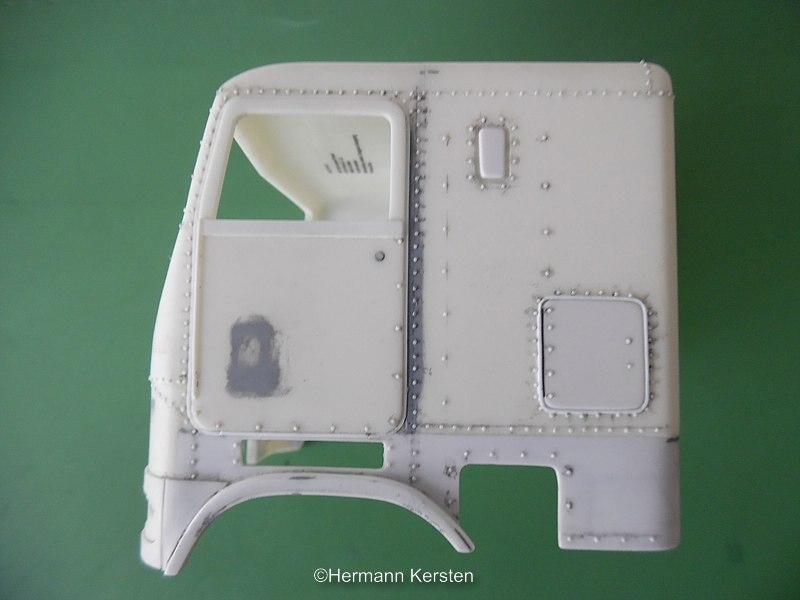
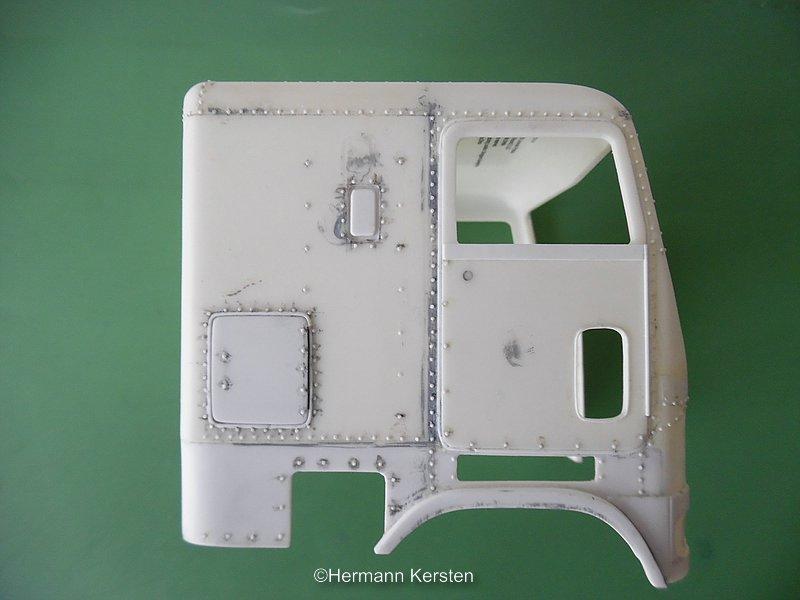
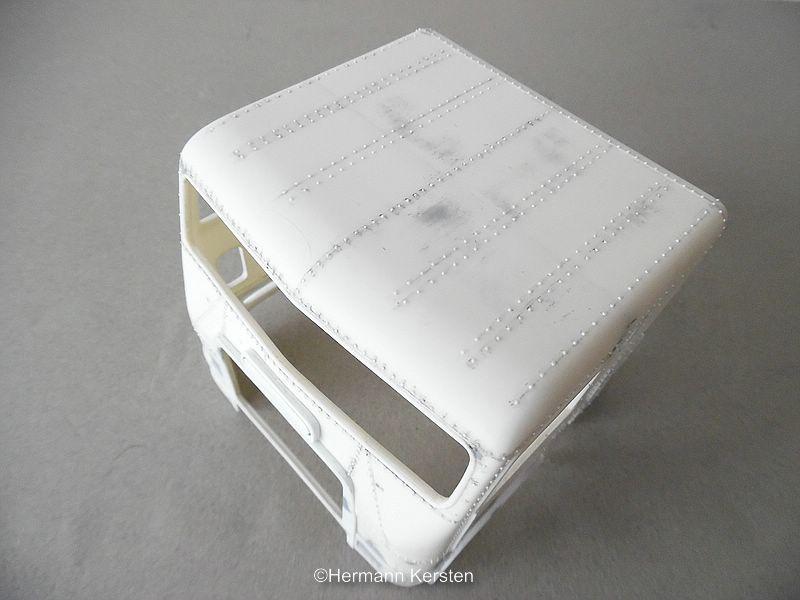
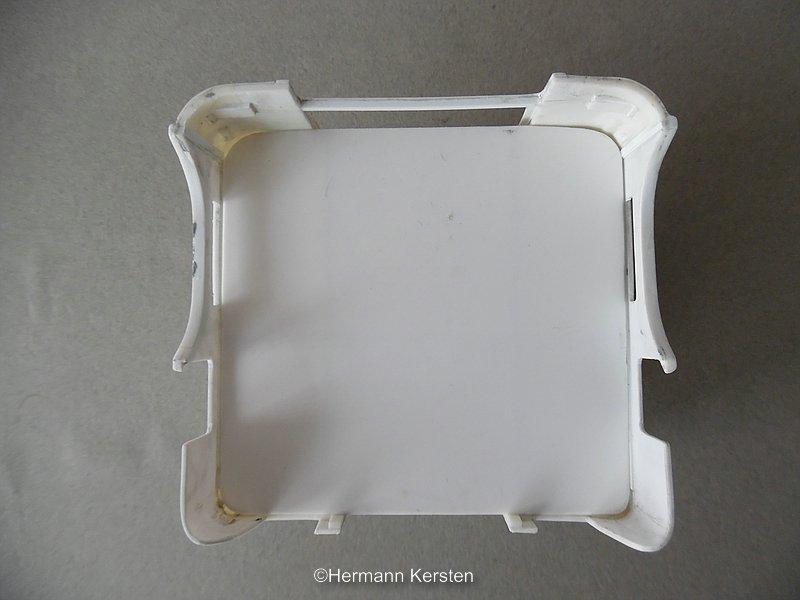
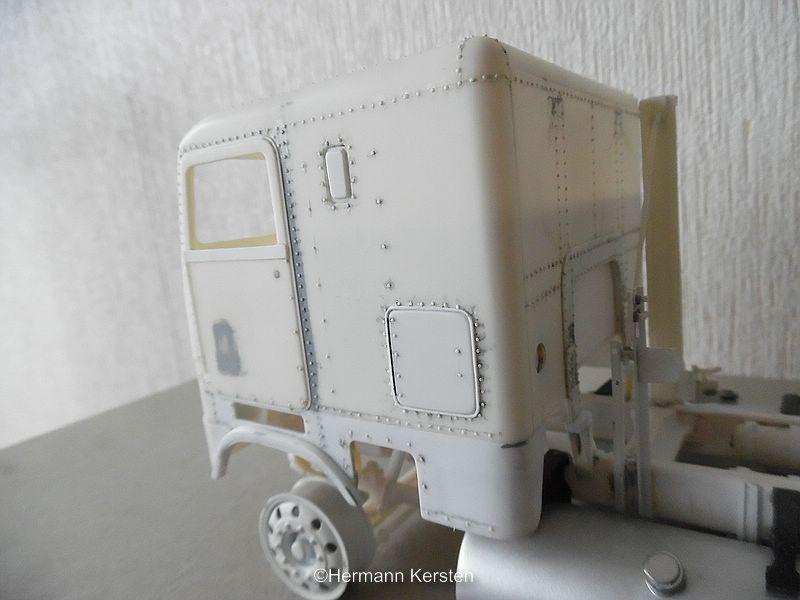
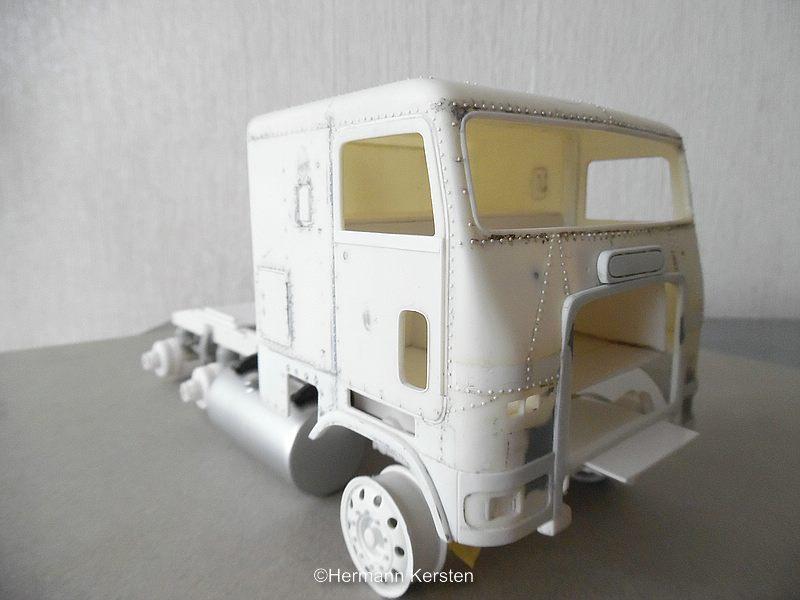
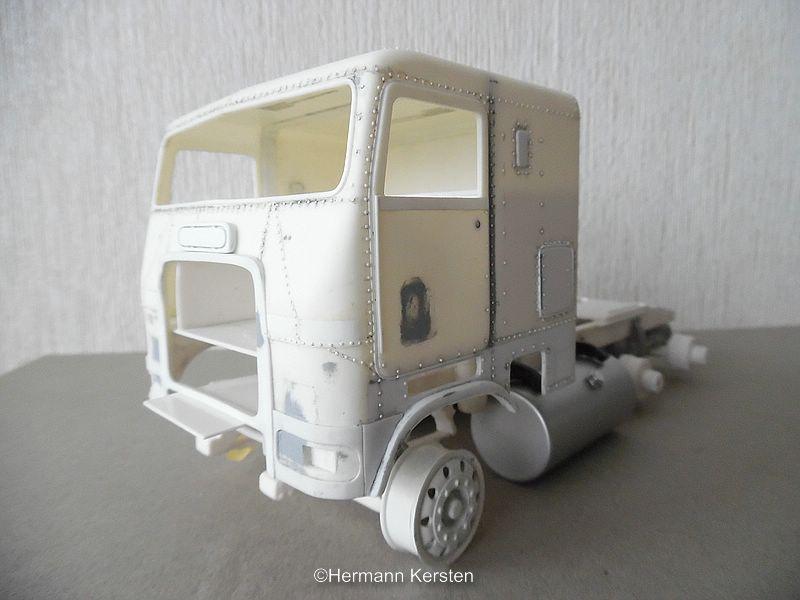
Hello everyone! Your welcome Brian.? Today i show you the progress i made with this project. After a long process of the rivetting job, i'm finally done with this patience job. Here is the result after 1000+ rivets. Then it was time to make the interior. Because this is a later model, I cannot use the interior of the AMT kit, i have to scratch build this interior by myself, except the bed, this part i can reuse for the interior. After cutting the 1mm styrene sheet in different shapes and parts, and glue them together, is this the result so far. As you all can see, i build everything up to an floor plate, and after all is dry and hardened, i will cut out the engine bay.....or engine tunnel. There was a lot of fit and sand job before everything fit perfectly. And some overall pictures so far. That's all guys, see you next round. Hermann.
-
Also from me, A Happy New Year to you all. Let it be a good, healthy and creative year for everyone!!? Hermann
-
Oshkosh snow plow
Hermann Kersten replied to gotnitro?'s topic in WIP: Model Trucks: Big Rigs and Heavy Equipment
Very nice project Jeff, keep the updates coming! Hermann. -
Thank you for all your comments guys, That's true Tom, it doesn't mean it will work out in the first time, but with some try and errors it will work out as you want it to work out. Yes Peter, the complex 3D surfaces are made with the same technique as you would do with paper. For sizing the parts i mainly use photo's. For the cabine i had a " global" blueprint, not very detailed, but with all the dimensions in it and that would work for me. The chassis is also an existing size, but the rest must be done from photos. After a few years of scratcbuilding you develop an eye for proportions and when it is not good enough, then you make it again until it fit the proportions. This doesn't mean that all parts individually have the right size, but overall, everything looks good in terms of proportion. The luck I have with this truck is that the Japanese sales sites, photograph the entire truck, also the entire chassis in parts, so that i can see every detail of the chassis. Hermann.
-
AMT/Italeri reefer trailer
Hermann Kersten replied to KJ790's topic in Model Trucks: Big Rigs and Heavy Equipment
Wonderfull, what catches me is the rusted rim, i did that also on my 20ft container trailer, it's an awesome detail.? Also good that you have taken outdoor pictures, gives the weathering the realistic look it deserves. Hermann.