Rich Chernosky
-
Posts
2,103 -
Joined
-
Last visited
Content Type
Profiles
Forums
Events
Gallery
Everything posted by Rich Chernosky
-
Very nice build.
-
Beautiful builds
-
That's a great little kit and you did it justice. I just painted mine and now I have the incentive to finish it once the paint cures.
-
The Ferrari 458 is one of my absolute favorite Ferrari's. They spyder version is exceptional. Very nice job on this one.
-
Color turned out great, nice job.
-
Nice build, David. That was a great kit and you did it justice.
-
Sunoco Camaro
Rich Chernosky replied to Rich Chernosky's topic in Other Racing: Road Racing, Salt Flat Racers
Thank you Phil, that was not a feature of the kit. One of my pet peeves is non-steering wheels. -
Gary....this is valuable information. It will help me a lot. The finished car is exquisite. I feel fortunate to know the original creator of this kit. Thanks for posting.
-
Yah...I've been kinda busy.....you should see the rest of them.
-
Thanks James, now I see, I may yank it back out of the case and add them. Great photo BTW
-
Sunoco Camaro
Rich Chernosky replied to Rich Chernosky's topic in Other Racing: Road Racing, Salt Flat Racers
Thanks for the compliment of the highest order. These cars were painted this way to really show up on TV. Sunoco got their money's worth on this one. -
Thanks for the info, you did better than I. And thanks for looking.
-
Great Job Brett, can't wait to see it in person.
-
"The Stig Collection" -Ferrari F40LM...street version
Rich Chernosky replied to Dann Tier's topic in Model Cars
As per usual Dann, excellent work. -
Tamiya 1/24 Porsche 911 (933) GT2 Clubsport
Rich Chernosky replied to Italianhorses's topic in Model Cars
Beautiful job, it really shines. -
Very, Very ,cool. Great job and thanks for the step by step pictorial.
-
Rex...I just scored a Mini Exotics Super Coupe. Your build looks very interesting but I see you also have the Super Coupe in your collection. I plan on using a Monogram 427 Cobra as a donor. Is there anything else you can tell me about your build. Nice stash BTW.
-
Sunoco Camaro
Rich Chernosky replied to Rich Chernosky's topic in Other Racing: Road Racing, Salt Flat Racers
Thanks to all for your kind comments and compliments. -
Nice job Bruce, looks good in blue. I like some of the details you added.
-
Sunoco Camaro
Rich Chernosky replied to Rich Chernosky's topic in Other Racing: Road Racing, Salt Flat Racers
Thank you Gary. I just like getting em done. Gotta a lot to do as you well know. And with this forced time off its all I have been doing. -
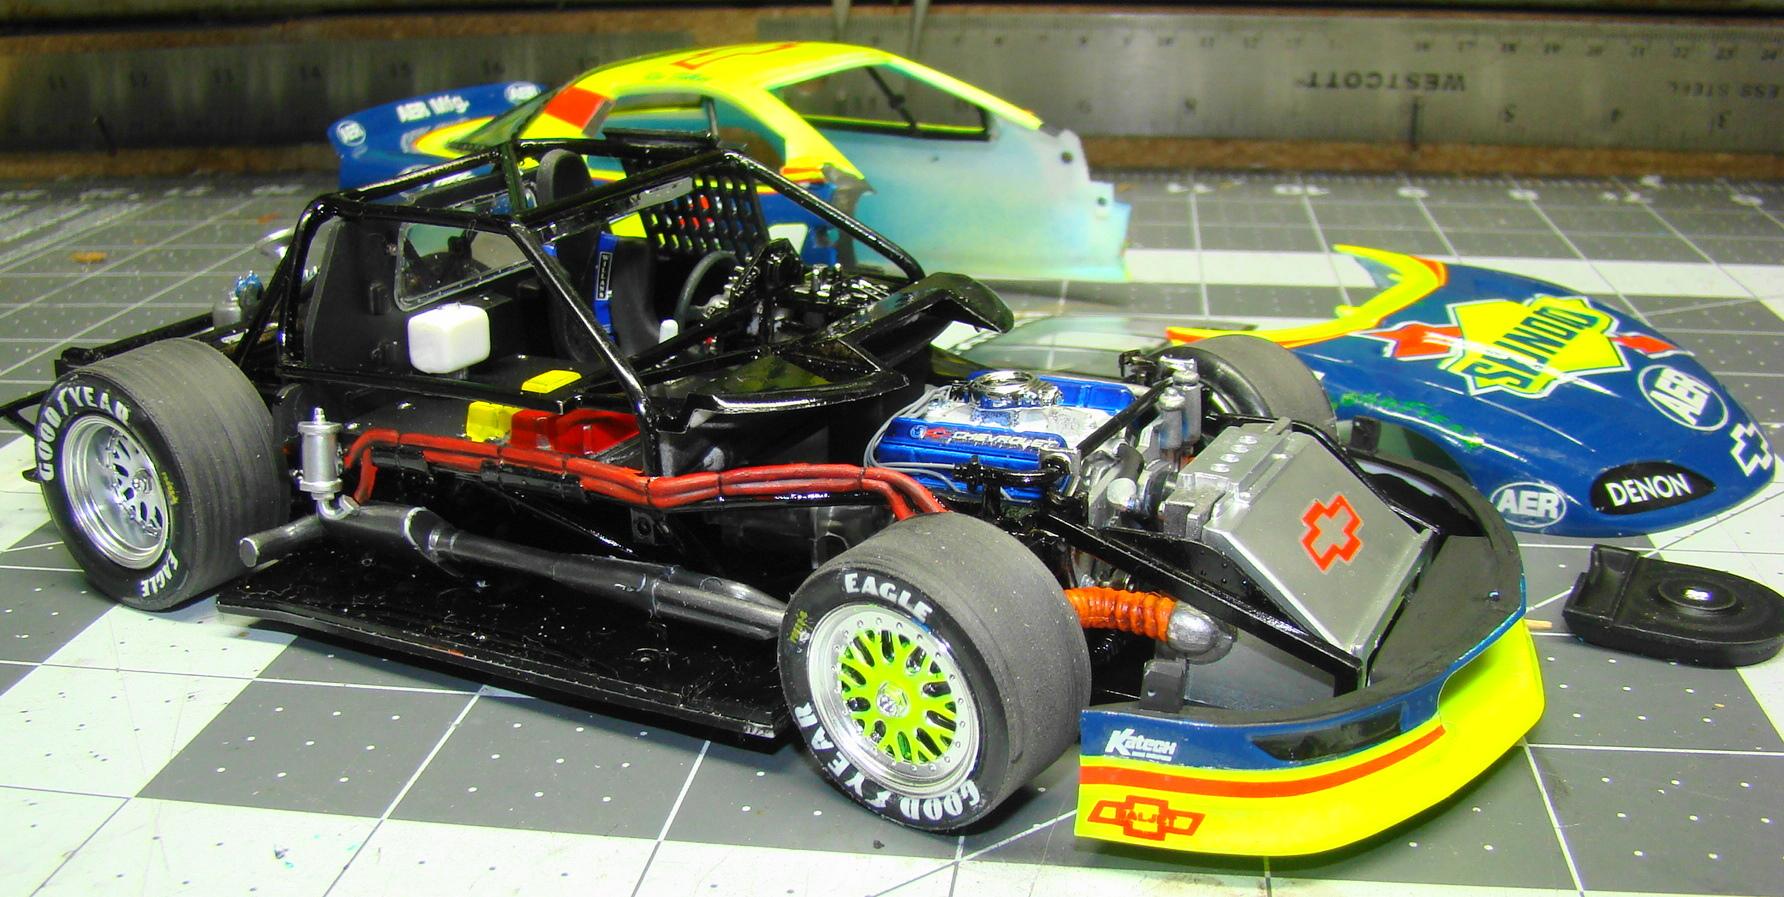
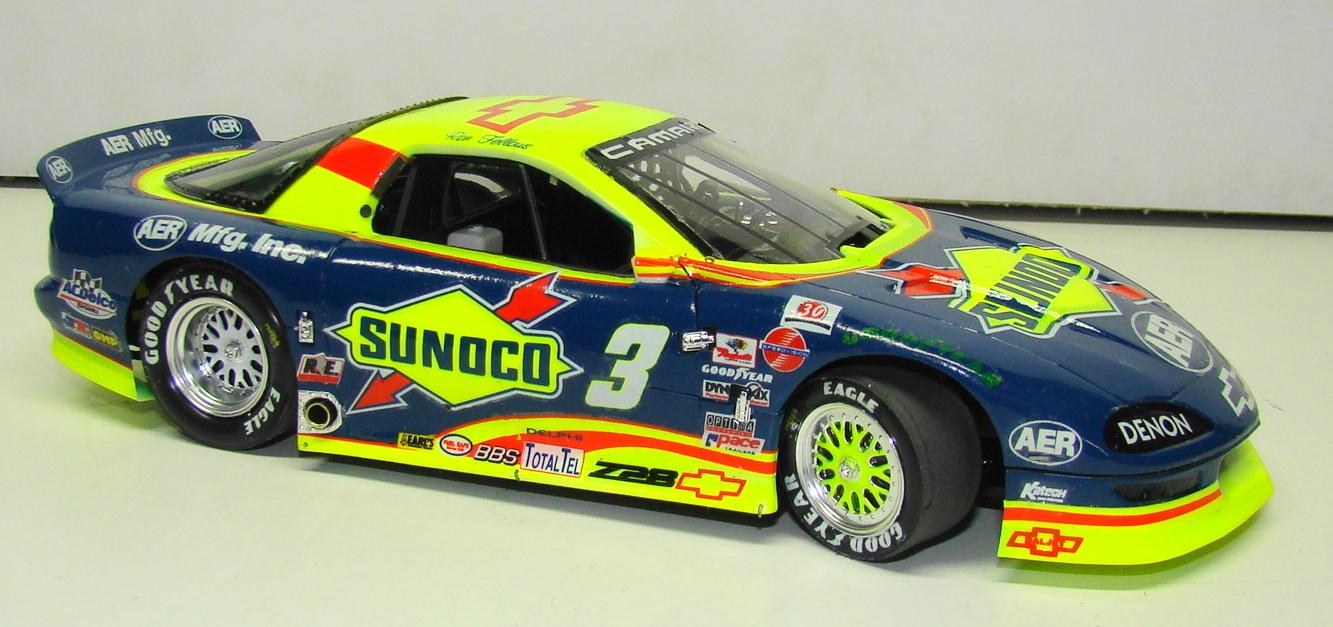
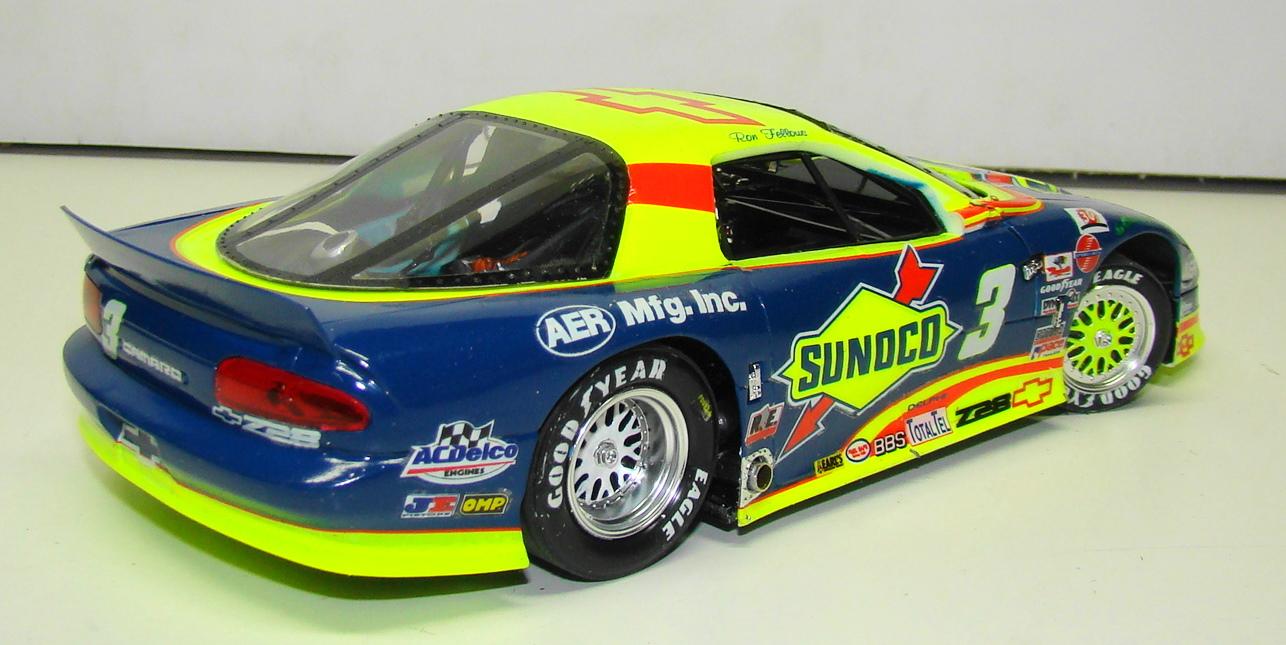
Makiing good use of some time off. This is Revell's 1/24 Sunoco Camaro that Ron Fellows drove in the 1996 Trans Am season. This kit was on and off my workbench several times mostly waiting for paint to cure. The flourescent yellow is Testors 1177 Neon Yellow airbrushed over white. The blue is Mr Color #322 (70%), Mr Color #328 (30%). This was done to match a diexcast in my collection which turned out to be a kind of mistake. You will see why. I chose to paint most of the yellow even though it was represented as decals. The large area on the roof was sure to wrinkle and the nose had to be painted anyway. I used a latex clear over the flourescent because it changes the color very little but takes 2 months to cure. The rest of the details are captioned under the pictures. Thanks for looking. The chassis was very detailed for a domestic kit. I added a few touches here and there but mostly it is detail painting. Getting all the pieces to sit right in the interior proved to be a challenge. Not my first time doing this chassis but it was still fussy. Body is three pieces and required several (10) small locator pins for it to sit right on the chassis. You can see three of them at the very bottom of the body. I always like this rear three quarter view. Note the chrome exhaust tips. This was cut from a radio antenna. A good source for chrome tubing of different sizes. I went way out of my way to obtain this GMP 1/18 diecast of the same car. Only to discover they got the yellow all wrong. I am seriously considering masking and spraying it.

-
Scott...that is a very cool kit. I remember doing mine many years ago when it was first issued. You did a great job on the details like the engine and the seats. Give yerself a pat on the back.
-
Lock down; might as well do ALOT of painting, and building!
Rich Chernosky replied to Dann Tier's topic in WIP: Model Cars
So this is where you are.....we kinda missed you..welcome back. -
Scratch built 1/18 scale Bryan Clauson Tribute sprint car
Rich Chernosky replied to Dirt Demon's topic in Model Cars
Absolutley beautiful work, the attention to detail is noticeable throughout. There has to be a couple hundred hours of work there. -
Very nice job...that's one of the tougher Tamiya kits...you got it right.