Rich Chernosky
-
Posts
2,143 -
Joined
-
Last visited
Content Type
Profiles
Forums
Events
Gallery
Everything posted by Rich Chernosky
-
After years of sitting in its box I have finally finished my 1/16 Italeri Mercedes 300SL convertible (also known as a cabrioblet) Colour is a pearlized ink by Liqui Acrylic currently sold by Hobby Lobby. Colour is called Sun Up blue and i add a small amount of Tamiya clear blue to bring out the colour more. The trunk had some sand through during polishing and had to be resprayed recently. Matching the colour again after 12yrs proved a little problematic. Which is probably why is sat so long. Once past that problem the kit went together well and the chassis was surprisingly detailed. (se photos) I liked all the working features on this kit, opening hood, doors and trunk. Especially the steering wheels which operate through the steering wheel via a rack and pinion box (shown) See photo captions for more details.Thanks for looking. Almost forgot I had this background, rest of the photos are on my white background to show detail One of my favorite photos, all that chrome trim was seperate but fit very nice. The engine is the same 6 cyl as found in the Gullwing coupe. It is mounted at a 45 degree angle to reduce the hood line. This was quite an engineering feat in the 50's The doors open and close quite nicely, I really like this interior which was sprayed with Tamiya flats. Carpet is velour wallpaper I had from a sample book. The chassis ready to go under the body Don't usually take this photo but the underside was so detailed...why not show it. That steering box has a small rack and pinion that worked very smoothly. Took this picture to show the actual size of the car. 1/16 is a good size model. Italeri hit a home run with the kit inmy opine.

-
Porsche GT1-98 Le Mans Winner 1998
Rich Chernosky replied to Gramps46's topic in Other Racing: Road Racing, Salt Flat Racers
Great looking model Gary, luv the photography, nice backgrounds. -
Ferrari 312b F1
Rich Chernosky replied to Brudda's topic in Other Racing: Road Racing, Salt Flat Racers
Its a winner Bruce, you did a great job. -
Great job on this one. It was one of Mark Donohues first rides.
-
Very Nice Gary...and thanks for the history.
-
I have this kit and have avoided it for quite some time due to the problems you have mentioned above. It is encouraging to know that it can be done and an acceptable model can be had. Thanks for posting and all the additional information provided. You did a great job.
-
My GT4 Mustang finished
Rich Chernosky replied to Penguins87's topic in Other Racing: Road Racing, Salt Flat Racers
I was curious because I have struggled with flourescents for years. By their very nature they are porous and absorb the solvents of any clear coat. Which changes their color and dulls them down. My solution was to go to a water-base clear. Krylon makes one in a paint called Lo-Odor. It dries very clear and builds nicely. Doesn't change the color of metallics or flourescents. It dries very hard but can take as much as 2 months to cure depending on humidity. So I am always looking for quicker solutions. Thanks for telling me. The artistry of modeling is in the paint...in my opinion. -
My GT4 Mustang finished
Rich Chernosky replied to Penguins87's topic in Other Racing: Road Racing, Salt Flat Racers
Interesting choice of colour, can't miss that one on the track. Whose paint did you use and what clear coat. ?? -
Lemans 2017 Ford GT
Rich Chernosky replied to Rich Chernosky's topic in Other Racing: Road Racing, Salt Flat Racers
Thanks for the compliment. In retrospect, that scoop can be glued on with the body in place. Make sure the window fits first, then glue the scoop on. Adjust it while the glue sets then fit the window and it will sit perfectly around the scoop. I did it bassackwards. -
Kurt....this is definetly something different for you. But I think you are doing quite well. You will enjoy Splash paints as they perform quite admirably. I have this car in 1/20 from Revival but I have been avoiding it for lack of reference. So you are giving me a big boost here. Thanks for posting and taking the time to do a WIP. Good luck with the kit.
-
Lemans 2017 Ford GT
Rich Chernosky replied to Rich Chernosky's topic in Other Racing: Road Racing, Salt Flat Racers
Tony...I was intimidated by this kit also. It sat and sat . Then I wanted to use it as a paint excercise and it took some creative masking but it came out great. Once past that, this kit just flew together. Hope this helps you. -
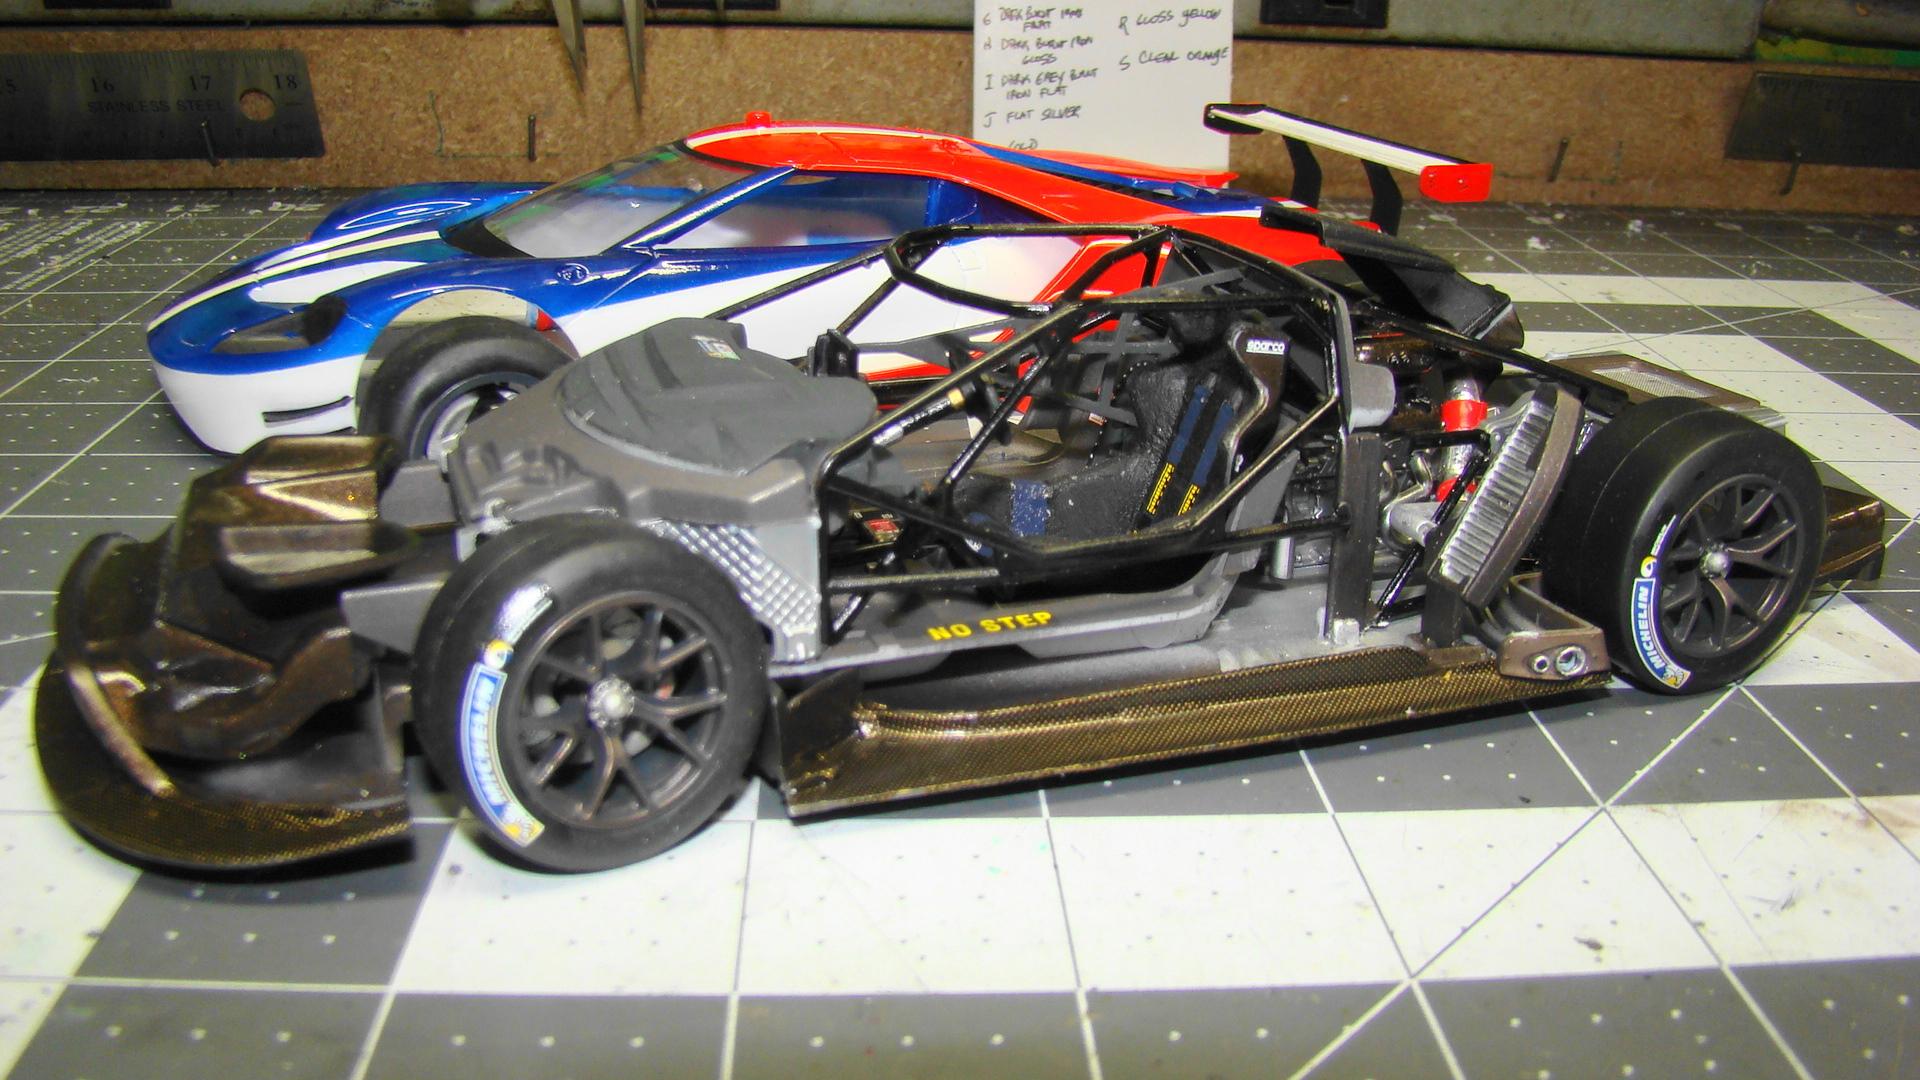
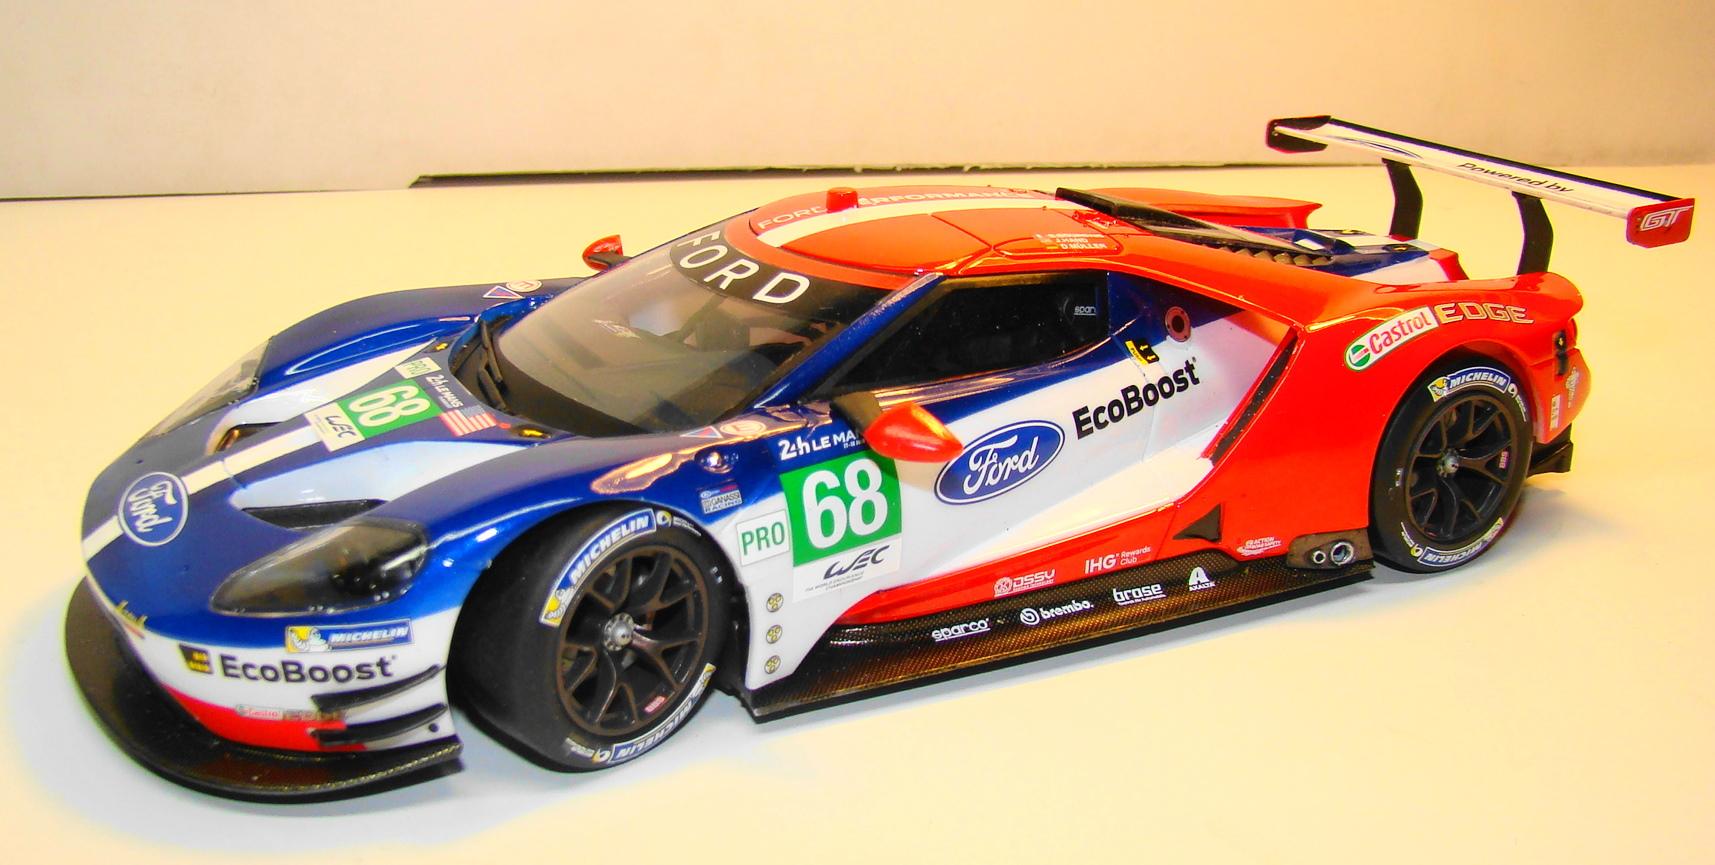
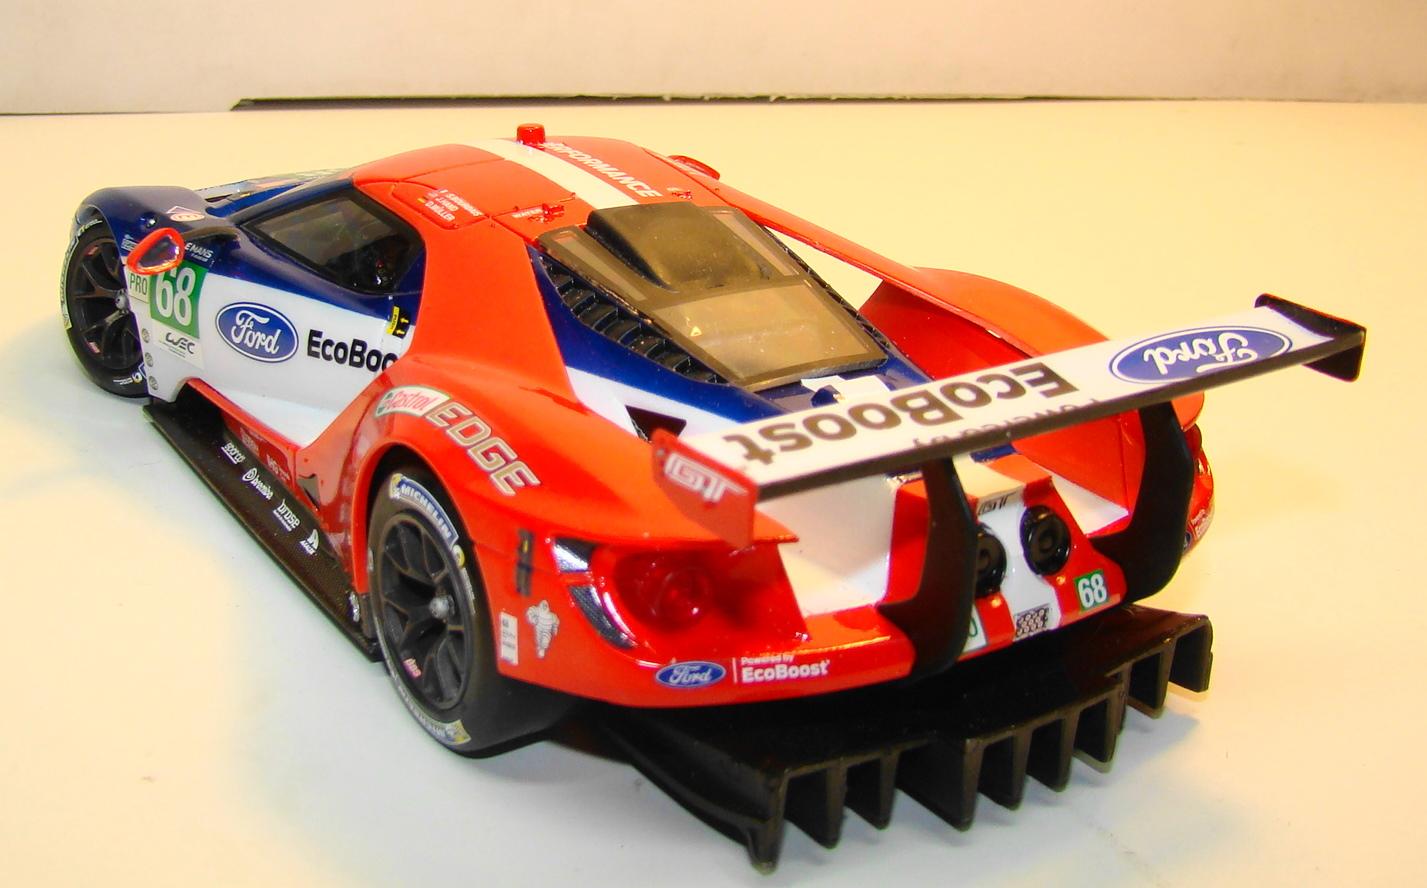
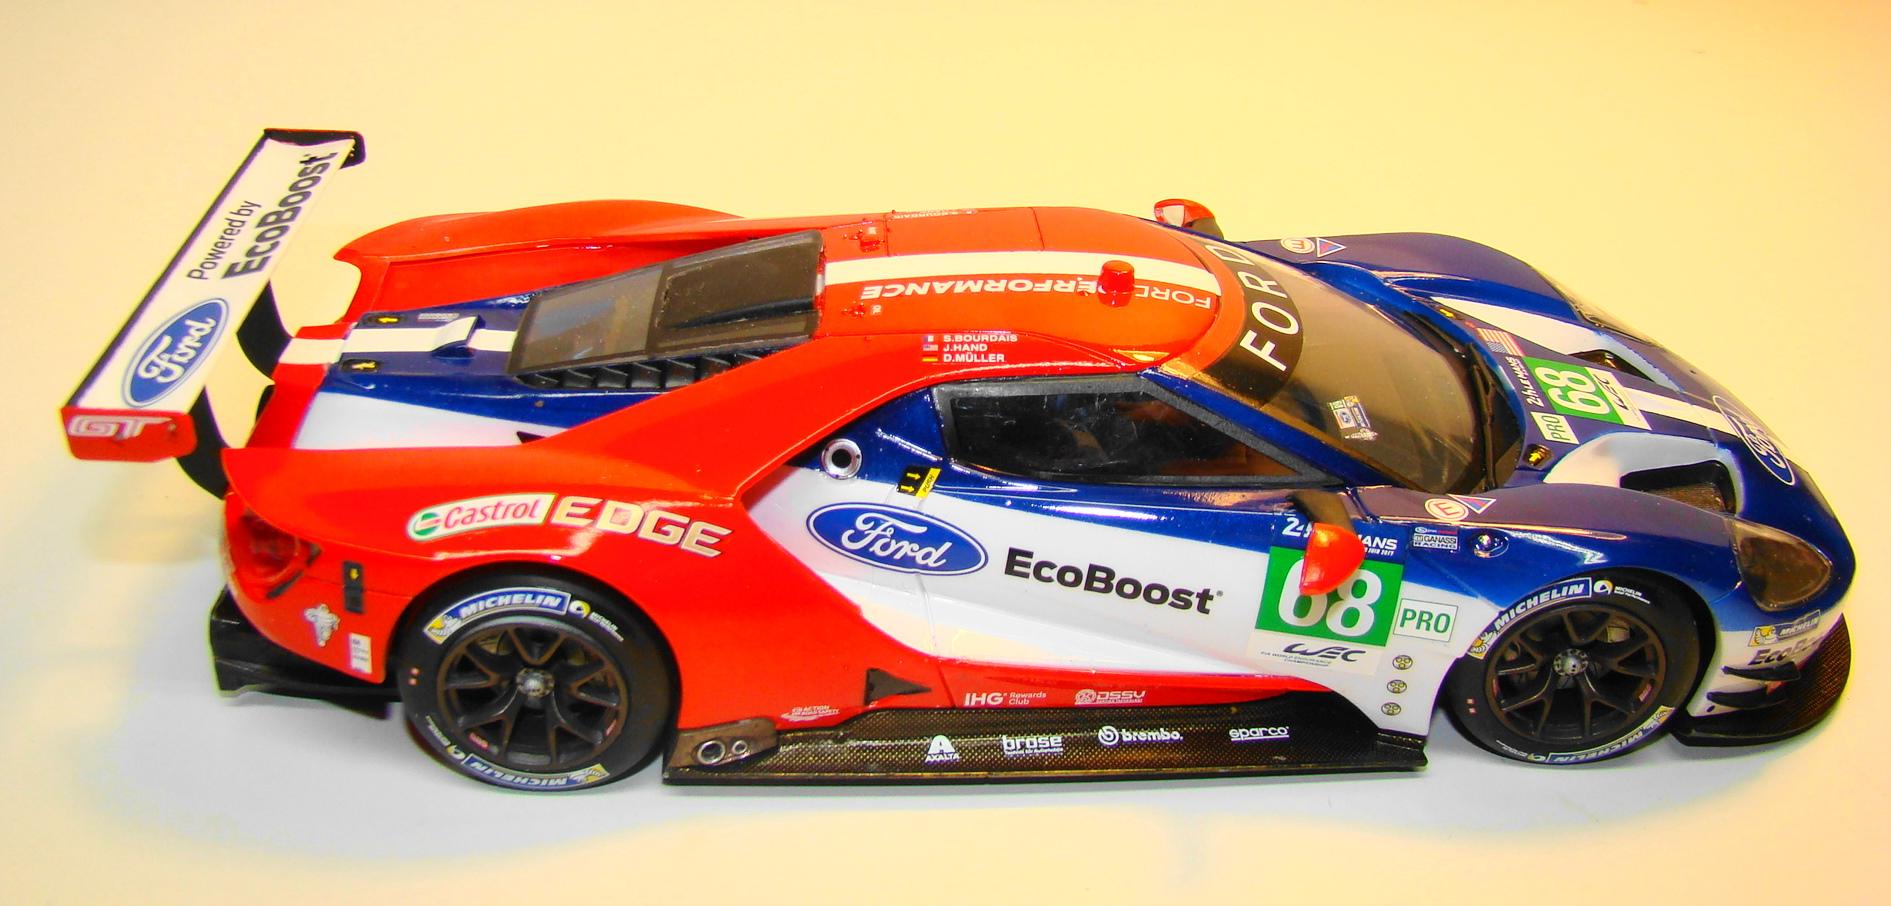
This model was intended to be a paint experiment. I wanted to try Splash paints and 2K clear. Colors chosen were Deep Impact Blue and Rosso Scuderia for the red. White was Tamiya TS26. Masking proved to be difficult but do-able. the two piece body greatly aided in the separation of blue and red. Must say the Splash paints performed admirably and laid down very well. They are extremely flat but when the clear is applied they come to life. Once the body was done and cured the incentive was there to finish the kit off. I am very pleased with this kit as the fit (with exception of back window) was excellent. The body in particular snapped down over the chassis and stayed in place with no glue or pins required. Revell has stepped up to the plate on this one. See the captions under the pictures for more details. Thank for looking. The body all sprayed and clear coated, sitting in the sun to cure. The chassis was very detailed and required much detail painting. Too bad most of this is covered when the body goes on so I always take pictures first. Much wiring was added to the interior. Sorry about the bad photo but I hadn't planned on taking the body off to take another. I thought with the large windscreen it would be visible but, alas it was not. All finished and decalled. I paid special attention to the color of the wheels. It was Alclad burnt iron with a misting of copper. Interesting color. The kit wheels did not steer but it was a fairly ea sy conversion. I also added the carbon fibre to the sills and the front. The business end of the car. Some very interesting aerodynamics. Rear window has the engine scoop sticking straight up through it. The scoop had to be carefully glued in the exact position for it to clear and the only way to find out was to attach the body. Suffice to say it wasn't and some careful filing and grinding solved this problem. The only one with this kit. This particular car placed second in the GTE Pro class. Not a bad effort for a a long layoff at Lemans. There were four of these cars that were fielded by Ganassi racing.
-
Thank you very much, I consider world class to be the ultimate compliment. At 17yrs old I never would have dreamed I would achieve such status.
-
Gary...this is my original Cobra build from 1965. Model is kinda showing its age but for a 55yr old it held its own. This kit holds many memories for me and it includes several firsts in my modeling career. Open doors with hand made hinges, flocking for carpet interior, wired engine using carpet thread. I used the chassis and engine out of an IMC Cougar II kit. A big reason was the greater detail but steering wheels were my main objective. This car was also used as a prop for a childrens film that was made by a friend of mine. Paint was Pactra white. Thanks for starting this post an allowing me to share.
-
Gary...great collection of builds. I built this kit when it first came out so its like a trip down memory lane. And thanks to others who added to this post. There is a wealth of information here...you guys are great.
-
BRE Datsun 510
Rich Chernosky replied to TonyK's topic in Other Racing: Road Racing, Salt Flat Racers
Nice job,paint work looks super. -
Facinating build you have here Andy. I am a big fan of the Lotus era and am learning a lot here. So thanks for doing this.
-
Tamiya 1/24 Mazda RX-7 FD-3S Innocent Blue Mica
Rich Chernosky replied to Italianhorses's topic in Model Cars
Another masterpiece Alex, that blue really jumps. I have only recently discovered 2K clear. It really makes a finish. -
Supermodified
Rich Chernosky replied to Brianl's topic in Other Racing: Road Racing, Salt Flat Racers
Very clever, I see a lot of Indy car bits in there. Seen these run, they are wickedly fast for what they cost. -
Tamiya Ford Mustang GT4
Rich Chernosky replied to Gt fan's topic in Other Racing: Road Racing, Salt Flat Racers
Turned out fantastic Tim, followed your work in WIP, now I can't wait to get started on mine. -
Beemax Lancia Delta S4
Rich Chernosky replied to Michael jones's topic in Other Racing: Road Racing, Salt Flat Racers
I am a big fan of the Martini livery and have many pieces in my collection. But not this one. You did a super job on it. Now it looks like one of these is in my future. -
Thank you Gary, always appreciate the compliments.
-
Thanks Dave...maybe I will tear into that Shadow soon too.
-
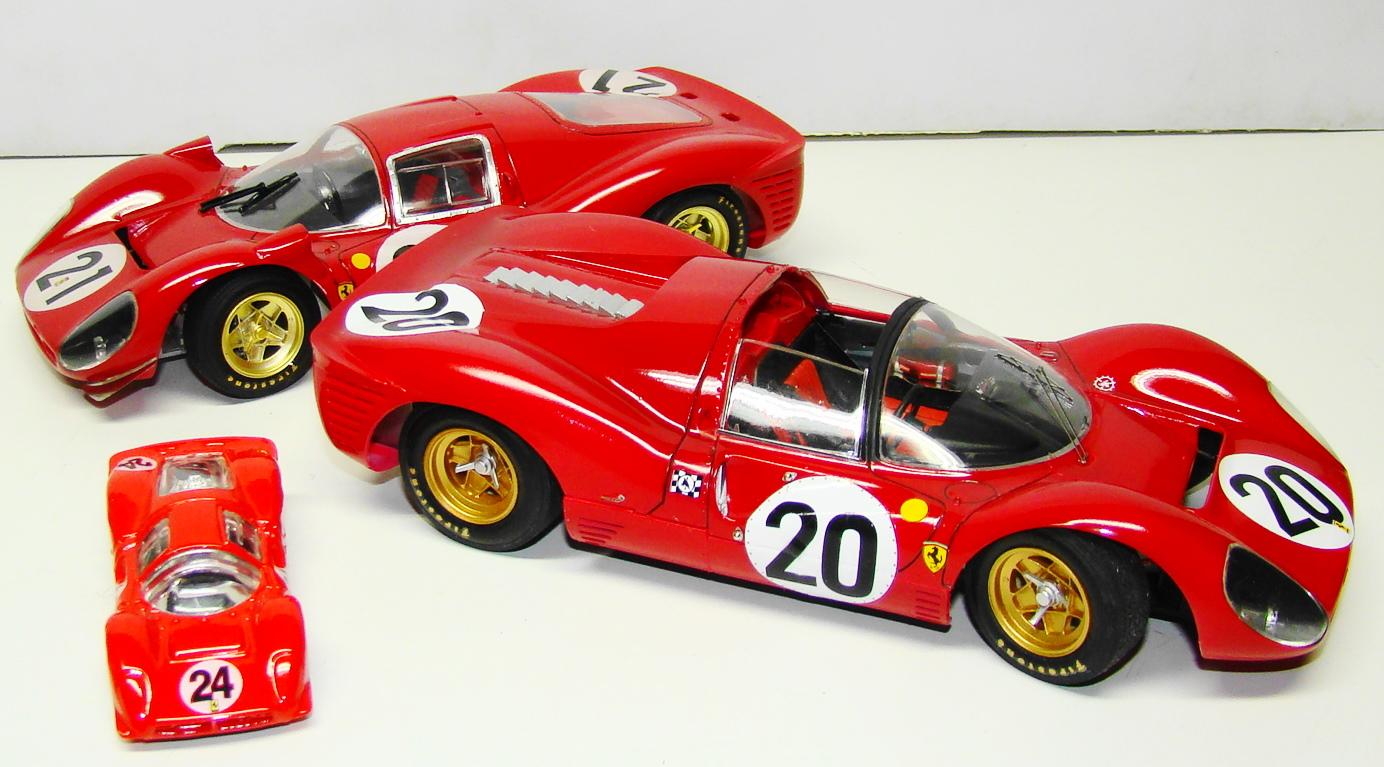
The models are both 1/24 , the diecast 1/64. Thanks for the compliment
-
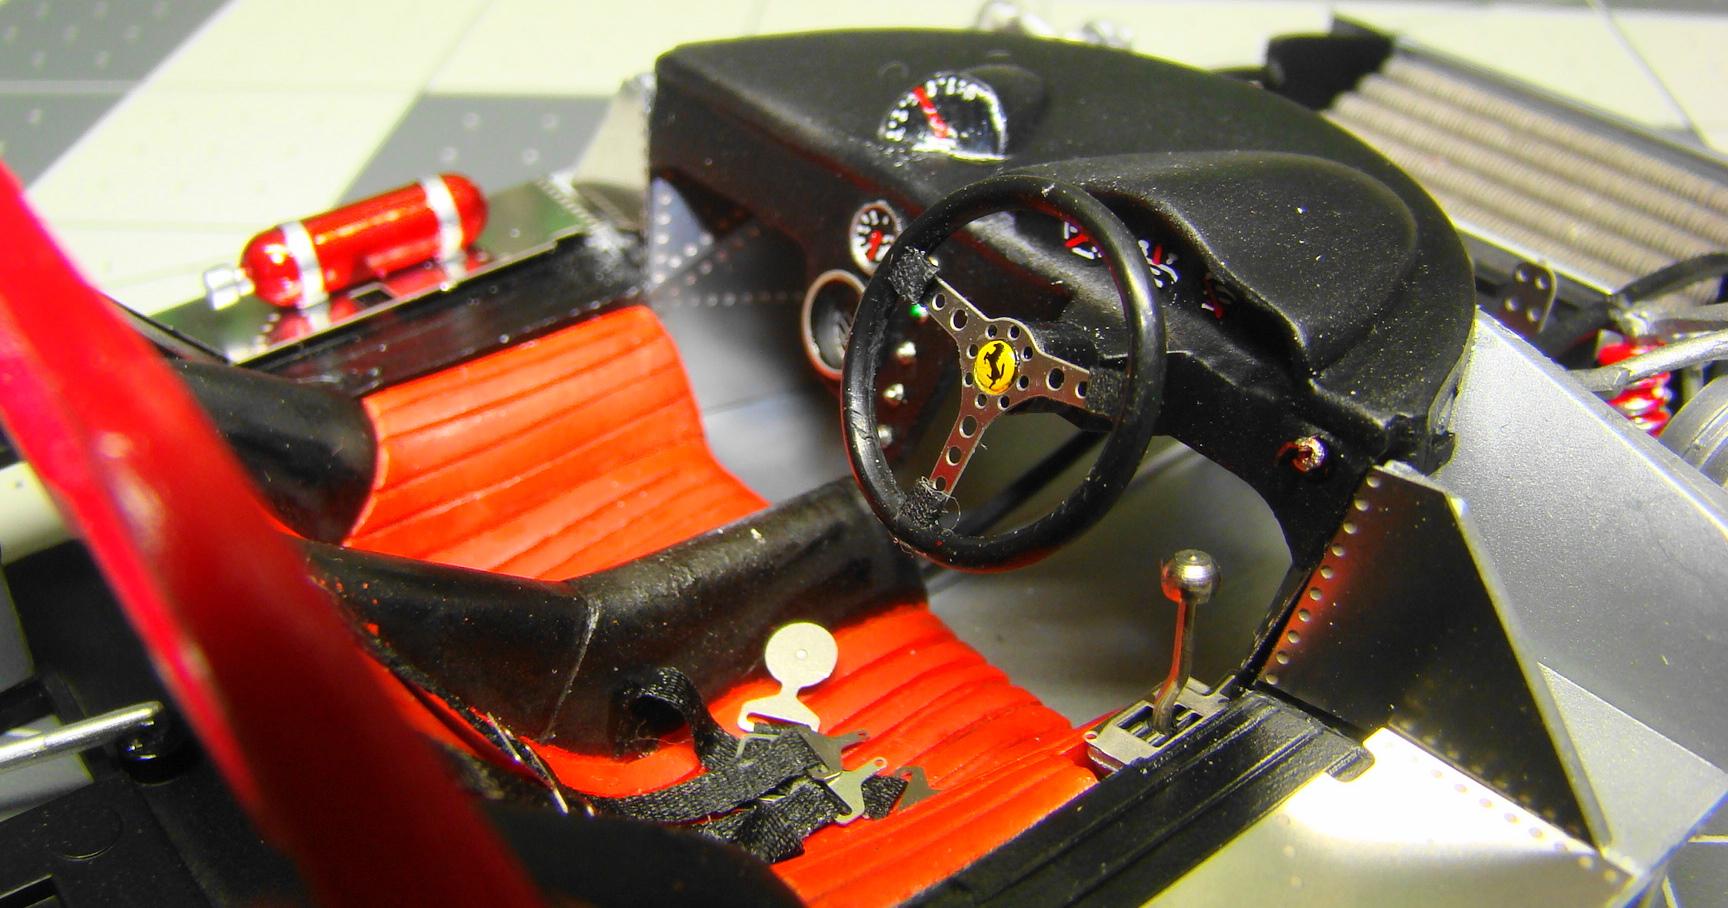
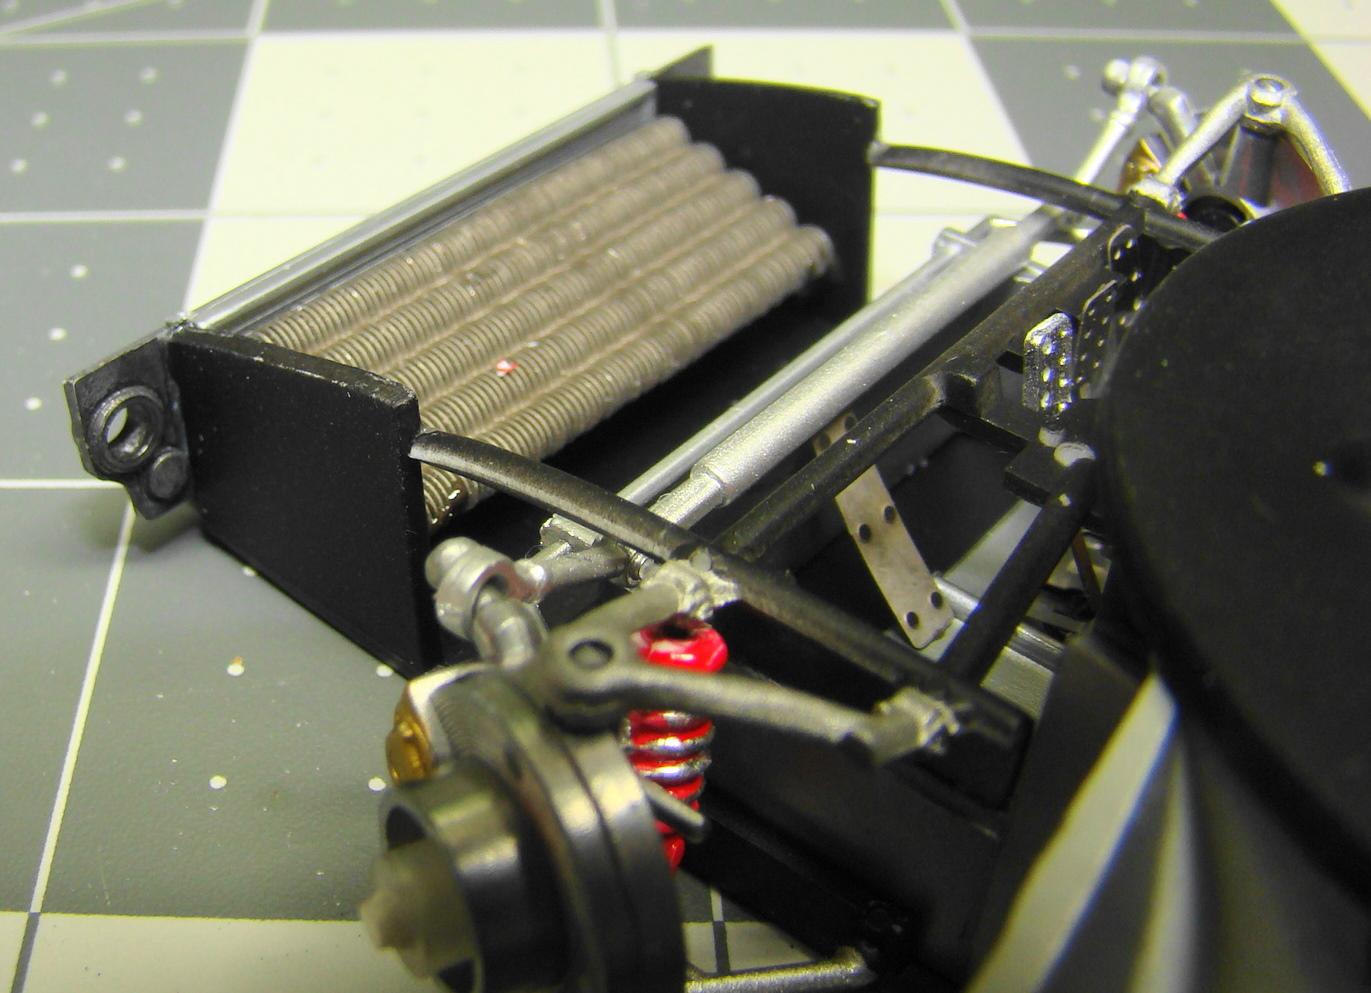
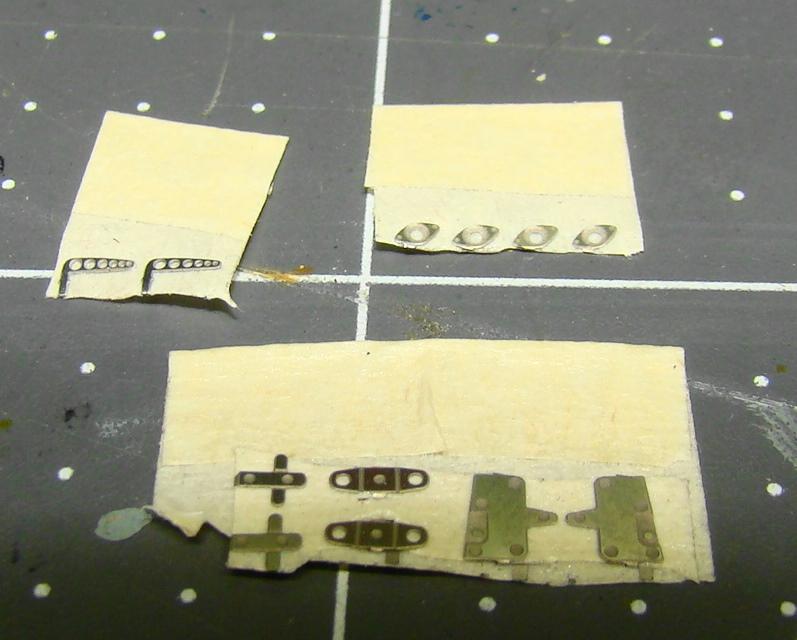
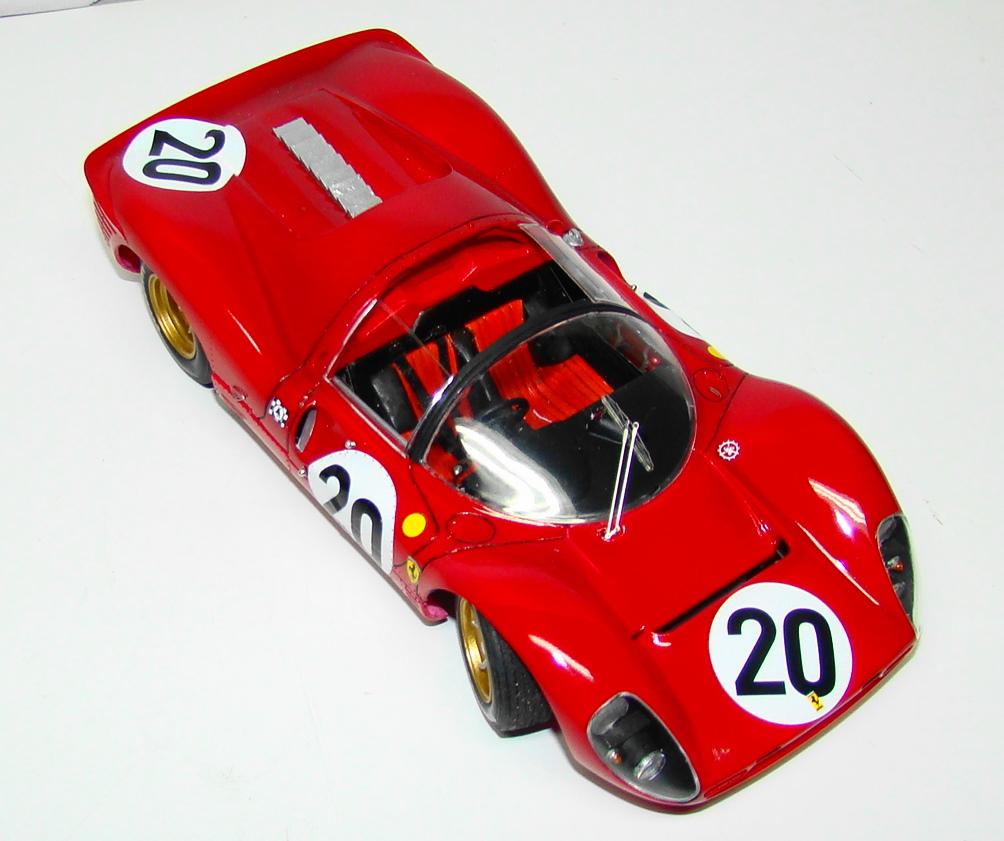
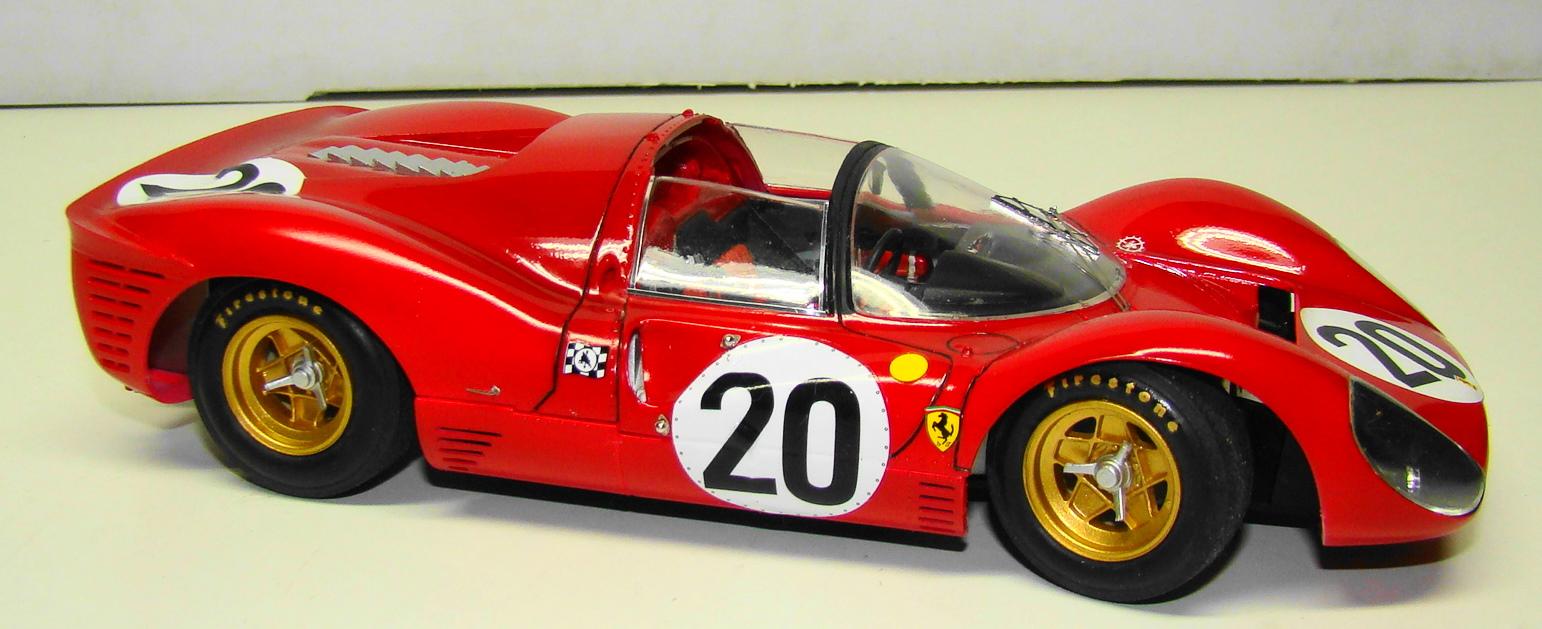
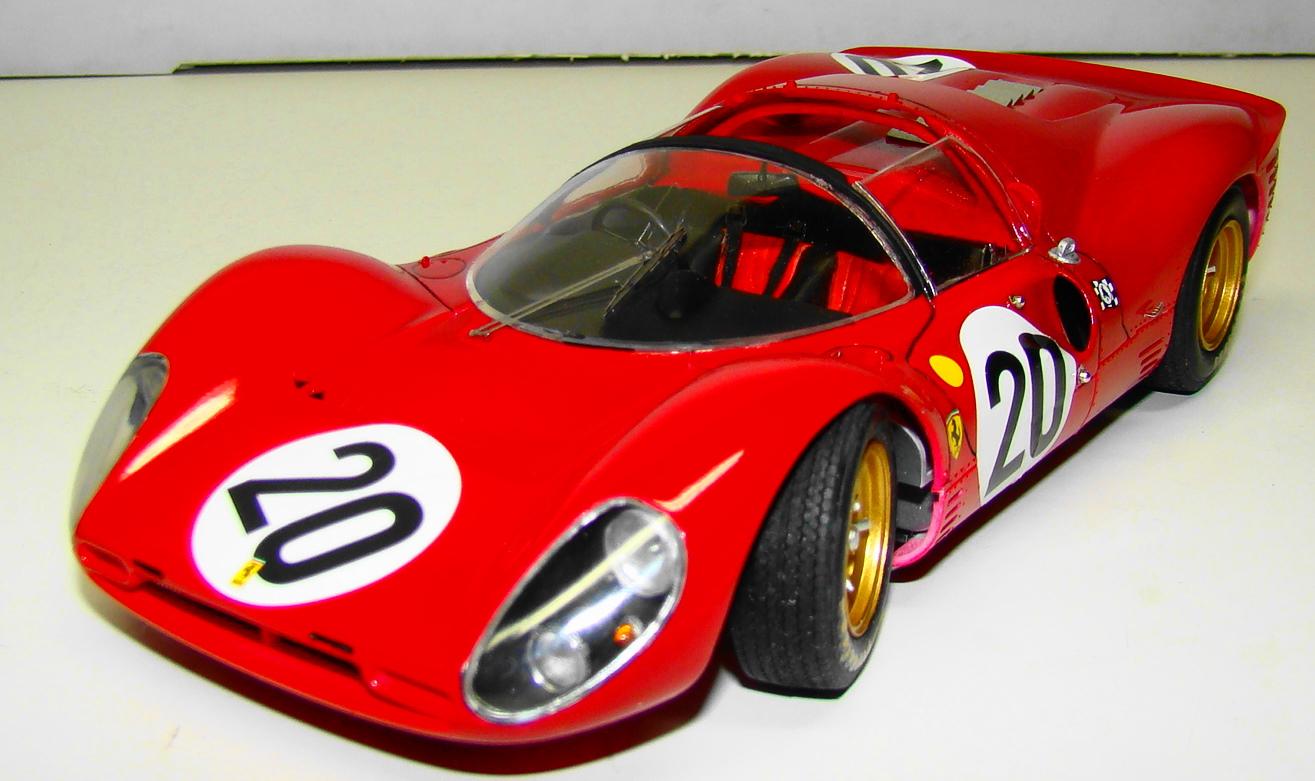
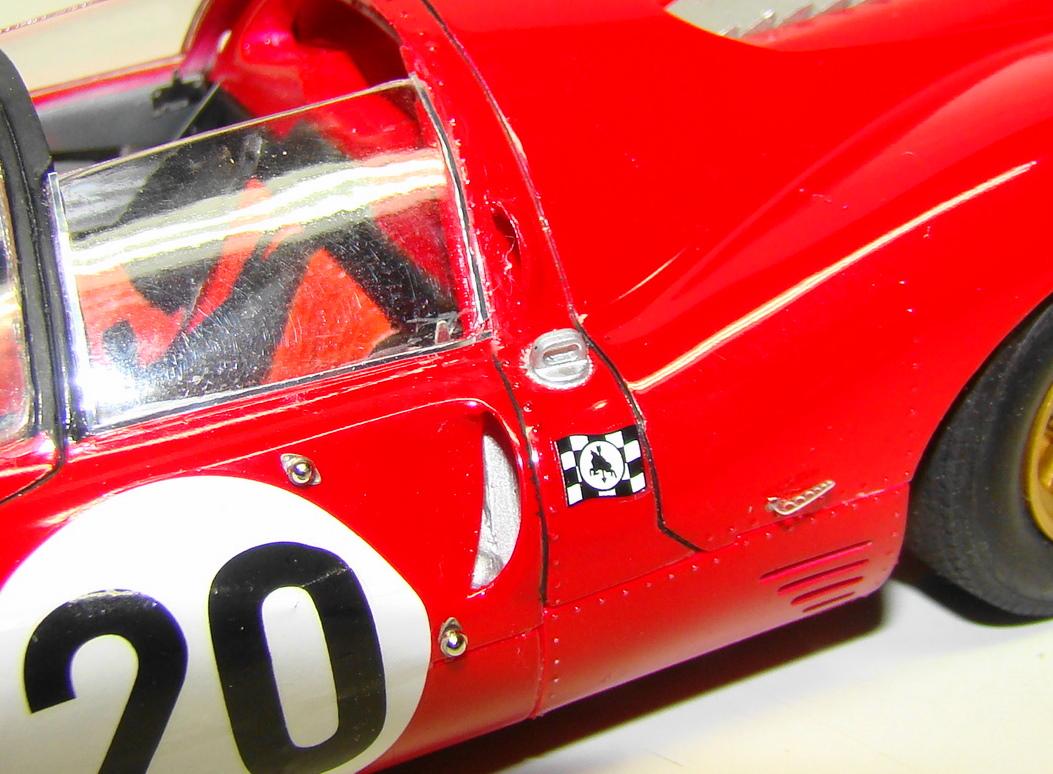
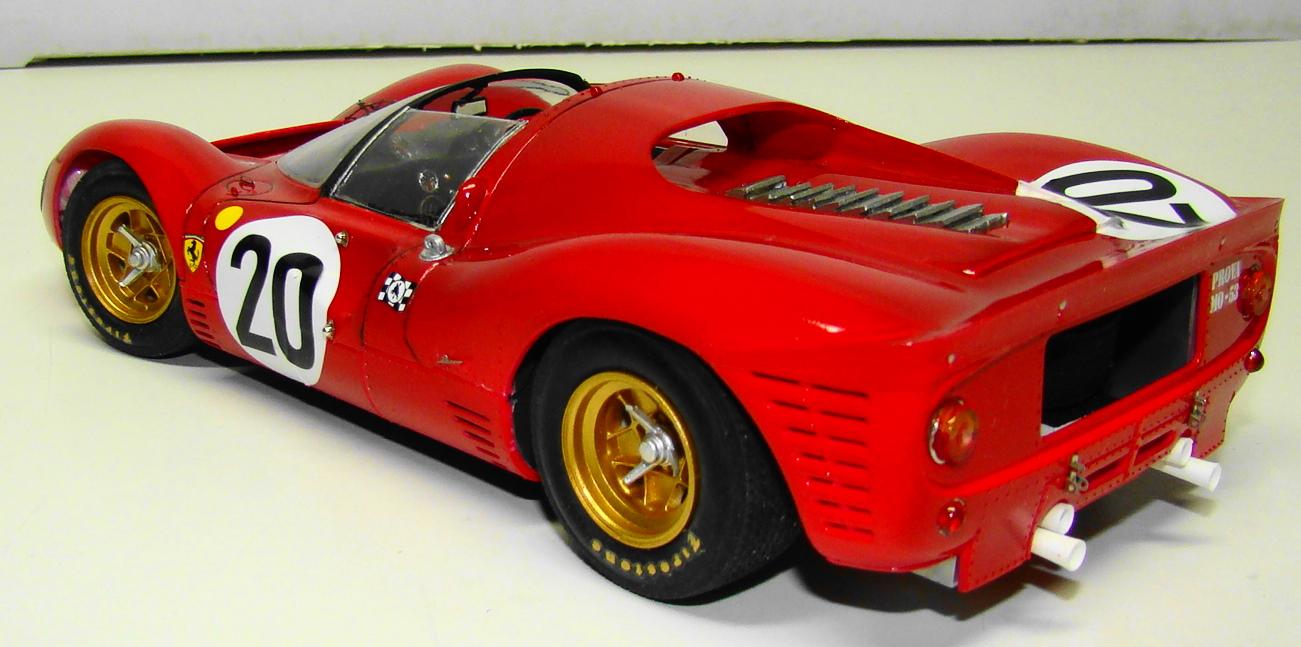
I have long wanted to do this conversion and had this Fujimi kit and a Renassaisance photo etch set for many years. I found a Hobbitime conversion kit to do the rear deck and that made this project a reality. Although it still took quite a bit of work as the resin conversion pieces still took a lot of filling, sanding and fitting. In the end it was worth it. Paint is Testors 1104 dark red and this matches my earlier berlinetta version. I have included a photo of both. Pictures with captions will tell the rest of the story. Thanks for looking. I really fussed over the steering wheel but it paid off. Seats are sprayed with Mr Color Character Red and then a brown wash. Kit PE for the hardware and silk thread for the belts. Gotta luv the machined gear lever. That radiator was over 45 seperate pieces of PE. It barely shows through the front scoop. Discovered this trick. Lay the photo etch on masking tape and trim with a scissors. Its easier to grab hold of them in a pair of pliers to grind down the little nubbins too. They don't go flying. I was getting rather tired of scrounging on the floor for tiny PE pieces and this solved that issue. This shot of the car reminds me of a line from the movie Ford vs Ferrari when Christian Bales character (Ken Miles) remarked "if this had been a beauty contest...we just lost" It show the lines of this car quite nicely and you can see why this car is considered one of the most beautiful race cars ever. The chrome trim on the vacuum form side windows is chrome tape cut down thin. I omitted the front winglets on this car as i thought it interfered with the lines. I may add them later after looking at the berlinetta. These tiny number marker lights are two pieces. A PE base and turned light housing. It took some special technique to get them attached. But the PE adds greatly to the detail. Here are both Fujimi kits. The berlinetta was done about 7yrs ago and the diecast is a Hot Wheels.