Plowboy
-
Posts
3,434 -
Joined
-
Last visited
Content Type
Profiles
Forums
Events
Gallery
Everything posted by Plowboy
-
'68-72 Chevy PickUp rummors about reissue?
Plowboy replied to Sergey's topic in Truck Kit News & Reviews
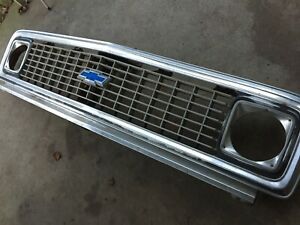
A person on the Spotlight board was recently asking about a rumor of a Revell '67-'72 C-10. But, that's probably all it is. I would much rather see Revell do this generation Chevy truck. Moebius has already butchered up the Fords. Kurt is right about the piece under the grille. It's not body color. It's actually part of the grille and is rarely visible in 99% of photos.
-
Thanx Helmut! The rear fenders are also from the car as well as the bottom section of the doors. Here's an early progress photo.
-
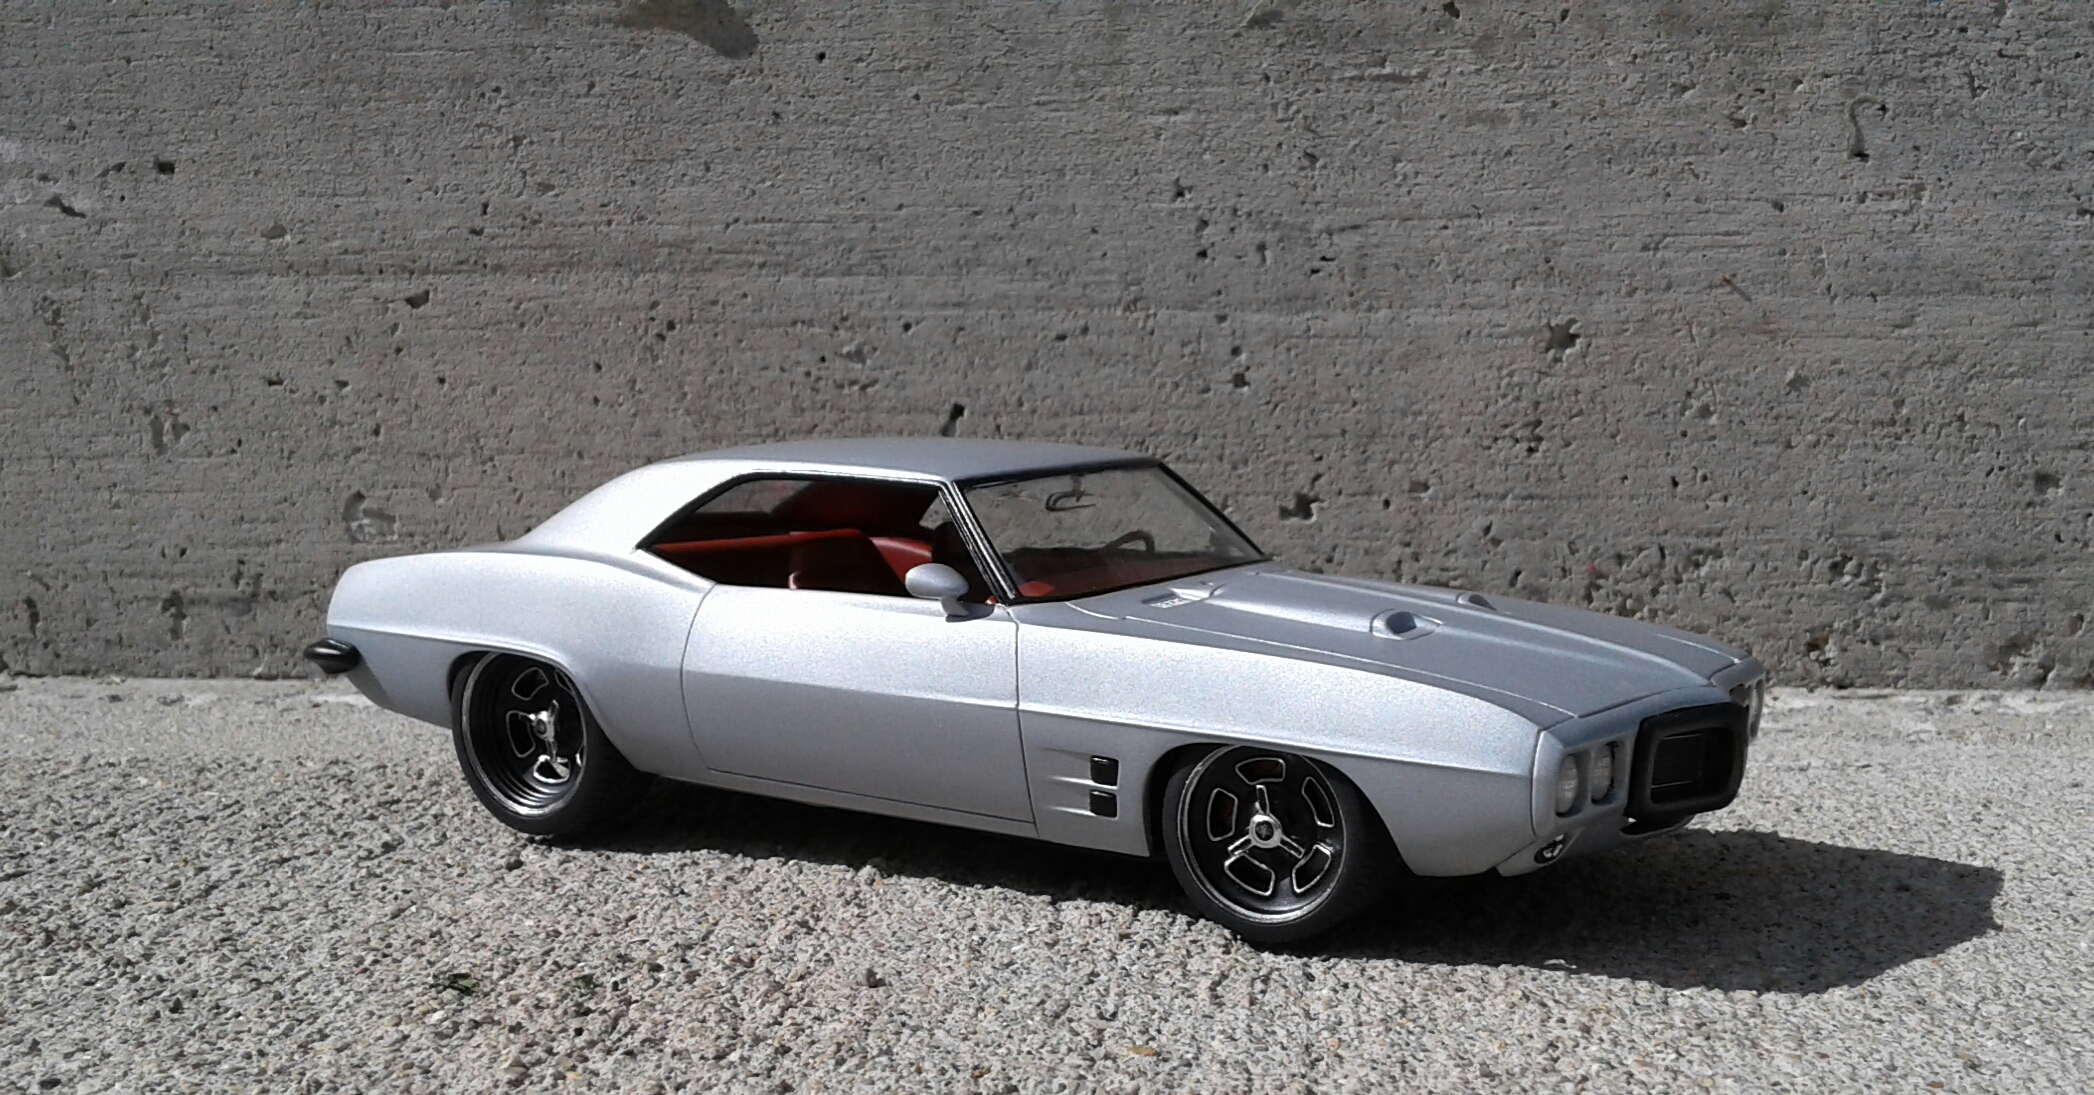
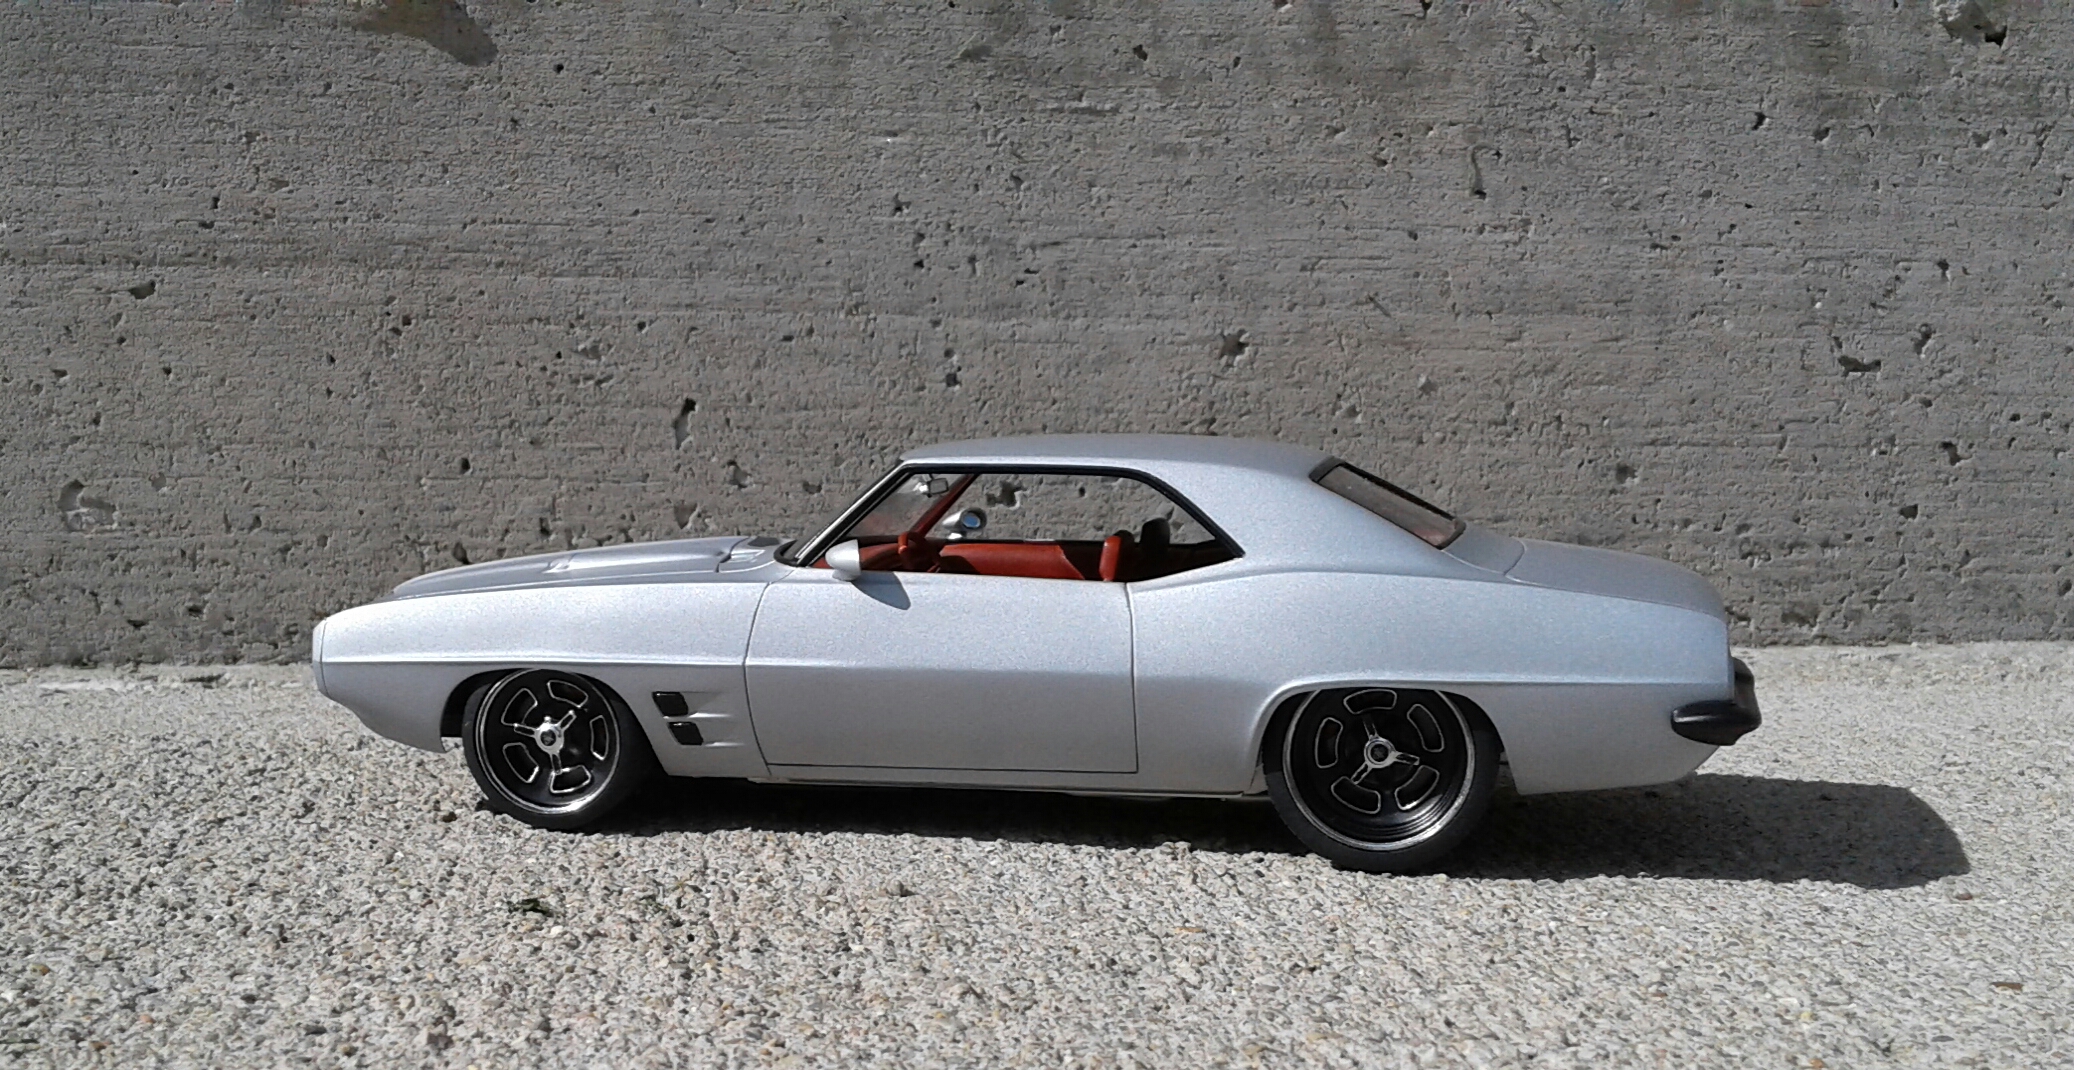
Thanx guys! I took a couple of photos out in the sun. My tablet doesn’t do well for some reason. But, you can see the effect of the Mica Silver.
-
Revell 1968 Chevelle SS396 Day 2 Street/Strip.
Plowboy replied to Dragonhawk1066's topic in WIP: Model Cars
Craig, get the headers from the Revell '69 Camaro with the BB. They'll fit like they were made for it. Also, before you paint, check the fit of the grille and bumper. The headlight bezels also need to be shaved off back to the mold lines at the top to get them flush. -
OK. I was thinking what was on the box was in the box. I had it in my mind that the stock version was a sedan and the street machine version was the hardtop. I noticed on my 150 that there's a pretty good dip in the roof between the A and B pillars. Looks like your Bel Air has the same issue or maybe it's a reflection?
-
What's wrong with this one? Isn't this the same thing you would get by putting the Revell front clip on the newer AMT body?
-
I gotta ask, "why?". Revell already makes the Bel Air with the sedan roof. If I ever do build a '57, I want to use the Revell 150 body and interior with the AMT street machine chassis. I've never checked out the interior in the street machine version. May use it or parts of it too.
-
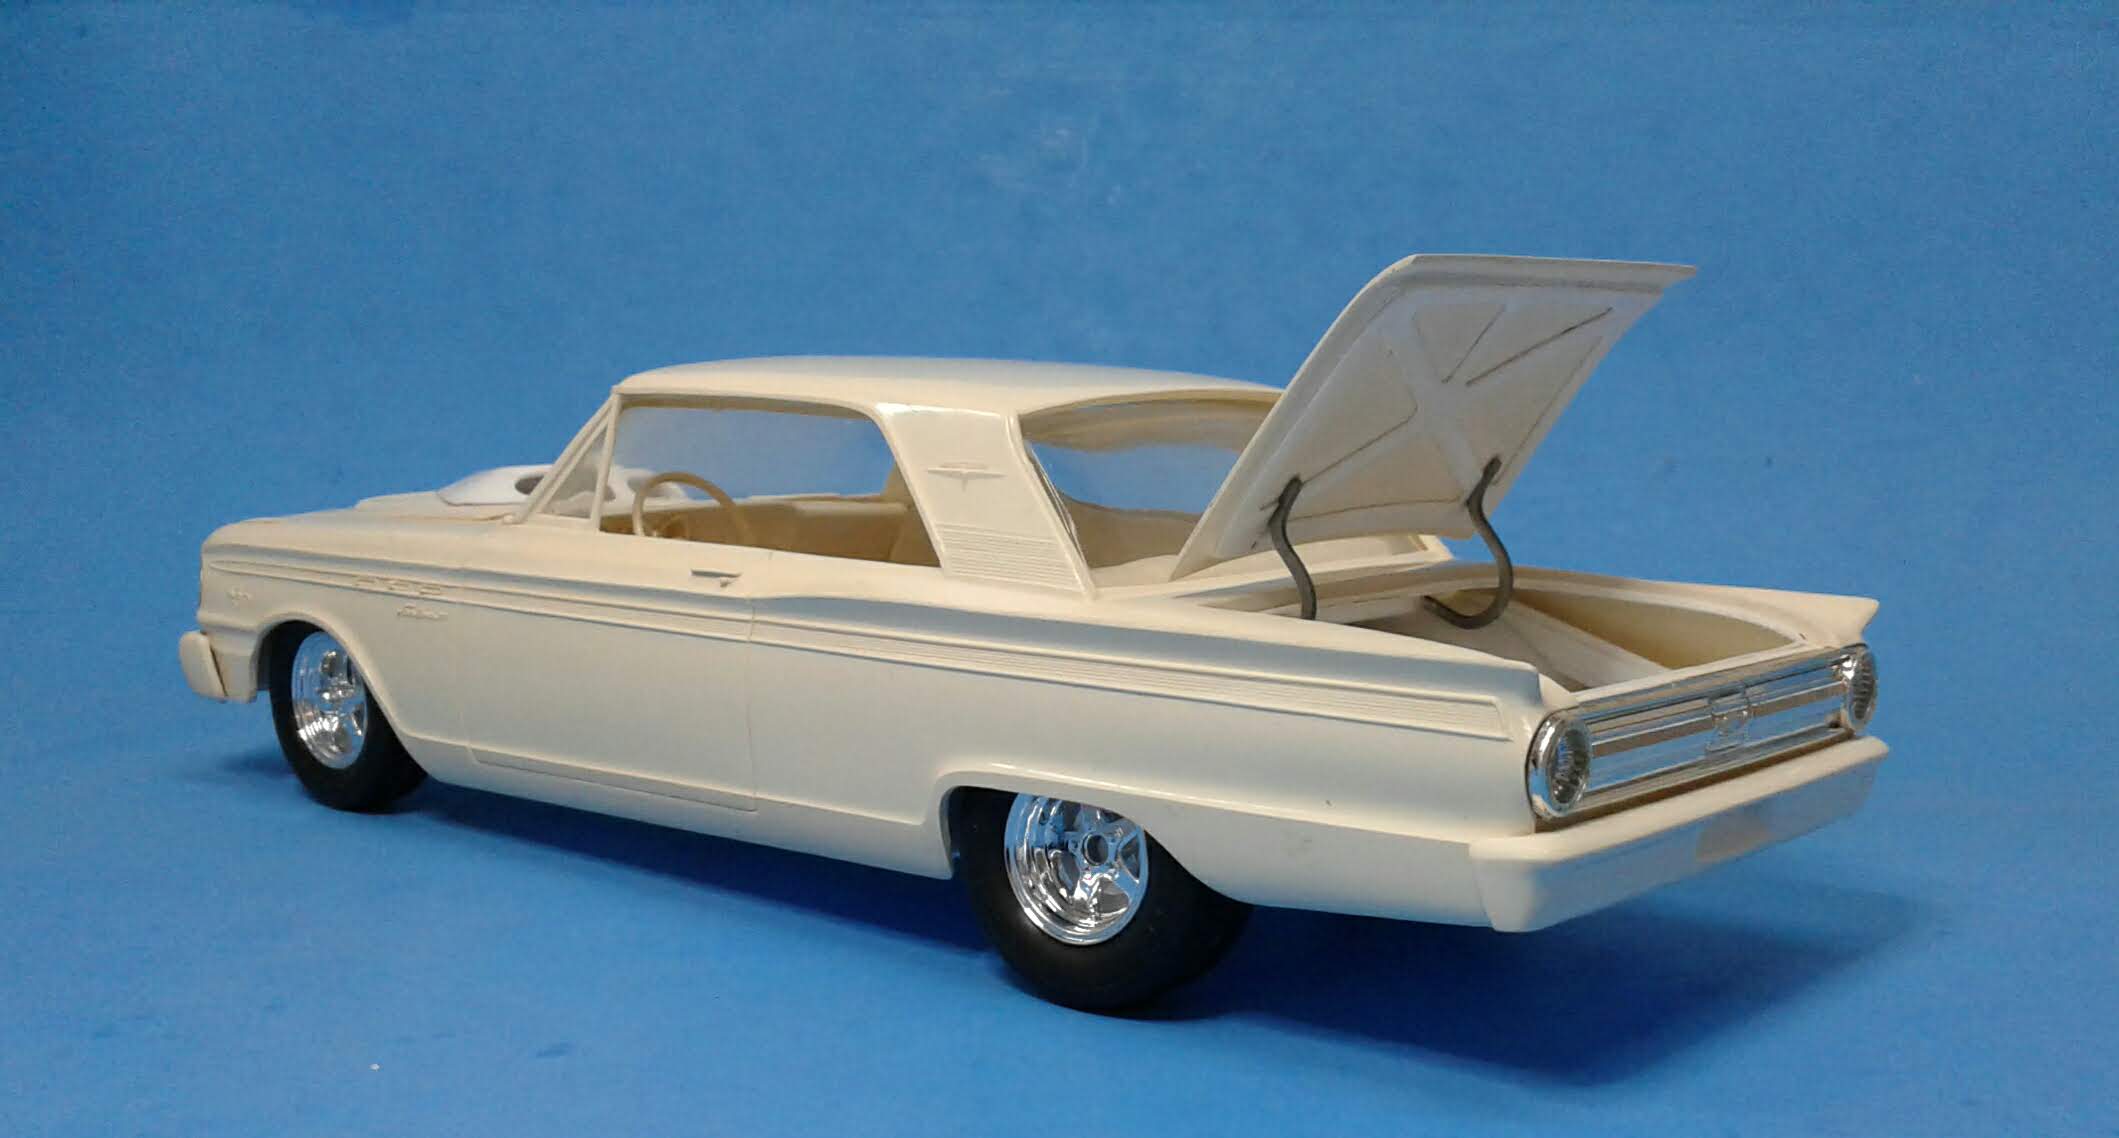
Yeah, they're made out of fencing wire. Something I have an endless supply of! Next time I open a trunk, I'll take some detailed photos.
-
Just looking at your photos, it looks like the pivot point on your hinges will have to mount to the package shelf instead of the body. That's the only way it can be done on a model with a small and curved tulip panel. I've done three different models that way and it works well. I don't have any progress photos. But, I think you can get the jist from this photo.
-
Issue with clear coat
Plowboy replied to plasticprime's topic in Model Building Questions and Answers
I've polished 32 bodies with the Tamiya compounds. The cost at the time was $21 plus $3 shipping. So far, my cost per body has been $.75. So, yeah, it's worth every penny. And I still have enough to polish 10 or 12 more. Way less labor intensive and way better results. -
Novus vs. Tamiya Polishing Compounds
Plowboy replied to Miatatom's topic in Model Building Questions and Answers
You're welcome Tom! You won't believe how easy it makes polishing a paint job! -
Novus vs. Tamiya Polishing Compounds
Plowboy replied to Miatatom's topic in Model Building Questions and Answers
What I like about the Tamiya compounds is that I don't have to go through humpteen different grits of sanding pads to get a glass smooth finish. I can sand with 2000 (I do sometimes go over it with 4000 also) and use the three compounds and I'm done. I've yet to burn through the paint with this process. Done it too many times with the polishing pads! One tip when using the Tamiya compounds : do not apply with your fingertip! That does nothing! It has to be applied with a soft cotton cloth over your fingertip. -
Issue with clear coat
Plowboy replied to plasticprime's topic in Model Building Questions and Answers
That's what I would do. I bought three tubes some years ago and have lost count of how many paint jobs I've polished with them. Best money I ever spent! -
That's some nice work on that land yacht! Don't see these often at all. Nice to see an old kit get built!
-
Issue with clear coat
Plowboy replied to plasticprime's topic in Model Building Questions and Answers
I bought mine through ebay a few years ago. I tried the Novus. Wasn't impressed at all. -
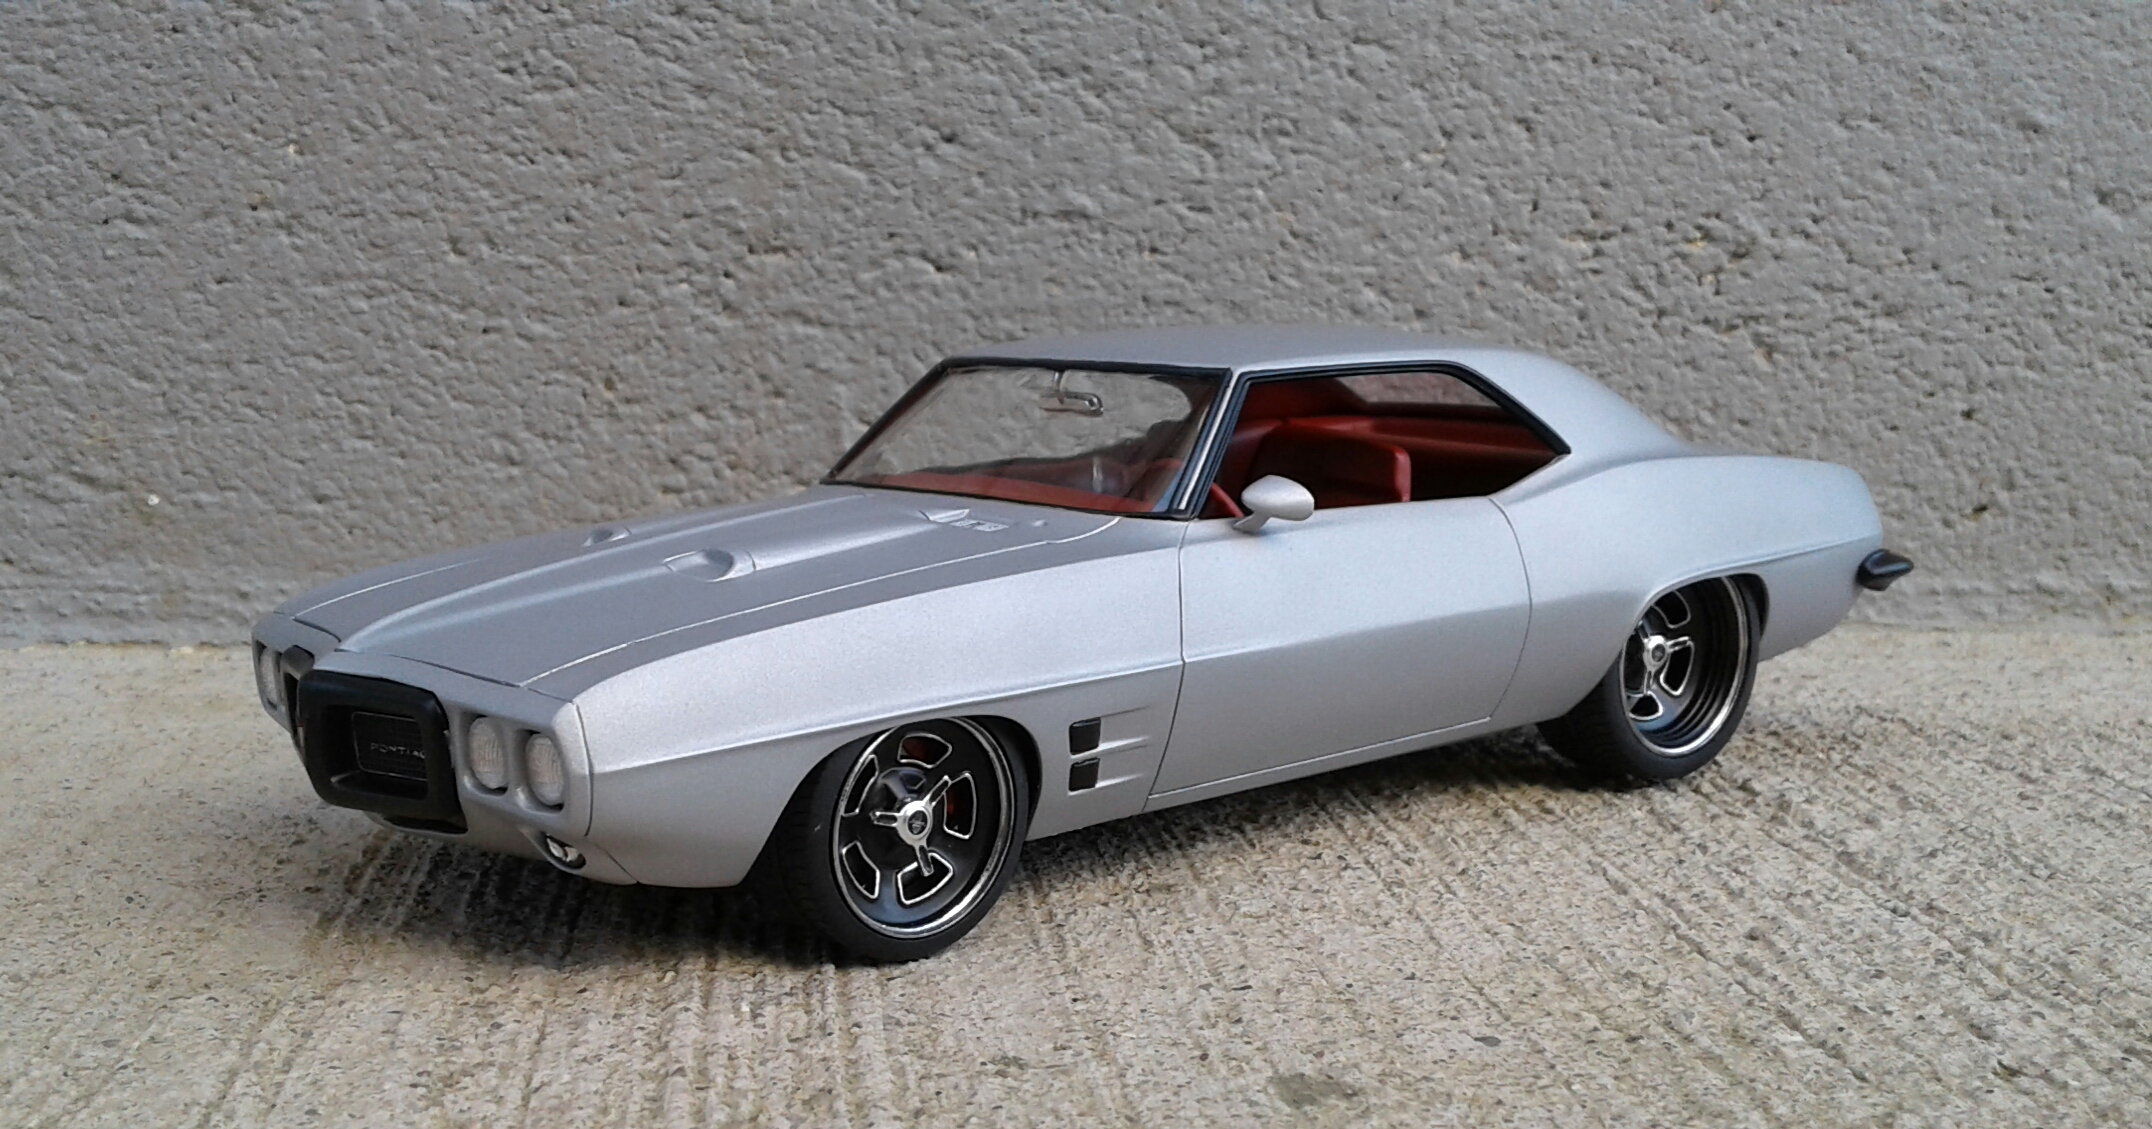
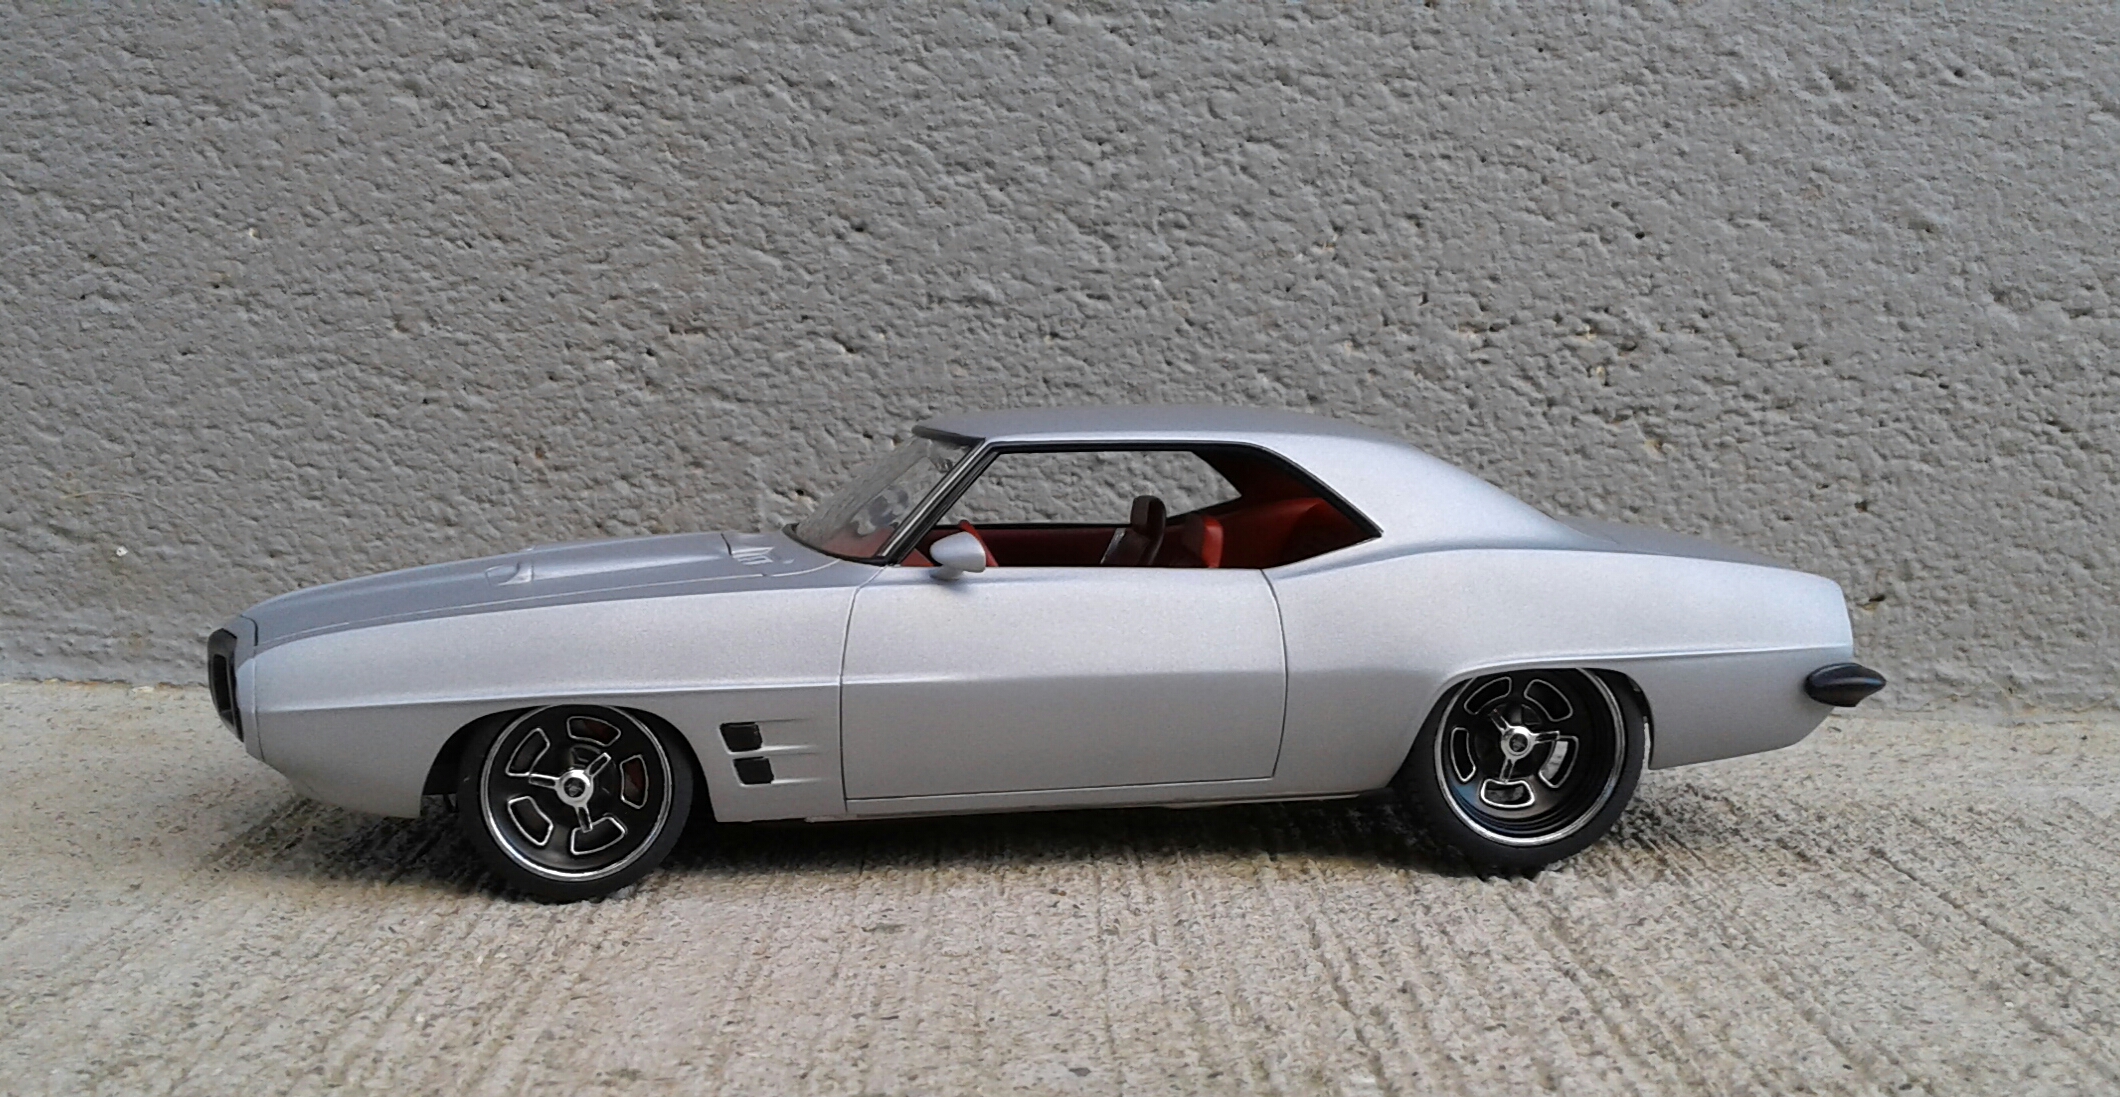
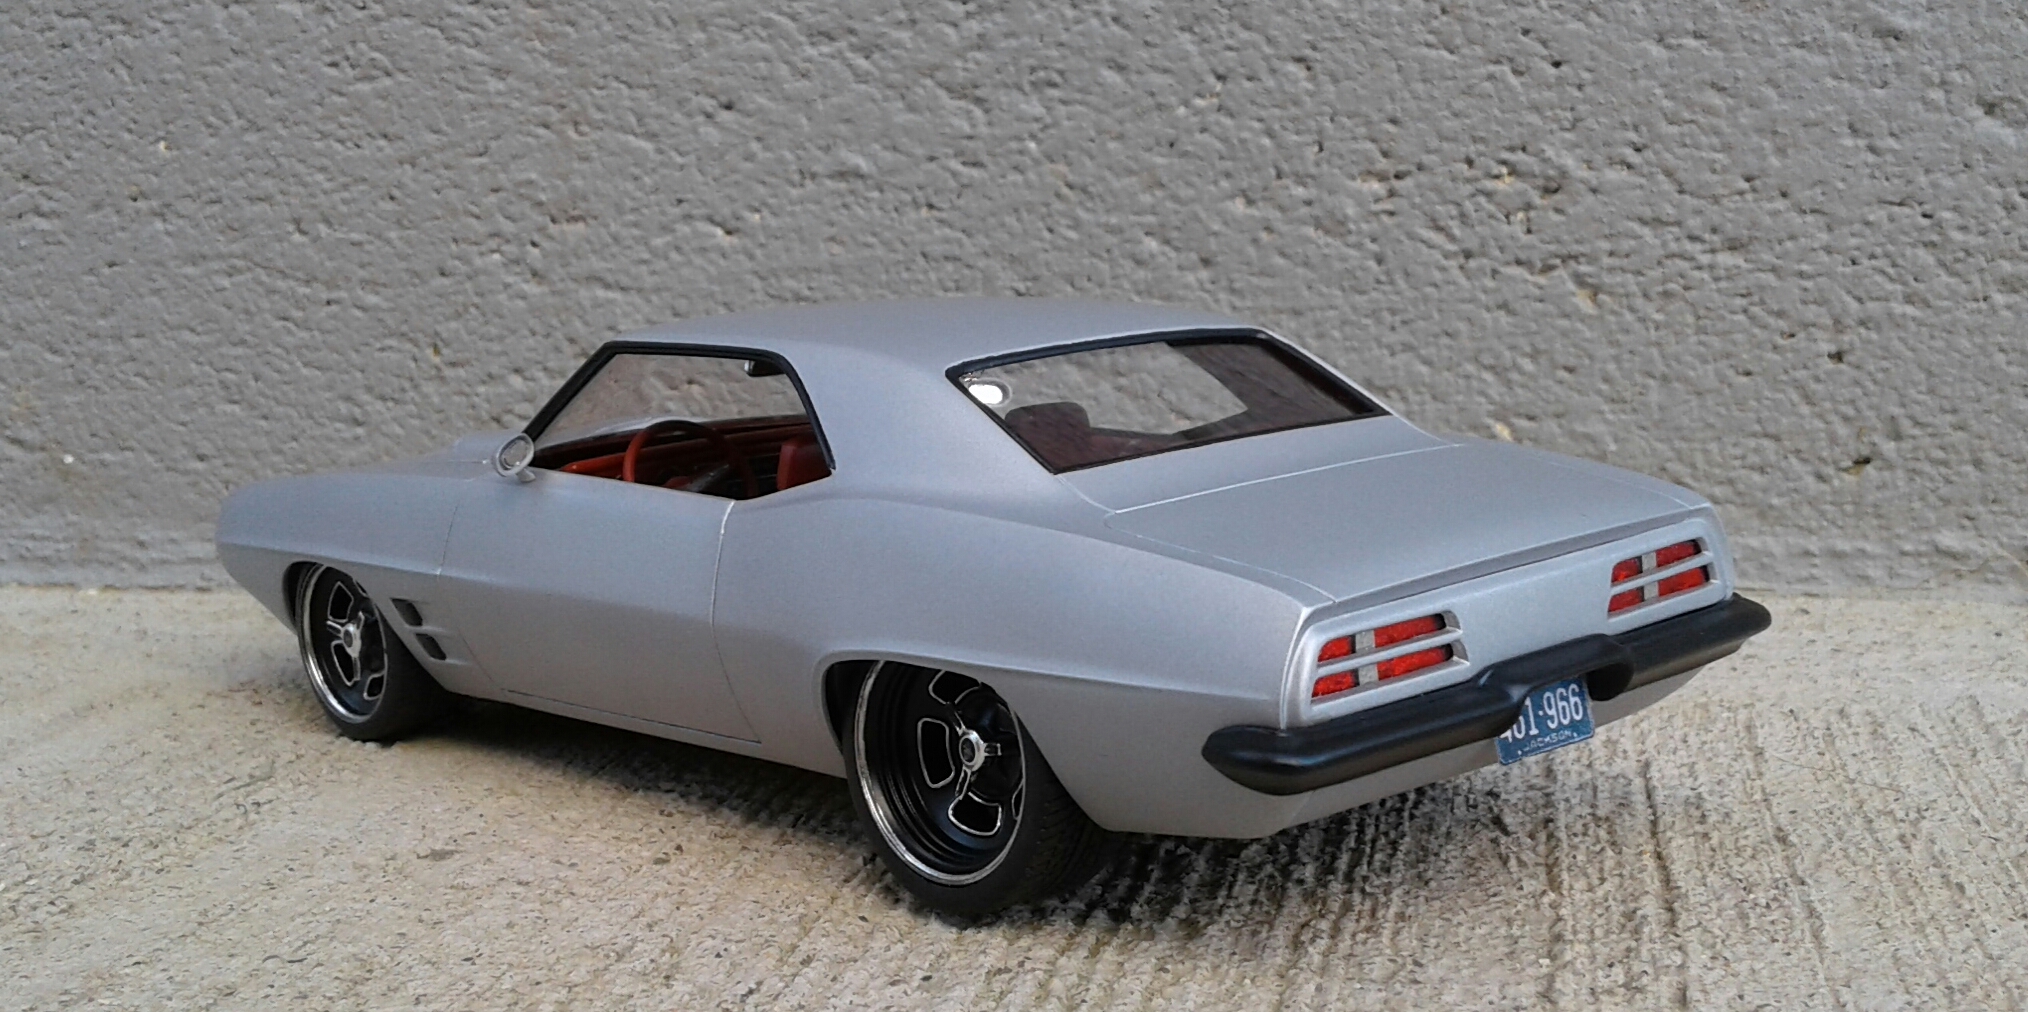
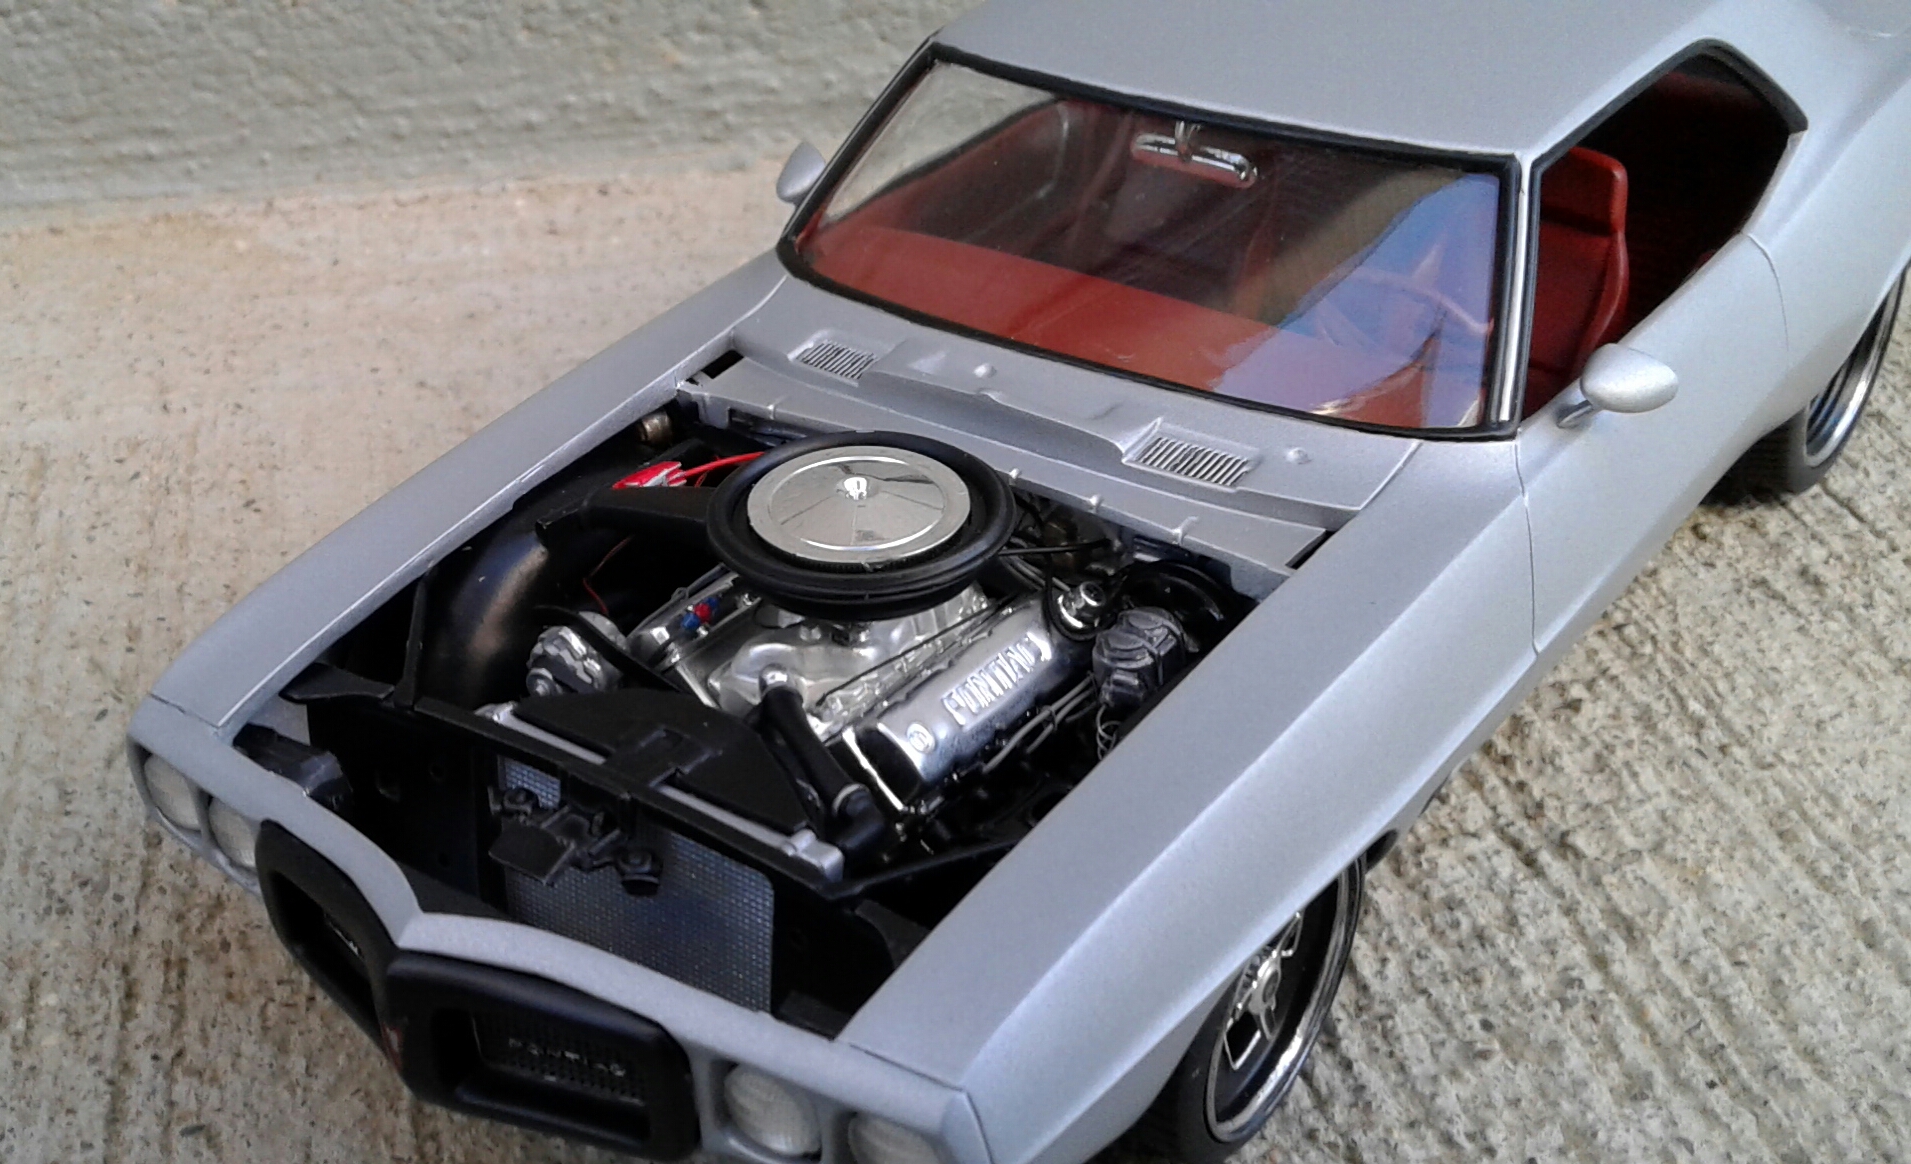
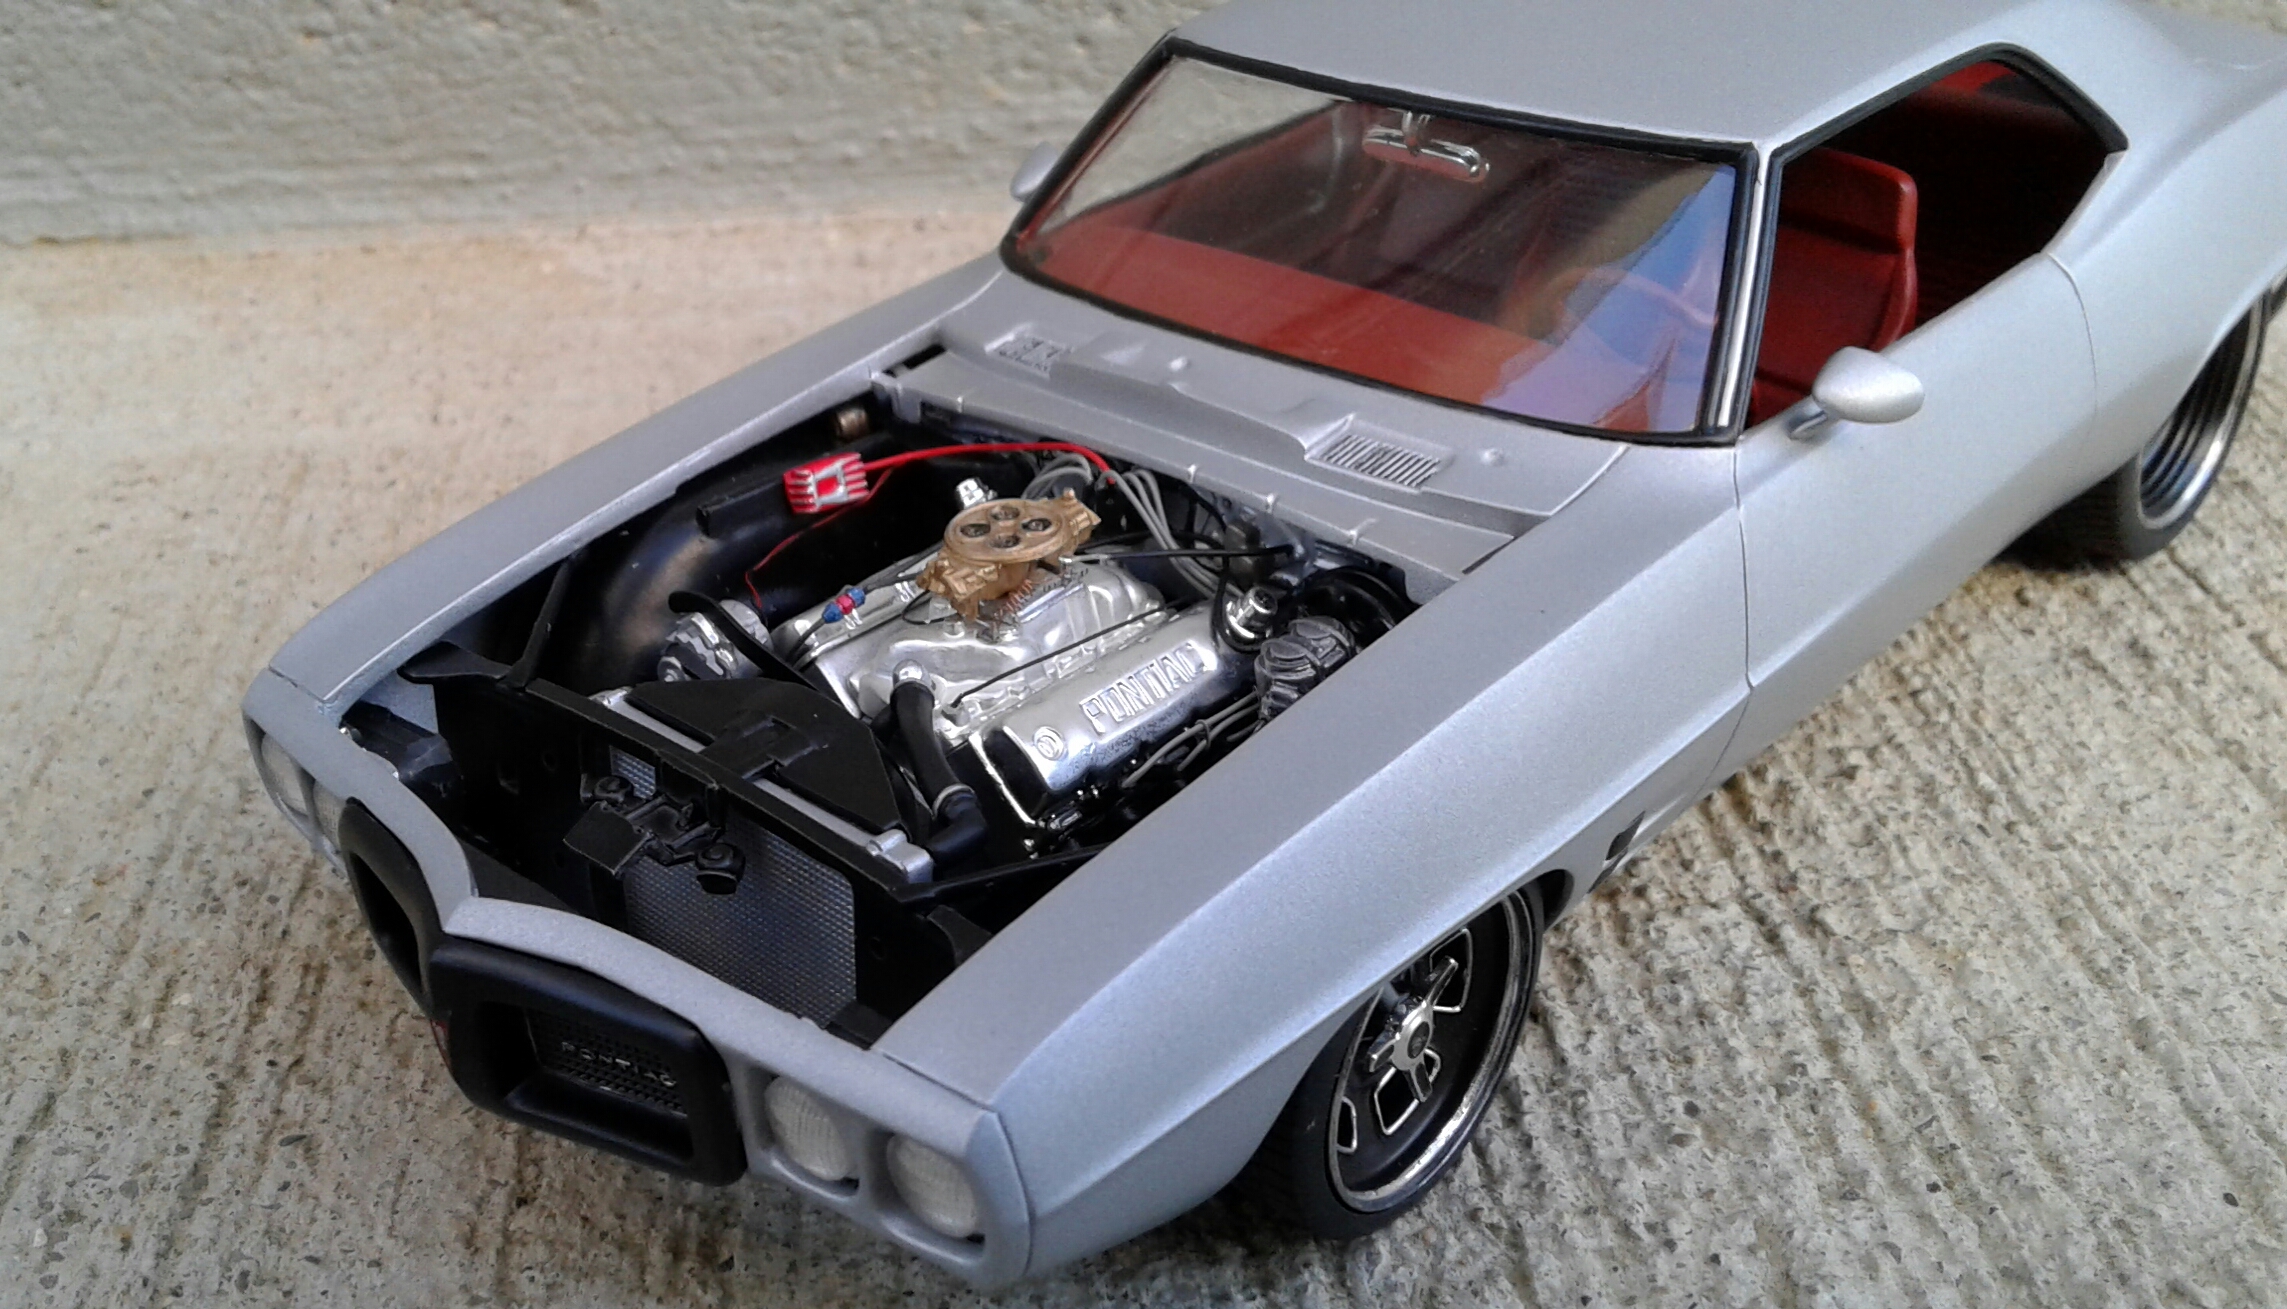
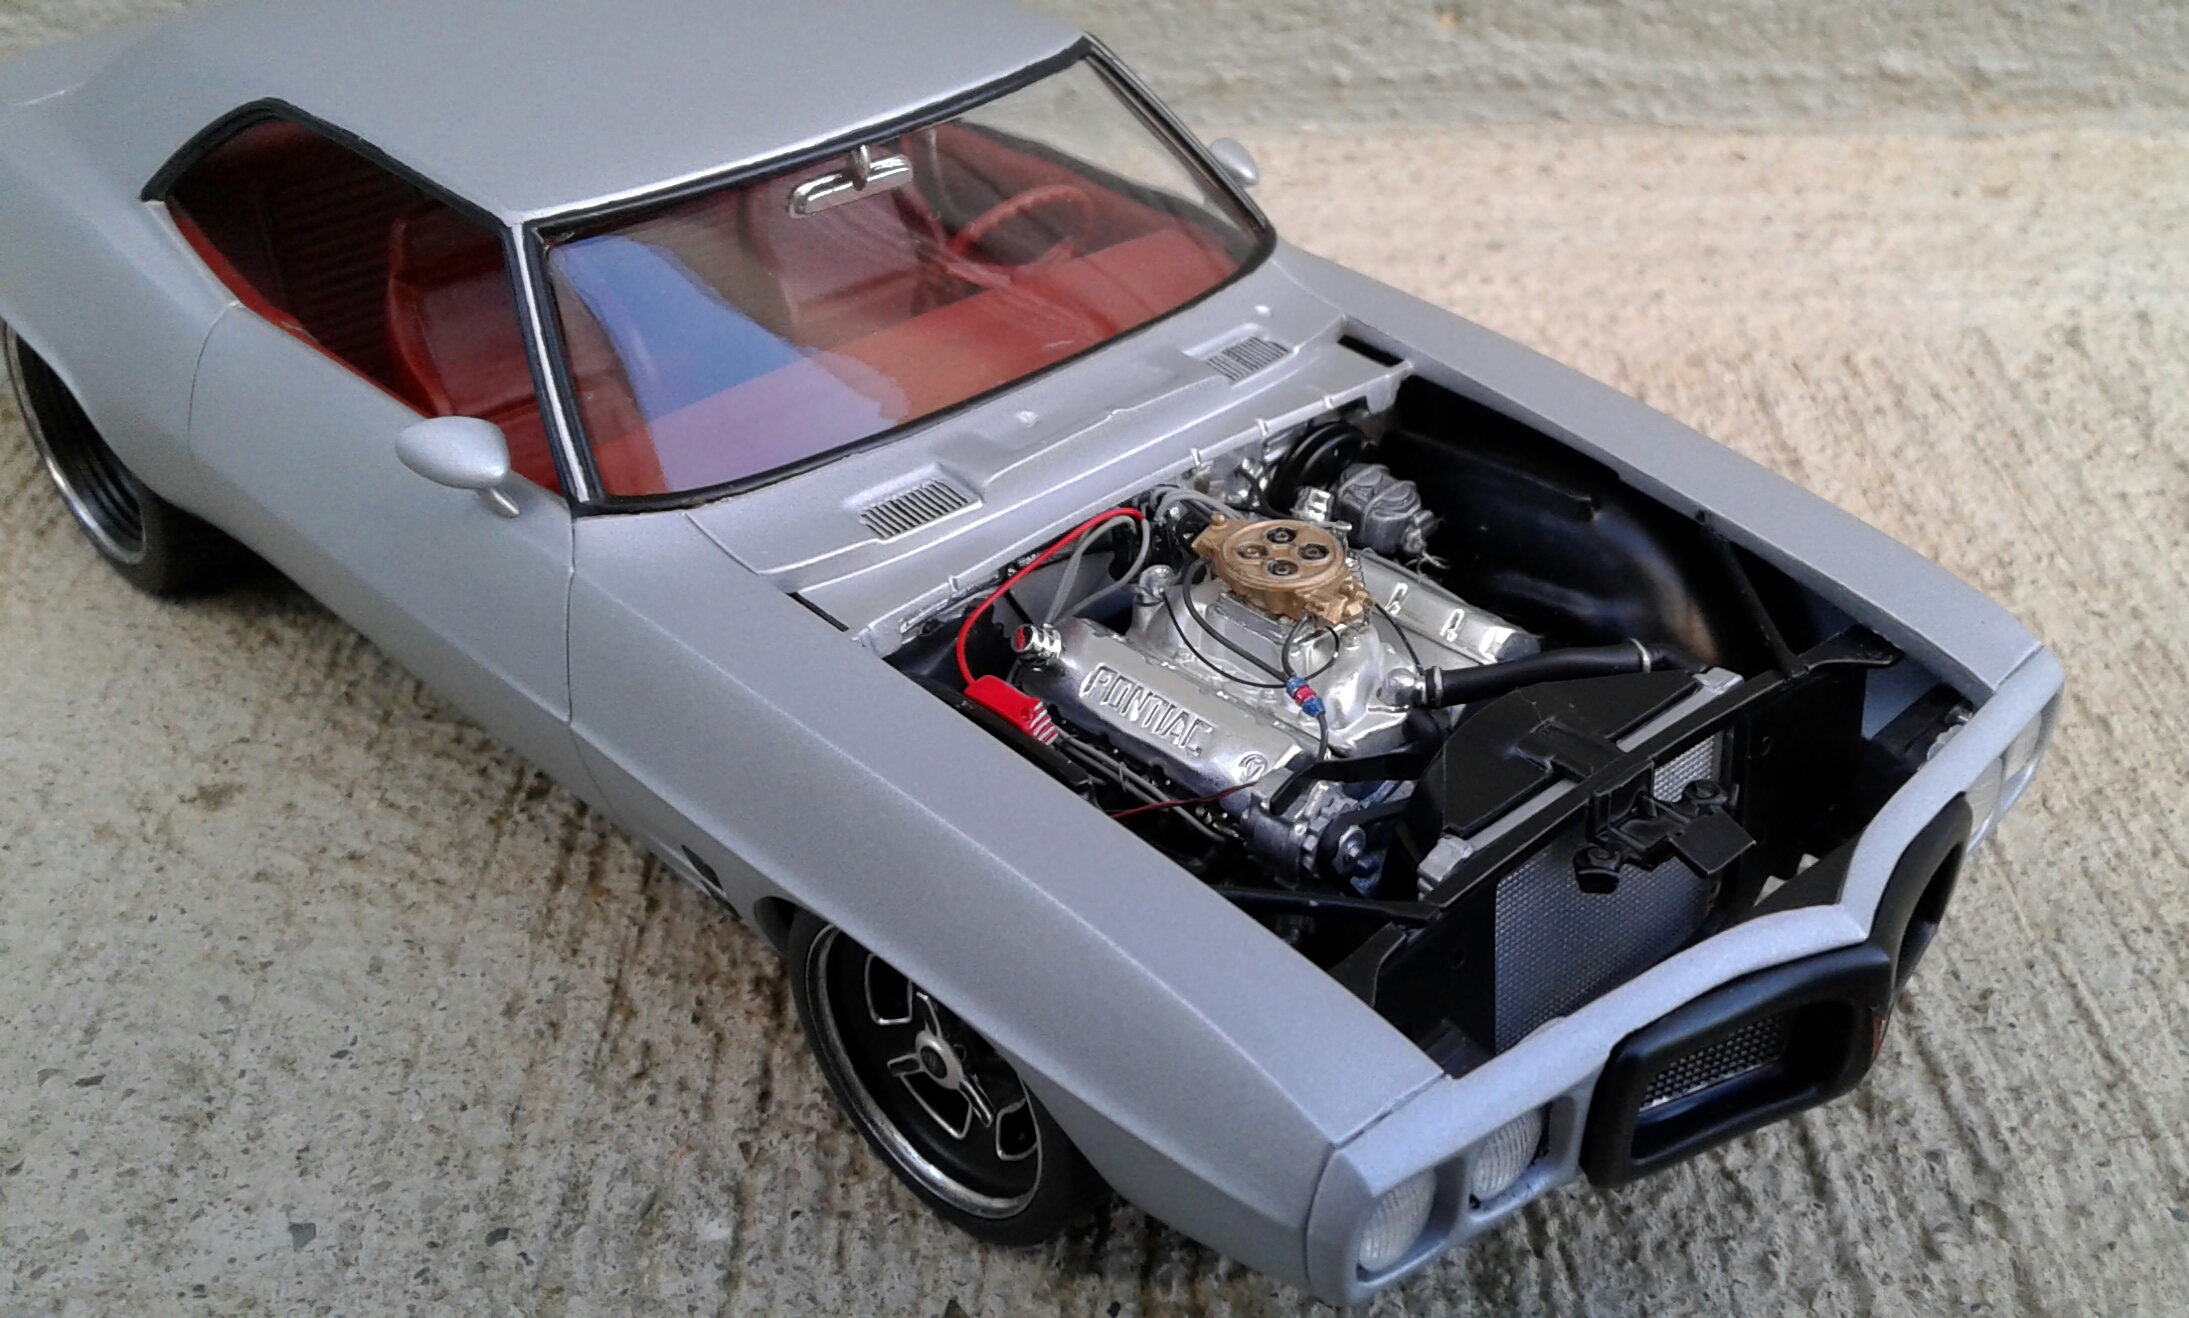
Thanx Carl! Thanx David! It was quite a bit of work. But, the result was worth the effort to me. Thanx Mike! The engine was the reason I decided to detail it. When I got it put together, I hated to not add details to it. Thanx Ed! I wish it coulda set just a little lower. But, the exhaust wouldn't allow it. Thanx! I've not seen many '69 Firebirds built. When I saw Tony's build a while back, I had to have one of my own. Thanx Tony! You build was the one that inspired this! Thanx David! Glad you learned a little something from this build. Just about every one is a learning experience for me. Thanx to everyone else who commented also! I appreciate it!
-
Issue with clear coat
Plowboy replied to plasticprime's topic in Model Building Questions and Answers
1. Throw away the Testors and get Tamiya TS-13 clear. 2. Buy the Tamiya polishing compounds (Course, Fine and Finish). You'll never need the polishing pads past 4000 grit again. I've done several paint jobs using 2000 grit and then the polishing compounds. 3. You don't have to do mist coats with Tamiya. Mist coats cause orange peel. It works for enamel. Not so much with lacquer as it dries quickly. You would literally have to try to make it run in my experience. I spray three wet coats of paint or two if the second covers well and three wet coats of clear. If I get good paint coverage with two coats, I'll spray two coats of clear the next day and one the next. If not, I'll spray a coat of paint and a coat of clear the next day (ten minutes between coats), then two coats of clear the next. Let it dry 2-3 days, sand smooth with 2000 and 4000 and polish with the compounds. You won't believe how easy the Tamiya compounds makes getting a slick paint job! -
I fill the panel line in with a strip of styrene the thickness of the line, sand smooth and rescribe. I have fixed small areas by filling with Tamiya Gray Putty and rescribe with a photo etch saw blade.
-
That looks so much better than the Fireball 500 ever thought about looking! It reminds me of the model Ron Savoi built by putting a '67 GTO roof on the Monkeesmobile. Your wheels are either from a Viper or the Duster Street Machine. Same wheel either way I think.
-
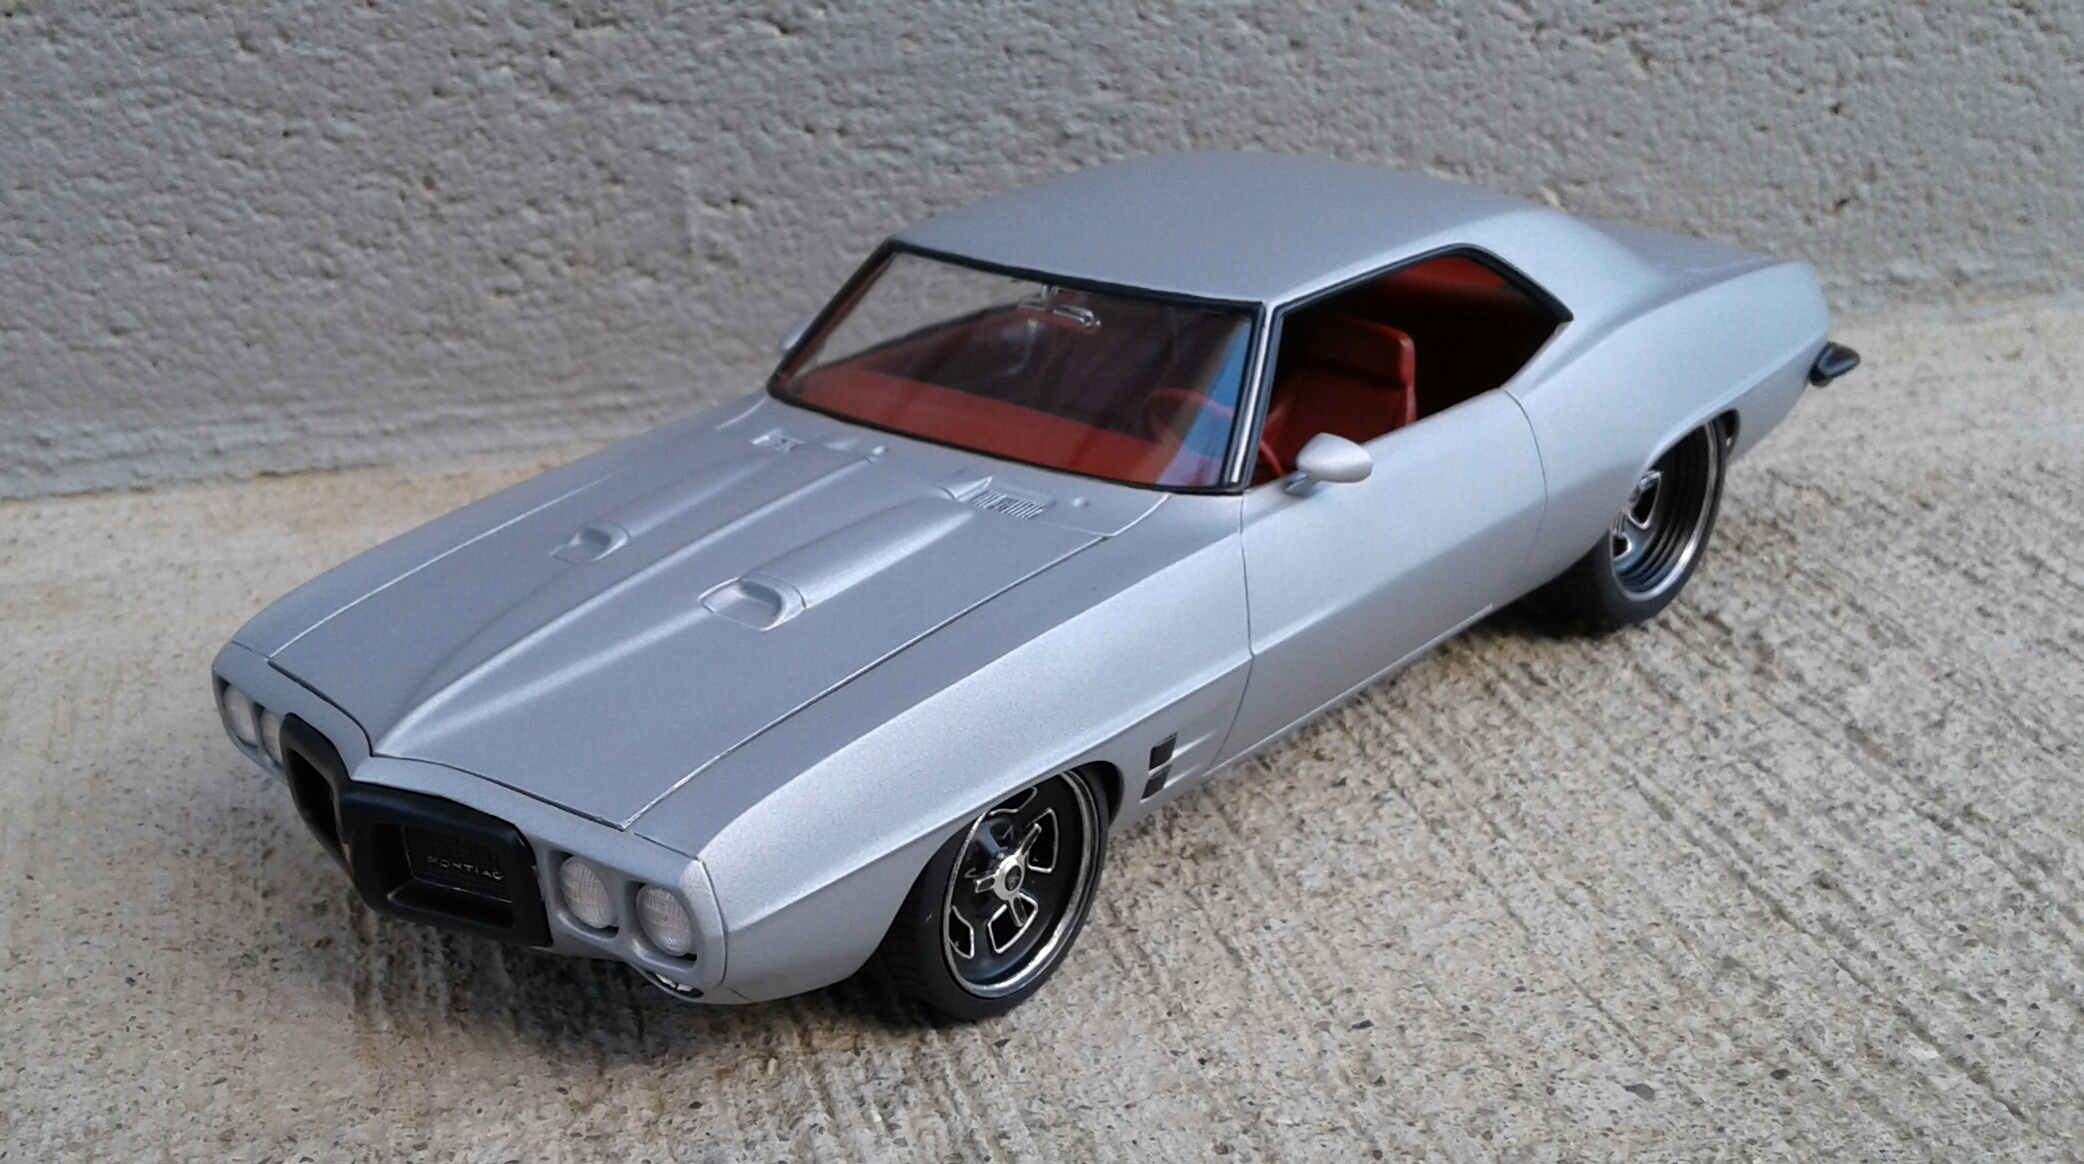
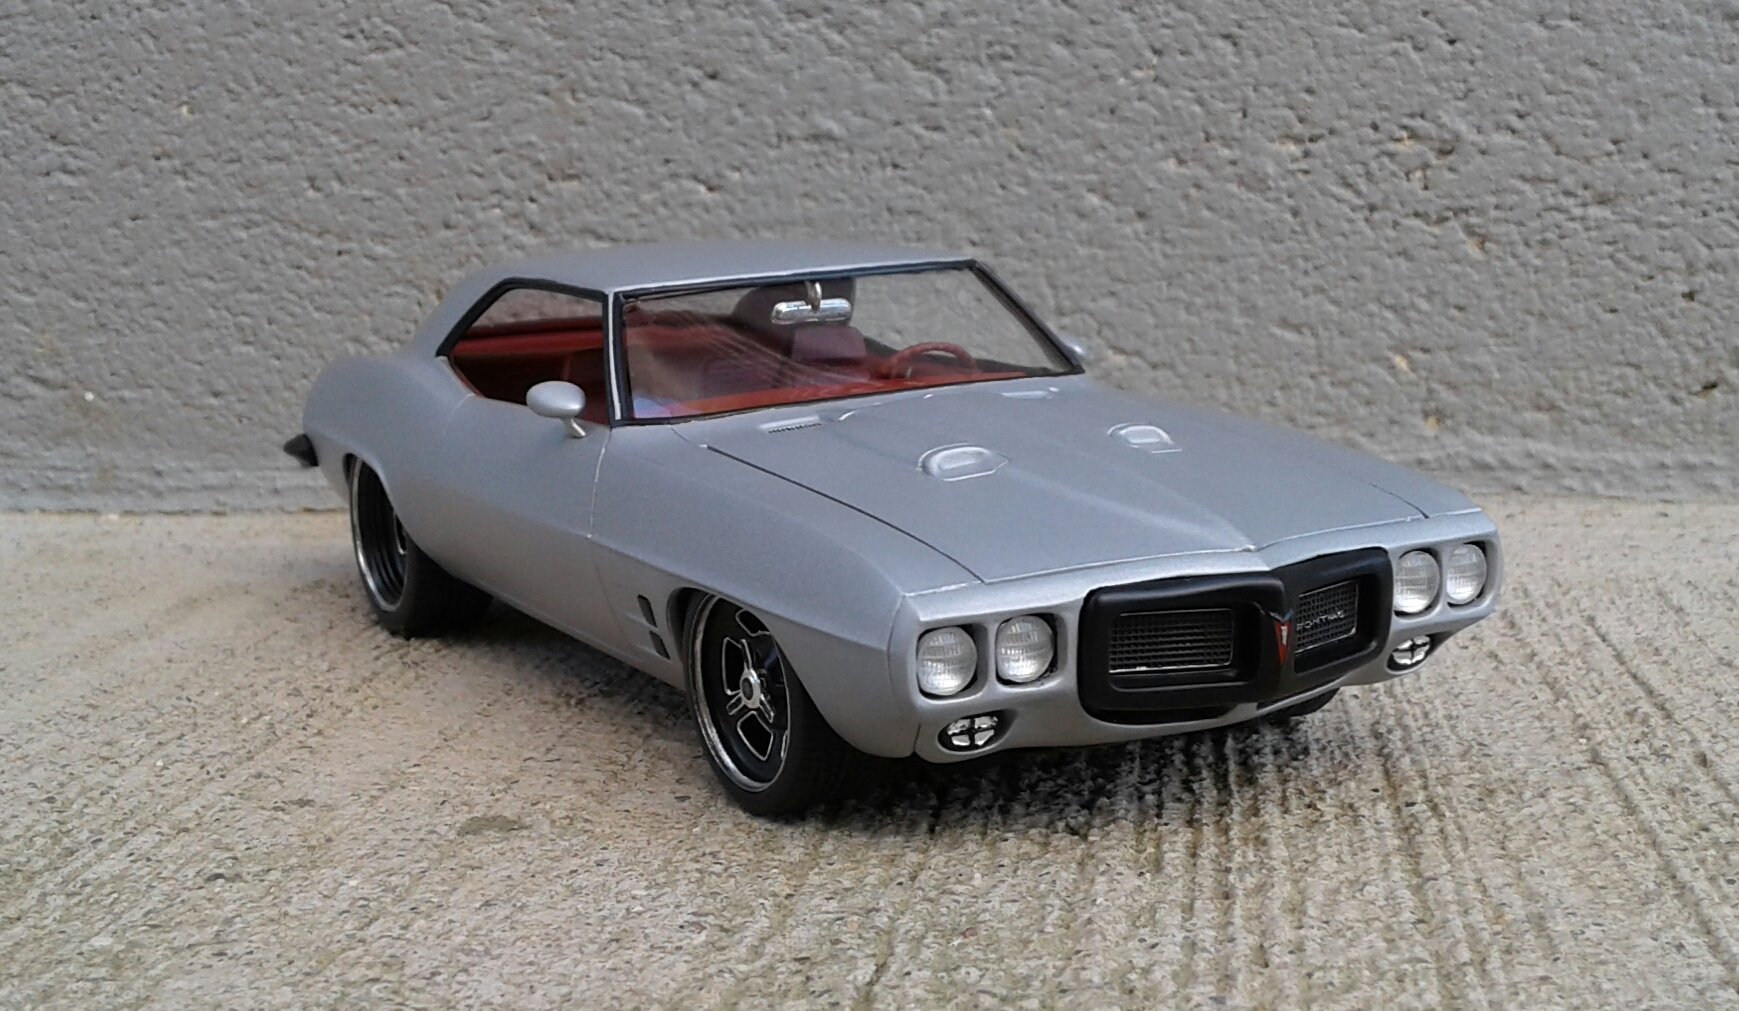
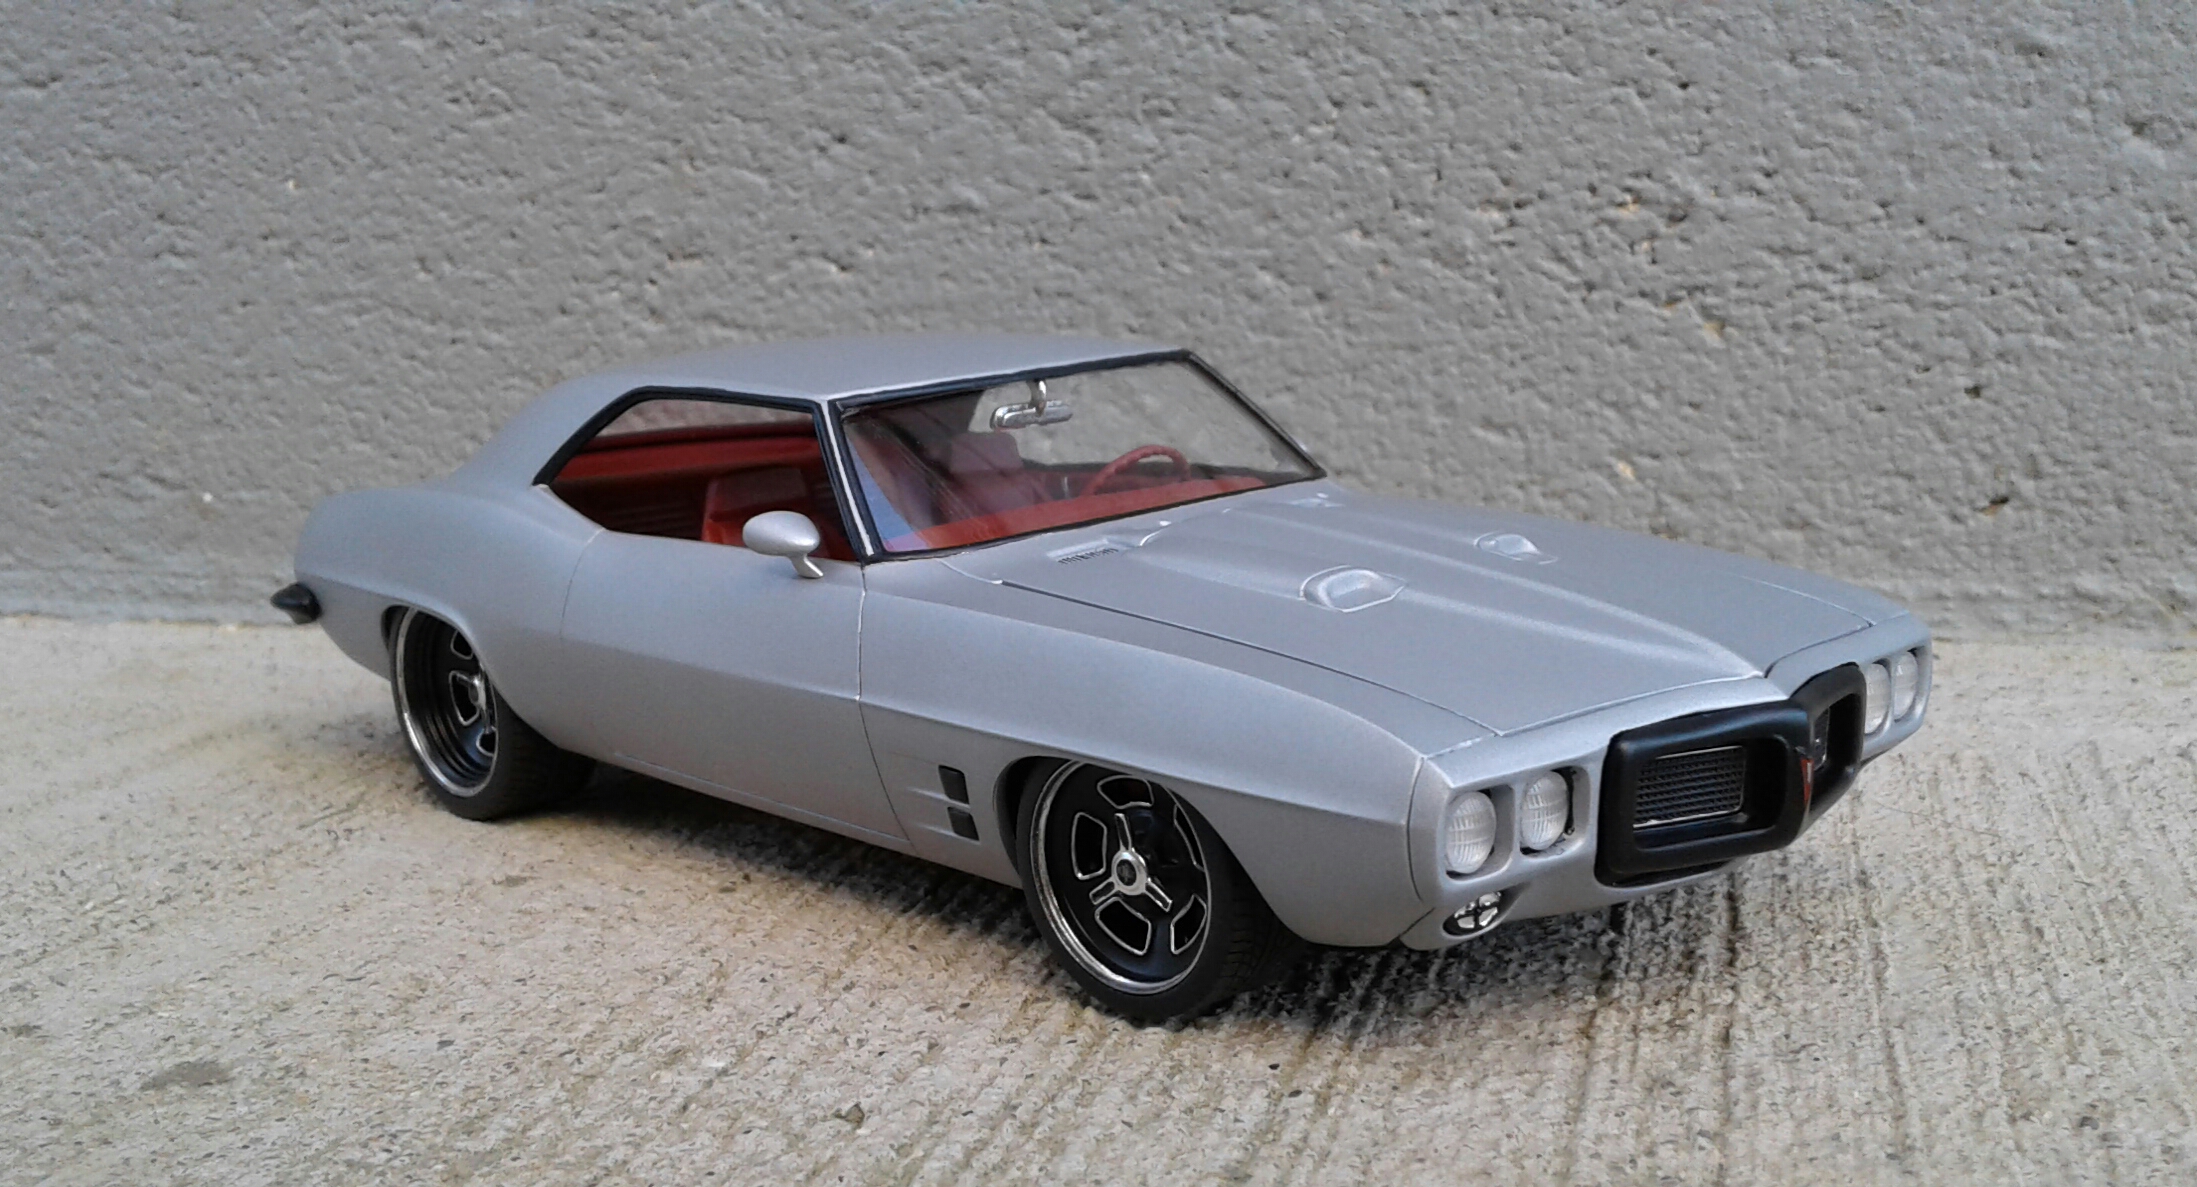
Thanx Kurt! I'm sure you've seen these wheels before. Just not painted. They've been around for close to 15 years. The horns/hood latch are from the Camaro kit. The side markers on this particular kit were barely there. The fronts were basically gone.
-
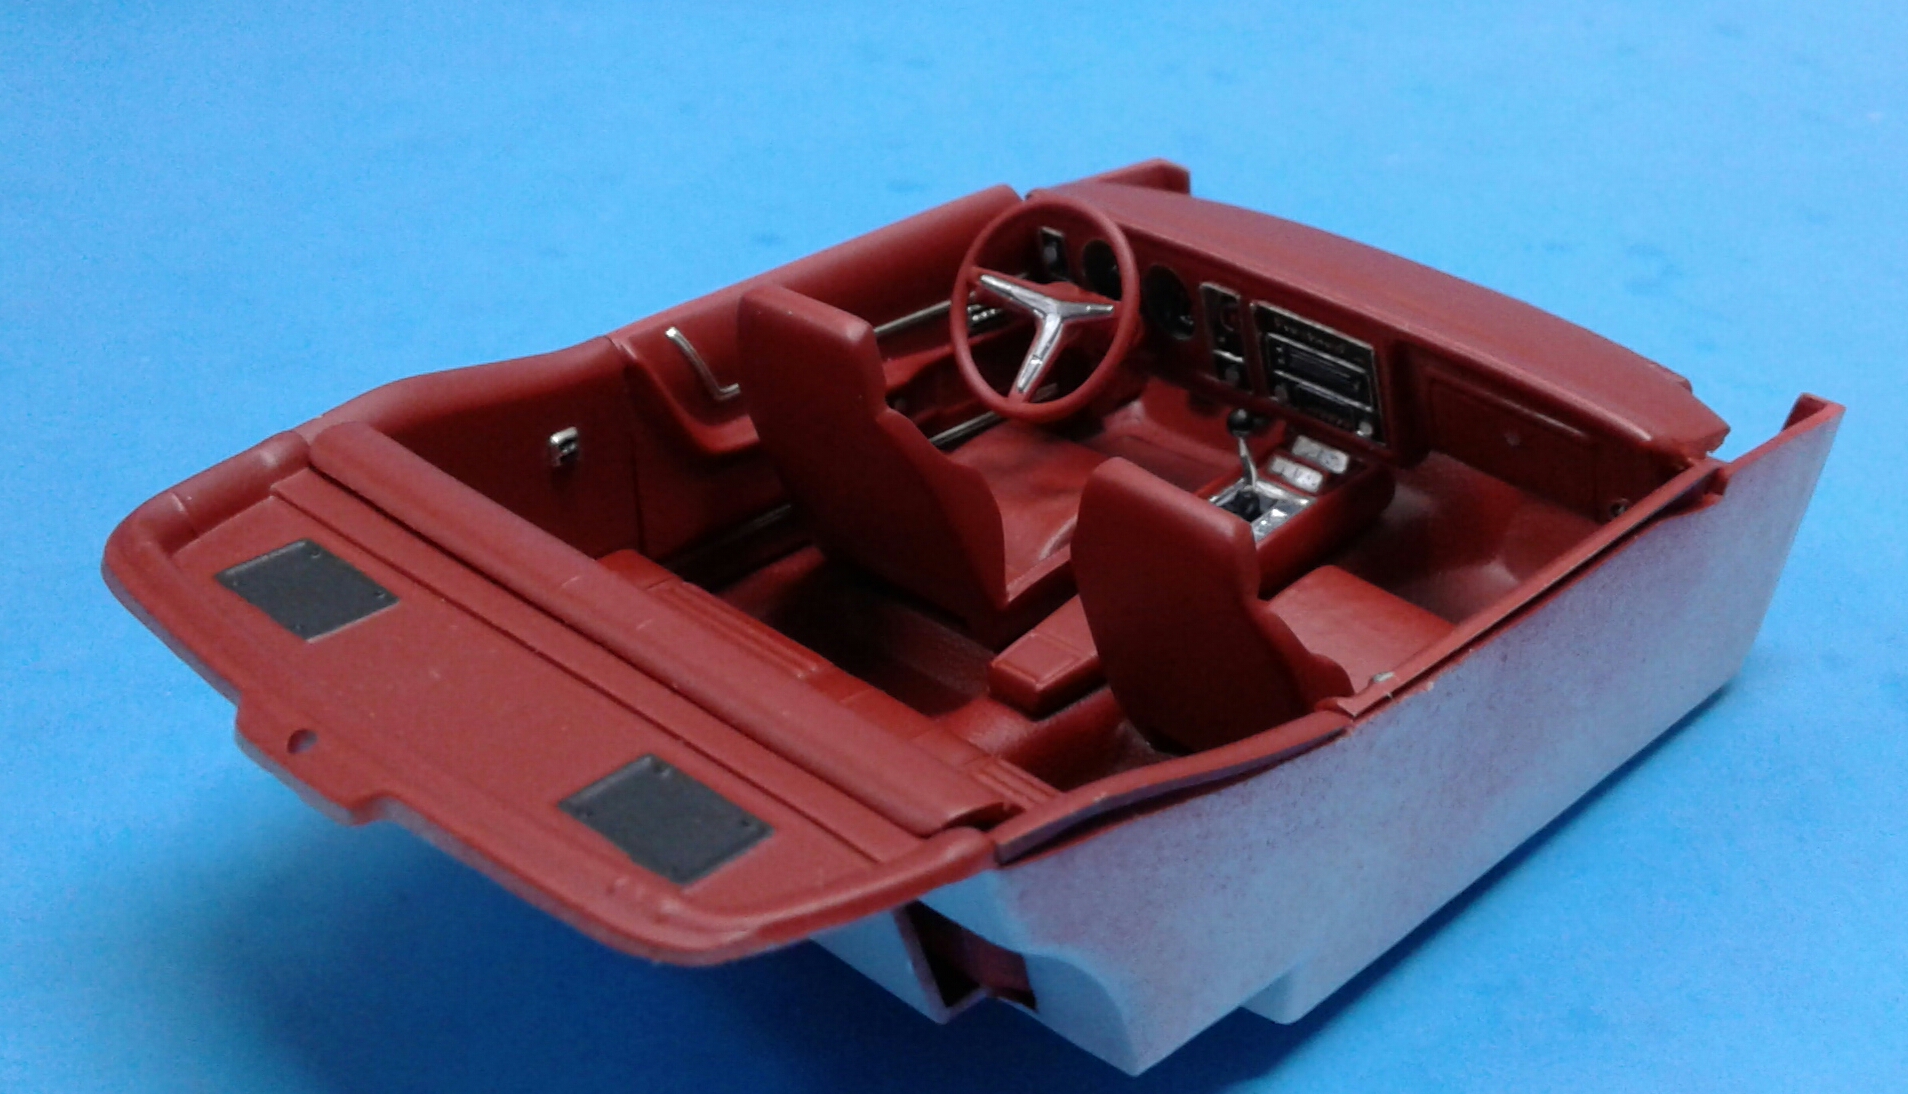
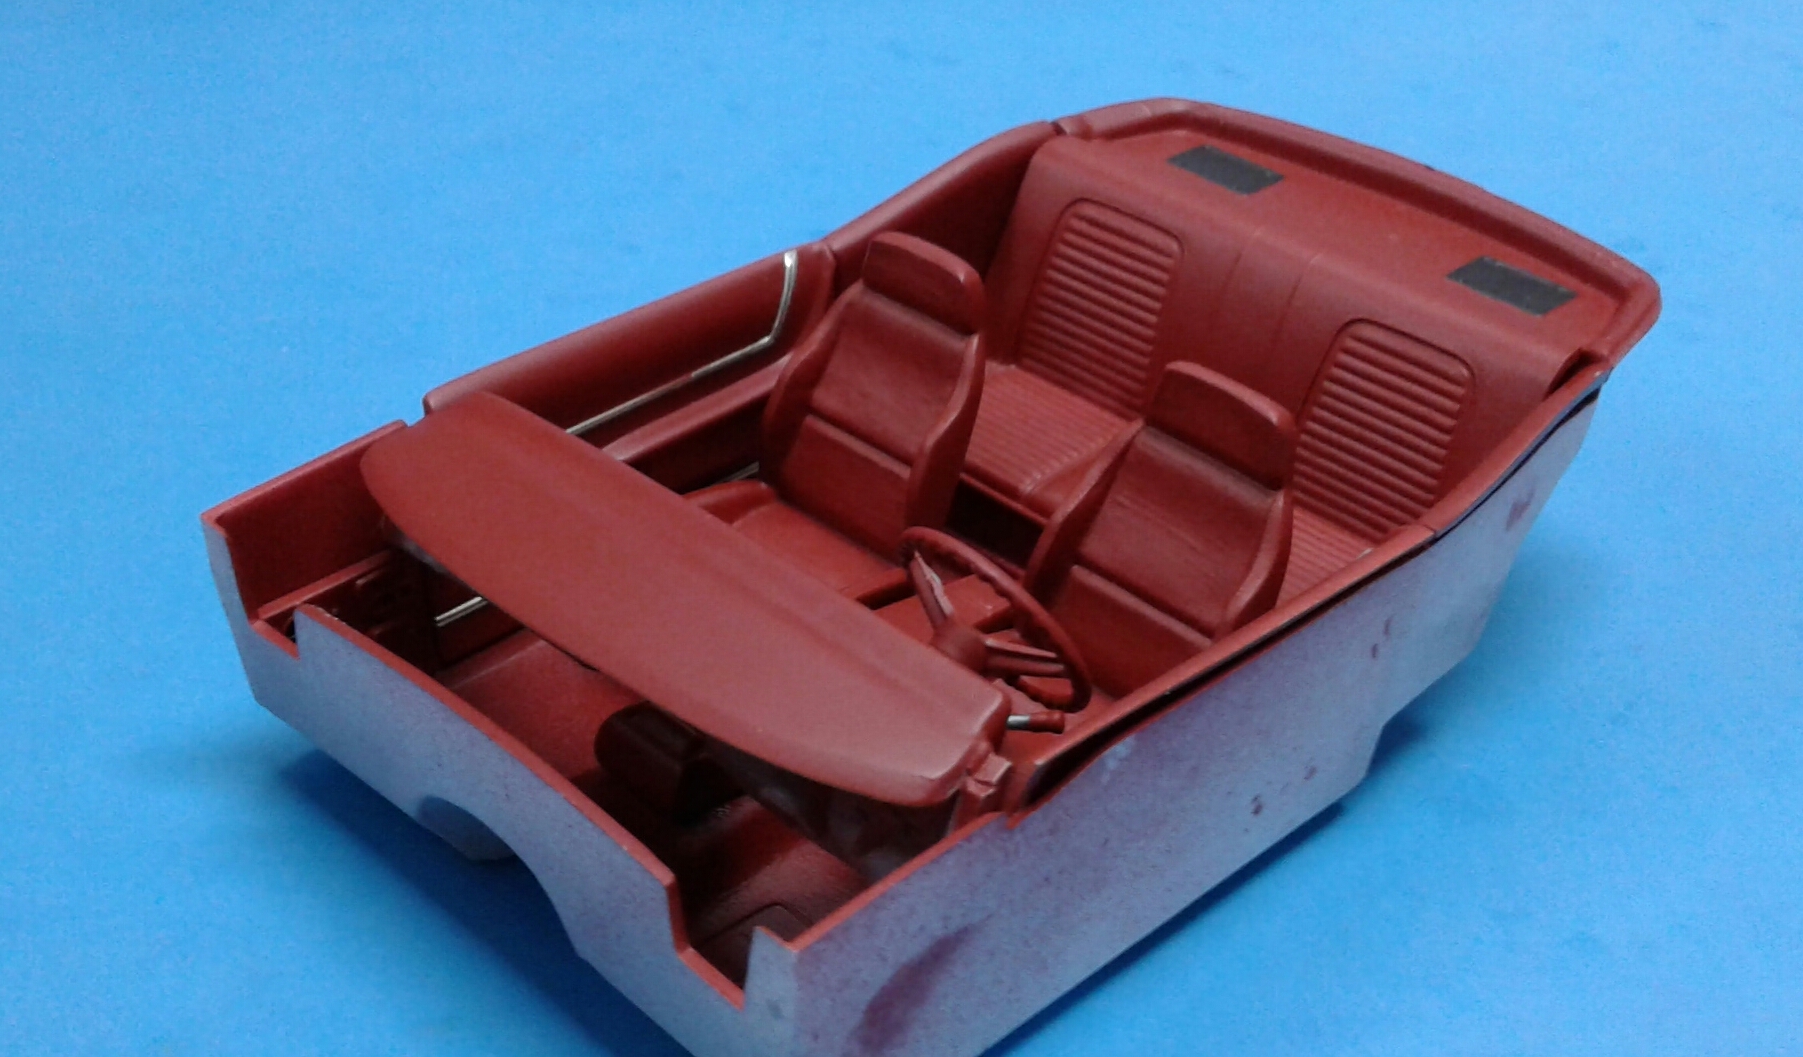
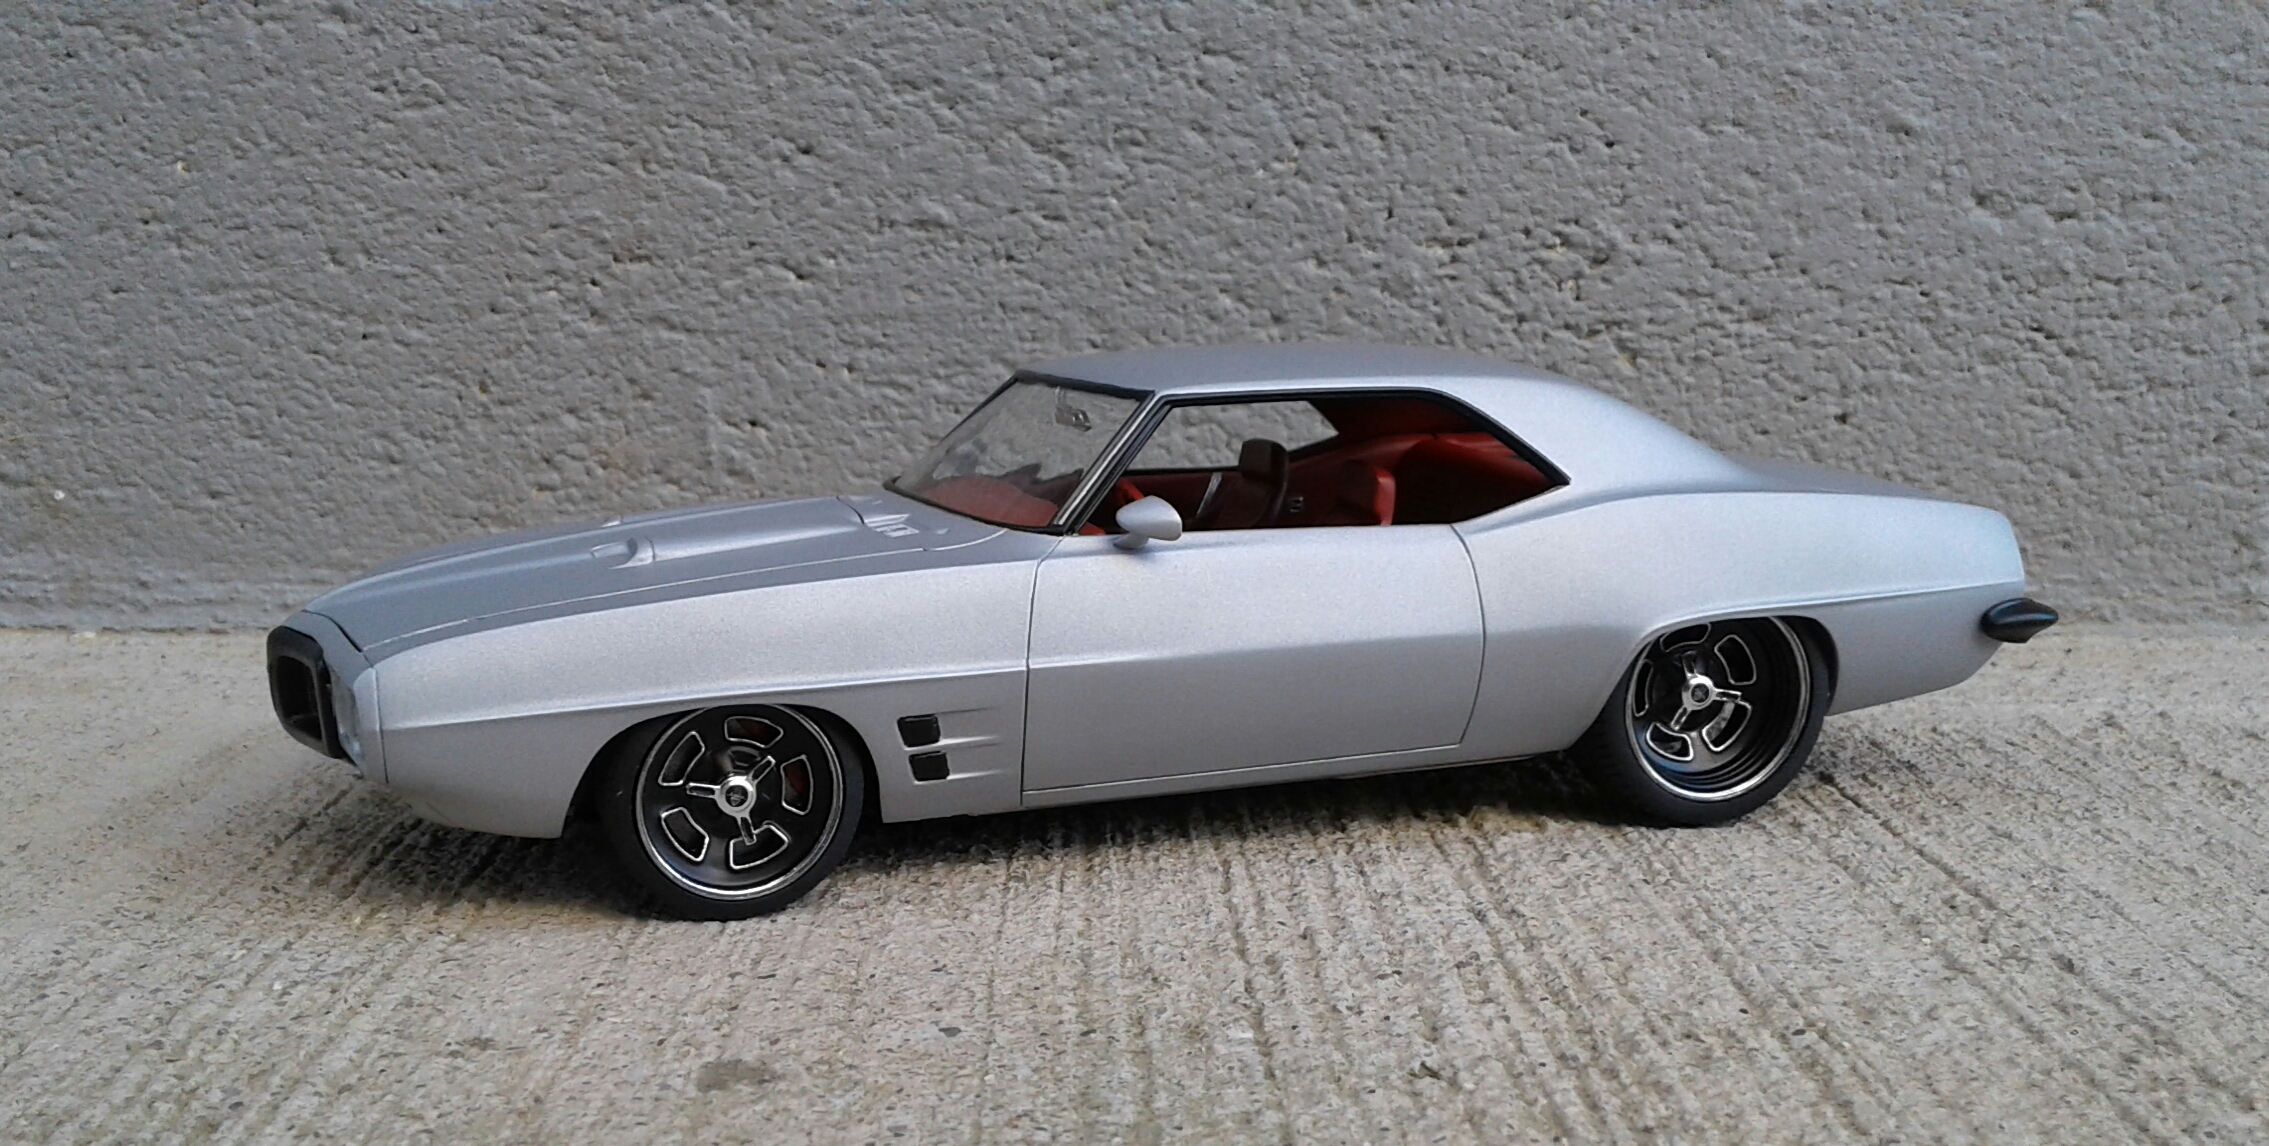
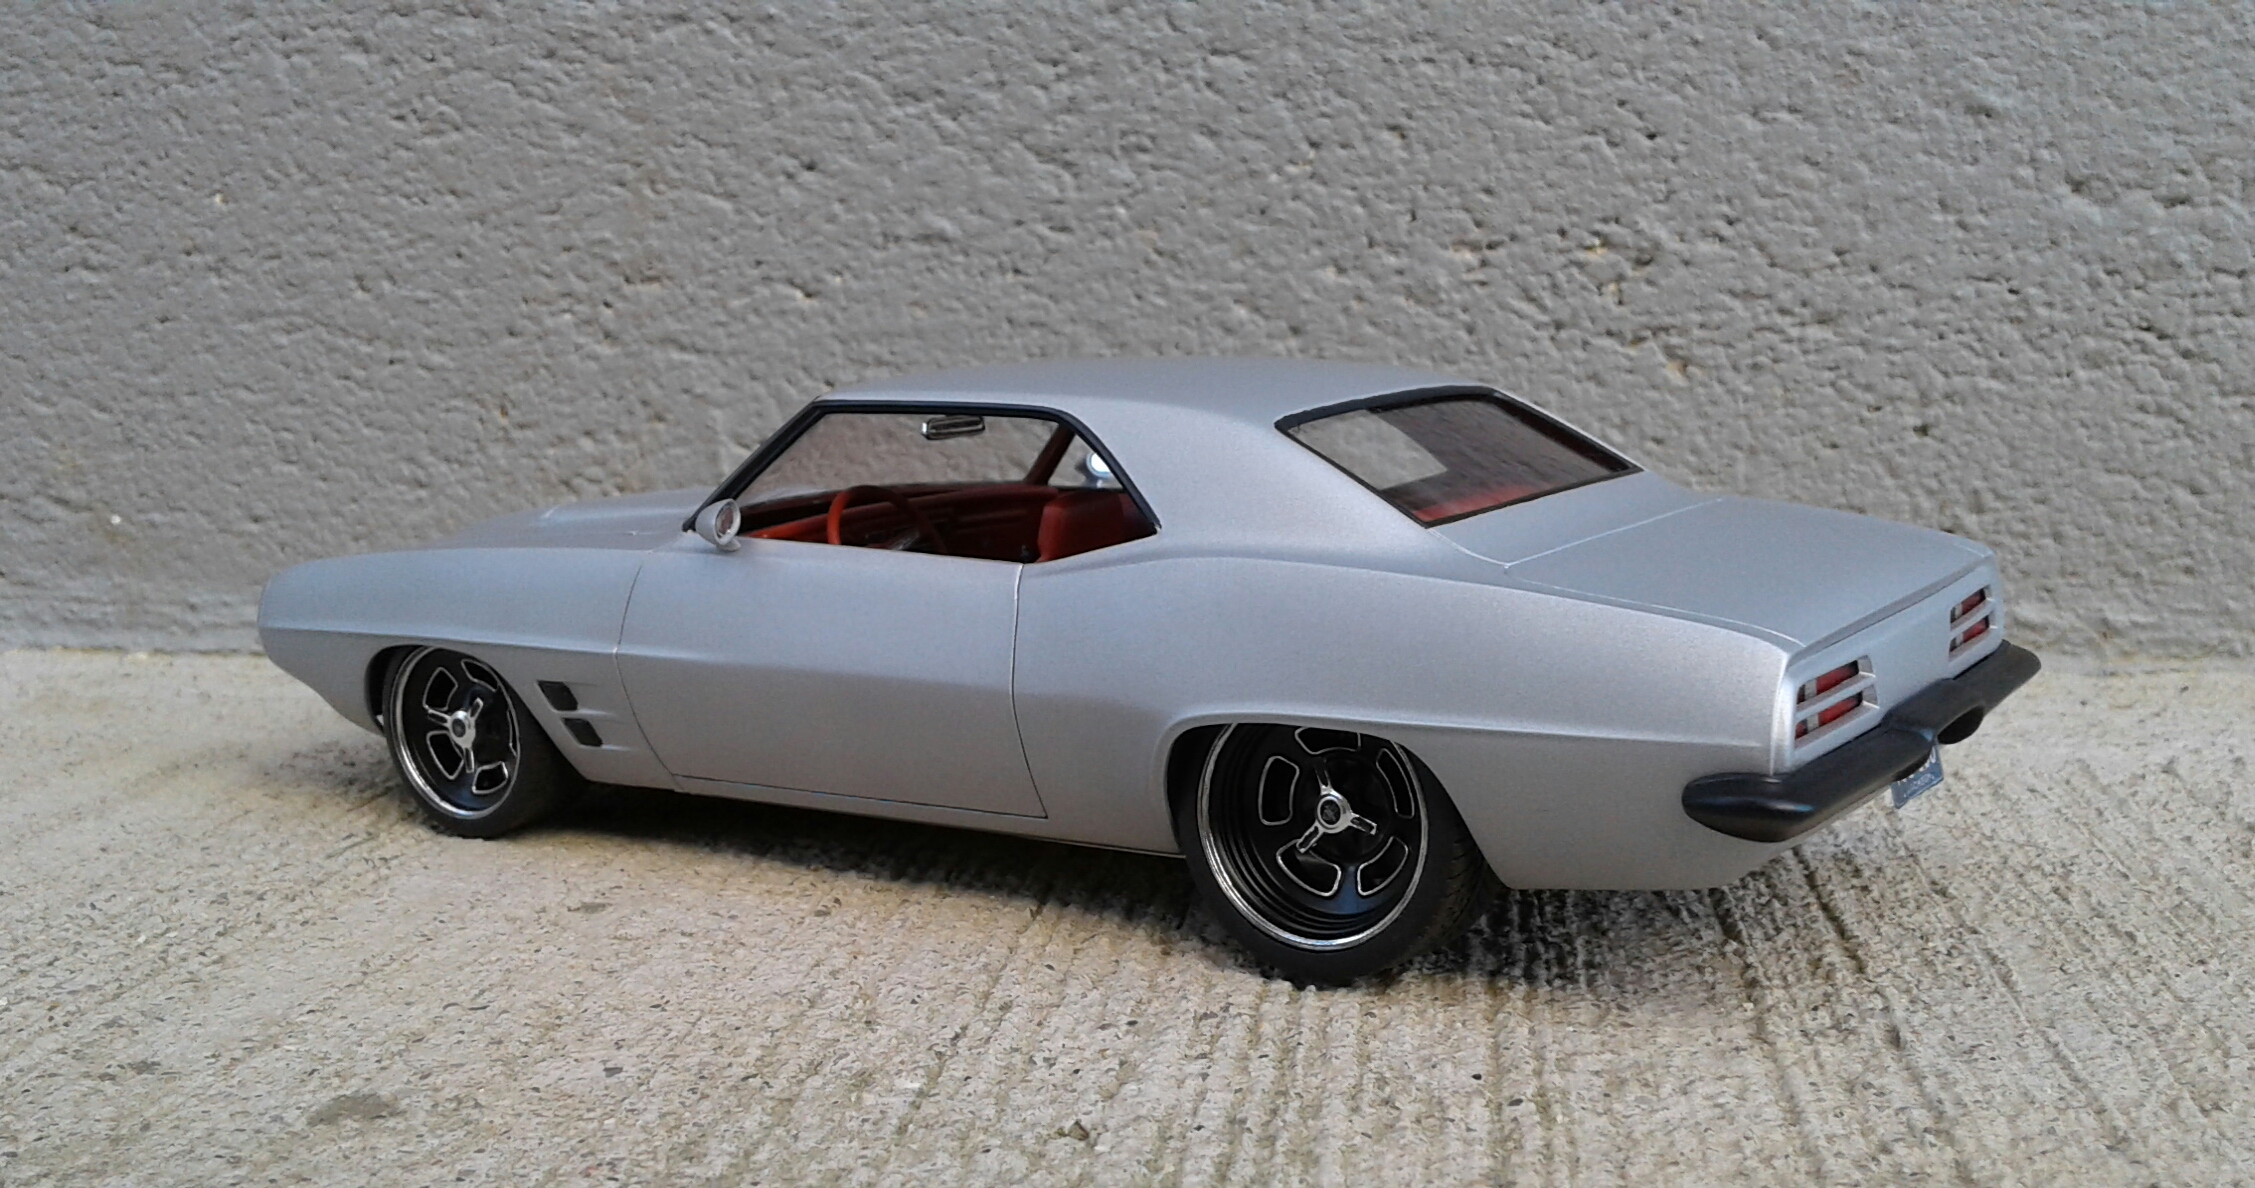
Just finished this one up. It's a kitbash of an old MPC/AMT '69 Firebird and a Revell '69 Camaro. This model was supposed to be just "for fun". The plan was to fix the body as best as I could, use the chassis and big block from a Revell '69 Camaro with no details added. But, that plan went south and I ended up going down the proverbial rabbit hole. I first worked on the body to see if my idea to make it look better would work. I cut the roof, cowl, top of the fenders,door and quarters along with a section of the trunk from the Camaro and grafted it to the Firebird body. With that done, I gave the chassis a mini tub and narrowed the rearend to make room for the Pegasus 23" Hellas. I didn’t like the shallow interior. So, I hodge podged a new one using the tub, console/shifter, steering column, rear seat and panels from the Camaro coupe. A Camaro convertible donated the door panels which were modified. An MPC '85 Corvette donated the bucket seats and the Firebird donated the dash and steering wheel. Paint is Tamiya Dull Red. The BBC engine, headers and transmission are from the Camaro. The Pontiac heads, valve covers and carburetor are from a Revell '55 Chevy P/S. The intake is from an AMT '57 Corvette street machine. The block is painted Dupli Color Avignon Blue which looks close to Pontiac Blue. The rest is various aluminum tones. The body is painted with Tamiya Mica Silver with a coat of Tamiya Flat Clear. The black is Tamiya Satin Black. I'm really happy with how it turned out. It has a really sinister look that isn't quite captured in the photos. I had some issues getting it all together. But, now that it's done, it was worth the trip down the rabbit hole. Thanx for checking it out!
-
No, I don't. I can dig it out and shoot a couple if you want.
-
I have one of these in the project pile that I used the chassis and underhood detail from a '66 Fairlane. But, that was as far as I got with it.
-
AMT 1960 Chevy pickup
Plowboy replied to cobraman's topic in WIP: Model Trucks: Pickups, Vans, SUVs, Light Commercial
Still looks good Ray! Looks like you sprayed the Pearl White over gray primer? Tamiya Pearl White needs a white base coat to go over. I recently learned the hard way that it's a very finicky color to paint. You could do a coat of white primer and Pearl White to brighten it up if you're not happy with it. Just make sure to attach the hood and tailgate to the body so that it will all match up. -
I have a few...