Plowboy
-
Posts
3,434 -
Joined
-
Last visited
Content Type
Profiles
Forums
Events
Gallery
Everything posted by Plowboy
-
Problem with Tamiya TS-13 Clear
Plowboy replied to David G.'s topic in Model Building Questions and Answers
I'm thinking you may have sprayed too much at once. Whether I'm spraying paint or clear, I never spray more than two coats per day. With clear, I spray two coats one day. Next day, sand with 2000 and spray one or two more coats. Allow it to cure, sand and polish. Most times, the way my paint jobs work out is I spray two coats of paint, dry a day, sand with 2000, spray a coat of paint and a coat of clear, dry a day, sand with 2000 and spray two coats of clear. Not always. But, most times. -
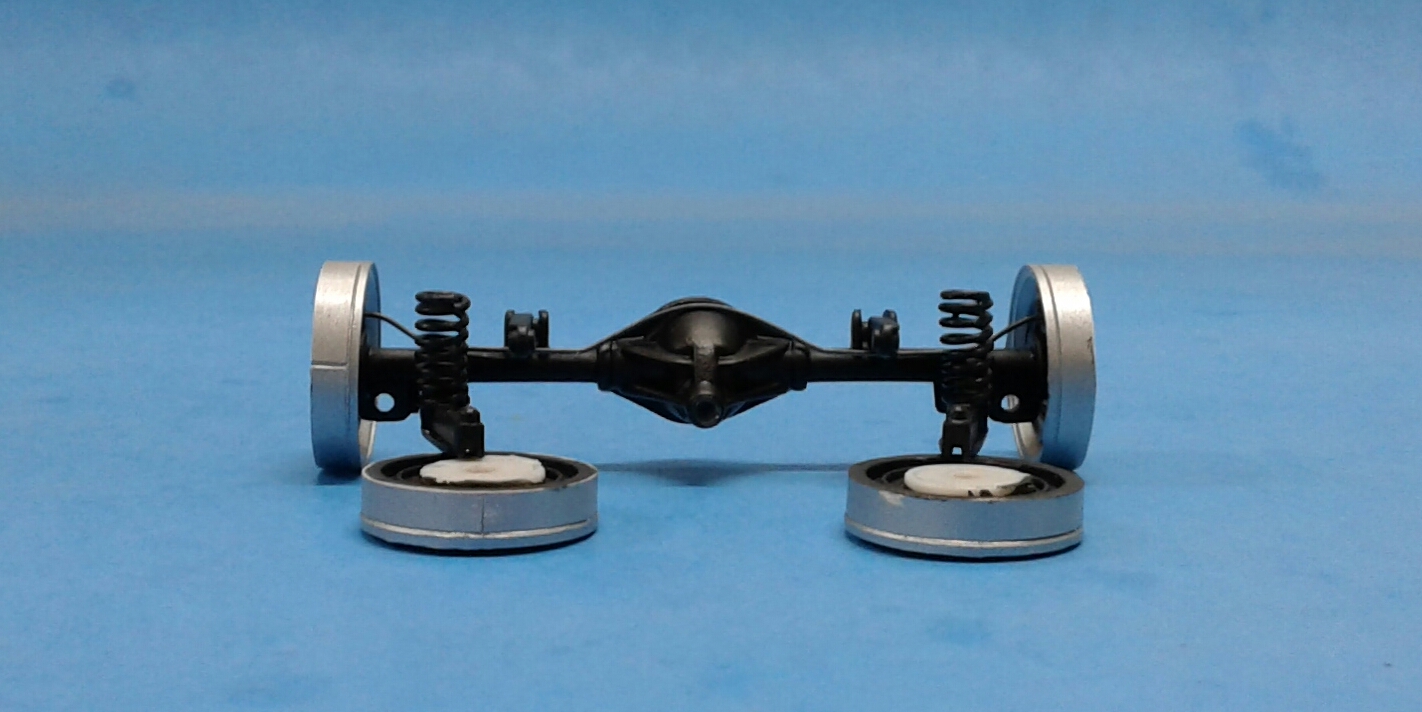
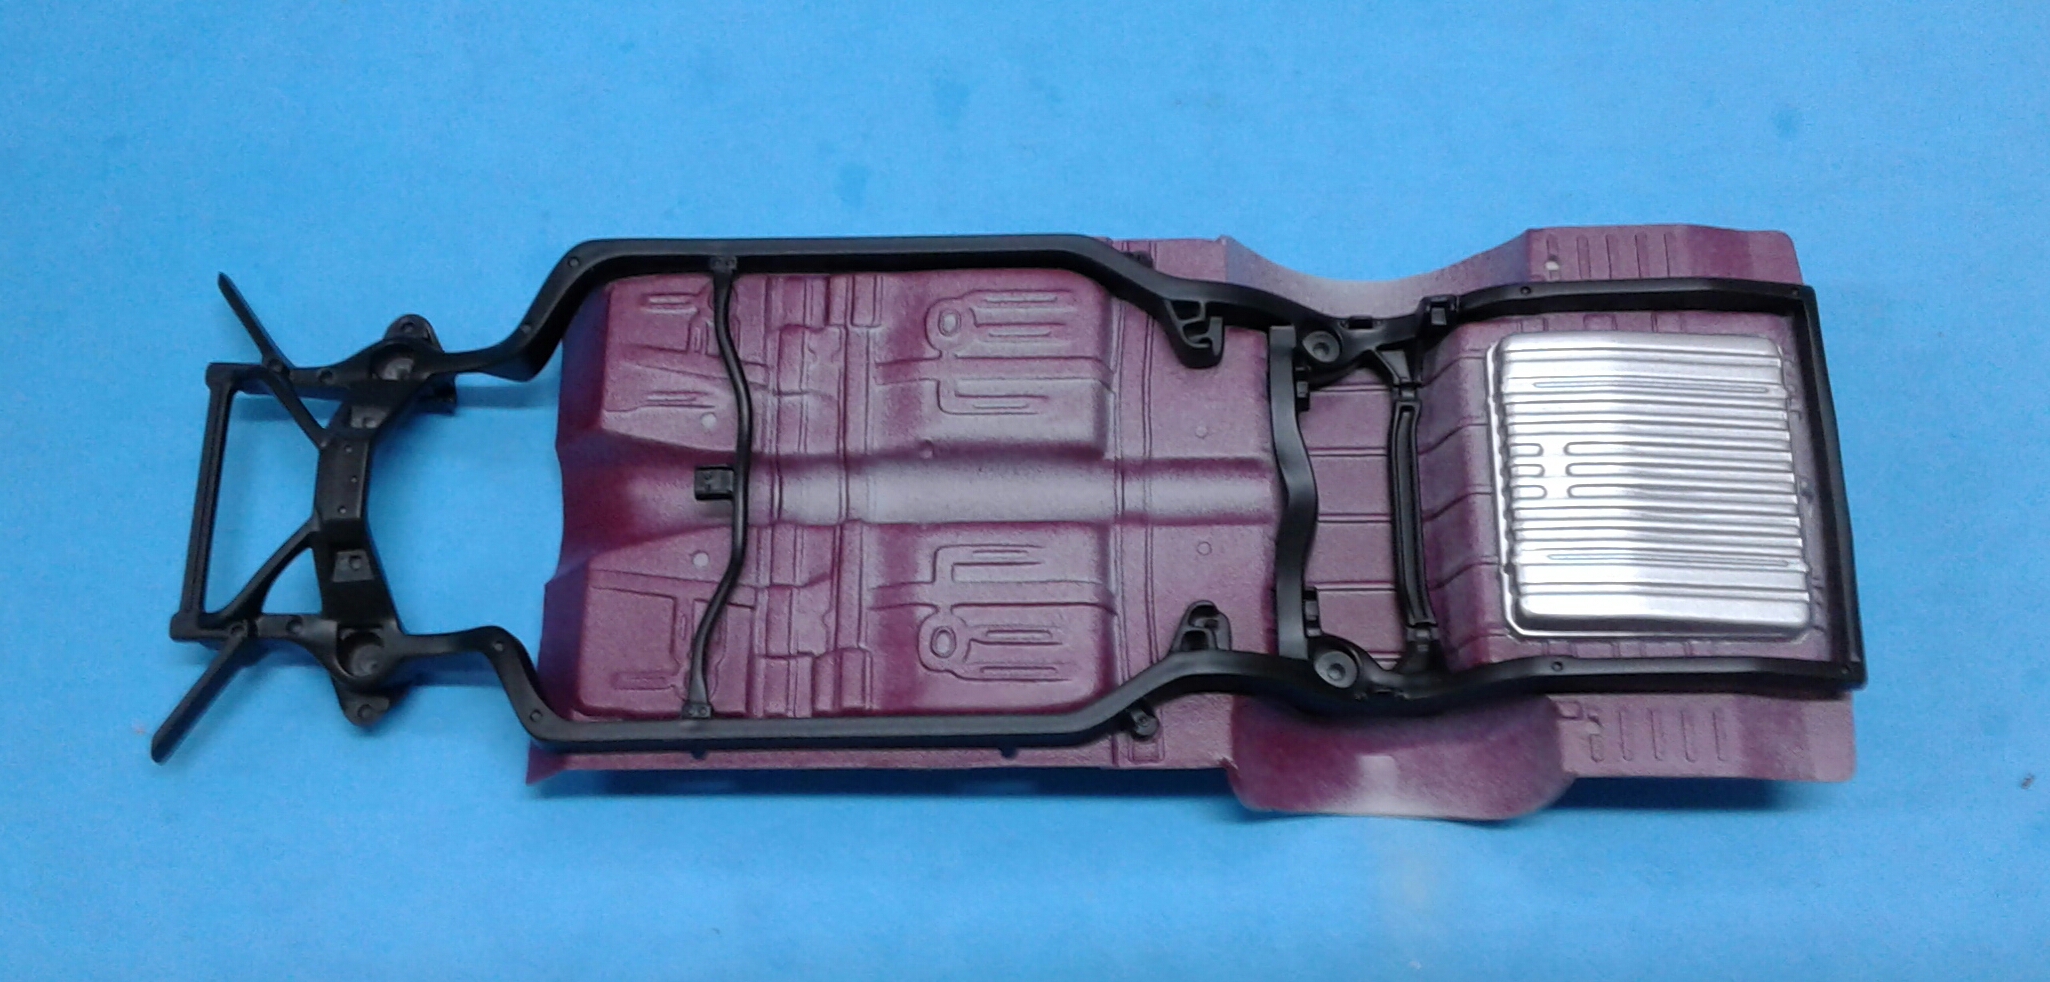
Thanx guys! I really like this color also! I have a couple of other models painted with it. A '29 Ford Roadster and a '39 Ford Coupe. I've started doing some work on the chassis. I've had this idea for years. But, I've never tried it to see if it would work. Kit coil springs aren't very realistic looking no matter how well they're detailed. So, I decided to try making my own coil springs. It took a little testing to find the right sized wire and screw to wrap the wire around to get the right outside diameter. But, I finally got it. For the front, I cut down the kit coil springs to simulate the shocks and insure that the front suspension will assemble easily. Hopefully, I'll get a chance to get some of it assembled soon. I'm thinking that I should get the frame glued to the floorpan first. If I do, I'll have to do the carpet and splatter paint first. Then, I'll be ready for the suspension and exhaust.

-
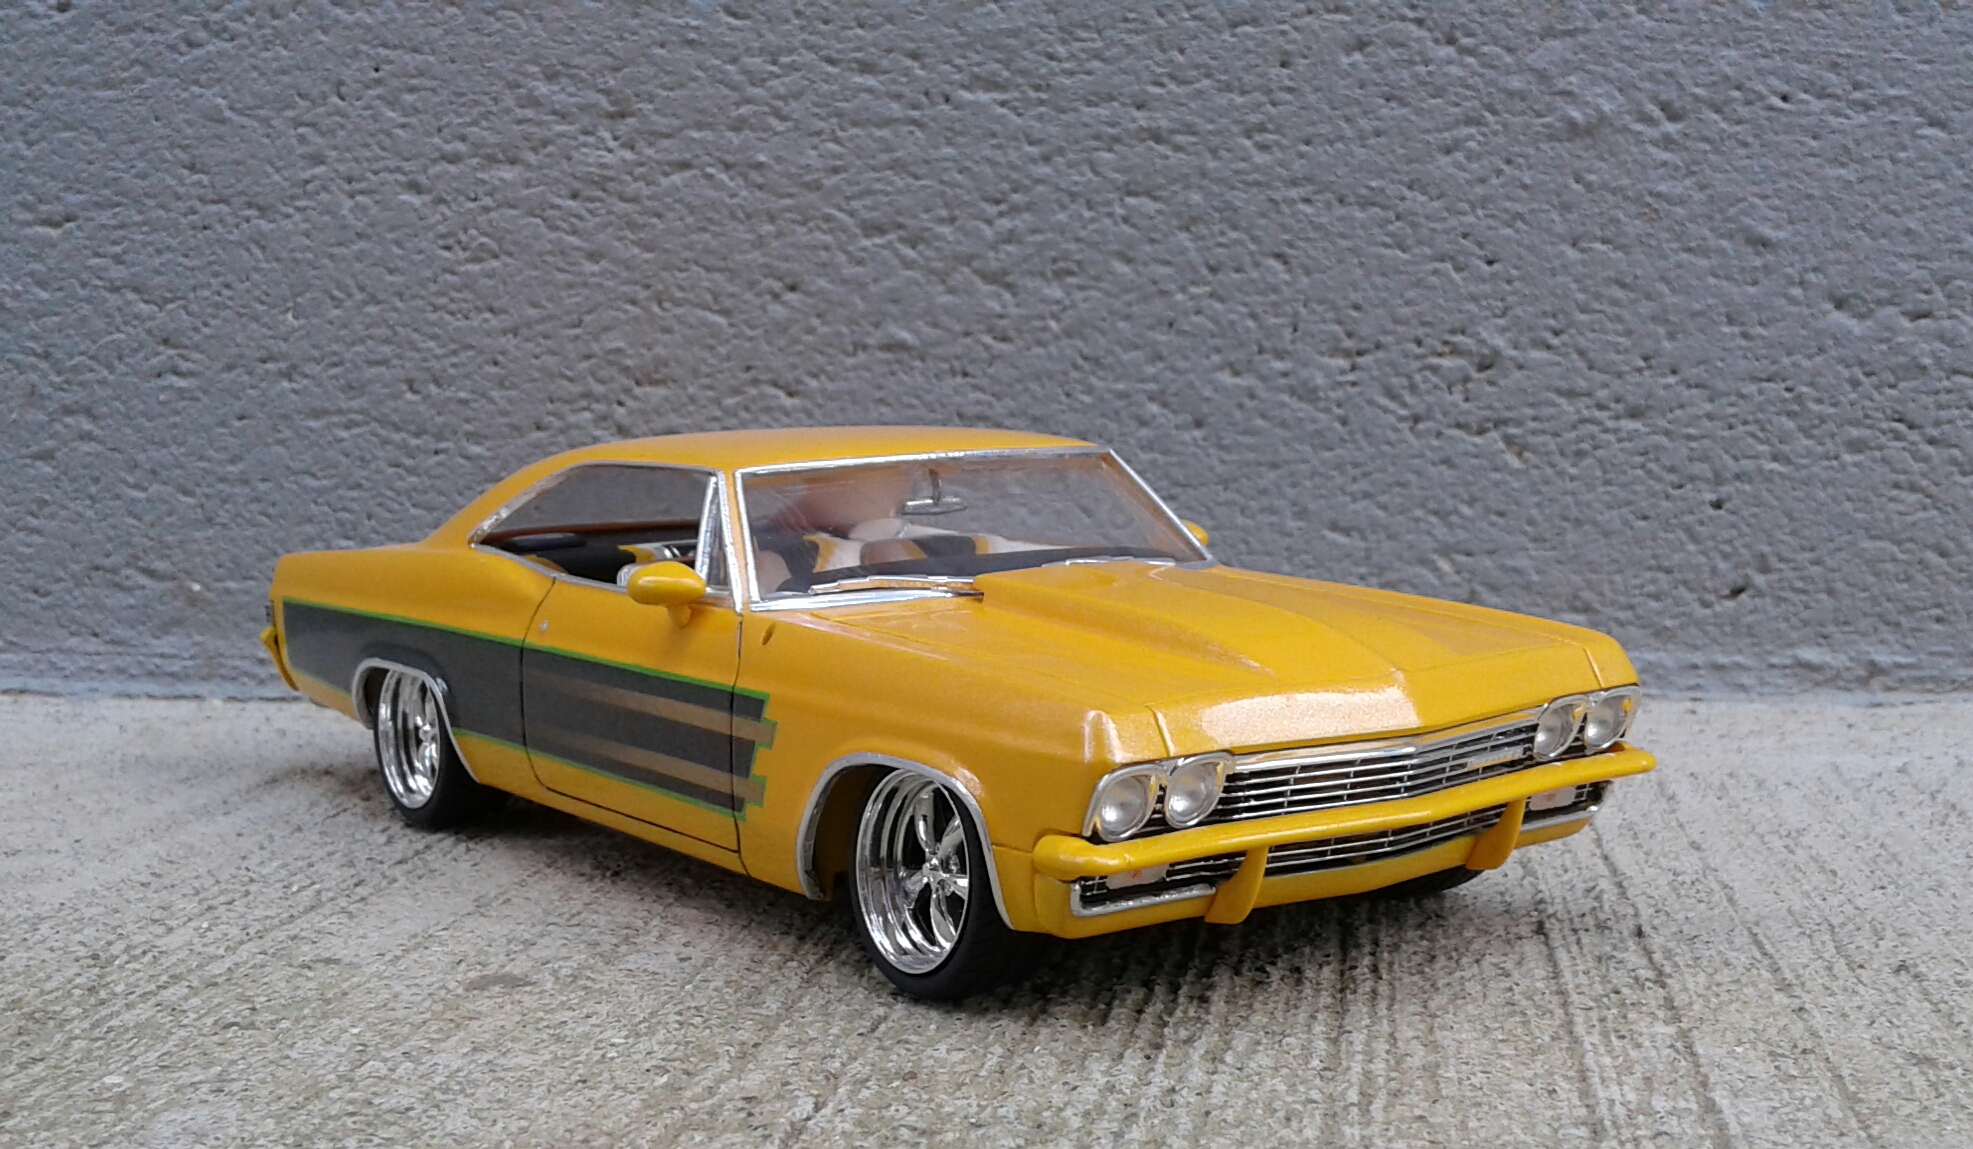
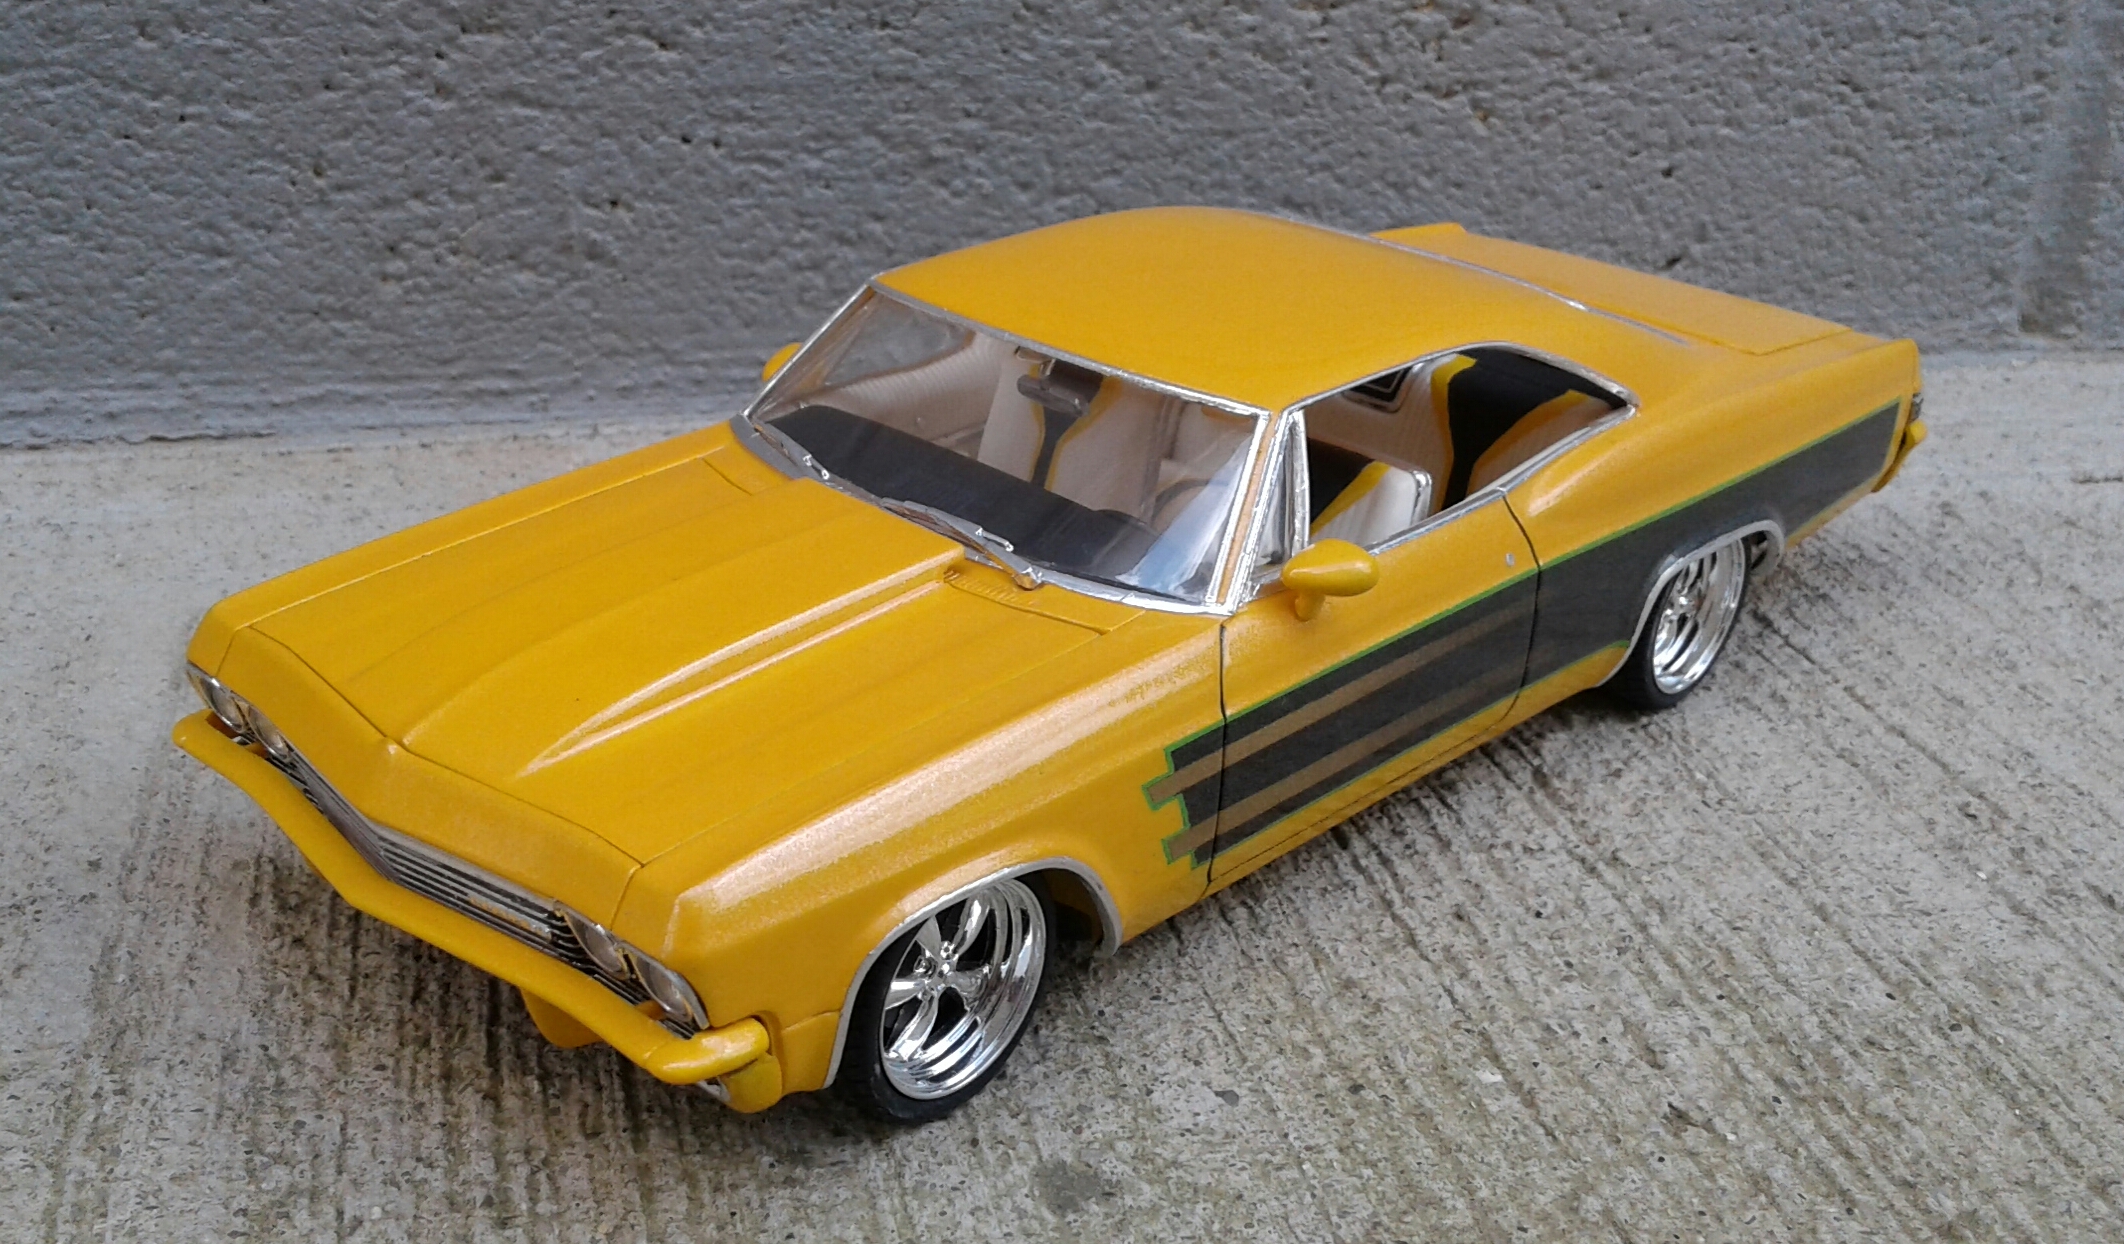
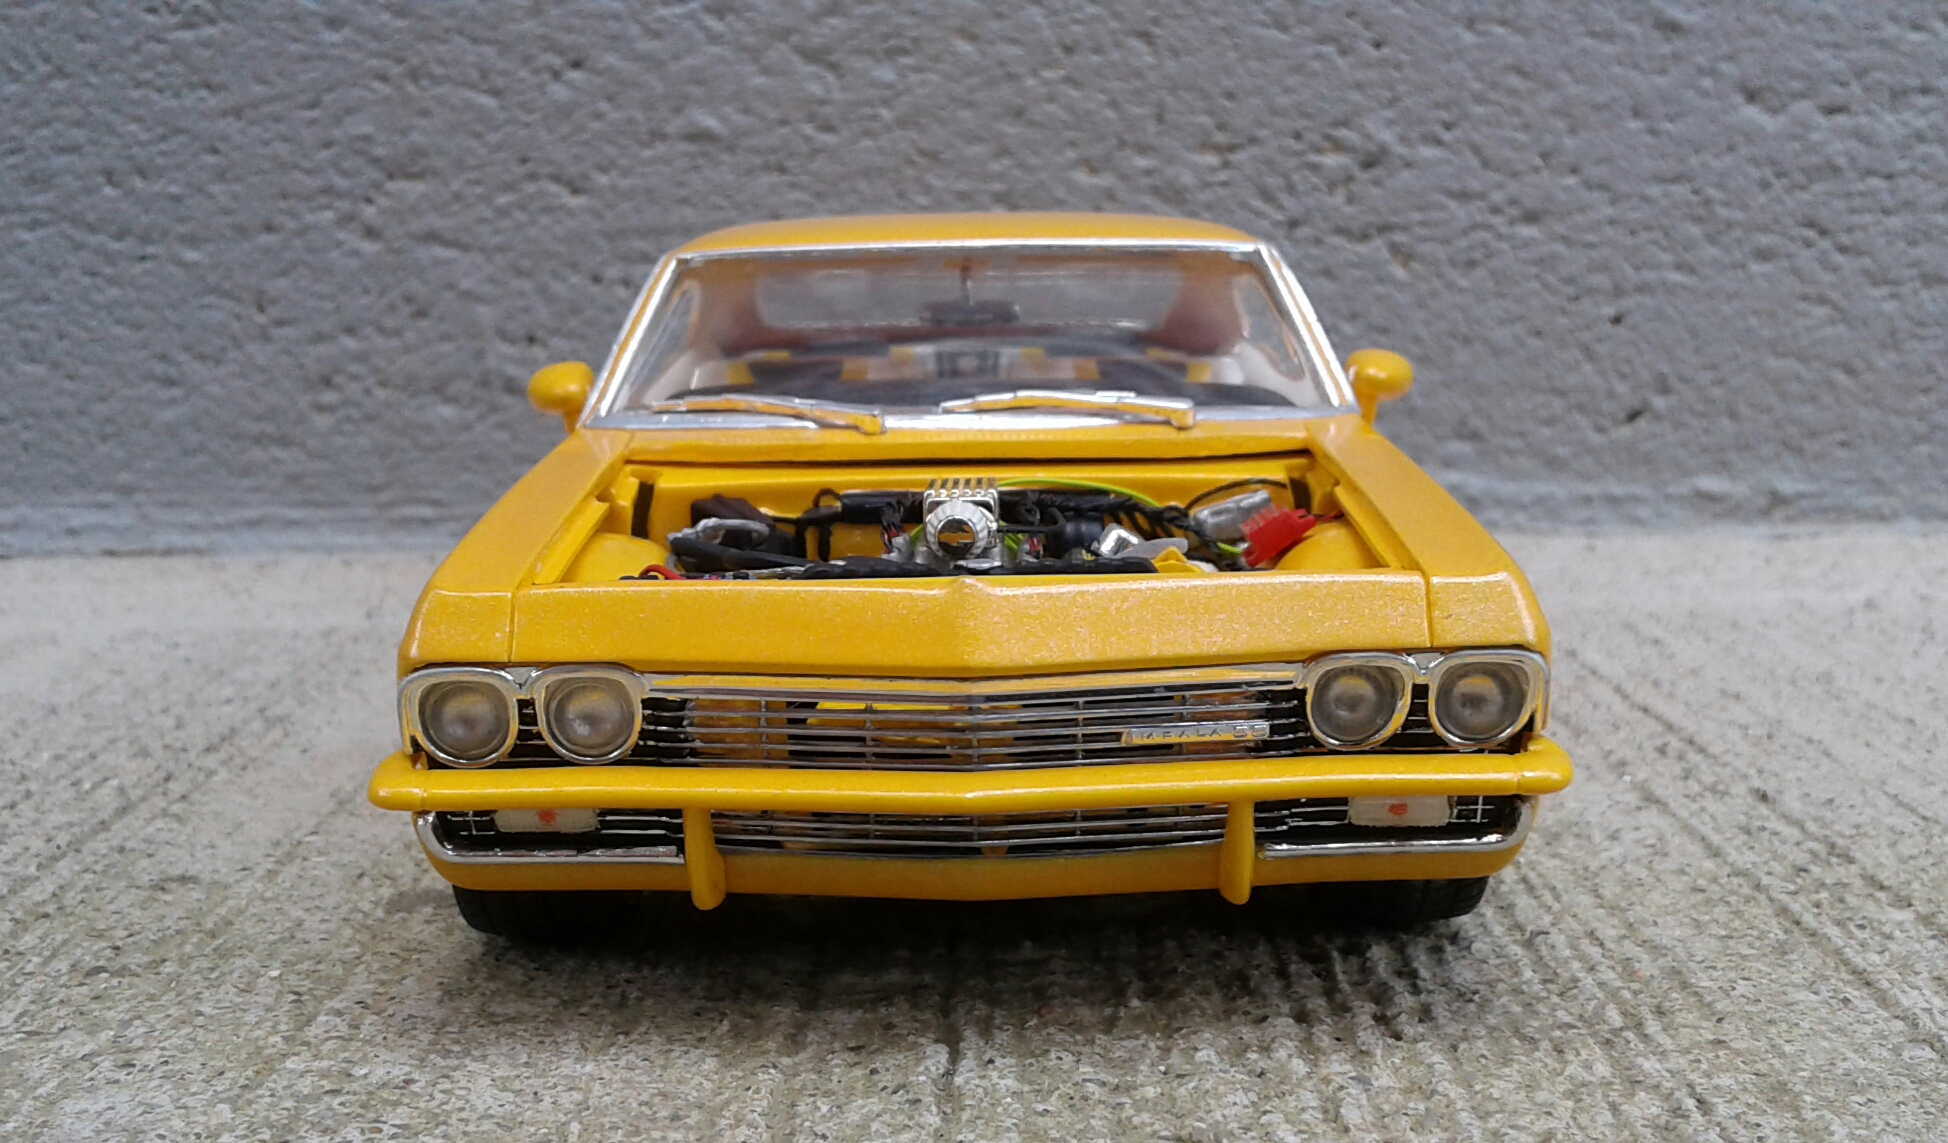
Thanx Steve! The body colored bumpers would be one of the things I would change. Especially with it being yellow. Maybe if it were black or silver they could work. But, as-is, it's planted firmly in the '90s.
-
IIRC, there was a Revell Datsun Z that has that exact wheel. I can check and get back with you. Just checked and it actually has the six slot wheels.
-
AMT 1971 Plymouth Duster 340 in Go Mango Orange.
Plowboy replied to Dragonhawk1066's topic in Model Cars
That's a nice looking Duster Craig! The Go Mango color really suits it! -
Thanx for that info Claude! I wouldn't have thought it would affect the primer also.
-
Miles, find and download the color charts for Tamiya TS paints. There's 94 colors. Also, do the AS colors. There's 32 colors in that line. They're flat military colors. But, they can be polished or cleared coated to get a good shine. Sometime, I want to see if the PS line of paints will work over styrene with Tamiya primer over it. That'll open up a several more choices.
-
That is a super nice looking interior Steve! I really like the work on the console! I take it you used embossing powder? If so, what brand do you recommend? I'm thinking about trying it on my current project. I've always used baking soda for carpet before. But, it has to be painted.
-
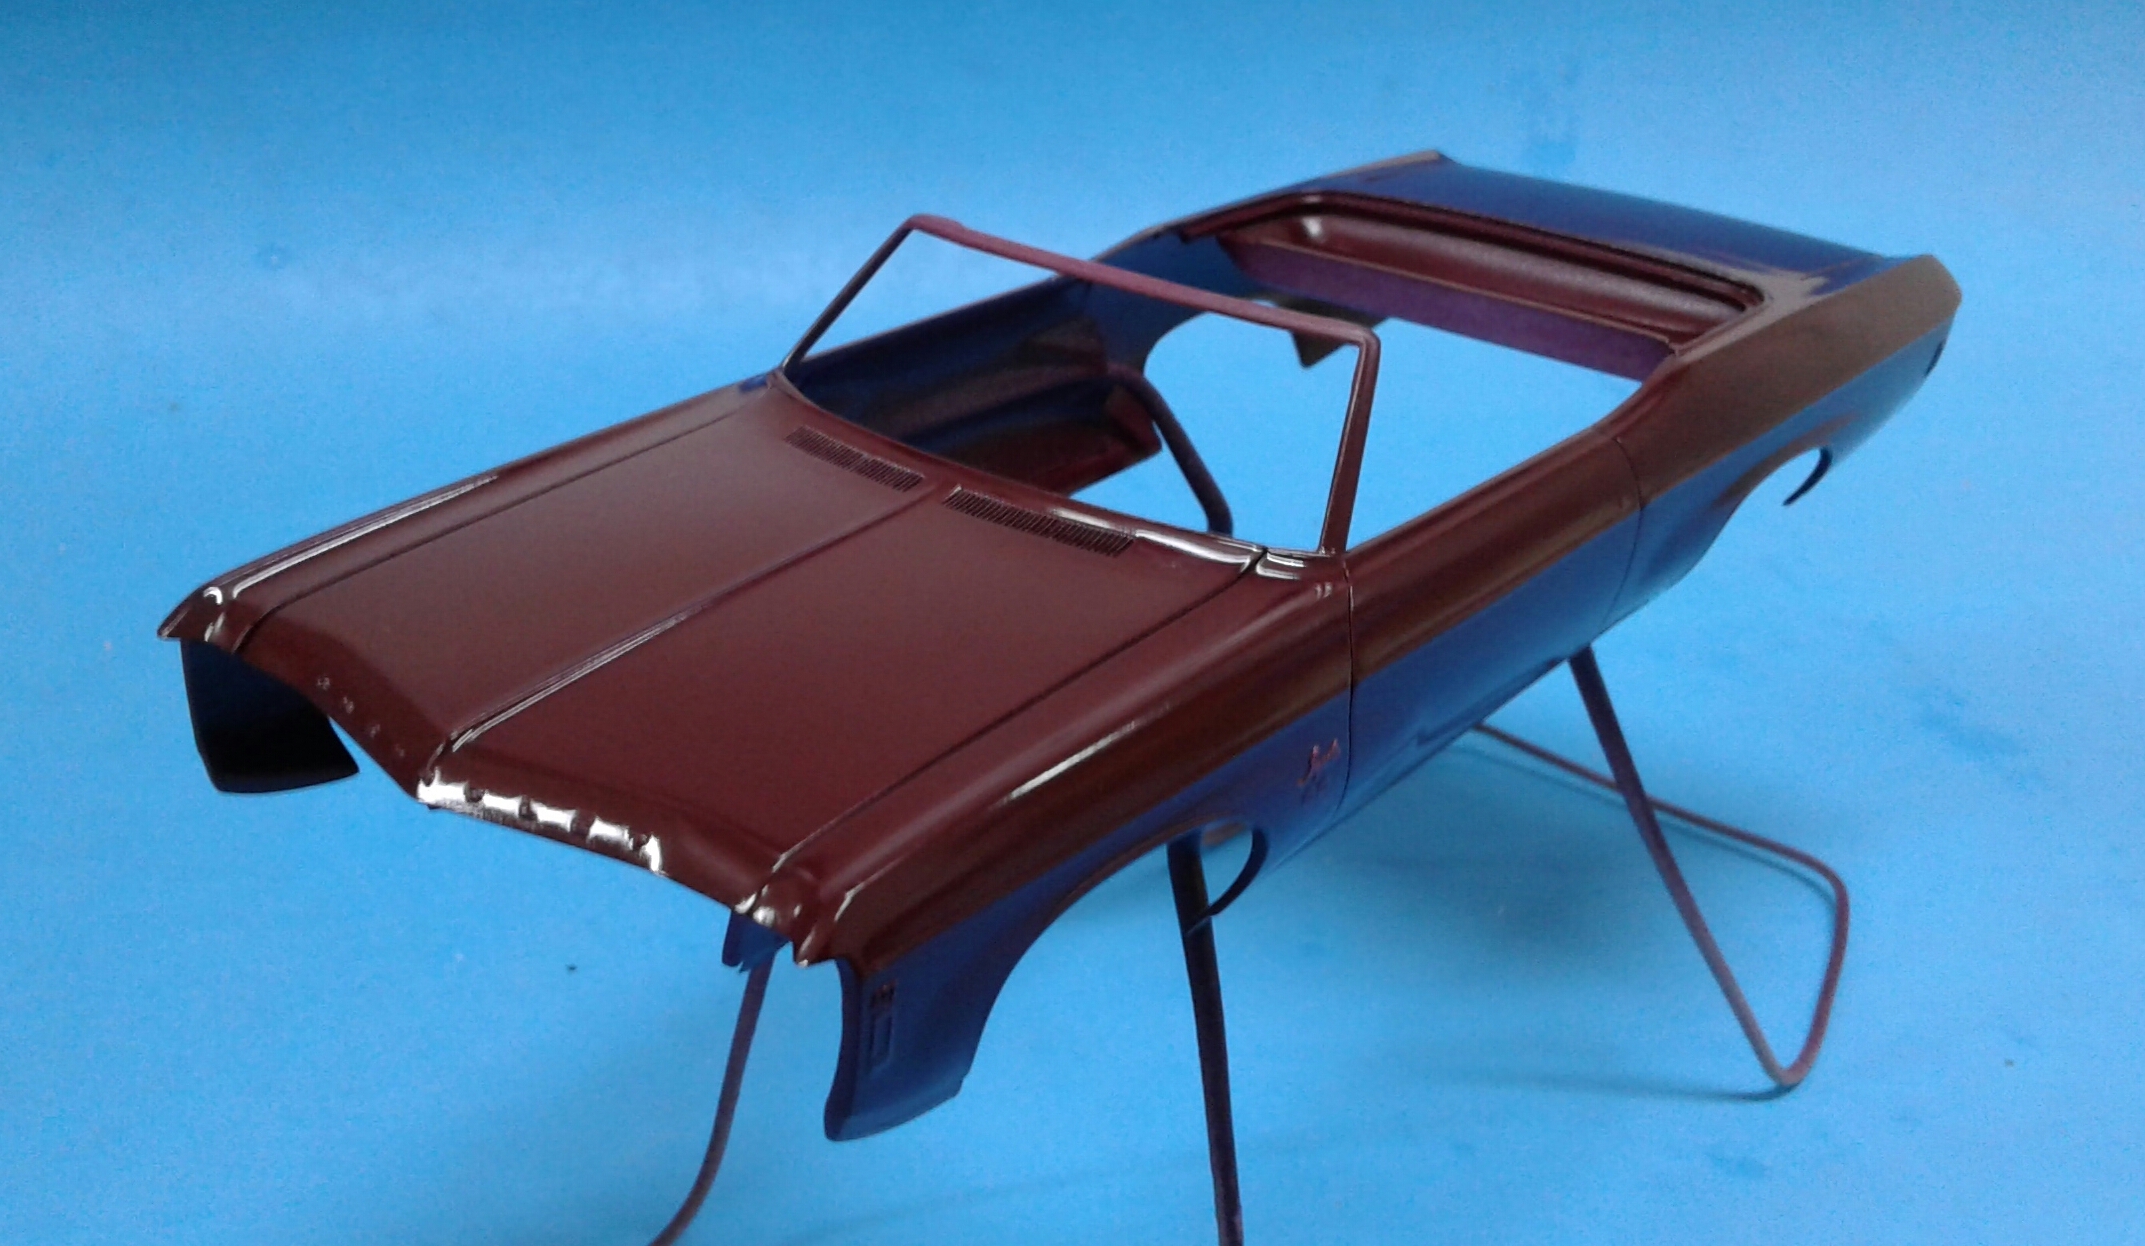
The body is now in color! It's Tamiya TS-11 Maroon. Looks close to Chevy's Burgundy Poly. I also have most of the small parts in paint. I have around a handful left to do.
-
I've used the LA's Totally Awesome for years now. It's my go to paint/chrome stripper. When I strip an old model, I can stick the whole thing, tires, glass and all in it without worries. It can be reused several times. It will weaken with use. But, at $3 for a half gallon, you can afford to replace it regularly. It is hit or miss on lacquer paints. Some it will. Some it won't. In which case, 91% alcohol does the trick.
-
Here's mine. Chopped two and sectioned three scale inches. Draped over the Foose Caddy interior, chassis and drivetrain.
-
Thanx to everyone for all of the great comments! I appreciate it!
-
Best way to cut and re-assemble interior tubs?
Plowboy replied to charlie8575's topic in Model Building Questions and Answers
I use a photo etch saw blade in an Xacto handle. I start with a course blade to get the line established. Then finish cutting with a fine blade. The fine blade seems to have a little set in it and won't bind like the course blades do. Since the material removal is minimal, I just glue it back together and hit the backside with superglue. -
Decals for 1966 Chevelle SS?
Plowboy replied to Safire6's topic in Model Building Questions and Answers
Round2 reissued that kit not too long ago. Try posting a request in the Wanted section. Someone probably has a fresher set with no plans of using them. You may also be able to buy a set from Round2. Worth a try. -
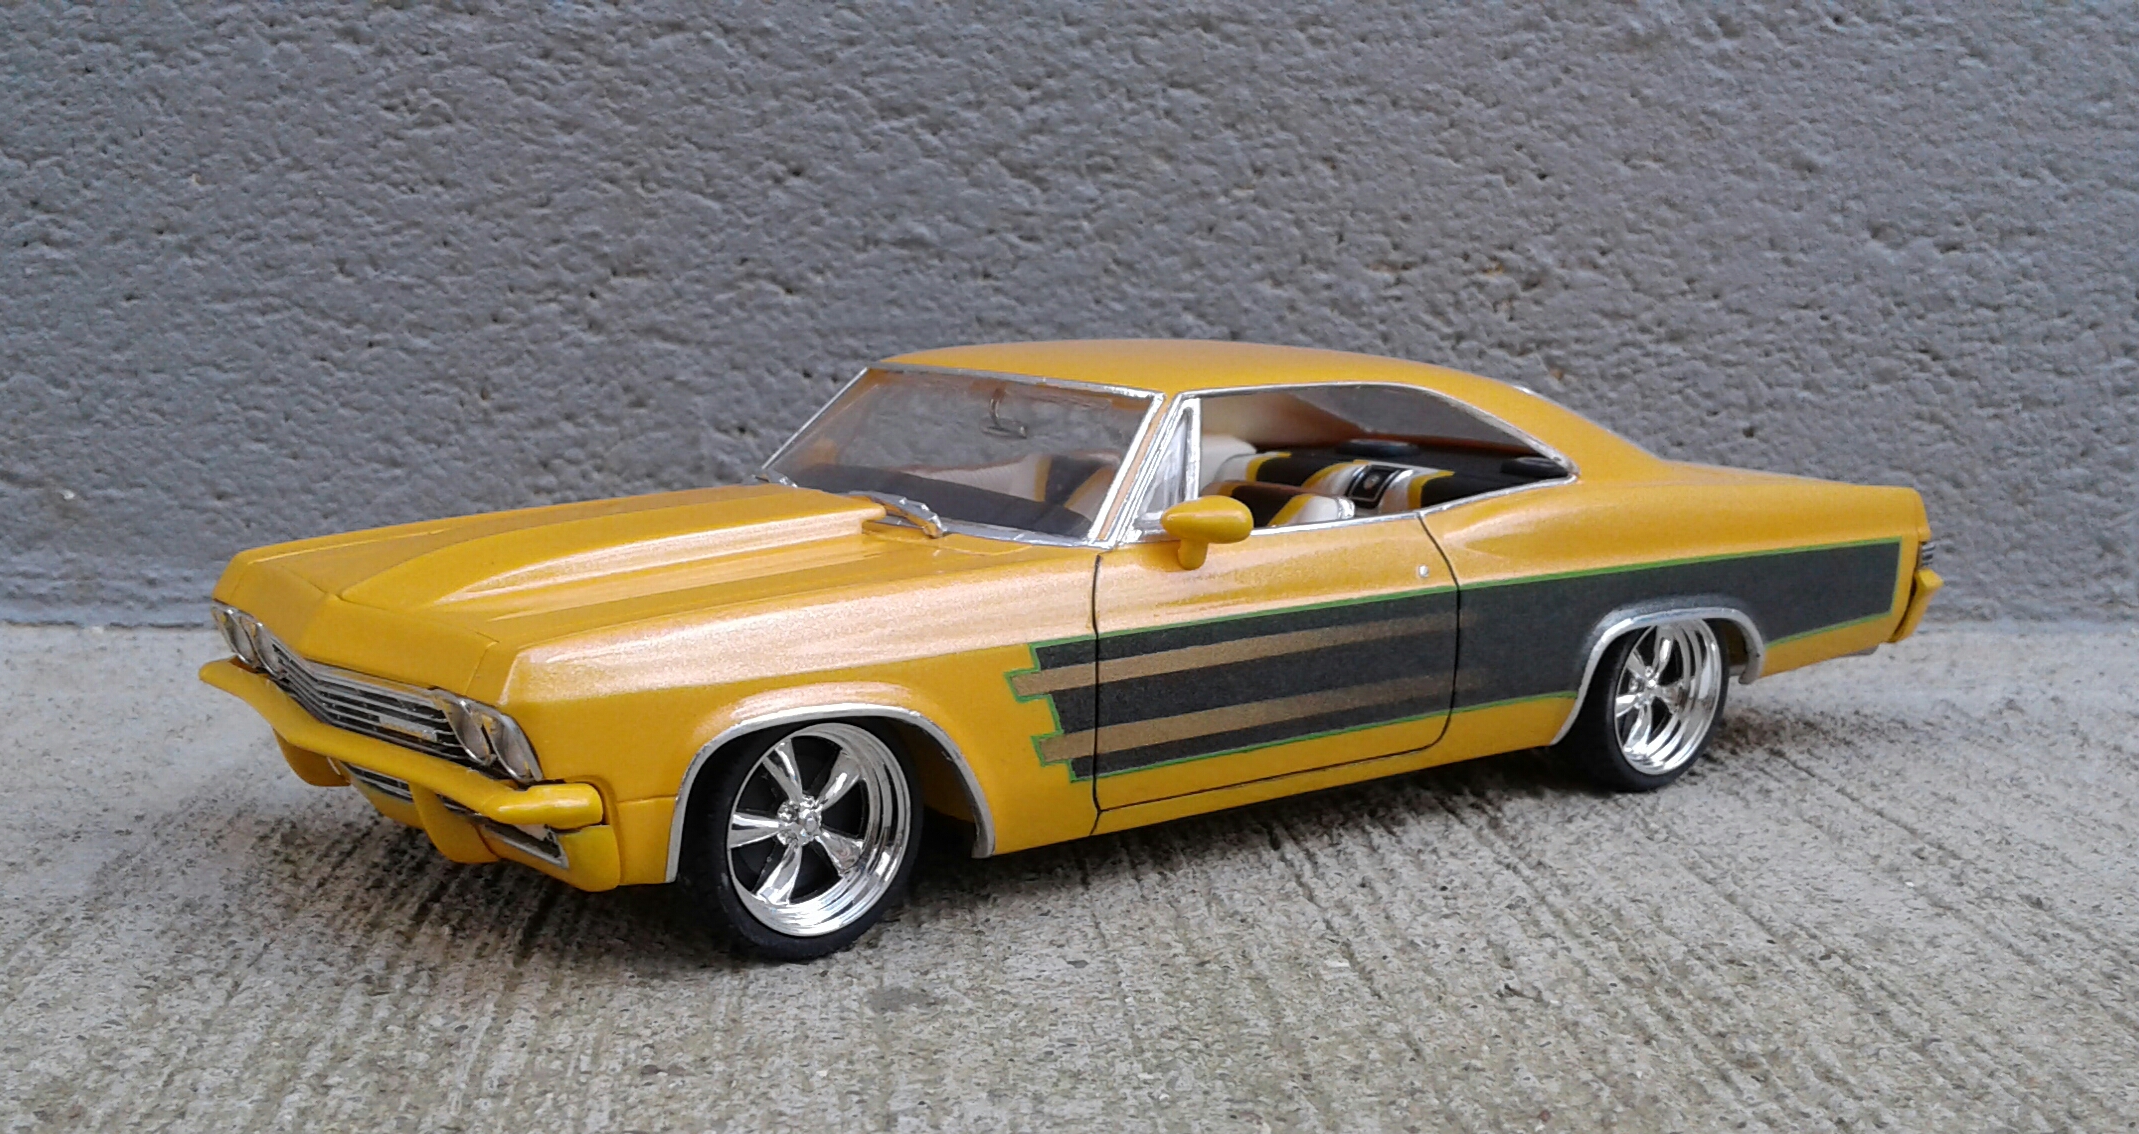
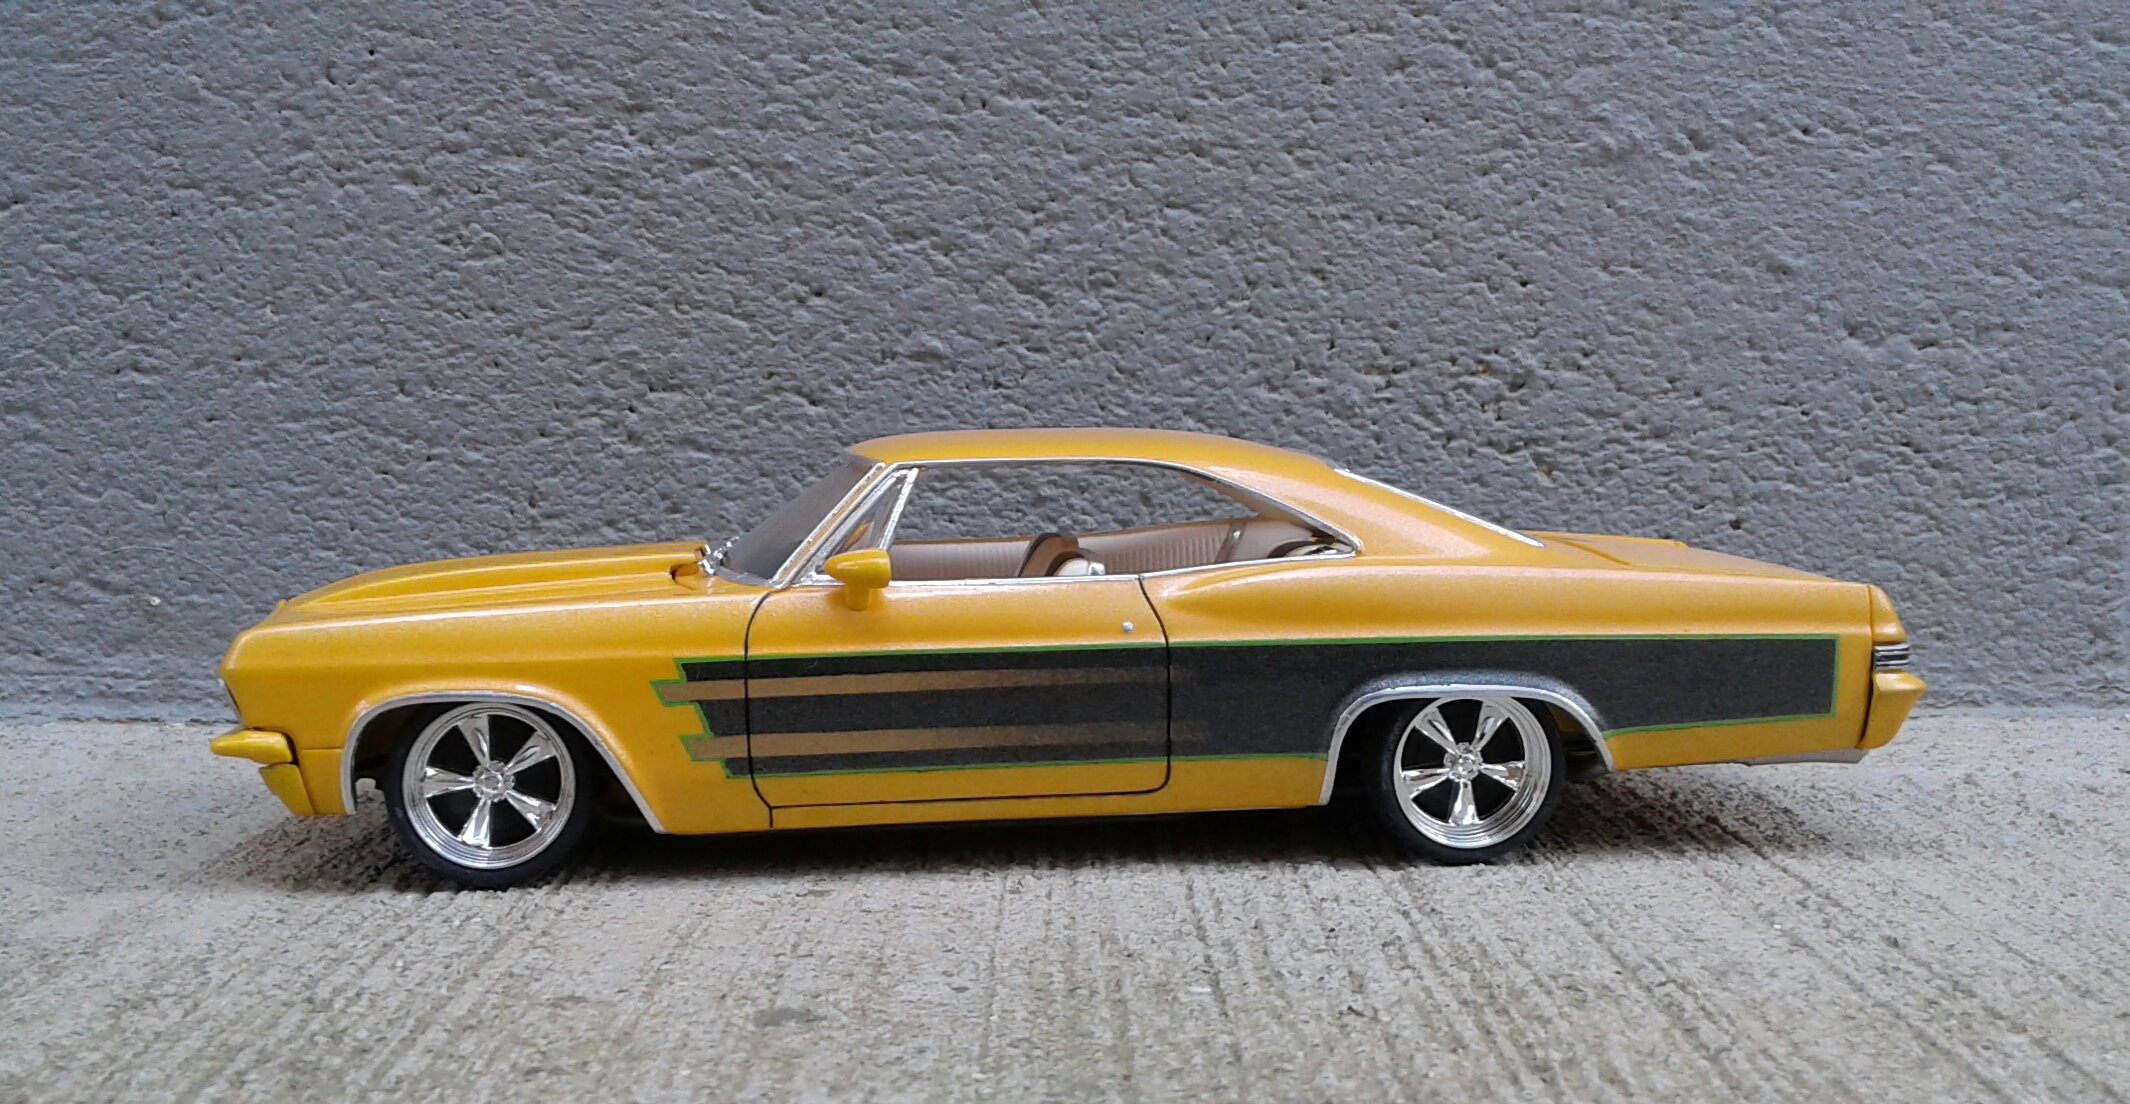
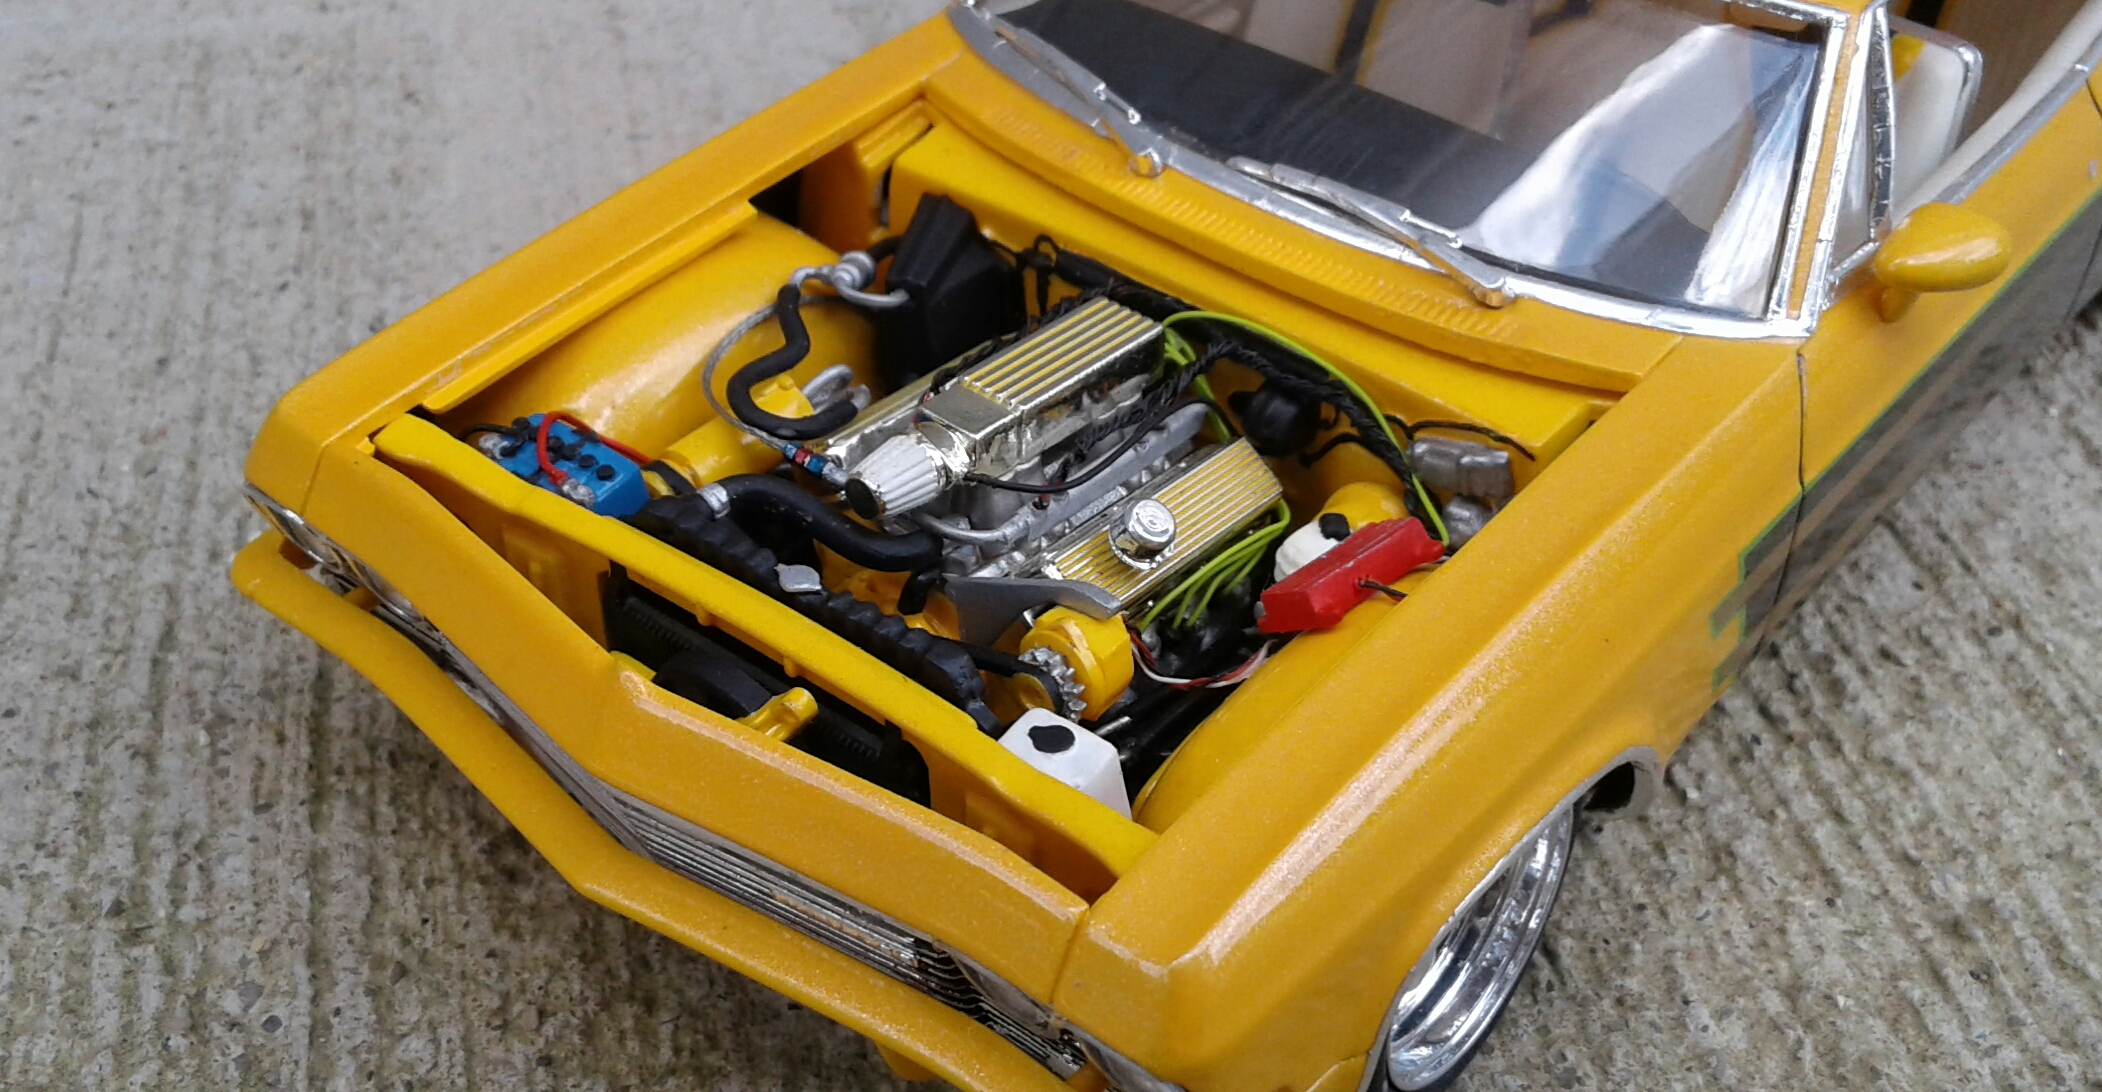
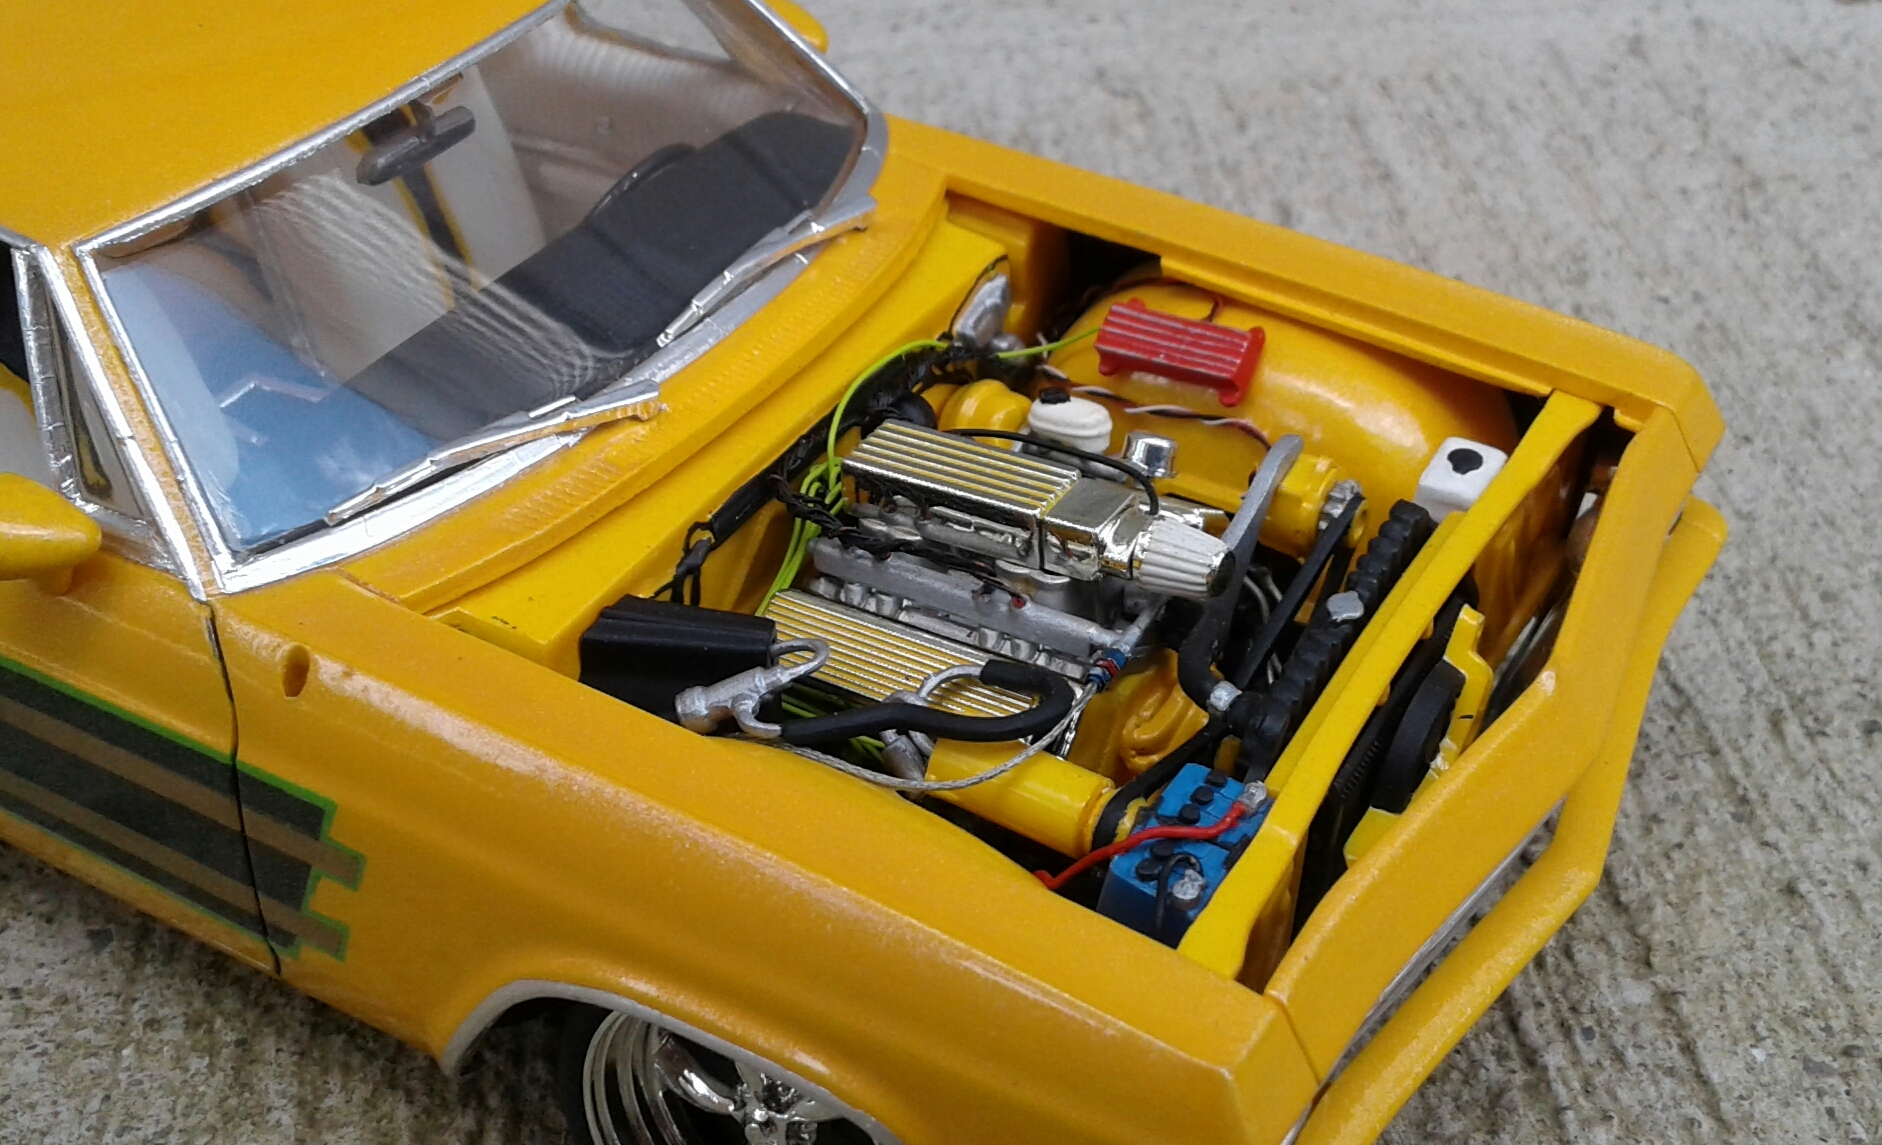
I built this model around twenty years ago. It's the Monogram Lowrider kit. It was my first custom paint job and first time using an airbrush (gold fade stripes and pin stripe). Also my first and only times using Model Masters Clear Pearl and blackwashing panel lines. Never again for either! Both were too much! The colors are just plain old Testors Yellow, Gloss Black, Sublime Green and Gold from the bottle. It has a few modifications like a scratch built exhaust that dump into Super Trapps, cowl hood, opened trunk, opened grille and a frenched antenna. I robbed the fuel injection etc. from an AMT '67 Impala Street version for the engine and added details. Wheels and tires are Pegasus that I modified to fit on the kit wheelbacks. There's a few things I would do differently if I were building it now. But, I've learned a little in the last twenty years. I think. Thanx for checking it out!
-
1964 Oldsmobile P-85
Plowboy replied to Chuck Most's topic in Model Trucks: Pickups, Vans, SUVs, Light Commercial
Very cool conversion Chuck! It has quite a natural look to it. Now do a wagon! -
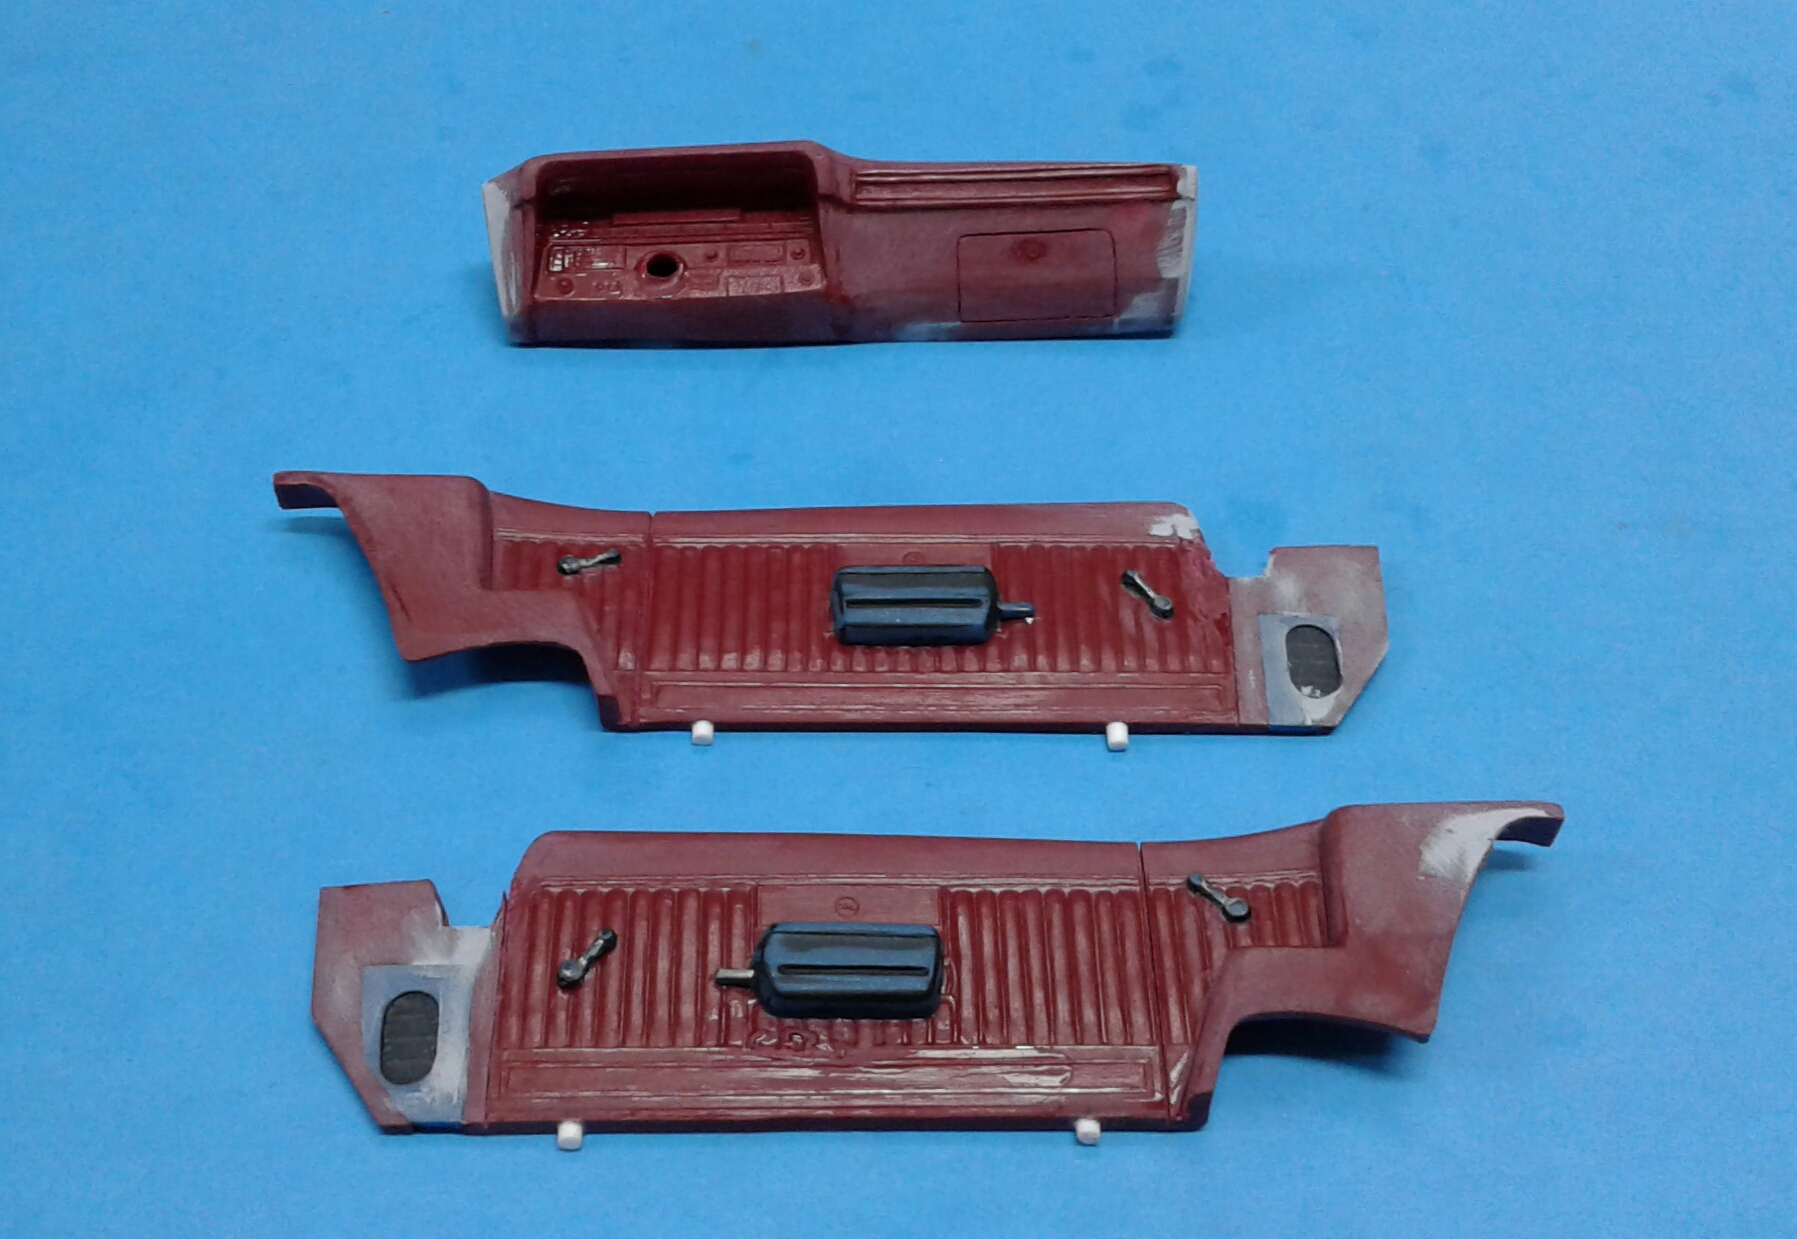
First squirts of paint! Bench time has been almost non existent still. But, I've been able to steal a little time at night and get some stuff accomplished. The interior is painted with Tamiya Dull Red (two coats). Just have to detail it and it'll be done. I dread painting the tiny chrome pieces on the seats! Pretty sure I'll have to mask those. I have the frame and floorpan/gas tank painted. The overspray is Tamiya Maroon. But, it looks kinda purple in the photo and in person. I now have a set of COPO hubcaps in hand. I'm anxious to see what they'll look like on it. I may or may not like them. But, I want to see how they look on it. I have a bunch of small parts ready to be mounted, primered and painted. I think I'll go ahead and paint the body so that it can dry while I piddle around with that stuff. I'll be glad to see the body in color!
-
That is sharp as a tack Tony! The paint, stance and foil work are really nice! That's one of my favorite Monogram kits from back in the day. I have one in the stash to build someday. Yours makes me want to build it right now! Nice work!
-
You did a great job on the chop Greg! I think your alternative method would work better. Still, you got a nice result with the method you used. If I ever do a five window chop, I think I'll cut the insert free, lengthen the roof, fill the opening and reinstall the insert. One suggestion I'll make concerning the windshield frame. It was easier for me to fill the opening solid with .040 and cut the center out for the opening. I chopped the kit frame first. But, I couldn't get it to fit right. It could have been due to the body being a resin piece too.
-
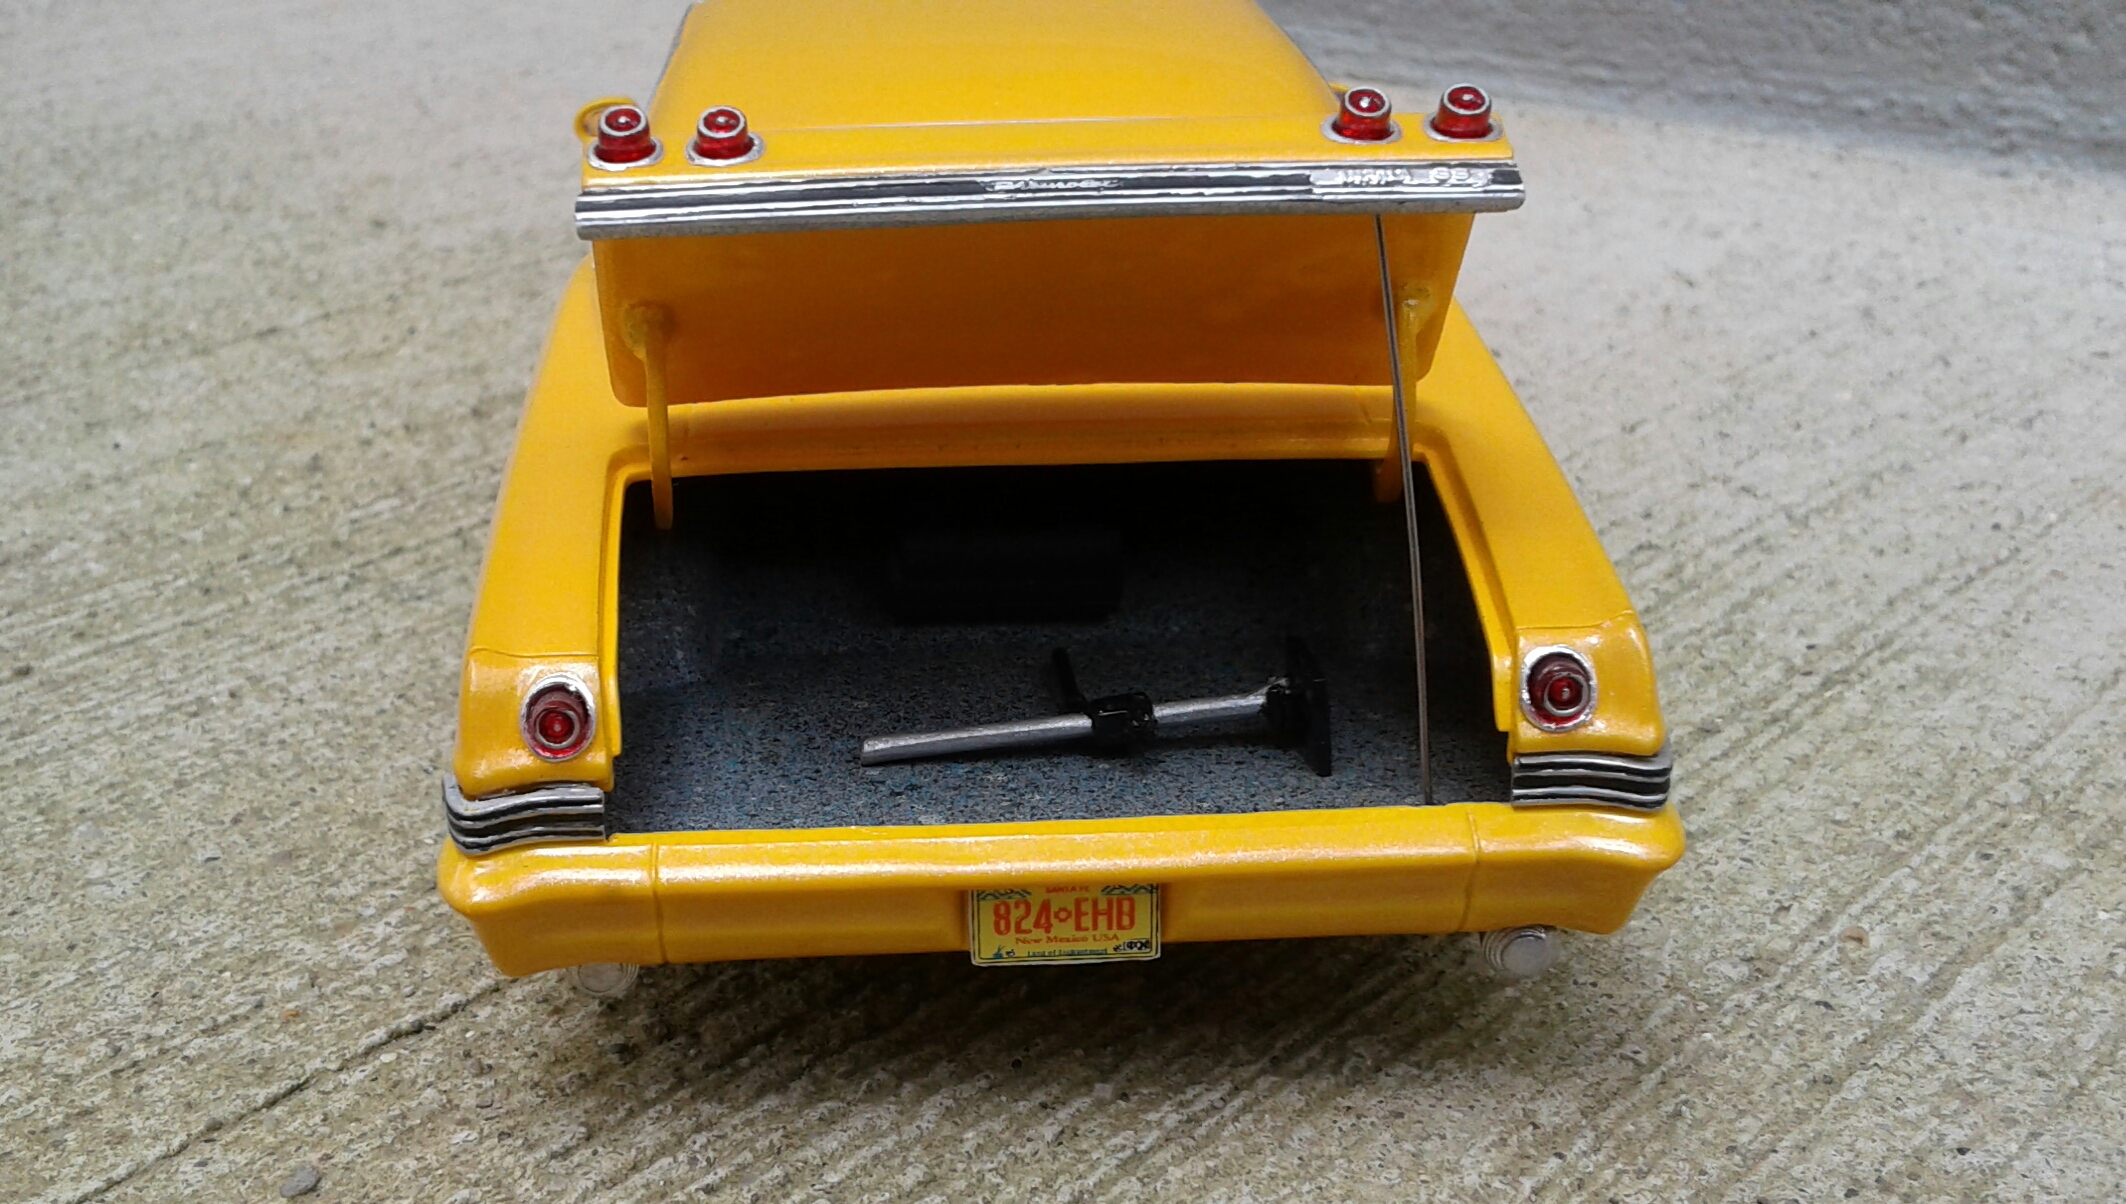
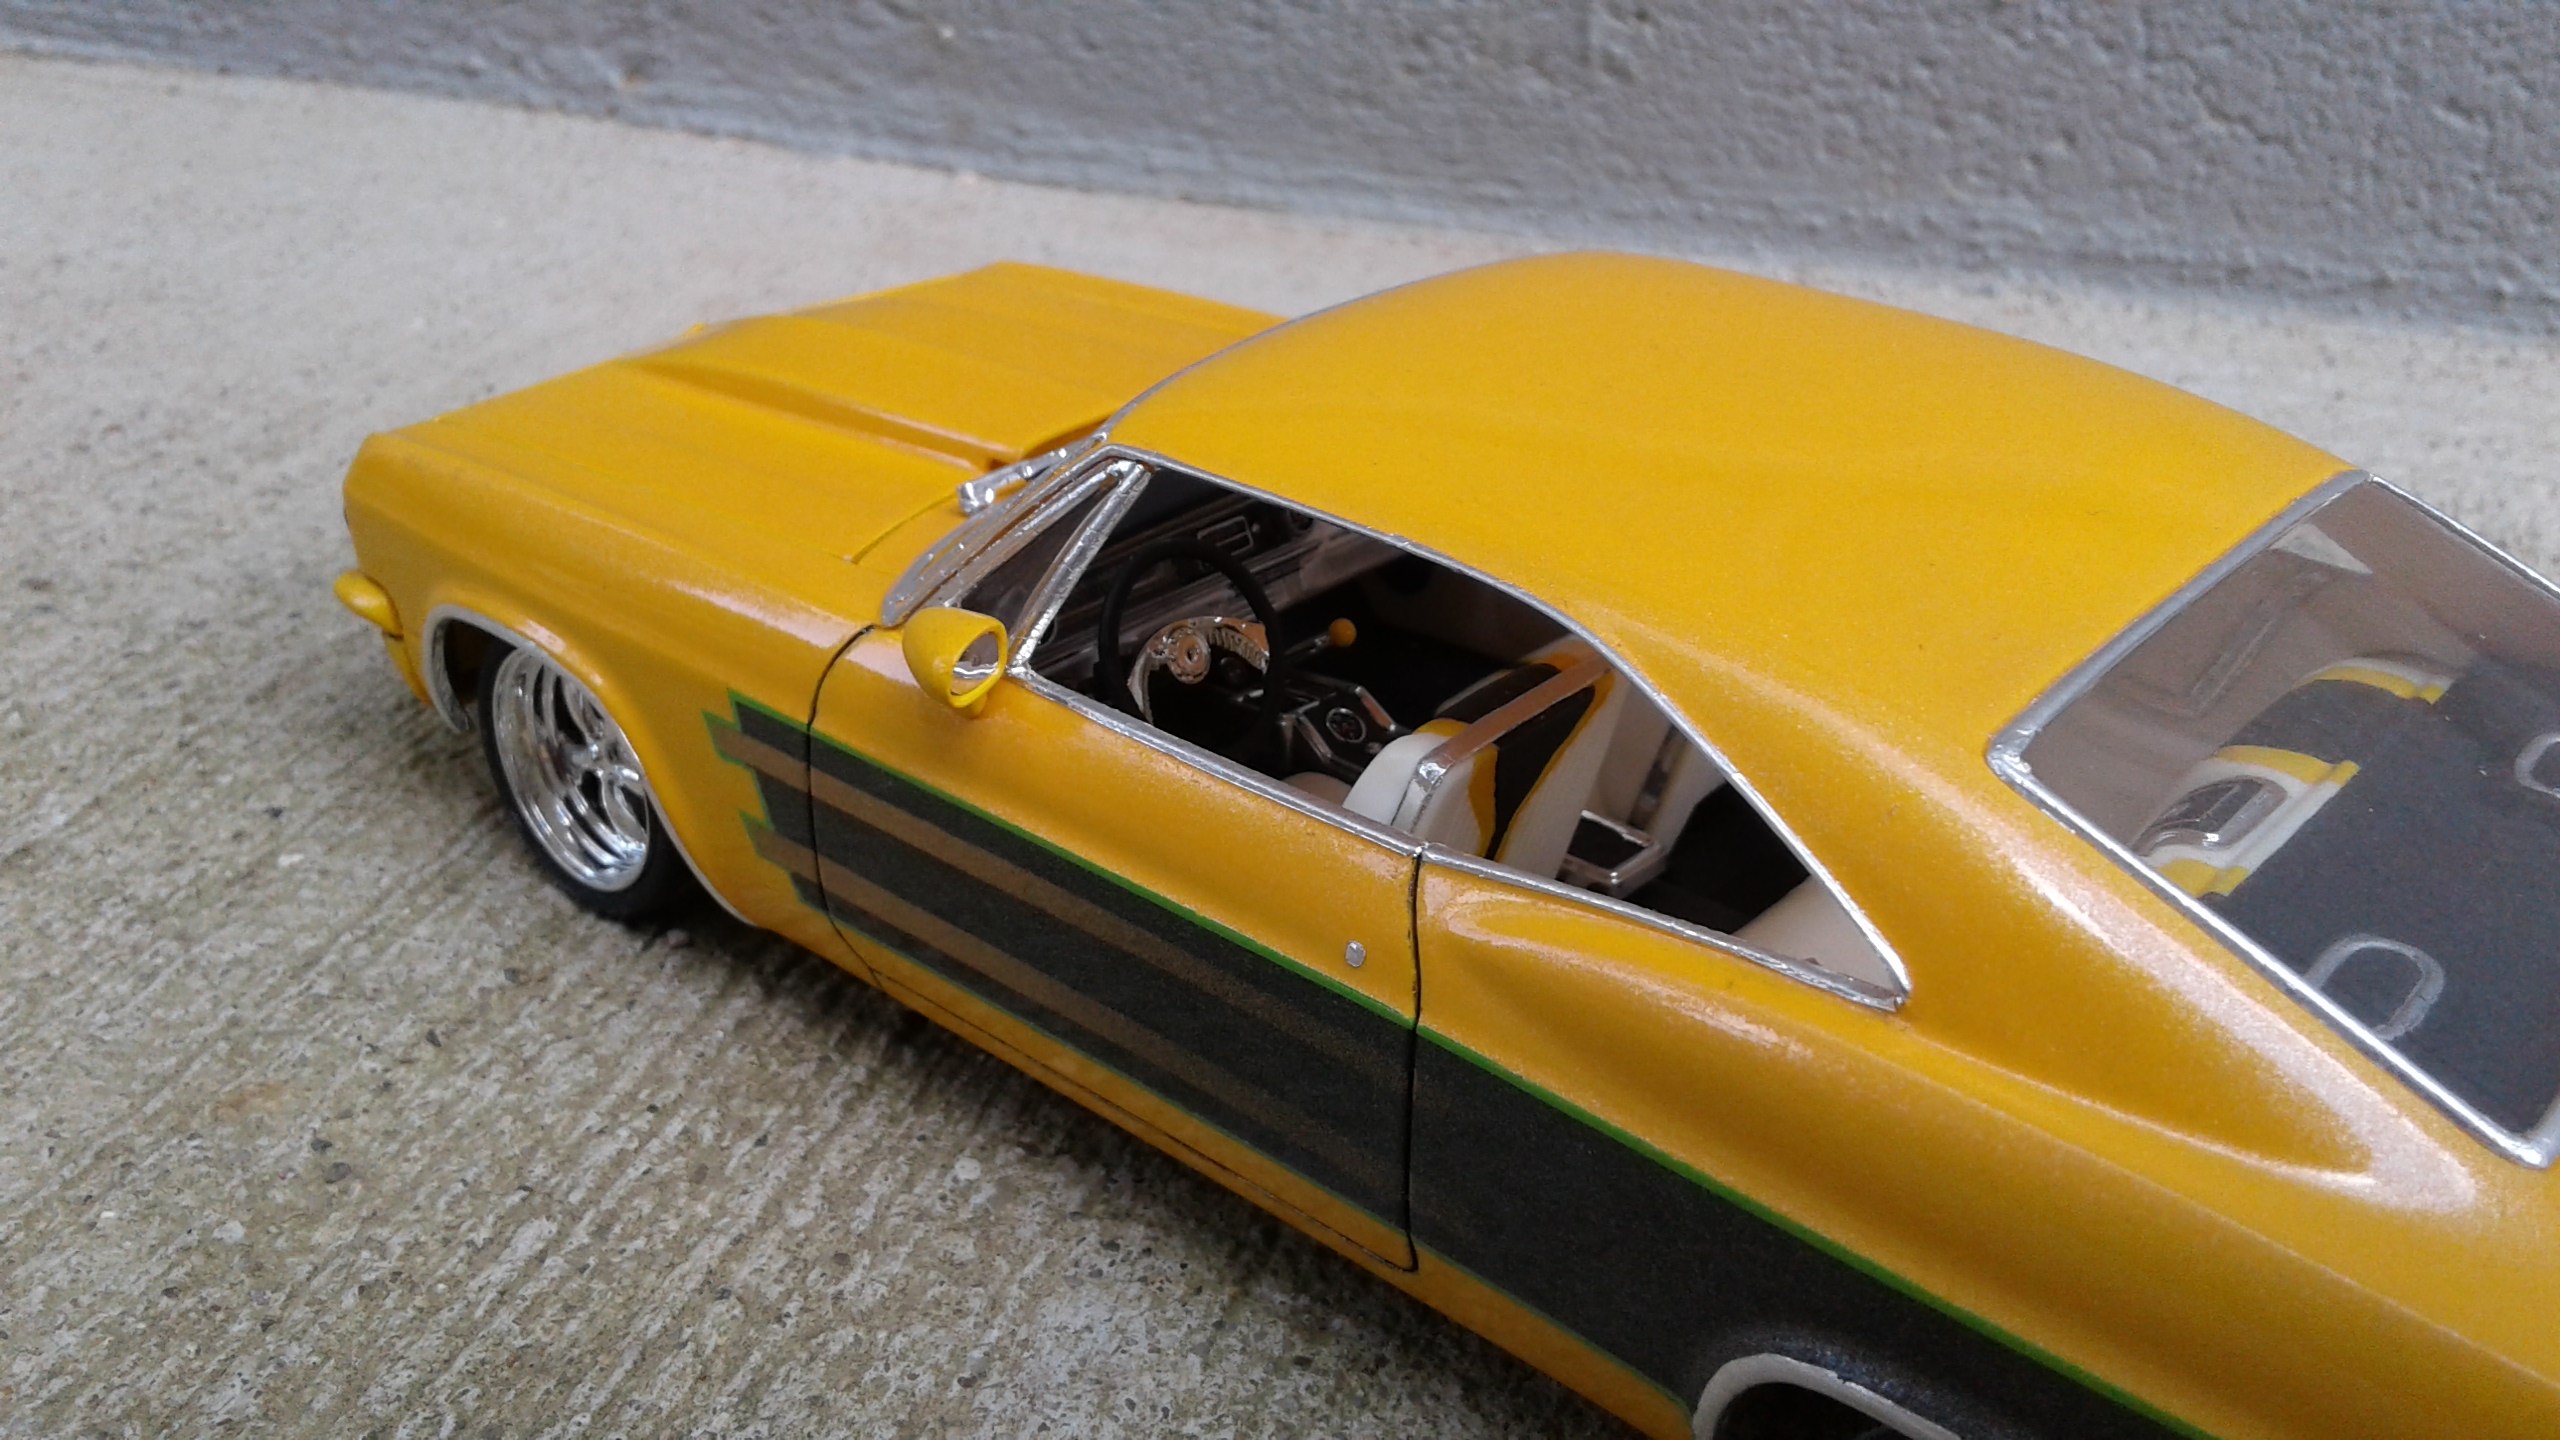
Nice looking Impala! The colors, wheels and stance really makes it come alive!
-
Such a clean, well done hot rod! I love the chop and the green!
-
Sink hole refuses to go away!
Plowboy replied to bh1701's topic in Model Building Questions and Answers
Tamiya White Putty shrinks terribly! To me, it seems better suited for filling scratches after primer. The Tamiya Gray Putty is much better for filling. I've not had any problems with shrinking since I switched to the gray putty. -
Thanx David! I probably wouldn't have done it had it been a hardtop.
-
Thanx Carl! I used the backside of an Xacto blade method. I use one that has a good sharp point. If the handles are a little too thick, I'll use a fine tooth photo etch saw blade.
-
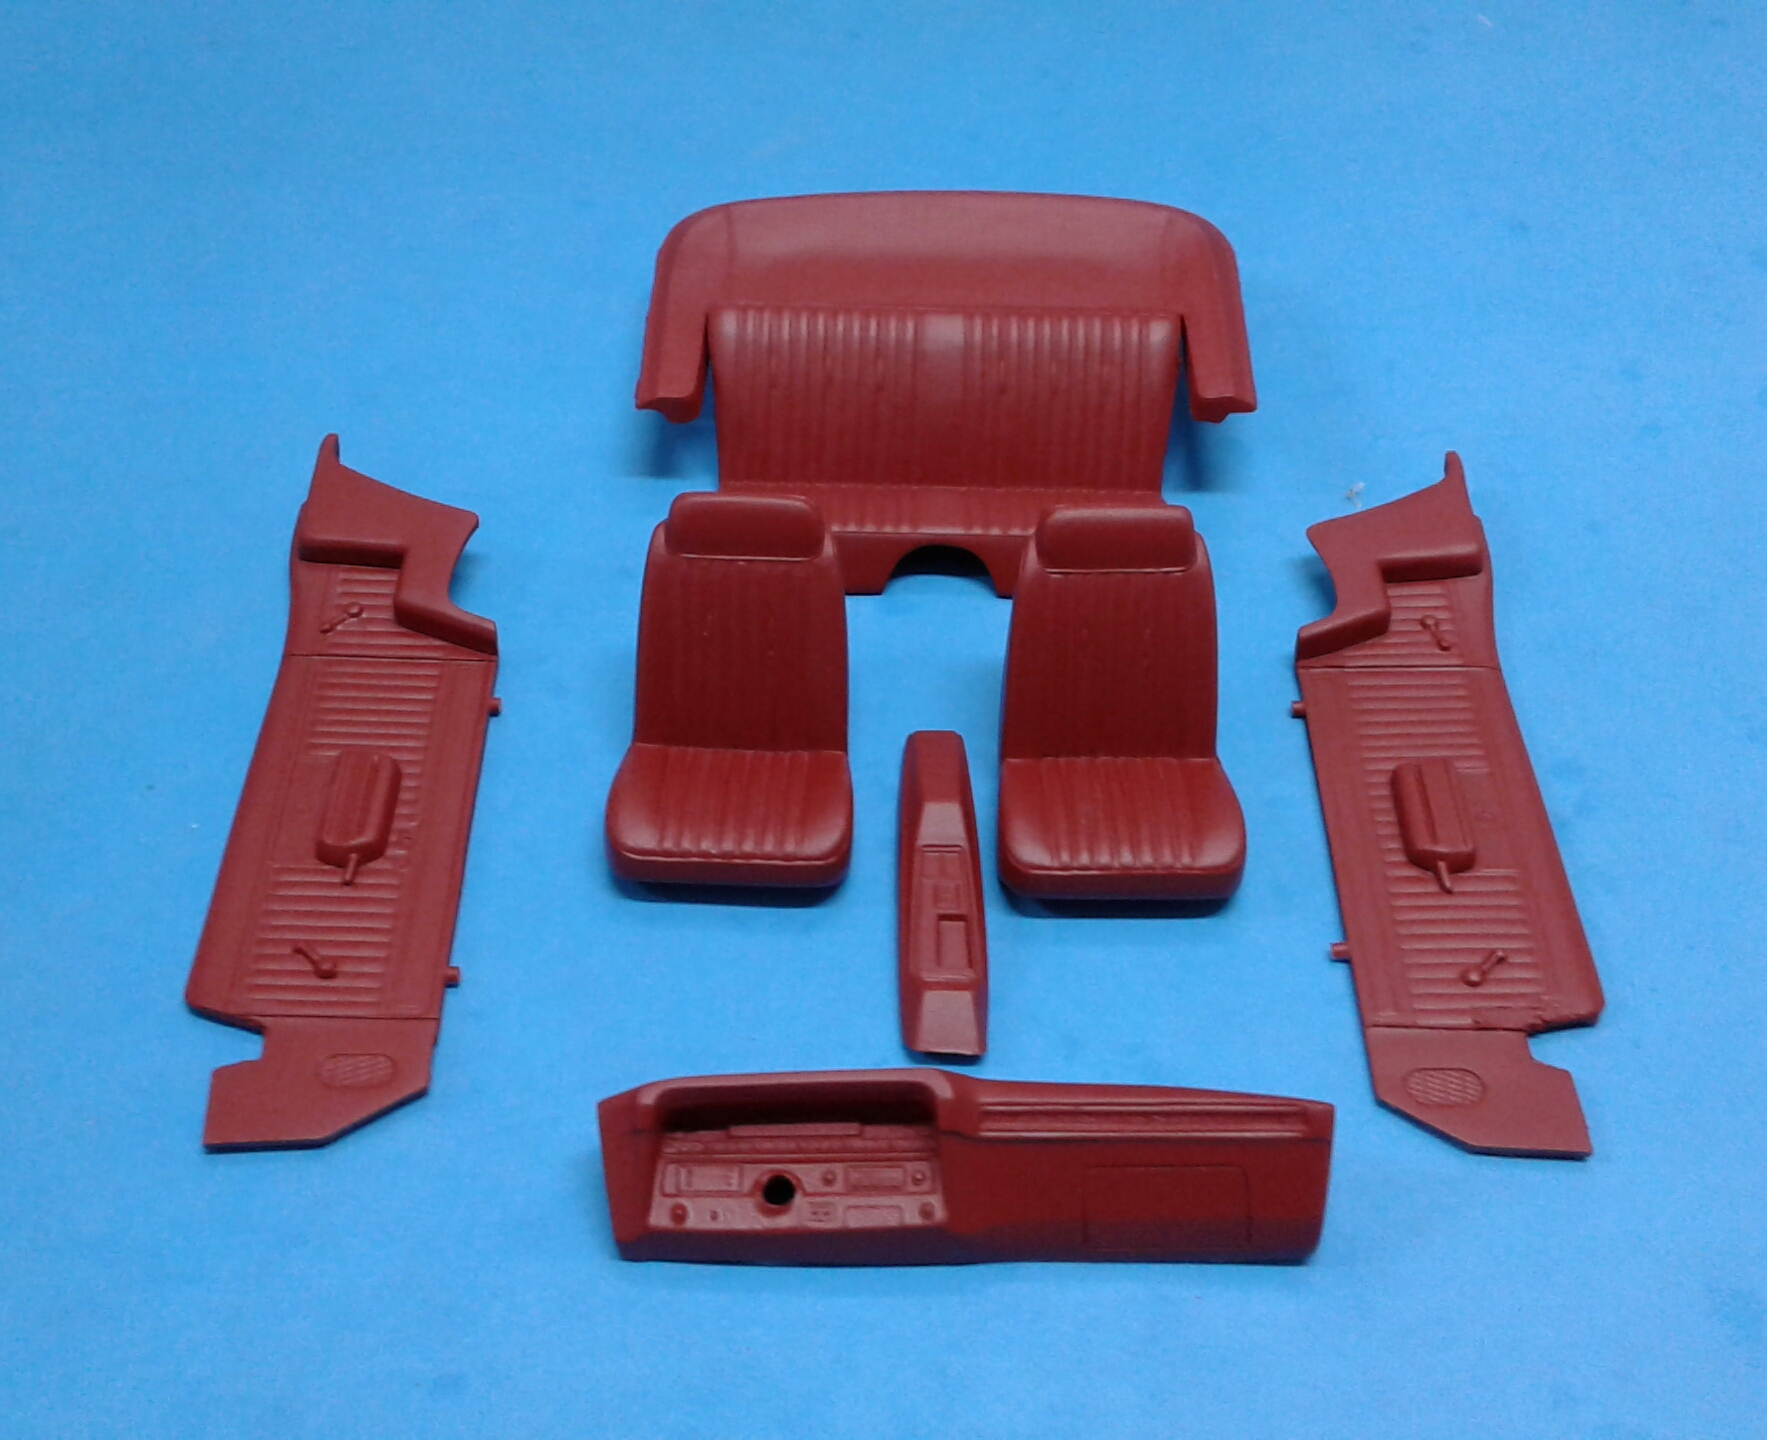
Thanx for the feedback guys, I appreciate the comments! Bench time has been almost non existent lately. But, I've managed to get a little time in here and there. With this model being a convertible, the interior needs a little extra attention even though it'll probably always have the top on. I made some improvements to the door/quarter panels. The quarters had no window cranks and the door cranks/arm rests were barely there. So, I cut those pieces away from a junk '69 Camaro interior and added those. I also used the Camaro's kick panel vent detail. I also added pins to the bottoms to locate them to the holes in the floorpan. Big improvement over the originals! The dash needed .020 added to each side for a better fit. It had A/C vents. But, with the design of the firewall and inner wheel wells, there was no room for the dryer. So, I decided to can the A/C. Plus, I didn't like the A/C setup on the '69s. For whatever reason, Chevy decided to put the compressor on the driver's side. It makes it have a cluttered appearance. The dash had an overdone texture to it. So, I sanded it semi smooth to tone it down. The passenger side door panel has some damage from assembly that luckily isn't visible with the seat installed. Theres also some on the driver's side that will be covered by the dash. Whoever put this thing together at the factory must have been a newby. It was everywhere it shouldn't be!