Plowboy
-
Posts
3,434 -
Joined
-
Last visited
Content Type
Profiles
Forums
Events
Gallery
Everything posted by Plowboy
-
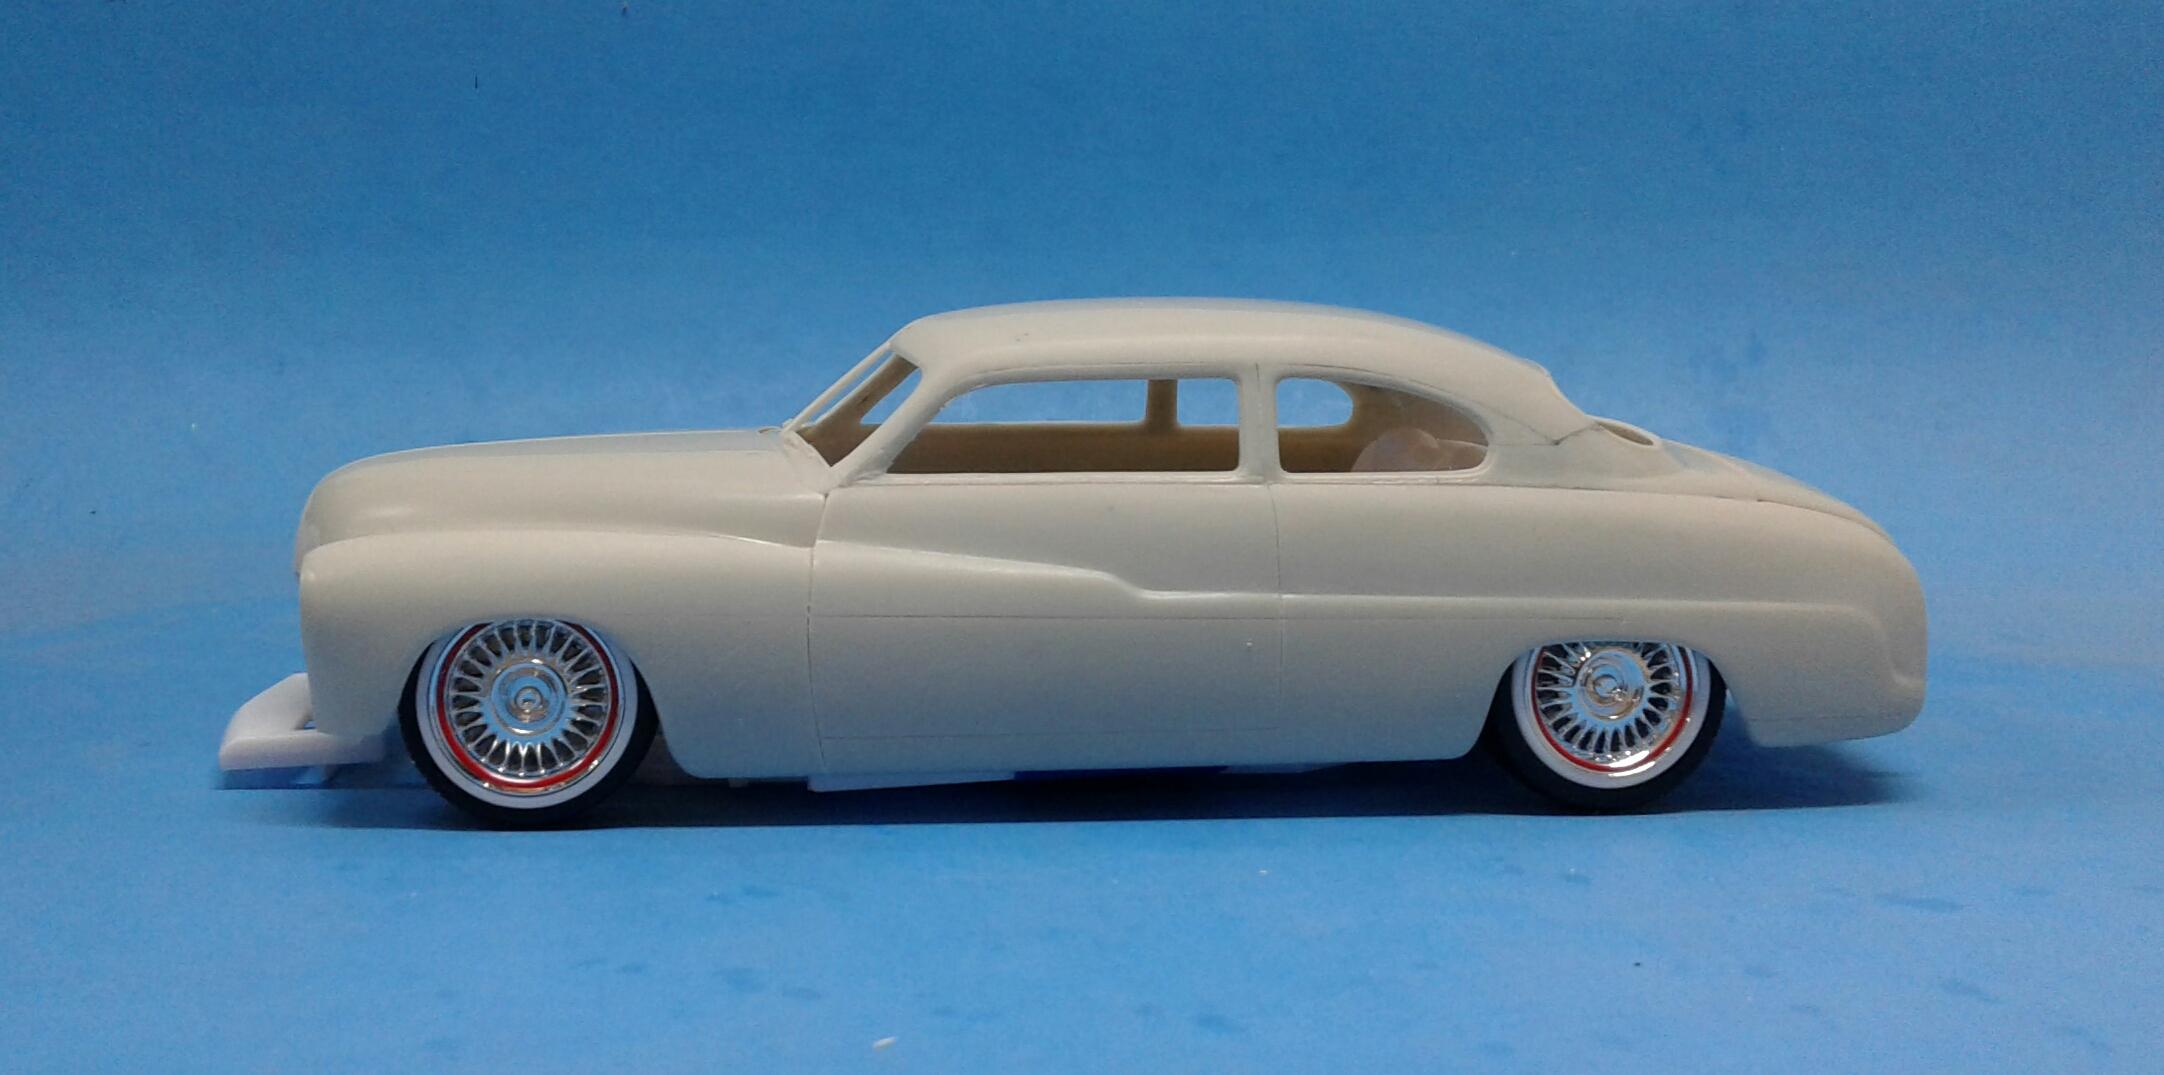
Thanx David! I'm really just using these wheels for mockup purposes. I don't like the red line on the wheel at all. I am thinking about stripping them, painting them black and doing the lip and center cap with a Molotow pen. But, I would also have to paint the whitewalls to get rid of them. I don't know if painting the white walls black would look right. I think it would make the tires look too big. I want to paint the set I have in mind and see what they look like before I mess with the Foose wheels and tires.
-
Thanx! See my first post.
-
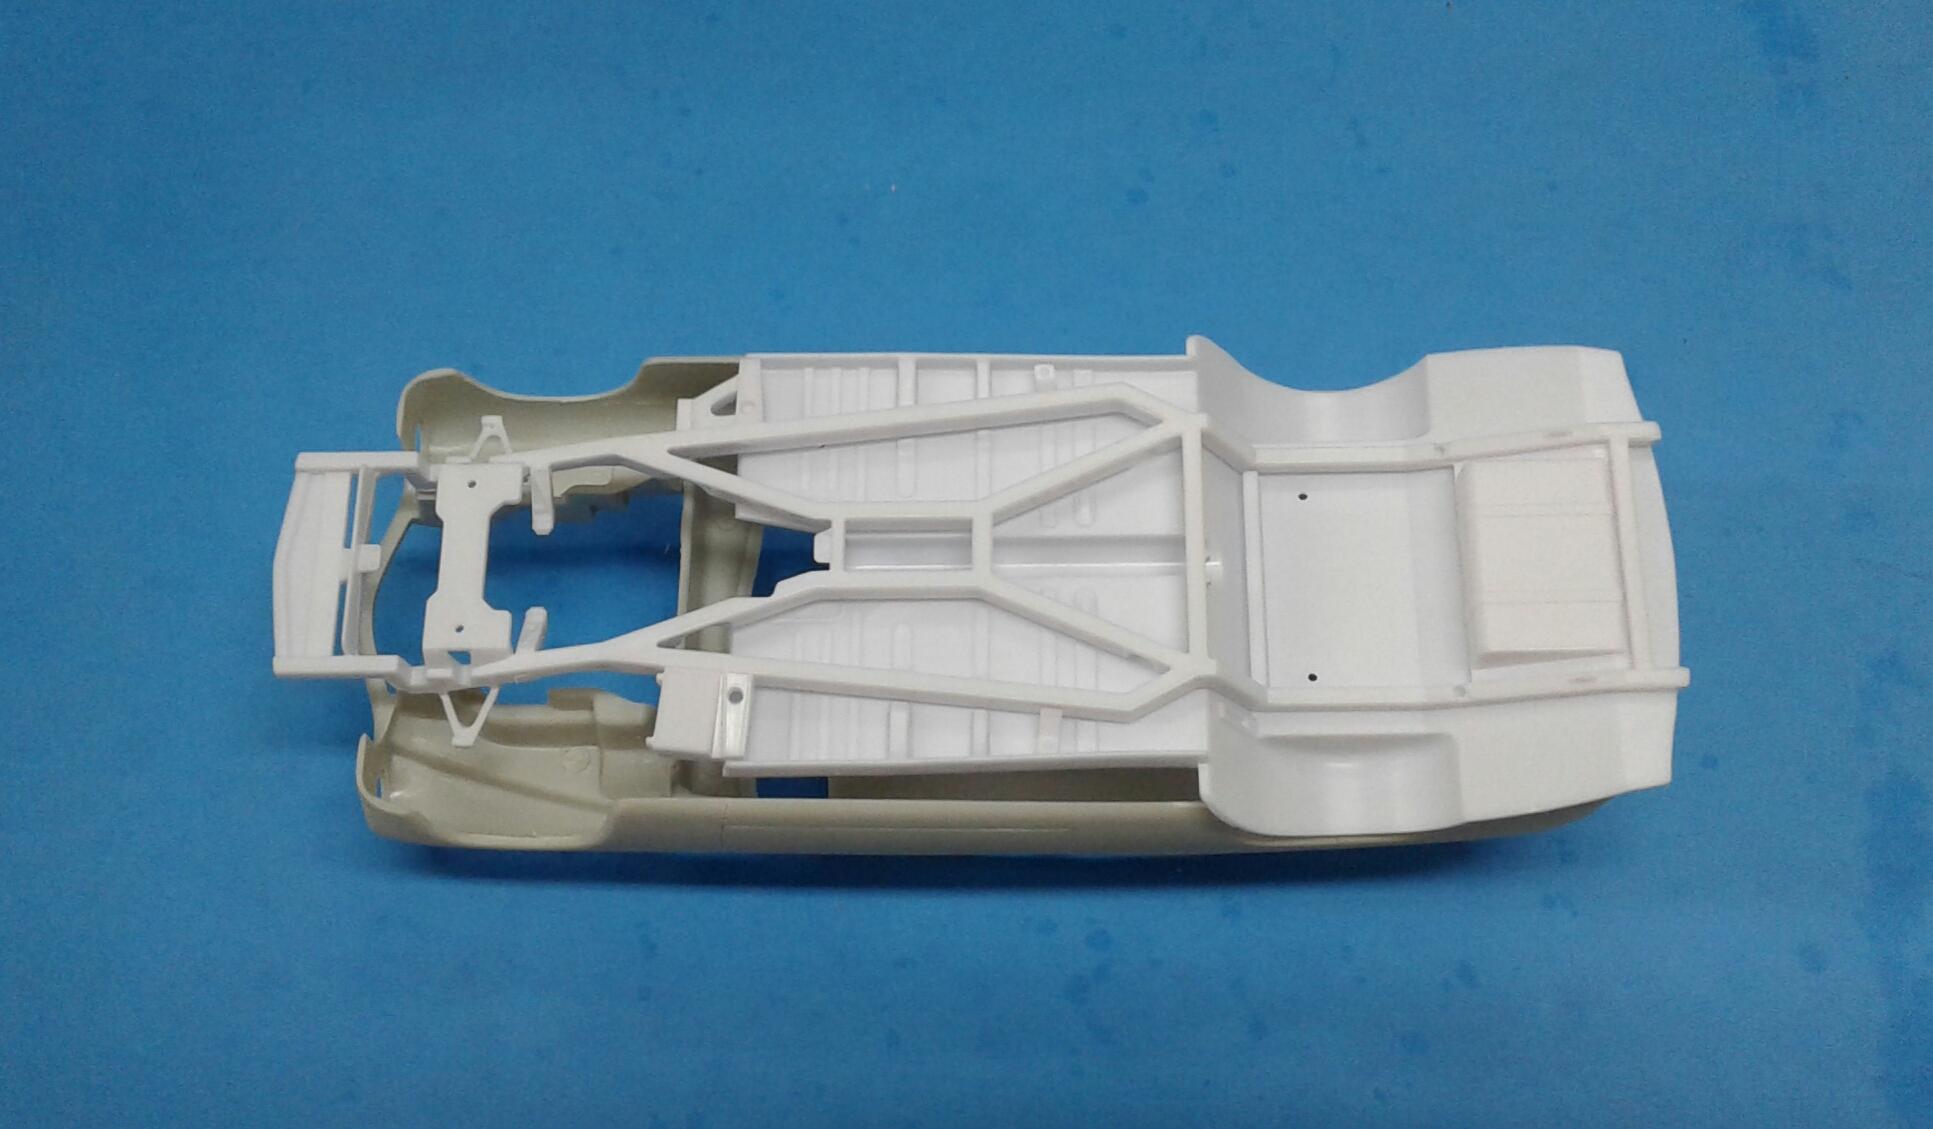
Thanx to everyone for all of the feedback! I appreciate it! I have the rear of the floorpan cut to fit and the rearend taped in to make sure I have the rear wheels centered. Now I have to get the front worked out. The best I can figure is I need to take out around 7mms. It's gonna be tricky moving the suspension back and keeping the engine mounts where they need to be. I hogged out the inner wheel wells so the frame could go up. I'm thinking I'll use the Caddy's core support to replace them and maybe the firewall also. I was able to cobble it together to get a visual for the first time. I like the way it's looking! I used the Foose wheels and have to admit that I kinda like them except for the red stripe and whitewalls. But, they don't suit the vision I have for it. The stance at the rear is how it will be. If I can get the front close to what it is now, I'll be happy with it.

-
Thanx! I use a scriber that I made from a dental pick, razor saw and a photo etch saw blade.
-
It's from the Foose Caddy. I'm also planning on using the interior.
-
58 Edsel Annual hood ornament
Plowboy replied to hedotwo's topic in Model Building Questions and Answers
You could add material to the base of the ornament to make up for the void and use Molotow chrome to finish it off. You would probably be waiting a long time to come across an original from an annual. -
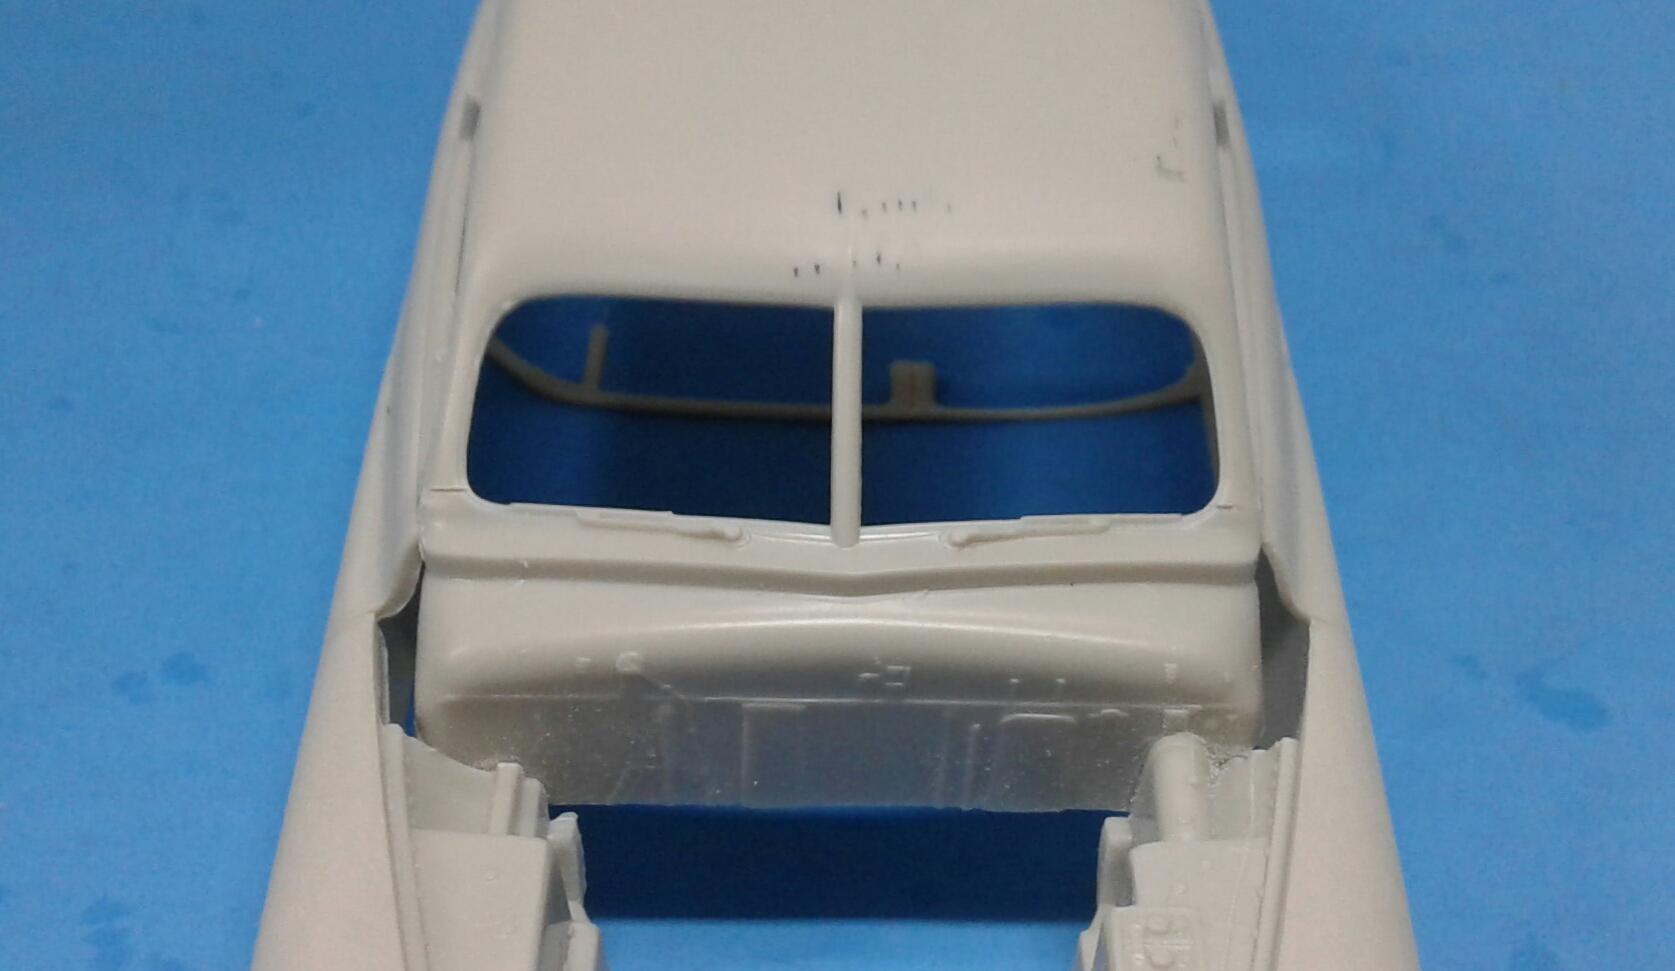
I'll be watching this one! I'm not a big fan of the laid down rear window. But, I think it could work if done right. The biggest issue I see with laying the rear window down is what it does to the quarter windows. Something I was considering doing on my Mercury and it may work in this instance was to invert the rear window. Instead of the top of the window curving down, it would curve upward.
-
The floor pan is beginning to fit. I need to get the rear suspension together and temp glue it to the frame to make sure I get the rear wheels centered. It looks like it needs to go rearward 3 or 4 mms. If it has to go back much more, I'll have to cut the tank loose and reposition it.
-
That's because it IS easy. If you look at it, all of the cuts are very simple. You just follow lines that are already there.
-
I am leaning more towards the Pearl White. I've used it before. But, I've never painted an entire body with it. I'm also thinking of using Satin Clear over it. I'm going to buy a can and try it. I'm not sure how it will effect the pearl.
-
Thanx Dennis! I'm not a big fan of the laid down rear window myself. I've viewed a lot of full scales that look like a 1/25 scale model with a 1/32 scale roof. To me, those chops wrecks the proportions. Especially the quarter windows. When I built my '39, I learned that a little here and there is better IMO than a lot in one area.
-
Scary Jerry's Ranger.... Reborn!
Plowboy replied to Chuck Most's topic in Model Trucks: Pickups, Vans, SUVs, Light Commercial
That's a sharp looking little Ranger Chuck! Makes me want to build one! -
Yeah Kit, this model will be similar. I actually have plans to do a '49 Ford in that style. This was actually my inspiration. I figured if Icon can stick an electric motor in a '49 Mercury and make it cool, surely I do something similar. I just want something a little more refined as well as sinister looking. I do love how that thing looks though.
-
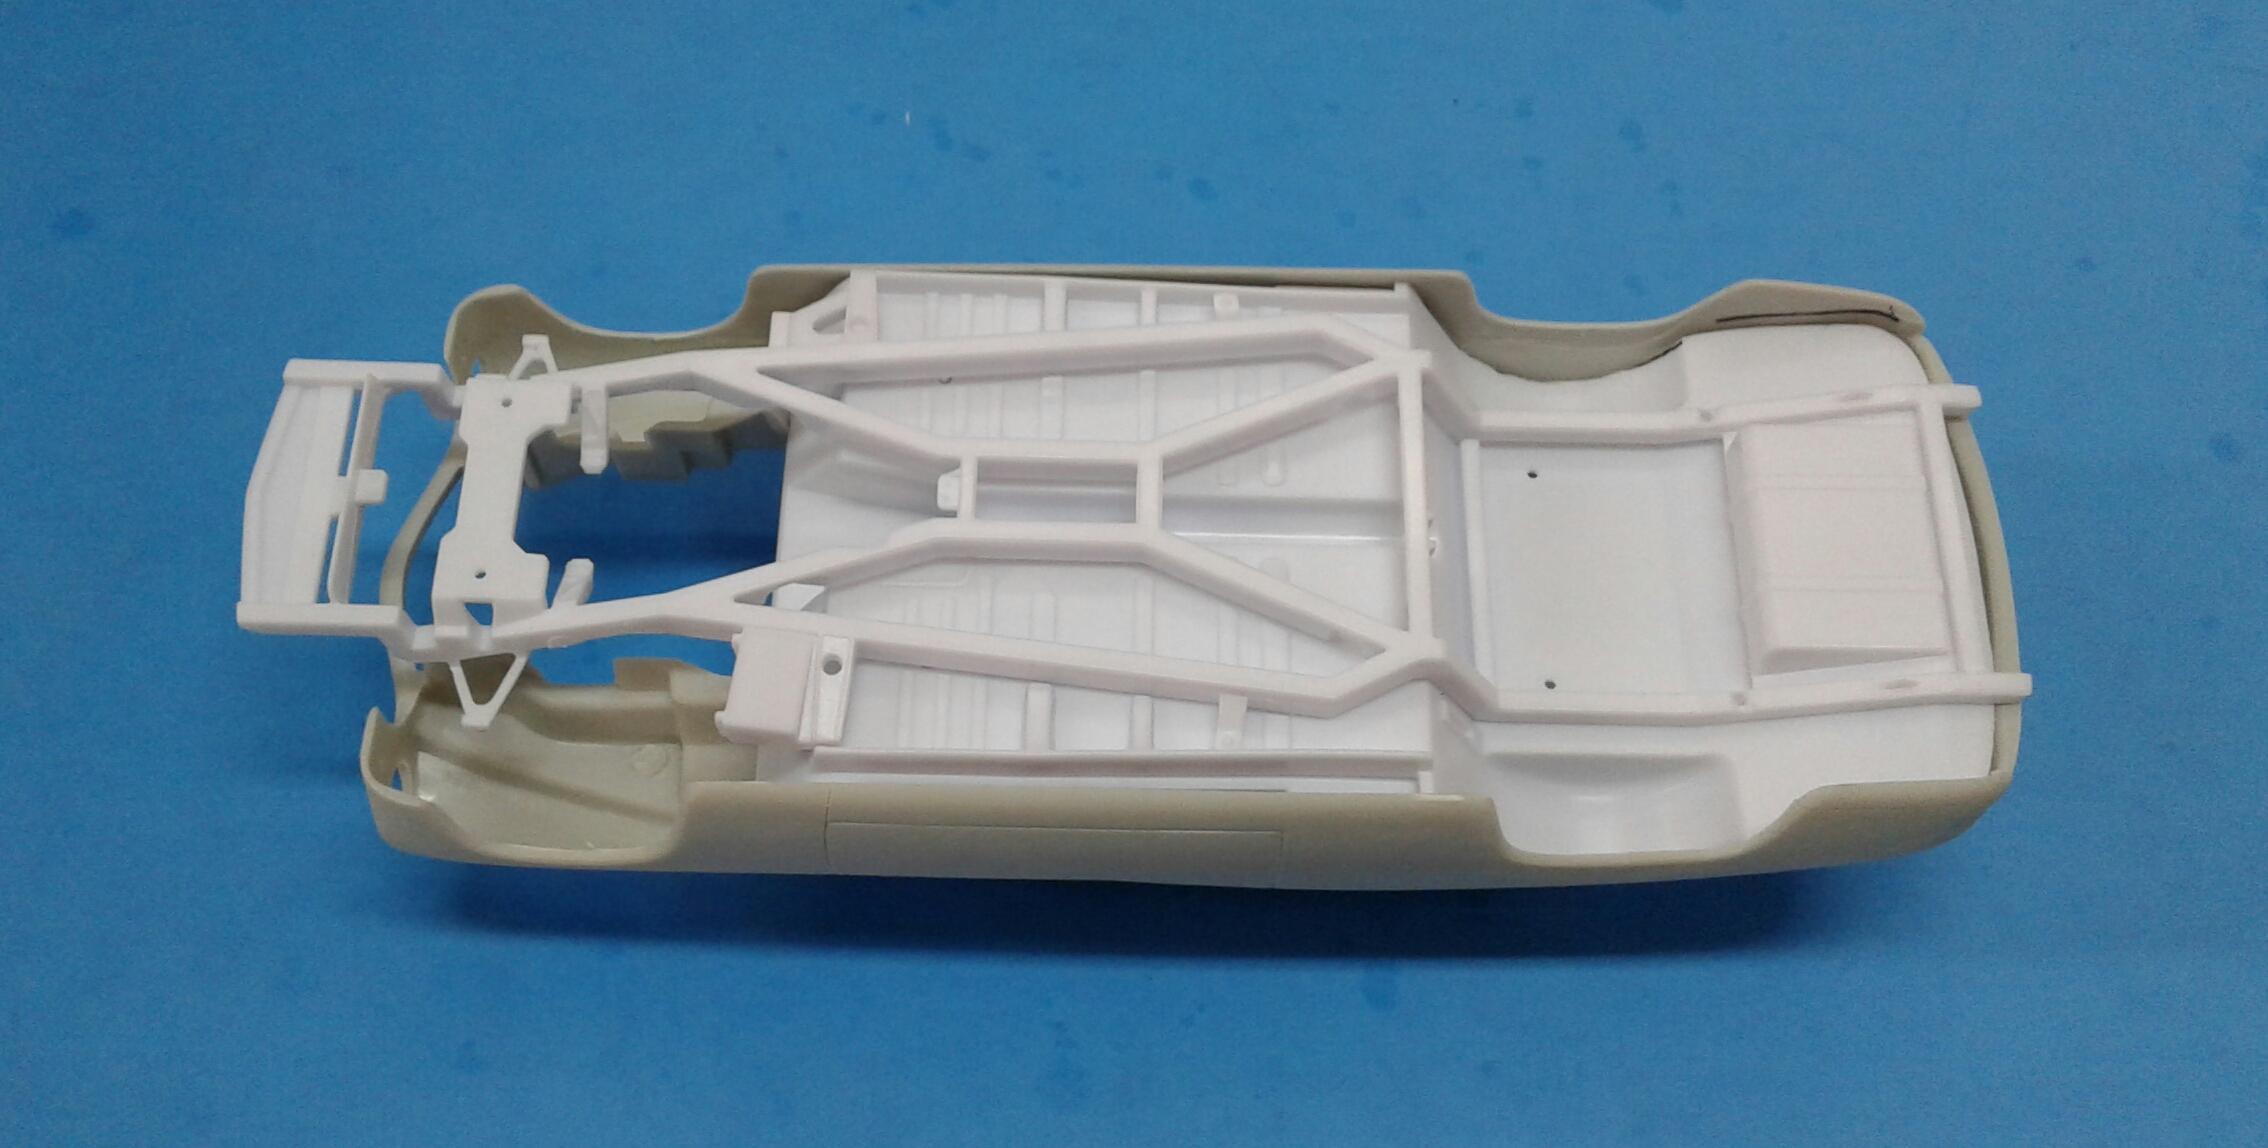
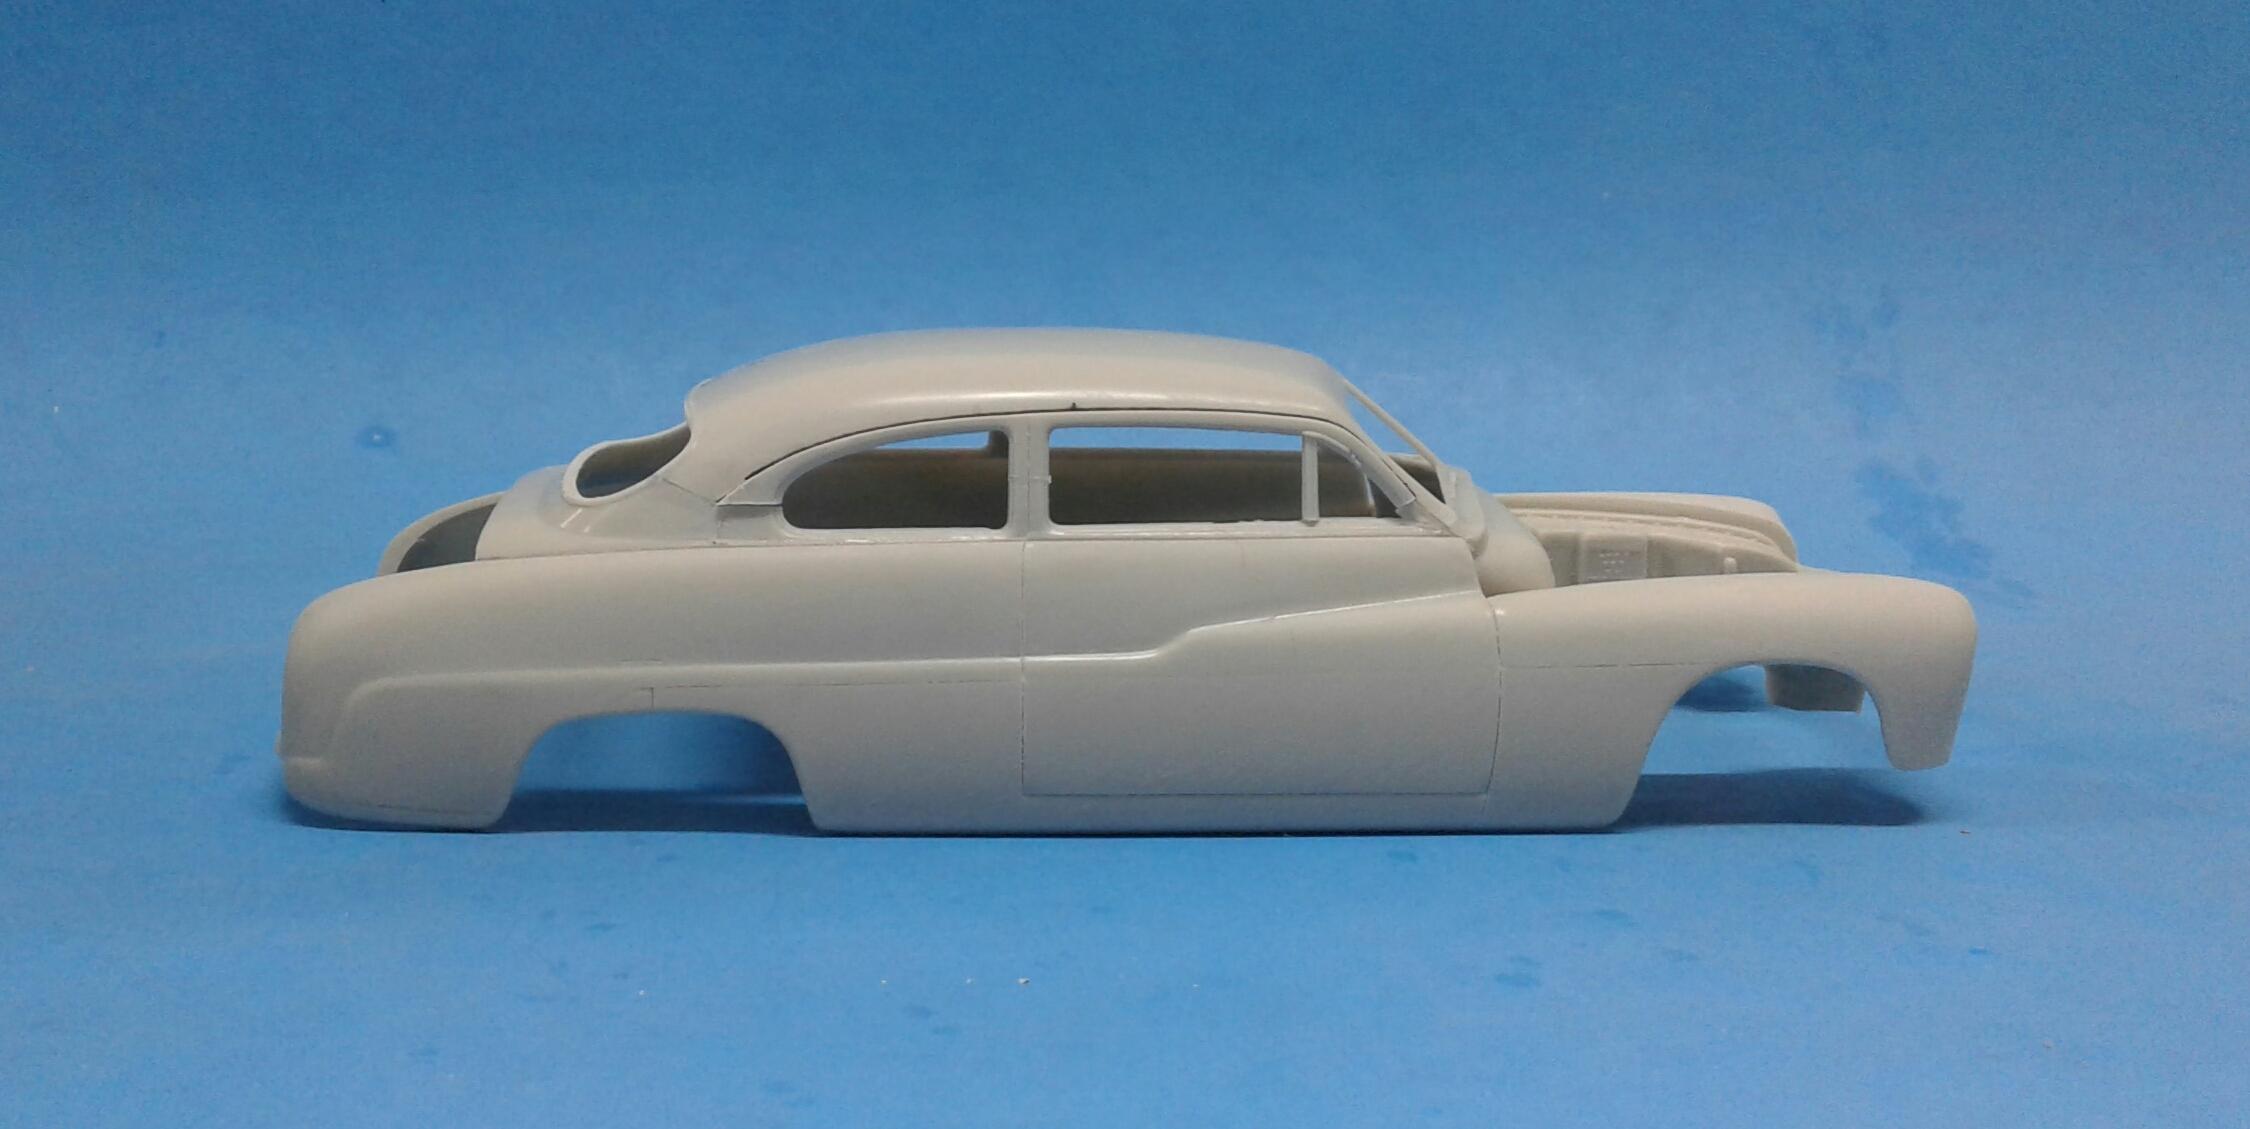
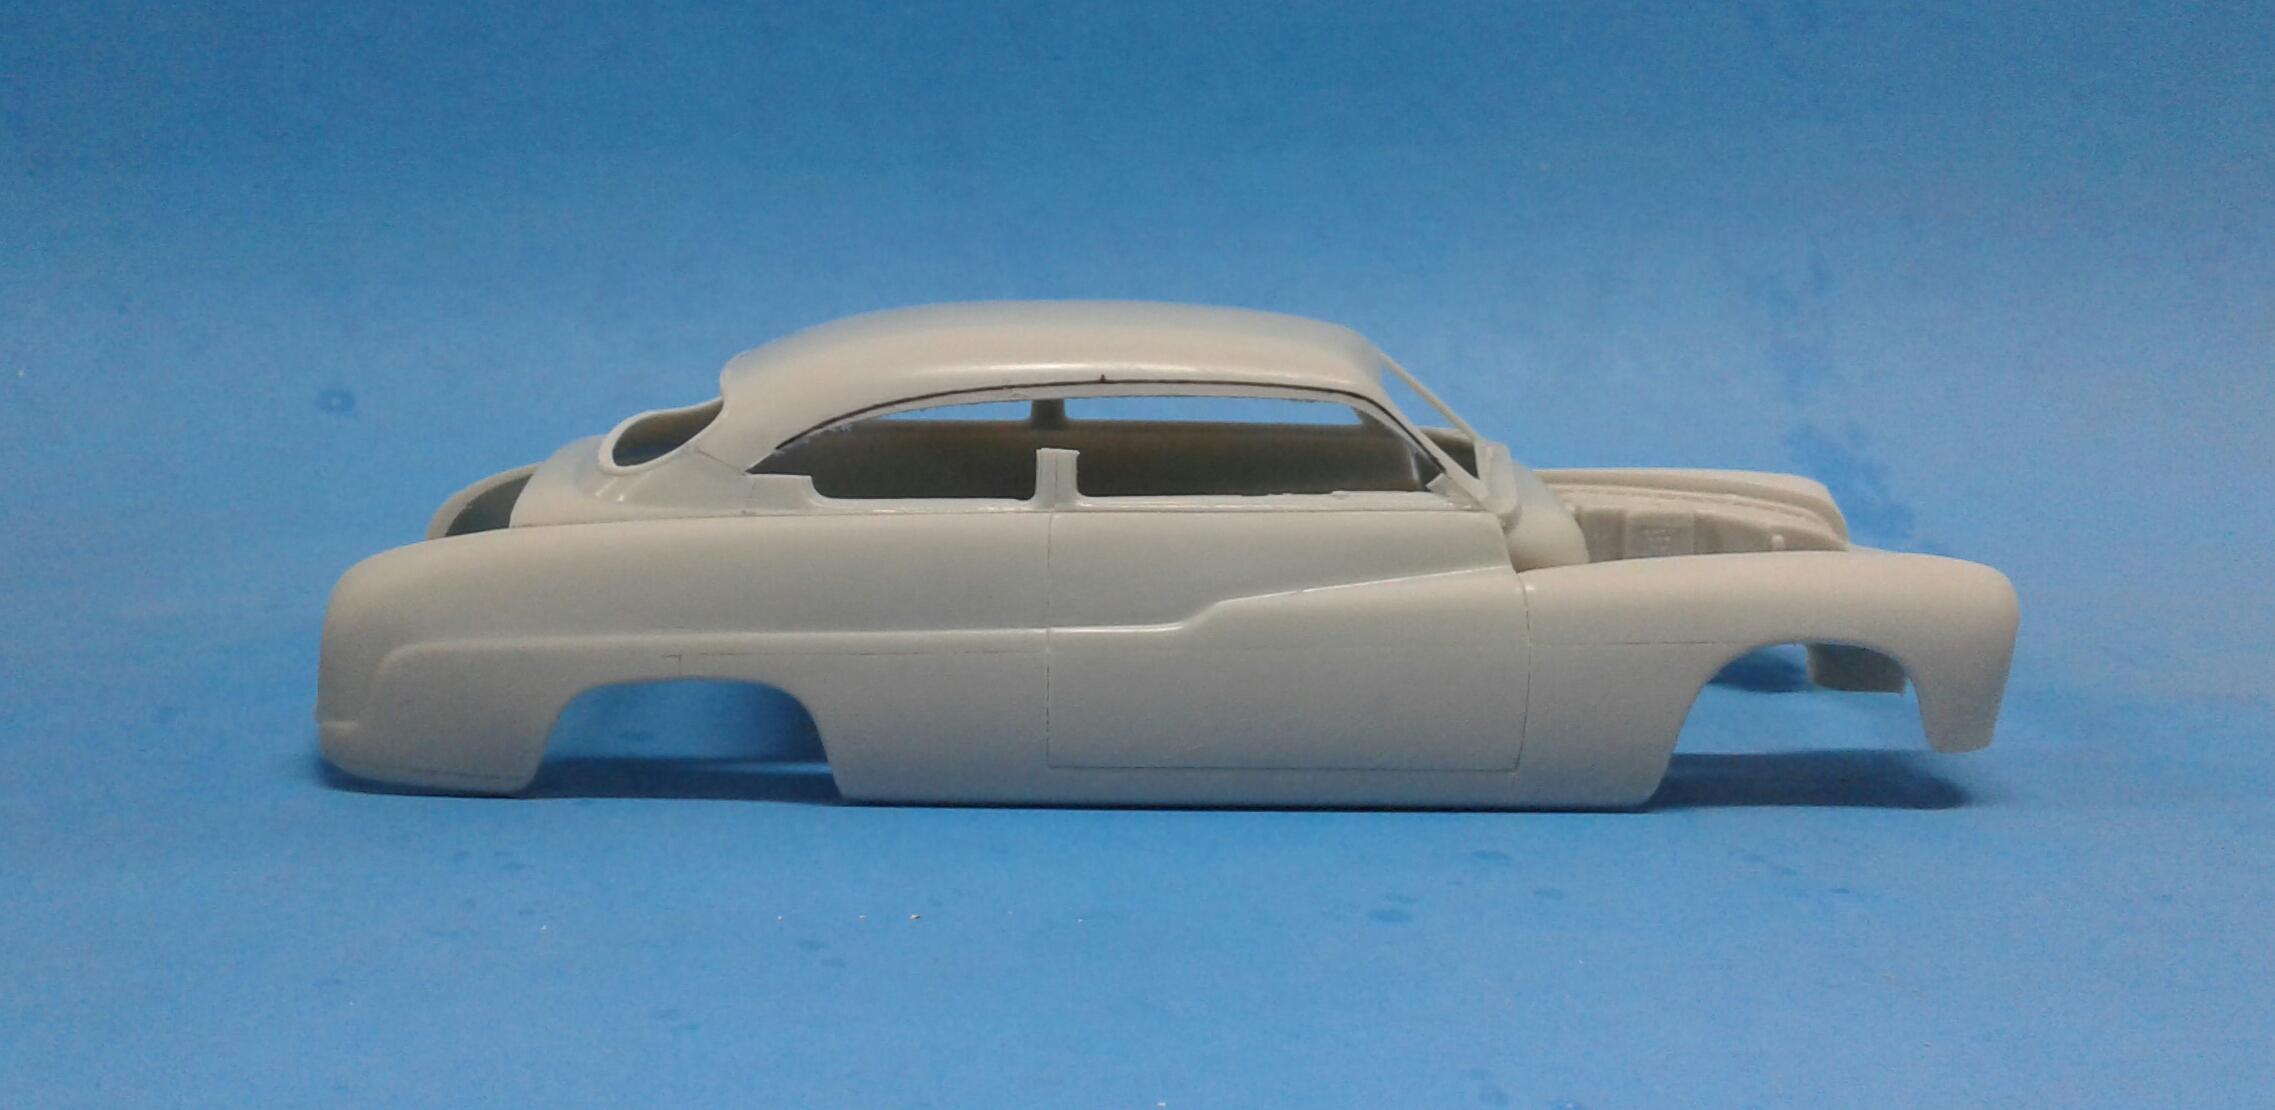
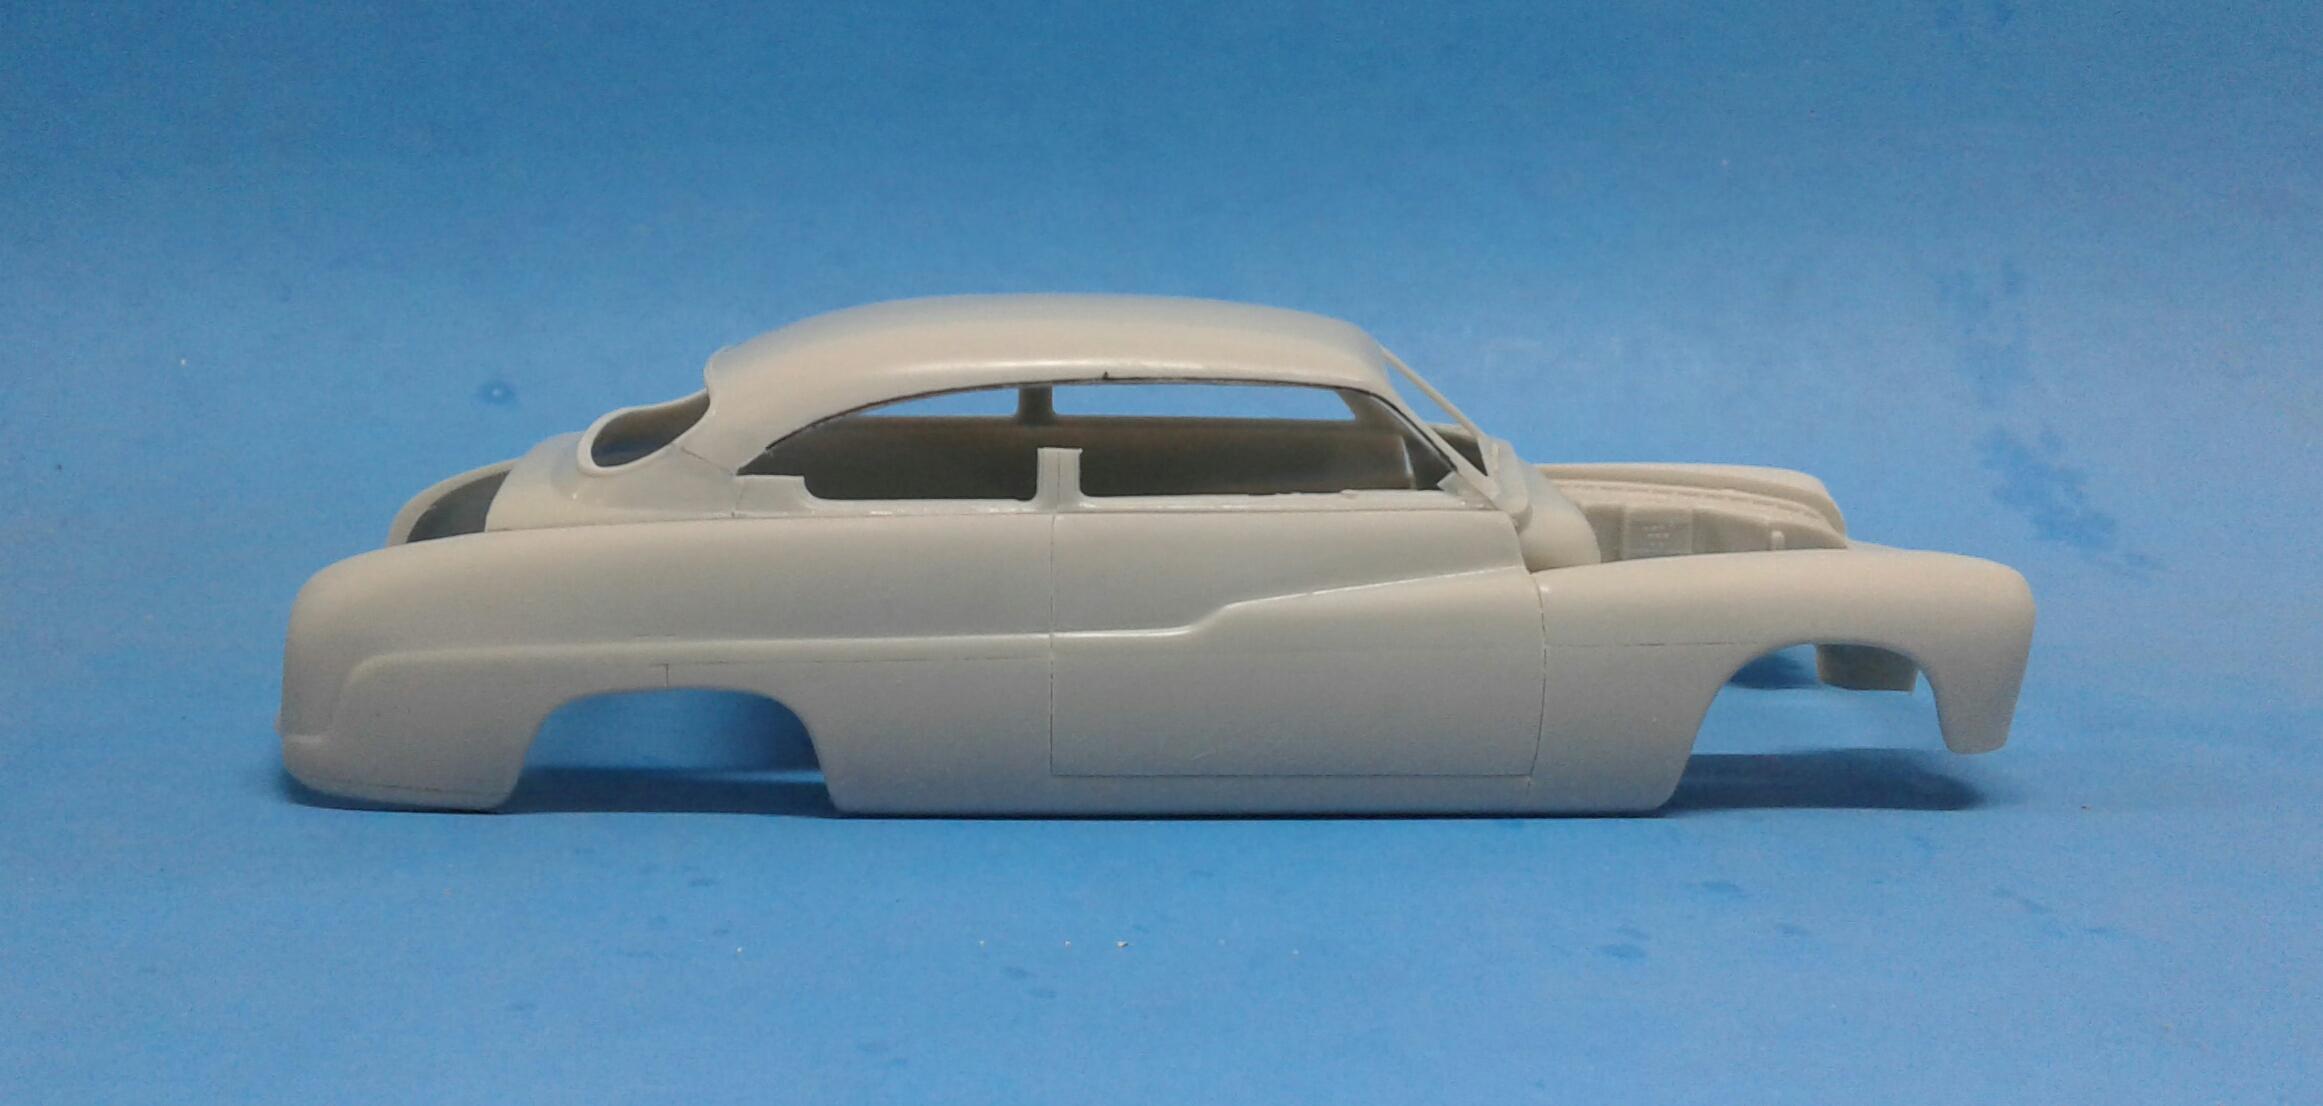
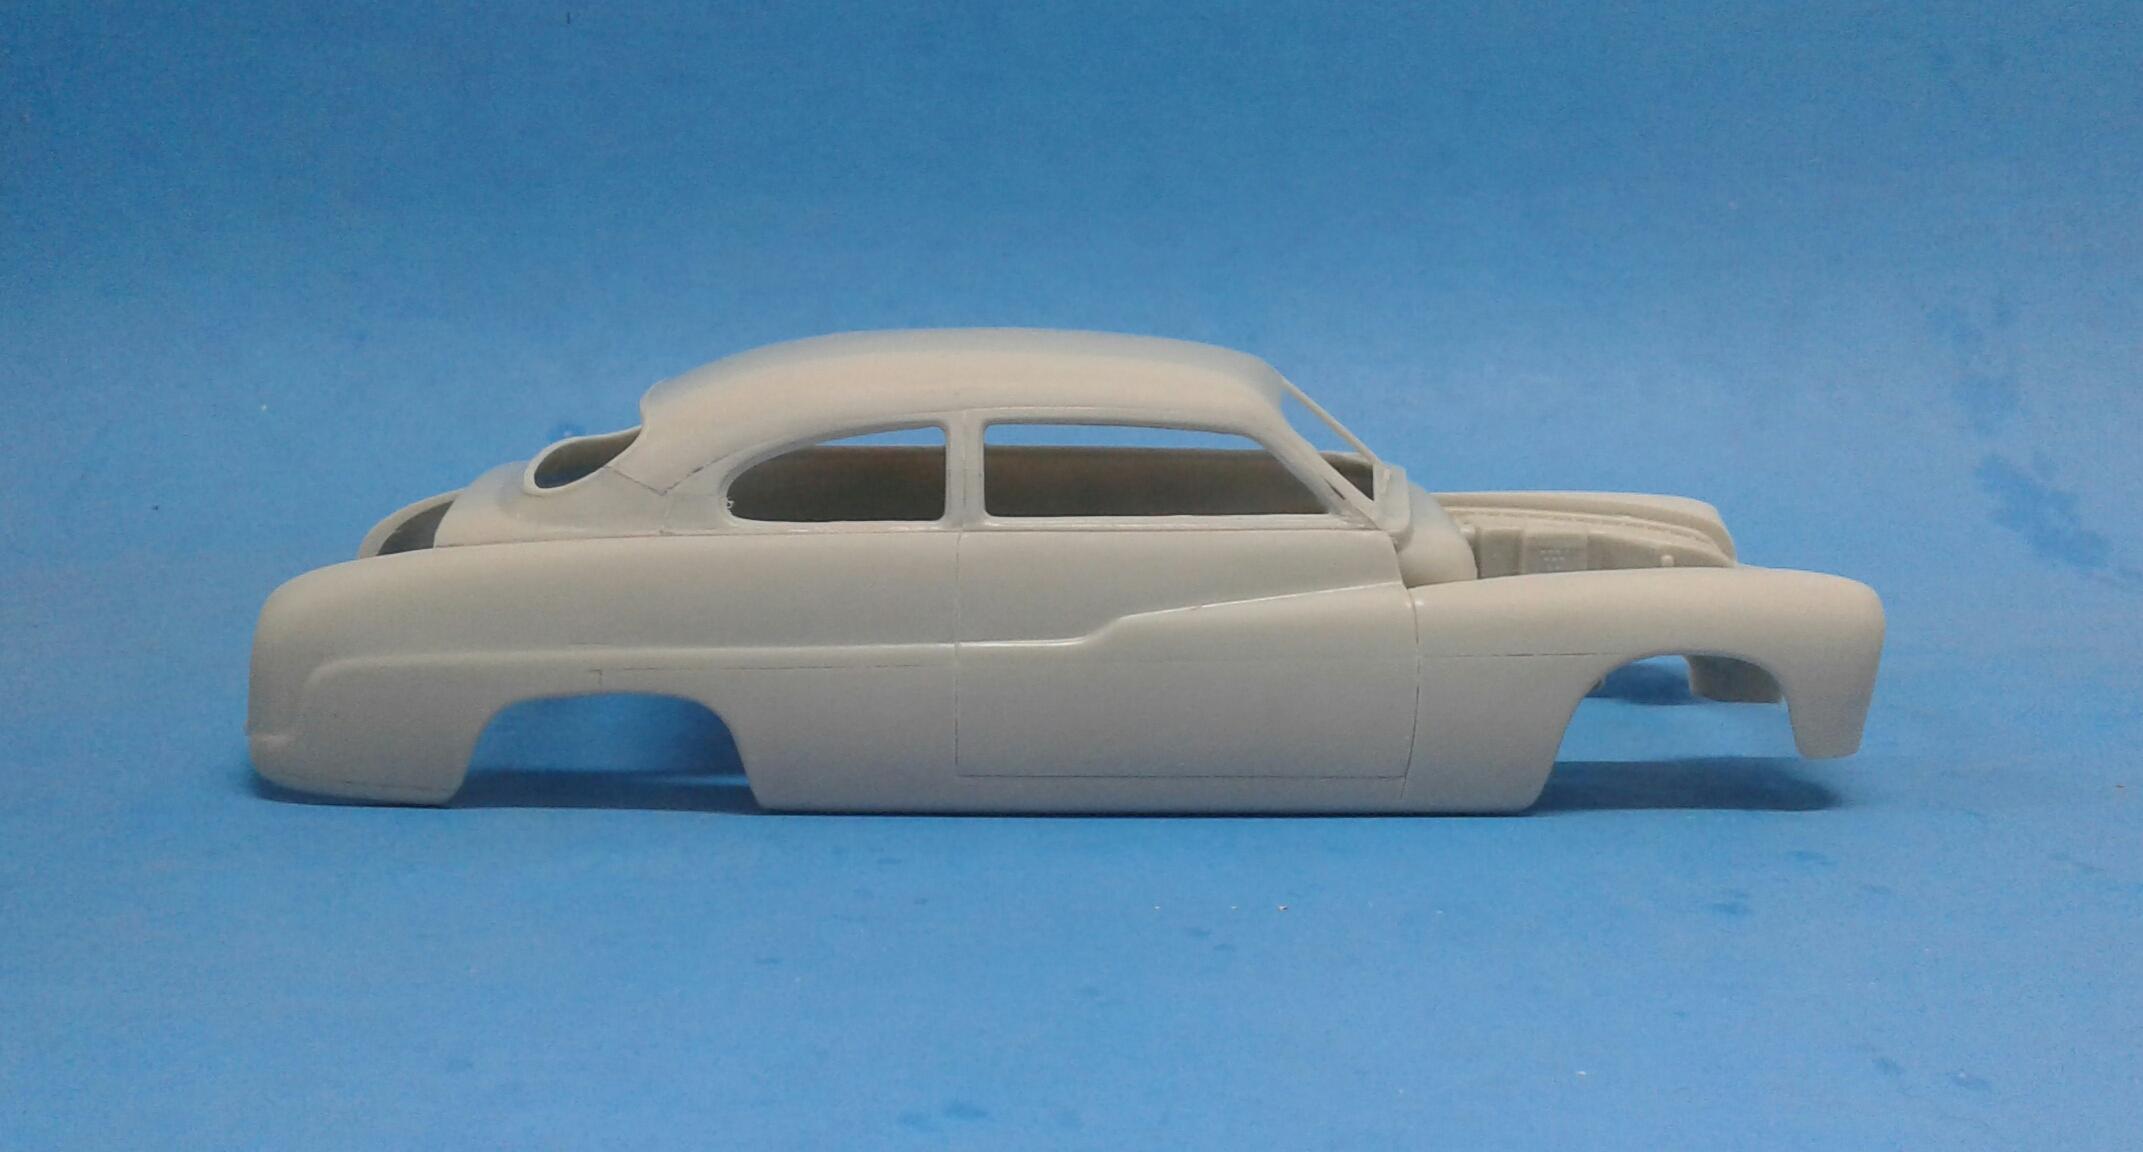
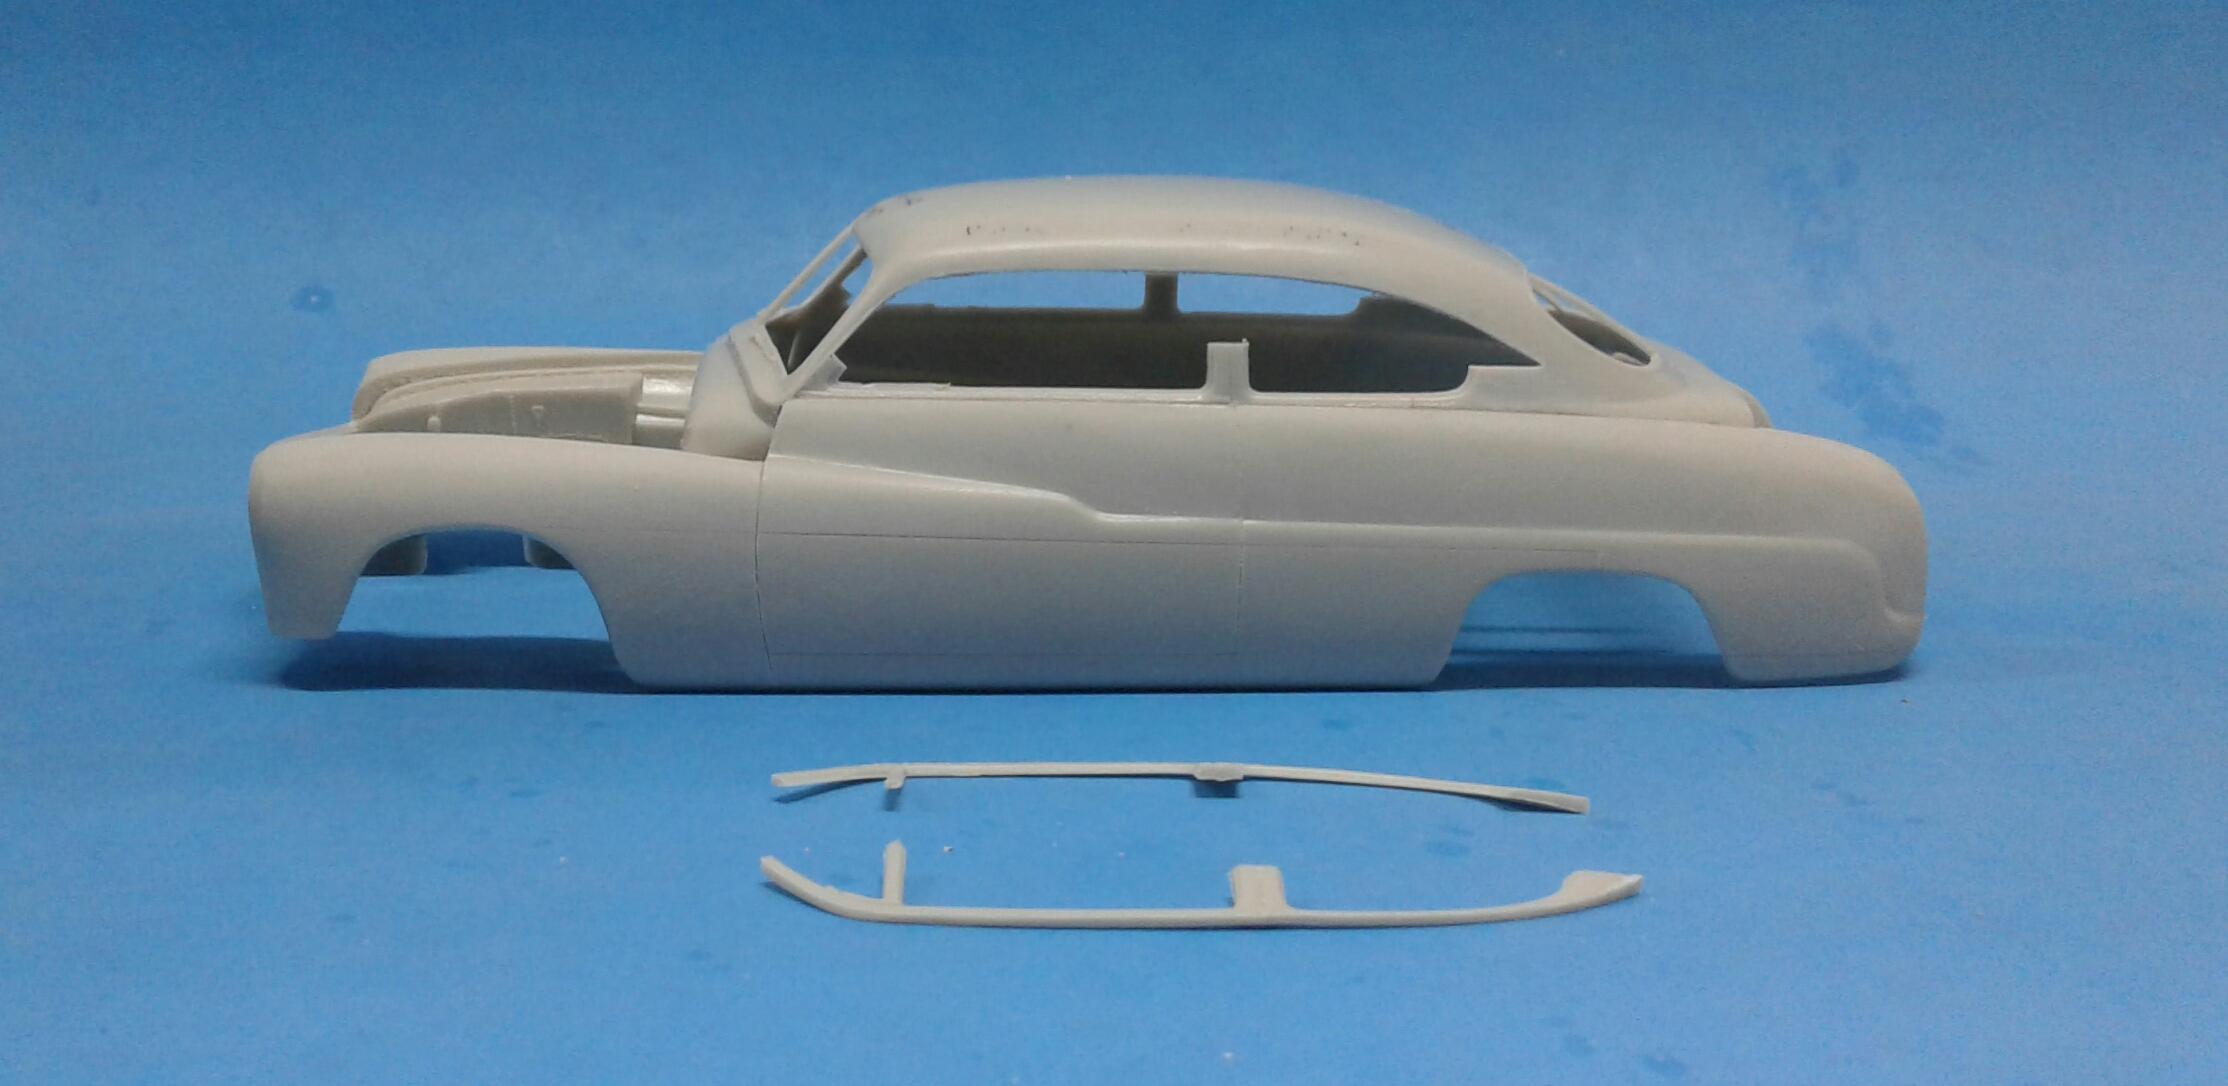
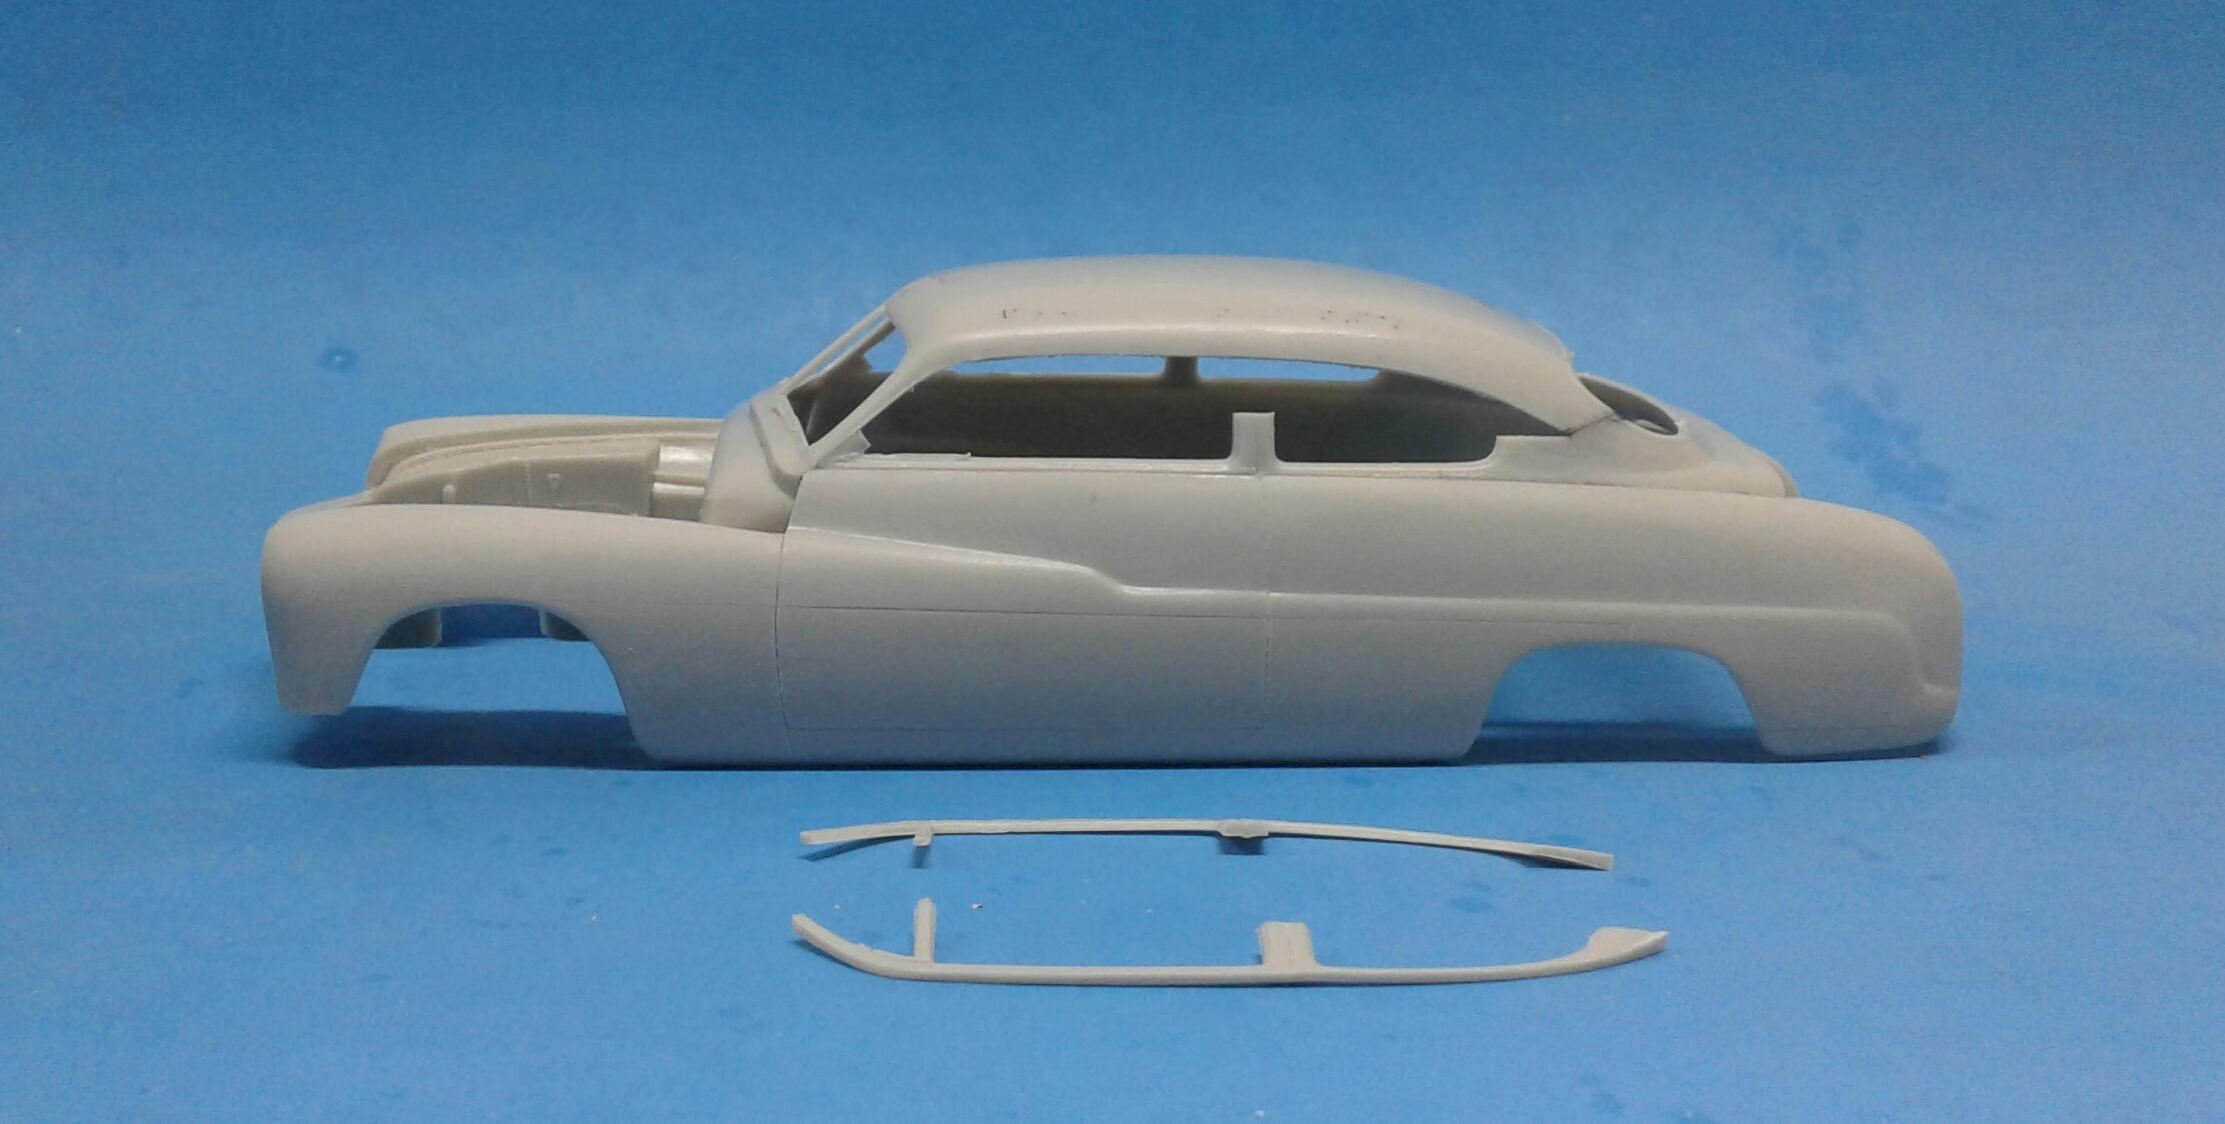
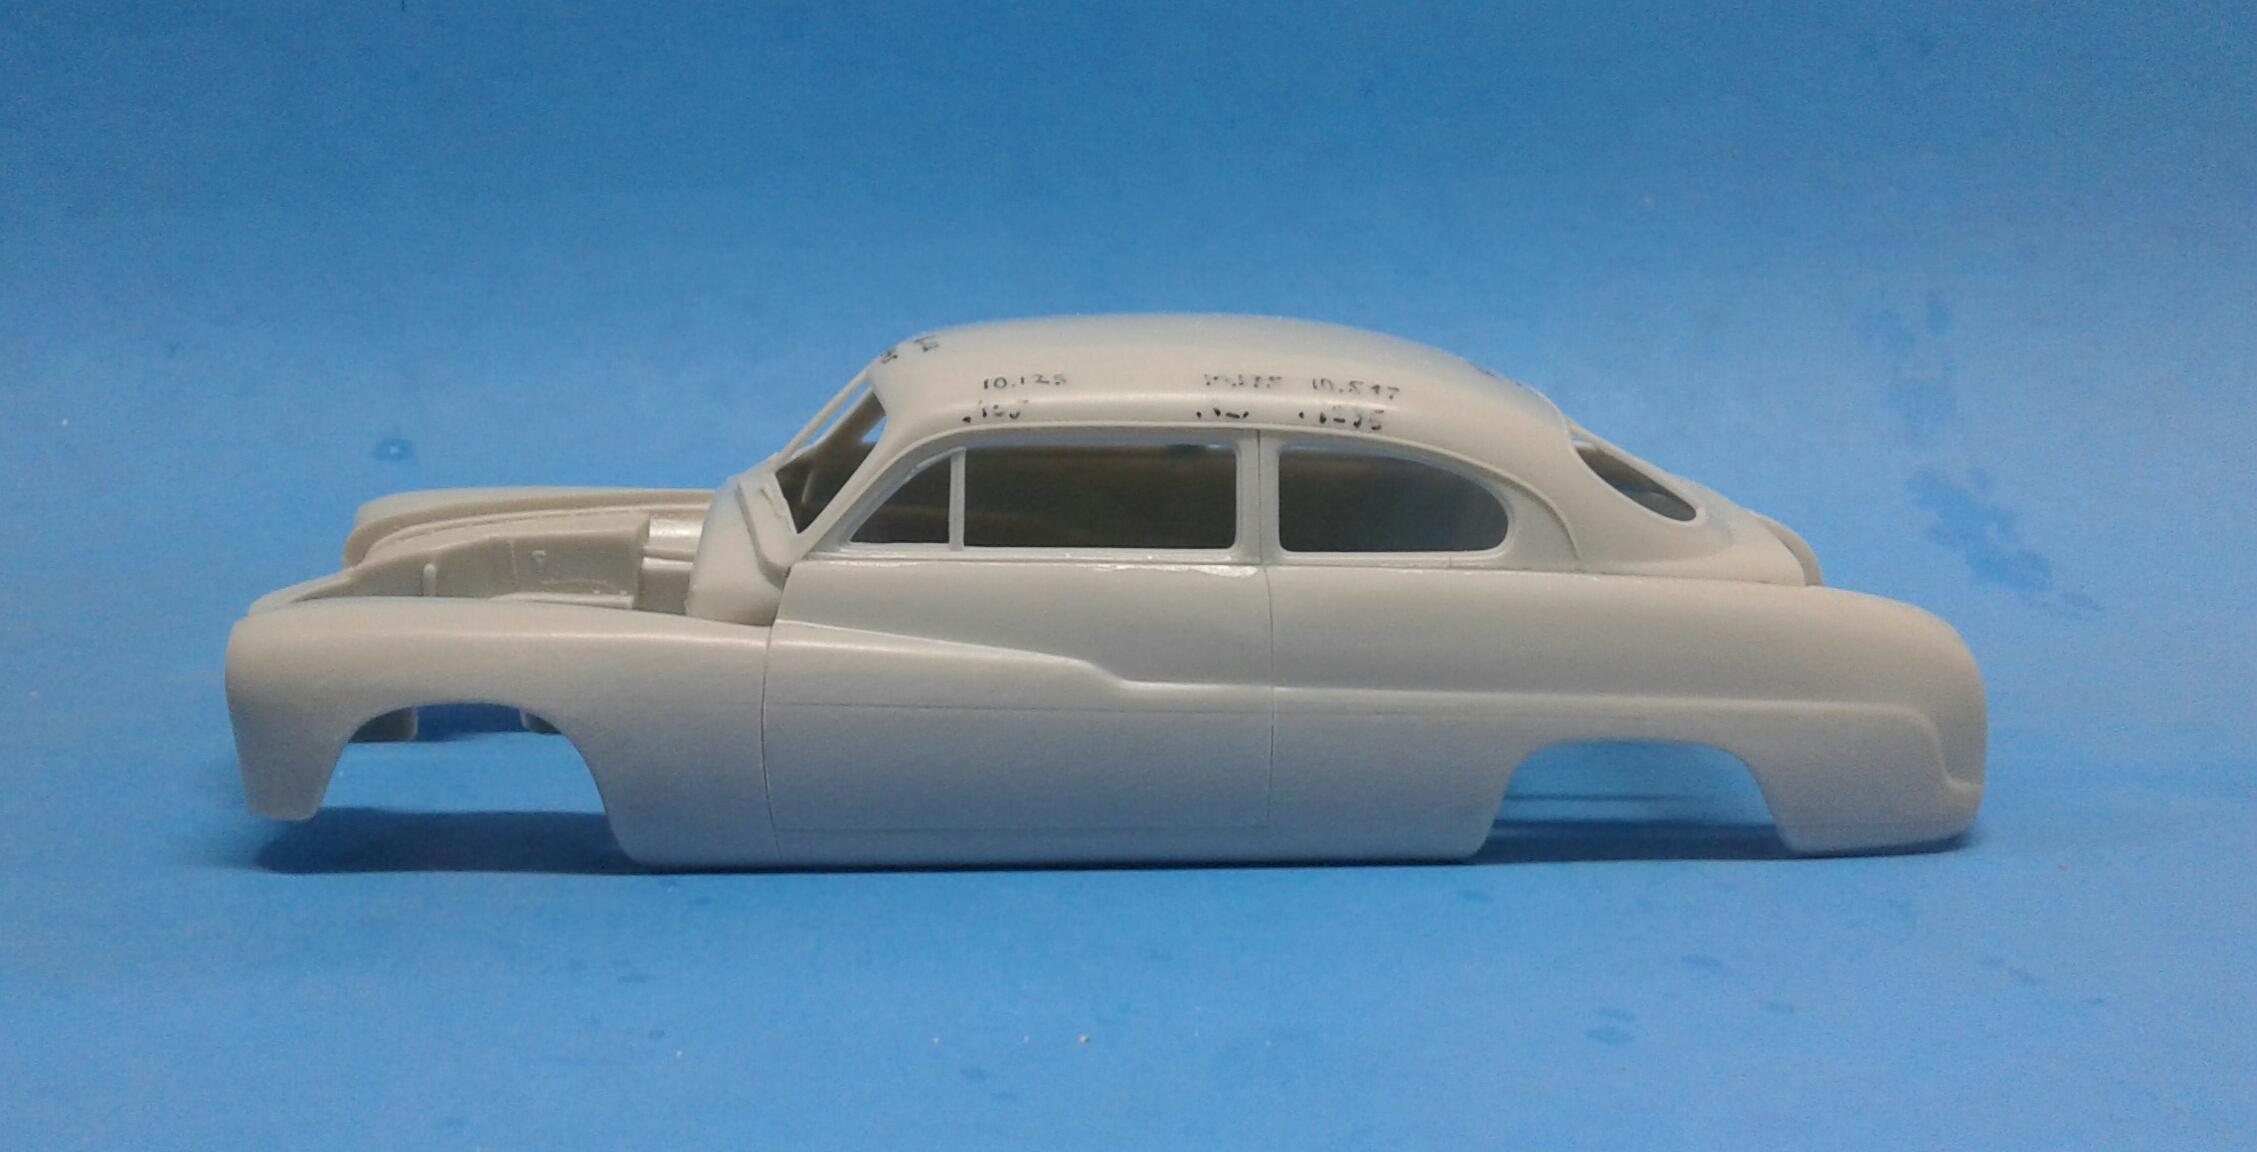
Here's the before and after. With the easy stuff done, it's time to get to the tricky part. From the start, my idea has been to do a modern version of a '49 Mercury. But, I sure wasn't looking forward to modernizing the stock chassis to current standards. It was then that I noticed the Foose Caddy and BINGO! There's everything I need! So, yeah, I'm going to attempt to drape this body over the Foose Caddy's interior and chassis. Right away, I knew there would be a wheelbase issue and I figured I would have to narrow the floor pan. But, to my surprise, I'm actually going to have to widen the floorpan. By a lot! I've just been throwing parts around right now. But, the plan in my head is coming together. Right now, my vision for it is paint the interior with Tamiya Dull Red. The body will be either Tamiya Pearl White or Tamiya Mica Silver. All of the bright work will get Tamiya Satin Black. Wheels will be black. Haven't picked those yet. I may give the Foose wheels a shot. This plan is subject to change at any time.
-
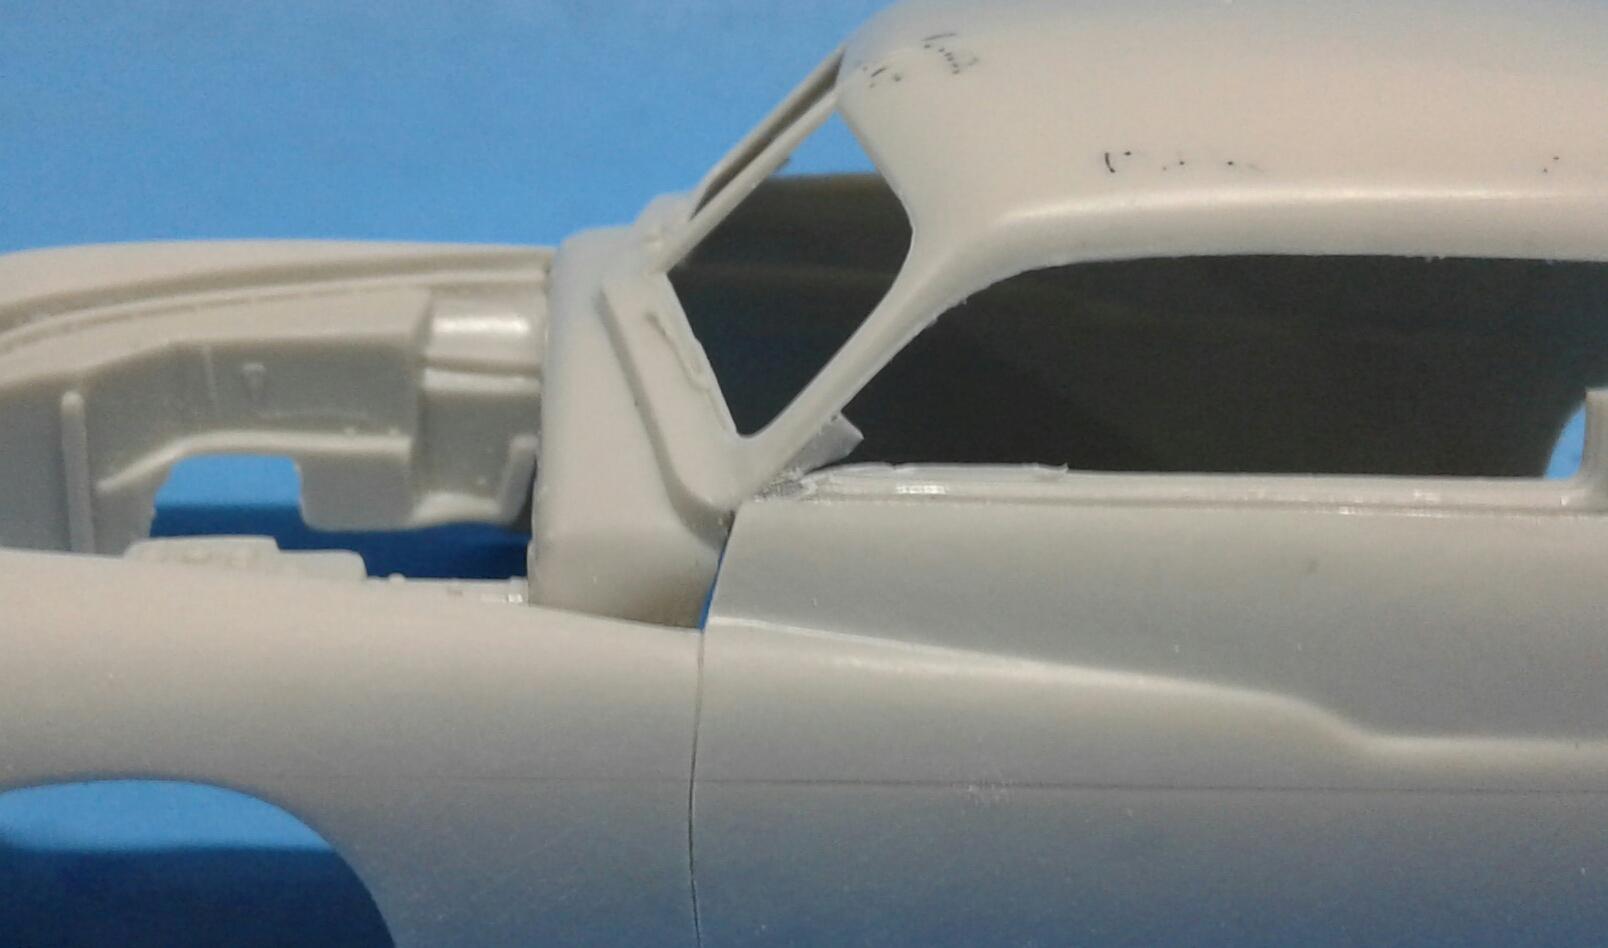
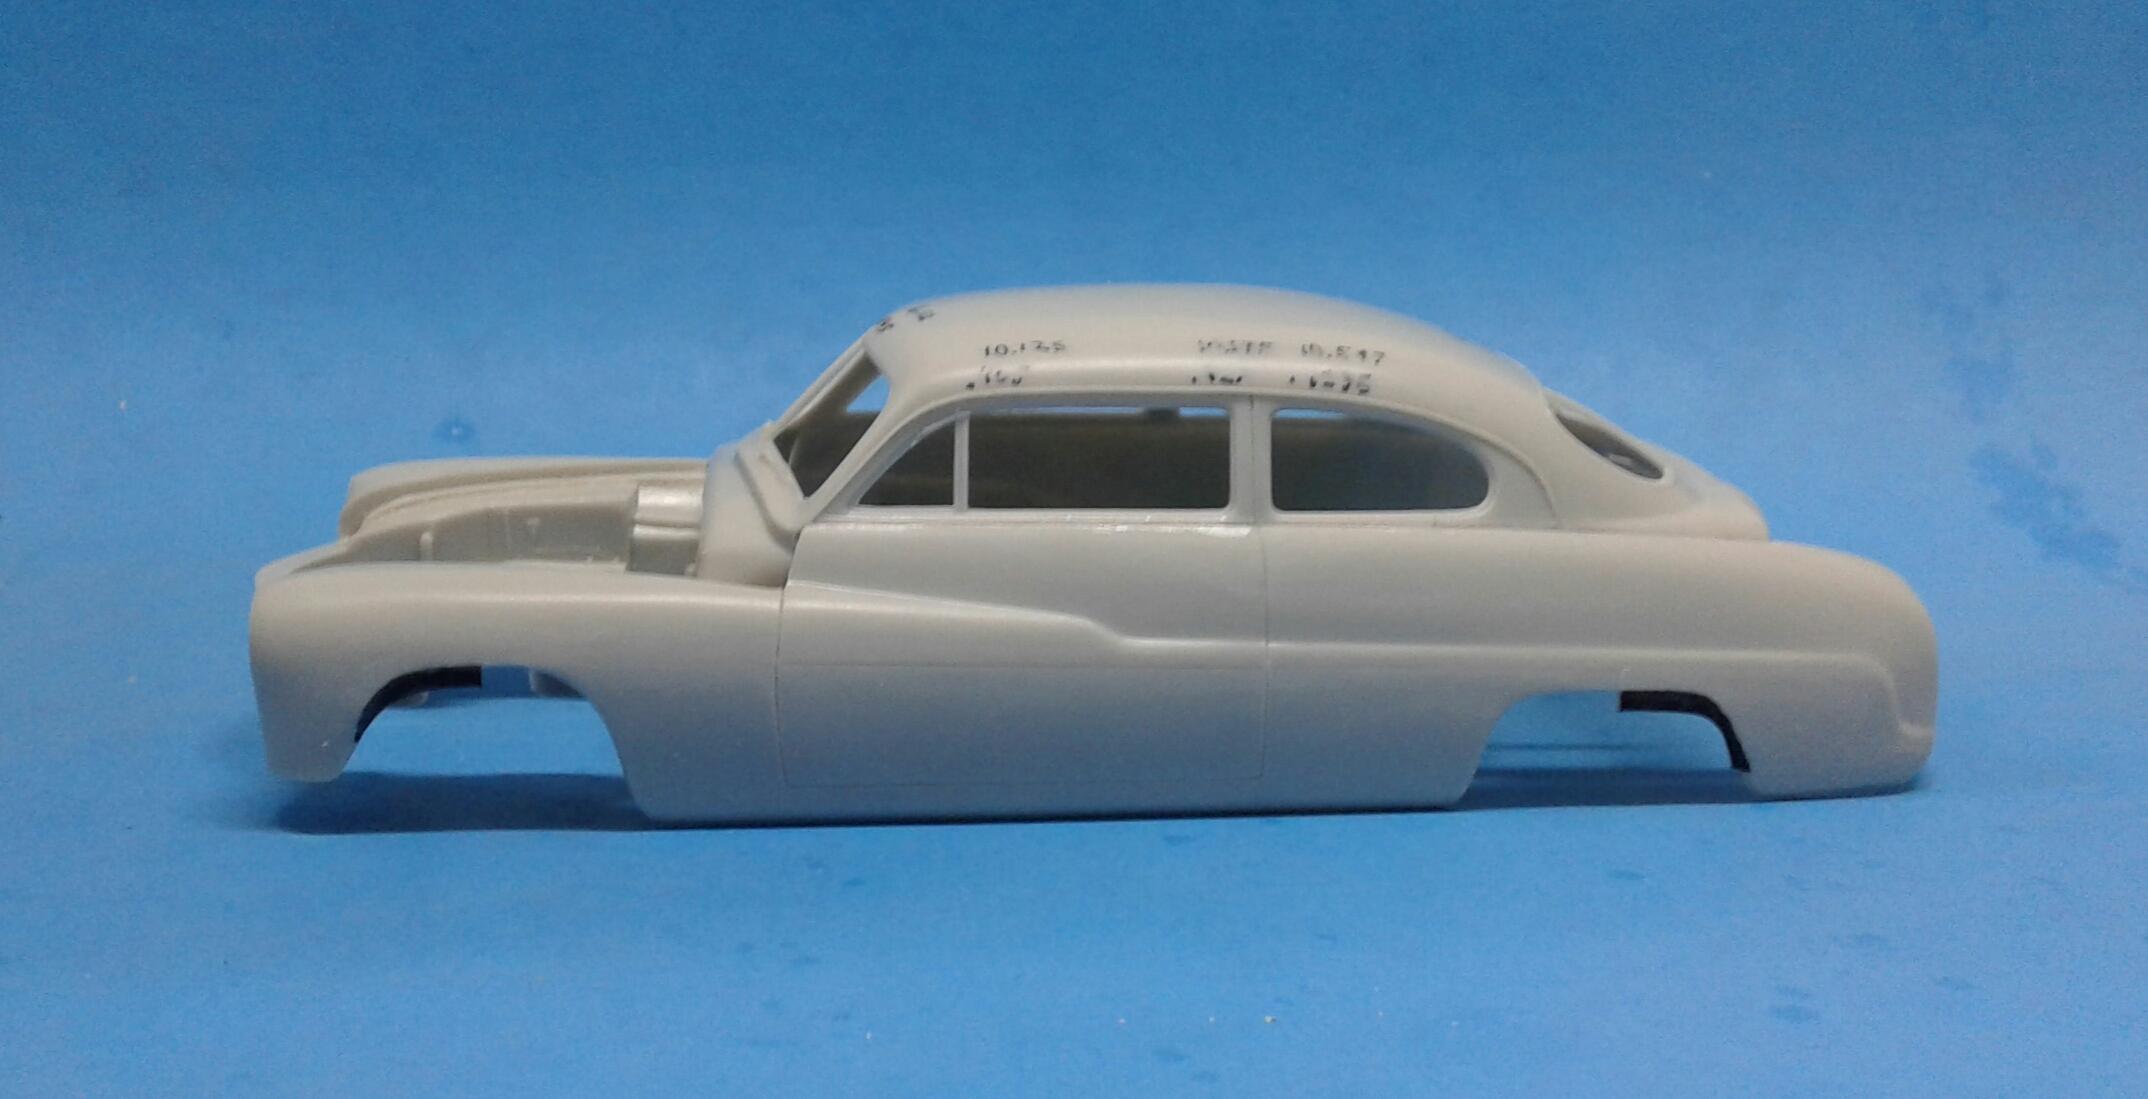
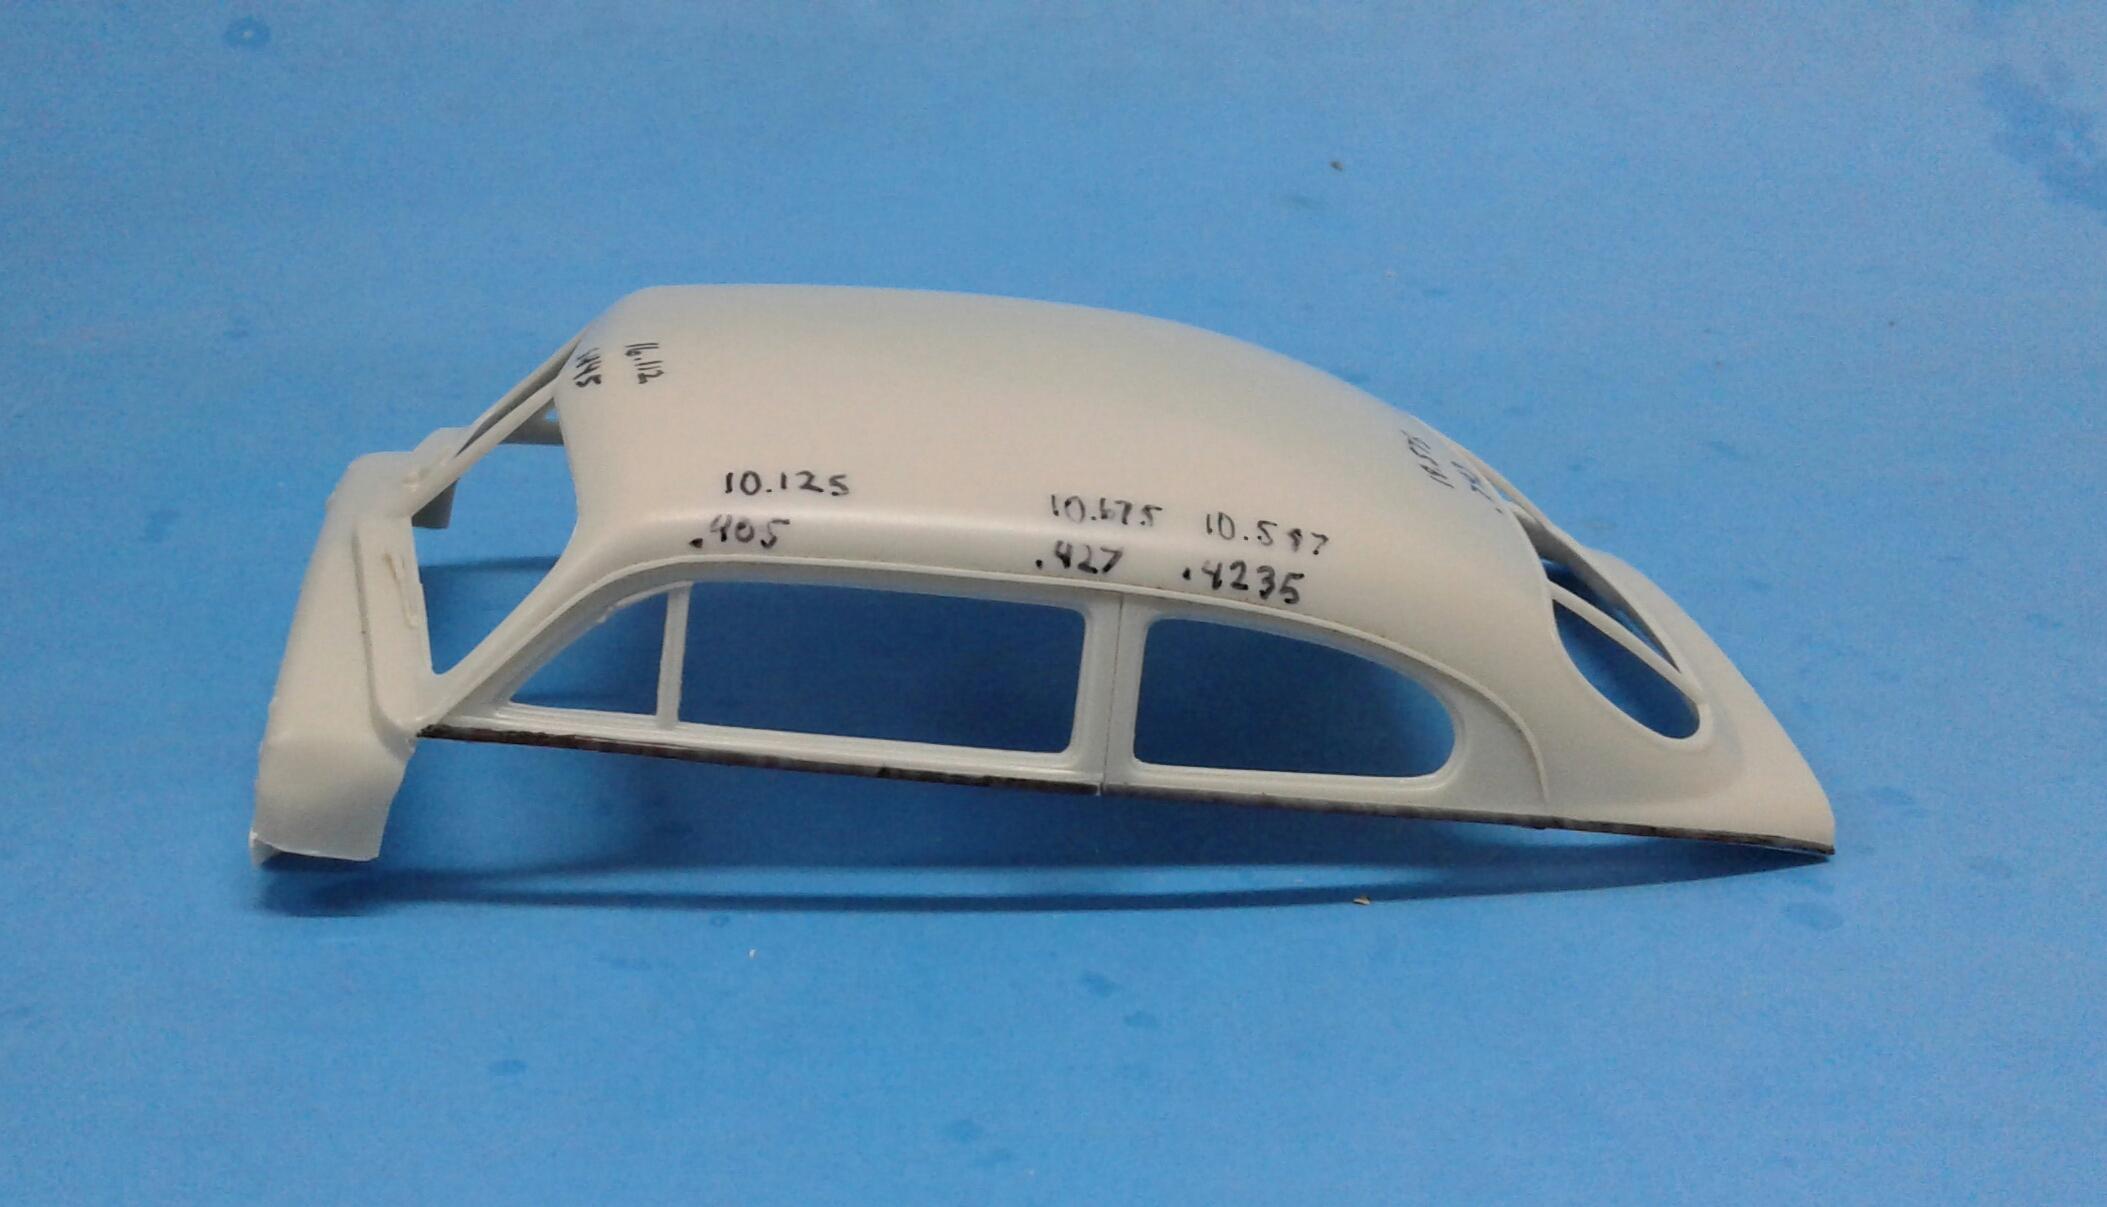
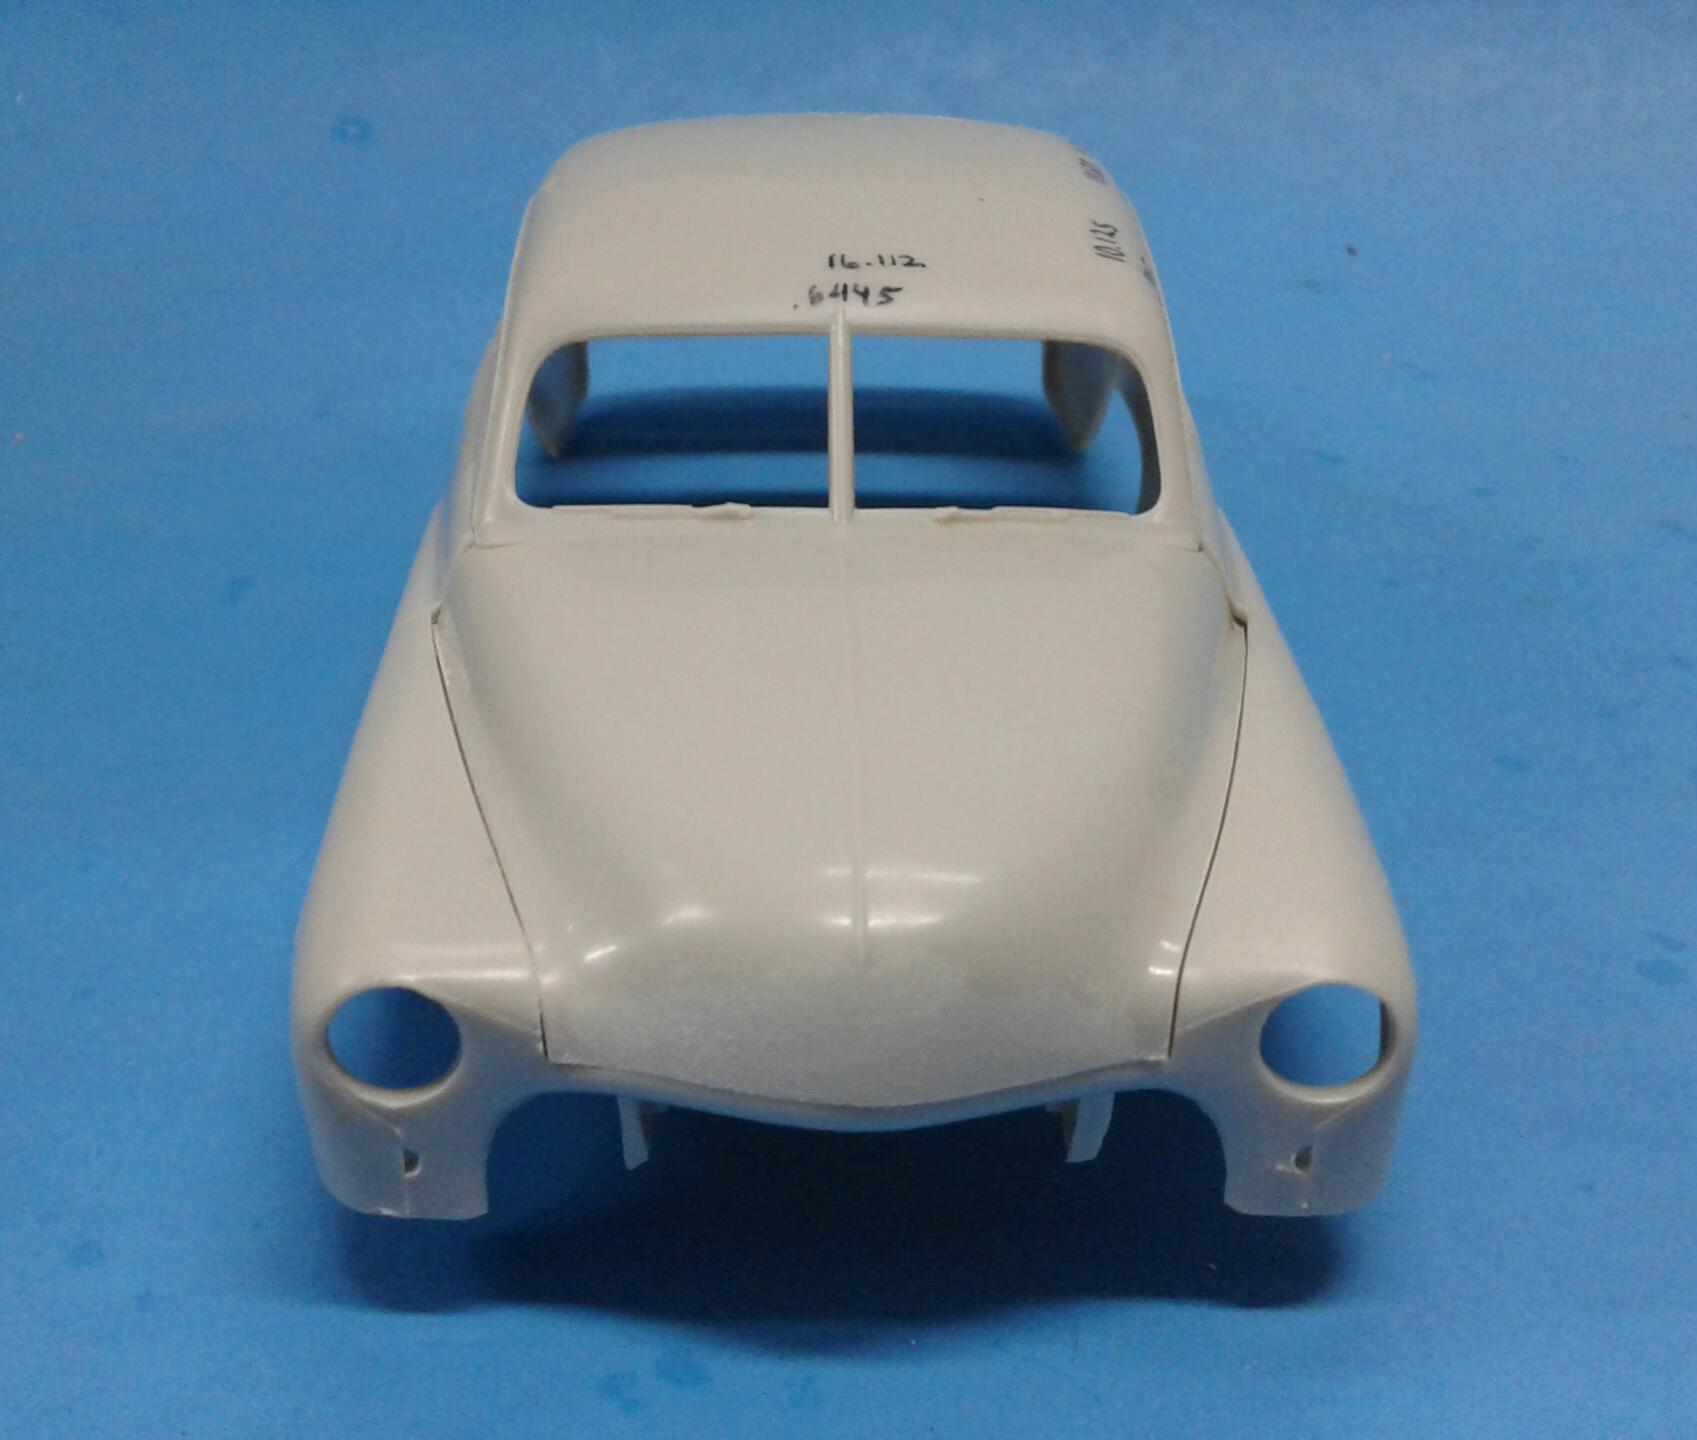
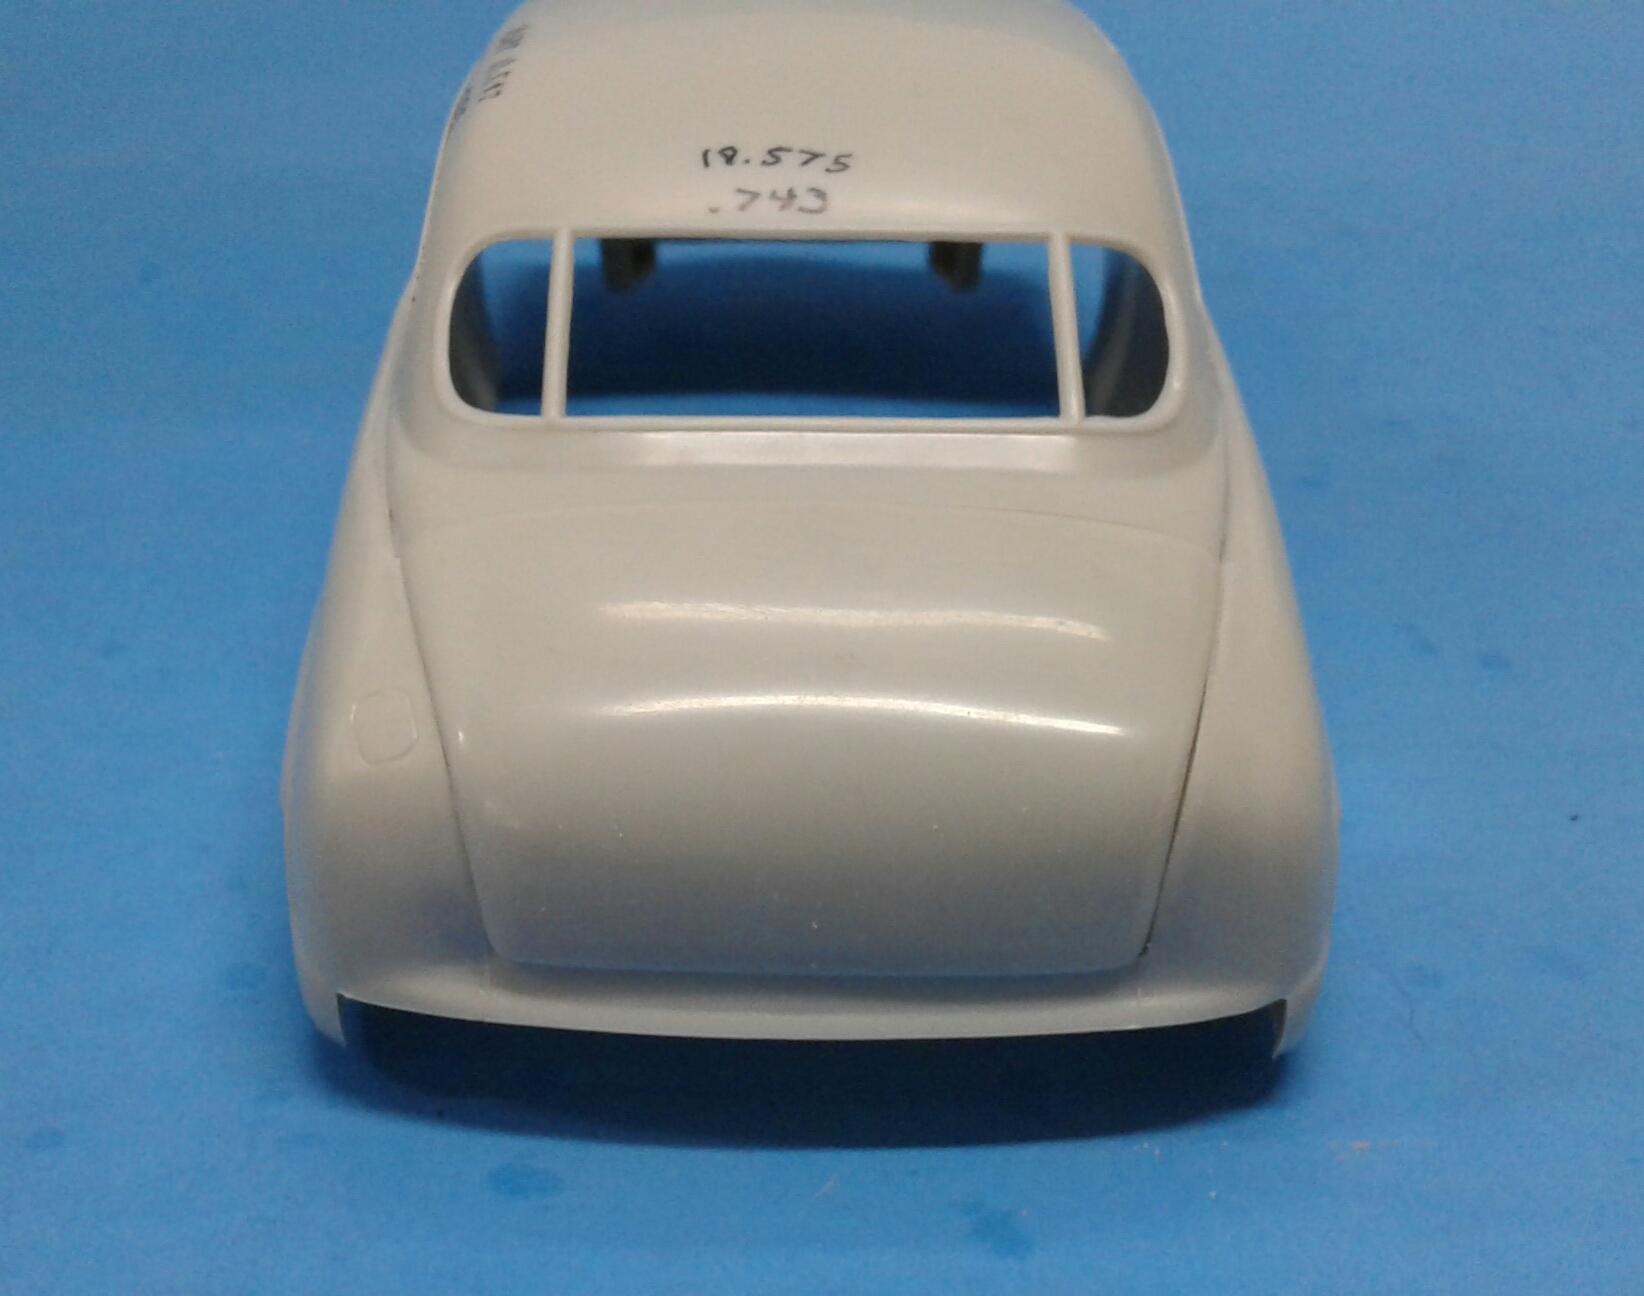
Thanx guys! Since I skipped the photos on the window frame steps, I thought I would take them while I did the other side. In this first photo, I placed the frame back to the body, temp glued it into place and traced the shape onto the roof. Notice that I didn't trim to the line on the A pillar. Since the angle of the A pillars has changed, the frame has to conform to it instead of the roof fitting to the frame. And back together.
-
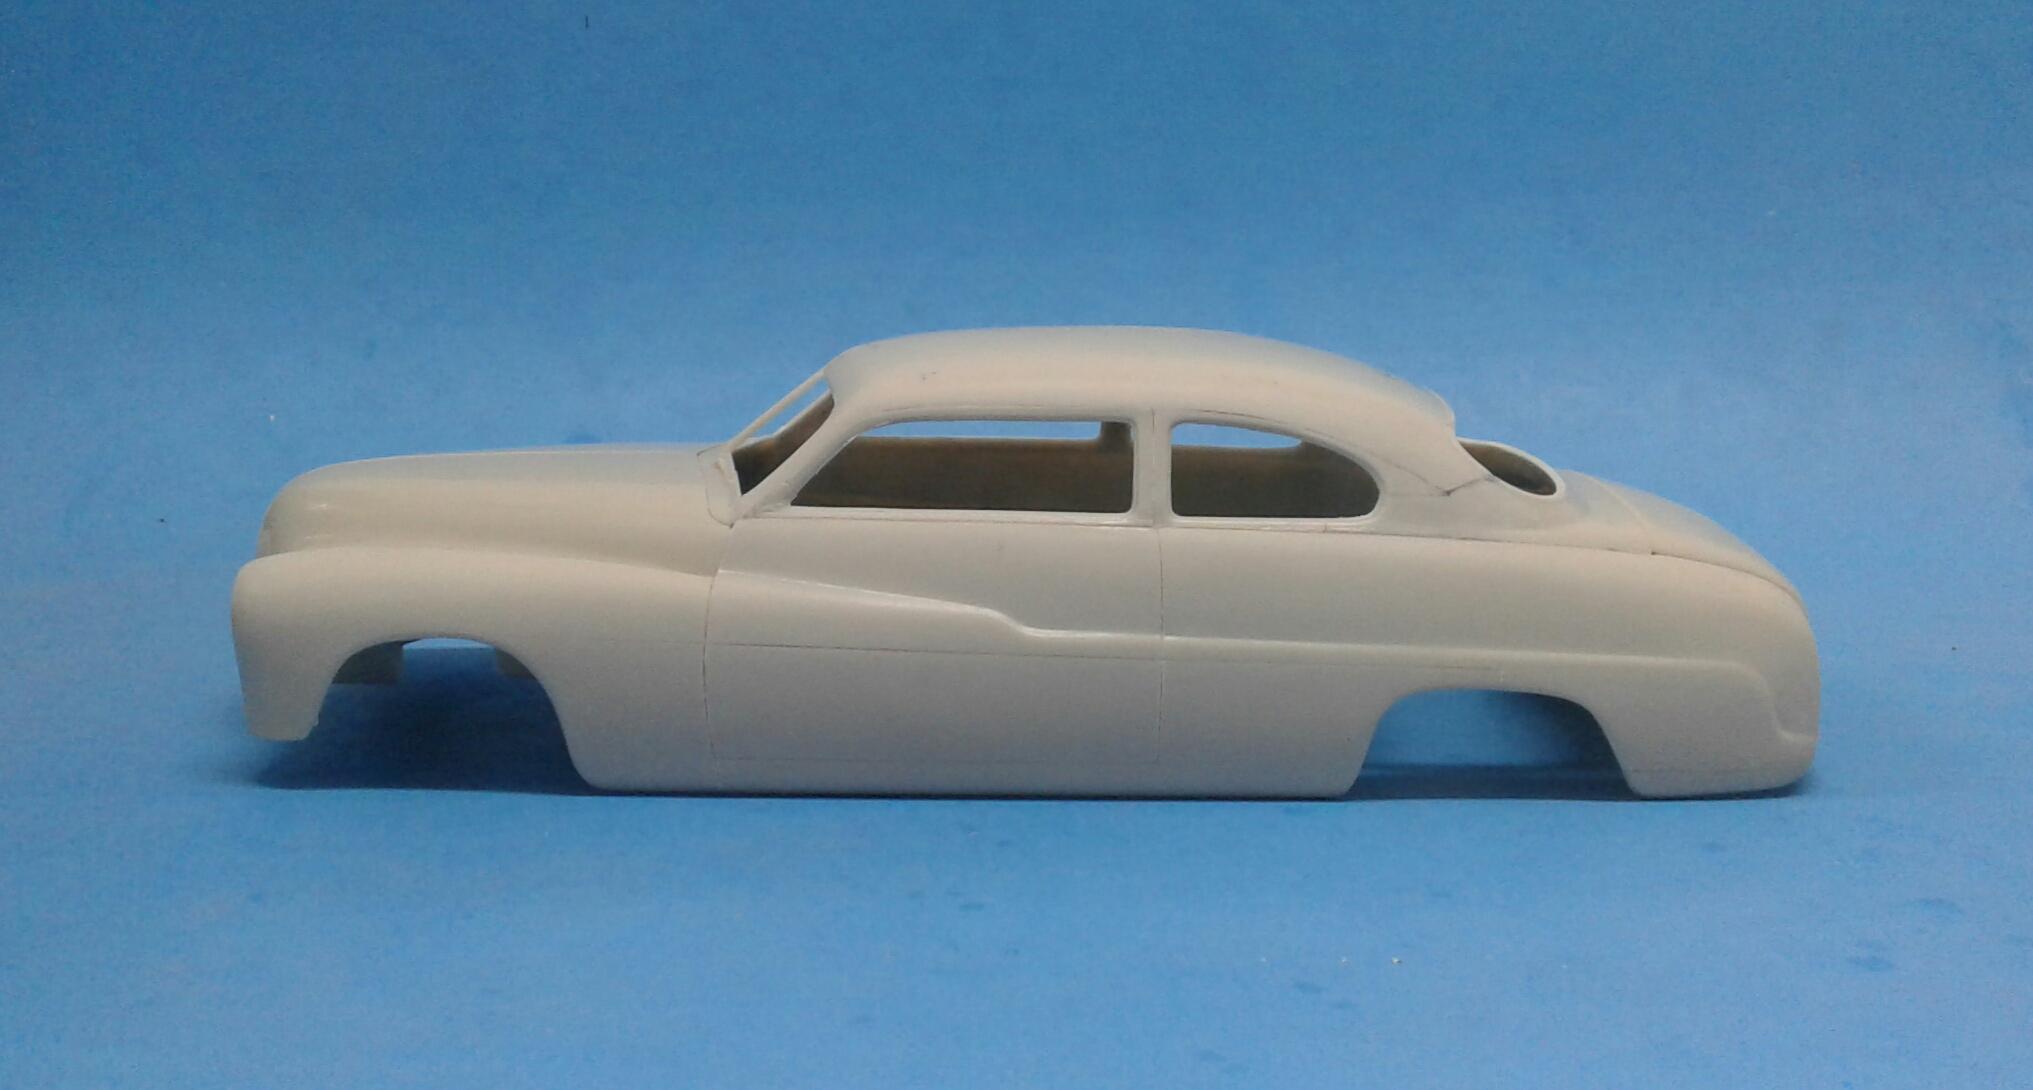
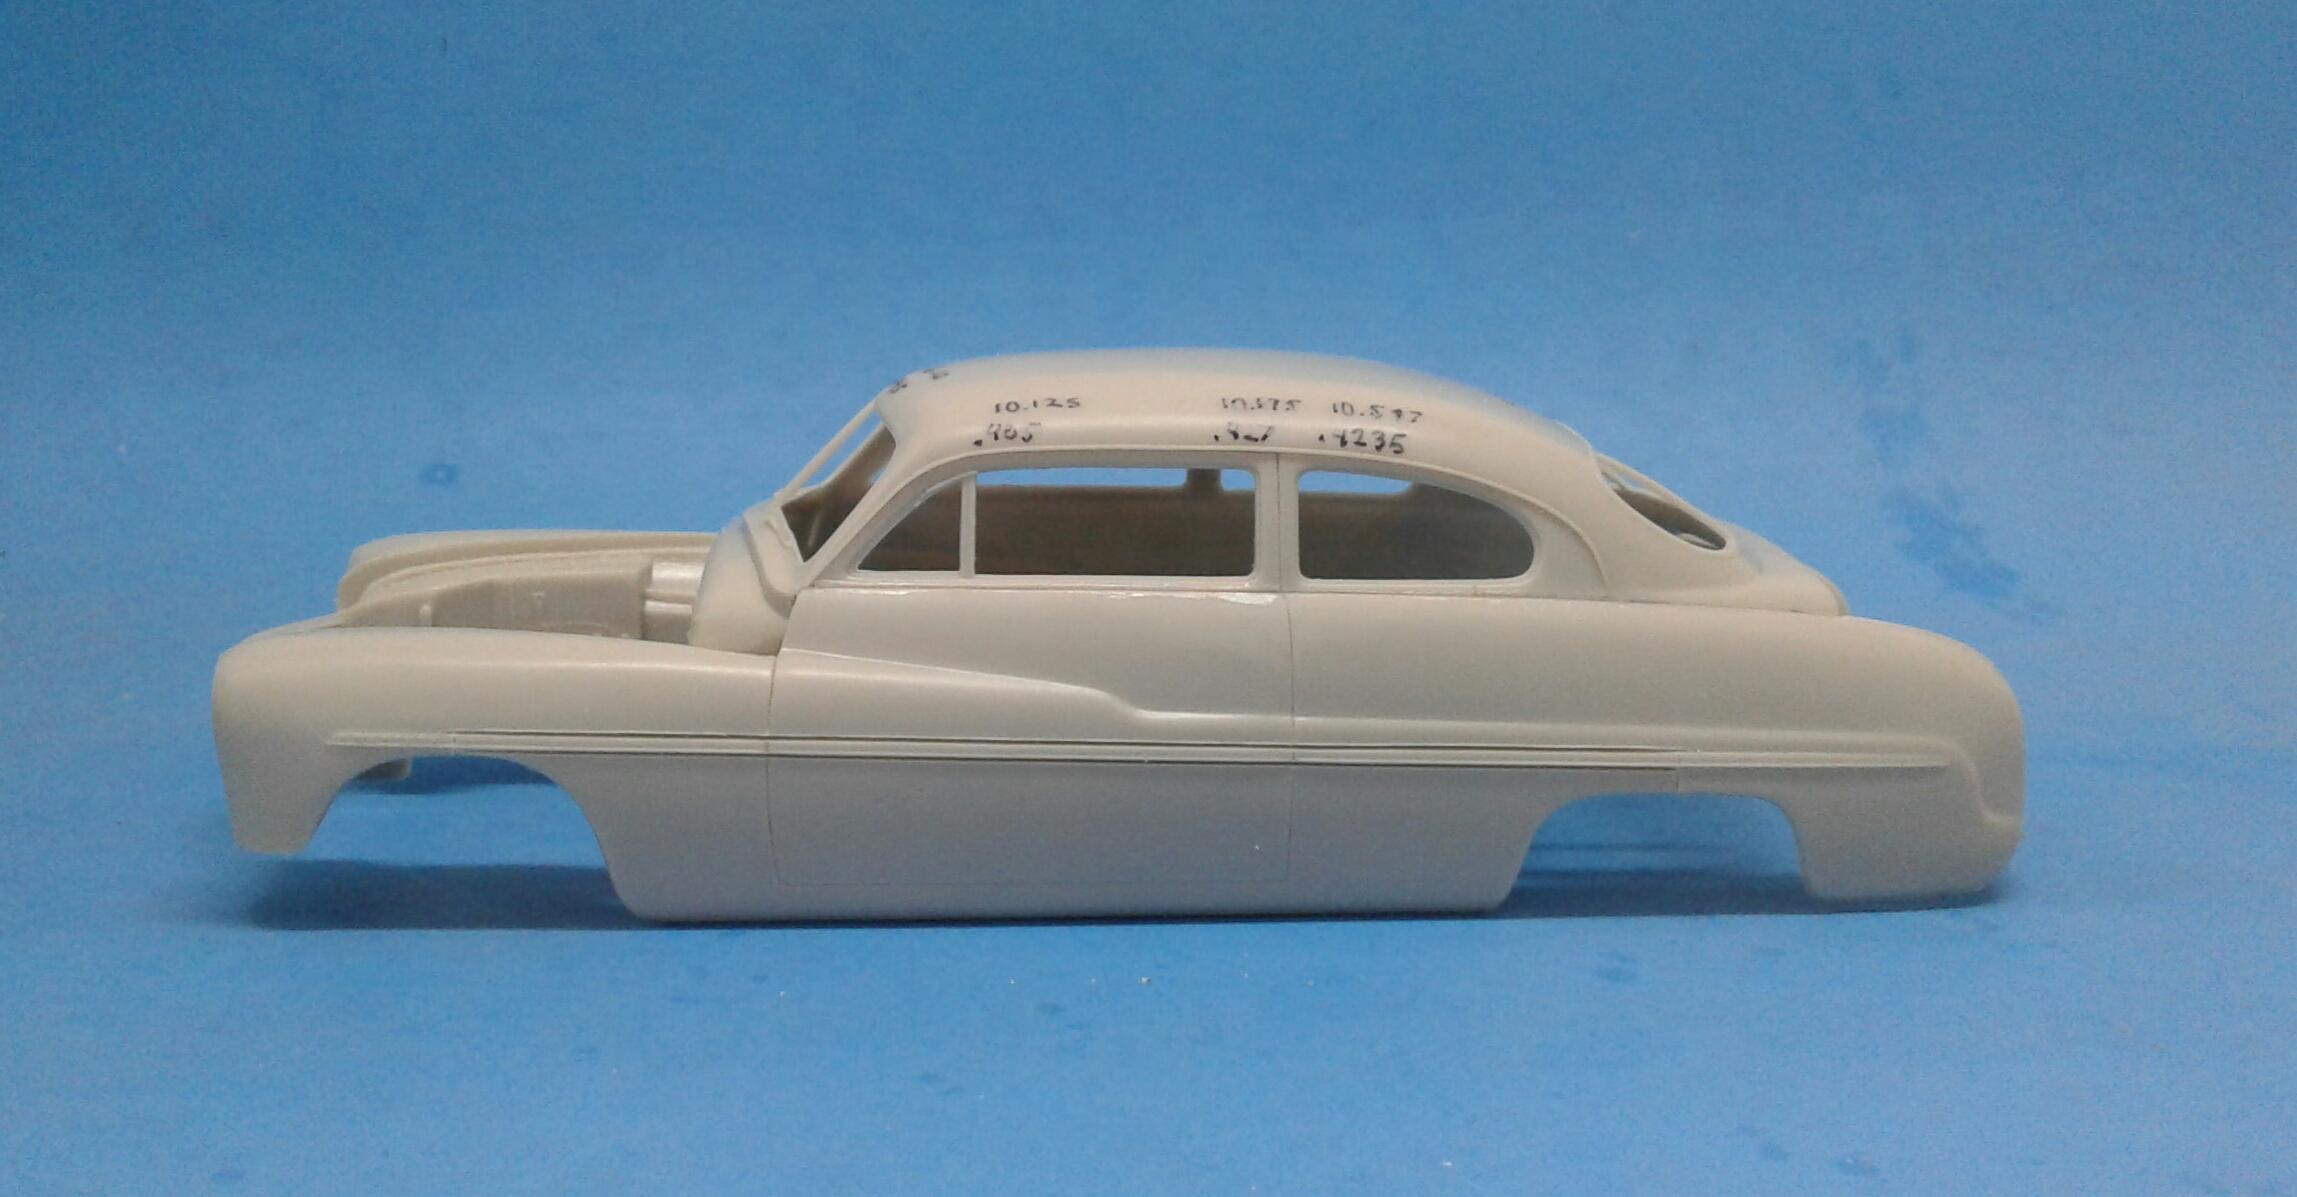
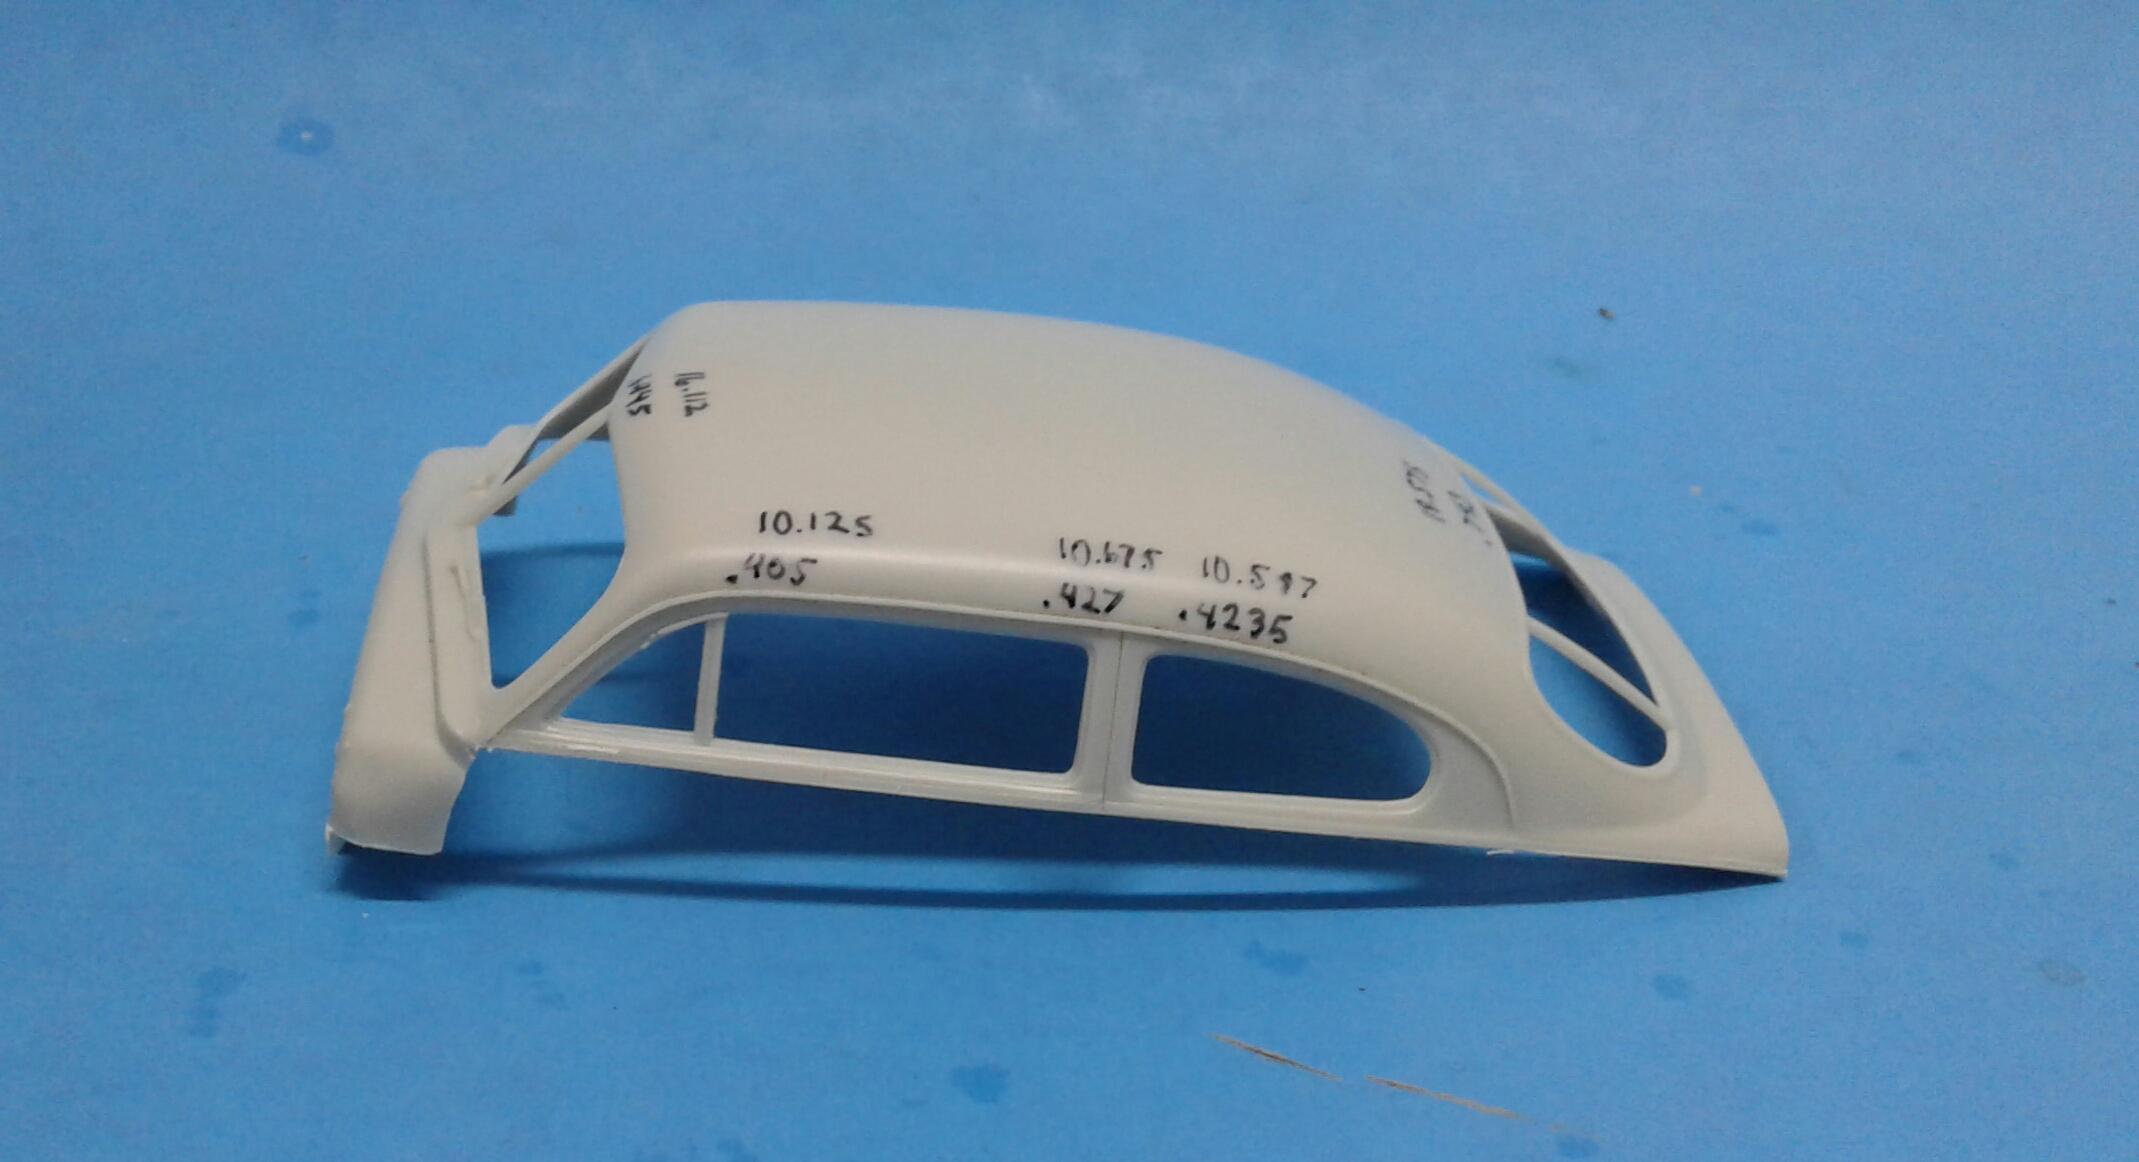
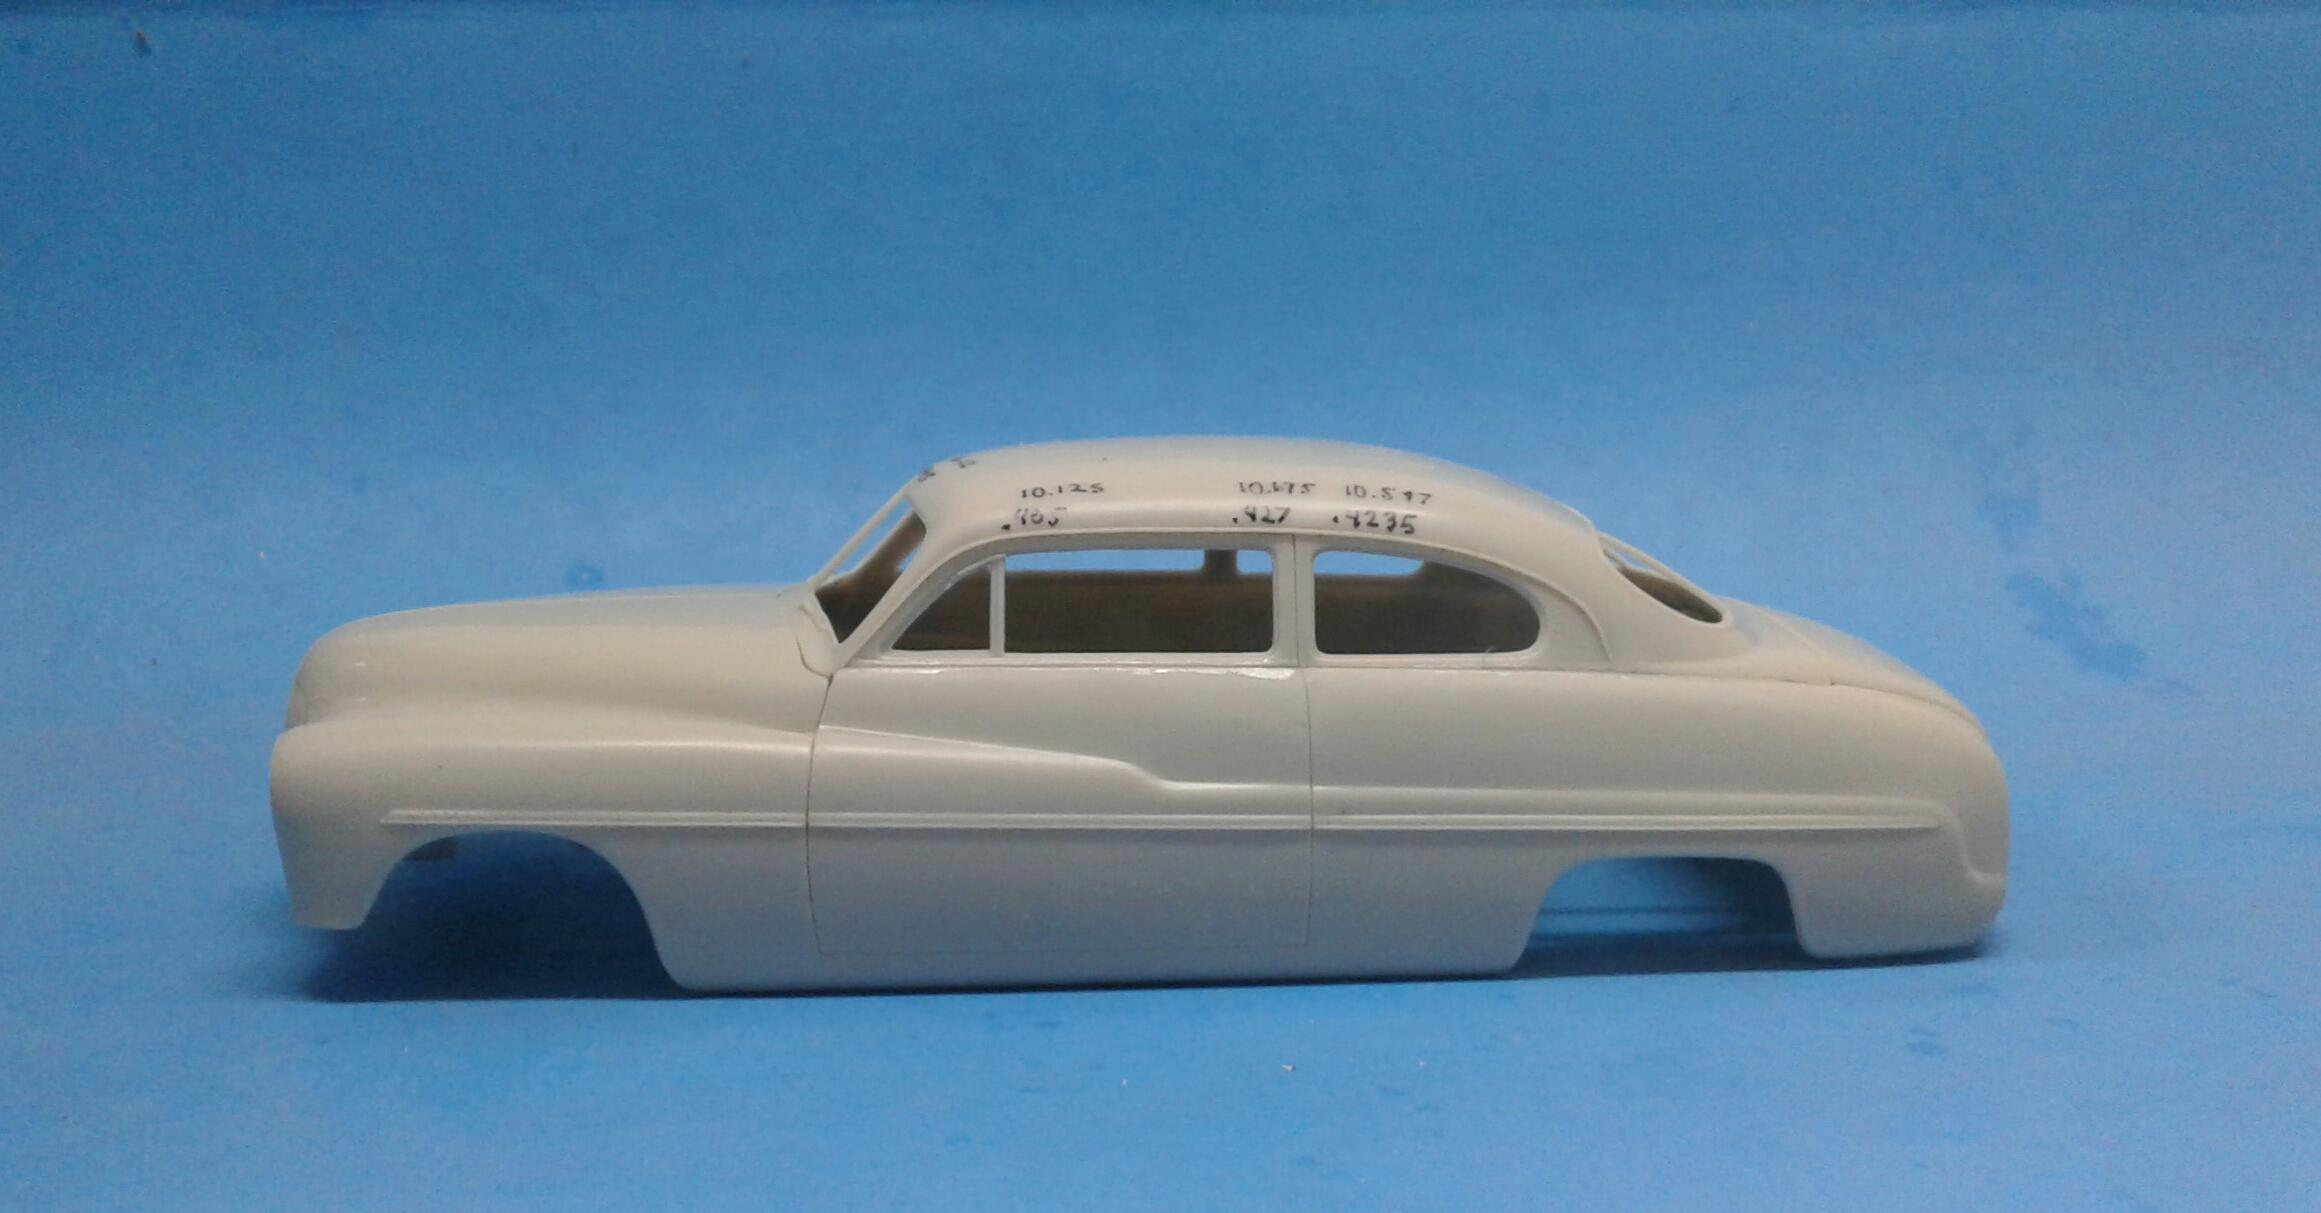
Thanx for the feedback guys! I now have the roof chopped. I started by cutting the door and window frames loose from the body. I simply cut along the drip rails, center of the B pillars, center of the quarter windows and close to the base of the A pillars. Then I cut out 2mms from the C pillars. Cut a notch at the base of the A pillars. A relief cut on the front of the base of the A pillars. That allows me to push the roof back so that it meets the C pillars once again. I did have to bend the C pillars on the roof out slightly to get them to meet the way they should. I then placed the frames back to the body, marked the roof along them, cut the material from the roof and glued them back in. I like it! While I usually don't like a laid back windshield, I like it on this body. The combination of the laid back windshield and the stock height openings on the doors puts the tops of both on the same plane. The reduction in height of the rear window makes it about the same as the windshield. The roof has the same contour. But, it now isn't as thick looking. I only lost the thickness of the razor saw in height on the door and quarter glass. So, it worked! I reduced the overall height of the body by five scale inches and it's barely noticeable.
-
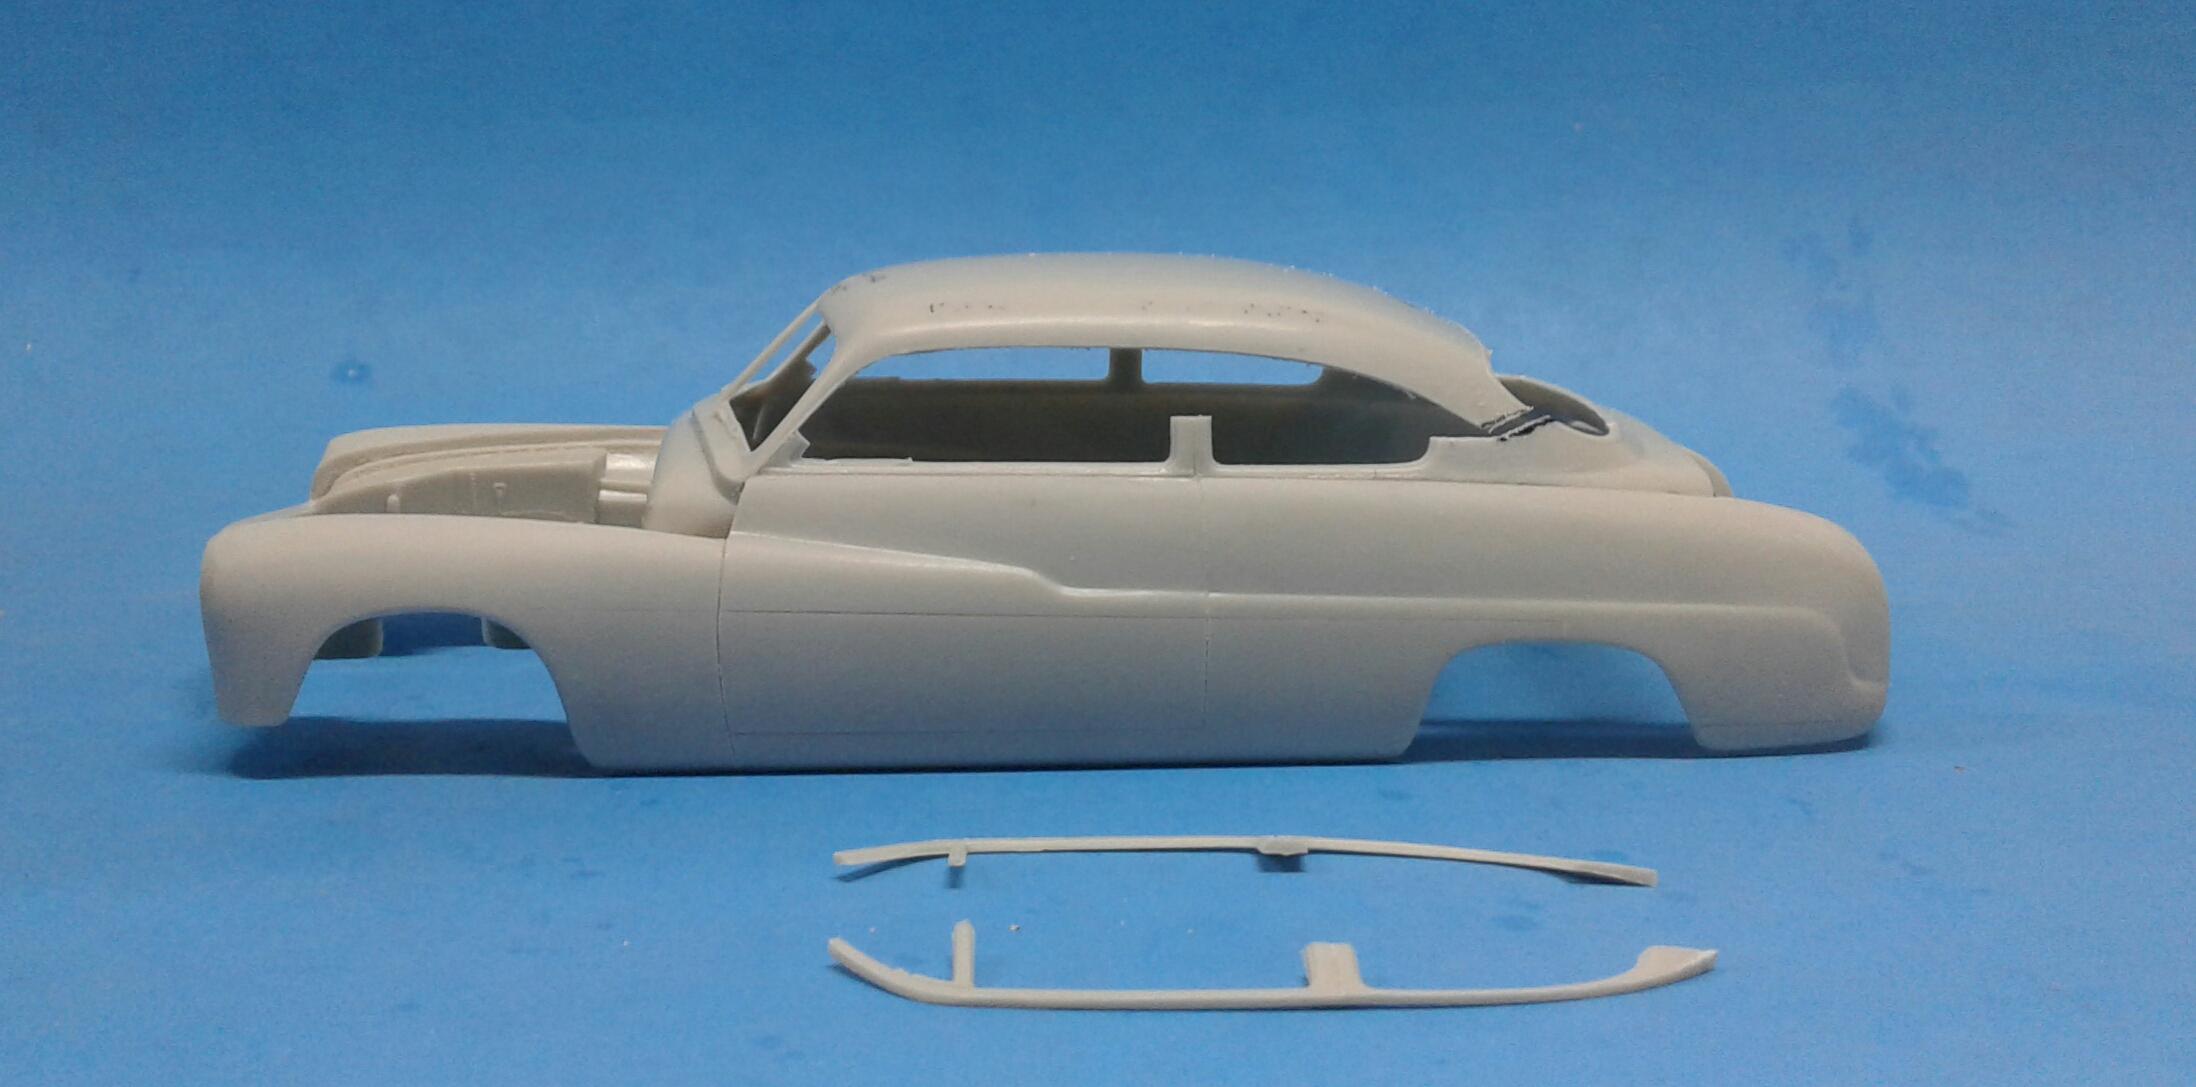
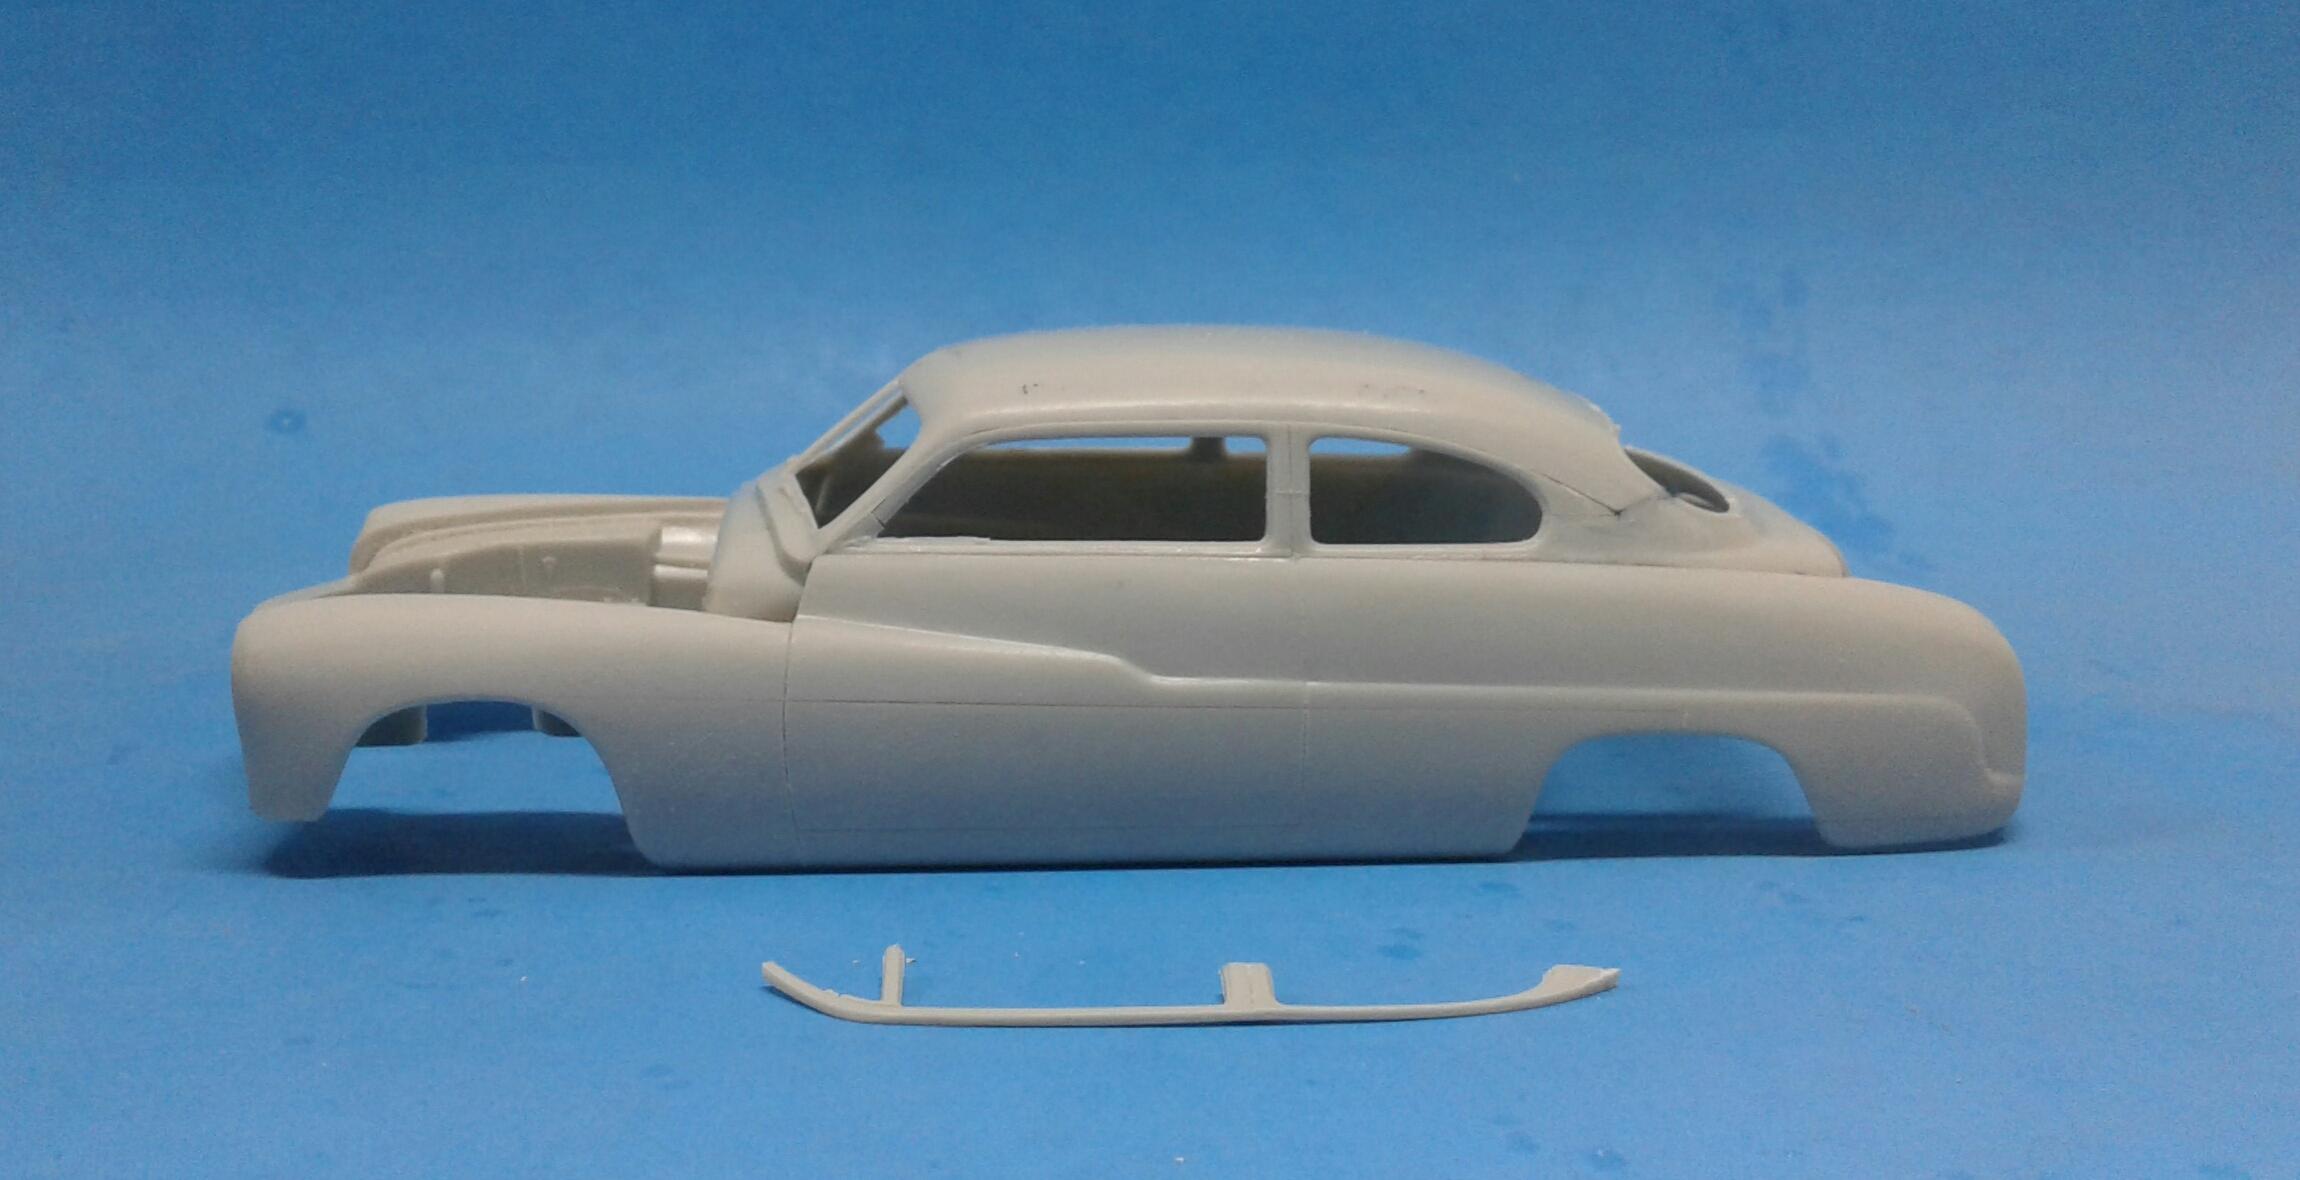
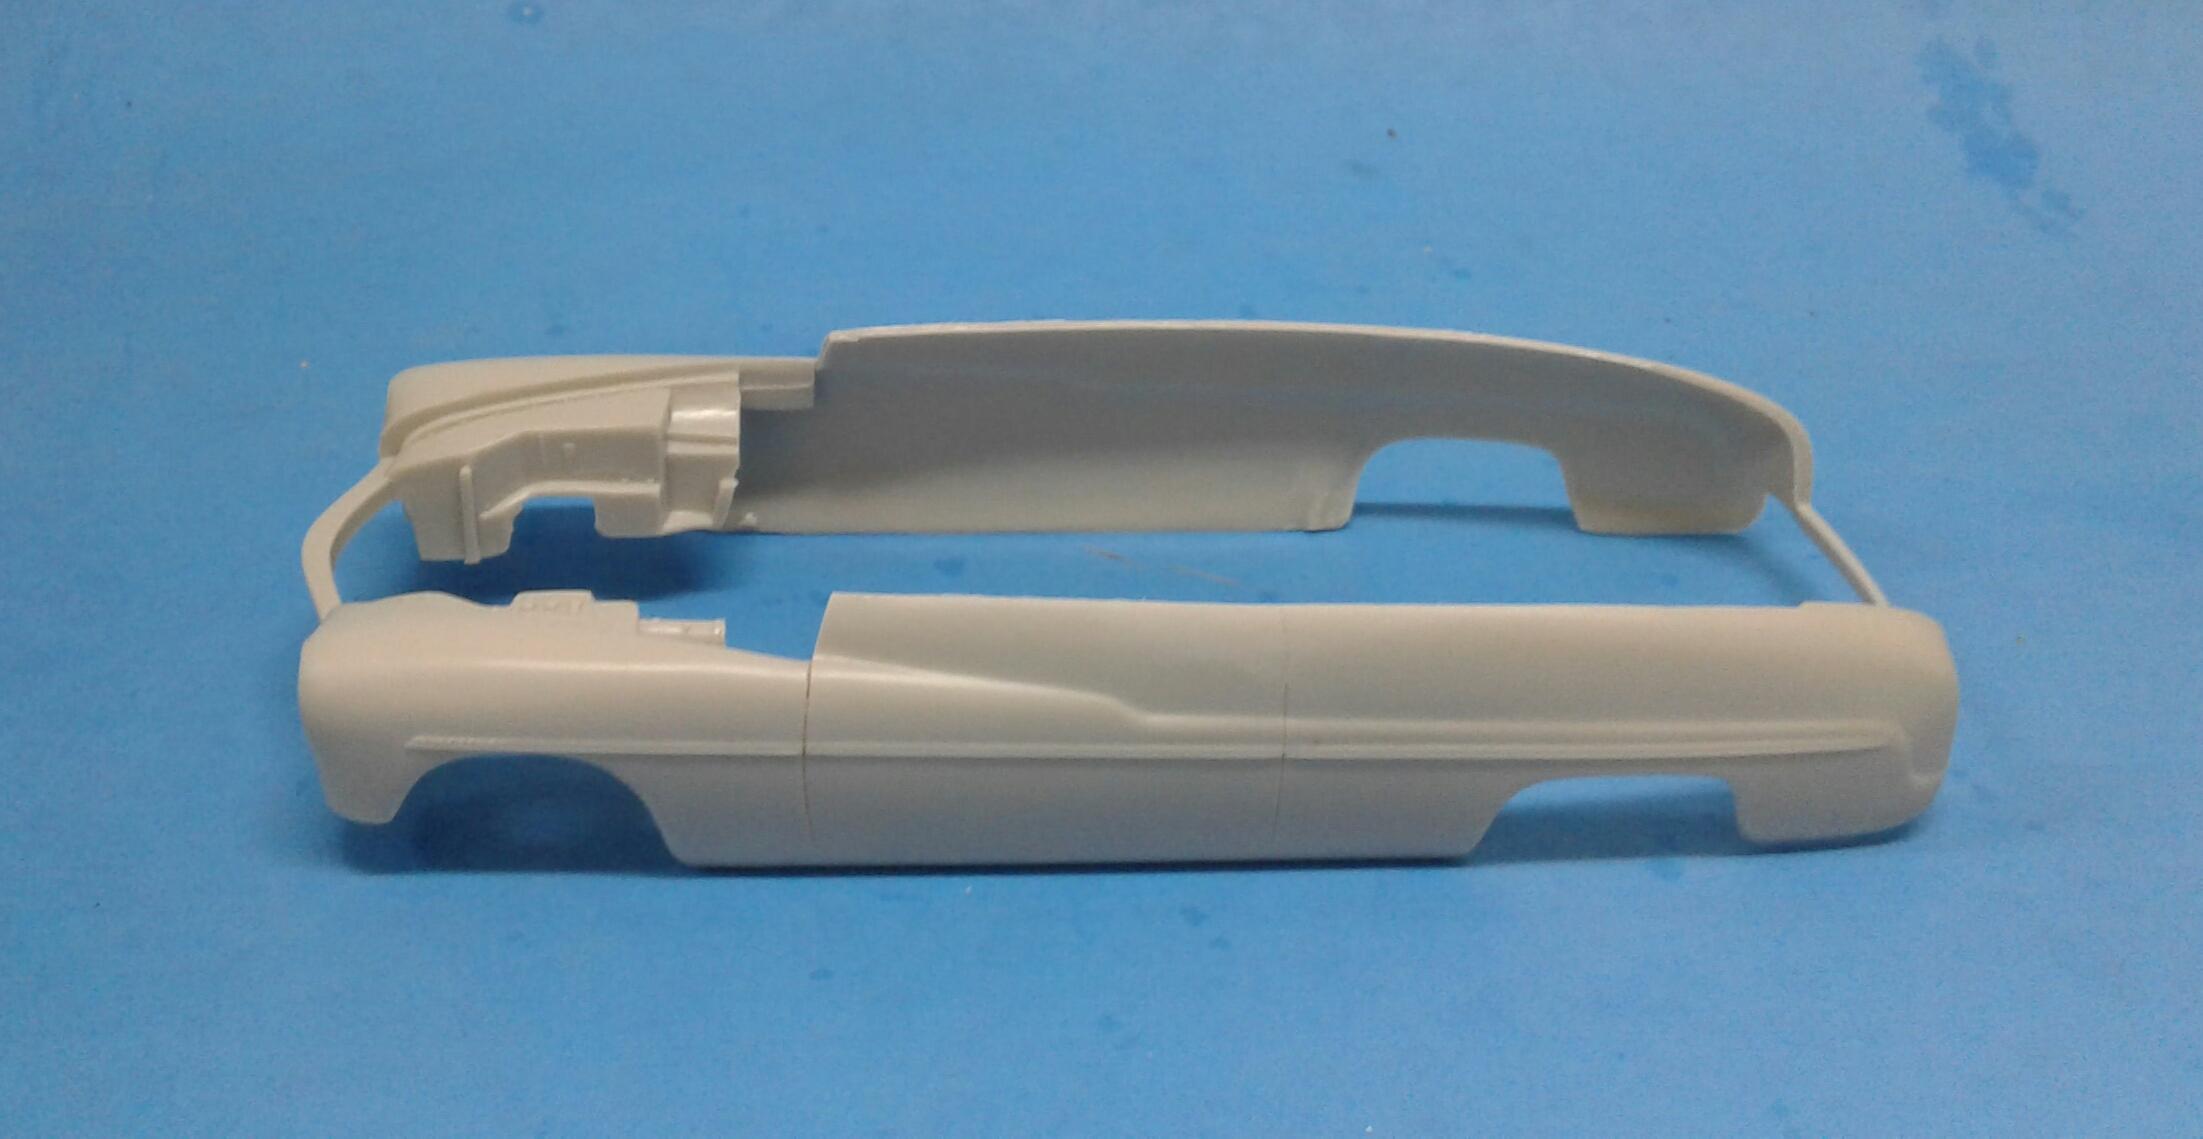
Time to section the body a little and take out some fat! Using the chrome trim as a guide, I used a razor saw that has a little thicker blade to get a two scale inch section. I made vertical cuts approximately at the center of the wheel openings. I took the section out and glued the bottom section back to the body. I used a piece of the cut out trim to use as a guide to section the area behind the rear wheel opening. But, I used a thinner bladed saw to reduce it just a touch. I marked the openings to cut out. Openings cut out and roughed in. Besides the missing trim, the modifications aren't very obvious. But, it's missing a scale three inches in height. Next modification will be chopping the roof two scale inches and trying not to lose any height on the side windows. I have a plan in mind. It may or may not work.
-
With my current projects nearing completion, I thought it was time to start hacking on something. I've never built a '49 Mercury before. Mostly because I didn't want to follow the herd. So, I'm going to meander off on my own and do what I want. This won't the typical '49 Mercury. It will be modified substantially. But, it won't be like the rest! The modifications will be subtle and fairly simple. I'm going to attempt to lower the profile by a scale five inches without it being obvious. After studying the body for a bit, I saw that I could take out a scale inch with simple cuts. I've already made the cut in this photo. It's just a simple cut right along the bottom of the chrome strip. The other cut is between the firewall and inner fenderwells. I wanted the firewall to also lower so there wouldn't be an issue with the hood. After the cuts. In this photo, you can see the chrome strip marked. This will be removed and the roof section will be glued back on. Top glued back on. This simple modification lowers the top, hood and trunk a scale inch. No big surprise that the hood no longer lines up with the fenders and doors. But, that's nothing that some putty and sanding won't take of. The big surprise is that the trunk actually fits better!
-
If you have several models, it's cheaper and better to buy one of the Carney displays. They'll hold 21 models and cost $115 plus shipping. They're really nice. I have 5 of them and getting ready to buy a 6th.
-
78 D-100 Lil' Aggressive Truck
Plowboy replied to thatz4u's topic in Model Trucks: Pickups, Vans, SUVs, Light Commercial
That's a wicked looking D-100! I started to do one similar to that years ago. But, I never did get around to it. -
Nice looking Monte Carlo! Great work on the conversion!
-
This is a bad ast little hot rod! I'm always a fan of different body styles! Especially those that can only come from the hands of the builder. I especially like how you did the front suspension. So much cleaner than the suicide method! Great work!
-
I've never done that for that very reason. Going from cold to room temperature is going to cause contraction and expansion. I don't see how it couldn't. That's at least a 30 degree temperature swing.
-
I always buy direct from BMF. He ships it in a cardboard box. It arrives just like it left. Something you can do to "fix" the sheet you have is place it on a flat surface and roll a smooth sided drinking glass over it.
-
Did you order direct from BMF or from a vendor?