ksnow
-
Posts
742 -
Joined
-
Last visited
Content Type
Profiles
Forums
Events
Gallery
Everything posted by ksnow
-
Any chance you can relay what was said?
-
What exactly is bad about those kits? I have all of them waiting to be built. My first build was the 69 T/A, I don't remember any issues with it, but I was new to model cars. Is there a good 67GTO kit?
-
I just watched the truck race highlights. Most entertaining racing I have seen in 20 years from NASCAR. Previous to that was the first year of the trucks at Daytona. They are trying to stop the decline in viewership.
-
"Bring Out Your Dead" Completion Build--ROUND 2 Is On!
ksnow replied to Snake45's topic in WIP: Model Cars
TimJ, that chevelle looks amazing. -
Very nice build. That white and black scheme looks sharp.
-
Thanks for the information. A 70-73 body would be great, not sure how available those are however. I may end up picking up a current 79 kit for the body. I prefer the front end on the 79 over the 77 or 78.
-
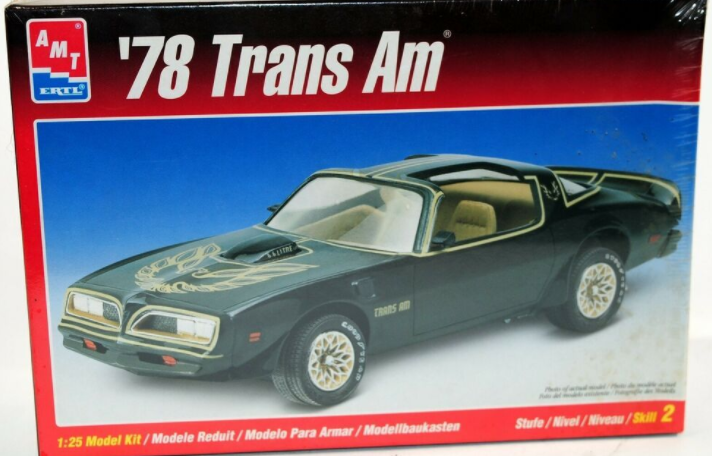
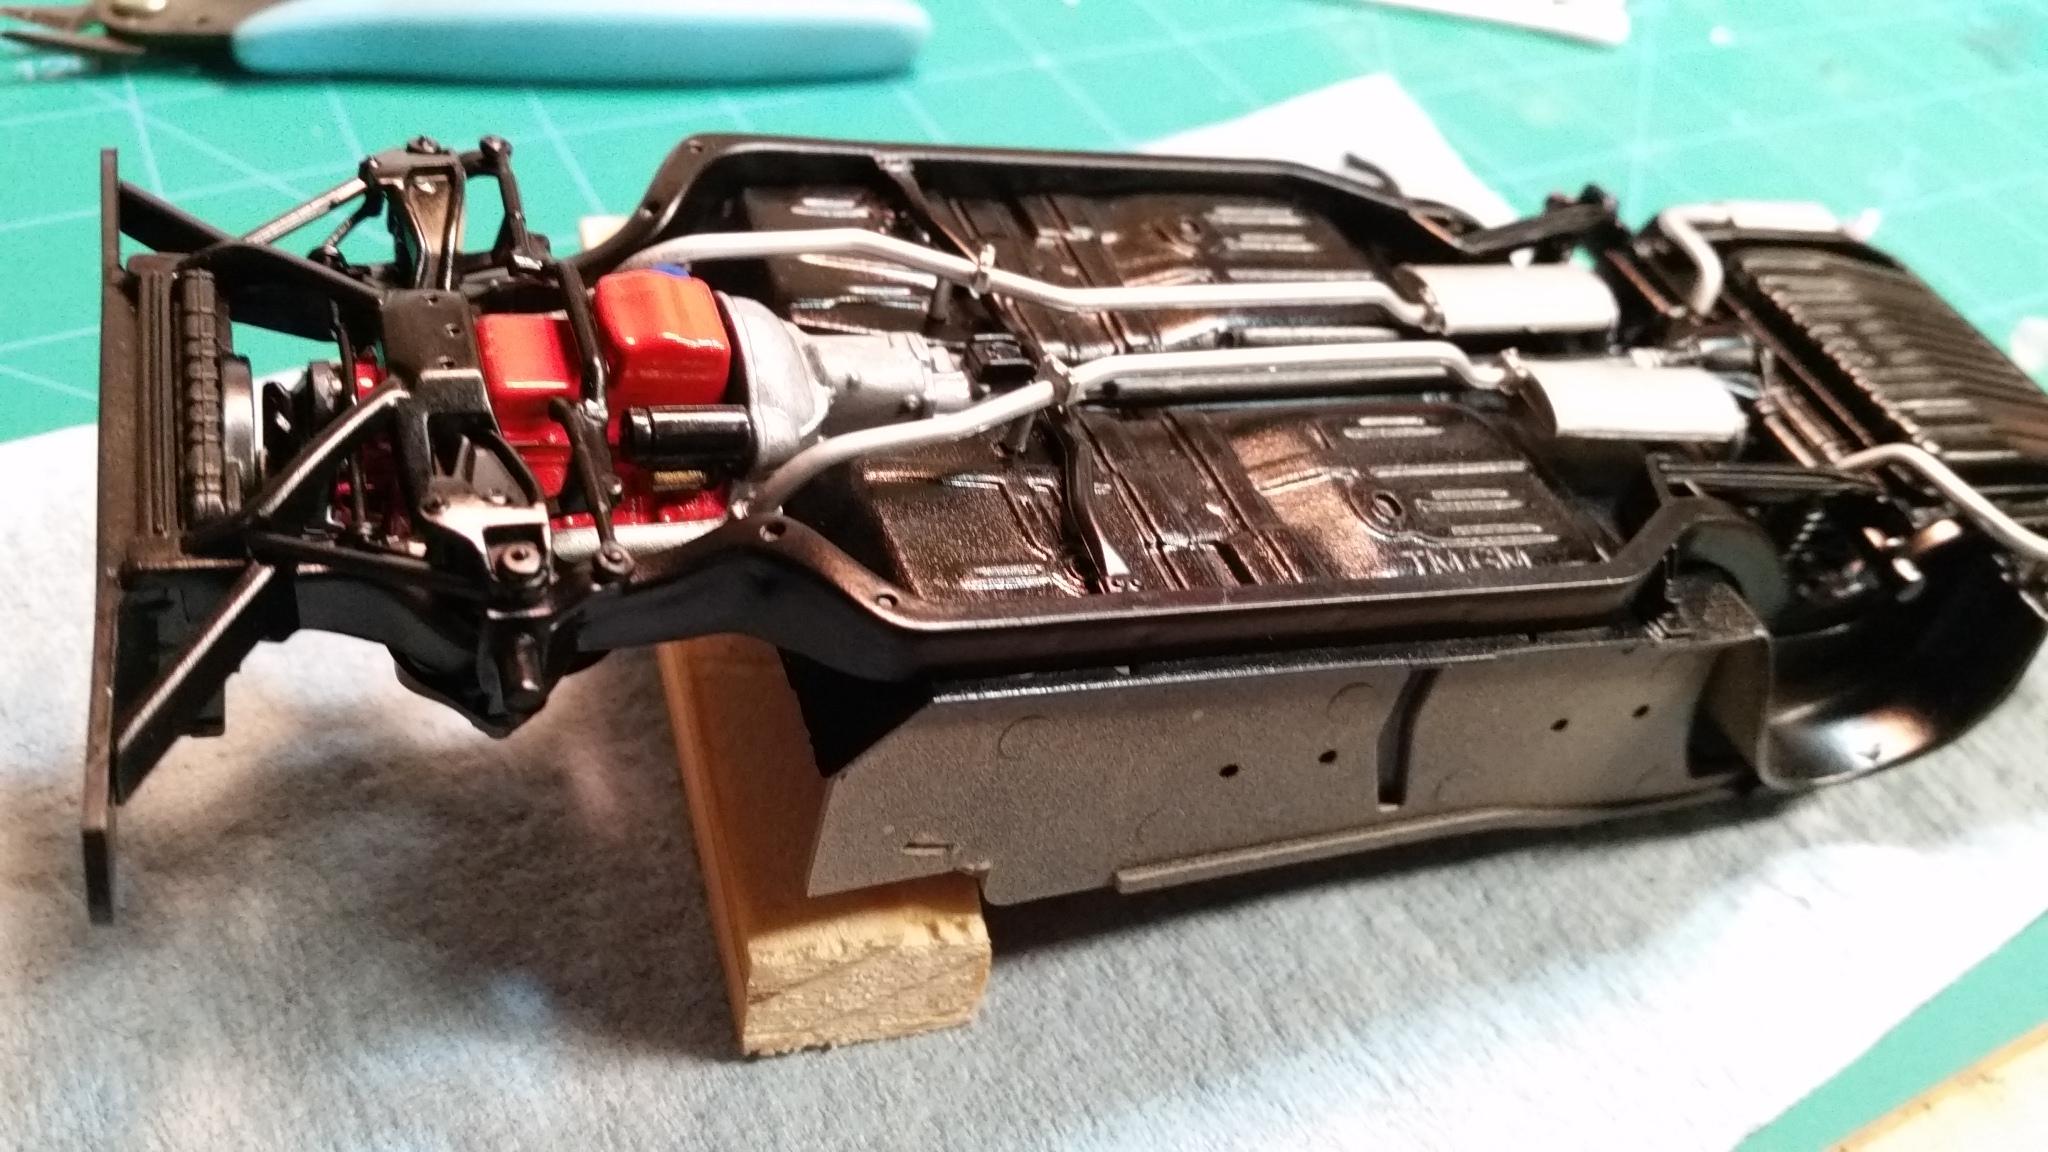
I had a clear coat disaster on a Trans Am body. The clear coat reacted with the paint, maybe, and crazed the entire body and glass. Is the body in this kit the same as any current release kits, or do I need to look for an older kit for a body. The chassis is in good shape. Or are there other bodies that will set on the chassis from this kit? I am not dead set on it being a 78 T/A. This is the kit:

-
What Did You Accomplish Today? (Model Car Work)
ksnow replied to Snake45's topic in General Automotive Talk (Trucks and Cars)
Yesterday I started the subassembly work on the monogram 86 Monte Carlo aero back and the 70 baldwin motion camaro. Also getting the last details (mirrors, badges, wipers) on the 65 Chevy stepside. First time using hypo cement for that work, I'm happy with the results. All that's left on the truck is decals and paint/install the bumpers. The chrome looked bad out of the box, so I strpiped them and they'll get painted body color. -
70 LS6 Chevelle
ksnow replied to Rodent's topic in 1:1 Reference Photos: Auto Shows, Personal vehicles (Cars and Trucks)
Just stumbled across this guy on youtube. Seems like a 70 Chevelle S guru. He has quite a few videos of very nice cars. -
What Did You Accomplish Today? (Model Car Work)
ksnow replied to Snake45's topic in General Automotive Talk (Trucks and Cars)
Got the chassis for the supernatural Impala just about finished up. Also got a little start on the engine for the 70 1/2 Baldwin Motion Camaro.
-
I like this a lot. Just getting to know more about gassers the last couple weeks and this is an inspiration.
-
Seems like the rule book changes over the years moved the classes more towards going fast, than running what you brought or keeping the class "pure". But, they weren't exactly nostalgic like we are. They were doing it for the first time, going fast was the primary concern.
-
Great analysis Draggon. In my limited reading over the last several days, topless cars were in their own classes, unless a hardtop was on.
-
Looks like some had to be nose high just to clear the headers. Nice looking models, guys. I think I have a 51 Chevy in the stash that just might have to be built into one of these. Yes, Ace, I was asking about body to frame lift. It didn't appear that way in any of the photos, but I figured I'd ask anyway.
-
Nice job, Love the license plates.
-
What did you screw-up today??
ksnow replied to TransAmMike's topic in General Automotive Talk (Trucks and Cars)
It was the little testor's bottle. Only lost about a third of it. At the rate I use it, it will probably go bad before I use it up. -
What did you screw-up today??
ksnow replied to TransAmMike's topic in General Automotive Talk (Trucks and Cars)
I tipped over a bottle of turn signal red. Luckily no models parts were contacted. It just looks like I bled all over the bench now. -
Almost unbelievable that kit made it through USPS unscathed.
-
Was there any body lift on these? Or does it just look that way with the bigger rear tires (and trimmed quarters) and raised up front ends to level it out. Some of them look taller than modern 4wd pickups.
-
Hi all, I've got one of my next builds selected, the AMT 70 1/2 Baldwin Motion Camaro. The decal sheet does not include the white body graphics. The photo of the real car on the box shows white graphics with a fine line border. The built model pictured on the box just has the white graphics, with no border. Is there an aftermarket or later set of decals that includes the white graphics? Also, any other issues with this kit I should be aware of before I dive in? Thanks.
-
After a VERY cursory glance of the GK web site, a gasser build has moved up my list of projects. I love the back yard ones, just normal guys with normal jobs who want to drive a fast car. Neat to see the small details. Things like mismatched front and rear wheels, towing setups, and almost level stance at rest. Paint jobs ranged from some pretty spectacular graphics to what looks like rolled on house paint.
-
Thanks for the headsup. That GK website is an absolute treasure trove of primary documentation. When I do decide to build one, I'll definitely be using that for reference.
-
Thanks for the link, I'll check that out. I've been watching Southeast Gasser's Association stuff on youtube, very cool stuff.
-
Great information guys. I admit I am woefully ignorant when it comes to drag racing history and classes and so on. I love watching drag racing, just never paid that much attention to the details. Force, that bothers me also. Actually any time people use words for things that aren't accurate it bothers me. If a car doesn't meet gasser rules, its not a gasser.
-
Second Completed of 2021 - AMT 1970 1/2 Camaro (Round2)
ksnow replied to Jonathan's topic in Model Cars
The weathering detail looks great. I remember seeing as lot of Camaros like that here in the salt belt.