papajohn97
-
Posts
701 -
Joined
-
Last visited
Content Type
Profiles
Forums
Events
Gallery
Everything posted by papajohn97
-
The silver paint (Molotow?) bright trim work is really impressive on this build. You either did a tremendous amount of masking or have a very steady brush hand! I love the two-tone scheme and color selection, perfect mid-60’s look.
-
Came out really nice despite the paint challenges. I agree with the “leave the hood off for display” comment, I generally leave them off to side on the few cars I display - who wants to hide the engine after all that work! Love the styling of these ‘66-67 Fairlanes and Comets. Thanks for posting.
-
Very nice! I’ve read other folks recommending using the ‘60 Starliner coupe as a donor for the chassis and engine for this kit but your beautiful build makes me question the need for the donor, especially for a stock build. Thanks for posting!
-
Never get tired at admiring a classic Willys gasser and yours is a real beauty. The injector scoop cover is a nice touch. I have the newer Revell SWC kit in the stash and your build is inspiring me to get to work on it soon. Nice job!
-
*Model Car Preference*
papajohn97 replied to Zippi's topic in General Automotive Talk (Trucks and Cars)
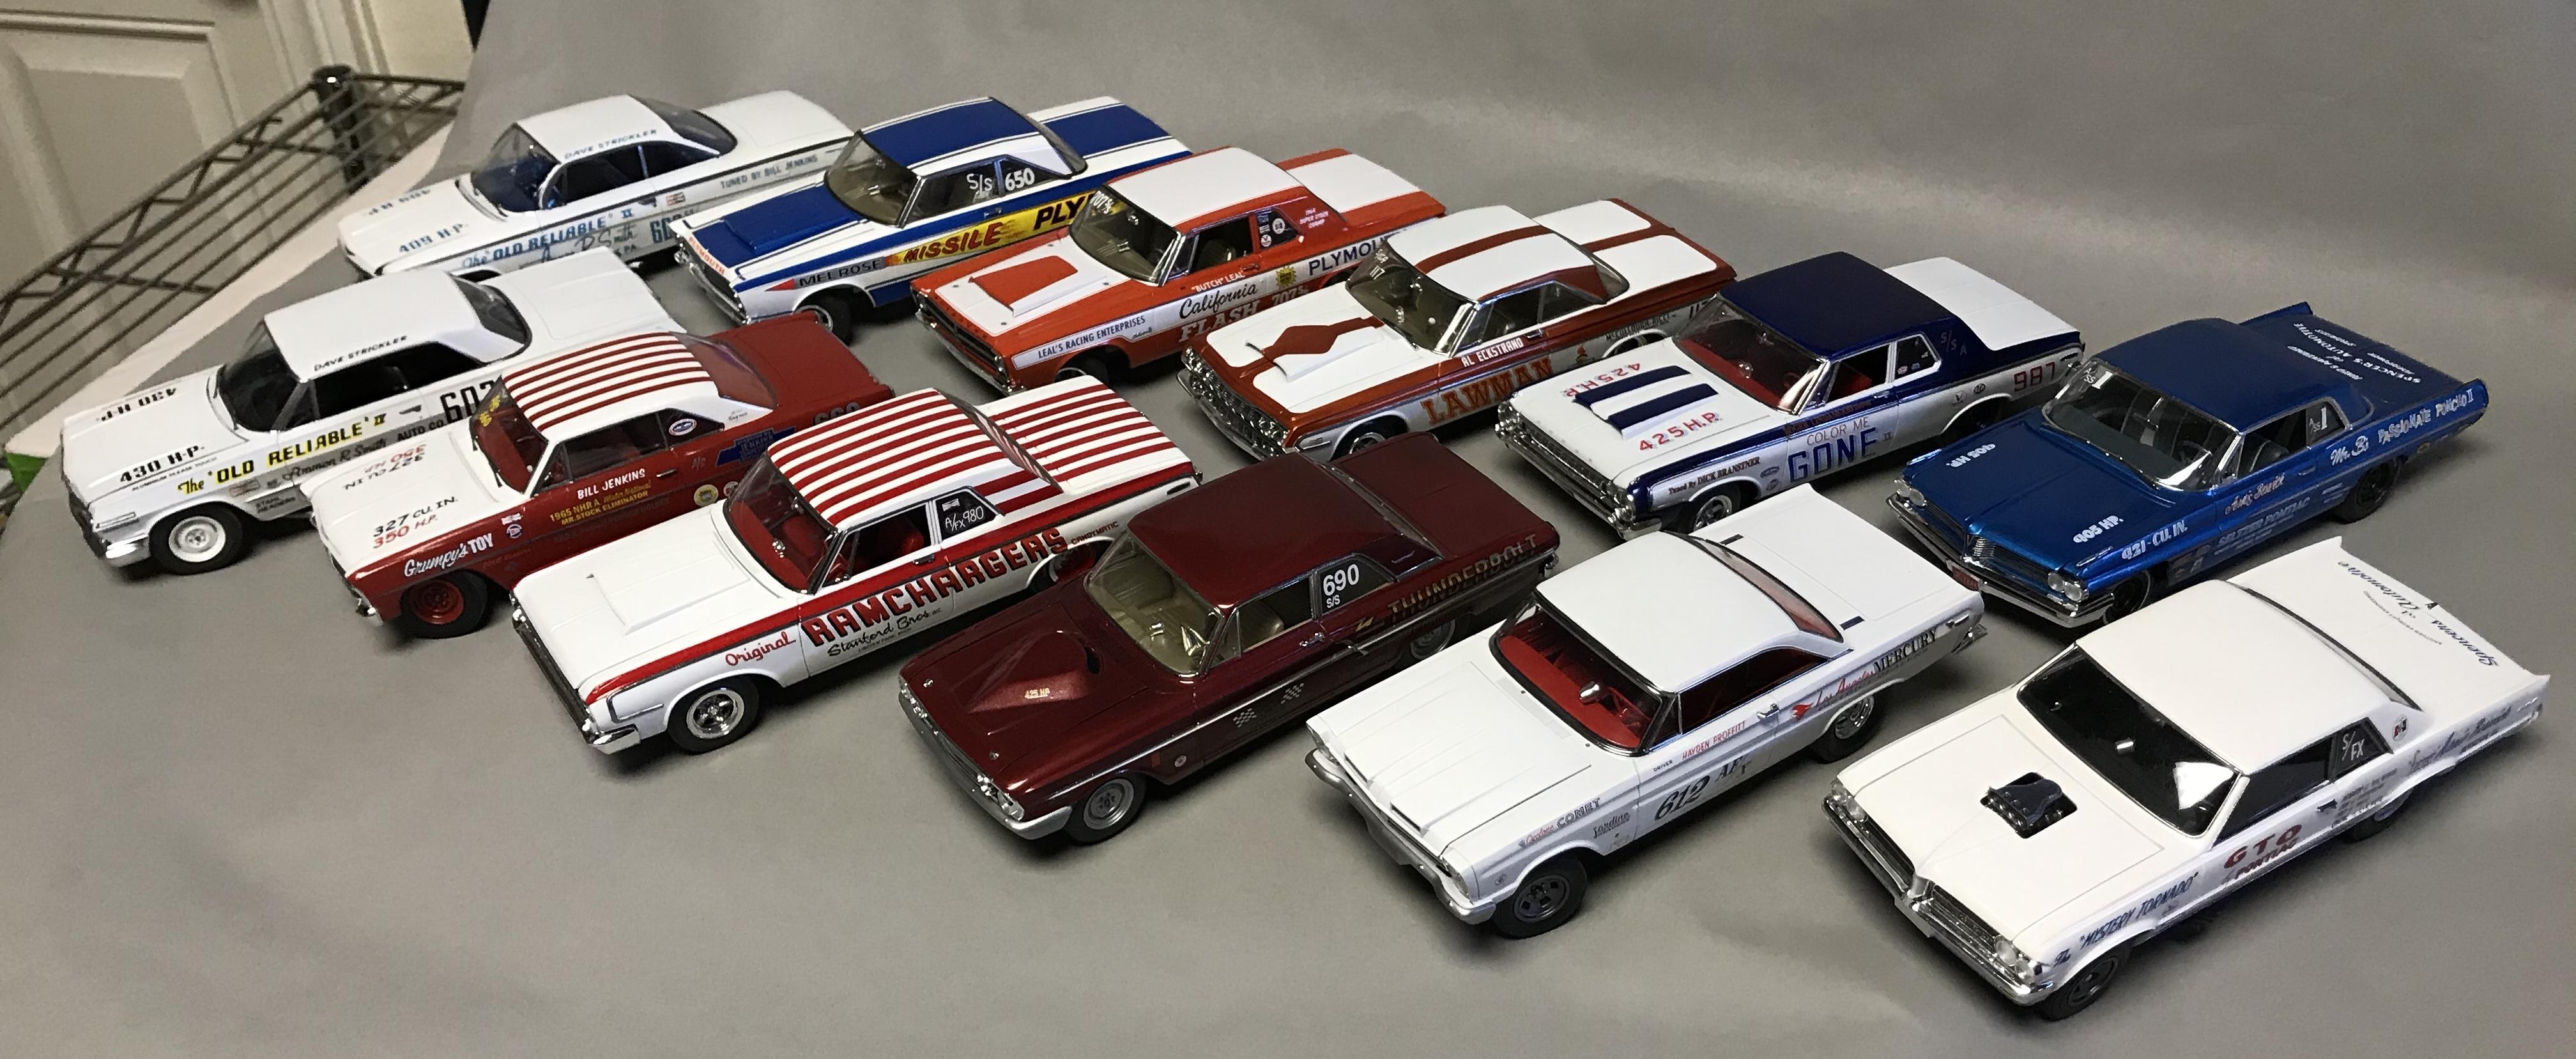
I love the 60’s gassers too (as a kid I remember seeing Big John’s Willys at Lions in 1964, left a big impression on me...). Love all the early 60’s drag cars, been building a lot of super stockers over the last few years. I build everything, stock and drag 1/24-1/25 cars, classic sports cars, 1/350 ships, 1/32 WNW planes, 1/20 F1 cars, WWII warbirds,.... I love 1/35 armor/ AFV subjects but suck at it so only have one finished tank (the excellent Tamiya Matilda) that I haven’t taken a hammer to. 1/350 ships are the most challenging in terms of assembly (tiny photo etch, complex painting/ masking, laser cut wood decks, rigging E-Z lines, handling a big awkward model with tiny delicate vulnerable details). I’m lucky to do one ship a year. Hardest part of car modeling is shiny paint. Good shiny paint jobs are really challenging for me and totally unforgiving! Dullcote can hide a lot of mistakes. Some of my favorite model builds were “camping models”, old classic late’50’s- 6o’s kit re-pops from flashy original molds built outside in a campground with tube glue, no paint, a dull X-acto knife and worn out sanding stick and liberal consumption of beer or Wild Turkey during the build.
-
Don’t be so hard on yourself Bob, this is a very clean straight build with very nice engine detailing. The almost semi-gloss black is all the rage these days and looks good/ contemporary on this car. Wish my first few car builds looked 1/2 this good! Keep building and posting dude! Gotta get me one of these ‘66 -67 Malibu’s. I learned to drive in my mom’s aqua colored ‘66 Chevelle HT coupe with that sweet little 283 small block. Thinking back, my parents were really brave to let me drive there nearly new (2 yr old) beauty around the neighborhood, I was nervous as hell gripping the wheel until my knuckles turned white. What a nice car memory.
-
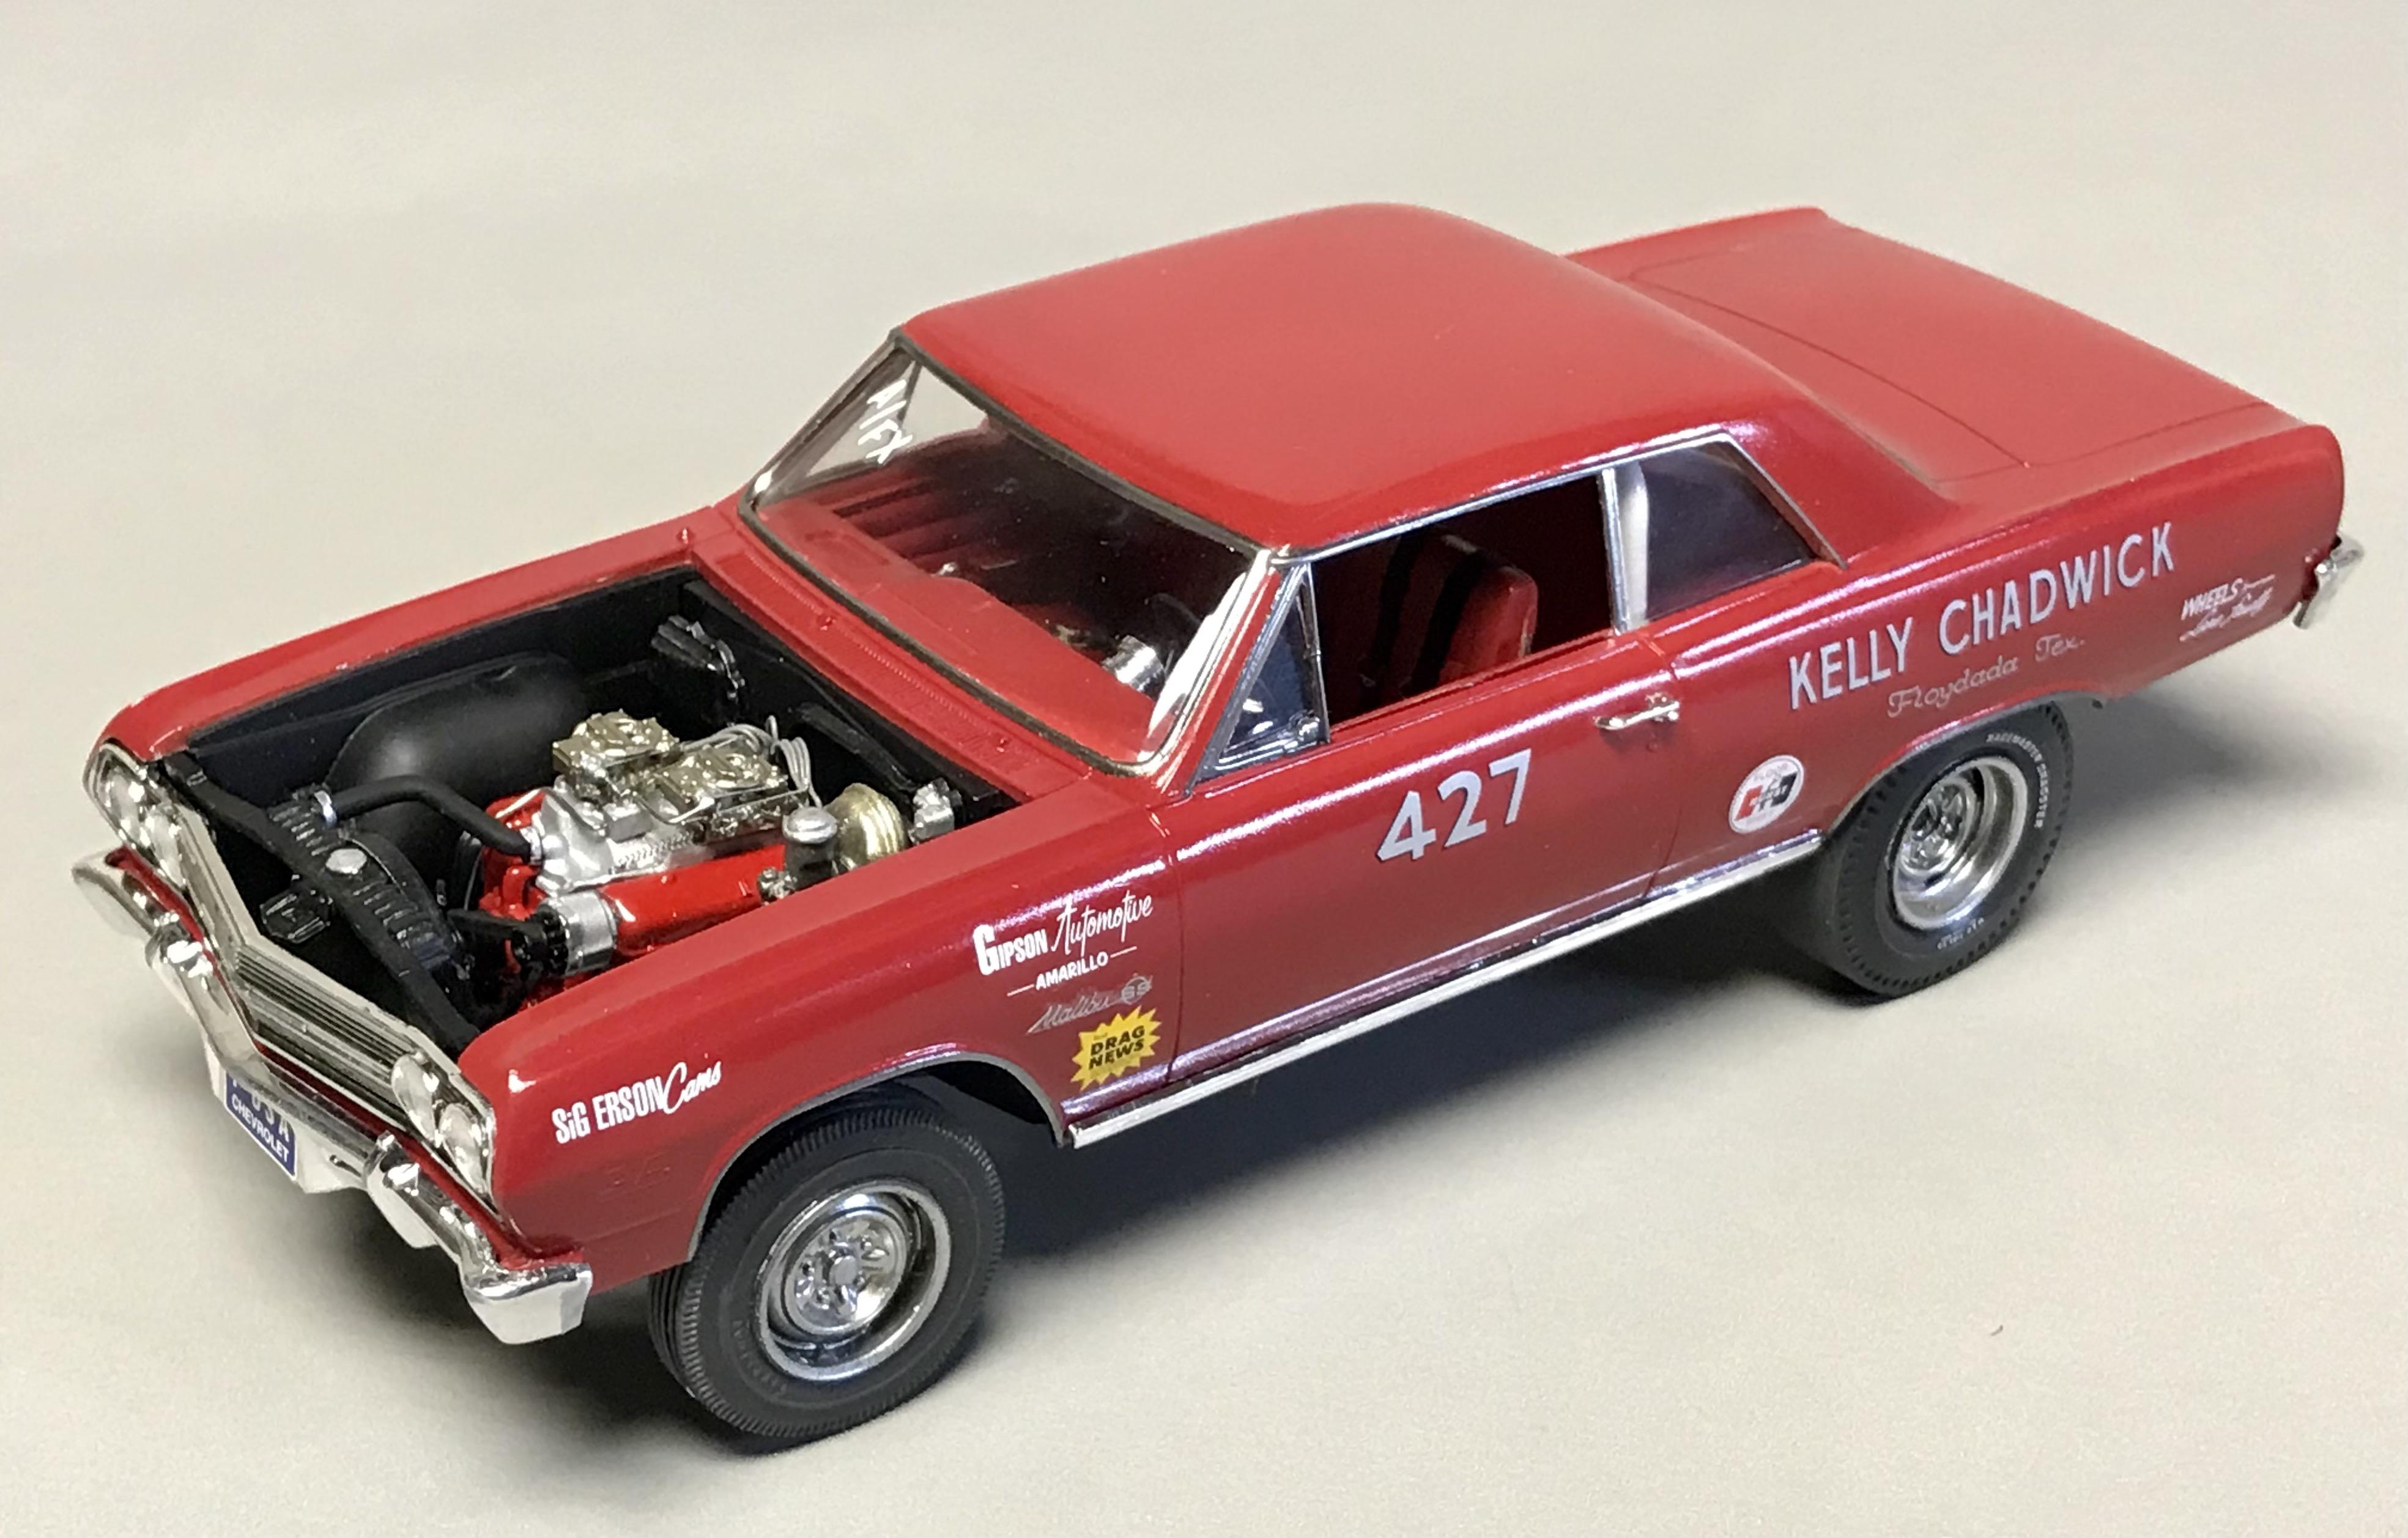
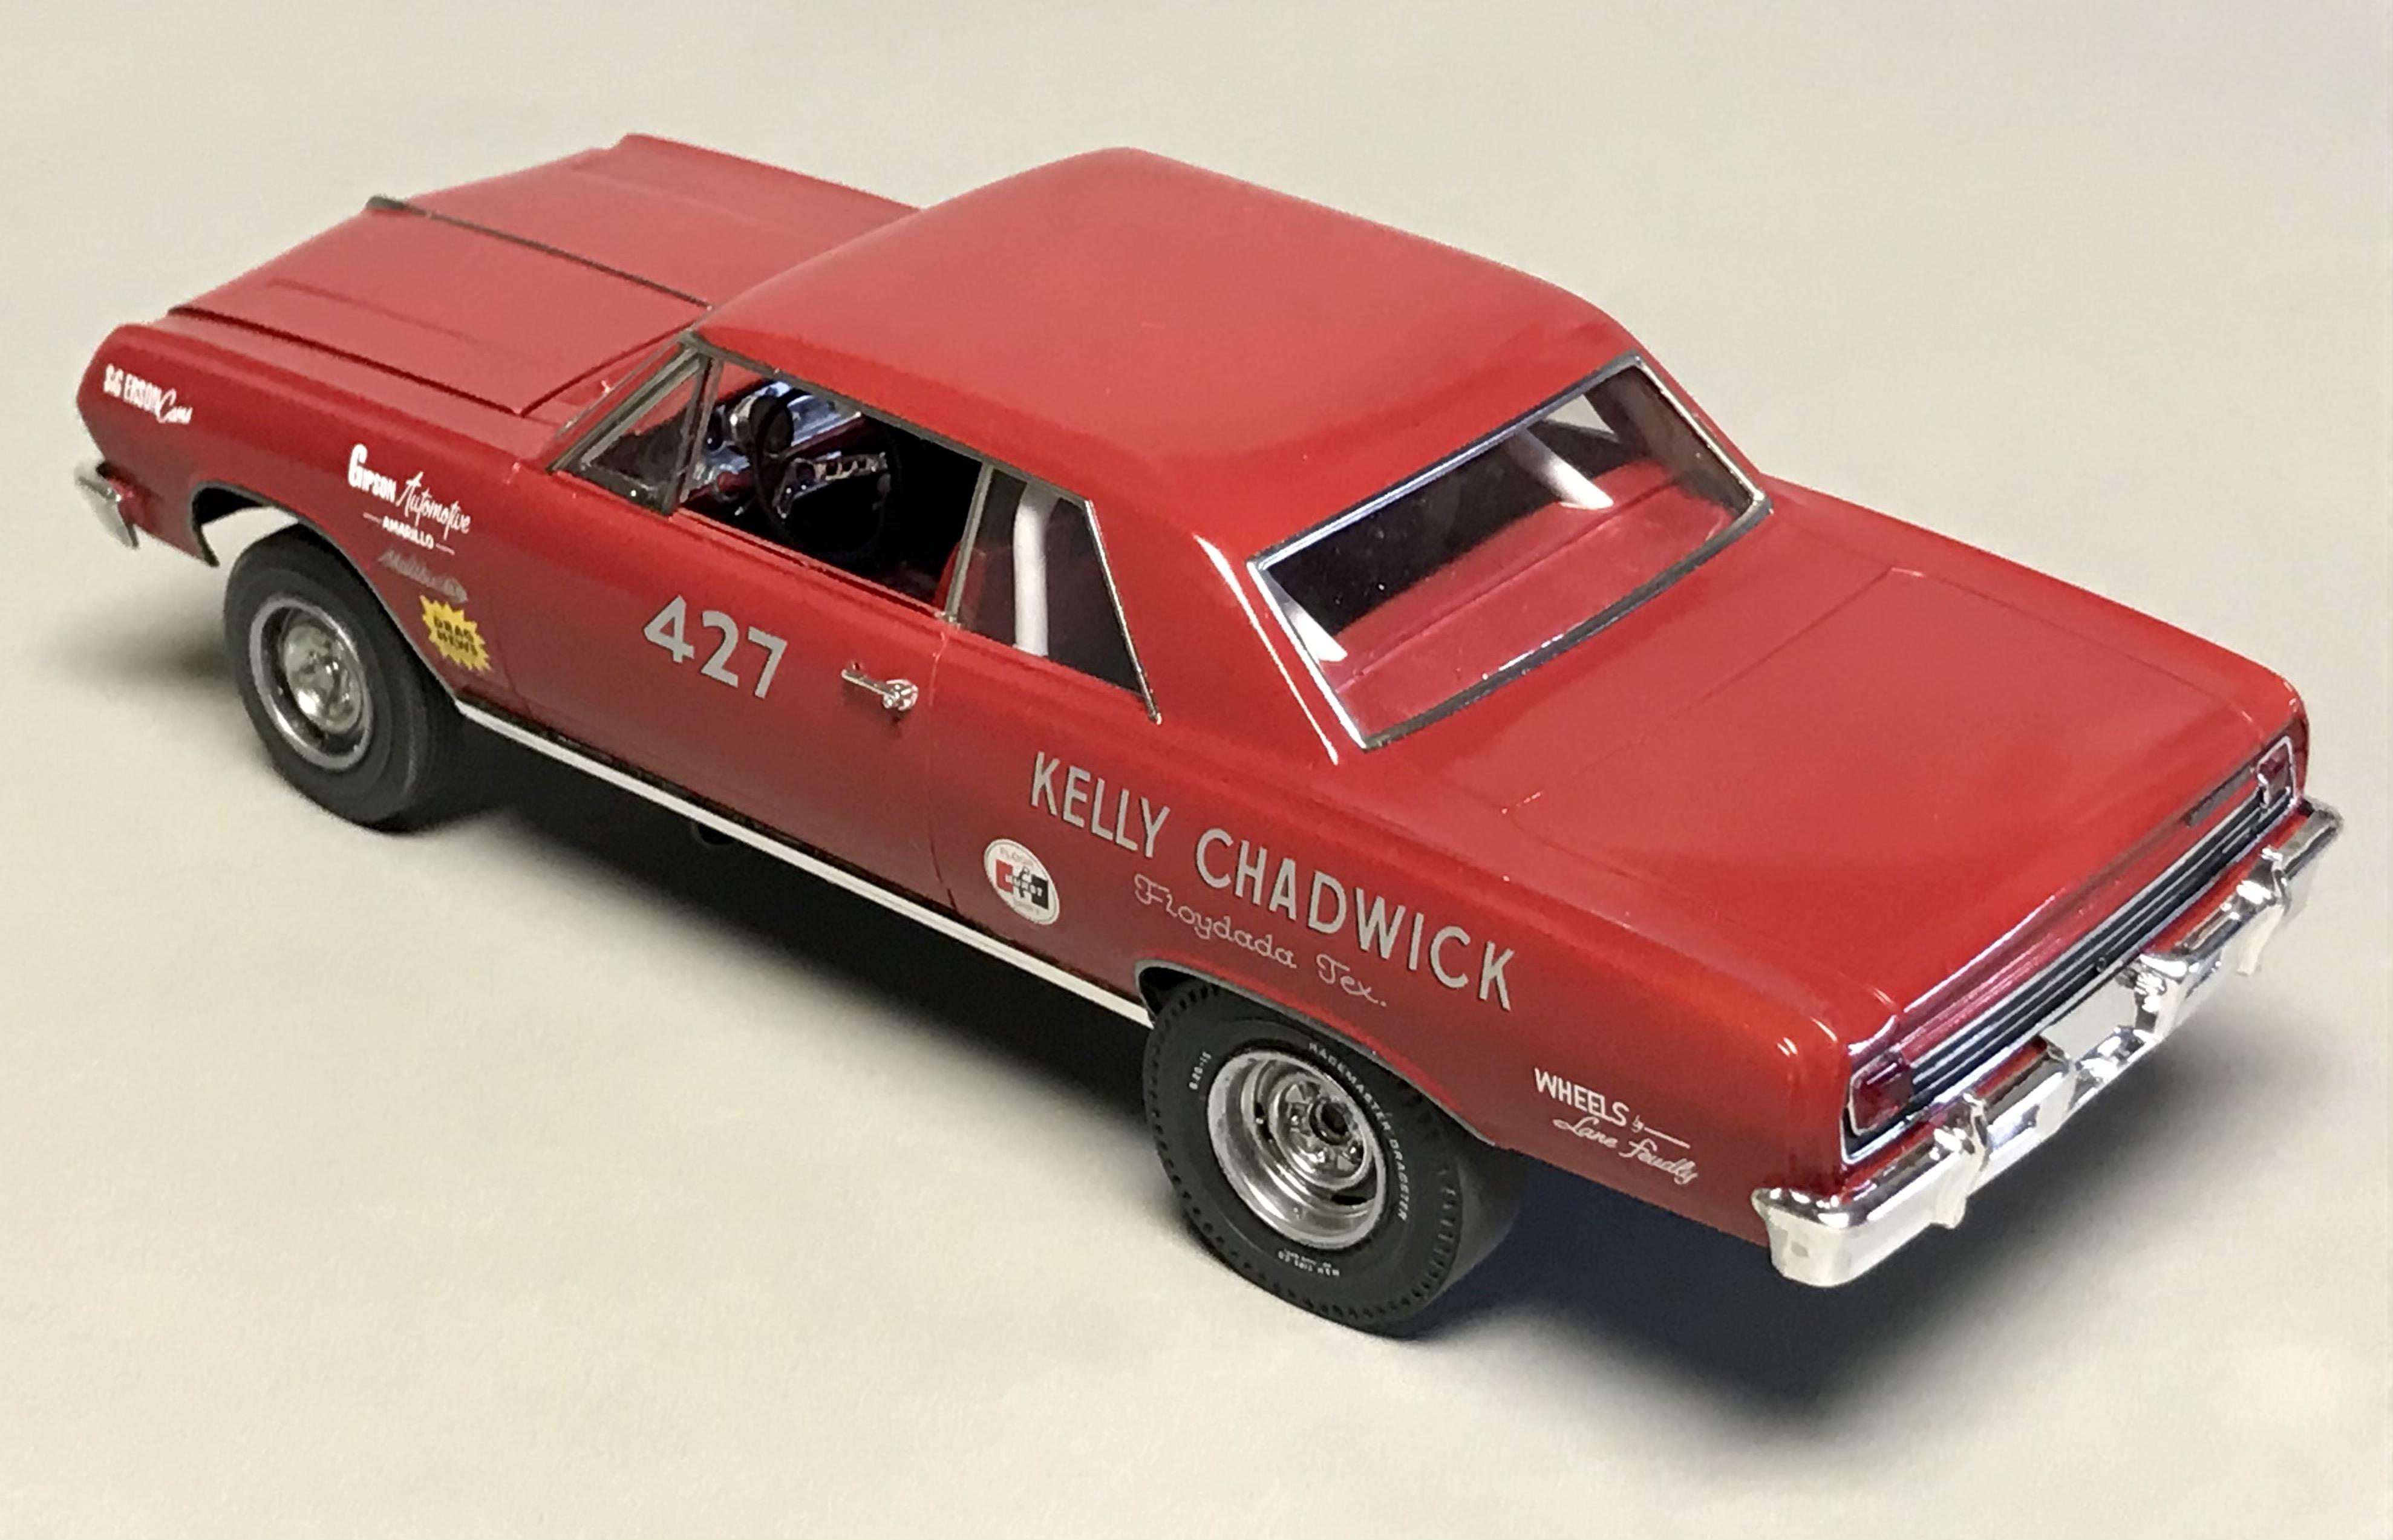
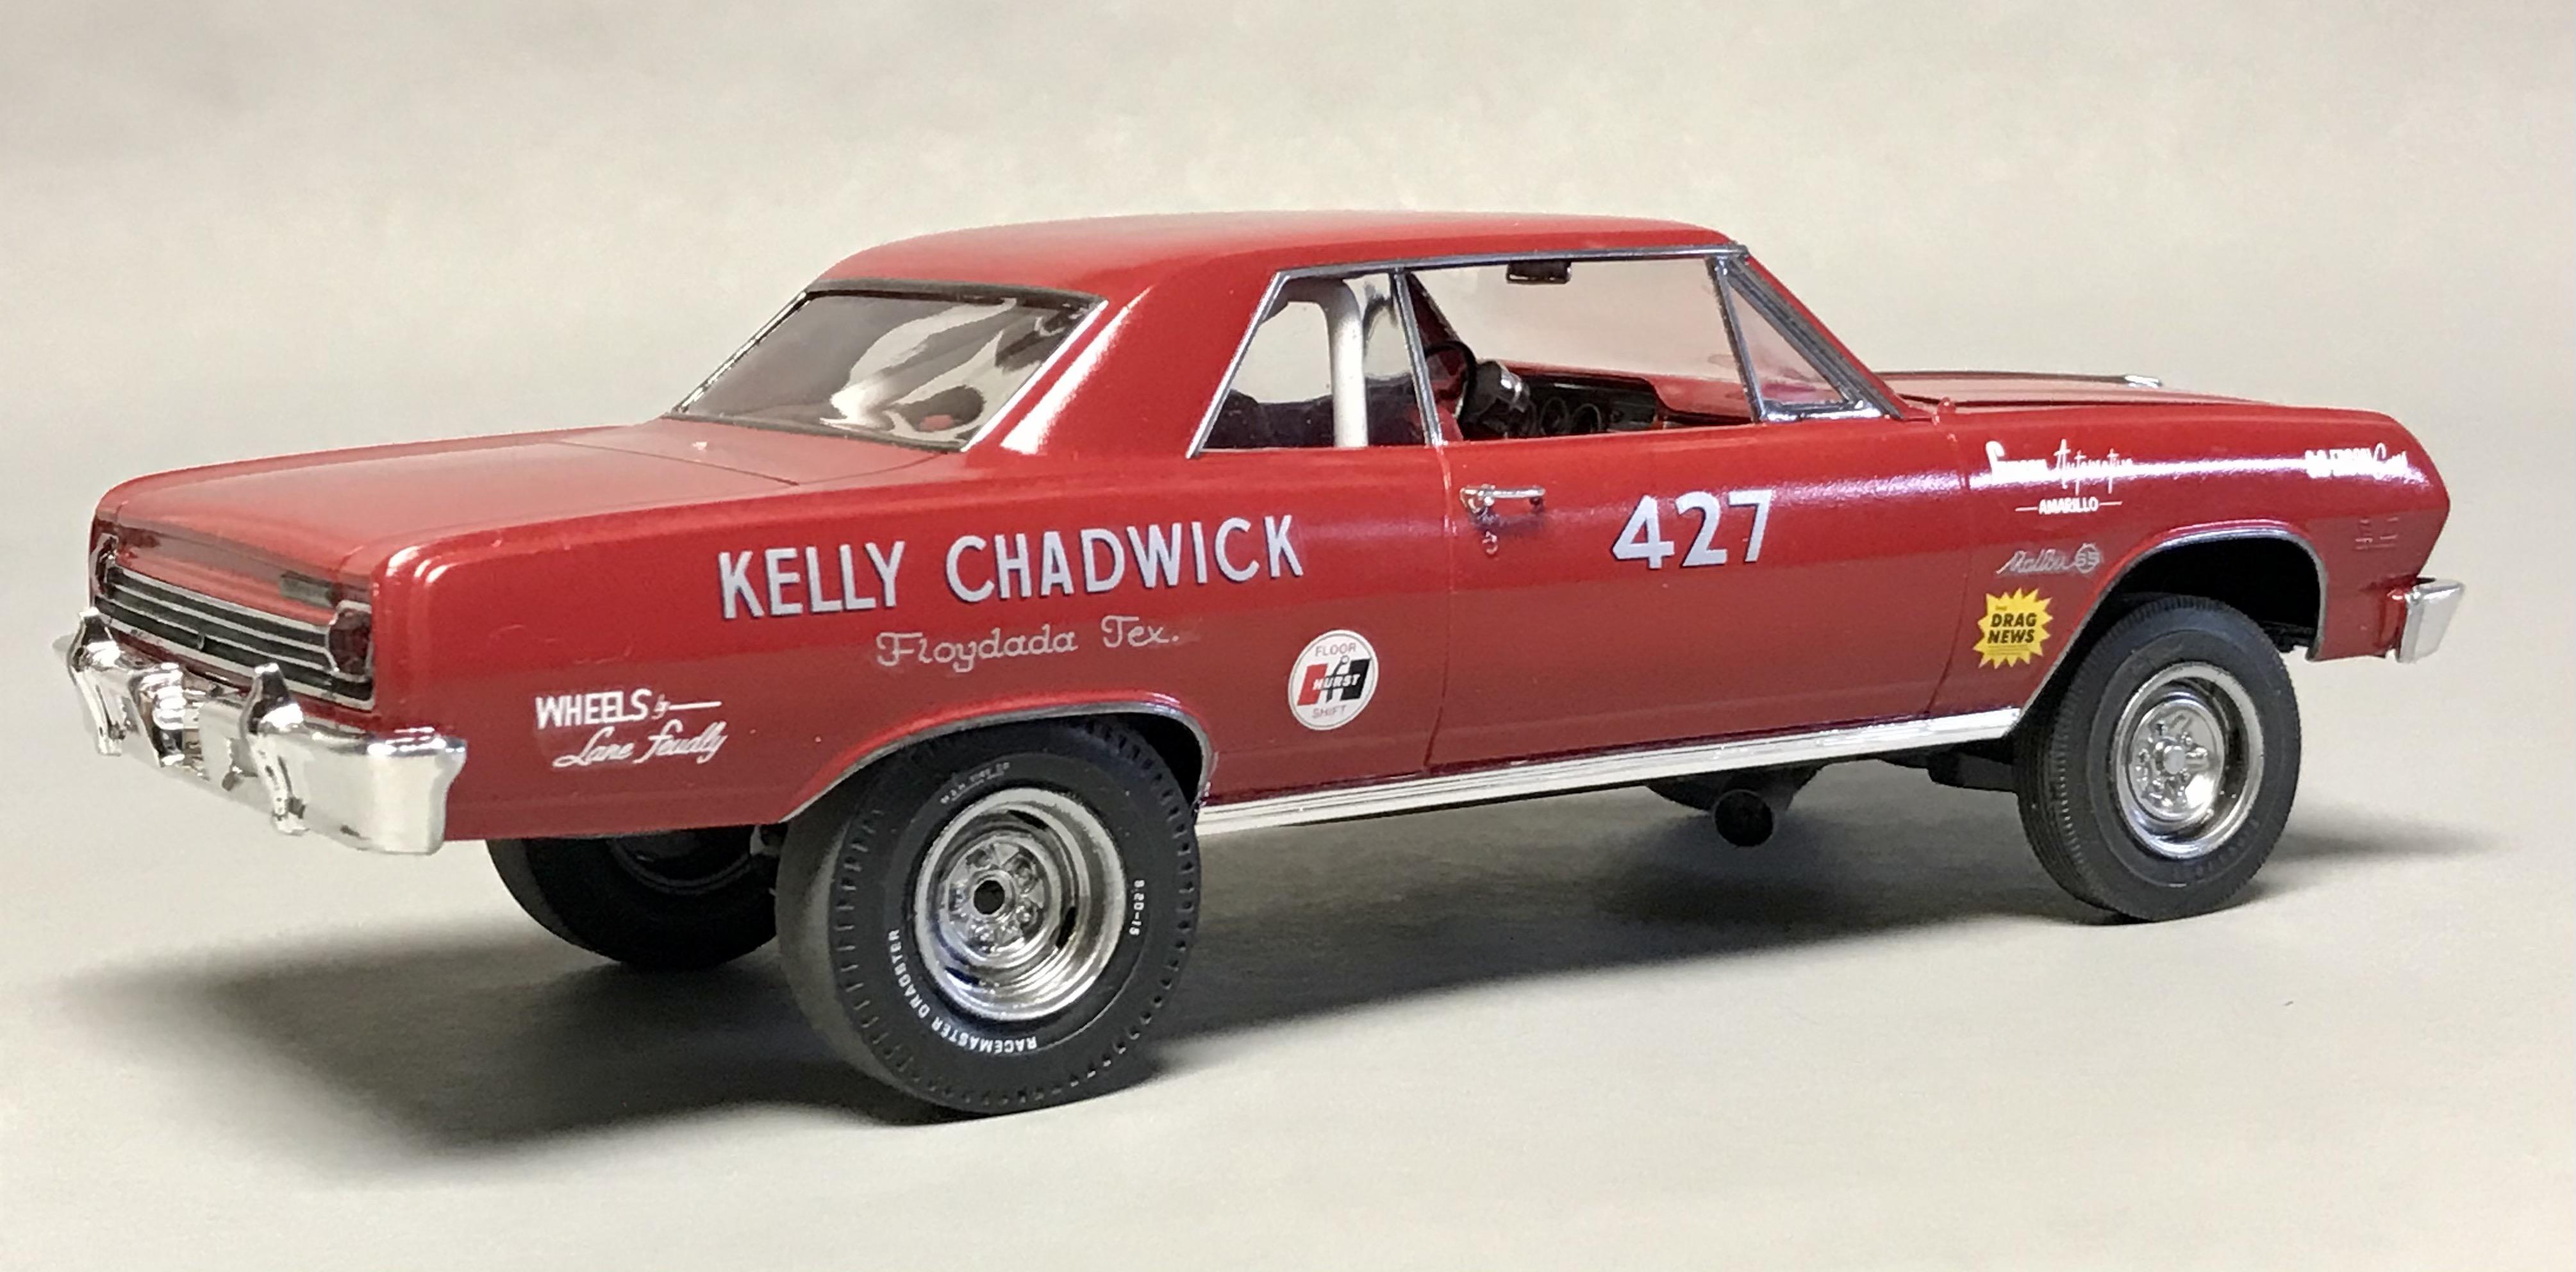
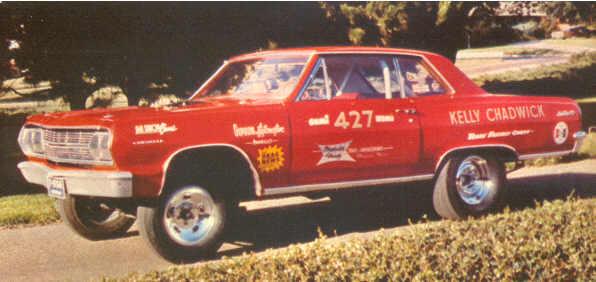
Thanks guys for the atta boy’s. You are correct Reggs, A/FX required suspensions with stock or manufacturer’s aftermarket mods so my A/FX window decal is almost accurate for my hokey suspension mods on this build (I used the stock parts!). I suspect a lot of pics of Kelly’s jacked-up (and AWB) Chevelle images I’ve found on the web may be when he ran the car as an unclassified match racer or some other class (A/XS?). For others asking why SS cars were so jacked-up during this period, I believe it was all about shifting weight distribution towards the rear tires. I love this period of drag racing not just because of my own childhood nostalgia but also because the technology/ art was advancing so quickly with noticeable changes being made on a monthly and even weekly basis between ‘64 -‘66. Dyno Don shifting wheel base and taking a hacksaw to the fenders of his ‘65 Comet a few hours before qualifying....cool days!
-
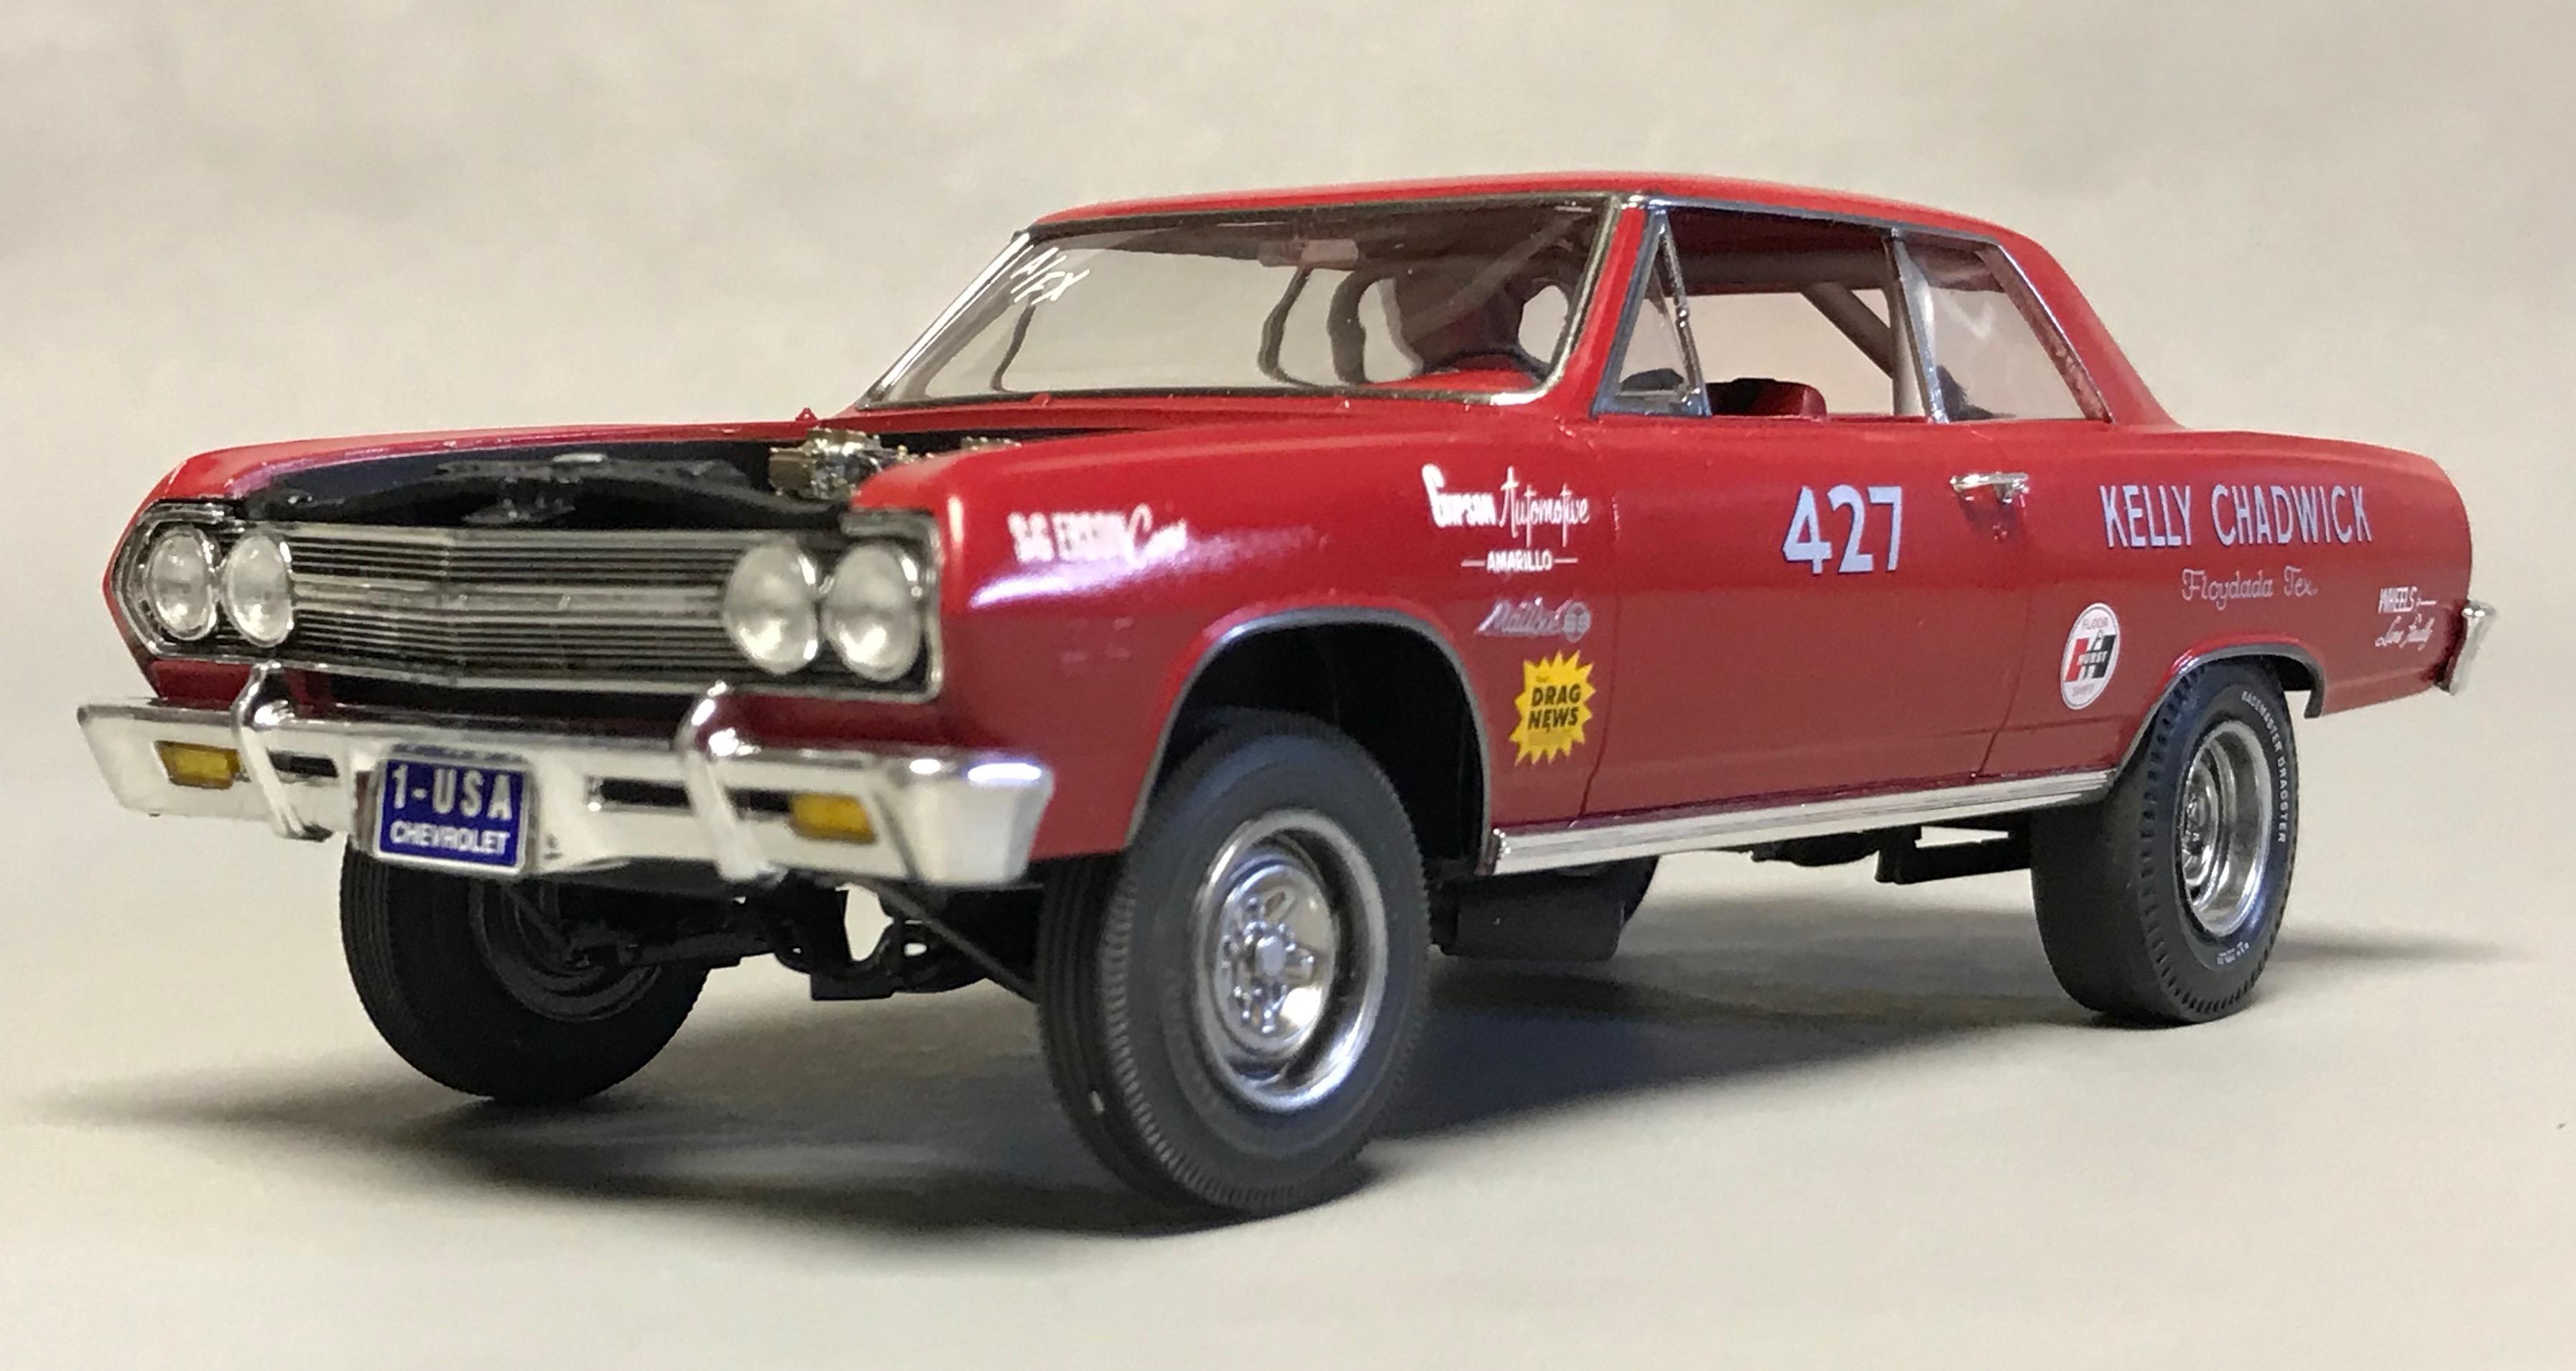
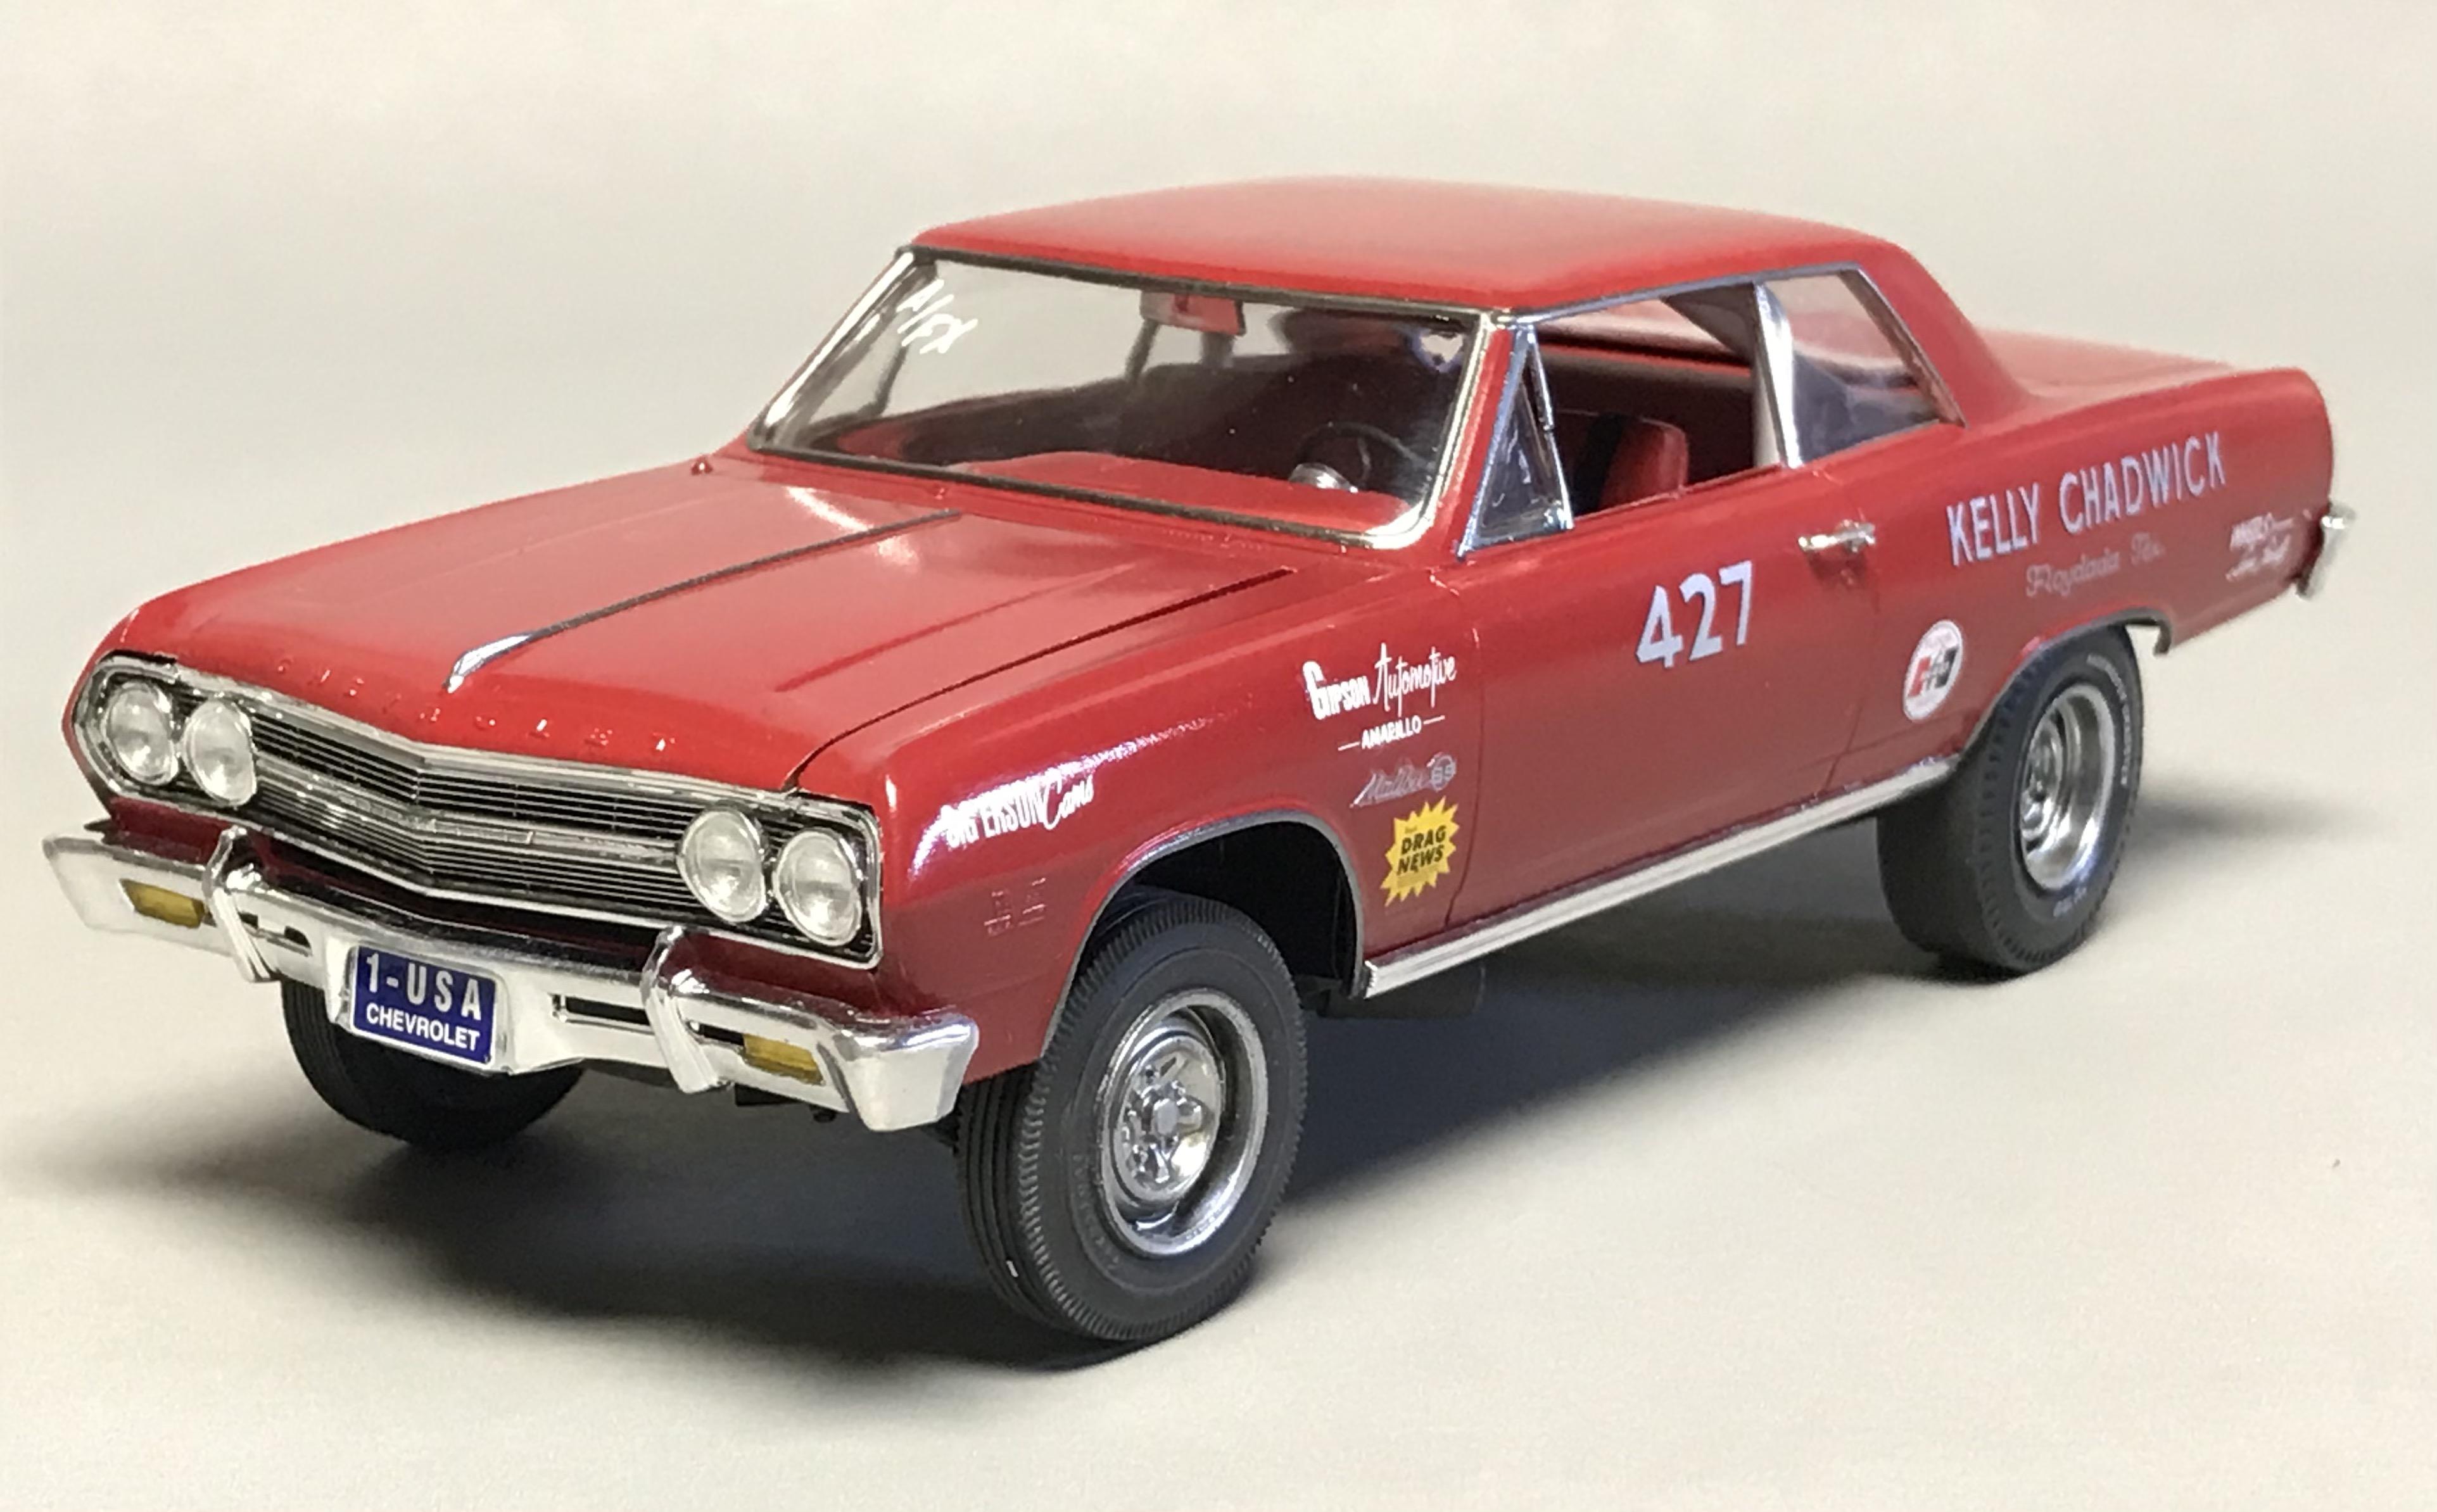
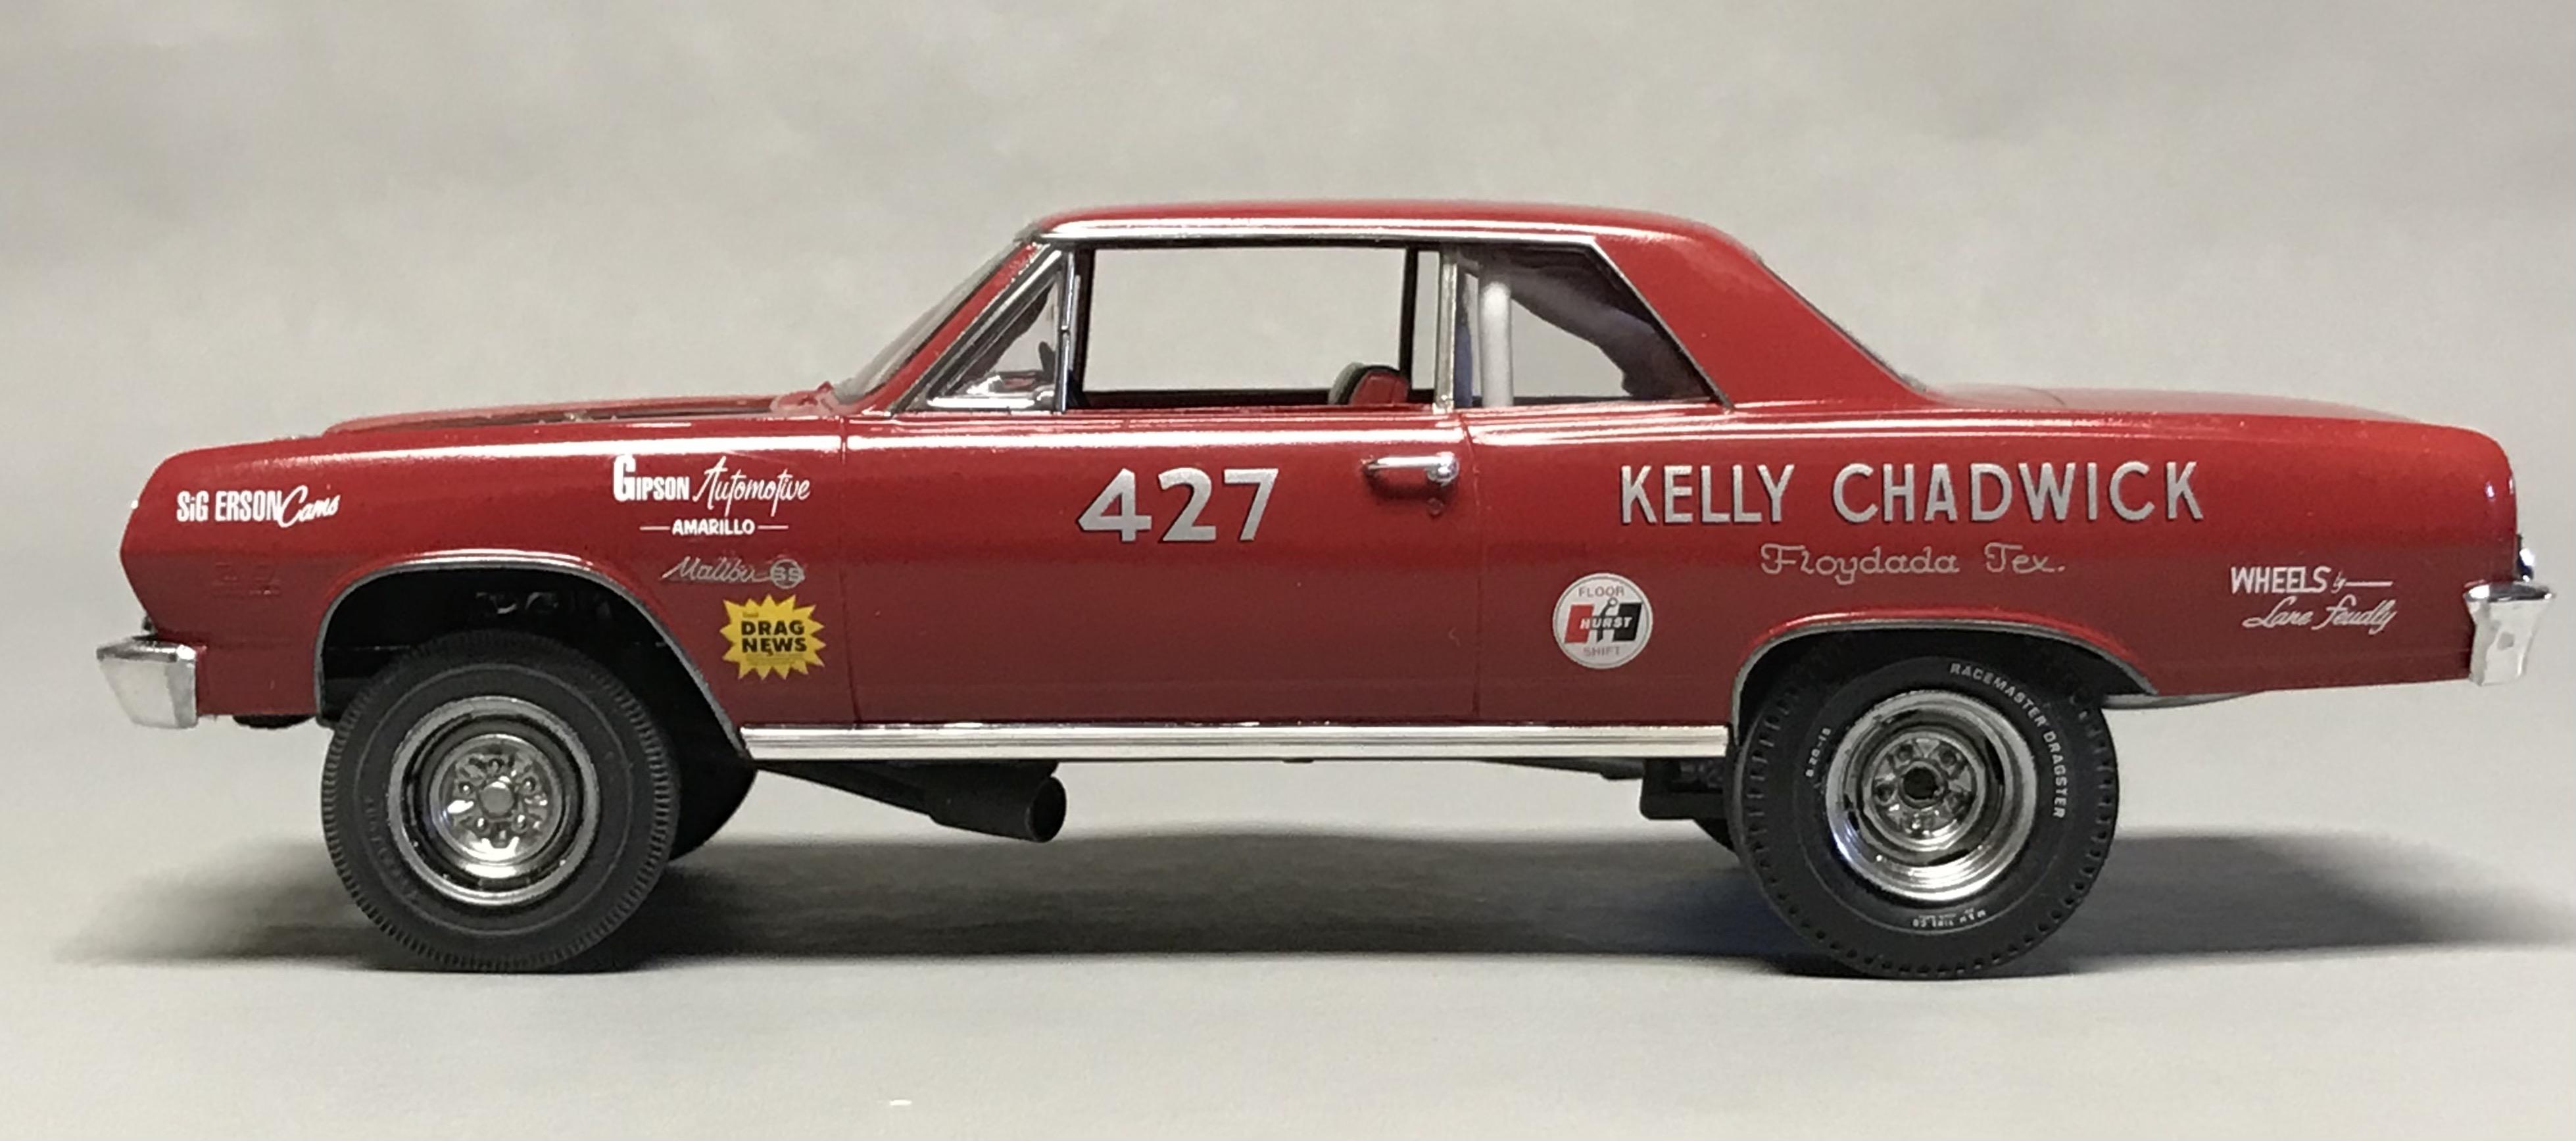
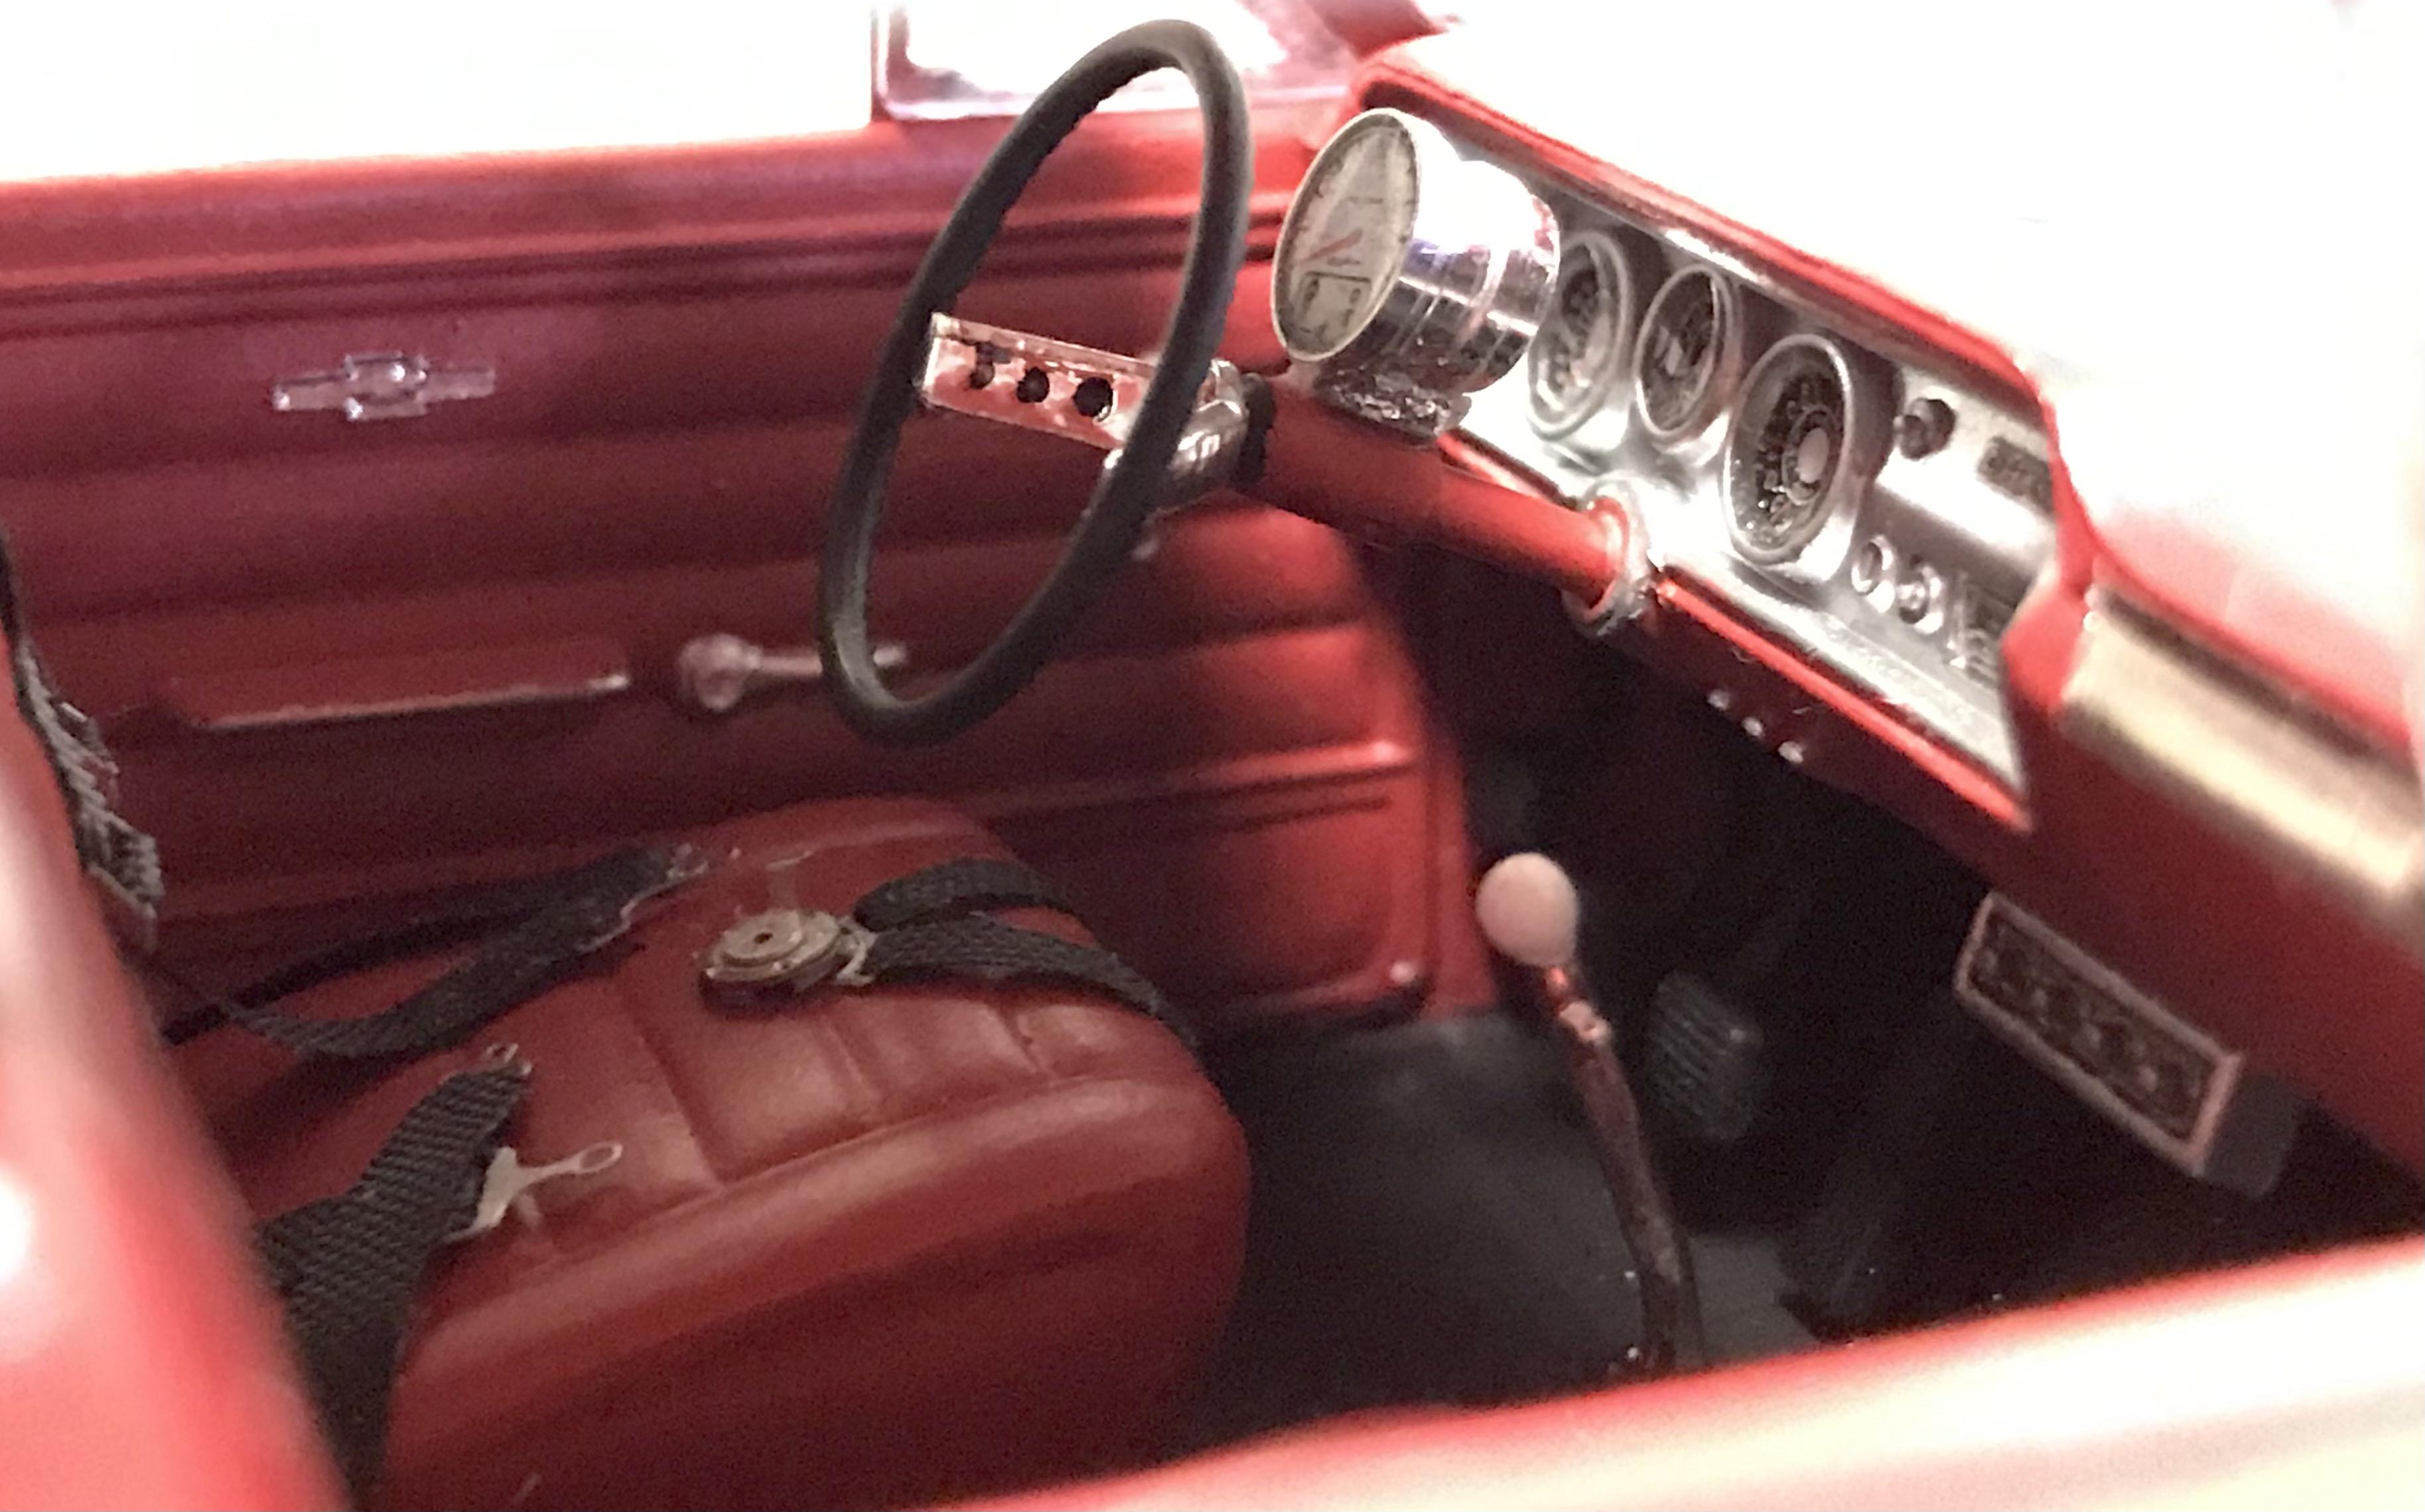
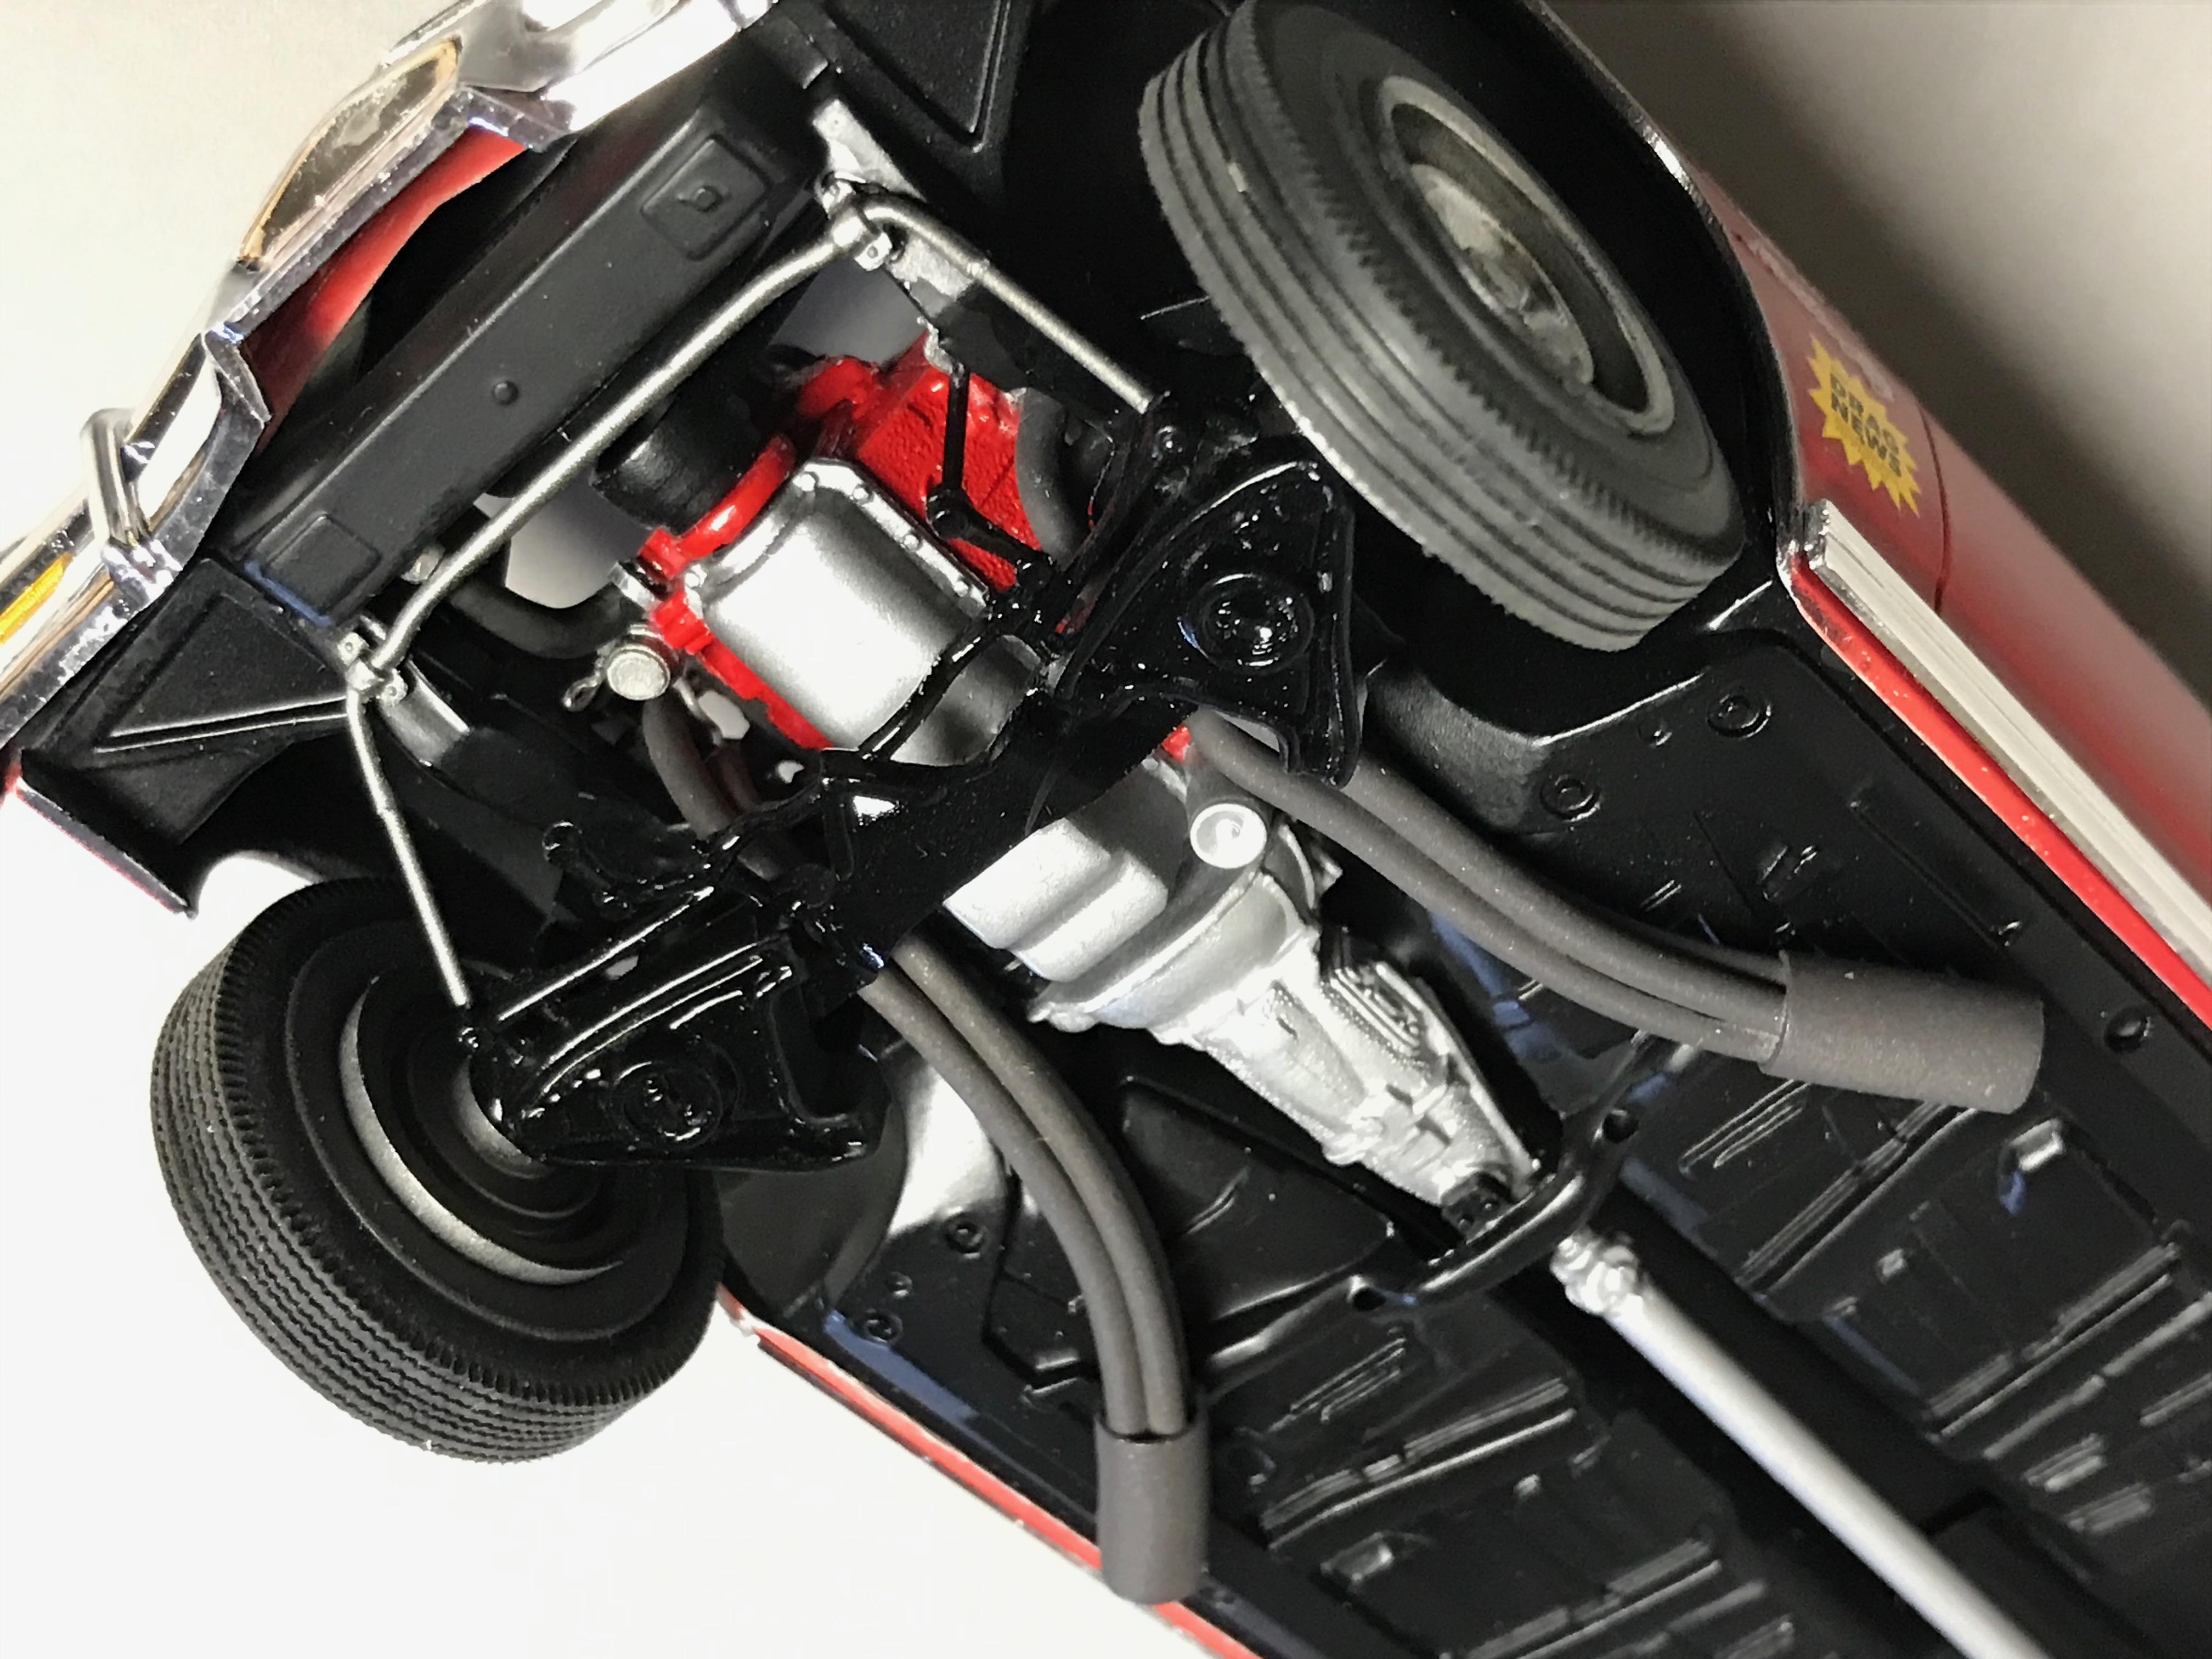
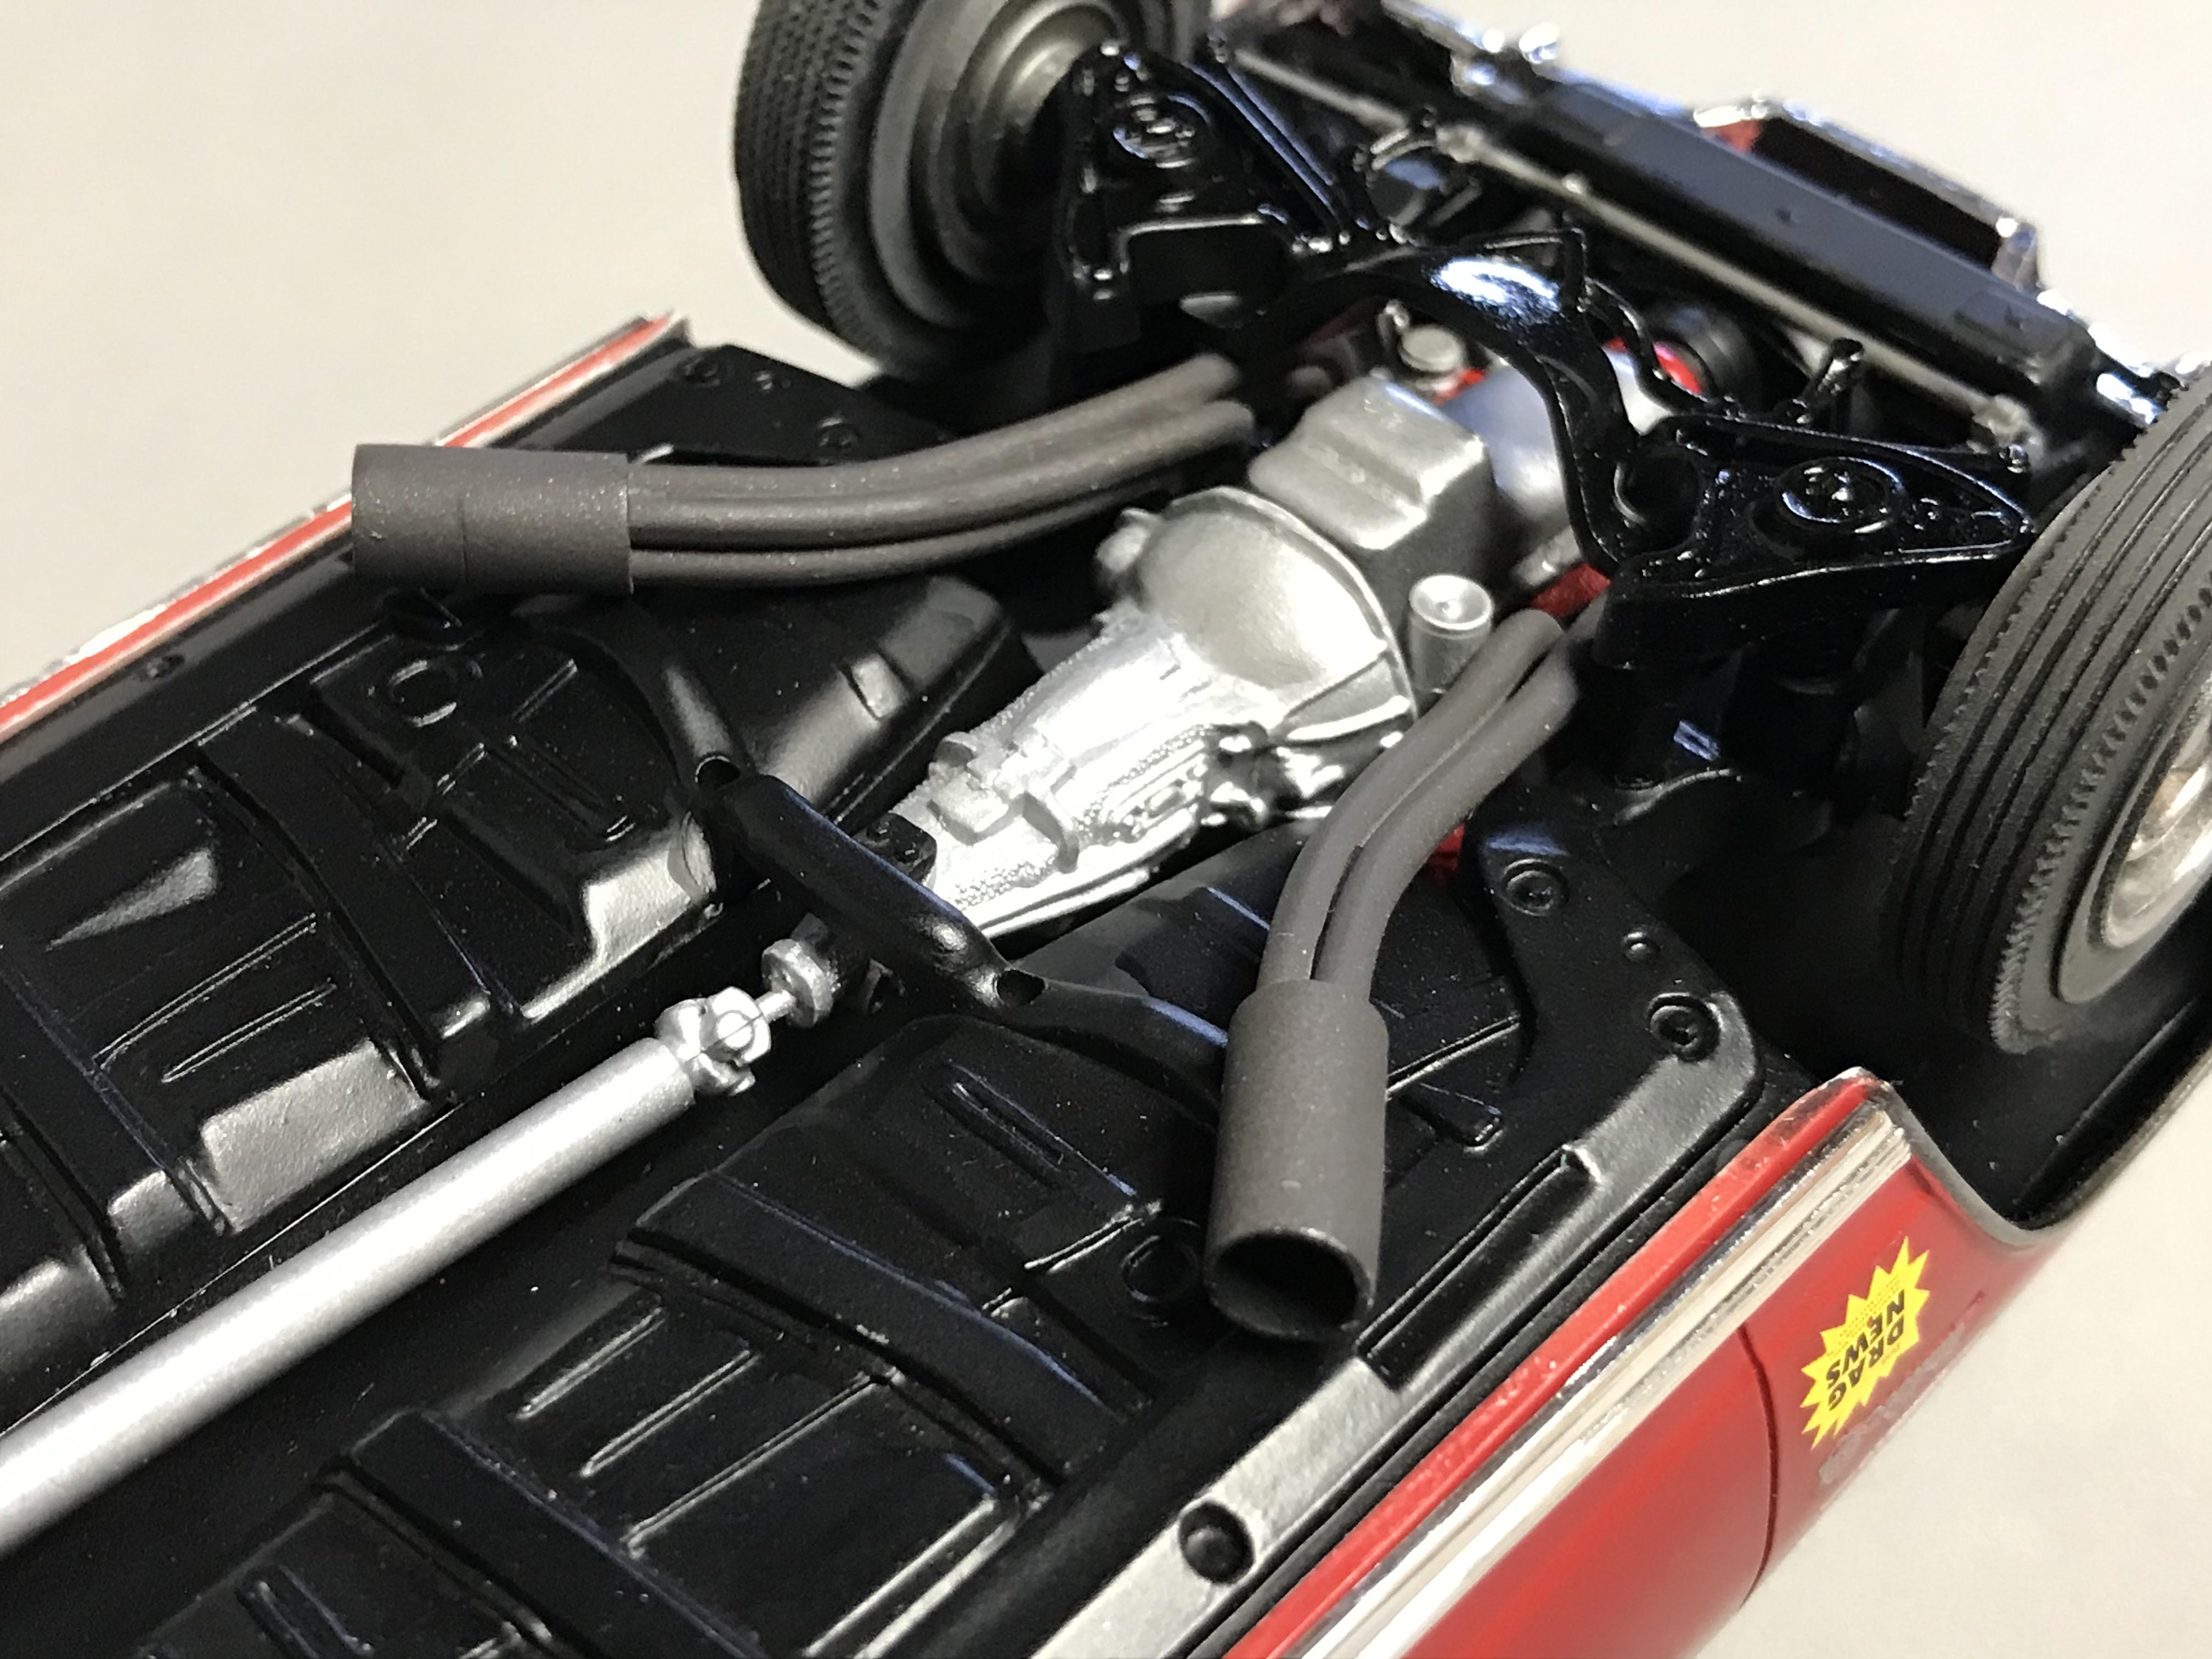
This one is OOB other than plug wires and seat belts. I did try to raise the front end slightly by dropping the wheel spindles lower in the front A arm assembly (thank you bogger44!!!). I used Scalefinishes Poppy Red exterior airbrushed paint with a TS-13 clear coat and Tamiya deck tan acrylic for the interior. I am mostly pleased that I as able to apply the 30 year old decals without damaging a one. Love Revell decals. I've had early 60's super stockers on the brain over the last weird year. I need to take a break and go build a P-38 or something before starting anymore drag car kits.... Thanks for looking, John
-
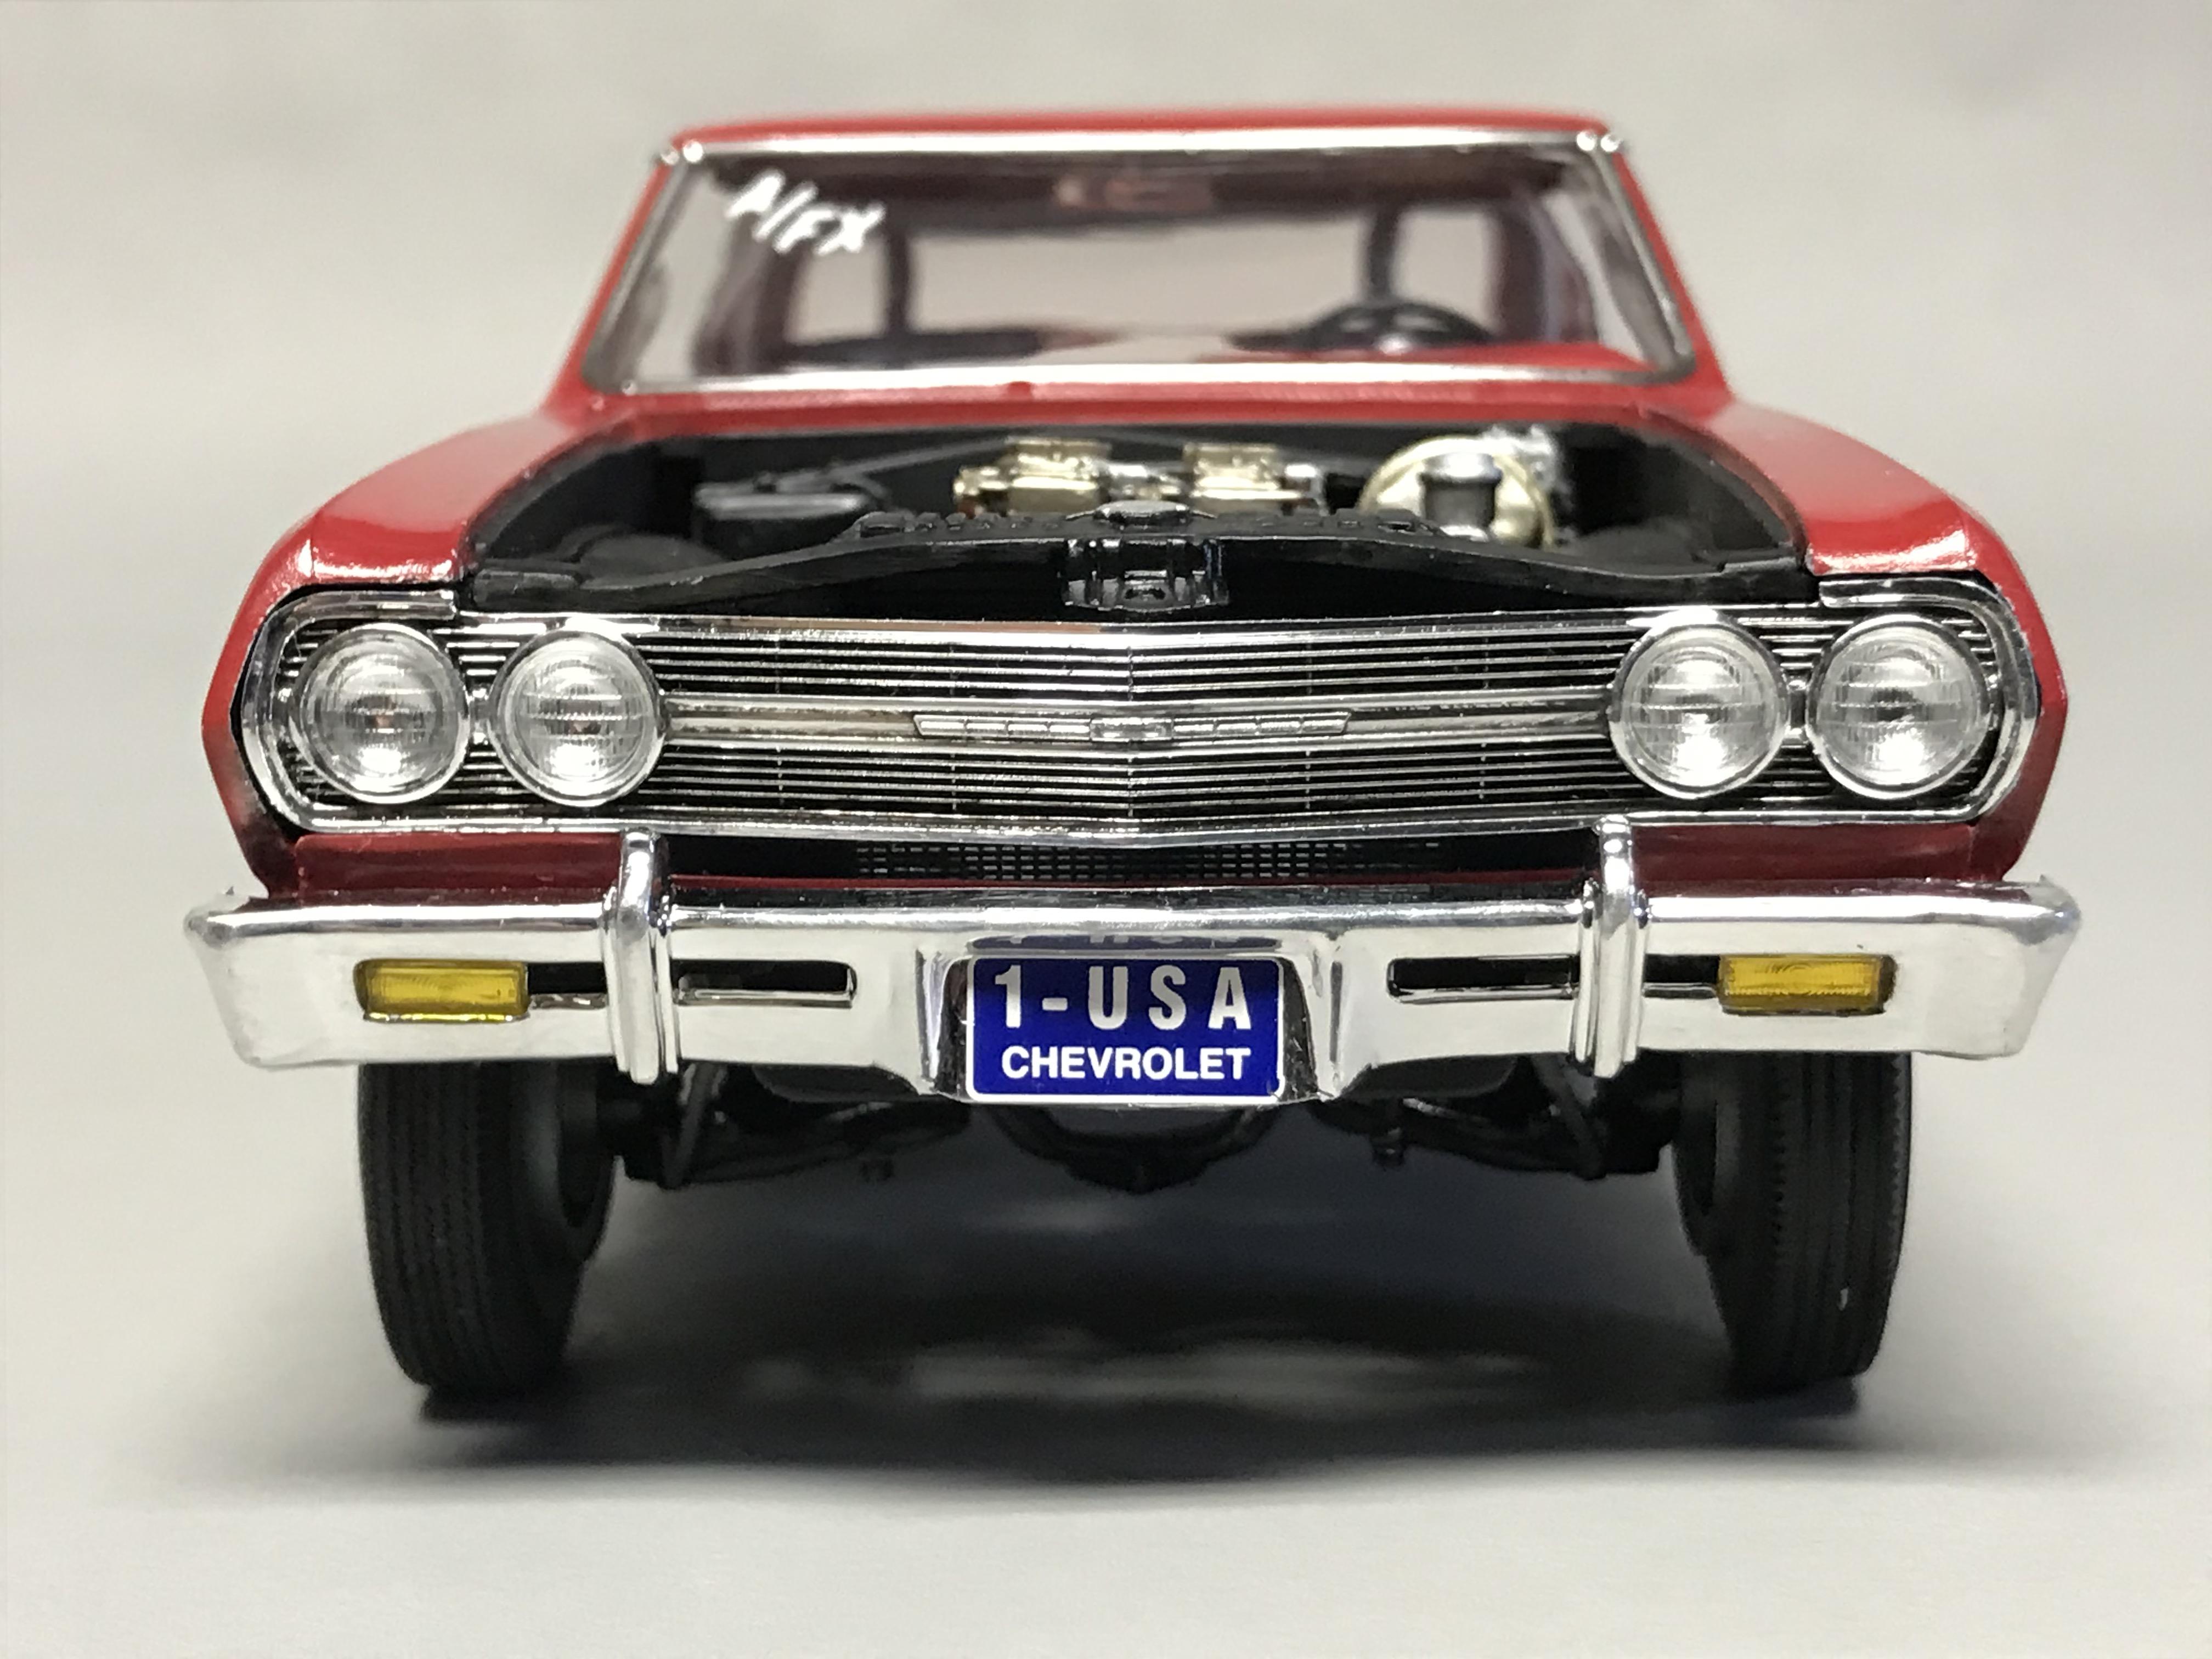
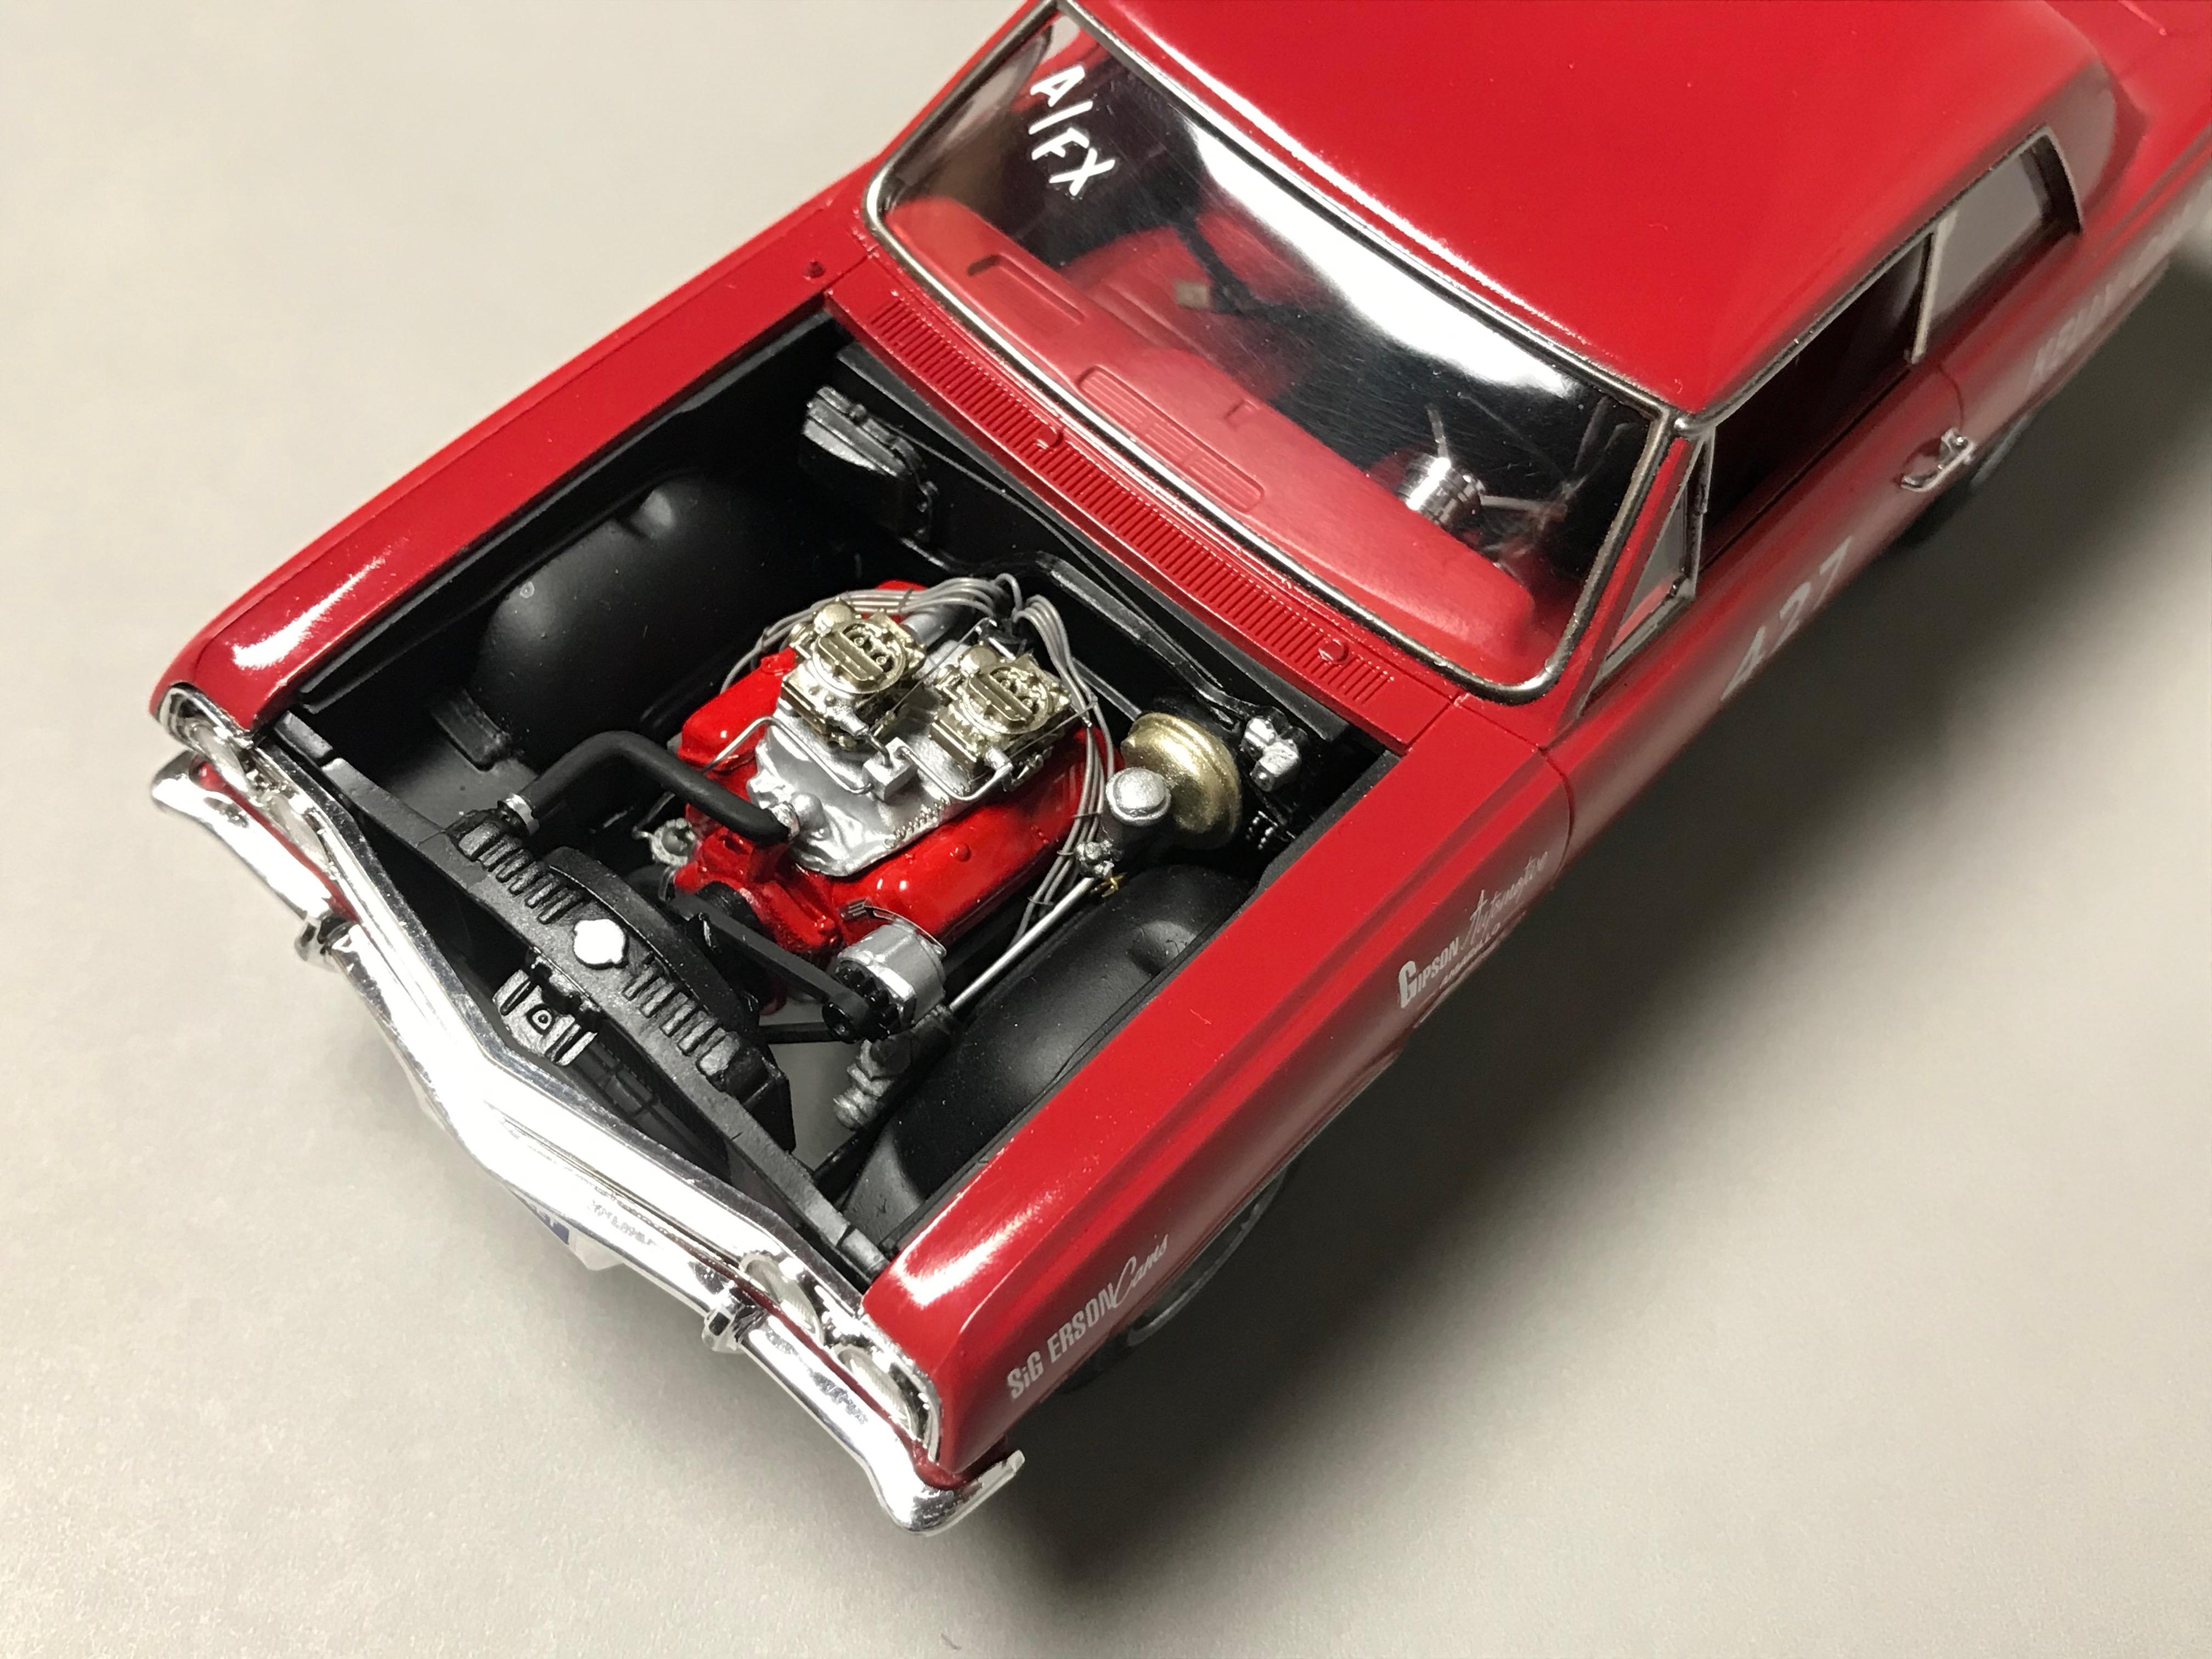
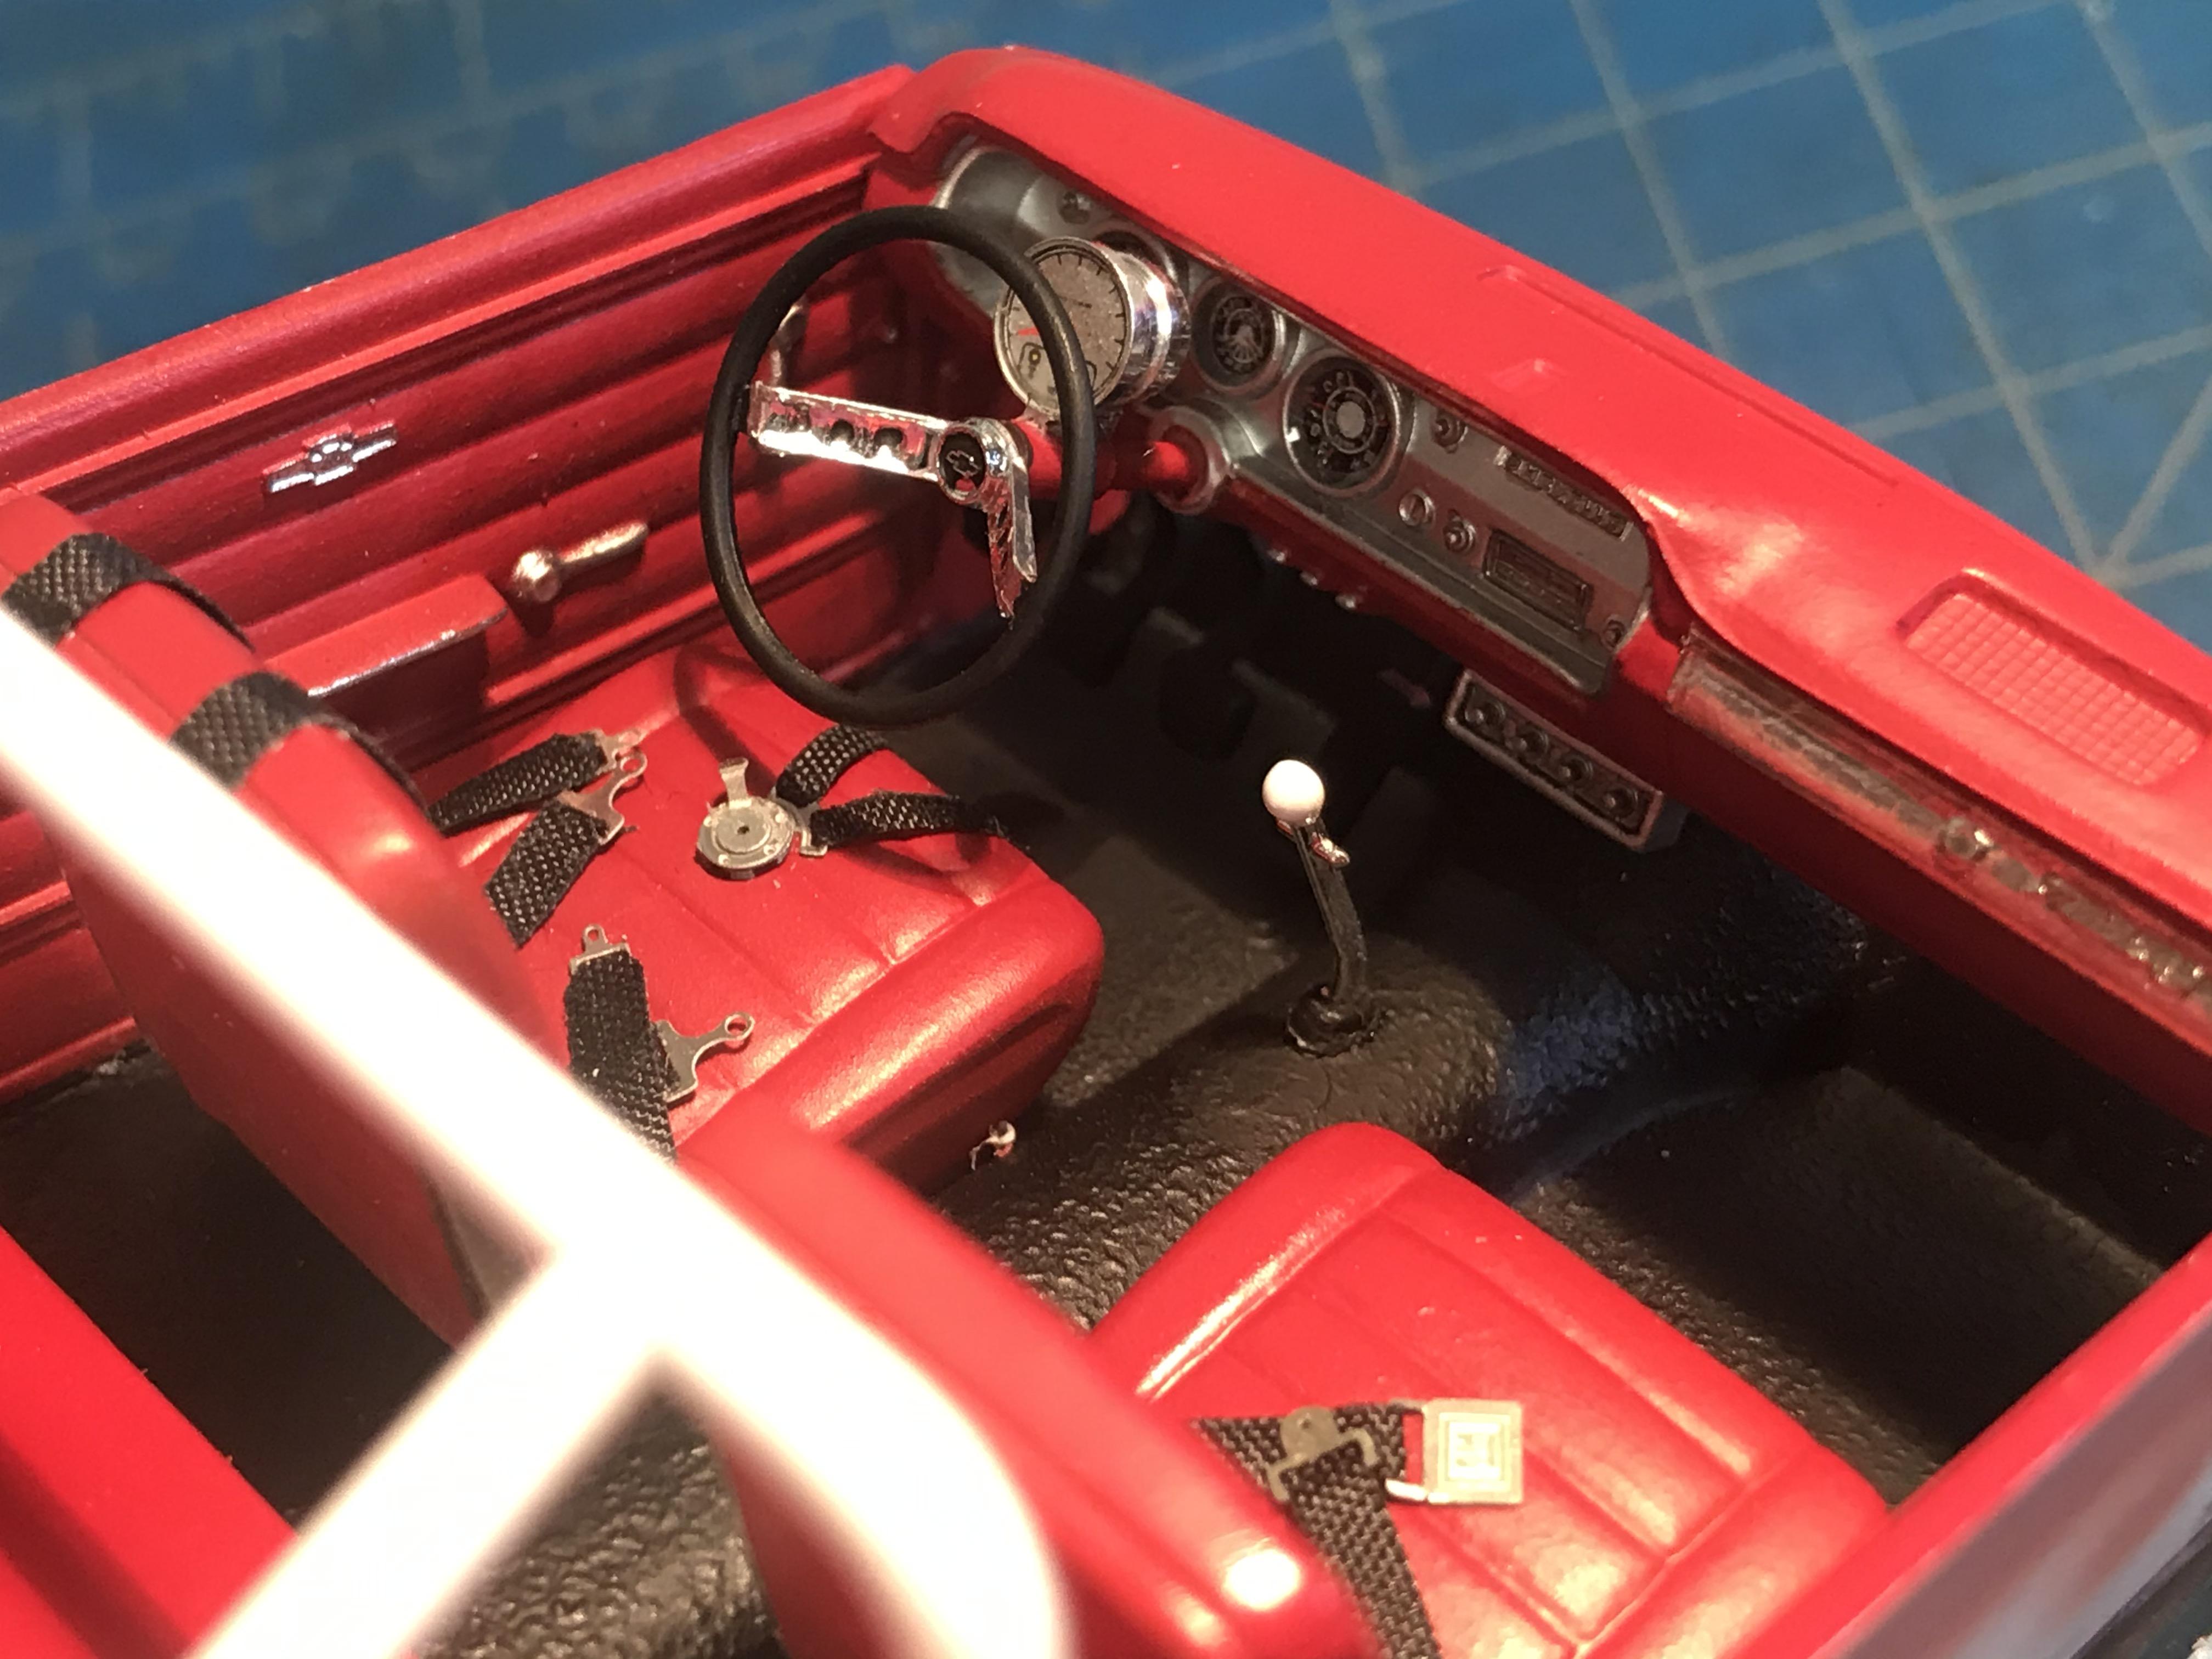
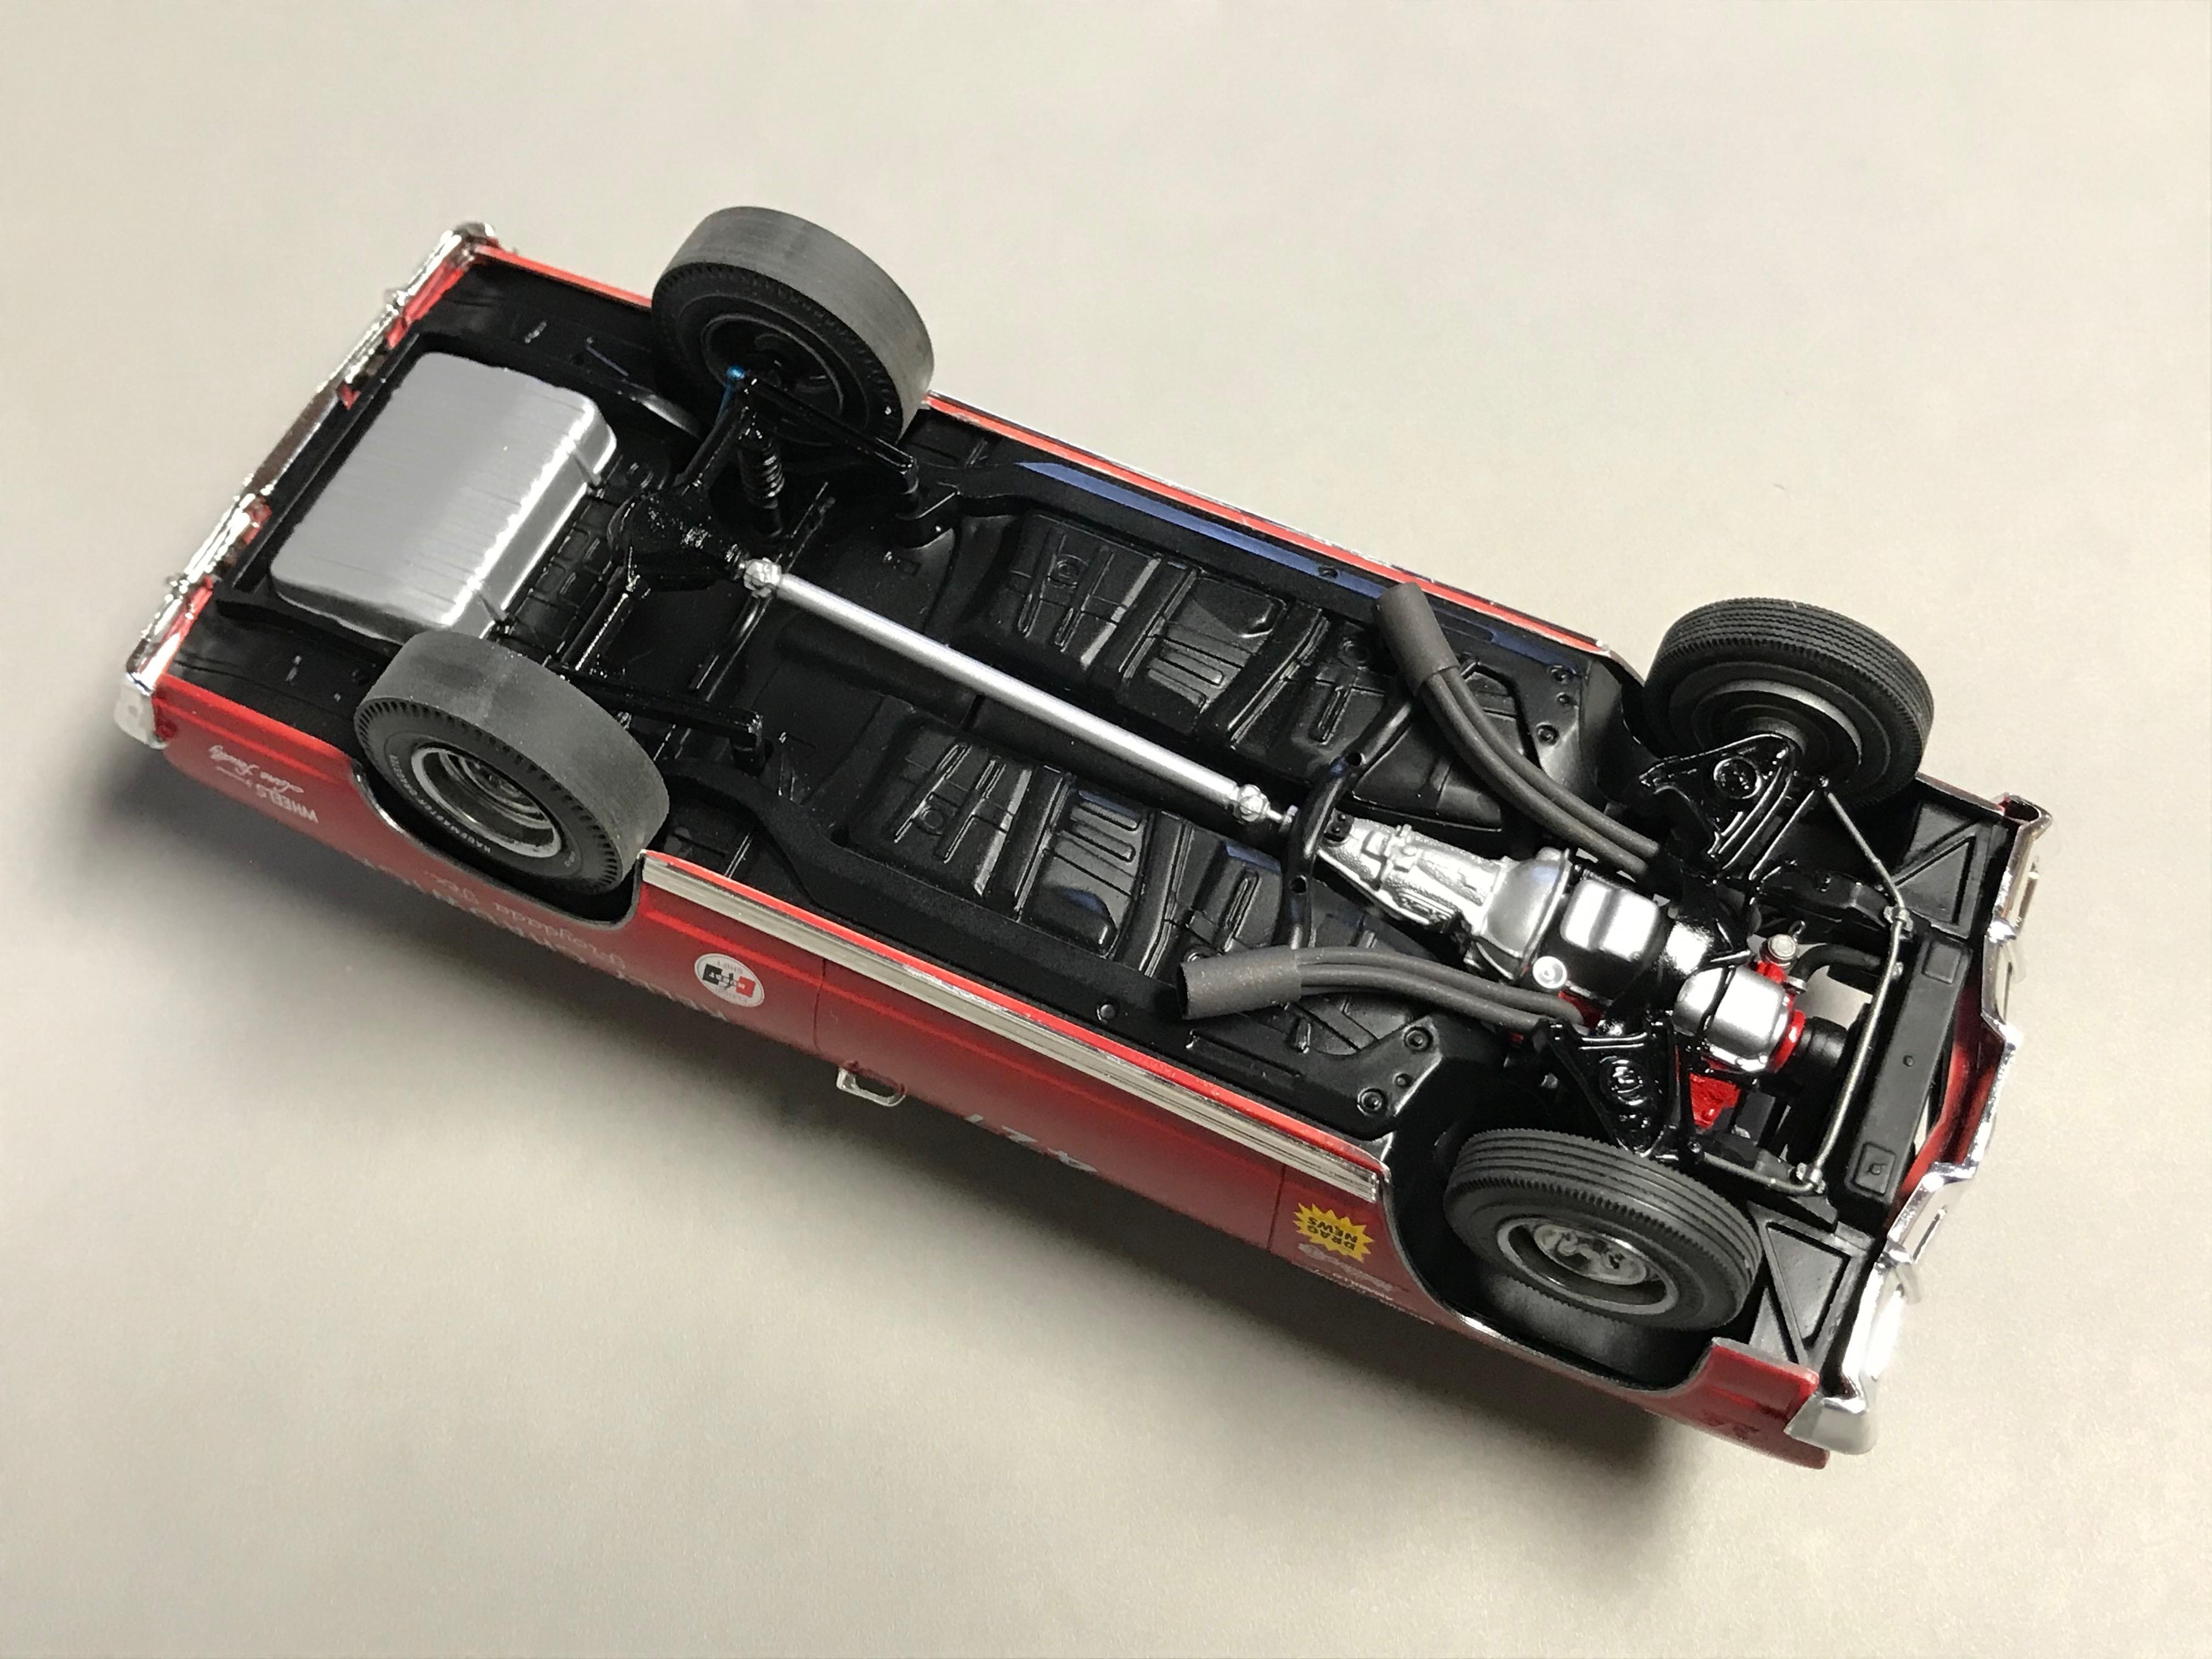
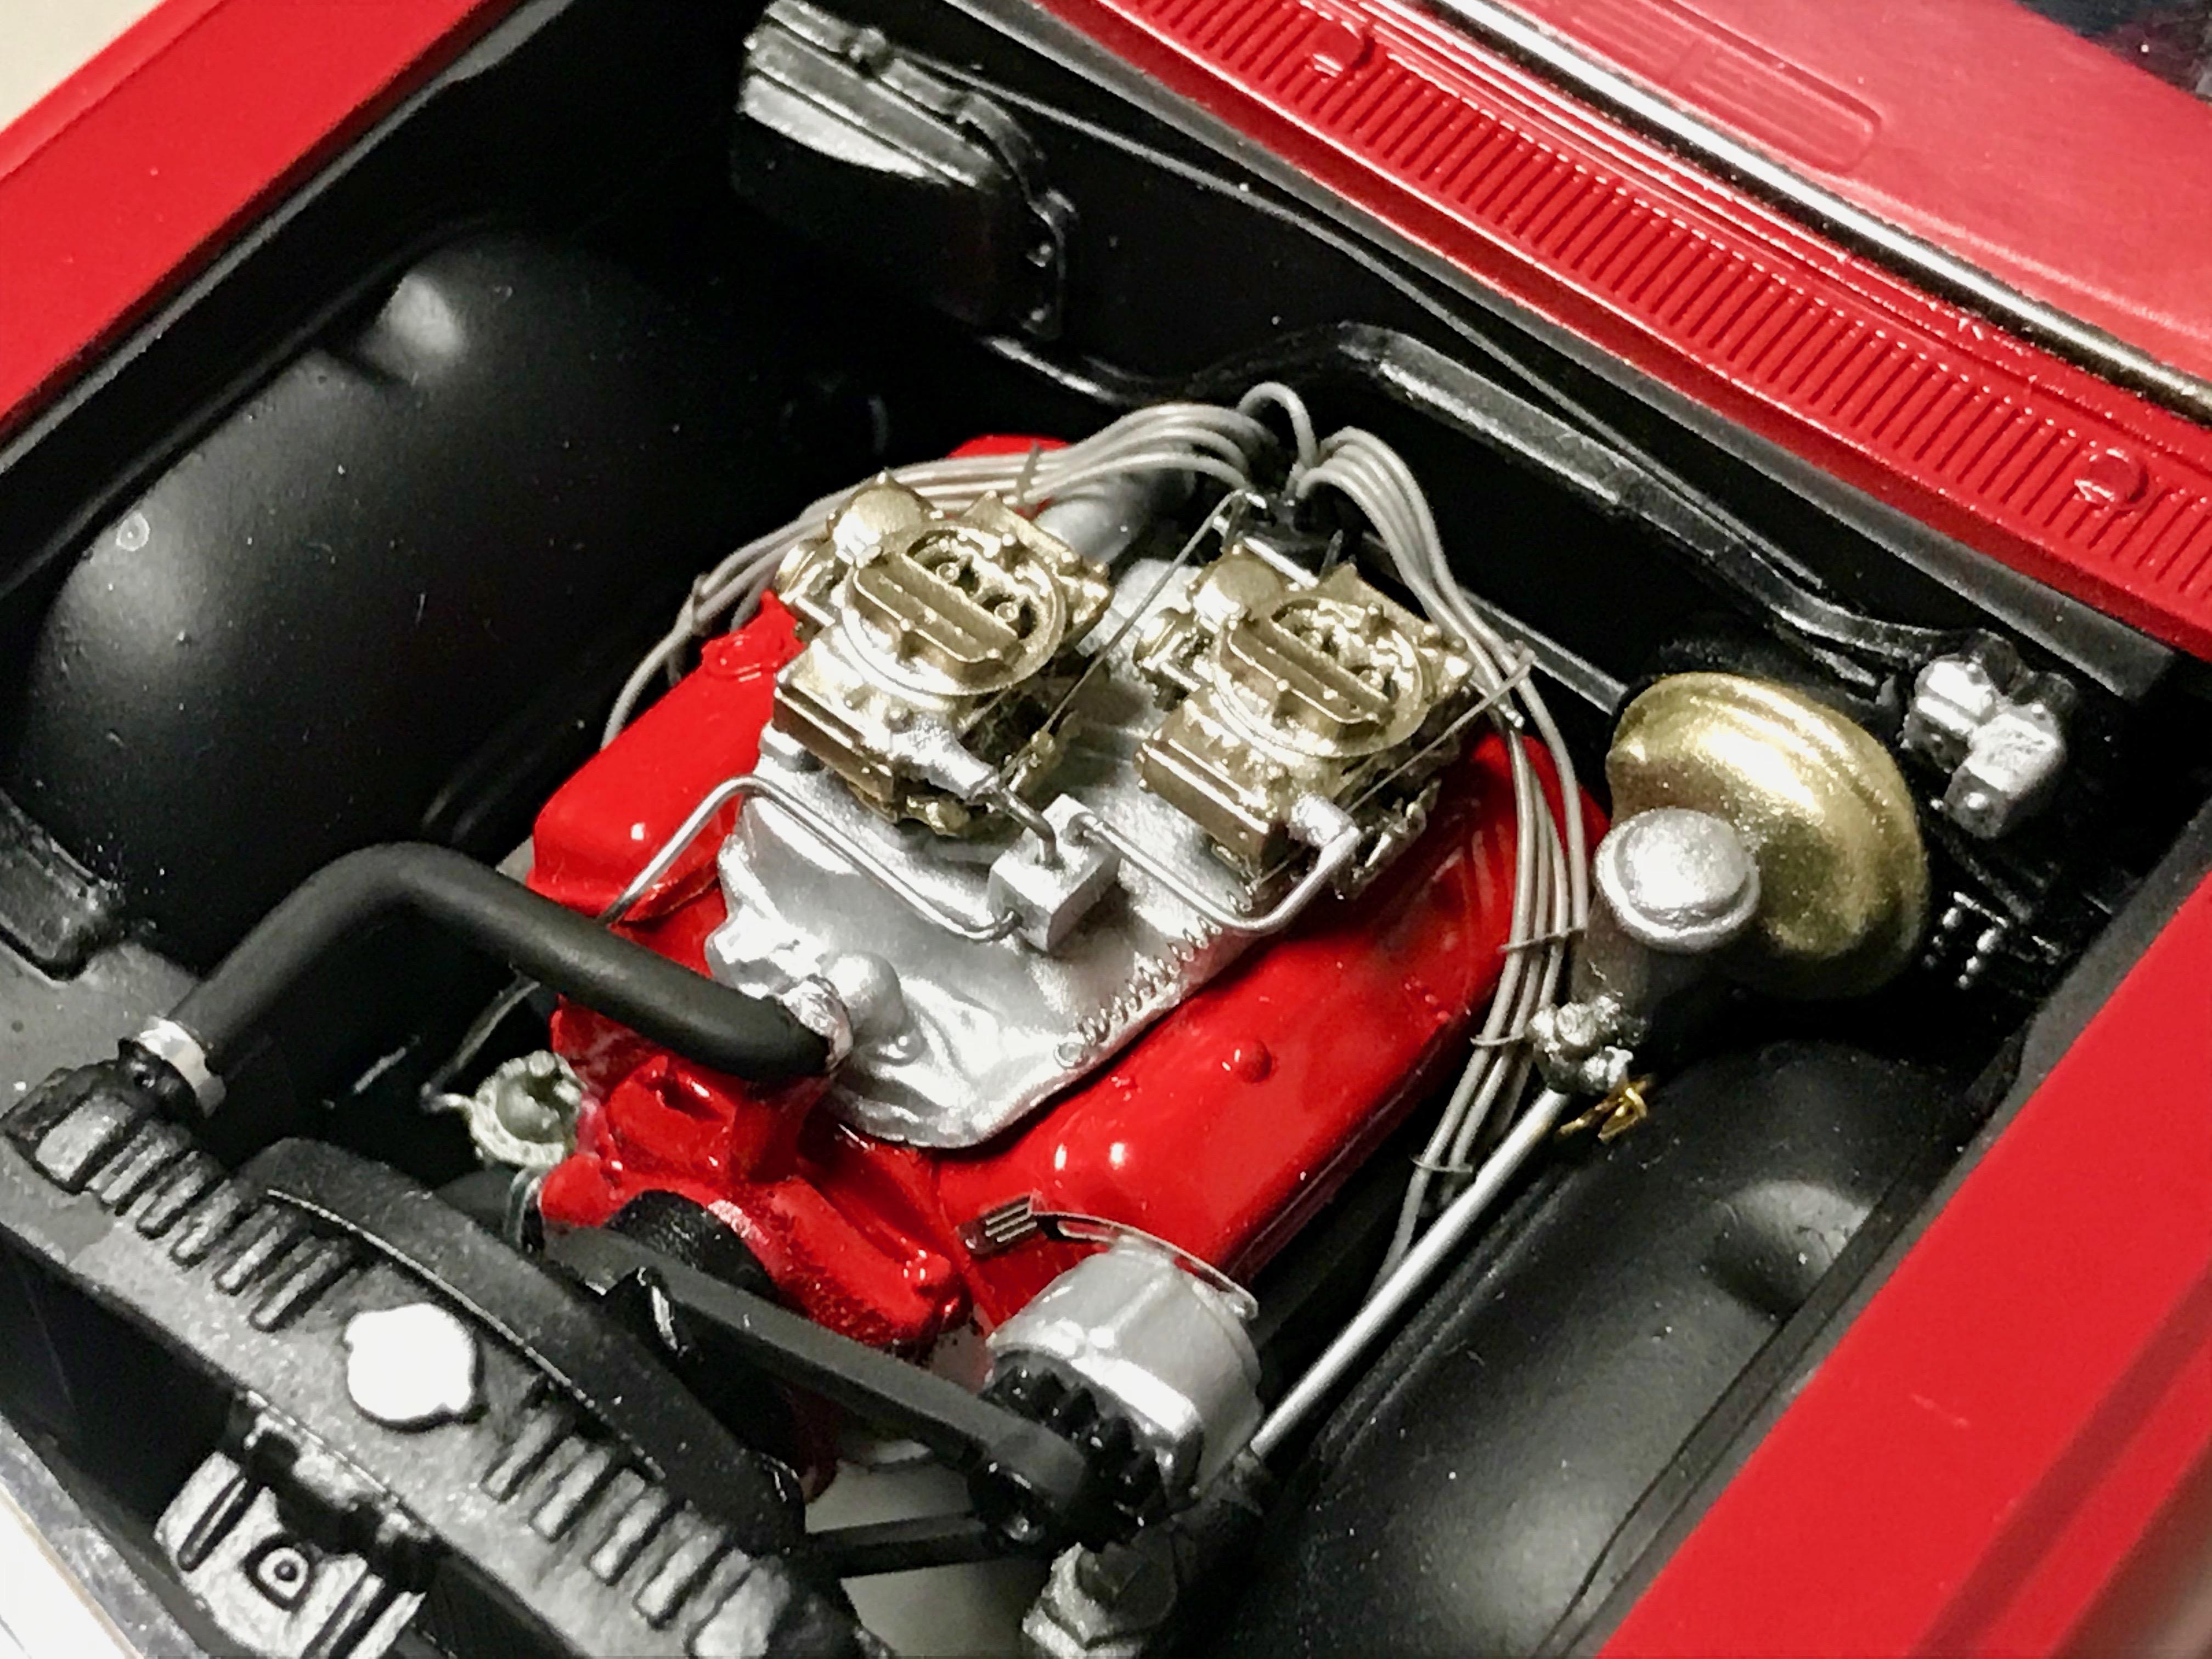
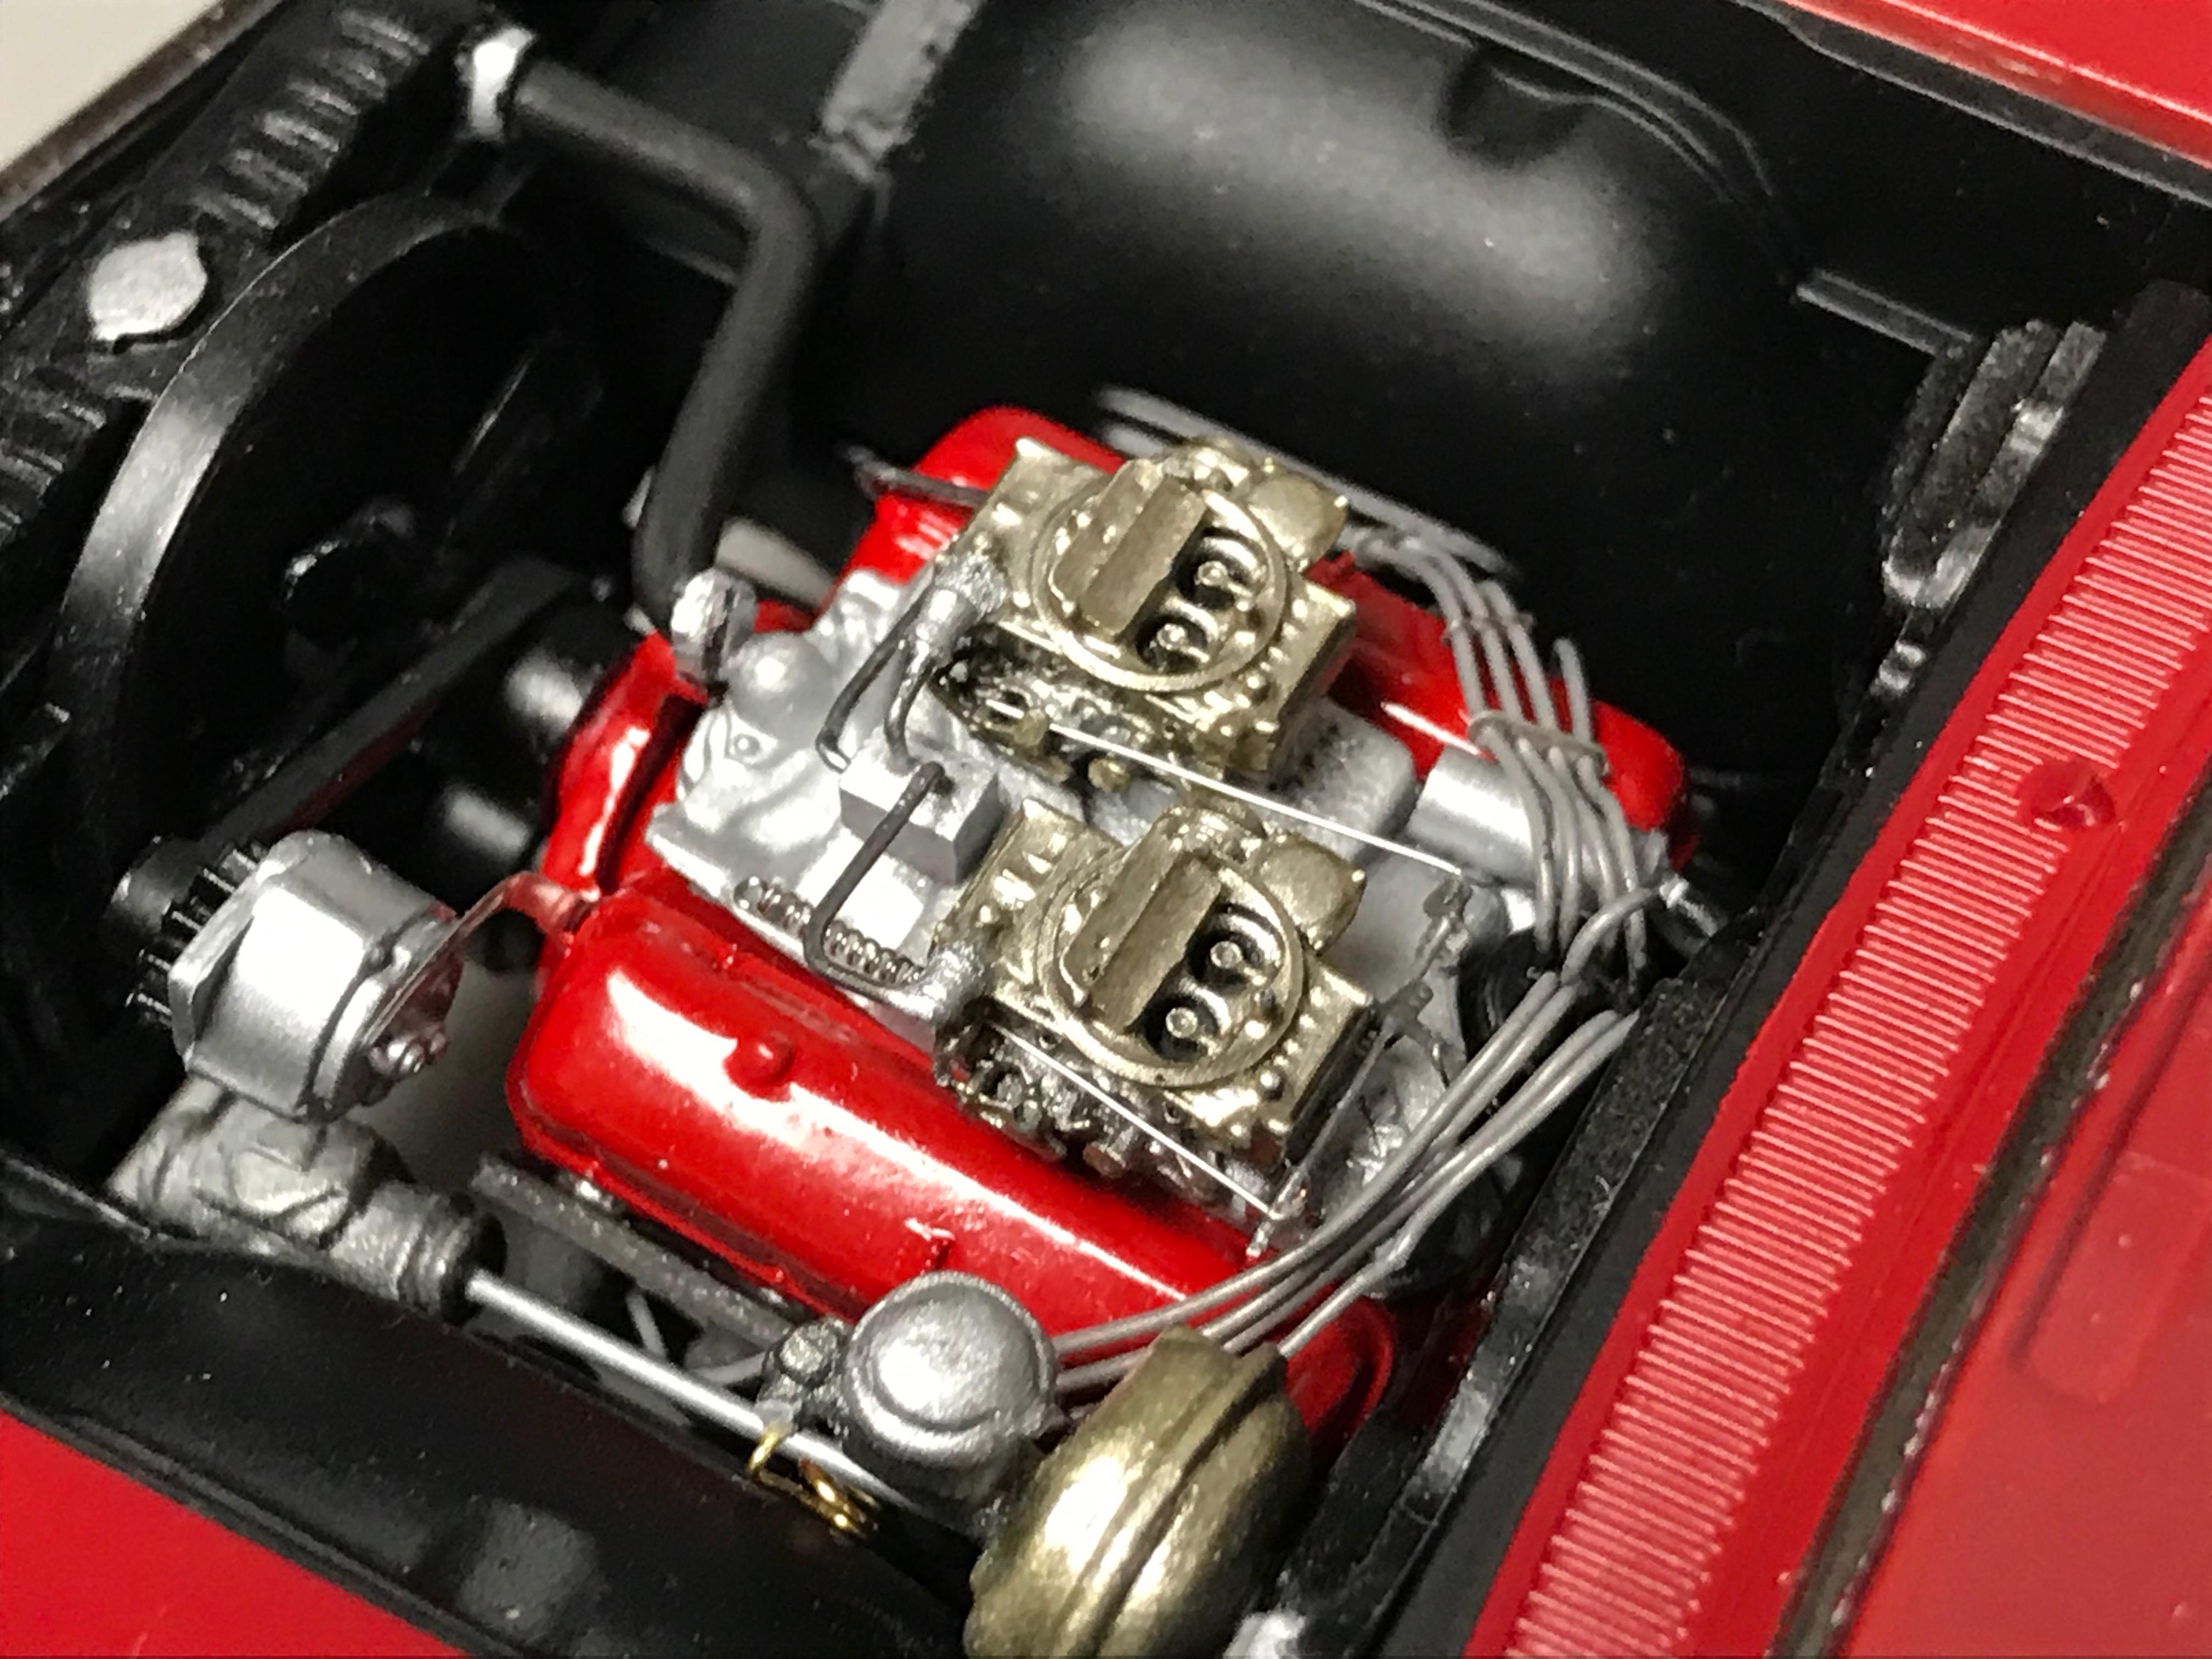
I used the Revell 1/25 '65 Chevelle Z16 396 SS stock kit and the excellent Slixx decals to build Kelly Chadwick's original (non-AWB) A/FX super stocker. I made the following mods/ additions: - I sawed out the molded-in battery at the front end of the engine bay and cut and bonded sheet styrene to cover over the holes. Battery would have been in the trunk on an A/FX in ‘65. - Lifted the front and rear suspension using Evergreen styrene tubes to approximate the stance from a few photos I found online. I know, it's a hokey way to go, the actual car likely replaced the stock A arms and coil springs in front with a straight axle and leaf springs in both front and rear, but it was a lot quicker and less hassle than fabricating complete new front and rear assemblies from scratch/ donor parts. - Headers were scratch built using 2 mm solder and styrene sheet and tubing. They ended up looking a little oversized so I may look for some slightly smaller diameter solder next time I do this in 1/25 - I used a cross flow dual carb manifold from the AMT 62 Bel Air kit and tried to increase the height slightly using sheet styrene. Fireball resin Holley carbs were bonded to the manifold and throttle linkage fashioned from photo etch parts and wire along with 0.5 mm solder for the fuel lines. - I used a Detail Master distributor and plug wire set. I had to fake installing each plug wire to the block after assembling the engine + headers into the chassis (reference photos show the plug wires going between and under the exhaust header pipes on these BBC's). I also need to start directing these plug wires in proper firing order on future builds. - The front steelies were taken from the '62 Bel Air kit and the rears were some Fireball resin parts I ordered for this build, both airbrushed using Alclad Chrome over gloss black enamel. Front and rear tires are from the same AMT Bel Air kit. - I scratch built the roll bar, added an angled back seat cover panel and a large aluminum tach. I added a five-point seat harness on the driver's seat and a standard belt on the passenger side, not sure about the NHRA seat belt rules for this period but I'd sure want a five pointer if I had to pilot this machine down a 1/4 mile. I airbrushed Scalefinishes "Regal Red" chevy factory color on both the body and interior with TS-13 clear coat finish. The Slixx decals are excellent but will still ghost over dark colors so I used a 1:2 mix of white glue and Micro-Set beneath each decal to avoid ghosting. This Revell kit assembles pretty easily except for the front and rear splash guards above each bumper as well as the bumpers themselves, all very easy to misalign. Also be careful bonding the chrome trim piece to the front of the hood - I didn't bond it forward enough so the hood fit could be better. The Revell '64 GTO 1/24 kit assembled much easier IMO. I do like these early '60's super stocks when they still somewhat resembled street cars. Sorry for this long winded post. I welcome any/ all constructive criticism and suggestions. Thanks for reading & looking. John The photo above is of the AWB version but was used for an approx. ref.
-
Favorite/greatest body style ever?
papajohn97 replied to Venom's topic in General Automotive Talk (Trucks and Cars)
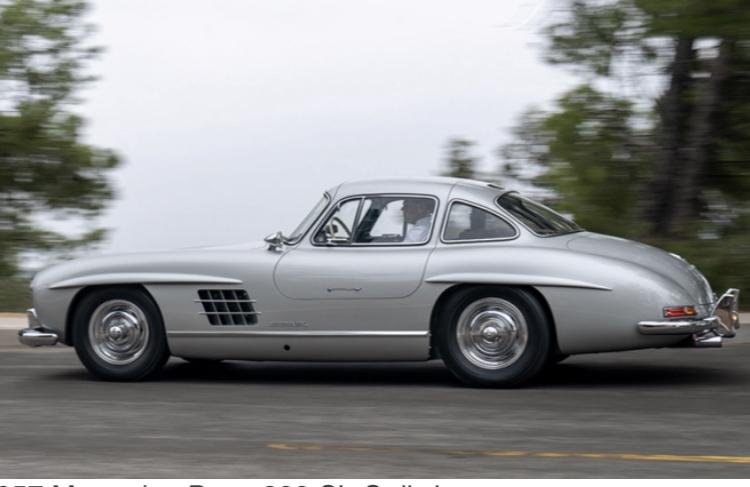
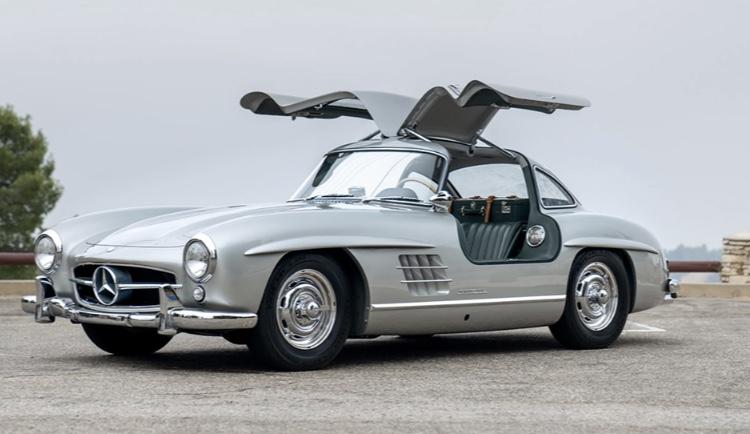
No argument with the previous postings above, love ‘em all! The timeless favorites for me that I never get tired of looking at are the C2 Vette, series 1 XKE, ‘65-66 Mustang 2+2’s and, I think would definitely add the Mercedes 300 SL Gull Wing to this list. Gotta build another one of those Tamiya 1/24 Gull Wings, what a fabulous kit.
-
1949 Talbot-Lago F1
papajohn97 replied to bbowser's topic in Other Racing: Road Racing, Salt Flat Racers
Amazing job on those one-piece clear wire wheels. How did you paint the spokes? Free-hand? Dry-brush? Beautiful job overall. -
Le Mans Ferrari 275P
papajohn97 replied to Bodnarus's topic in Other Racing: Road Racing, Salt Flat Racers
What a gorgeous build of an ancient kit. The clean detailed job you did on the interior makes this build really standout. Inspiring build! -
Hi Zippi, I believe I sprayed the blower on the Willys with Alclad dark aluminum over a gloss black enamel base.
-
That is very cool. I can see some current custom car builder doing something like this with a fiberglass copy of a Buggati type 57 body. Why not? There must be at least 50K fiberglass Cobras out there besides the original <1K “real ones” that were manufactured. Maybe one could even “dress up” an old Pontiac or Buick straight 8 for a Bugatti Rod like this. I did find one design exercise similar idea to your build: https://www.topspeed.com/cars/car-news/this-bugatti-type-35-hot-rod-render-dances-on-the-border-of-blasphemy-ar189483.html Nice job! Thanks for sharing!
-
I love that Meng mentions that the tires in this kit don’t smell bad (???)....yeh, first thing I do when I open the box is smell those tires....
-
Tamiya 1:12 Brabham BT44b
papajohn97 replied to AL.'s topic in Other Racing: Road Racing, Salt Flat Racers
Incredible detailing job on this build. The brake lines and IP and chassis electrical wiring must have taken many extra hours of build time. So much eye candy to look at! Overall a masterpiece! I love the big air box F1 cars of the mid-70’s. I’ve built a few of the 1/20 Tamiya and Ebbro kits in my stash and am trying to add more detail with each kit but no where near the level of your Brabham. Thanks for posting and please share more of your builds here. -
Please forgive my faux pas, I’m new here and had no idea scalemates.com was held in such low esteem on this board. Let me know if there is a more accurate online reference out there for researching model car kit genealogy. Much thanks.
-
Thanks Bob for your compliments on my Willys. I think I clear coated this one with TS-13 after laying down the transparent red. I’m slowly learning ‘best methods’ with Tamiya gloss lacquer color and clear coat rattle cans for me. Things I do are to pre-heat can in hot water, wipe down model with damp paper towel and then wipe dry to discharge static electricity/ reduce dust/ lint, spray multiple thin coats and allow to dry 5-10 min between coats, on final “wet coat”, rotate body around randomly relative to gravity for the first few minutes of drying to prevent wet coat runs. I lucked out on this Willys, most of my gloss jobs have some slight orange peel or semi-gloss to them, I’m definitely still learning....
-
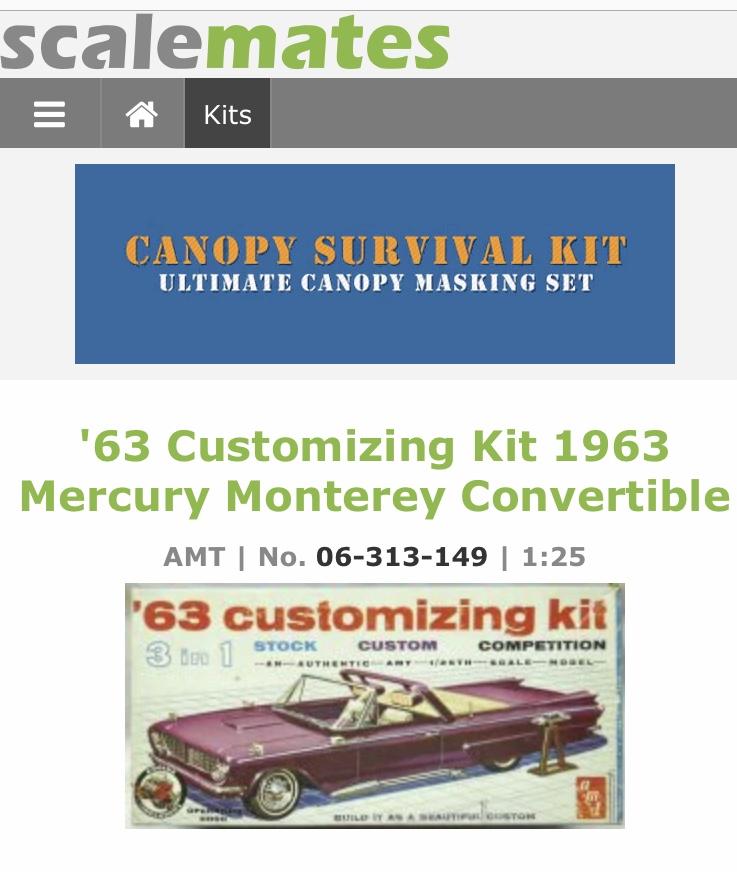
Thanks Tom for posting this base kit. First time I’ve researched an old kit on scalemates and came up dry, it’s usually a pretty comprehensive model kit history resource. I re-did a search there using “AMT 63 Hardtop” and found it listed as a Monterey: I remember my brothers and I building AMT kits like this one as kids. Like my first few used cars, if only I knew then what I know now what they would end up being worth!
-
Very cool project. I’m starting to dip my toe into the kit bashing pool, currently gathering parts and kits for ‘62 and ‘63 Ford super stockers using nice ‘AMT 60 Starliner chassis/ engine parts, so I’m watching and learning from your excellent tutorial here. Question on your base kit for this build: what specific AMT kit are you using for the body? When I review past kits in Scalemates, I can’t find anything that has rear light features that look like your Meteor here. Did you modify a ‘62 Comet kit?
-
Very realistic and clean build of an interesting subject. The three Ebbro kits that I’ve assembled (all 1/20 F1 cars) were quite challenging - did this one go together easily? Do the doors open on your build or did you choose to bond them shut?
-
Nice job Michelle! Love the color! I’m building the Gas Ronda Thunderbolt version of this (Revell I assume kit) and am making all kinds of mistakes as I go but having fun. So far I haven’t broken the front suspension assembly but can see how easily it can happen (the two bulky A arms tethered by a very thin connecting link). The headers on the racing version of this kit are a bear to assemble to engine/ chassis. The kit I’m building has very nice chrome parts, particularly the bumpers and front grill. Did you sprayed your chrome with aluminum paint? Thanks for sharing! Hoping to share my Thunderbolt on here soon if I don’t first take a hammer to it!
-
Really gorgeous and tasteful bucket T model! Looks like a real one you photographed at the GNRS! I particularly love the engine detailing (carbs, fuel lines, linkage, throttle return spring (guitar string?)) and those beautiful cal custom scoops. How did you do the chrome parts on this build (metallic paint? Alclad?)? Great job in making the chrome/ bare metal look real and avoiding the model car “toy” chrome look.
-
1965 Sebring #2 Grand Sport Corvette
papajohn97 replied to 65slotcar's topic in Other Racing: Road Racing, Salt Flat Racers
Beautiful execution of the two-tone/ pin striped GS. I assume this is the Accurate Miniatures kit, a challenging one to build well. I completed a light metallic blue one a few years ago and remember struggling for days with the fit and alignment of the engine, front end assembly, exhaust headers and hood fit. Still, the Grand Sport is such an awesome looking race car and that AM Webber topped engine is so cool it makes the kit assembly hassles worth it. Your build has inspired me to take a crack someday on this two-two version. I like your taped over headlight covers, looks more realistic than the painted over white ones I’ve seen on other builds. Thanks for posting! -
1966 Ford GT40MKII Sebring Winner
papajohn97 replied to Gramps46's topic in Other Racing: Road Racing, Salt Flat Racers
Very nice and vary rarely modeled GT-40 variant. Love your taste in cars and car modeling subjects!