papajohn97
-
Posts
701 -
Joined
-
Last visited
Content Type
Profiles
Forums
Events
Gallery
Everything posted by papajohn97
-
 Great pics! Sure would like to drive that white ‘62 bubble-top (409?) home.
 -
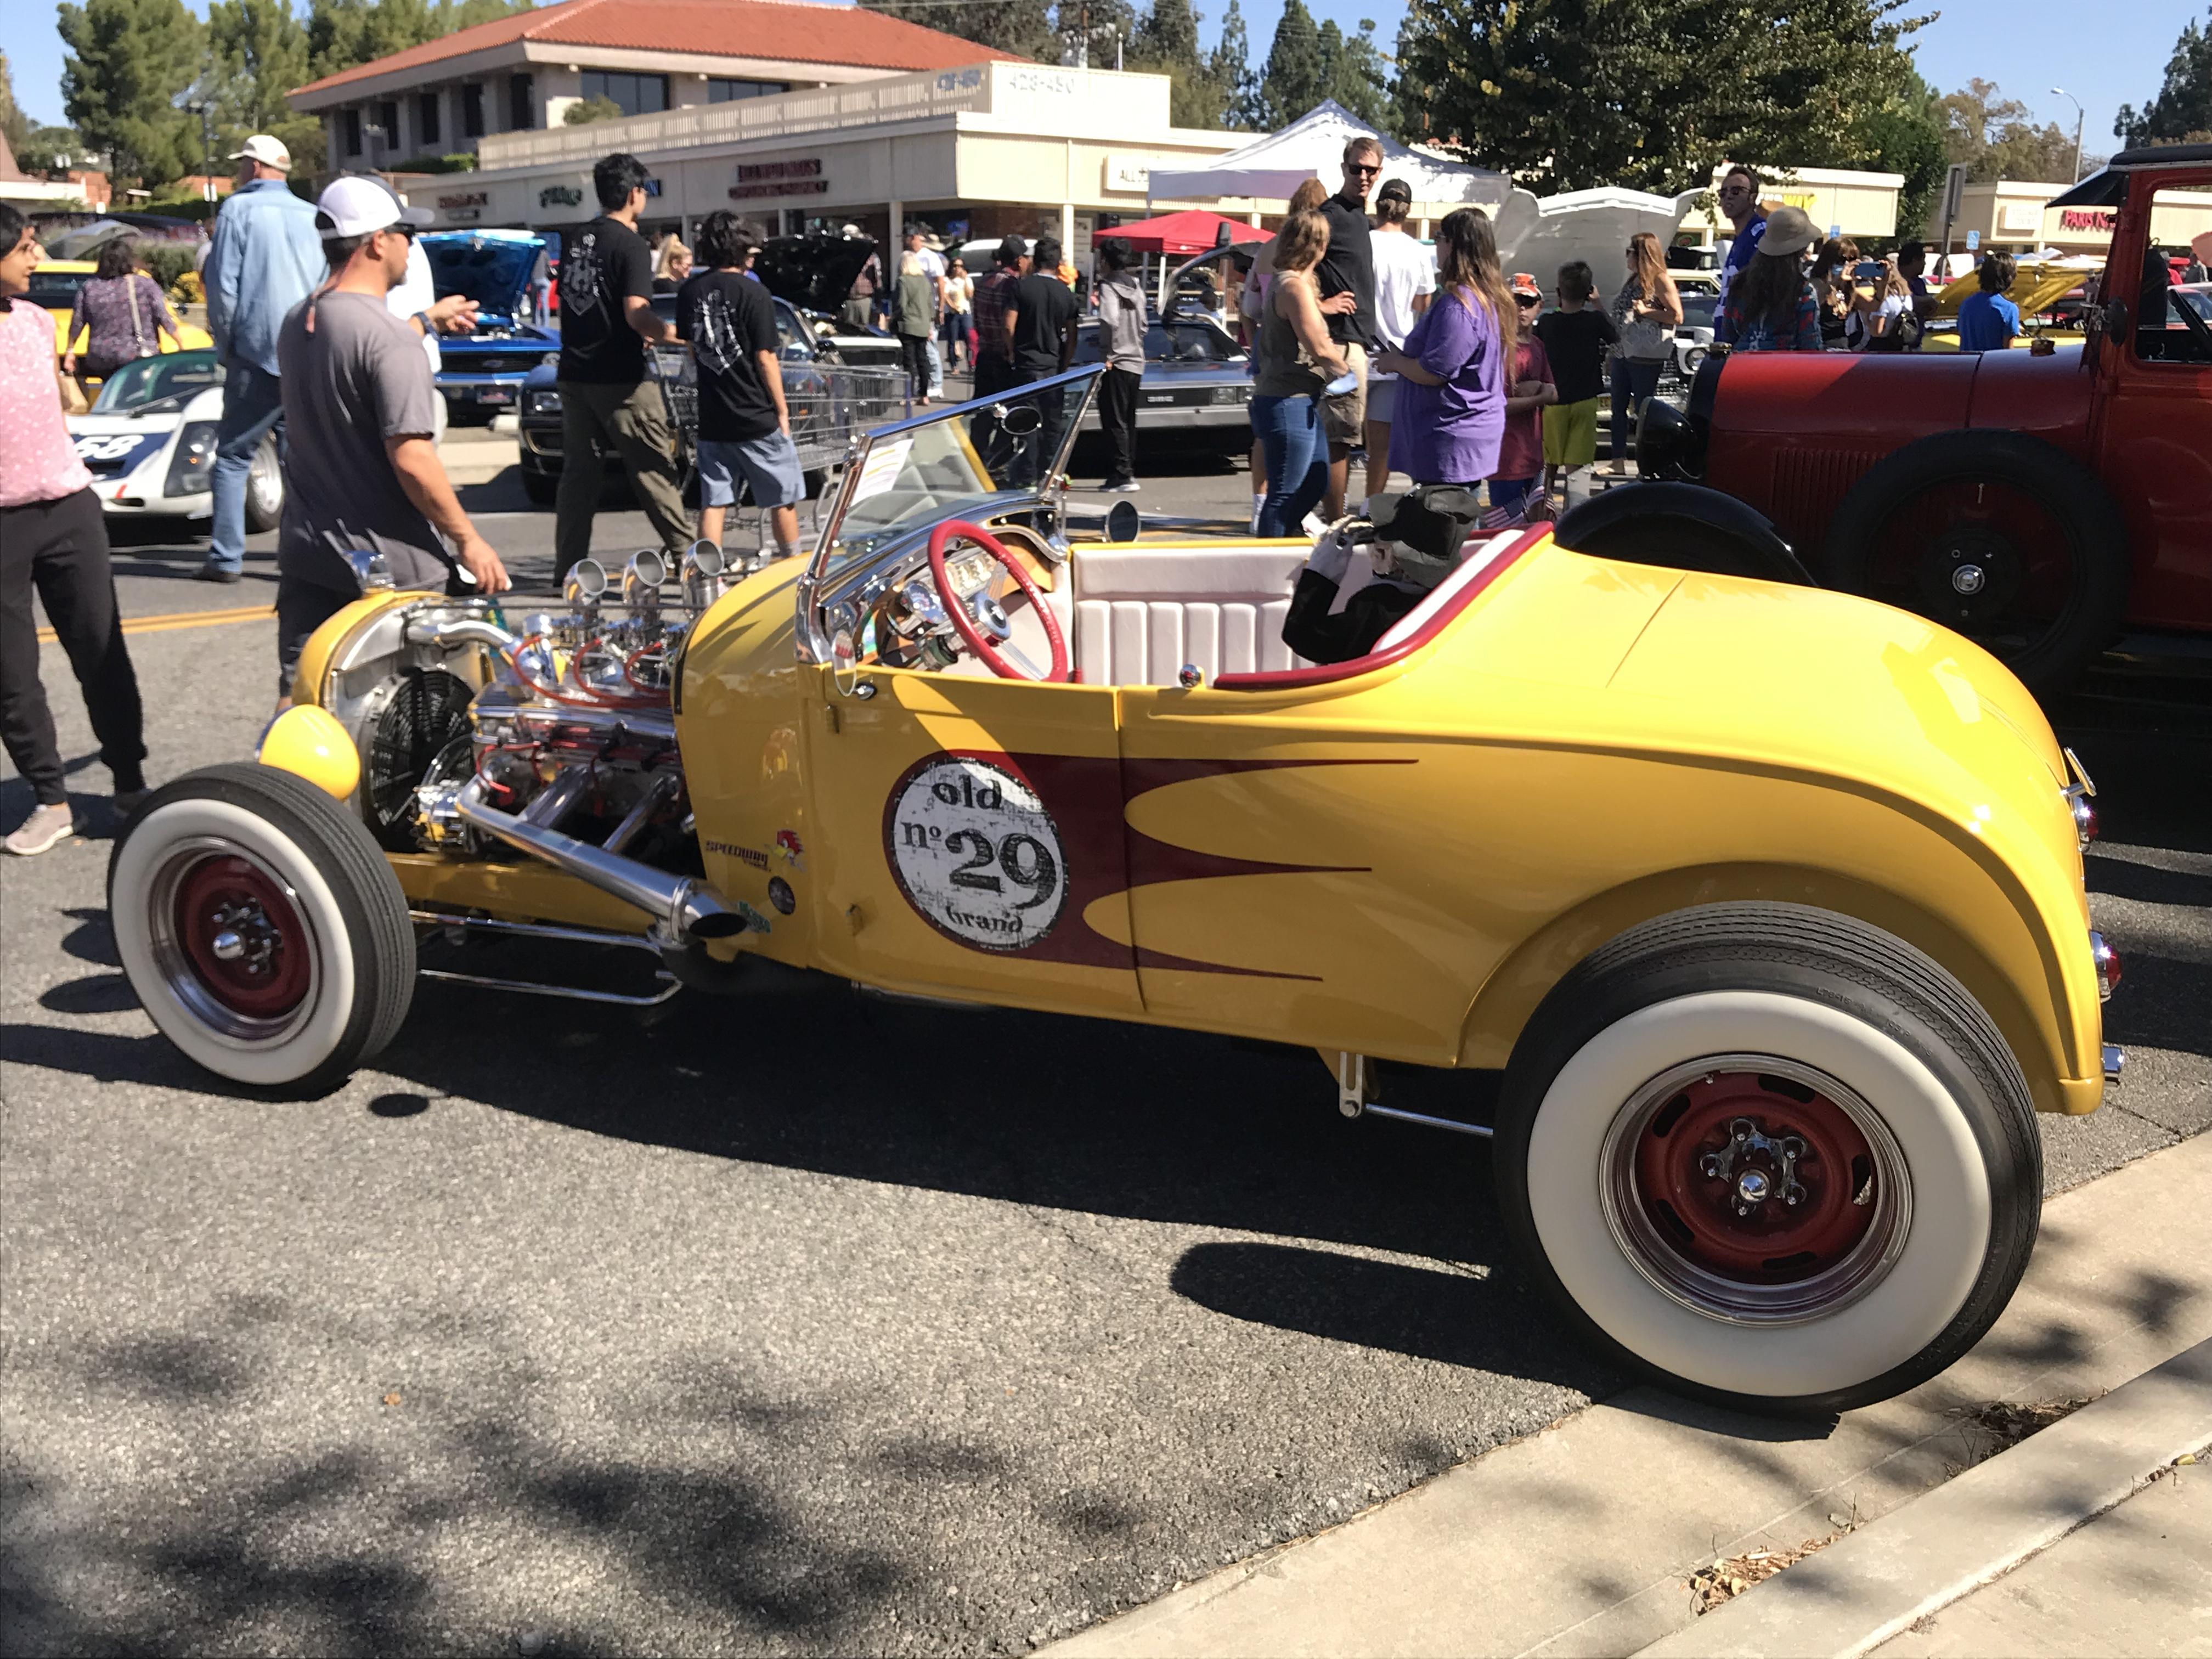
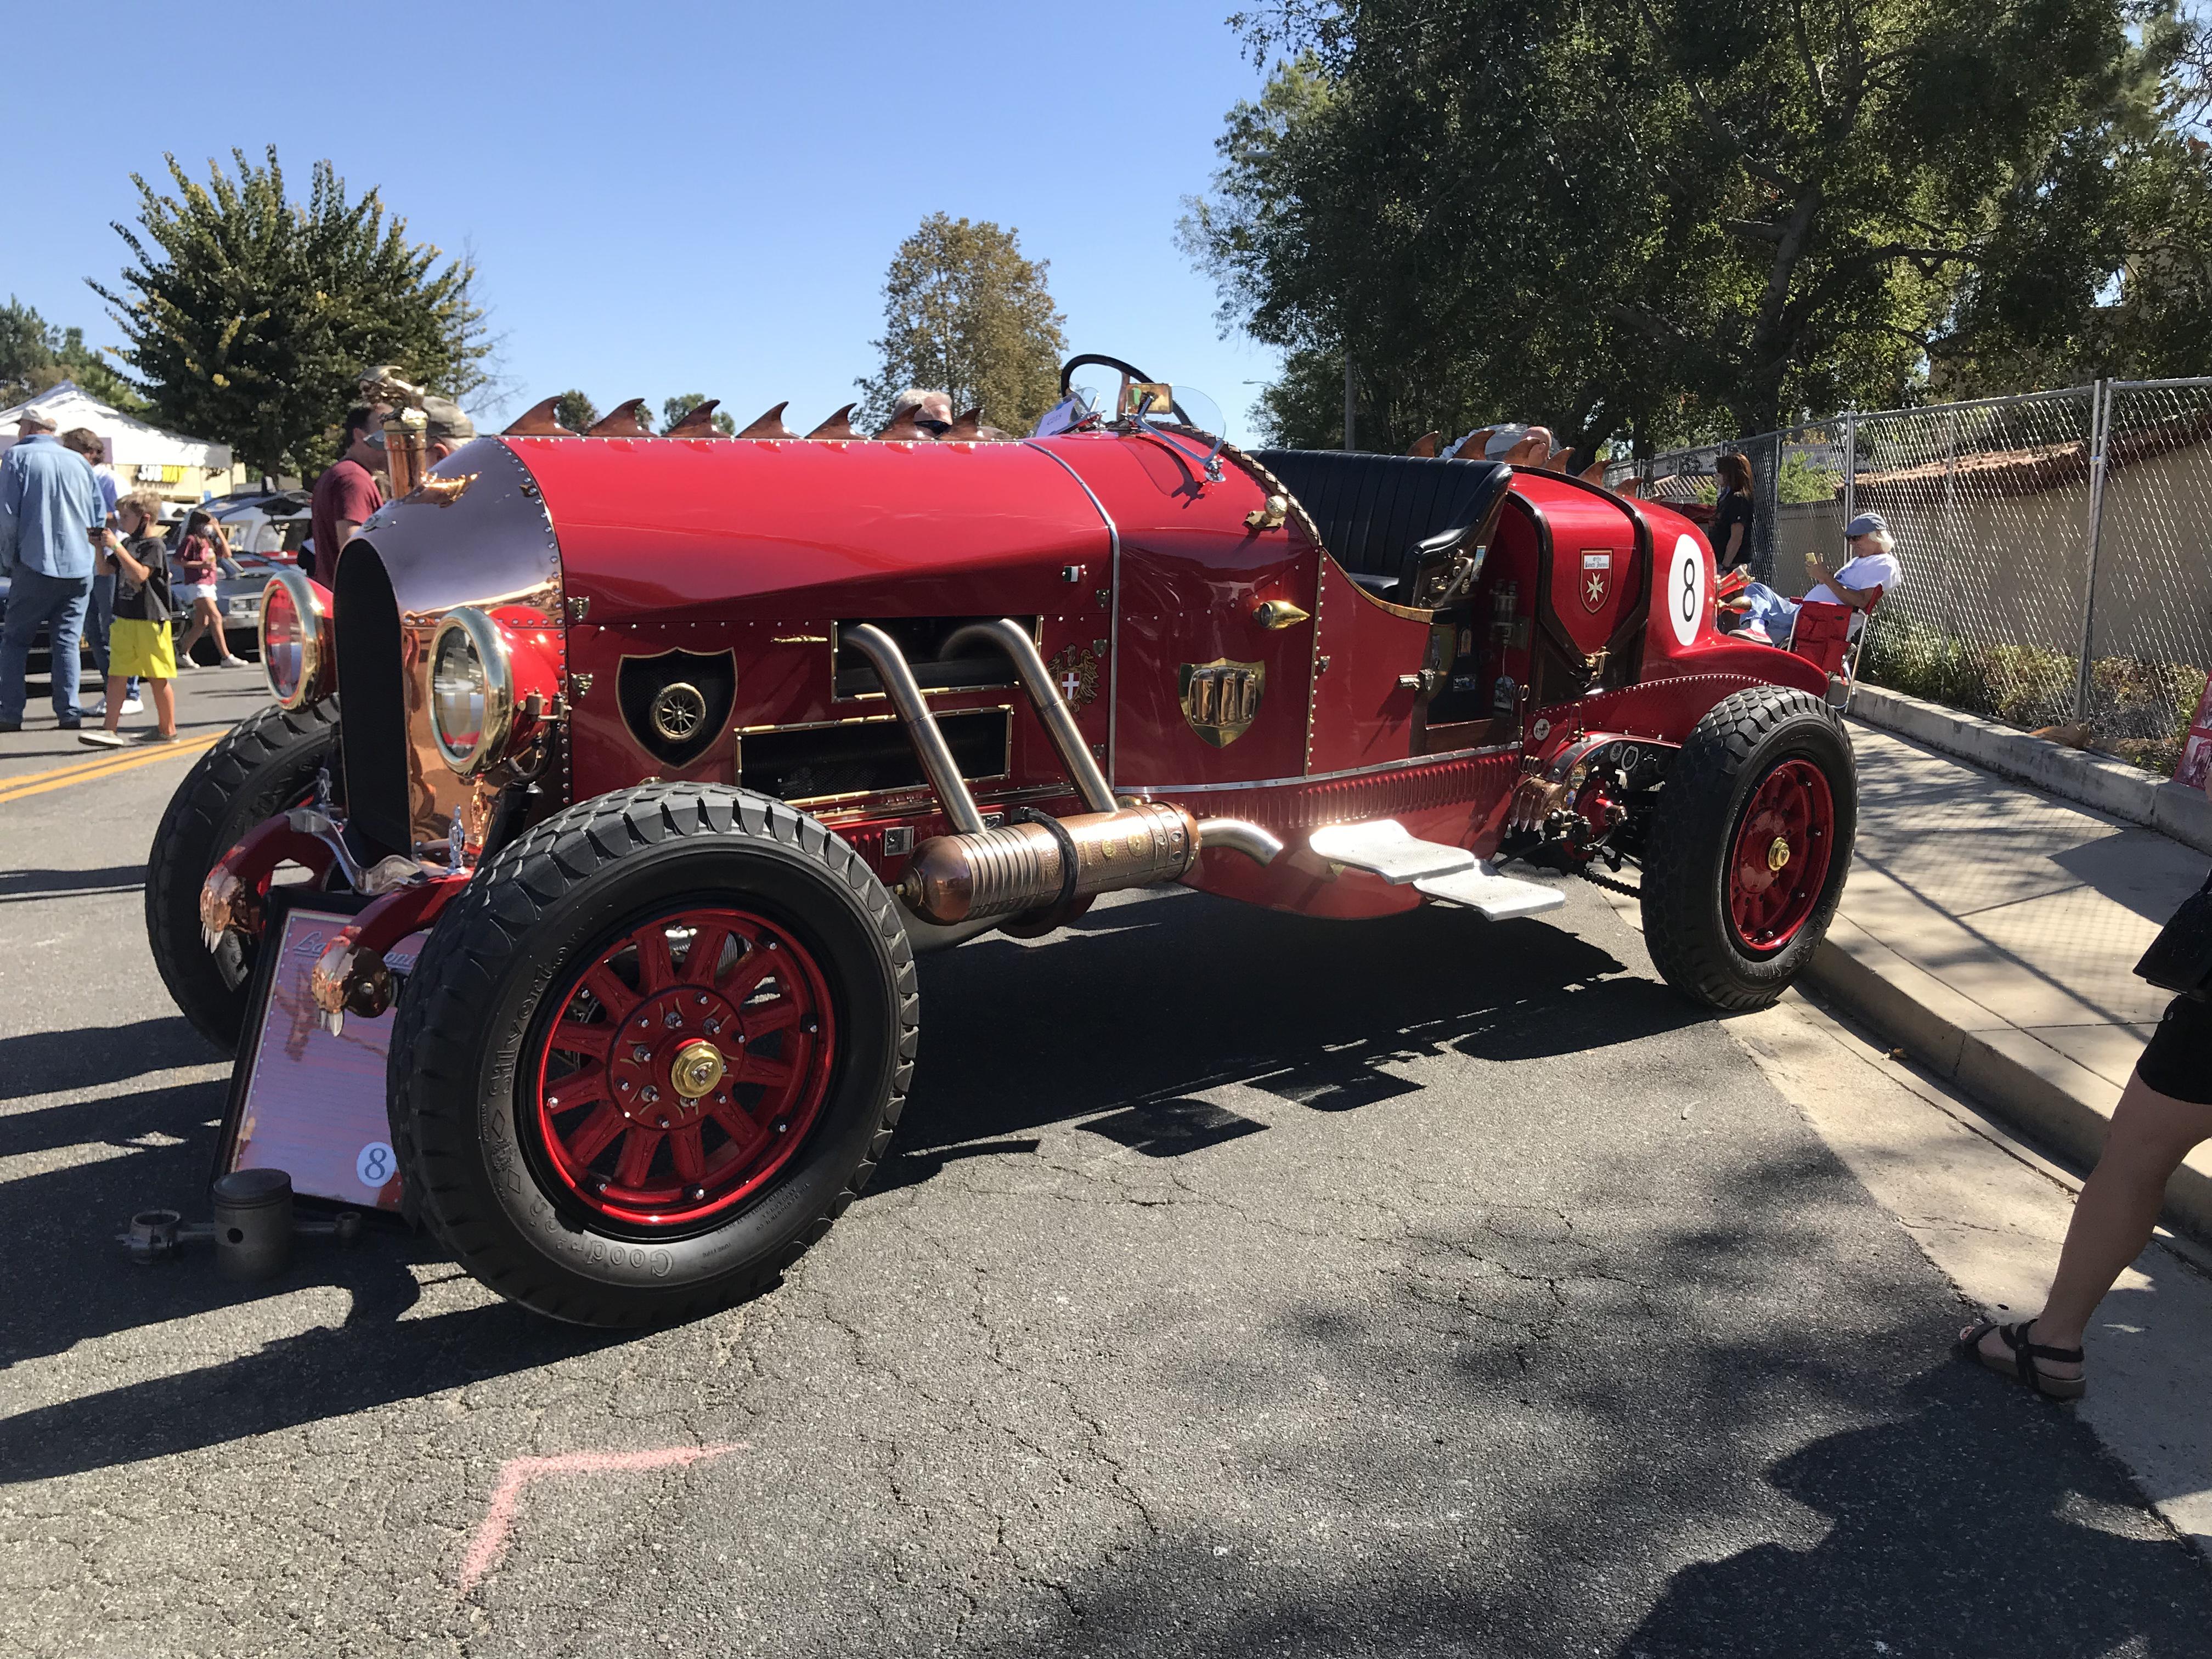
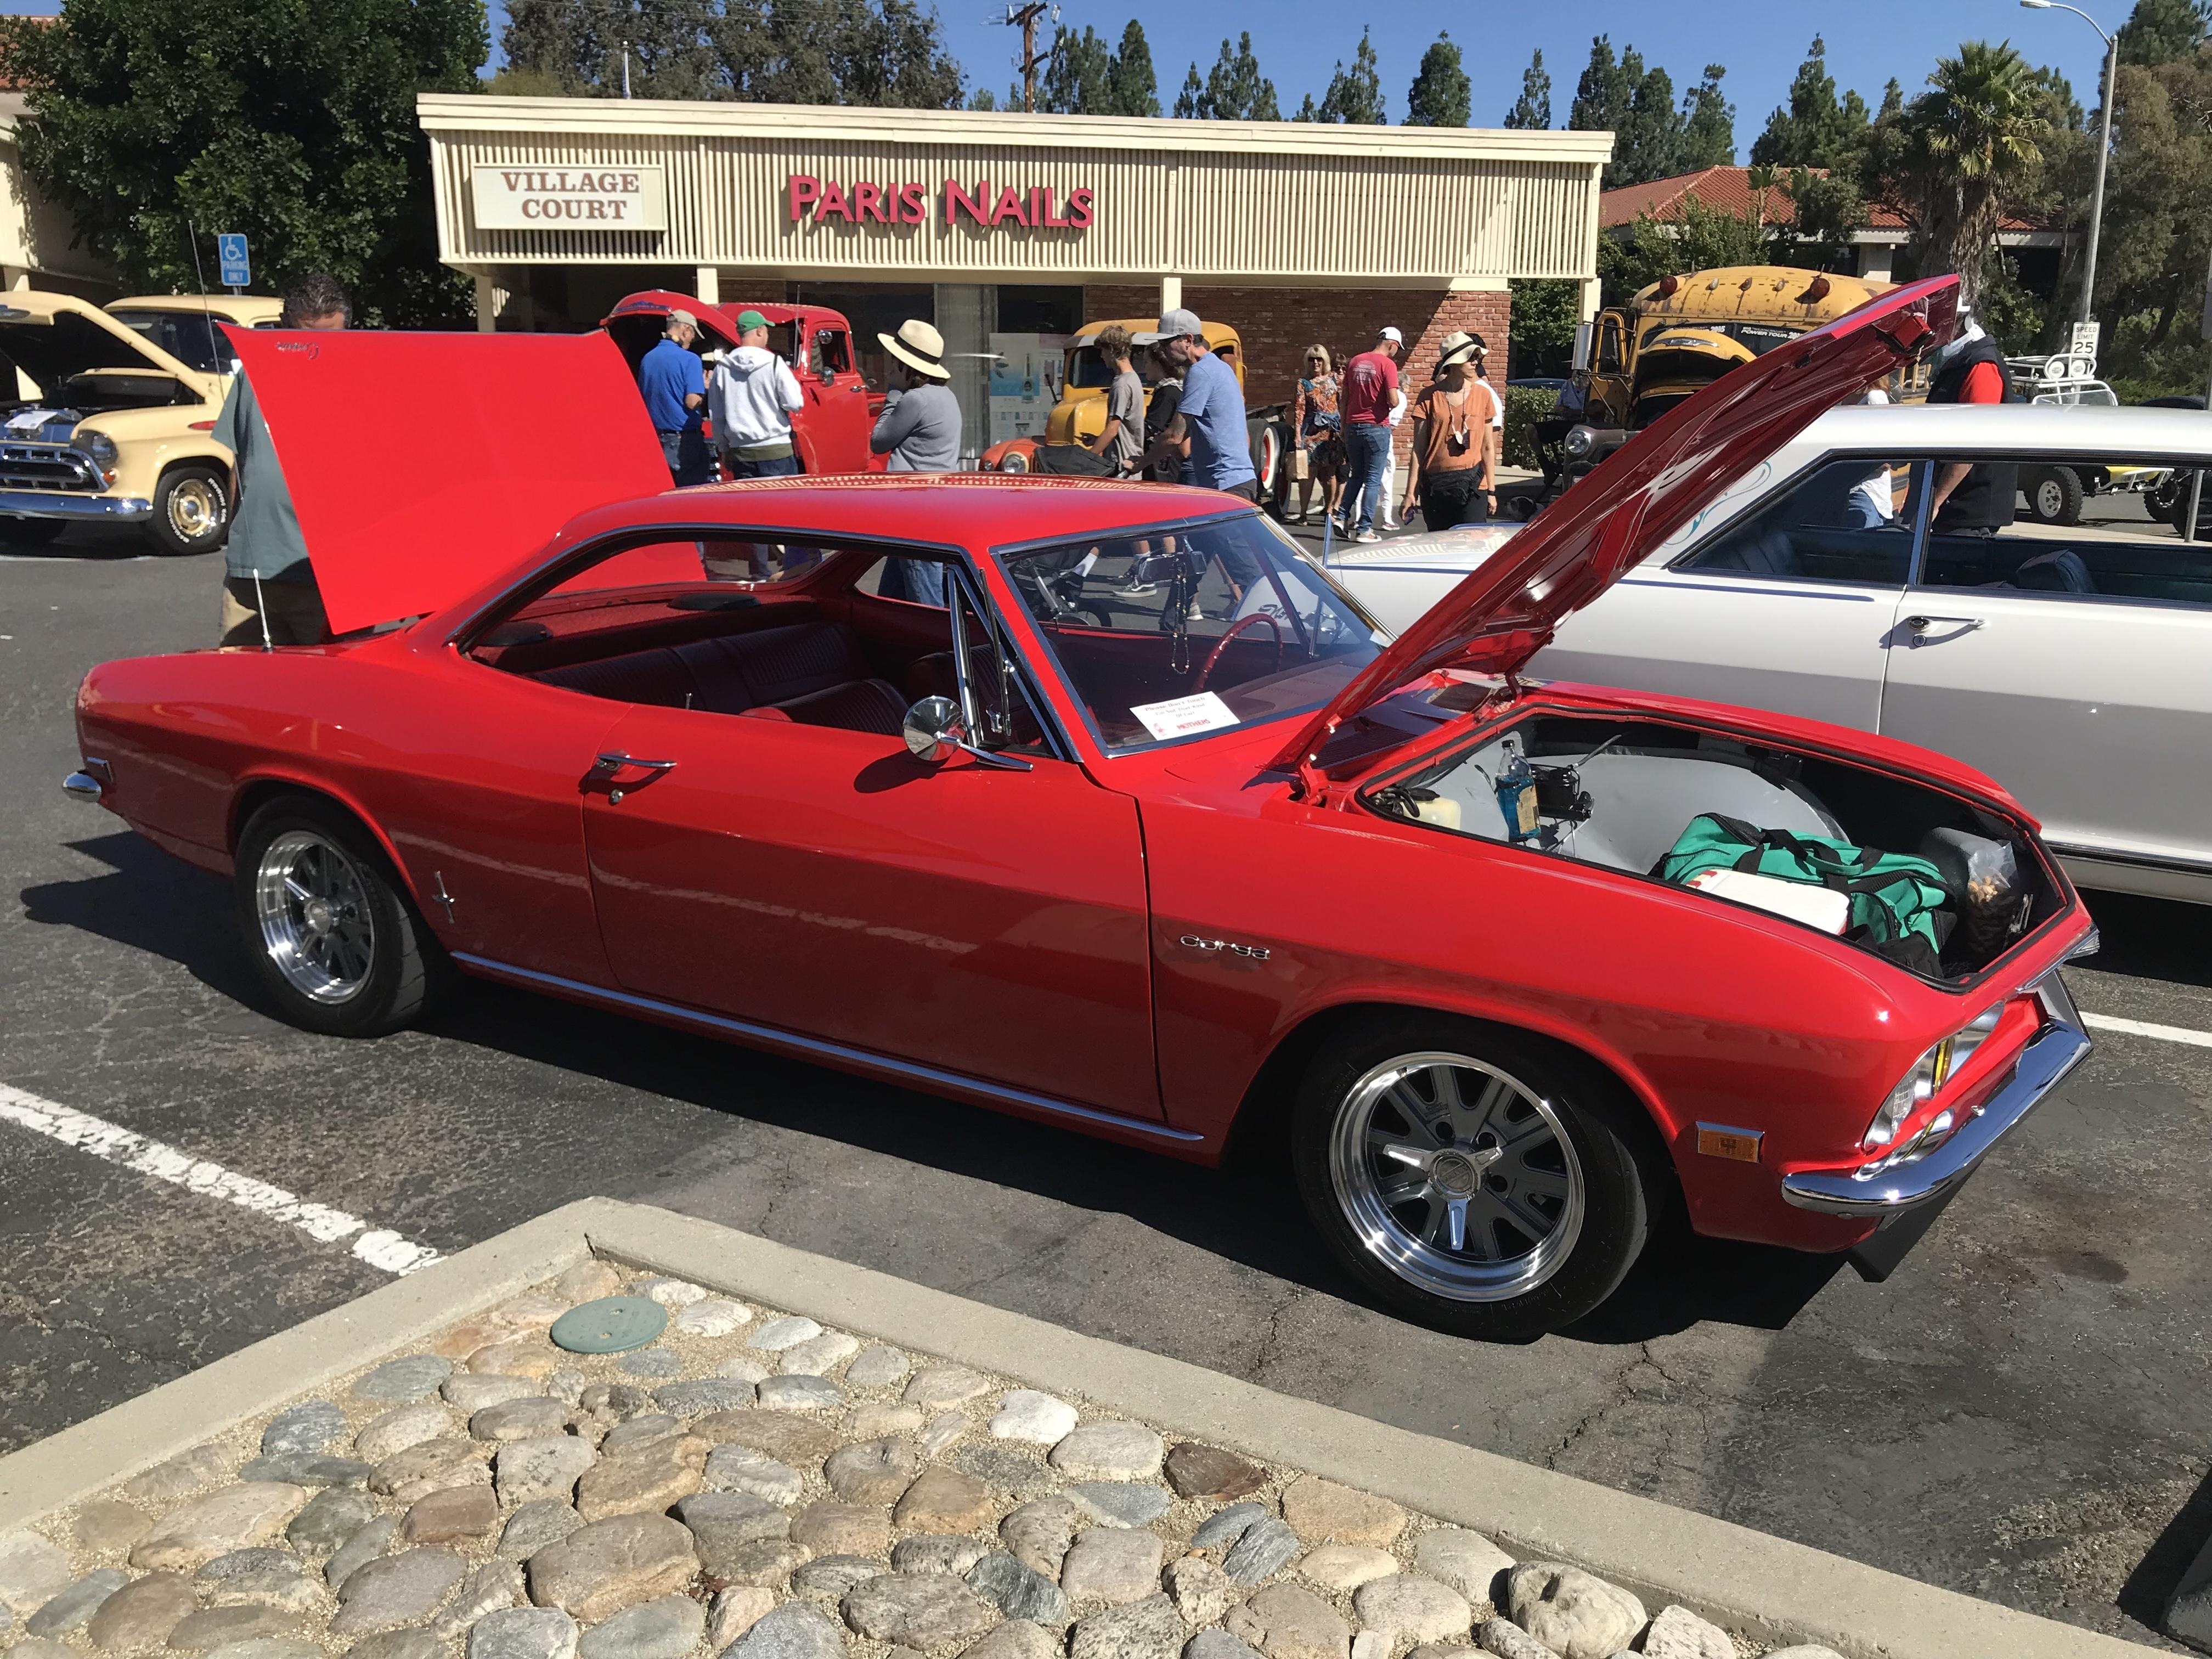
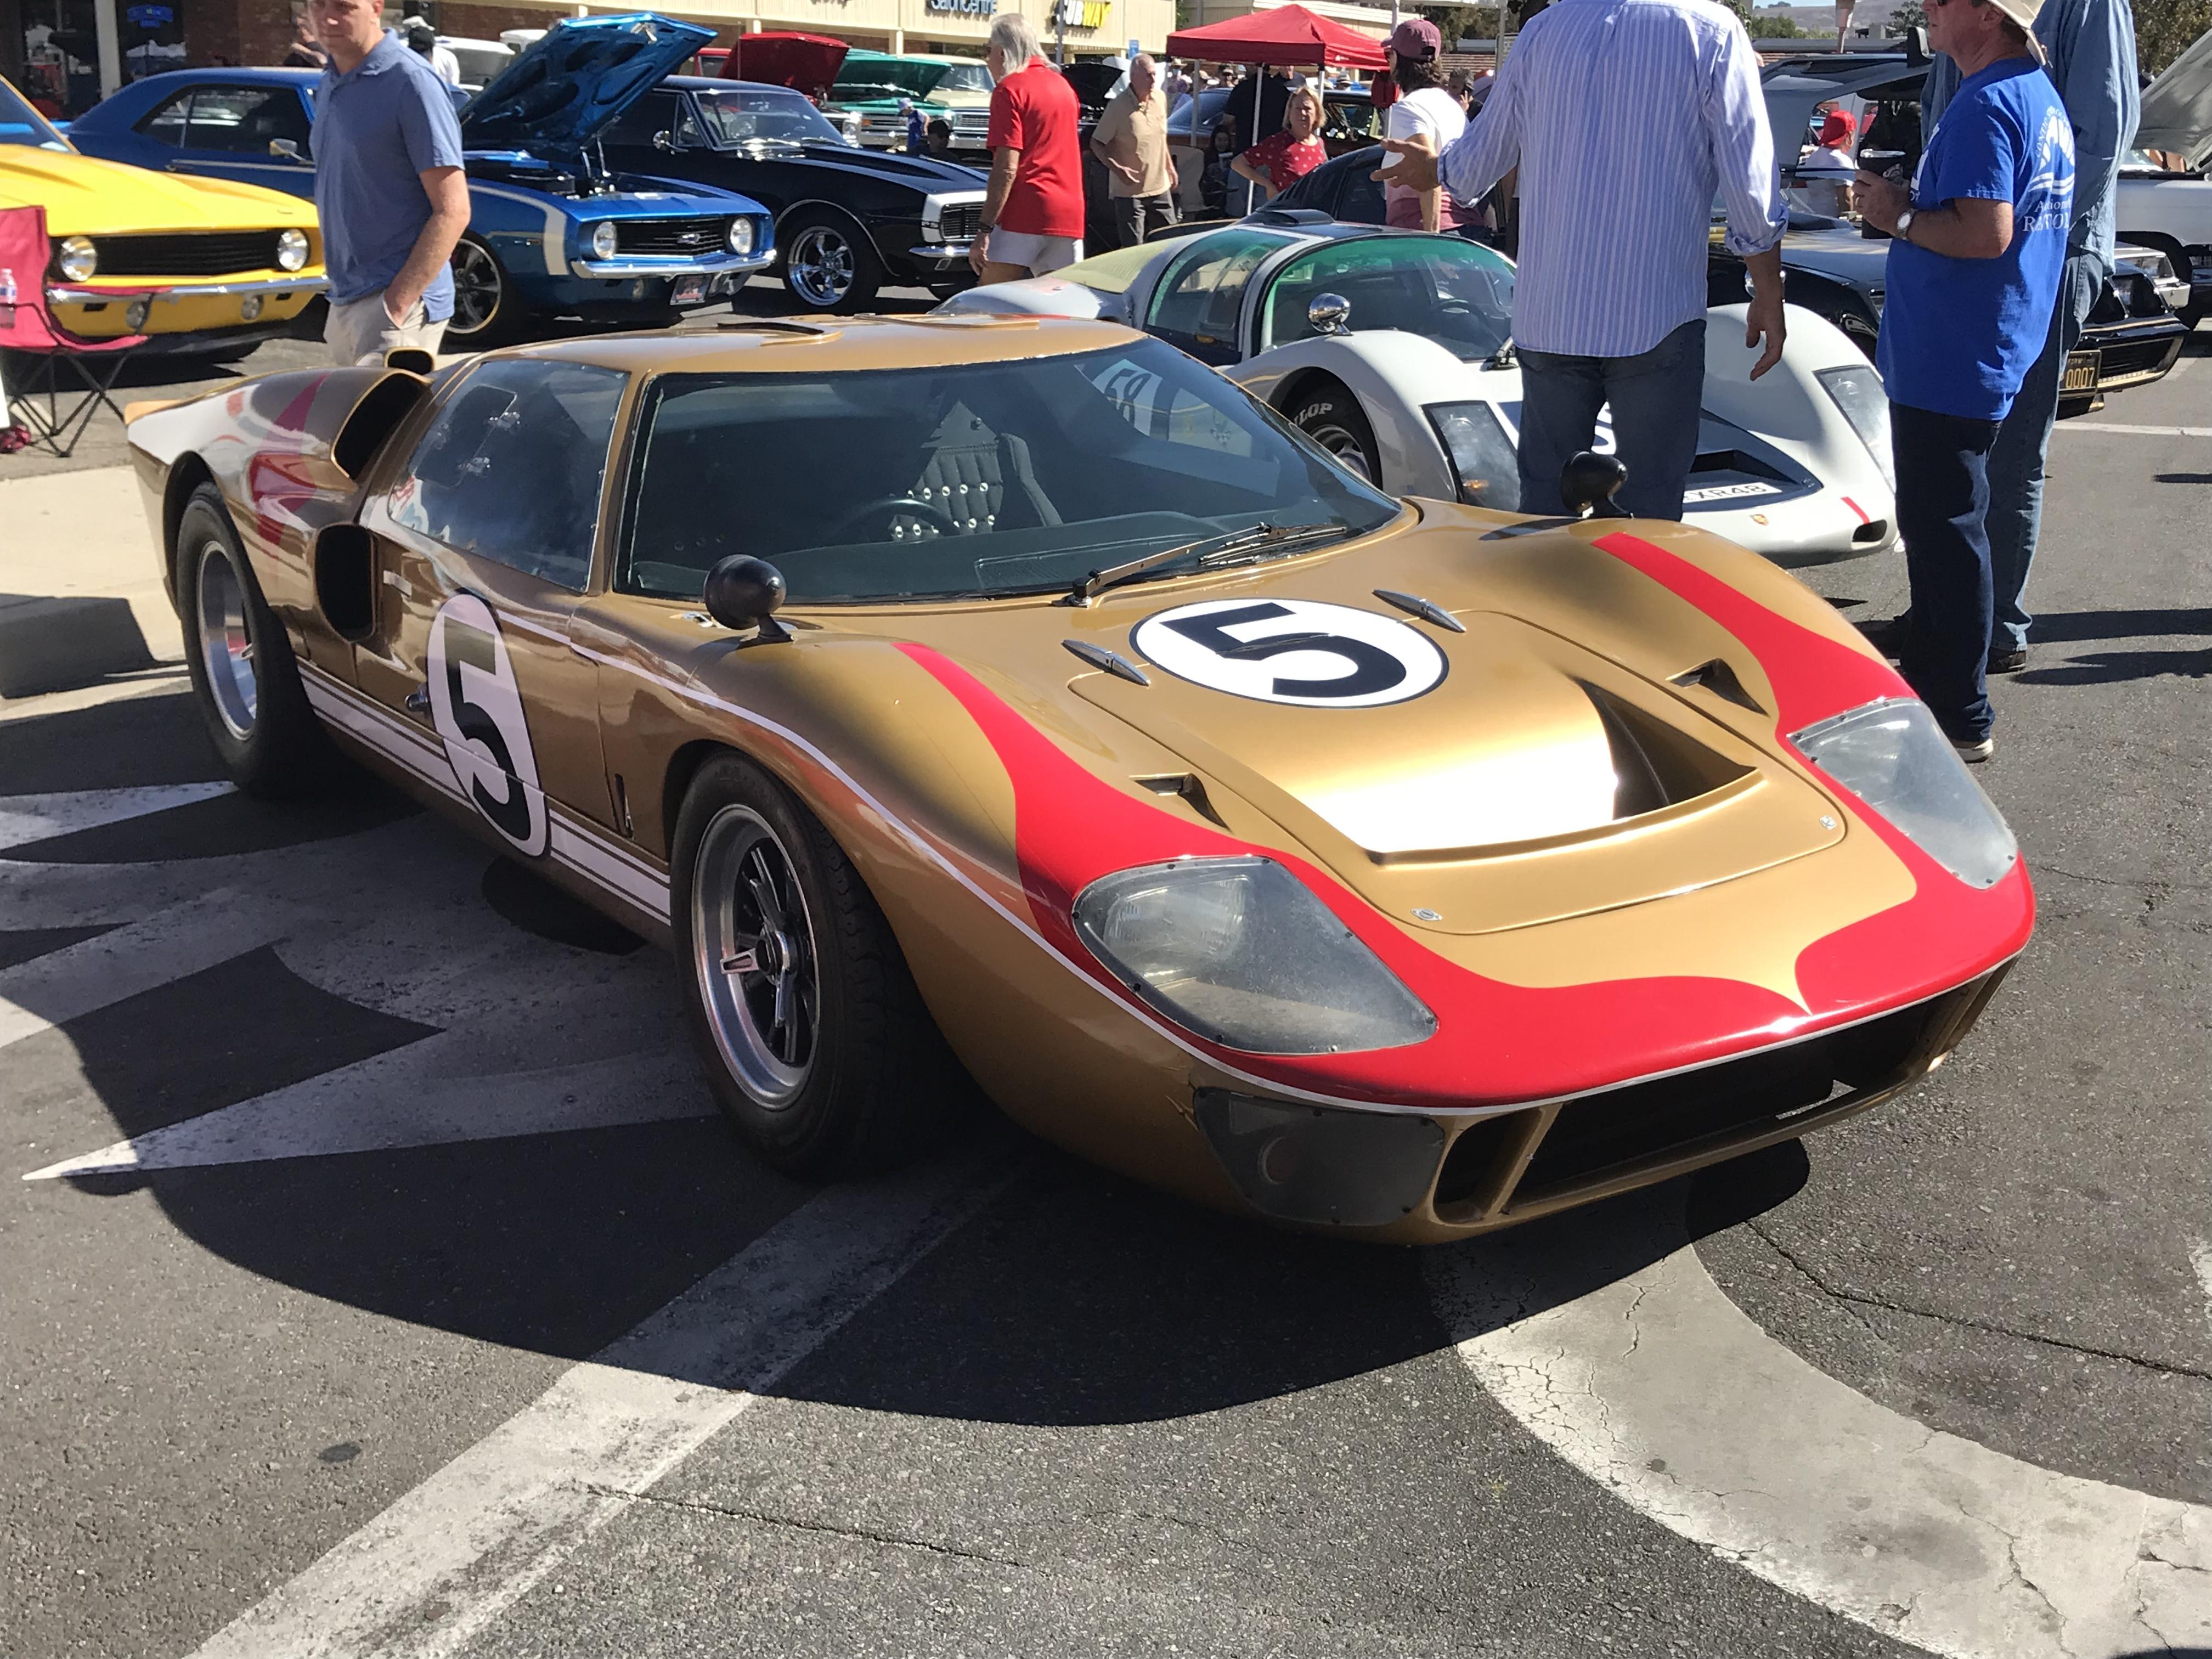
Looks like a wonderful variety of wheels on a beautiful fall day. Wish I was there! Thanks for posting!
-
Here’s two more pics of the “piece-of-pie” that I took:

-
Hi Ray, it’s the “piece-of-pie” tribute car, here’s an article that includes info: https://www.edelblog.com/cars/edelbrock-equipped-rick-kersh-1929-ford-model-a-sedan-delivery-with-324-olds-v8
-
Yeh, it’s been awhile since I breathed in that wonderful smell of nitromethane and burned rubber….I’m going to miss it. Makes you wonder what’s going to happen to all of these beautiful museum pieces when the grandkids inherit them?….
-
Cayucos car show
papajohn97 replied to majel's topic in 1:1 Reference Photos: Auto Shows, Personal vehicles (Cars and Trucks)
Nice show! I would love to hear them start up that McLaren (chevy powered Mk8?), those old Can-Am cars are ground shakers. Thanks for sharing! -
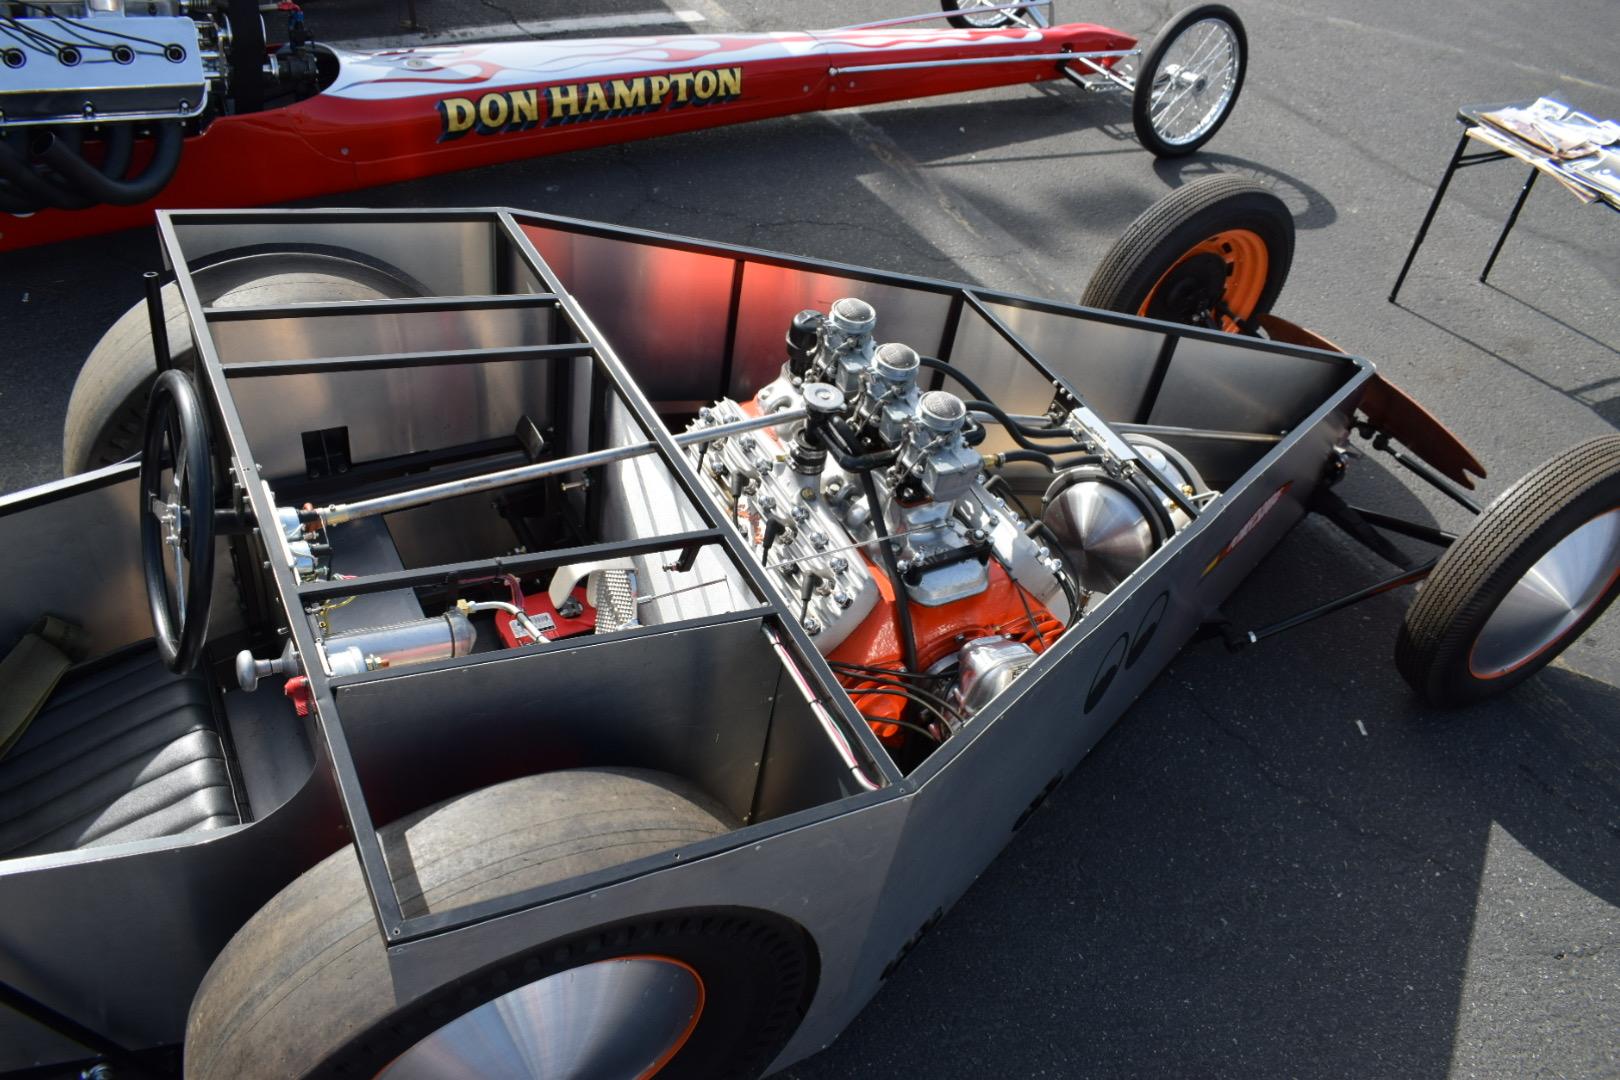
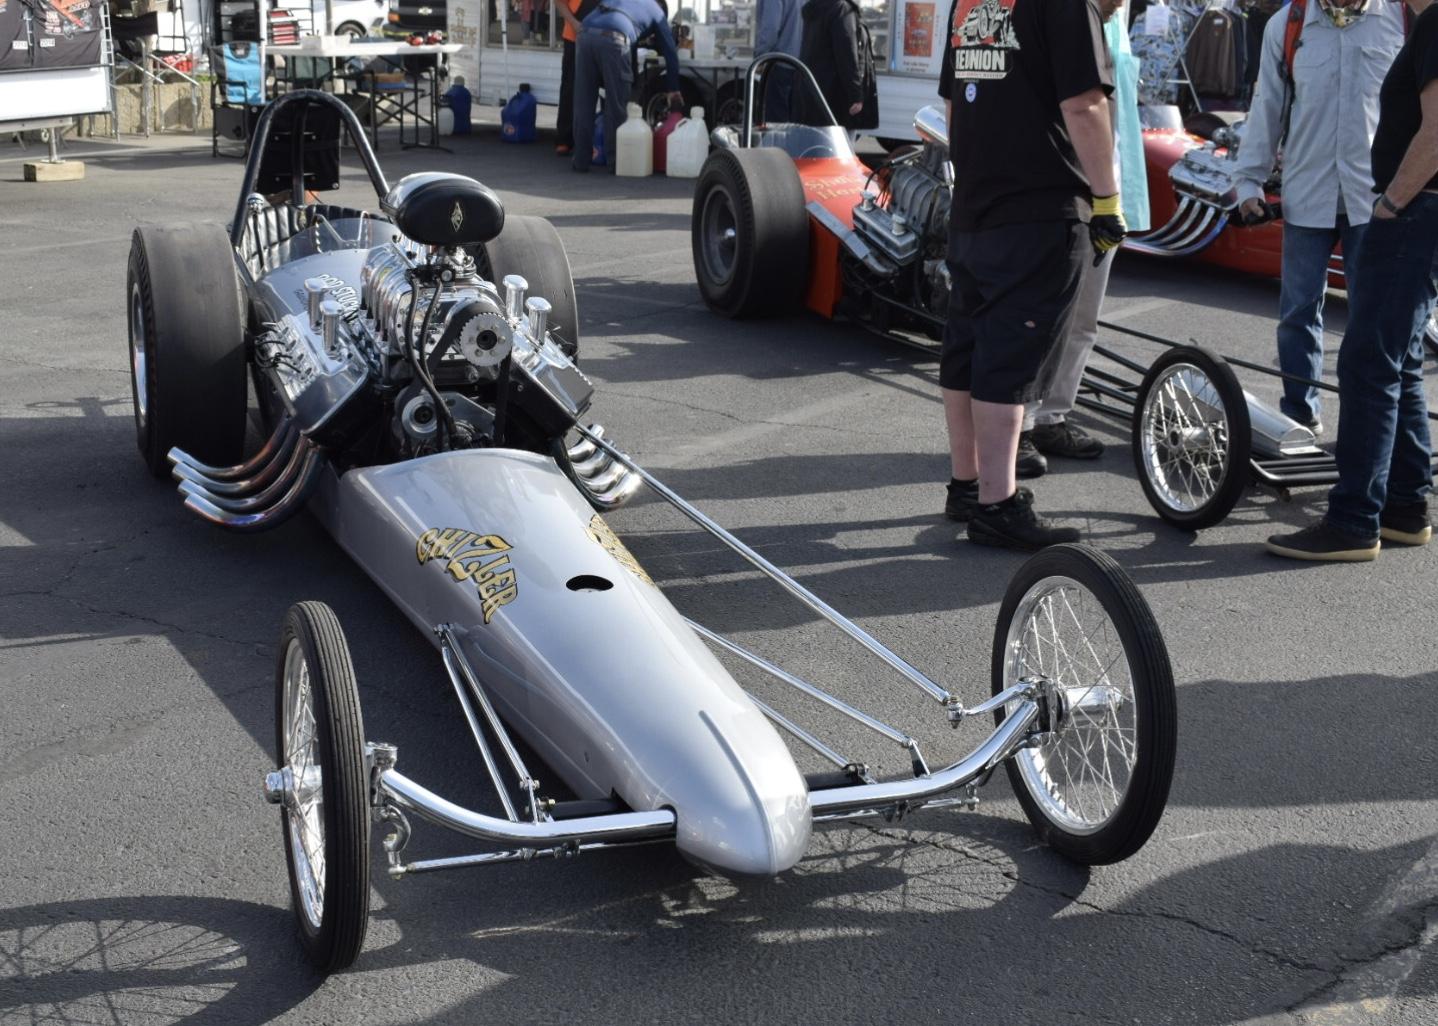
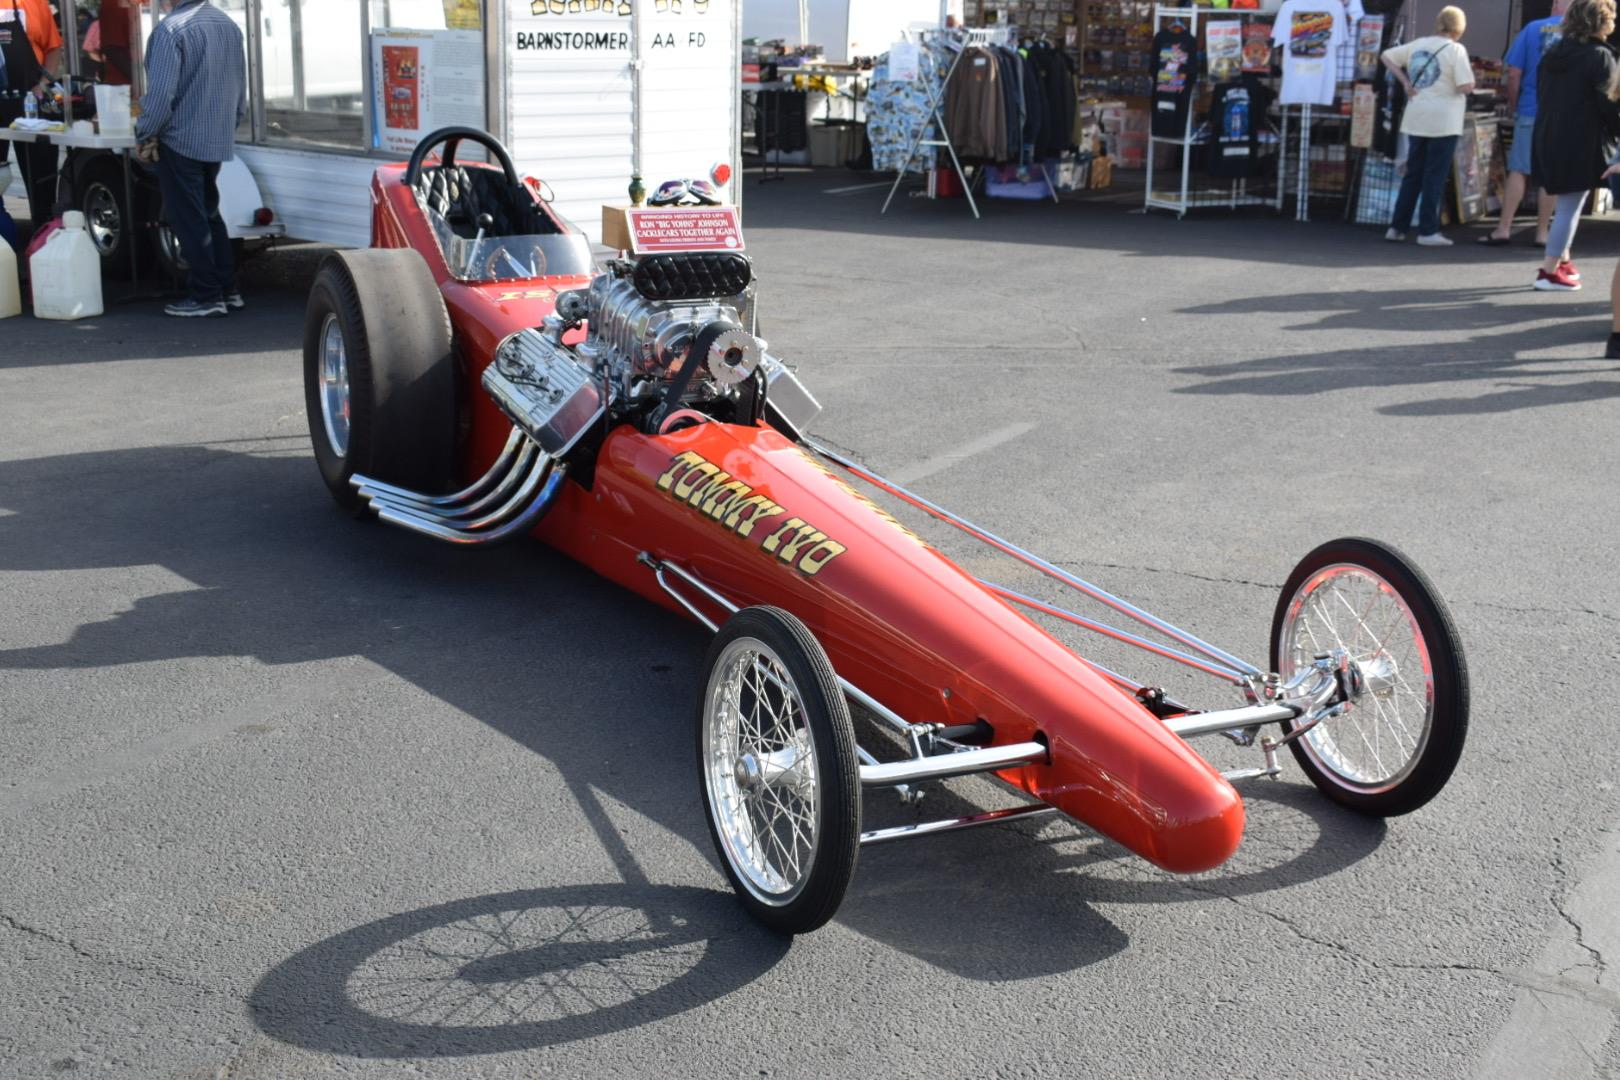
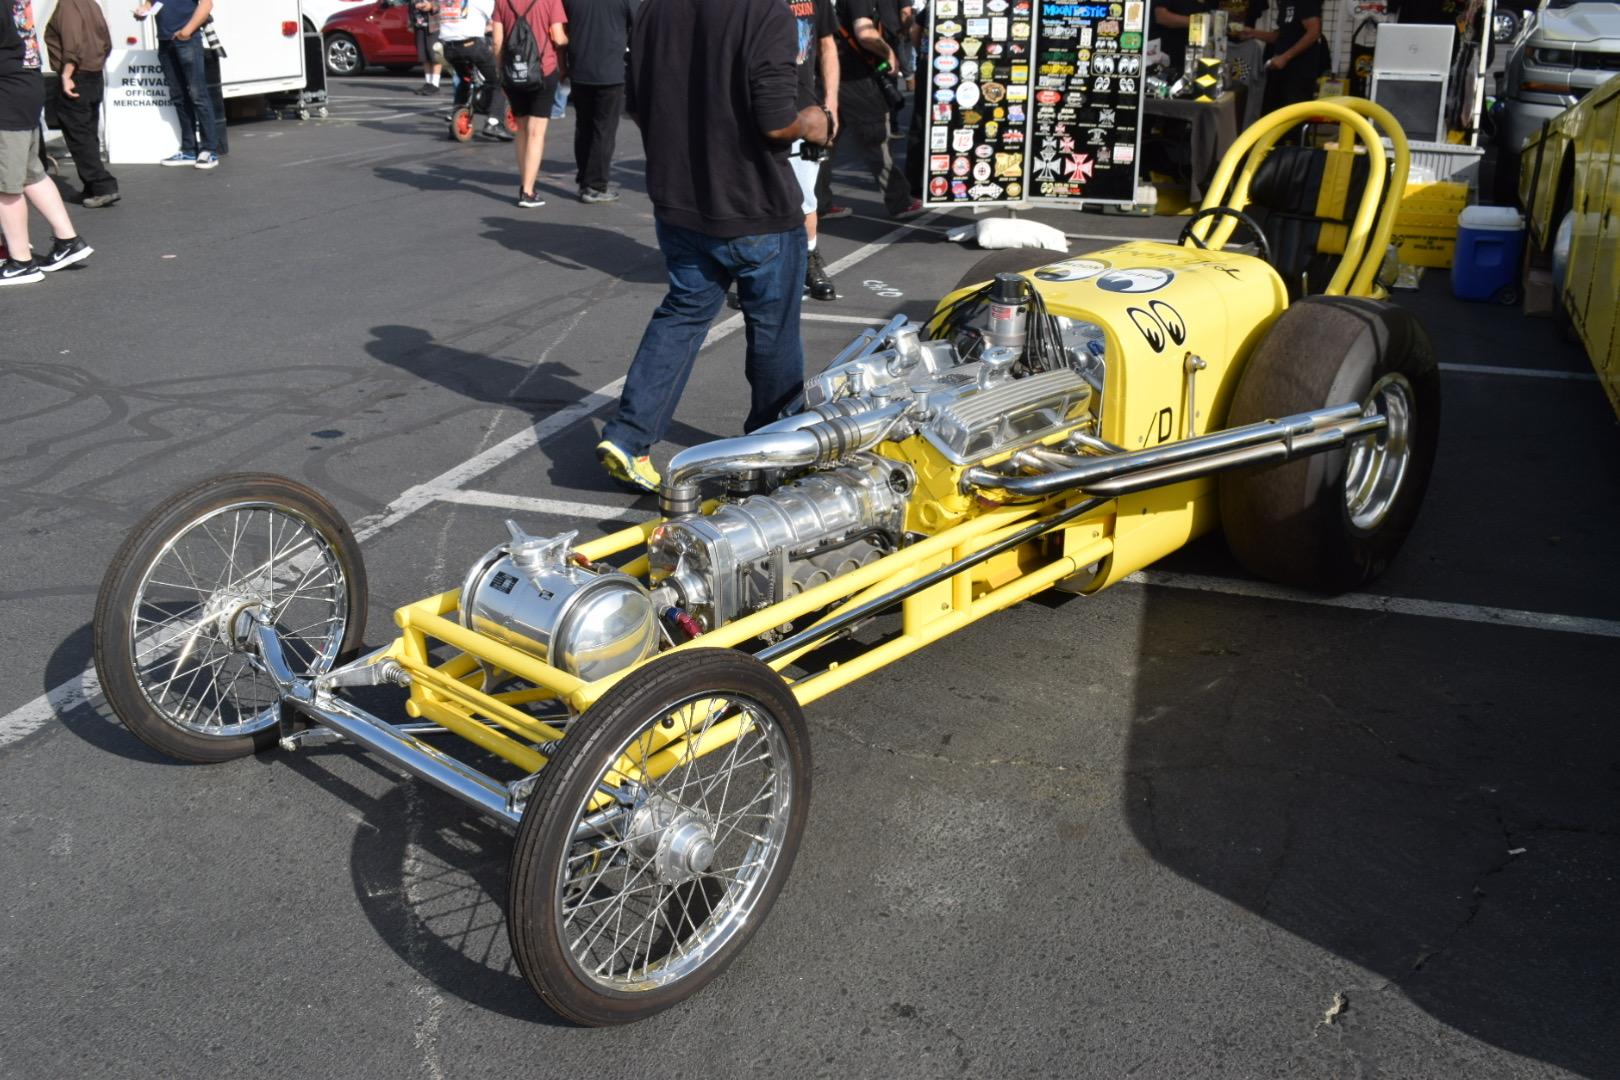
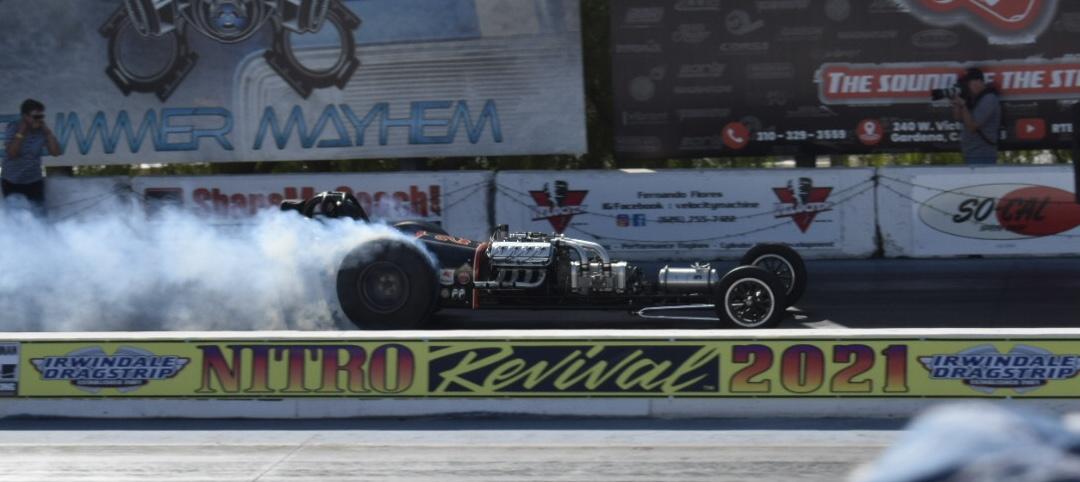
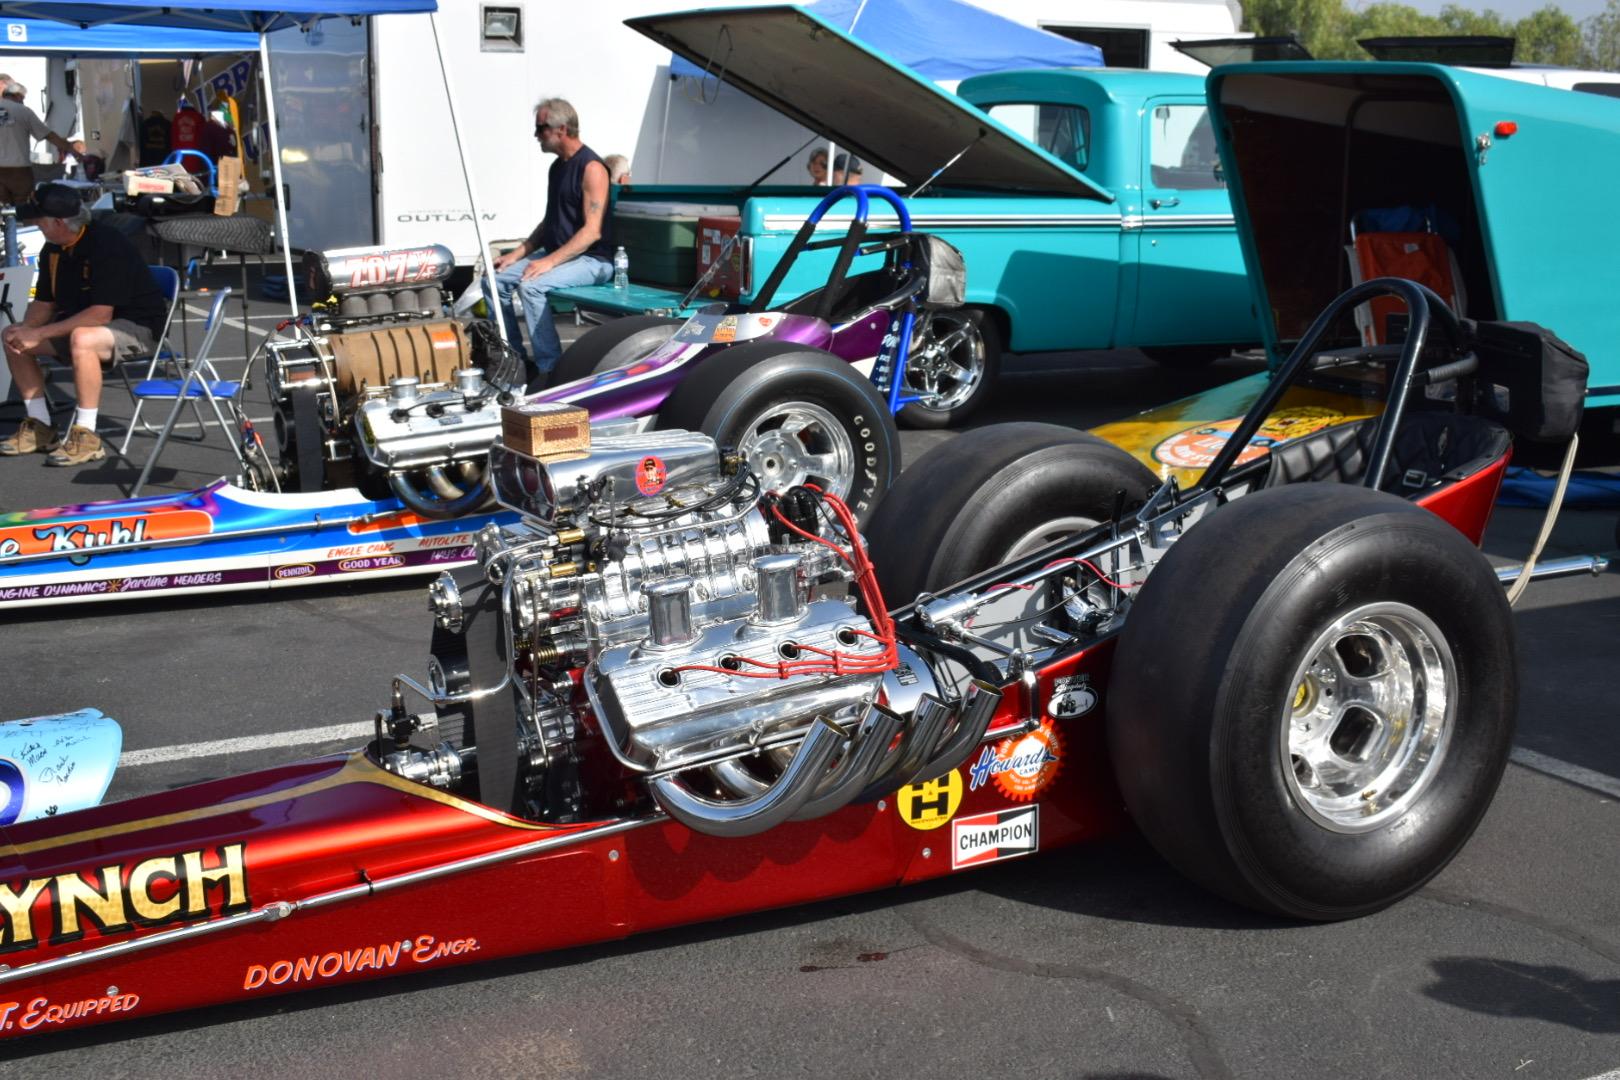
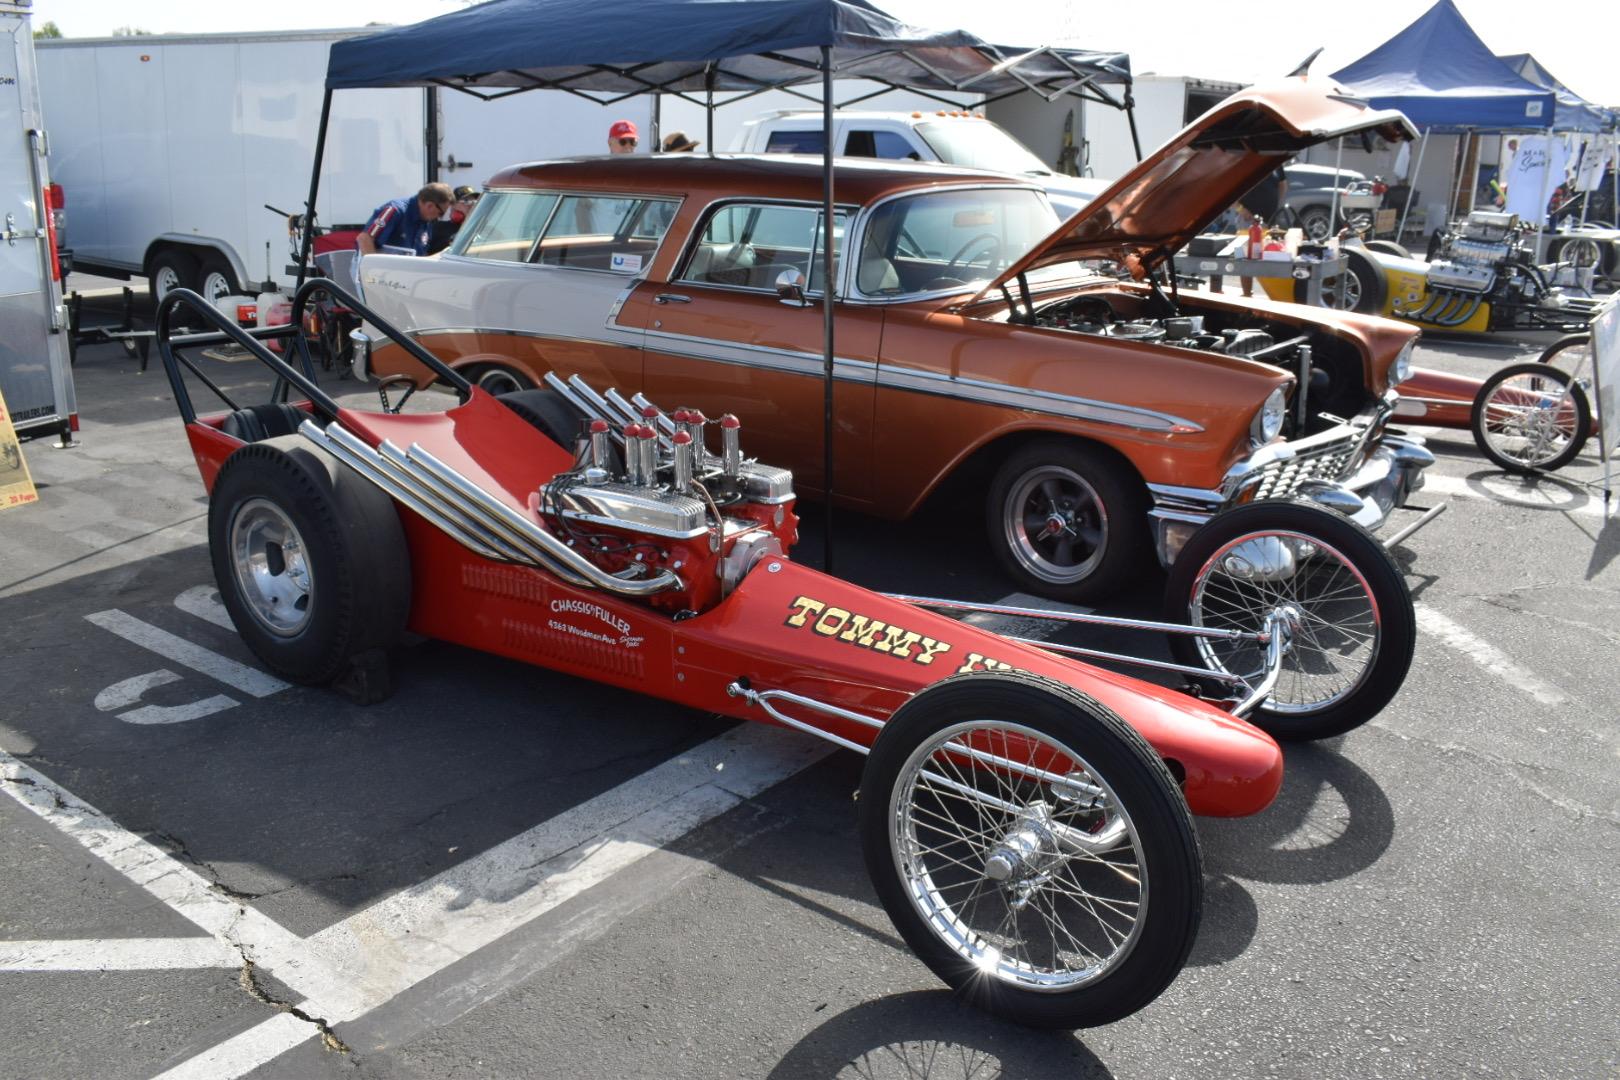
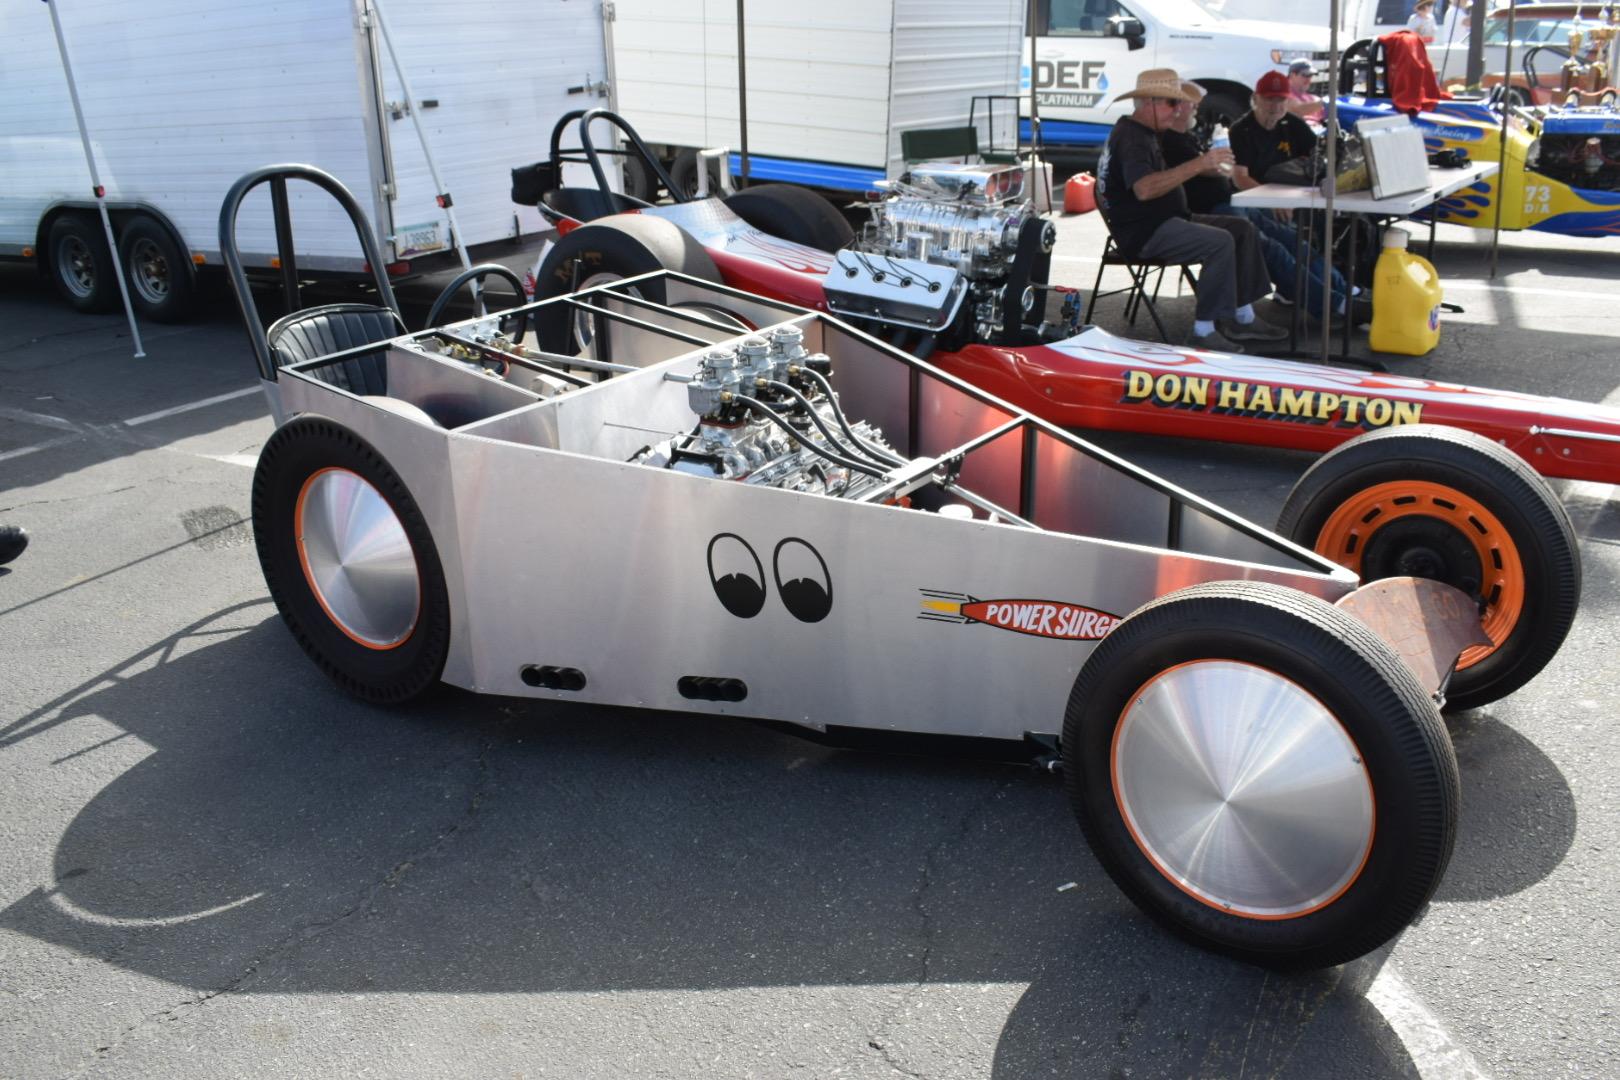
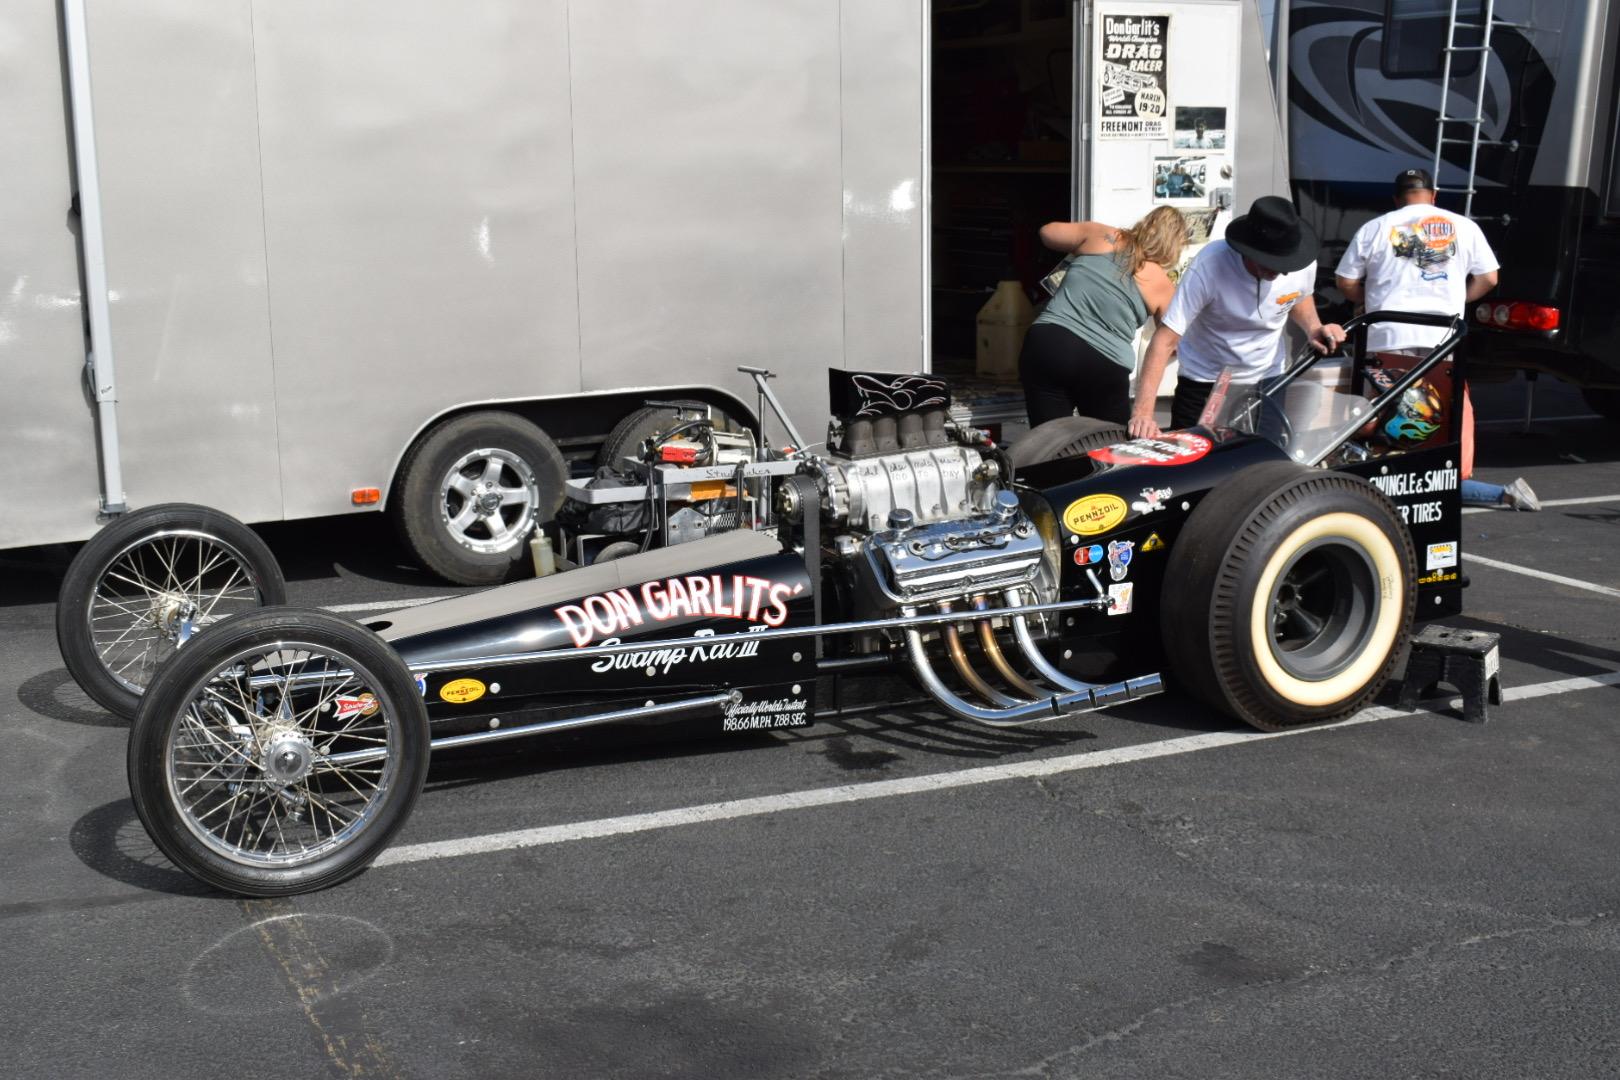
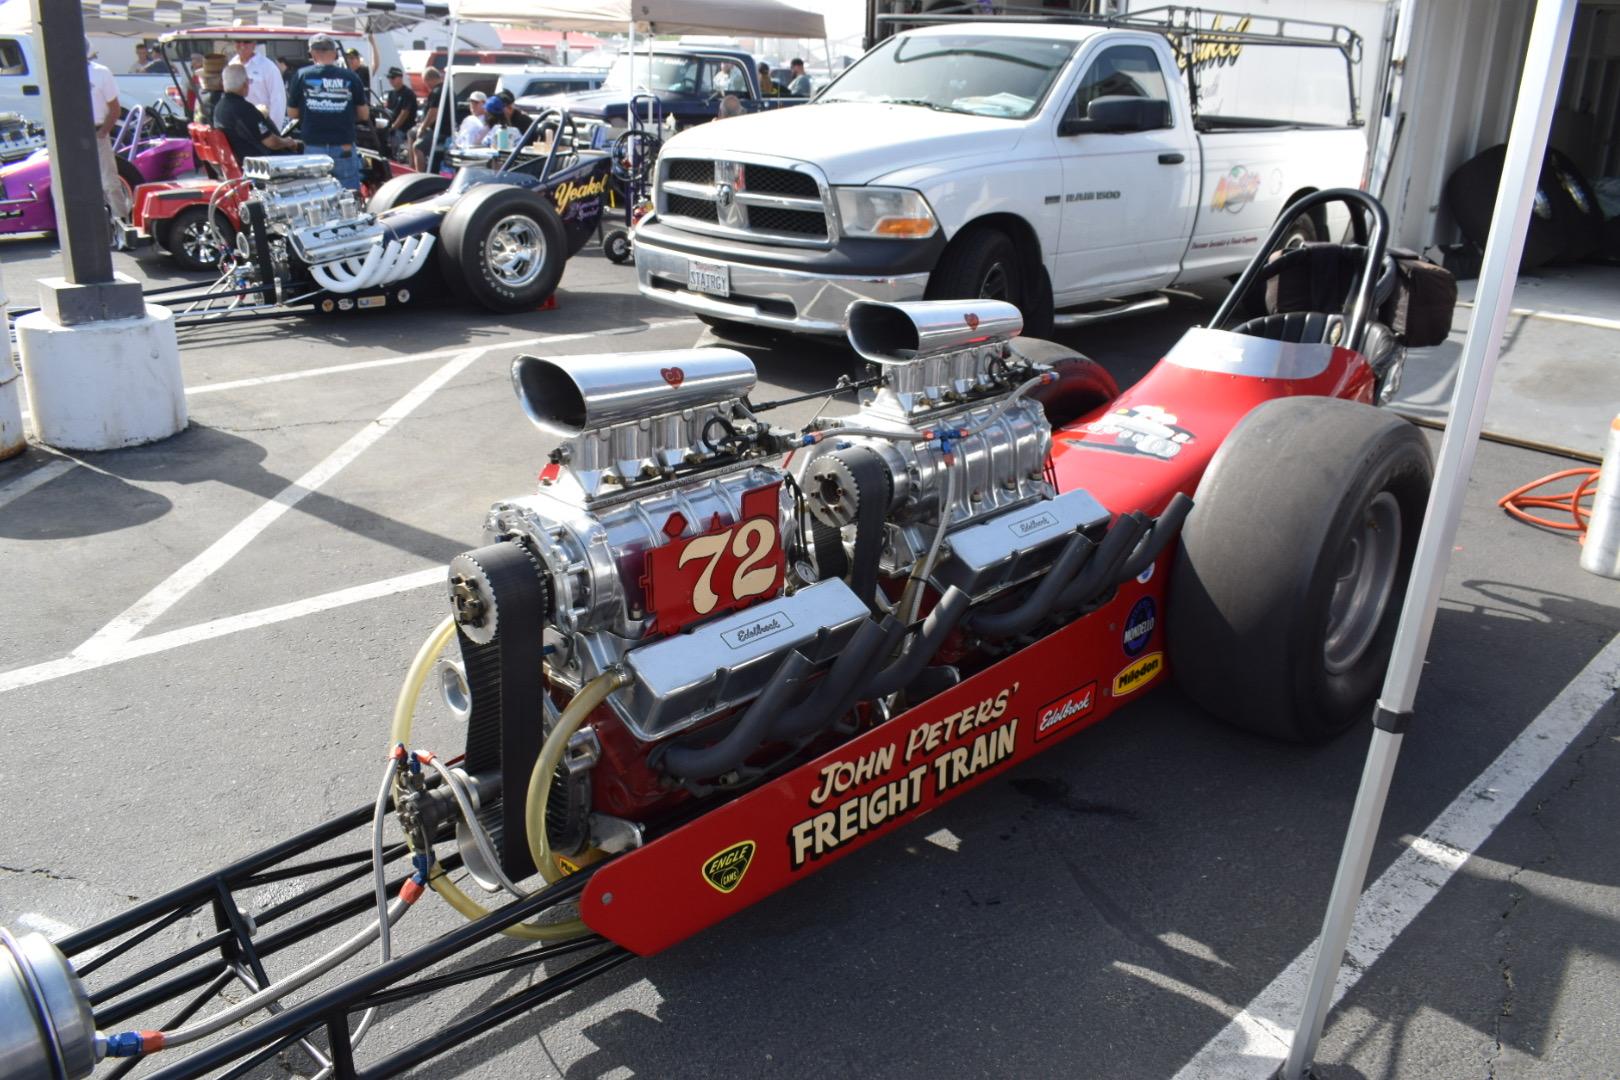
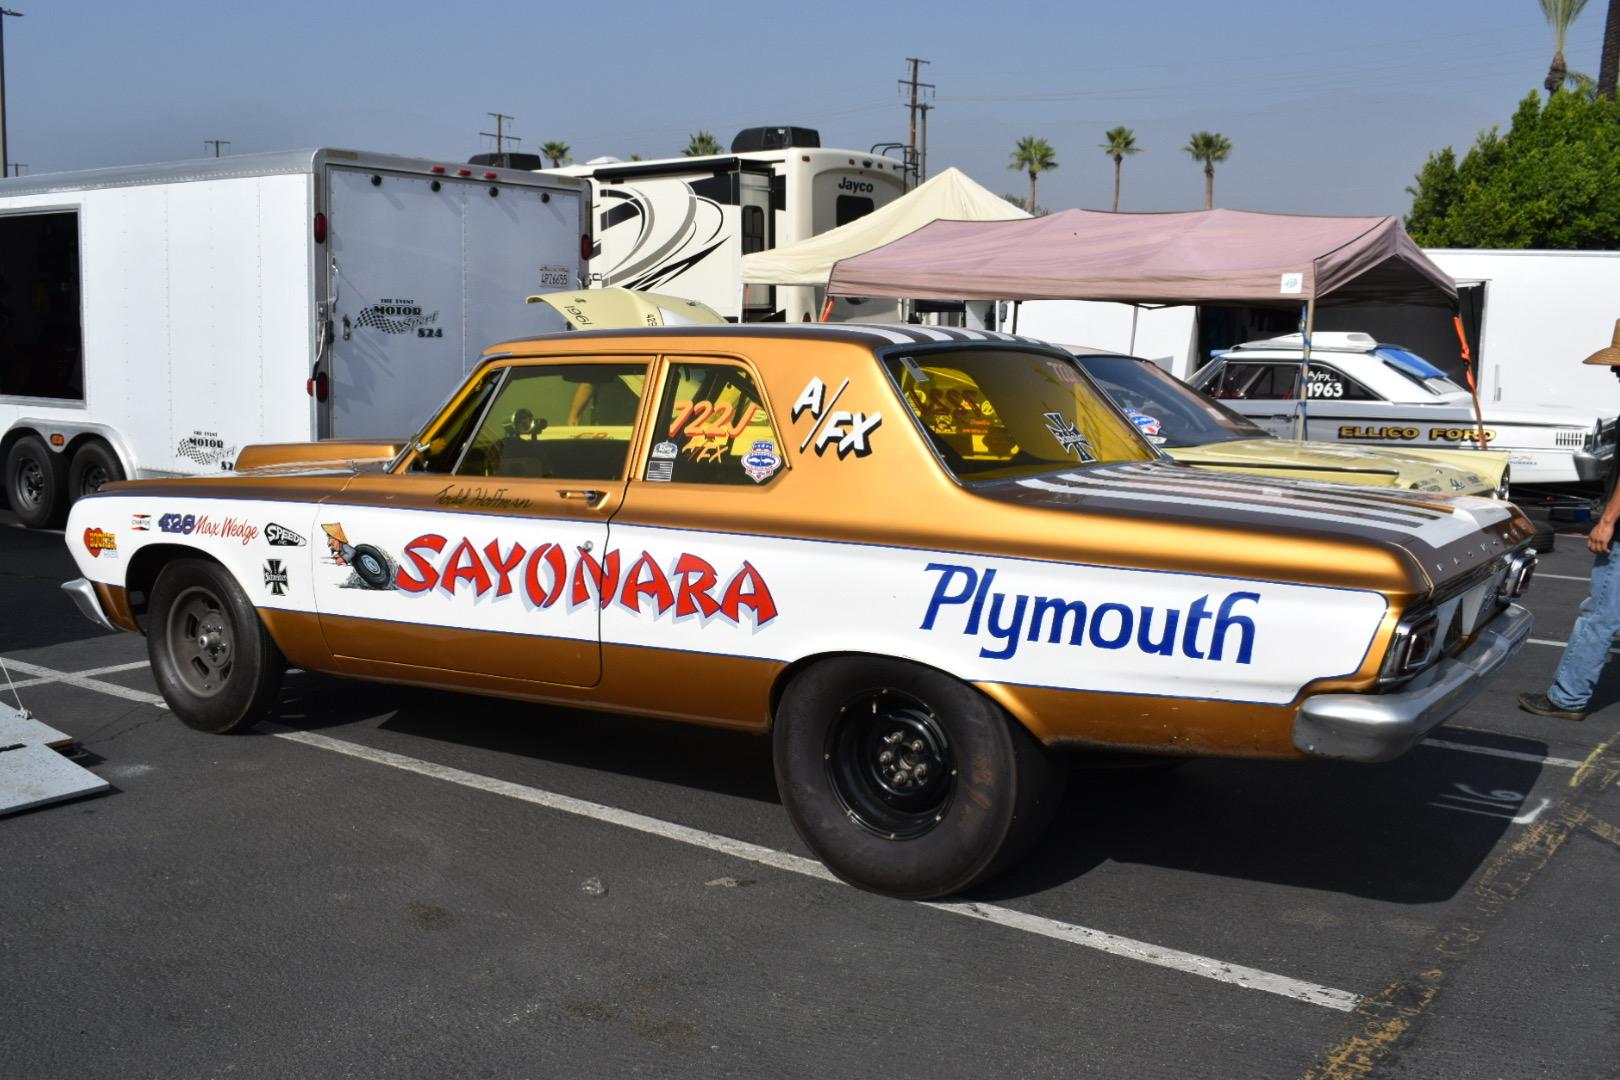
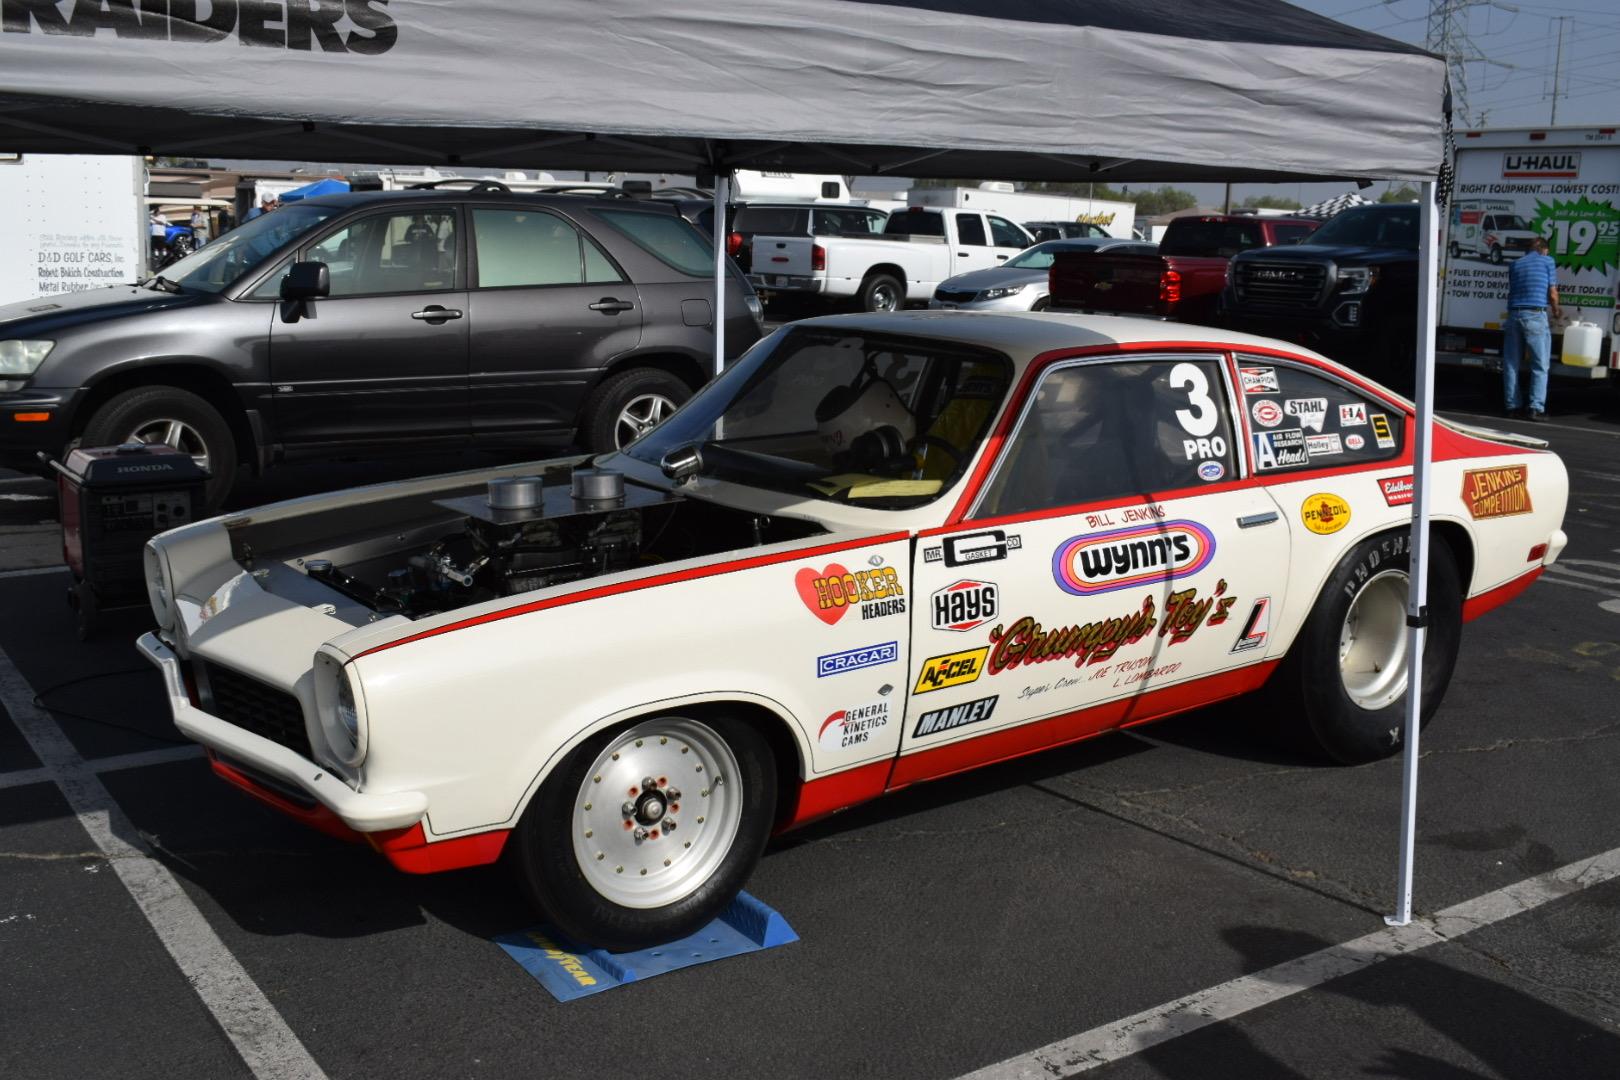
I enjoyed attending a fabulous vintage drag meet yesterday at Irwindale Raceway east of Los Angeles. This is an 1/8 mile track at the edge of a speedway complex, not the original 1/4 mile track that was operating in the 60’s. I’m guessing there was +100 vintage AA/FD dragsters and fuel altereds as well as a nice group of 60’s gassers and SS’ers. I believe the nitro burning cars that ran were limited to lifting off the pedal at half track (probably for liability reasons?) but the gassers and stockers put on a great show with lots of wheel stands. The participant and crowd demographics were at the white hair and wheel chair side of the curve so I suspect these shows may go away soon. A number of legendary racers were supposedly in attendance (Prudhomme, Ivo, Karamesines, Butch Leal) but the autograph lines were mobbed so I missed that part. I took a gazillion pics, here’s just a few. Enjoy, John
-
Nice job on this wonderful Moebius kit. Yes, the front grill fit and front/ rear window to body fits are both challenges to sort out on this build. Your window fits look great, much better better than I was able to do. On the hood fit, It looks like you needed to remove just a little more material on the rear of the grill and/or inside surfaces of the front bumper wrap-arounds to fully seat the front grill/bumper to the body/ hood. Most of these builds I’ve seen posted are the Ventura with the finned wheels, it’s nice to see a stock Catalina posted.
-
Fabulous job converting this crappy Revell gasser kit into a nearly stock J. The continental kit really ties the overall look together, nice job! My dad bought a $99 “Allstate” from a used car lot with I was a pre-schooler, many fond memories of riding around town in it (before seatbelts), always standing on the back seat floor and leaning on the front seat between my parents to be able to see out of it! I remember it being a very bare-bones car (no radio, no heater, JC Whitney seat covers, slow as hell).
-
Wow! What a beautiful execution on this old Revell kit! I’m particularly impressed with the decal job, all of them perfectly aligned and no yellowing! Yes, please build and post an entire Roth museum for us!
-
Beautiful job Jim on the fuel lines. I’ve never had much luck using braided wire lines on car models and you’ve really mastered it, yours look very realistic. Looking forward to seeing this one come together.
-
New Build Dyno Don 1965 Mercury Comet A/FX
papajohn97 replied to Metalmad's topic in WIP: Drag Racing Models
It’s a beautiful kit Seth, Moebius did a great job on this cammer and can be made even better with a pair of Fireball Resin Holleys 4160’s in place of the kit carbs. I have this same kit in my current queue of auto builds on my bench and will enjoy watching your build. -
Amazing under-the-hood detail! Also love the plain-Jane white over blue cloth sleeper look. Nice job!
-
Beautiful clean accurate build of a kit I never get tired of seeing built and displayed here. Something about the styling and stance of these ‘64-65 Comets, they just look like they’re screaming by even when they’re standing still. You did a particularly nice job on your window frame foil work and slightly orangey red metallic looks good with the yellow decals. I’m about to start this same Dyno Don comet and hope I do half as a good a job as you’ve done on yours.
-
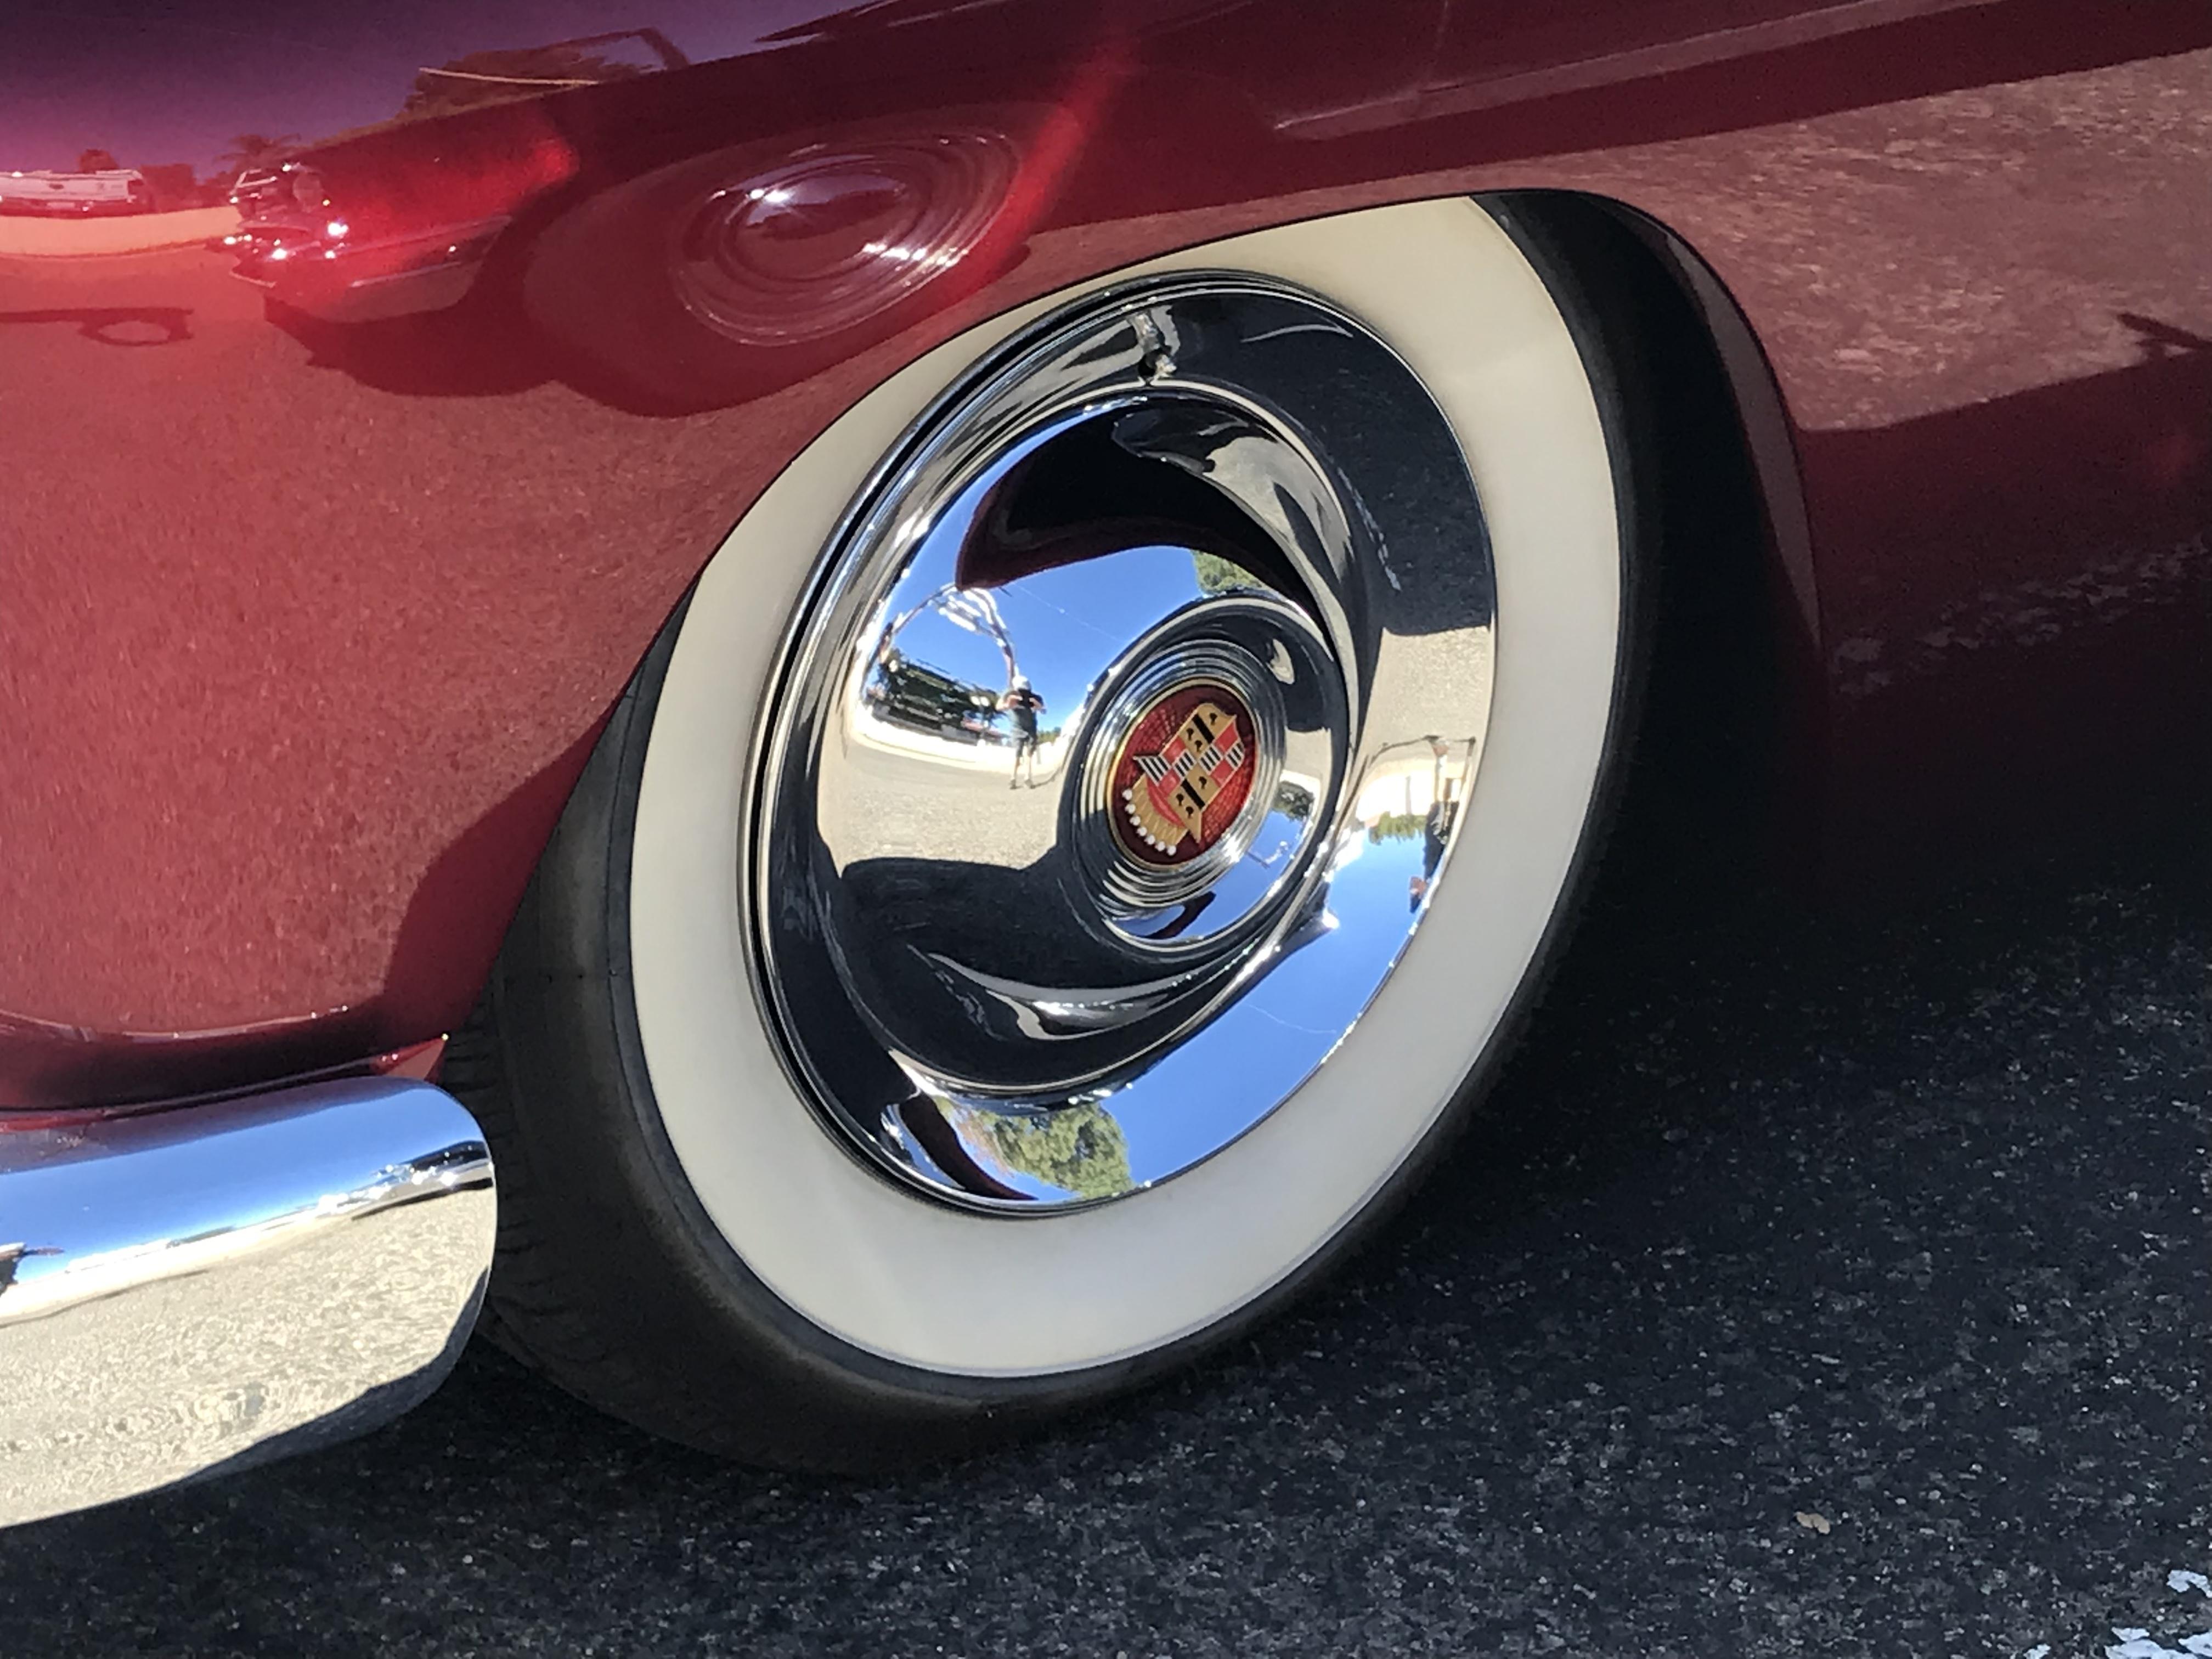
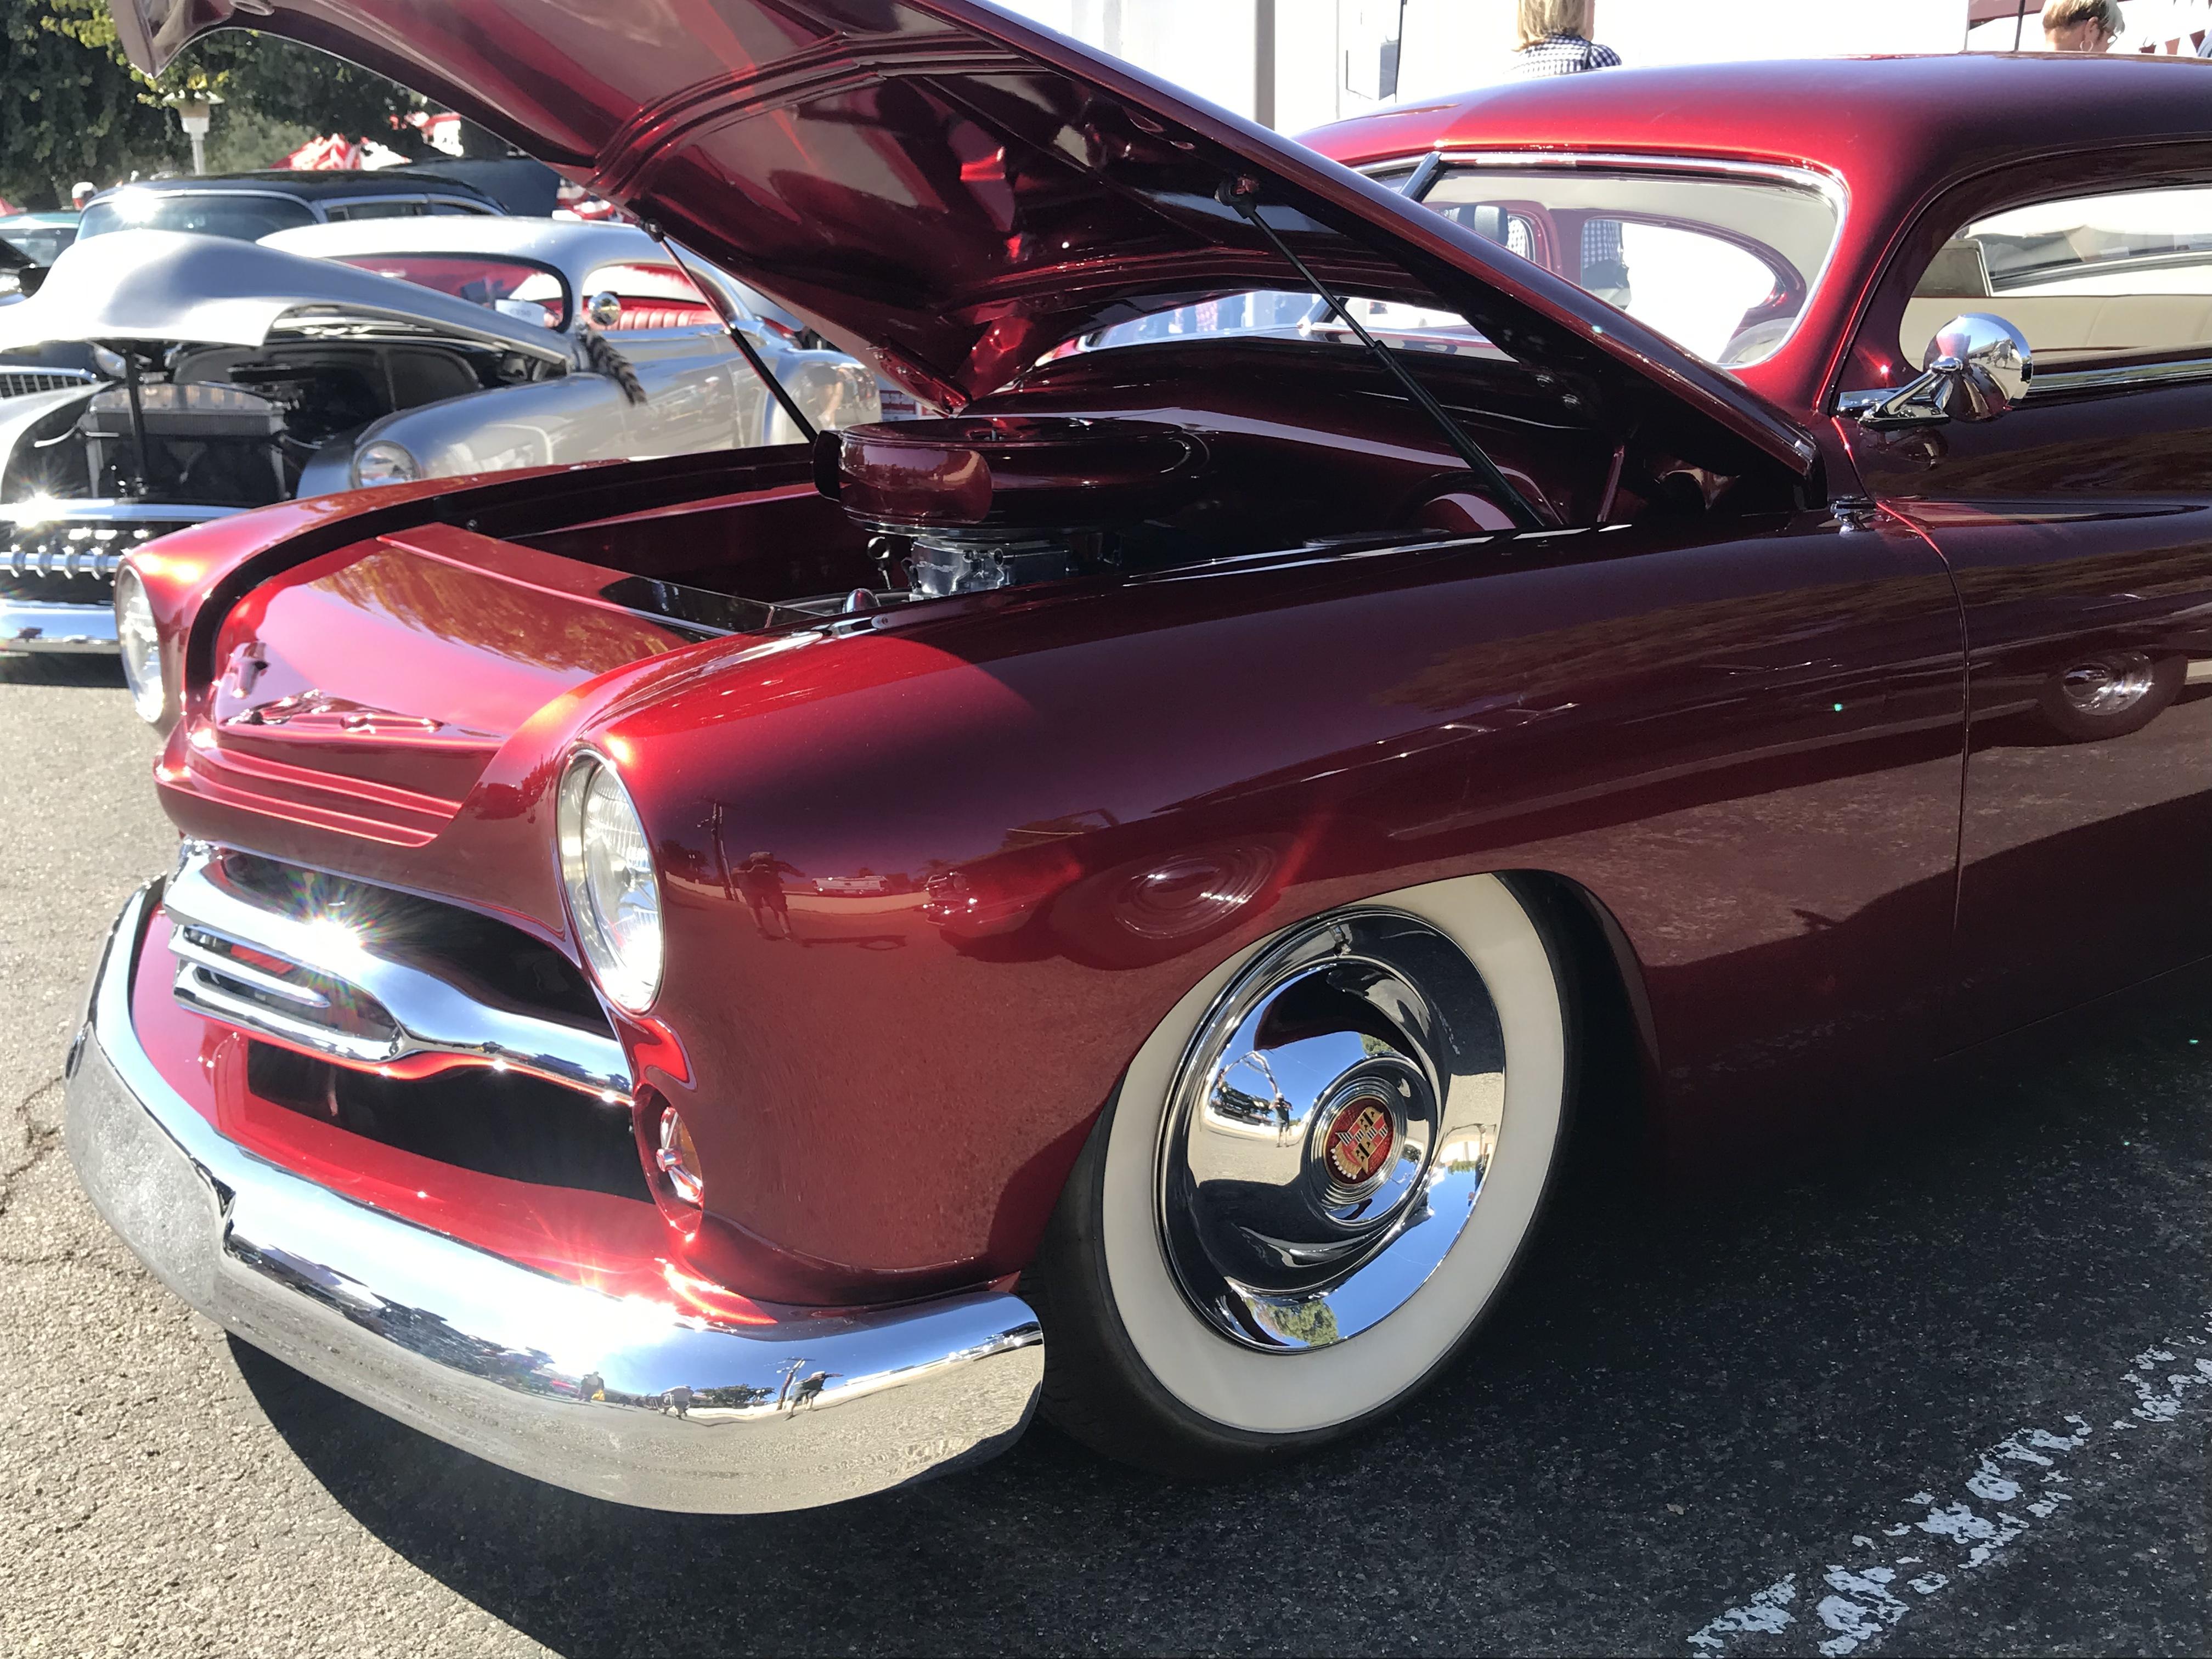
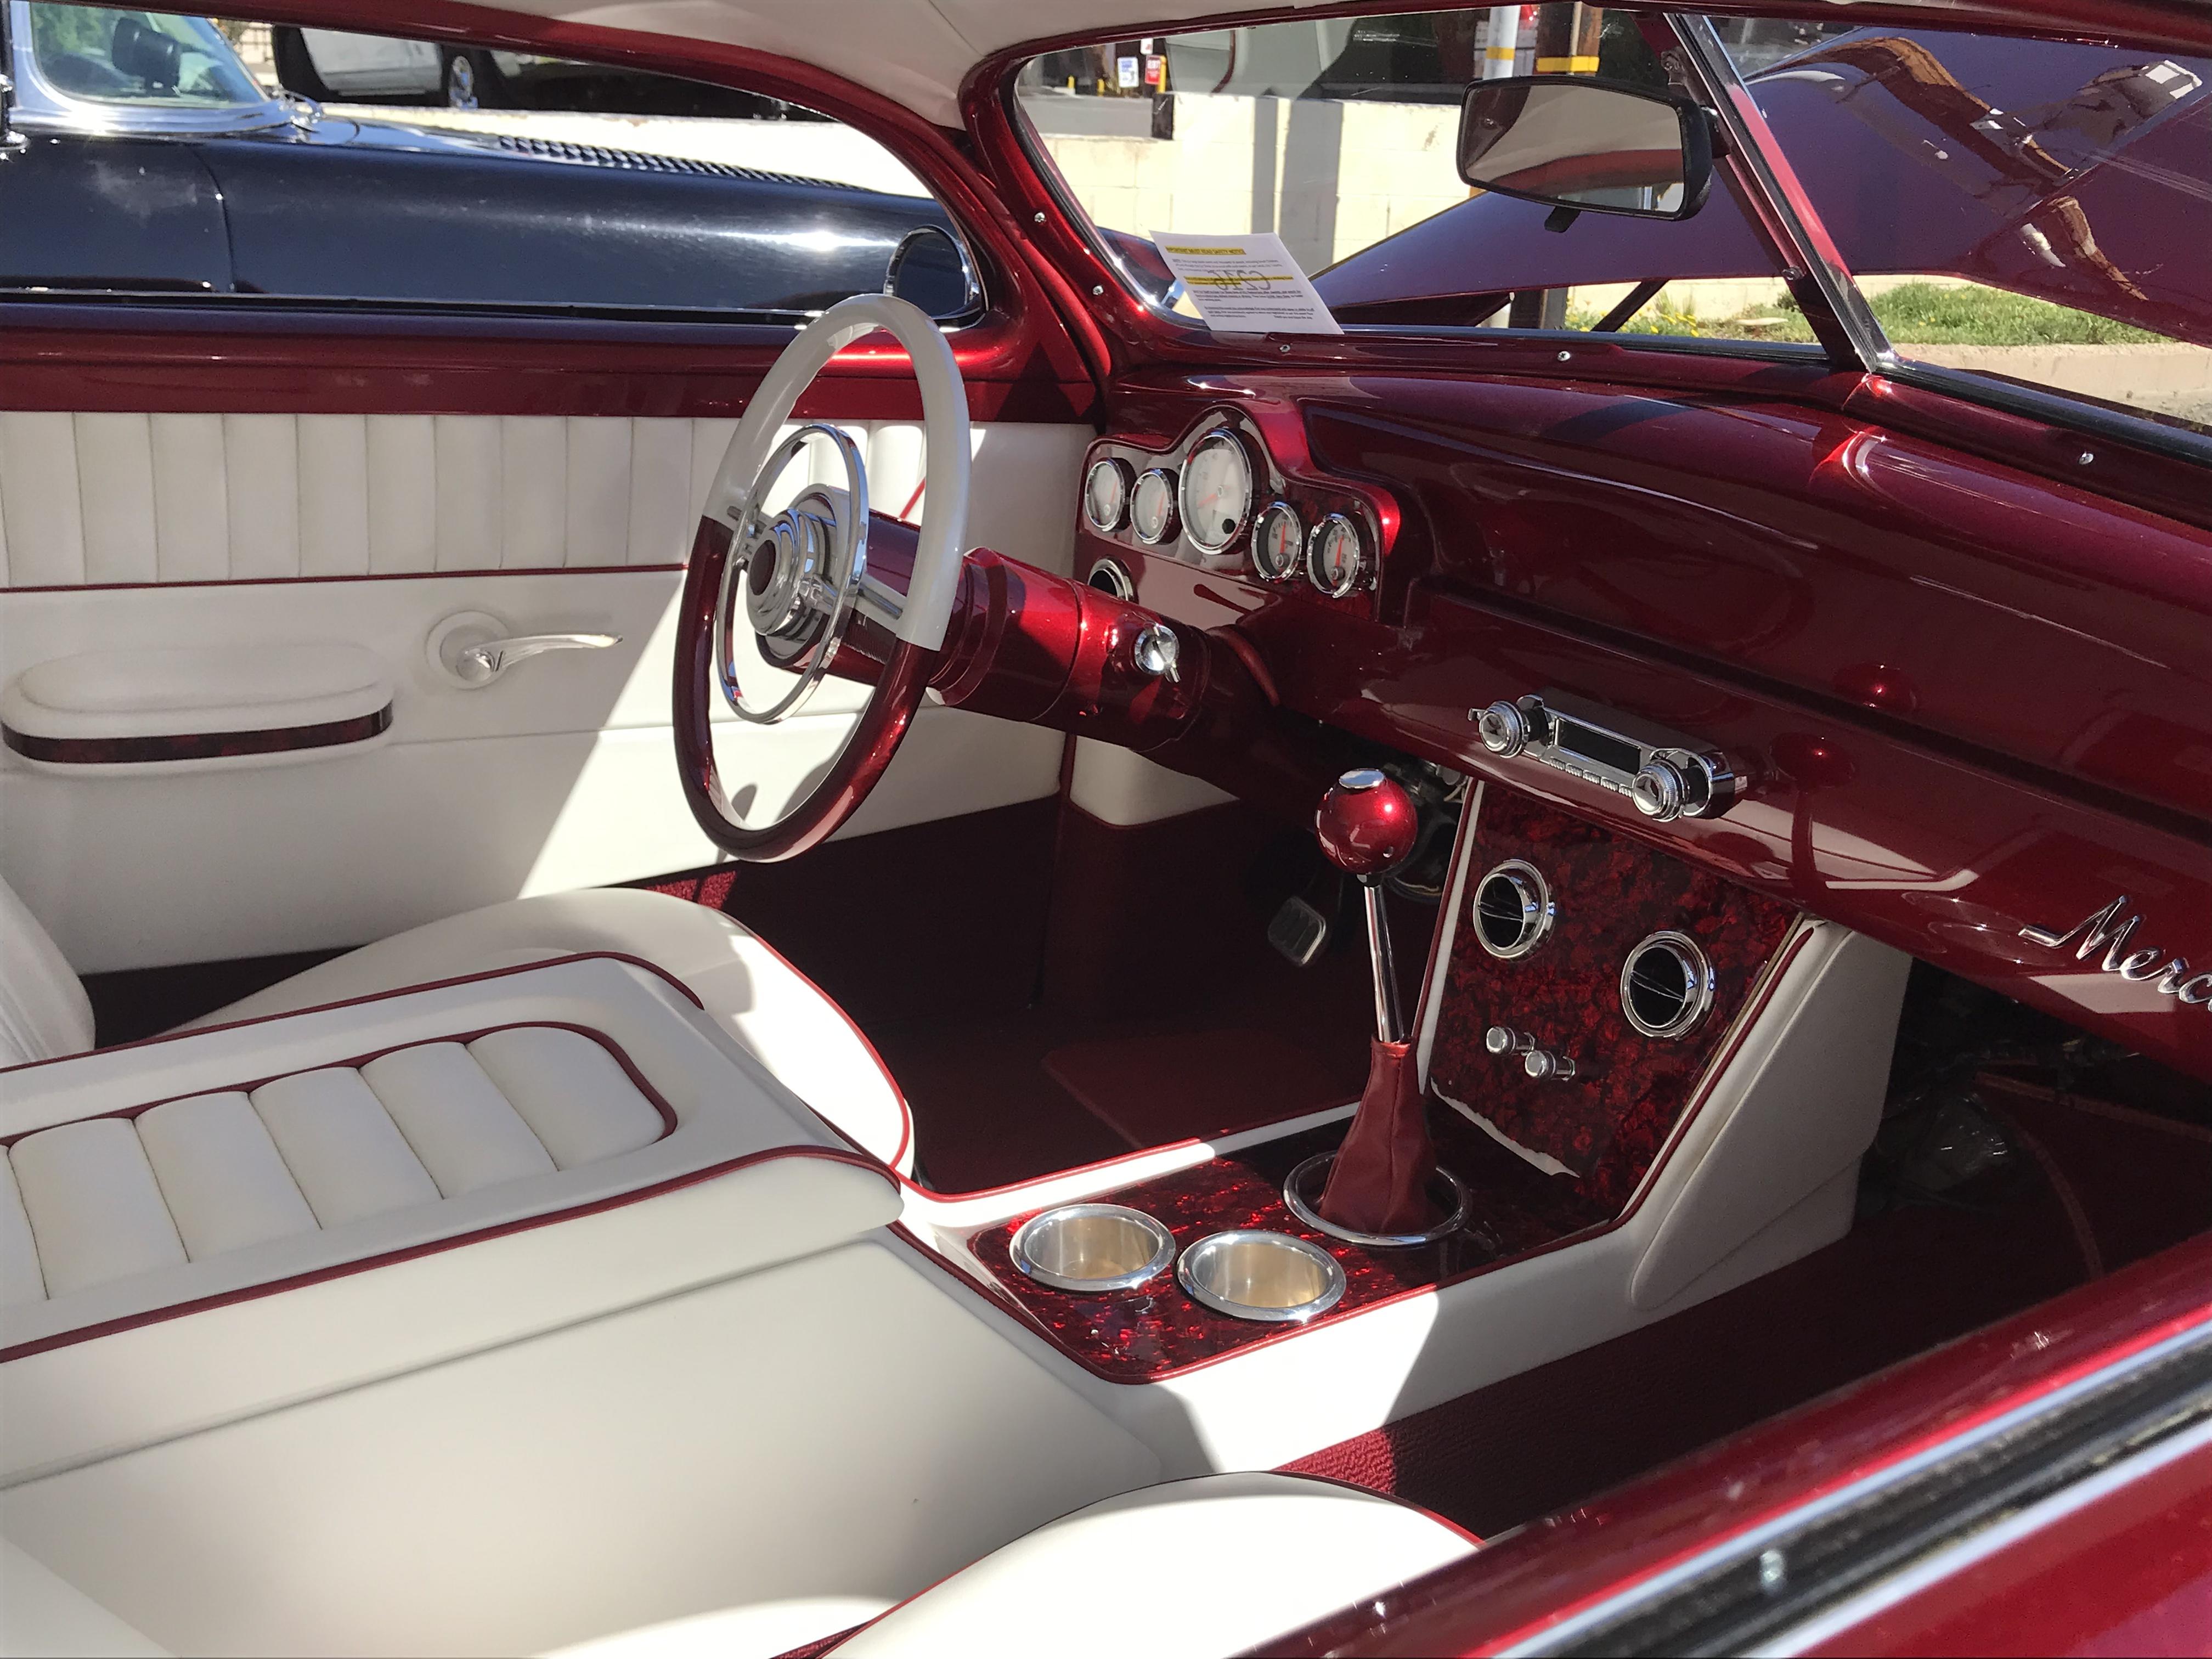
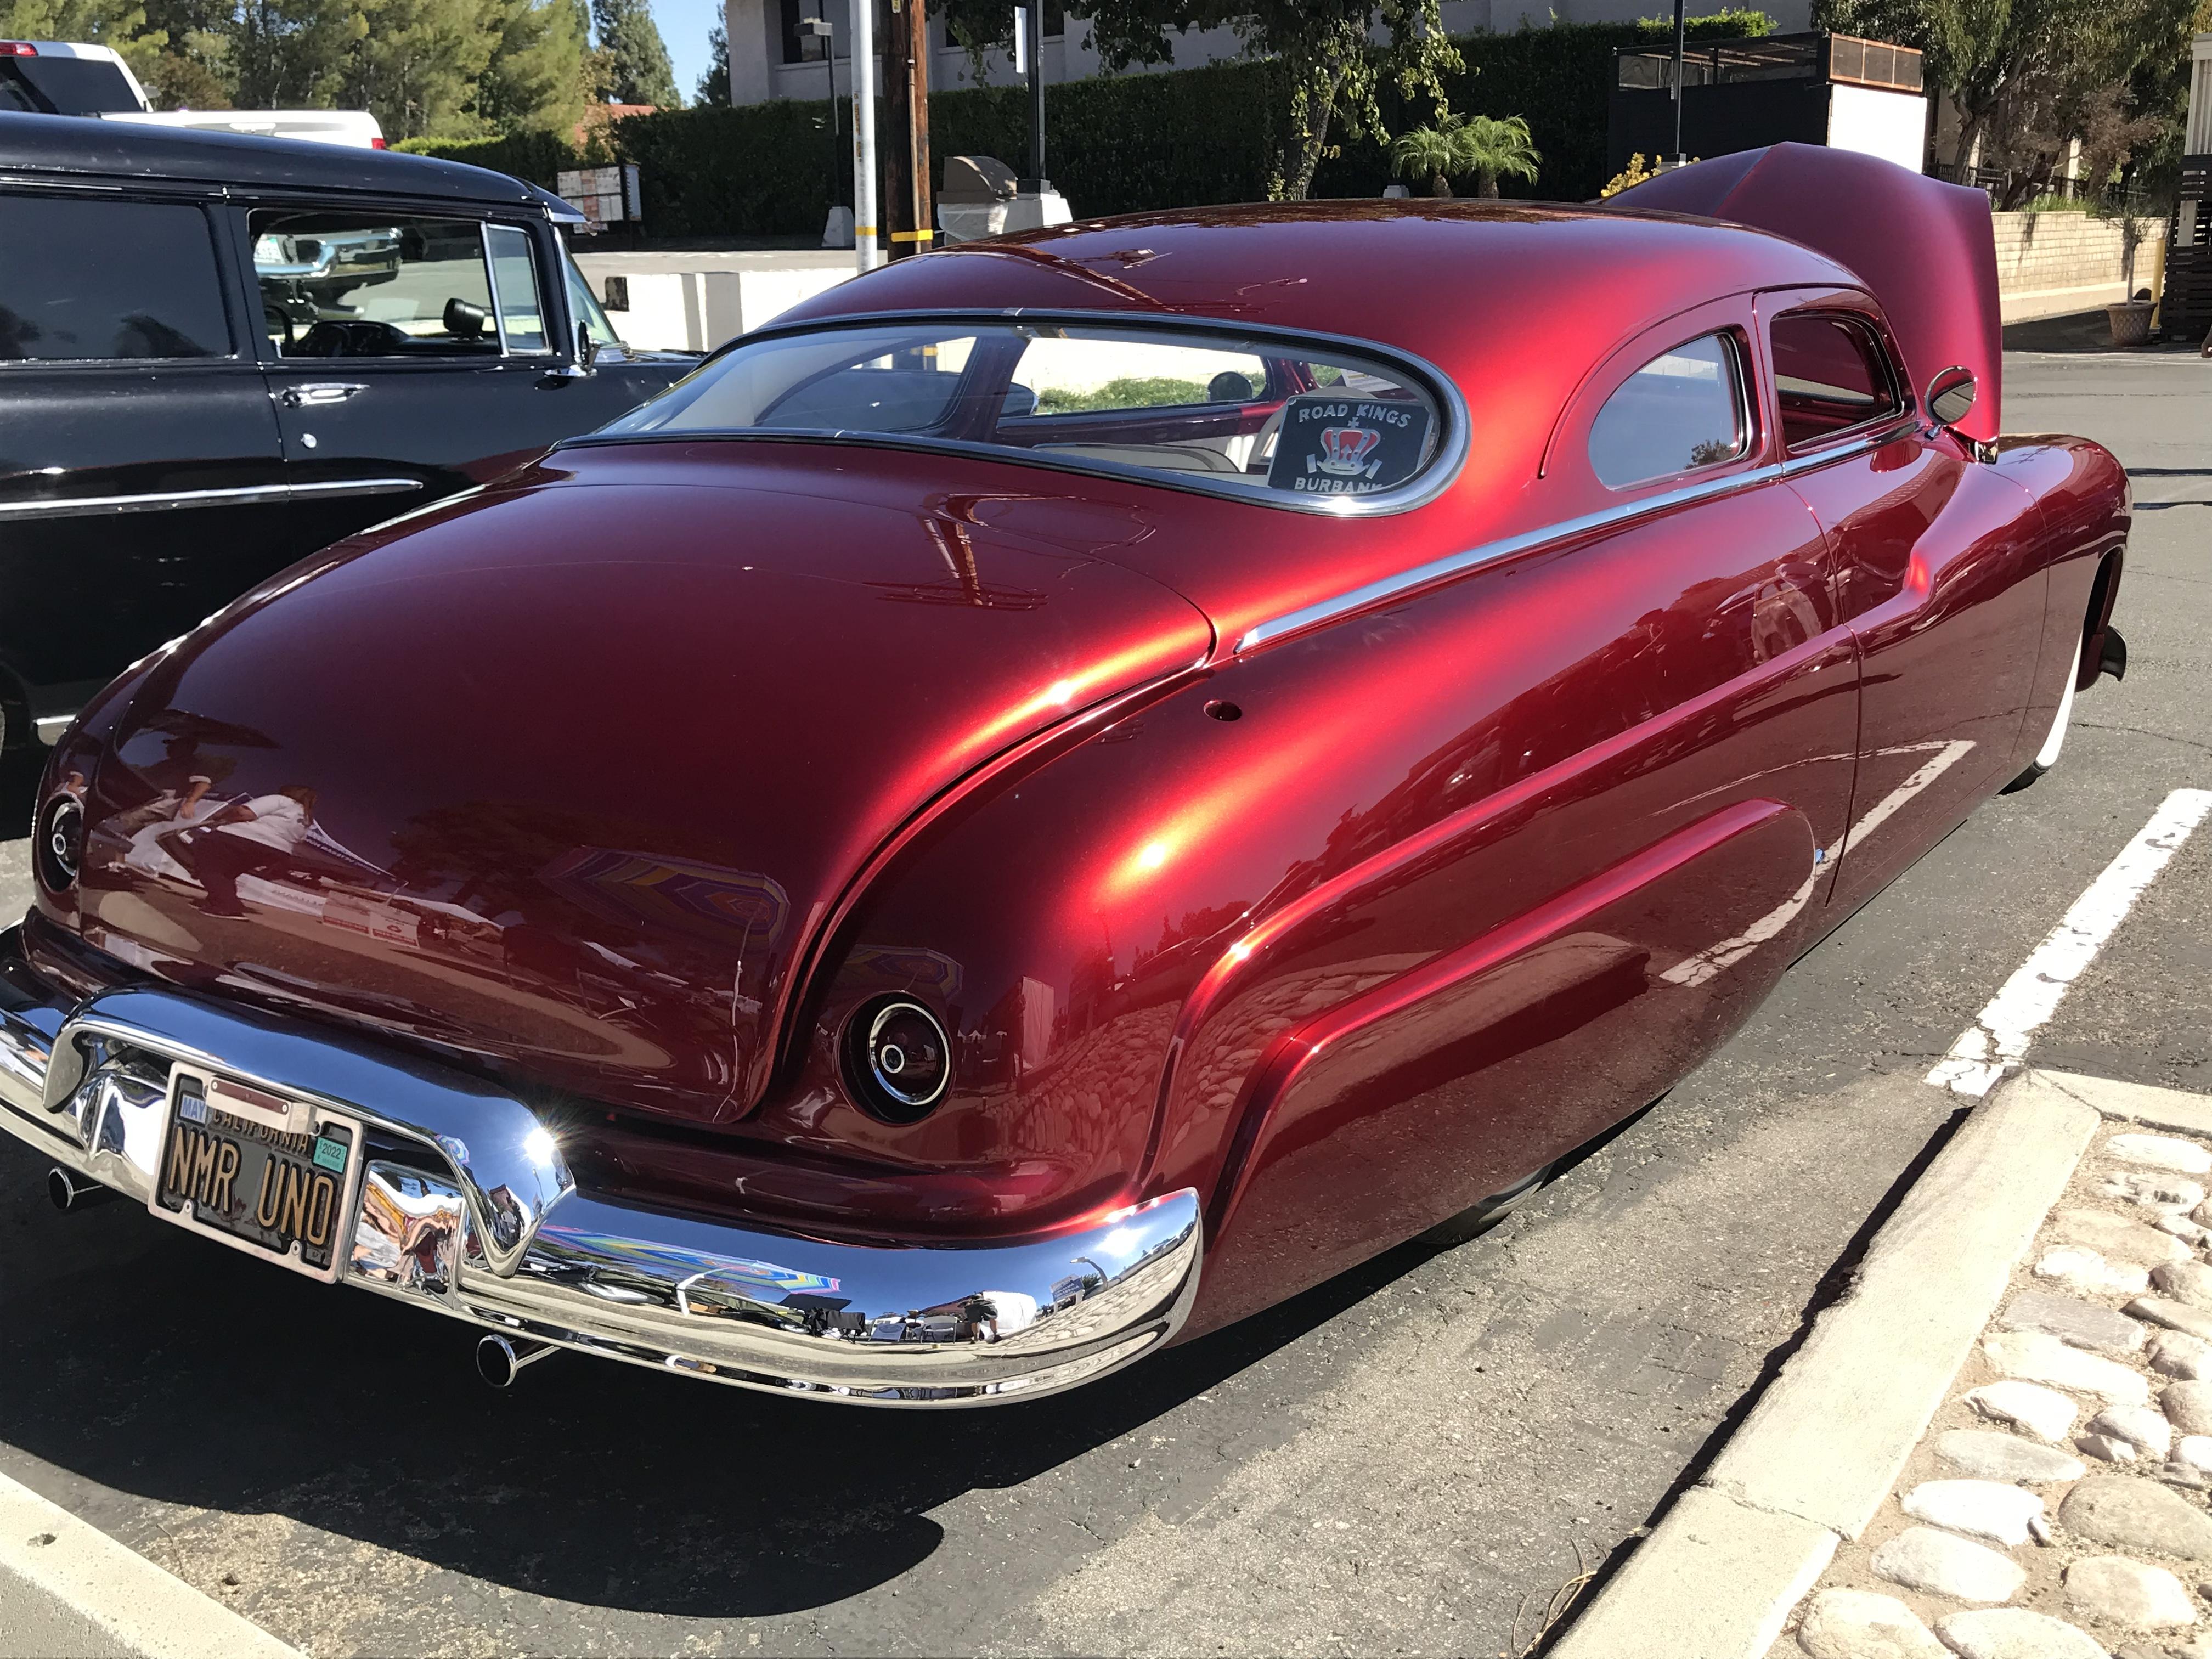
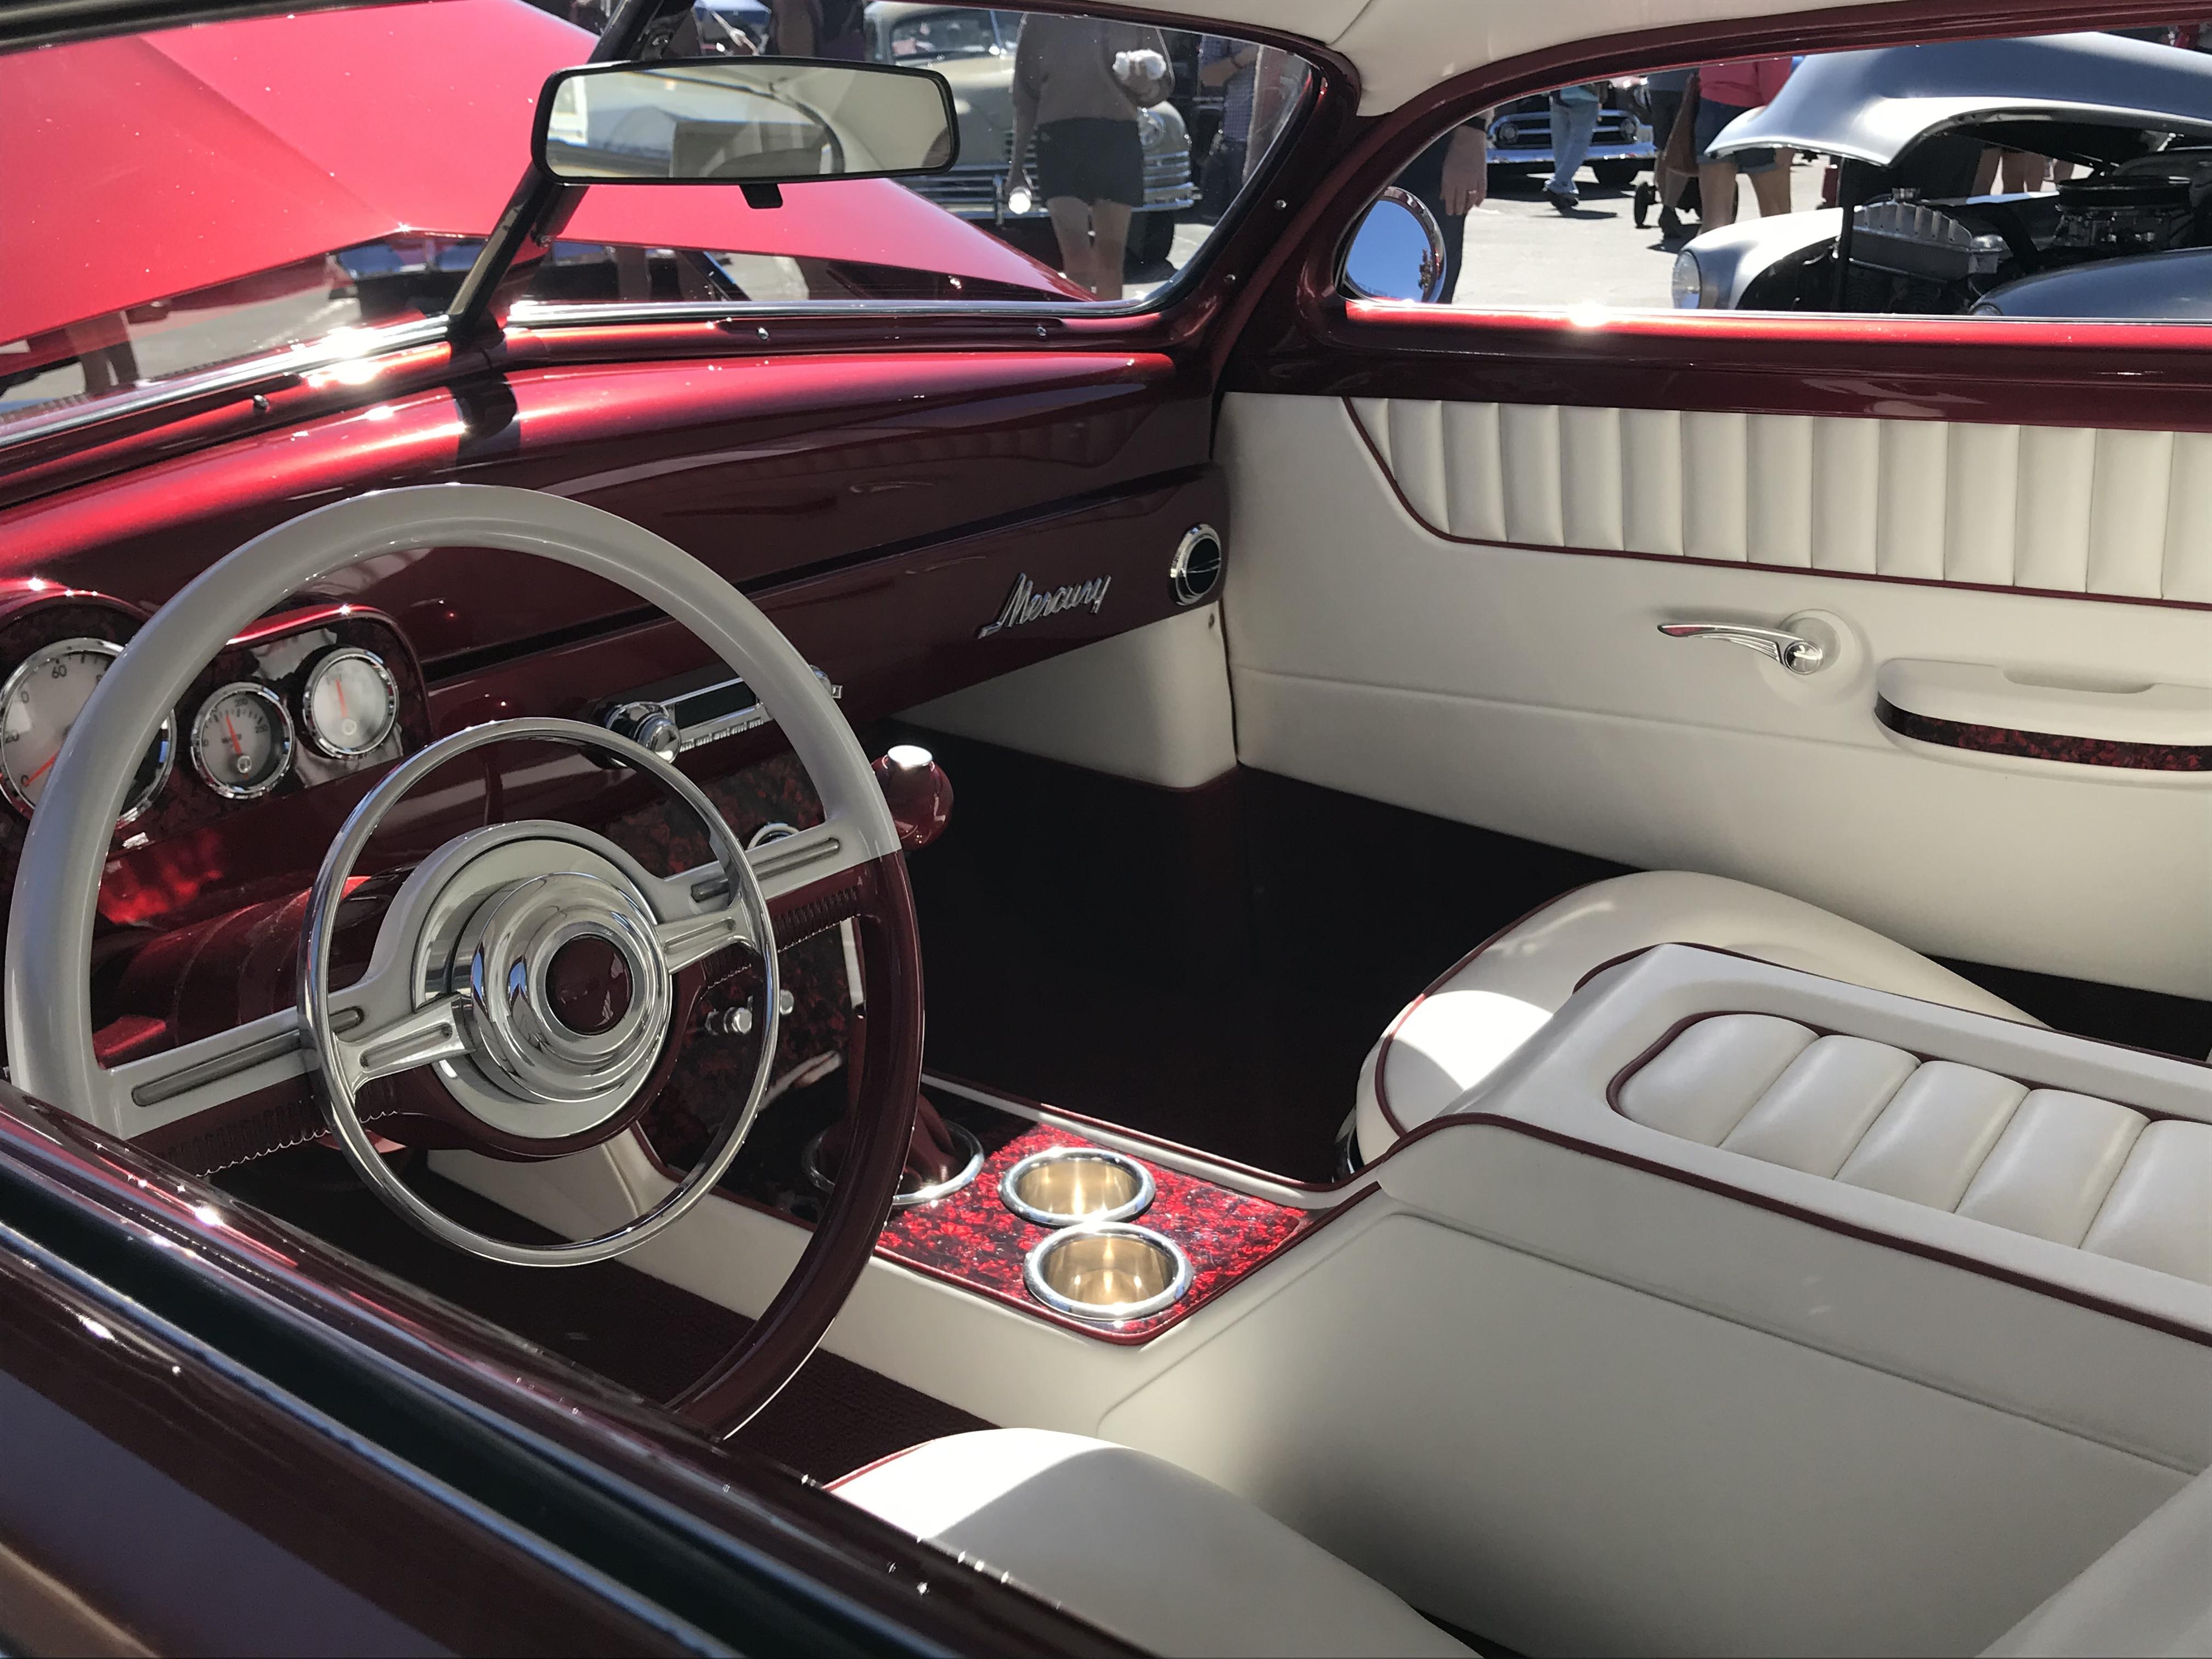
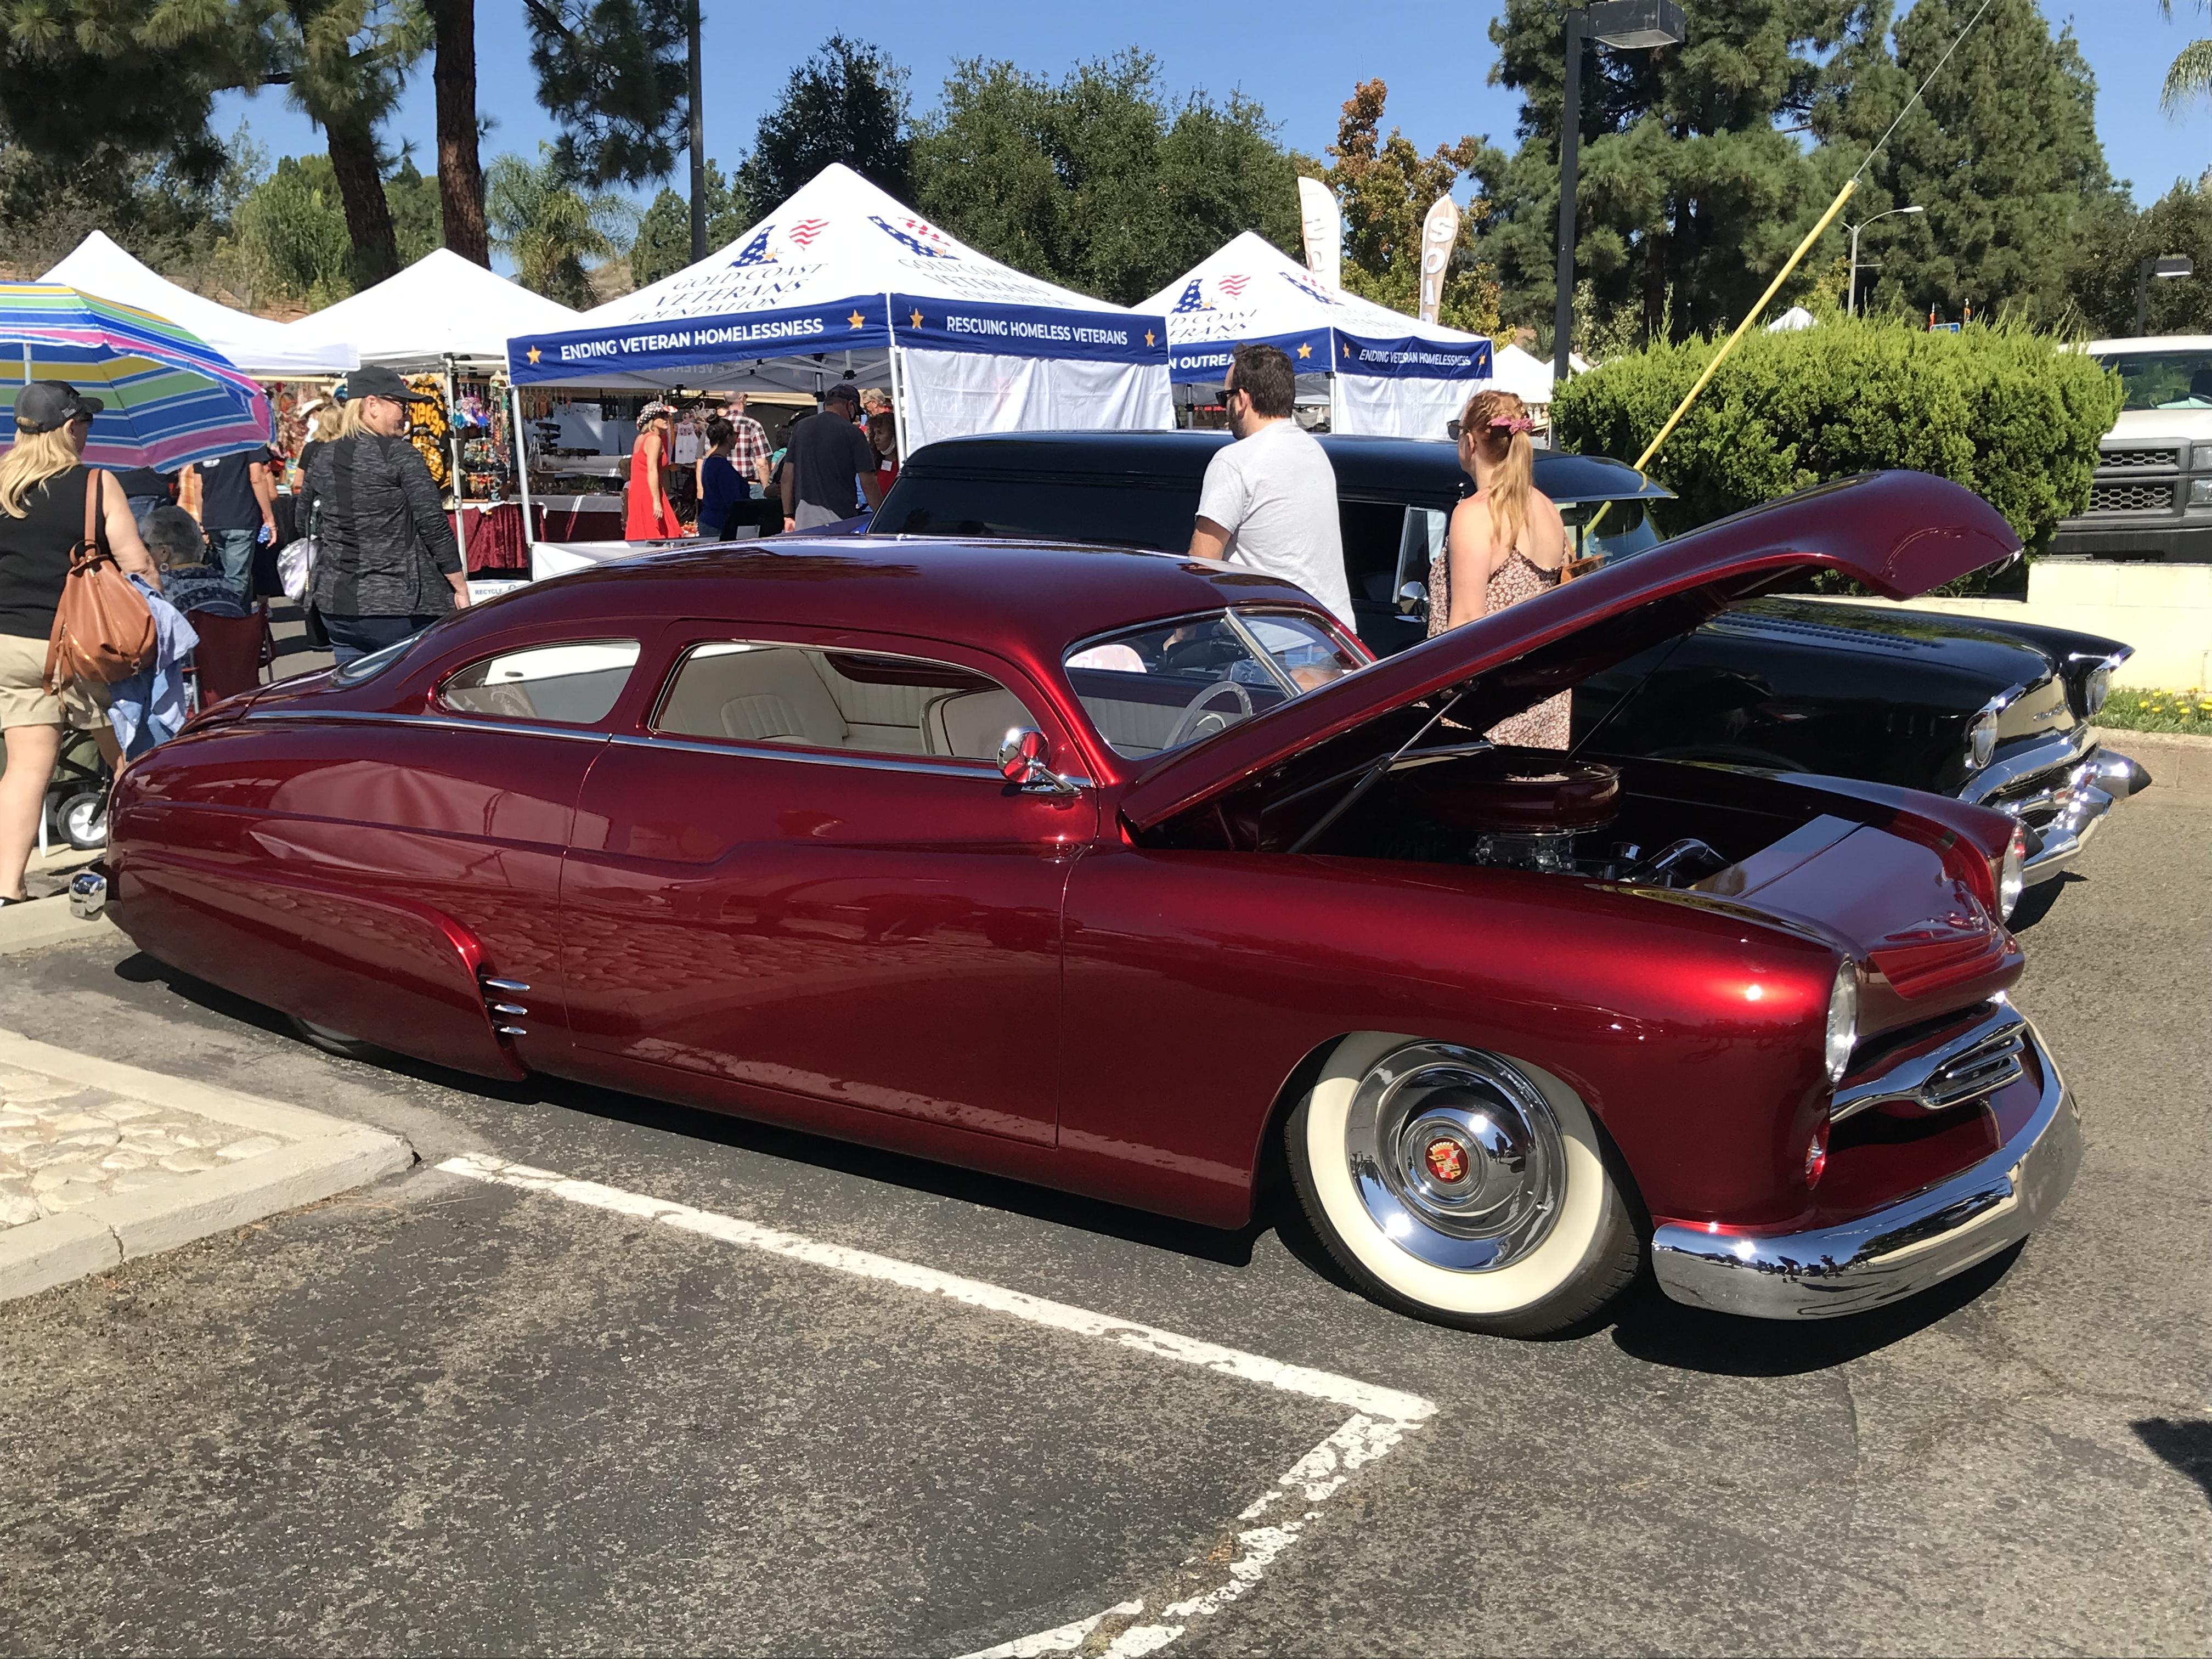
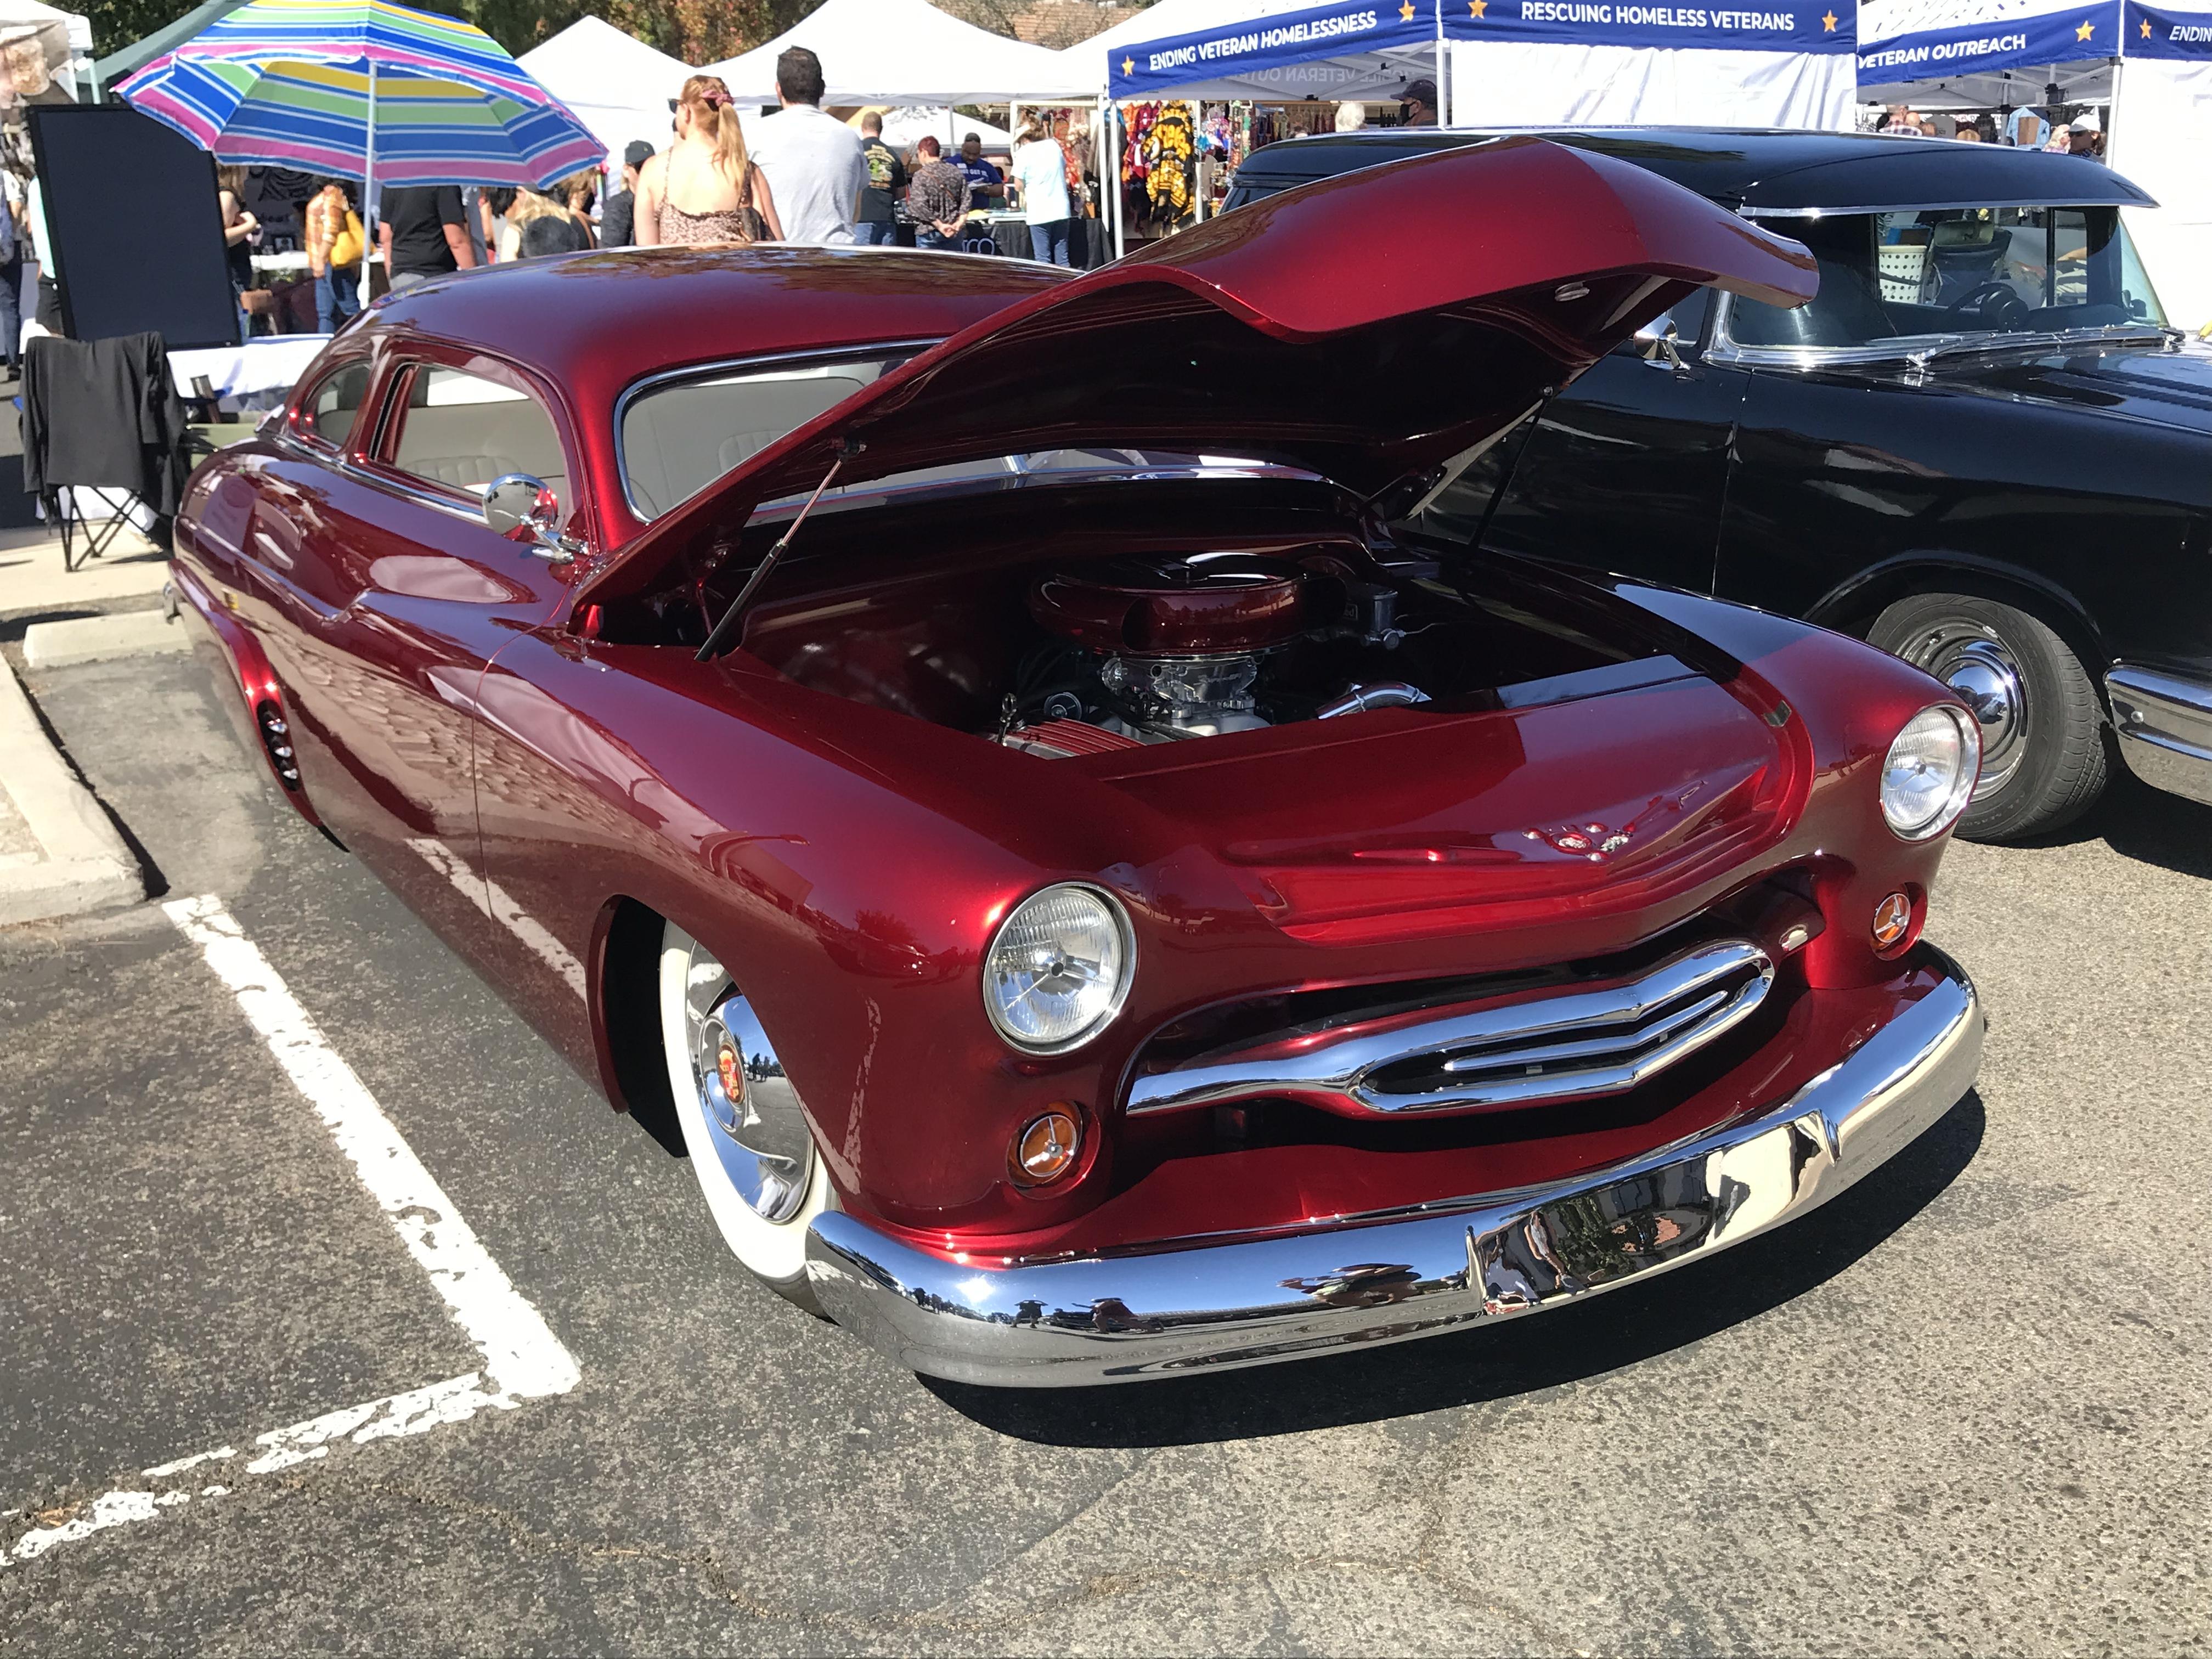
Other favorite car at the street fair. This is one fabulous custom Merc, a famous car no-doubt? Saw this driving down our local streets a year ago and wanted to follow it but it wasn’t where my wife wanted me to take her. So nice to encounter it again and be able to study it up close. I do believe it’s the nicest custom car I have ever seen. If I were a very wealthy man, I would make the owner an agreeable offer just so I could park this beauty in my living room.
-
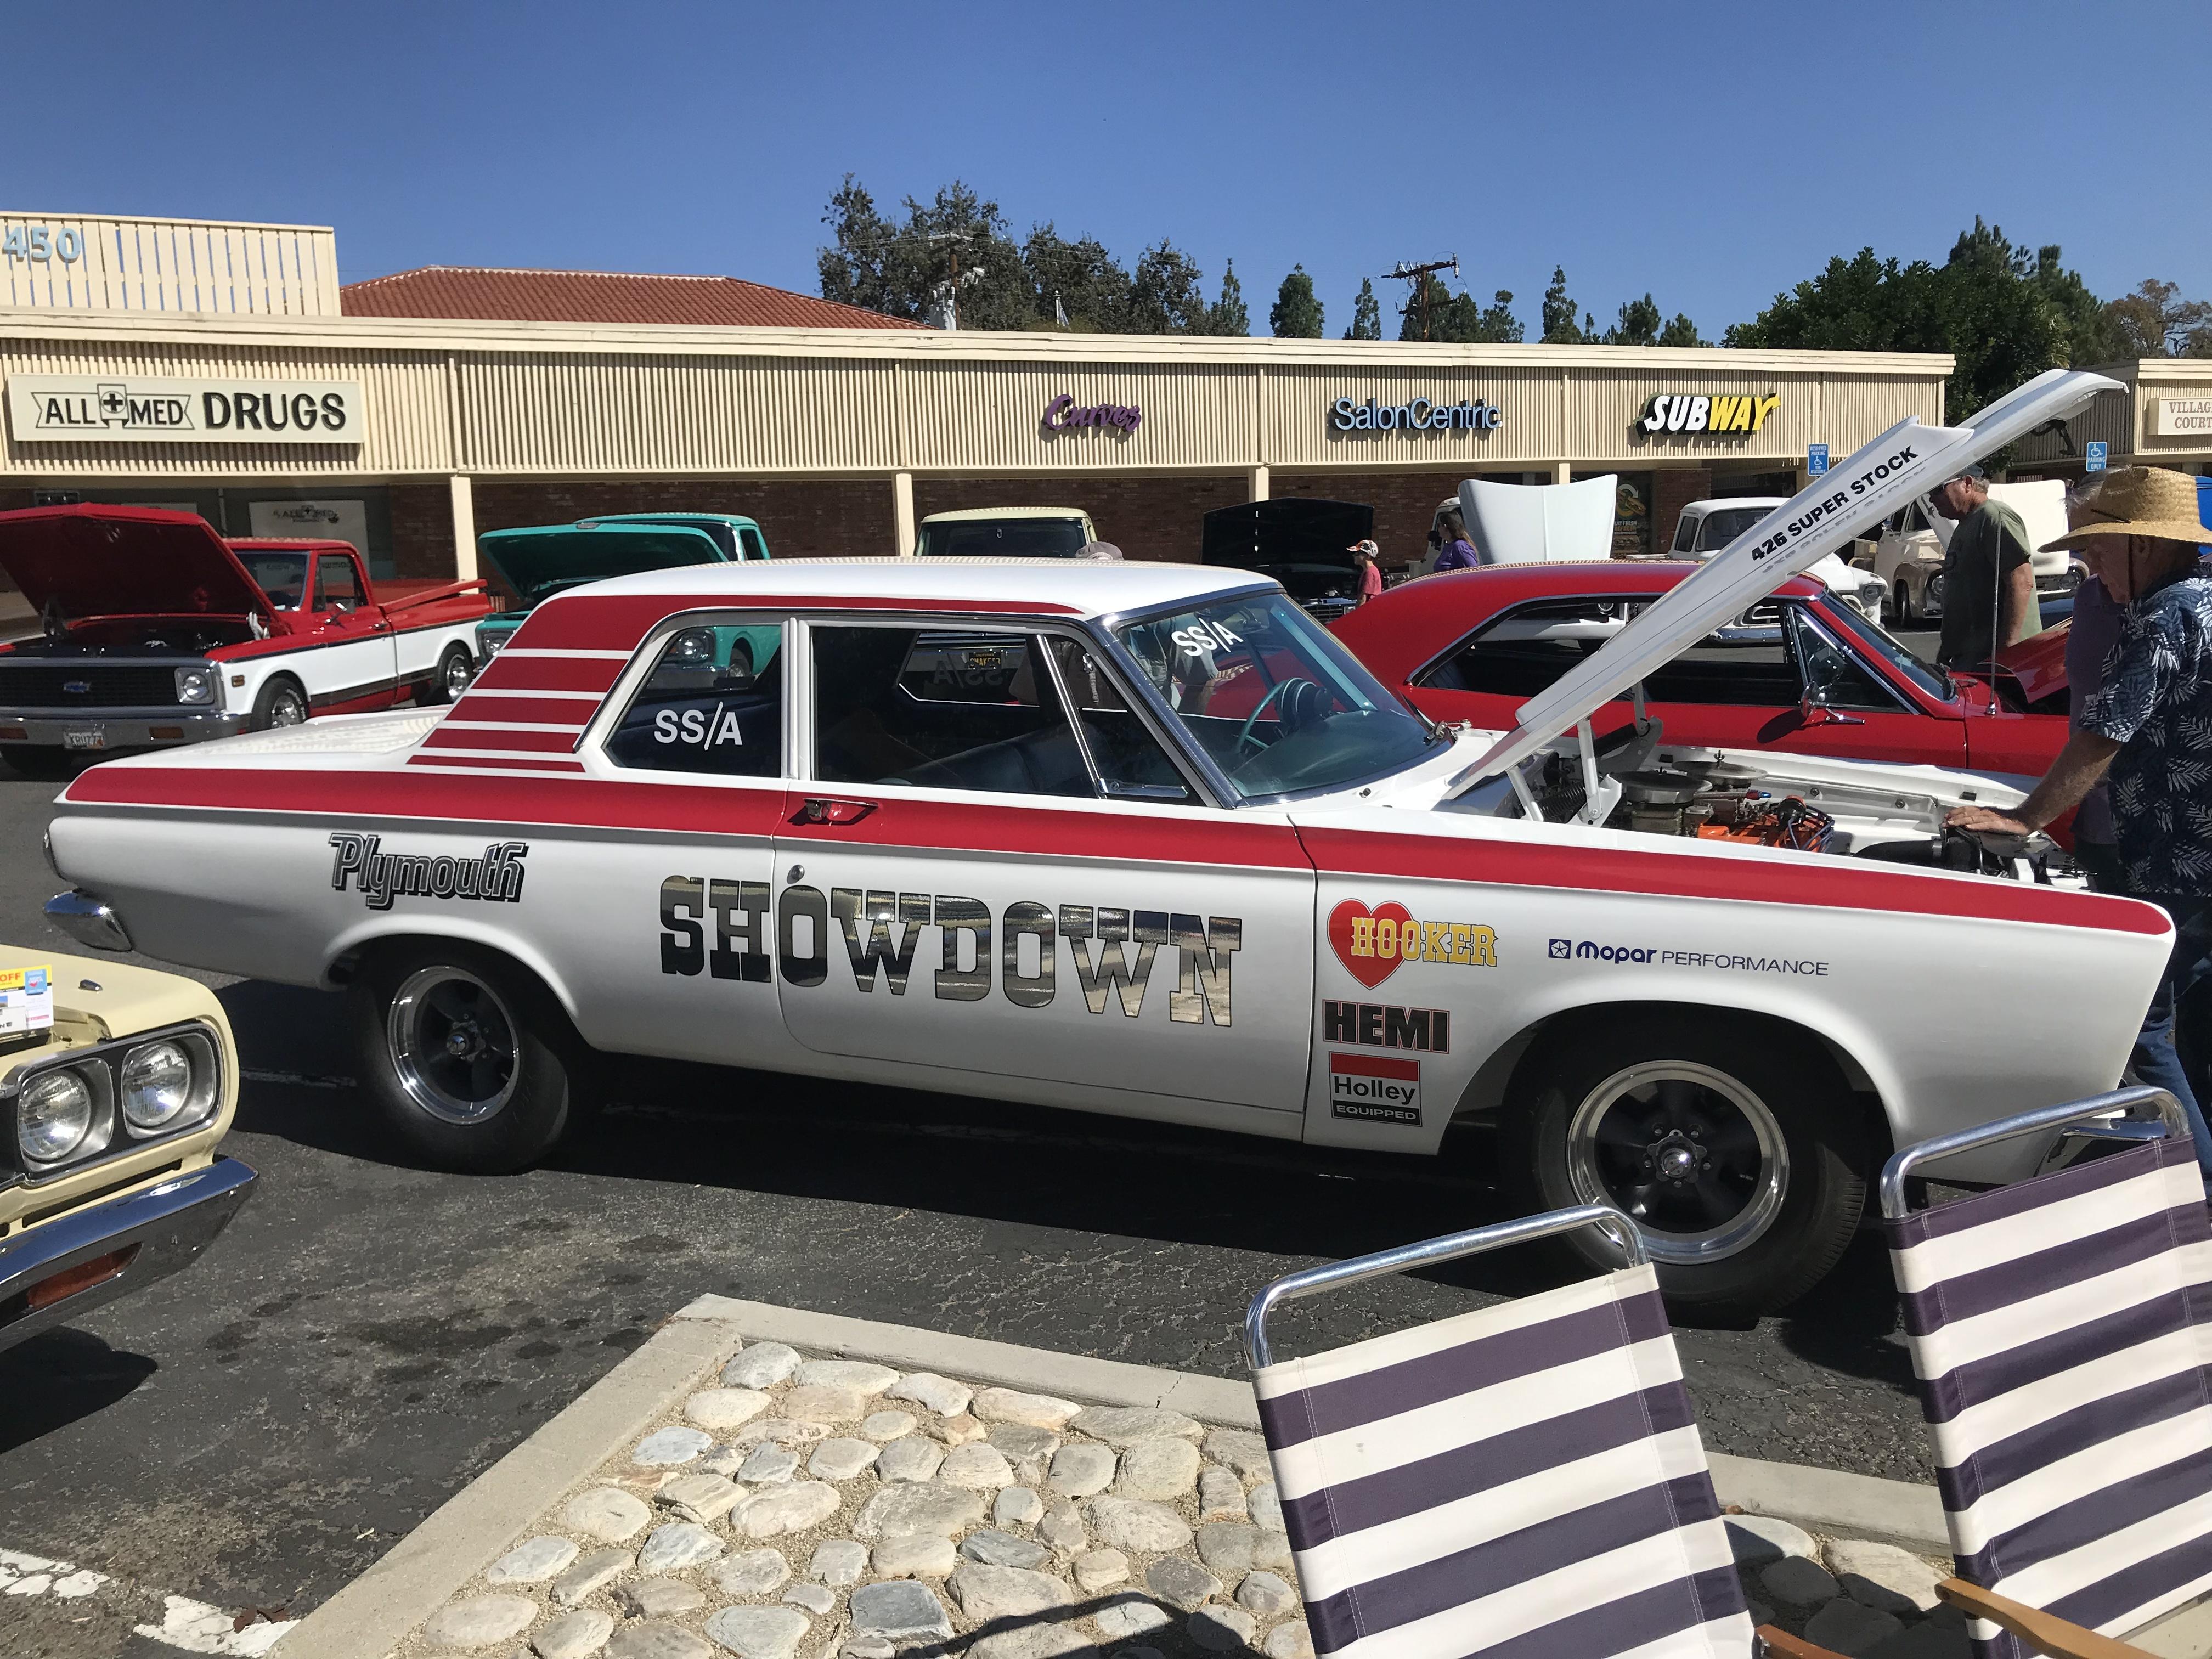
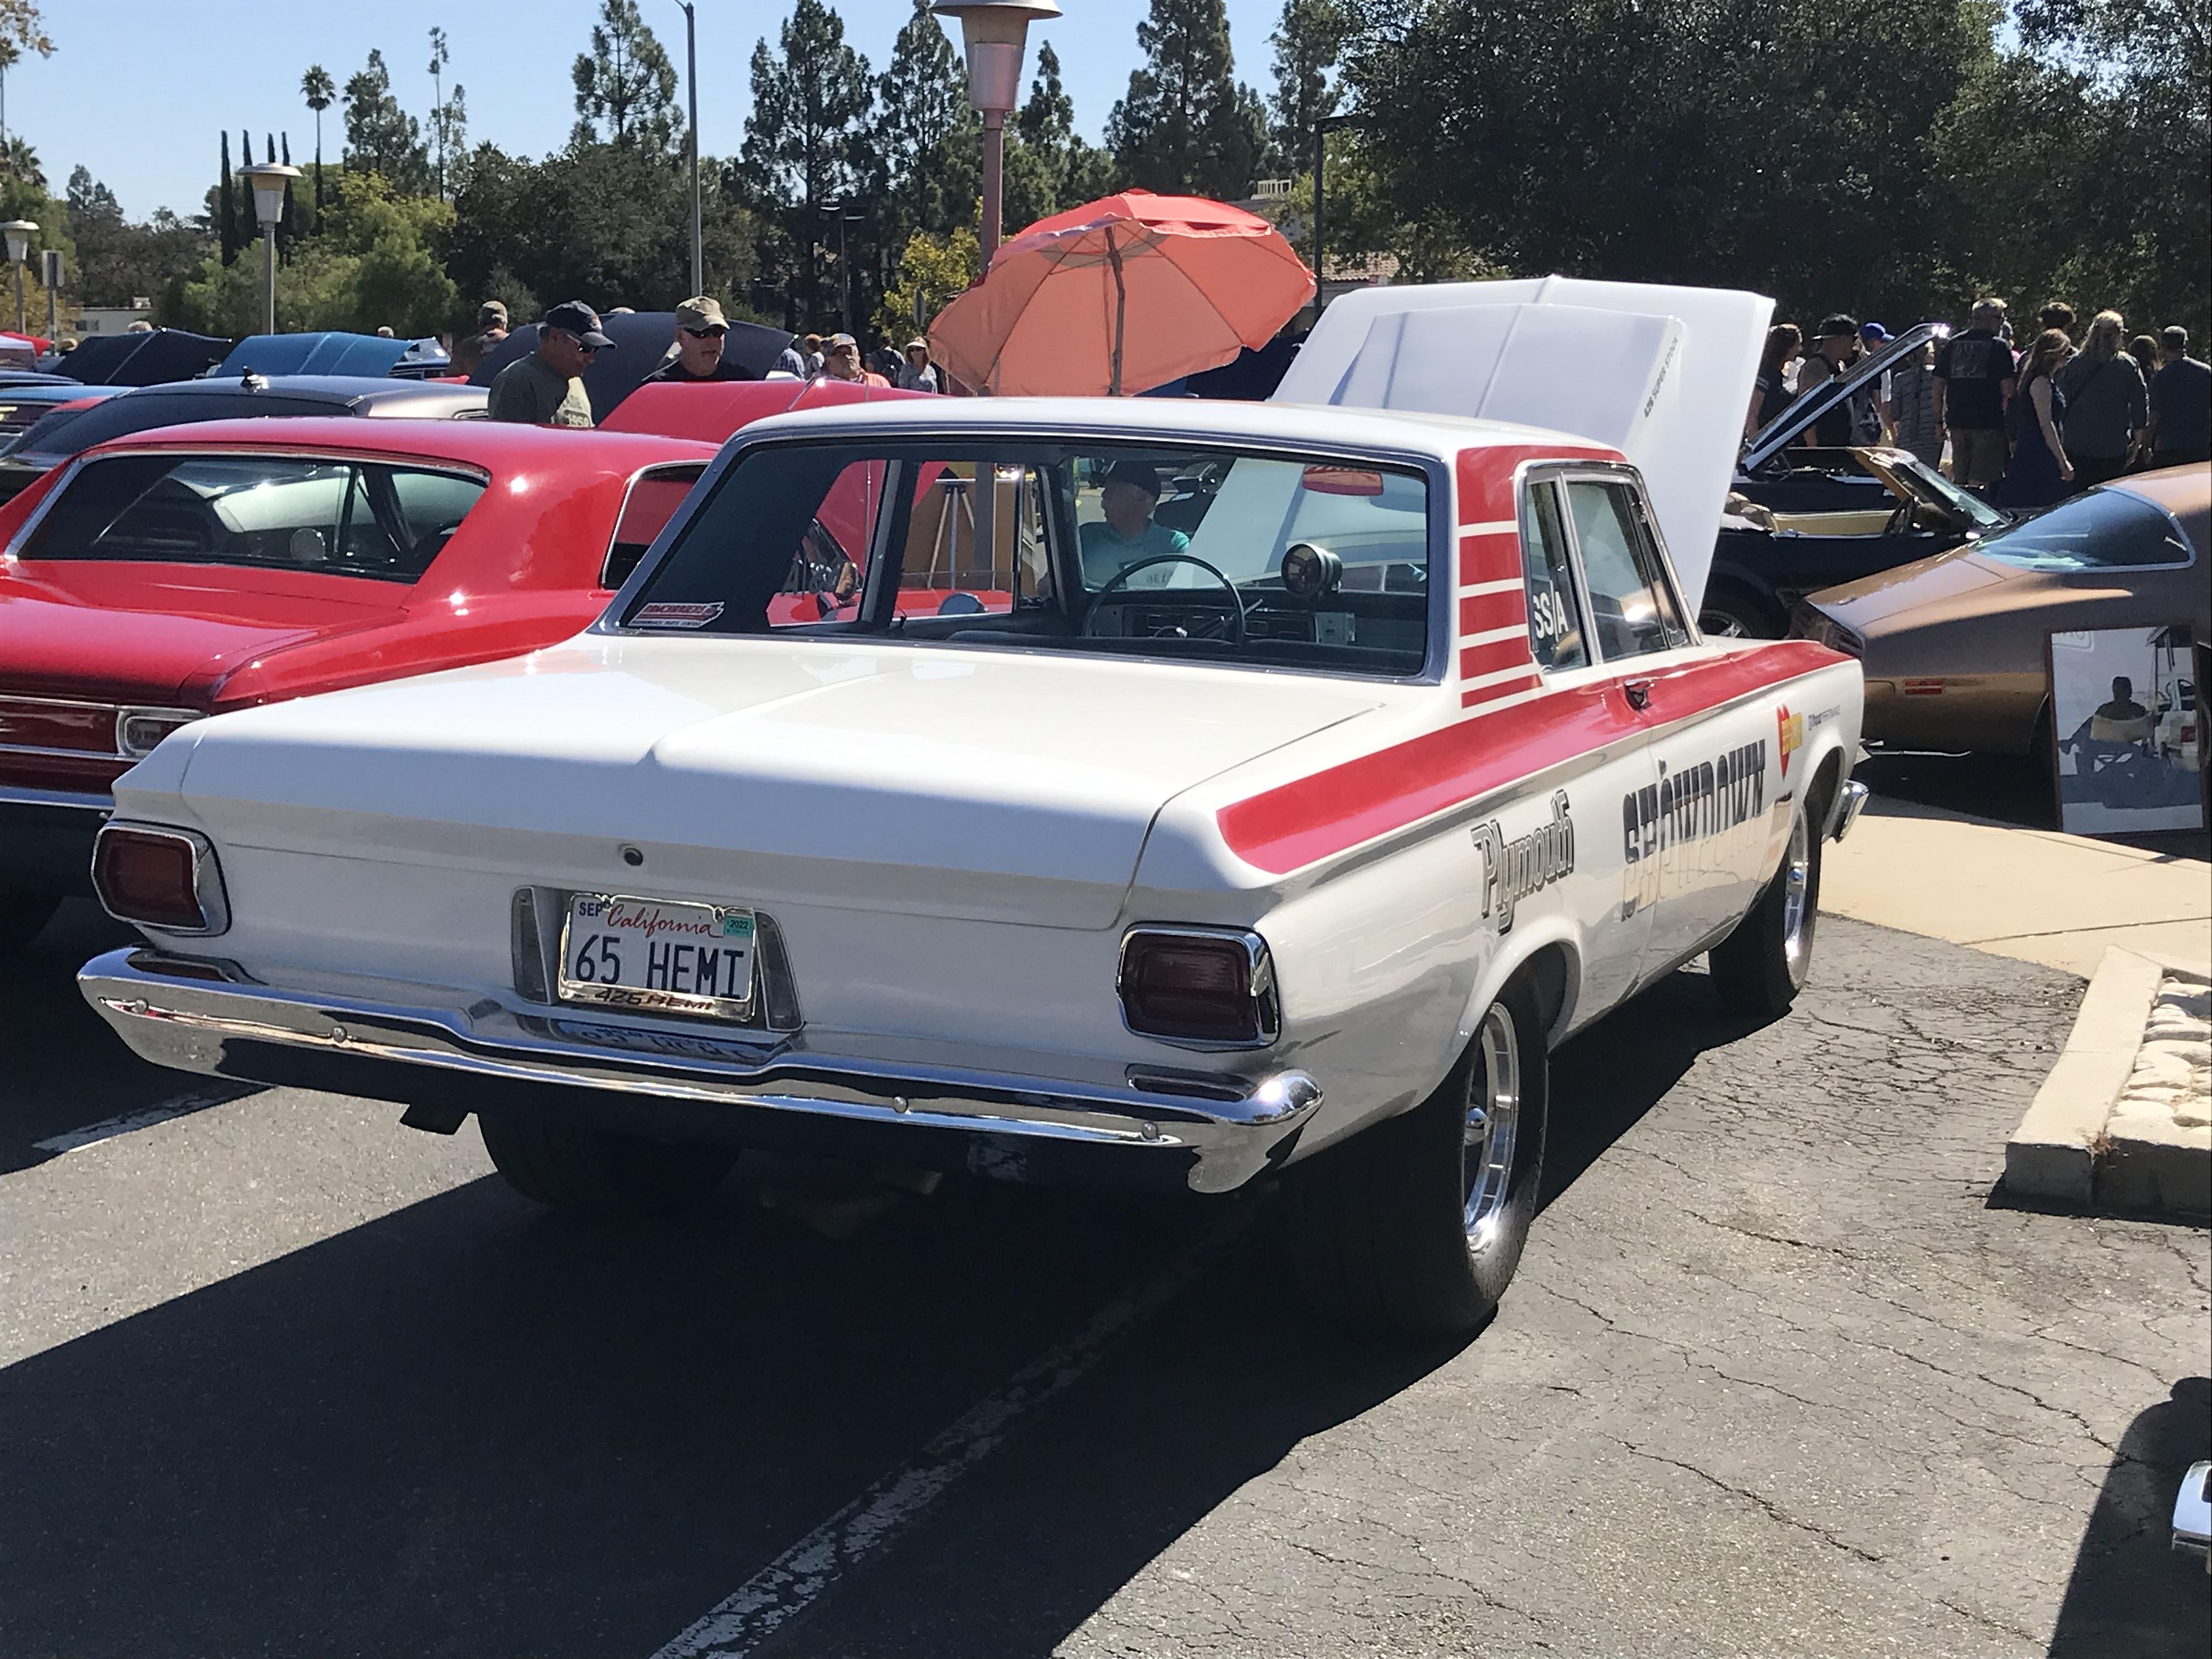
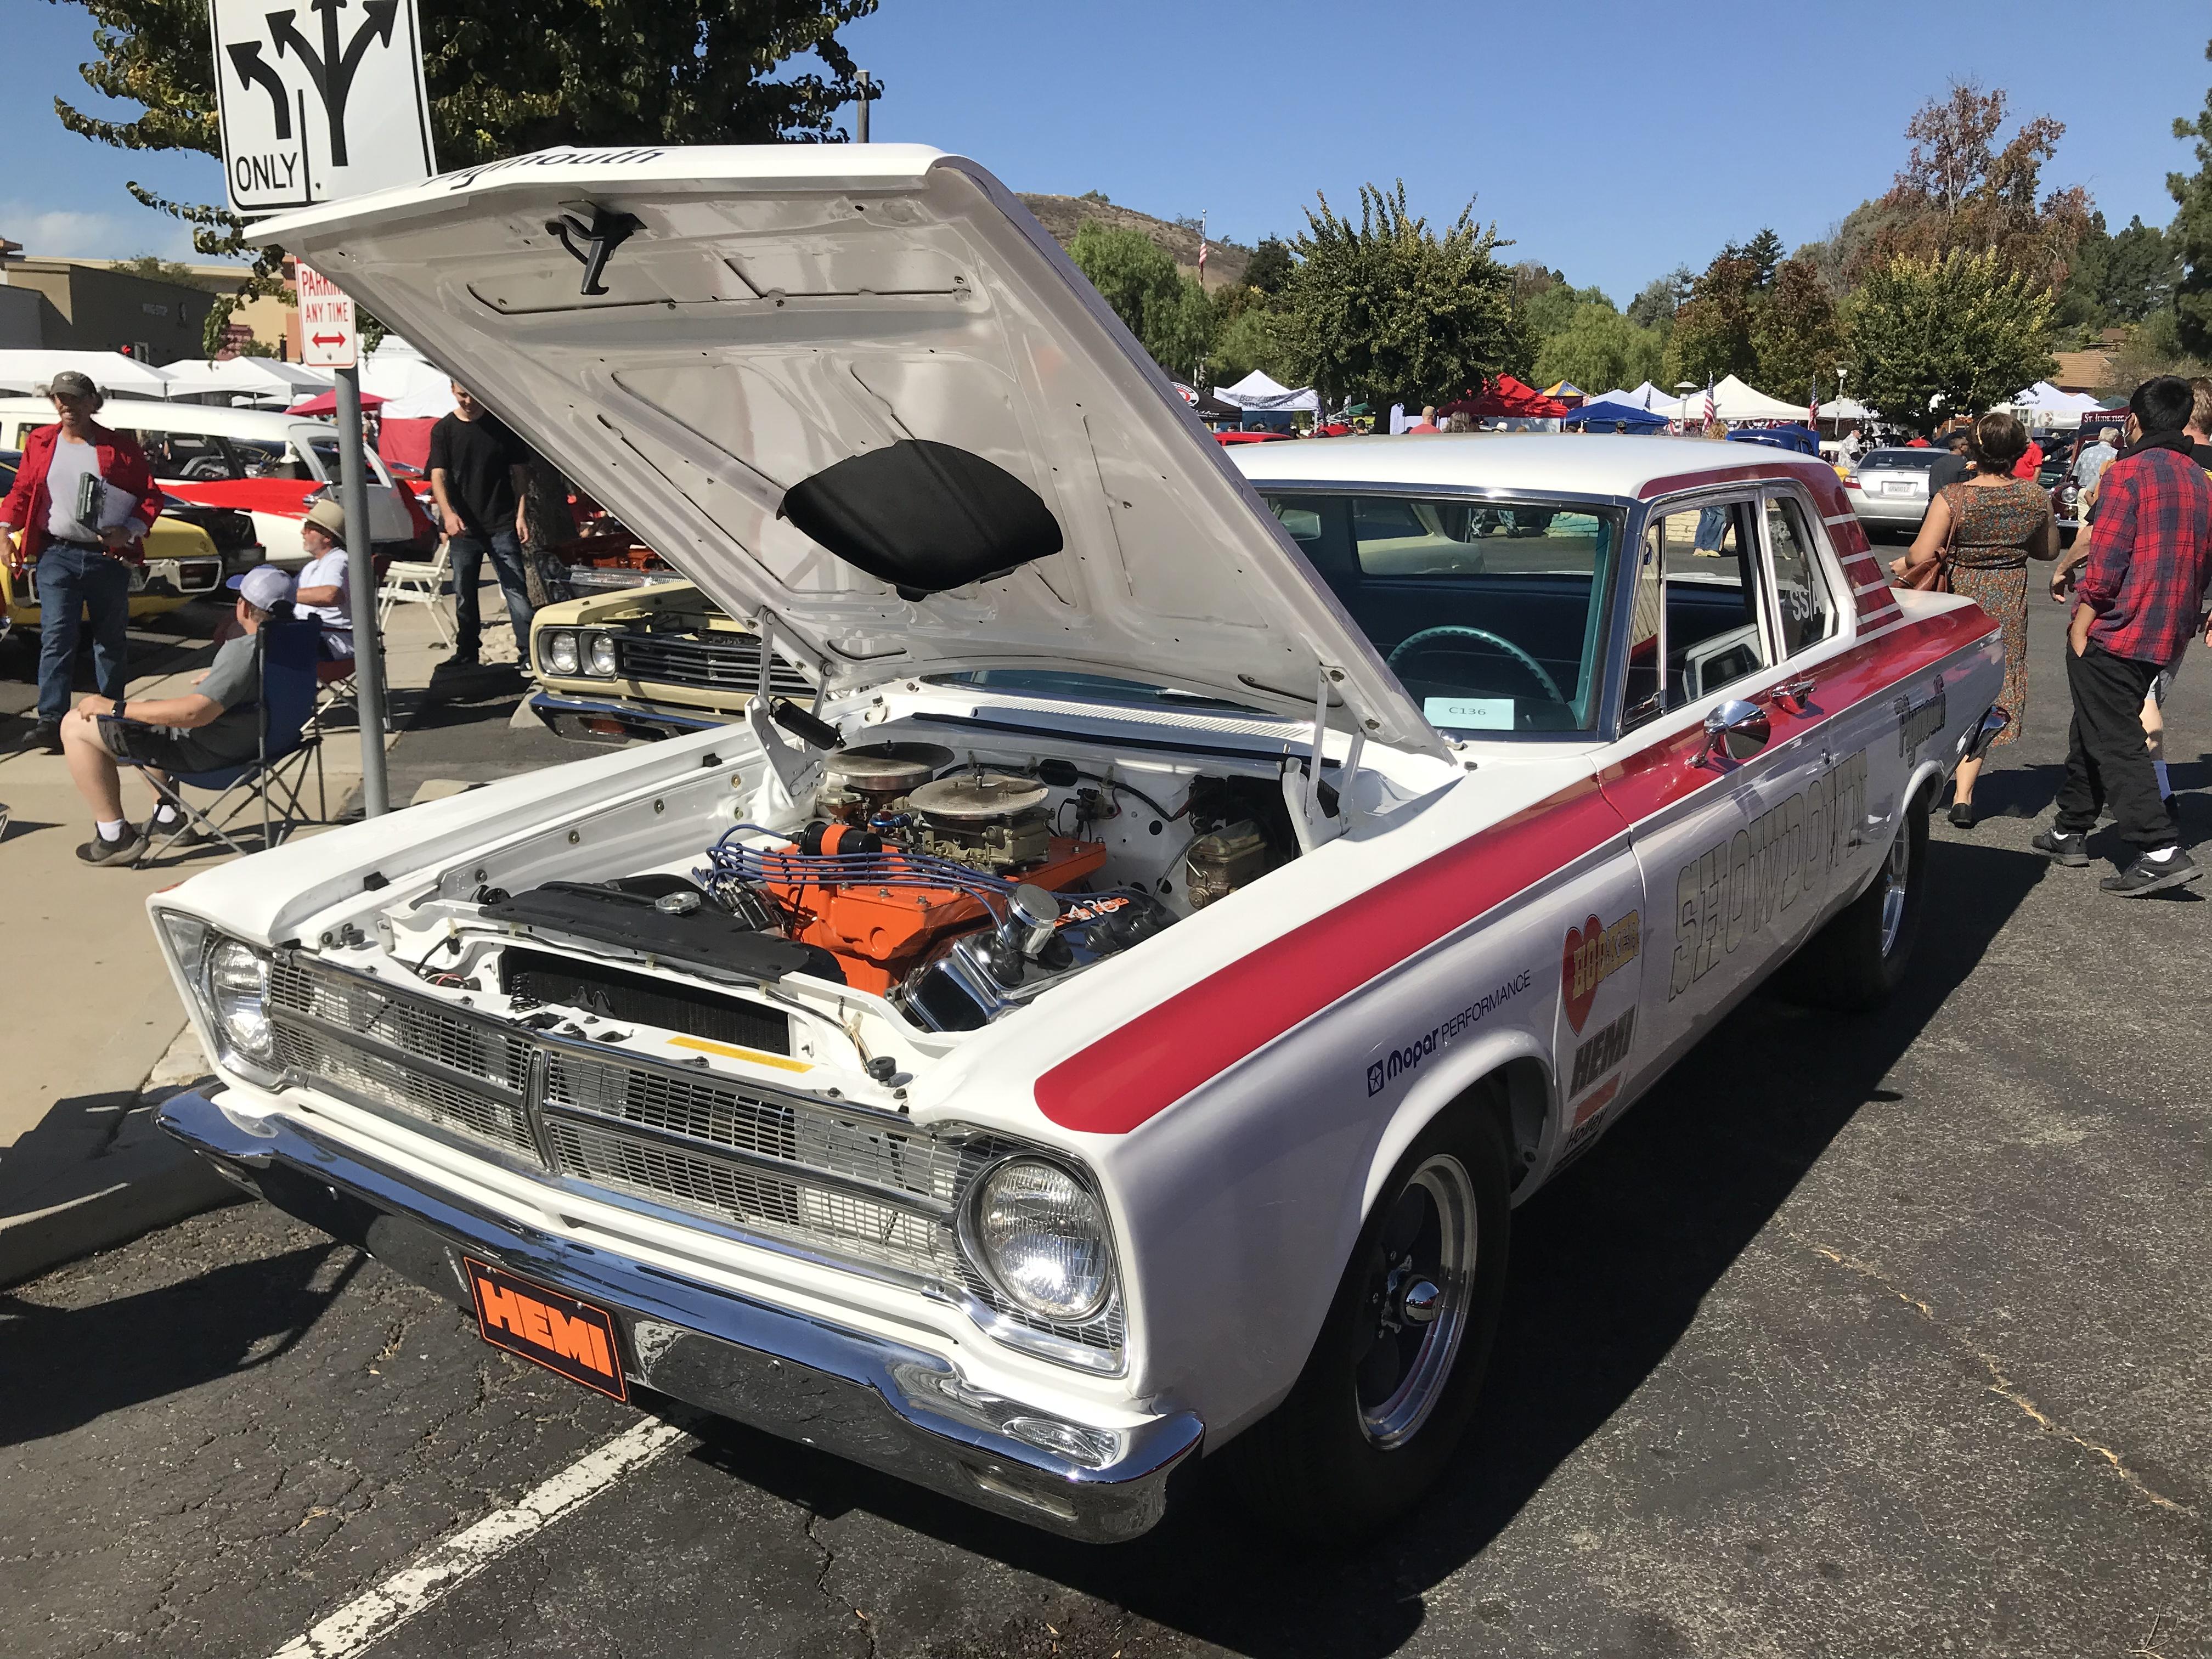
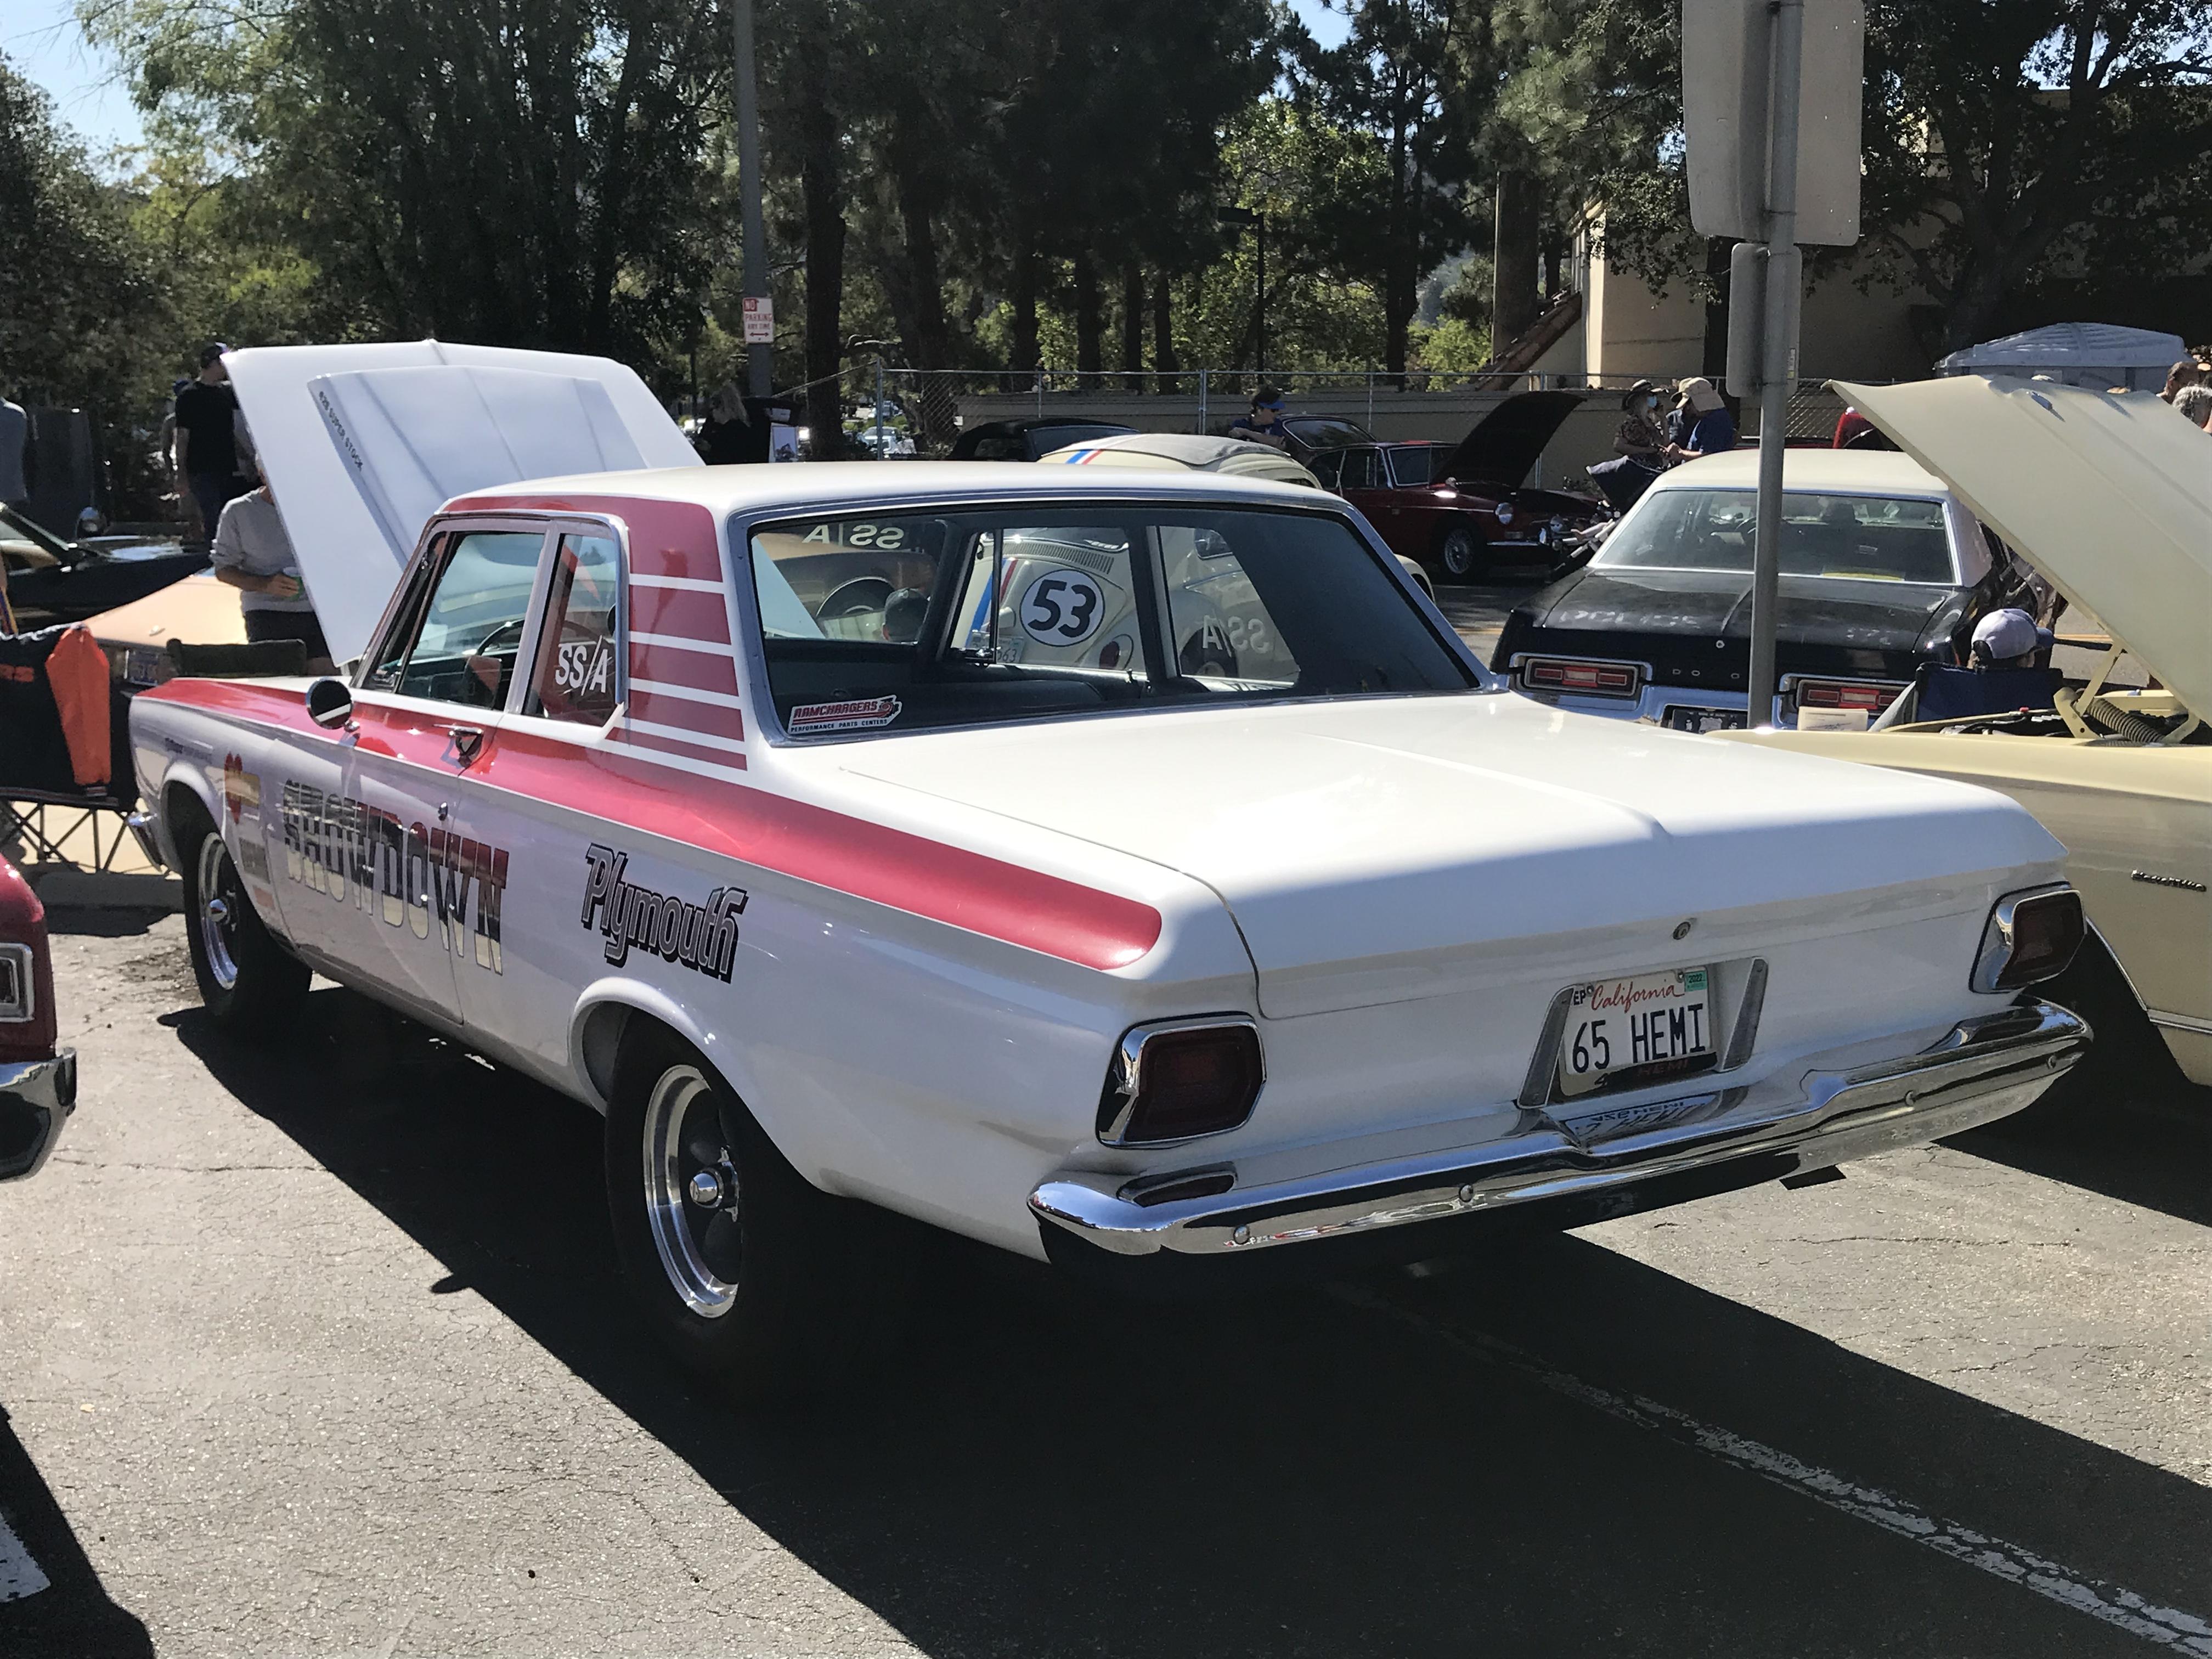
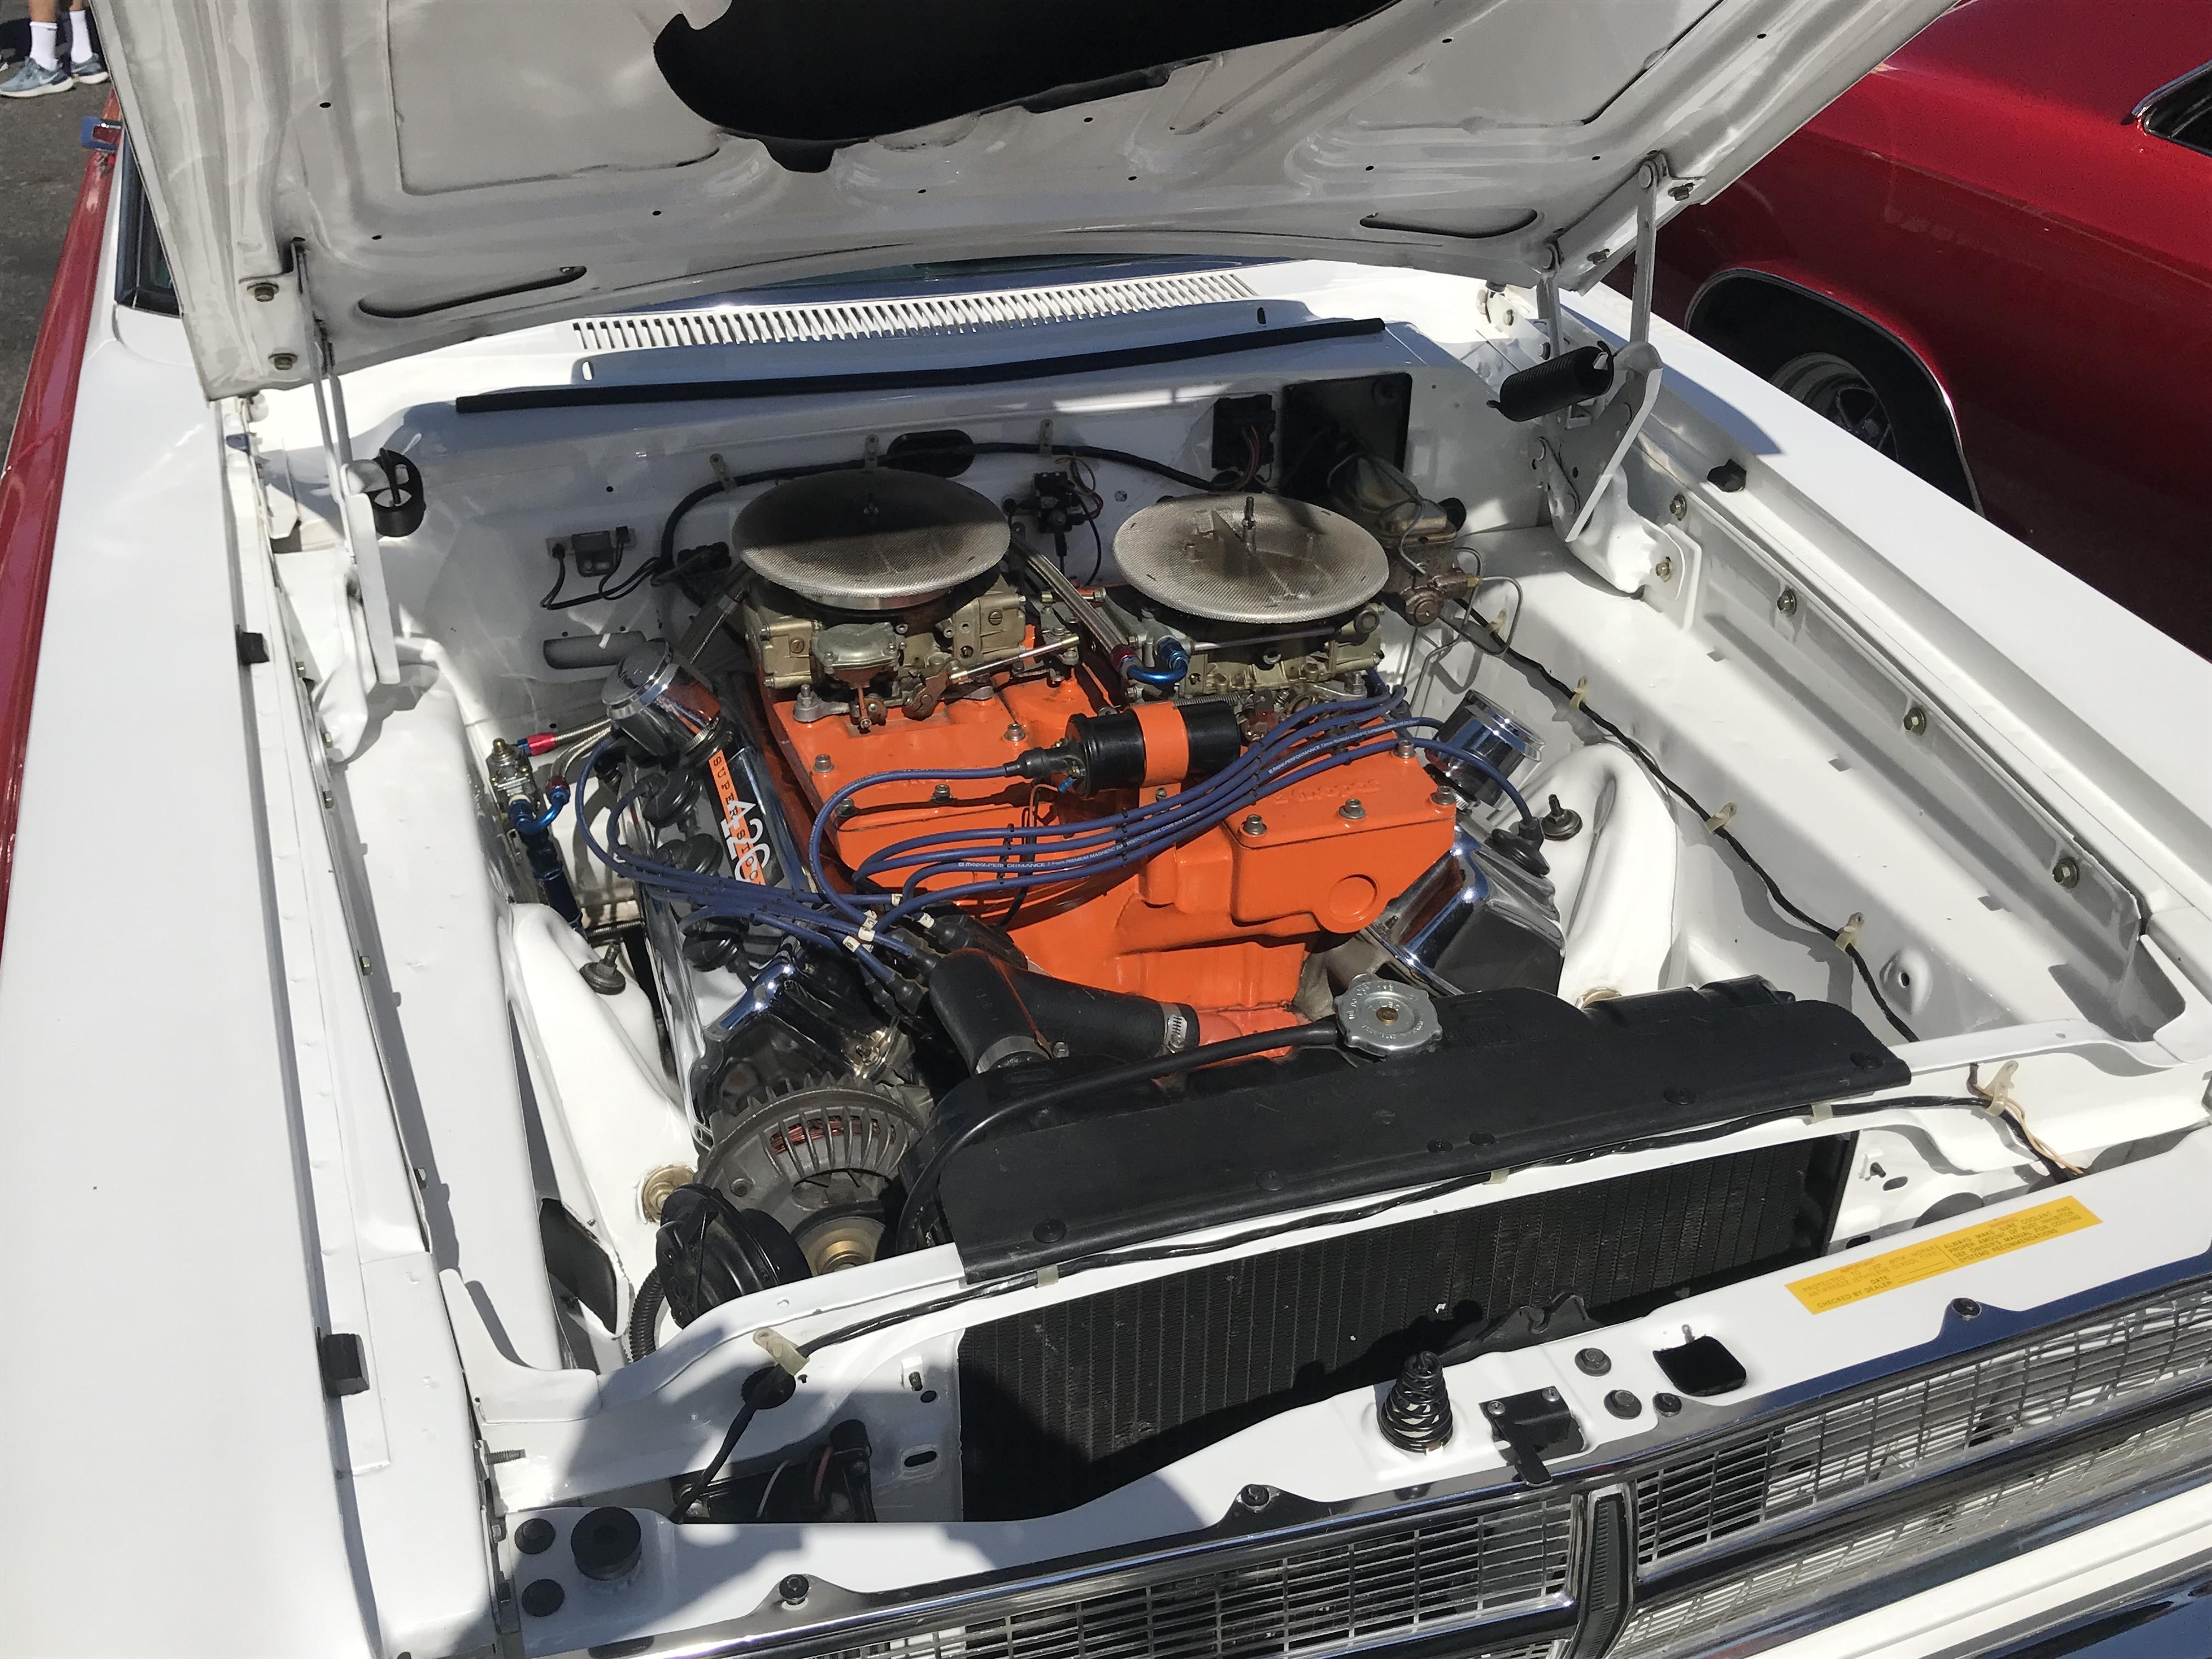
Love-love-love this ‘65 Plymouth Belvedere 426 Hemi SS/A. I’ve had a fetish for these since the 7th grade and have built a few 1/25 models of these in my old age from the excellent Moebius kit. Think I’ll build some more ?! Wish I could have stayed at this show long enough to hear this beast fire up.
-
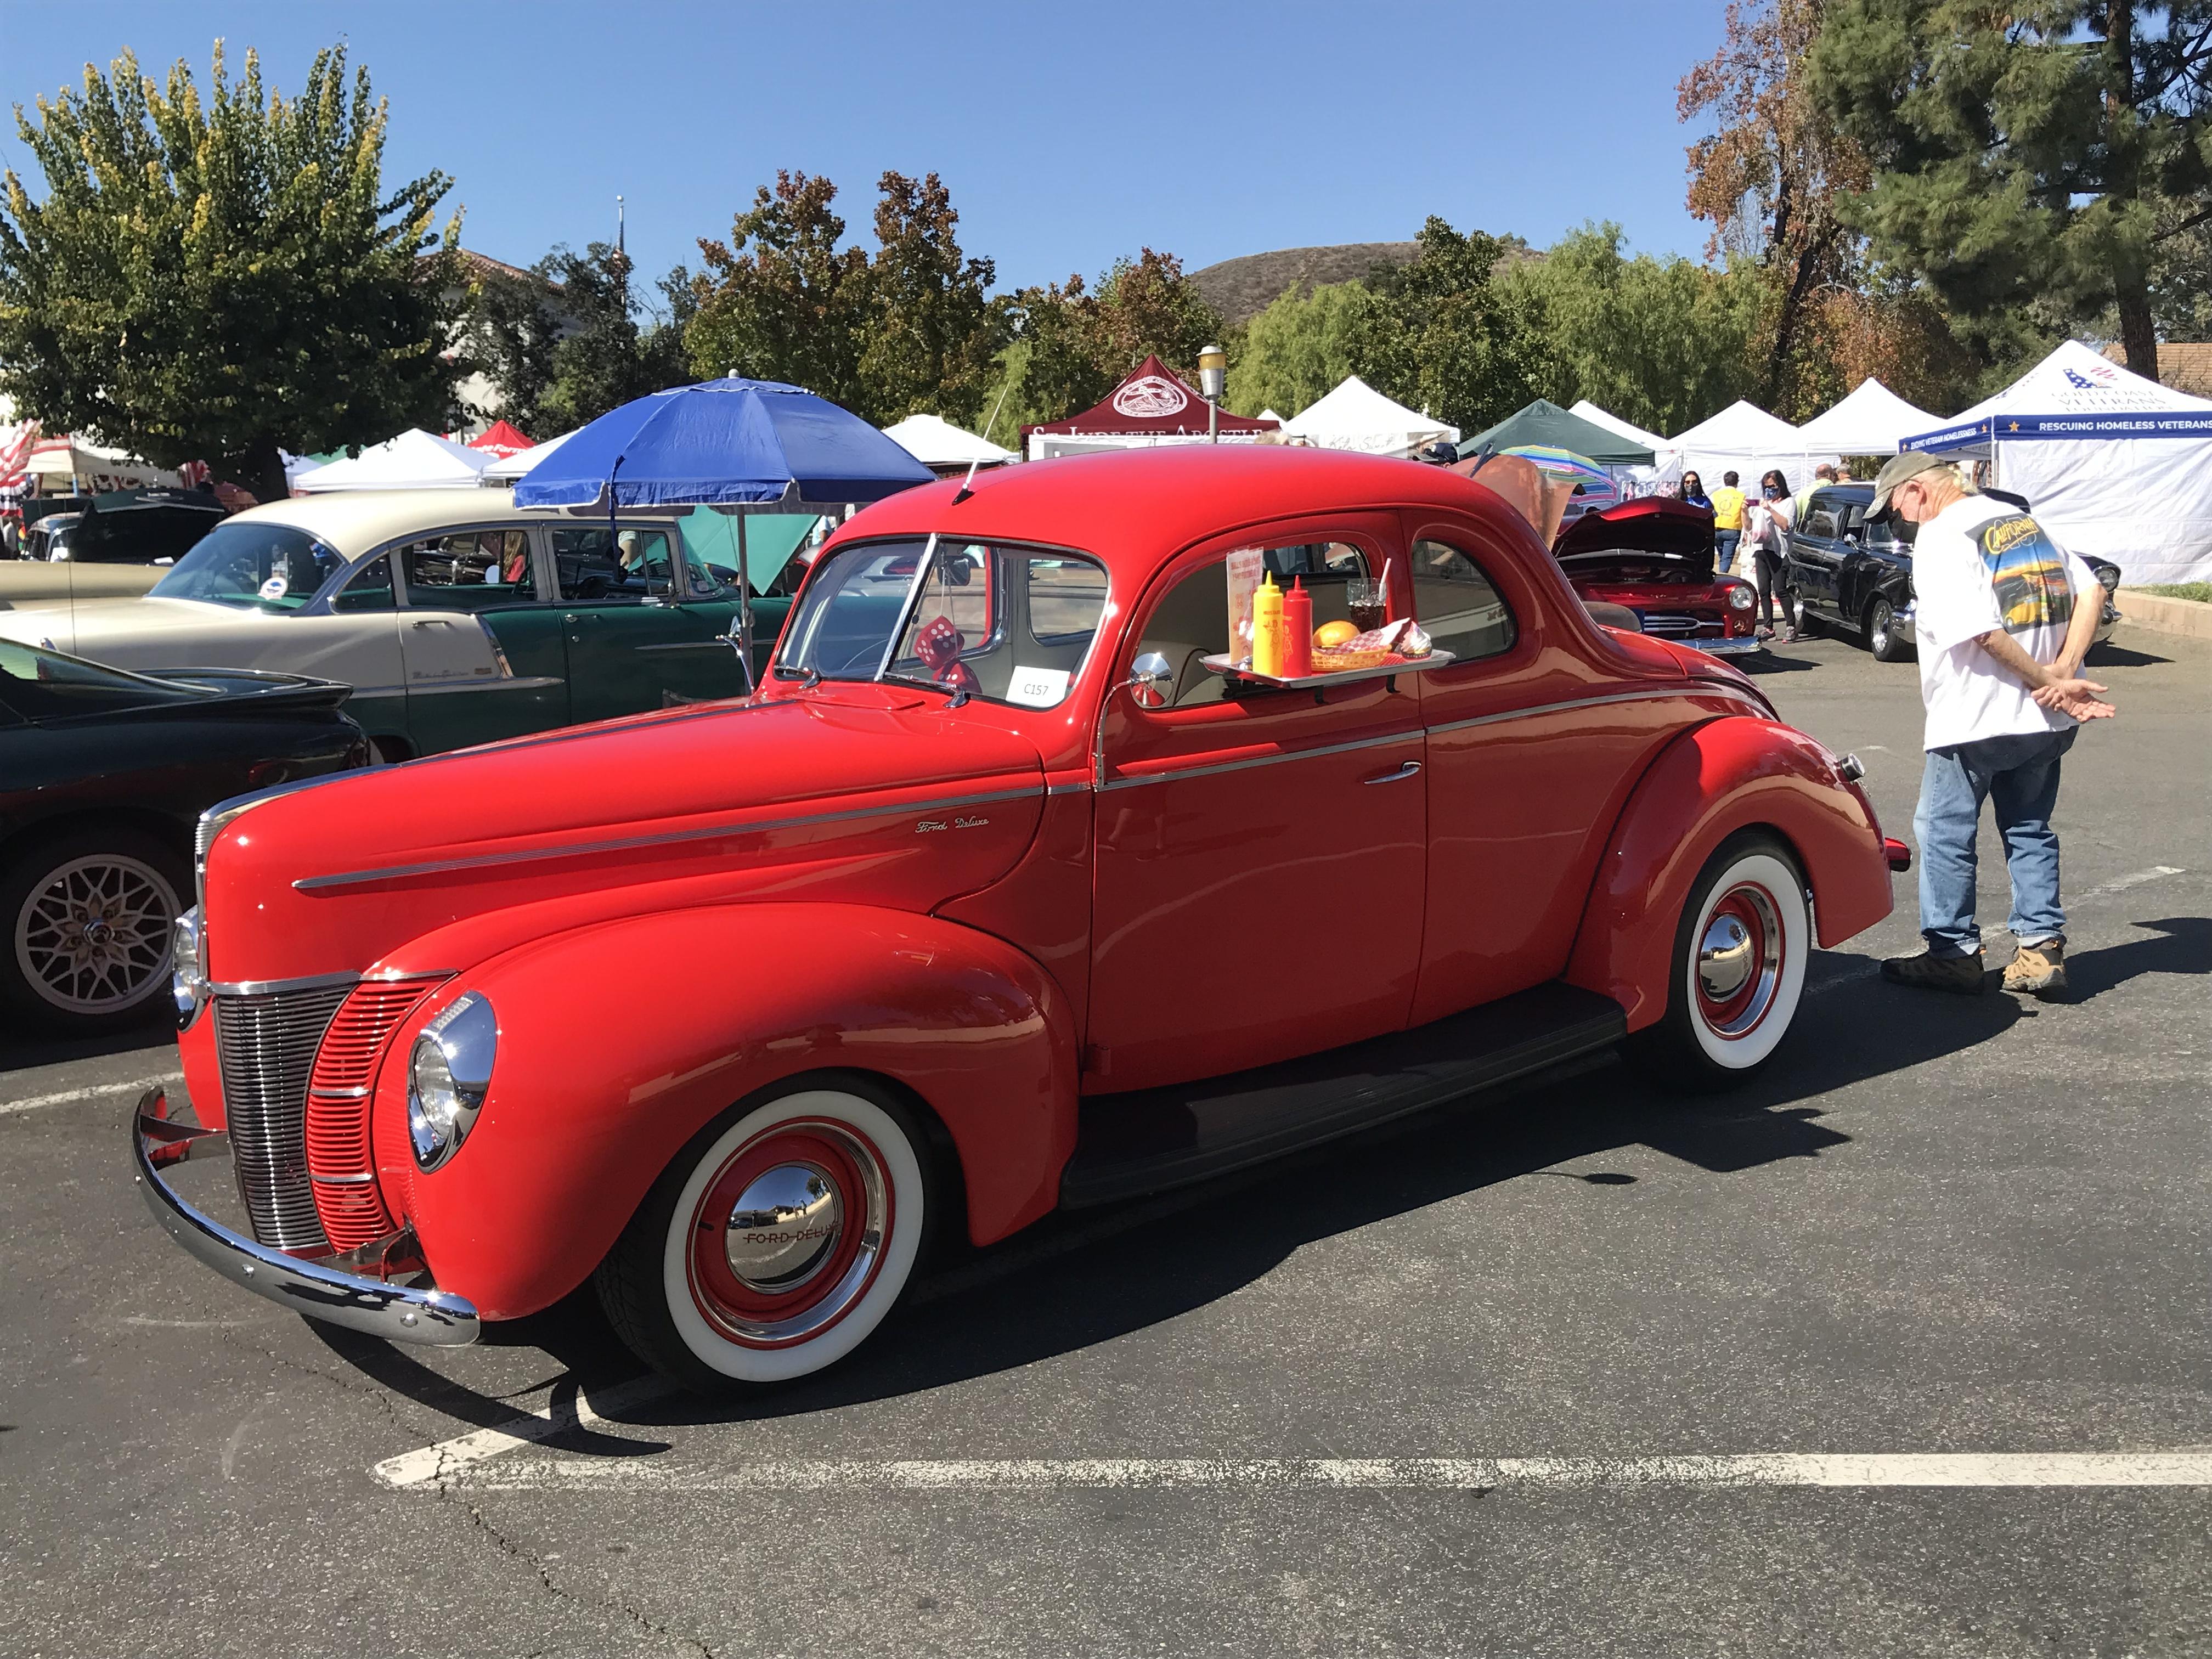
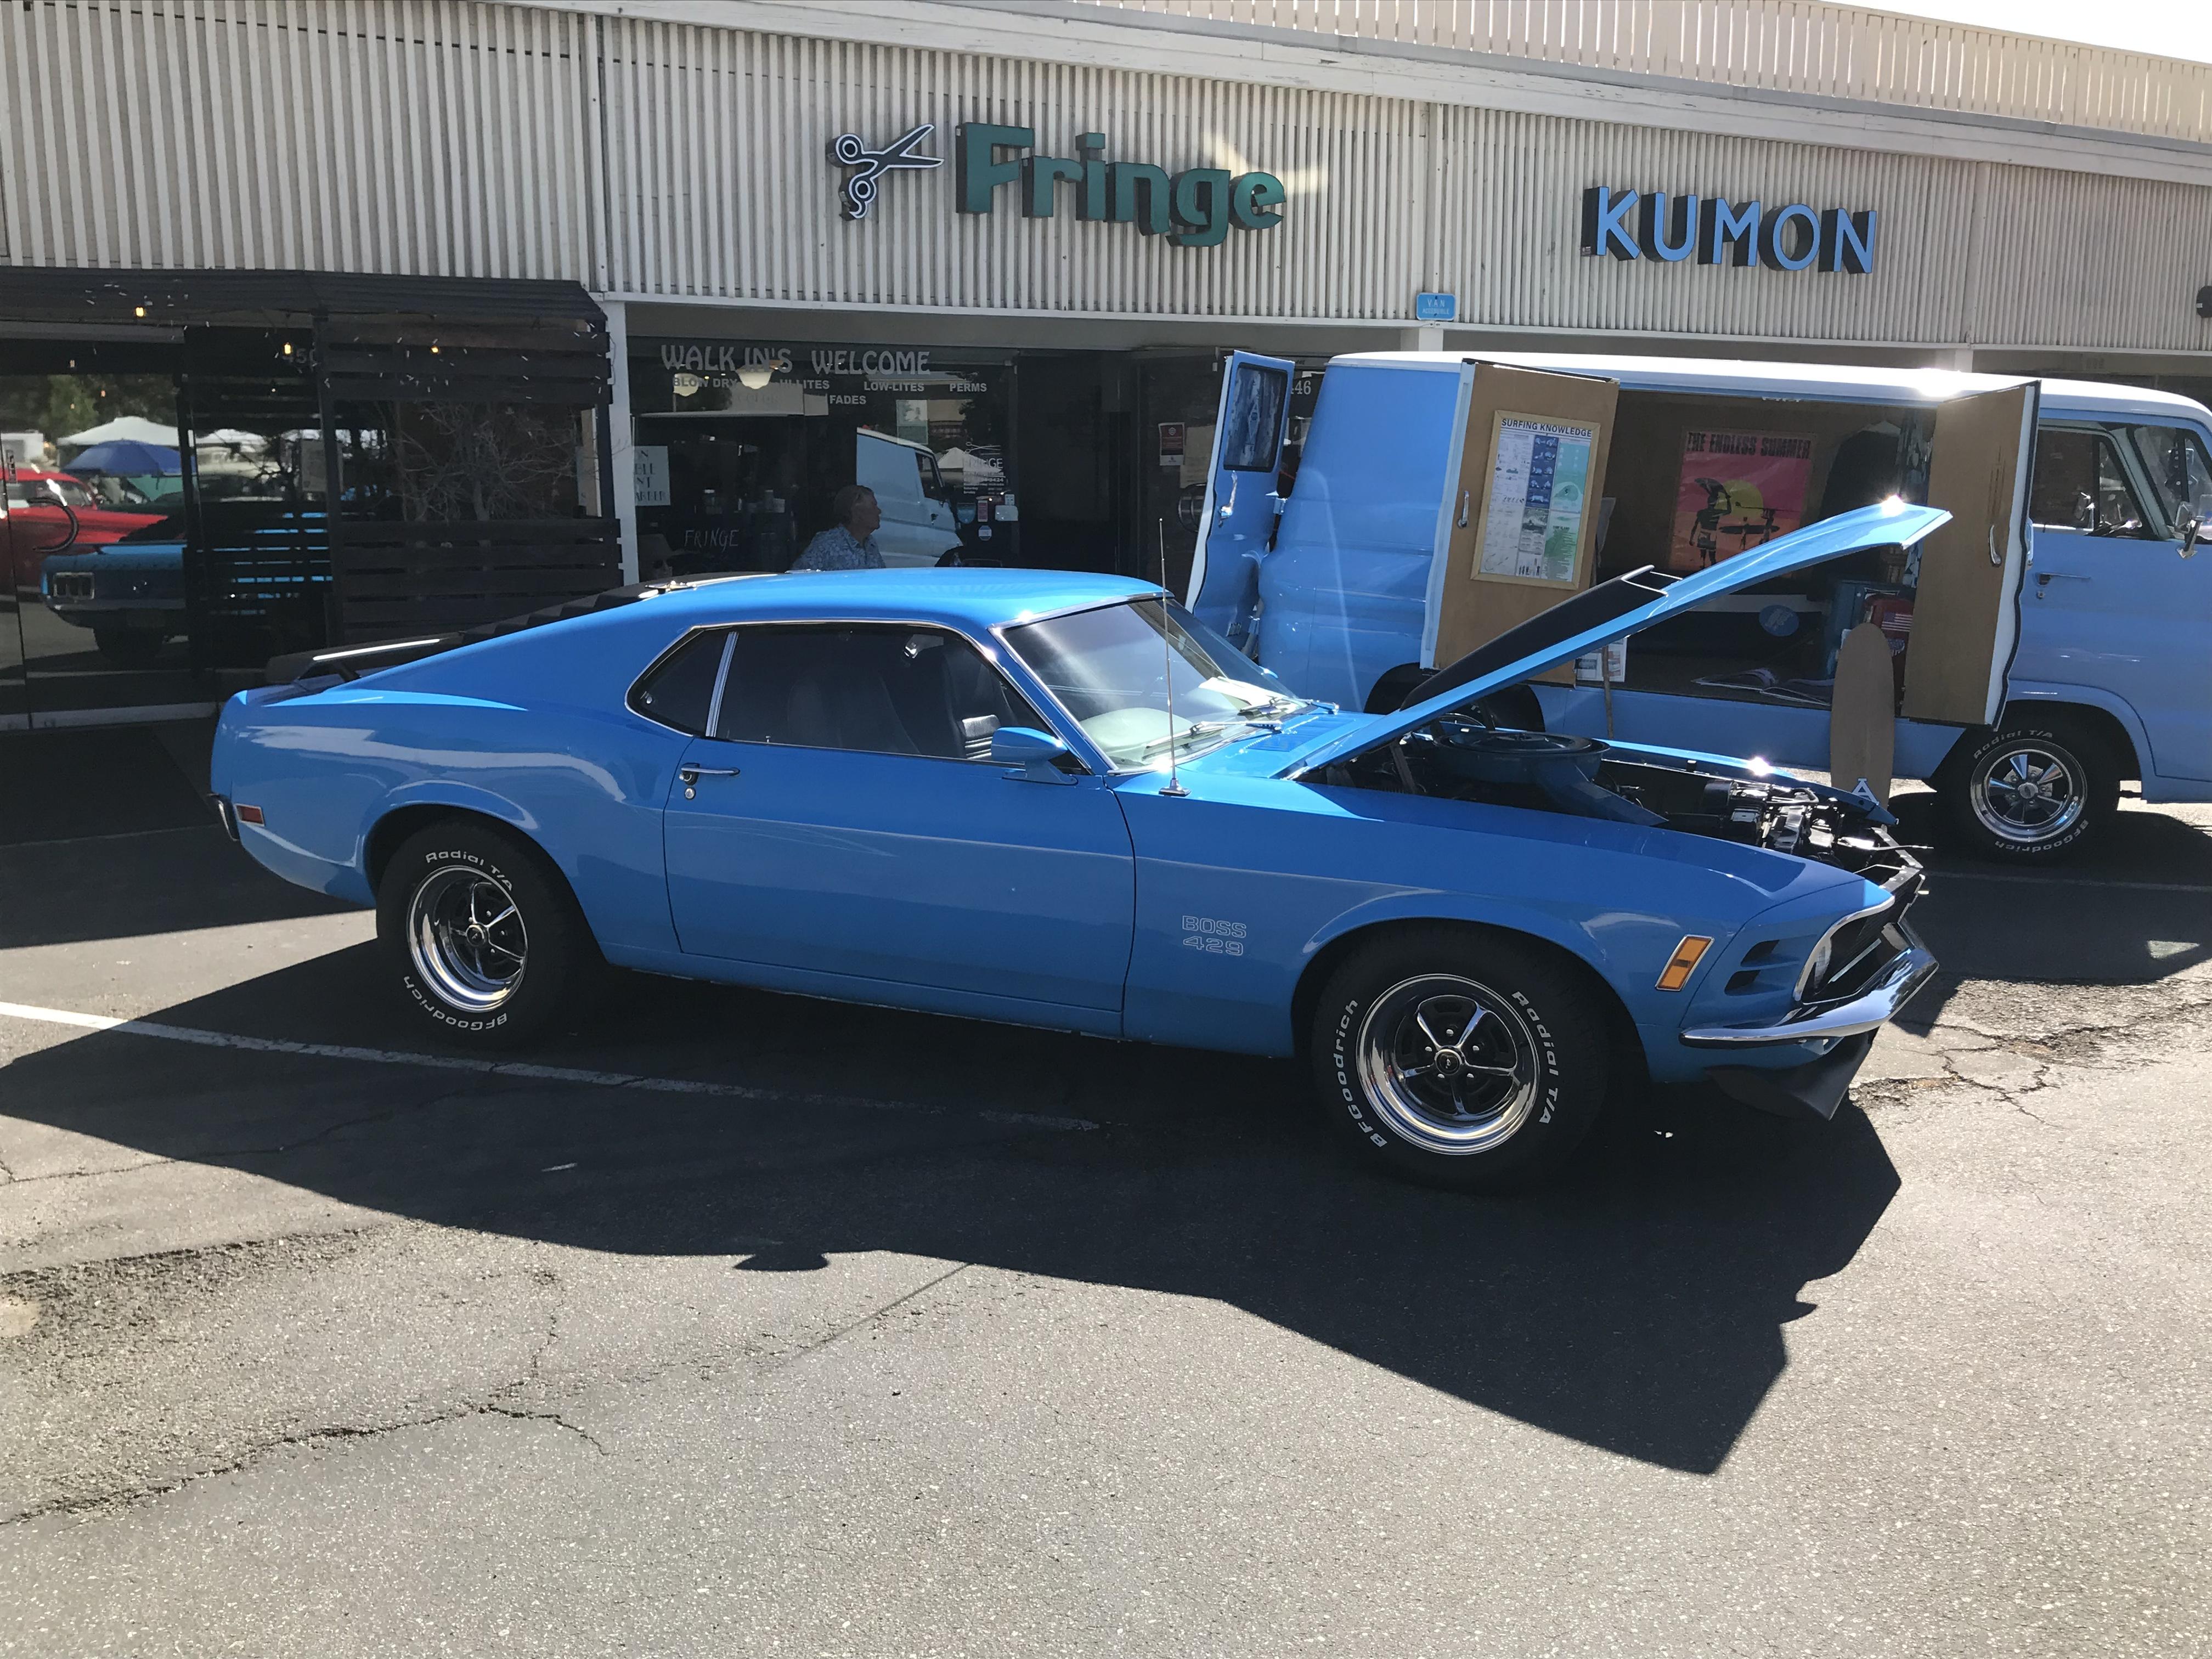
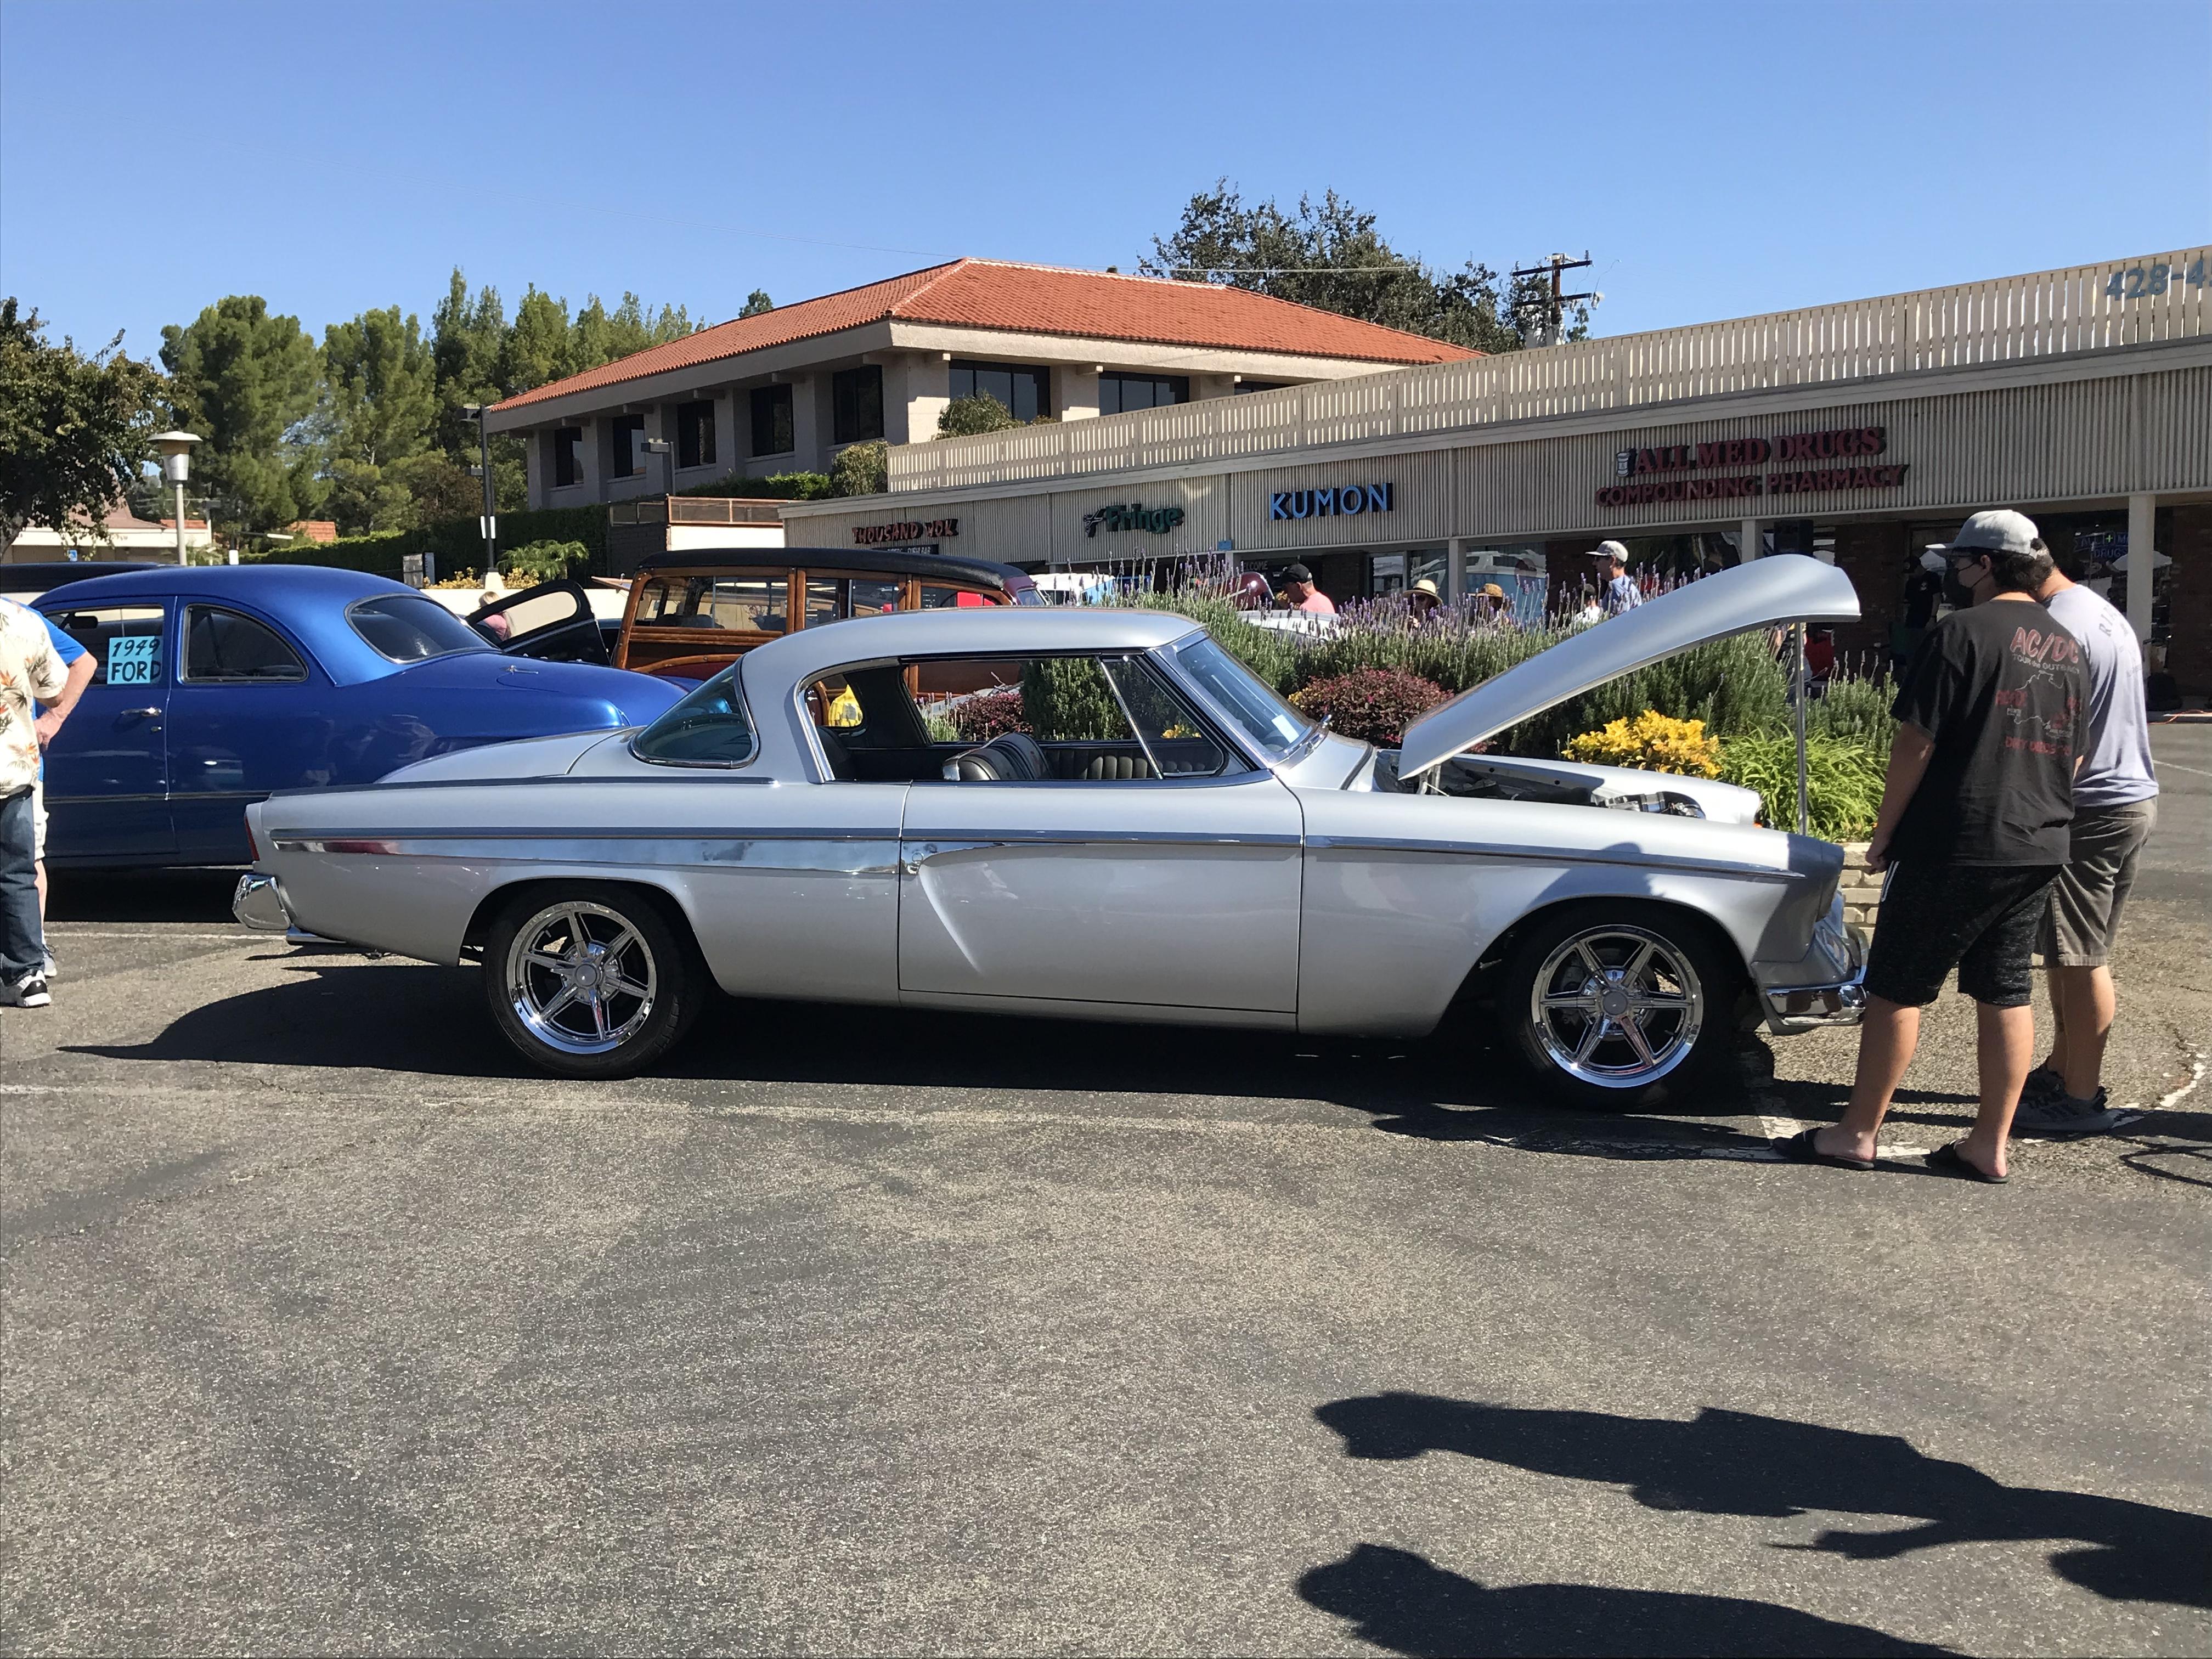
Here’s a few more of my favorites from this same street fair car show,
-
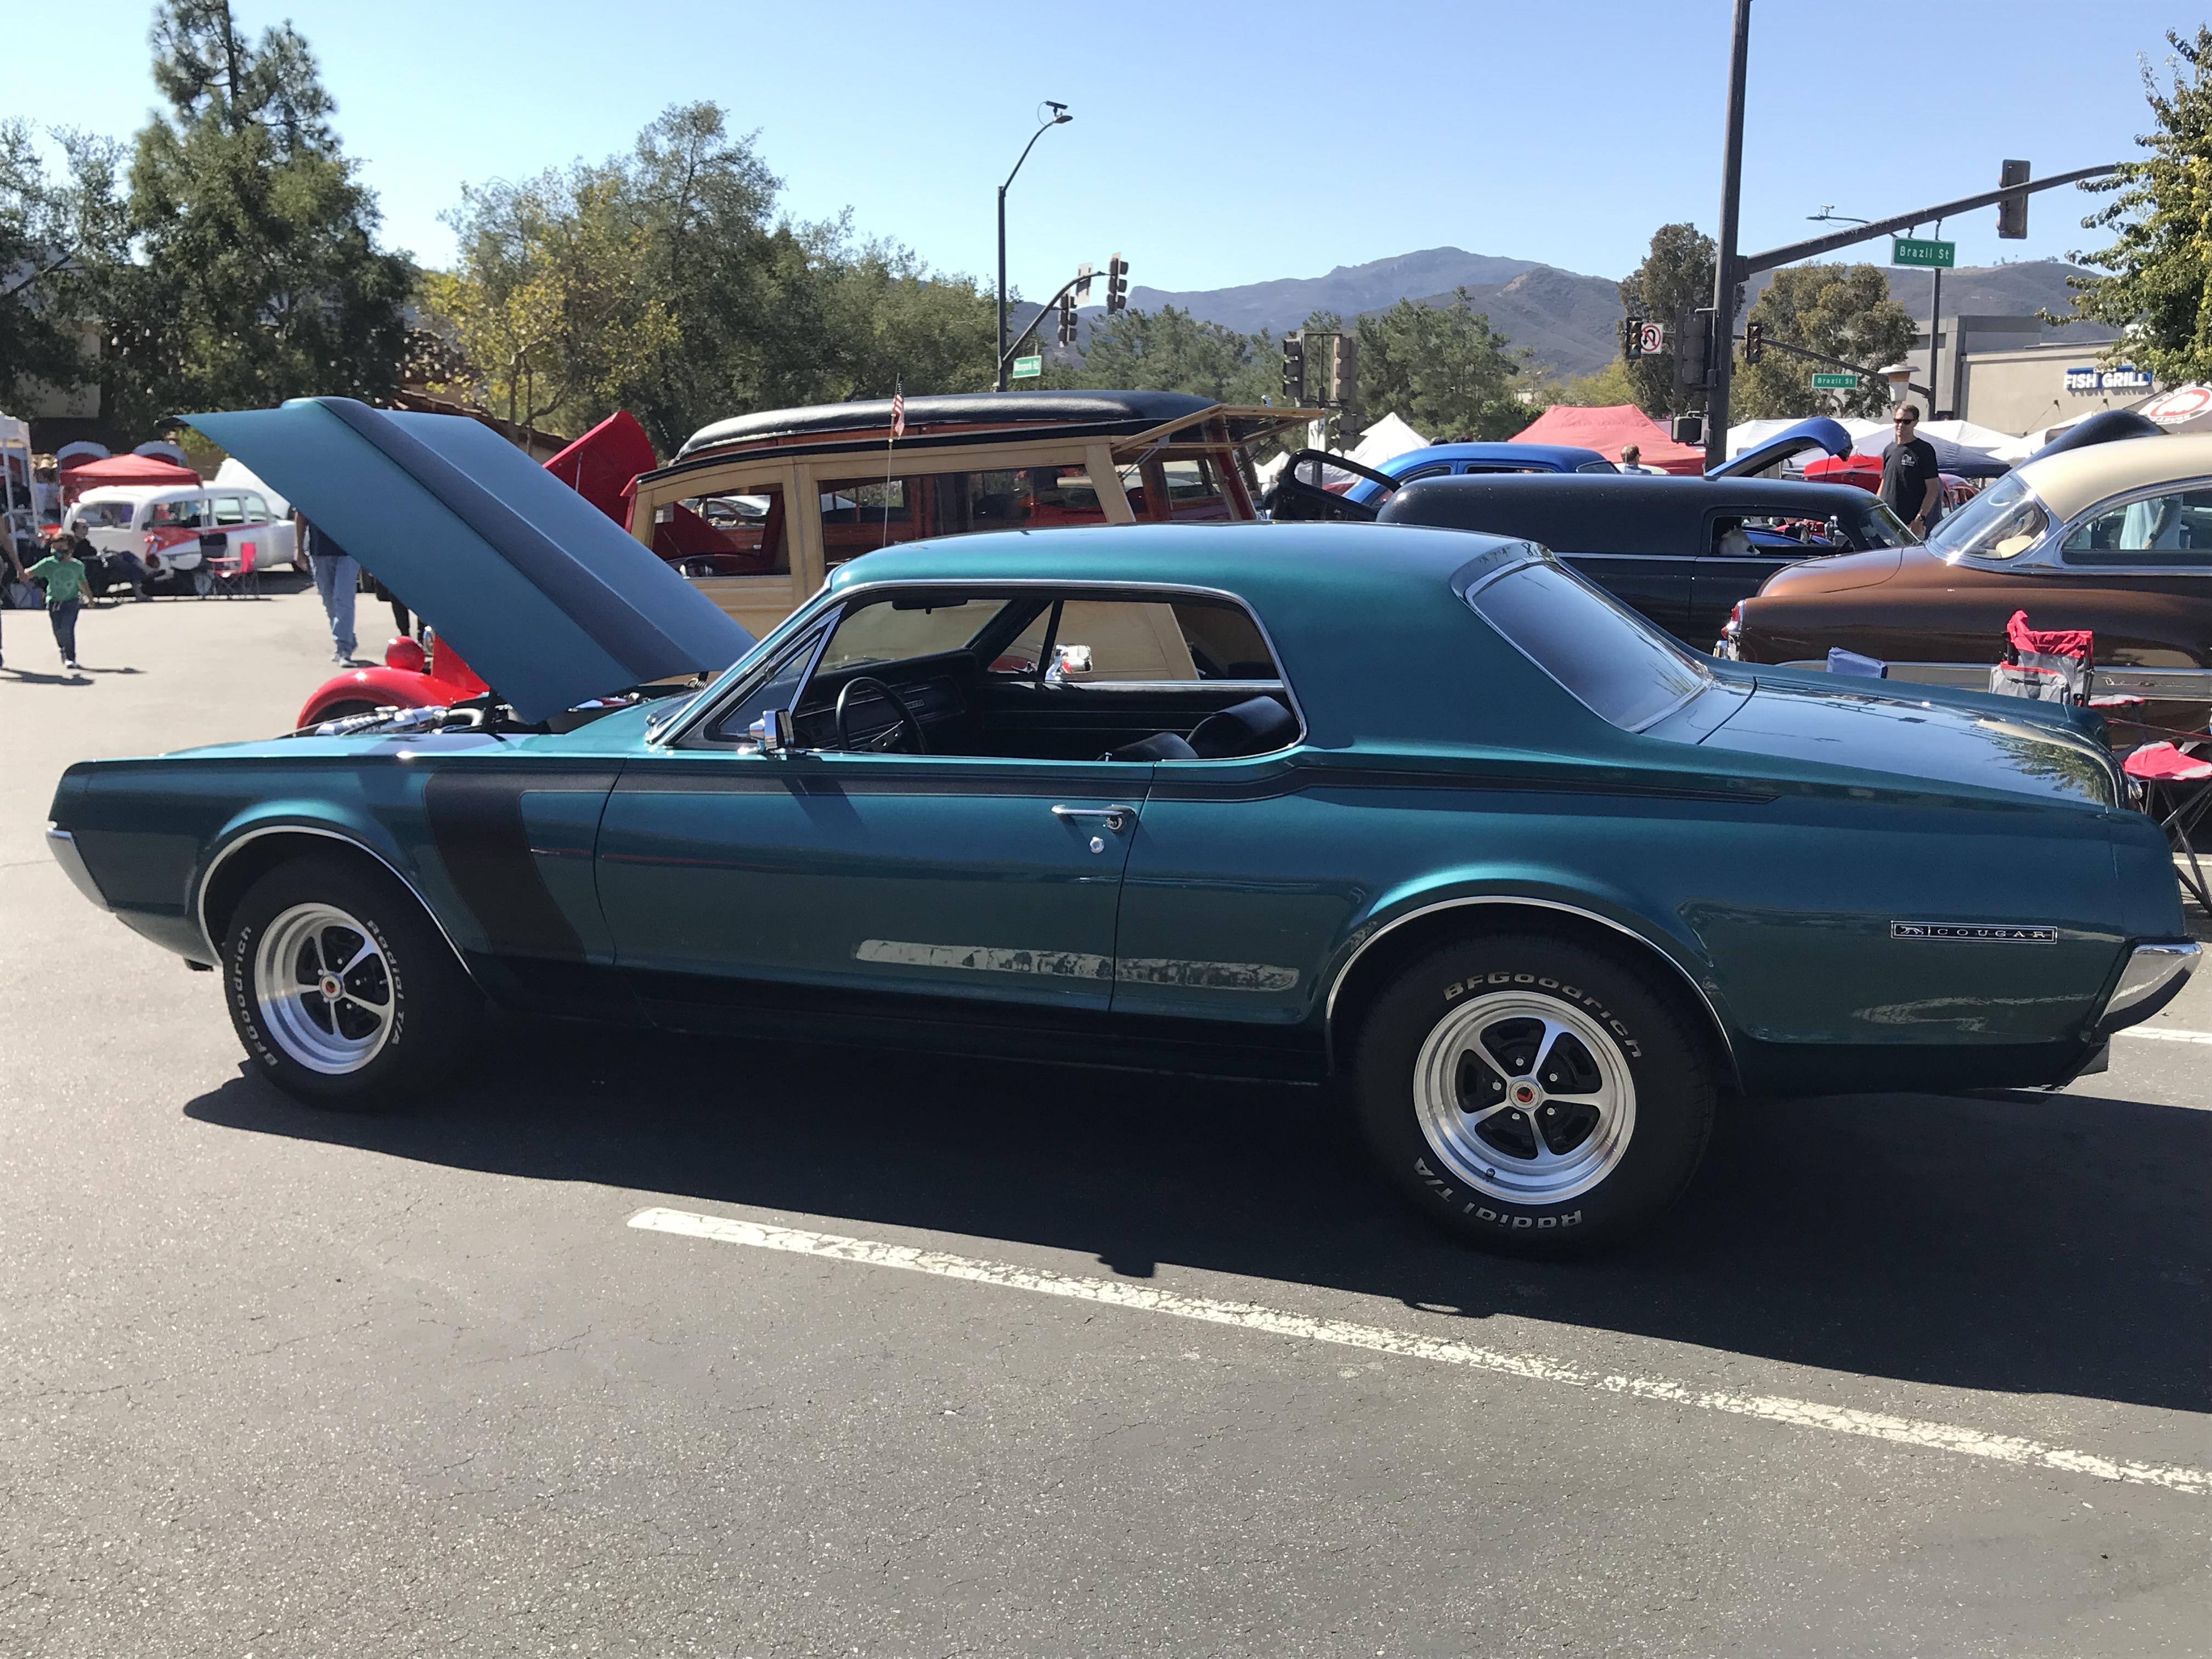
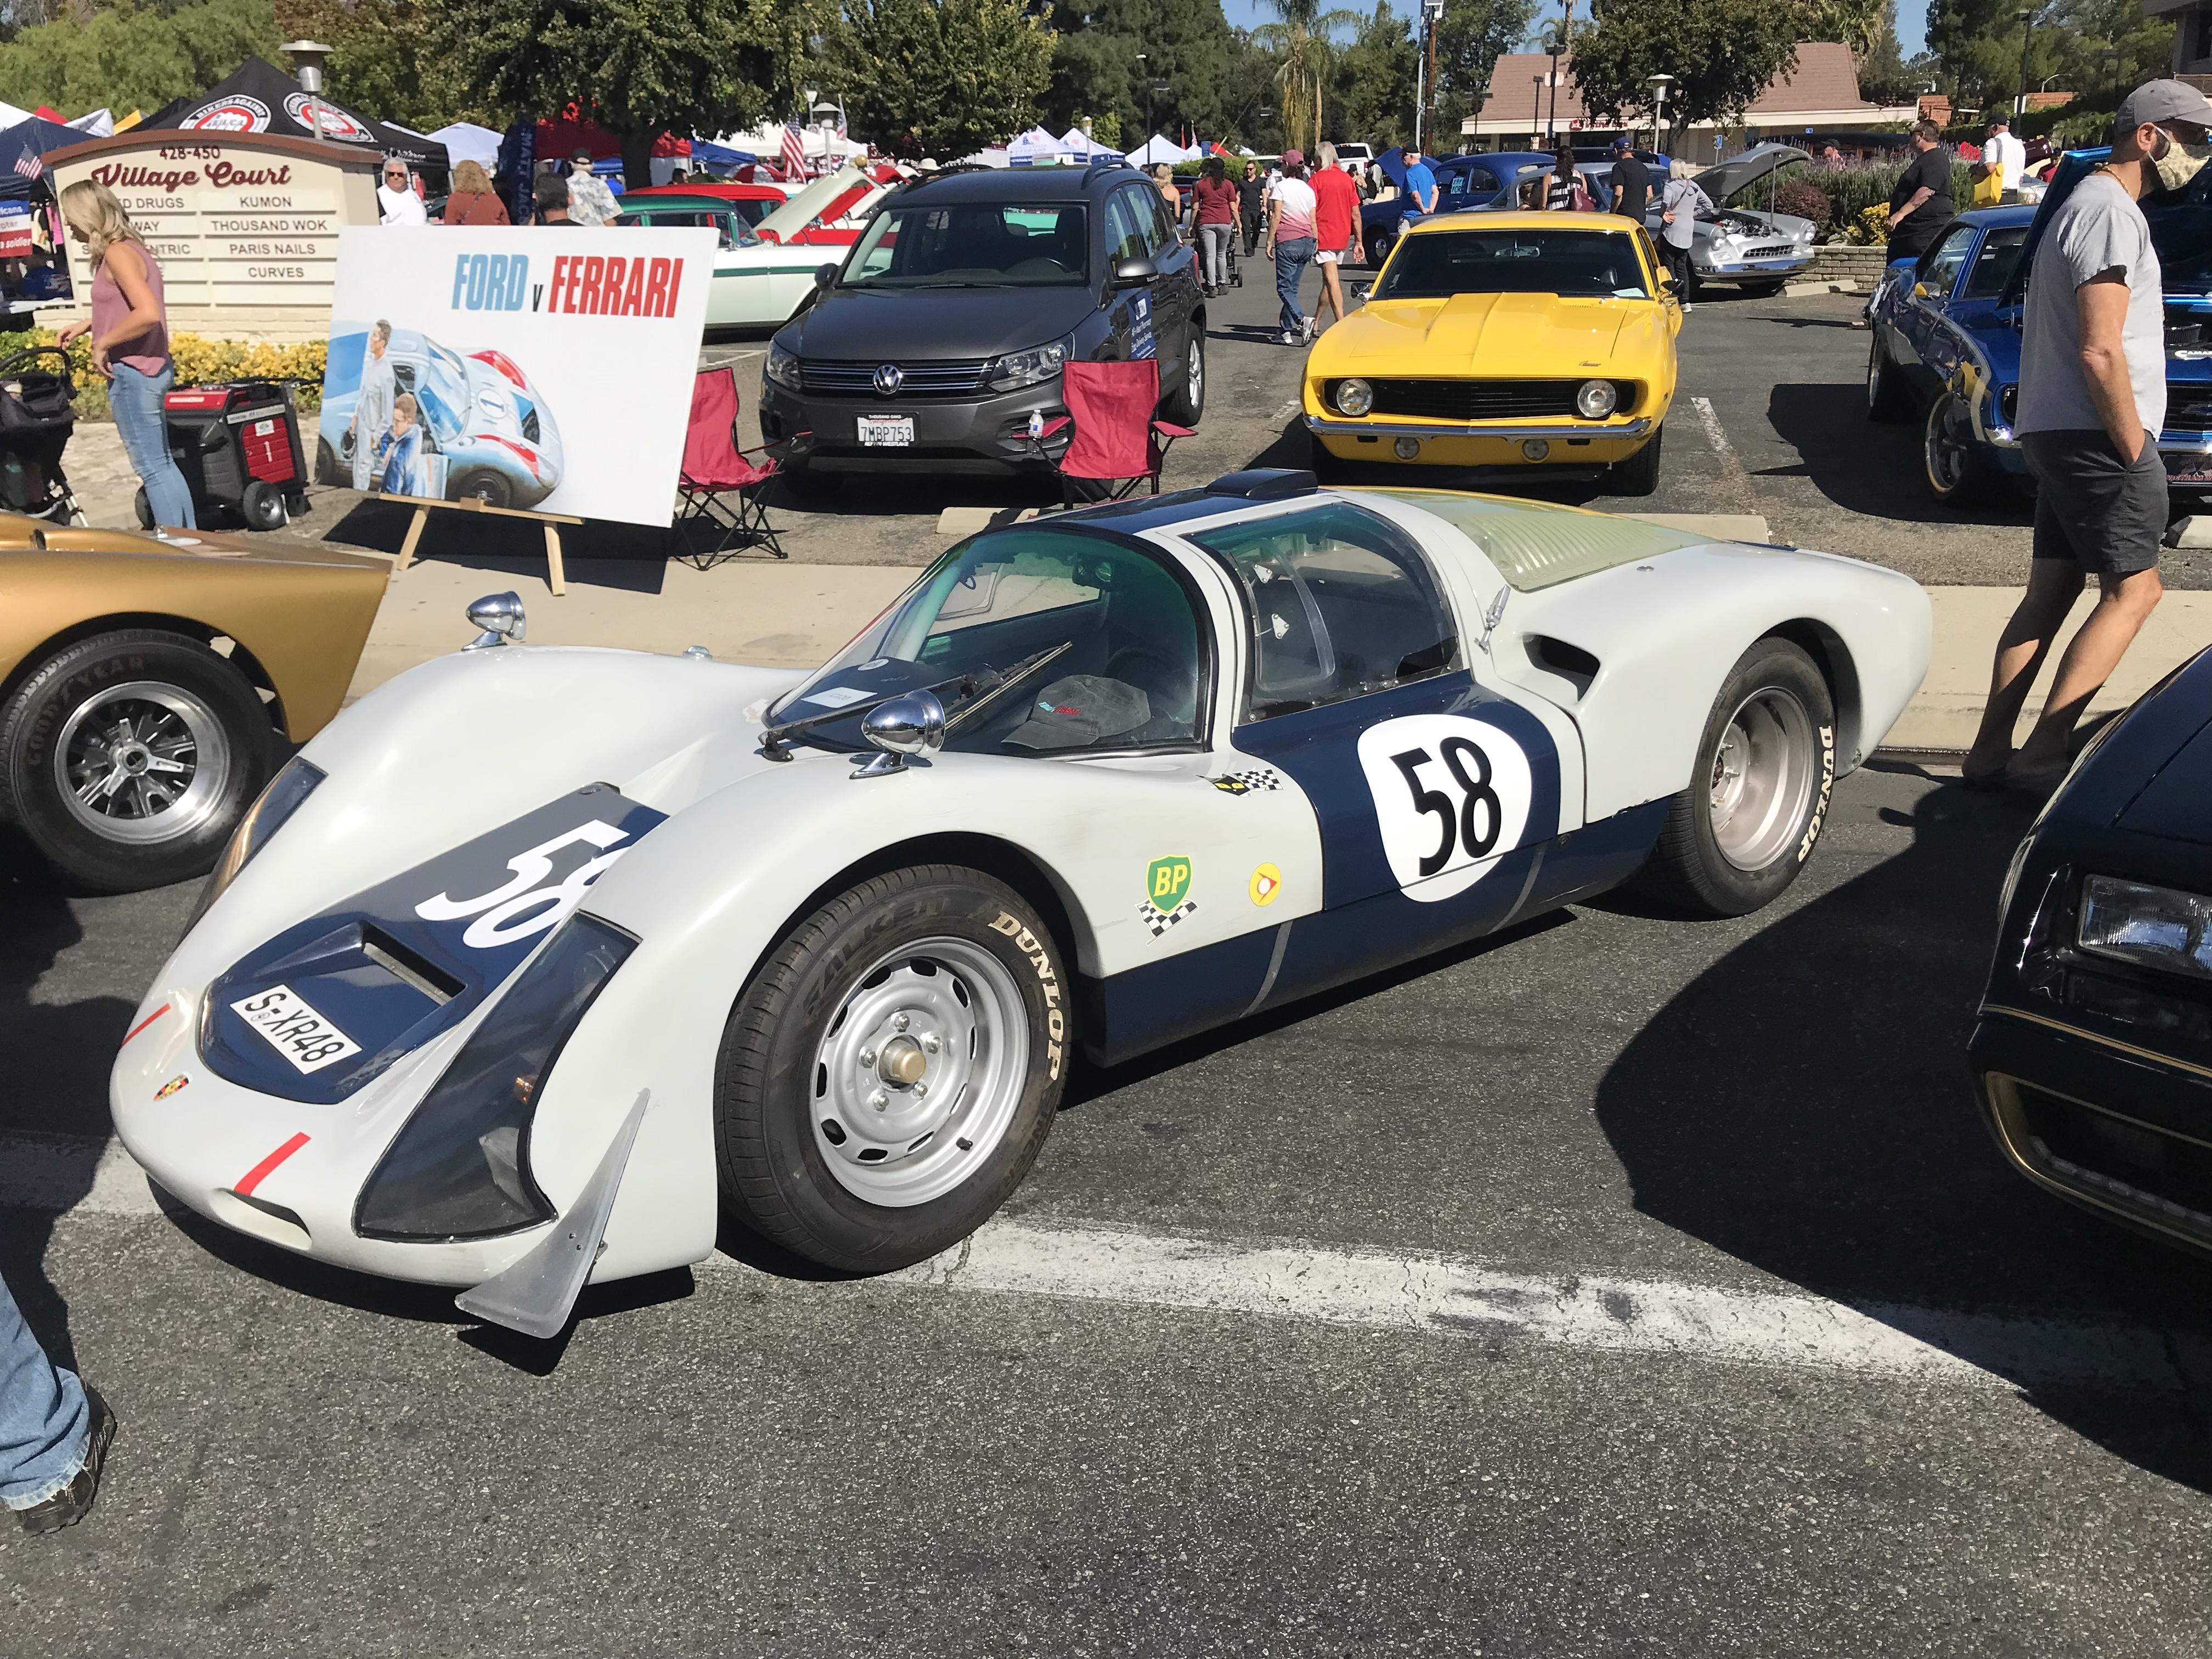
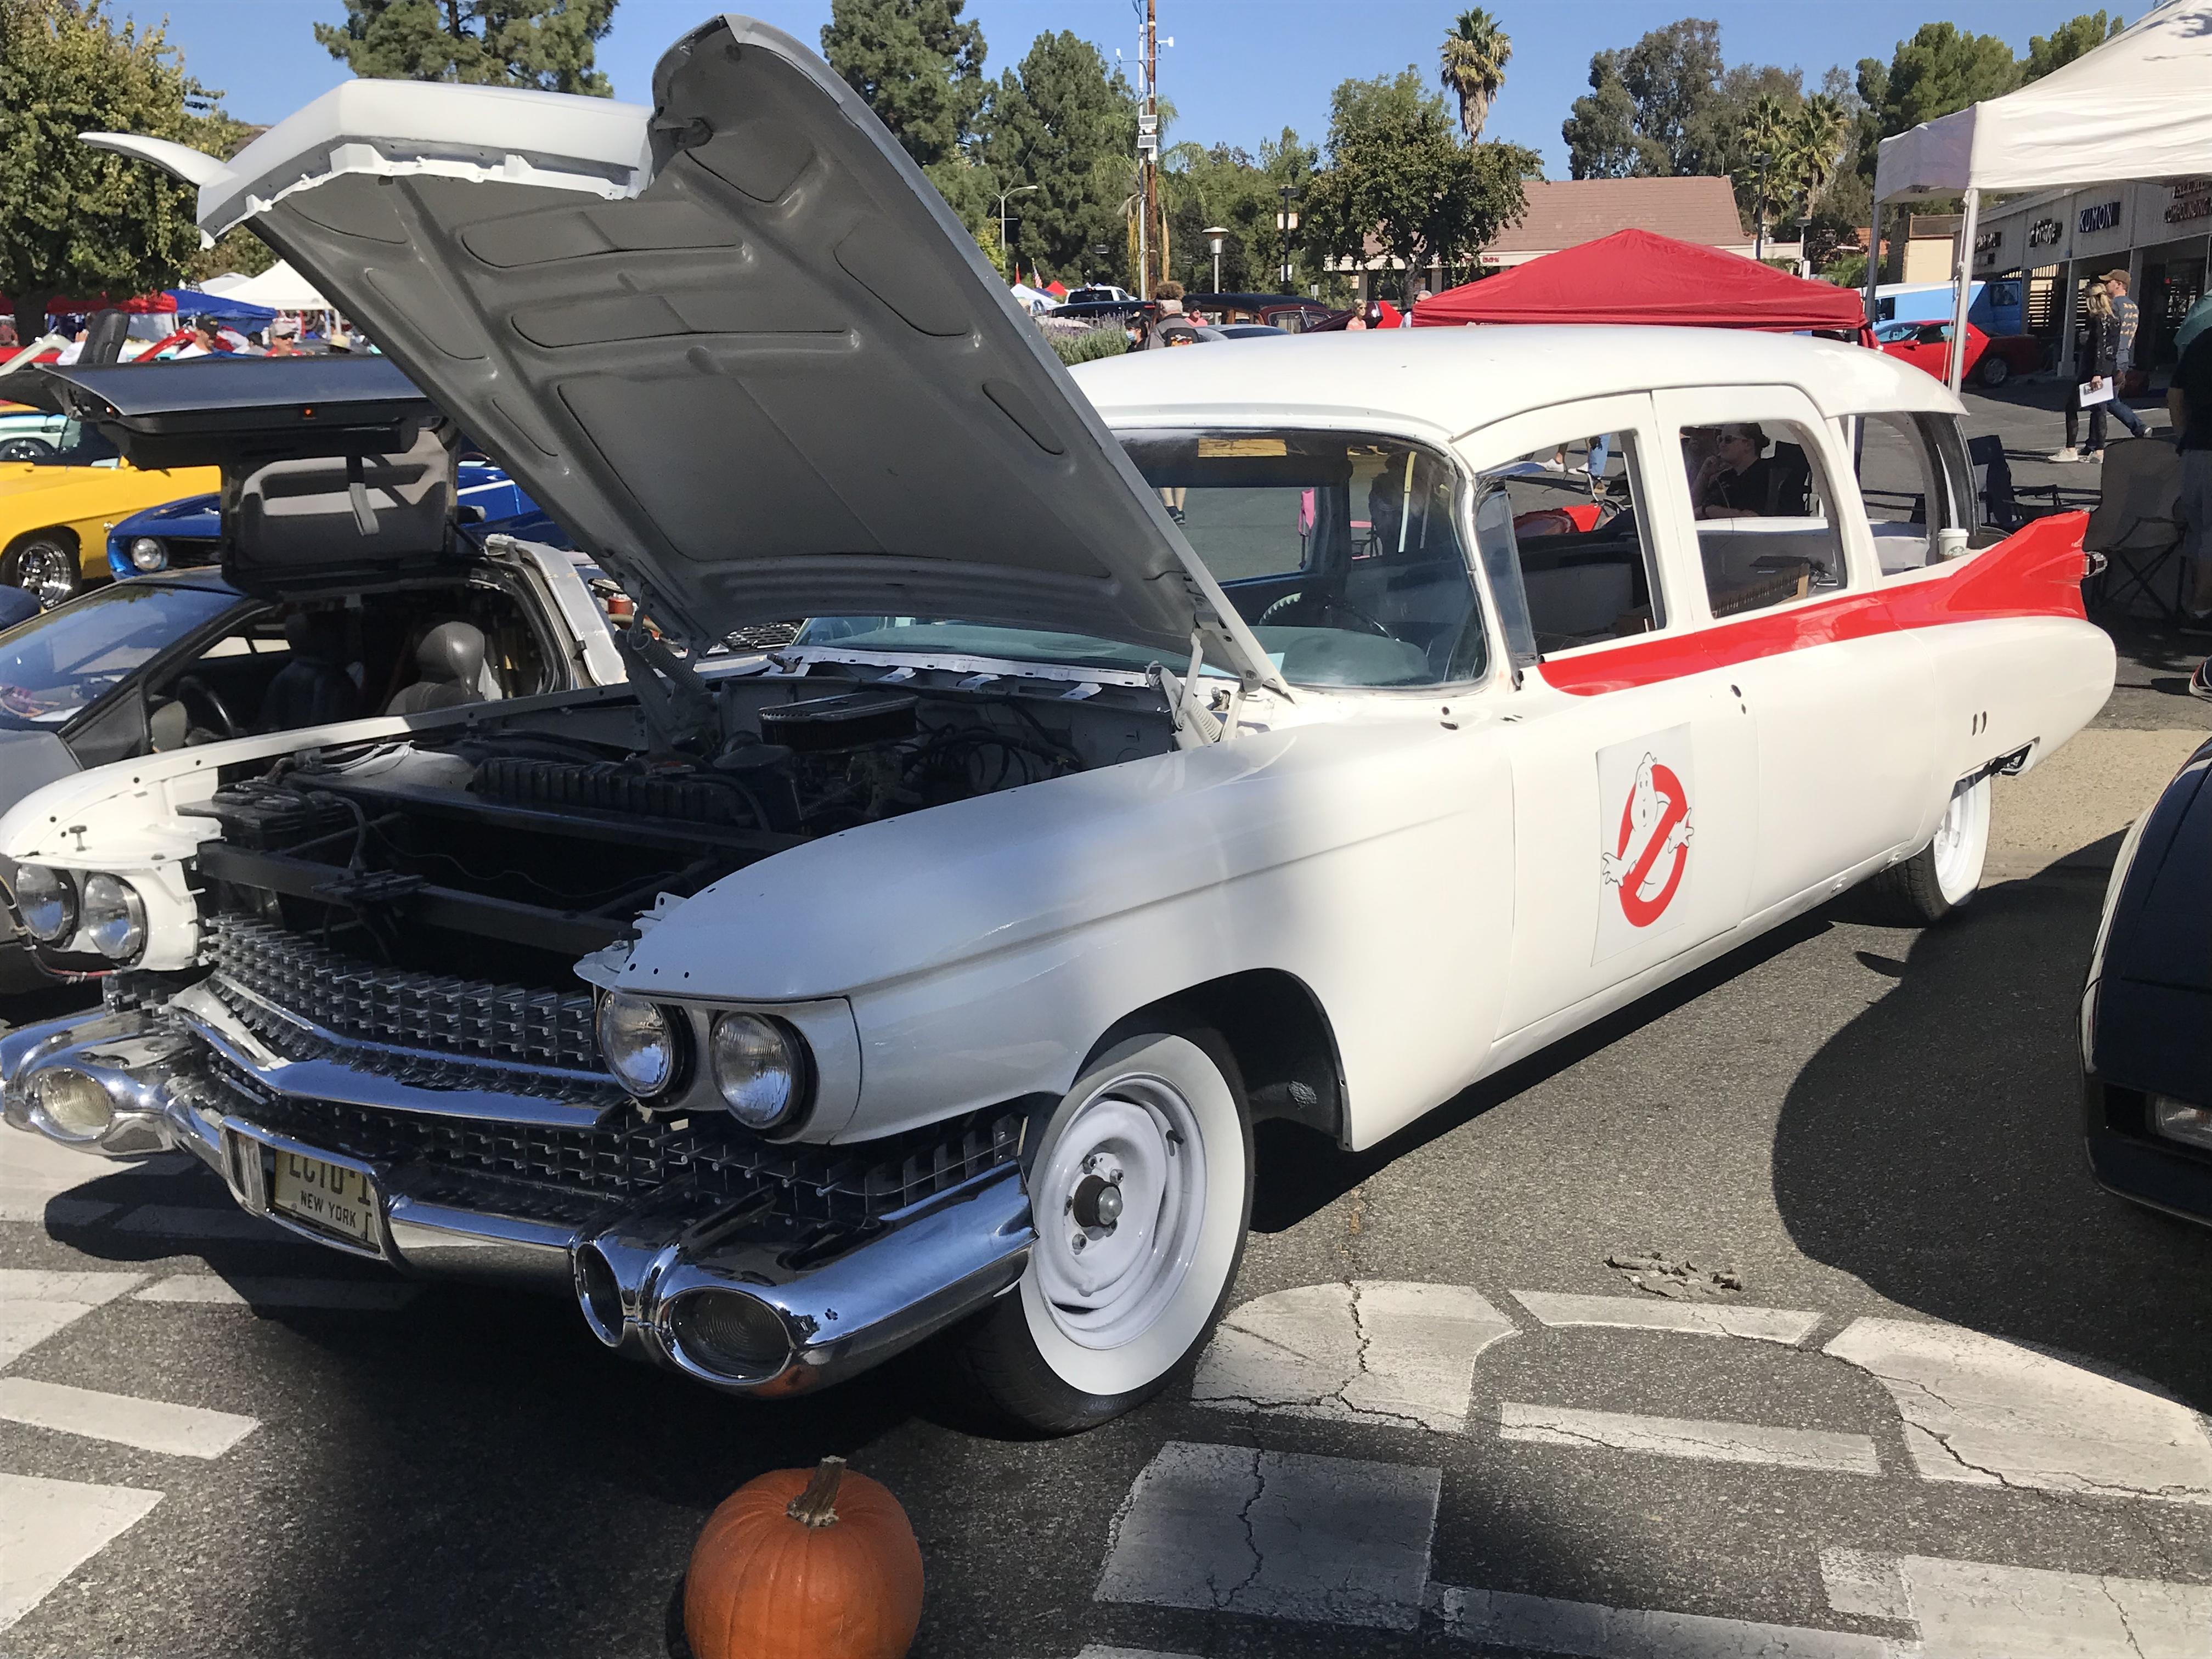
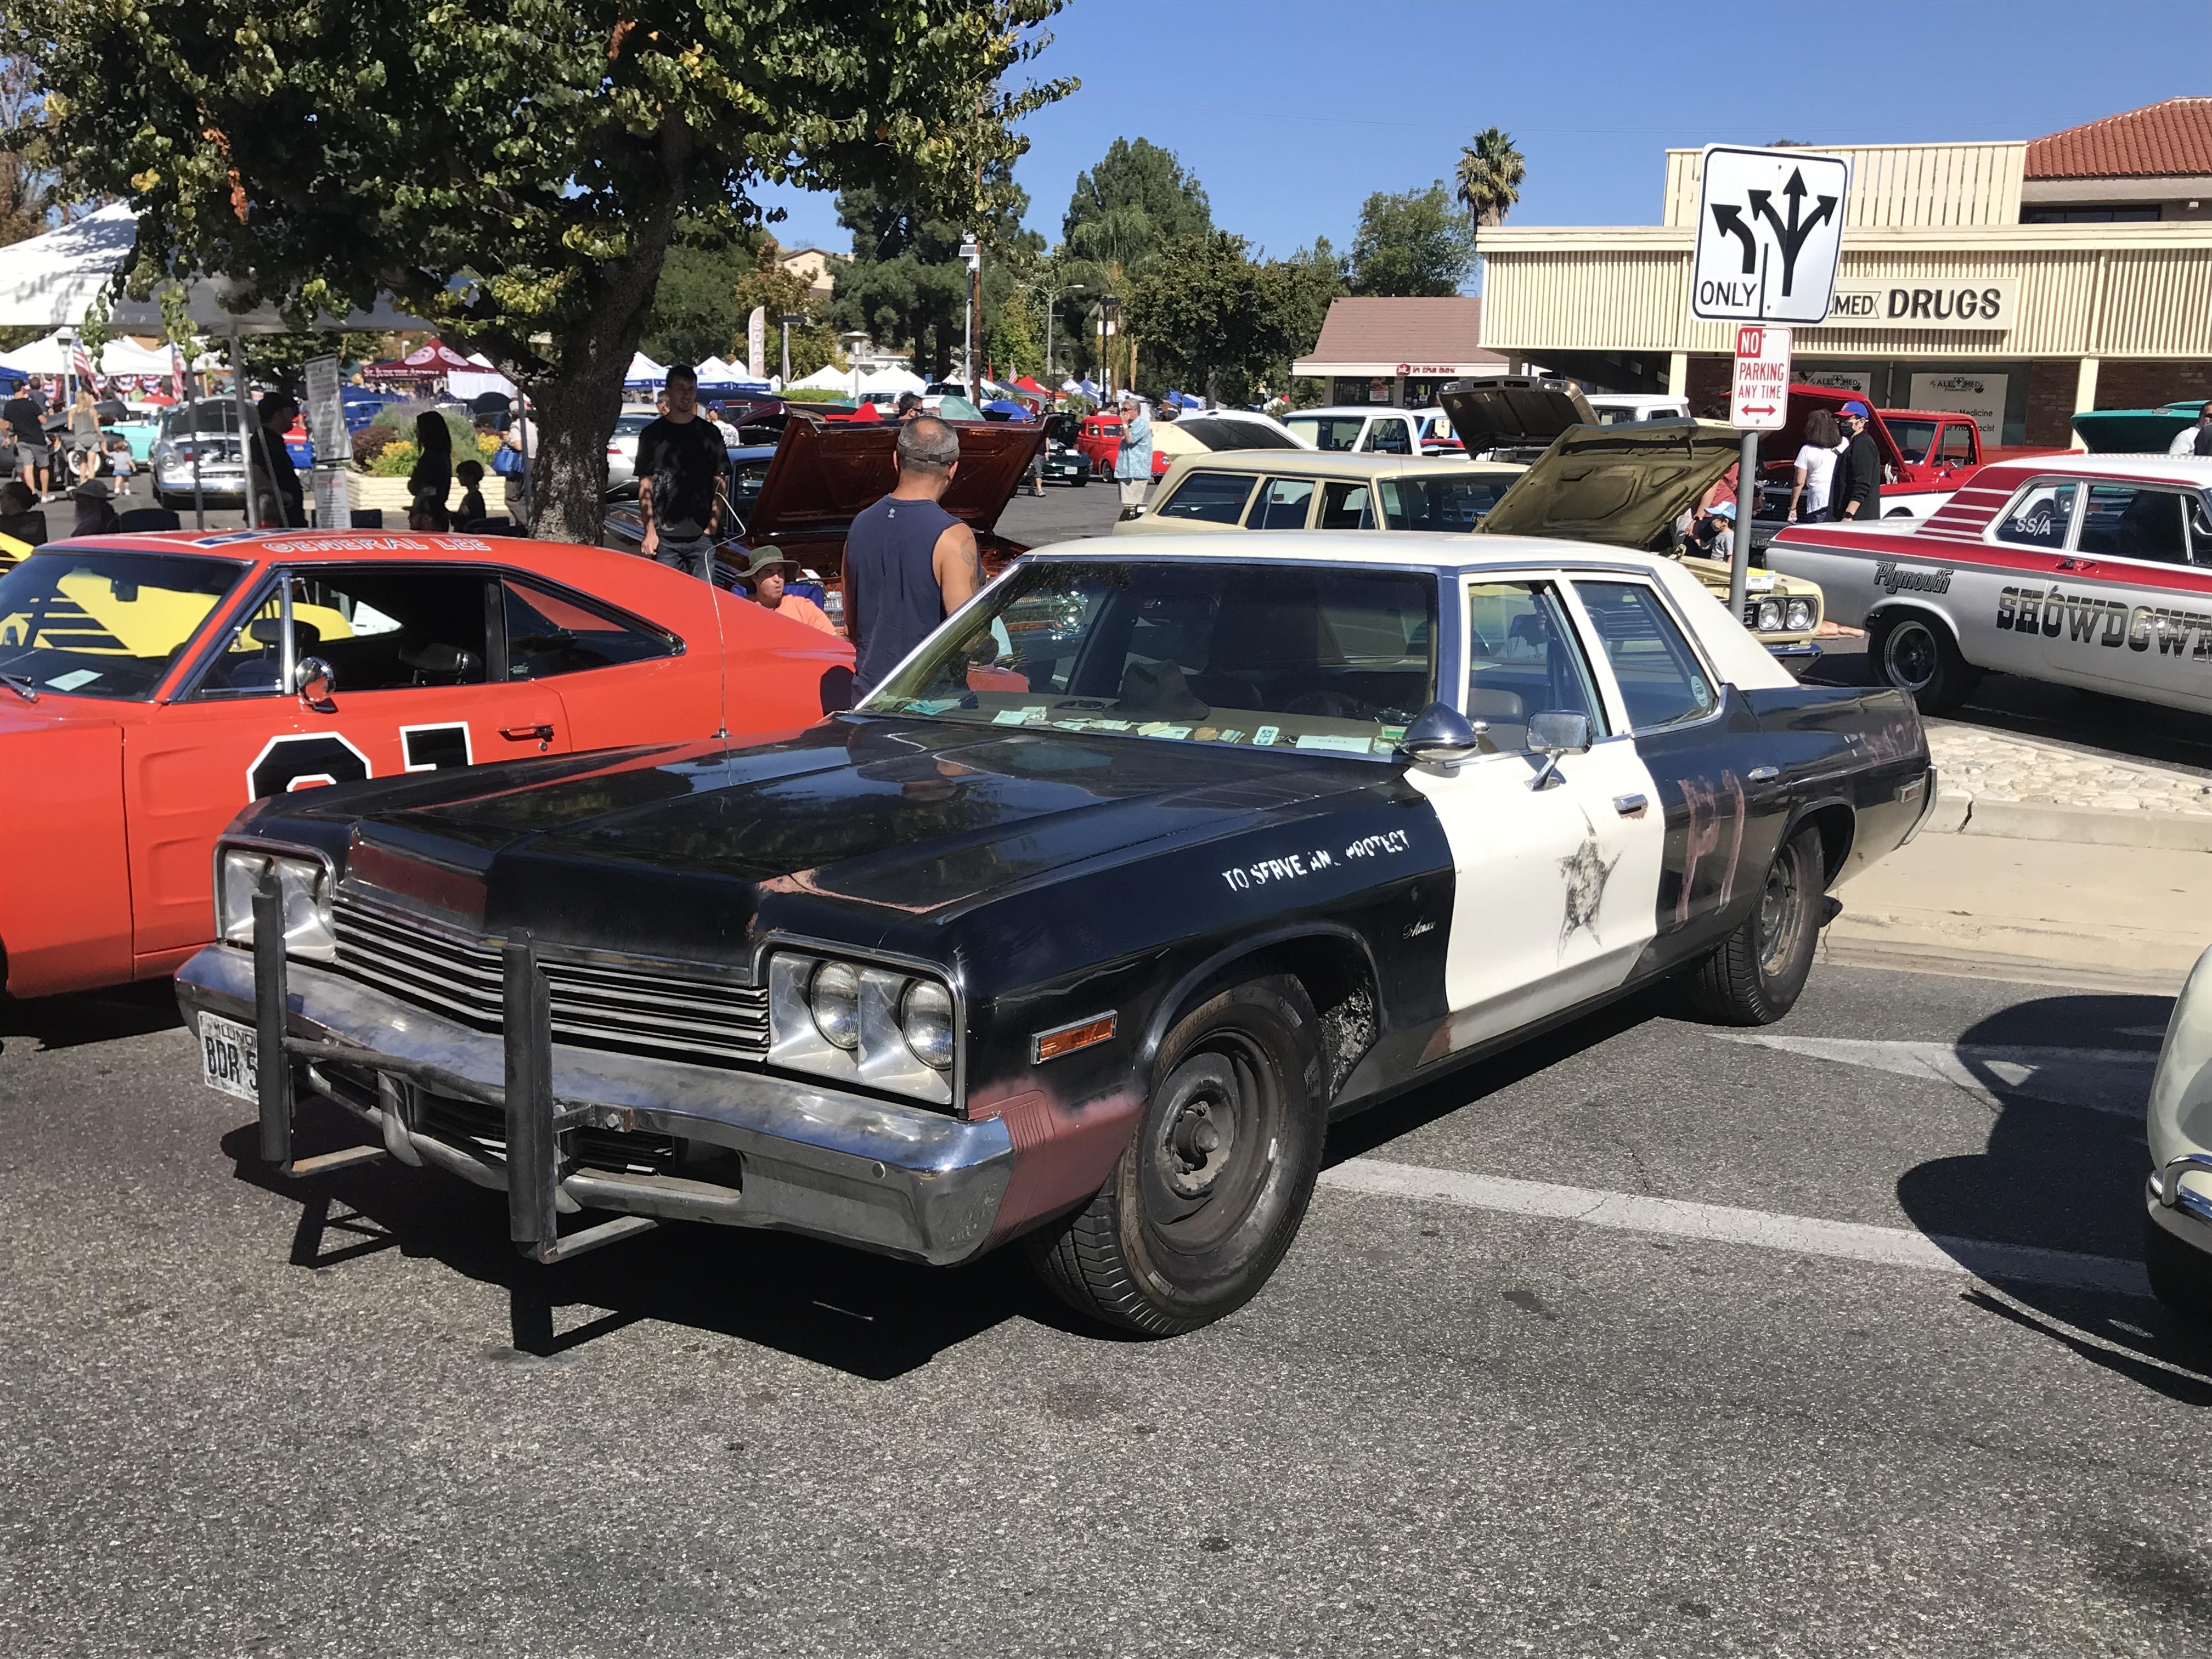
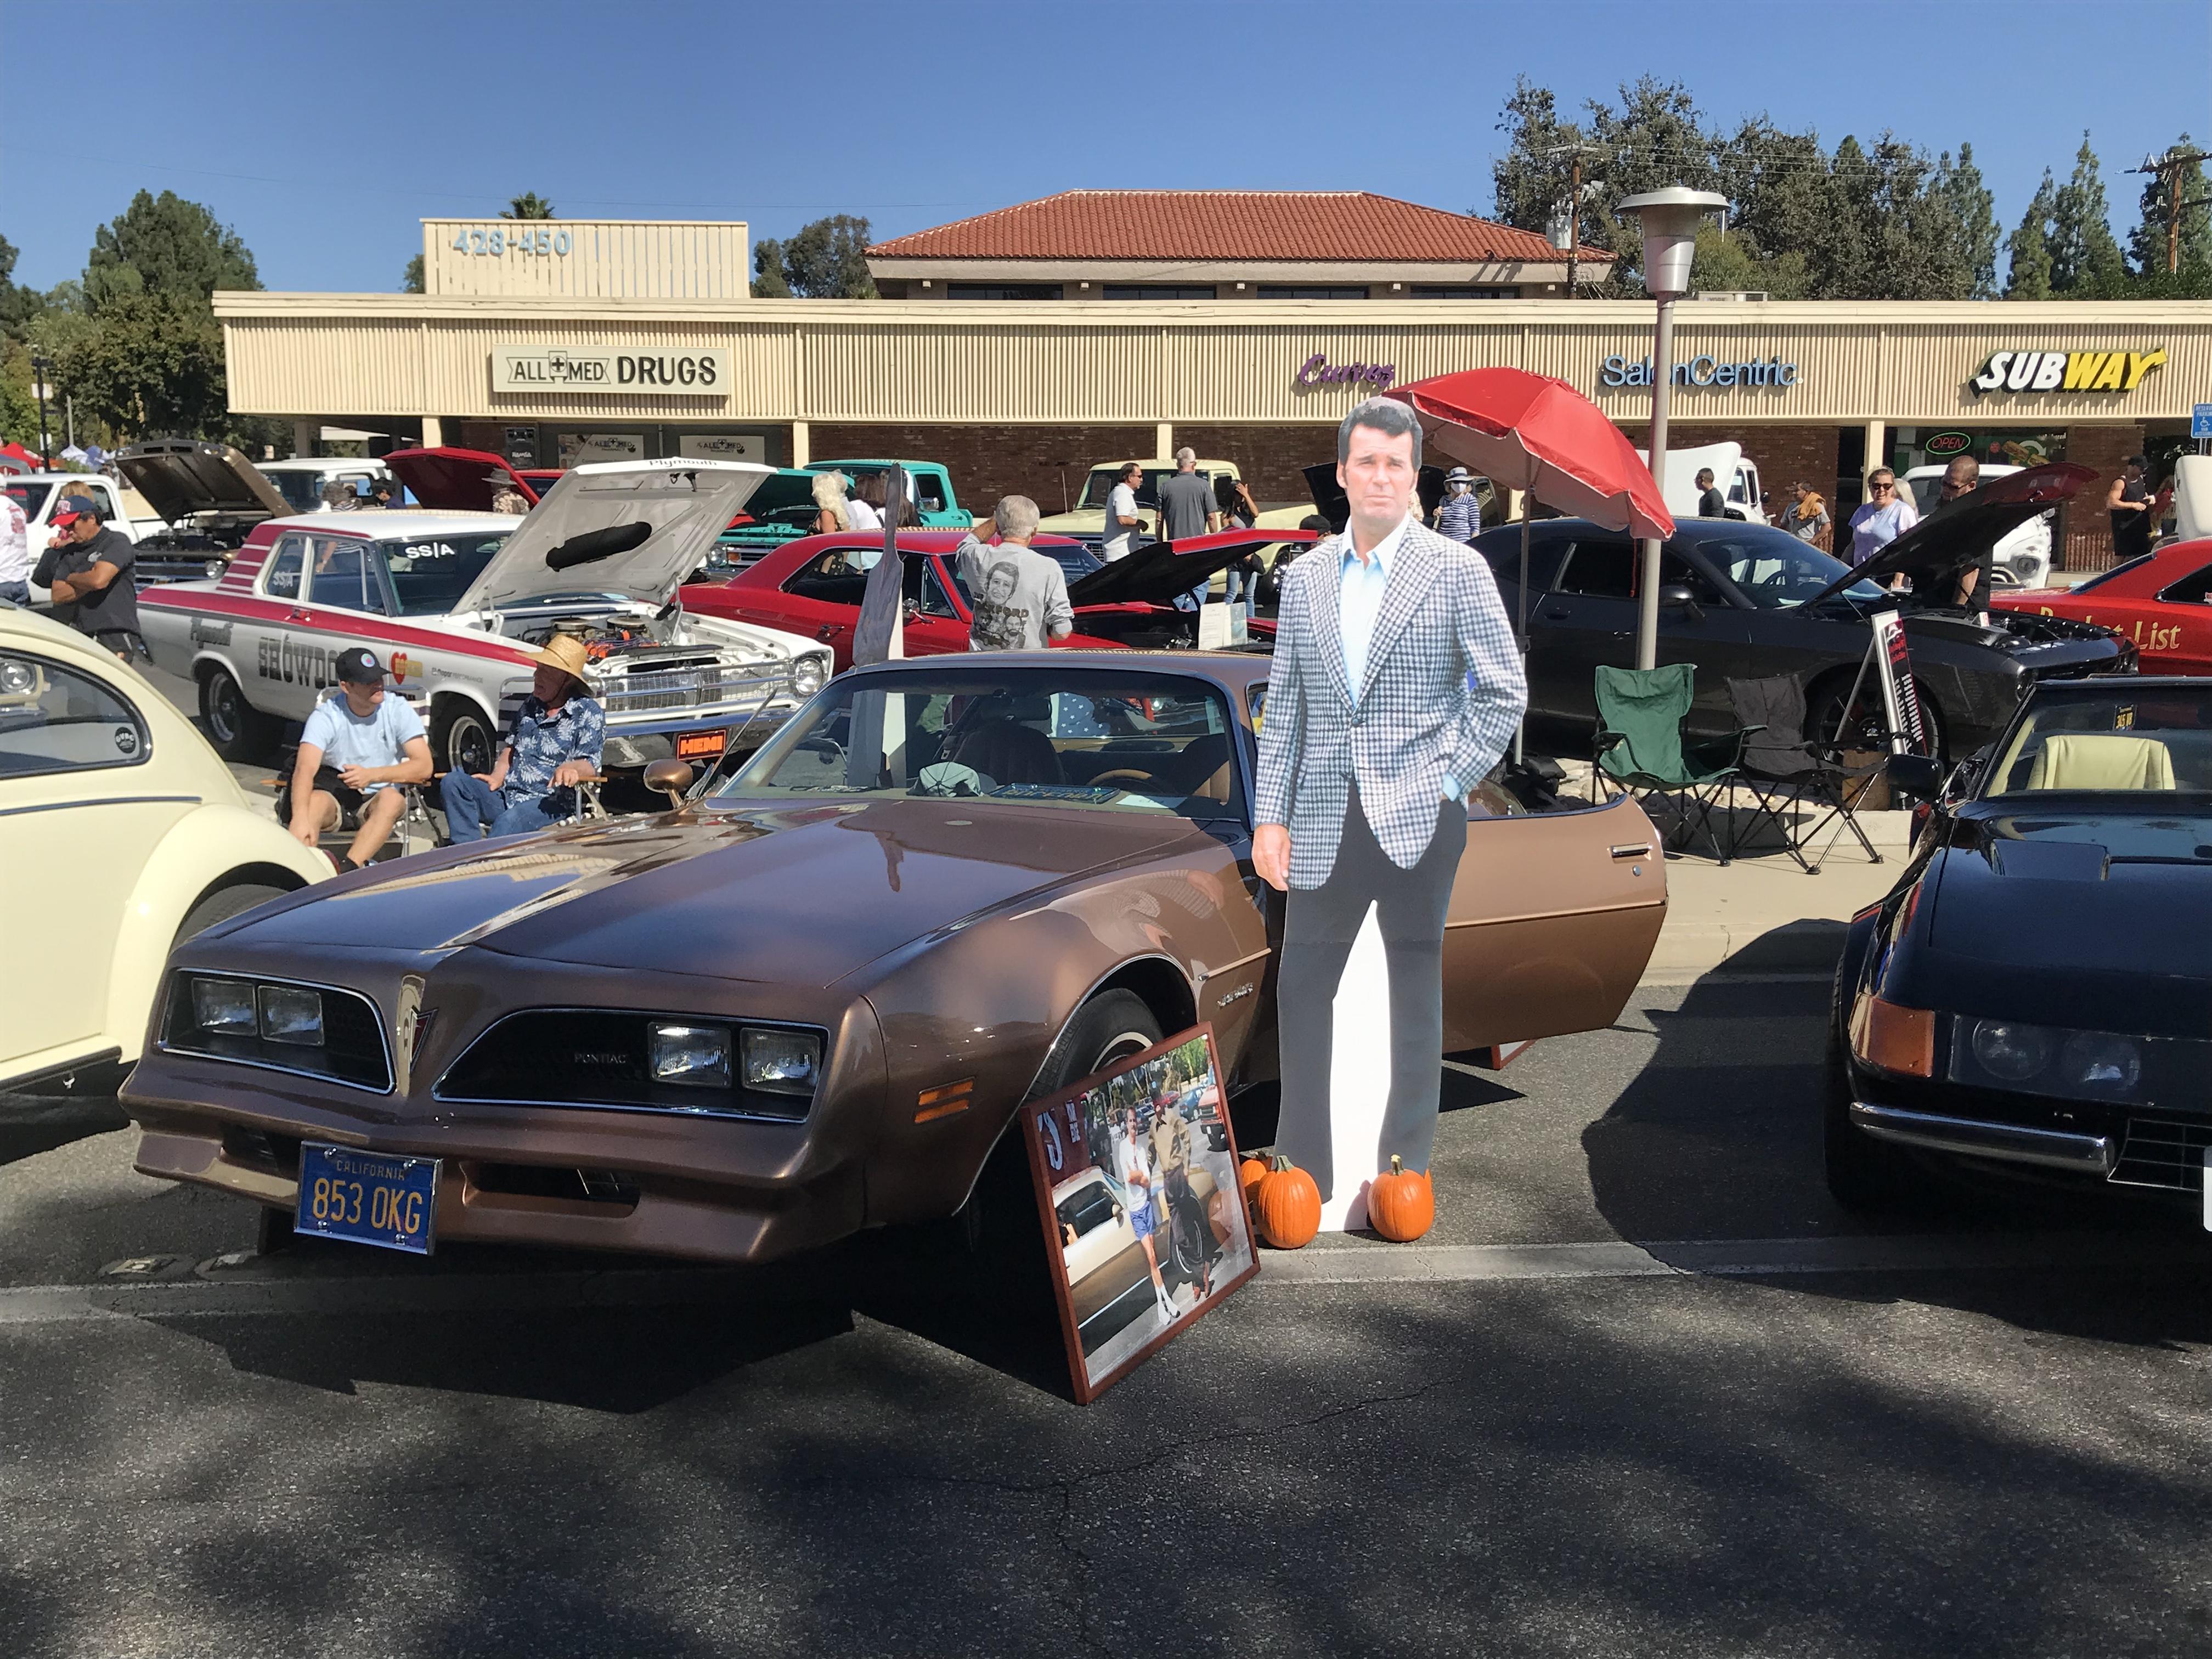
Some pics I took this morning at our local street fair in Thousand Oaks, CA, first bunch are movie prop cars from FvF movie as well as other movie, TV shows. I assume the Ferrari, GT-40 and P 910 are all reproductions based on the lack of roped-off barriers and guards….
-
This light color really shows off the beautiful lines of this timeless classic design and the wide whites really make’s it all pop. I built this excellent kit a few years ago and sprayed it a dark maroon which, in hindsight, muddied the highlights. I also love the cityscape background of your photos, they look like period color photos of classic 1:1 cars you see on the HAMB.
-
Yes, the AMT instructions related to the exhaust are pretty ambiguous. Stock class NHRA rules in ‘66 required the stock exhaust and muffler(s) to be intact and any performance headers were allowable but they needed to be routed thru the stock exhaust. Open bypasses were allowable so as long as the stock exhaust pipes are connected to the headers up near the engine, it should be legal. In hindsight, I probably should have connected the dual stock exhausts to each header near the header outlets (“the open bypass”), much like the Moebius ‘65 Plymouth SS and A/FX kits. Bill Jenkins was notoriously secretive about his race cars, I was never able to locate a reference photo of the underside of this car so who knows what the headers and exhaust system actually looked like.
-
Really nice job Ryan on this new-tooled XKE. Love the color combo and those toggle switches are amazing (how did you do those?). I built a red over tan version of this new kit for my wife to replace the ancient Revell 1/25 kit that I built for her years ago (and misplaced). This new XKE kit is the most Tamiya-like Revell that I’ve ever built. I de-chromed and Alclad metallized the wire wheels but If I build another one of these kits, I’ll just hit the chromed kit wheels with a black wash -yours look great!.
-
427 Cammer in a '67 Mustang GT aka "Platinum Pony"
papajohn97 replied to Bills72sj's topic in Drag Racing
I really like the look of the black teardrop hood with the silver and your home-made decals came out perfect. I’m amazed you were able to fit that wide SOHC engine in and still leave the tops of the strut towers and brace. Your scratch-built solder headers came out really nice in your WIP, too bad they’re so hidden. All around beautiful drag car build, thank you for sharing! -
Moebius has a history of doing that (Hudson coupe, convertible and fastback) so ?. Still optimistic that someday they’ll issue ‘65 Dodge RWB and AWB kits to go with their wonderful Plymouth’s
-
Thanks Tim for documenting and posting this build, really appreciate all the details. I’m a big fan of Mobius kits, particularly the wonderful Mopar and Comet SS and A/FX kits which have so accurately depicted some actual historic drag cars. Question on this Nova kit: will Moebius be supplying decals in this kit that depict an actual period gasser of the mid 60’s that existed or will they be for a generic/ fictional racer? Would be nice if they could also someday do a ‘64 Nova variation of this kit for the Doug Thorley “Chevy-2-Much” car.
-
Beautiful clean builds of these classic drag cars. Love the paint colors. It’s amazing how many variations can be built from this AMT double kit. So fortunate for us old guys that this and several other kits from our earlier modeling years are still available as re-pops (Revell Tony Nancy double kit, Monogram Sizzler) to give us a “second crack” at them! Thanks for posting!