papajohn97
-
Posts
701 -
Joined
-
Last visited
Content Type
Profiles
Forums
Events
Gallery
Everything posted by papajohn97
-
Hey Mike, this kit is on my wish list so much thanks to you for posting your build. Engine looks great so far. I love these early to mid 60’s GM full size hard tops, they still look stunning to my eyes sixty years later. If you’re looking for factory original paints and if you have access to an airbrush, I highly recommend Scalefinishes.com flat base paints. Jameston offers all the original ‘62 Chevy colors and his paint is a joy to use. It does require a clearcoat (I use TS-13).
-
Don Nicholson's 1965 Comet Cyclone
papajohn97 replied to ModelcarJR's topic in WIP: Drag Racing Models
That’s coming out really nice John. Beautiful foil job and I like the black-out you did on the front grill. I love this Moebius kit and had fun building a white Hayden Proffitt version of it a few years ago before I was able to post on here. These ‘65 Comets look like they’re screaming down the strip when they’re standing still. And that 427 cammer is one of the coolest looking drag engines of all time. I bought a second one of these kits to build this same red Dyno Don version, an iconic car raced by a legend! -
Respirator for 2k Clears (Splash Paints)
papajohn97 replied to DiscoRover007's topic in Model Building Questions and Answers
From my read of the MSDS’s for 2K two-part urethane clear coats, you need a “closed” ventilation system (essentially a breathing tube connected to outside air that is physically separated from the mixing/ spraying area). You also need to probably wear long sleeves, gloves and a face mask to prevent any skin or eye contact as well. I don’t believe anyone is safe using a cartridge type ventilator mask with any type of available filters, even outside. I don’t care how wonderful the final finish is on a car model, it’s just not worth the health risk for me. Be safe. -
Beautiful job Brian! I have a 1/32 slot version of this same car and wish there was a 1/24 -1/25 kit for this car that you built. Despite the shorter nose, your build looks “right” to my eyes. With this year’s releases of the new tooled XKE kits, I’m hoping Revell has plans to issue a lightweight XKE racing coupe. It probably won’t happen but I also believe a new tooled D would sell like hot cakes.
-
FIA 289 Cobra
papajohn97 replied to Rich Chernosky's topic in Other Racing: Road Racing, Salt Flat Racers
Very impressive job Rich on the front end mechanicals, interior and all of the engine detailing. On the Webber carb inlet screens, are those decals or actual metal screen or PE? If $$$ was no object and I could have any 1:1 Cobra I wanted, it would be one of these earlier small block cars (without the wide flared fender 427 look). -
I also like the look of the yellow steelies with the dull green, look’s like an authentic early 60’s gasser that was driven to the strip. I would add a few small sponser decals and a class decal to the right side of the windshield (A/GS?) to complete. Nice job!
-
Great job, especially on the paint. I’ve always found black shiny paint jobs to be the most difficult to pull off, your nephew nailed it! Careful uncle Fantom, a few more of these and he’ll be hooked and your best tools and supplies will start to mysteriously disappear!
-
Great job on a unusual drag car subject. Your engine detailing is really… detailed! This build inspires me want to find a 50’s subject kit and parts for a 6 cylinder stocker drag car. Would love to see some more images of the 1:1 engine you posted.
-
This build is amazing to watch. What you are doing sir is literally “advanced plastic surgery”! Thanks for doing these posts!
-
I feel your pain David. I have tried BMF on several projects and experienced what I like to call the “Ouija Board X-acto knife misfortune”, particularly around curved features. I’ve seen some amazing foil jobs on this board as well as on models at contests but even on areas where my knife doesn’t slip, my finished foil ends up with micro wrinkles or bumpy surface due to imperfect base paint. I only use foil now on interior features (door handles, dash, seat surrounds) or to repair kit chrome and have gone back to masking and airbrushing body trim and window frames with Alclad over black enamel. It’s much more time (and masking tape) consuming but much easier to control and I never get that wrinkled Hershey’s Kisses foil wrap look. Hoping you can master BMF but if you can’t, don’t feel bad, you’re not the only one!
-
Beautiful job Justin on this older Tamiya F1 kit. I’m particularly impressed with your decaling, those long narrow ones are really challenging to apply and align without tearing/ damaging them. Nice!
-
Theater = that. I hate software.
-
“She’s real fine, my 409....giddy-up giddy-up....” Love a ‘61 bubble top and this one is gorgeous. I like the stock wheel cover faux knock-offs that you used, very period correct for a 60’s southern CA cruiser. Theater Alclad Blue is a knock-out!
-
Beautiful job Keith on this T-Bolt. I’ve built two of these kits and could build a few more because they go together so well and look so good when finished. I also applaud you for cutting out the two vents on the teardrop hood. The silver Sharpie trim work looks great. I have given up on foil and mask and paint all my trim but the masking is very labor (and tape) intensive. What did you use to highlight the panel line grooves on your doors and trunk? Tamiya Panel Line stuff?
-
Thank you Justin for posting the WIP on this kit. So far you are doing a beautiful job on this one. I love 70’s F1 cars and have this kit in my stash to build someday so I will benefit much from your postings. I have also had to replace old Tamiya decals with Indycals on my WR1 and 312T3 kits and had mixed results with them. One set was incredibly fragile/brittle and tore on me during application but Indycals happily replaced them at no cost so I’ll still be using them for future projects. They are very thin which is nice but I do wish they would provide them pre-cut. I read Ebbro is coming out with new tooled Tyrrell 005 and Lotus 33 1/20 kits so my stash will continue to grow quicker than I can build (a good thing!).
-
Coming to this posting late; the ‘63 Nova wagon craftsman kit was recently released so I assume that’s the new kit? This one (Tempest wagon) would be #1 on my wish list but I don’t think it was ever tooled so probably never going to happen...(maybe do a resin one with Nova and Catalina parts?) The ‘62 Buick wagon would be a nice one to see re-popped. So glad Round 2 is still out there doing any of these old kits for us old guys ???

-
Hey Bob, I’m with you on the 409 love. One of my favorite kits is AMT’s ‘62 Bel Air, particularly the most recent SS “Northwind” SS drag version. Besides a nice 409 block, this kit includes additional carb, manifold and exhaust header options as well as other race parts. This is one of AMT’s better kits and I highly recommend it if you’re into 409’s. Ive always loved the lines of the 65 Impala, still looks futuristic to me 56 years later and is one of GM’s best looking cars IMO. I look forward to watching you have fun with this Foose kit. Cheers, John
-
Any word on if/when Ebbro will ever re-issue the original Lotus 49 kit? They have been going for $200-$300+ USD on eBay for some time now. Wonder what kind of minimum volume and kit cost they would consider worth doing to justify reissue of one of their original 1/20 F1 kits that are OOP? I have built four of their 1/20 F1 kits but have been afraid to start the 49, no chance of a do-over if I screw it up!
-
Thank you Steve for all the effort and details that you are putting into documenting this WIP, it’s fascinating (and educational) watching how you do your magic. This engine is almost too magnificent to install and risk hiding any of these incredible details. If I were a rich customer and you were building this Dodge for me as a commission project, I would order a second engine from you to be able to display next to the finished car!
-
'66 Skylark GS (Craftsman) Glue Bomb Rescue/Rebuild
papajohn97 replied to Snake45's topic in Model Cars
Amazing polish job on raw styrene, looks like paint! I’m in awe of how you and others here are able to foil and avoid knife slipping disasters. I guess I just need to dive into the deep end of the pool on a few “learning builds” to conquer my foiling anxieties ???. I remember building the original AMT ‘66 Skylark kit when it was new and it looking really sweet after painting and assembly (mine was yellow). It’s amazing how $$$ these old kits are these days, too bad these old molds have been modified to make modified stocker kits...thanks for rescuing and sharing this one. -
Great resto job on my favorite Corvette (C2 coupe) in my favorite color (blue). You are inspiring me to build a stock C2 kit someday. So which is the best kit/ kit bash combo to use as a basis in 1/25? AMT ‘63 body over a Revell ‘67 chassis?
-
These are all really incredible car models. Like many others here, I would love to take “master classes” from Mr. G, especially classes on how to do under hood detailing. I also love his taste, the Bill Mitchell years at GM which I think produced the most beautiful American automotive designs. Thanks for posting these masterpieces!
-
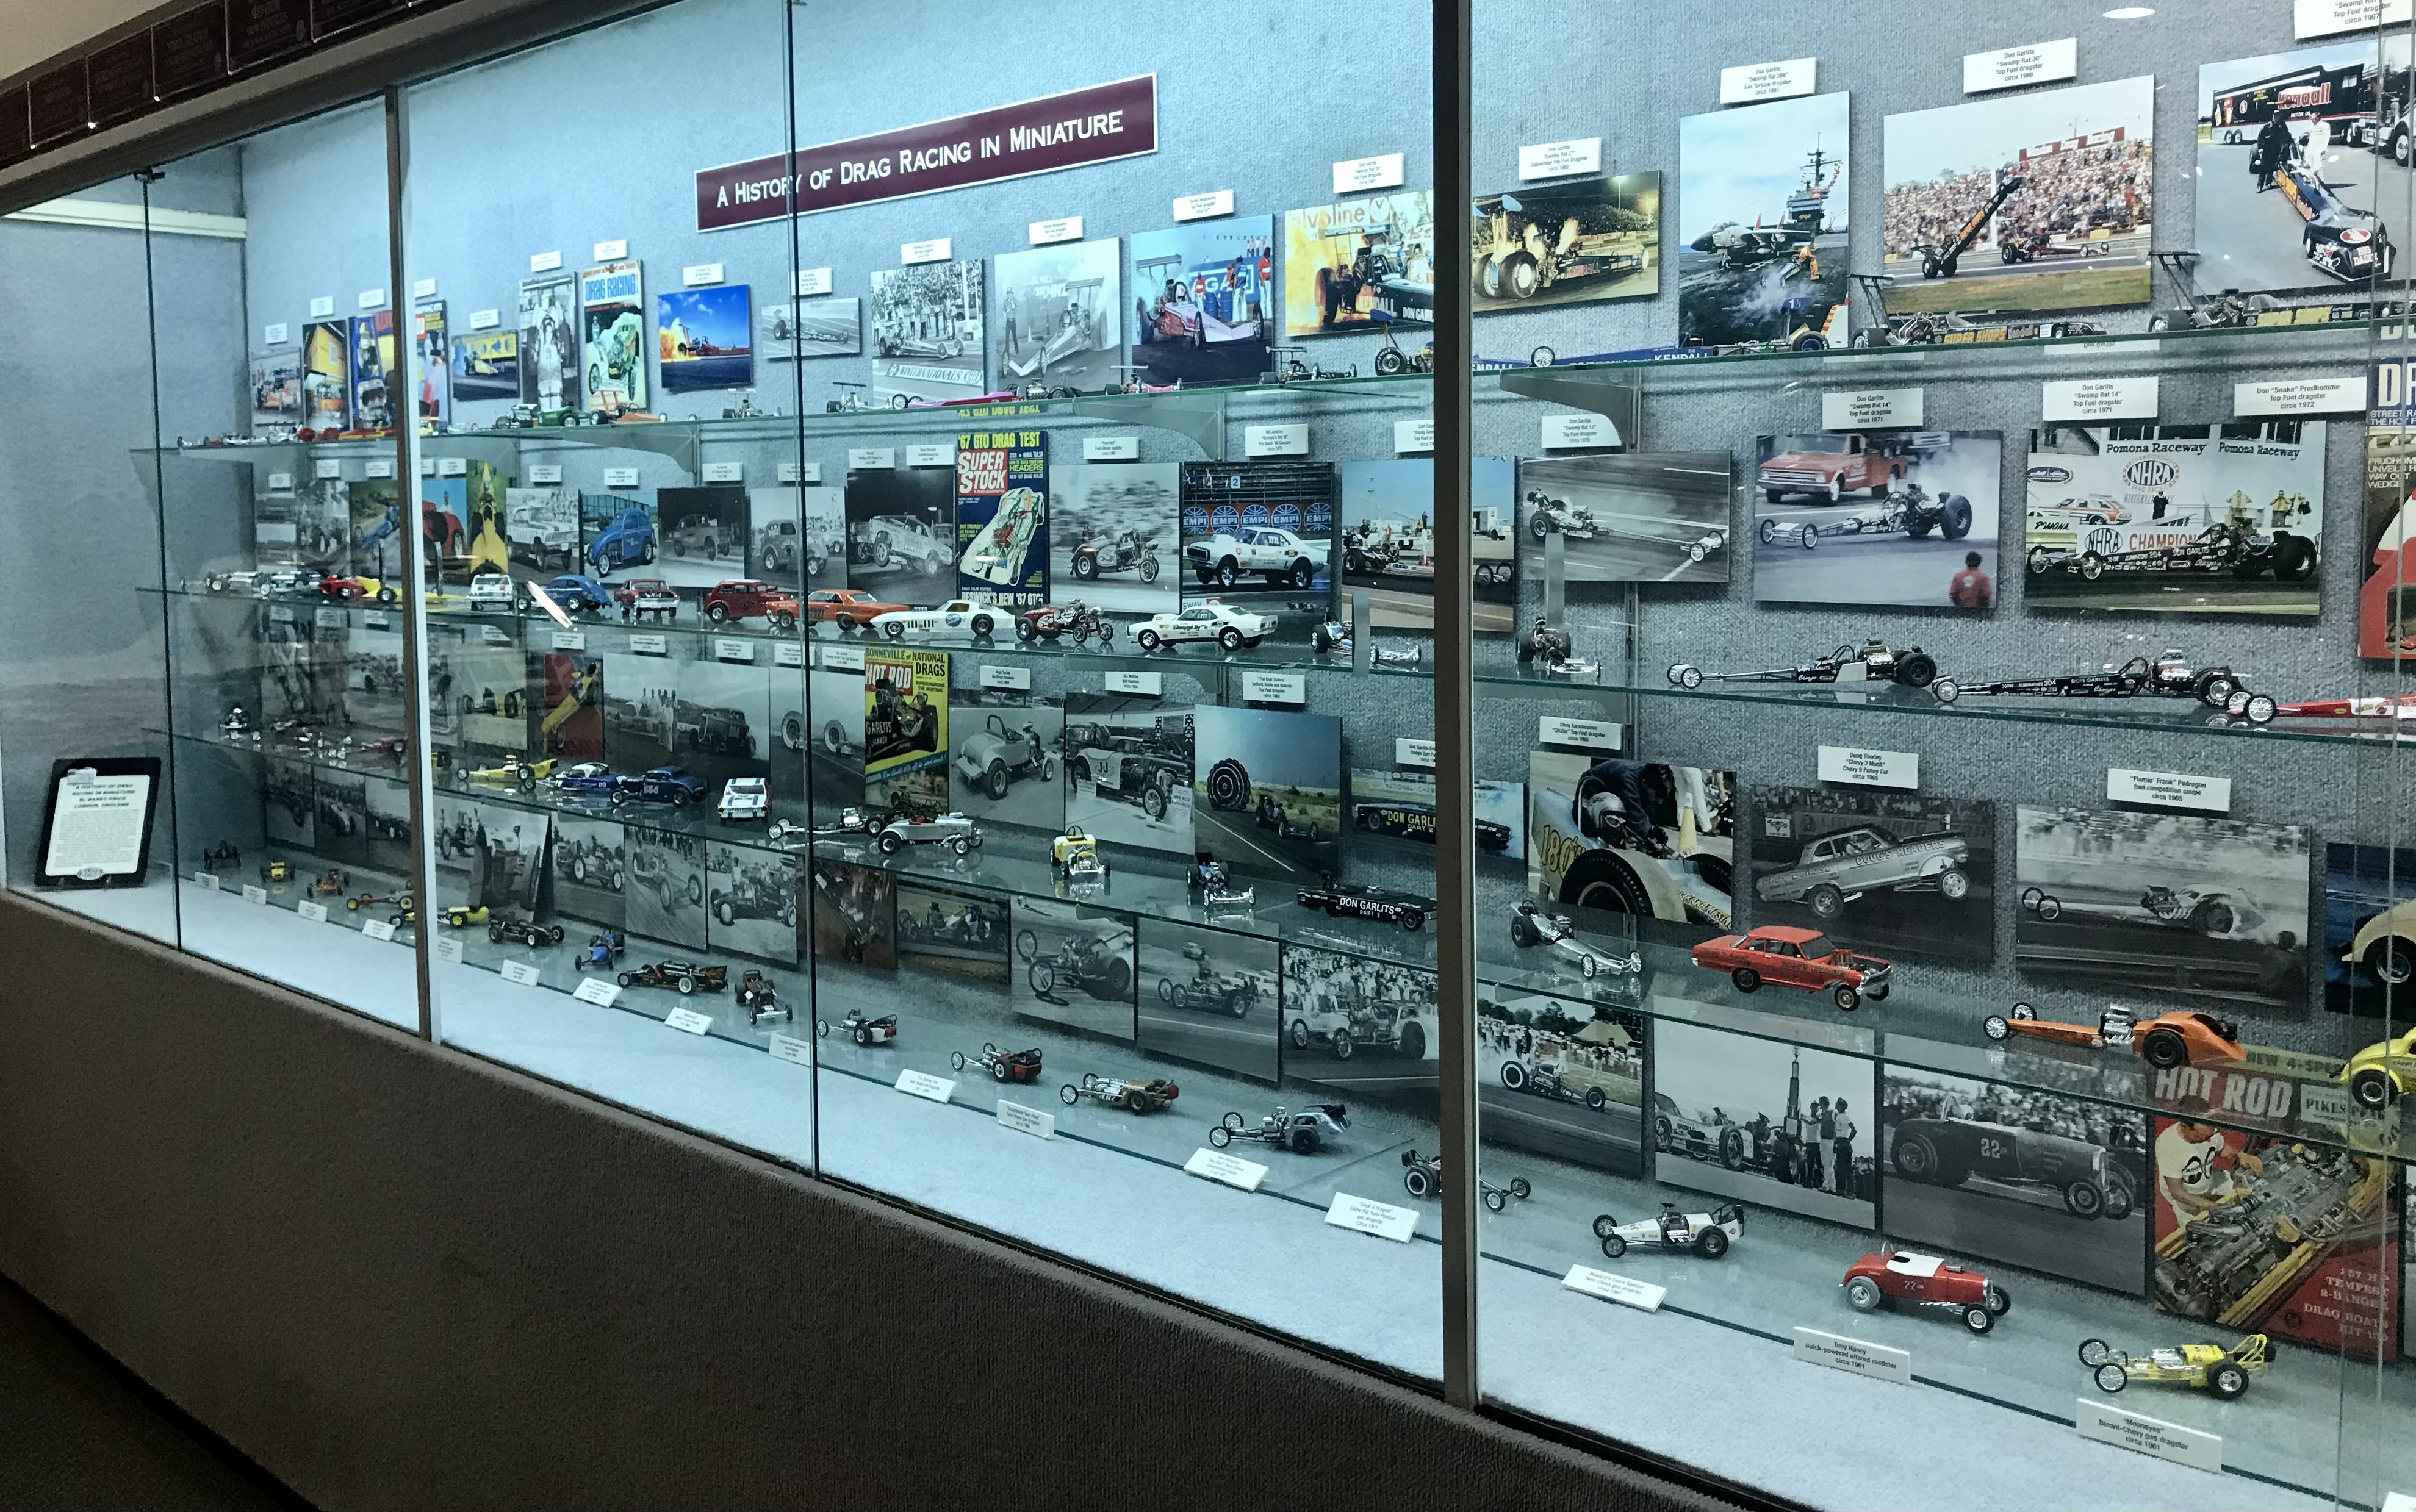
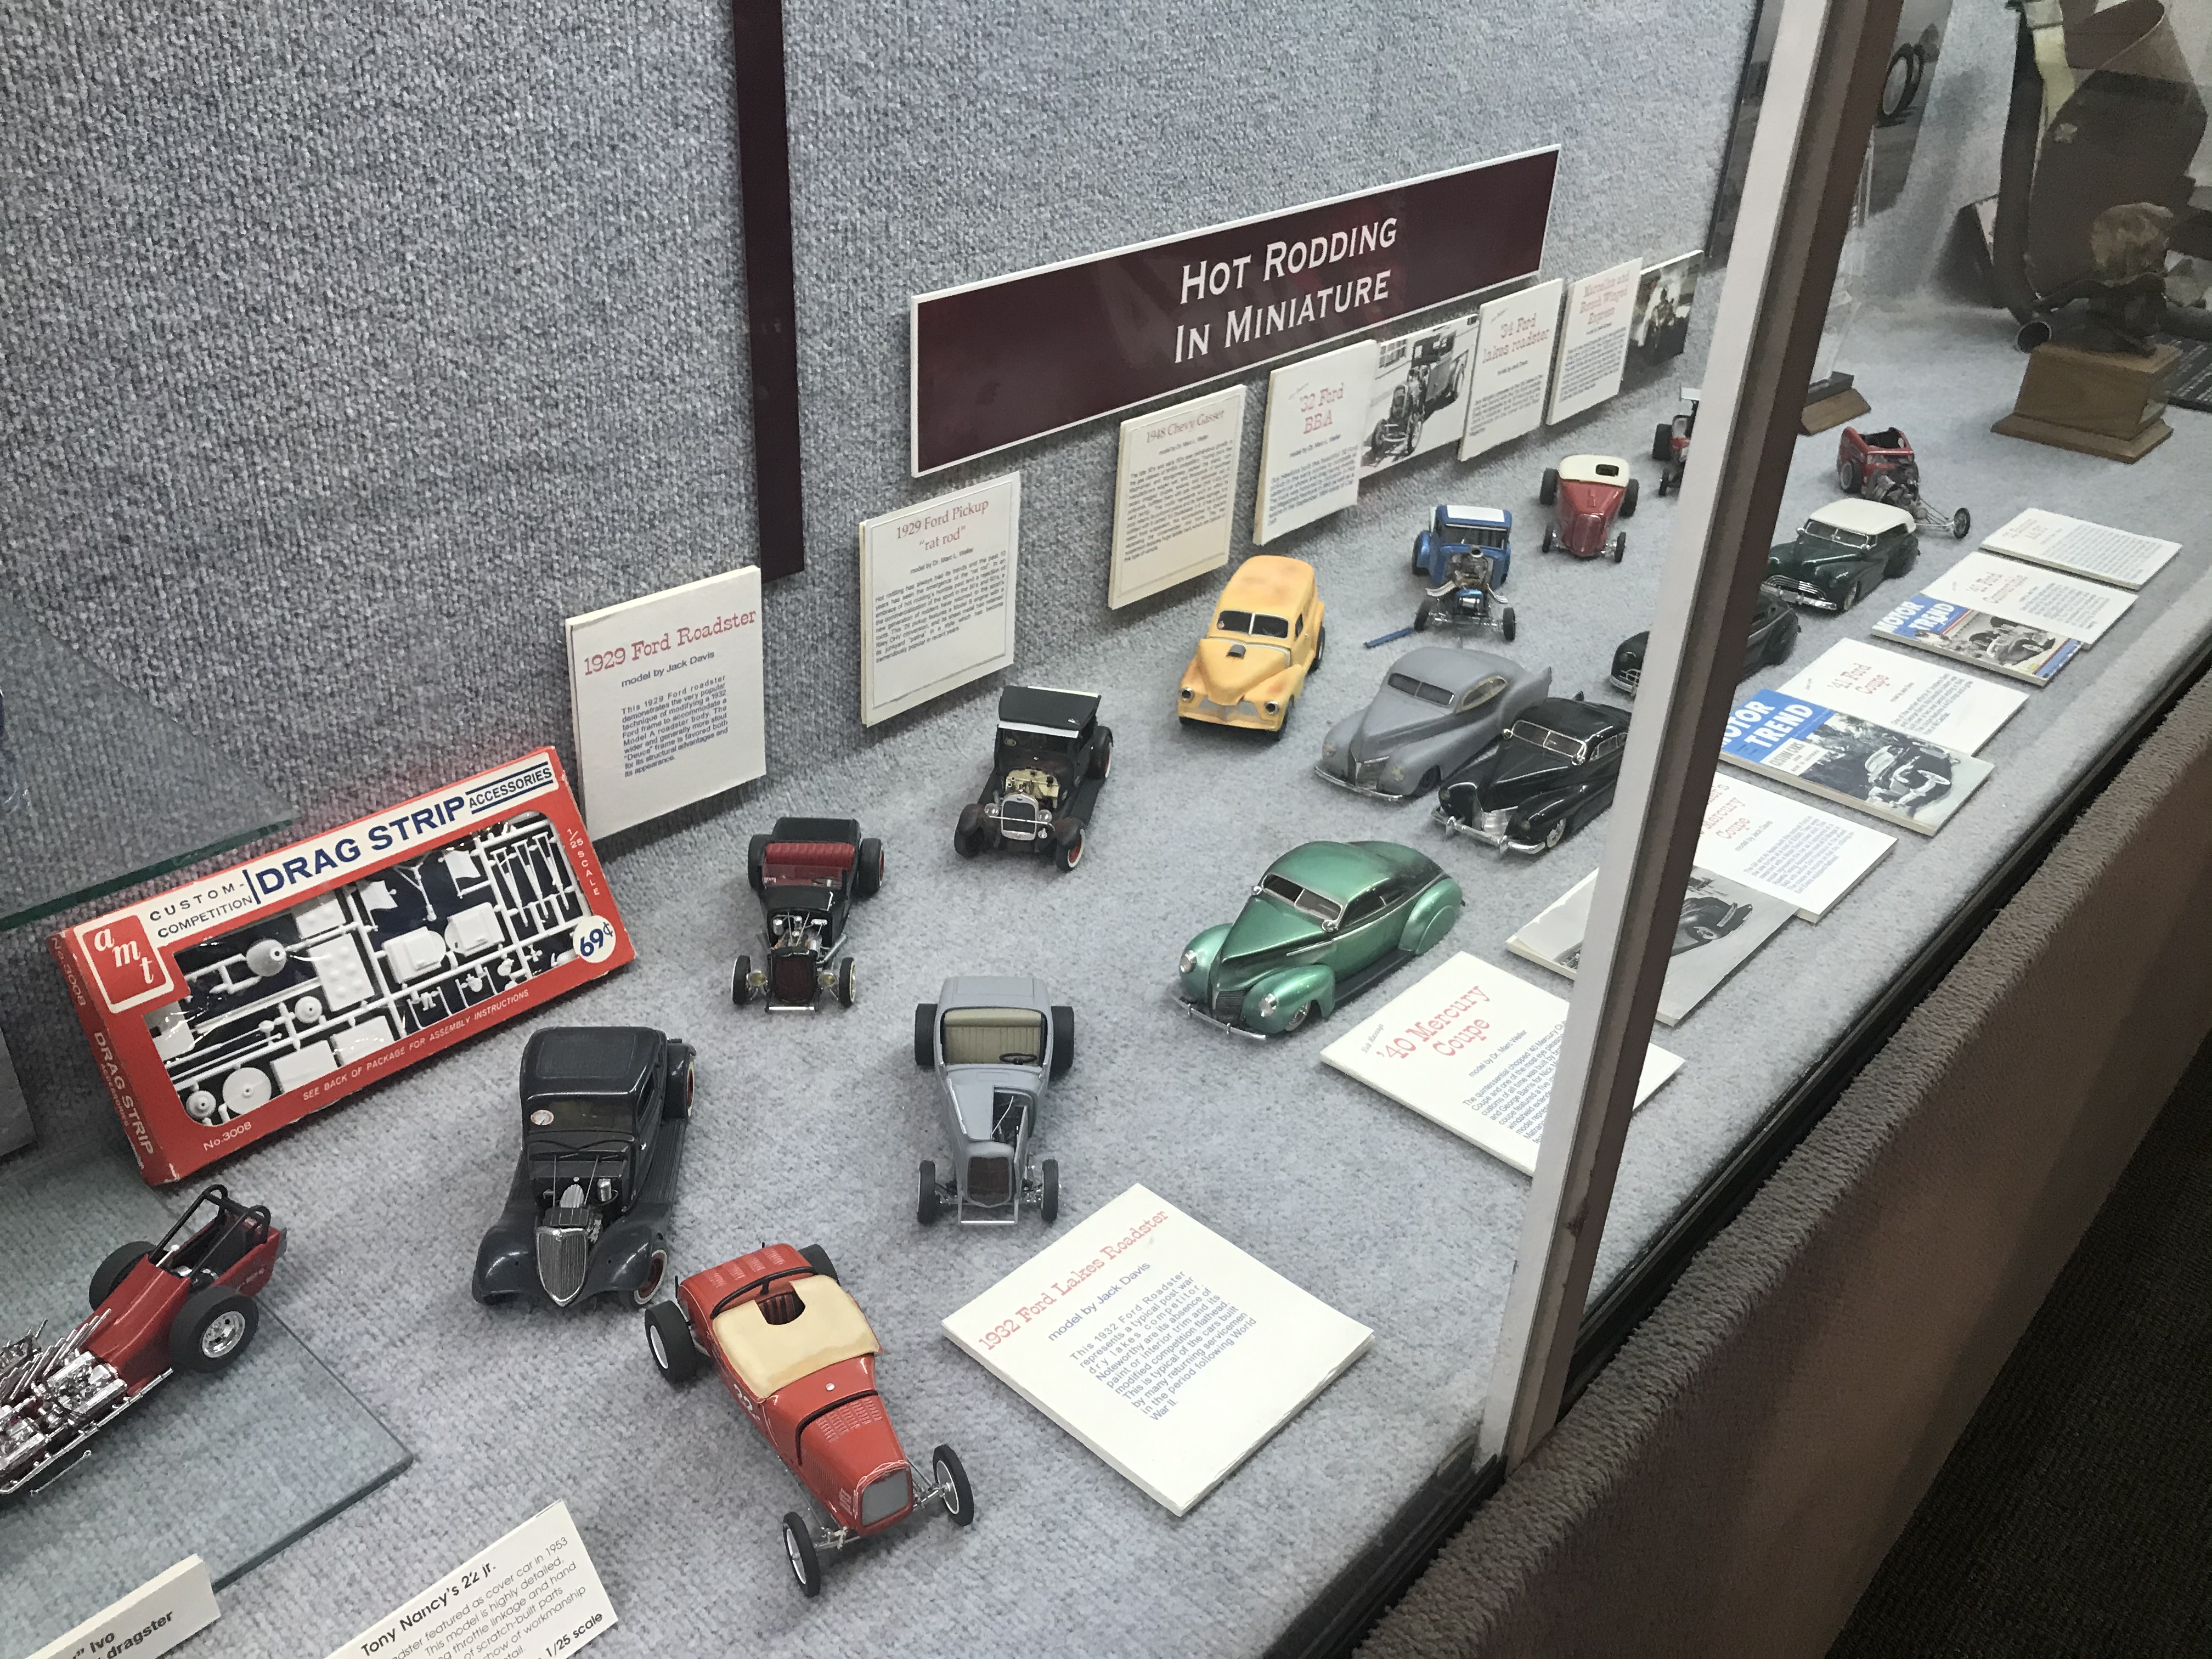
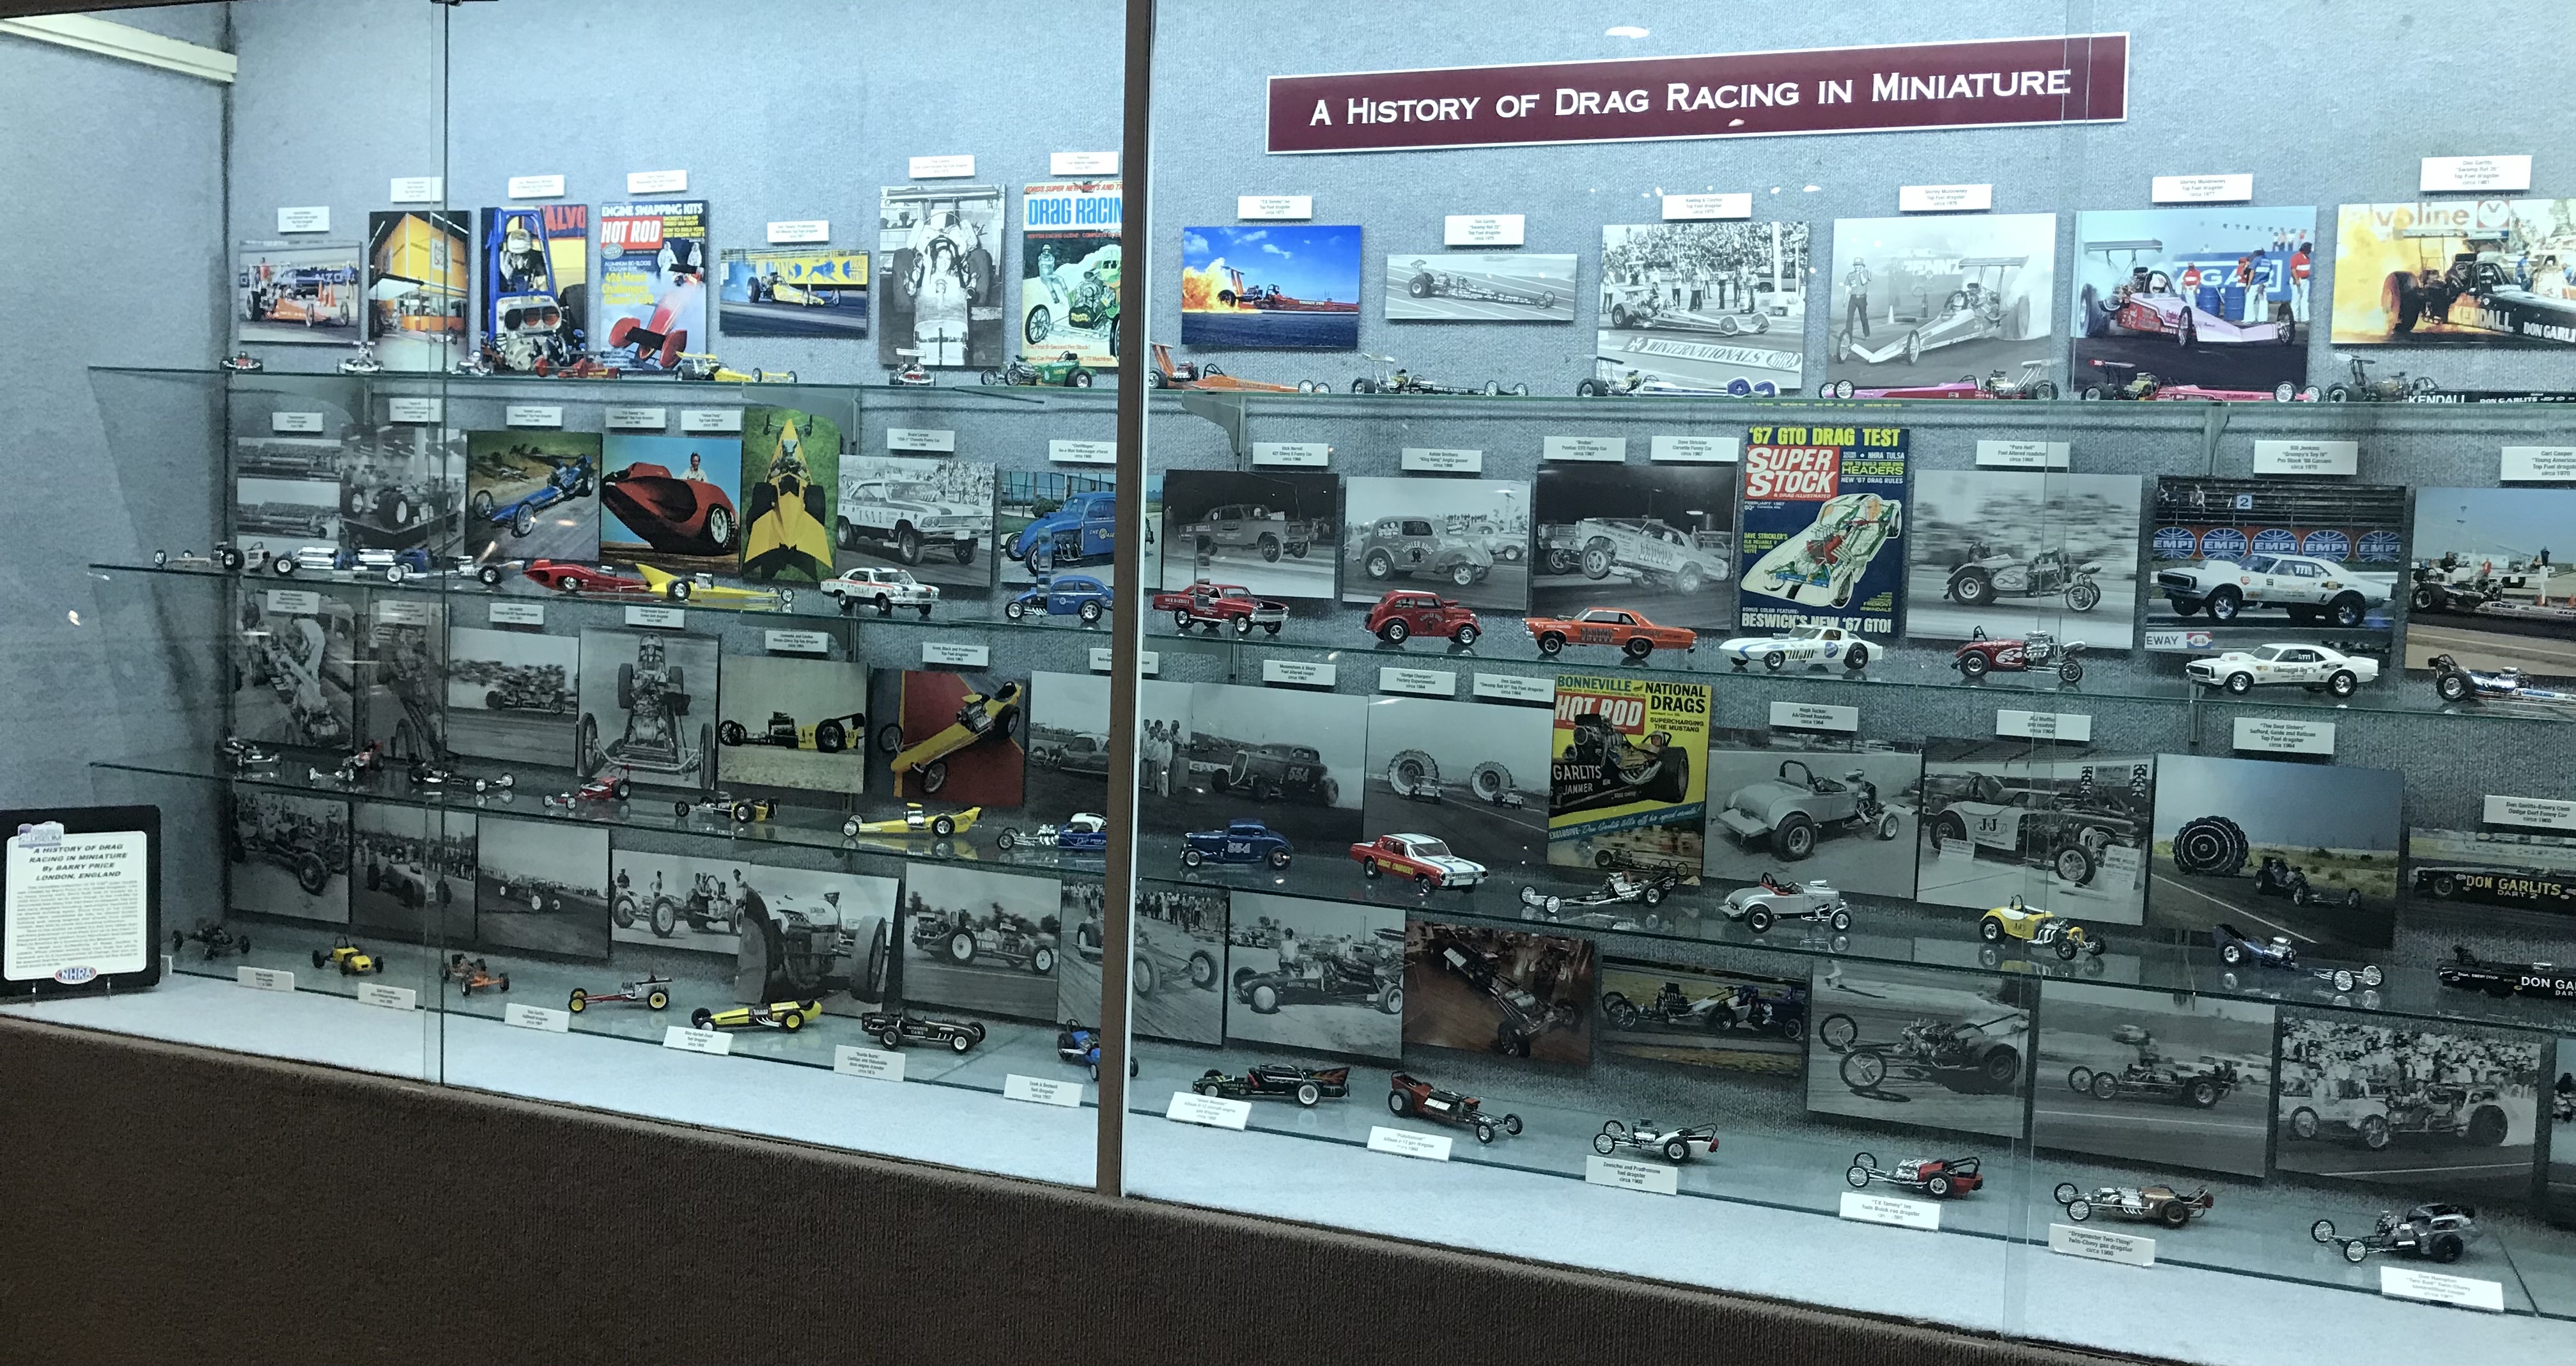
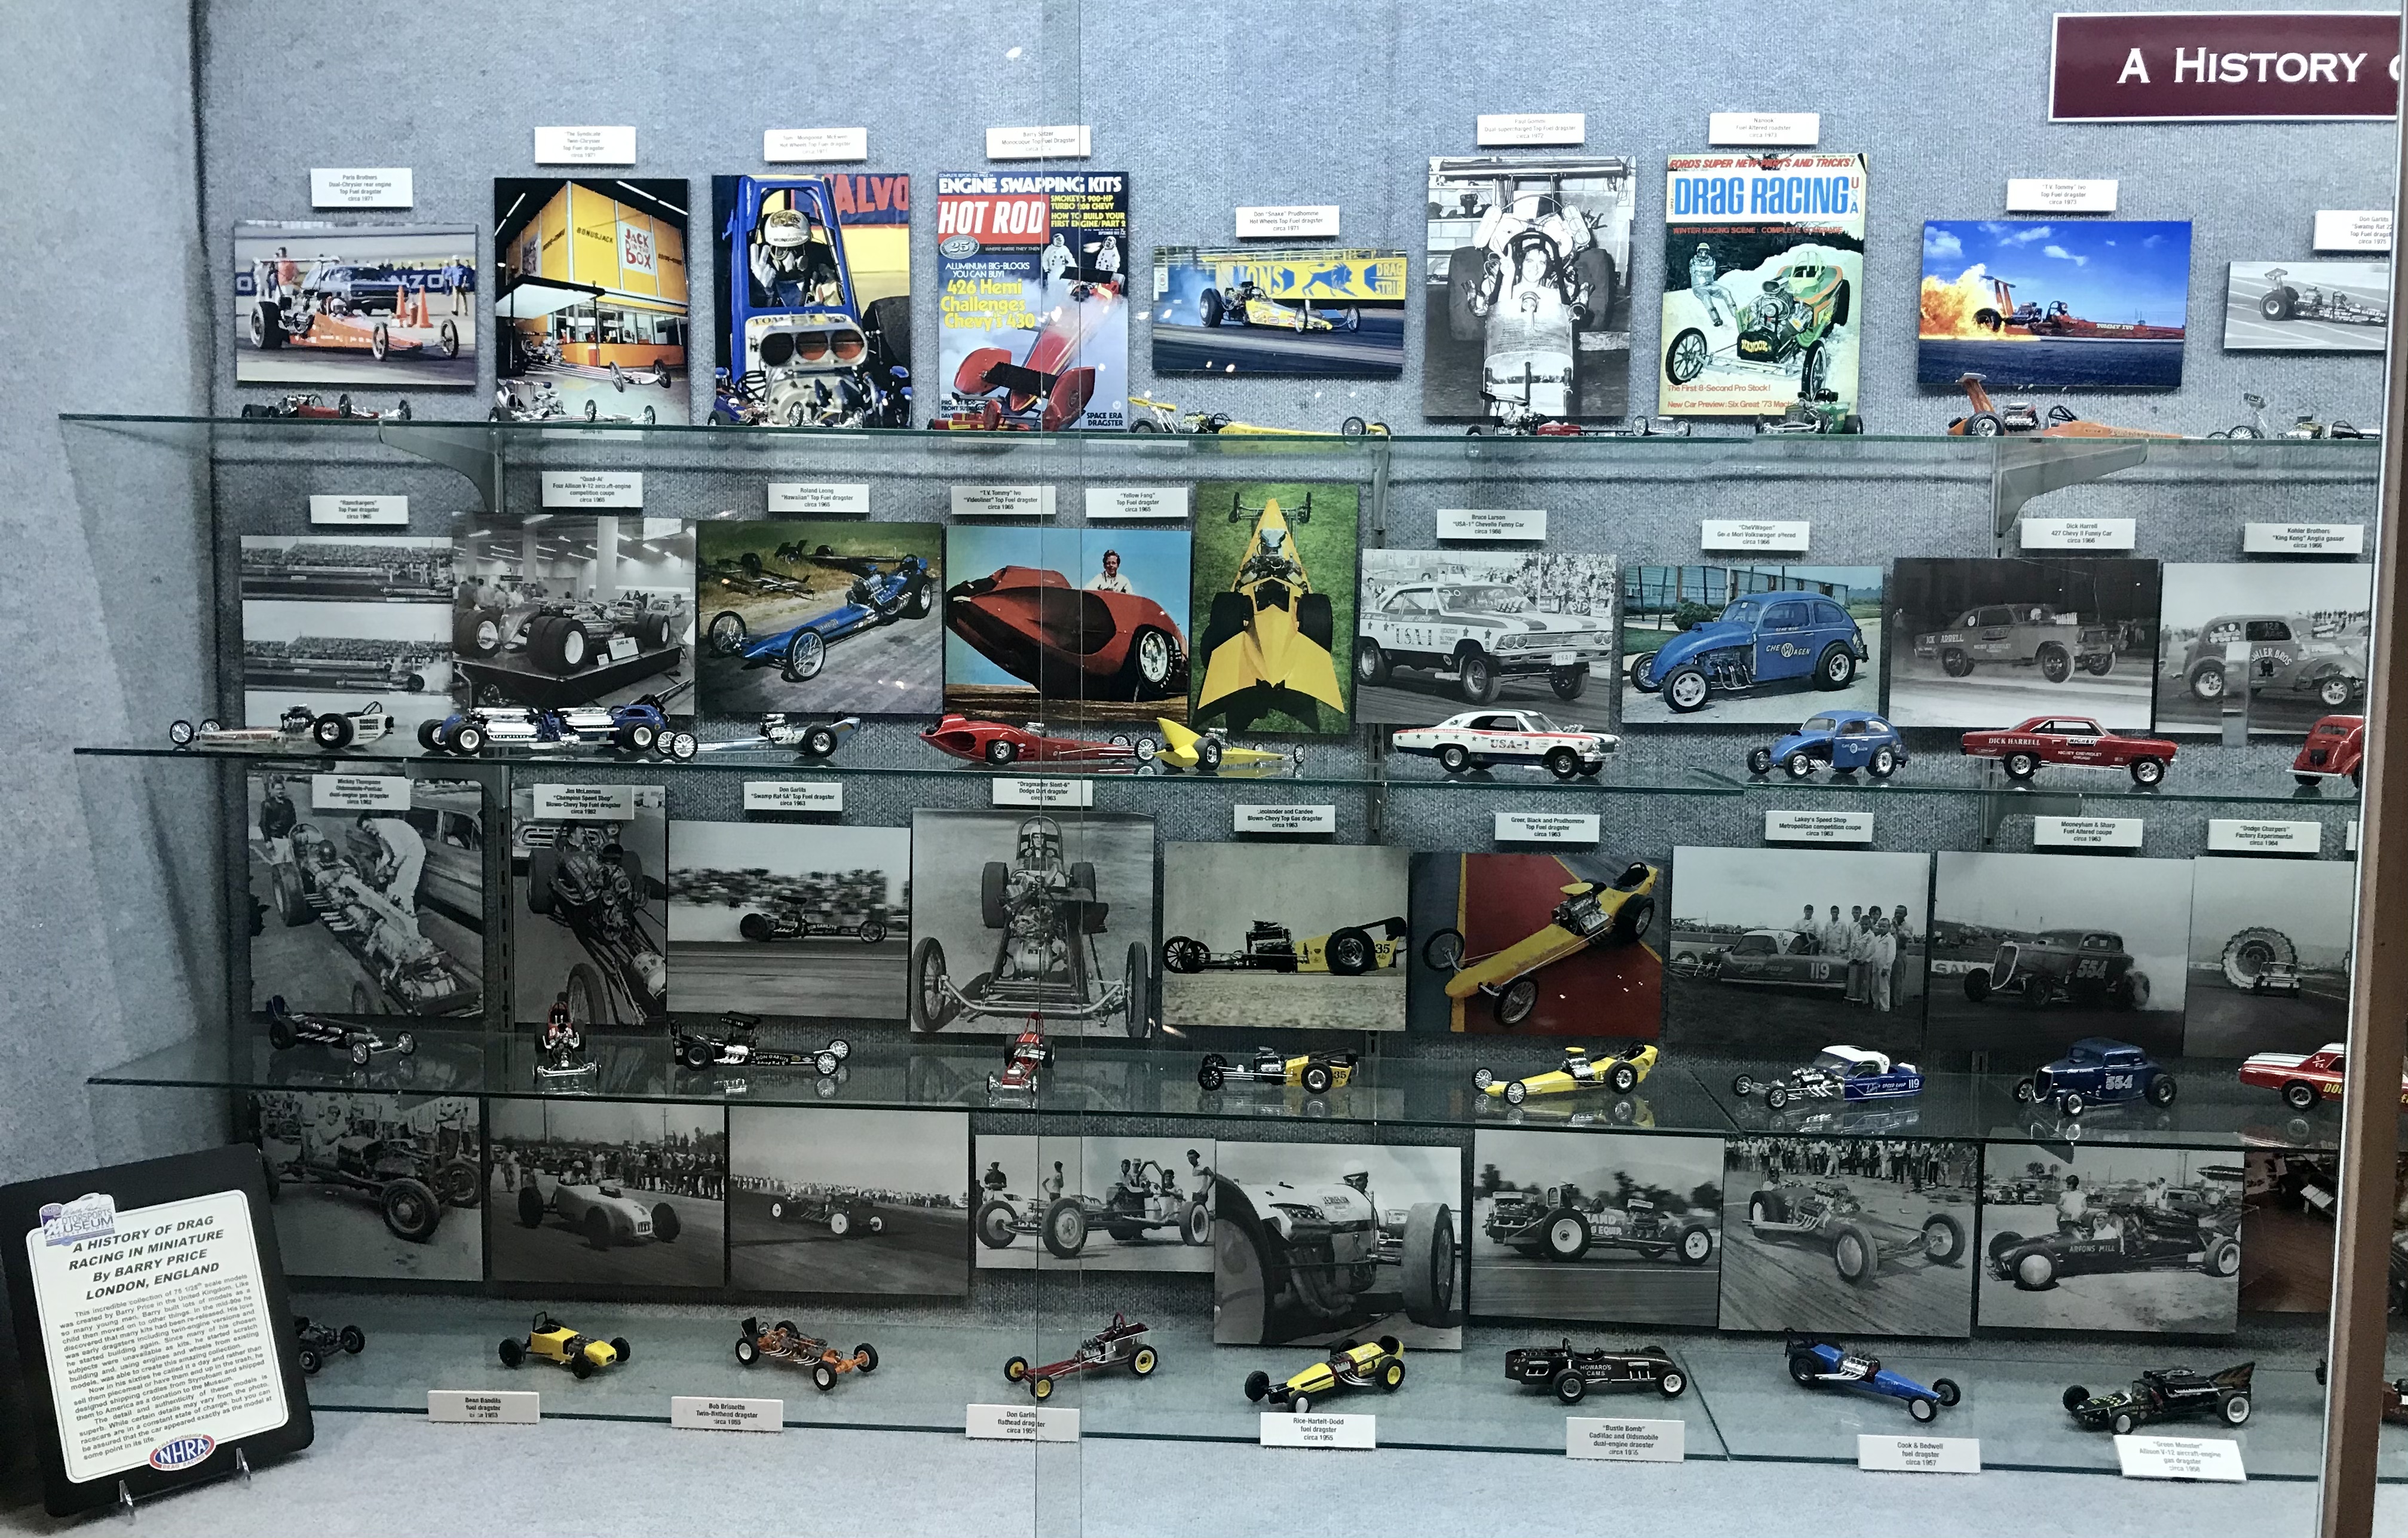
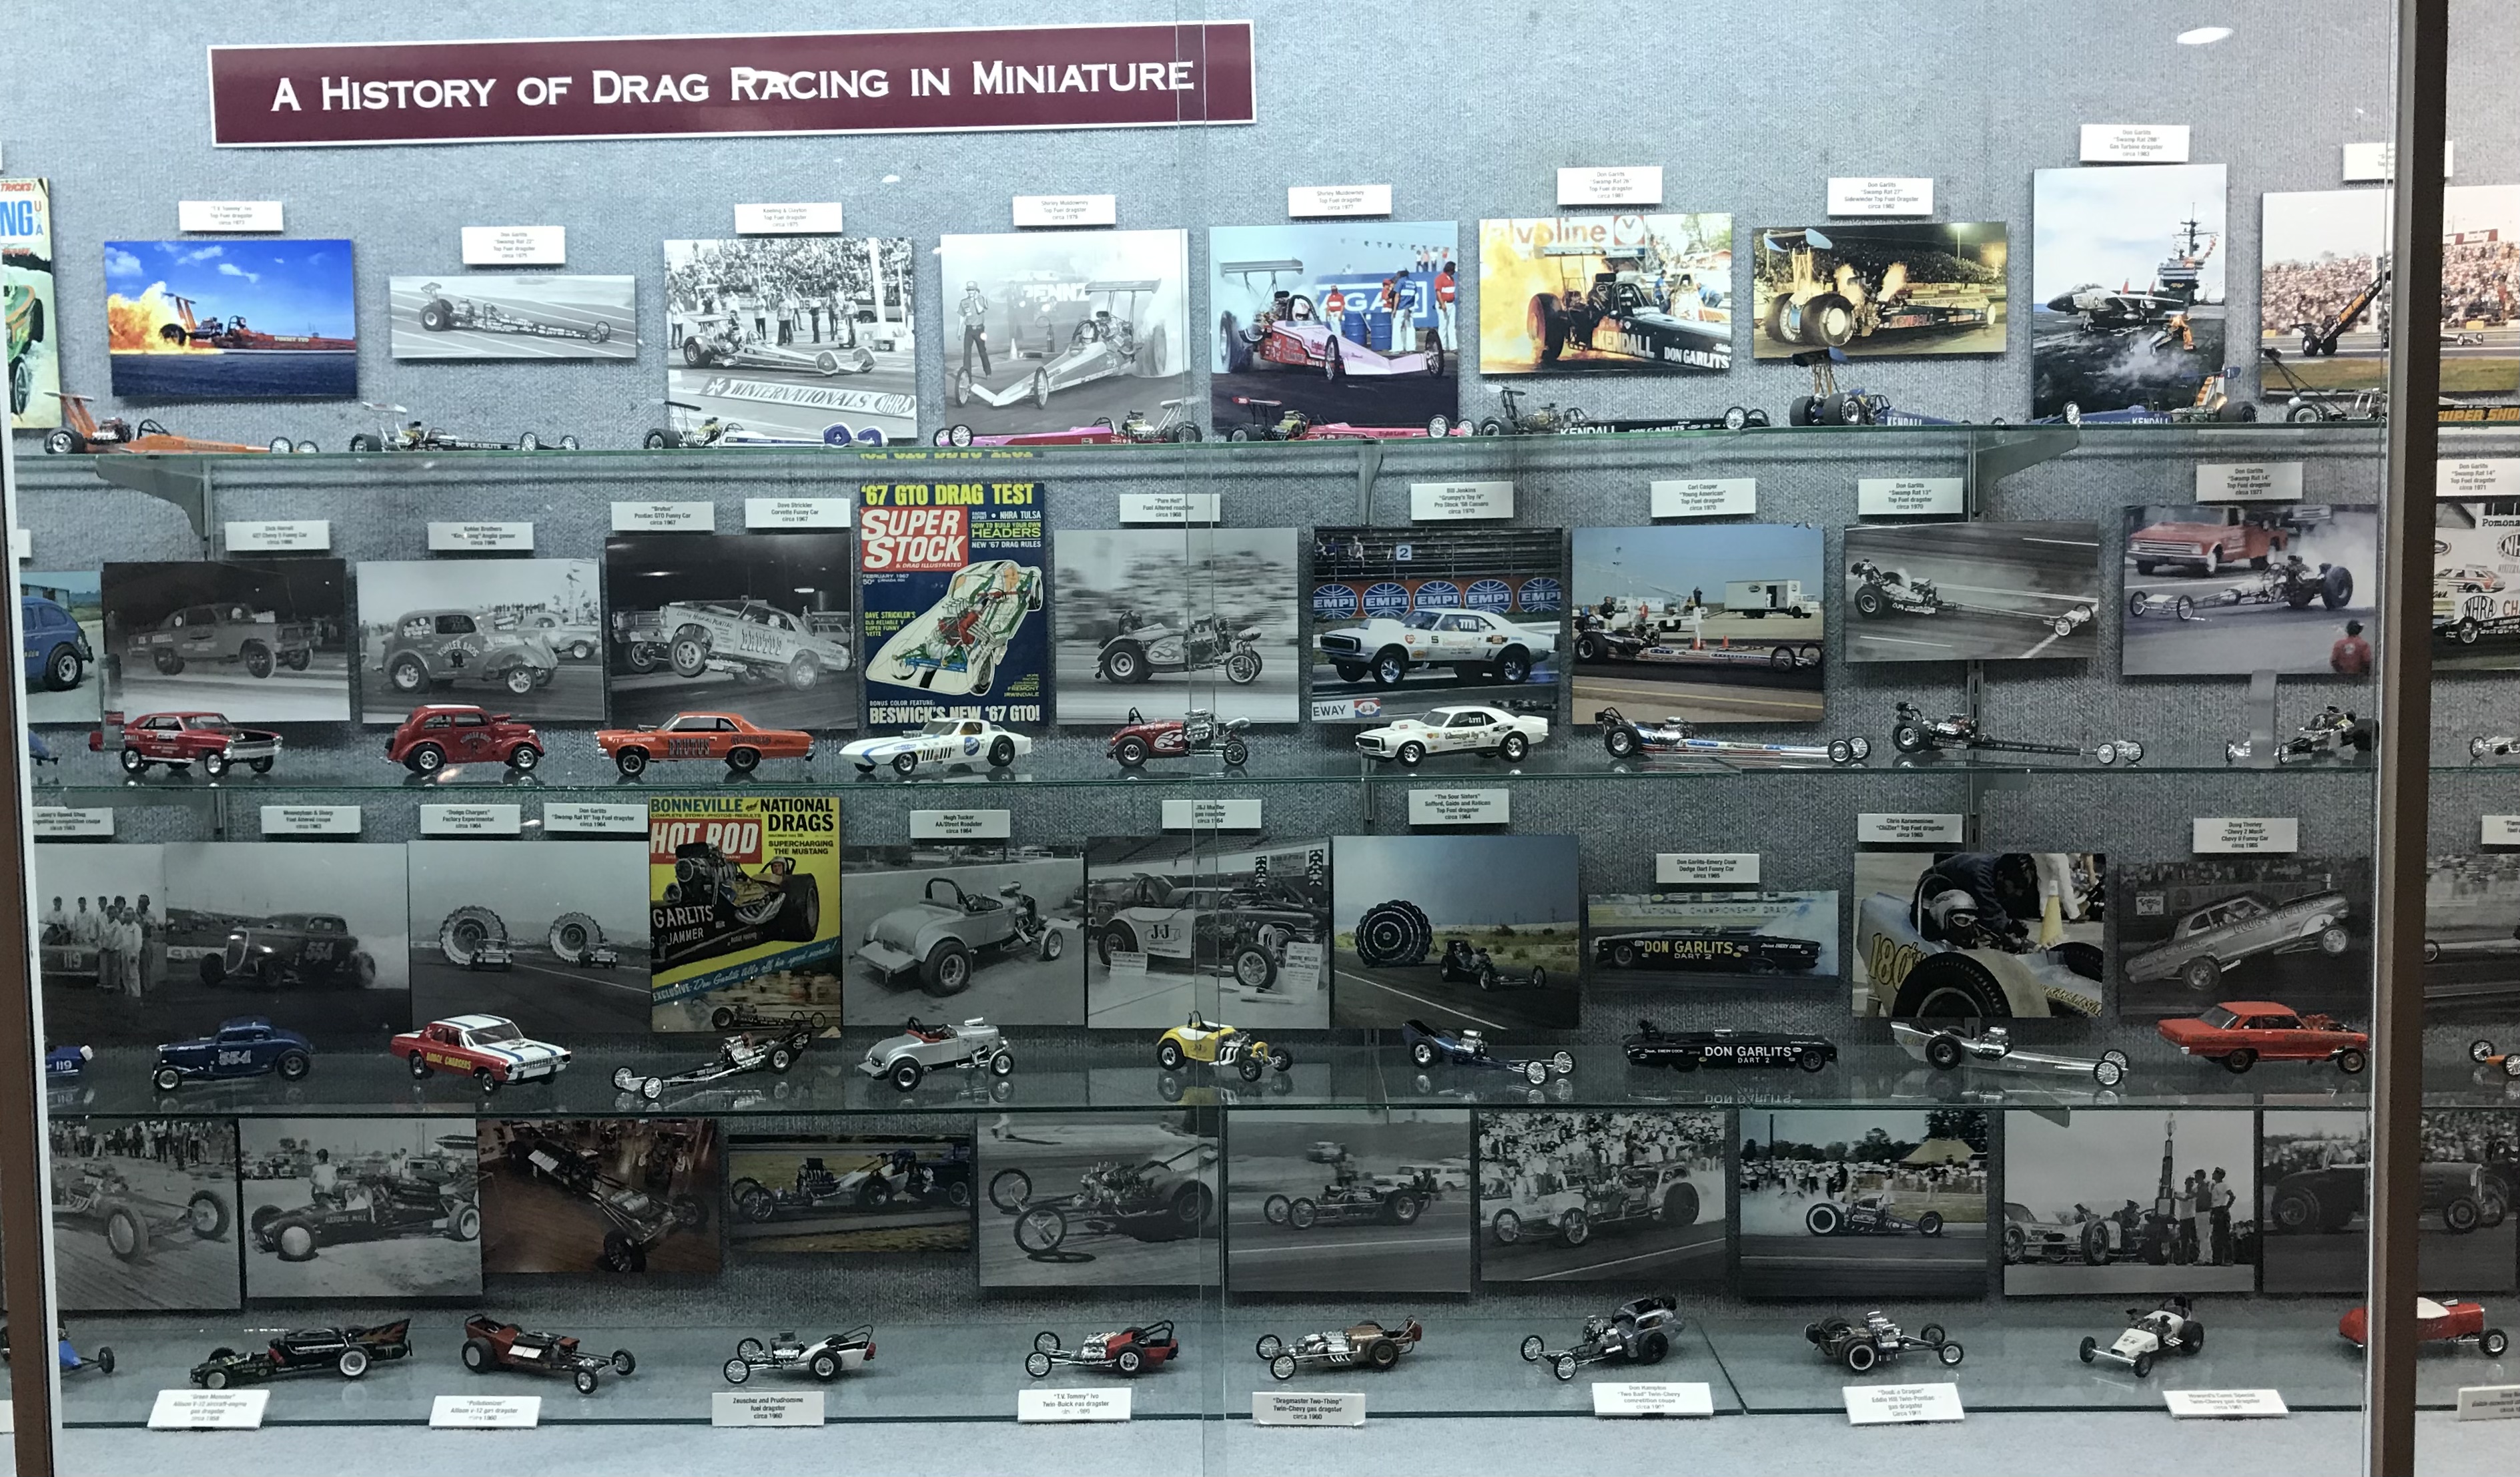
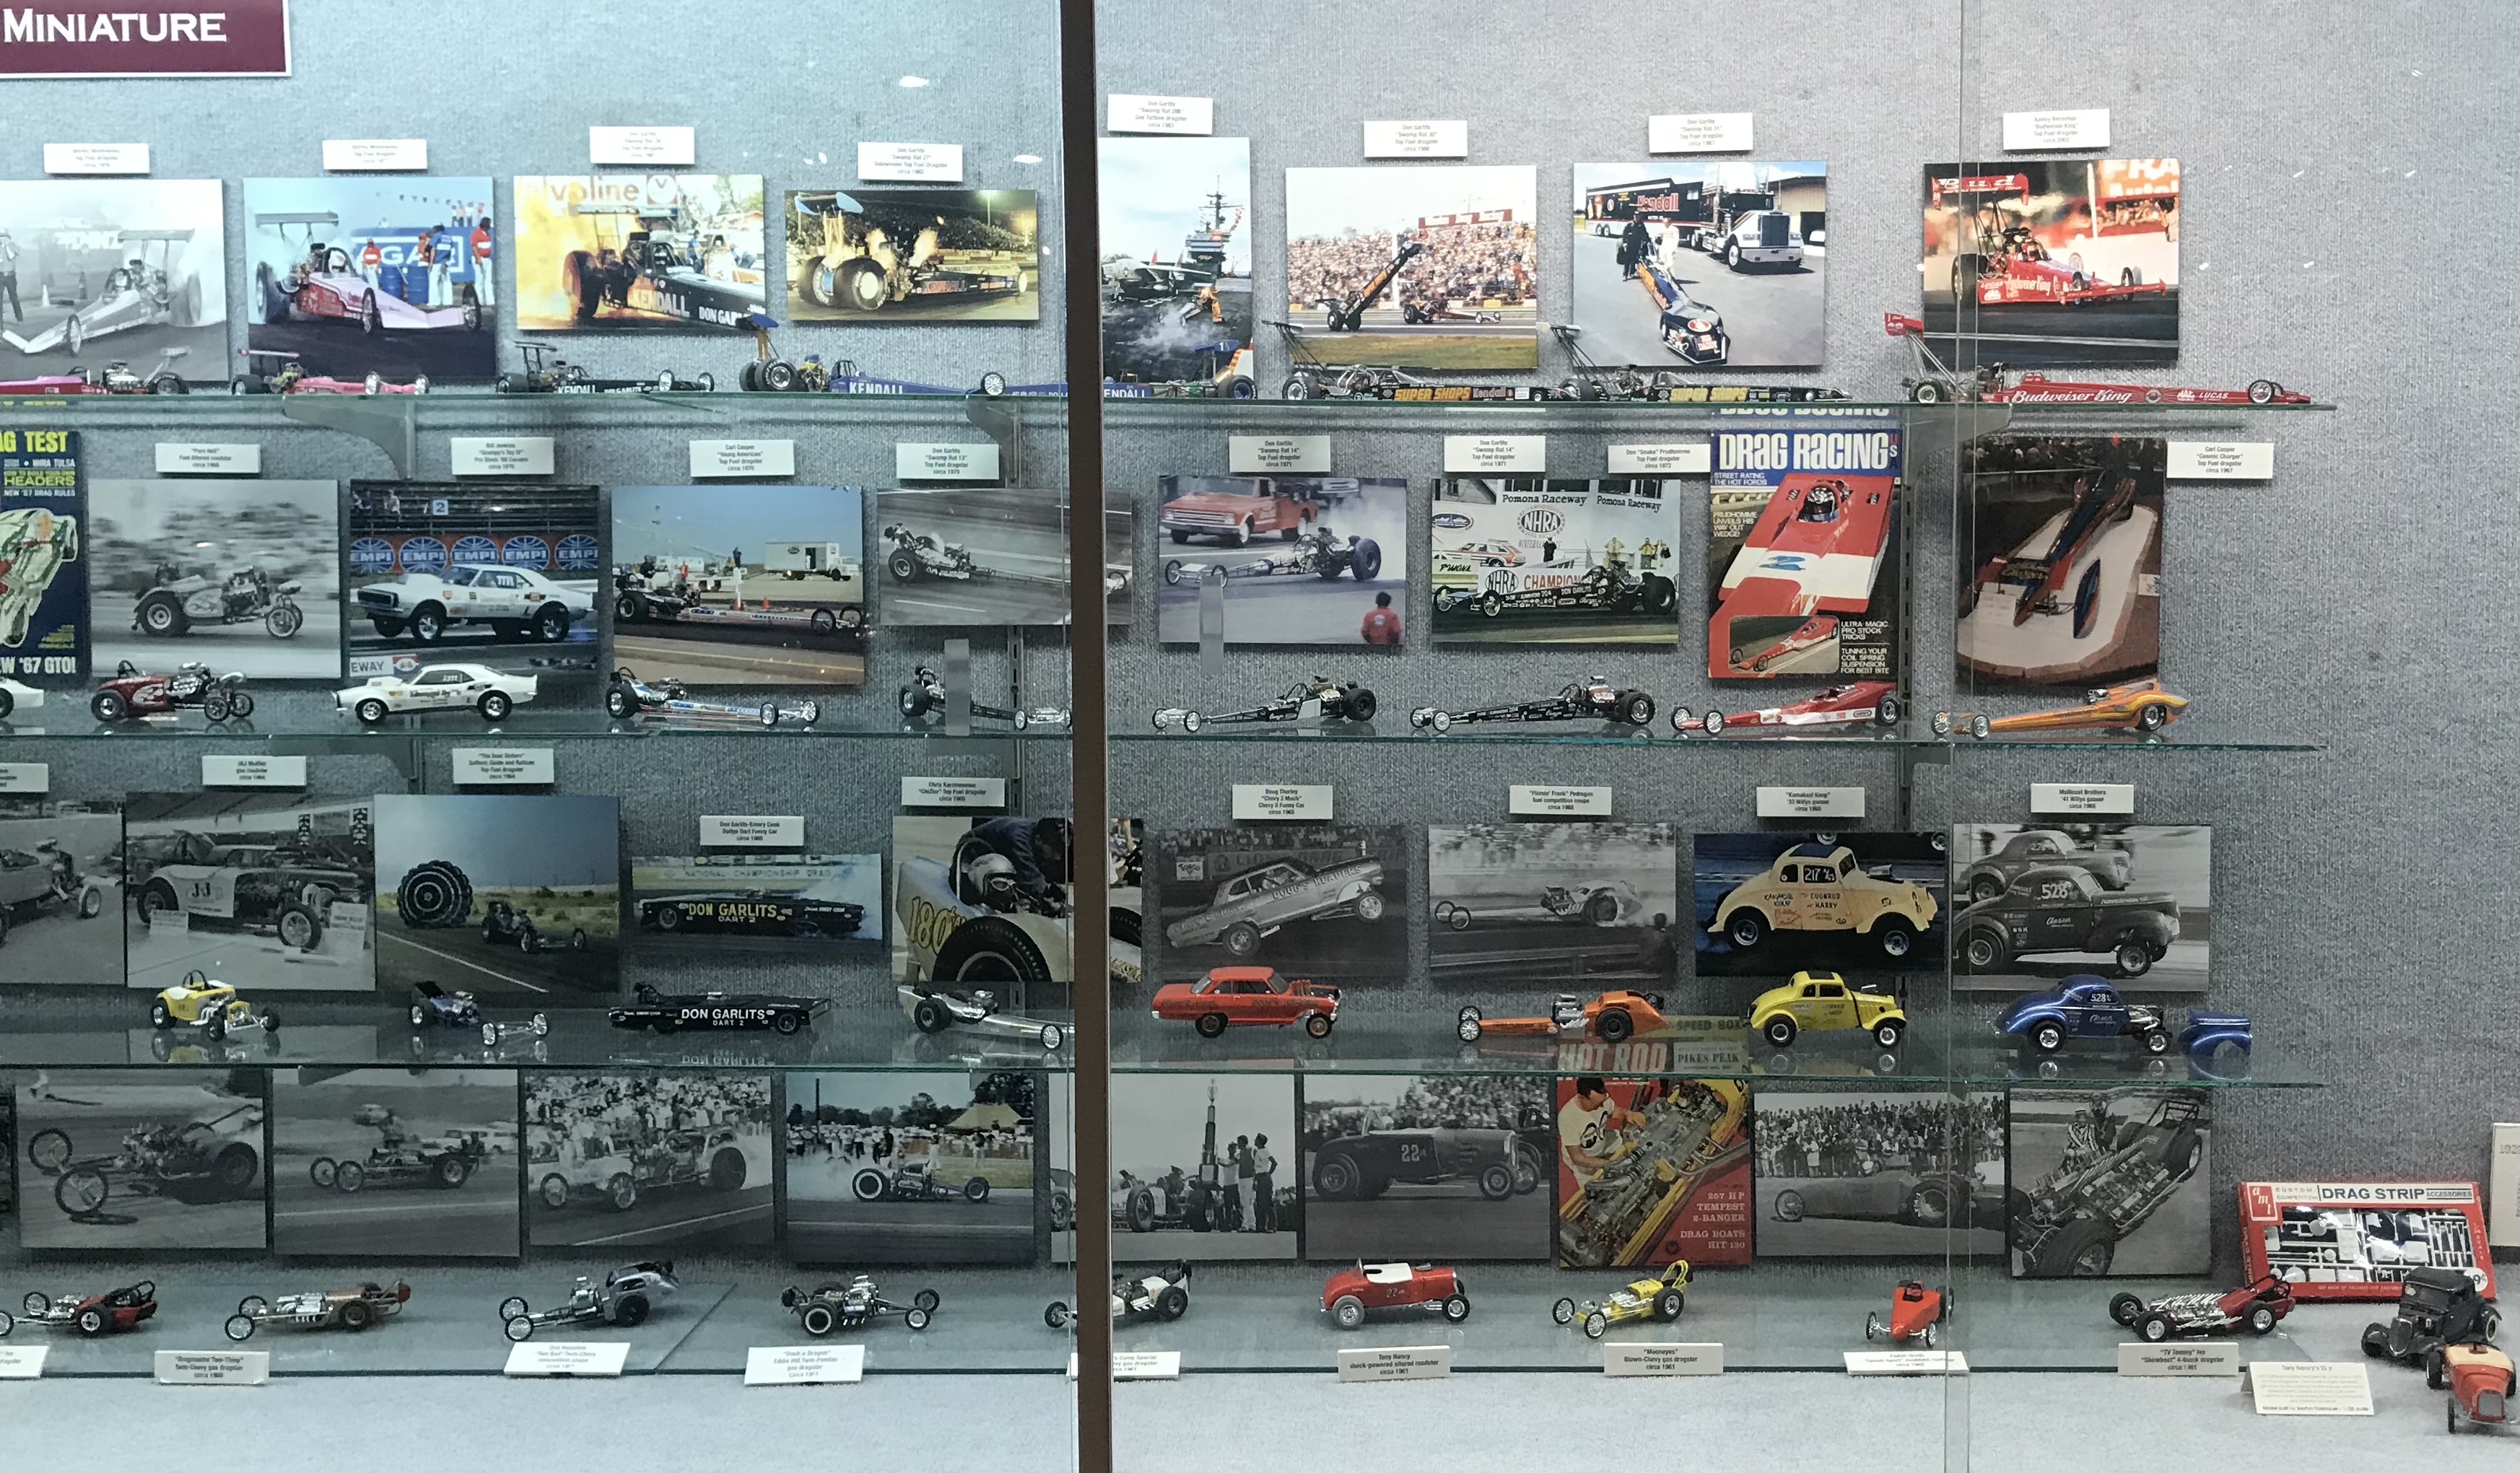
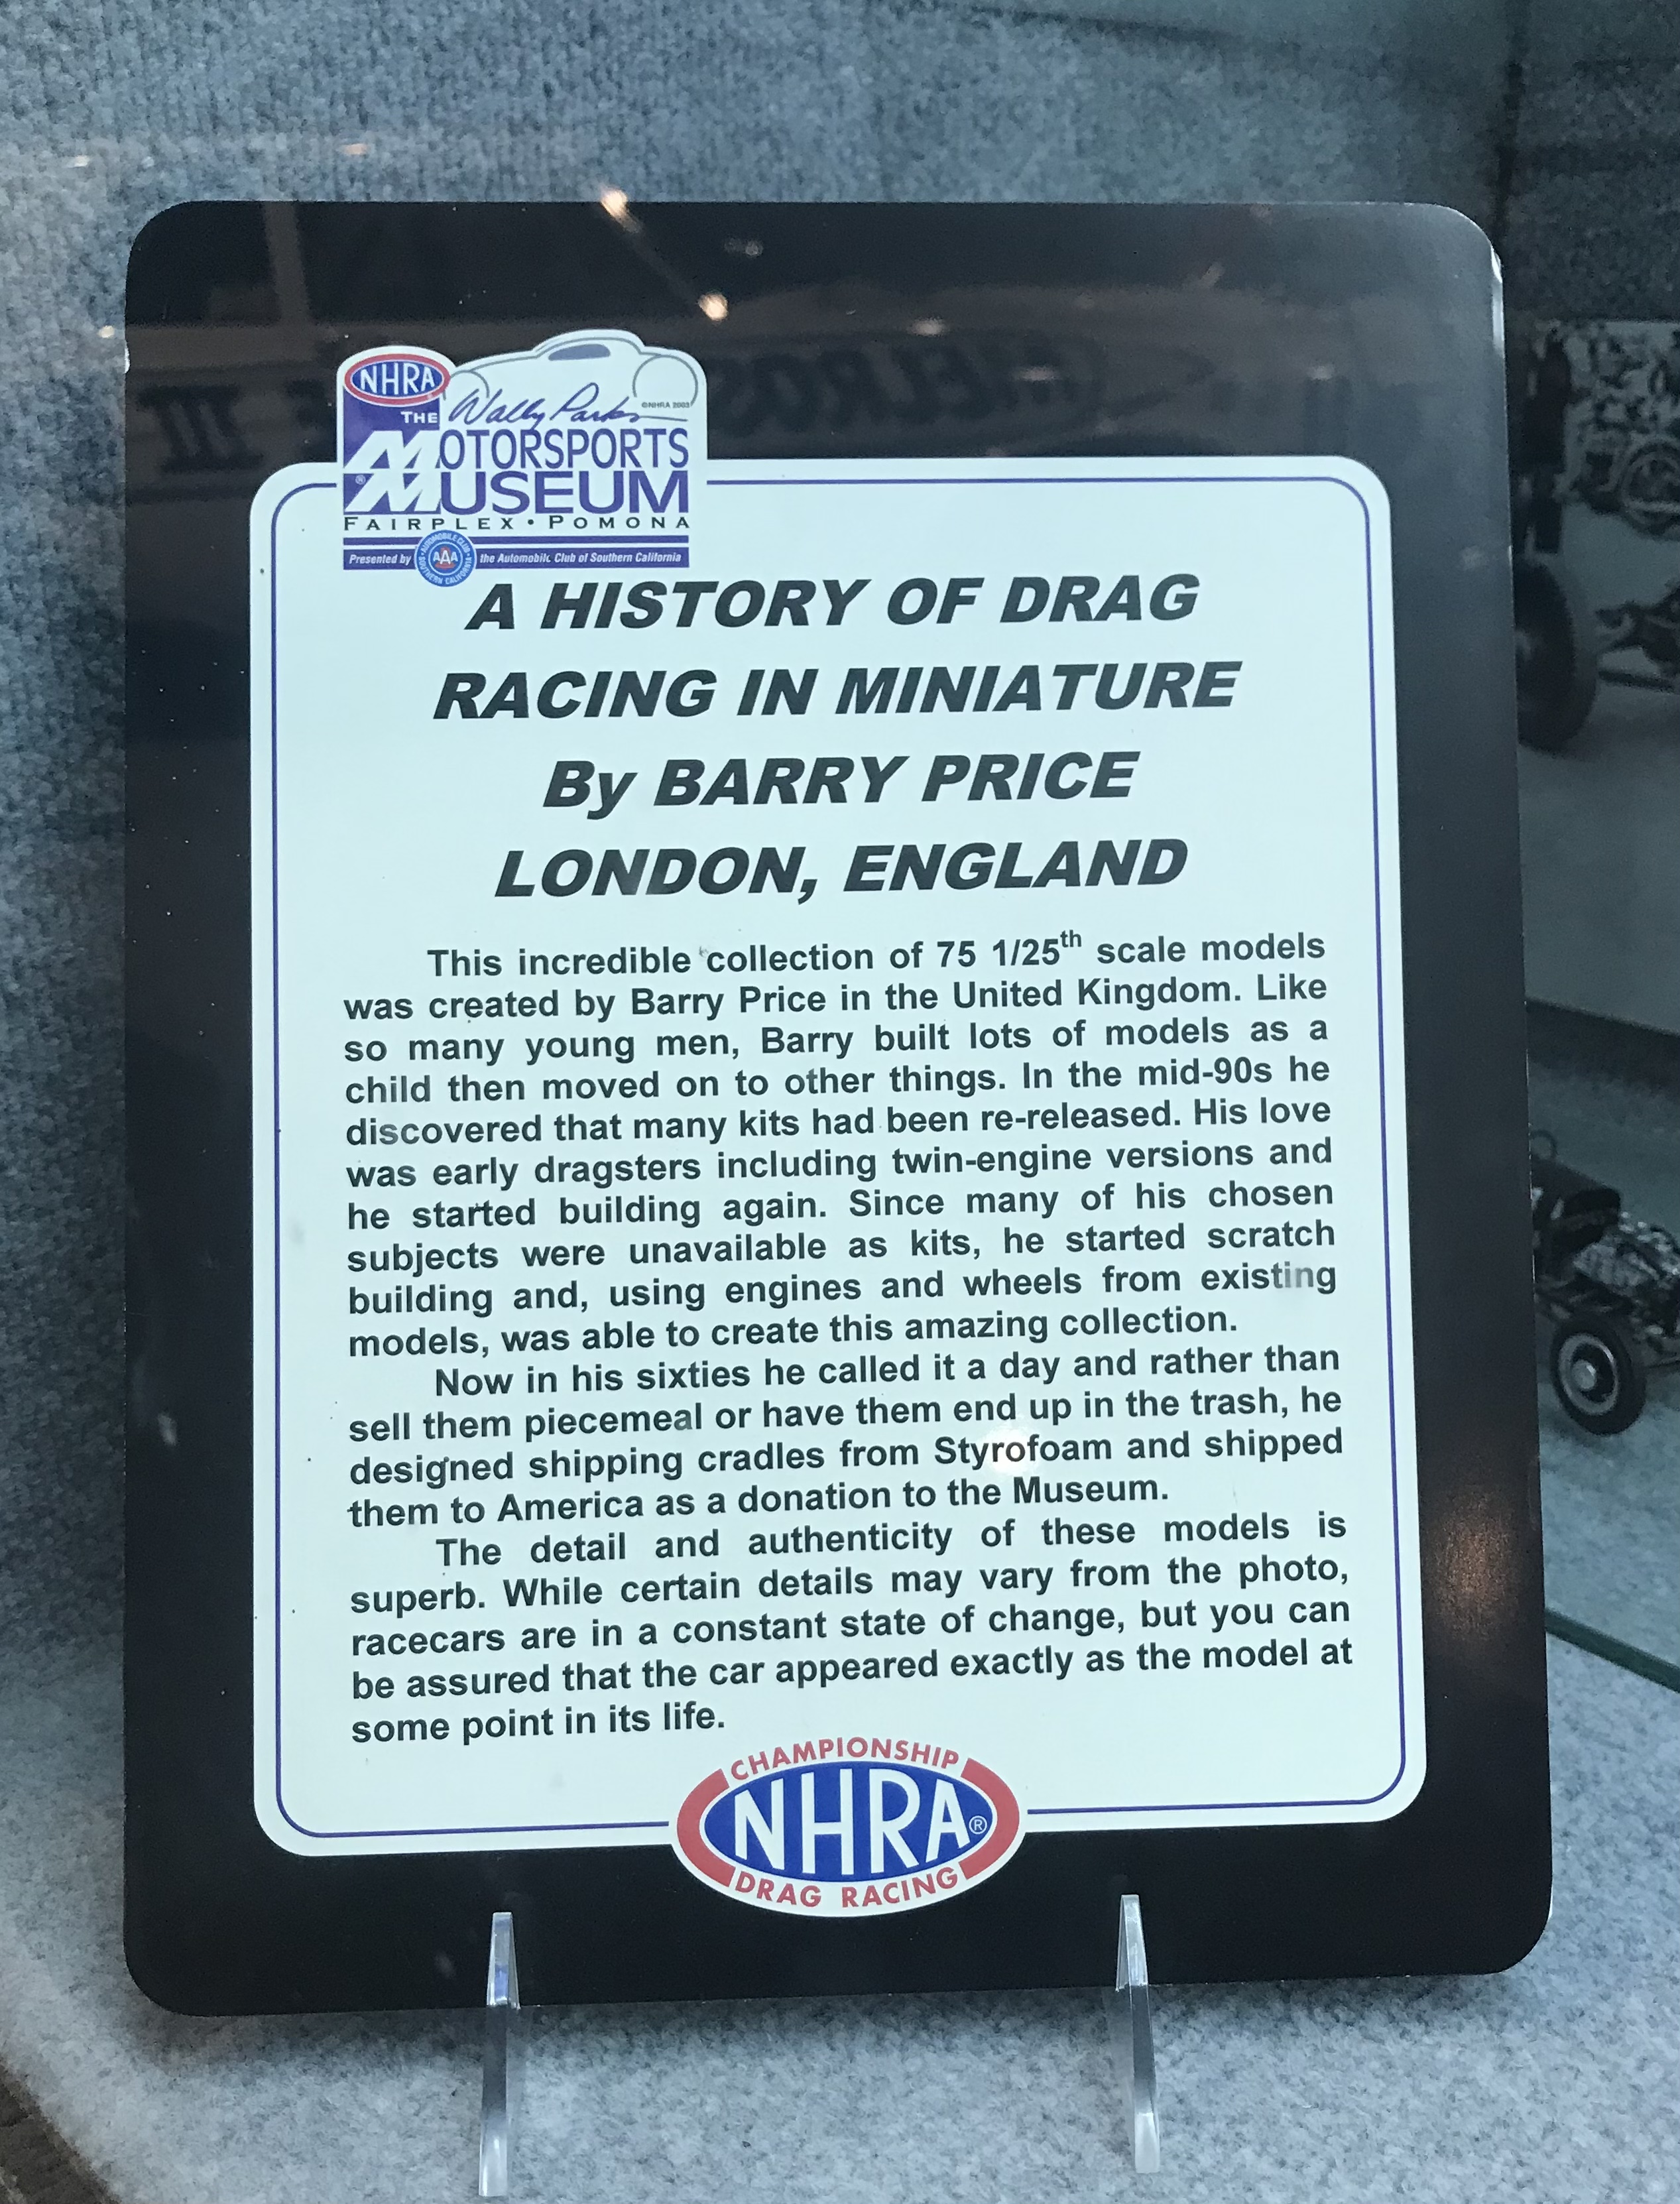
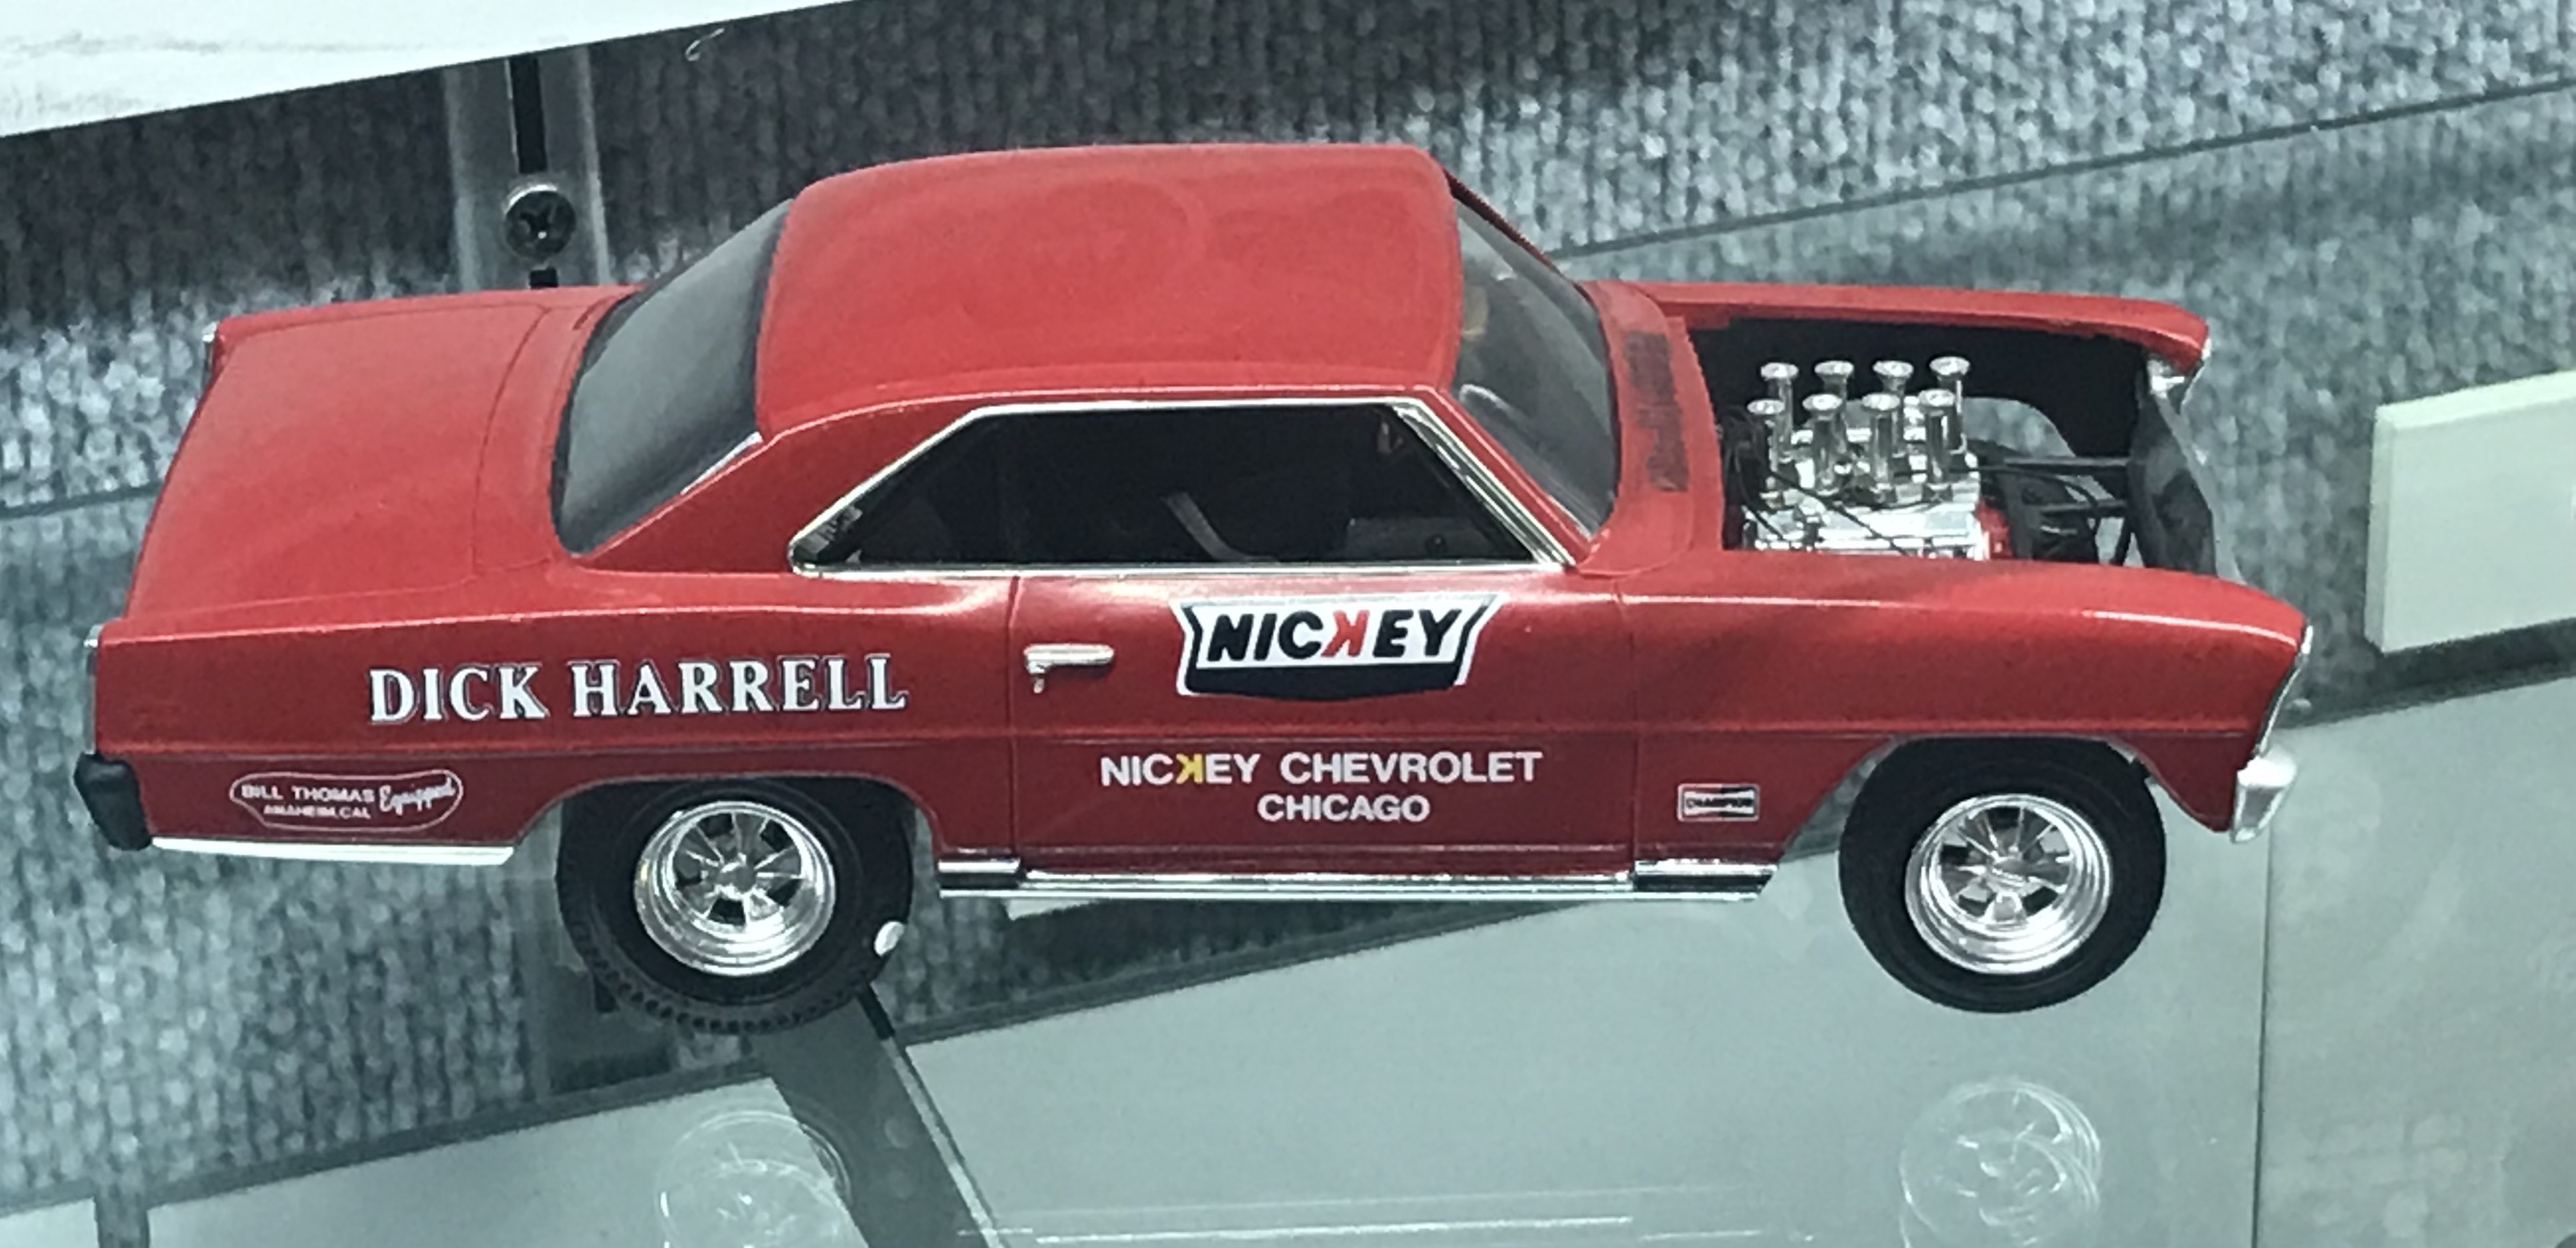
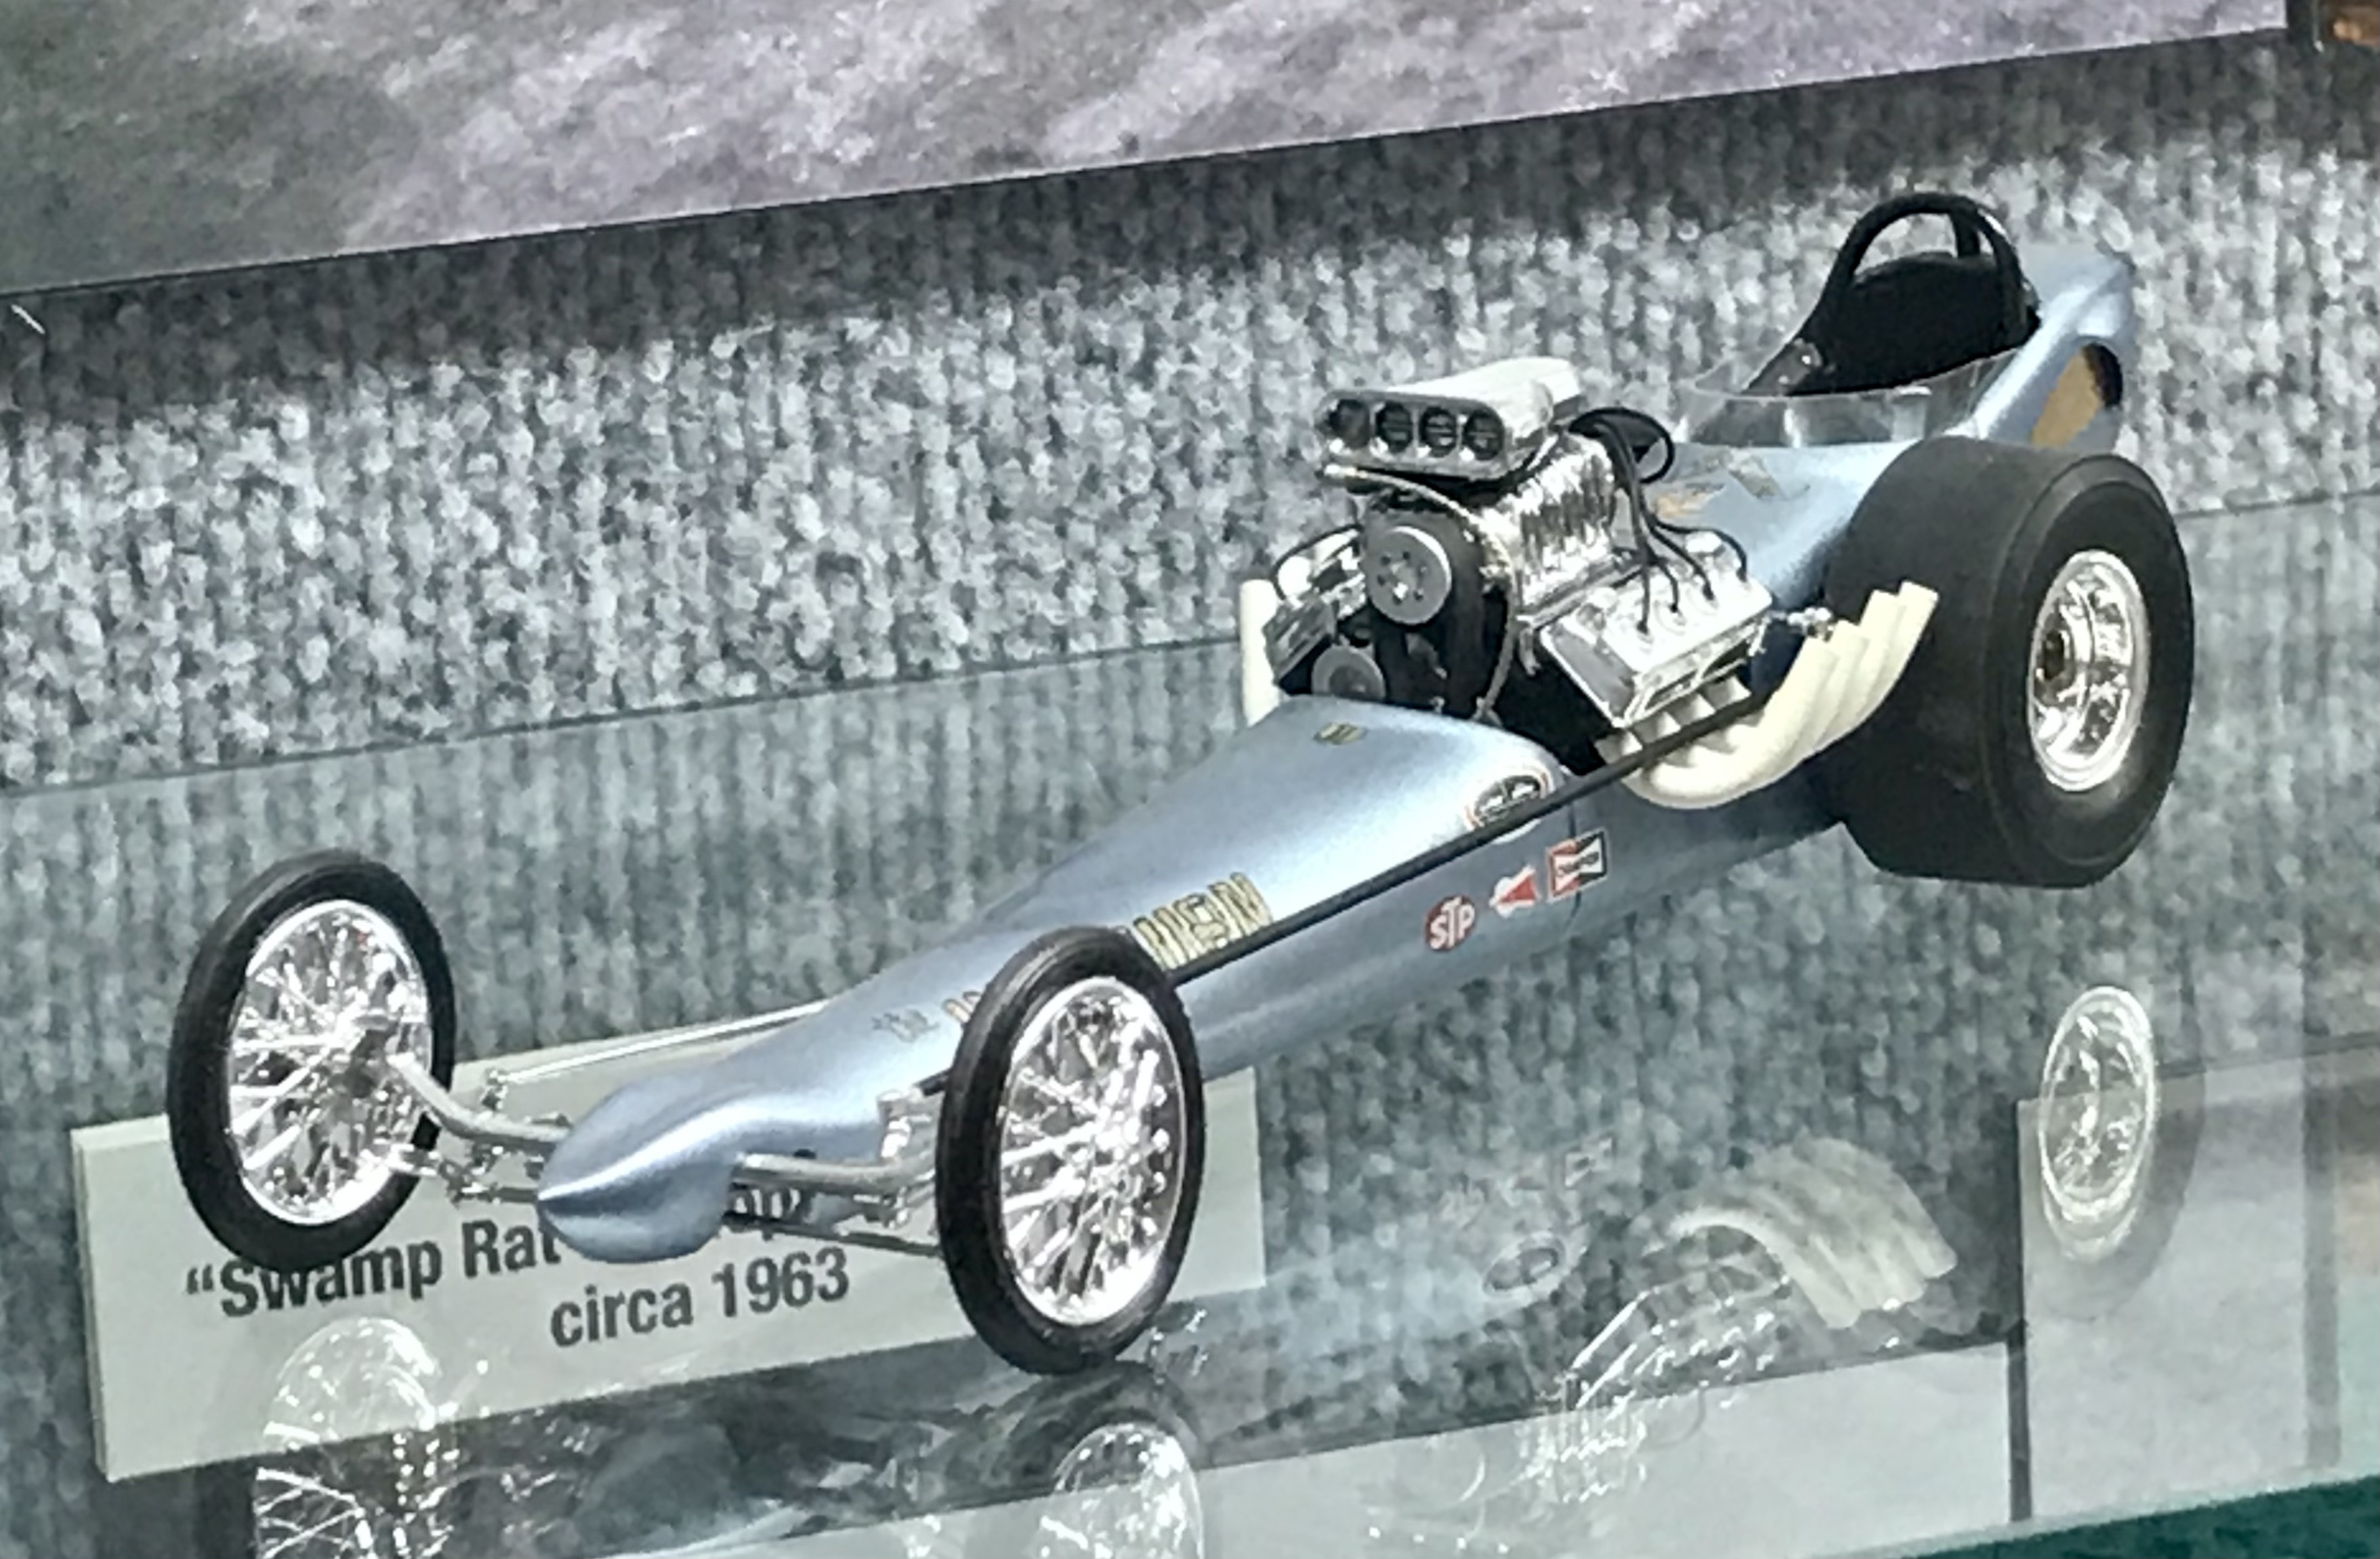
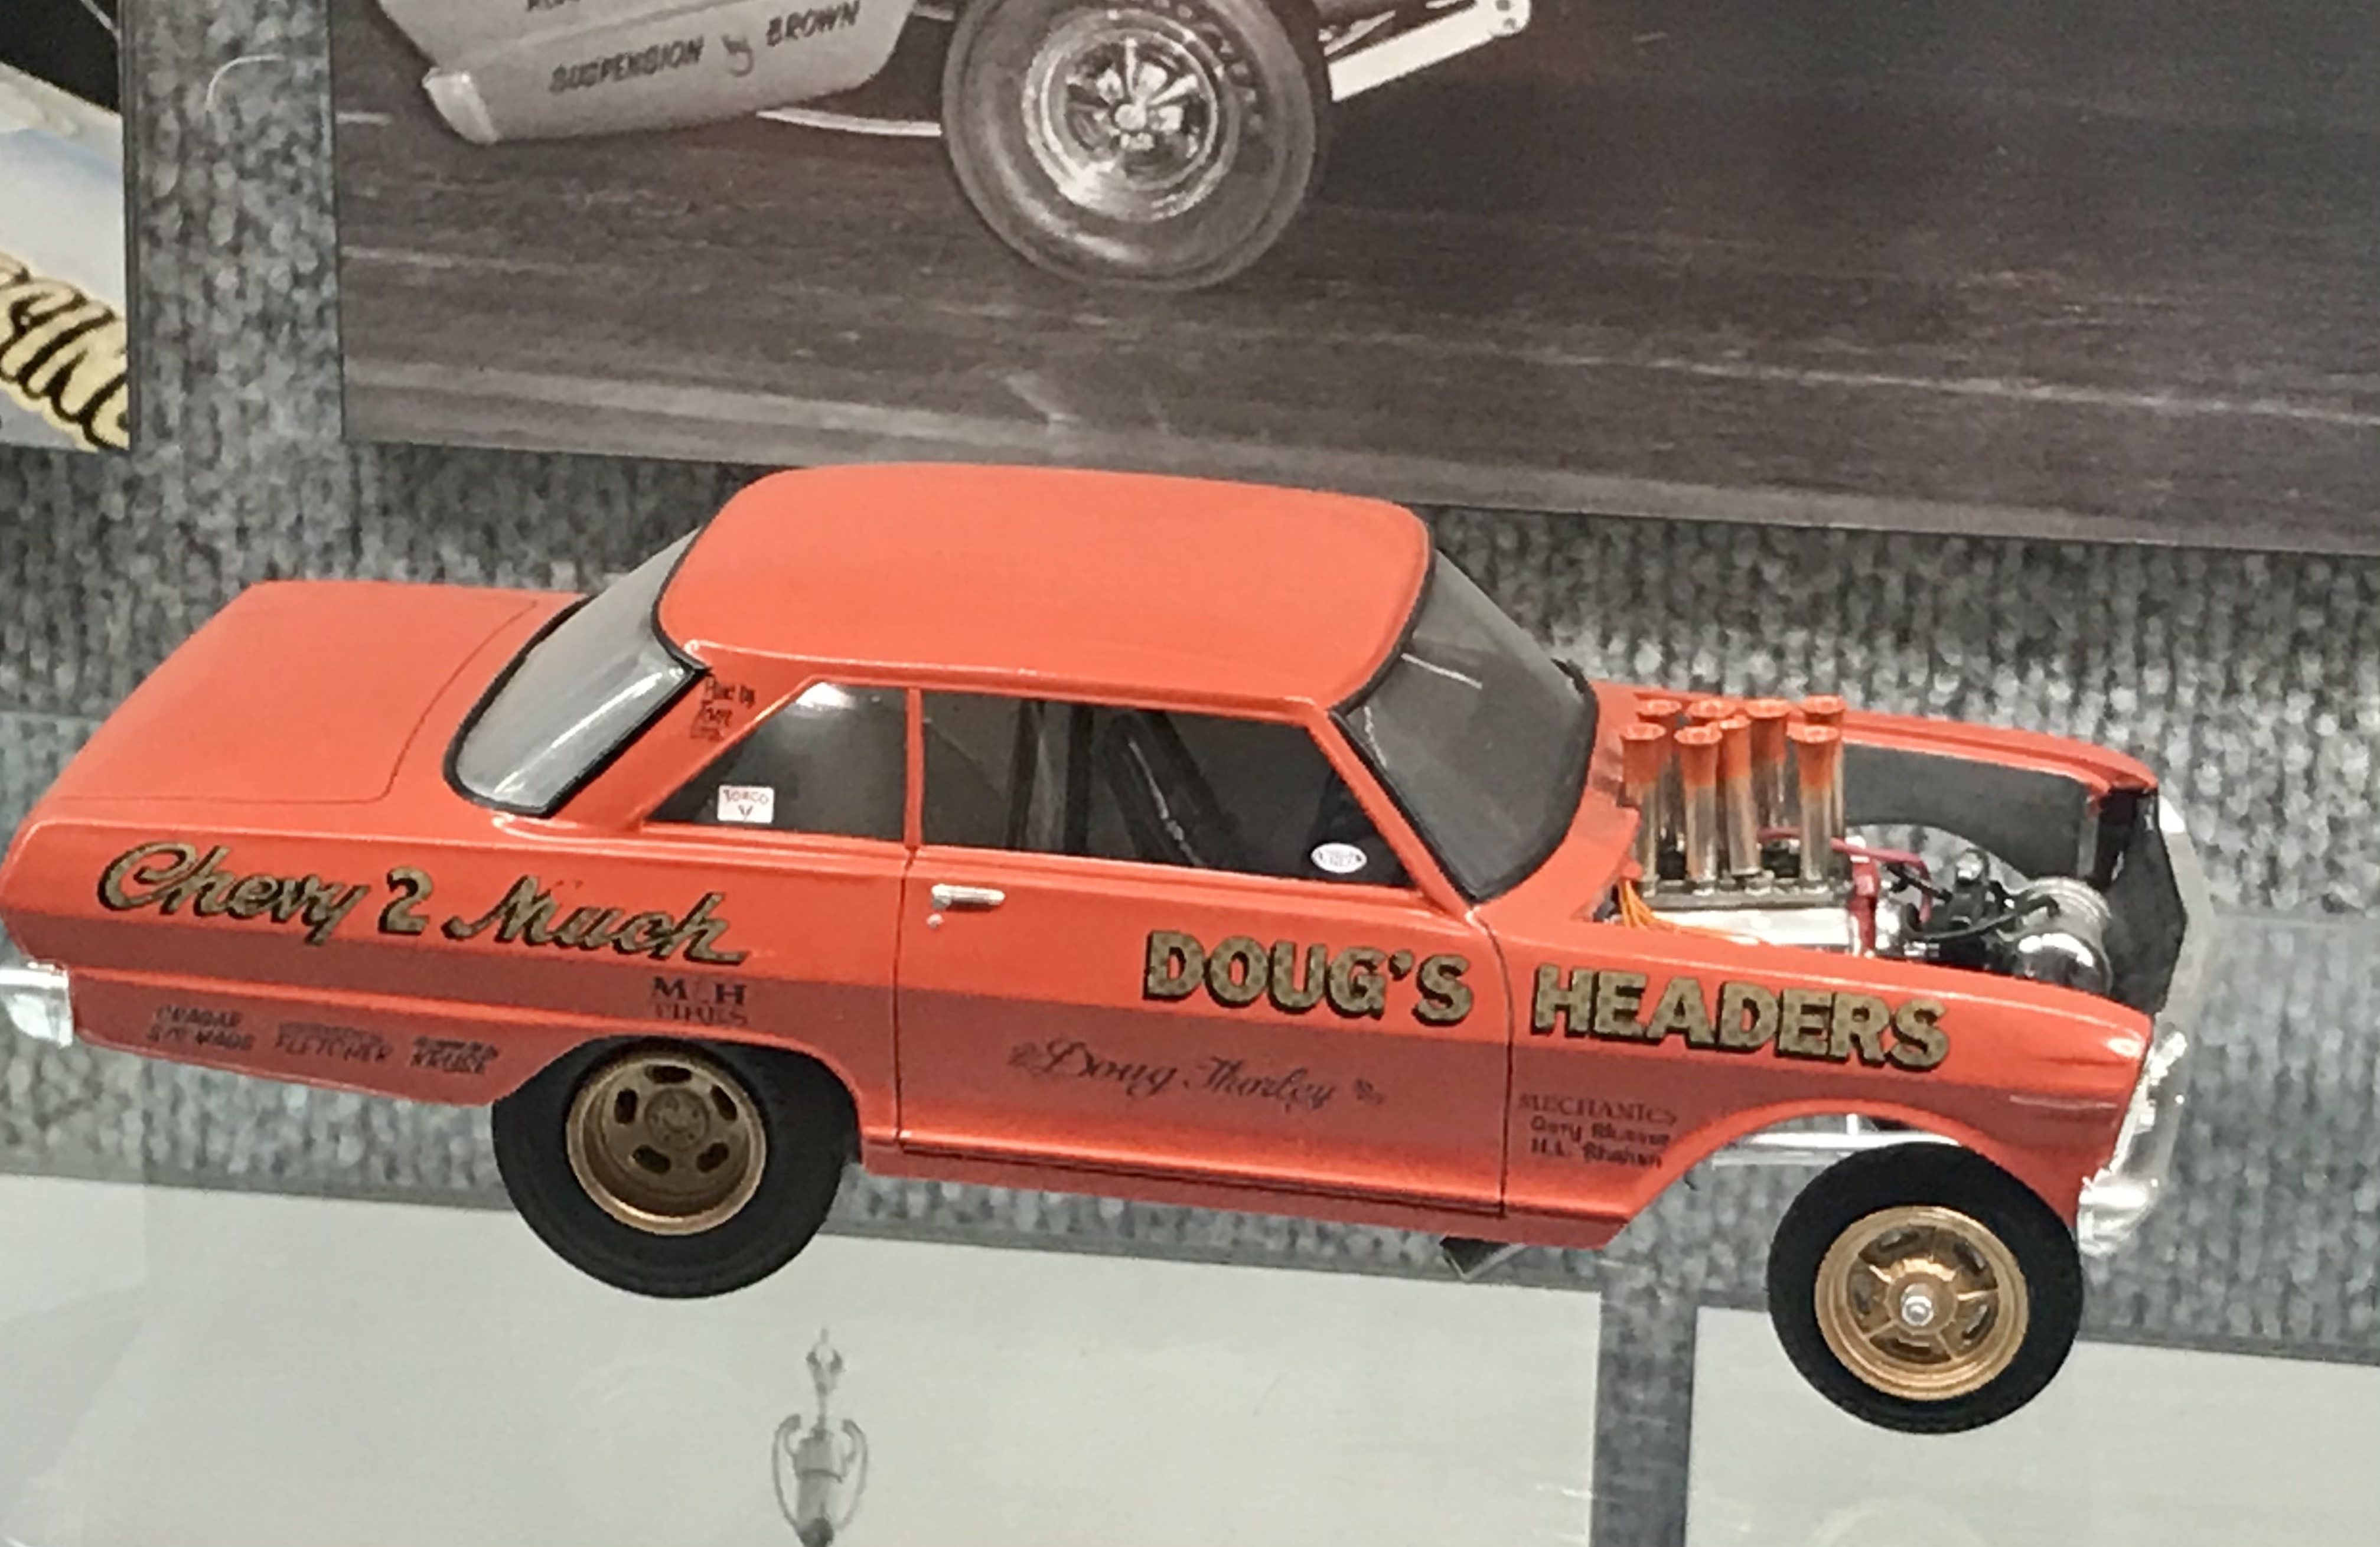
Enjoyed my first museum trip today since the shutdown last year - the NHRA Museum in Pomona, CA. It was really an excuse see an old buddy and meet half way (I live north of LA, he’s down in South Orange County). We’re both retired and it was really nice to get out of the house and spend a few hours together after a long absence. I think we both thought “boy did my old friend ever age a lot!” The museum staff was still cleaning/ preparing the place after being shut down since last year. It’s a nice collection of 1:1 cars although reduced from the last time I visited (5-7 years ago?). Other than us two and a few other visitors, the place was empty. The highlight was seeing Barry Price’s excellent collection of 1/25 drag car models. Here’s a few pics I took. Price is a very talented builder from the UK and I believe one of our fellow posters here on this board, Marc Weller, did a fabulous job repairing the cars in this collection from the damage they encountered during shipment to the museum. My friend is not a modeler but he was equally captivated by this collection. Check it out if you’re ever near Pomona, CA. Enjoy, John
-
Wow! You build’em FAST! Came out beautiful too! Interesting how the darker lower half seems to reduce the “funny-ness” of the altered wheel base, at least to my eyes. Dog dish caps on the rear may also contribute to making it look a little less radical. I have not yet built this AWB kit, only the Moebius stock wheel base Melrose Missile which assembled pretty easily. The plastic injector stacks look pretty good on your build, did you have to do anything special to clean them up and align them?
-
Nice job on Honda’s first big hit. I had a silver ‘78 CVCC 5 speed with the “hound’s tooth” cloth seat inserts. These CVCC’s had the best “drivability” of any vehicle available in the mid/ late 70’s, the “not golden years” of autos IMO. They were fun to drive compared to everything else (all relative...). They also tended to fall apart before 100k miles. Thanks for sharing!