OldNYJim
-
Posts
251 -
Joined
-
Last visited
Content Type
Profiles
Forums
Events
Gallery
Everything posted by OldNYJim
-
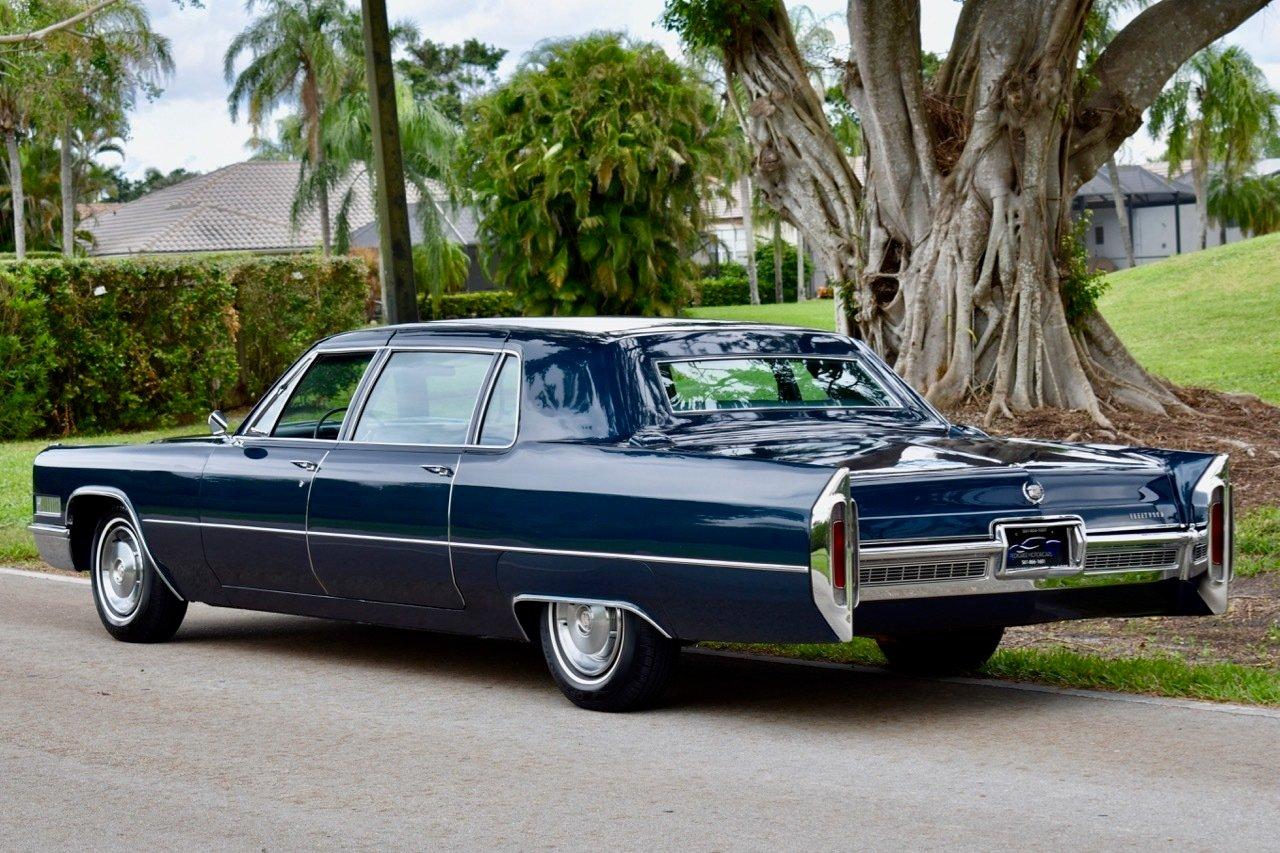
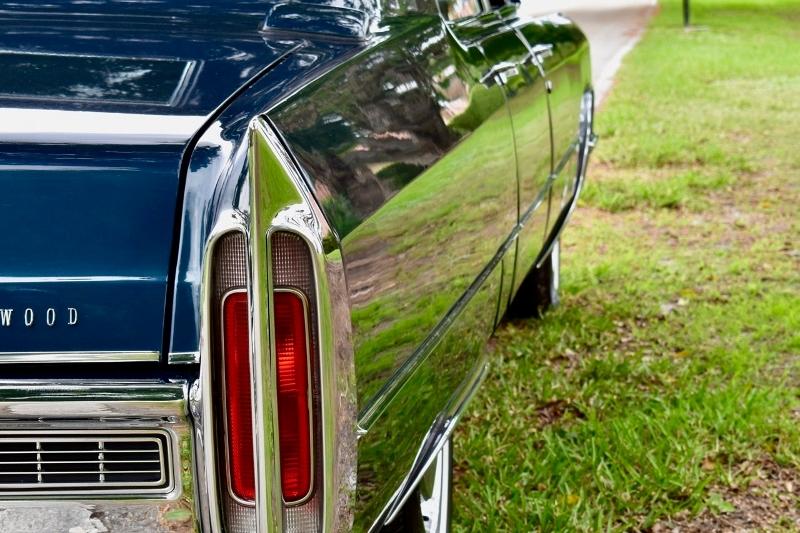
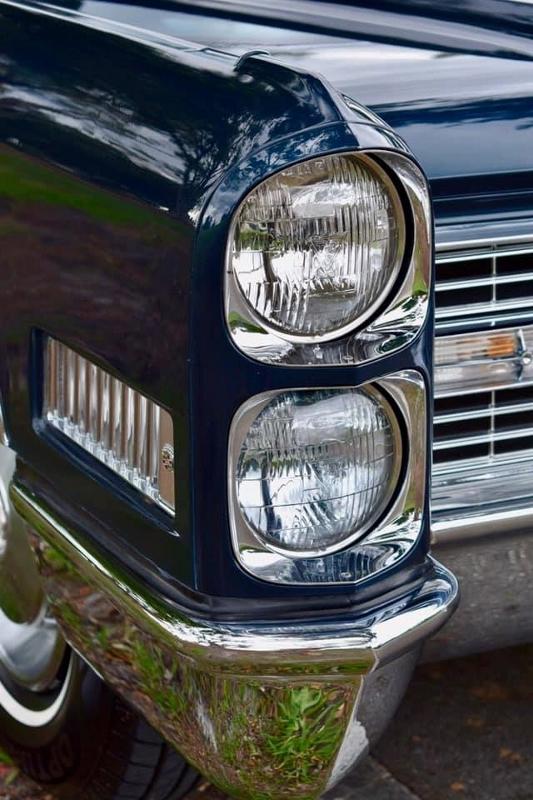
 Howdy y’all! I’ve got a Johan ‘66 Coupe De Ville kit to build here, and I think I want to go with a dark blue GM factory color named ‘Nocturne Blue’. Wondering if anyone has a good lead on matching this color (hobby paint or otherwise…). I tried some of the obvious paint suppliers (MCW and the likes) and didn’t immediately see anyone selling it, and I only rarely do a factory-stock build so I don’t research this stuff very often. Any ideas, GM experts? Any hobby colors that are a close match, or a GM paint code match that’s currently (easily) available? Maybe a Duplicolor rattle can that I can decent and airbrush, or similar? For reference the color looks like this (and my original ‘66 Cadillac brochure notes that it’s ‘iridescent’): Semi-related question - Cadillac offered a white interior option on this era of car, but I can’t find a pic online of a blue car with a white interior…I’m wondering if certain interior colors were typically paired to certain exterior colors (their blue interior to the blue paint, the green interior to green paint etc. etc.). Is there a database out there somewhere where I can research this stuff? Would love to hear from anyone who knows more about this era of Caddy than I do!
-
AMAZING work - wow! Tonnes of beautiful little details to enjoy!
-
Interesting! I’d seen that you used automotive products (with great results)…thanks for the info!!
-
I’ve got the roadster version of this kit in my stash, but you’re right, the tires look way too small. I should try and find a file to 3D print some correctly sized ones. Good start! I’ll be watching!
-
What filler do you like @Brudda?
-
AMT '70s Short Body R.E. Dragster (05/22/2022)
OldNYJim replied to Straightliner59's topic in WIP: Drag Racing Models
This is really interesting - never saw one of these ‘short bodies’ before - but I like it! Way cool! -
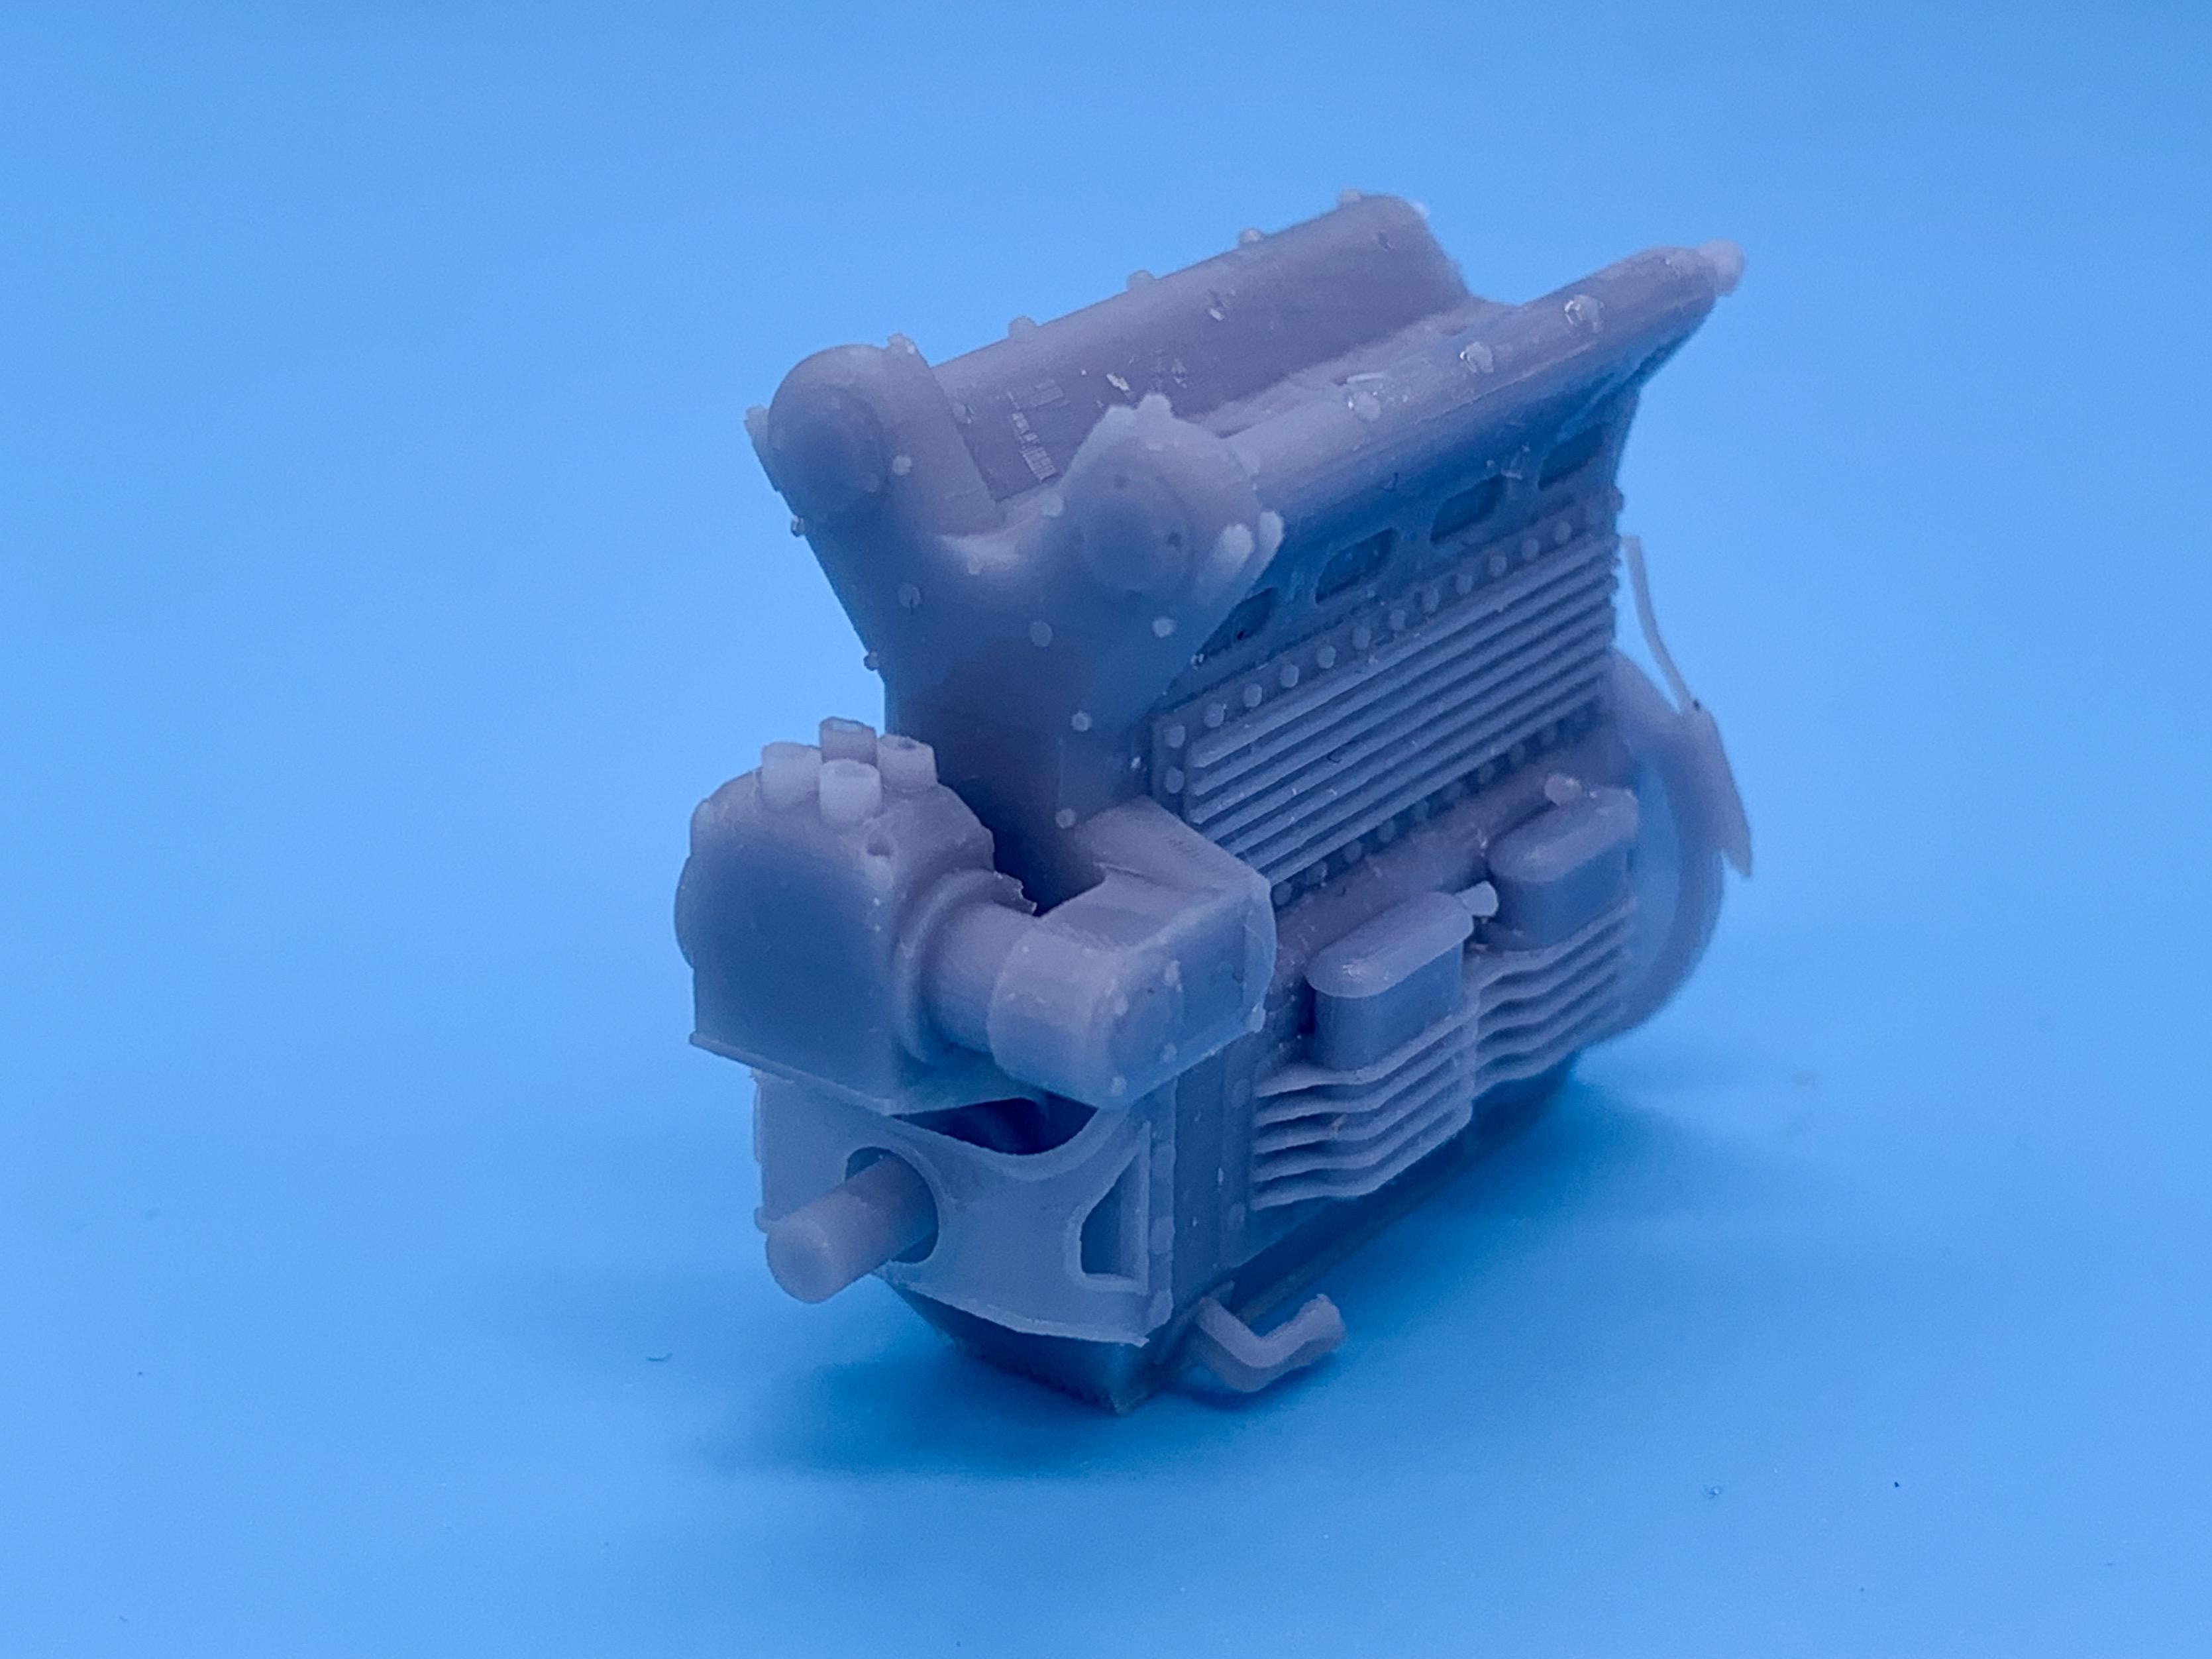
Offenhauser Engine for 3D print
OldNYJim replied to Oldmopars's topic in Car Aftermarket / Resin / 3D Printed
Just printed a batch of these - they’re beautifully done with really nice detail and great scale fidelity: GREAT work Scott!!
-
Just a nice clean traditional Deuce Roadster
OldNYJim replied to OldNYJim's topic in WIP: Model Cars
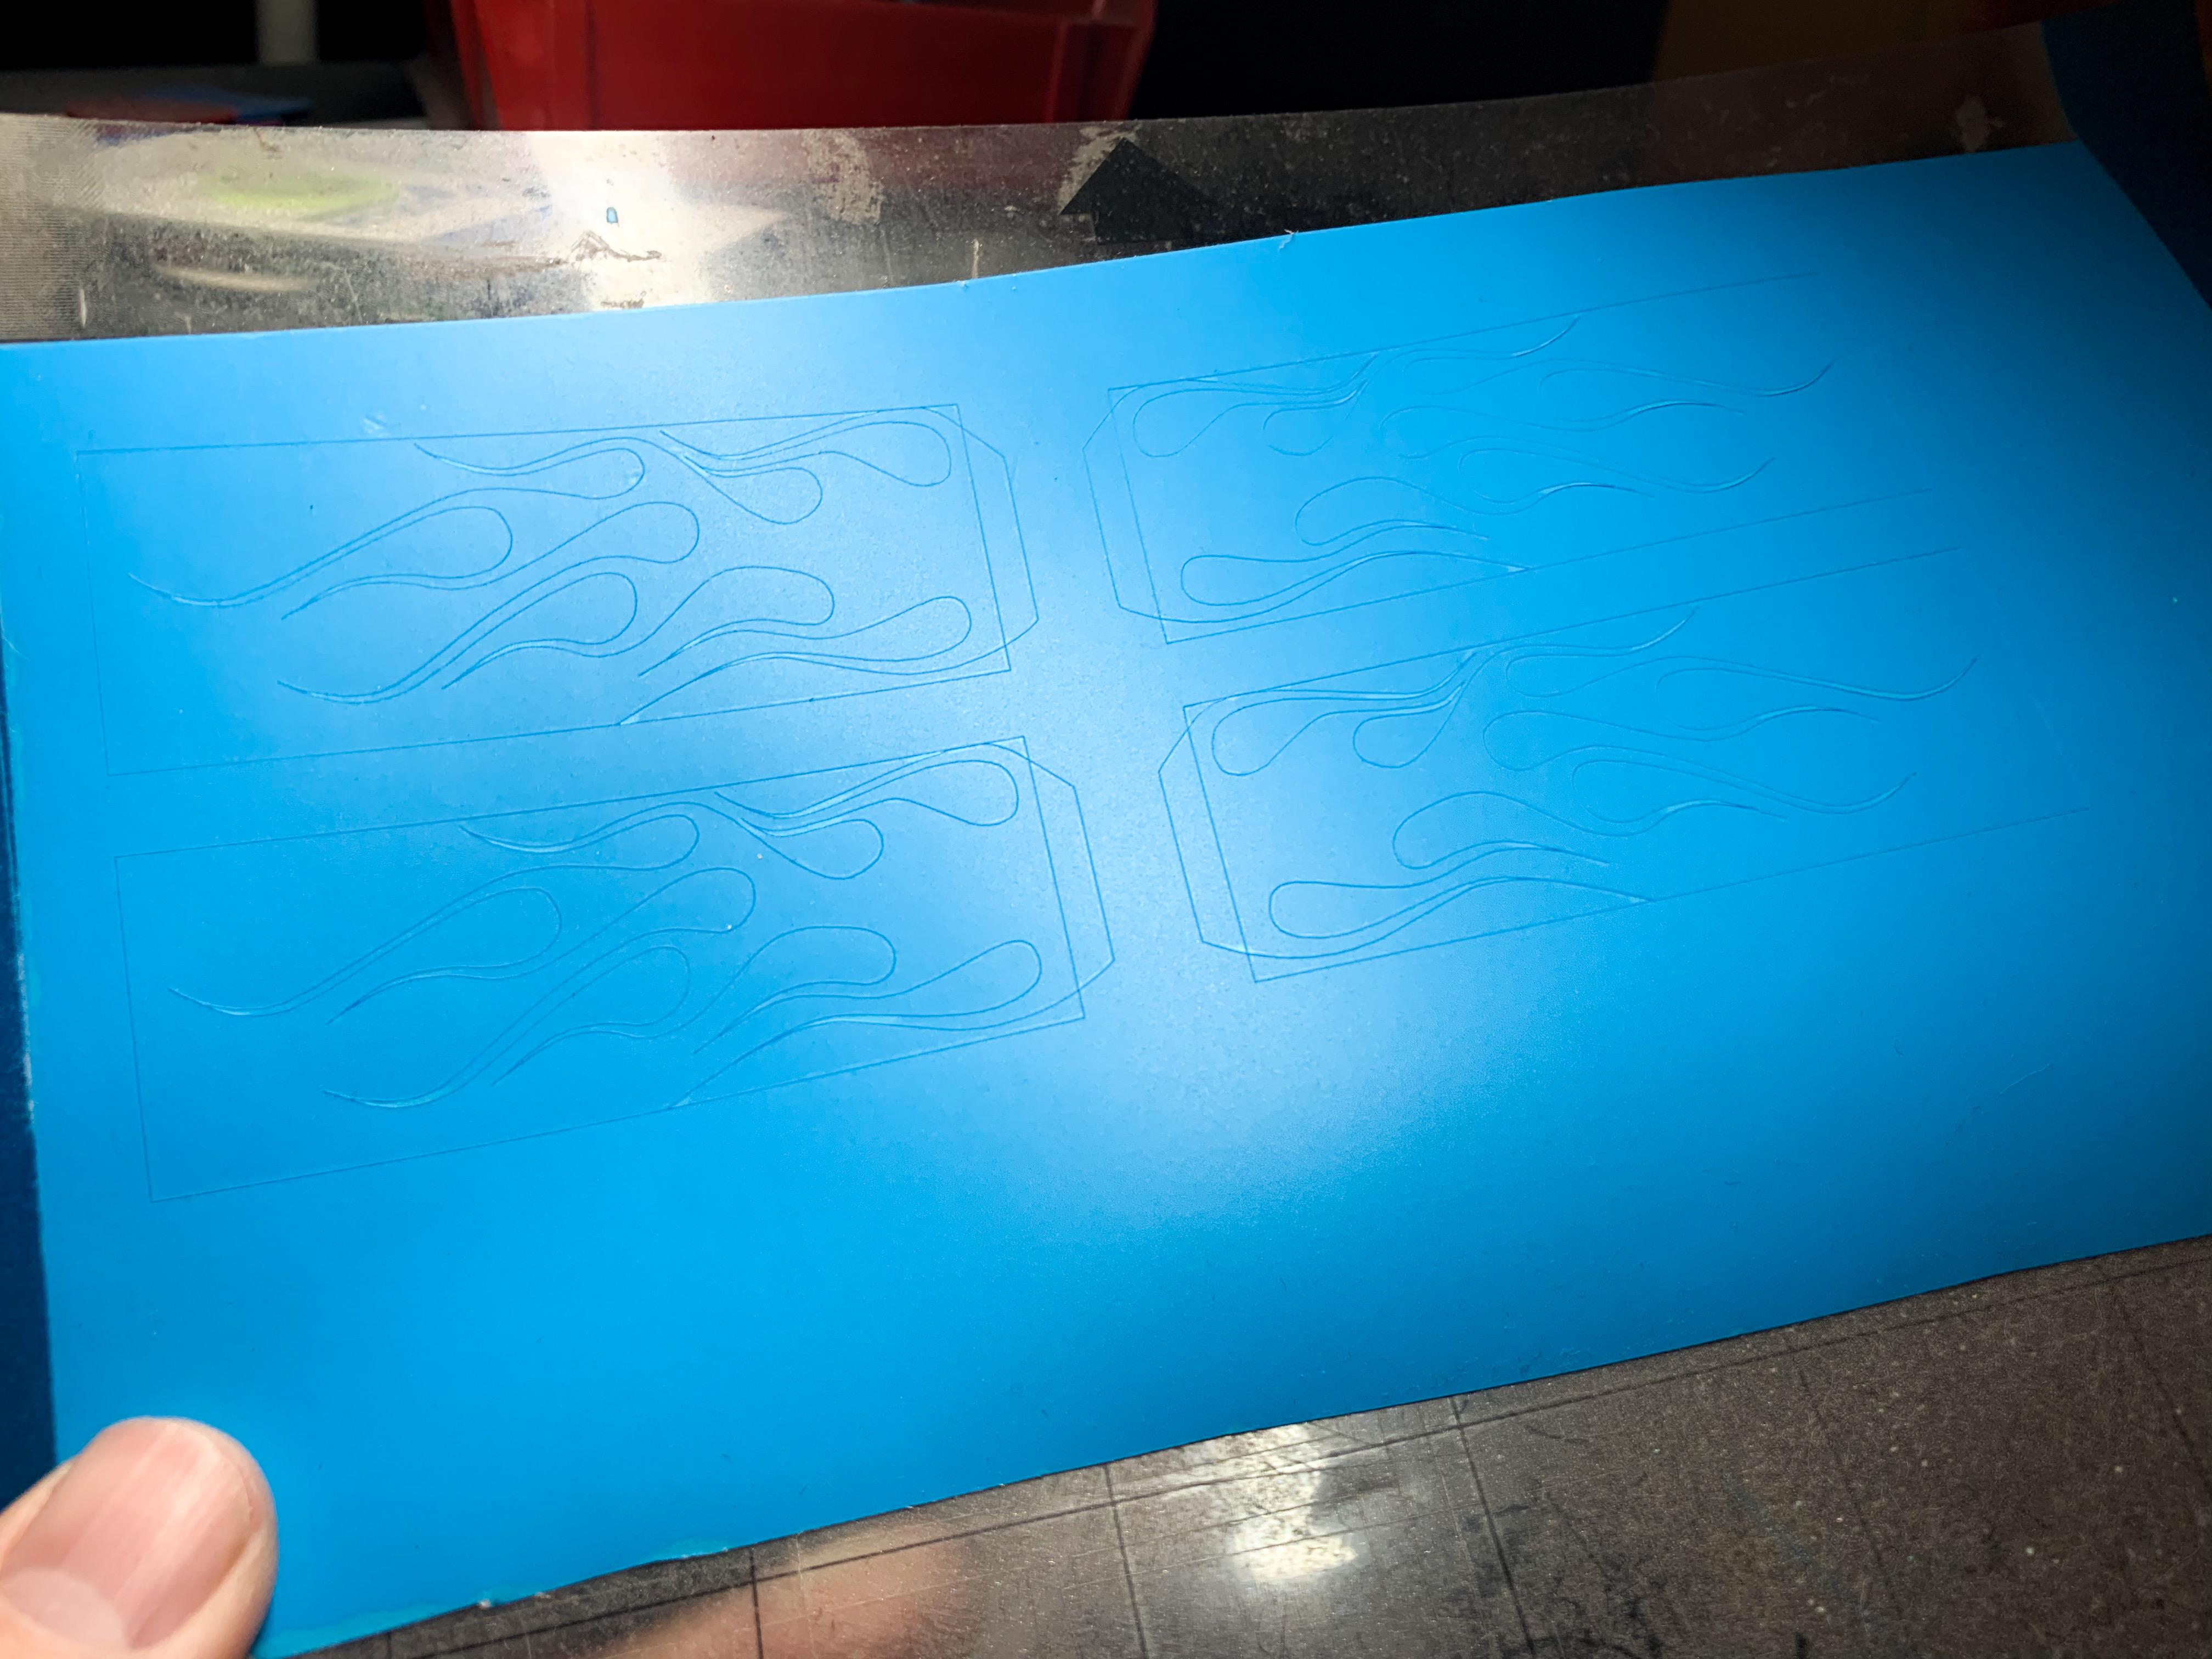
Thanks fellas! Tonight’s project - finishing off the flames! Cut some masks out of Oramask on my Silhouette cutter: Laid them down over the fade I shot yesterday: Shot Createx black sealer over top (my favorite black paint - lays down thin, covers great, doesn’t run or pool ever): And then…carefully peel back the masking! Tomorrow I’ll clean up any spots that need attention before laying down some clear. Didn’t have a bunch of free time this evening at the bench, but paint day is always exciting! More soon!
-
Ding ding ding ding!
-
Help matching this color of gold
OldNYJim replied to Redisetta's topic in Model Building Questions and Answers
That is an AWESOME link - thank you so much for posting that! That’s REALLY useful! -
I wish they’d reissue that Black Force kit (although I actually never tried looking very hard for one…they’re probably not super expensive. Look forward to seeing what you do with them Bill! I got a care package from a buddy - old-school-cool model parts! Anyone recognize these?
-
Printed an Offie designed by @Oldmopars- he did an AMAZING job on it. I love these engines! Didn’t nail the settings for printing these yet, but it’s close - I’m excited to put it in something!
-
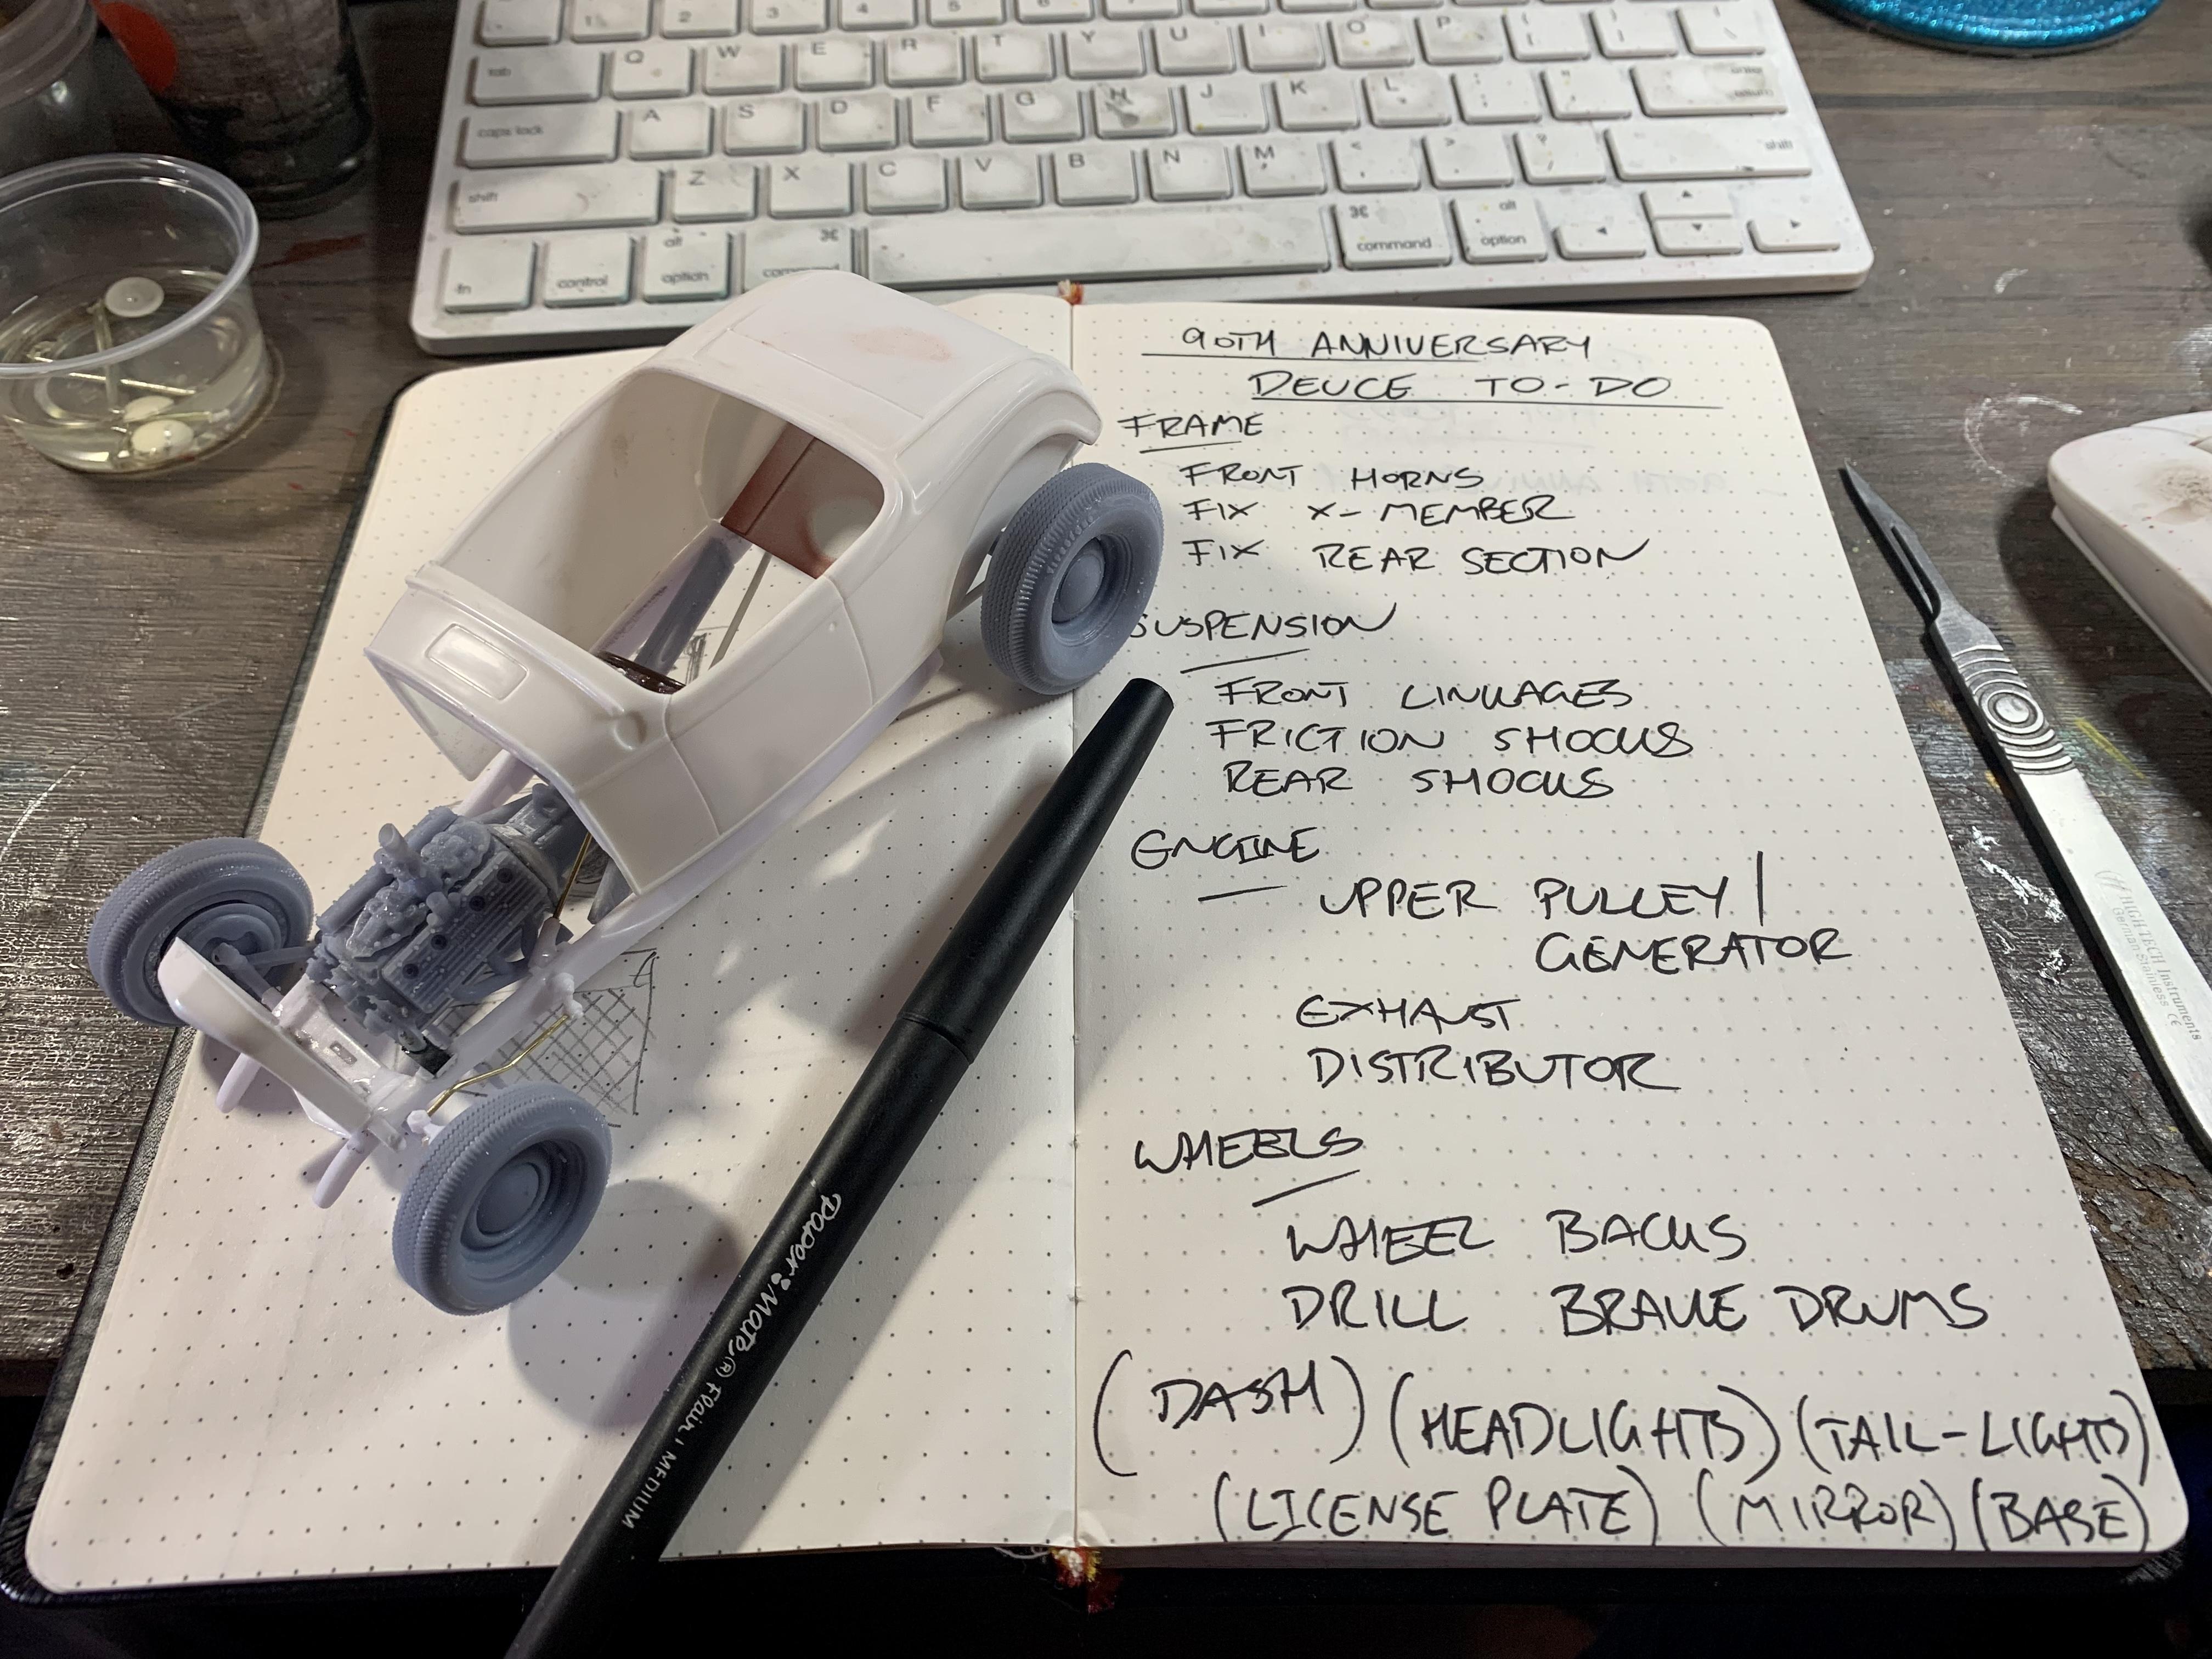
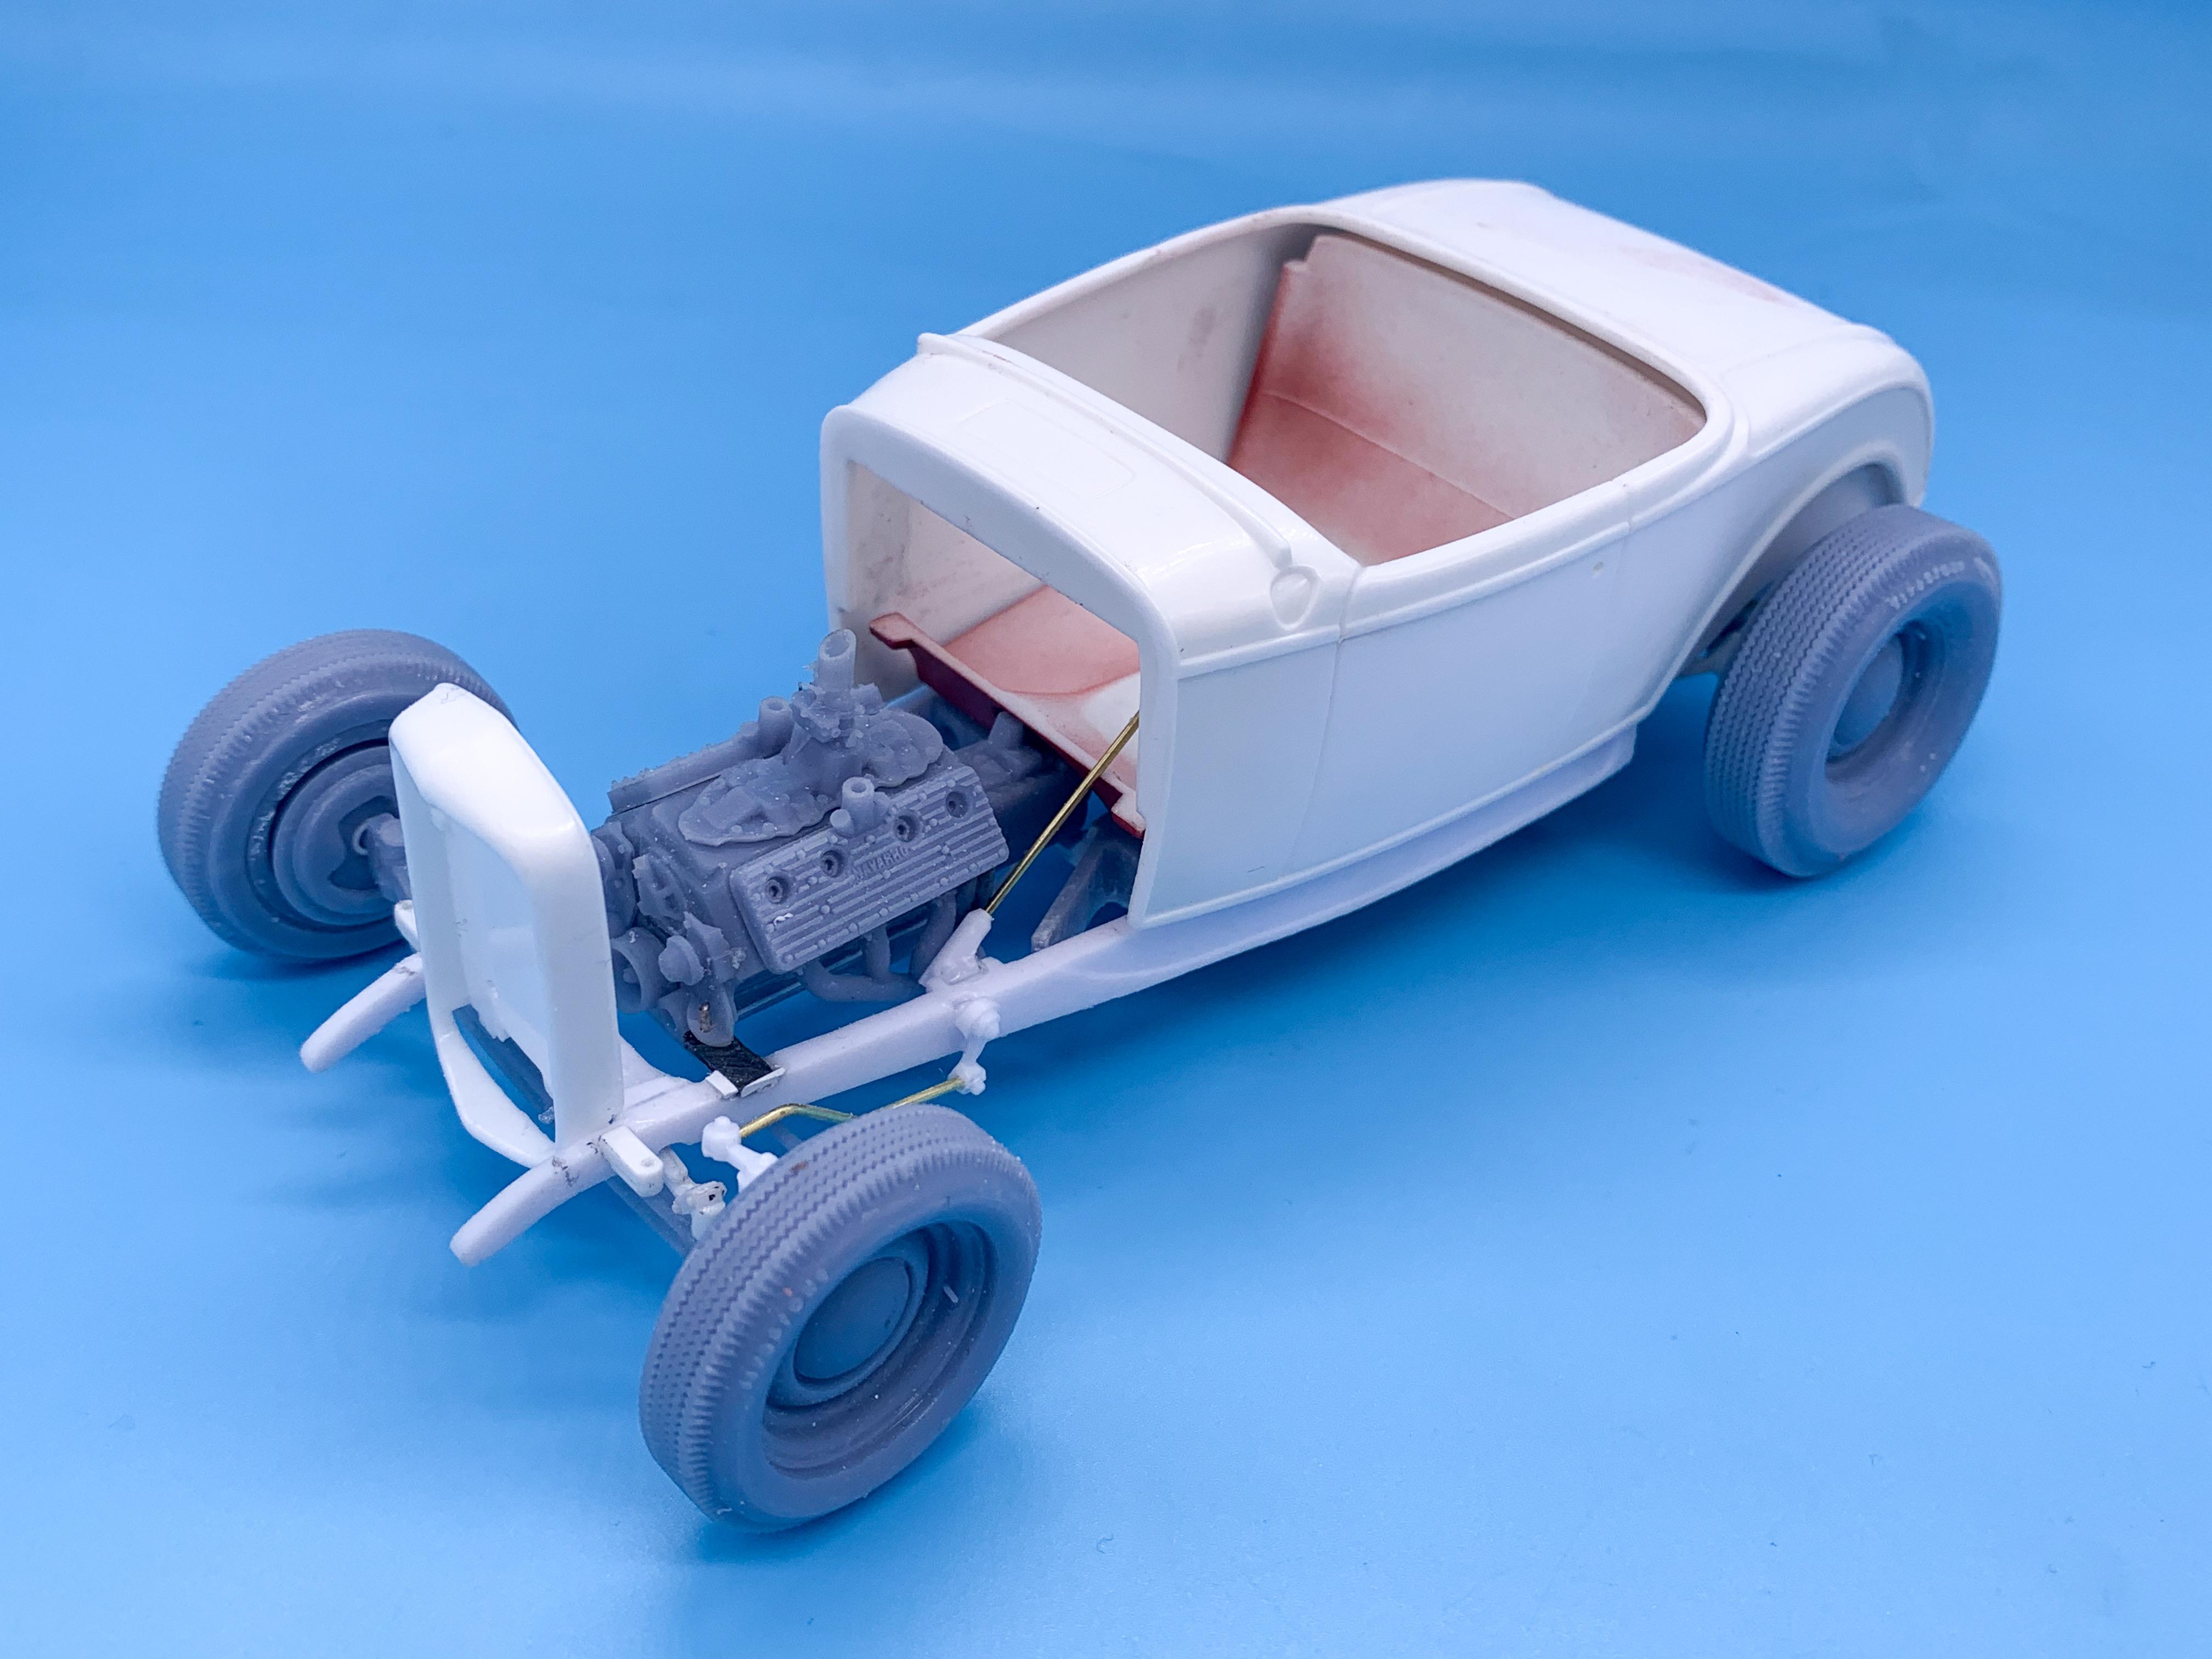
Just a nice clean traditional Deuce Roadster
OldNYJim replied to OldNYJim's topic in WIP: Model Cars
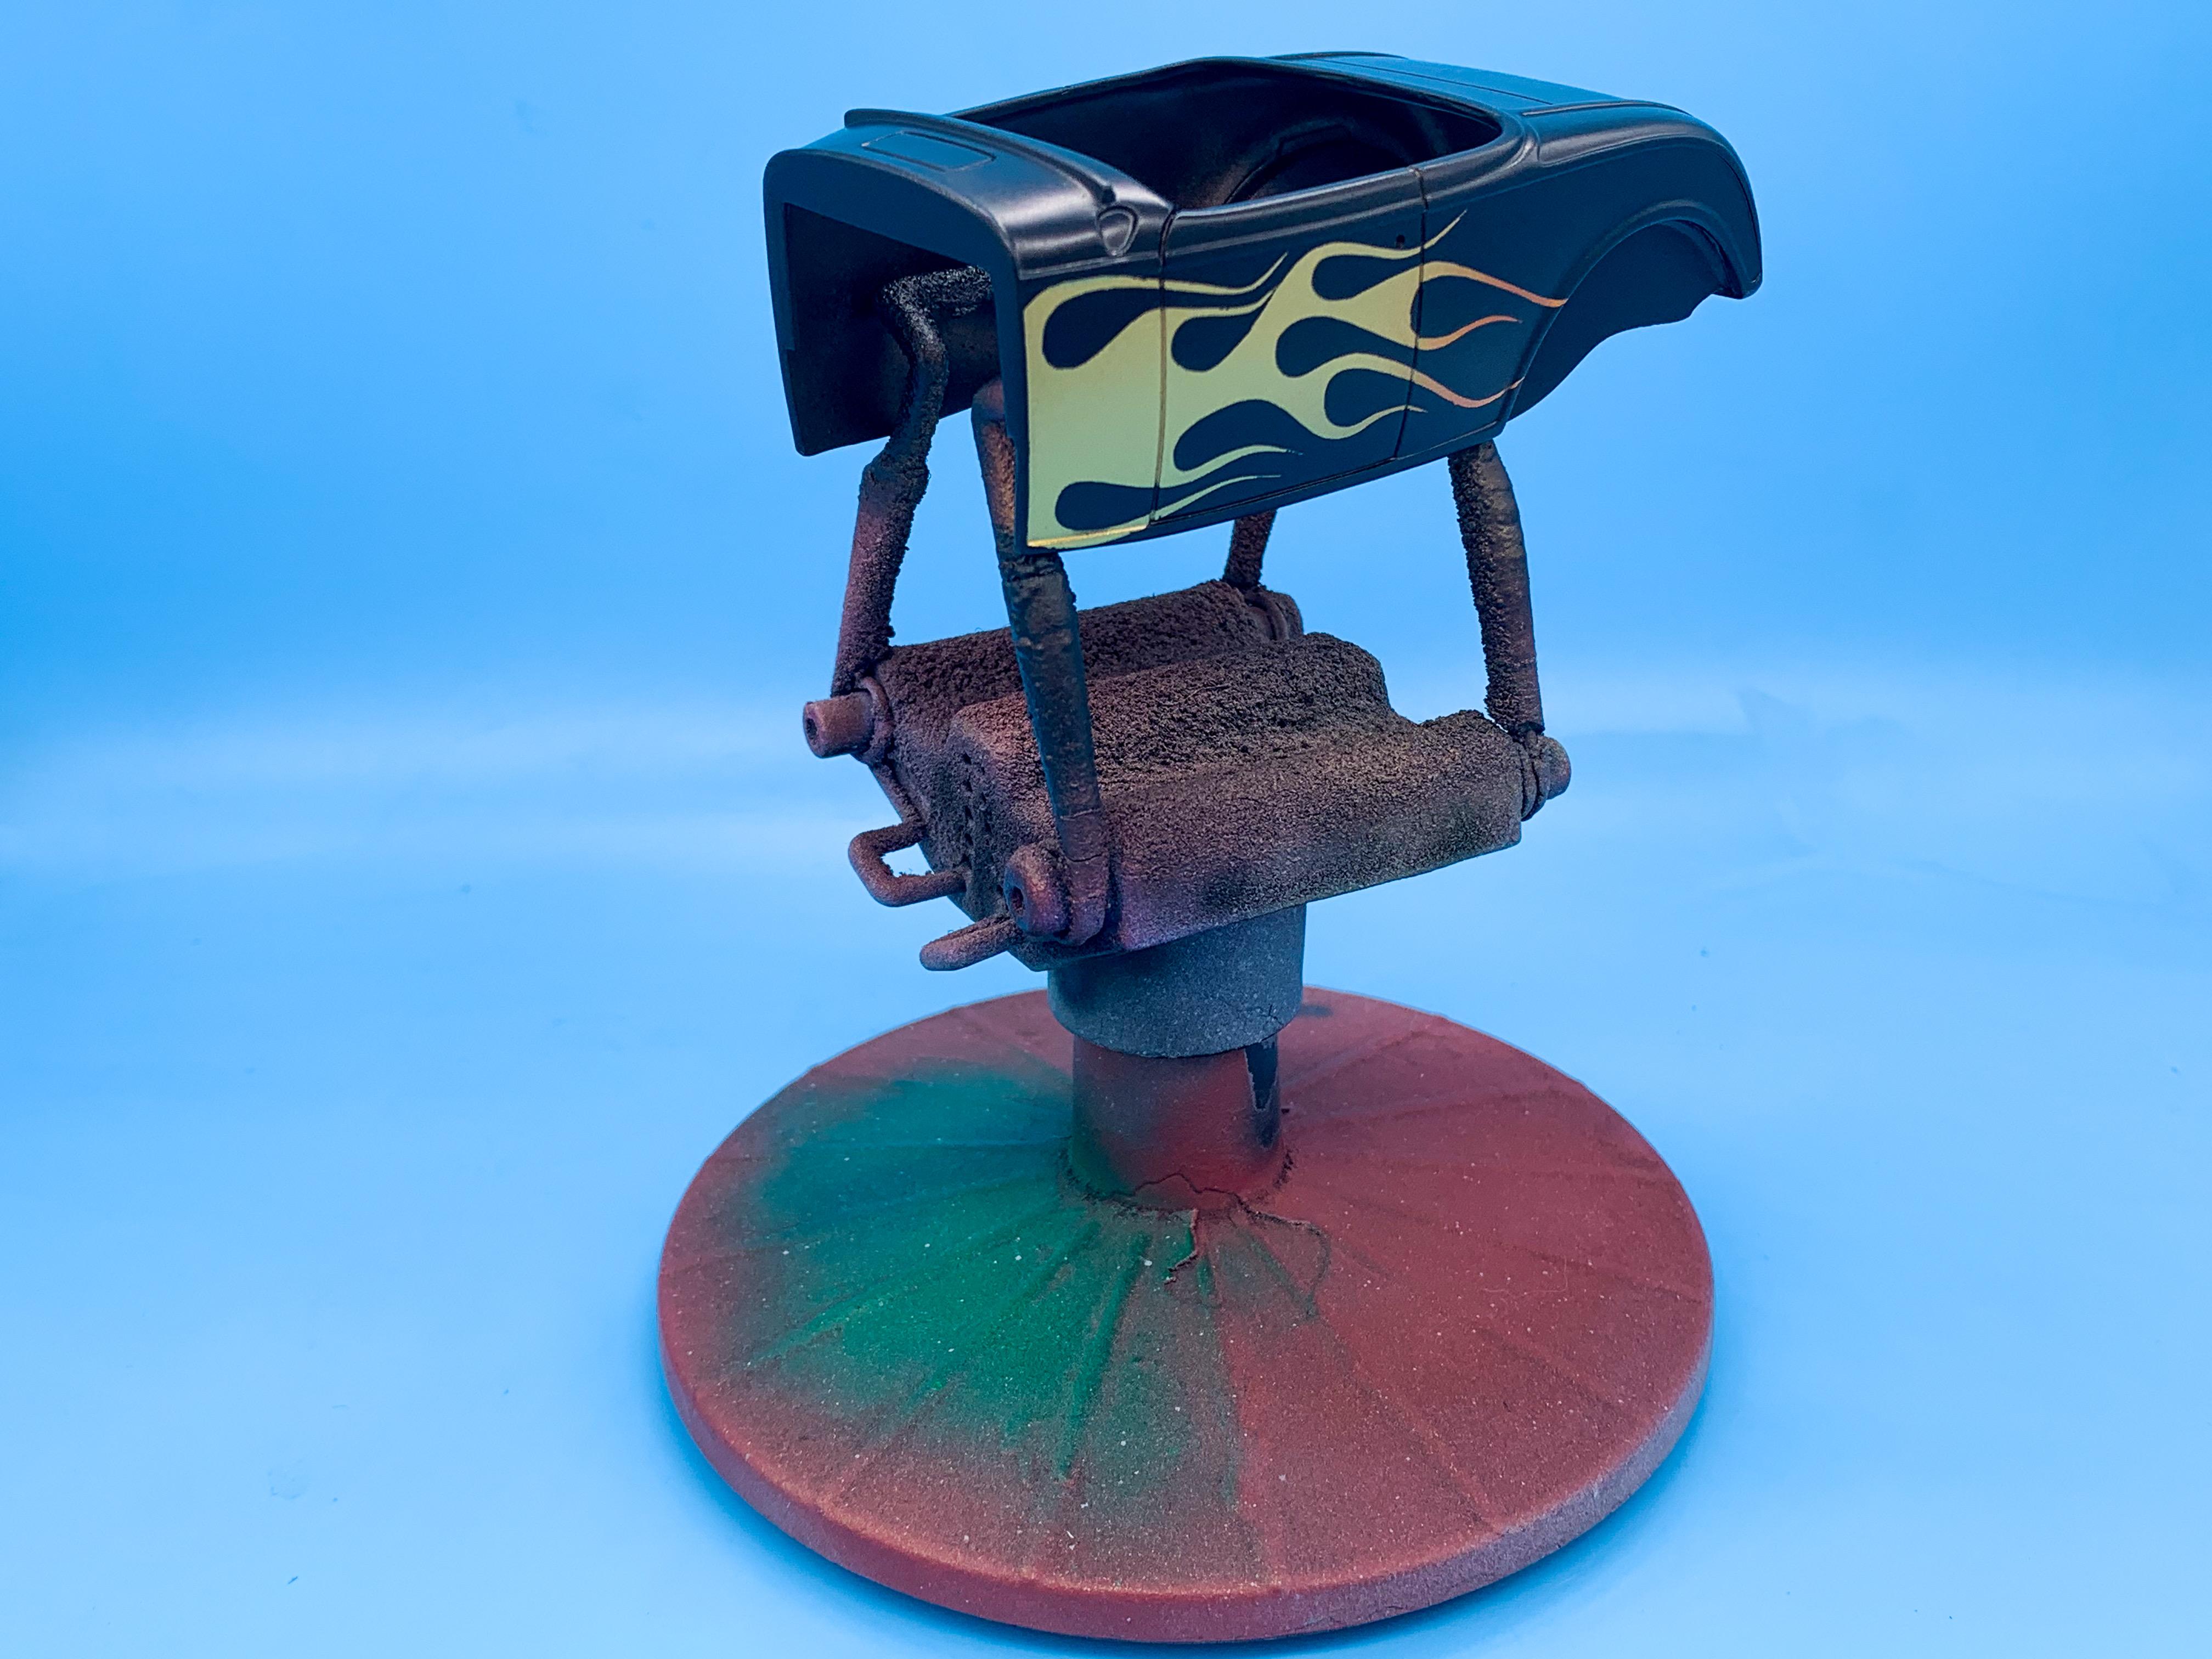
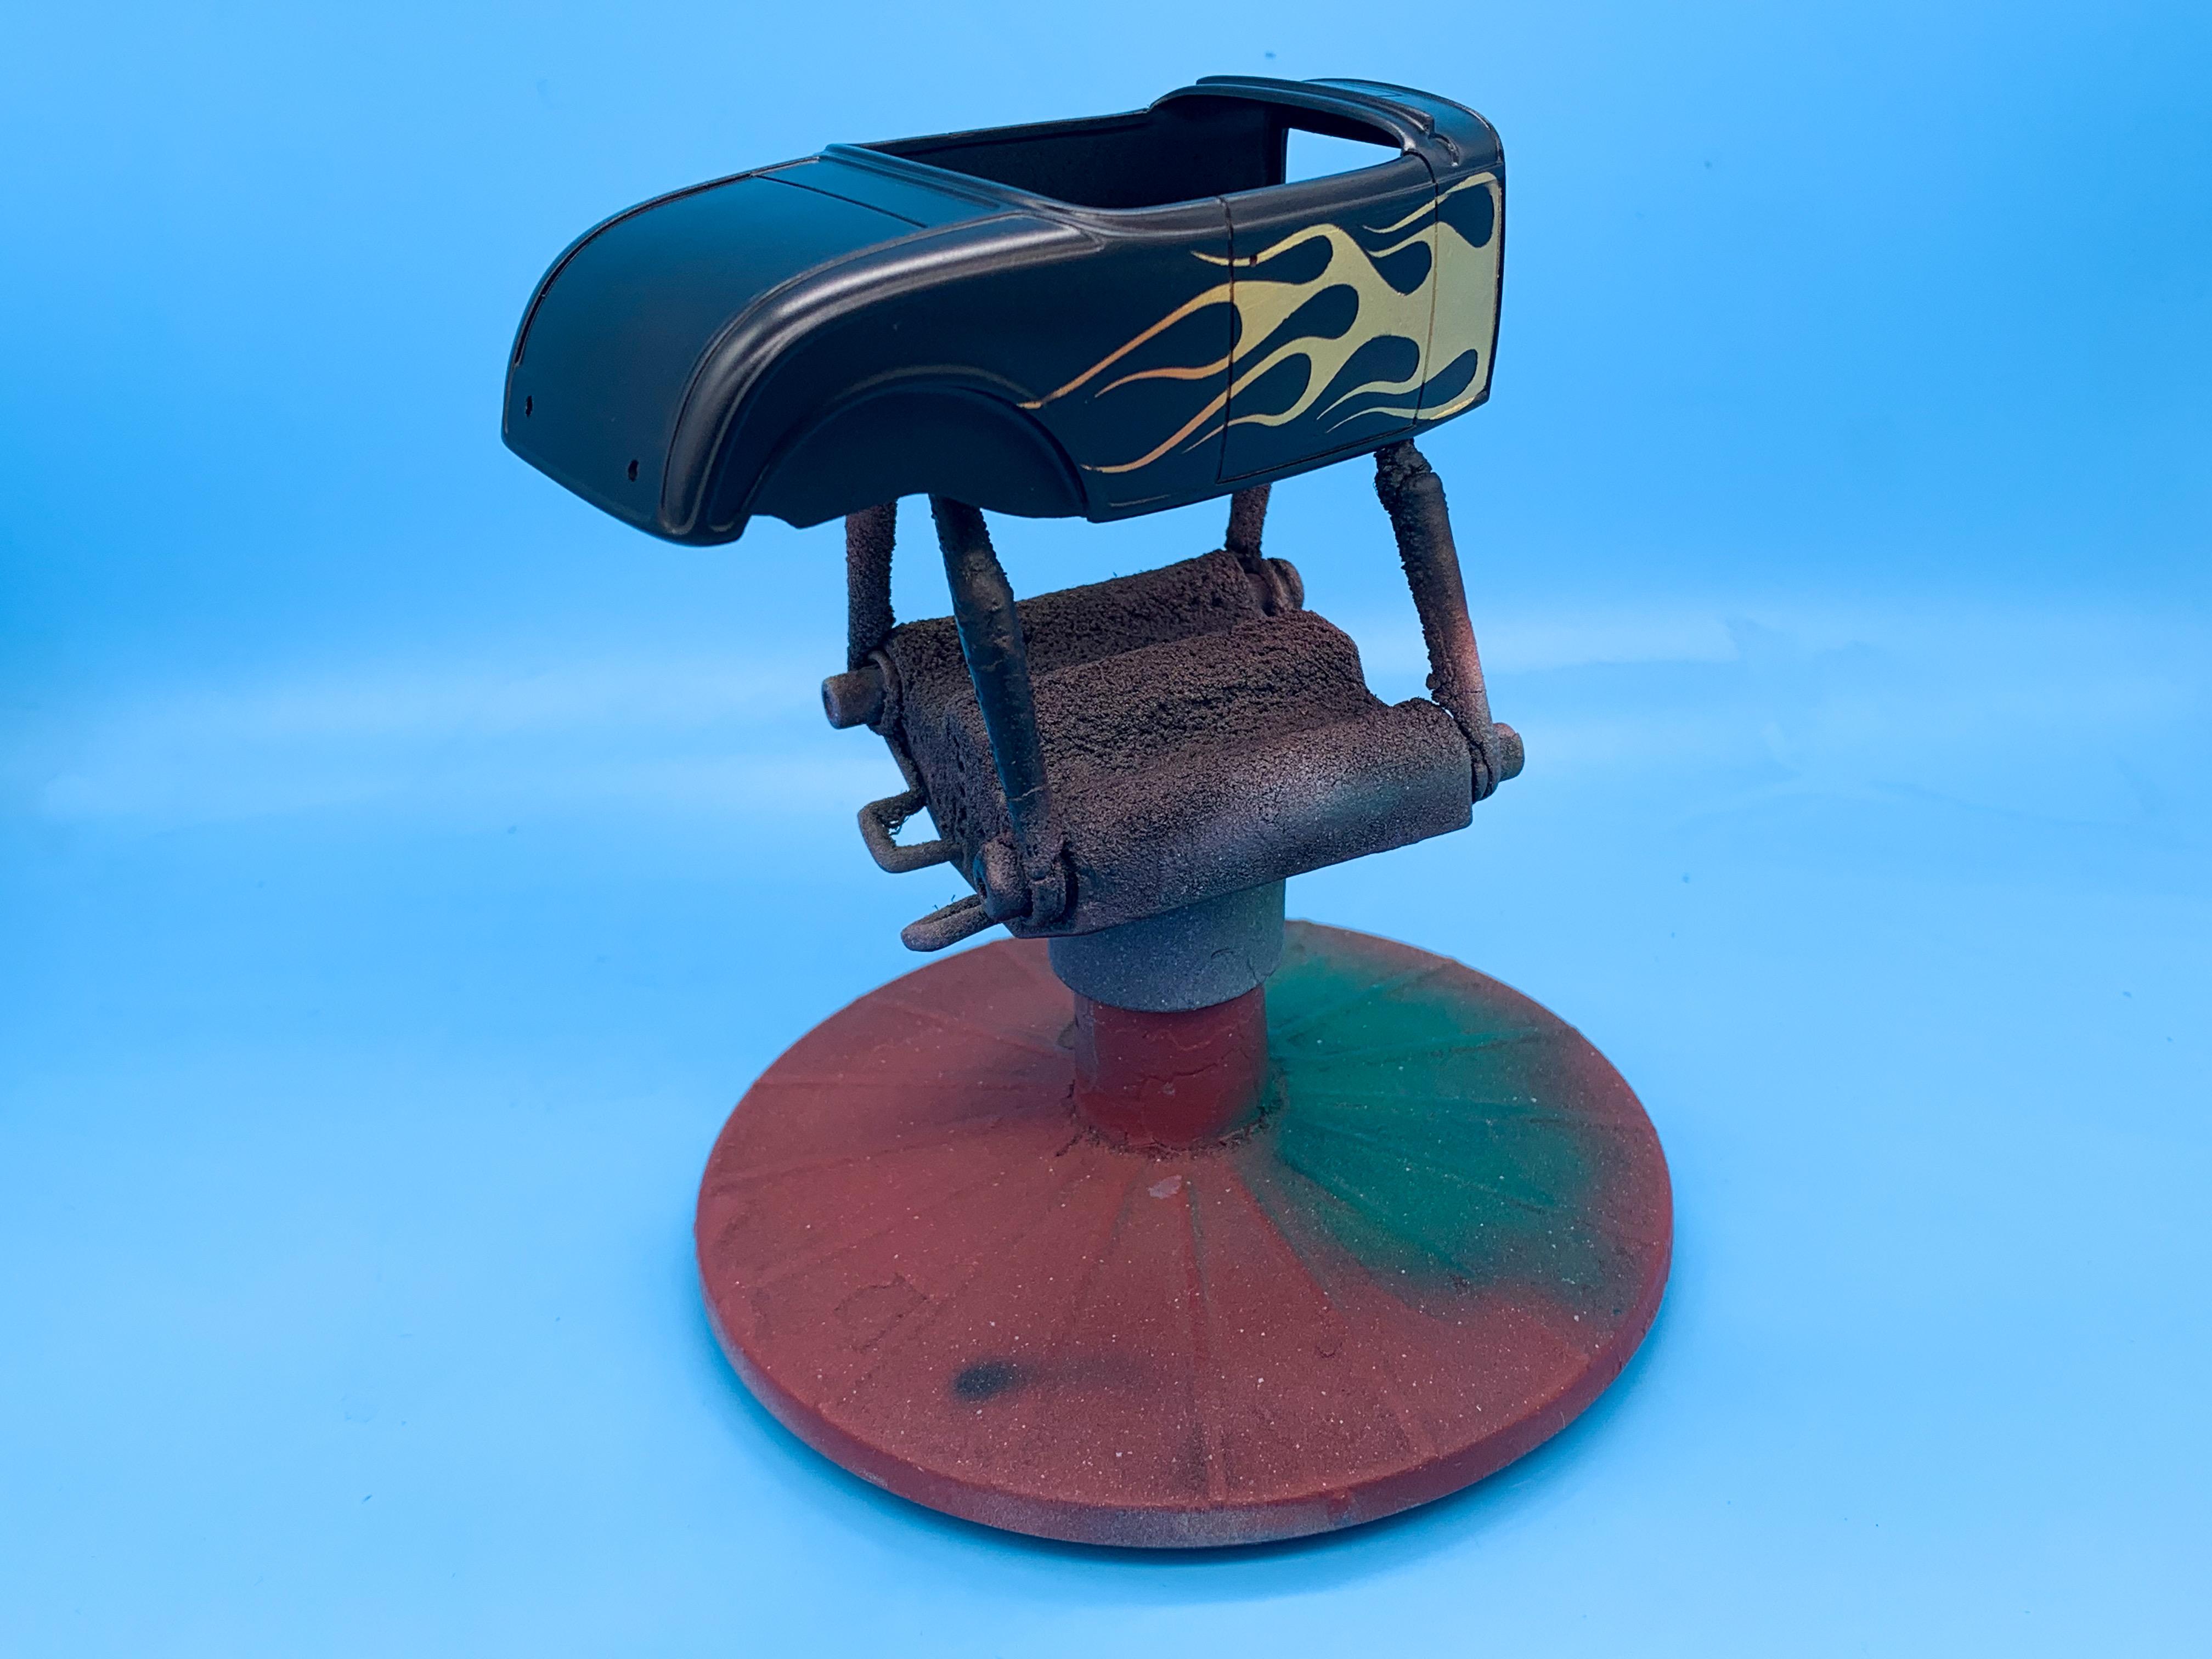
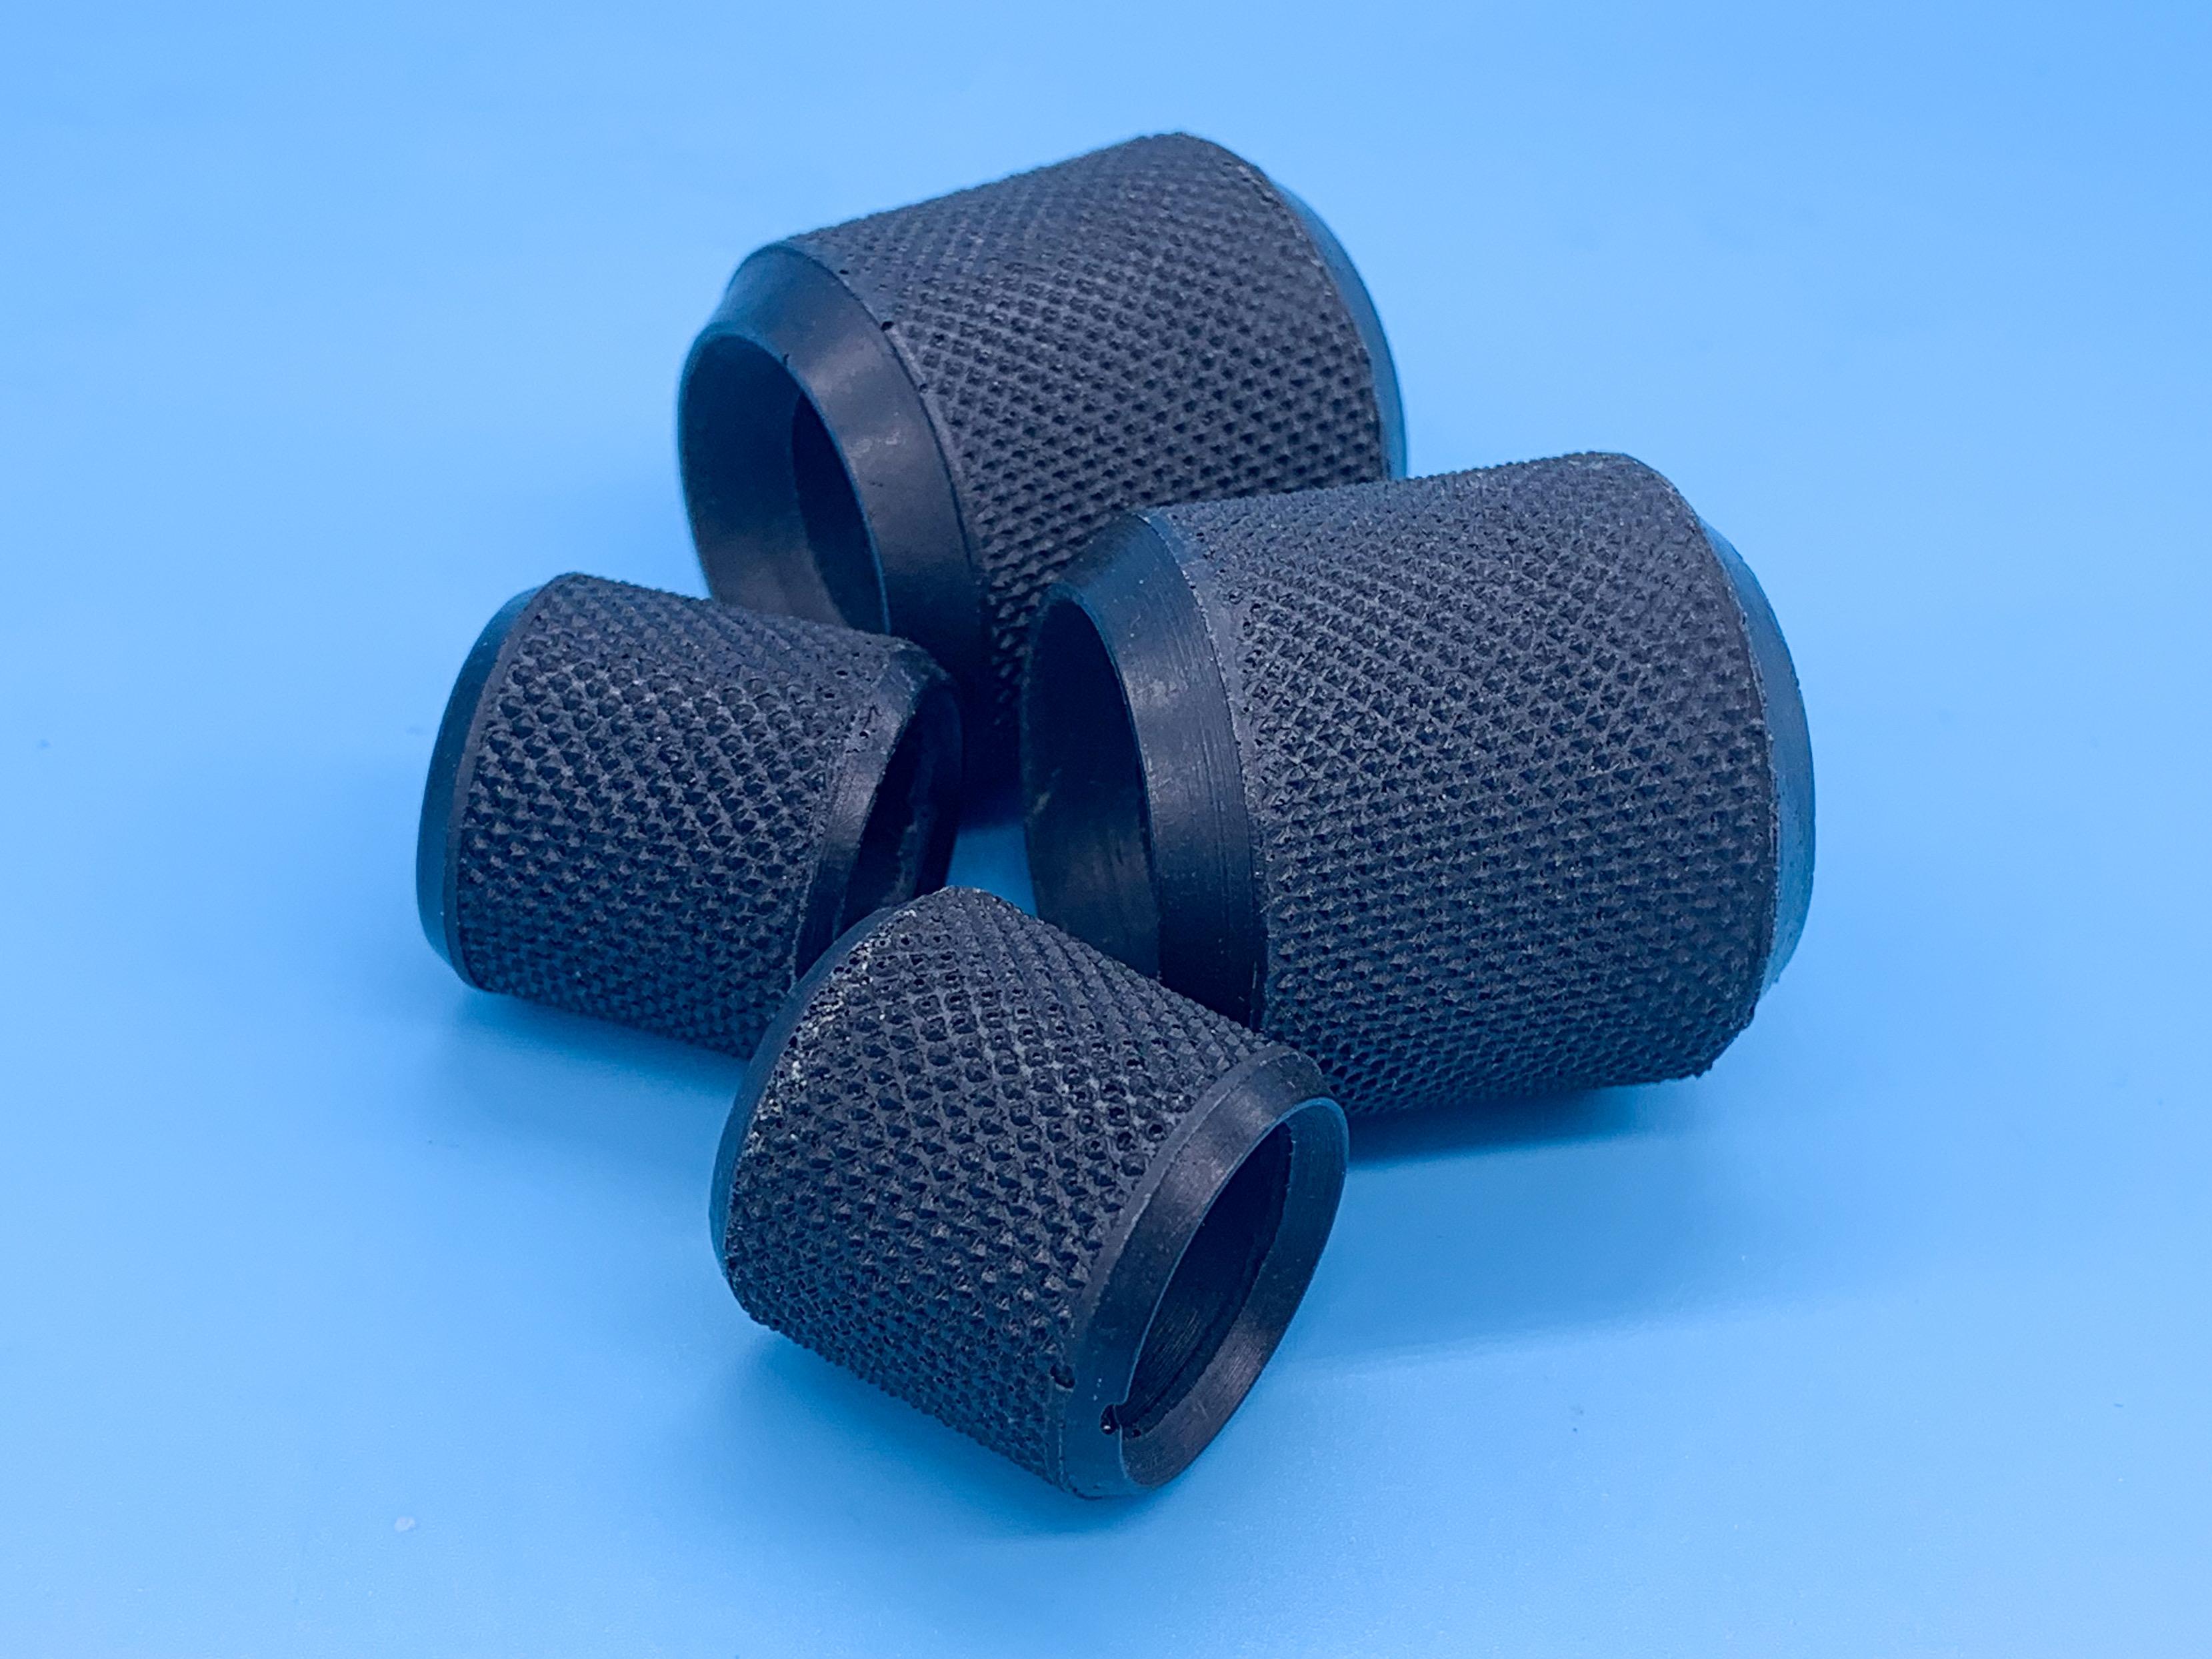
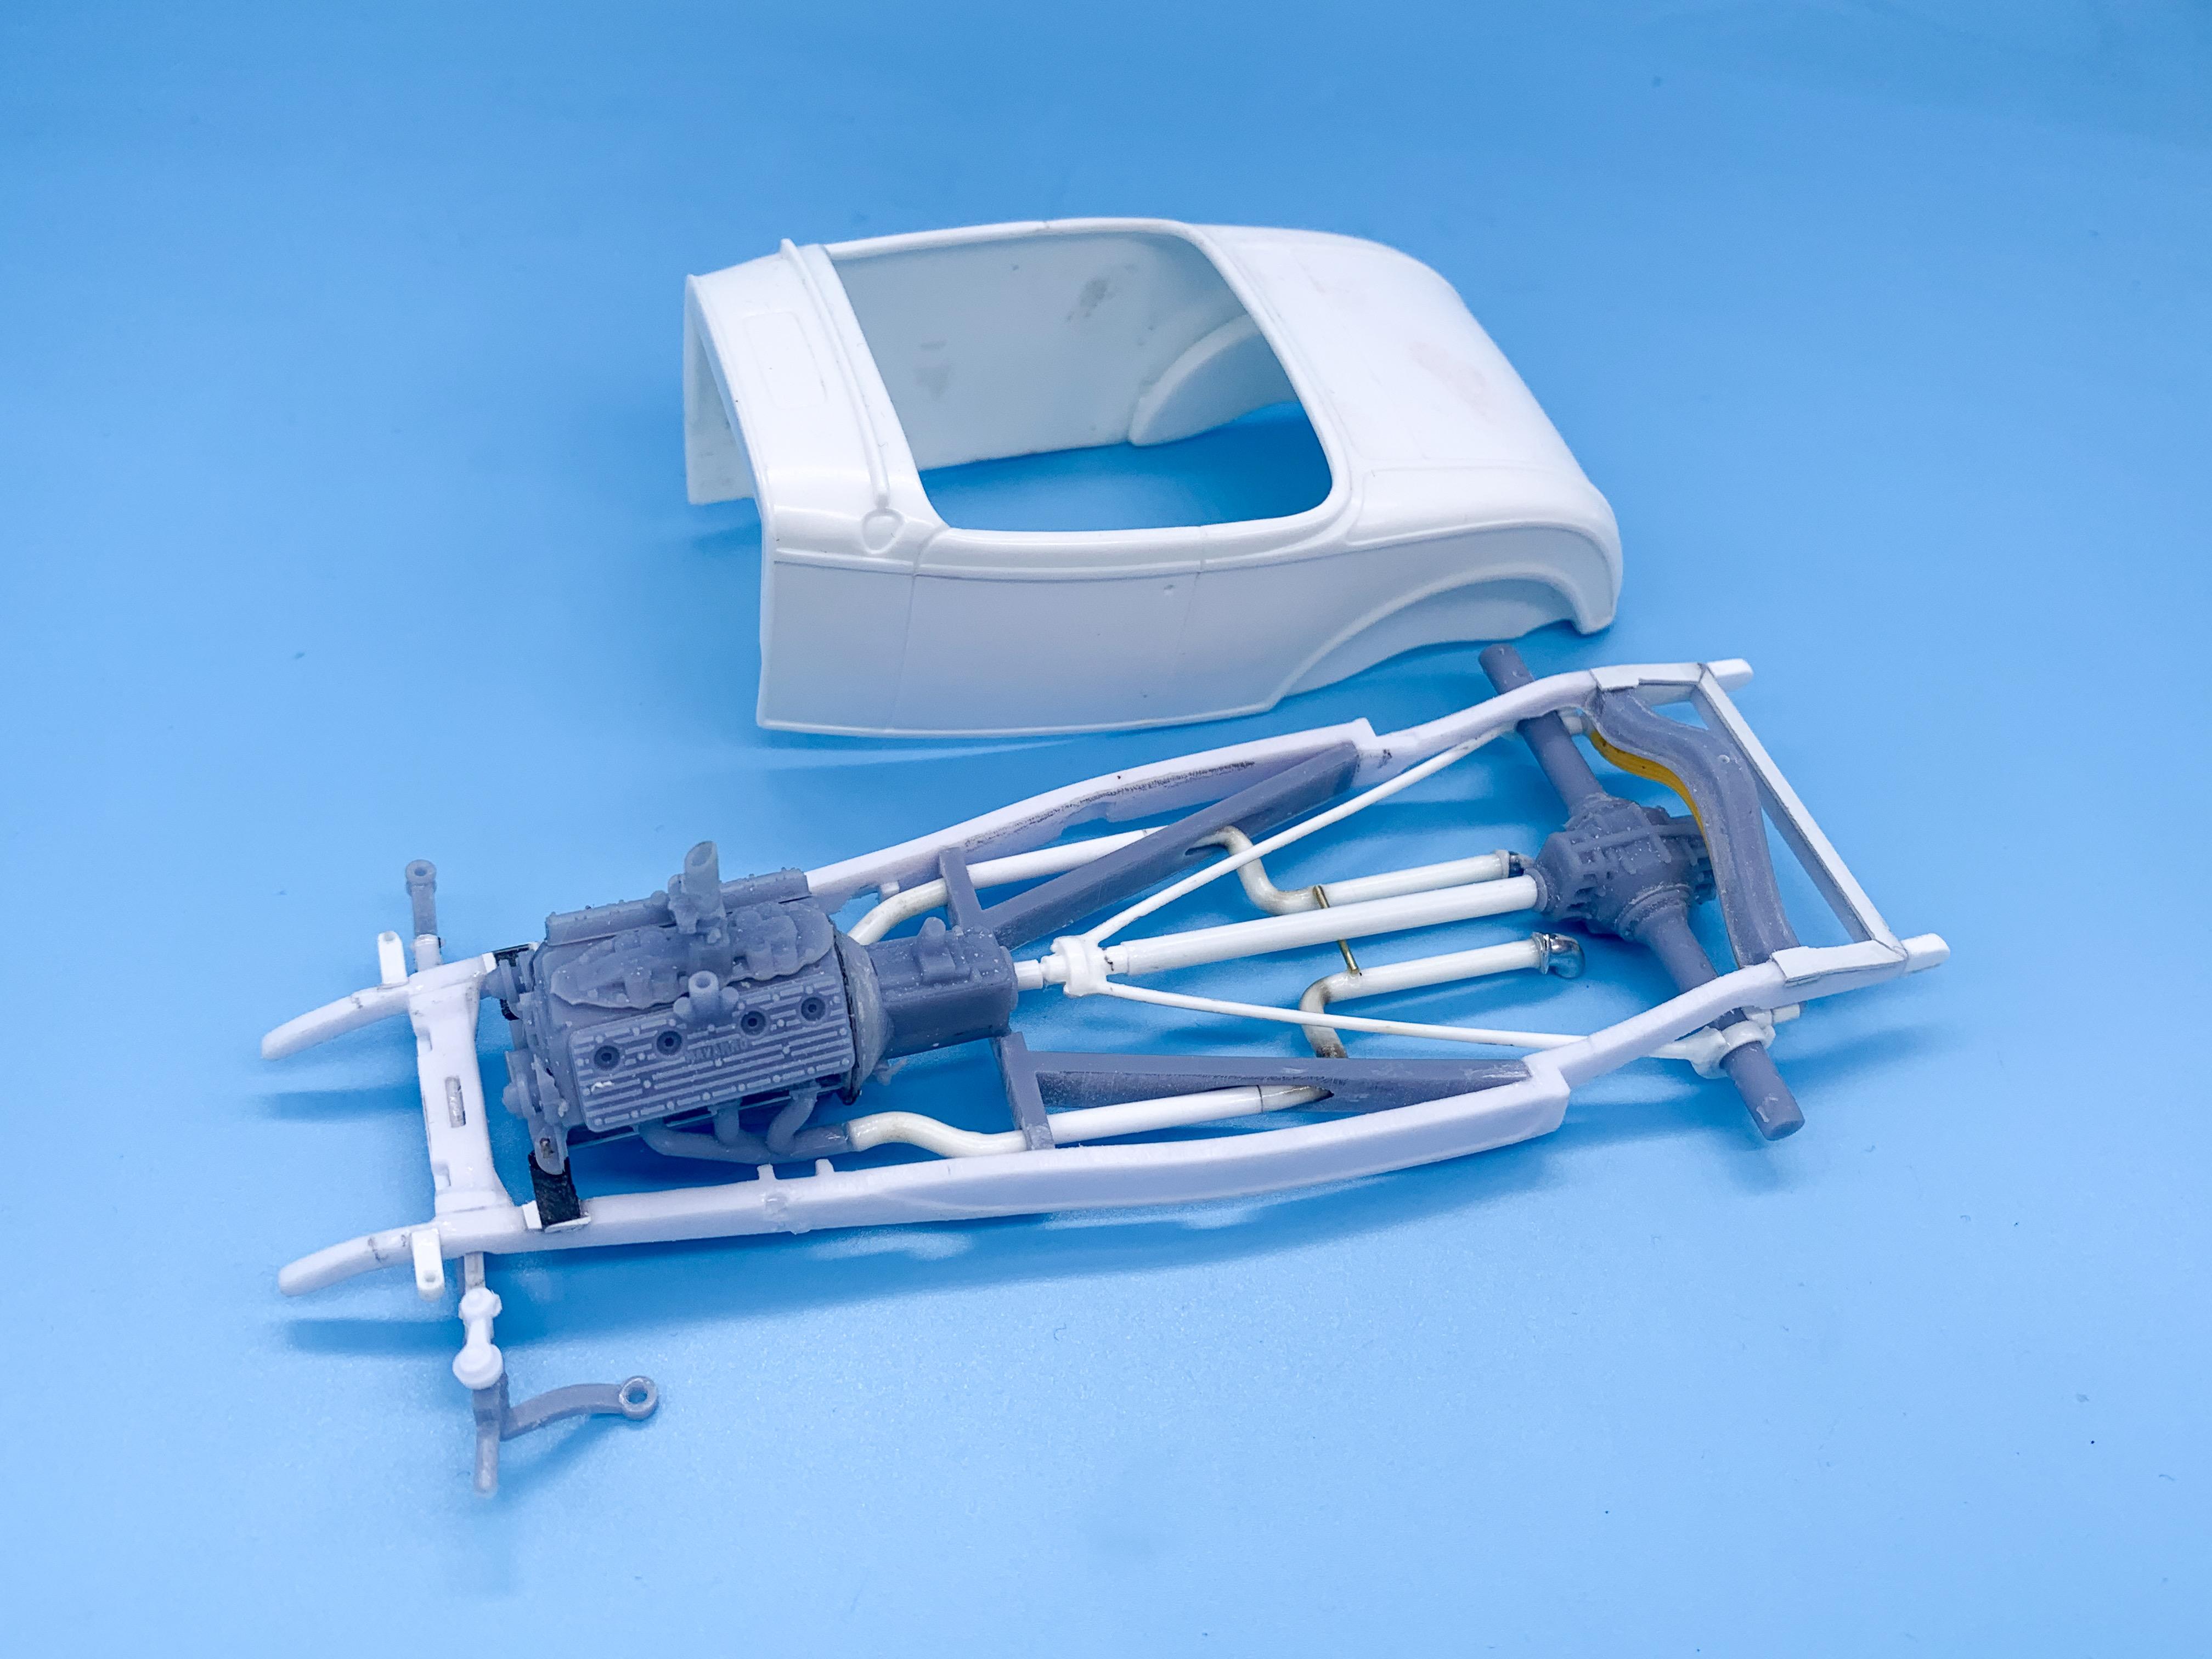
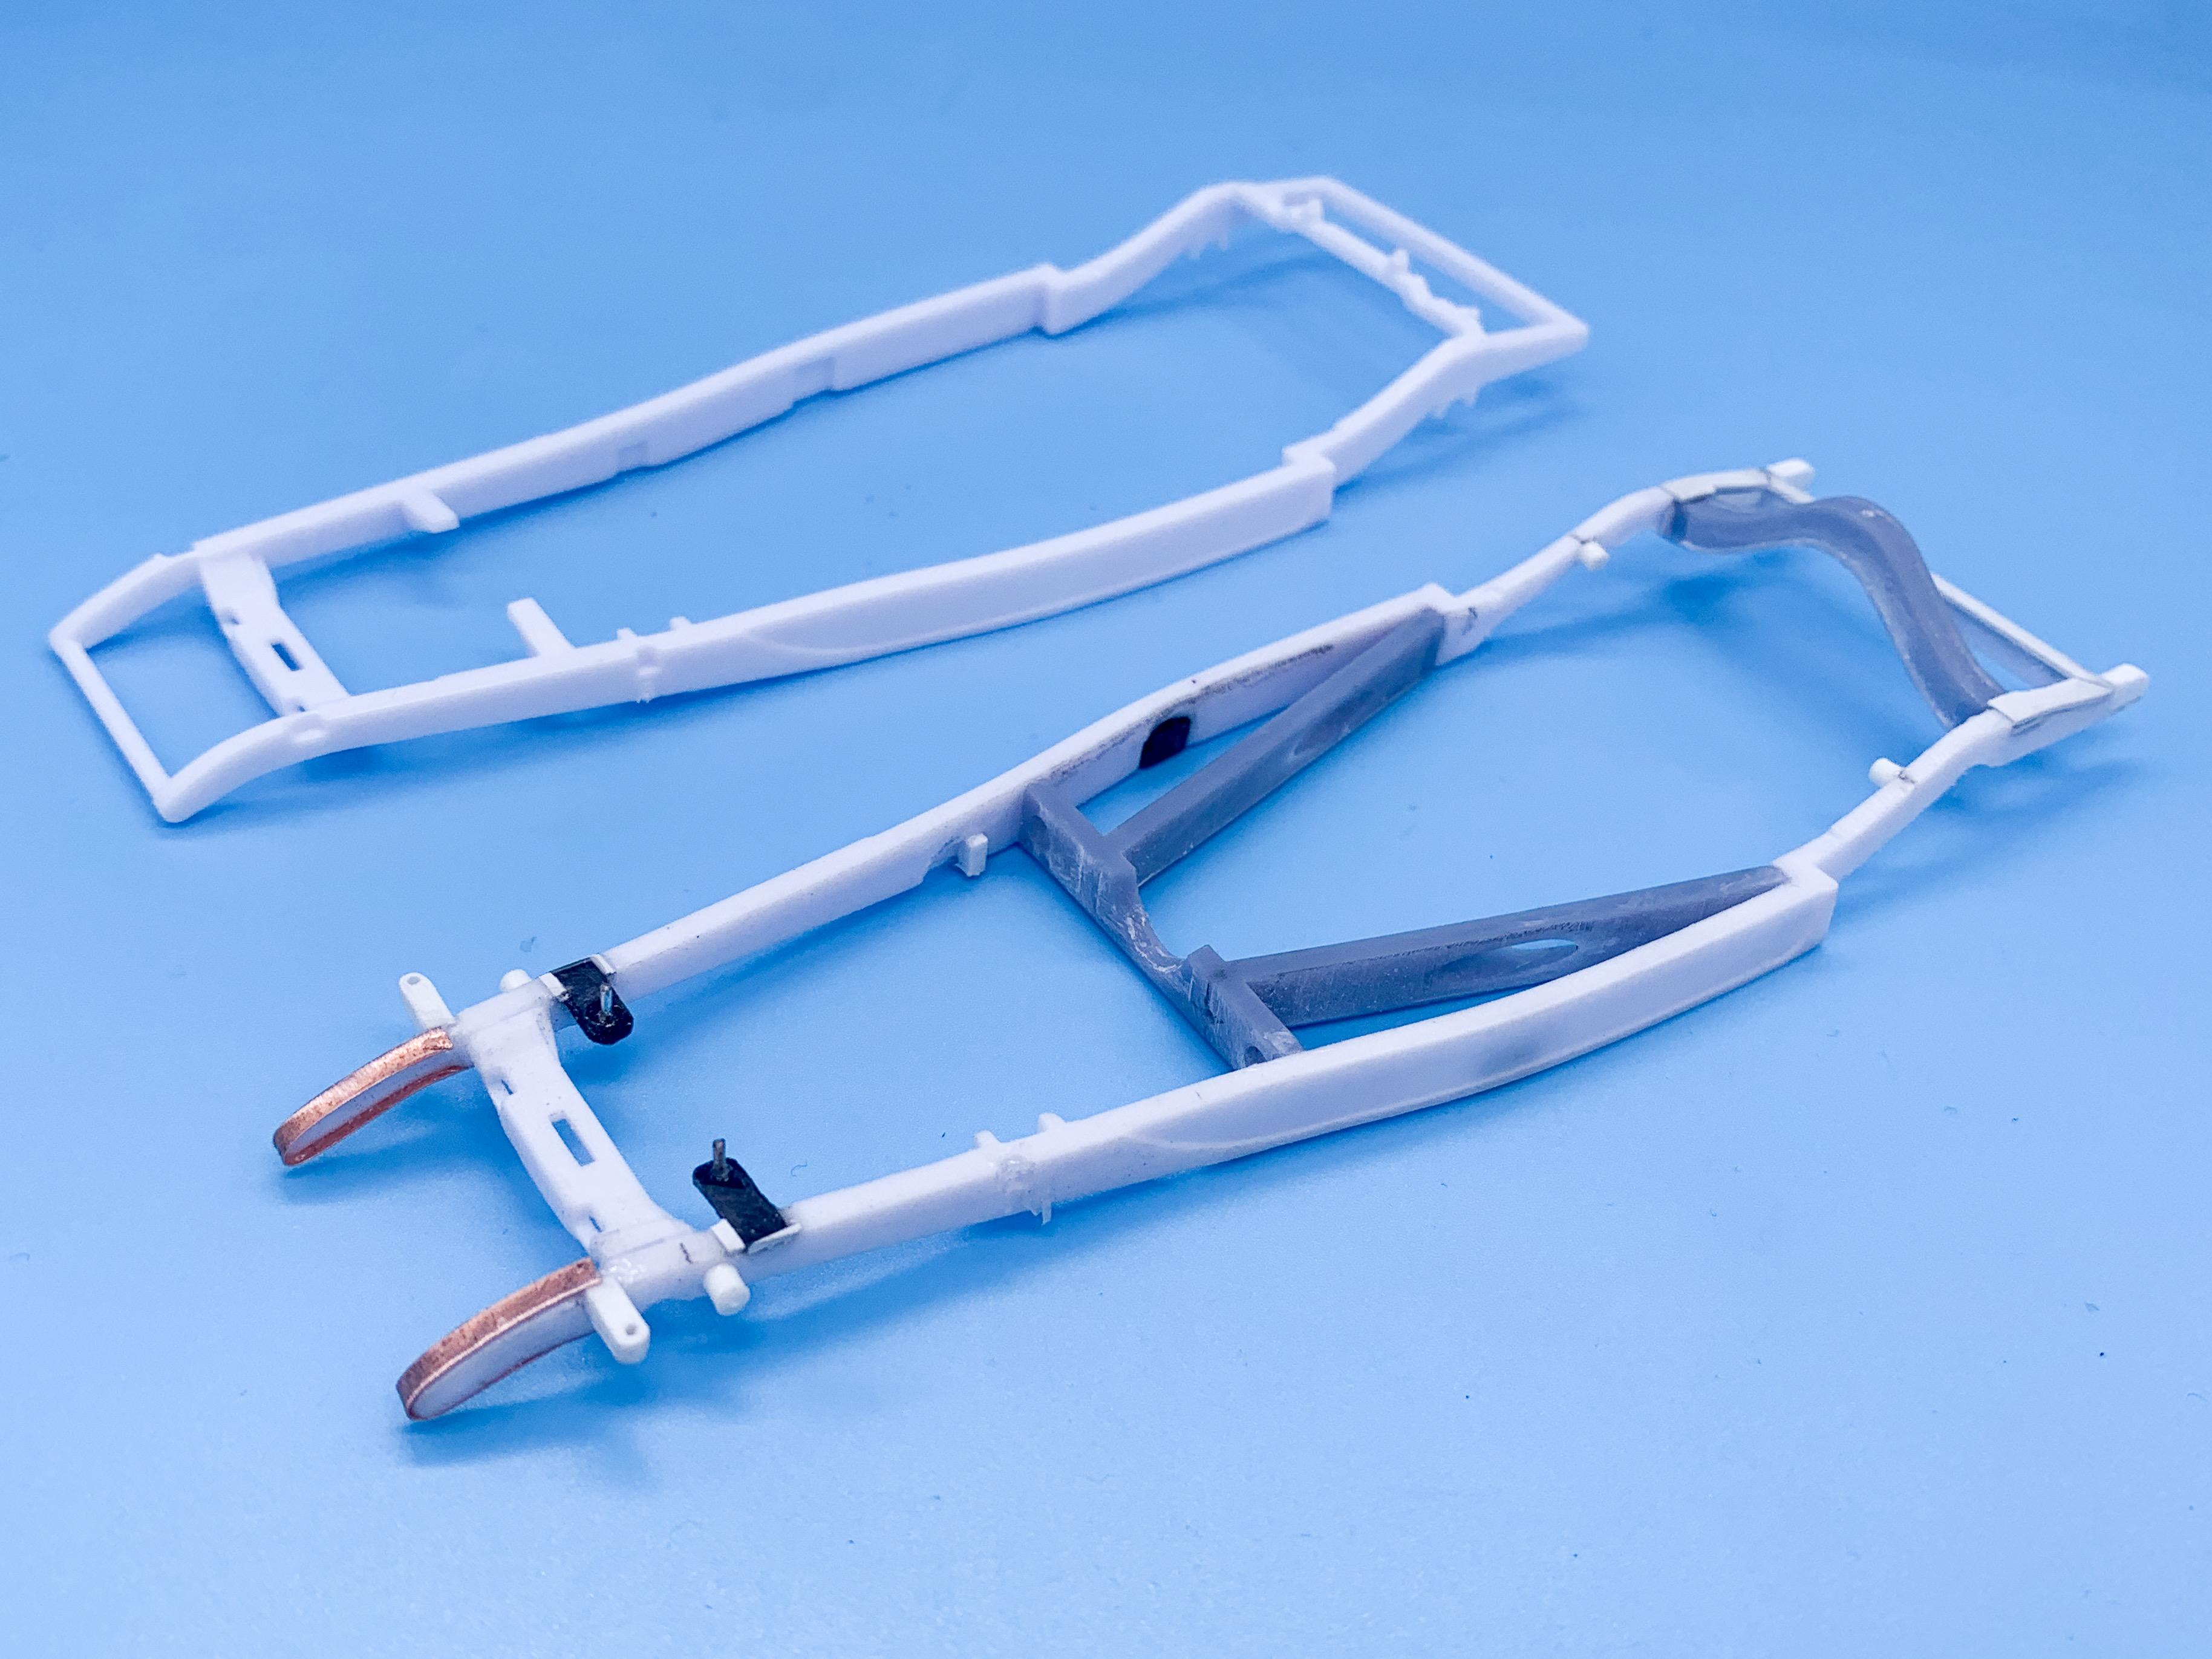
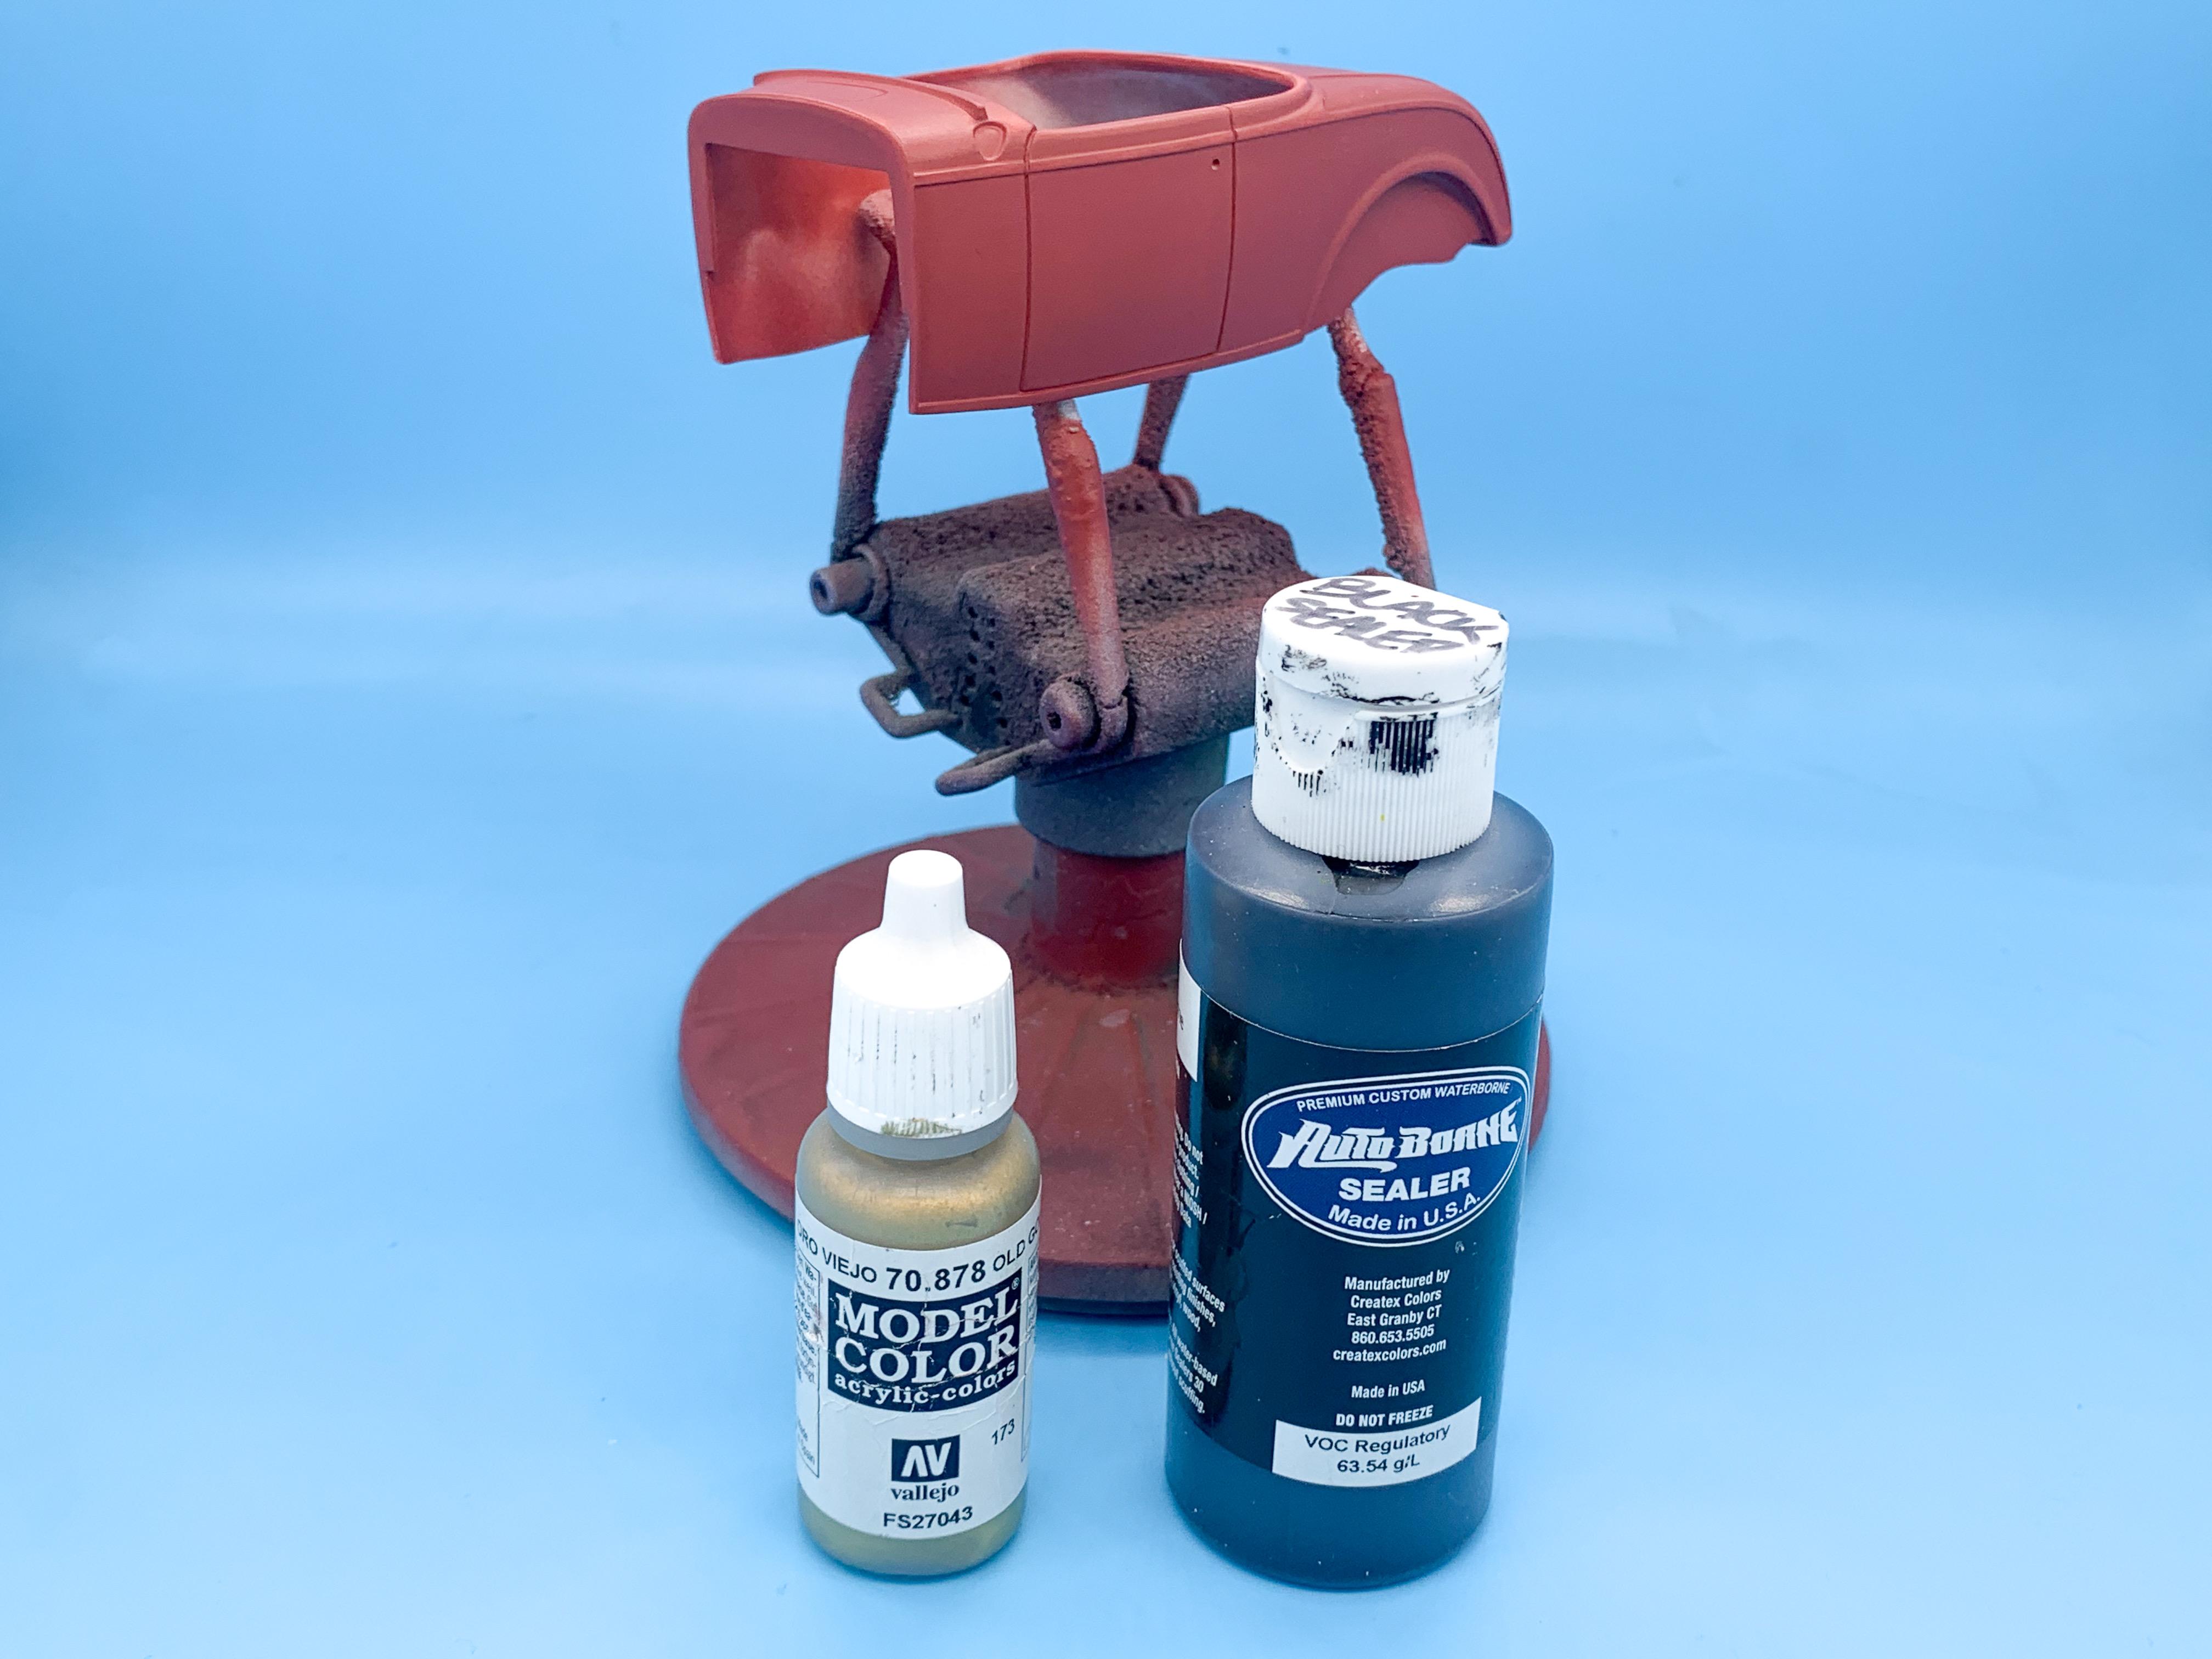
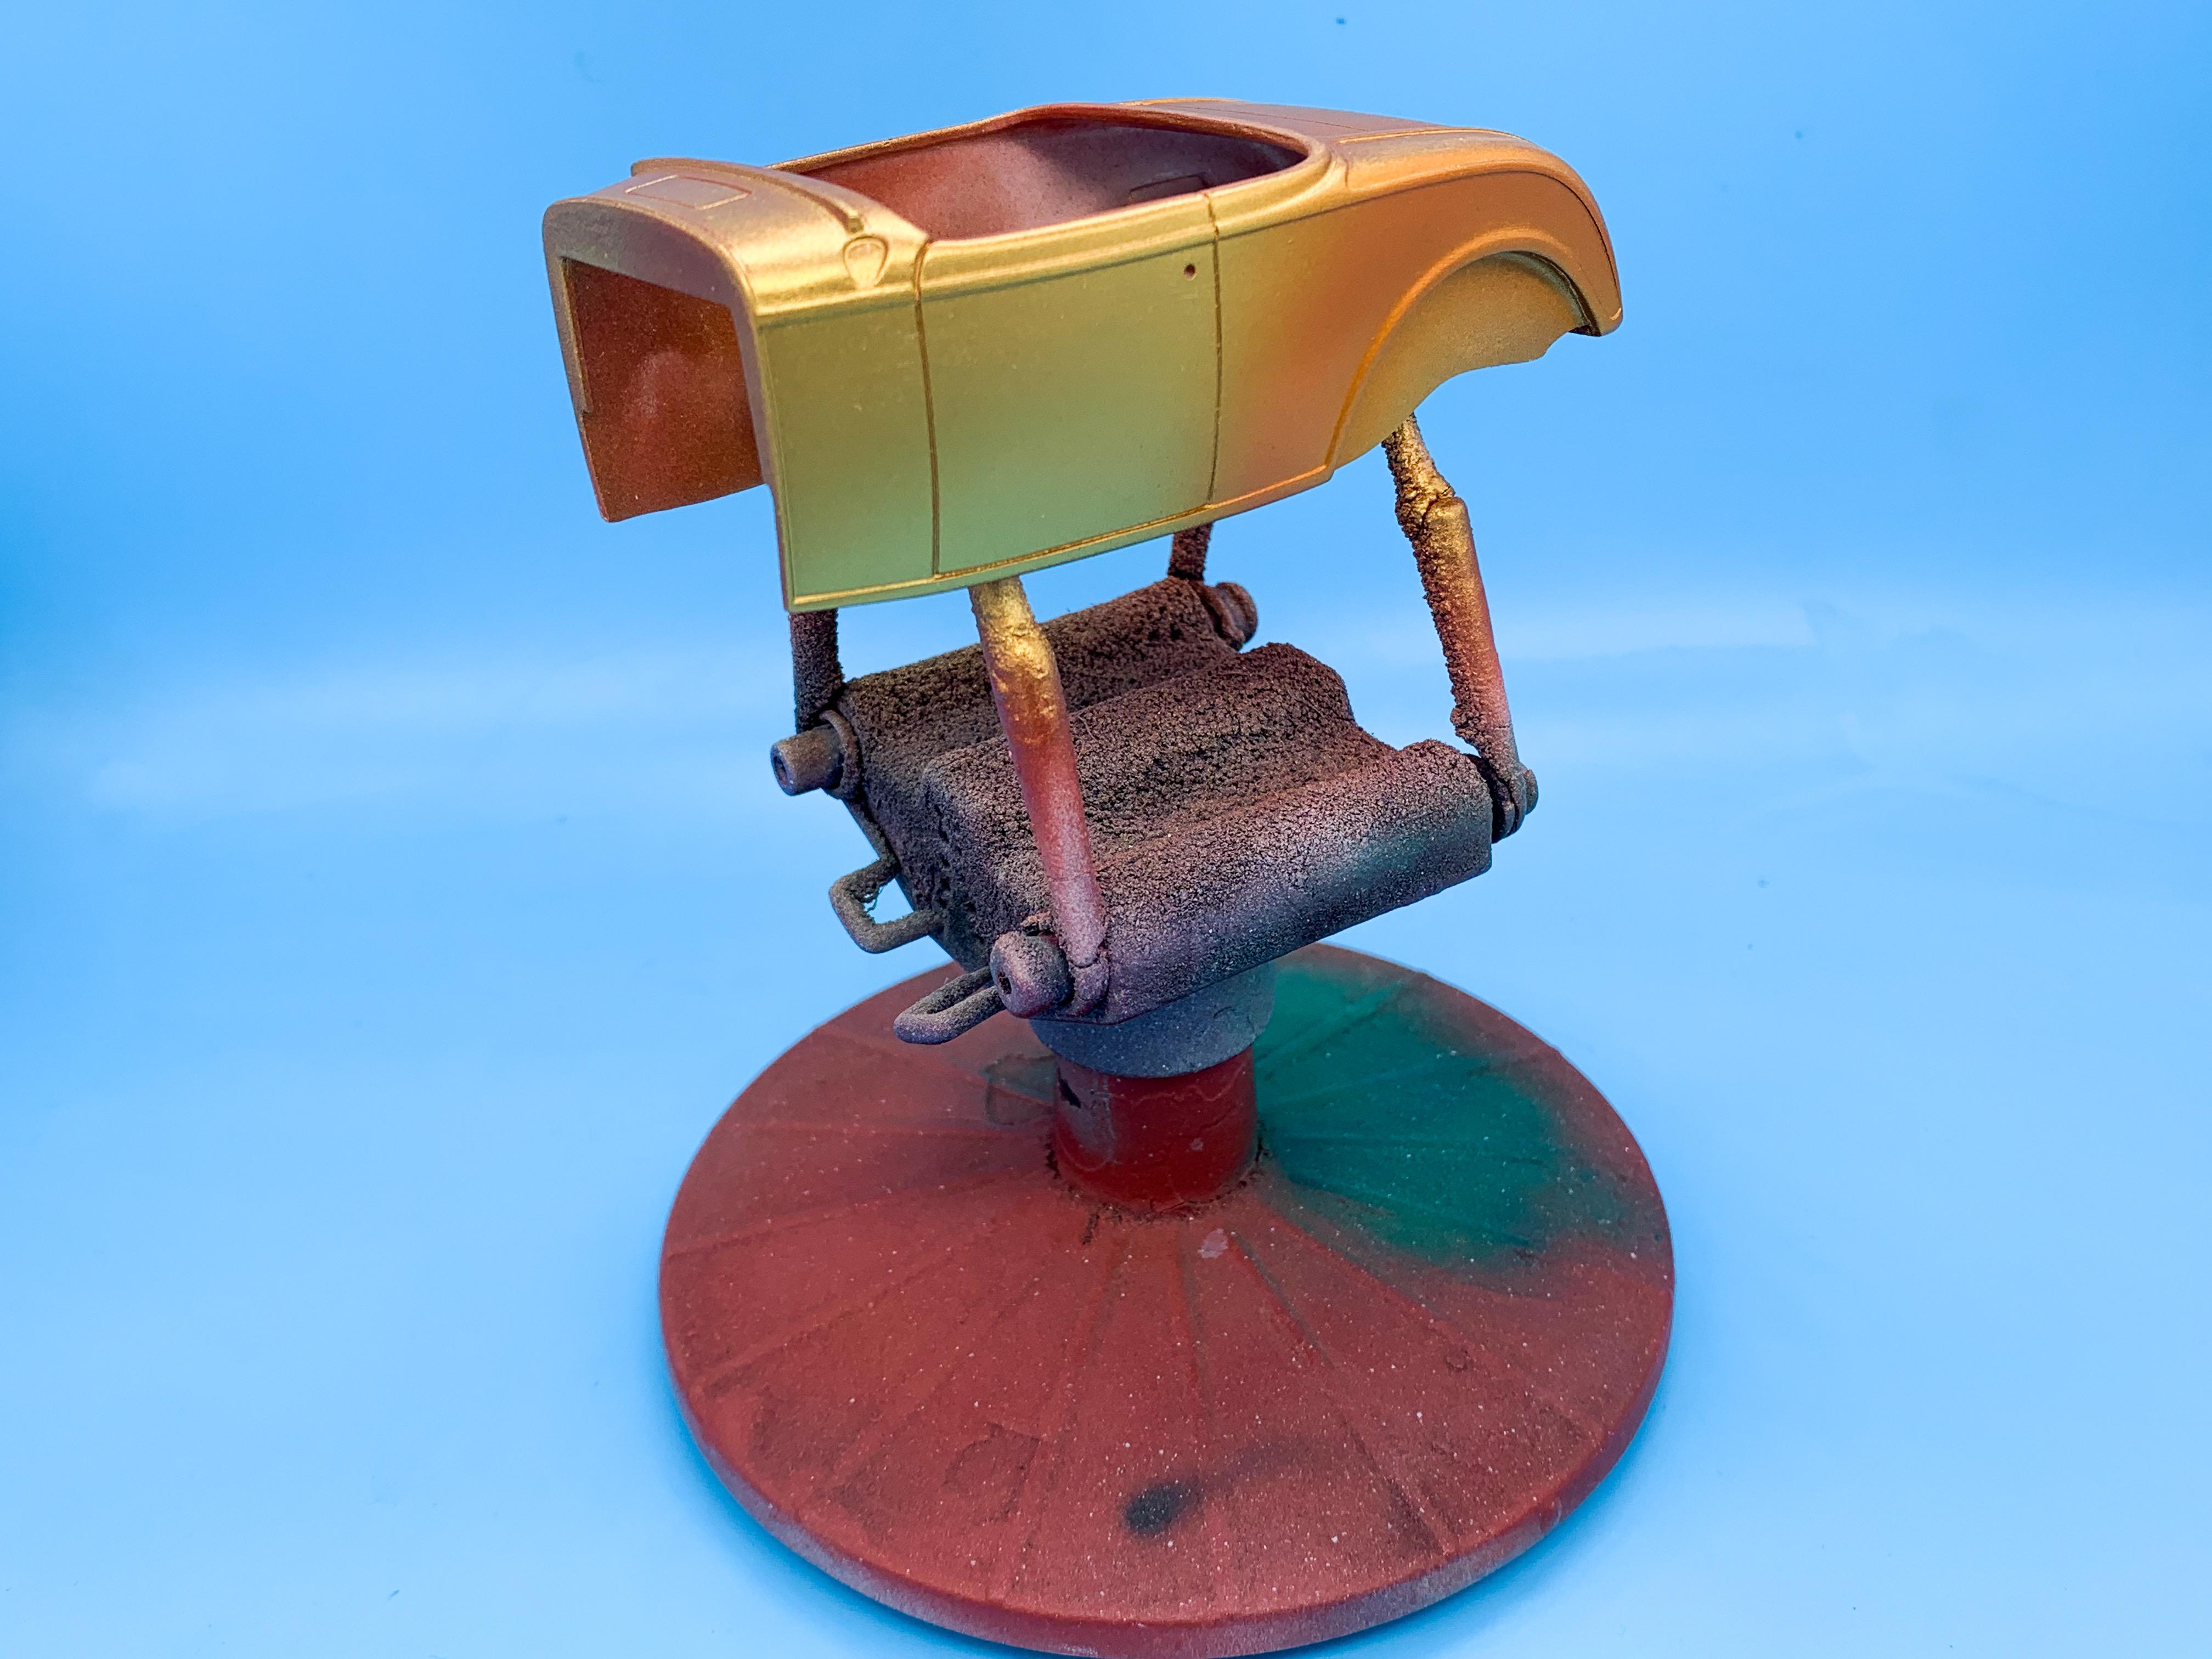
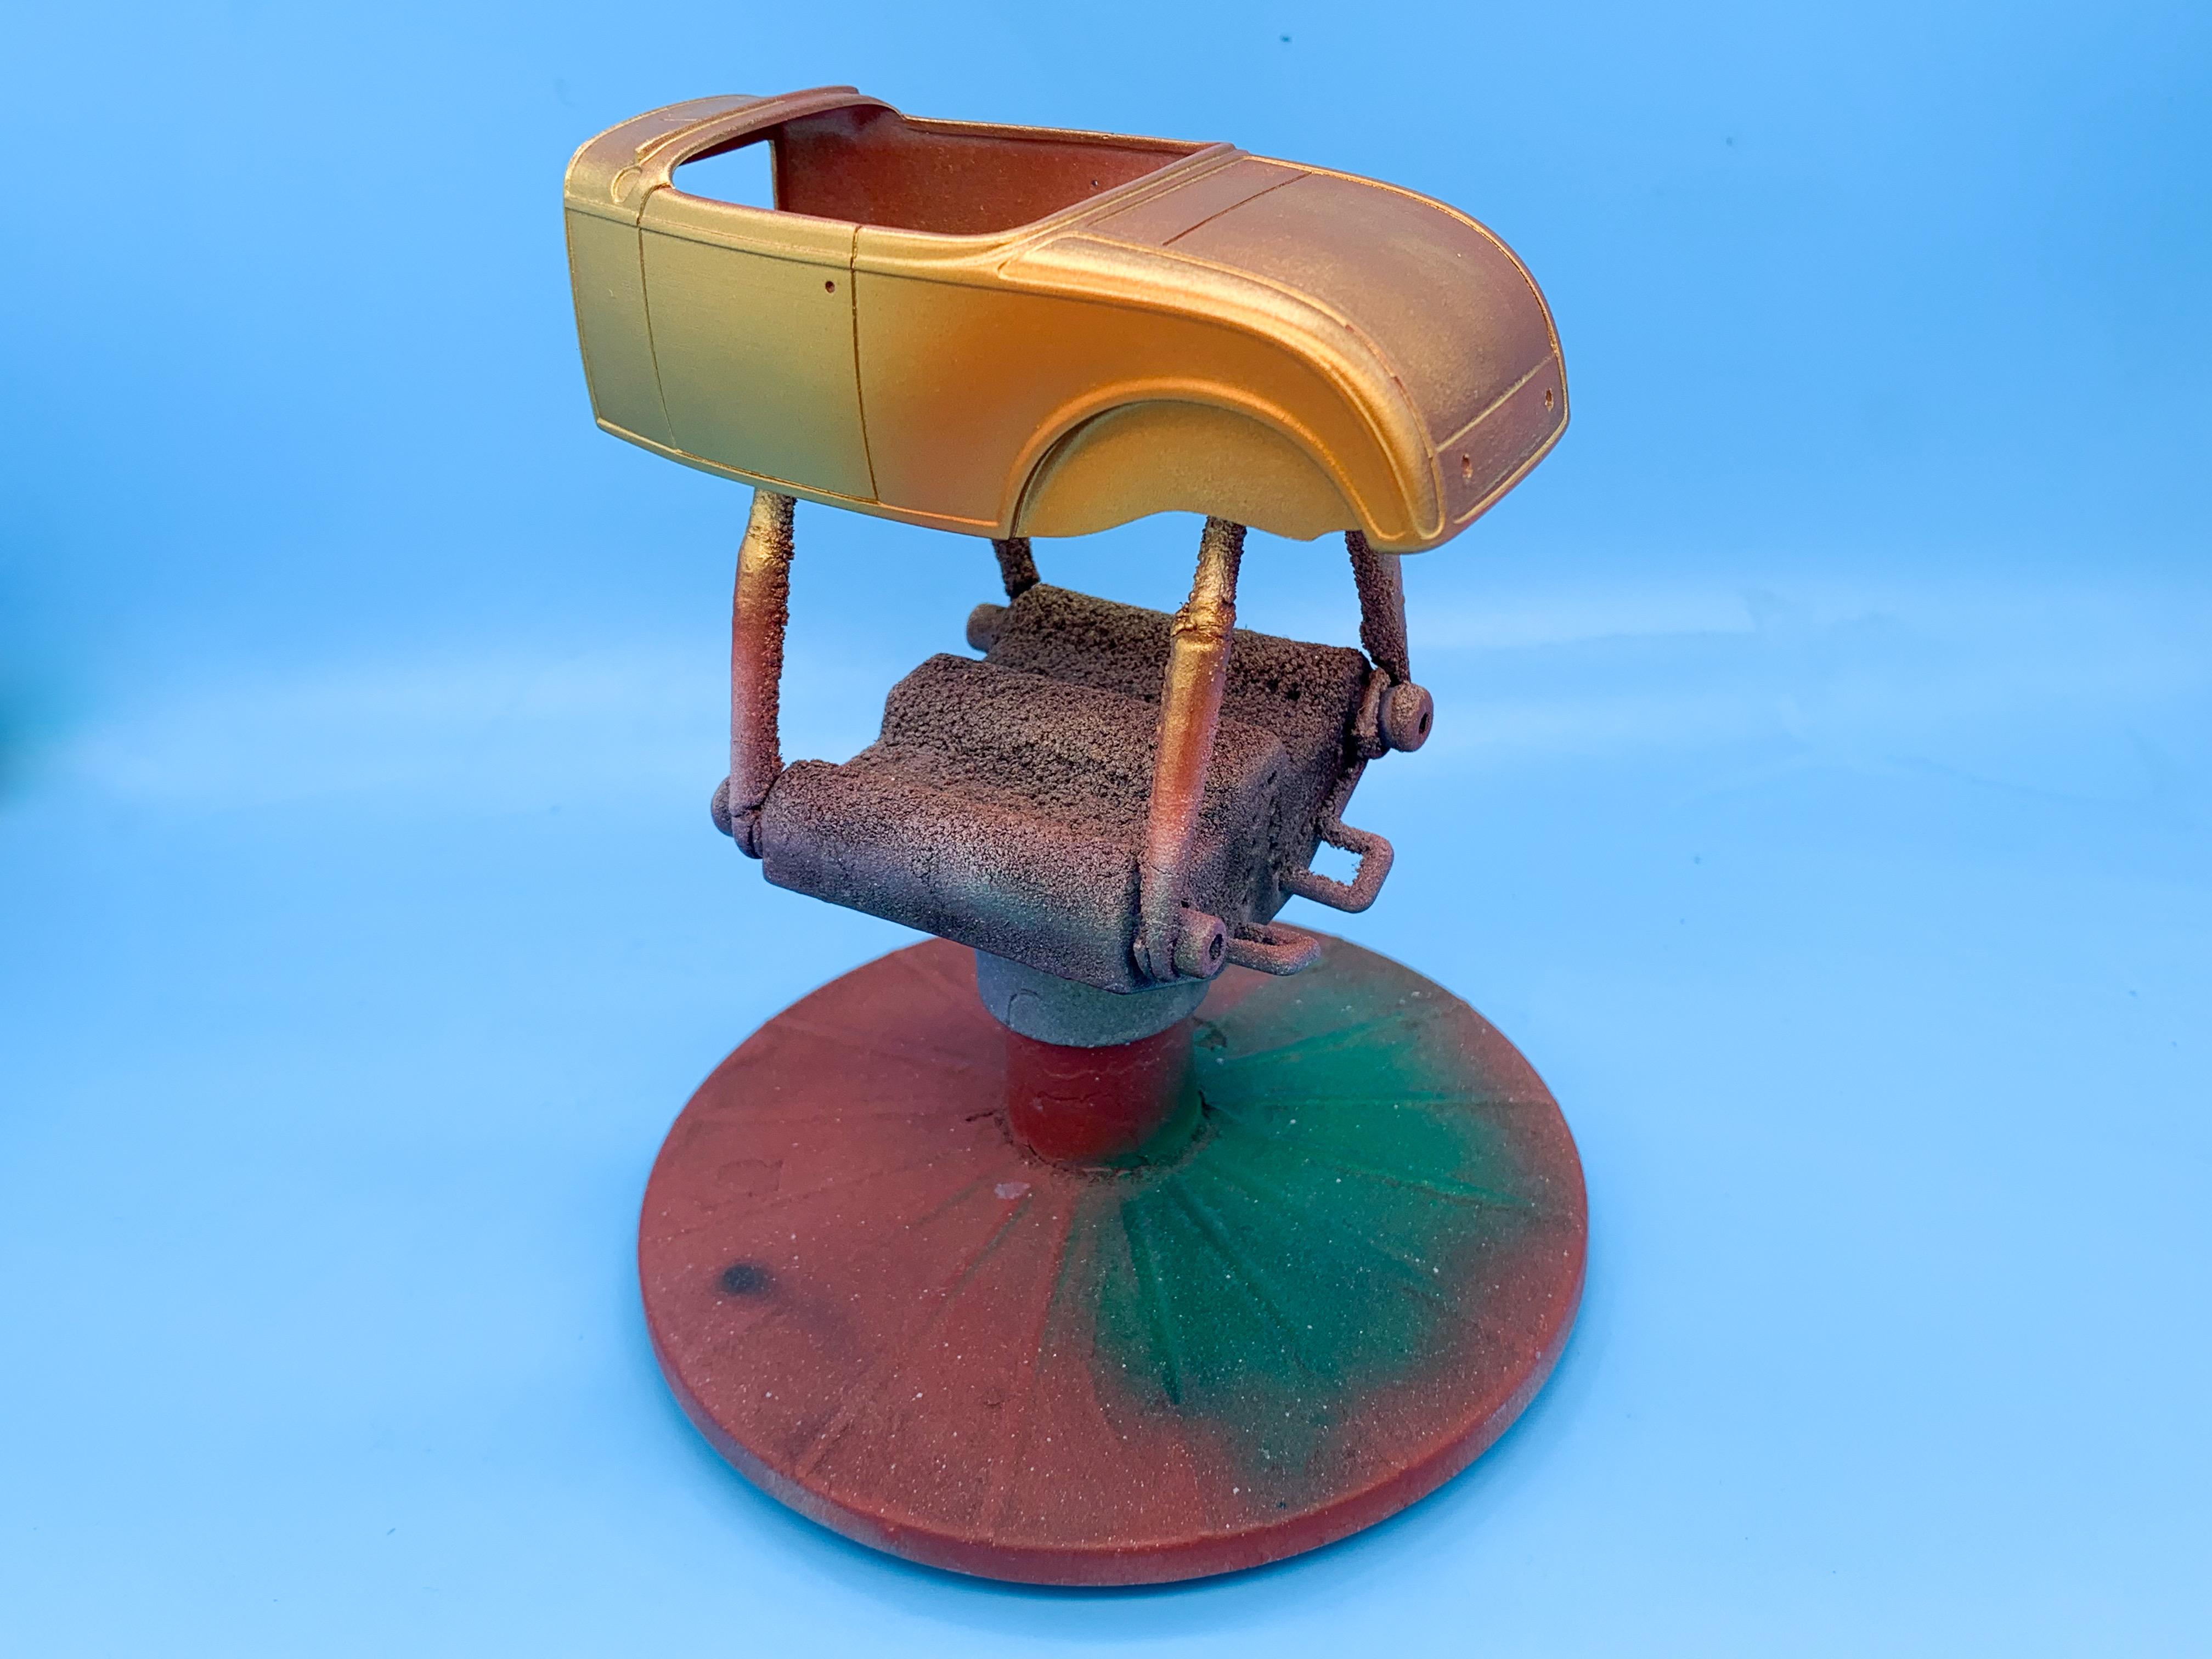
Thanks fellas! Been finishing up a few loose ends this past week so I can get to some painting. Designed and printed some friction shocks… Figured out a simple exhaust… I was careful to leave a spot on the driver’s side there whilst running the exhaust for a brake master cylinder - I’ll look through my spares and see if anything grabs me, or print one if I need to… Ended up making a lot of changes to this frame…shoulda just started with a pair of frame rails ? Note the copper strips on the front horns there - I thinned up the styrene so I could give them that open c-channel look… Started laying down some color on the interior pieces - not done messing with these yet: And picked out some colors for the body - going mostly black with some nice simple gold flames… I’m going to do my usual reverse-masked flame paintjob on this one, so last project of the afternoon today was laying down the gradient… I’ll clear coat this with Future tonight as a barrier coat to protect the flake, then lay down masks and shoot black tomorrow. More soon! Thanks for looking!
-
Exciting! I wish they’d send Hobby Lobby some of the ‘30 Ford kits so I can stock up on them cheap…but regardless of where I get them I’ll be picking up some of the Deuce and 55 kits
-
INCREDIBLE work Scott! You did an AMAZING job on that - really impressed!
-
Making seats look like leather...
OldNYJim replied to Hillbilly Deluxe's topic in Tips, Tricks, and Tutorials
Your interiors are always great Steve - you’re an outstanding builder all round, but your interiors always catch my eye. I need to try some of your techniques (no doubt to discover that you make it look easier than it is…) -
Great photos! Thanks for sharing!
- 49 replies
-
- 1
-

-
- phoenix
- championship
- (and 1 more)
-
Mine arrived here in Cornsville, Indiana today - looks like another GREAT issue! These recent issues remind me of Scale Auto back when it had a lot more pages and a lot more content…great work everyone!
-
The more the better, when it comes to your projects! Love seeing your clean, thorough style of building!
-
Huh! That’s a really cool Easter egg! Good spot!
-
That's really helpful - I wasn't familiar with this kit...thanks Garry!
-
NASCAR Next Gen questions
OldNYJim replied to dawgvet's topic in Model Building Questions and Answers
Oh man, that is a GOLDMINE of useful reference pics…I’ve been wanting to build one of these Next Gen cars but don’t know enough about them - GREAT reference material. Thank you!!! -
Beautiful work - one of my favorite tiny details, though simple, is the oil washes you used on the metal lines to add a little color to them…I love little touches like that! Great work so far!
-
Paint boo-boo aside, that color looks GREAT! Nice choice!
-
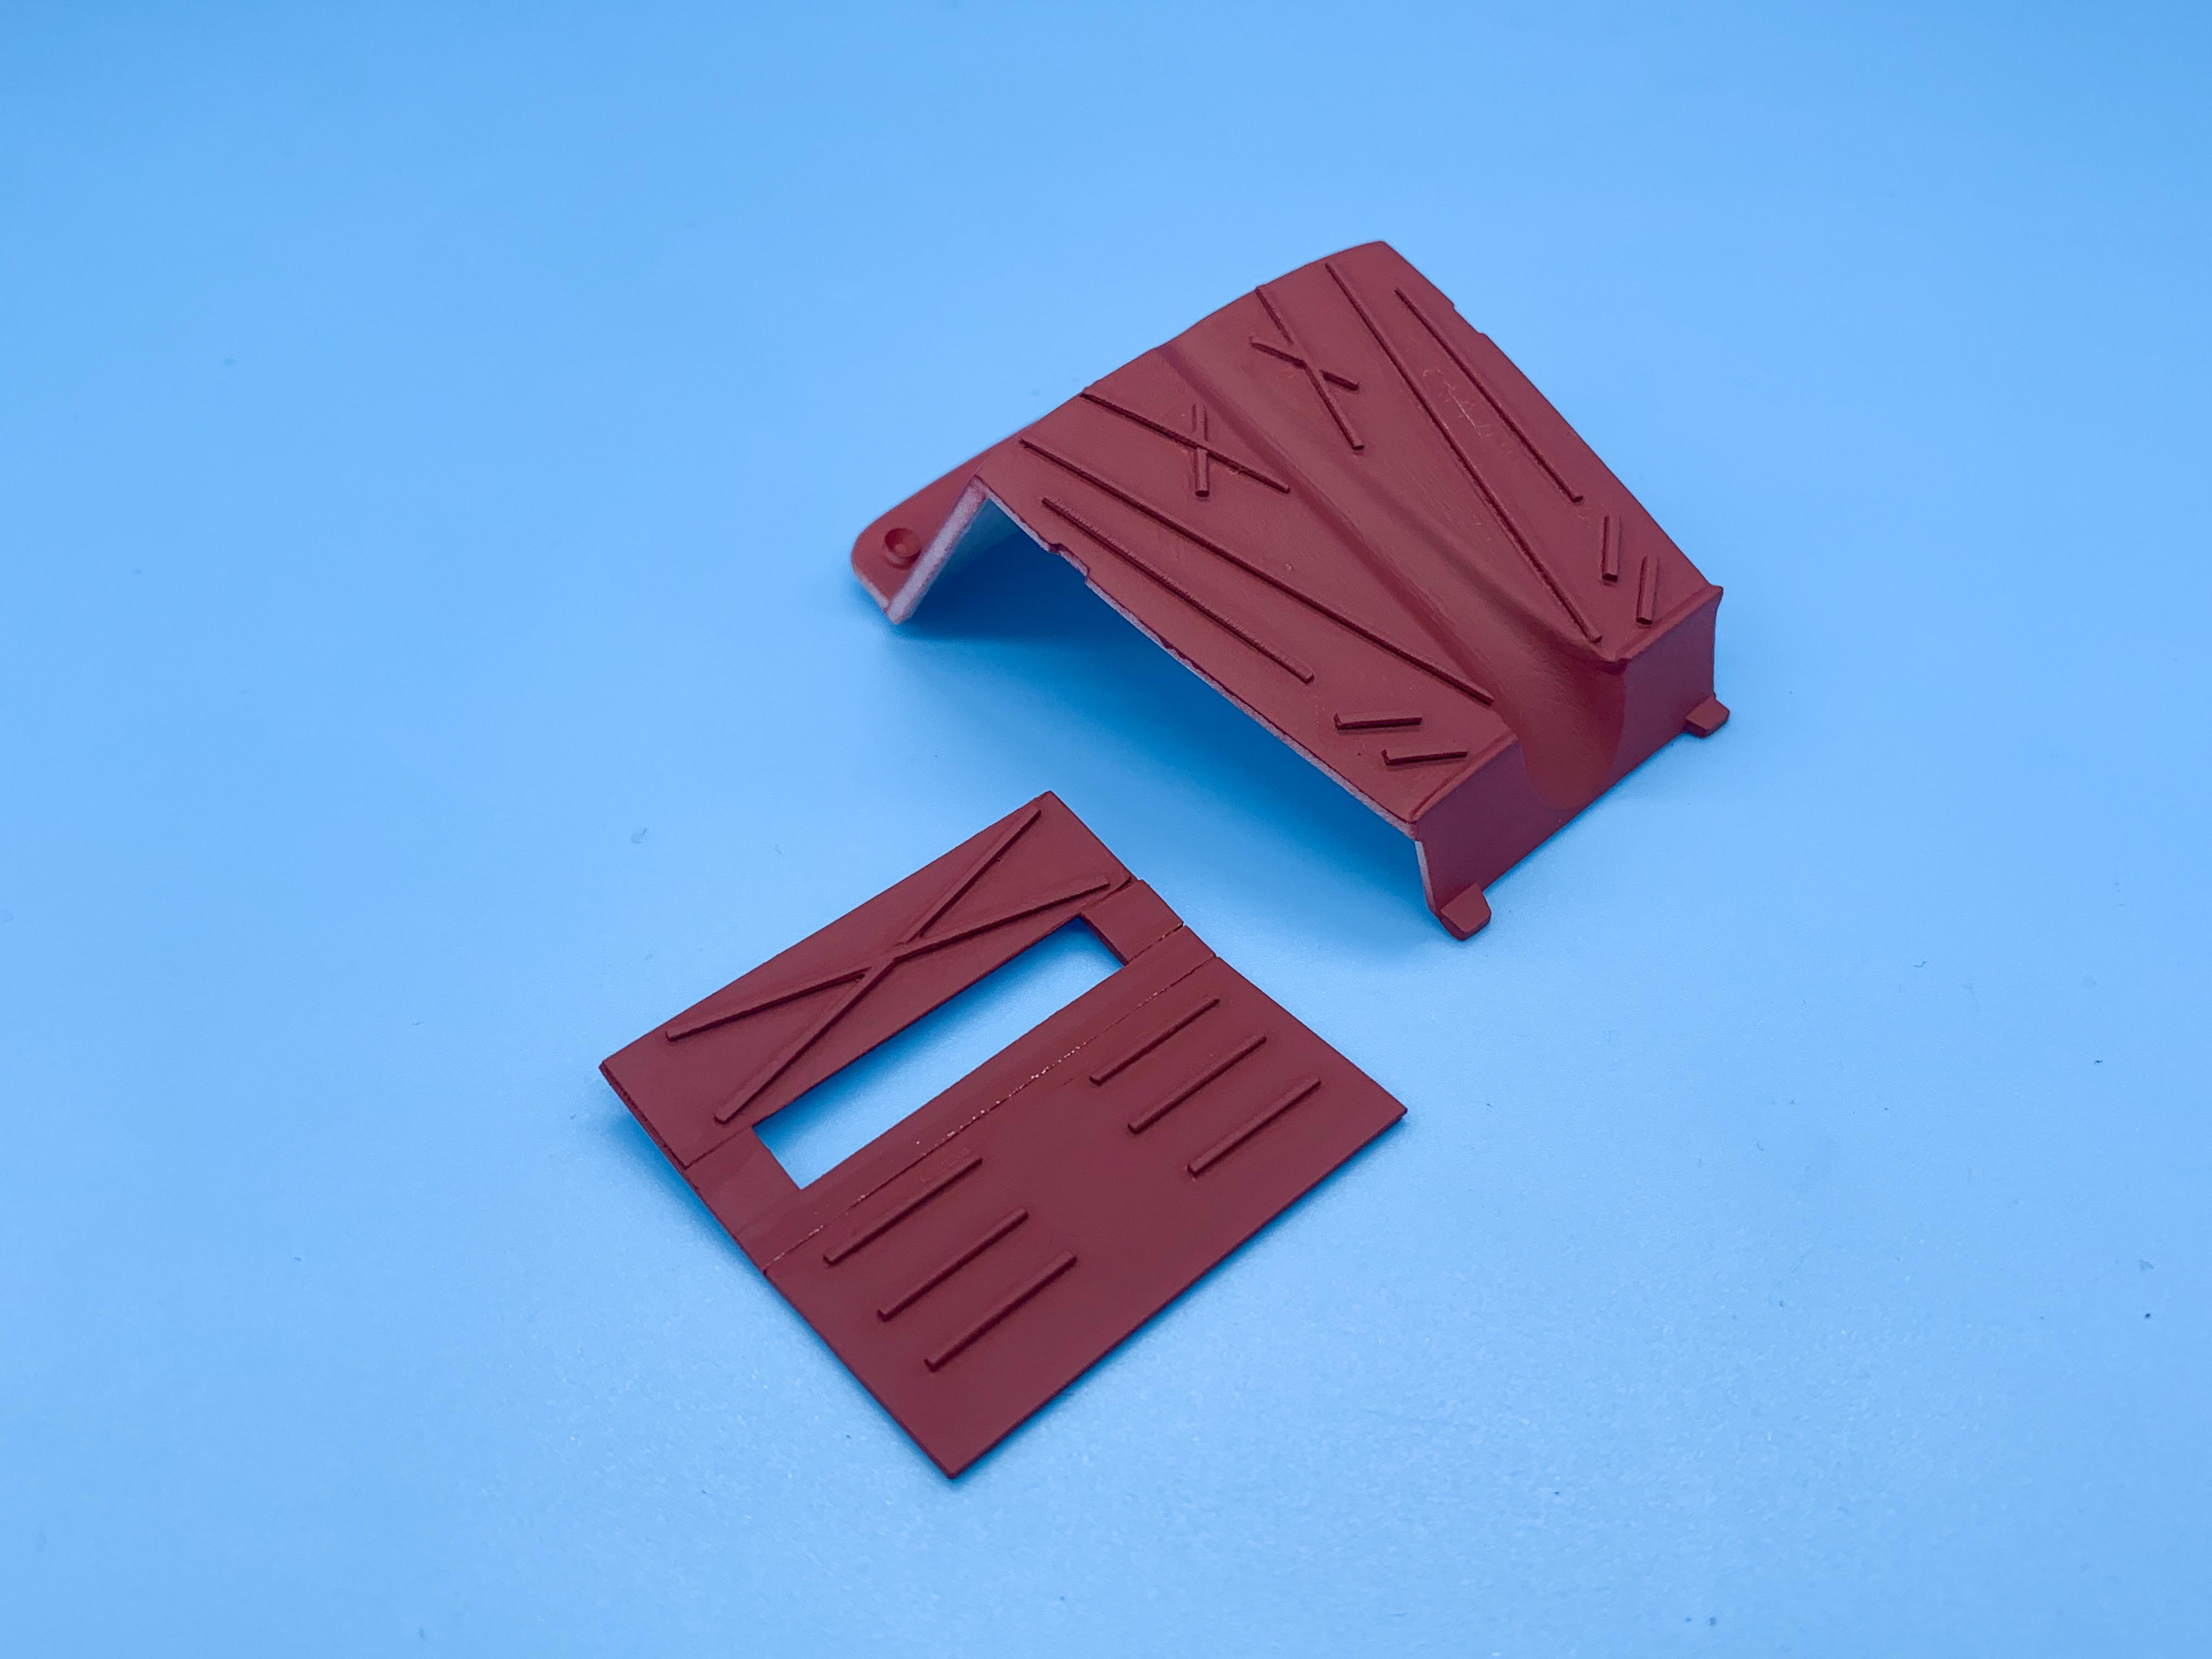
Just a nice clean traditional Deuce Roadster
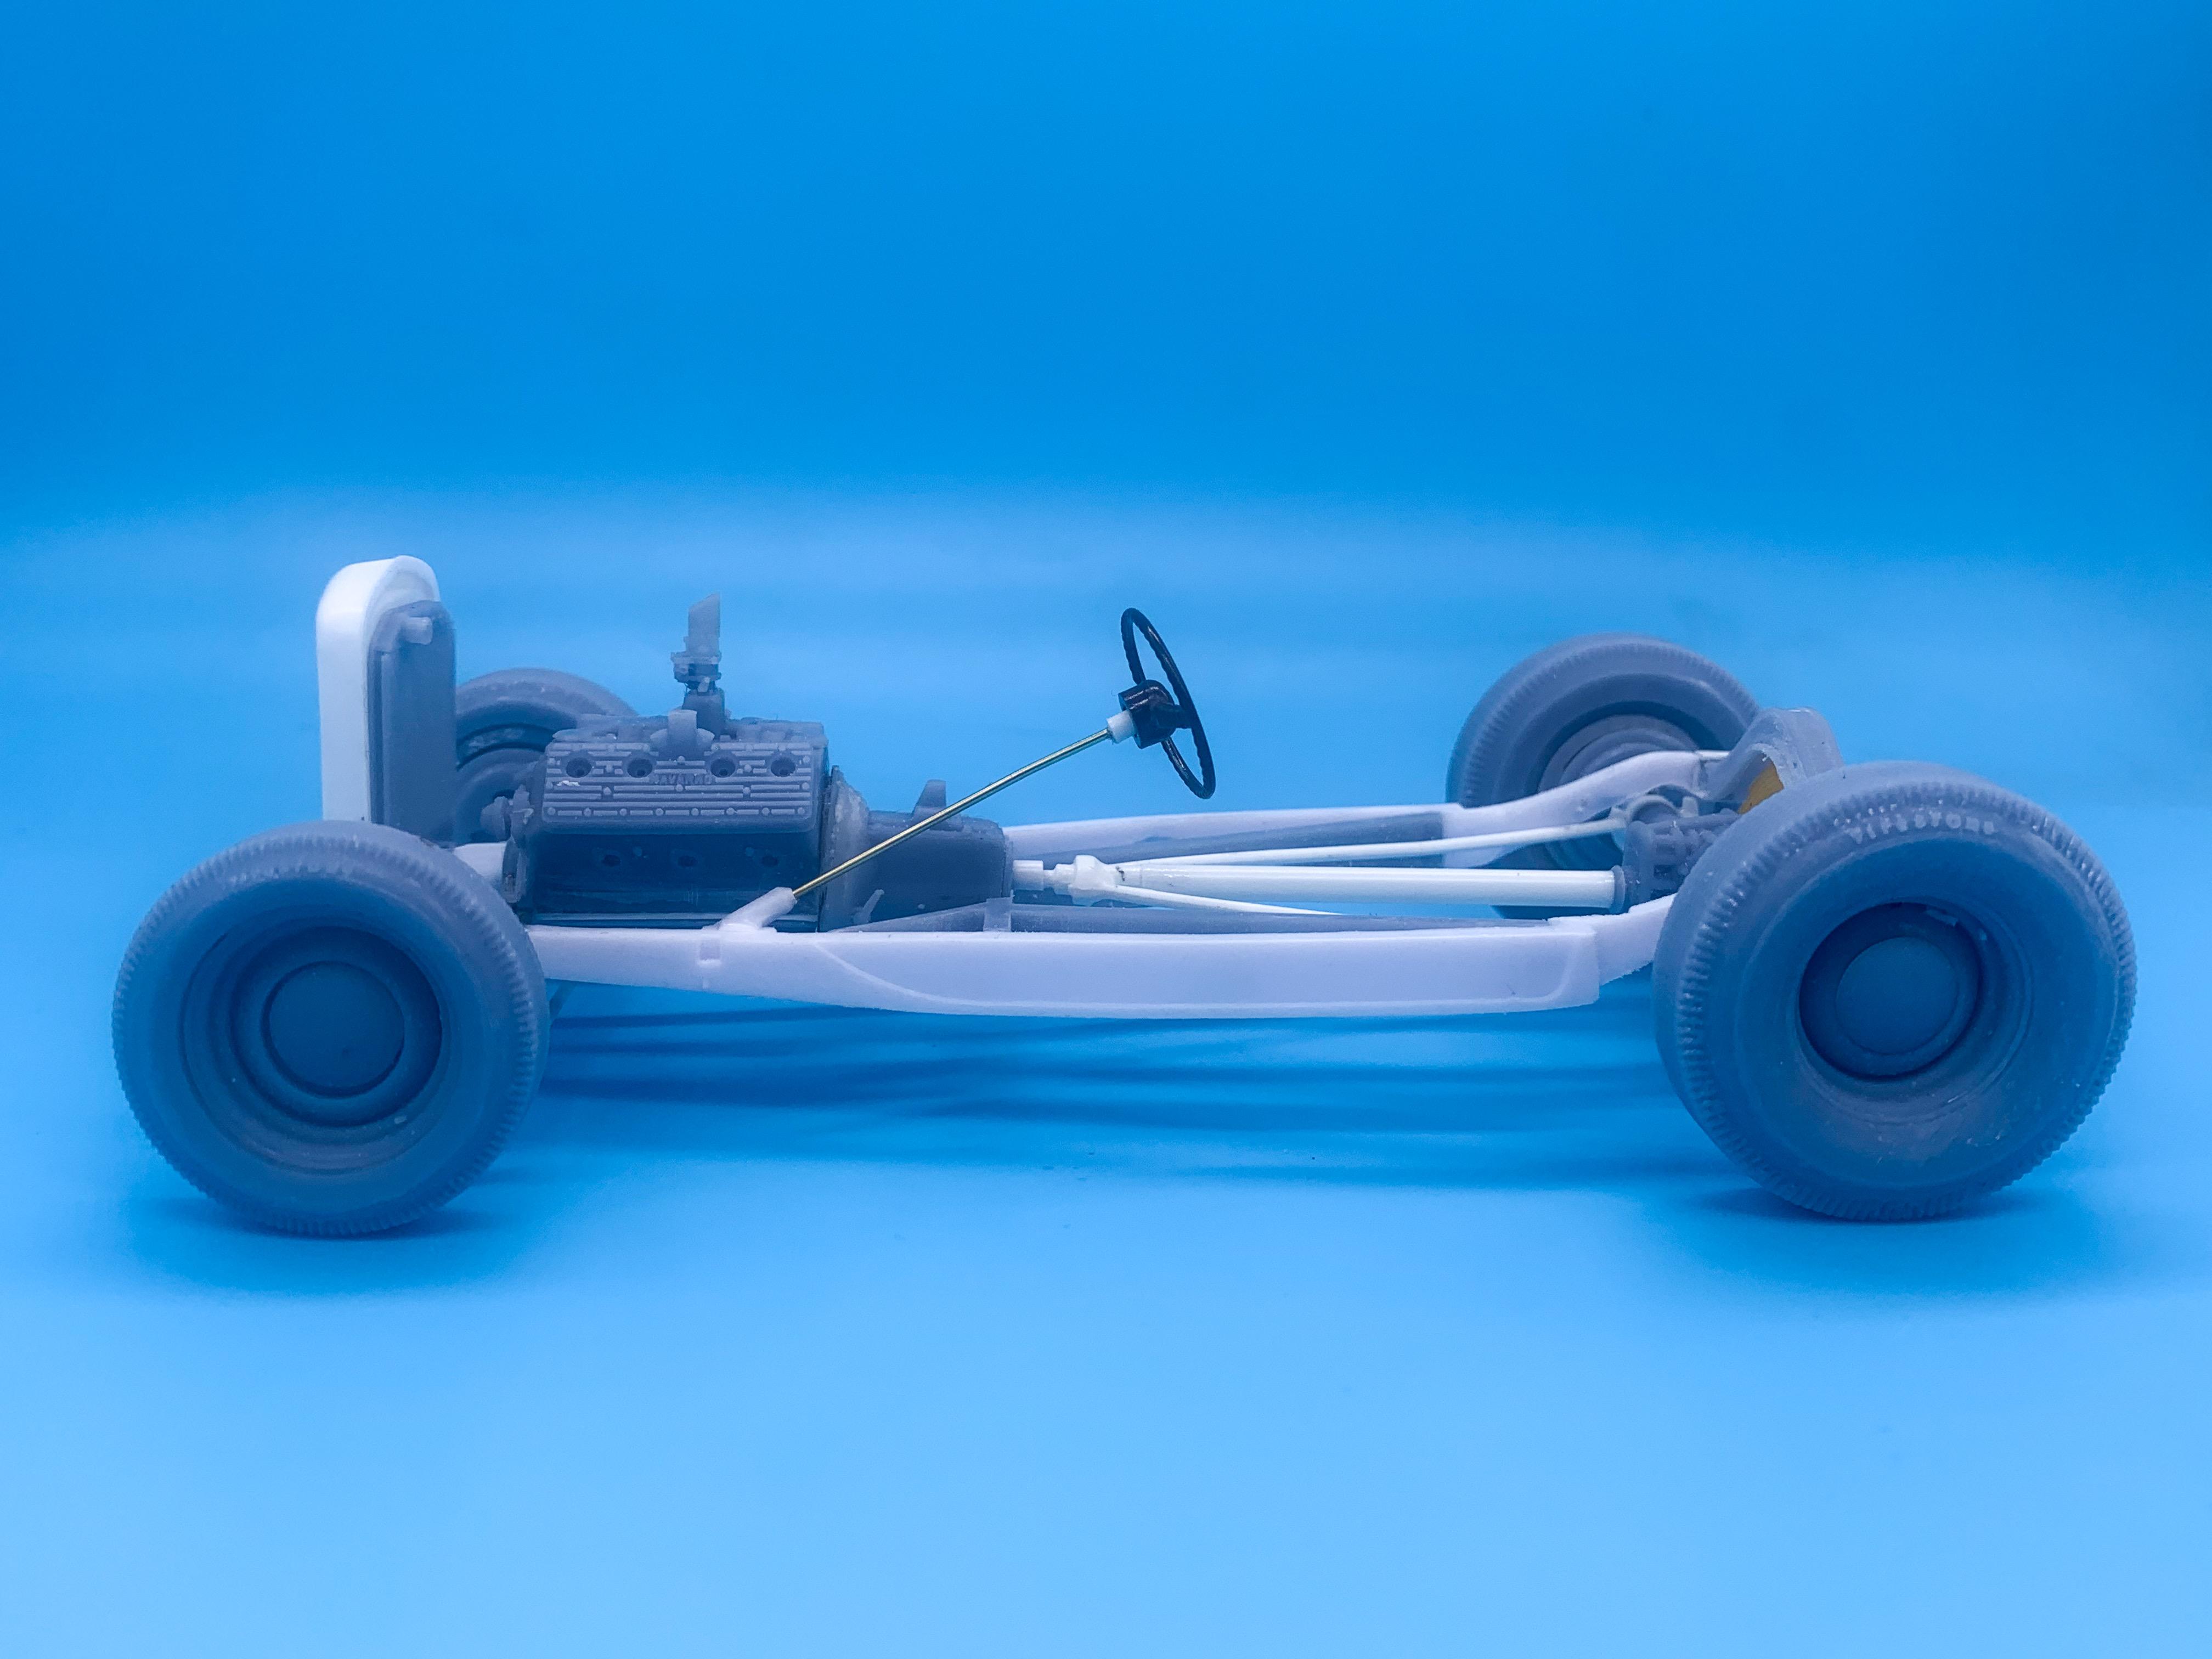
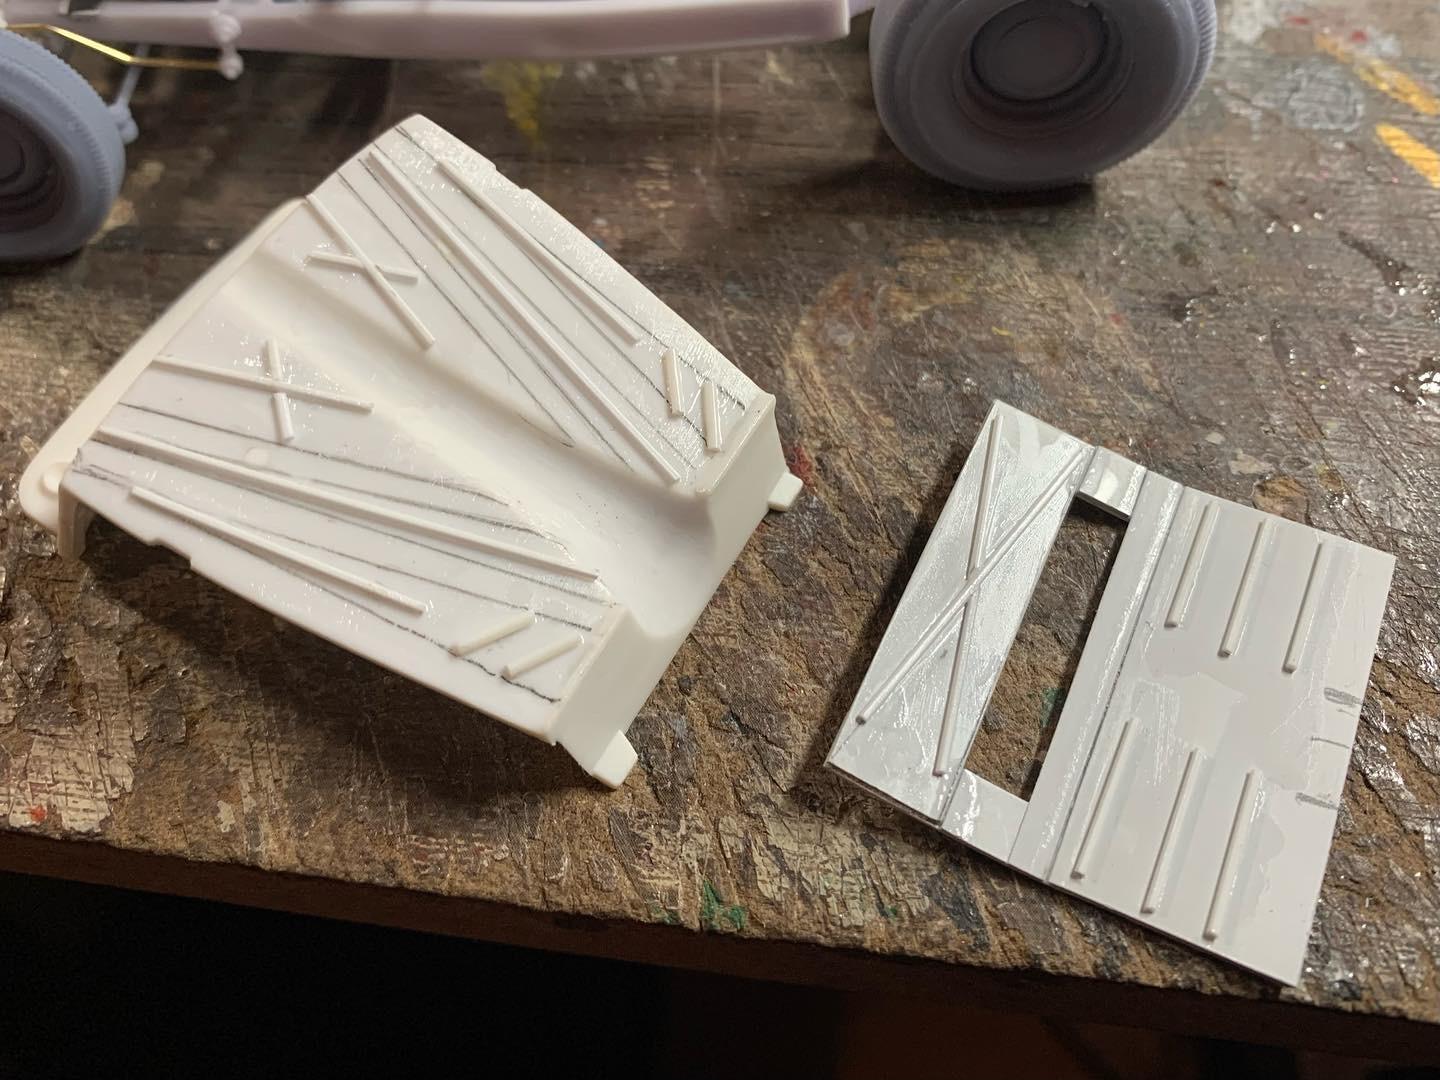
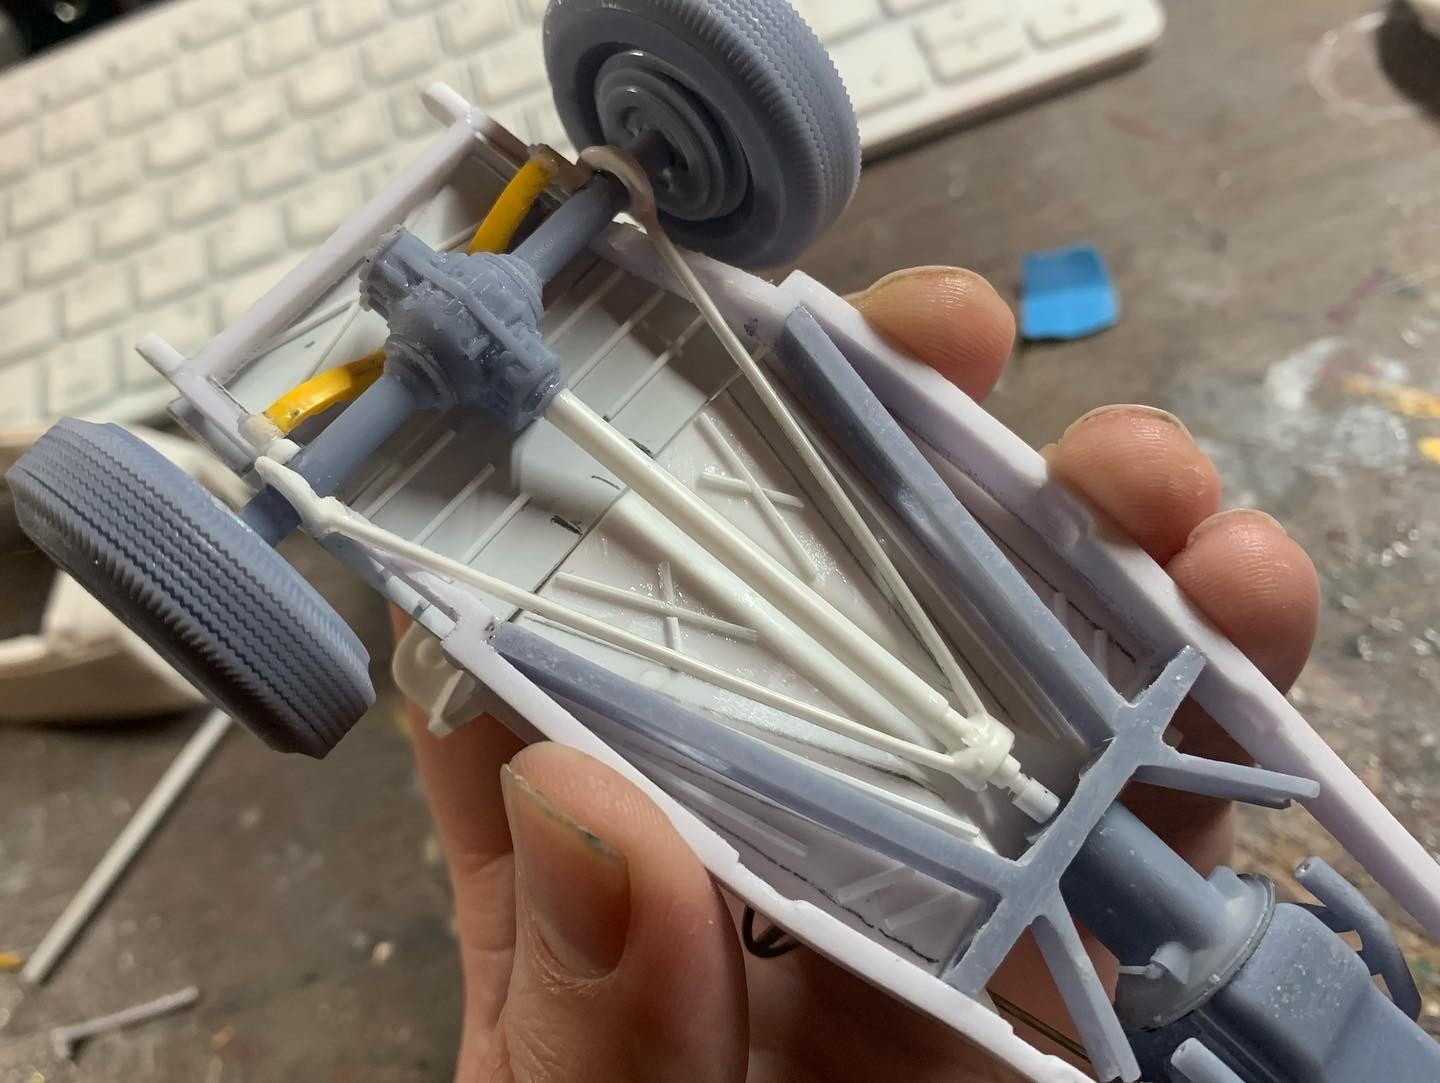
OldNYJim replied to OldNYJim's topic in WIP: Model Cars
Yes sir - you’re right, it’s just the camera angle making them look similar size…here’s a (slightly) better pic to show the difference… Thanks for the comments everyone! Appreciate the interest! This weekend’s embarrassingly slow progress was a bunch of little things (headlight mounts, steering linkage, parts-box hunting, thinking about the exhaust, cleaning up the body)…the floor was the main project I really wanted to get out of the way so I spent a couple of hours today watching the F1 race and working on that. Used the interior ‘tub’ from the Revell 32 kit as the basis for the bulk of the floor, and added some styrene bar to add some of the embossed detail you’d normally see under there…plus a little piece for the trunk too: You can’t see this too well when it’s attached to the frame, but well enough that it adds a little… I’d normally use half-round bar for a project like this, but I was out, so I knocked them down a little with a sanding stick before priming to see what more clean-up they’ll need before paint: When I mock this thing up it looks kinda close to being ready to blow apart for paint, but I’ve still got a bunch of little things to handle and some more details to design and print… I like the general look so far though - looks like a neat old hot-rod! More soon, soon as I’ve done more! Thanks for looking!