Joe Nunes
-
Posts
1,292 -
Joined
-
Last visited
Content Type
Profiles
Forums
Events
Gallery
Everything posted by Joe Nunes
-
Greetings From Northern Illinois!
Joe Nunes replied to Cheveuxroux's topic in Welcome! Introduce Yourself
Welcome to the forum, Robert! Joe -
For years I used 2 stroke engines in my RC model aircraft. Then, after scratch/plan building an old timer style RC model aircraft, I decided to try a 4 stoke engine. What a joy! The 4 stroke was much quieter throughout its operational curve, easier to start, could idle and stay running at a much slower RPM, used less fuel per flight thereby being more economical to run, and could turn a larger prop for a given engine size. Only downside was that the initial cost per engine was higher compared to a 2 stroke. Nevertheless, it was an eye opening experience for me...and they looked and sounded really cool too! Joe
-
A very talented and prolific writer of many popular songs over the years. May he have a Peaceful Rest. Joe
-
Nice looking model with a realistic color finish. Well done! ? Joe
-
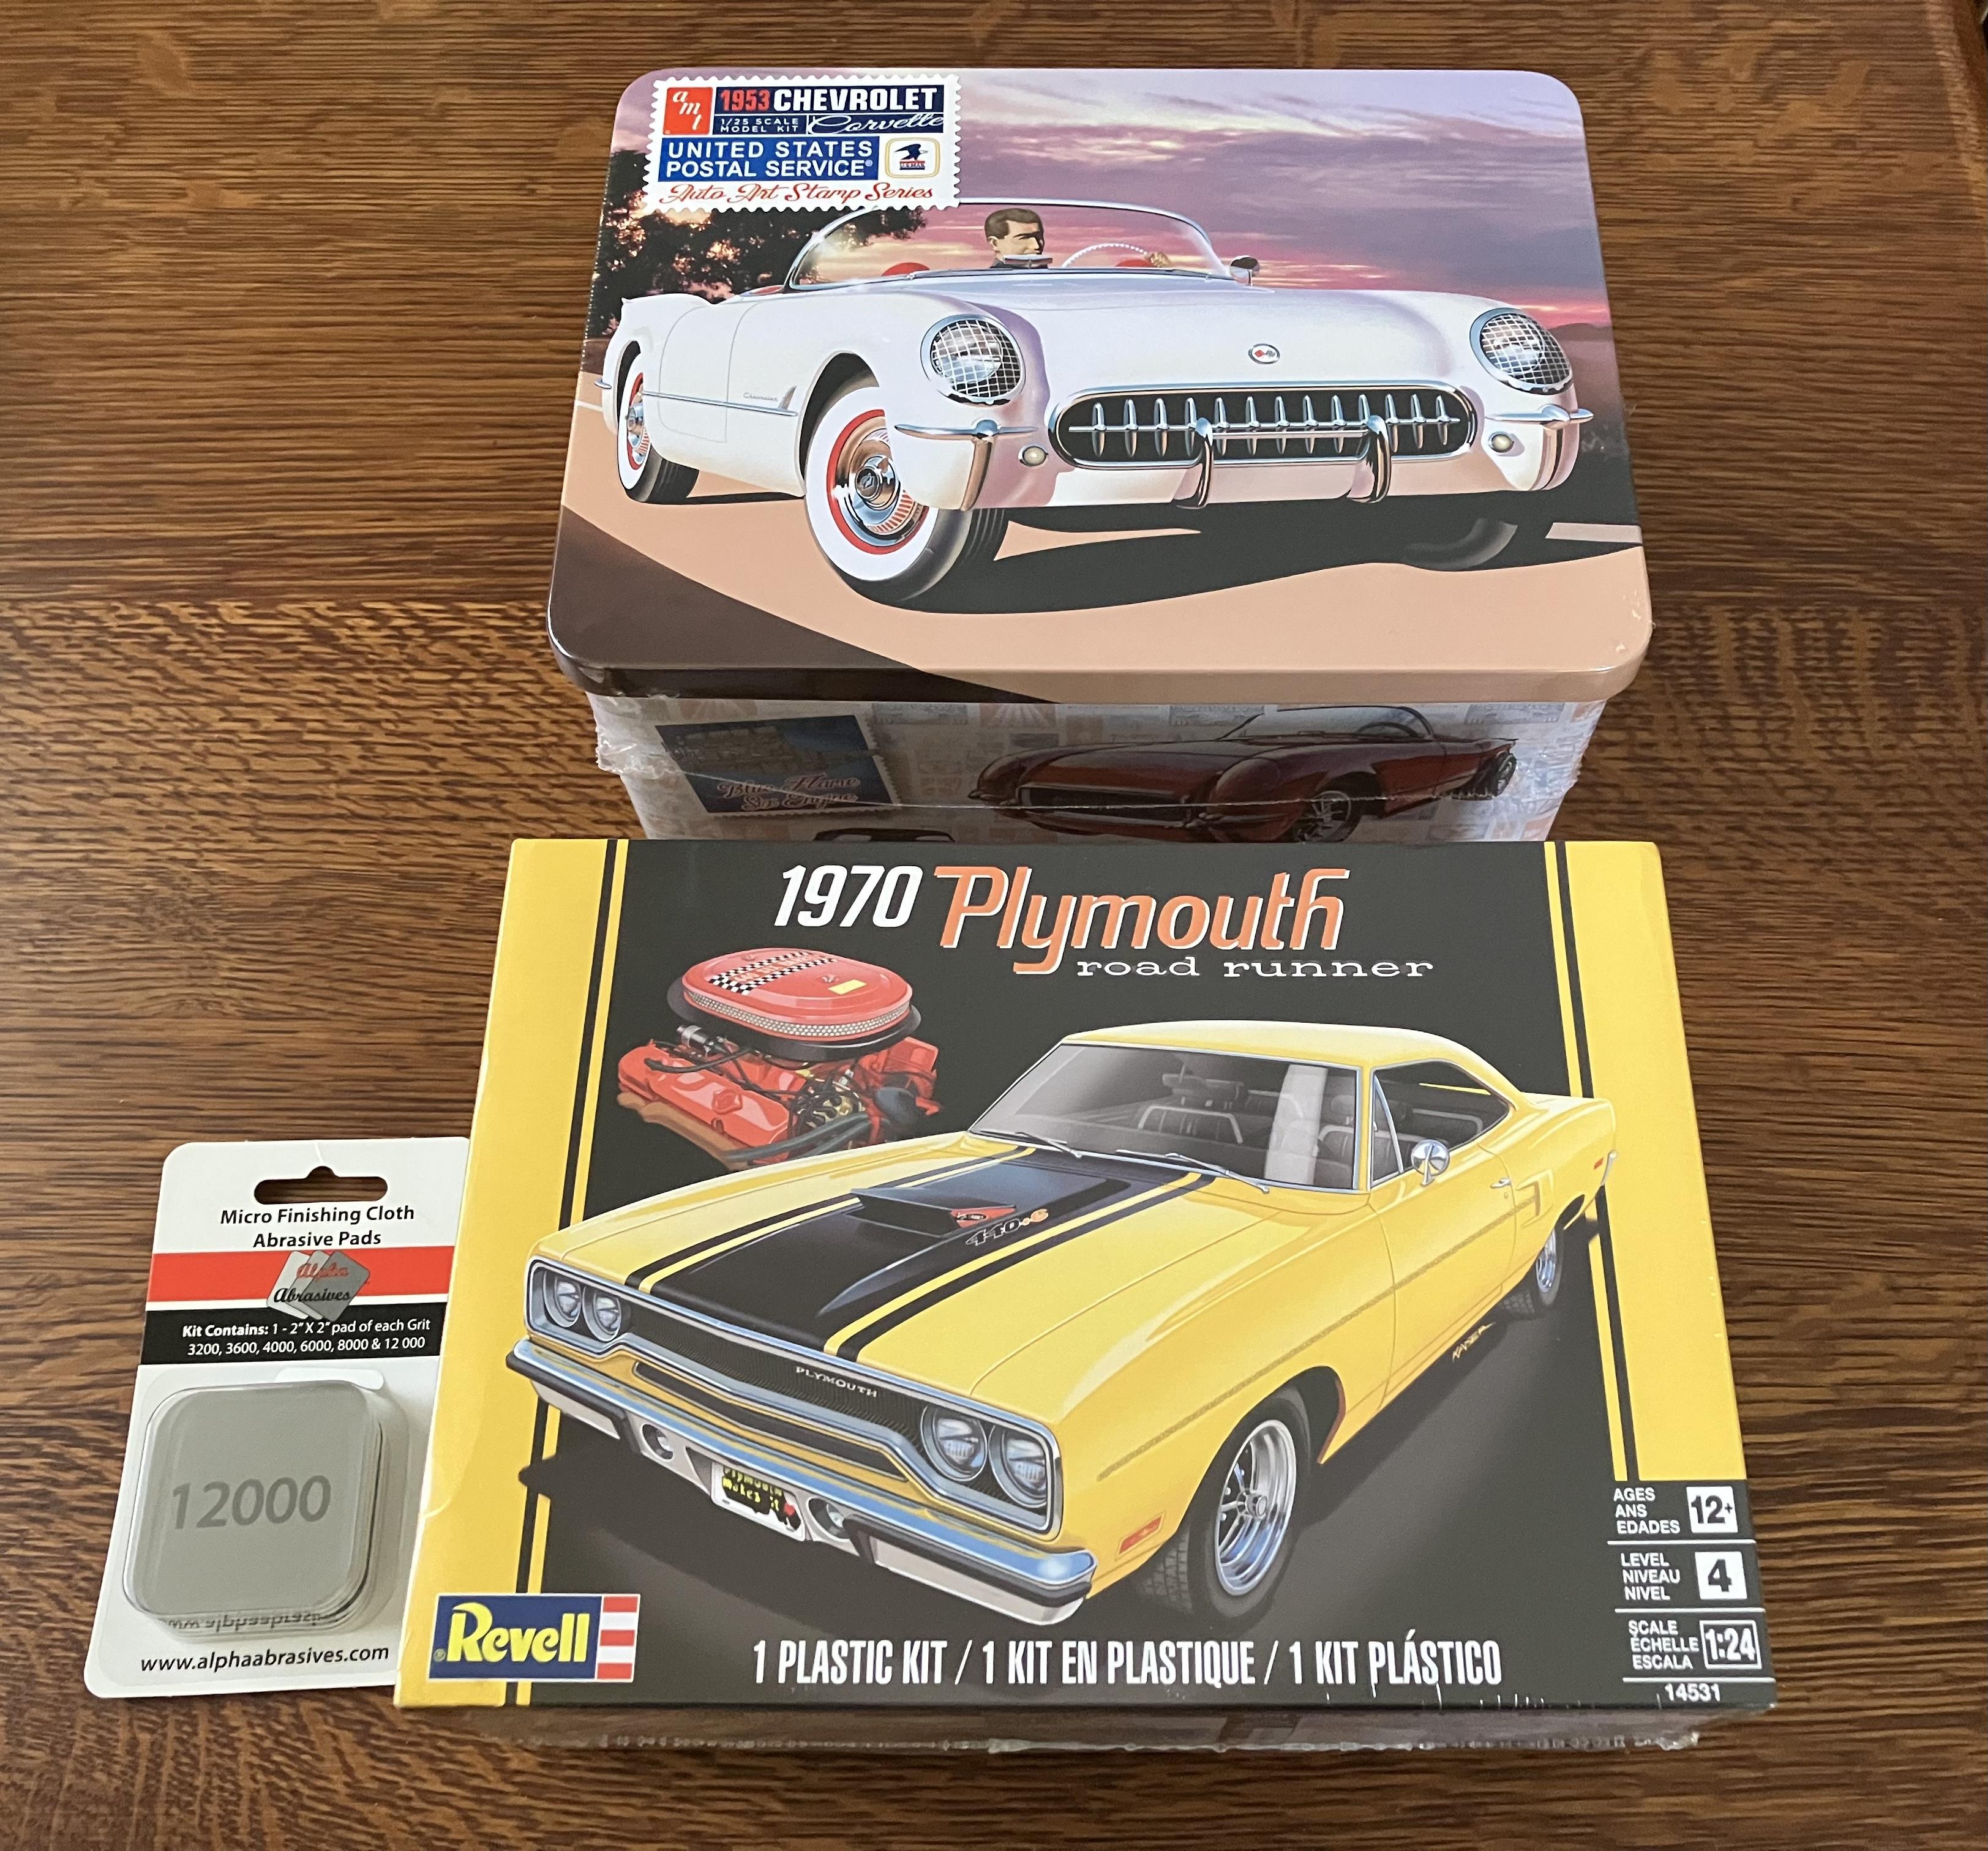
Stopped at HL this morning while in town to see what was on the shelves. Joyce picked out the Vette and I got the Roadrunner and polishing pads. Joe

- 39,147 replies
-
- 3
-

-
- johan
- glue bombs
- (and 1 more)
-
Greetings from Kernersville,North Carolina!
Joe Nunes replied to ncbuckeye67's topic in Welcome! Introduce Yourself
Welcome to the forum, Jeffrey! Joe -
Revell 1956 Ford Thunderbird 1/24 Scale in Pearl Magenta.
Joe Nunes replied to Dragonhawk1066's topic in Model Cars
Great looking model and color combination. Well done! ? Joe -
Me too!? Joe
-
Hope you have fun with this model kit. Brings back memories of my building a '66 T-Bird when I was a teenager. Baby Blue and a White/Baby Blue combination on the interior. Will be watching from the sidelines. ? Joe
-
Your certainly not late for this party, Dave. Thanks for sharing your comments. I have done quite a lot of research regarding my new Crescendo airbrush and haven't seen any reason not to use it. I bought some liquid green food coloring (food grade) and will be practicing with a food color/distilled water mixture in the airbrush. Like anything else new to me, I just need to get familiar with the tool. I am one of those people that like to use the fat round ballpoint pens as they feel good/comfortable in my hand when writing. The Crescendo 175 feels the same way to me, that is, it's comfortable to hold in my hand so that's a good start. ? Joe
-
Nice build! Used to watch those guys on TV and still enjoy listening to their music. Sad that only one of the group is still with us today. Well done! ? Joe
-
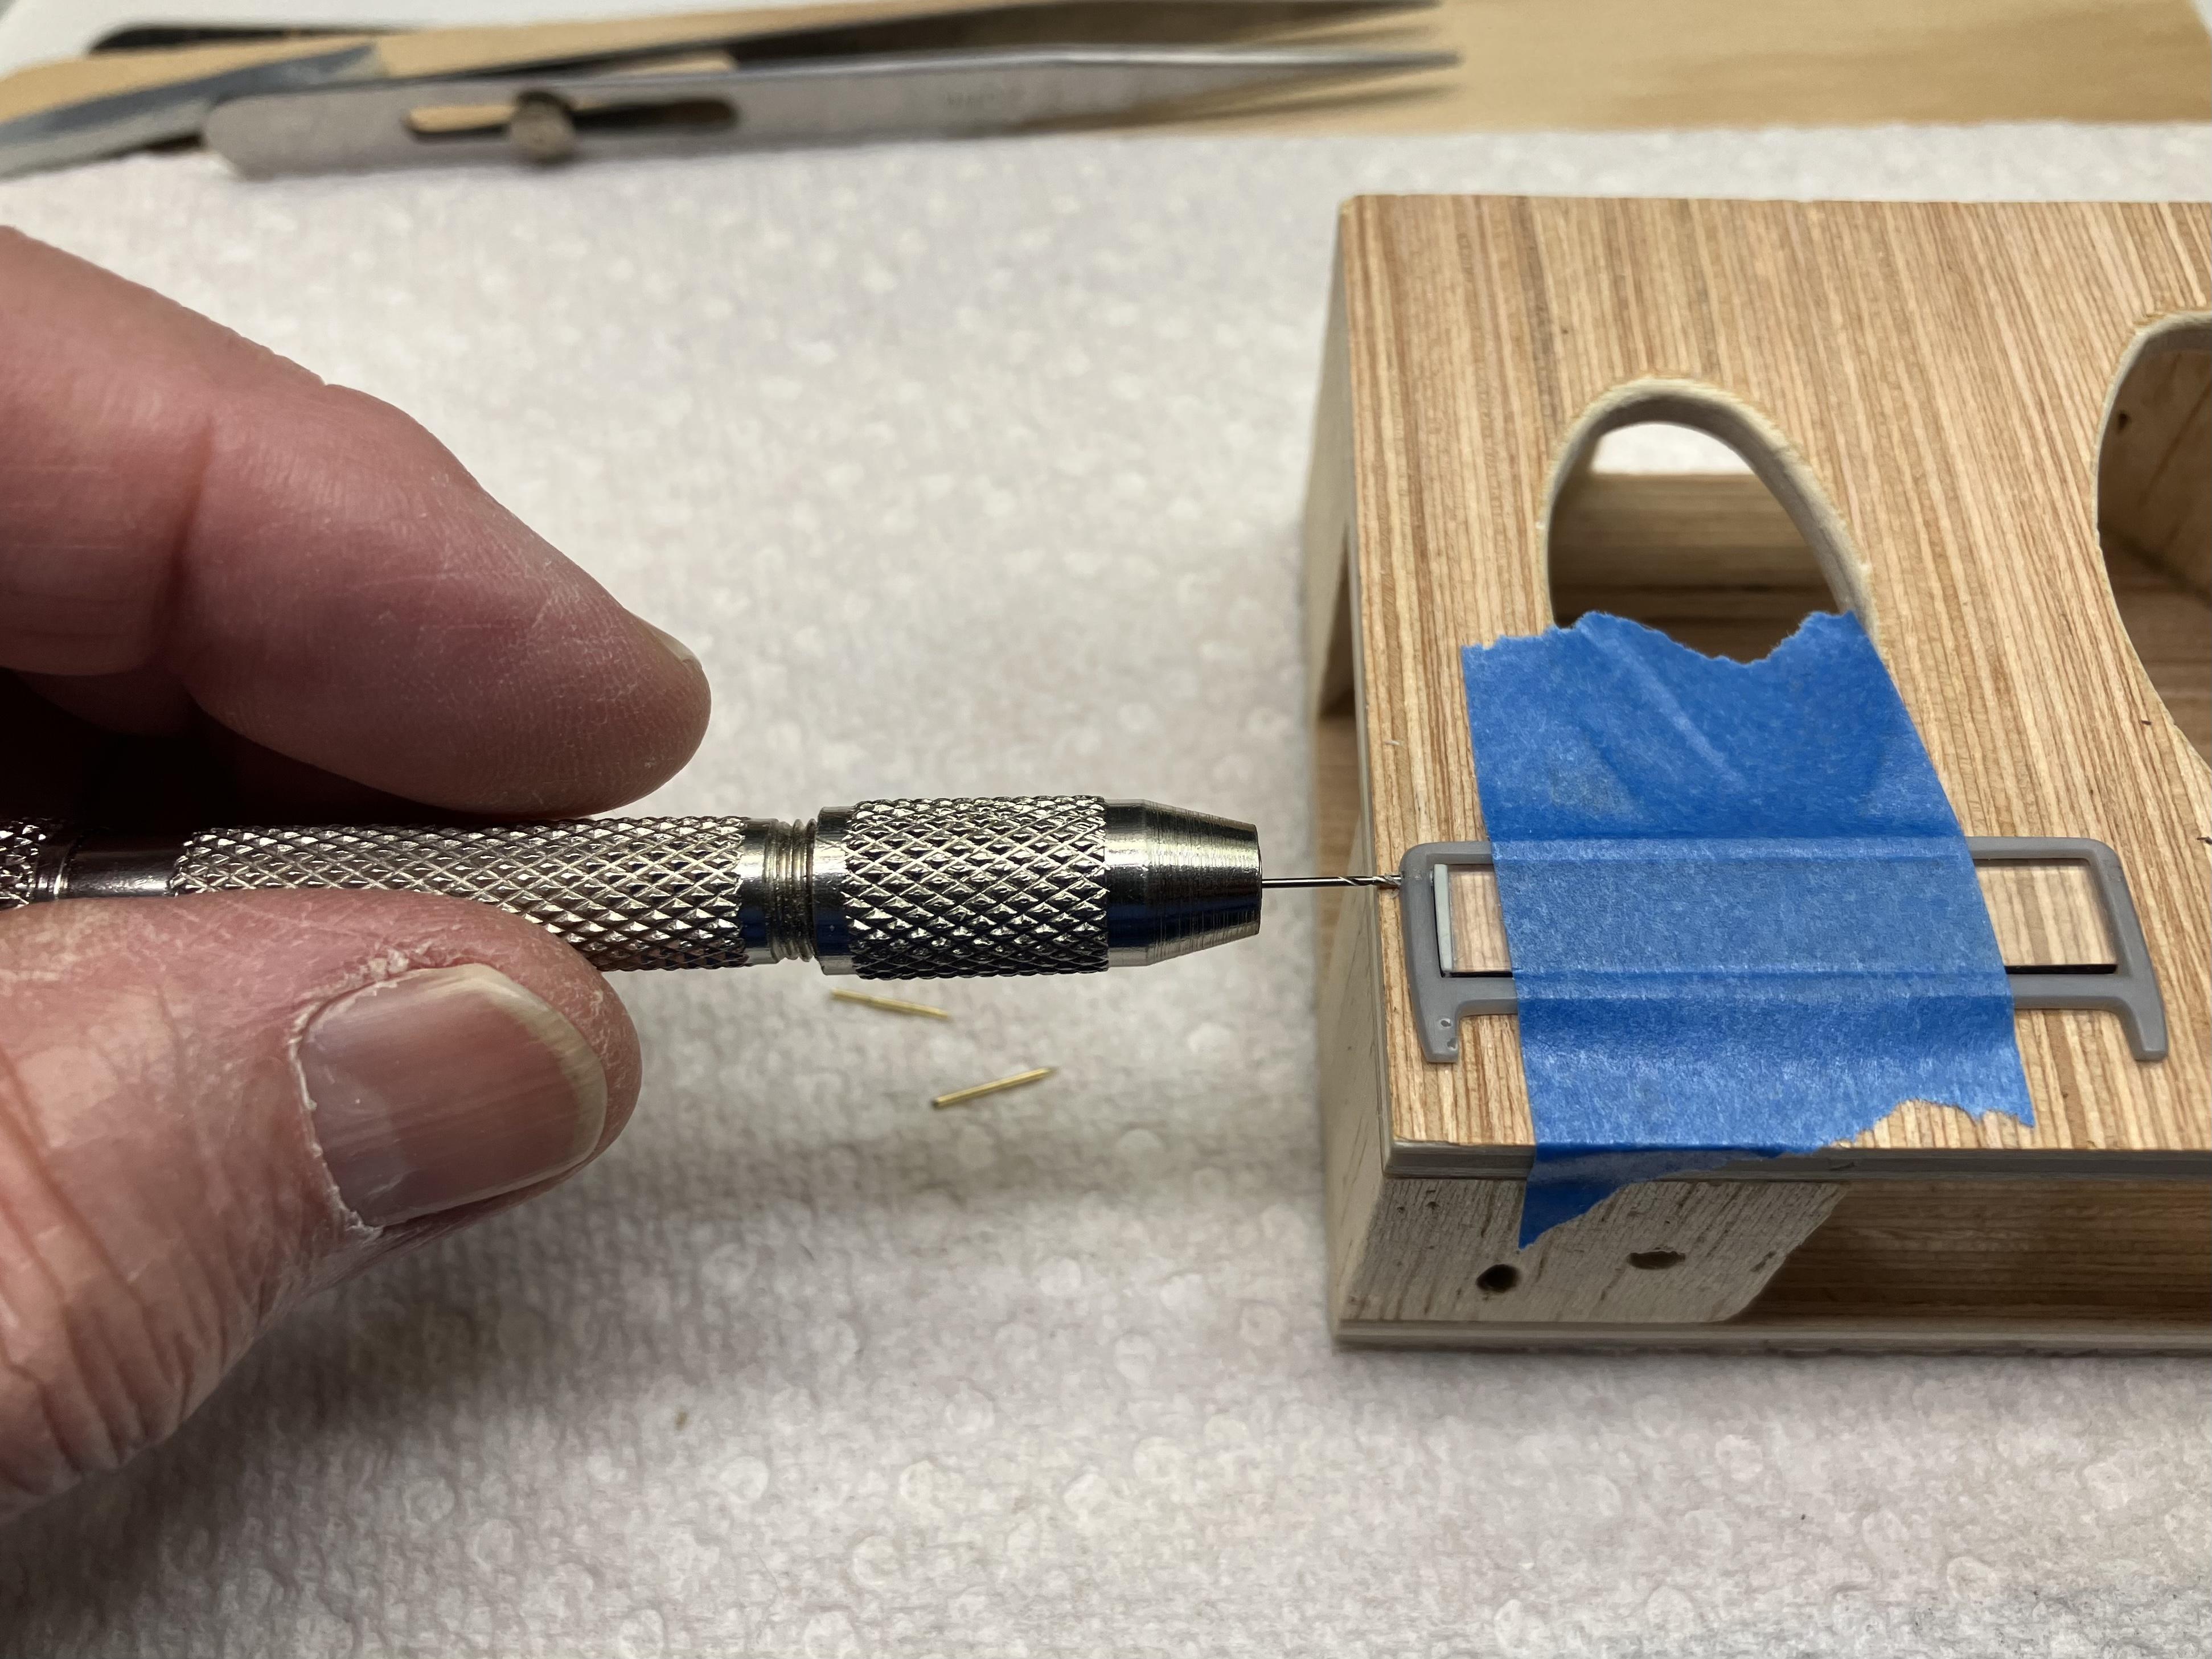
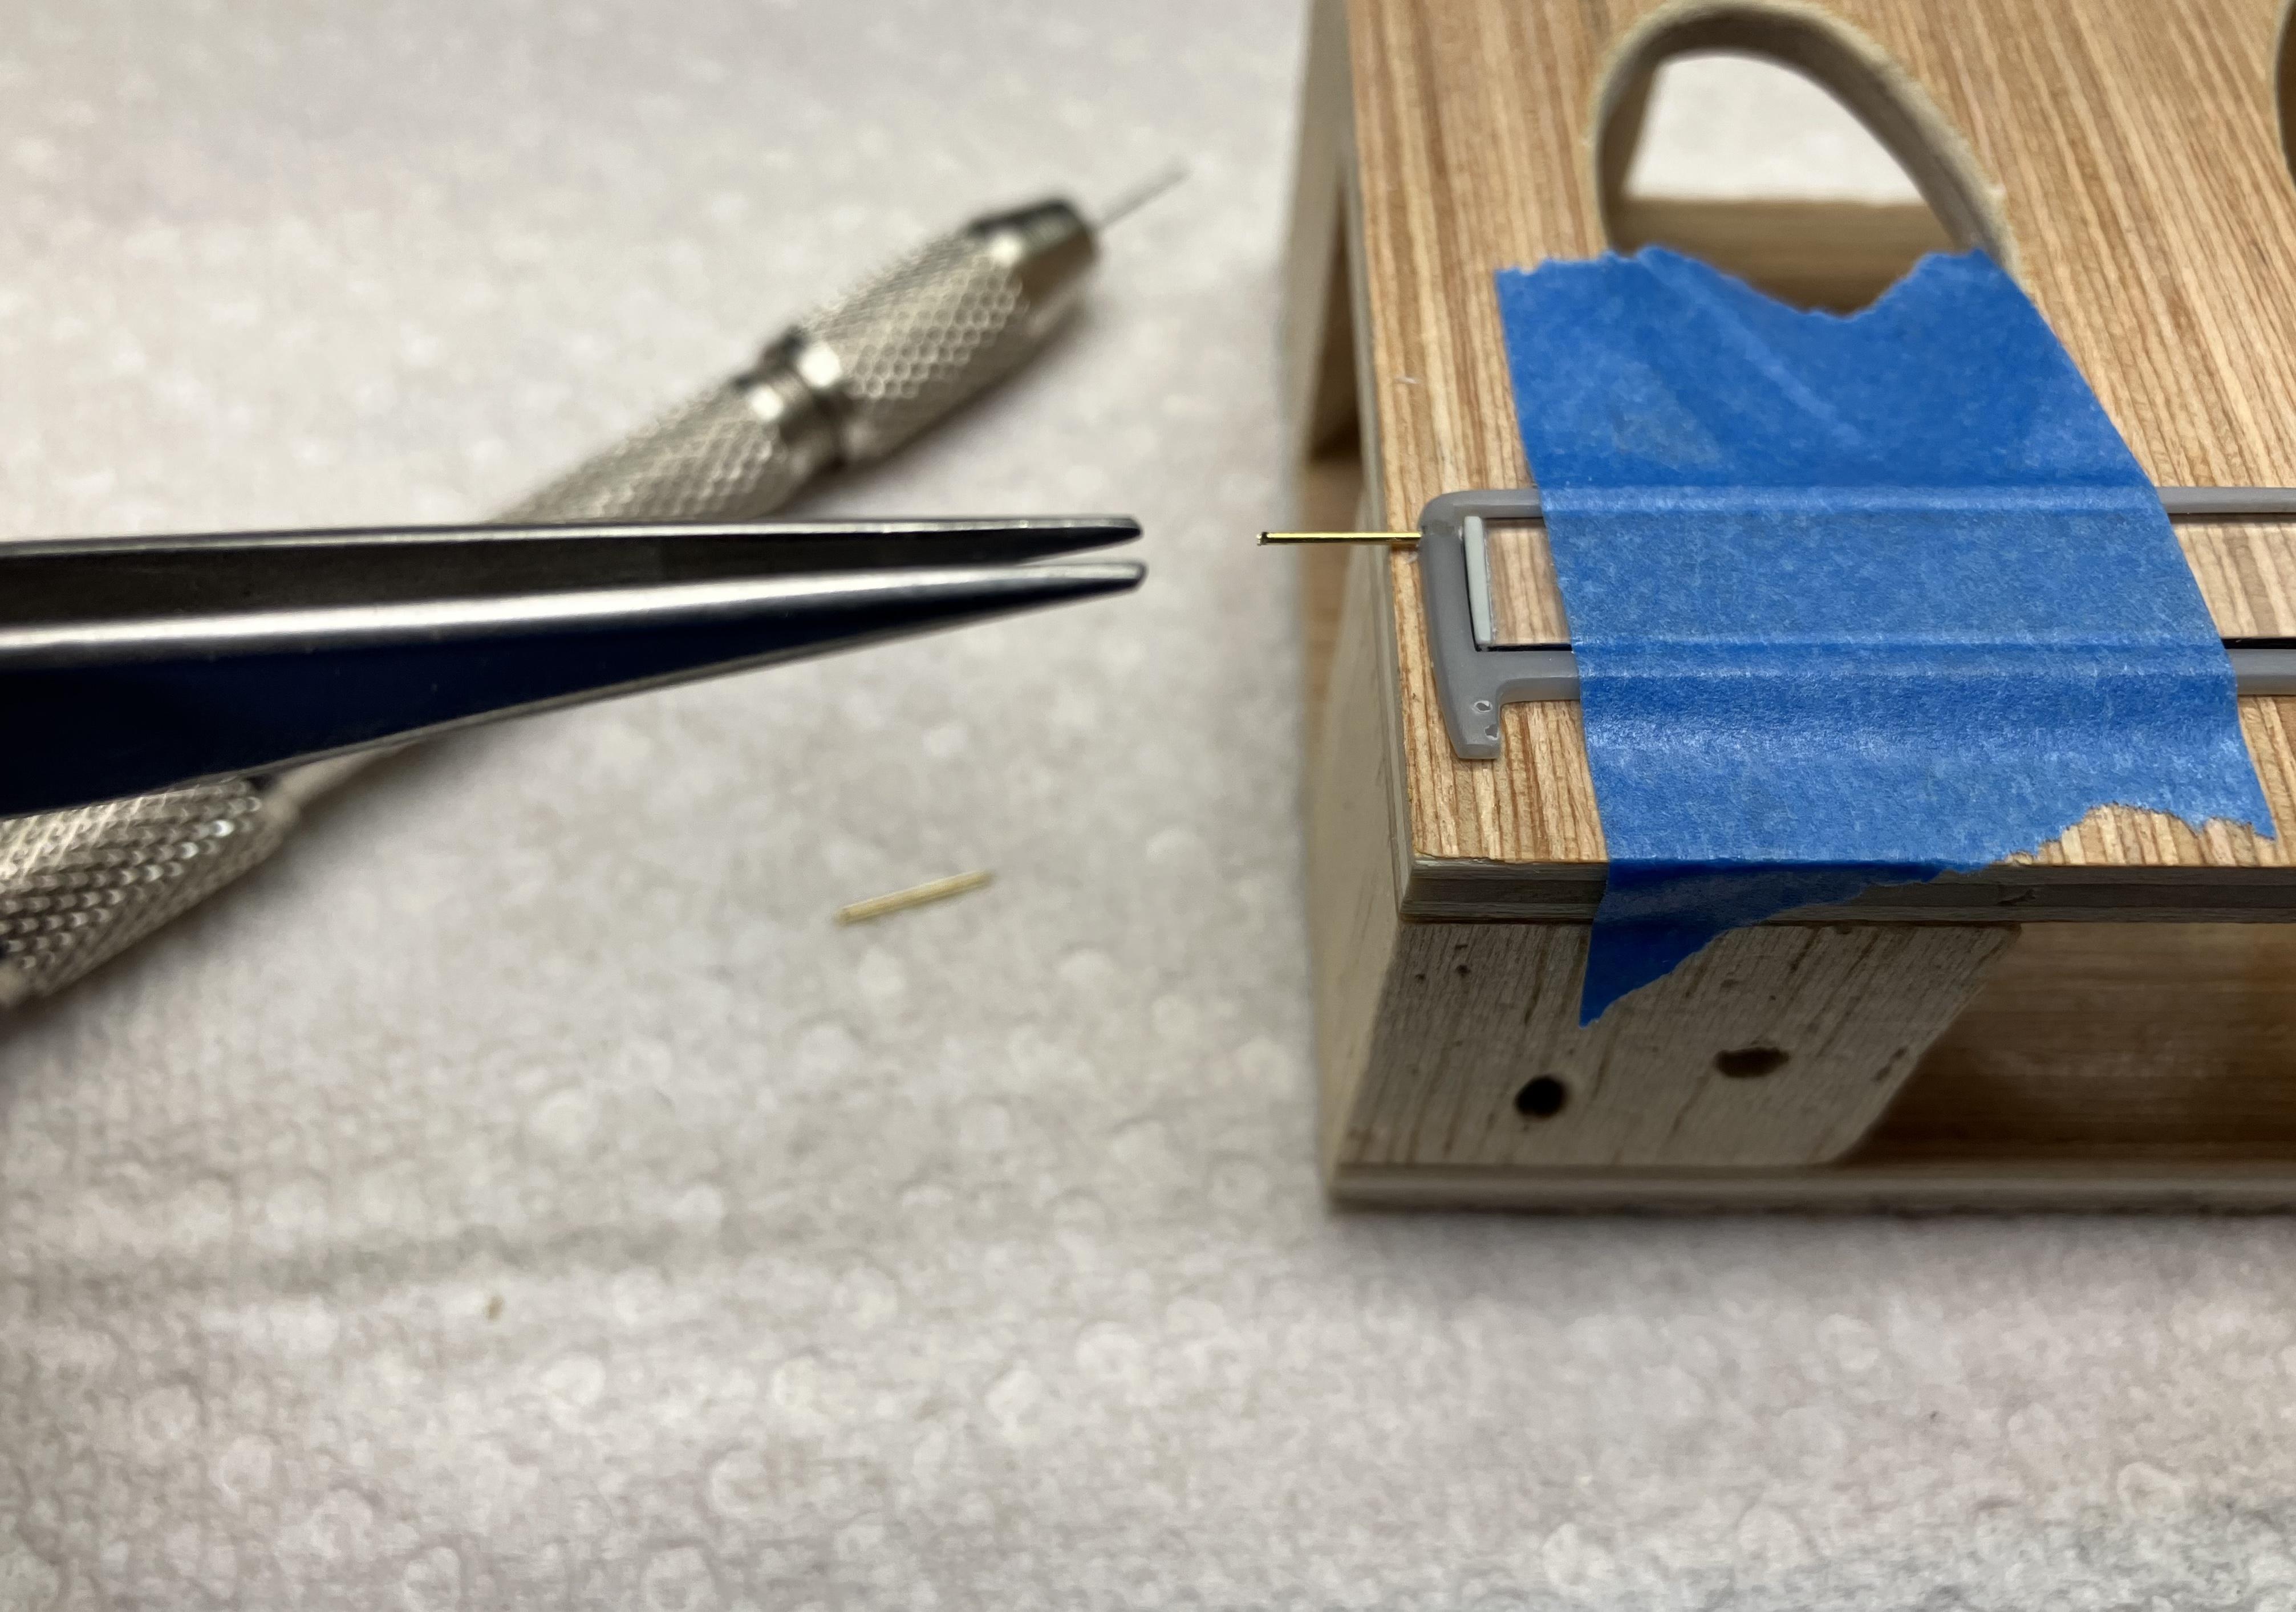
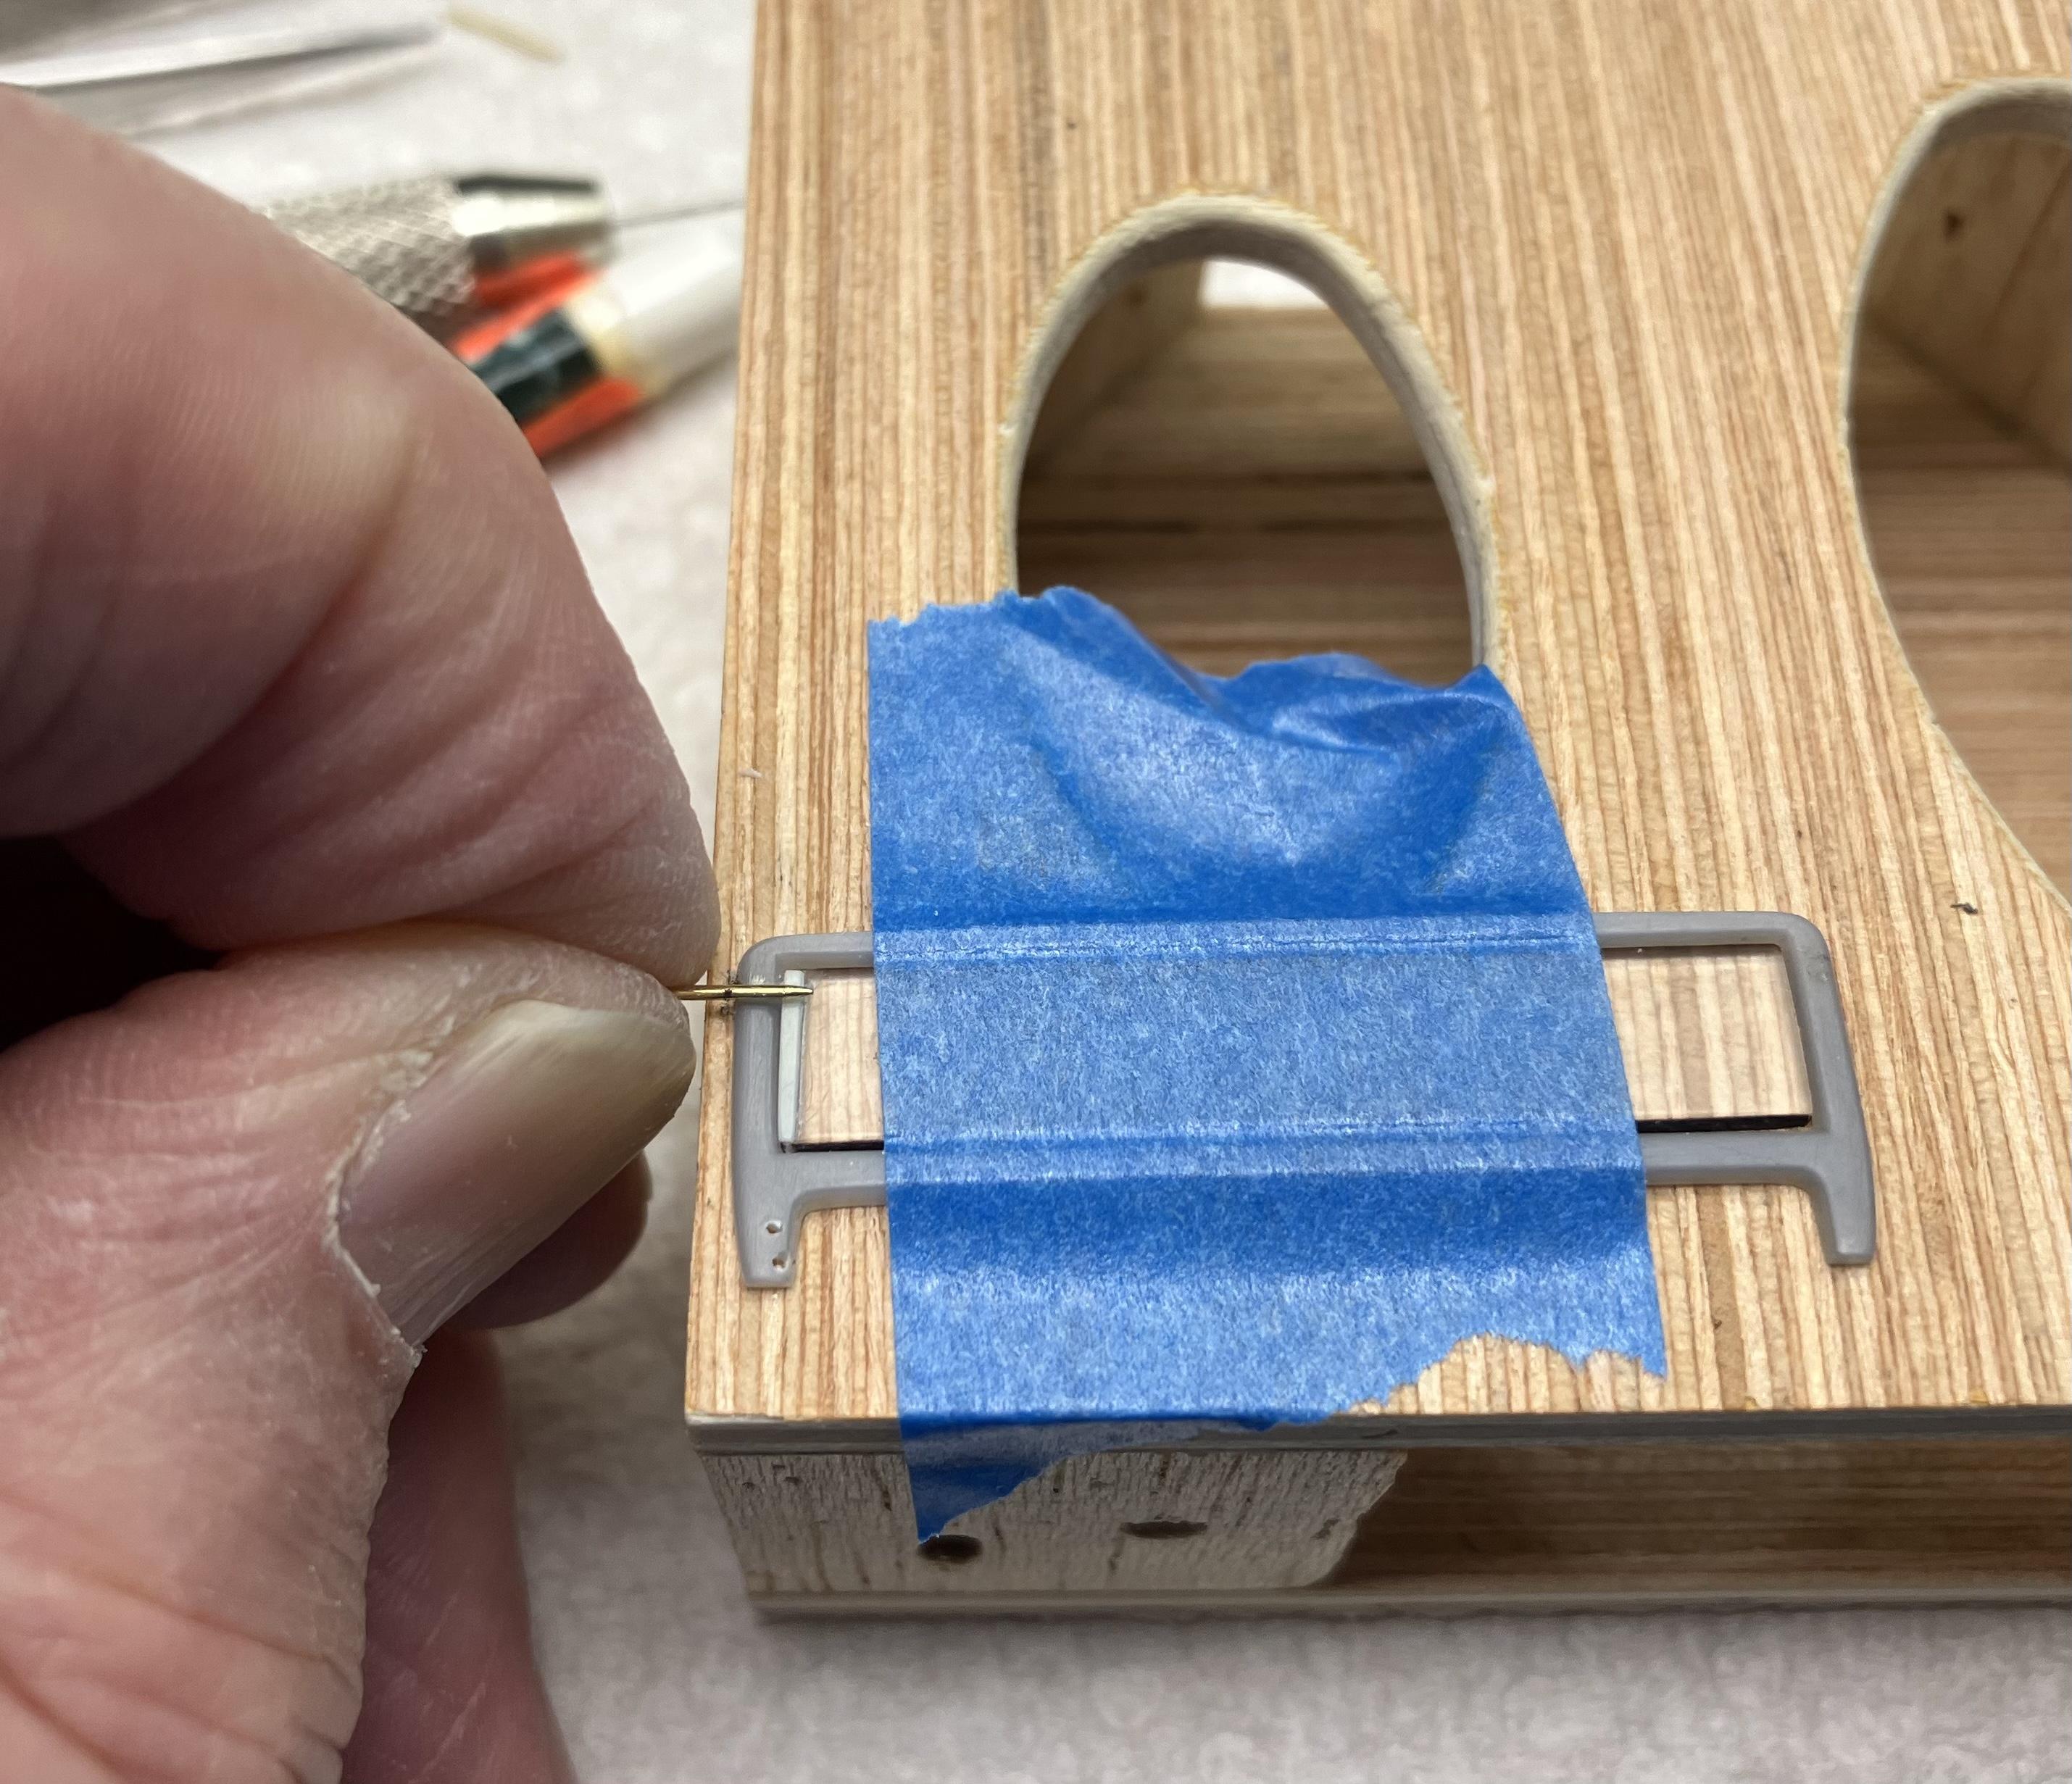
This afternoon I worked on the front window a bit. Decided to pin the “glass” before finishing the glass cleanup, glass surround and windshield frame. Now I have an opening front window that I can pose open or closed as desired. So, onward we go as I continue avoiding paint time! ??? Joe
-
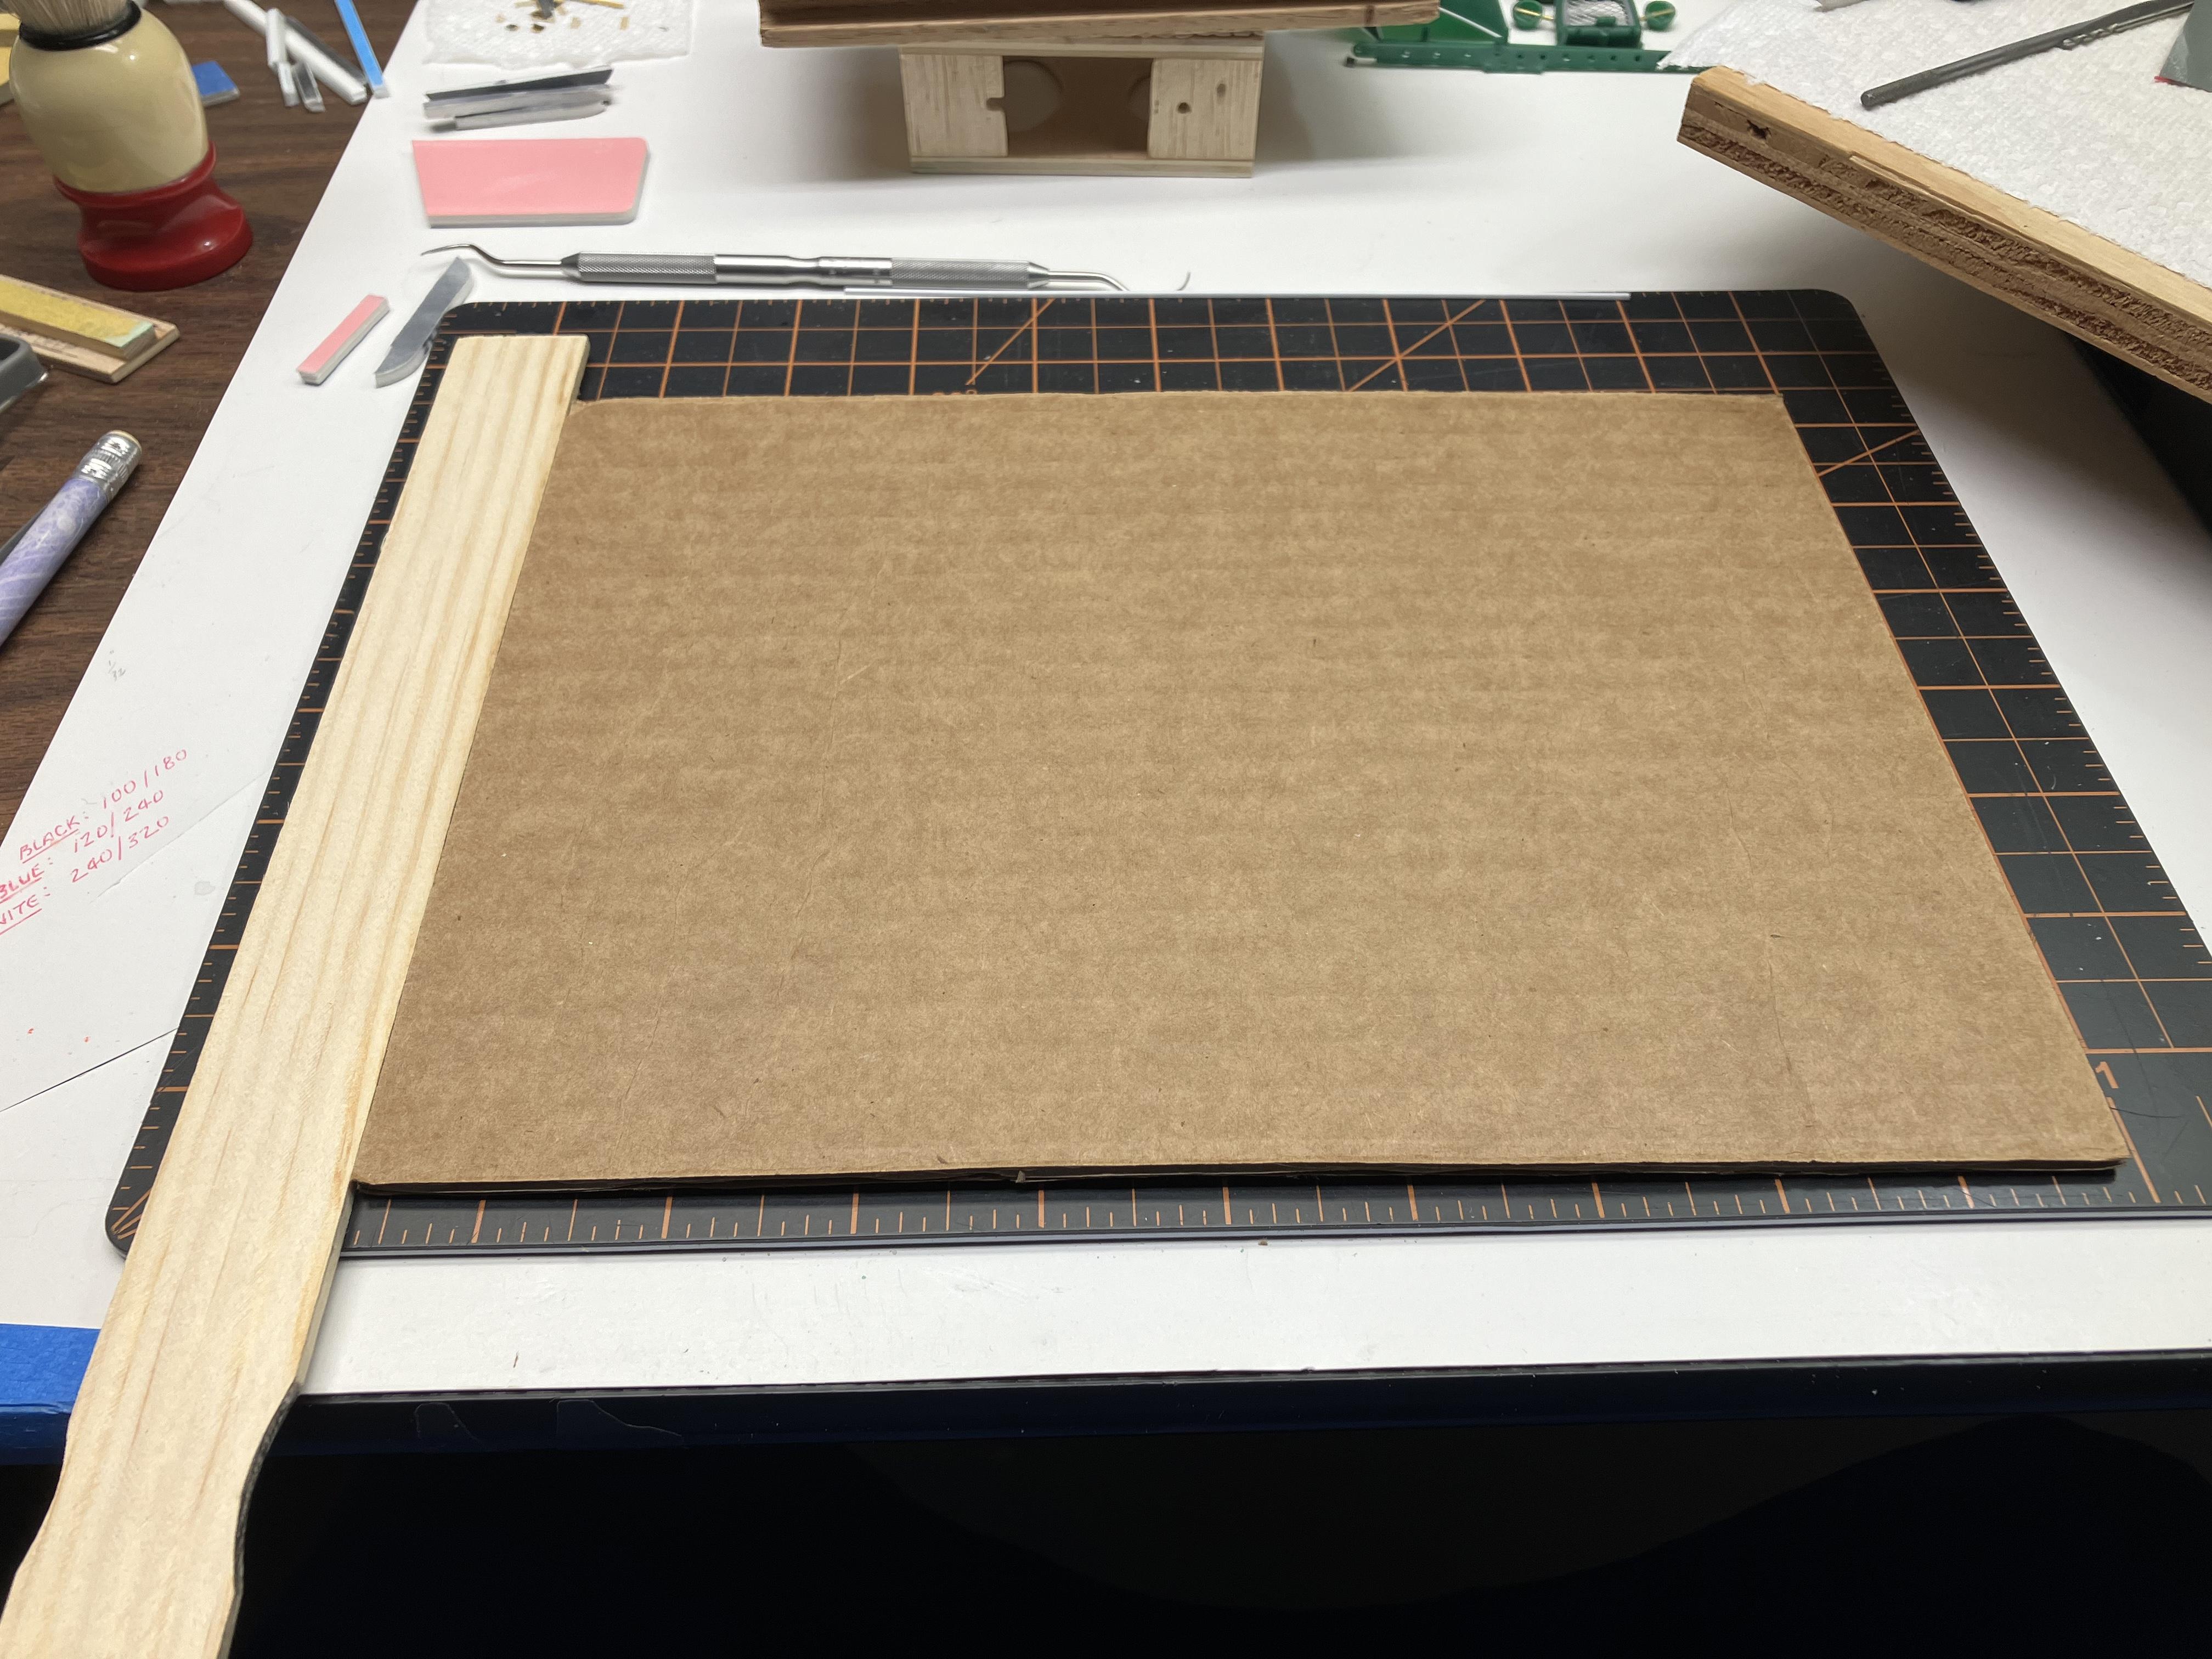
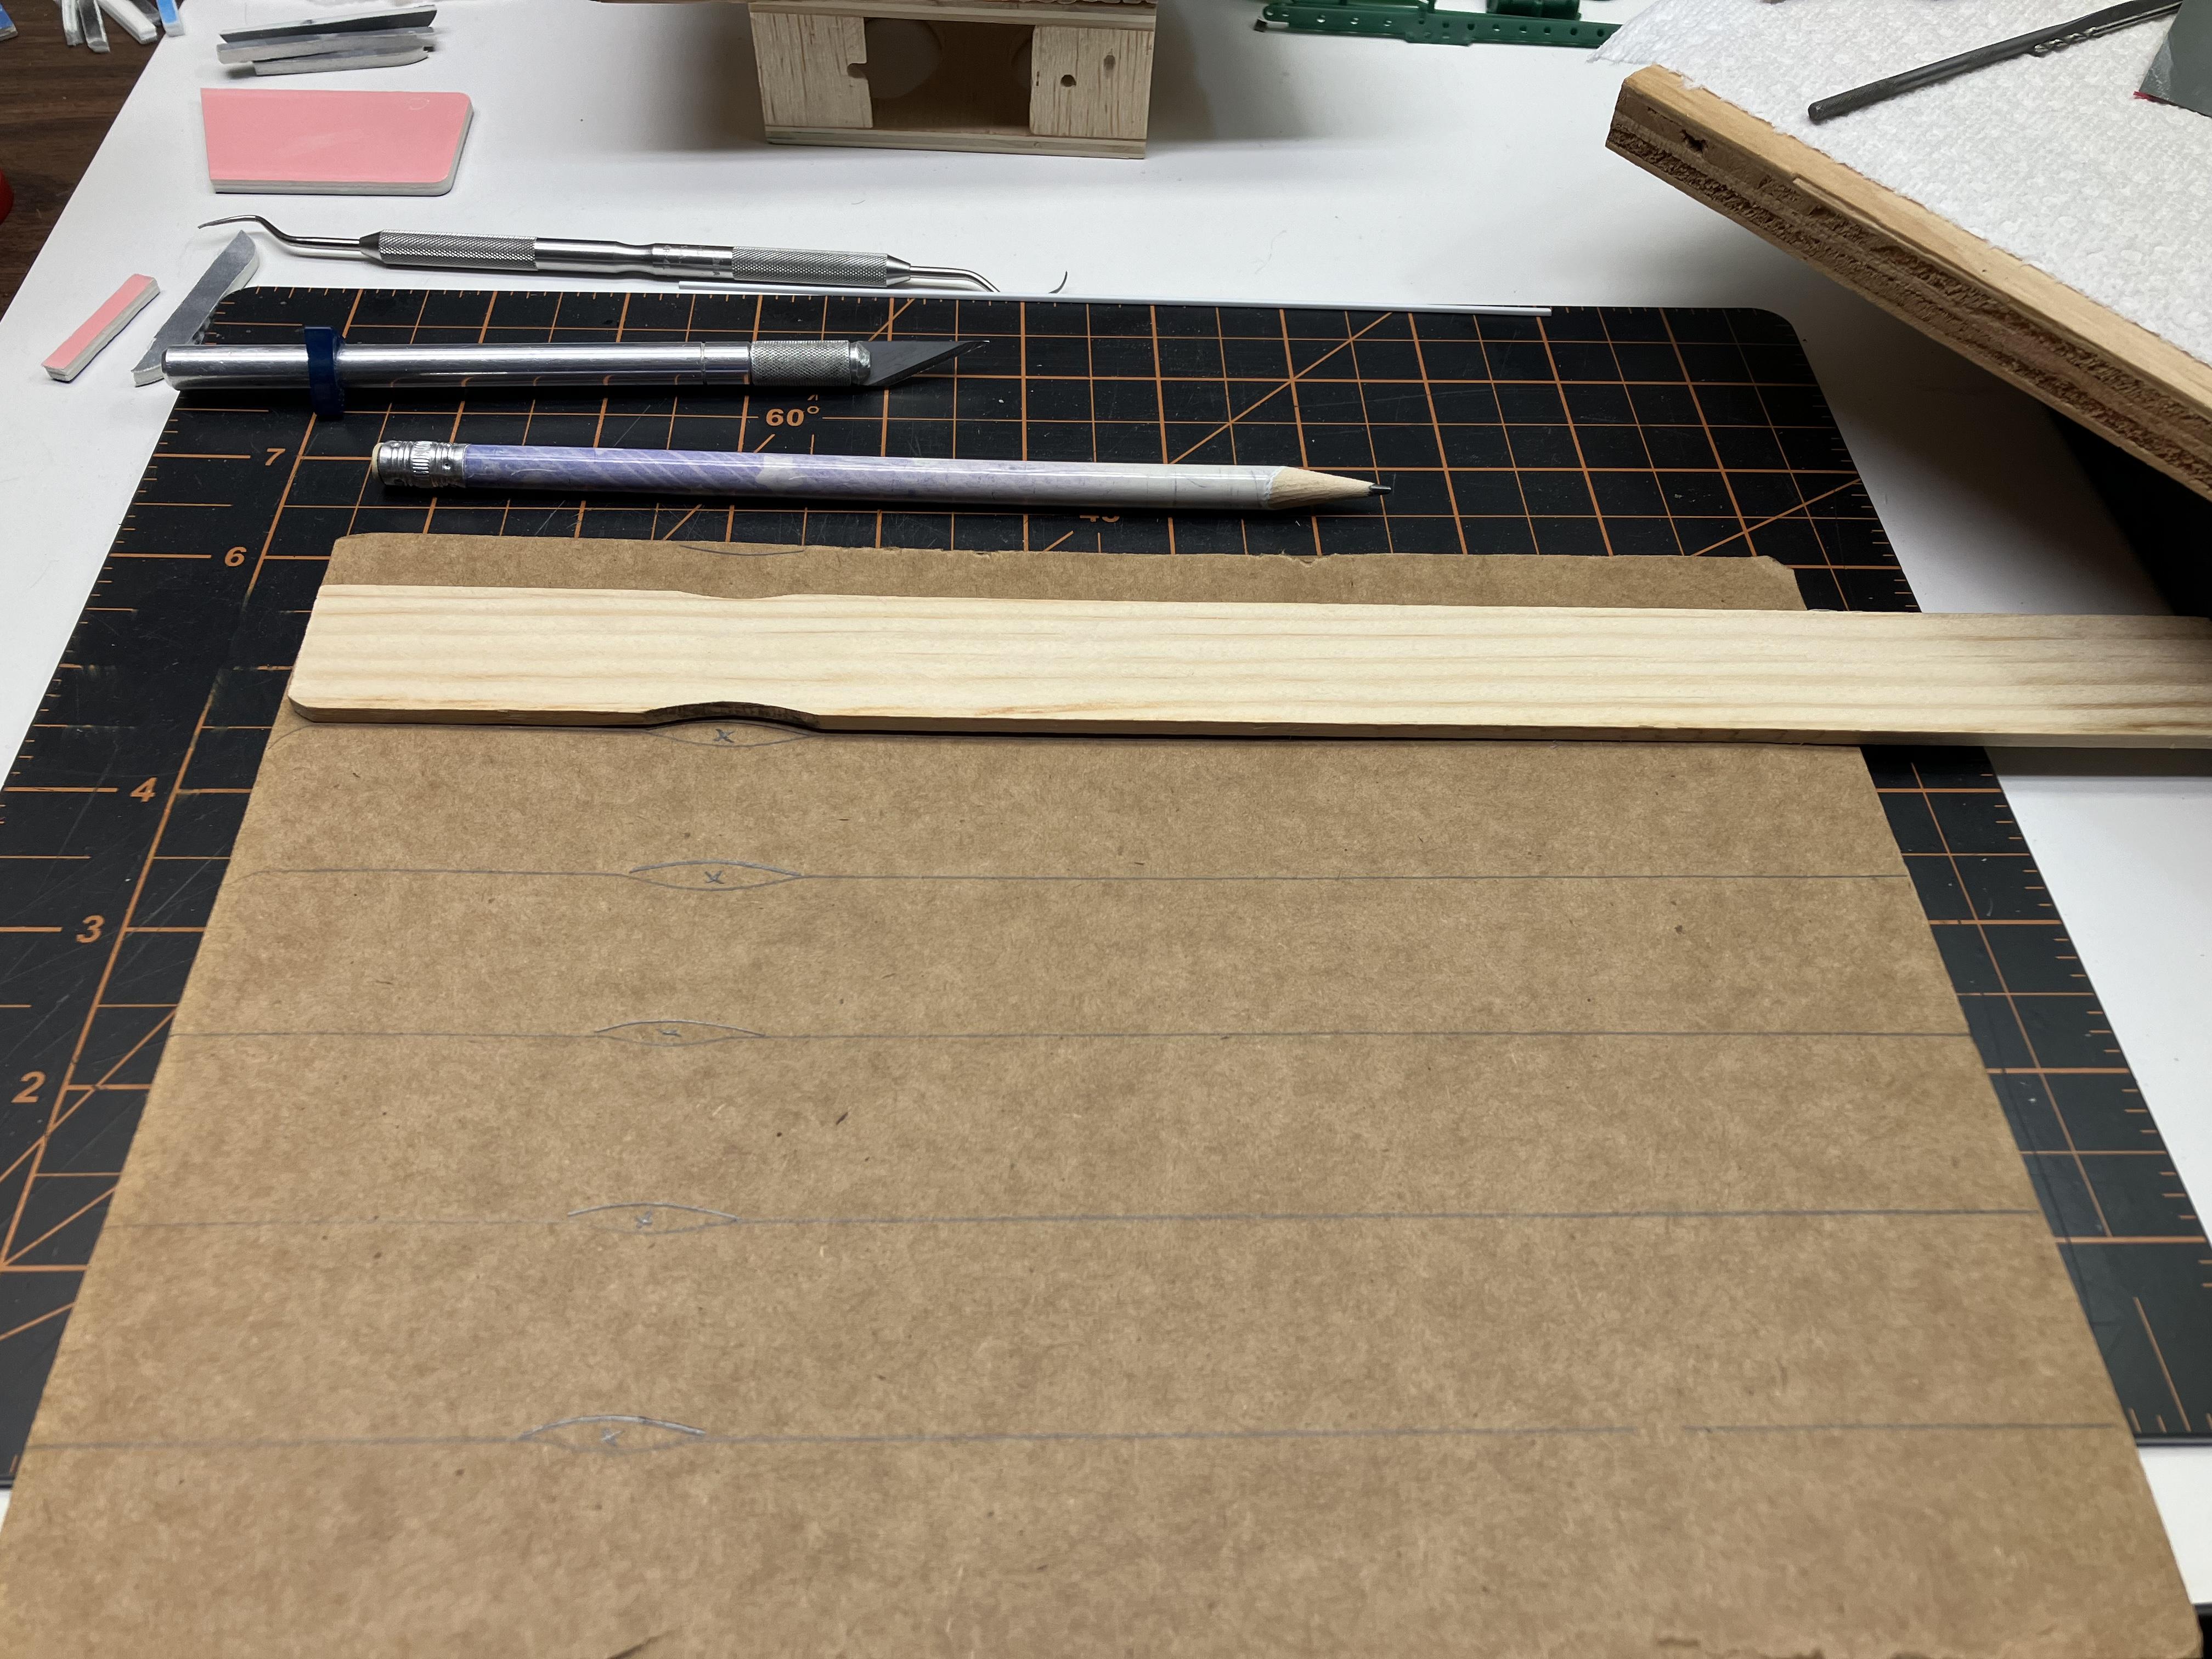
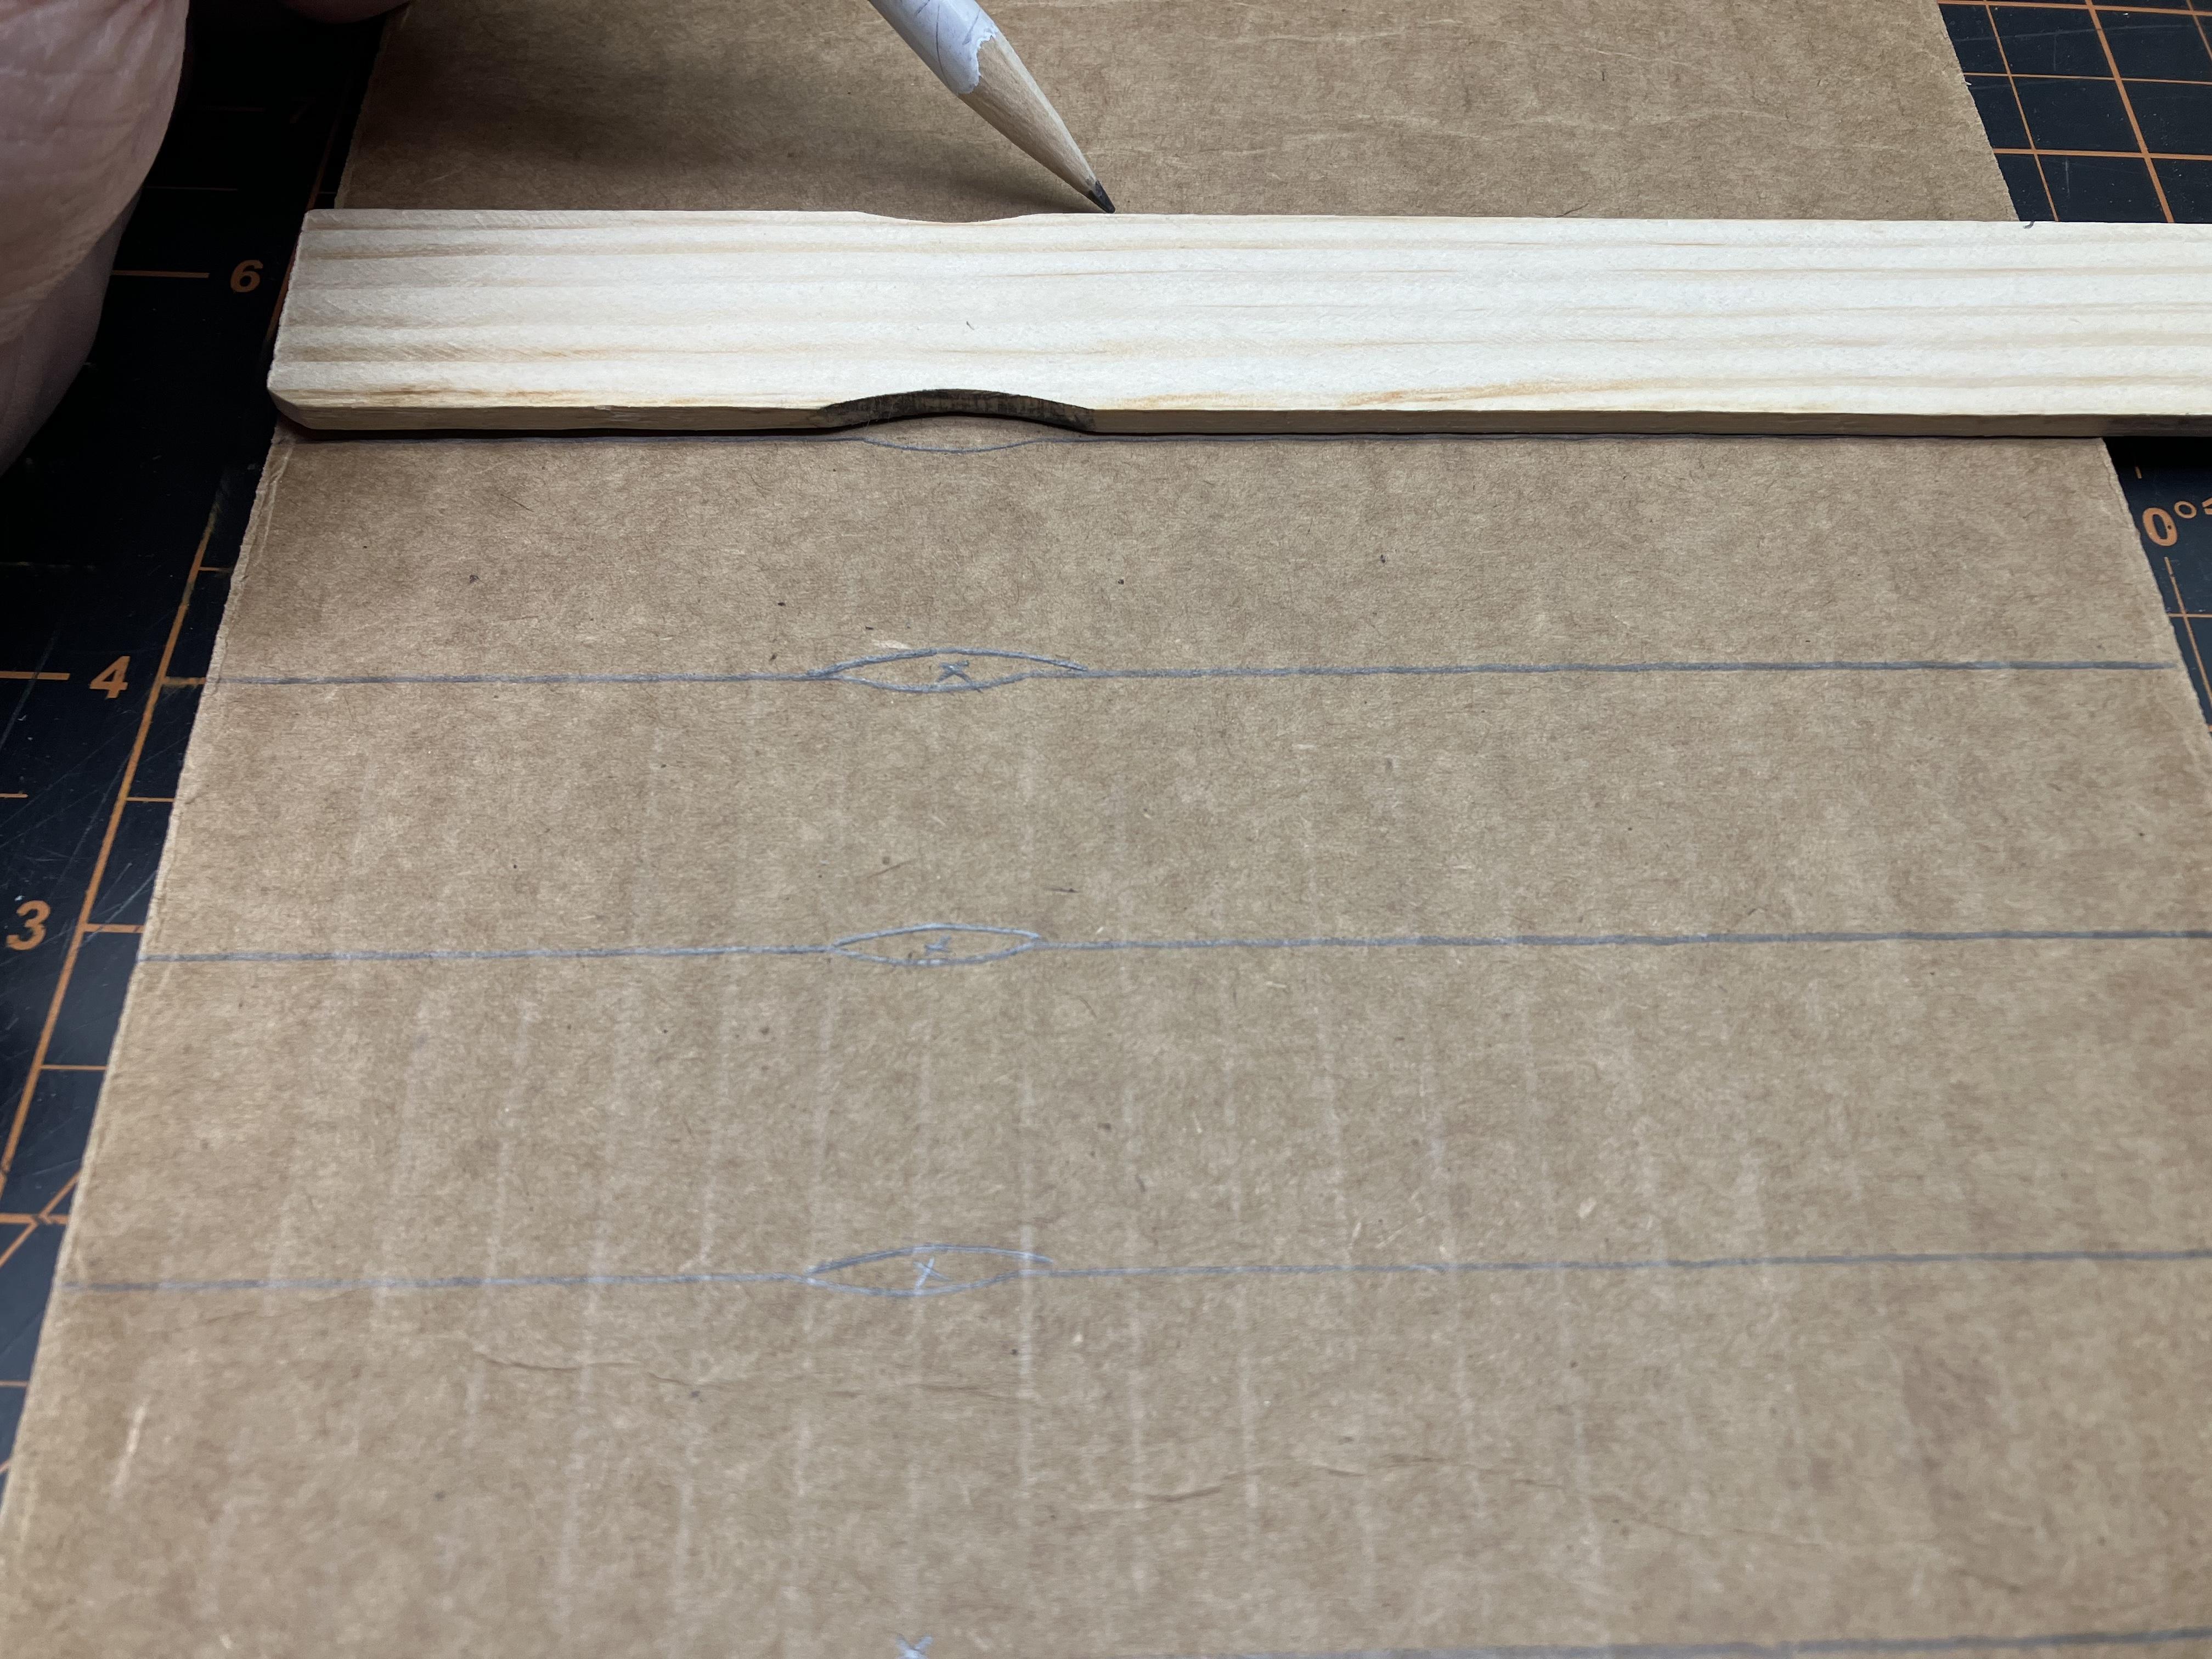
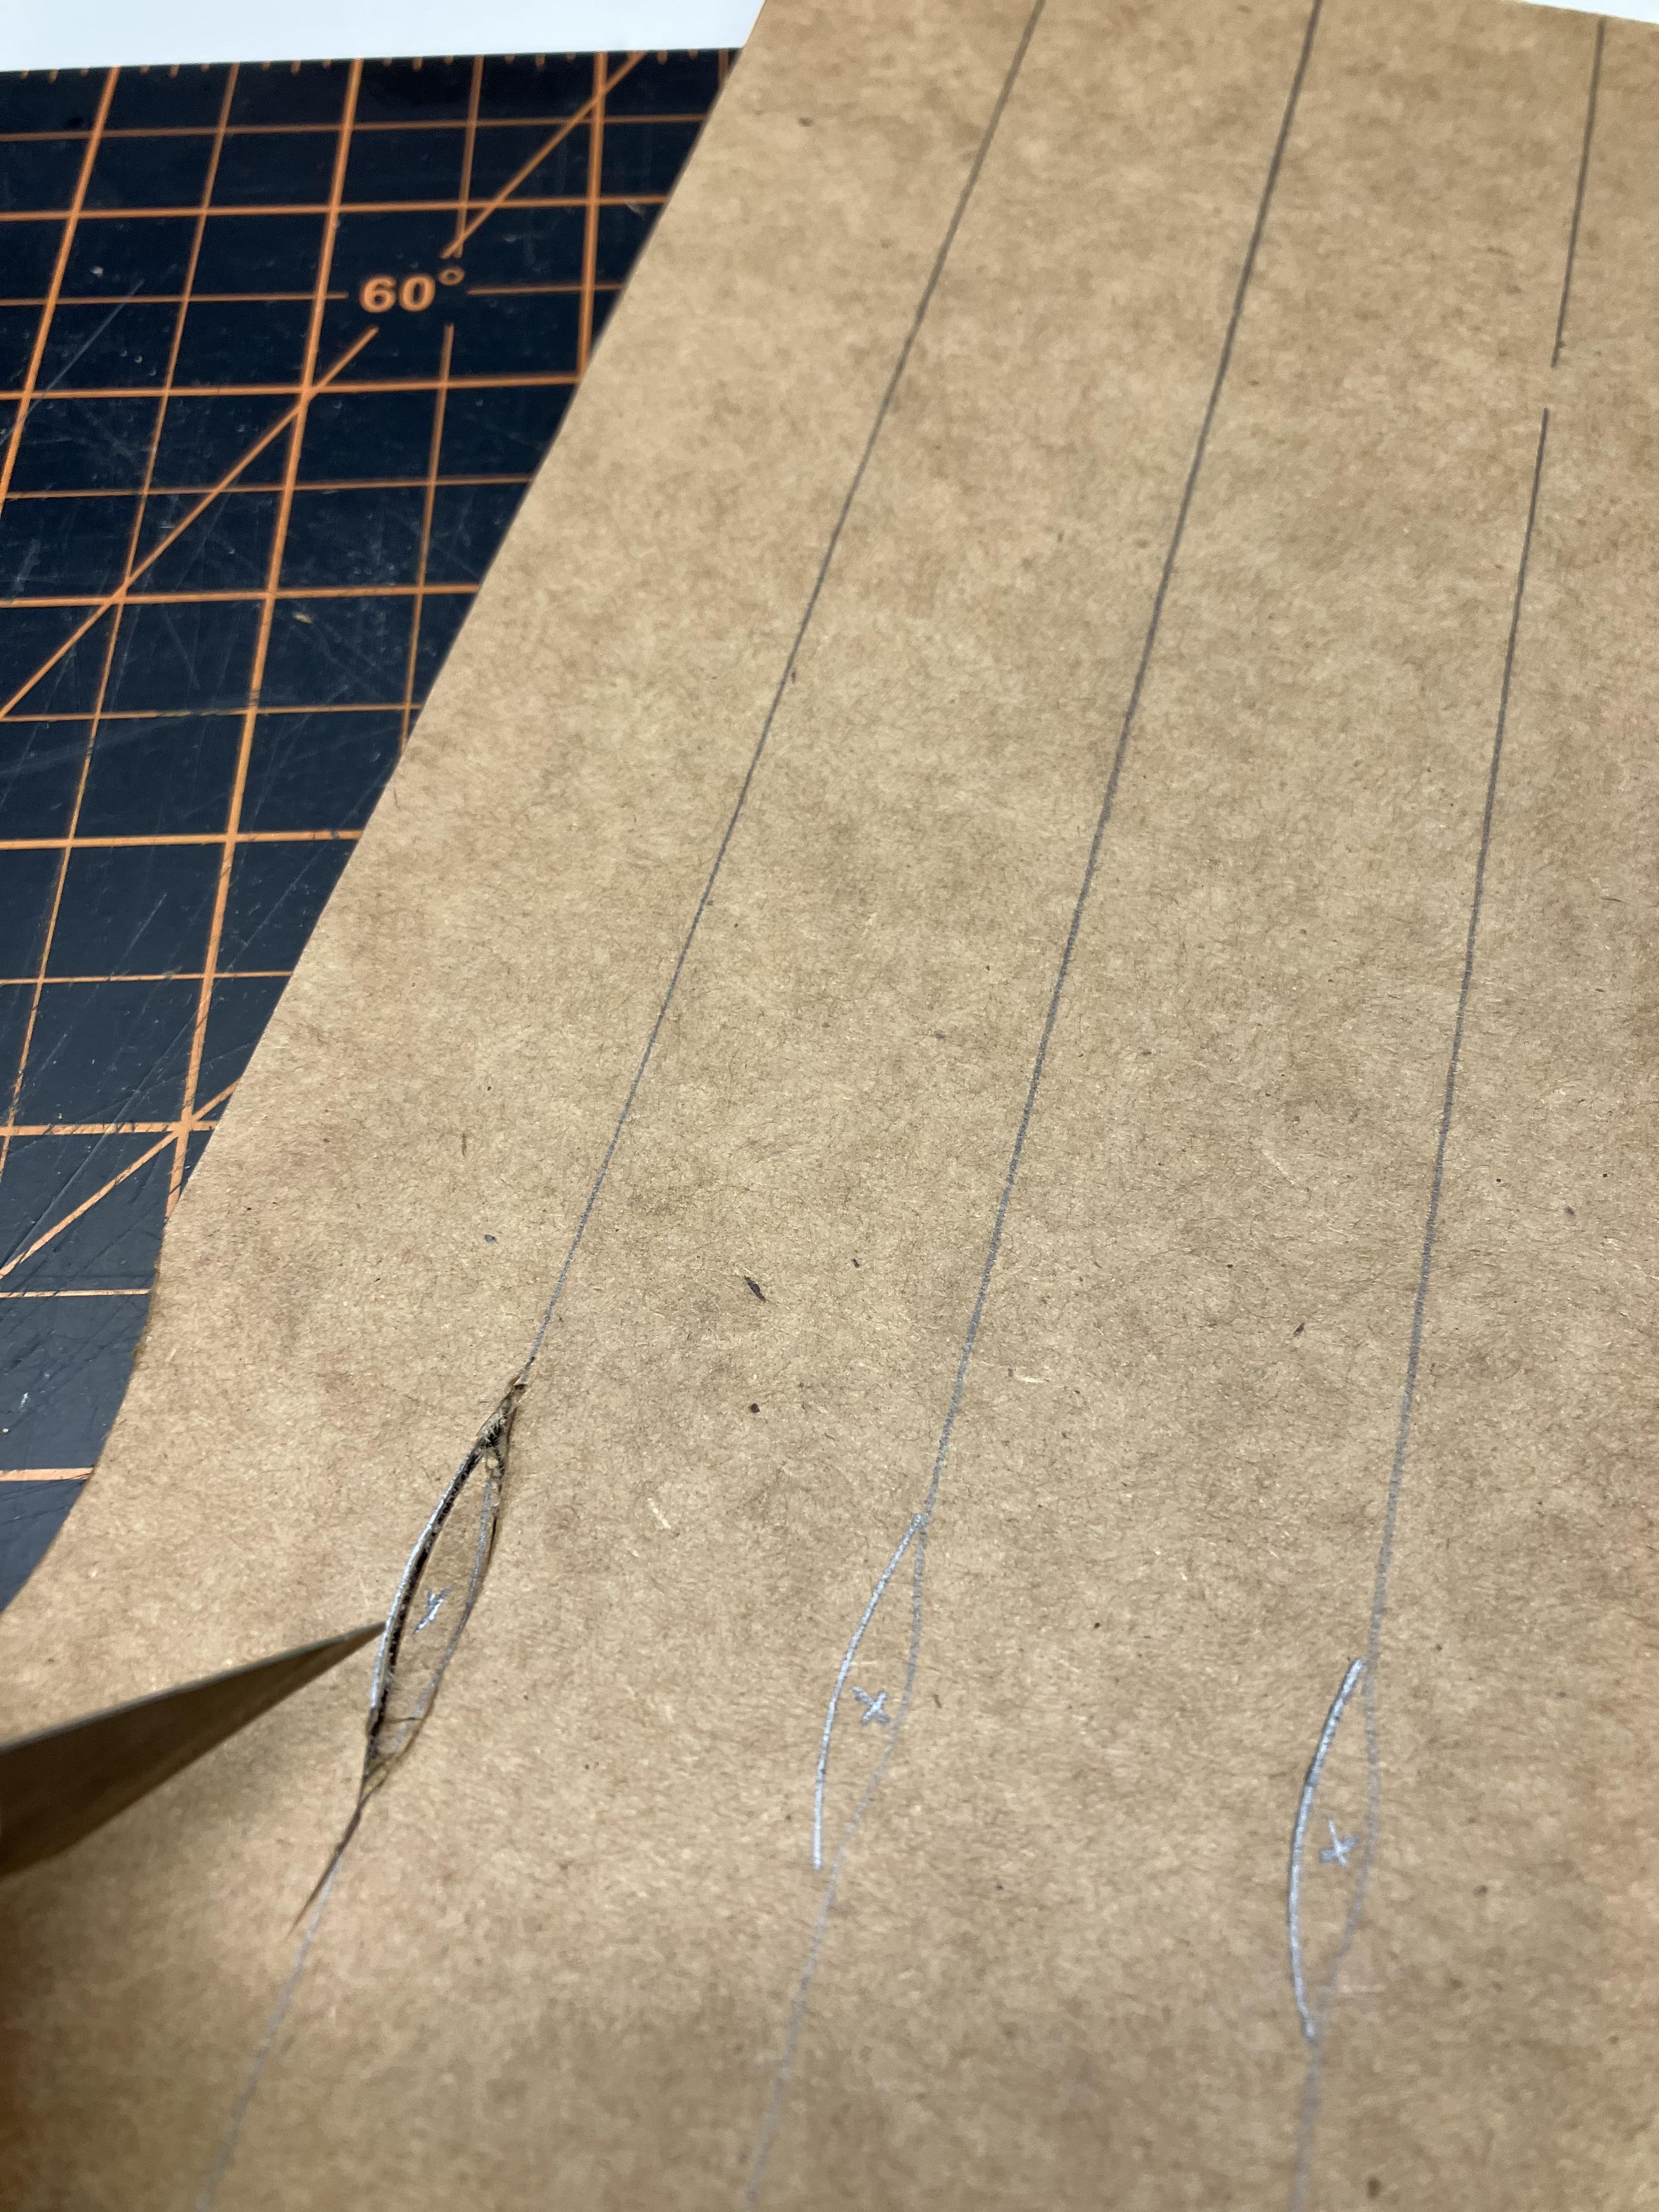
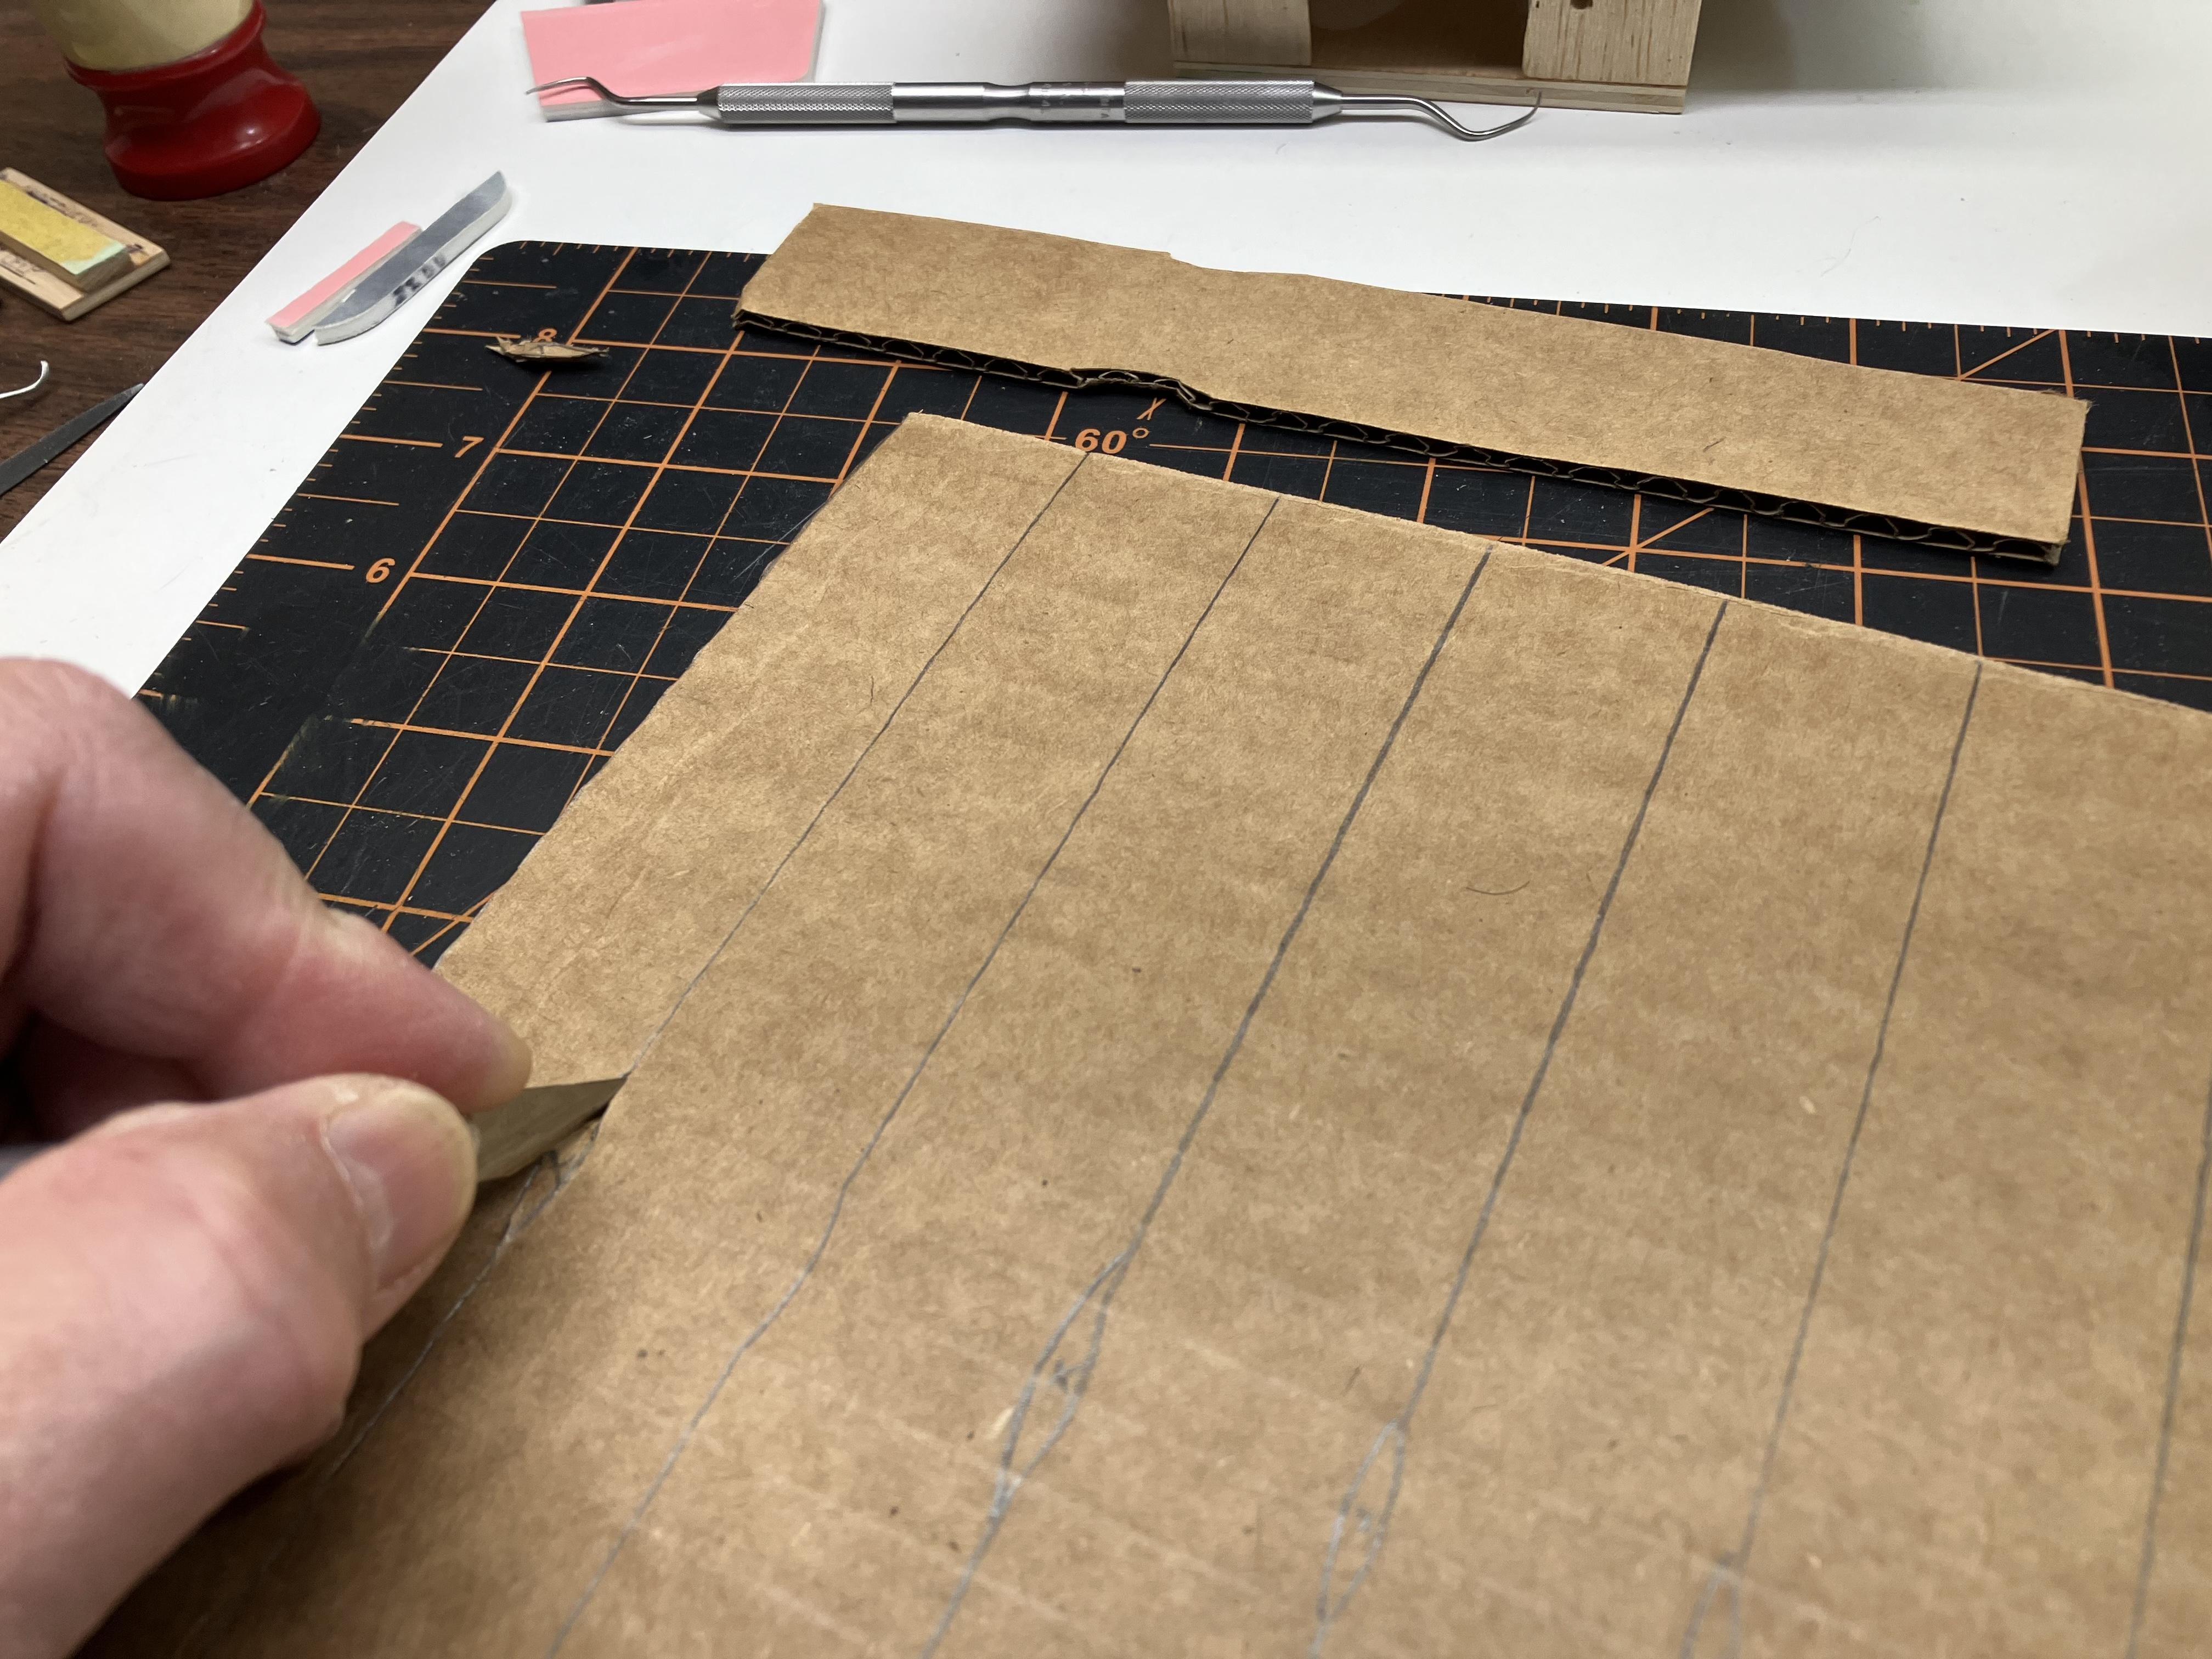
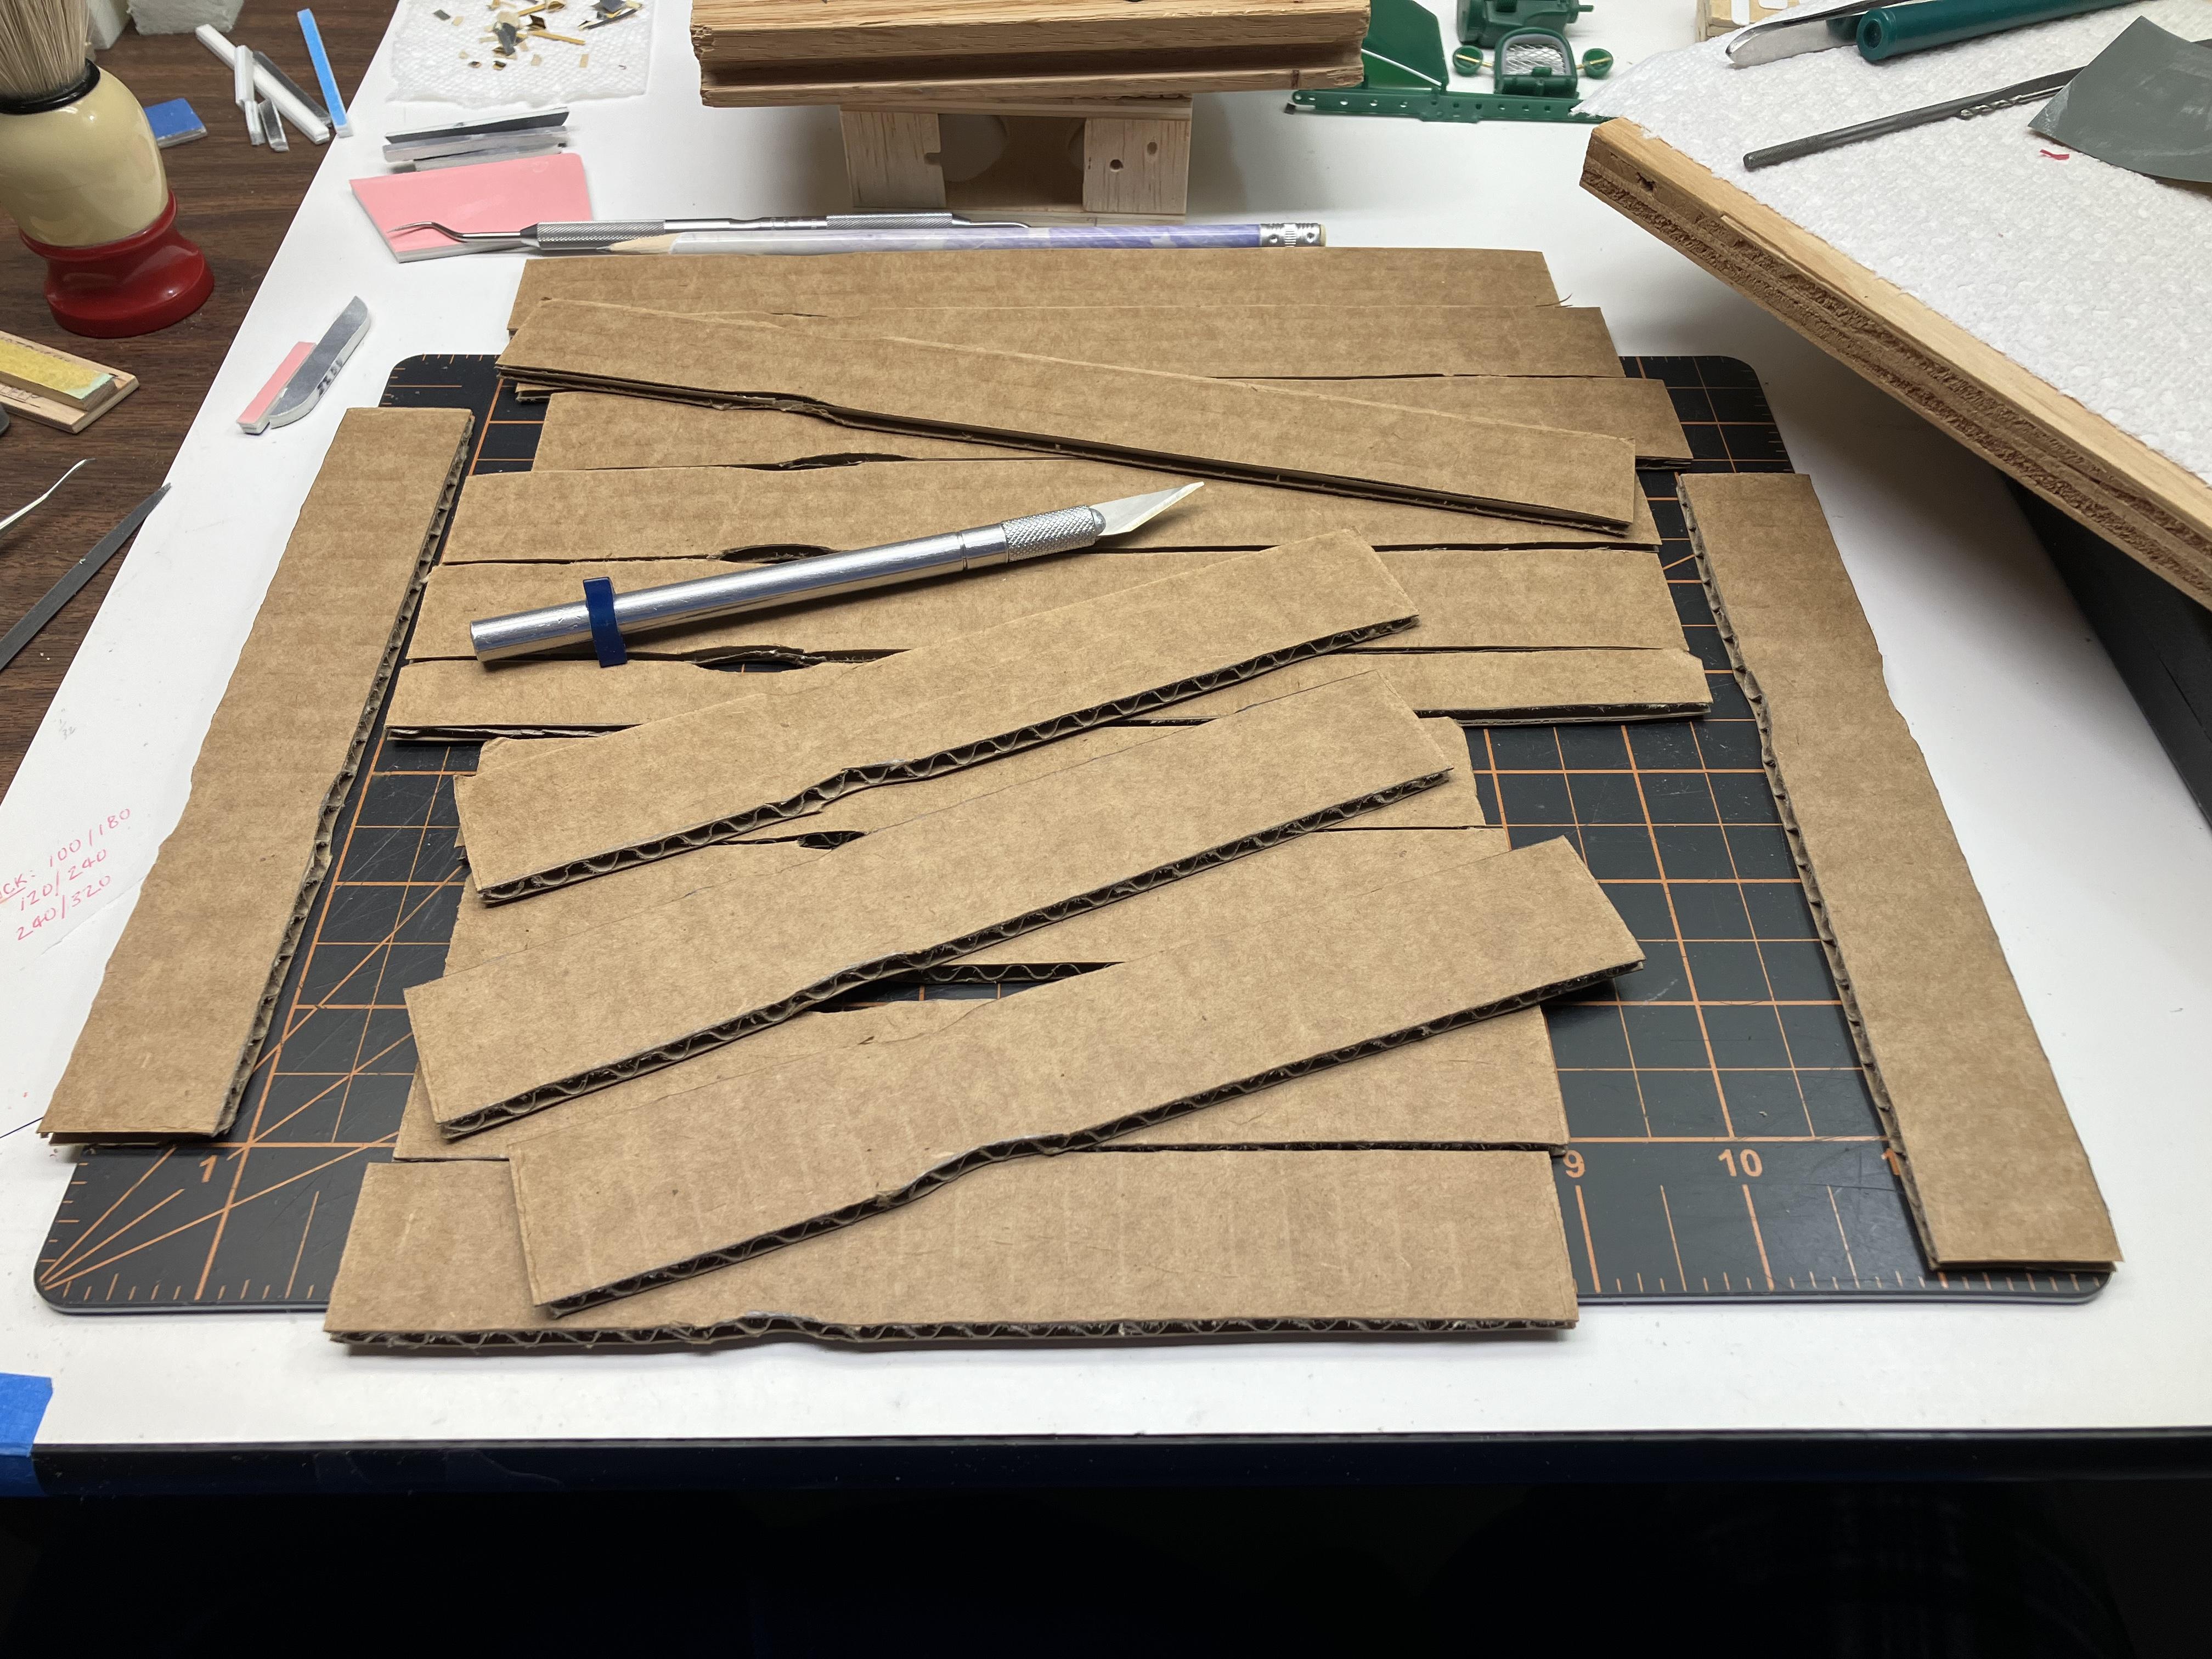
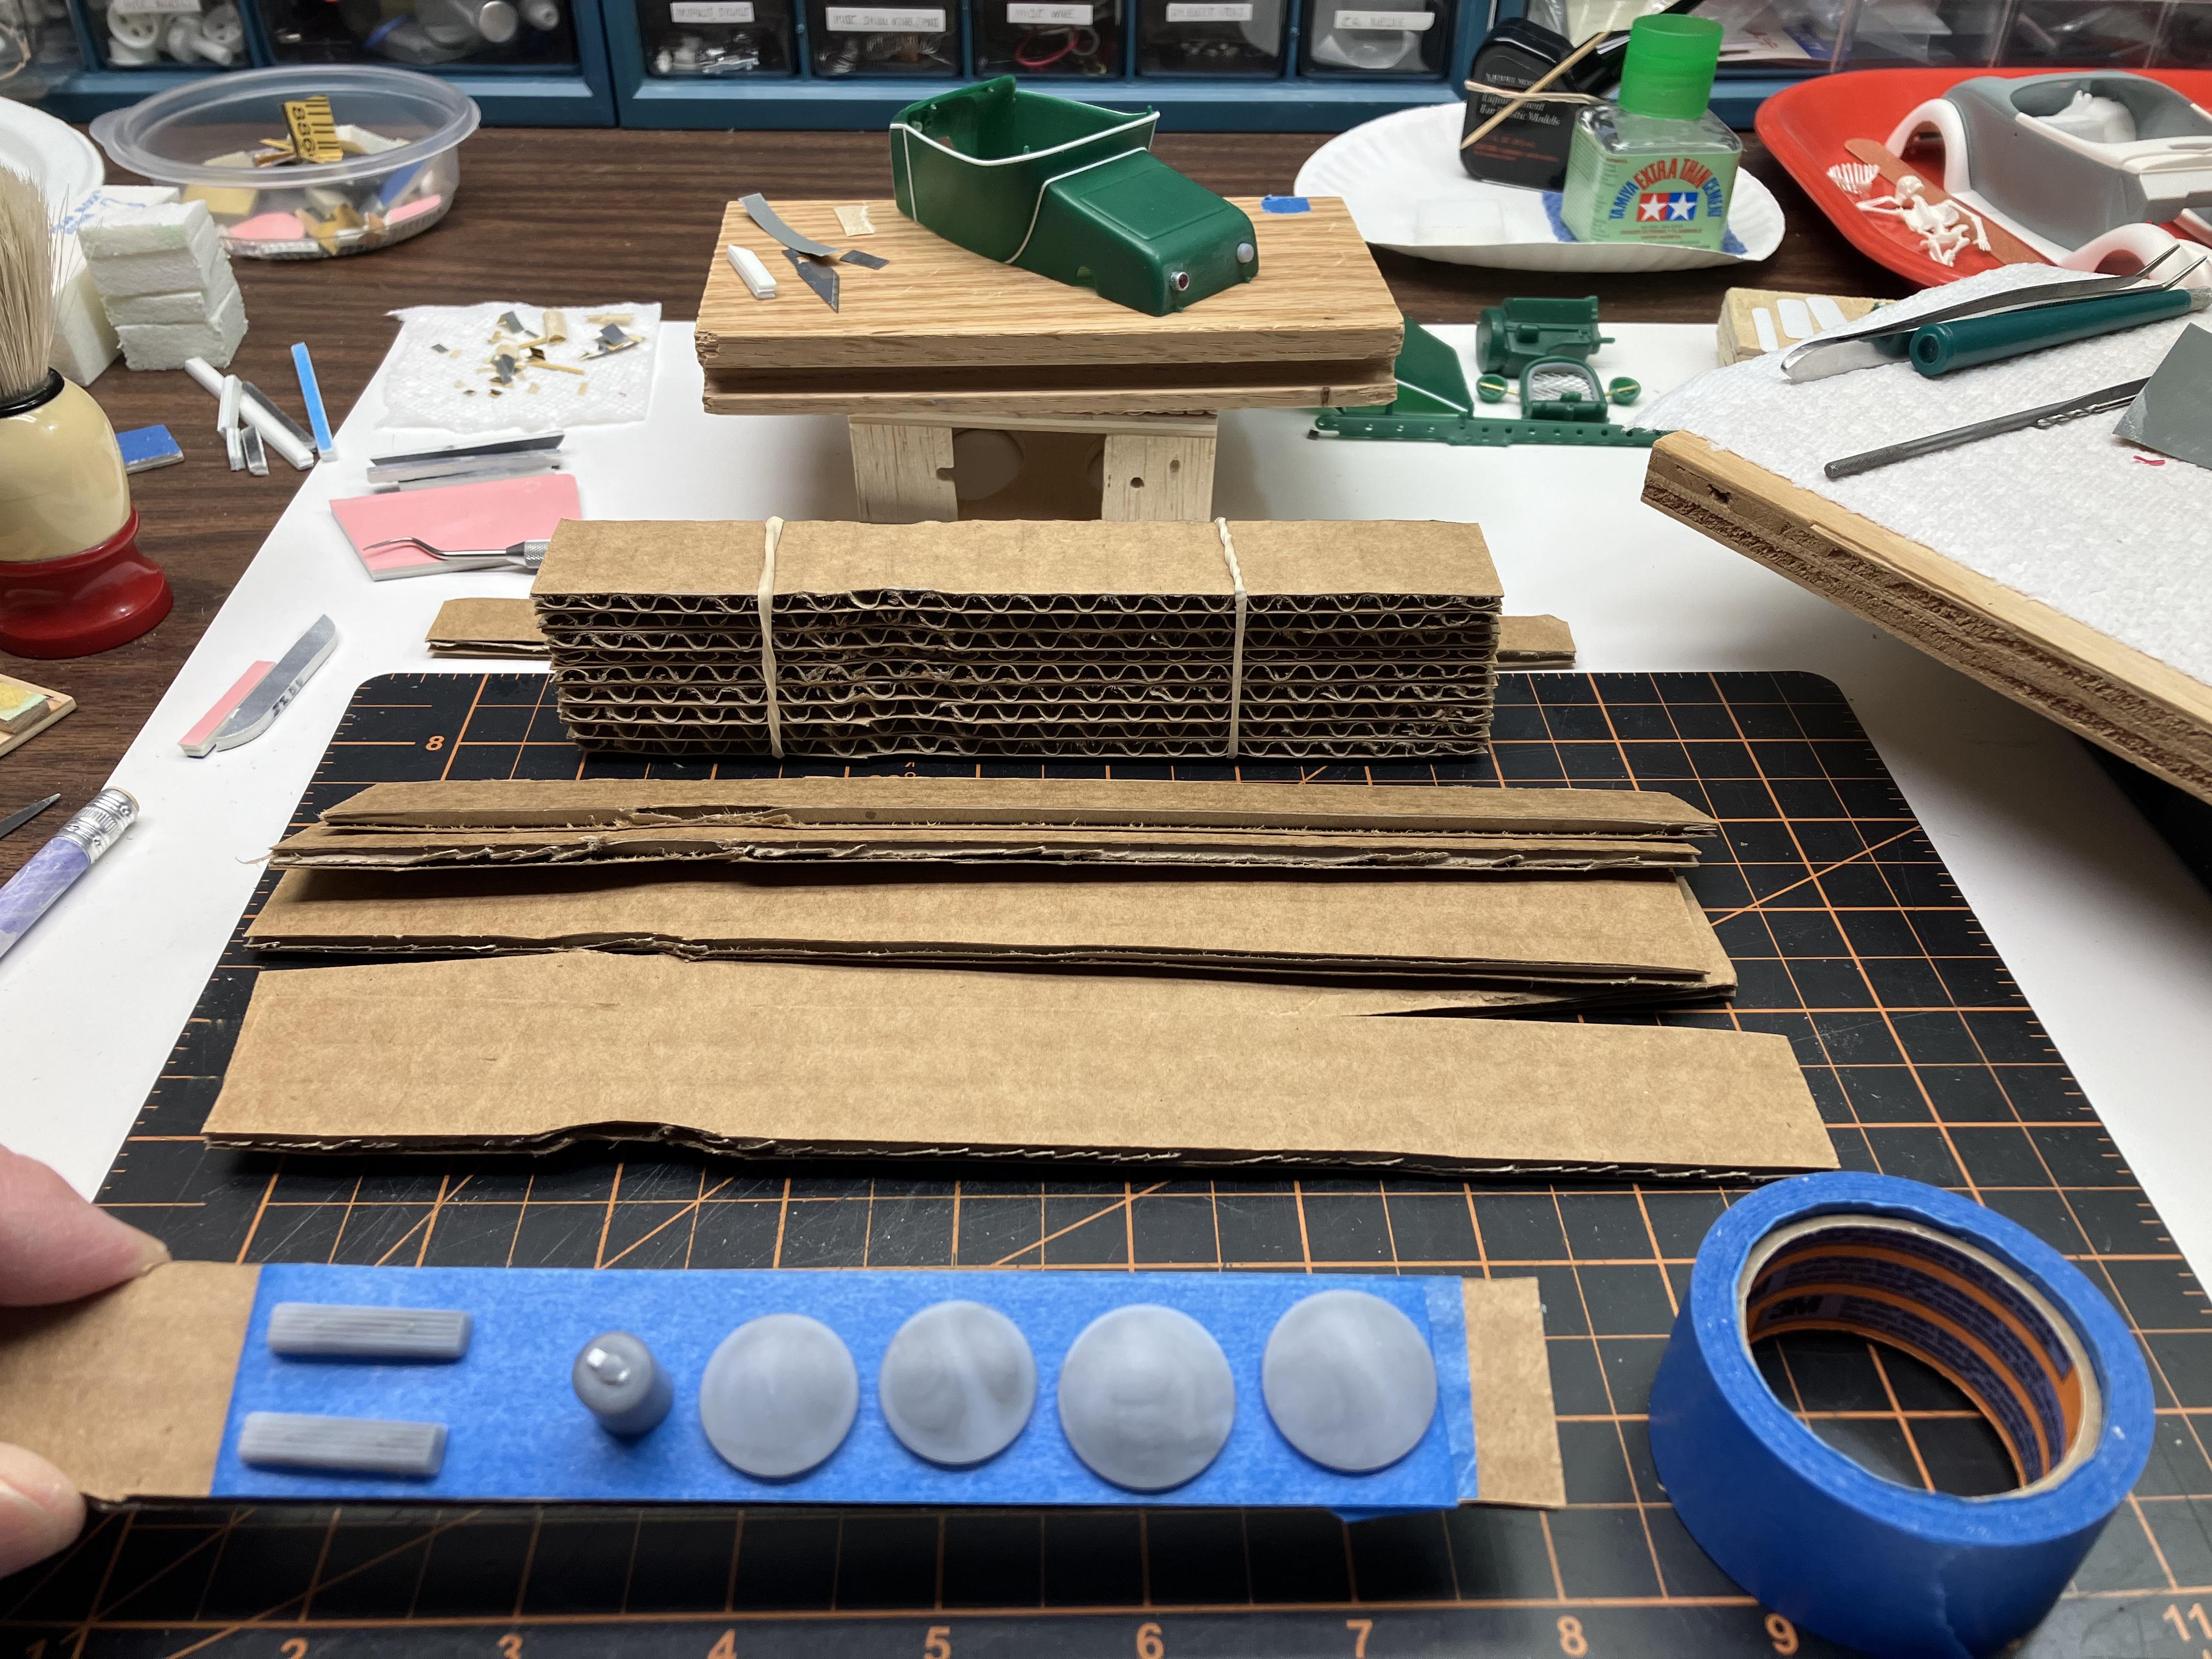
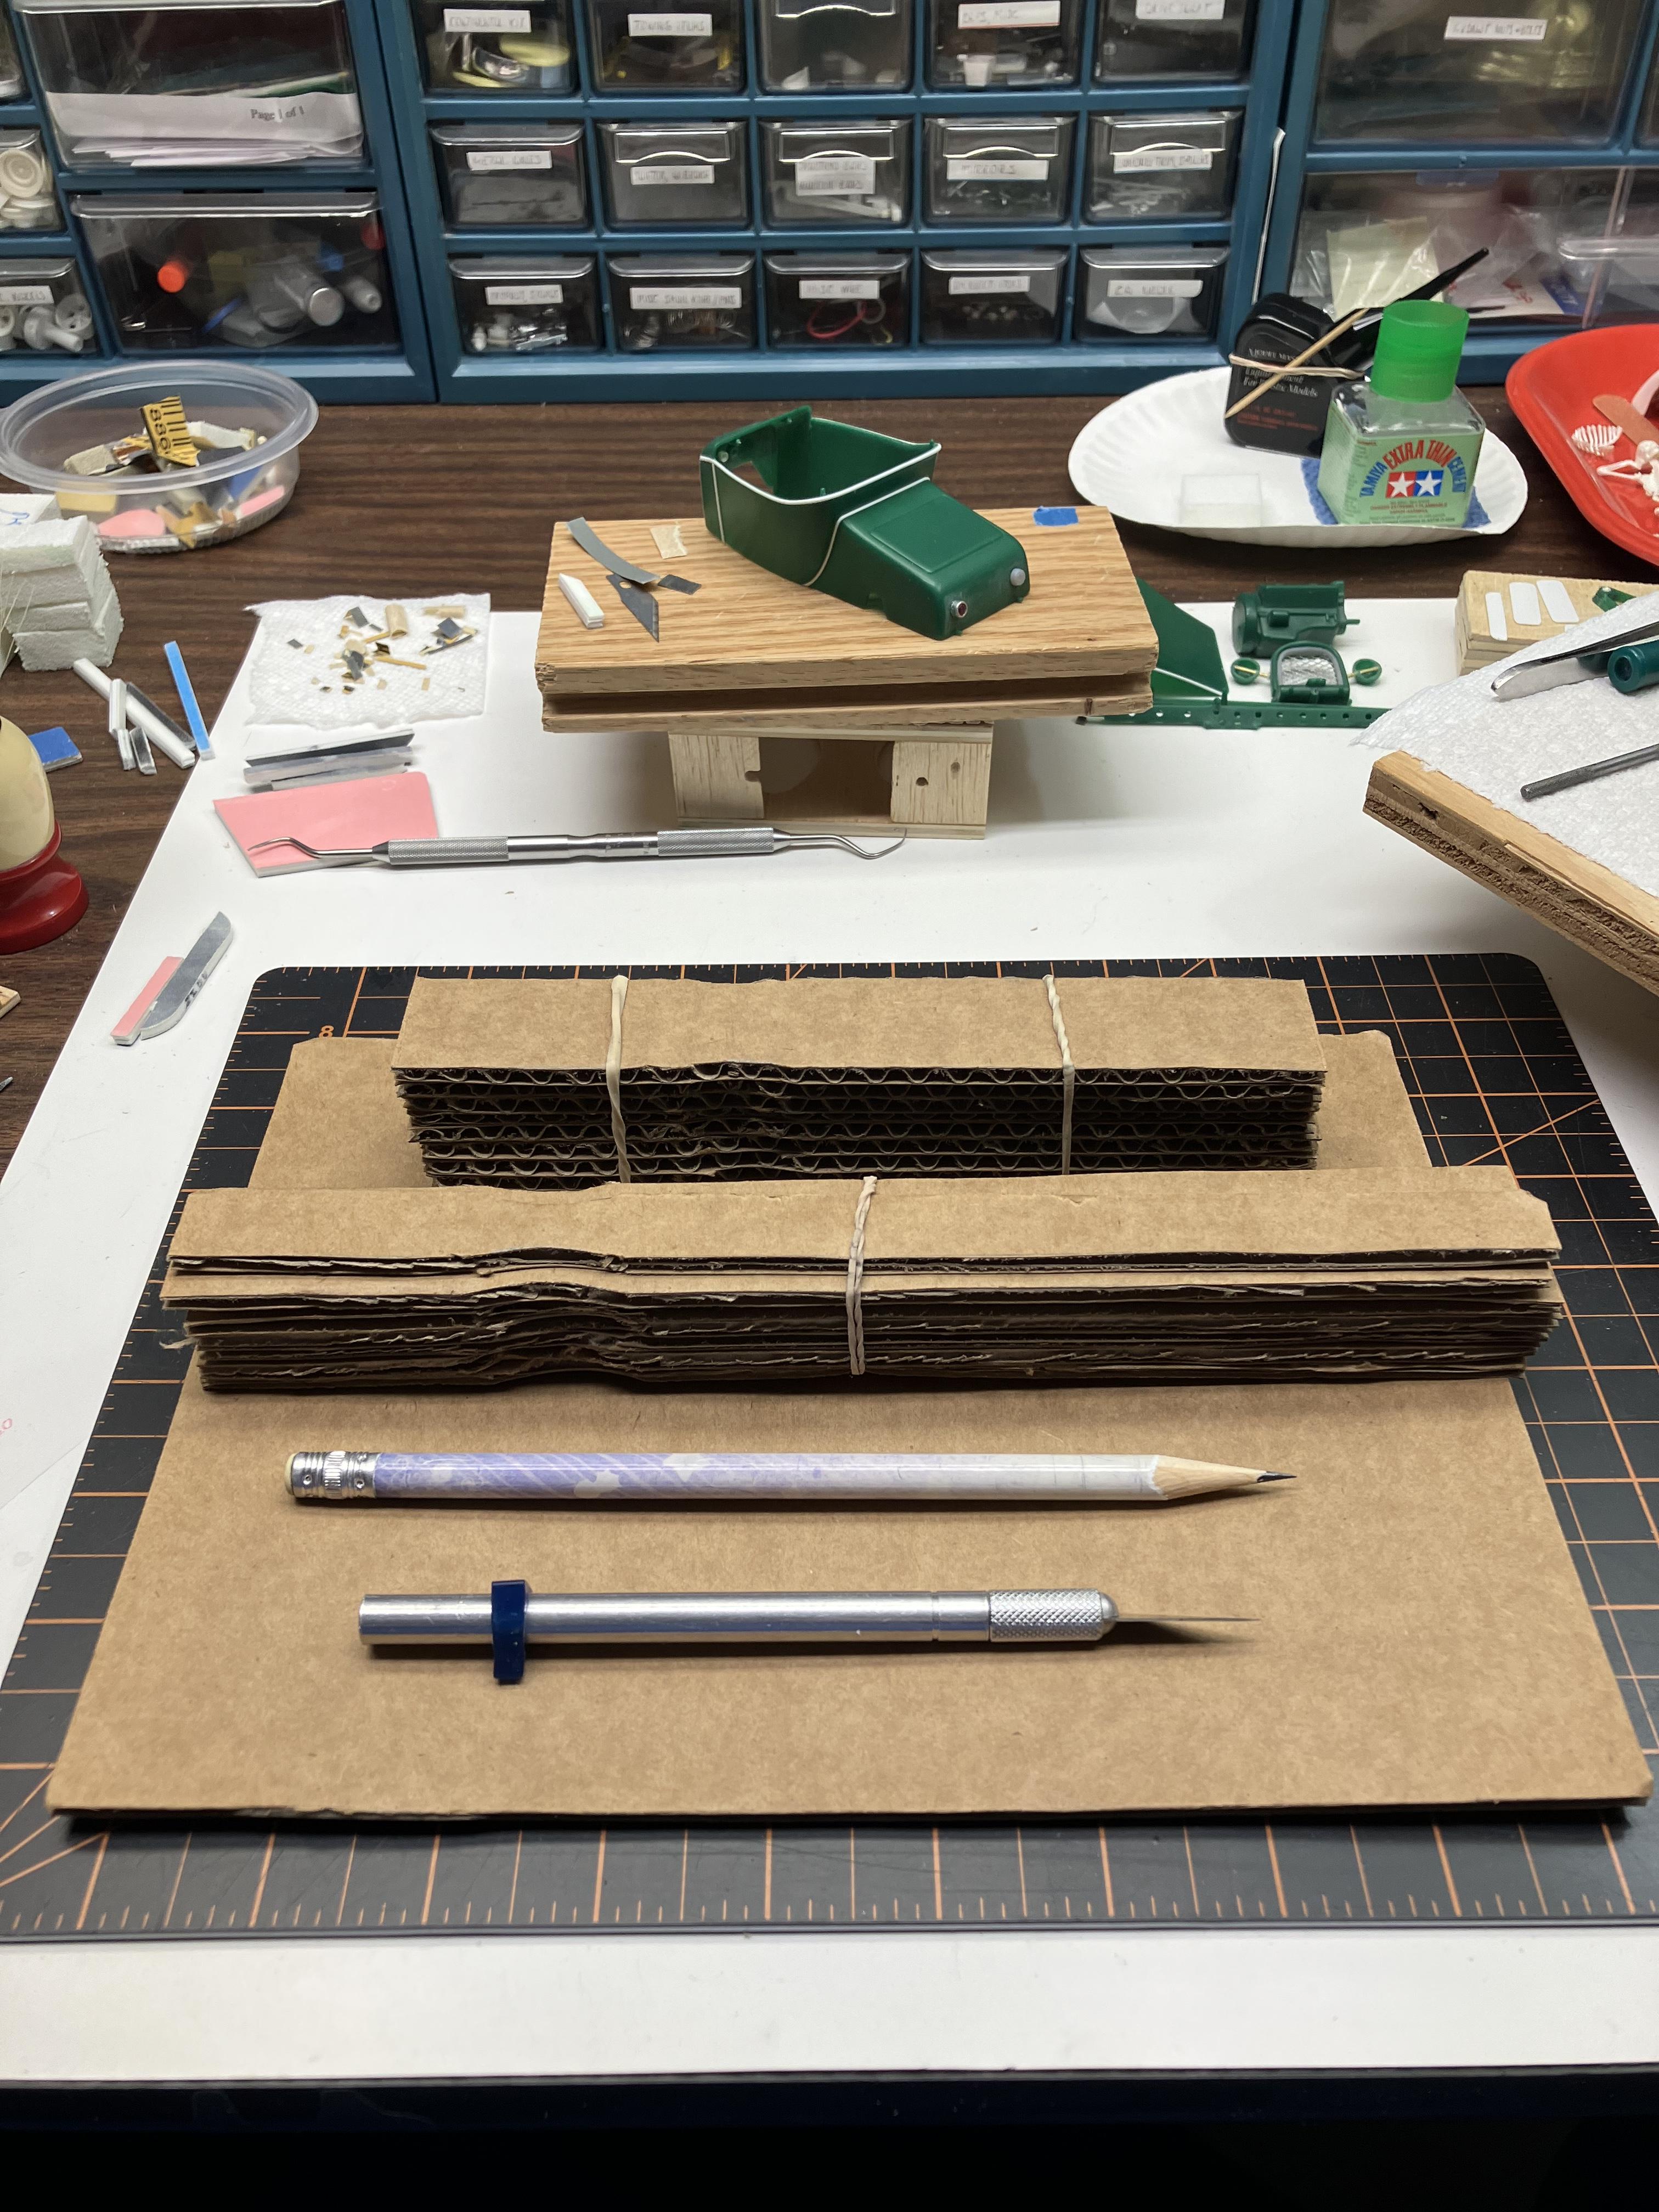
Today I was looking around the shop for some wooden paint stir paddles to use for holding model parts while spray painting and found only one to use. While thinking about this I walked into my model room and saw a stack of cardboard stock that matched the wood paddles thickness. I don’t recall where the cardboard pieces came from but I thought I could put them to use. The cardboard pieces are, in this case, 9.5 x 7.0 inches in size. I laid the wood paint paddle on one cardboard piece using the longer length and traced the wood paddle sides consecutively. I then did the same thing on another cardboard piece, running the paddle layout on the short length. This gives me two sizes of cardboard paddle; 15 pieces and one additional narrow piece to use when spraying paint. I don’t have to use the wood paddle and can just toss the cardboard paddles when I need to. A recycling effort that sure works for me. Note: I used a brand new X-Acto #11 Z blade for cutting the paddle lines and cut each “hand grasp” ellipse out first while the blade was sharpest, then cut the cardboard paddle separating lines; the cuts were made on a hobby cutting mat. It took about twenty minutes to do the actual project…and somewhat longer to get it ready to post! ☺️ Now I just need to get back to actually working on my model project! ? Joe
-
A nice model here with an eye catching color combination. Well done! ? Joe
-
AMT Kenworth K123 stretched
Joe Nunes replied to Bronzekeg's topic in Model Trucks: Big Rigs and Heavy Equipment
Very nice model and great color combination! I would have really enjoyed driving a ride like this back when I was on the road. Well done! ? Joe -
I am looking forward to seeing the models you decide to build. Not all models need to have the miles deep paint job, and if there is a good storyline to go with the build that is even better! You have got me thinking about building a model of my Grandfather's new '64 Chevy Impala. ? Joe
-
Very nice model! Well done! ? Joe
-
Very nice Chevy build and great color combination. I drove a 1952 Chevy 4Dr Deluxe, black body with a light green top, during the late '60's. Had about 5000 miles on it and was fun to drive. Your model brings back some fond memories. Well done! ? Joe
-
Nice model build of your Grandfather's car and I enjoyed the background information. Thanks for sharing. ? Joe
-
Coming along nicely with the modified details. ? Joe
-
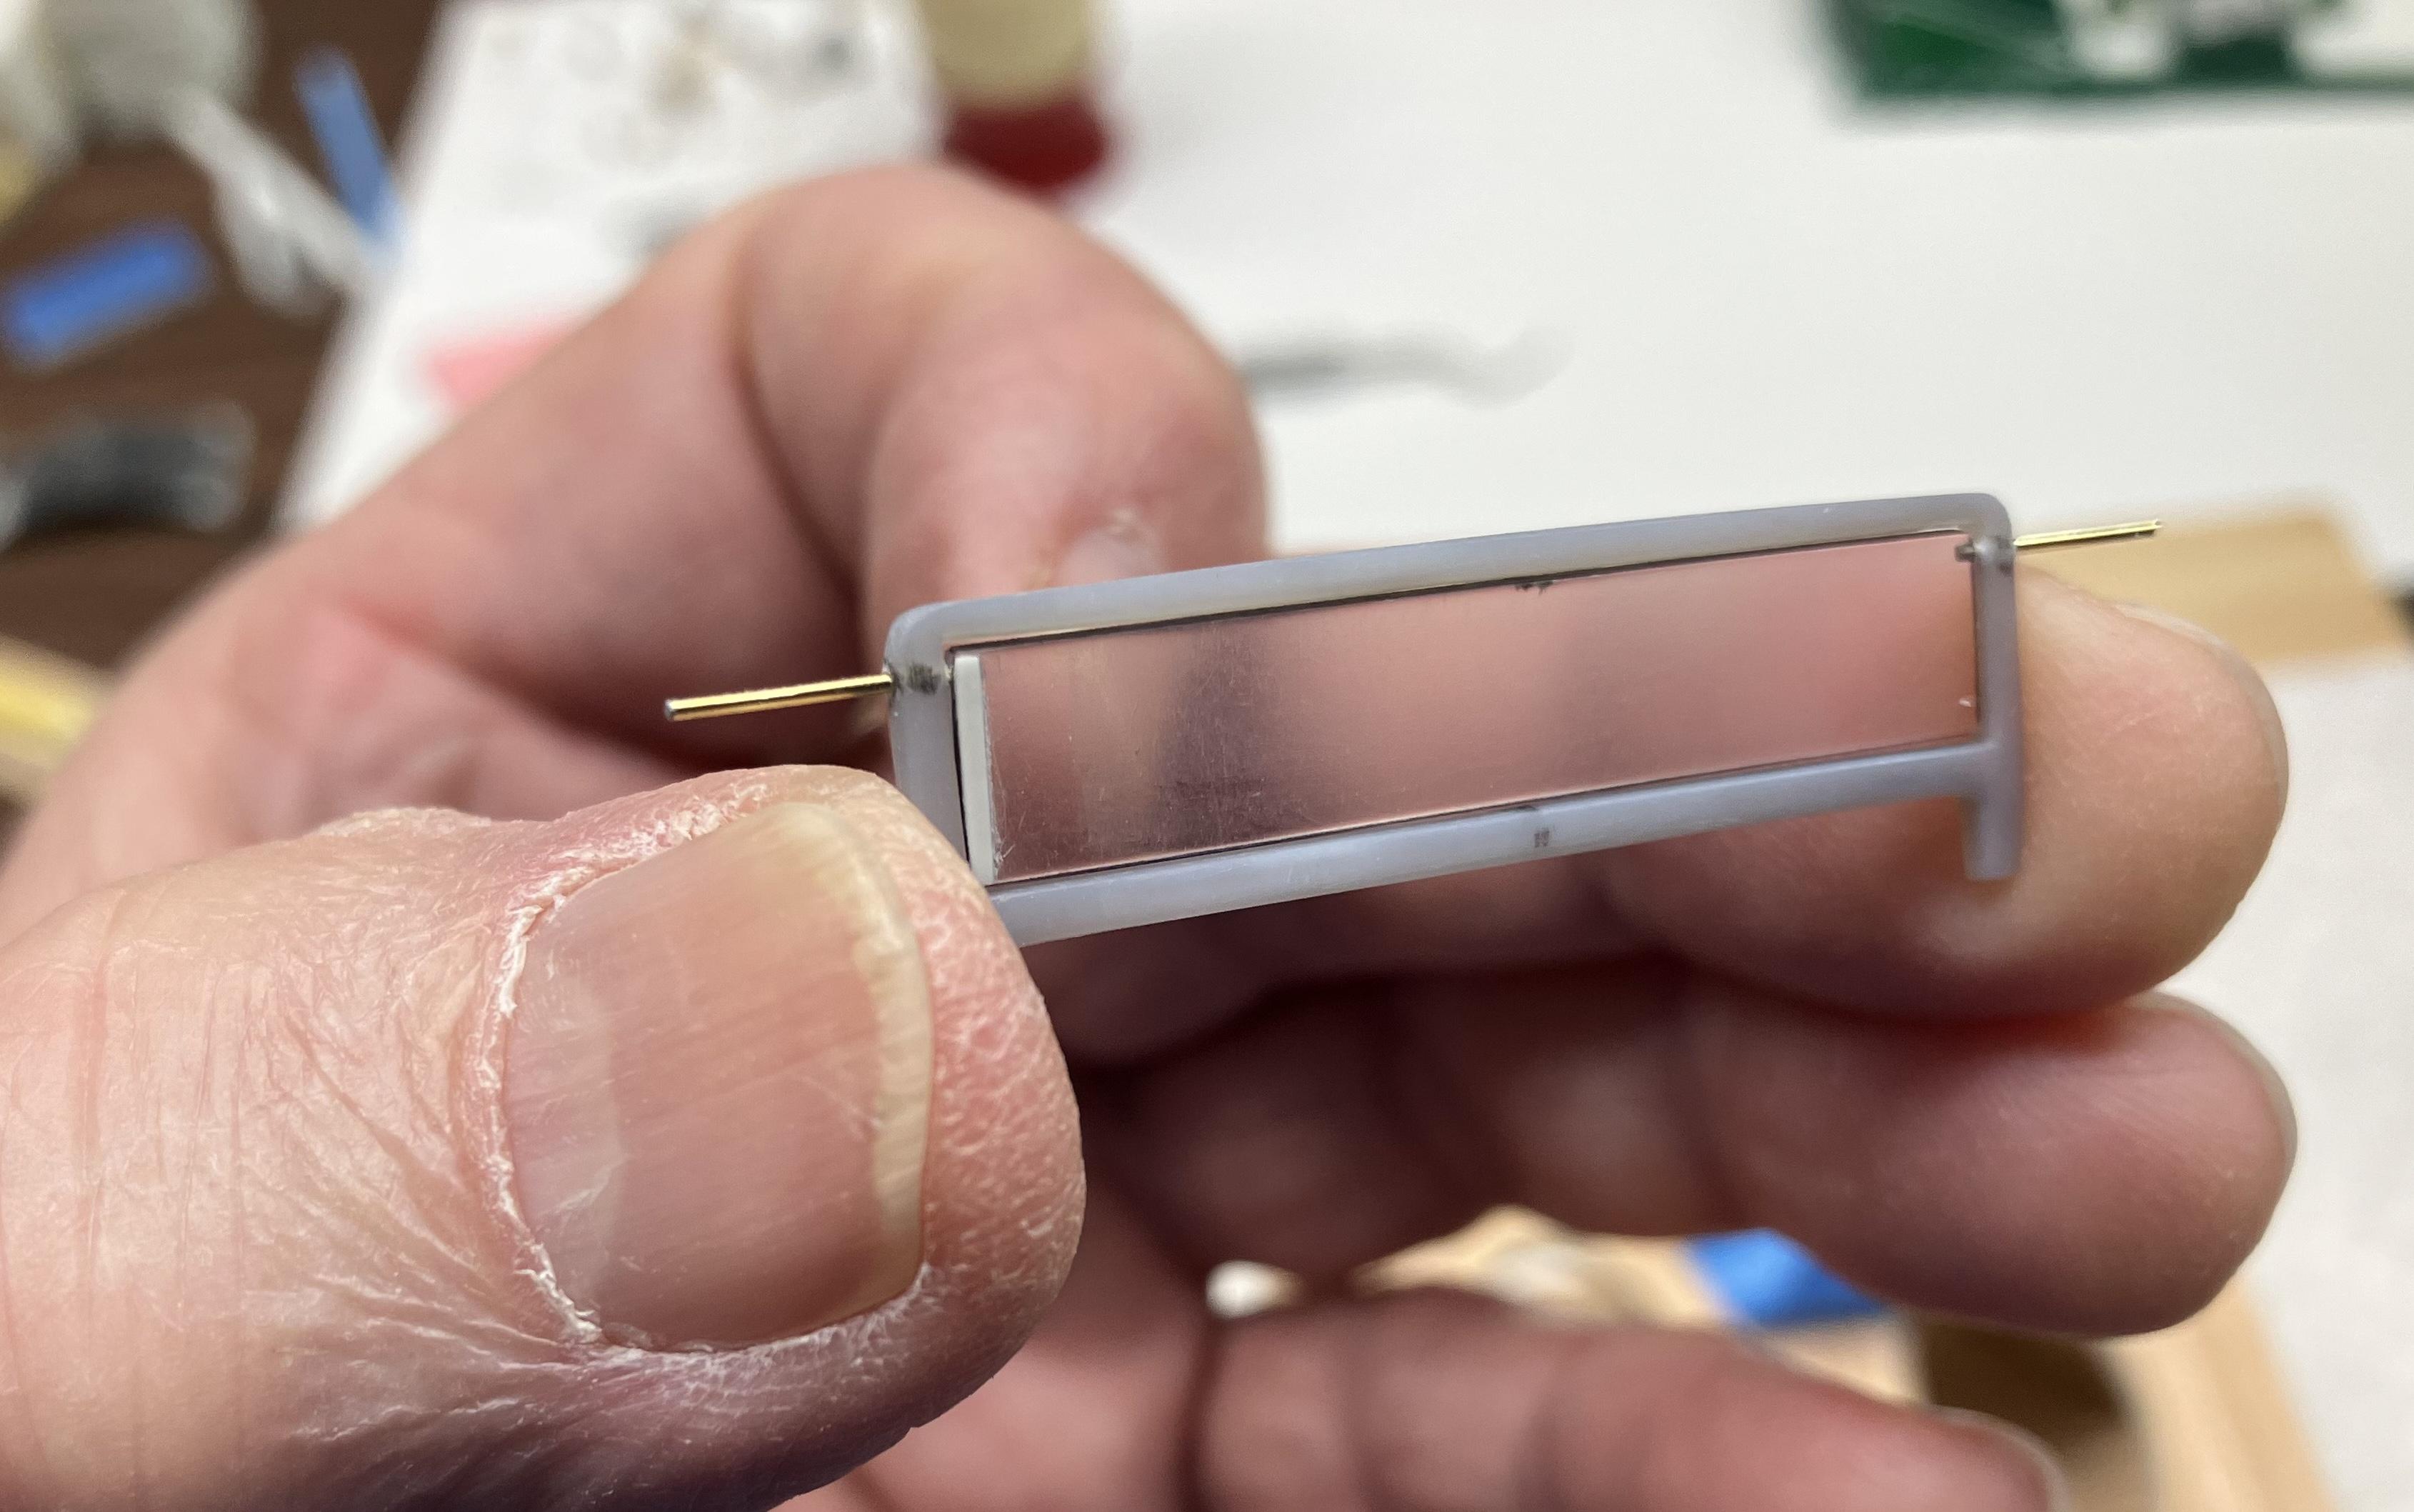
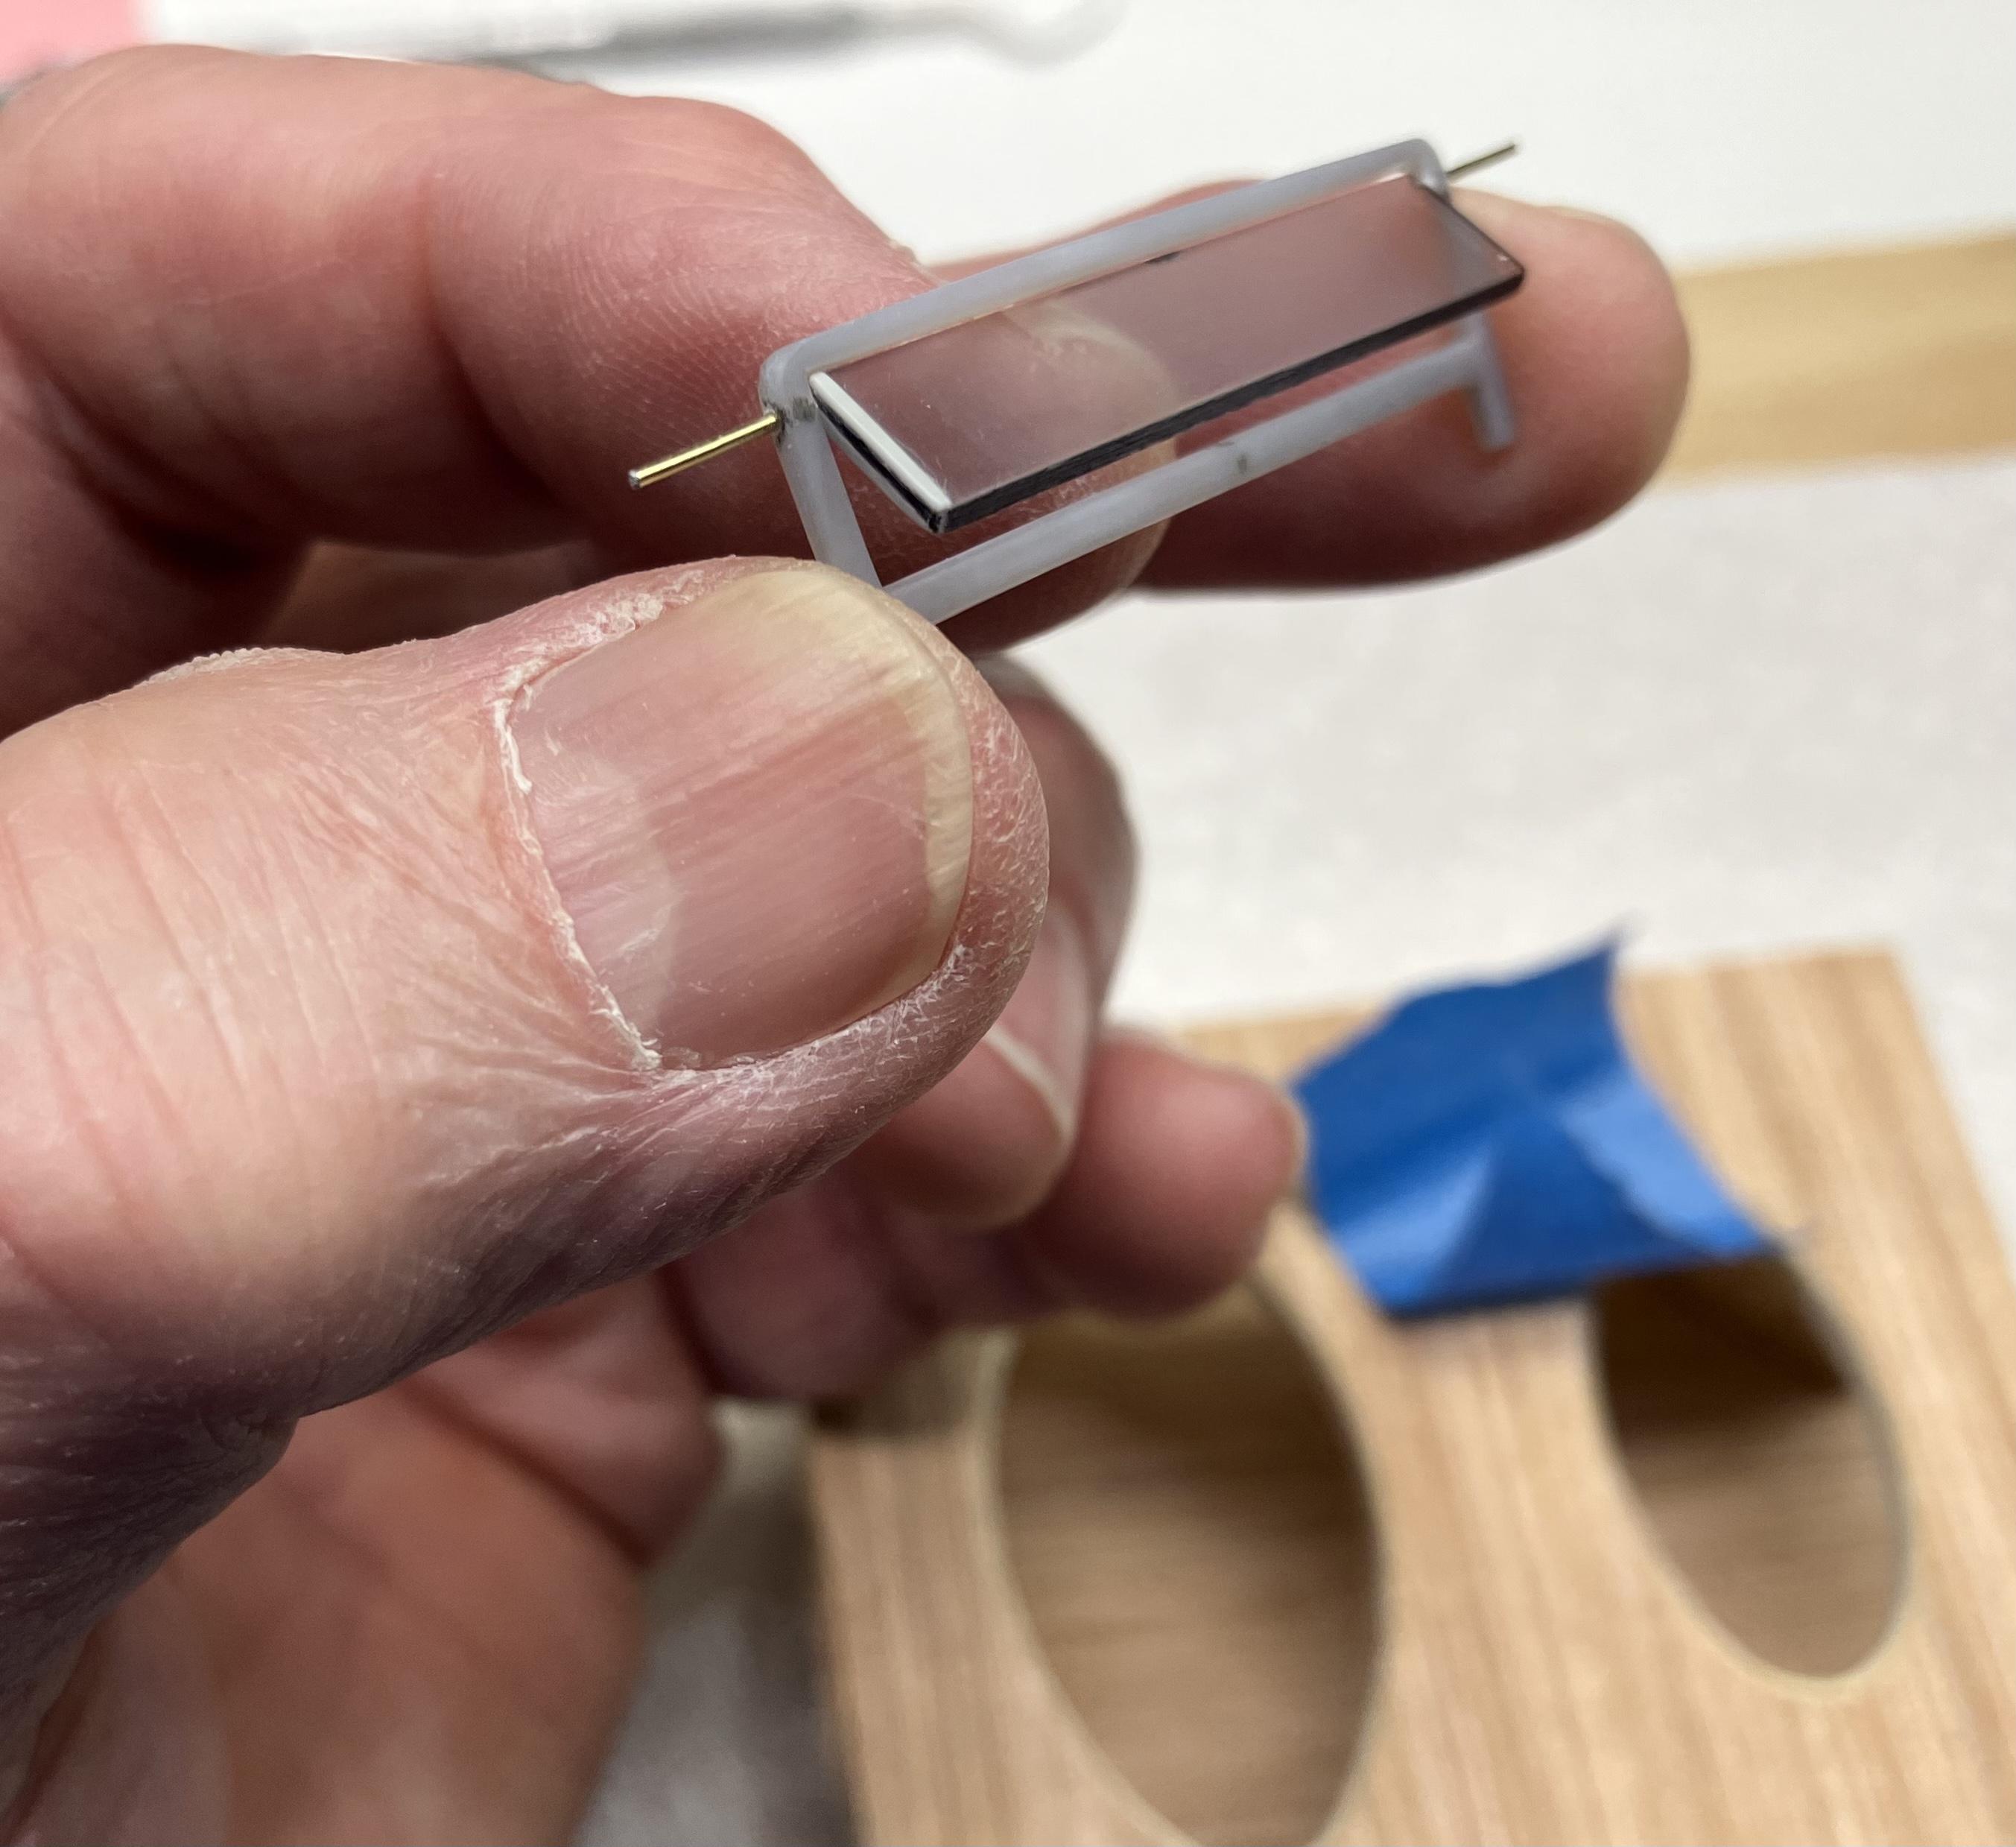
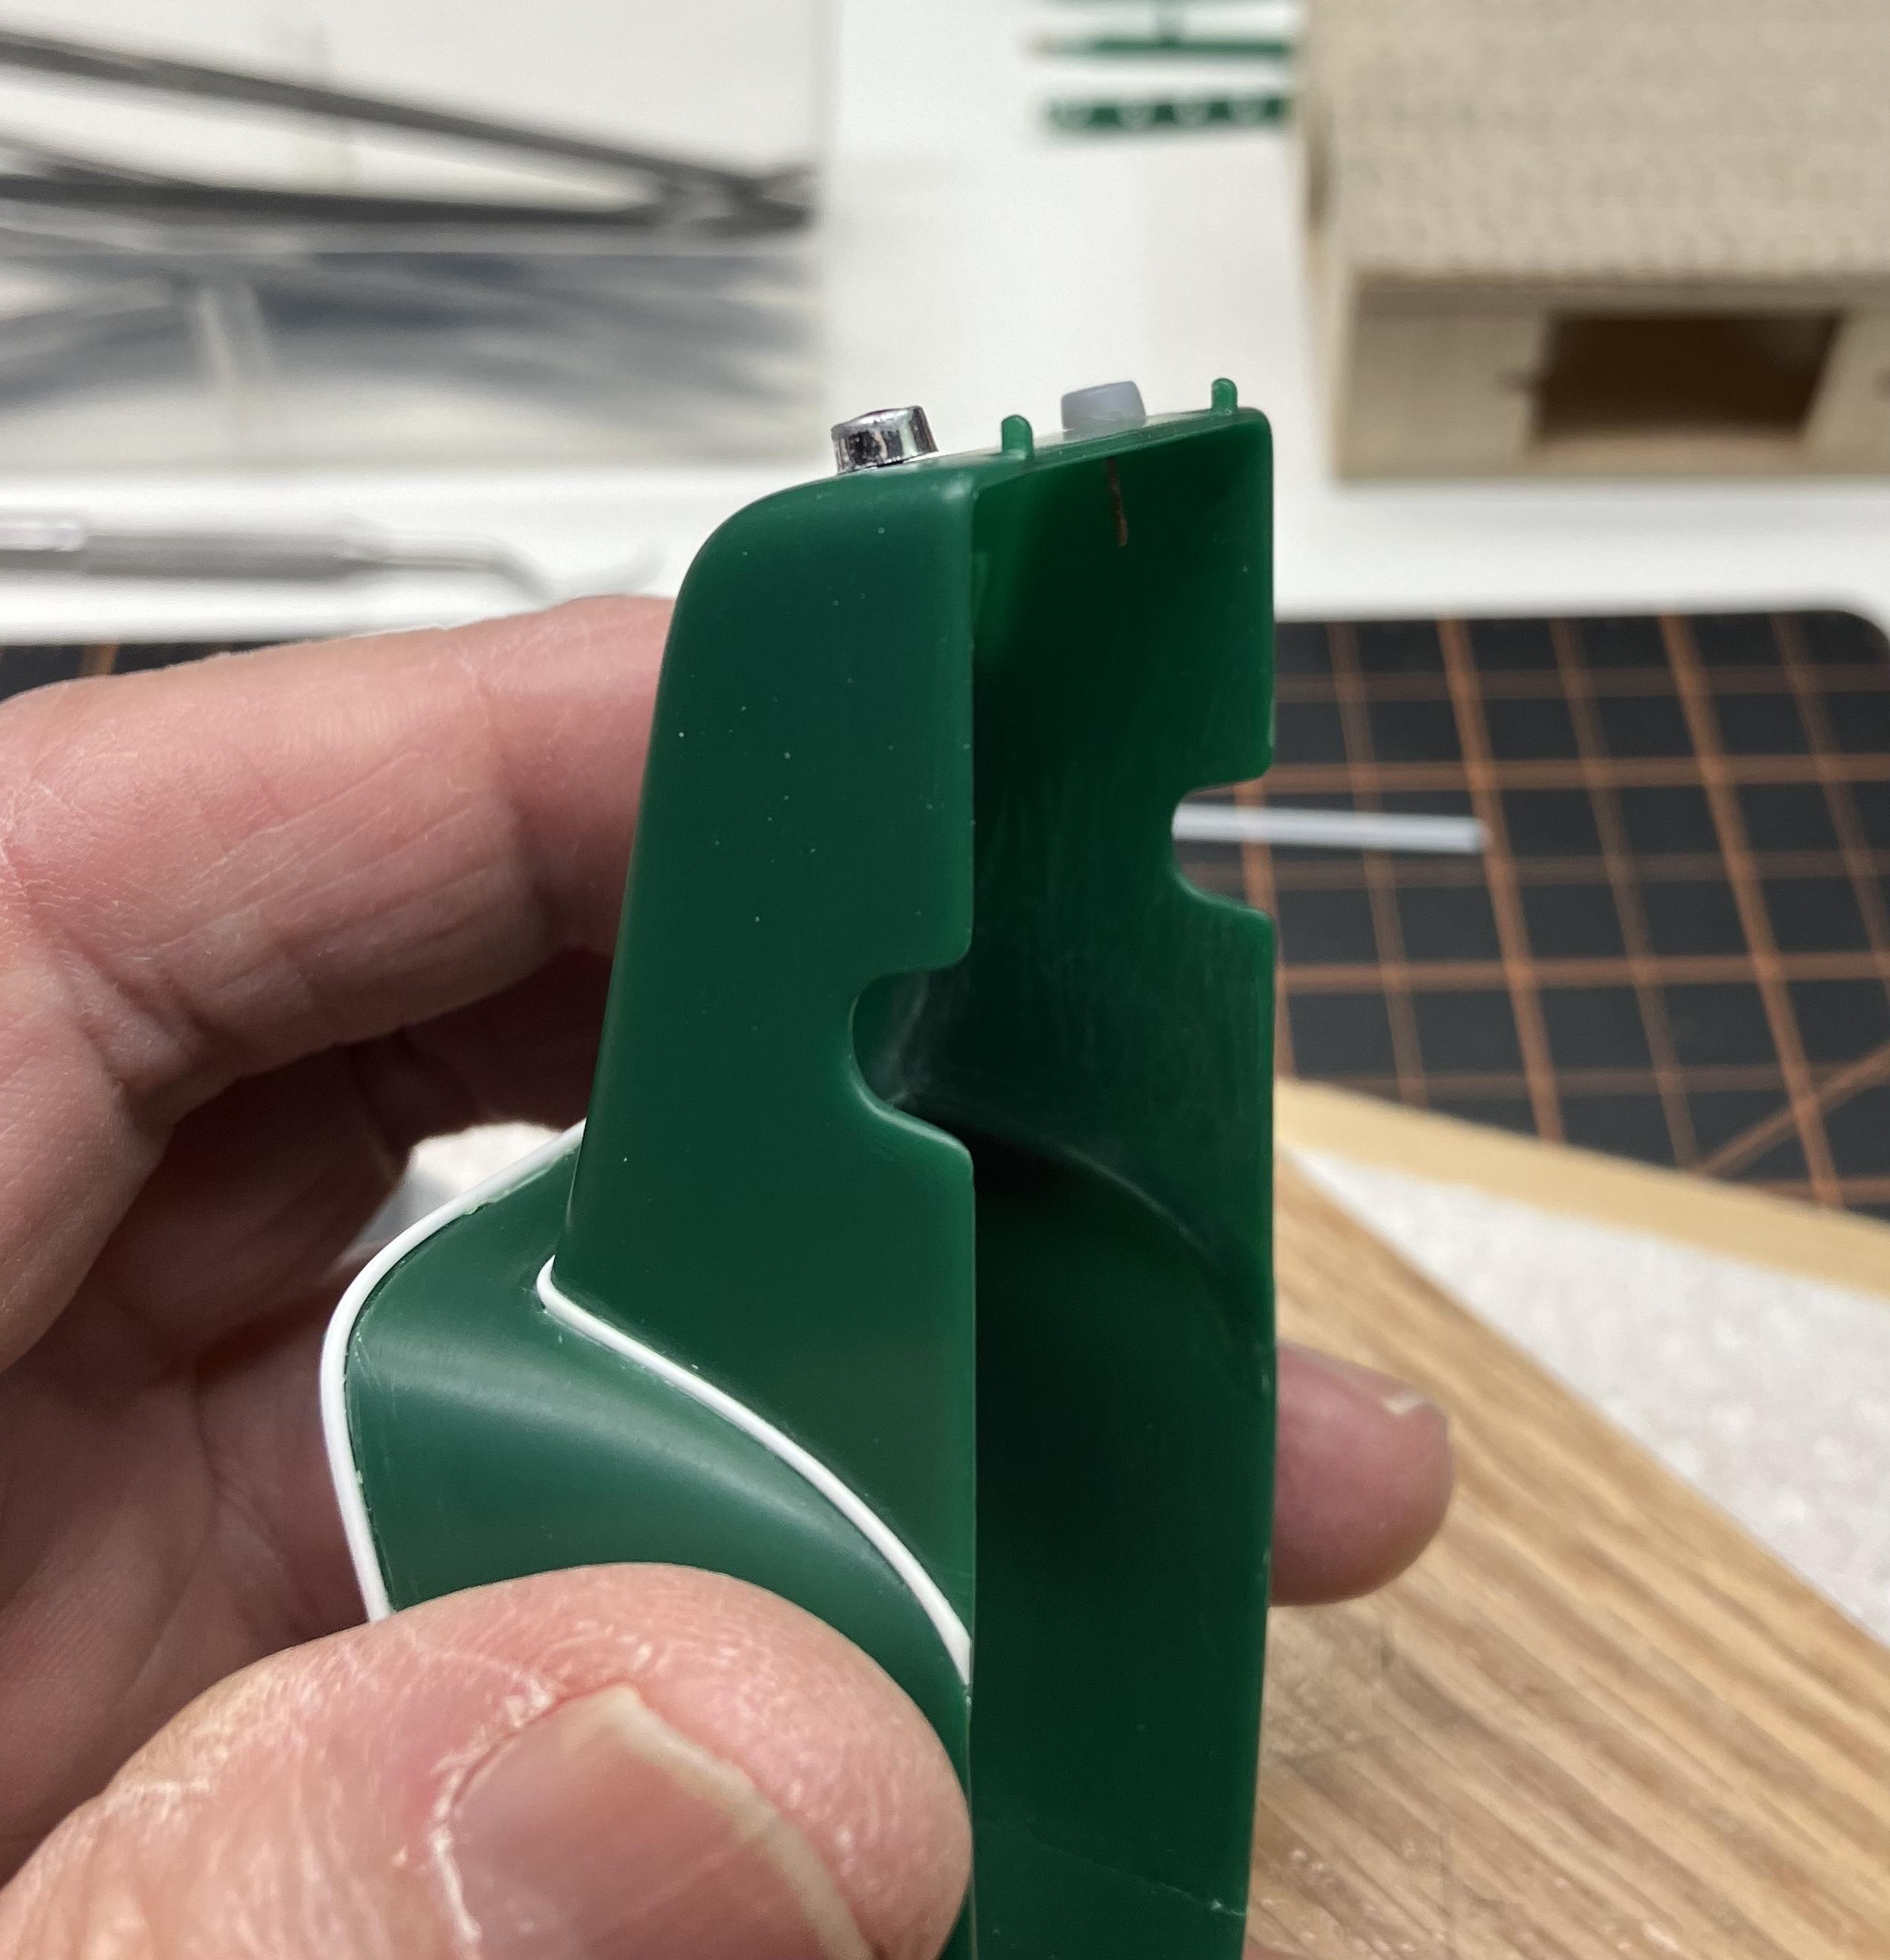
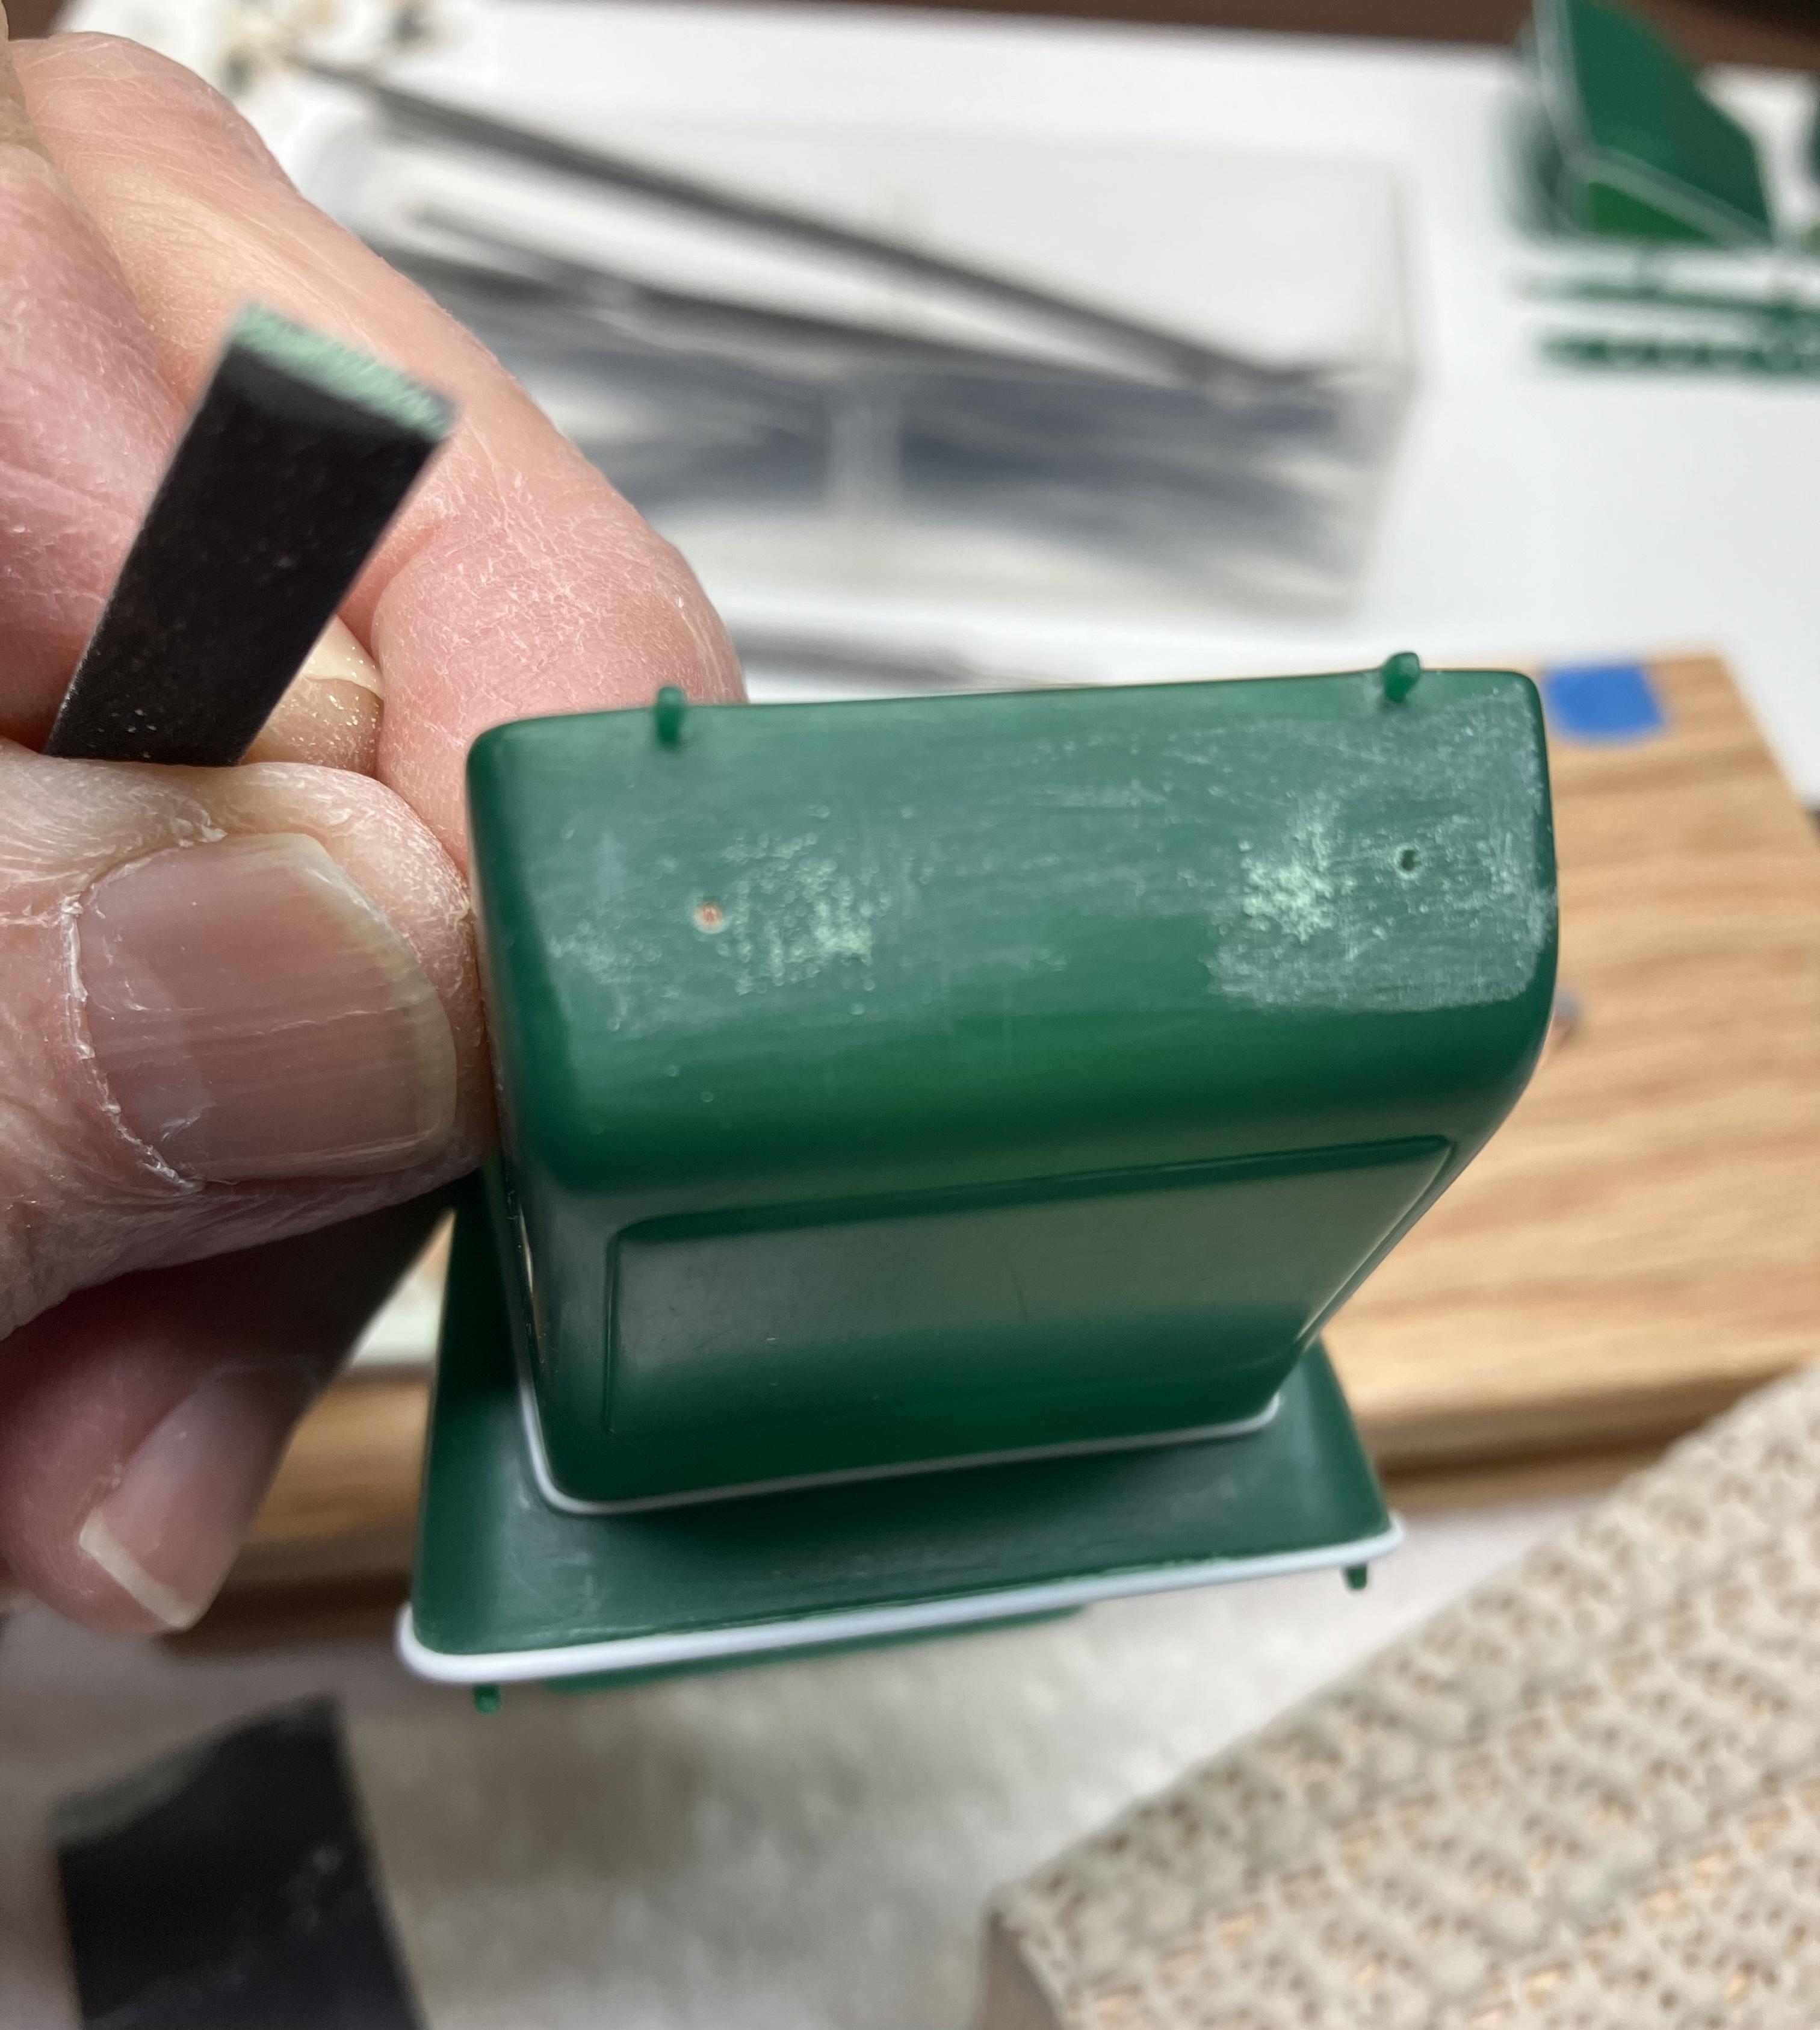
The tail light area on my kit part had a slightly rounded surface running vertical. This keeps the tail lights from sitting flush on the body surface, which I thought left an unsightly gap around each tail light. I could foresee the glue wanting to ooze out when the lights were put in place. Also, I wasn’t pleased with my previous work on the tail lights so I made the decision to redo the lights. First, I carefully removed the clear red paint and the blue sequin dot from the light using dental tools and the like. This allowed me to open up the area in which the clear red paint will again be applied. The light was sanded smooth and I took the opportunity to drop the height of the tail light so it would not stand so proud off the body; I think this looks better to my eyes. Second, I made up a couple of wire pins for the lights to help keep the lights on the body during the work. Then the mounting holes were drilled through the body to match the wire pins. Thirdly, various metal hobby files, a #11 blade, and various sandpaper grits were used to flatten the surface where each light will be mounted. Each light location was outlined with a graphite pencil lead so I could keep the work localized to each tail light. Finally, some careful sanding should remove the work scratches and get the body cleaned up again. I am pleased with the results. A fiddly little thing perhaps, however, now I feel better having made the change. Joe
-
Or when she was trying to get her younger son to eat at the Supper table! She looked like she was having as much fun or more than the kid was having. She really helped to pull A Christmas Story together and make the movie a fun event to watch. Joe
-
Haven't gone any where, my friend. Went back and edited my above post so as to be a bit more clear. ? Joe
-
I thought she was a great actress in A Christmas Story; a great Mom character to all the family members in the movie. We watch the movie every Christmas Season. Rest Peacefully. Joe
-
Now this is a head turner! Well done! ? Joe