Joe Nunes
-
Posts
1,292 -
Joined
-
Last visited
Content Type
Profiles
Forums
Events
Gallery
Everything posted by Joe Nunes
-
Thank you for sharing the above post and photos. I am not knowledgeable as to airbrush history and use. I have a Badger Crescendo airbrush and haven't had the "courage" to use it yet. ???? I do, however, really enjoy reading about historical aspects of items from the early 20th century and find this airbrush design from the early 1900's to be quite fascinating. Joe
- 39,147 replies
-
- 1
-

-
- johan
- glue bombs
- (and 1 more)
-
This looks like something I would like to see at 1:1 car show. Nice build. Well done! ? Joe
-
A very nice model with a great color combination. The White with Red interior is certainly appealing. Well done! ? Joe
-
An outstanding build! Great color combination and the engine detail work is really nice. Well done! ? Joe
-
Bullnose Kenworth Race Hauler
Joe Nunes replied to DRIPTROIT 71's topic in WIP: Model Trucks: Big Rigs and Heavy Equipment
Nice start on your model project. ? Joe -
Now this is an interesting piece of airbrush history. Thank you for the photos and sharing this with us. ? Joe
- 39,147 replies
-
- 2
-
-

-
- johan
- glue bombs
- (and 1 more)
-
Welcome to the forum, Anthony! Joe
-
Yes I do! Very nice build you have here and the details certainly help put this '36 Ford on the top shelf. Well done! ? Joe
-
Nice models! Looks like you may have had some fun with these kits. ? Well done! ? Joe
-
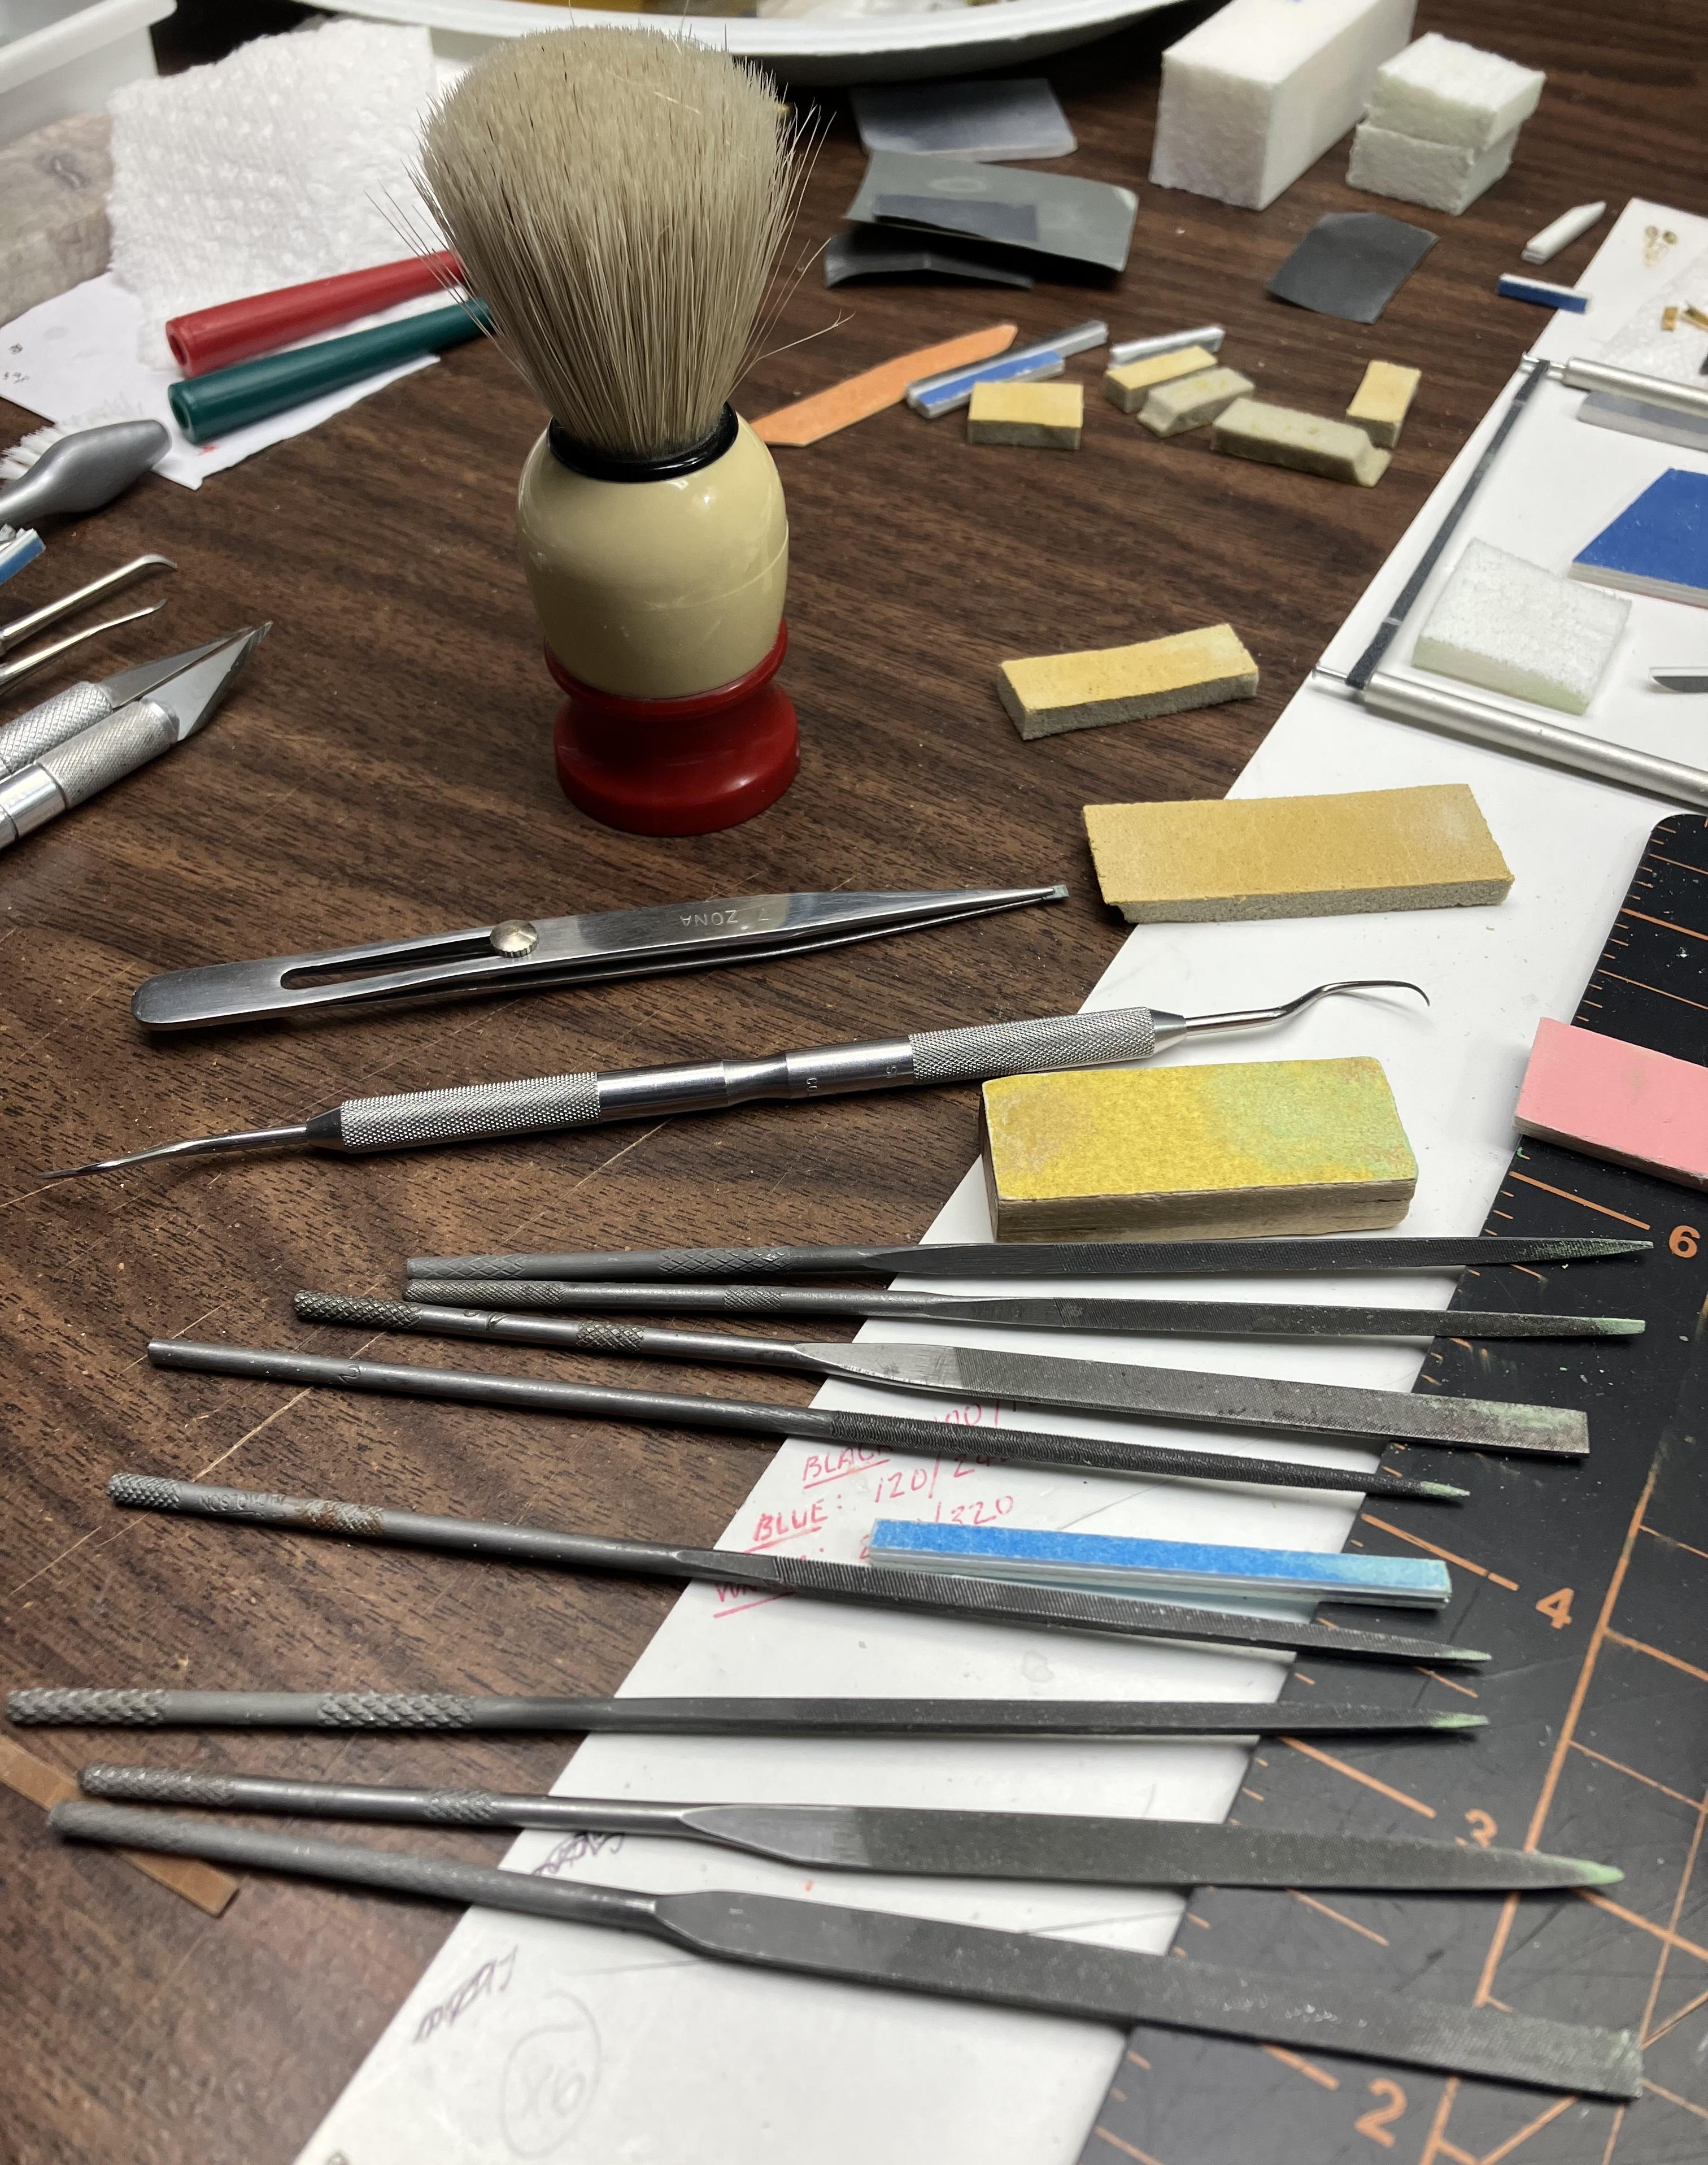
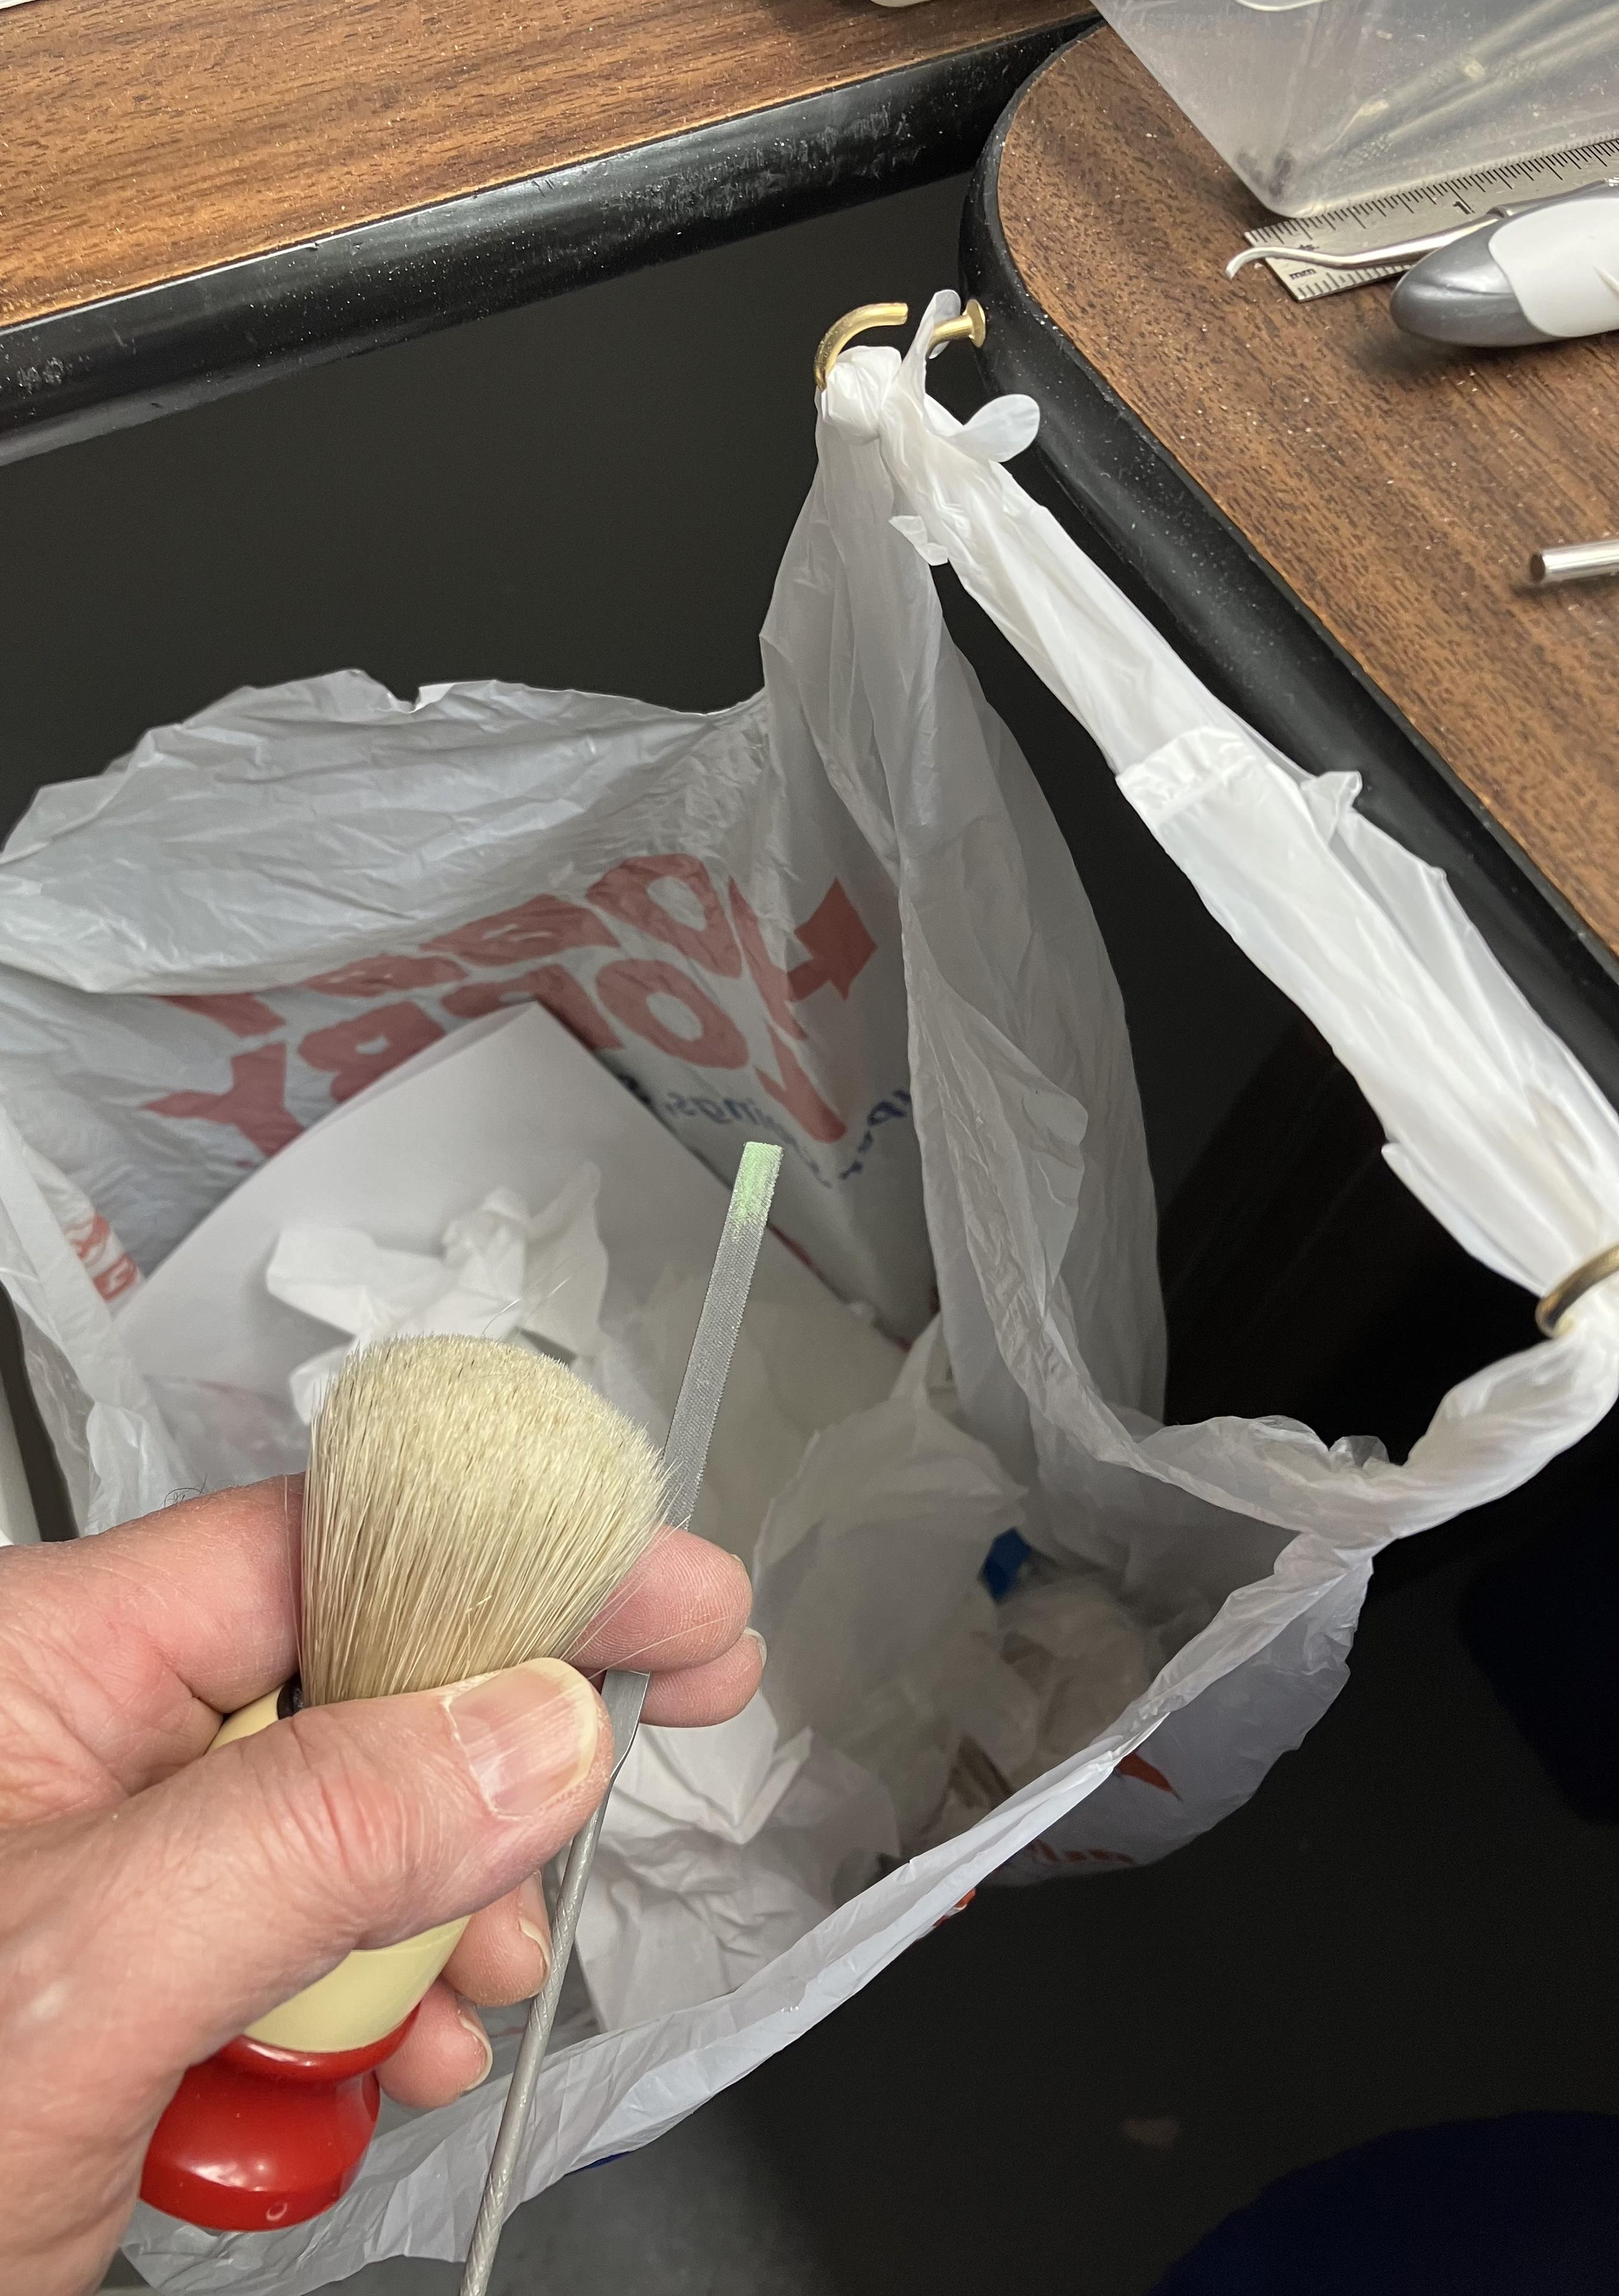
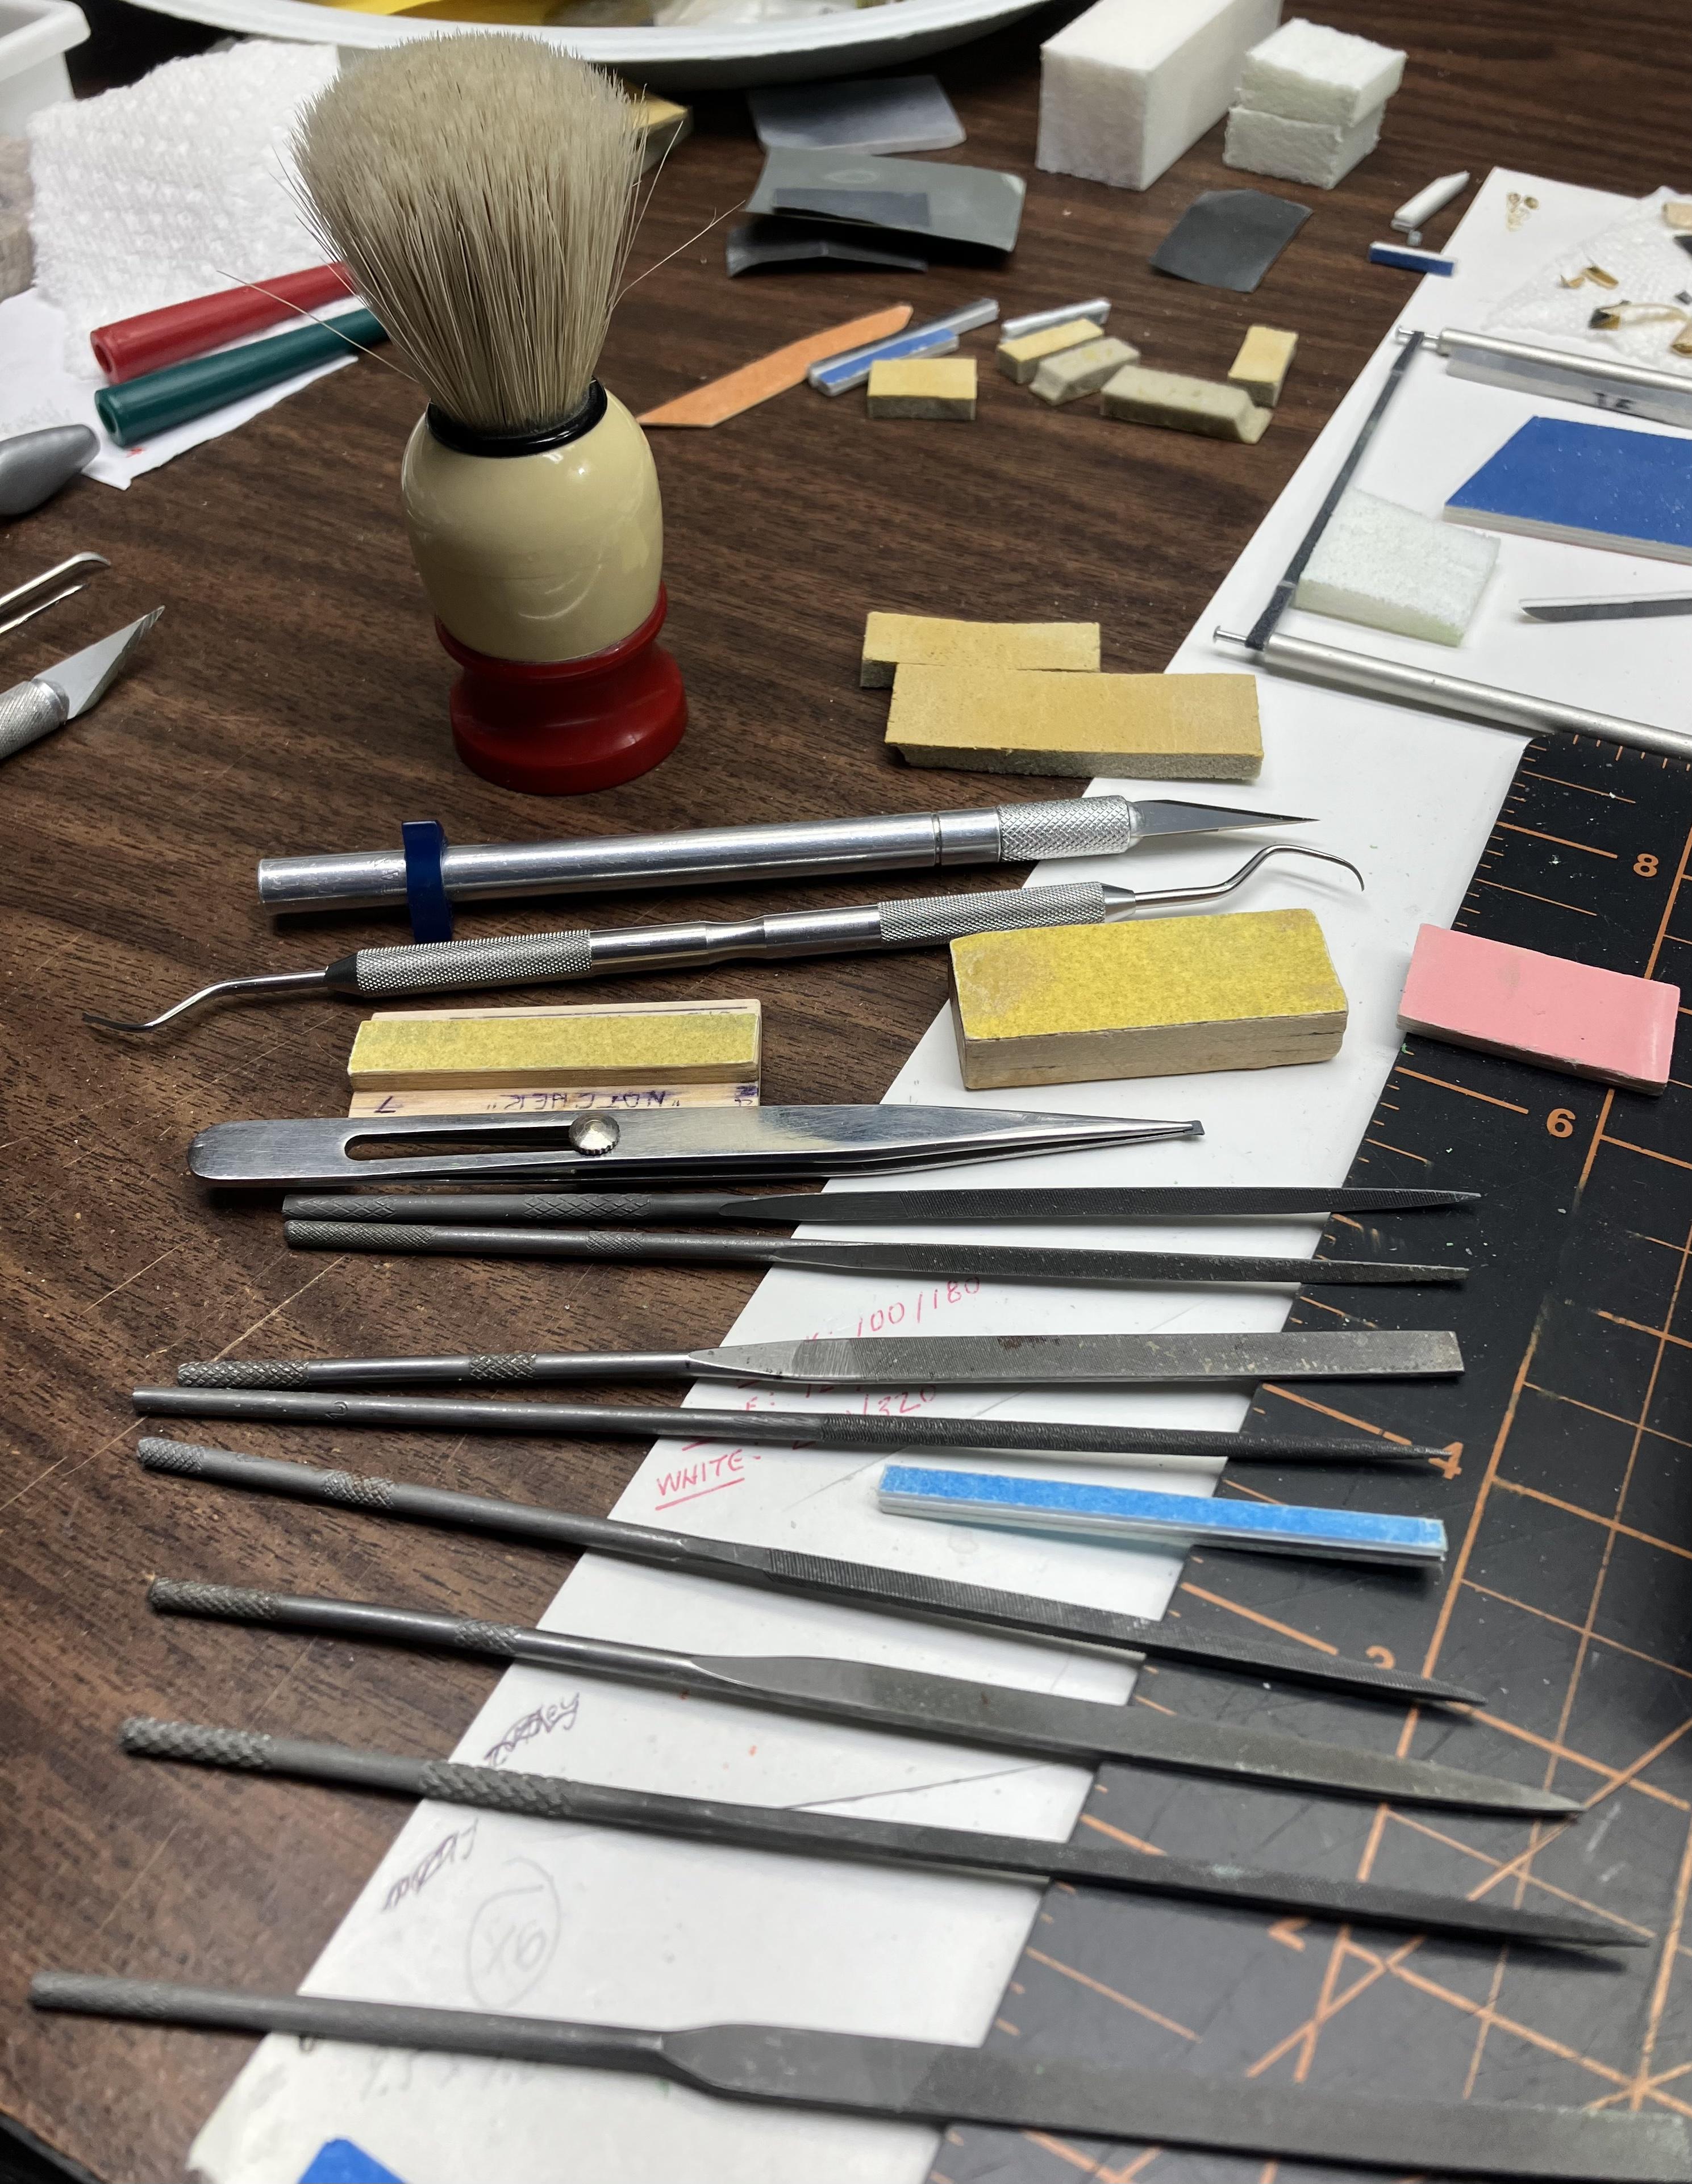
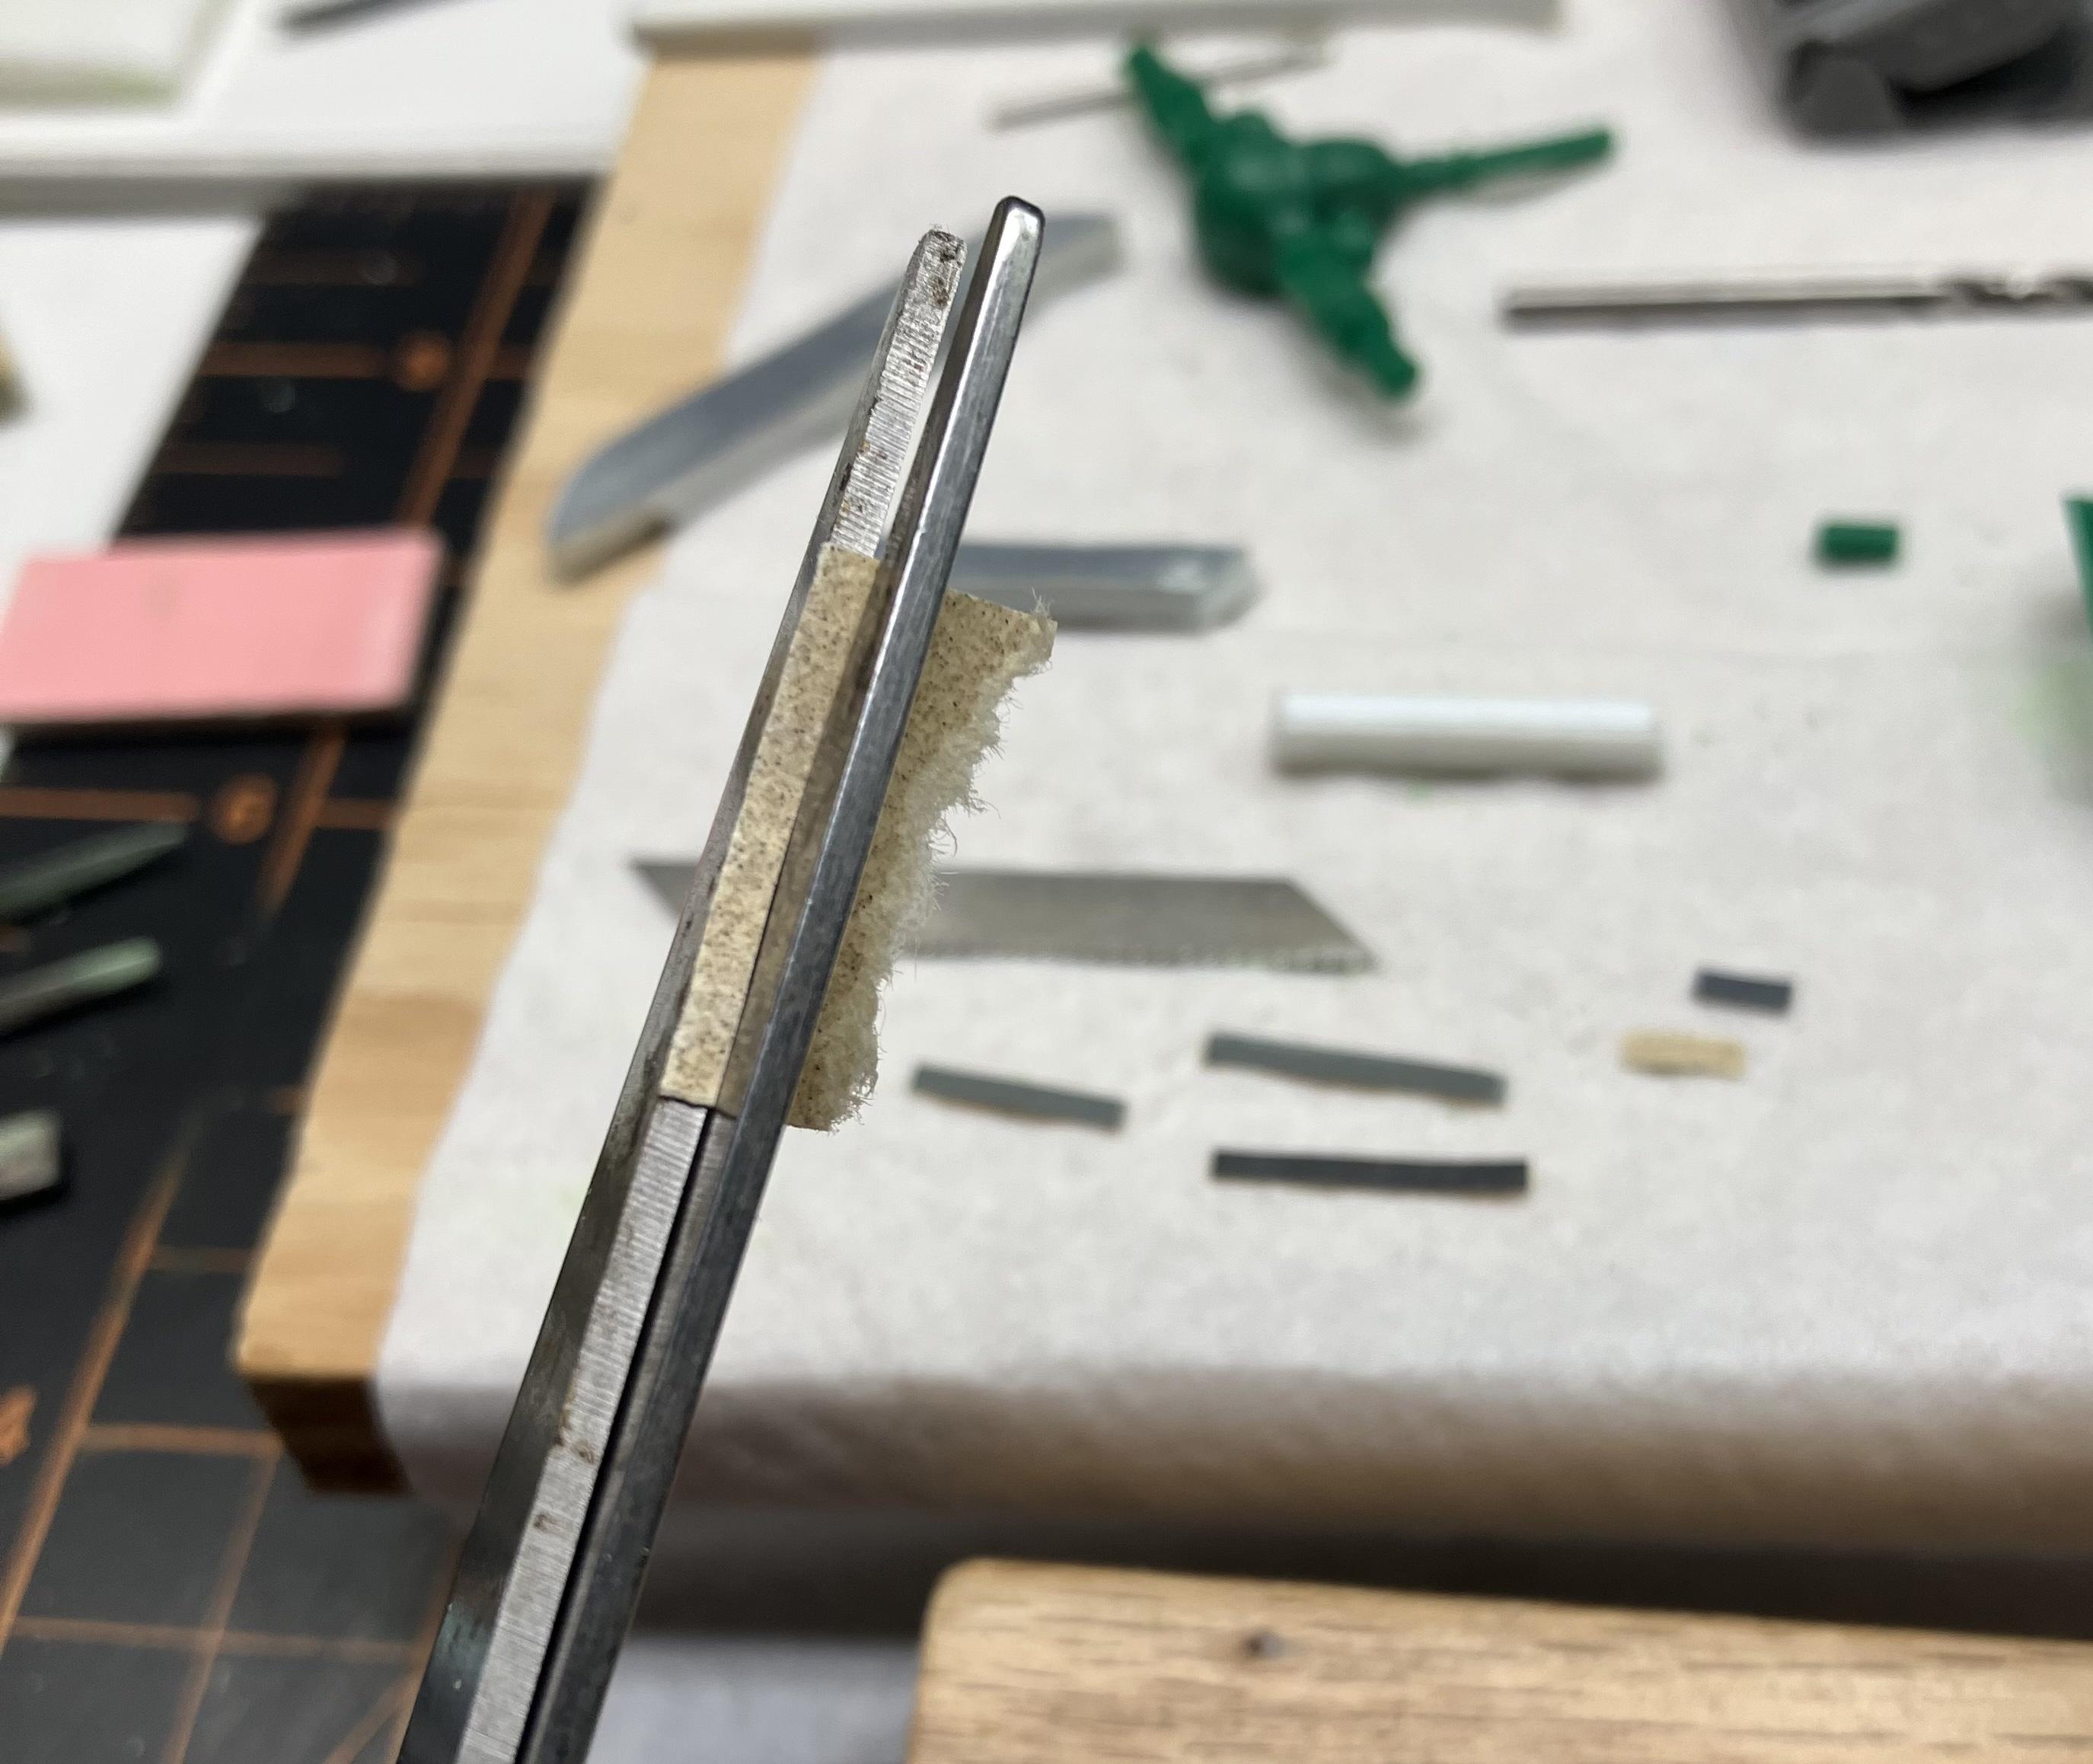
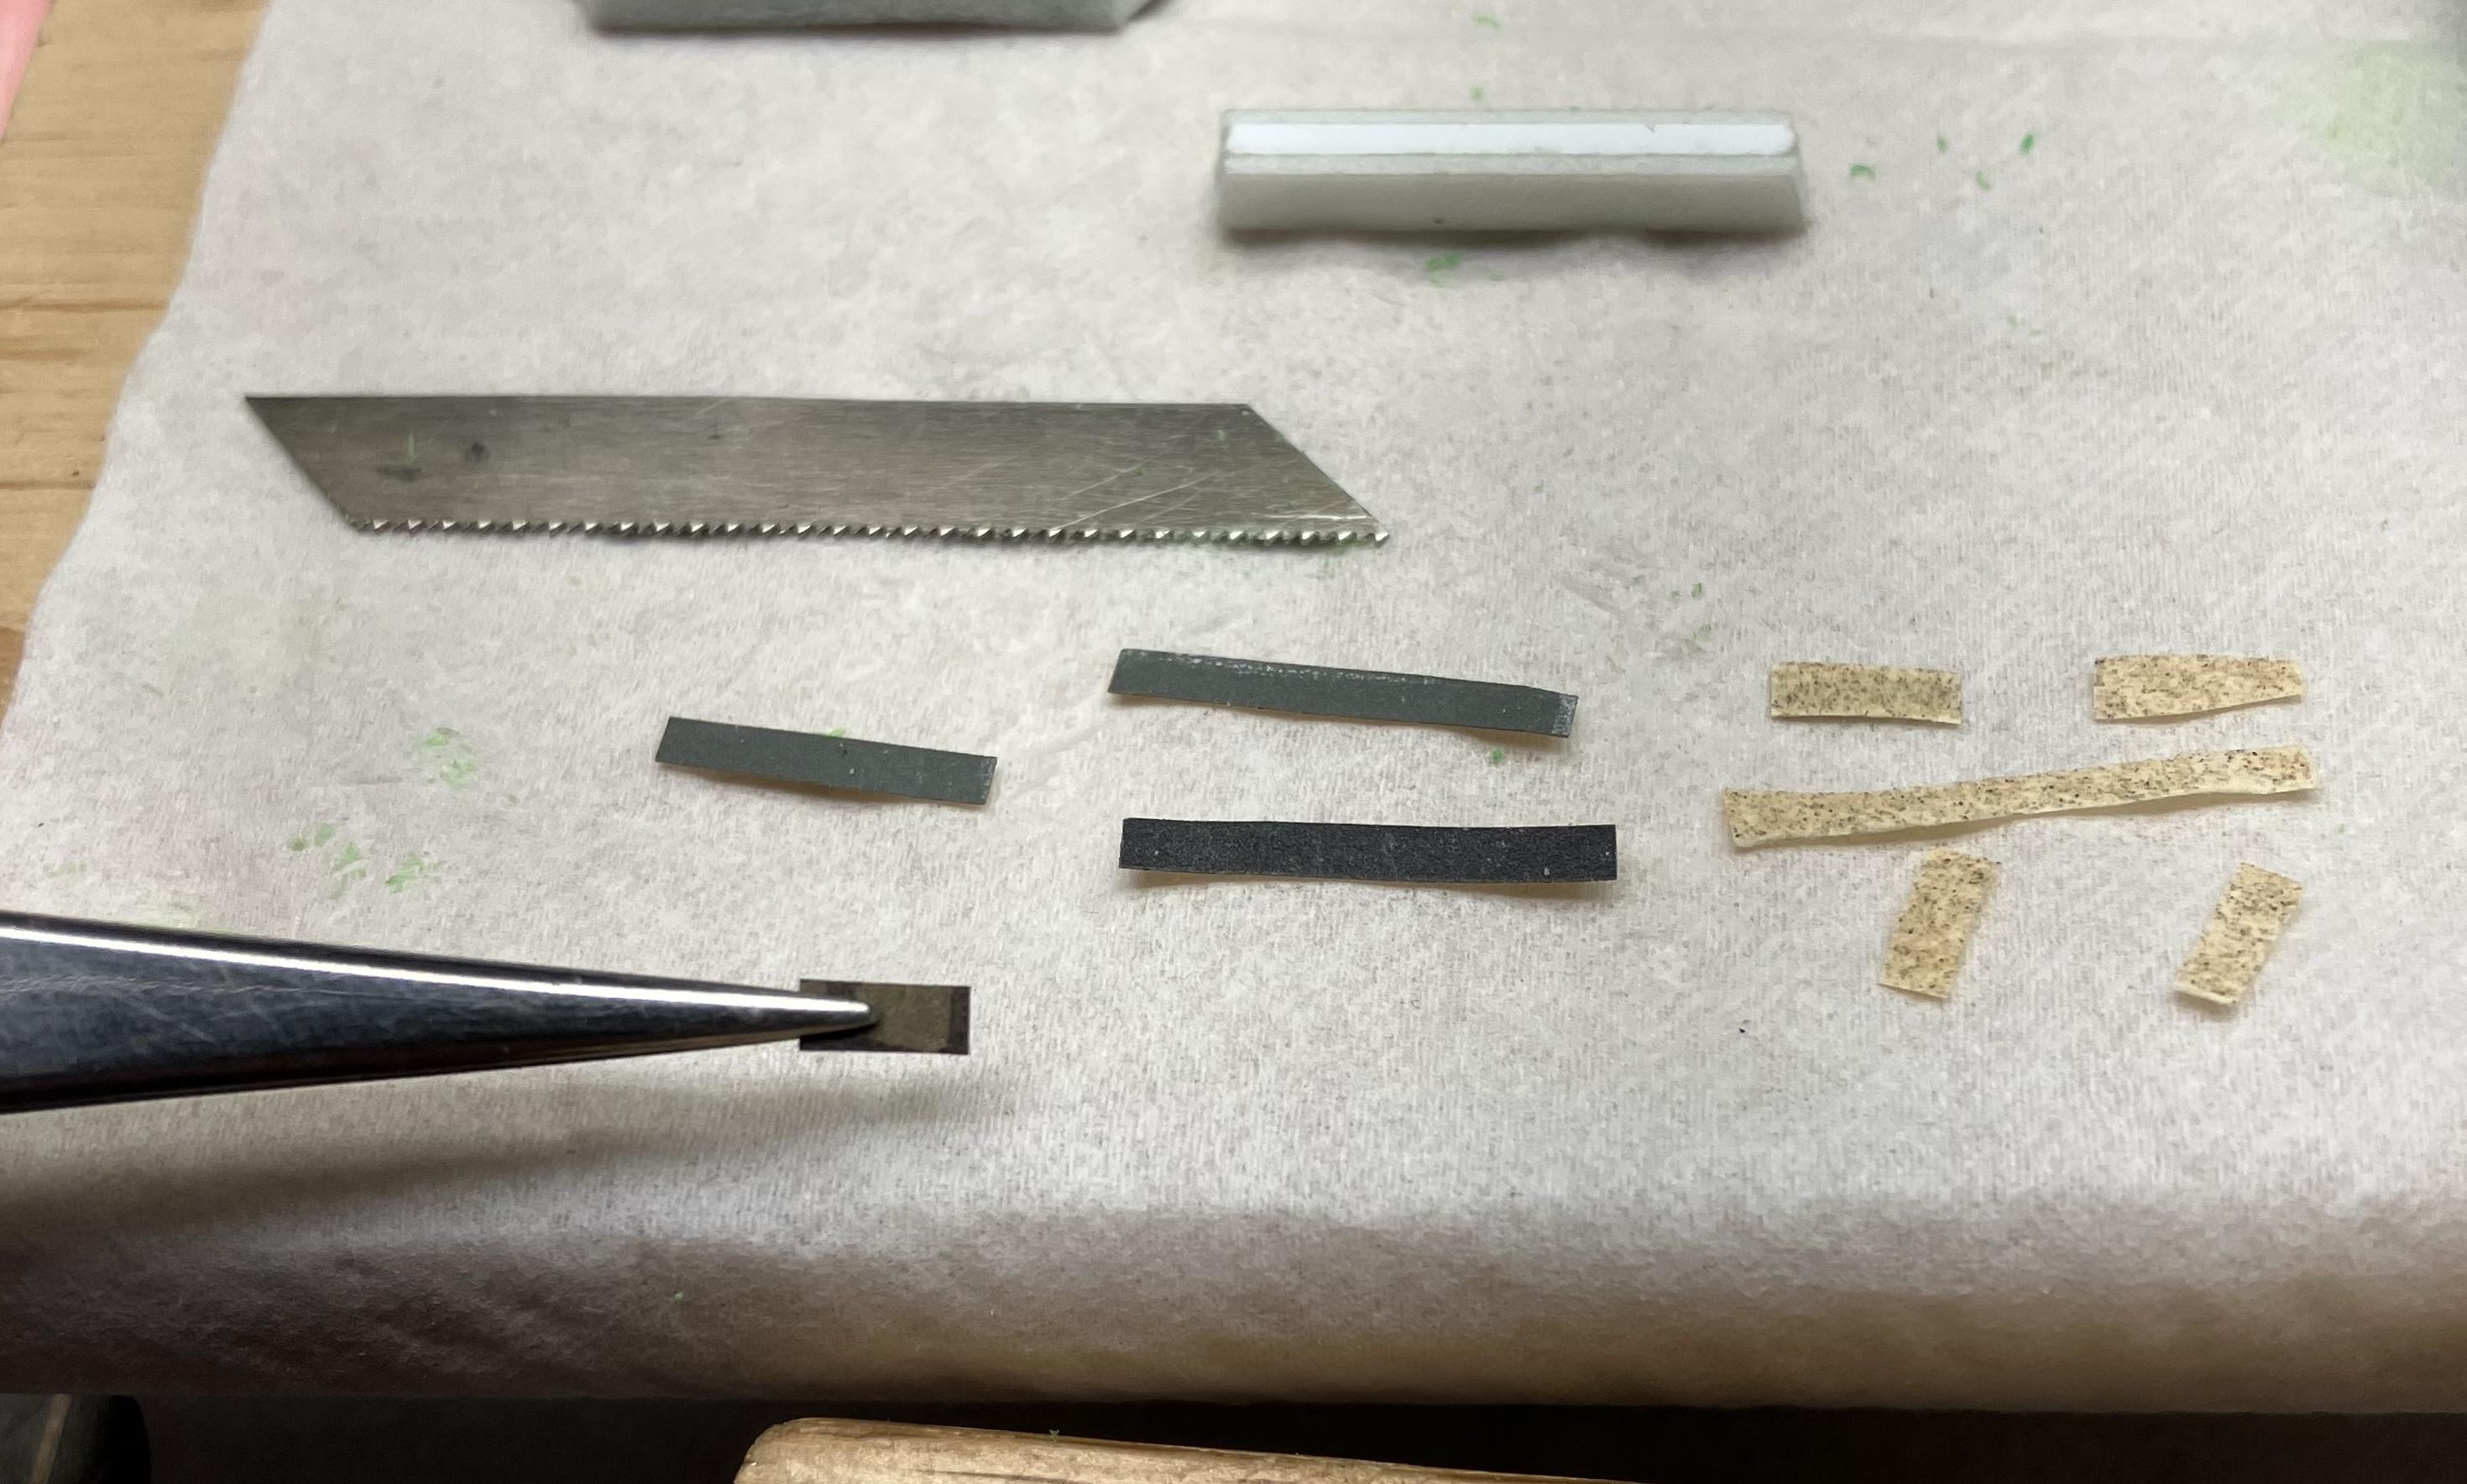
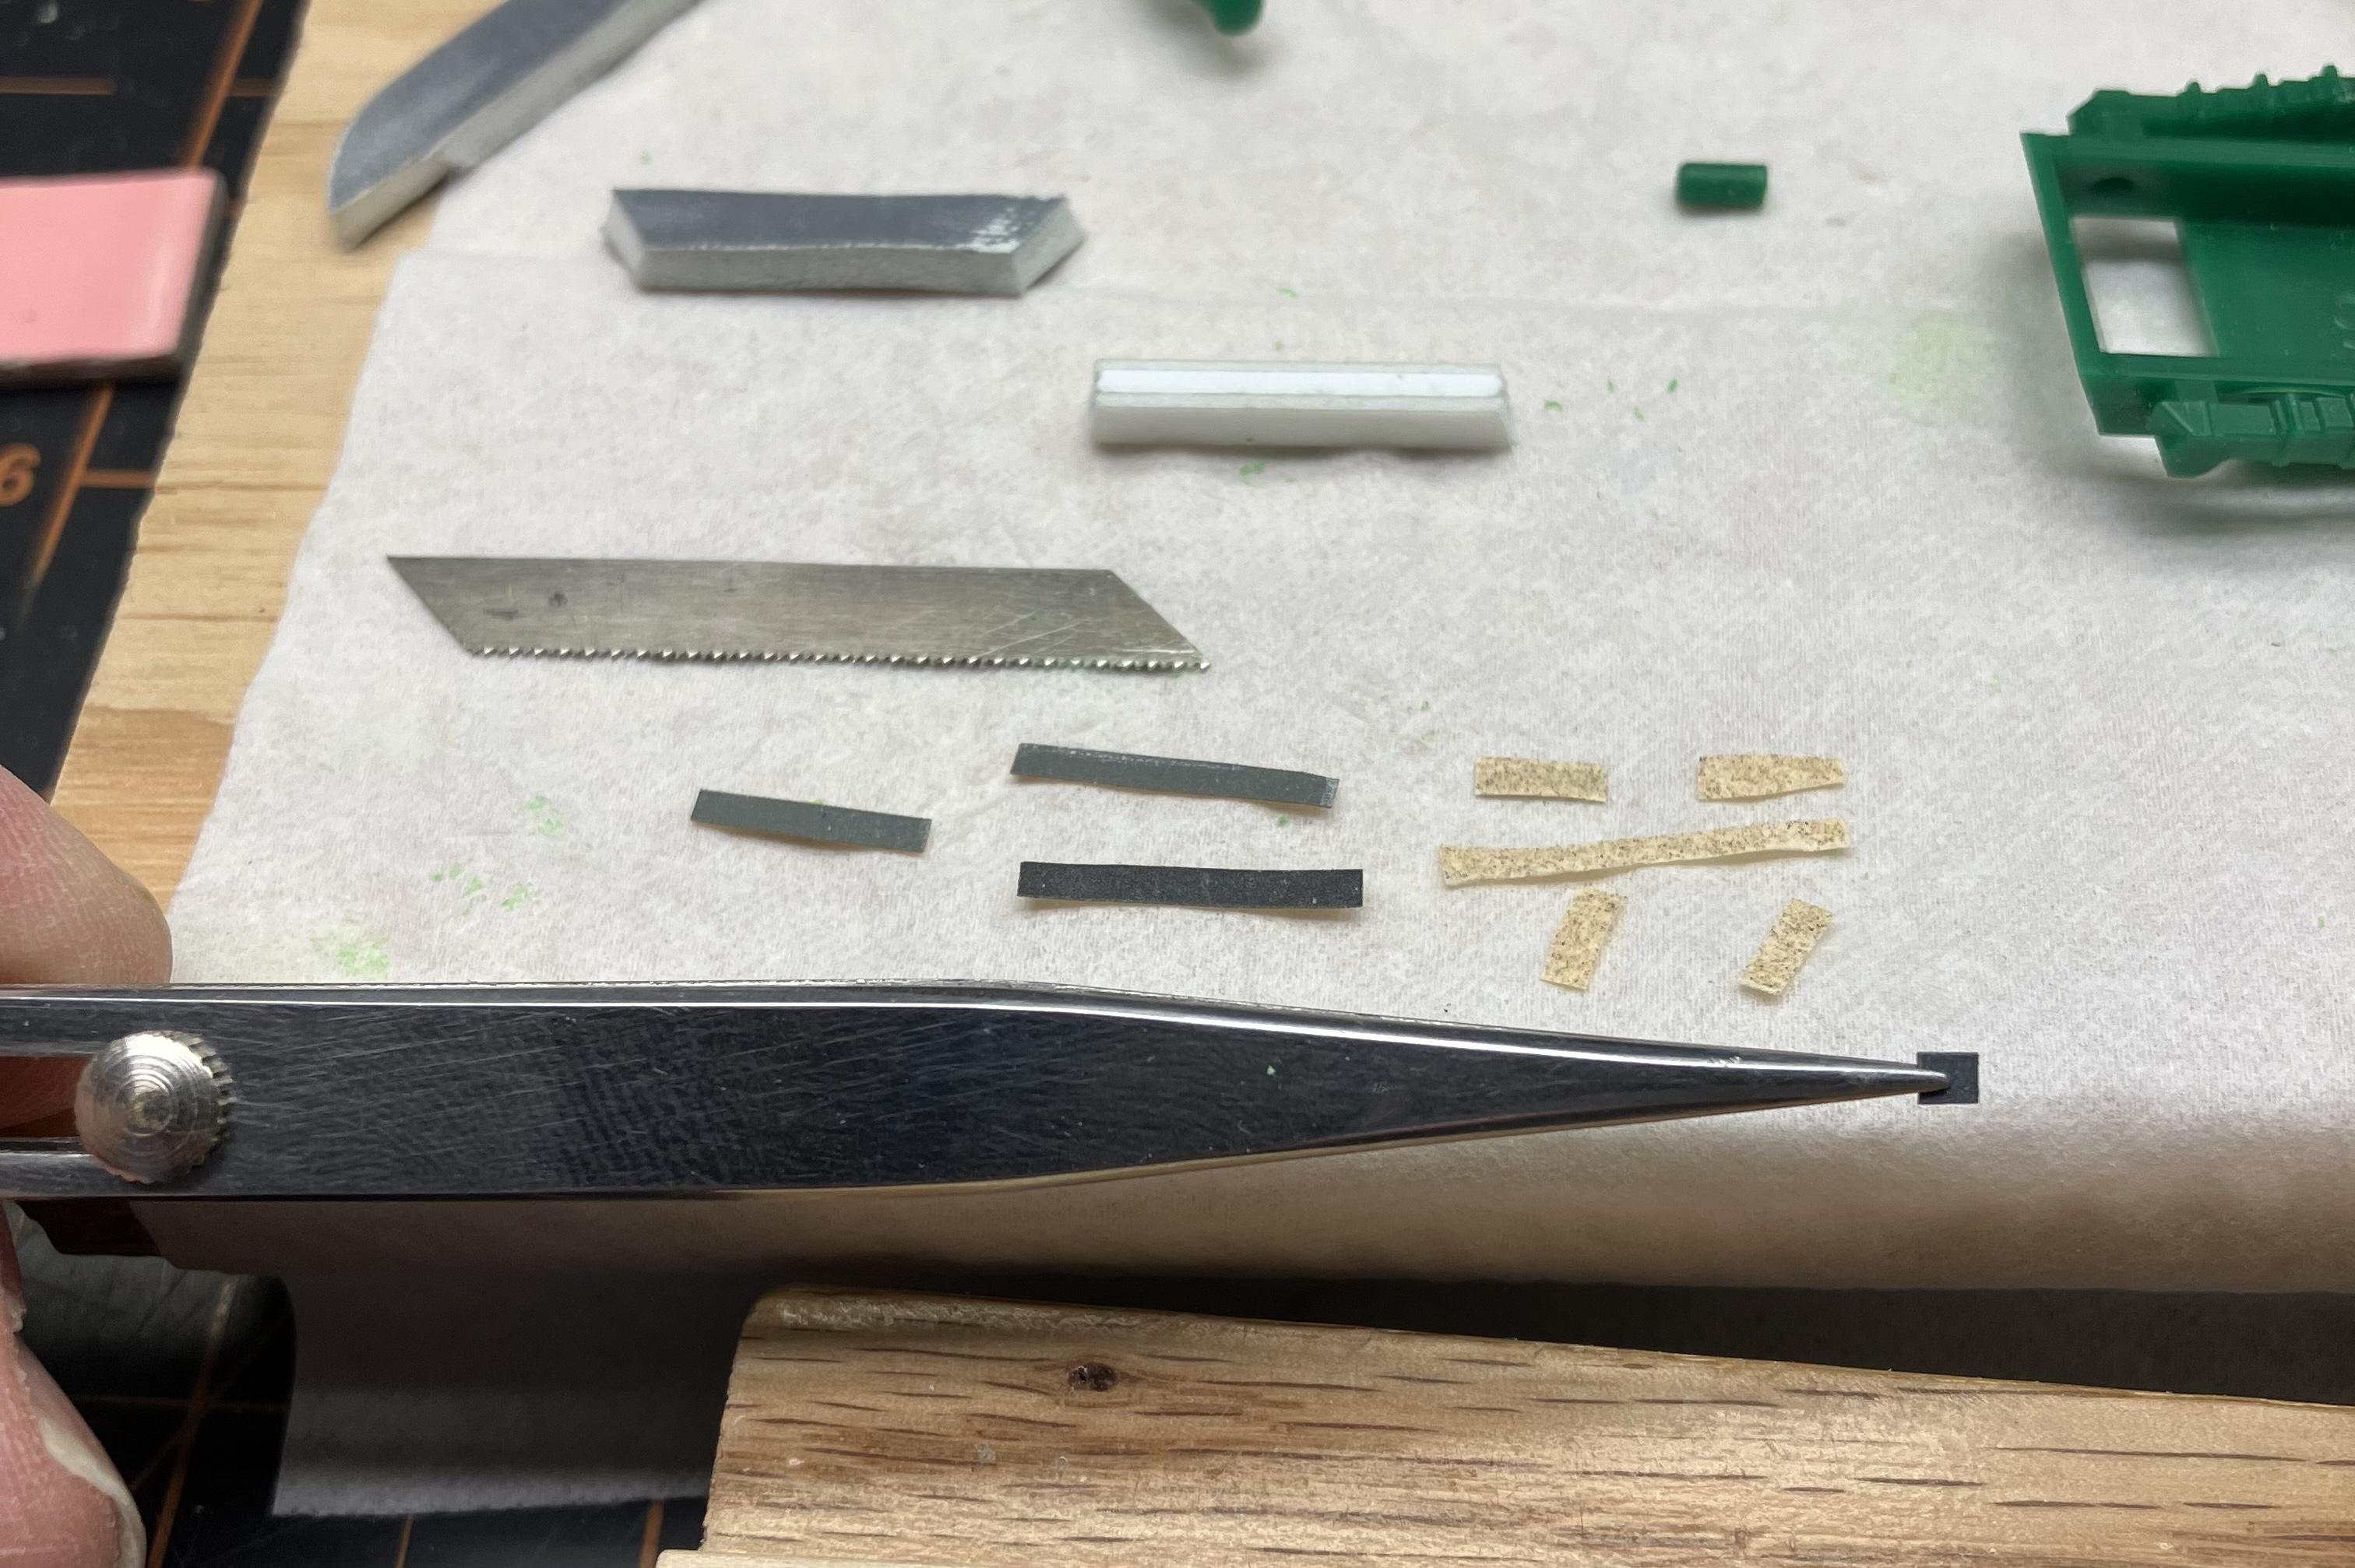
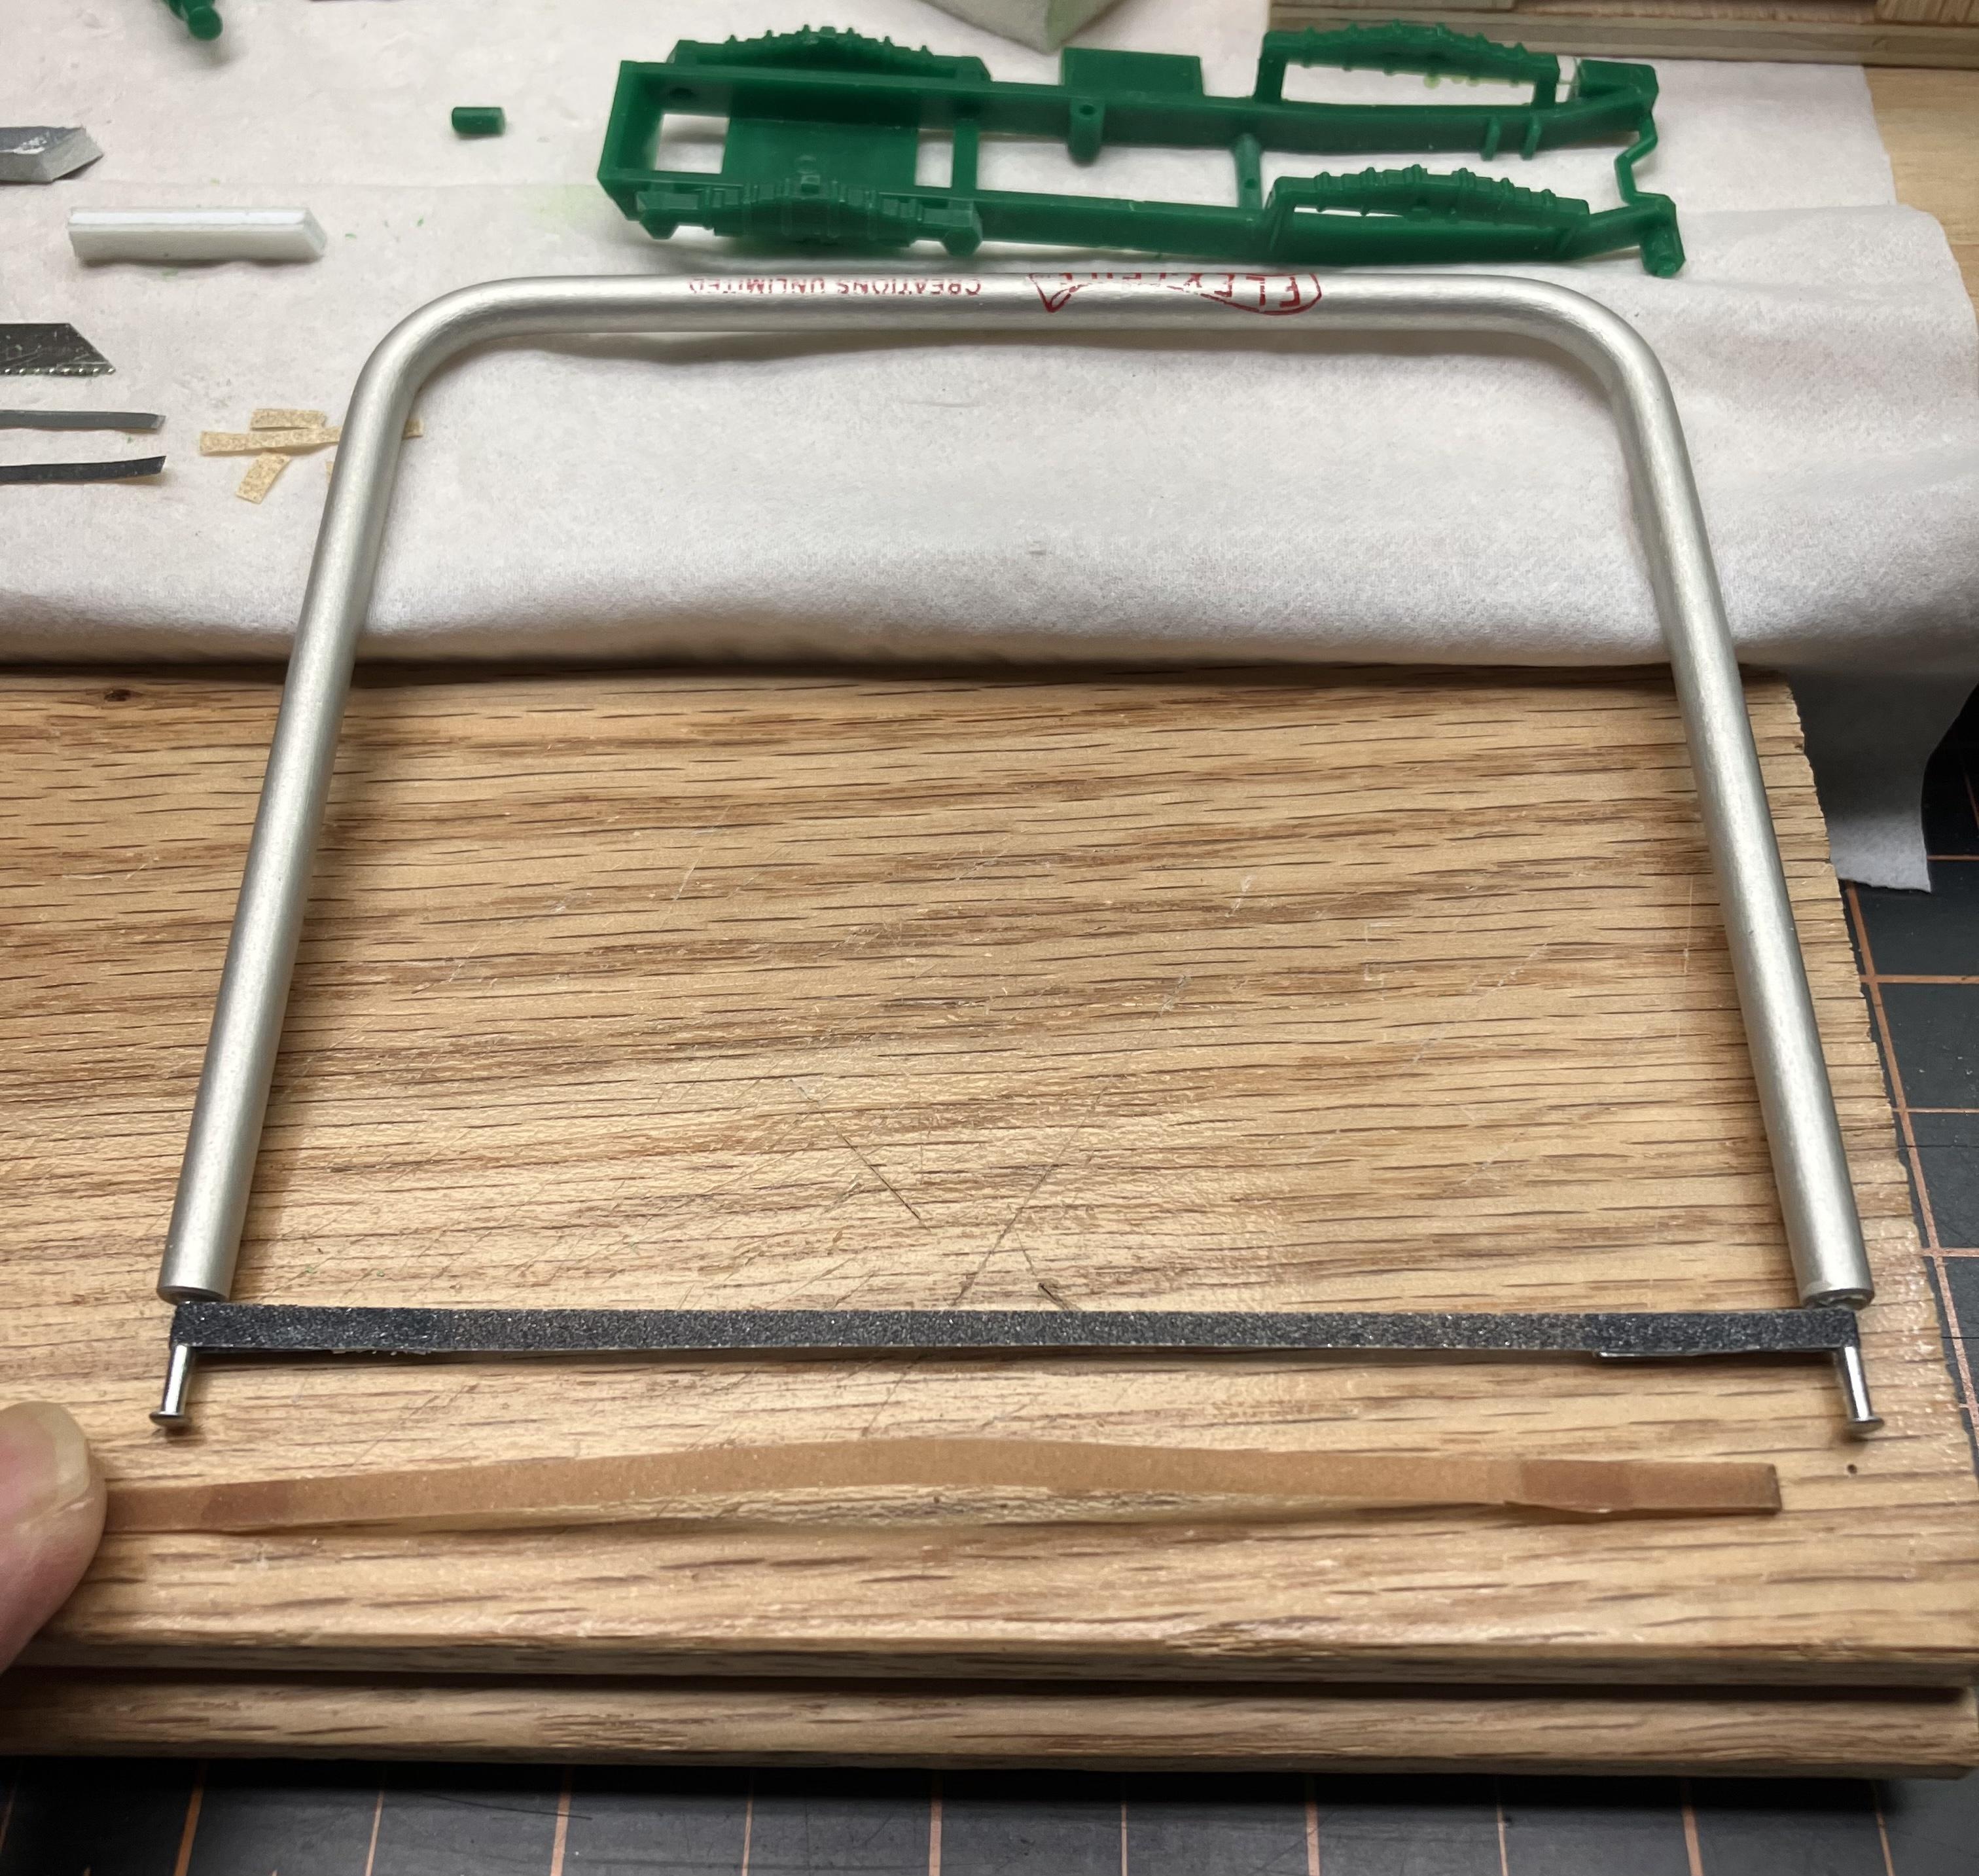
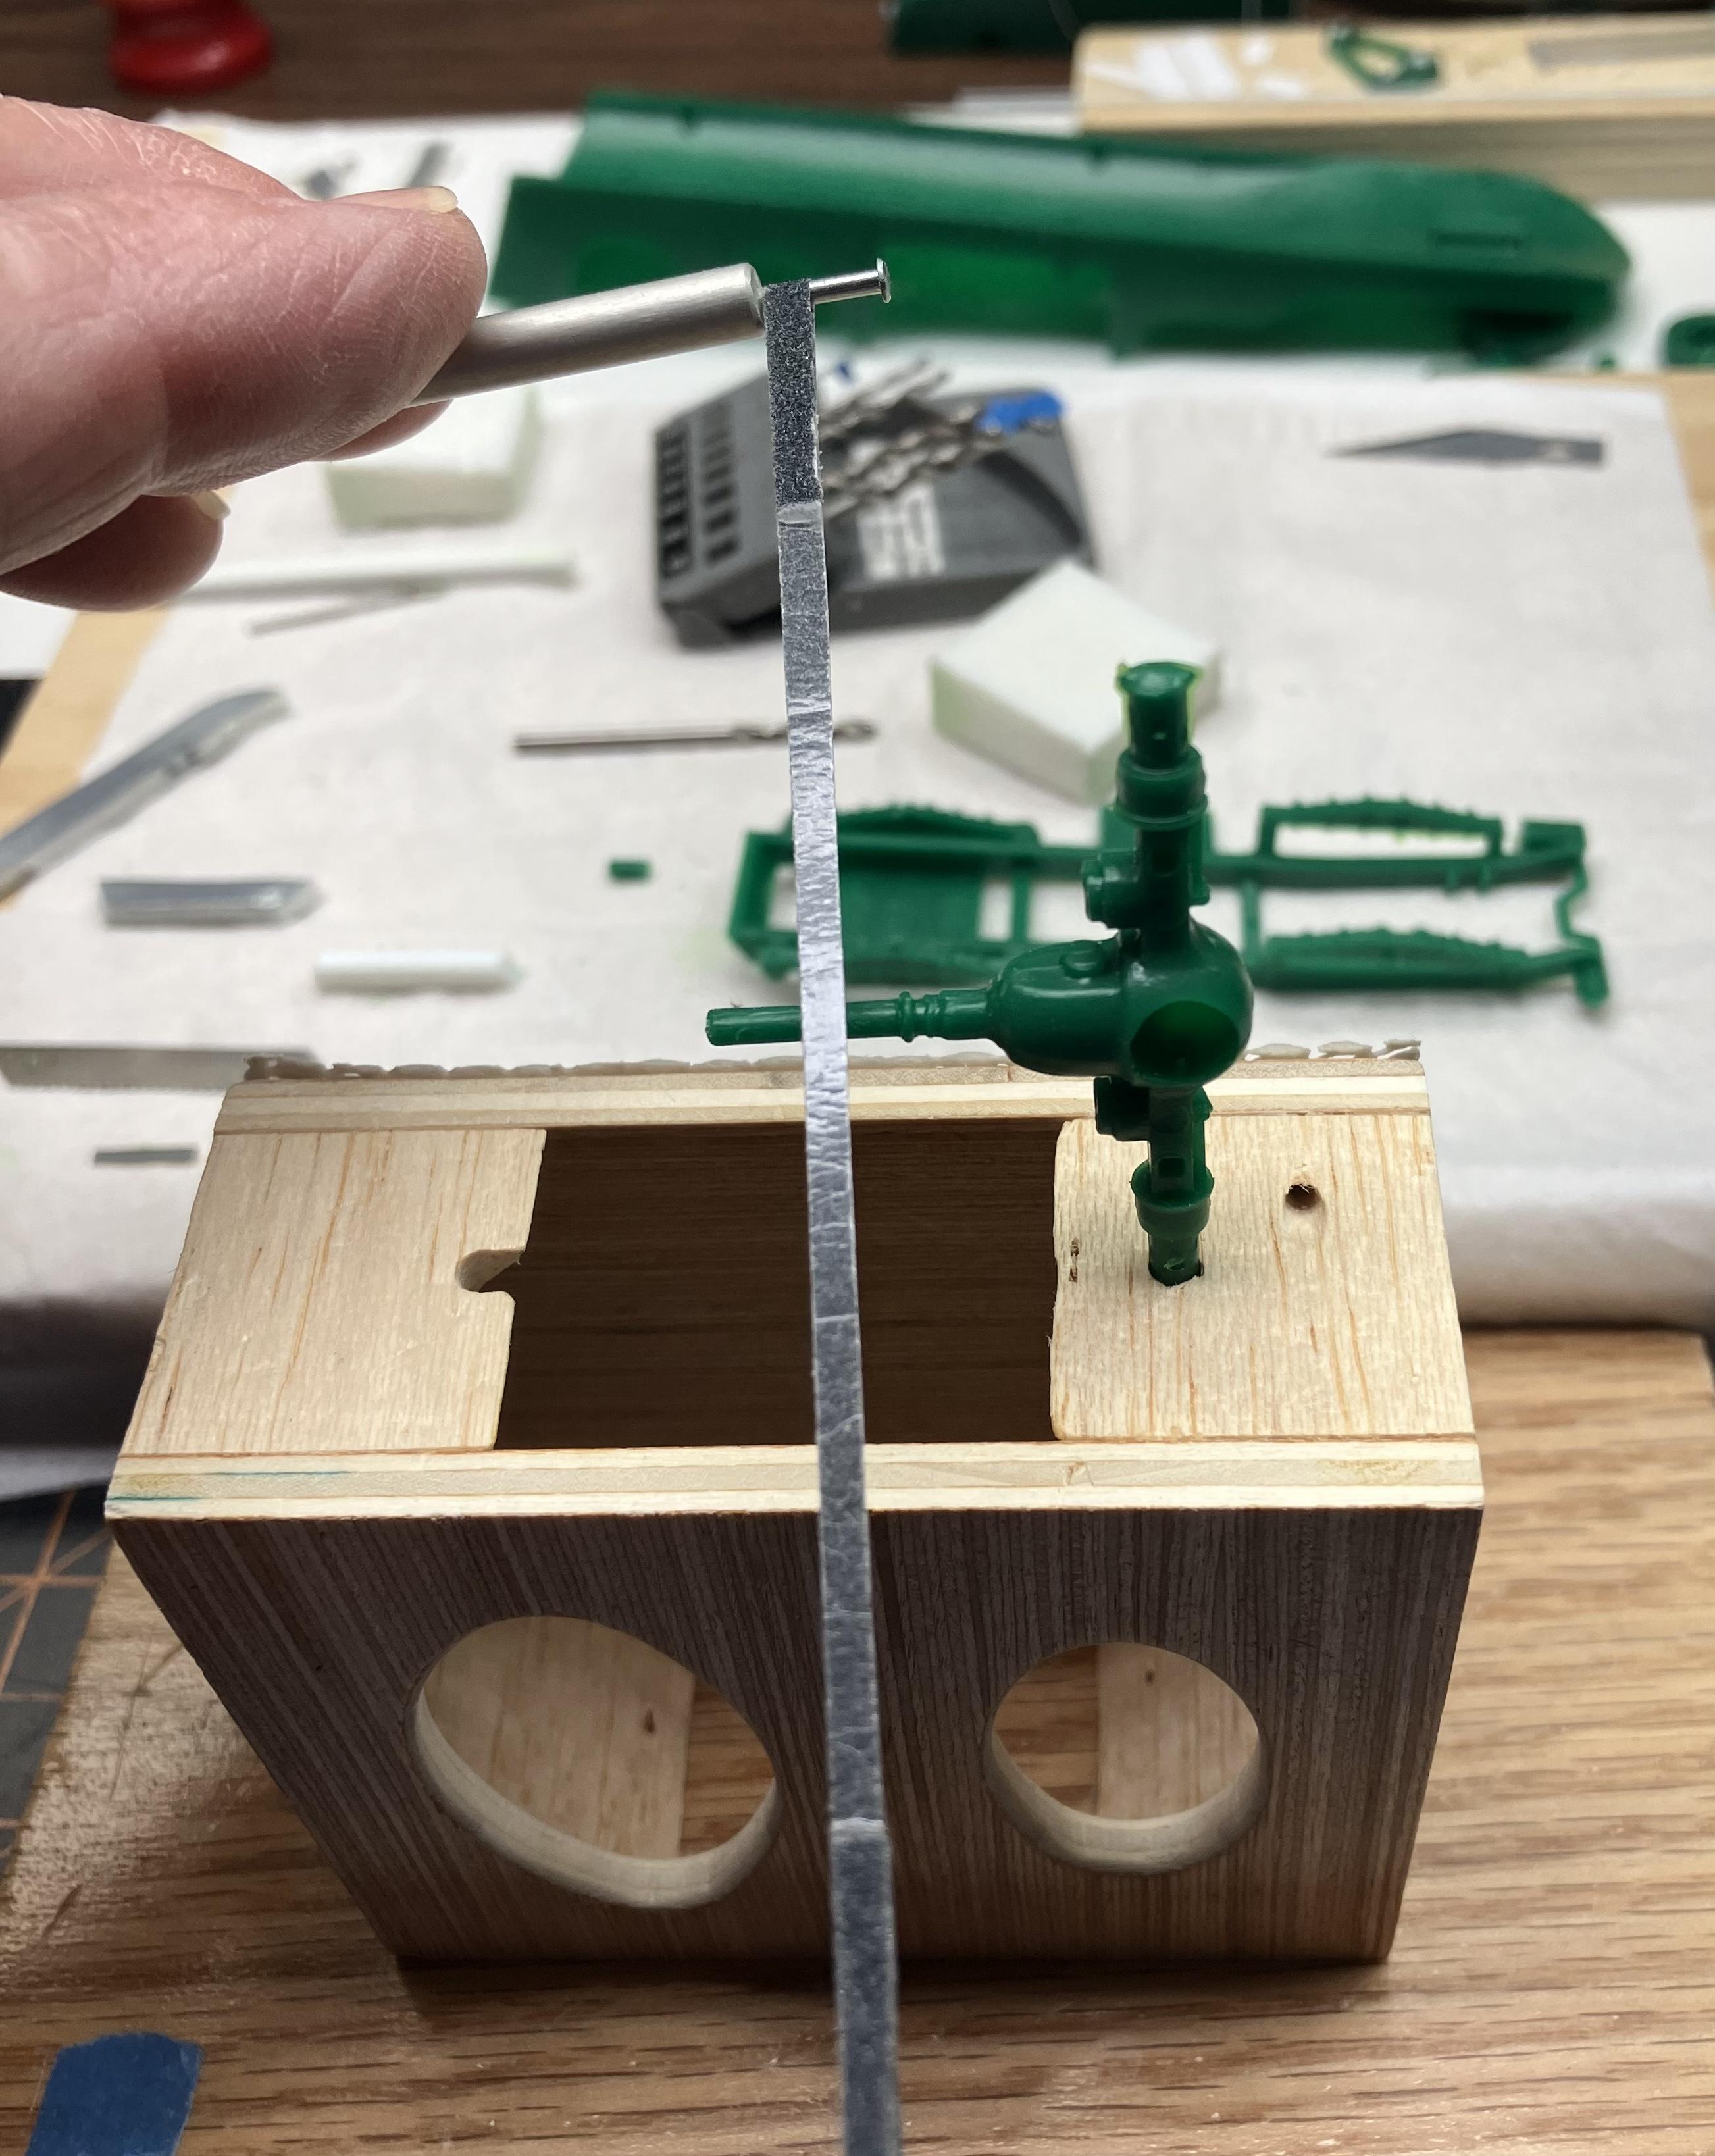
Note: this was originally posted on the wrong forum; I moved the post here and deleted the original post. Sanding and cleaning model parts of excess flash and whatever else needs attention is something most all modelers attend to. Here are some of the items I use while addressing the various model items in a kit. 1). Files and sanding devices, like sandpaper, can clog up quickly when used for plastic model work. I use an old fashion shaving cream brush as my “go to” for quickly removing the plastic residue from the sanding/cleanup items, and, to brush the sanding dust off the part itself. I have a small plastic bag next to the bench and brush off everything requiring attention over the open bag. Keeps things somewhat tidy. 2). Often, there are areas on model parts that require sanding/cleaning and it can be a chore to get into a tight and/or close part molding. I found that using small strips of various grit sandpaper, folded back on itself, and held with locking tweezers, can really help during the cleaning of parts. Just be sure to fold those small sandpaper strips so that you keep the tweezer points away from the plastic. I can quickly change sandpaper grits as required and can use both sides of a given strip and all the strip edges to get into and around the part as needed. 3). Sanding cylindrical shapes, like exhaust piping, axles, steering columns as a few examples, can easily lead to flat areas on a plastic surface. A tool that I used while building RC model aircraft when sanding cylindrical/round items is called a Flexfile. It uses narrow strips of various grit sanding paper, held on a bow shaped tool. I find that this is yet another welcome tool for use on plastic model parts. Very easy to use and can go a long way to help me get a plastic model item looking nice. Just a few suggestions for your consideration and/or use at your model work bench. ? Joe

-
Very nice looking model and the color combination is great. I need to get that kit. Well done! ? Joe
-
I enjoyed looking at the photos, thanks for sharing! ? Joe
-
Added information to my above post: found the tweezers to be ZONA 7. Glad to see you found some of similar style as they are definitely useful. ? Joe
-
Jim, thank you for the vote of confidence; you are much too kind! As for the tweezers, I bought those quite some time ago when I was building RC model aircraft and do not recall where I got them. They are perfect for holding/changing small strips of sandpaper while working on a model project. Joe Edit: The tweezers are a ZONA 7.
-
A very nice looking model you have shared with us. The color combination is classy. Well done! ? Joe
-
Yepper, the two figures look as though they had a rough day on the job. Your idea of using the tanker as part of a 1/48 scale aviation diorama interesting. ? Joe
-
What Did You Get Today? (Not Model Related)
Joe Nunes replied to LOBBS's topic in The Off-Topic Lounge
Ordered a new Motorcraft HVAC Air Door Actuator for my 2008 Ranger PU; will pick it up tomorrow. Then I get to have fun taking the old actuator out and installing the new actuator (actually not a hard thing to do). Then I can adjust the heat temperature in my truck…gets hot in a hurry now because I can’t adjust the cabin temperature. I‘ll be glad I am doing this change out now when it comes time to use the air conditioner too. ? Joe Edit: The new part is now installed and my HVAC system works fine. Saved a lot of money...and took my bride of 53 years out to lunch afterwards because she held the light so I could see inside the dashboard behind the glovebox. Tight work spot!! Joe -
Pontiac engine blue metallic
Joe Nunes replied to casassa's topic in Model Building Questions and Answers
Can you disclose the paint colors/ratio for this Pontiac engine mixture? Thanks! ? Joe -
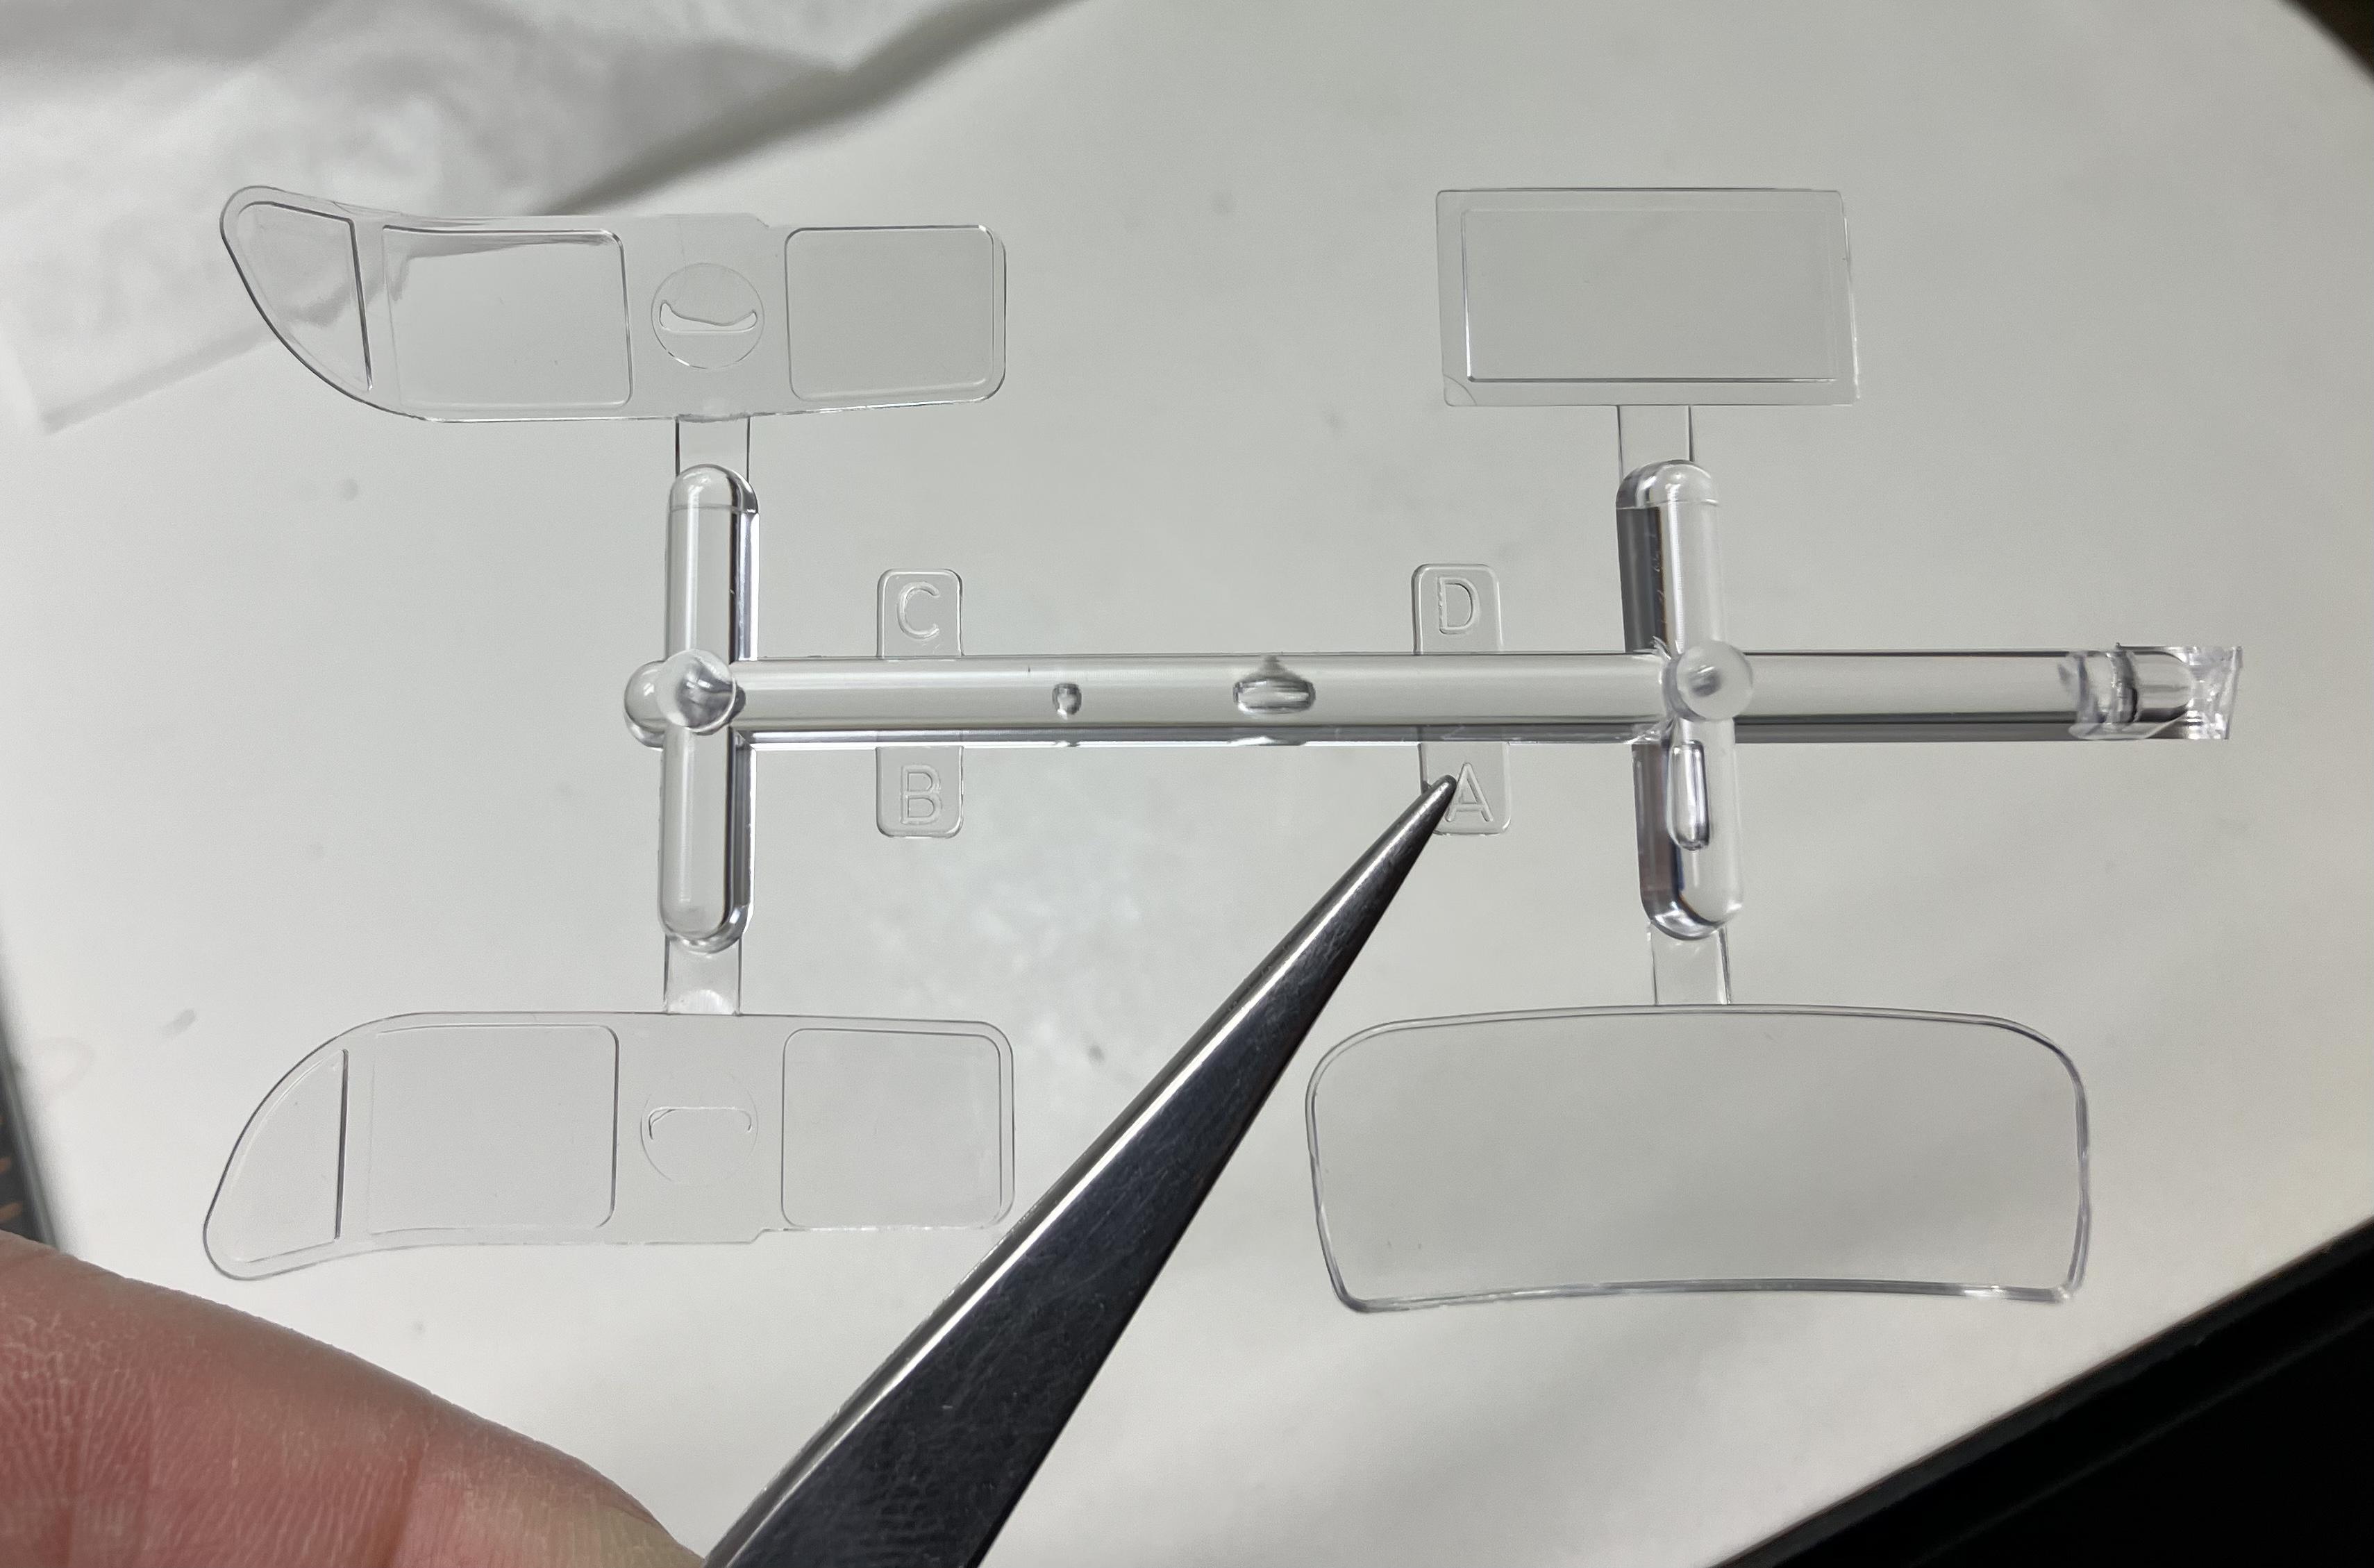
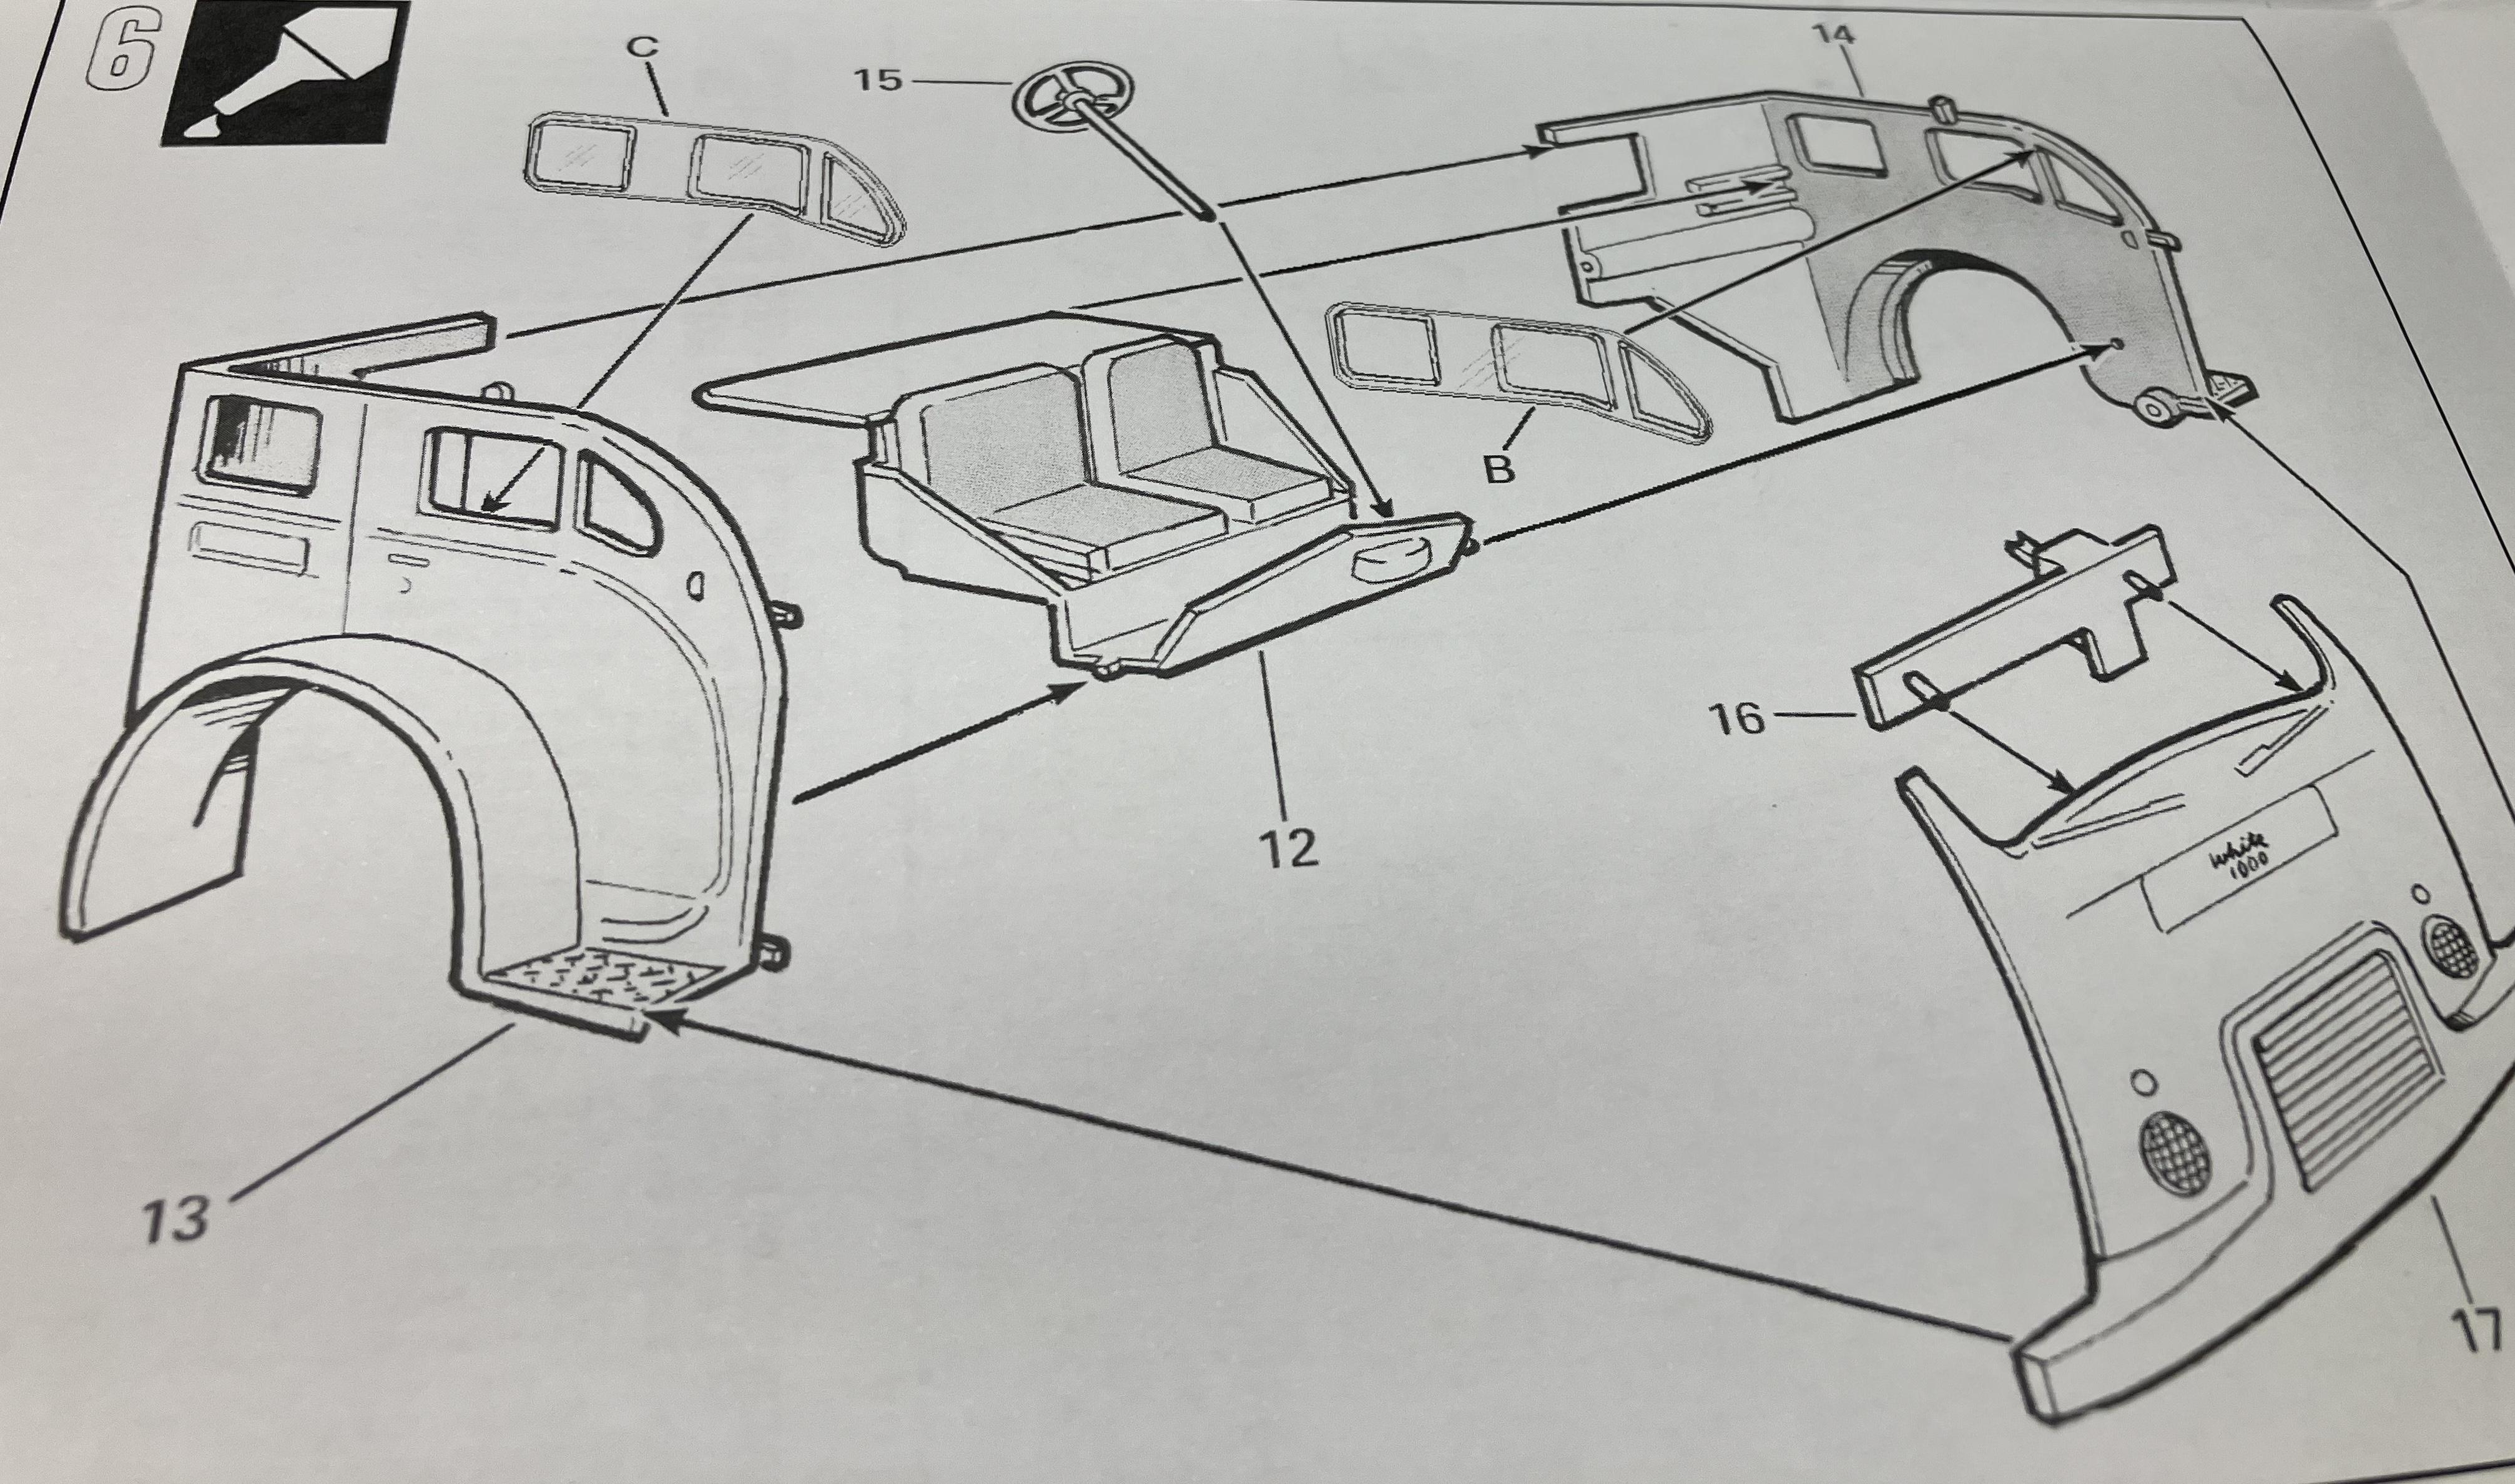
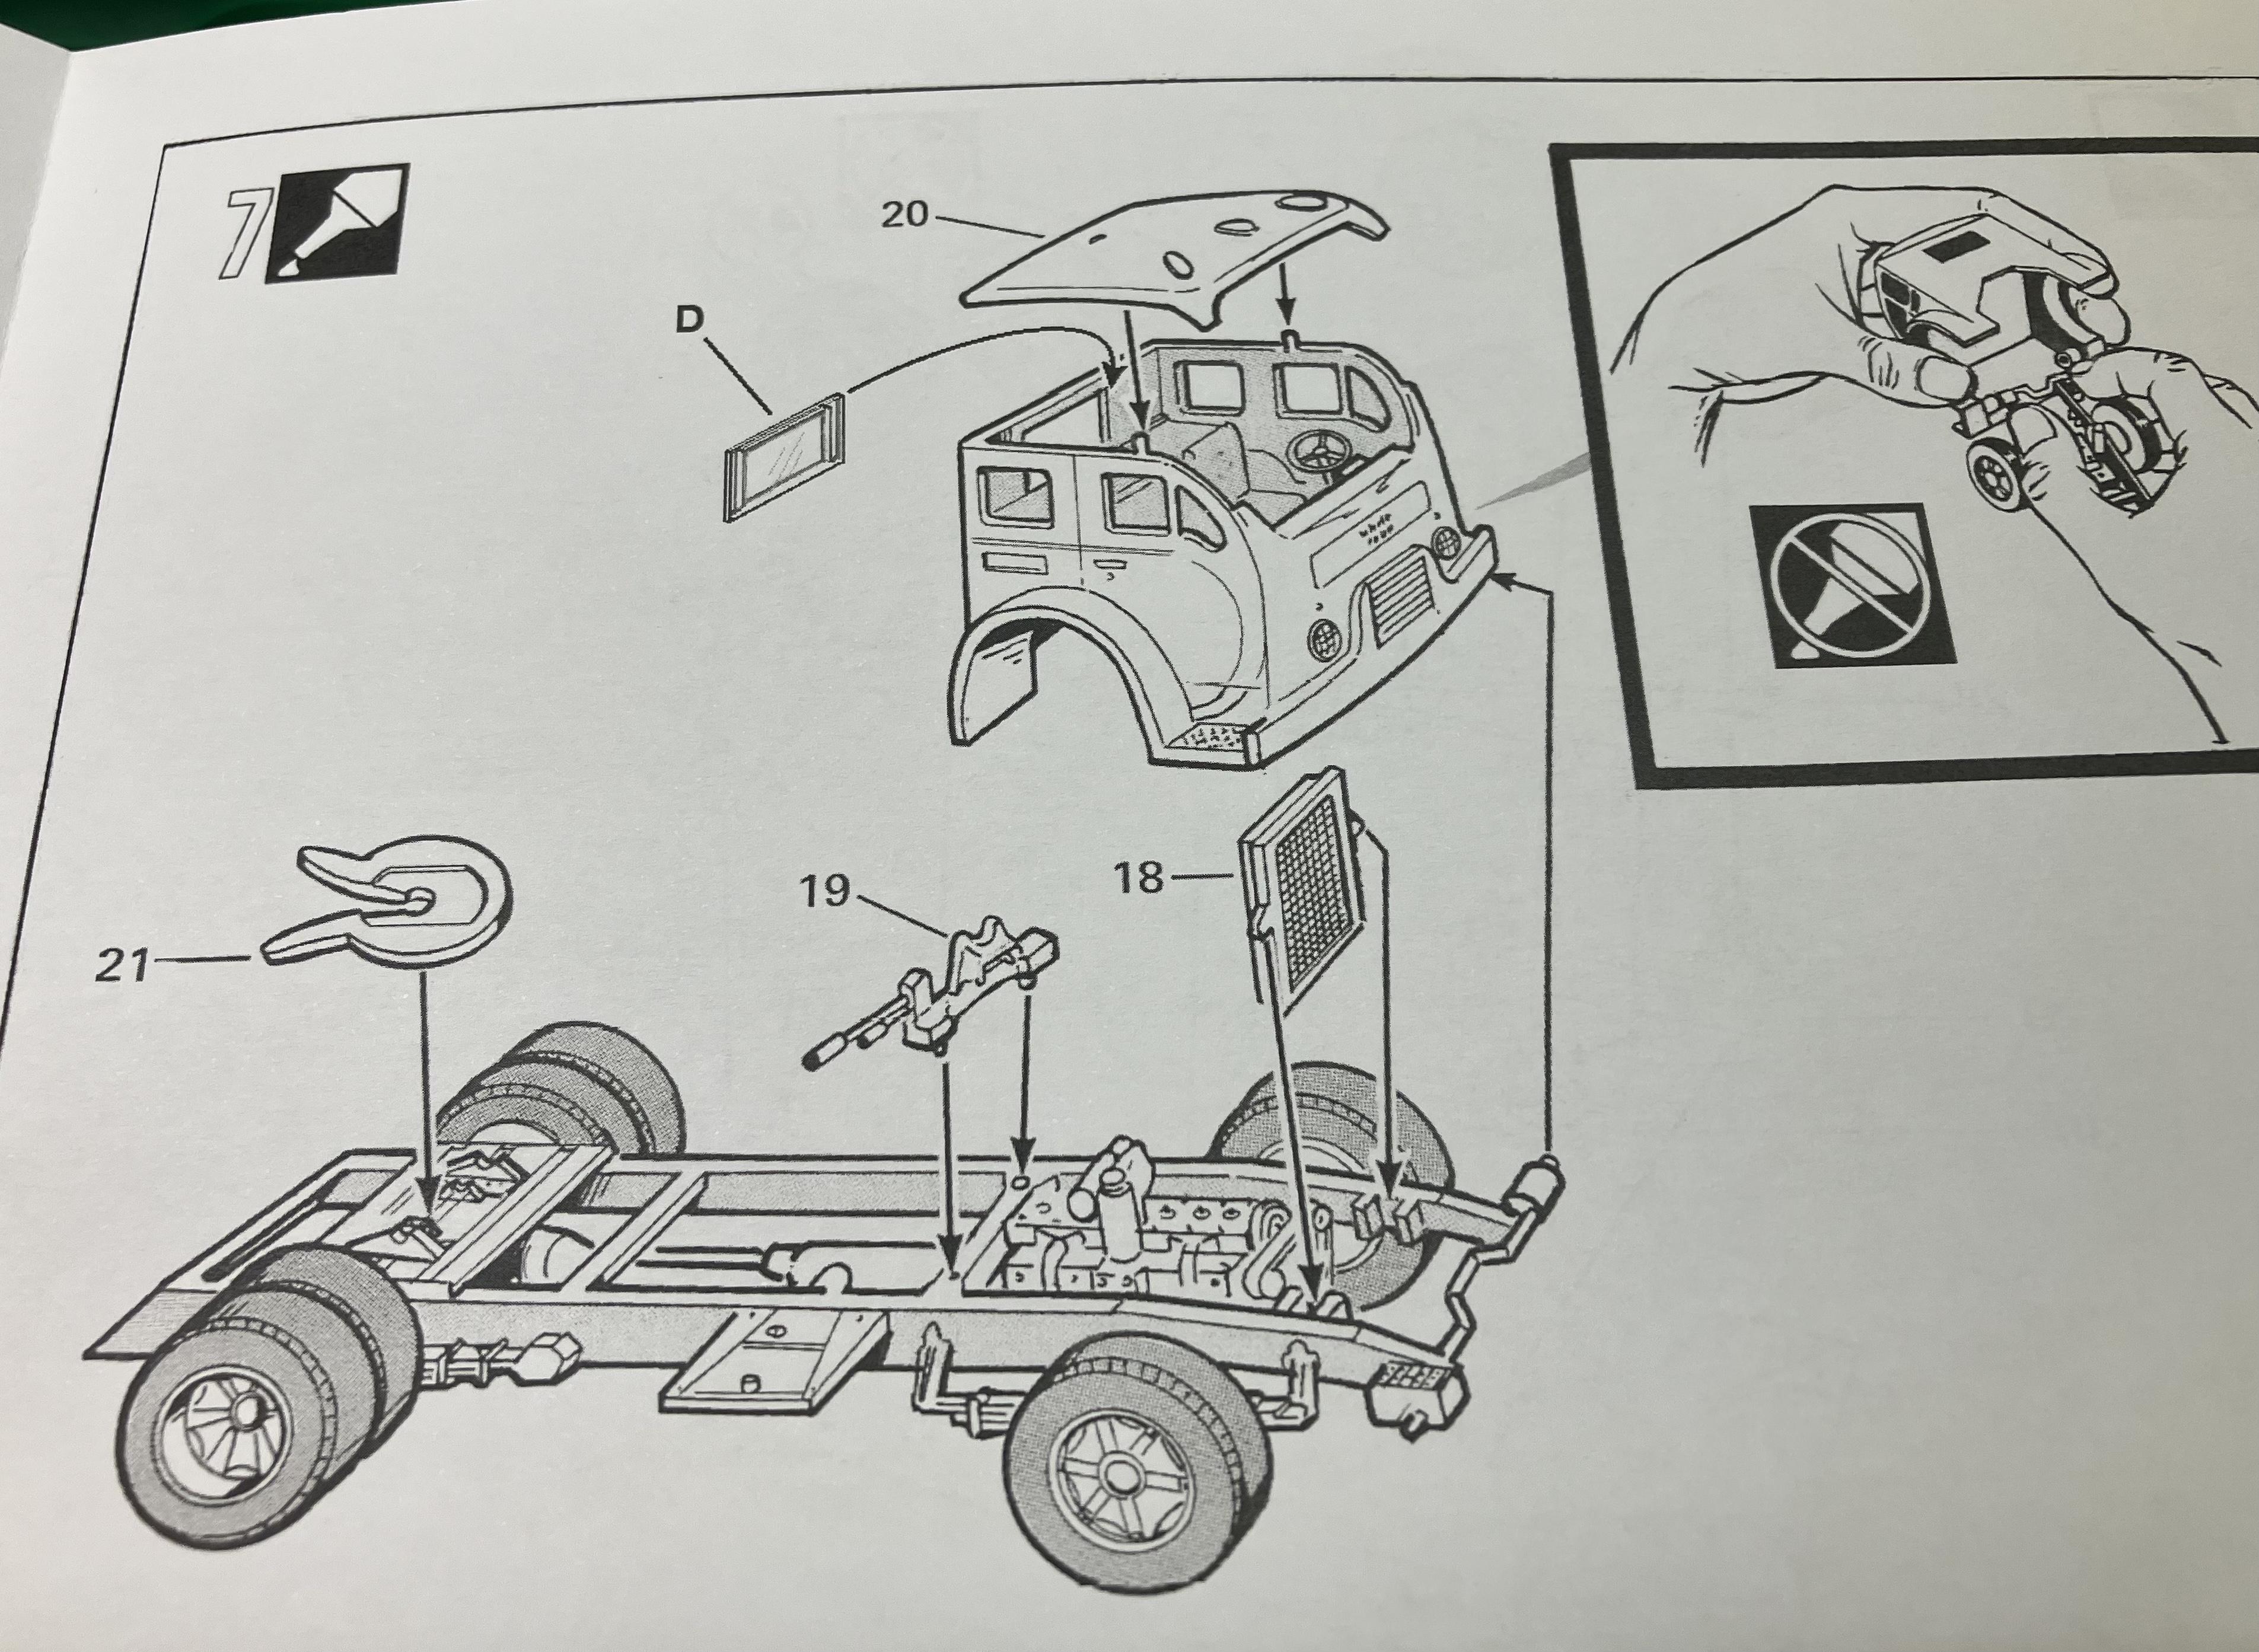
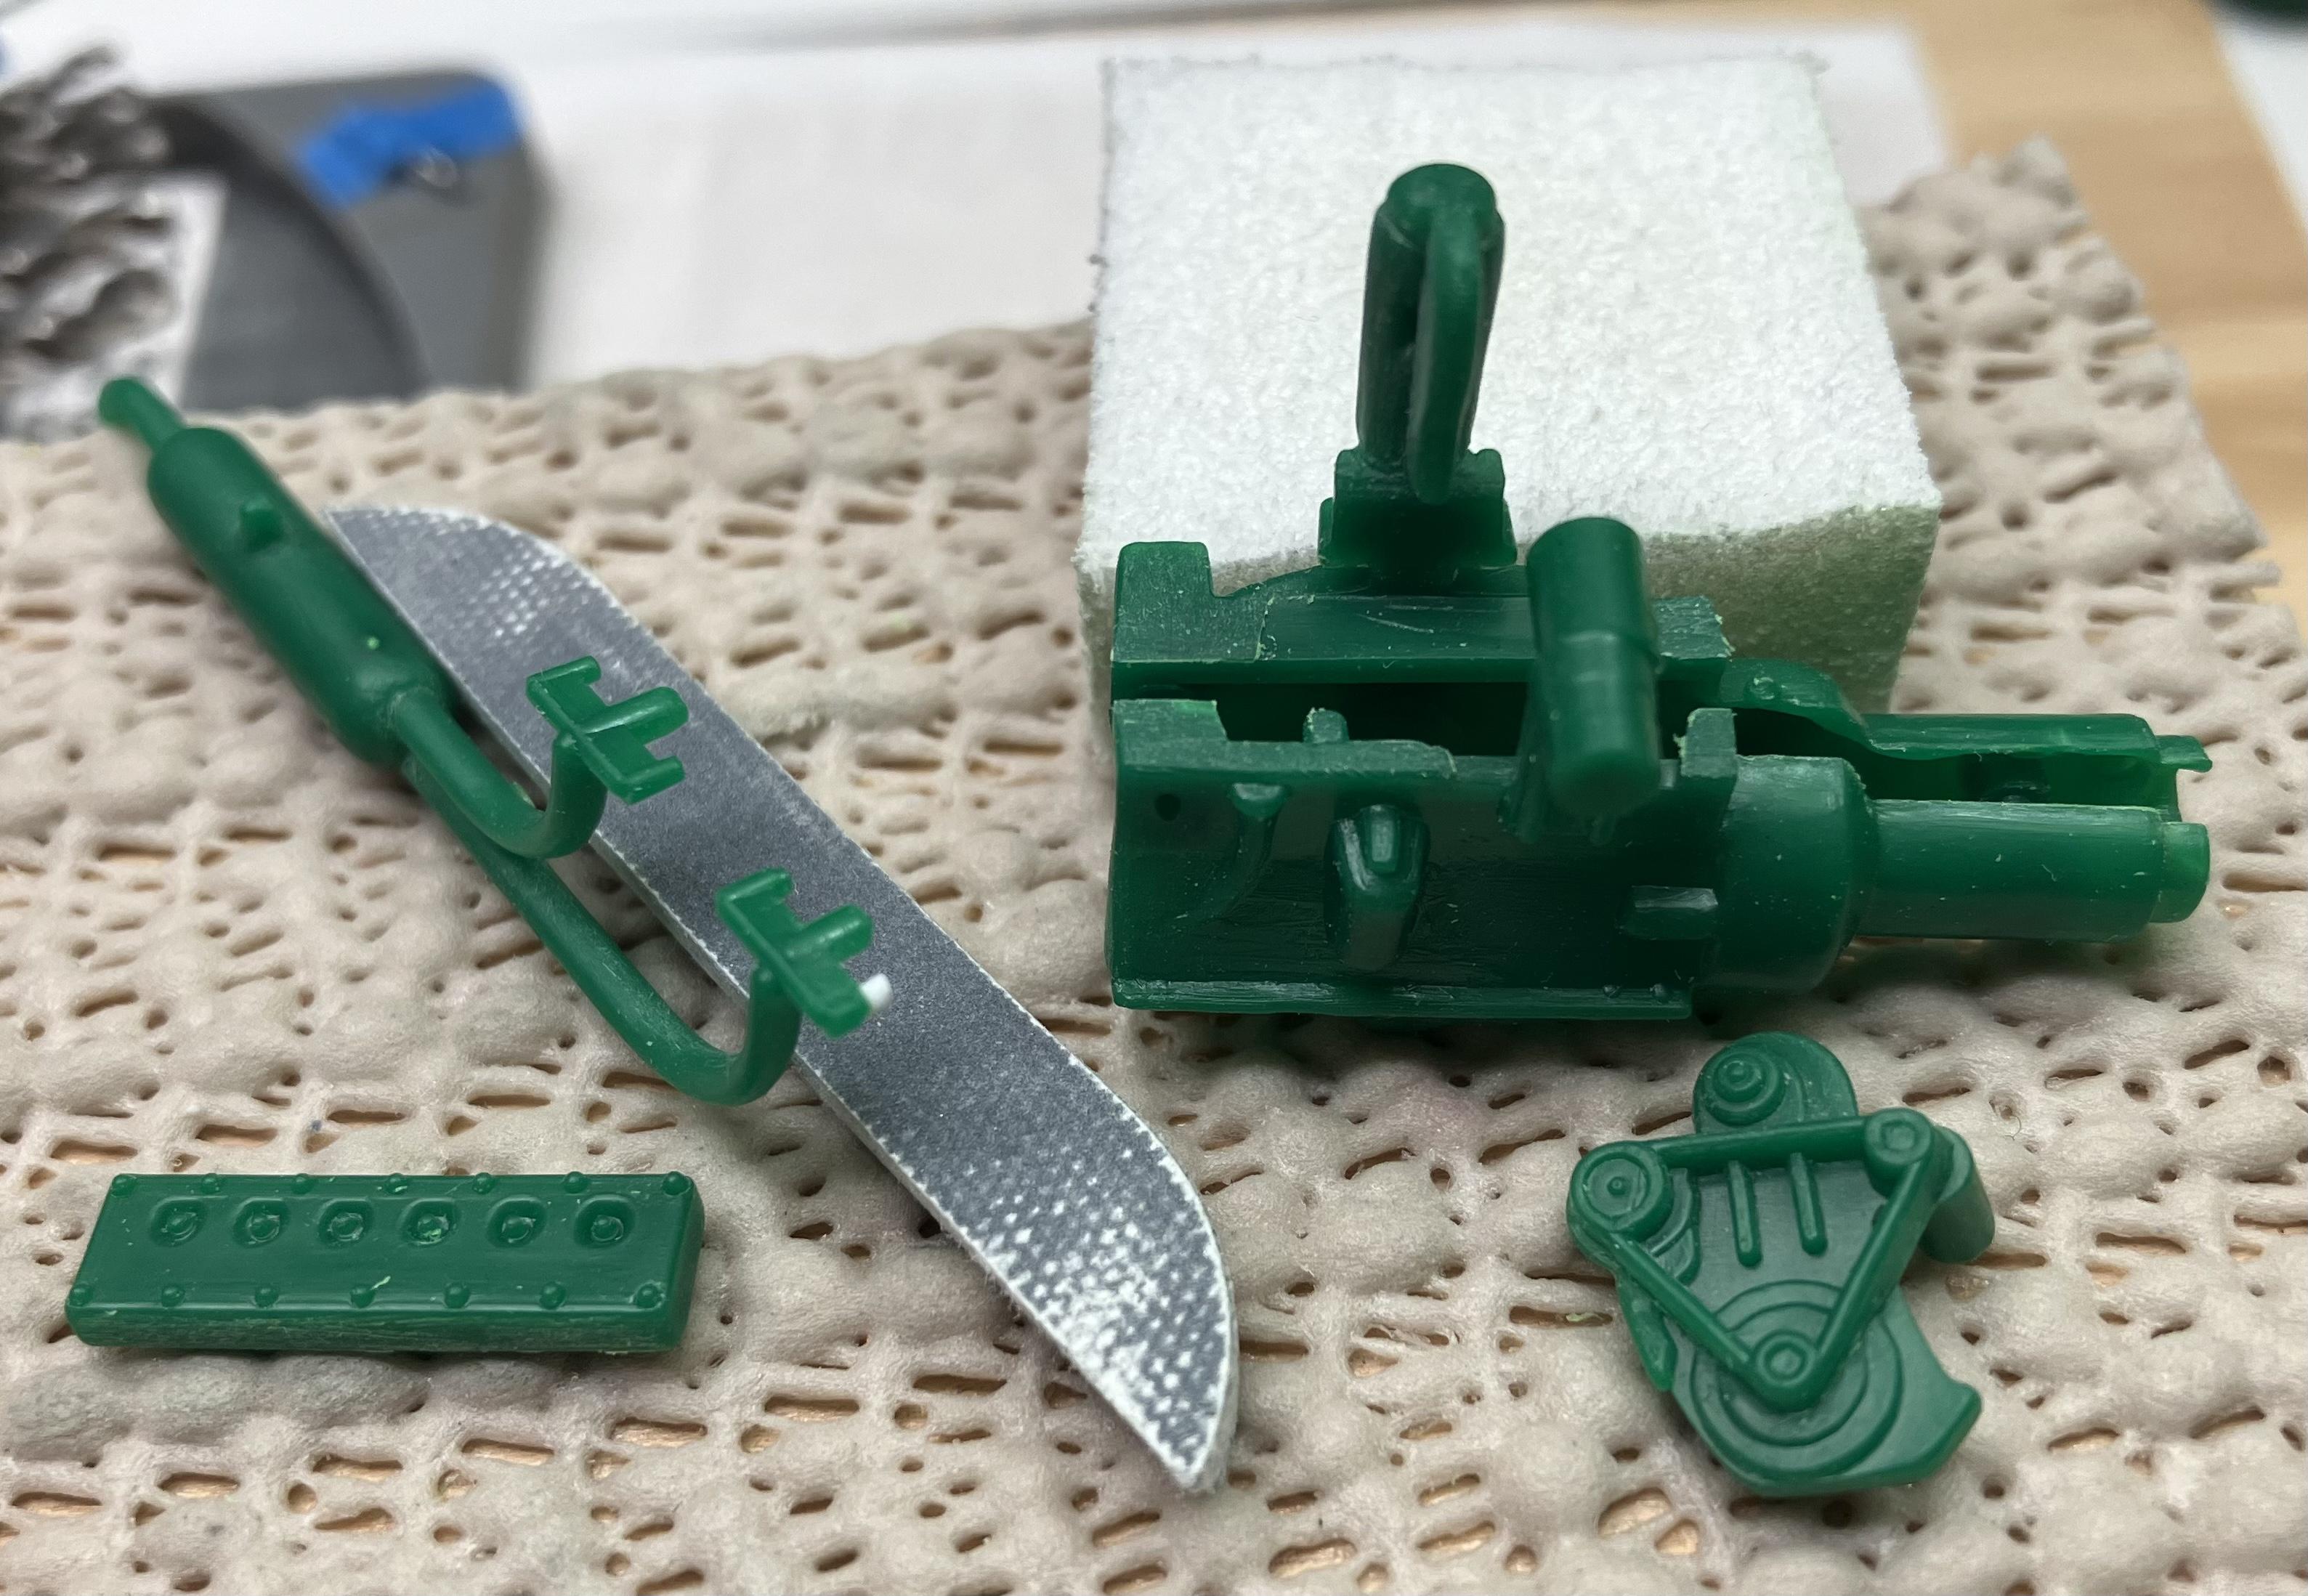
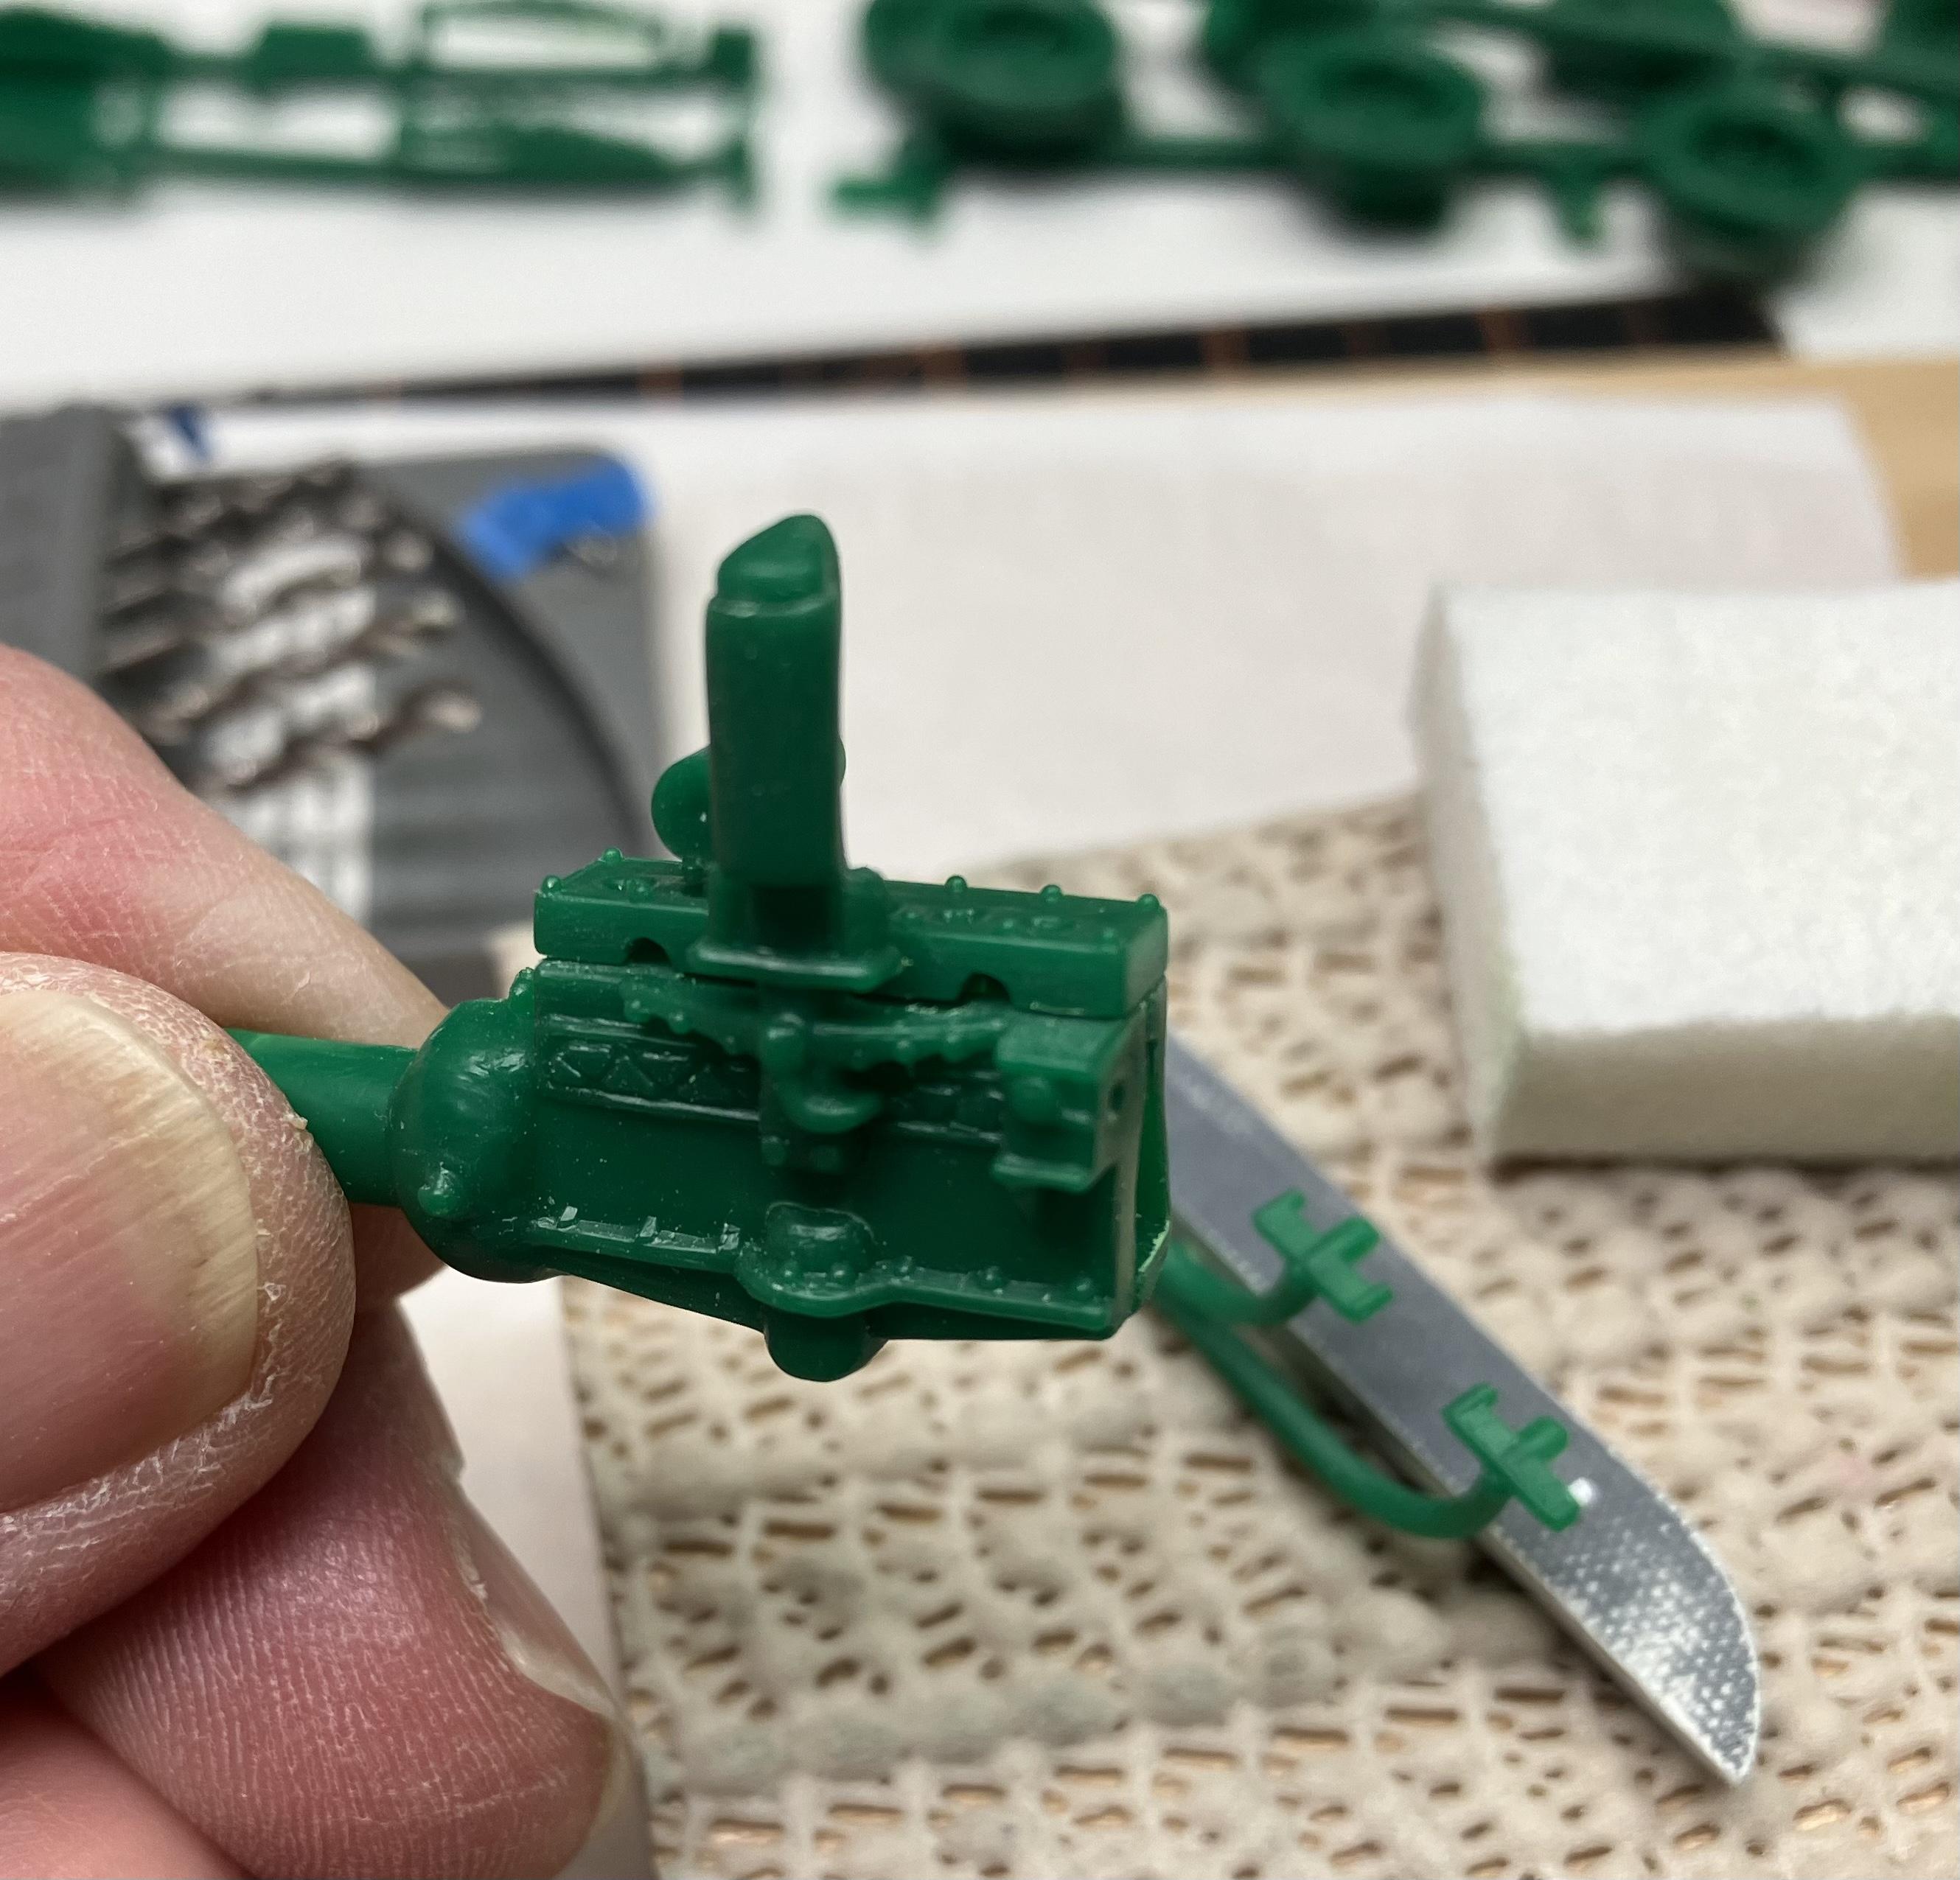
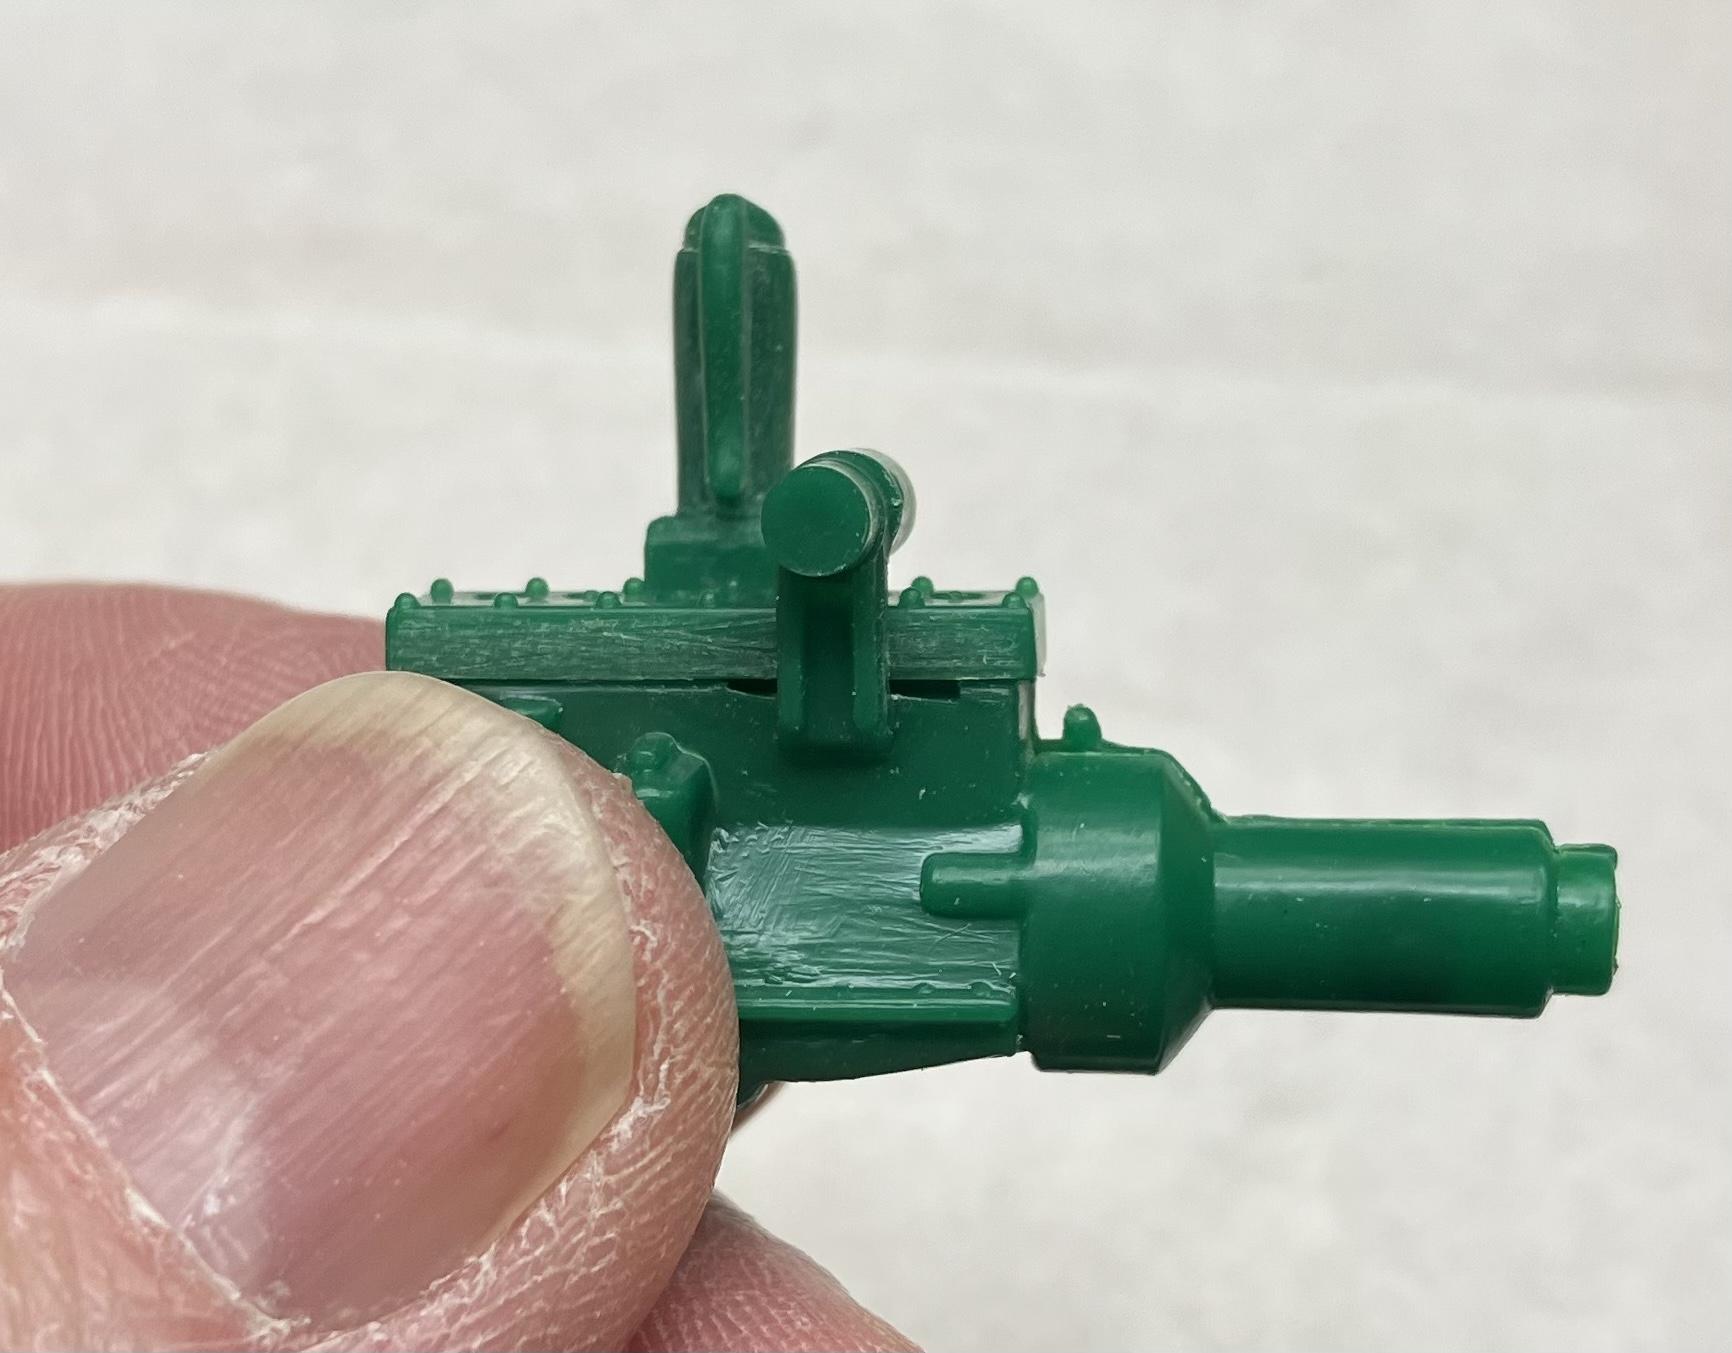
Yes, my kit has the “glass” tree included which is a nice touch for the model. I took photos of the glass and instructions. You may want to check with Atlantis and see if they sell the glass tree separately if so inclined. I also took a few photos of the engine items so you can see how small the parts are, and a photo of the small fire extinguisher too, all before final sanding and paint work. ? Joe
-
Very nice! I am not a regular fan of lowrider vehicles, however, this one grabbed me. The color combination really works great and the graphics are quite appealing. Well done! ? Joe
-
These are pieces from an old kit offering that came out years ago. As such, and even with new boxing (that I think is pretty neat), and instructions and new glass, it's still the same 'ol kit. Actually, the extra time at the bench to bring this cute model kit to "life" doesn't bother me at all; my posts are nothing more than letting folks know what I have encountered with this particular kit. You may find your particular kit of this subject to be different in its own way. The last thing I want to do is just "slap" the model together, spray some paint on the model, toss the tanker on the shelf, and then call it good. That's not going to happen in my hobby room. I have discovered that this build is going to require some extra TLC in order to complete the model to the desired level of finish that satisfies me. It is all about the fun derived from the build experience. ? Joe
-
That's exactly what I did, my friend, once when the halves were originally cleaned up...and again and again when the halves were placed together with the other engine parts. ? What fun! It's all good now so onwards we go! ? Joe
-
American LaFrance Eagle
Joe Nunes replied to Engine 51's topic in Model Trucks: Big Rigs and Heavy Equipment
Well done! You have a lot of nice detailing on this model and the project came out looking great. ? Joe -
Well, the honeymoon is over on this kit. ? Tonight I thought I would fit the five engine parts together to check out the fit seeing as the engine parts are now cleaned up. Only five parts here so should not take too long..; nothing fit correctly...not one engine part. The engine halves didn't fit together and I ended up drilling the receptor holes larger for the mounting pins and then fiddled around with adjusting the three location pins to line up with the pin holes. Finally got the two halves to fit properly though the detail on one half doesn't necessarily match up with the detail on the other half. More match sanding tomorrow. The head didn't fit the location openings, and, didn't sit flat on top of the engine block. Ended up sanding the top of the engine surface flat, adjusted the locating "pins" on the bottom of the head and then sanded the port side of the head so it would not touch the upright part on the port side of the engine. Now the head lays flat on top of the engine. Oh, there is an opening under the head, on the port side, that will need to be filled with a small piece of plastic...tomorrow. Then there's the front piece for the engine that wobbled from side to side until that problem was addressed. Got the exhaust piece into position and realized I needed to add a small piece of round plastic stock to one of the mounting locations in order to make it look right. Gosh...this was only five parts. It is definitely going to take a wee bit more time to build this gas tanker than I originally thought. Just thought you might want to know what I have run into thus far at the workbench. However, I am enjoying the challenge and having fun. ? Joe
-
There was? Well..,dang! I never got past looking at Jeannie... ???? Joe