dino246gt
-
Posts
2,244 -
Joined
-
Last visited
Content Type
Profiles
Forums
Events
Gallery
Everything posted by dino246gt
-
Very nice! Great color!
-
If that roof has a nice flow to it, this mash-up can be gorgeous! That illustration is sure beautiful. I KNOW you'll make a fantastic model!
-
Wow, that is one sweet conversion! I don't think anyone else has done that, and it looks so natural, nice! There are so many attempts at 'Cheros, and 'Caminos that just don't look right, this one does! I hope the roof isn't too high at the back, I know it's not glued yet.
-

Tow Mater F350 Version
dino246gt replied to Redisetta's topic in Model Trucks: Pickups, Vans, SUVs, Light Commercial
Very nicely done, I like the painted rims. -
Who doesn't love a mock-up? Let's see yours!
dino246gt replied to Belairconvertable's topic in WIP: Model Cars
This is an old build but I thought they were some cool "mock up" pics:
-
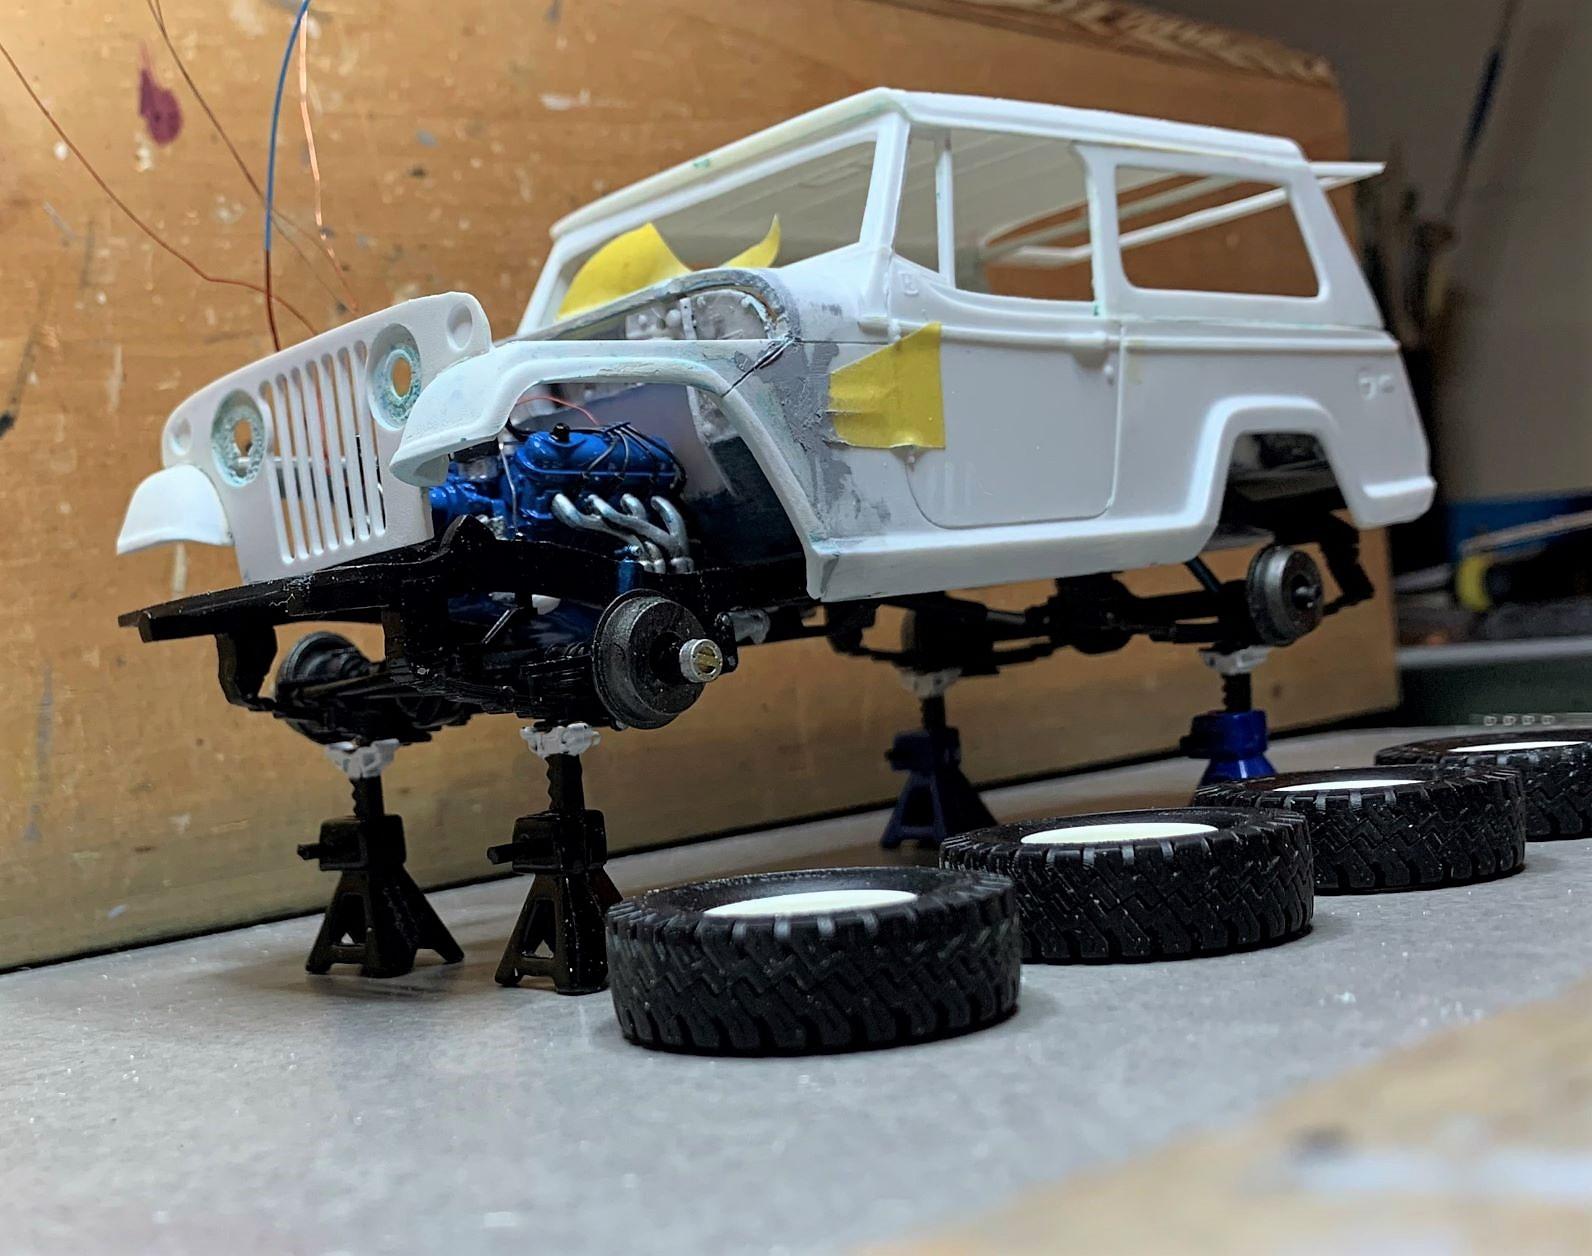
revell K5 Blazer
dino246gt replied to Falcon.Studio's topic in WIP: Model Trucks: Pickups, Vans, SUVs, Light Commercial
That's certainly along the lines of what I and probably a thousand others want to do to that kit! Thank you for showing us, we can see how it looks already, keep it going! -
That looks great! I love doing all kinds of heavy mods like you did to make this work. The thing to keep in mind all the way is, since you've basically re-engineered the kit, "HOW can I assemble these pieces once they're so modified"! You've done it, isn't it so rewarding!
-
Greg, thanks so much for the carbs, yeah they look as good as the originals.
-
Some of you know from another post that I lost the use of my hands a few weeks ago, HOPEFULLY only a temporary thing, they're so swollen that I can't hold anything. So, this Merc was my latest, hopefully not my last, project. I was saving this much progress to make a series but I'll just post it now, because I like to keep in touch with you all. This is where the chopped '64 Merc project stands, 351 Windsor, 4 Webers, Tremac 6-speed. Cheers, NO SYMPATHY please, just model comments!
-
Revell (Germany) Ferrari 250SWB! New for October
dino246gt replied to Matt Bacon's topic in Car Kit News & Reviews
It's a very old picture from my files but I do have a few Ferrari kits!
-
1968 Mercury M350 Wrecker
dino246gt replied to Chuck Most's topic in Model Trucks: Pickups, Vans, SUVs, Light Commercial
Wow, I didn't know where Deerwood Manitoba is, now I know. Great model! Stay warm, cheers! -
1968 Mercury M350 Wrecker
dino246gt replied to Chuck Most's topic in Model Trucks: Pickups, Vans, SUVs, Light Commercial
Beautiful build and great story. We'd love to see it at one of our Winnipeg Model Car Club meetings! The third Sunday of every month except July and August. St. Alphonsus hall 341 Munroe at 11 til 1. Love to meet you and see your cool model! -
Very nicely done!
-
Beautifully done as everyone has already said, but what about those seats? Made your own decals? They look super cool!
-
I'm interested, don't see many cool '34s in scale. Keep us informed on your mods! I like what I see so far!
-
I love the use of various shades of black, dark grey, etc. Looks so much more realistic than all black. There's also Nato Black, and Rubber Black.
-
Wow, that is so realistic and in that setting, just amazing modelling skills!
-
Revell 1965 Chevy Suburban
dino246gt replied to happy grumpy's topic in Model Trucks: Pickups, Vans, SUVs, Light Commercial
Very nicely done! -
Beautiful Blazer but I wouldn't be out in the snow without the roof on! I love that era and you've done it justice, nice!
-
Jeep wrangler rubicon
dino246gt replied to charger74's topic in Model Trucks: Pickups, Vans, SUVs, Light Commercial
Nicely done, I love it! -
I love that you're doing a model of this overlooked extremely cool, somewhat affordable car!
-
1937 Cord 812 Custom with Audi R8 v8 Engine
dino246gt replied to carl63_99's topic in WIP: Model Cars
Using a mid-engine configuration for a front wheel drive car is brilliant! Can't wait to see more! -
Wow, that engine looks fantastic, love those fuel lines and trumpets, and well everything about it, so cool!
-
Who doesn't love a mock-up? Let's see yours!
dino246gt replied to Belairconvertable's topic in WIP: Model Cars
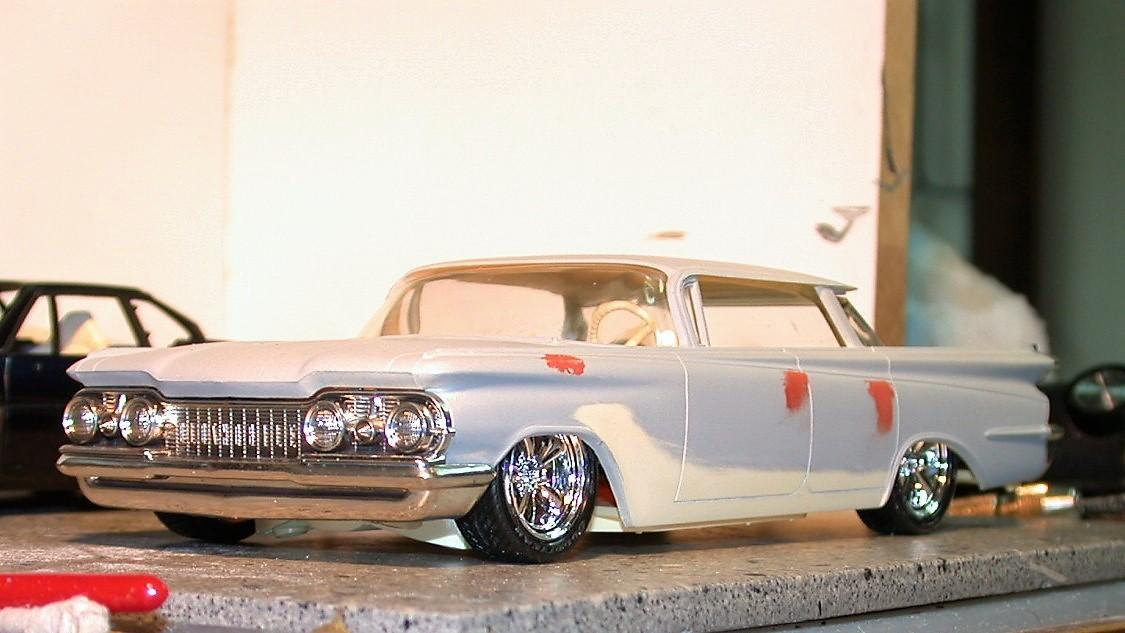
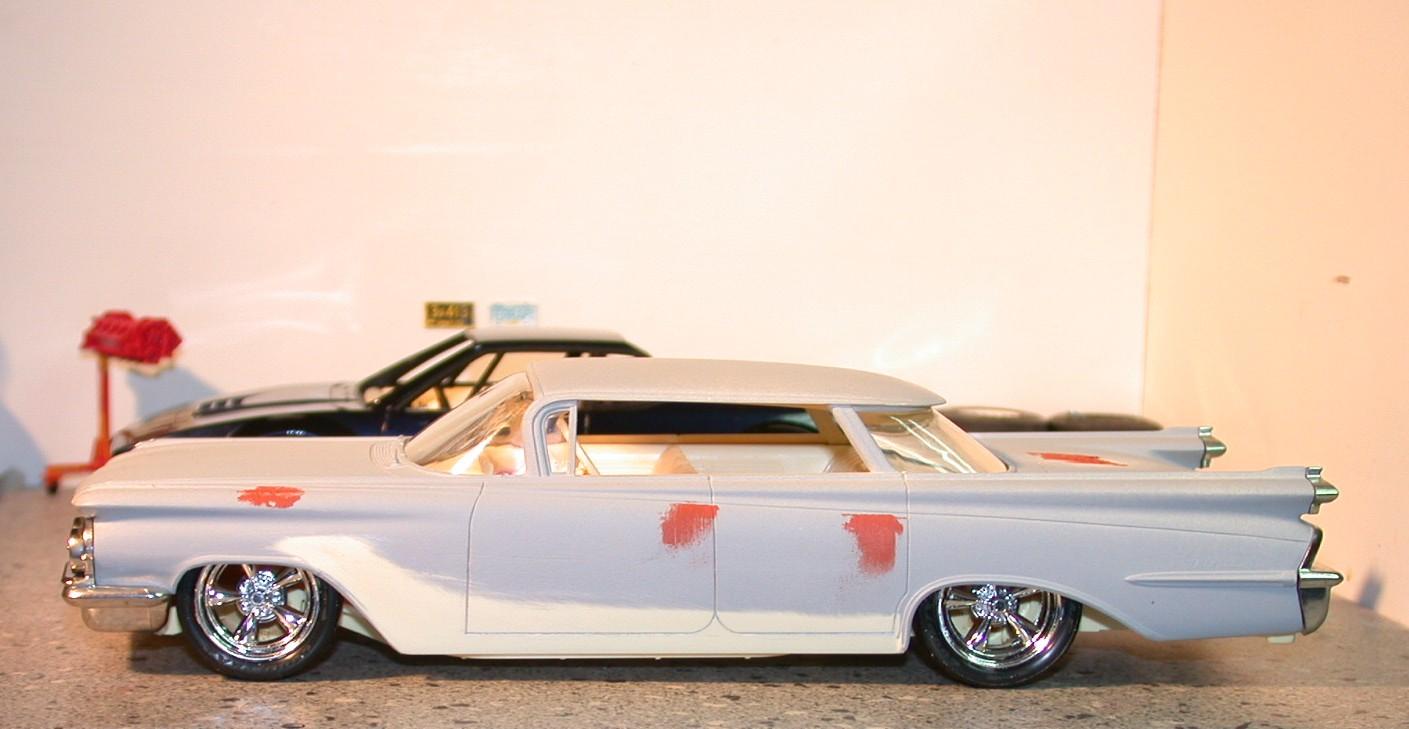
To be honest, I've had some health issues so I can no longer build models, (tempory) so I'm posting old pictures from my files, just to stay in touch with the modelling community. I hope to be able to get back the use of my hands because I love modelling! And I've done so much work to my "Chopped '64 Merc, who knows how it'll turn out", that I really want to finish that one! -
Who doesn't love a mock-up? Let's see yours!
dino246gt replied to Belairconvertable's topic in WIP: Model Cars
Flat top four door de-chromed and slammed '59 Olds: