randyc
-
Posts
2,961 -
Joined
-
Last visited
Content Type
Profiles
Forums
Events
Gallery
Everything posted by randyc
-
I have the blue in 1/64 and got lucky on the 1/24 Franklin Mint pink one with guitar a few months back. But good to see them coming. If cheap enough, would be a nice set of wheels and tires. Engine maybe? Other parts harvest?
-
That looks pretty cool. Thanks for sharing those.
-
Well I did attach the rockers. One at least. Wanted to let it cure good and then I'll do the other side. I'm getting closer on wheelbase and track. Still seems to be sagging in the back, but I'll get there. Second photo shows Gap between body and engine room panels. This kit is trying to drive me nuts. If I ever built a second one, is know more tricks. Kinda like Dann is.

-
If you can't find a 31 delivery, hit me up. We can work something out. I have one and would be willing to let it go to a good home.
-

Re-engineering Monograms Lotus Esprit...new update!
randyc replied to Dann Tier's topic in WIP: Model Cars
Okay, that is a good looking solution! Thanks! -
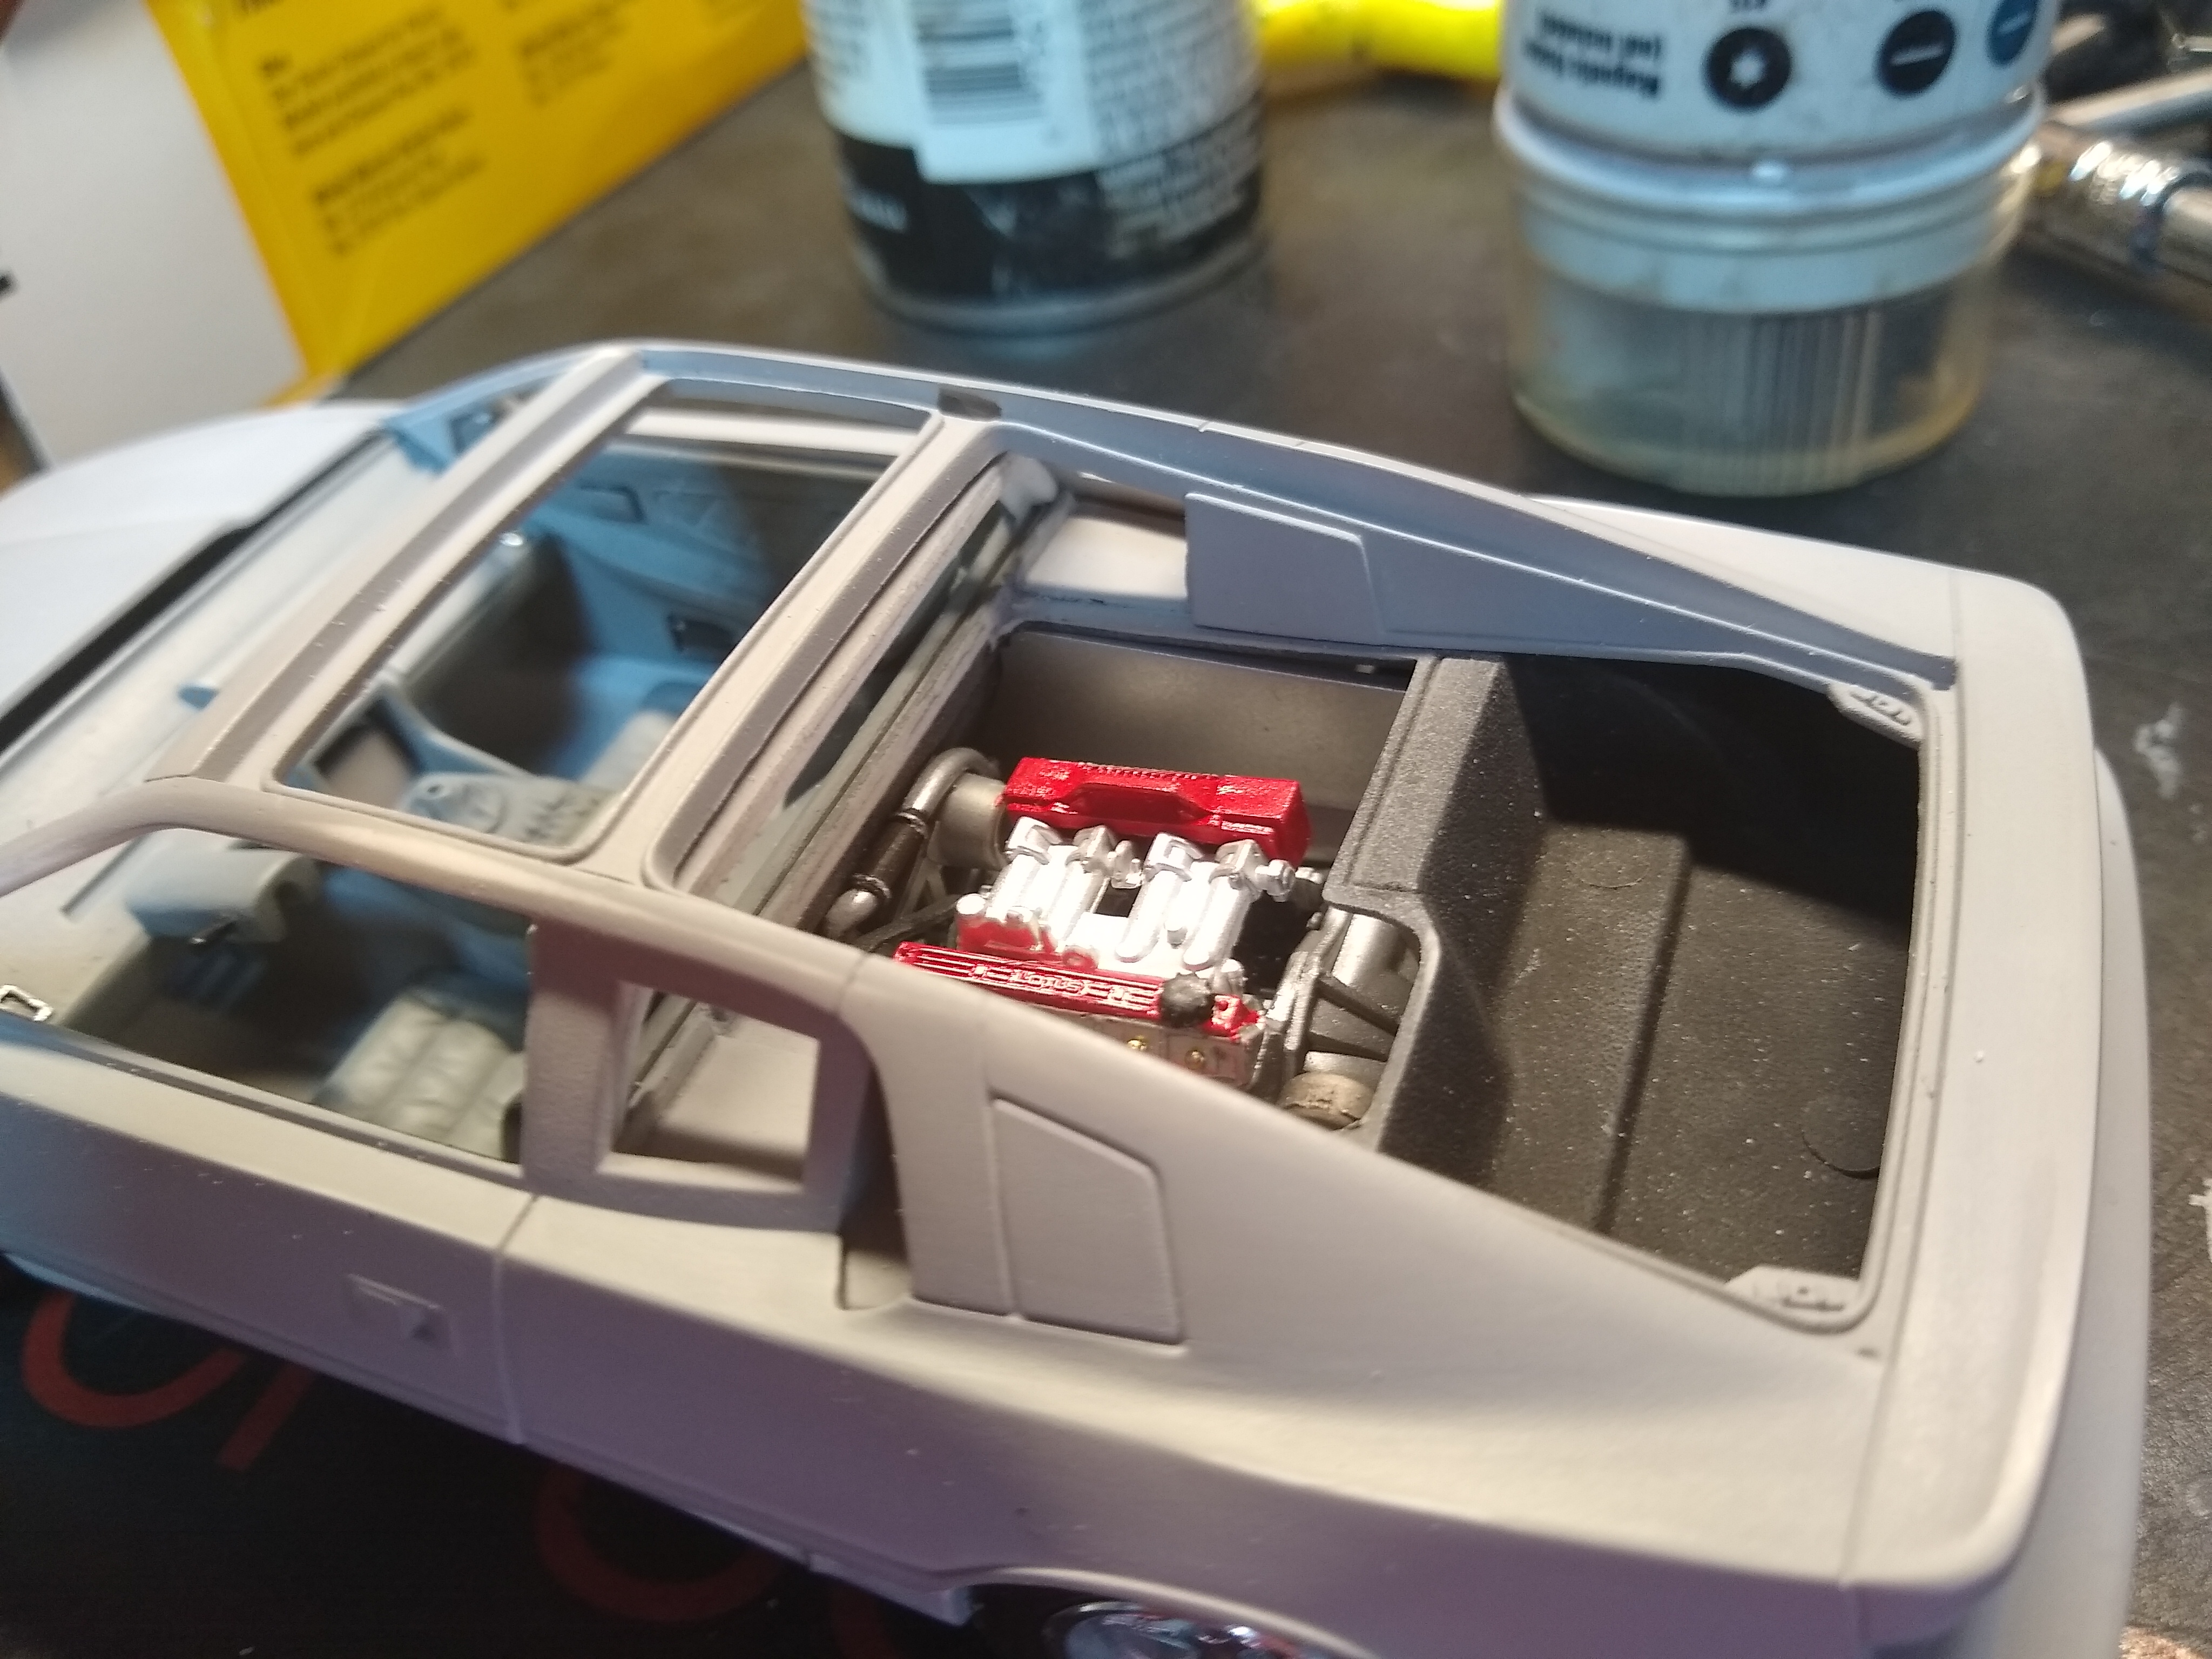
Eh no big deal. I guess the next big thing on mine is everything! LOL. I need to get the wheels all placed correctly, then see what's up with the fit of chassis to interior platform/body. I think the most improtant thing for a new build would be to get the body glued together so the interior platform is locked to the body properly for test fitting. If I ever did it again or end up having to start over on this one... this is one of those kits where every piece seems to relate to every other piece. And they all need to work together properly for it to go together correctly. And from the box, the ride height is going to be wrong. I may have the rear too low by accident. The rear shock hoop doesn't want to fit right at all - comparing to your build. I may try to make a pivot like the real car would have. BUT... Unfortunately that will lock the wheelbase and the wheels would travel in an arc when adjusting the ride height. If I can get ONE wheel in place correctly, then I can adjust the last wheel to sit right. And lastly, it seems like the rear track may be narrow out of the box. I know yours will have custom wheel/tire and will probably be better. We'll see next time I'm at the bench. I am also wondering if I can go ahead and attach the rockers to the bottom of interior. So when I mock it all up, everything shows "final fit". I can mask around them to do the paint. But I think the paint process may be further away than I thought due to trying to get everything fitted up correctly. I'll study that next time I'm working on it. Tonight hopefully.
-
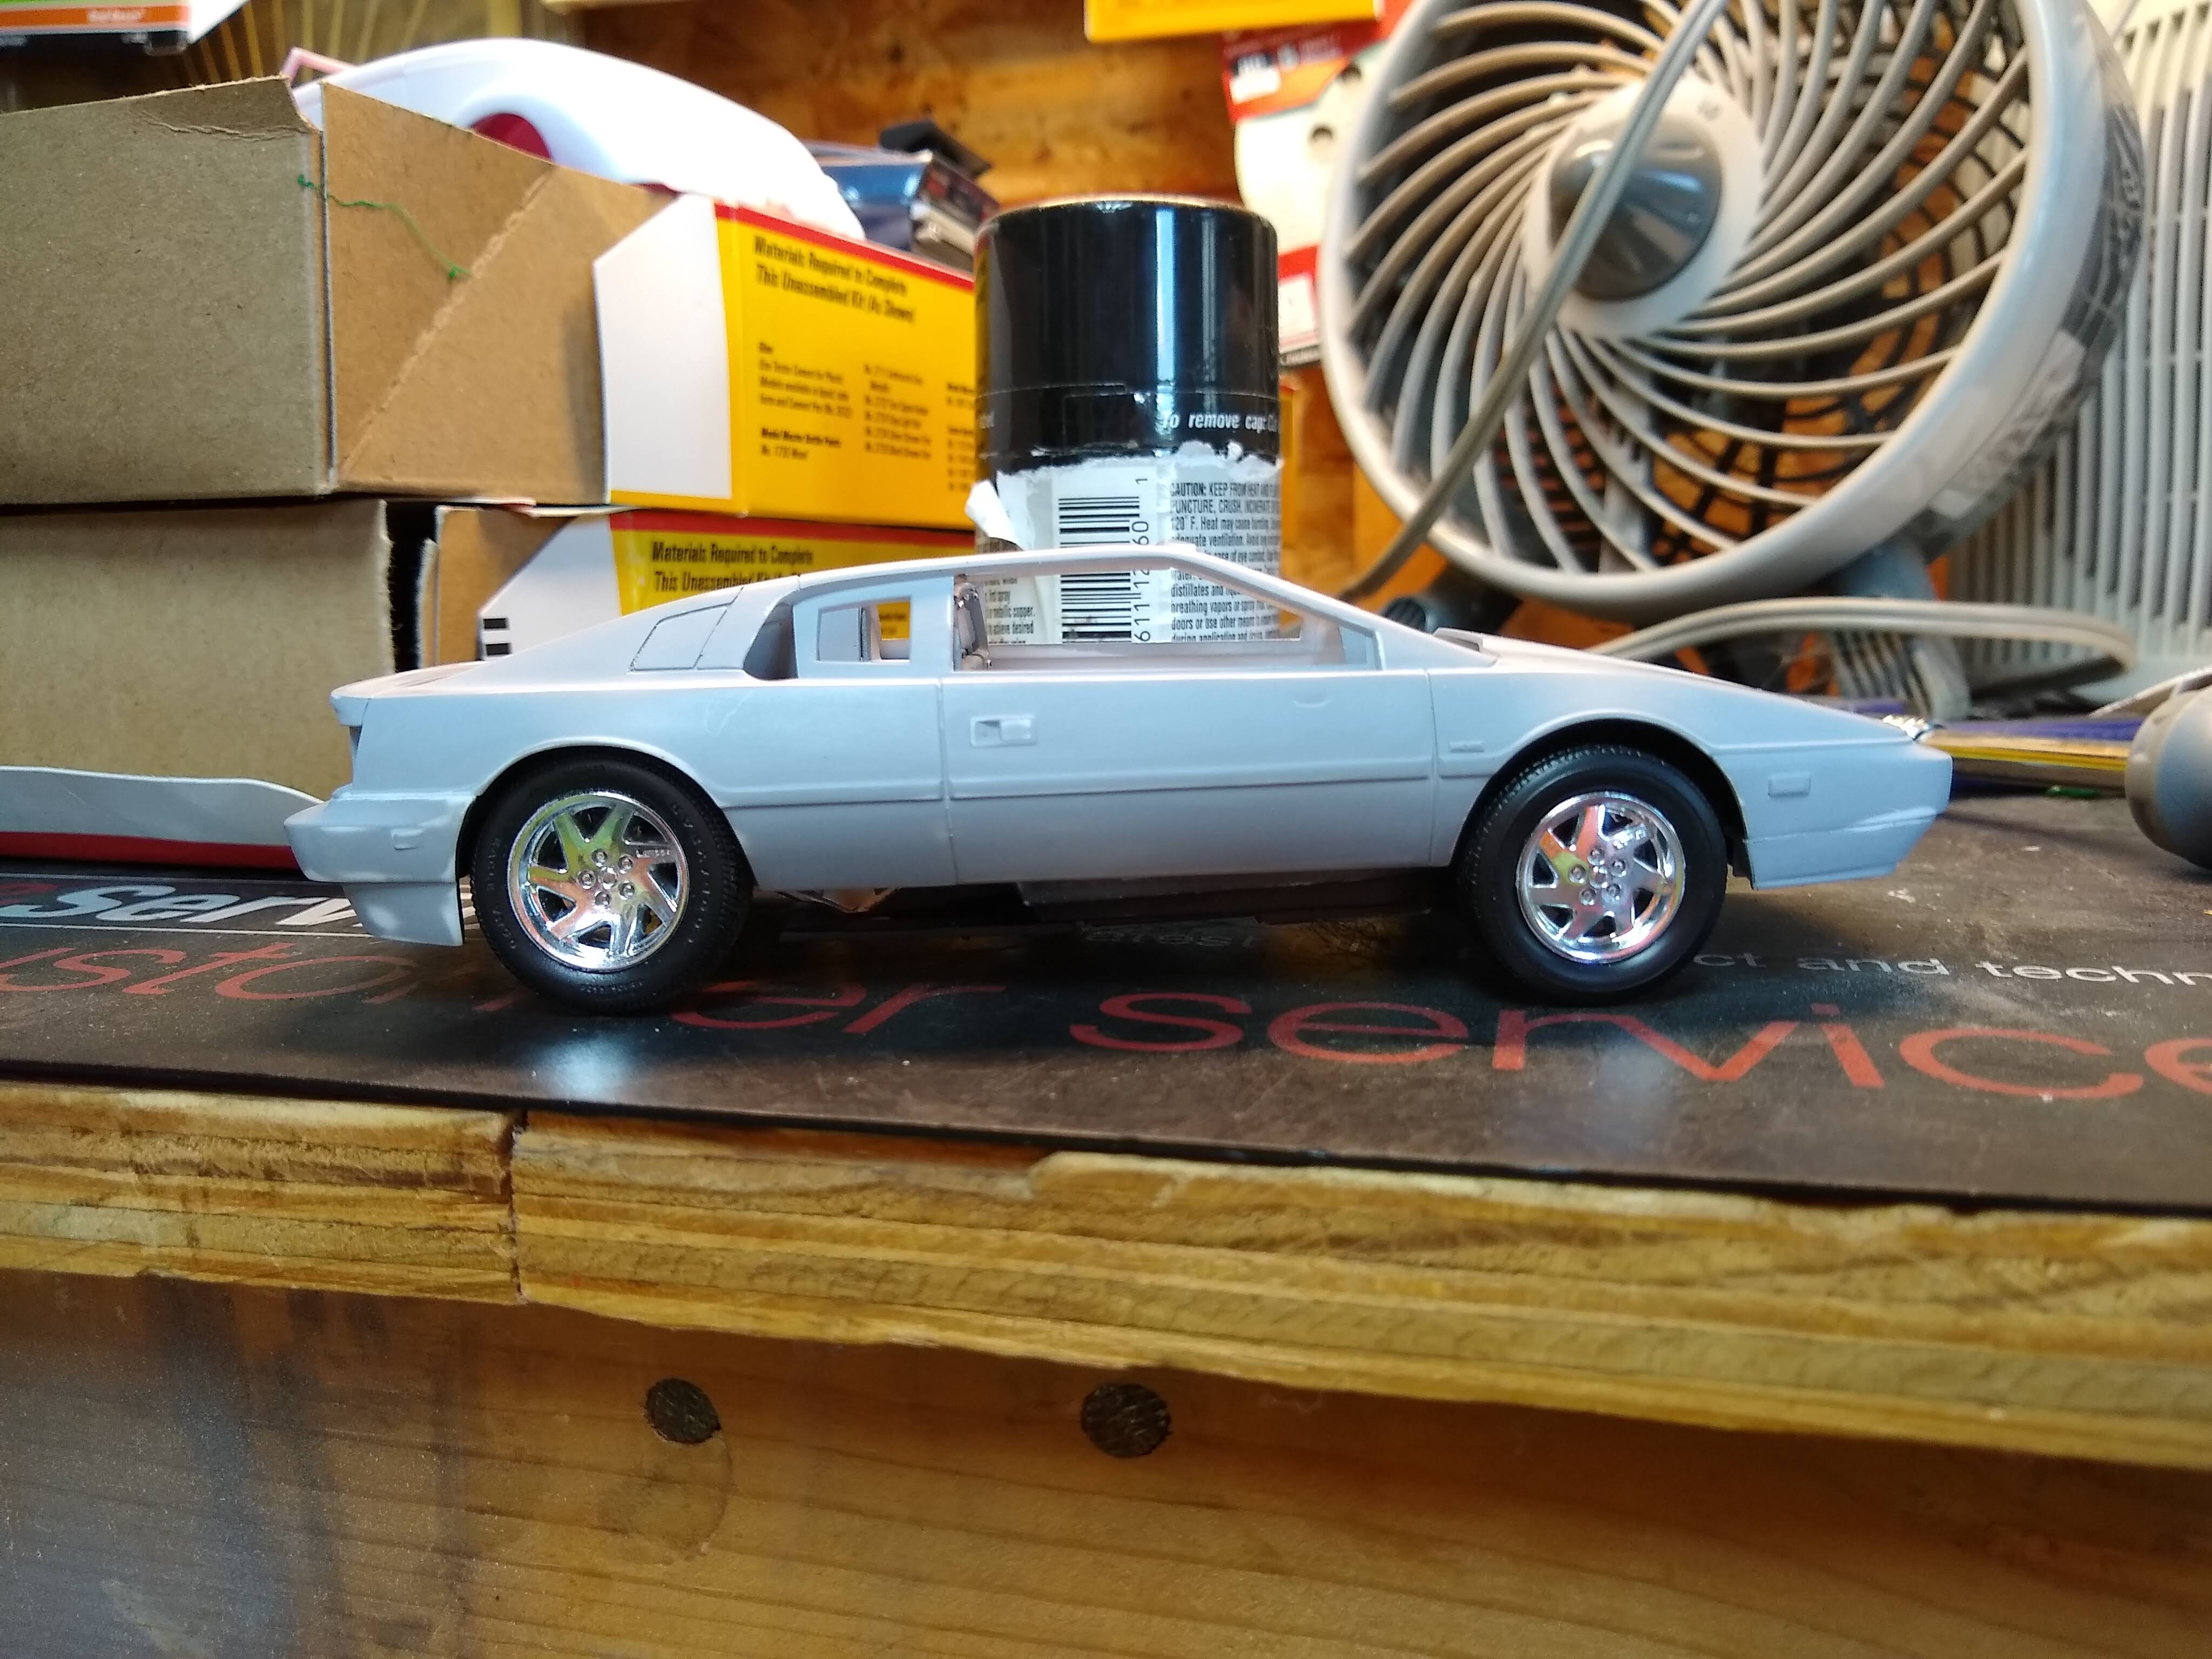
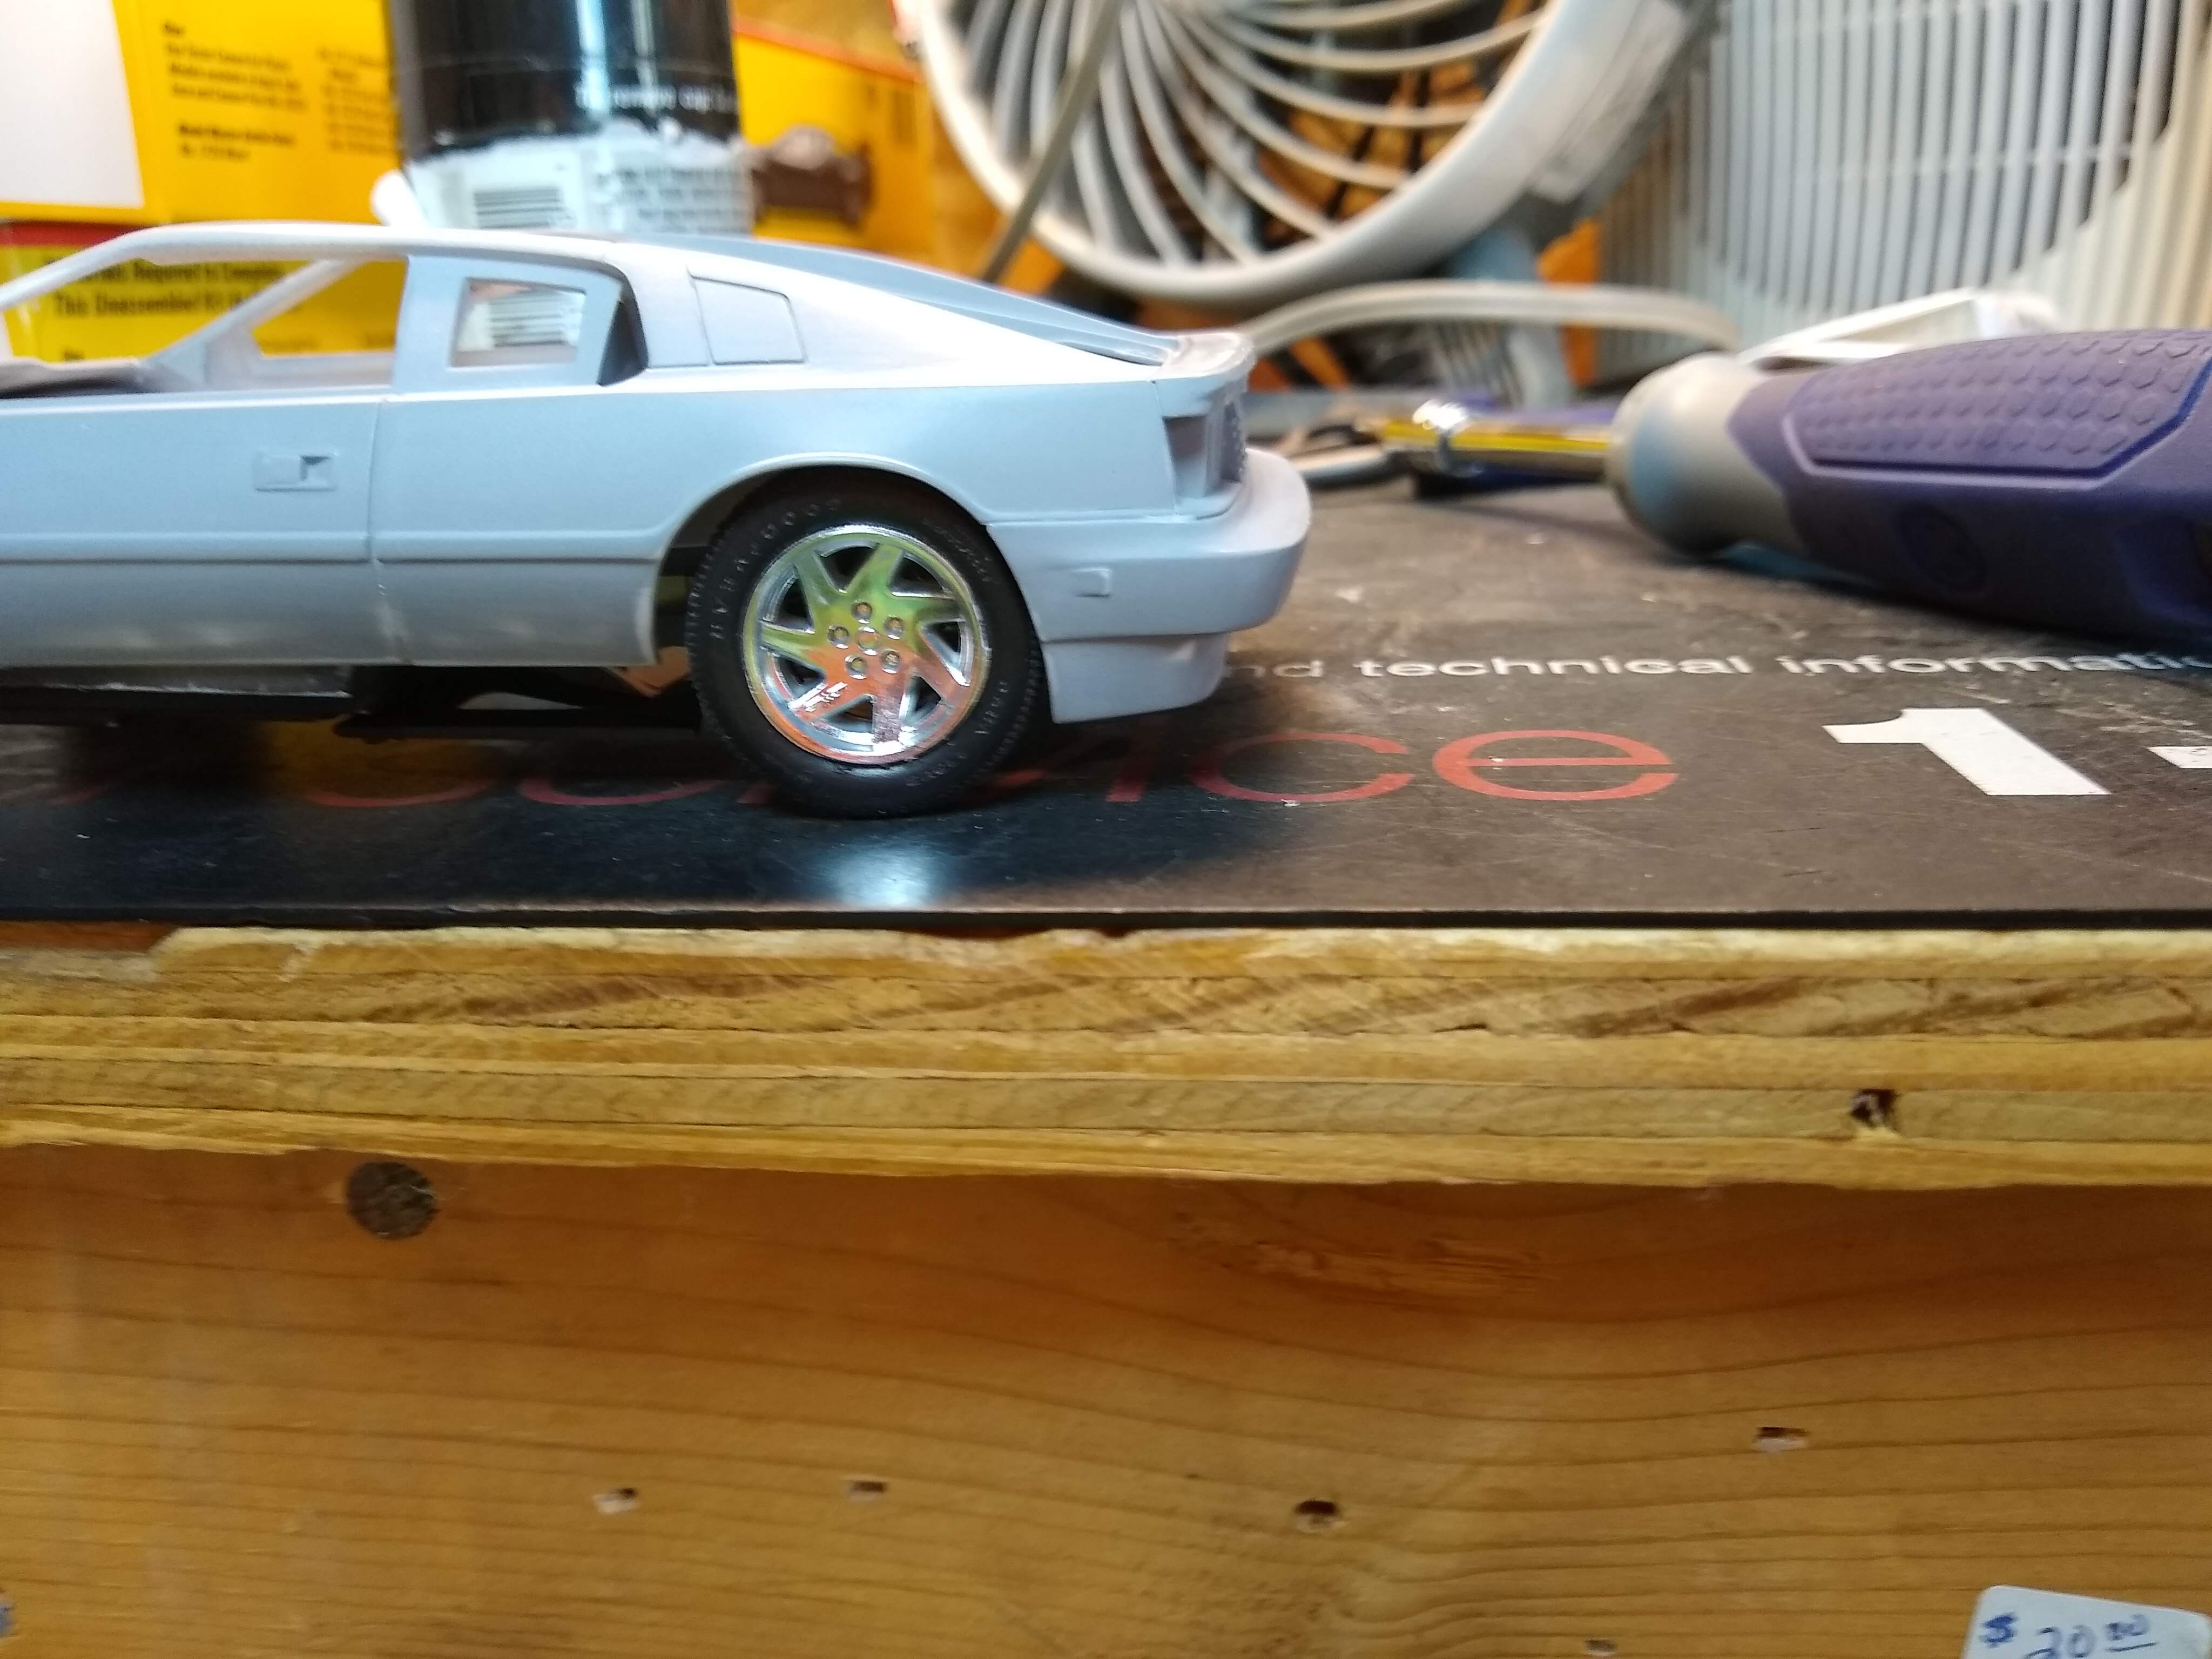
ok, so I'm back on this one. I didn't realize I haven't posted a photo of the chassis. I assembled it according to instructions and it looks great as a model on it own. I had test fit the interior platform and body over that with no nose or rear caps glued in place and everything looked REASONABLE. After reading Dann Tier's post, I glued the nose and rear cap on. Let them dry. Last night I was going to finish up the rear suspension with the shock towers and rear links. The links went on well, and couldn't exactly see how the shock tower loop went in place. So I put the interior platform on and nothing was fitting right. The engine room panels were not snugging up to the chassis side panels. I had been very careful to make sure this all fit when gluing up. So no shock towers for now. Snaded top of transaxle to allow the platform to sit lower. At this point I don't have the body on the interior platform. I decided I better put the interior up in the body. So I did and tried it again. That's when everything went sideways. With the nose and rear bumper in place, it changed the fit of the interior to body. I put the body on there. I now see why everyone says it sits too high in the front. OMG that is awful! And the driver's rear wheel is all wrong in the wheel well. Too far inboard and too far back. VERY IMPORTANT TO GLUE THOSE ENDCAPS TO THE BODY AND TEST FIT A LOT!!!! You should do the endcaps first thing so you aren't misled through any early test fits of the chassis to body parts. So lots of issues to tackle. I sorta started messing and should have taken a more methodical approach. First thing I did was to elongate the holes in top of spine so the wheels would slide back a little in the openings. This may bite me later.Trying to figure out all the fit issues that are happening here. And the frame does not locate securely without gluing. I was able to clamp the front in place to look at the back. I did not see an easy proper way to put in new lowered front mounting spindles. The upright tapers and I didn't want to drill for new. The front wheels don't attach in any secure way and it seems to me as if the holes the spindles go in are crooked from the factory. If I put the wheels on a rod and spin the rod, the wheels wobble. So I made an executive decision to just drill the holes lower in the wheels/rotors and hopefully get them to mount straight. I clamped them in the vise and drilled carefully. Glued them back in place and that seems to be better. Next issue is the rear wheels. I ended up breaking the glue joint loose where the big control arm goes to frame. There is a pin to mount with. I cut it off and filed the mount flat. With the body ON the chassis, clamped in place, I CA'd the control arm and lower locating arm into what seems to be correct placement and alignment. And then I put it down to let it cure. I will go back and drill the arm and frame for a pin to strengthen the joint. So... I am learning that all the problems I've read about are probably true. This thing is pretty poorly engineered. What seems like some interesting engineering and kit construction is just awful when you try to put all the subassemblies together. I can't imagine some young or inexperienced modeler trying to build this thing. Especially without folks like Dann Tier trying to guide us all to successful completion. And here I thought all was well and I was about ready to paint the body parts. In my photos, I think the rear of the pan has slid too far up in the body as well. I'll get back to it this evening maybe. I really want this thing done and off my bench. If it were mine, I'd just chunk the whole thing. But this is a build for a friend. So I'm trying to get it together as nicely as possible. I think it will end up being TWO nice models. A chassis with a beautiful engine. And a nice body/interior. But will those two go together to make ONE nice model? We'll see....
-
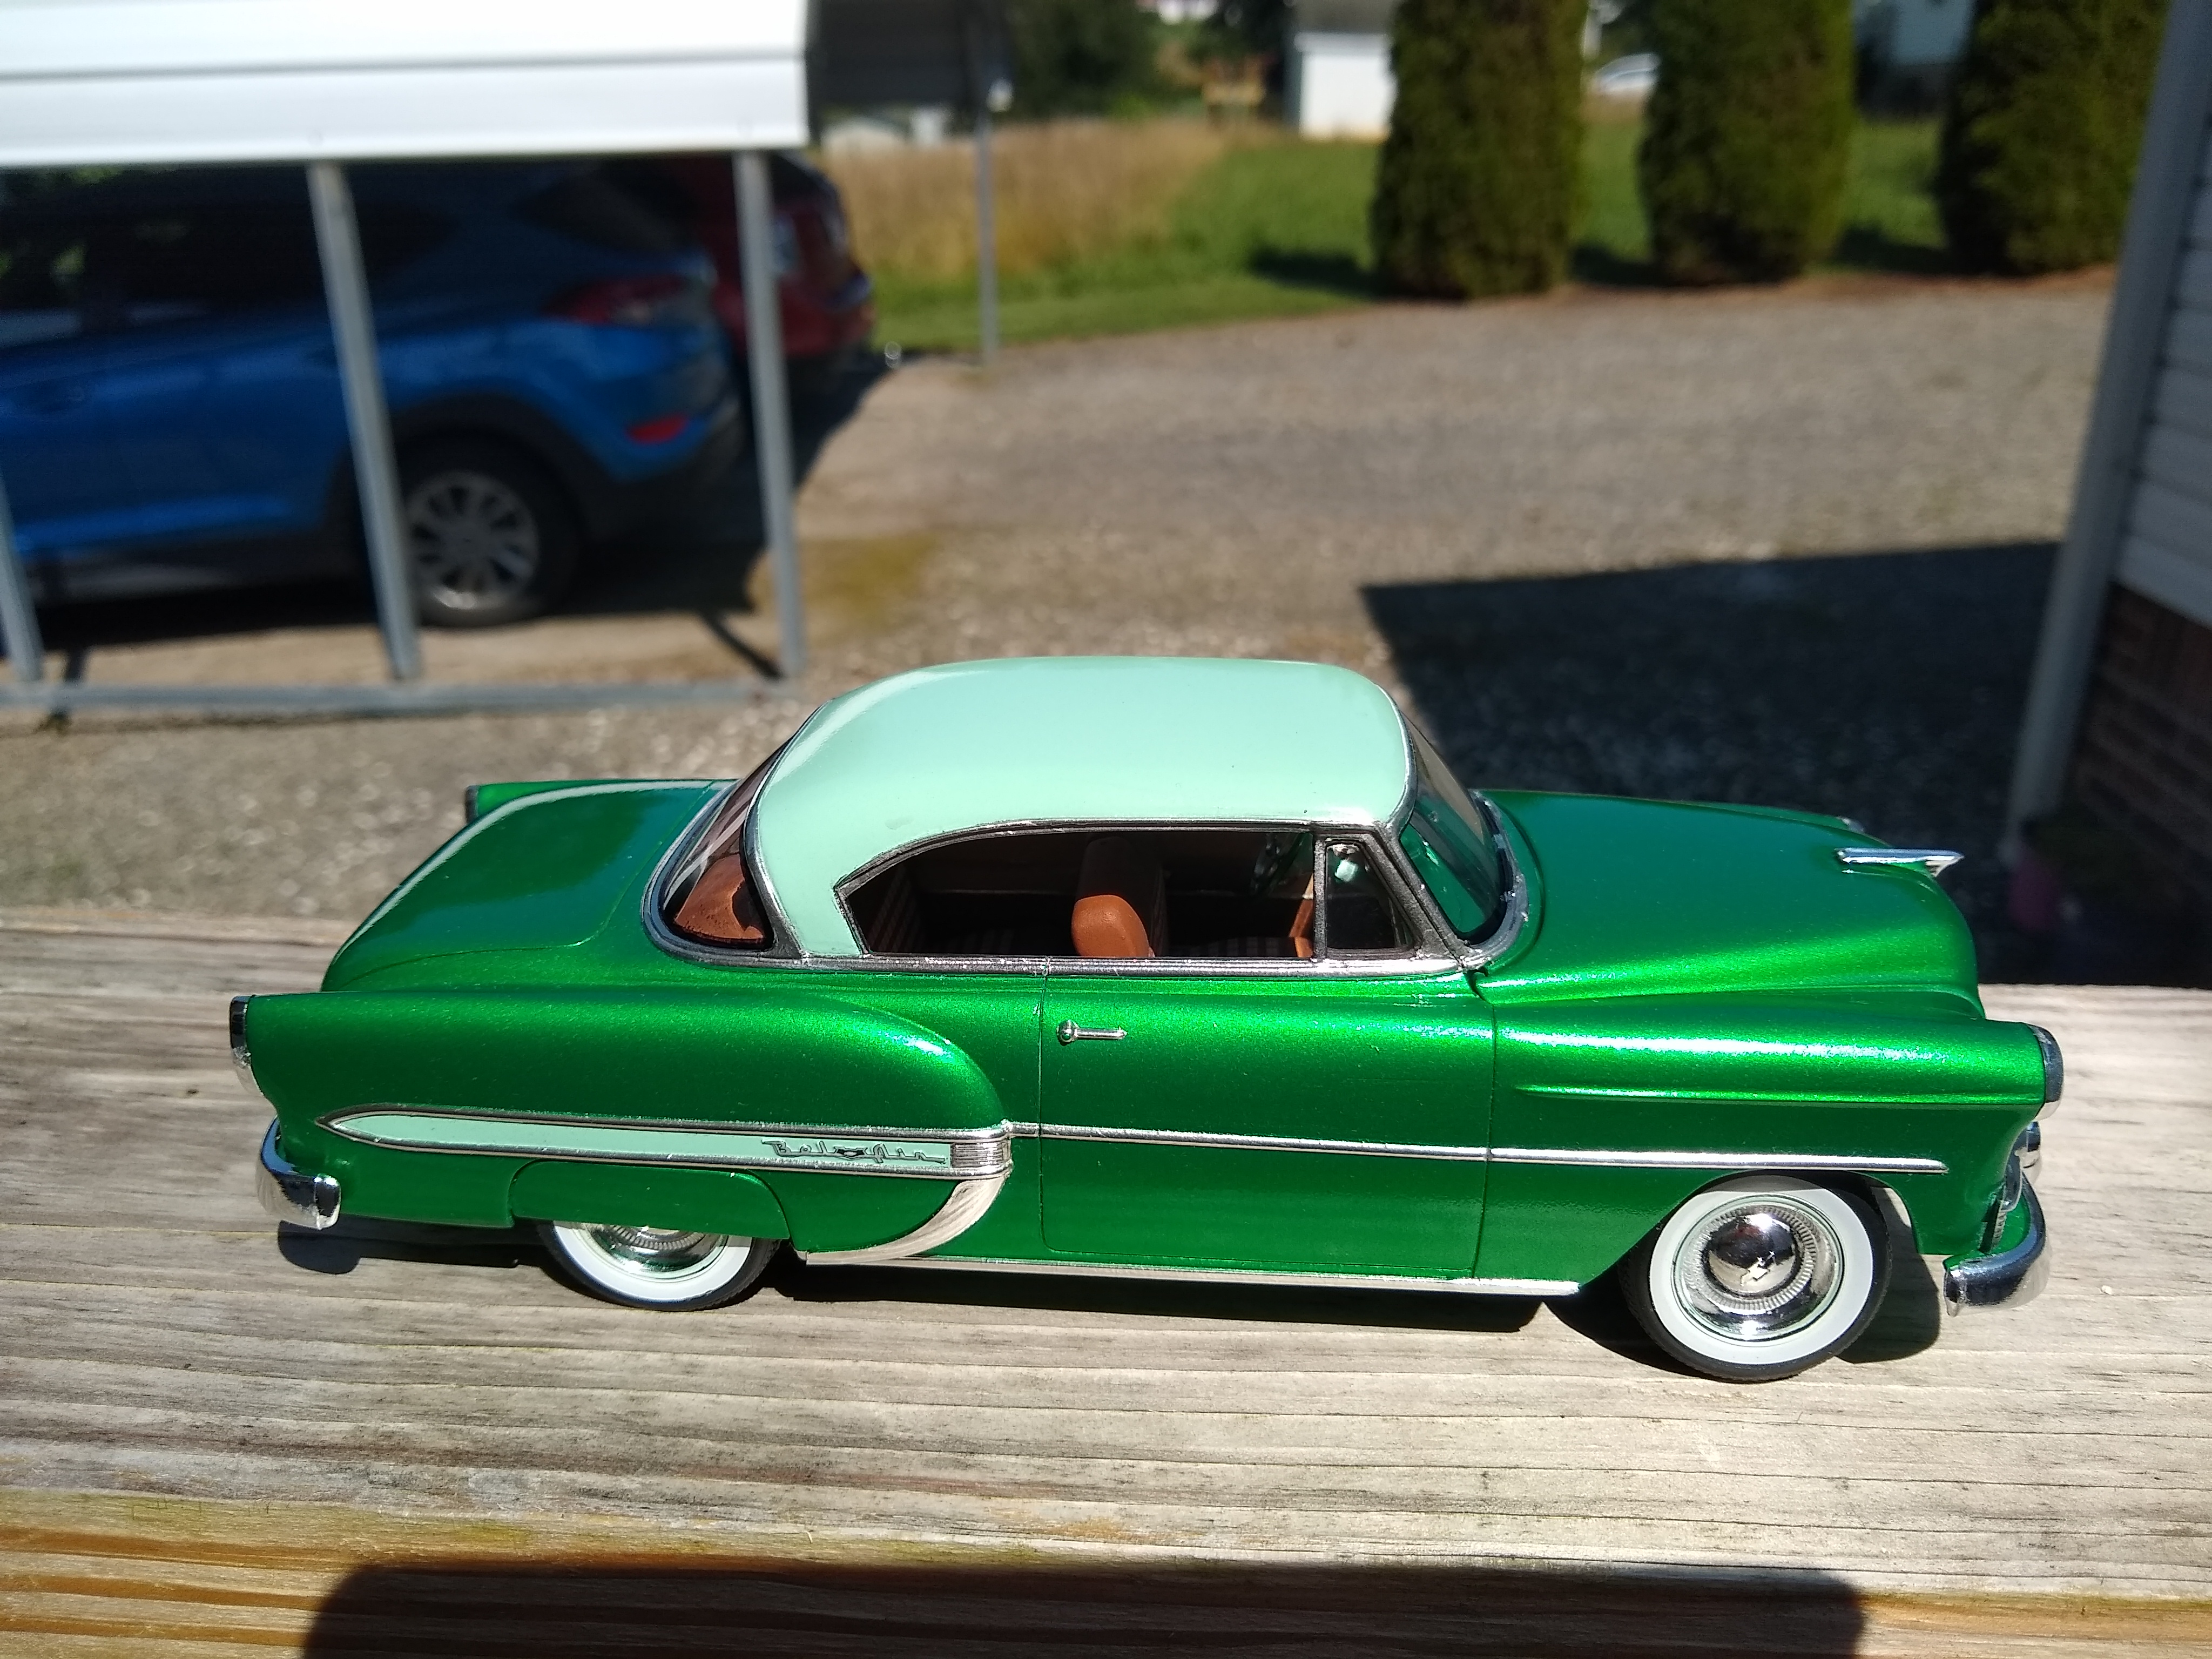
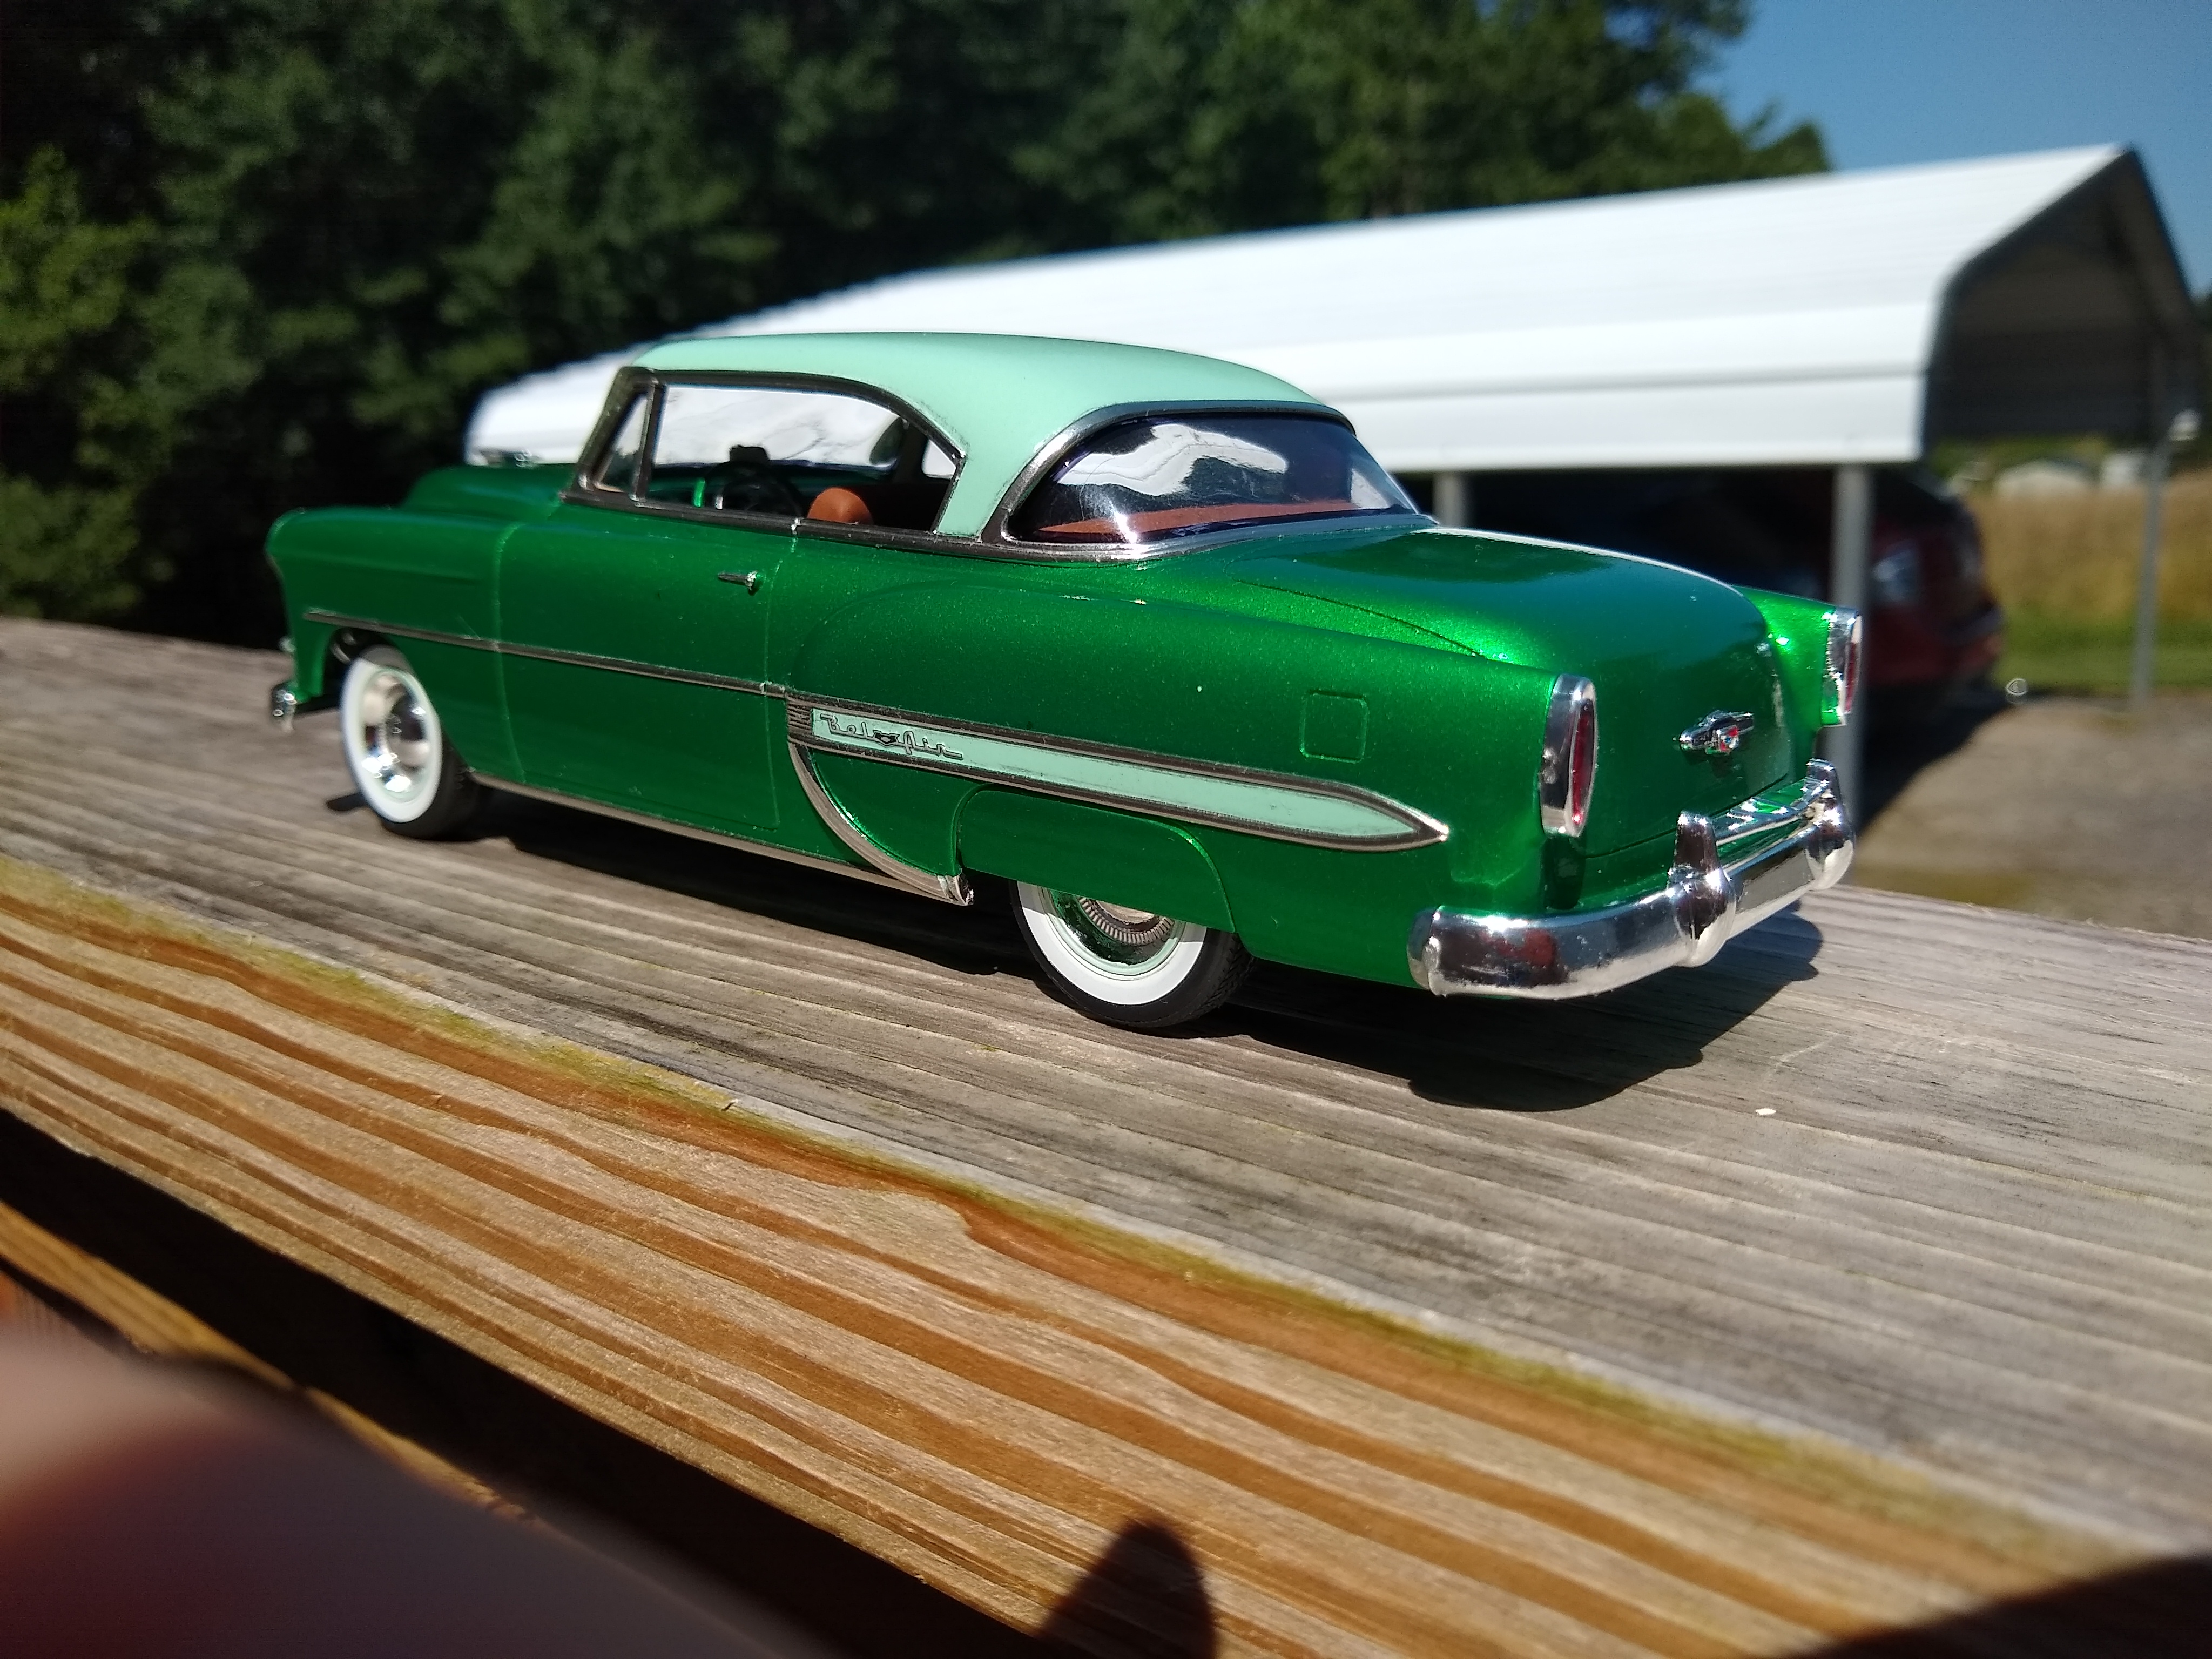
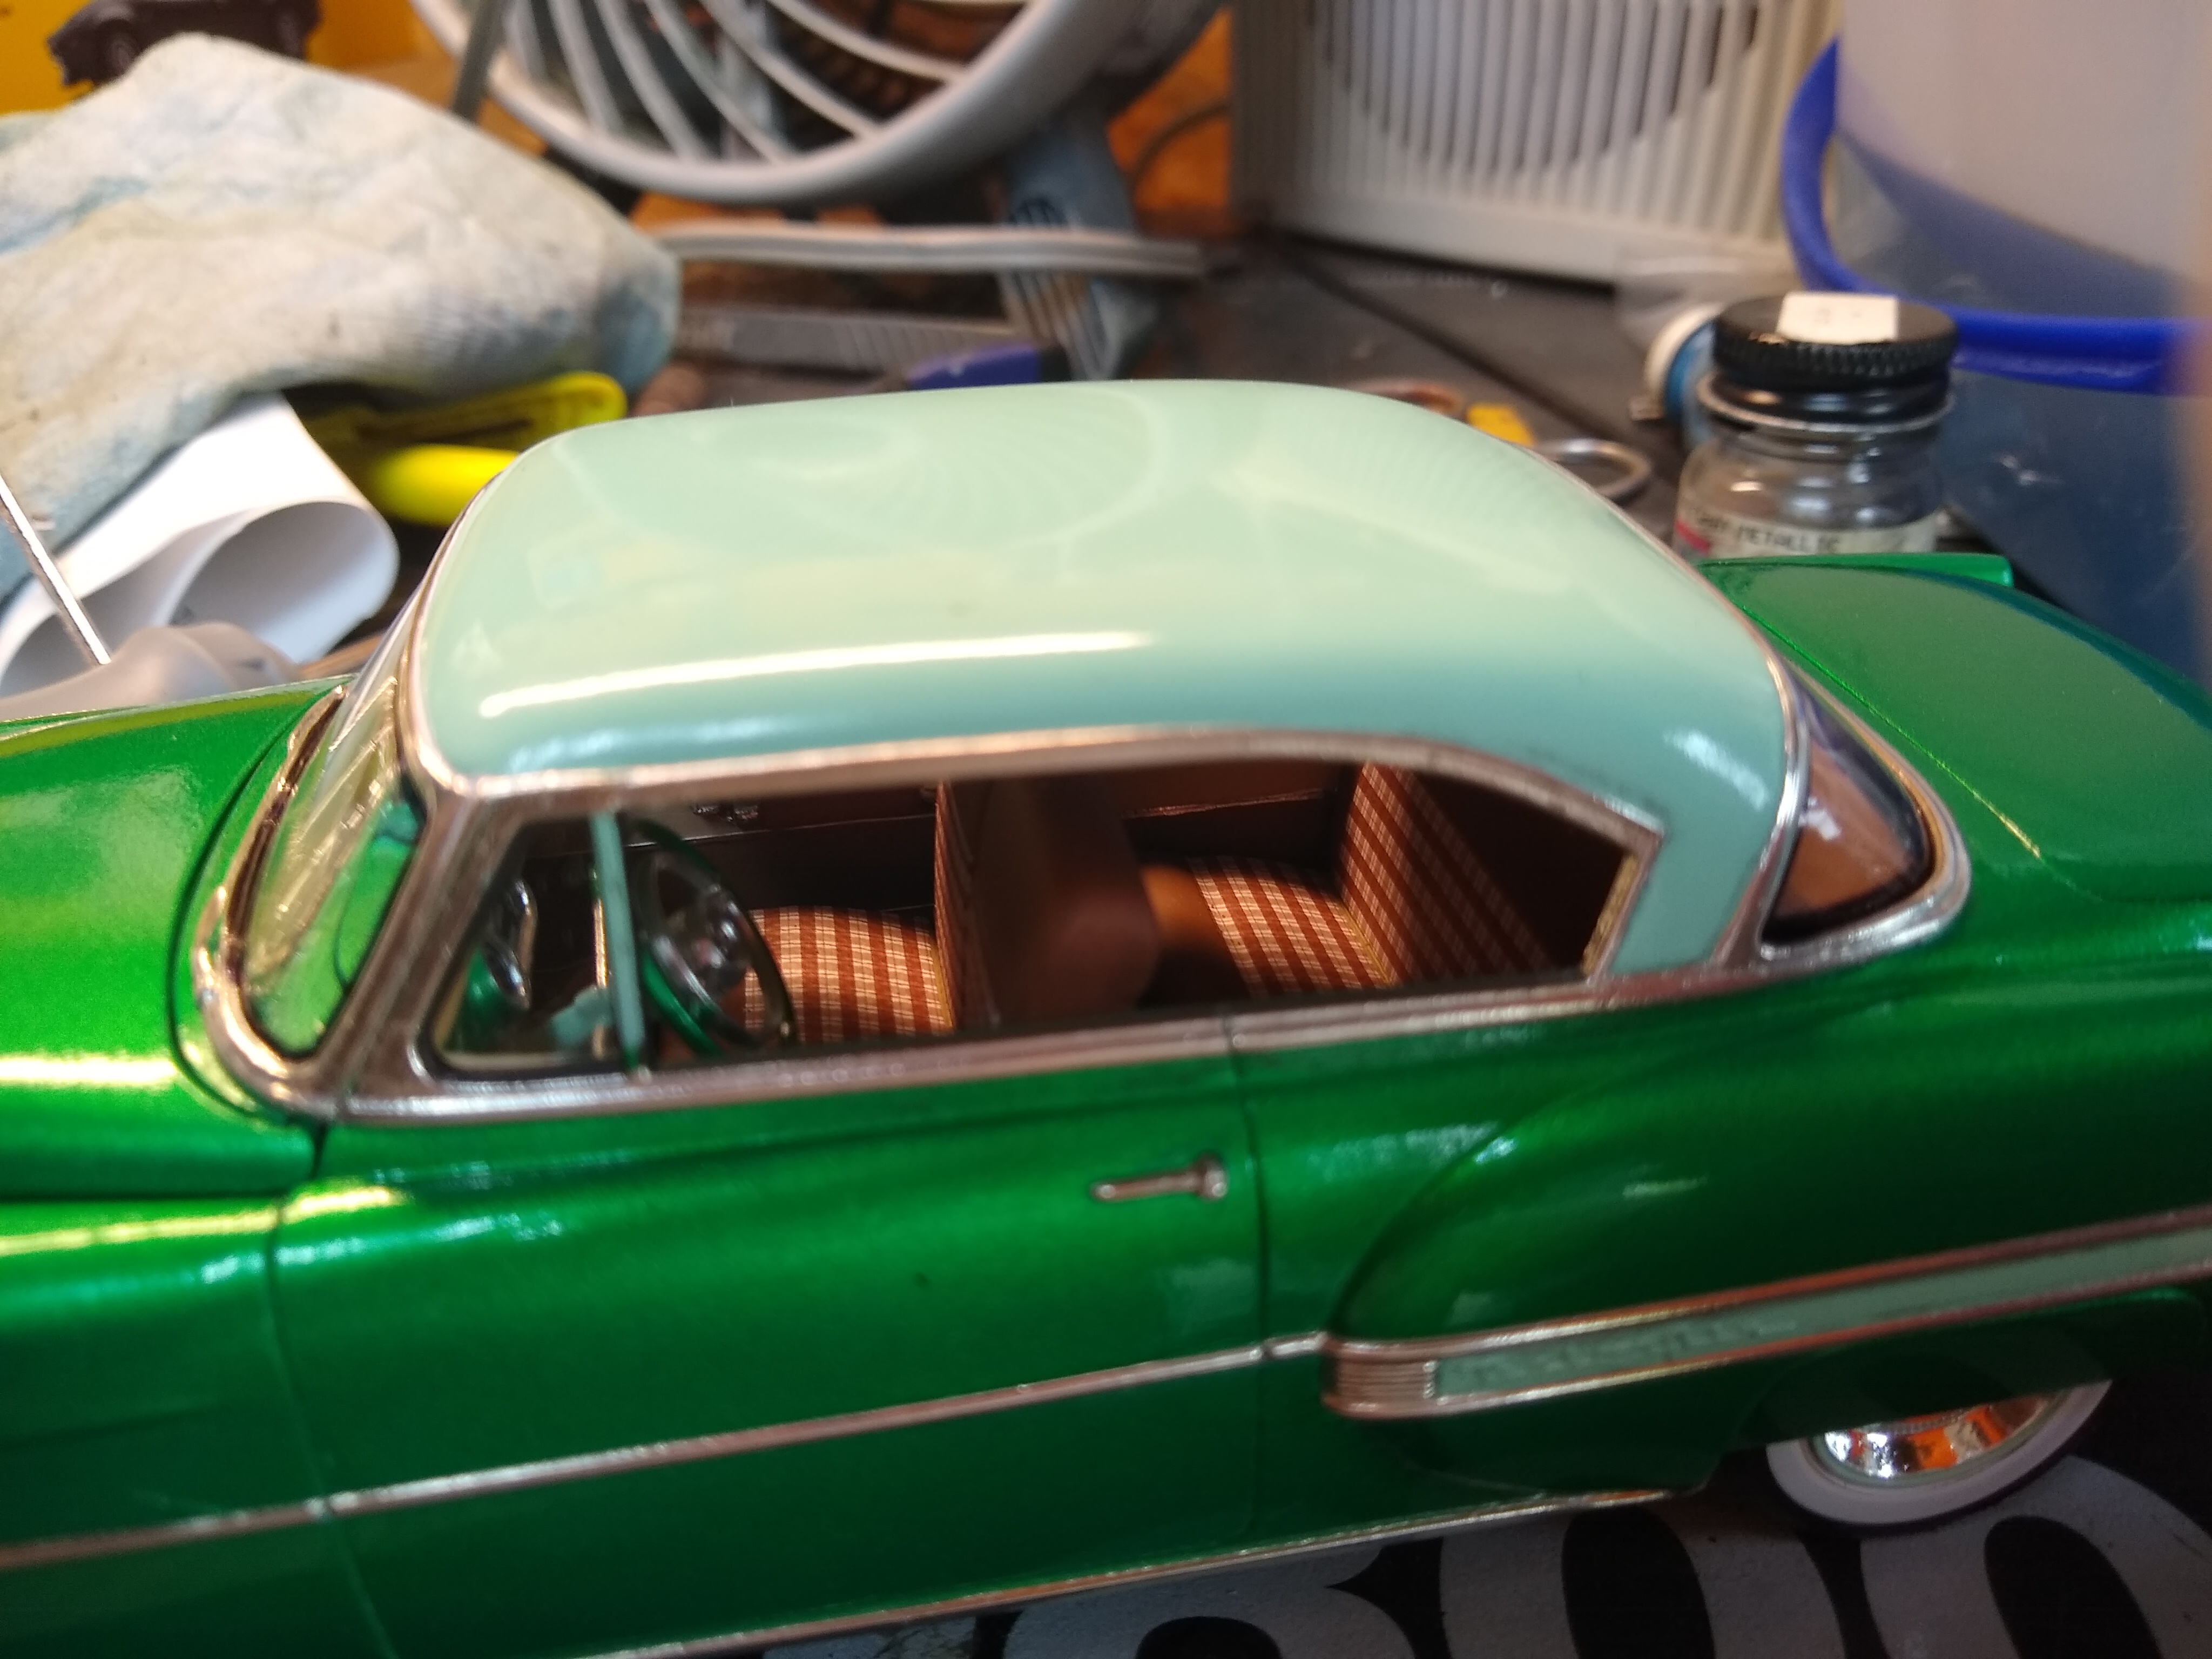
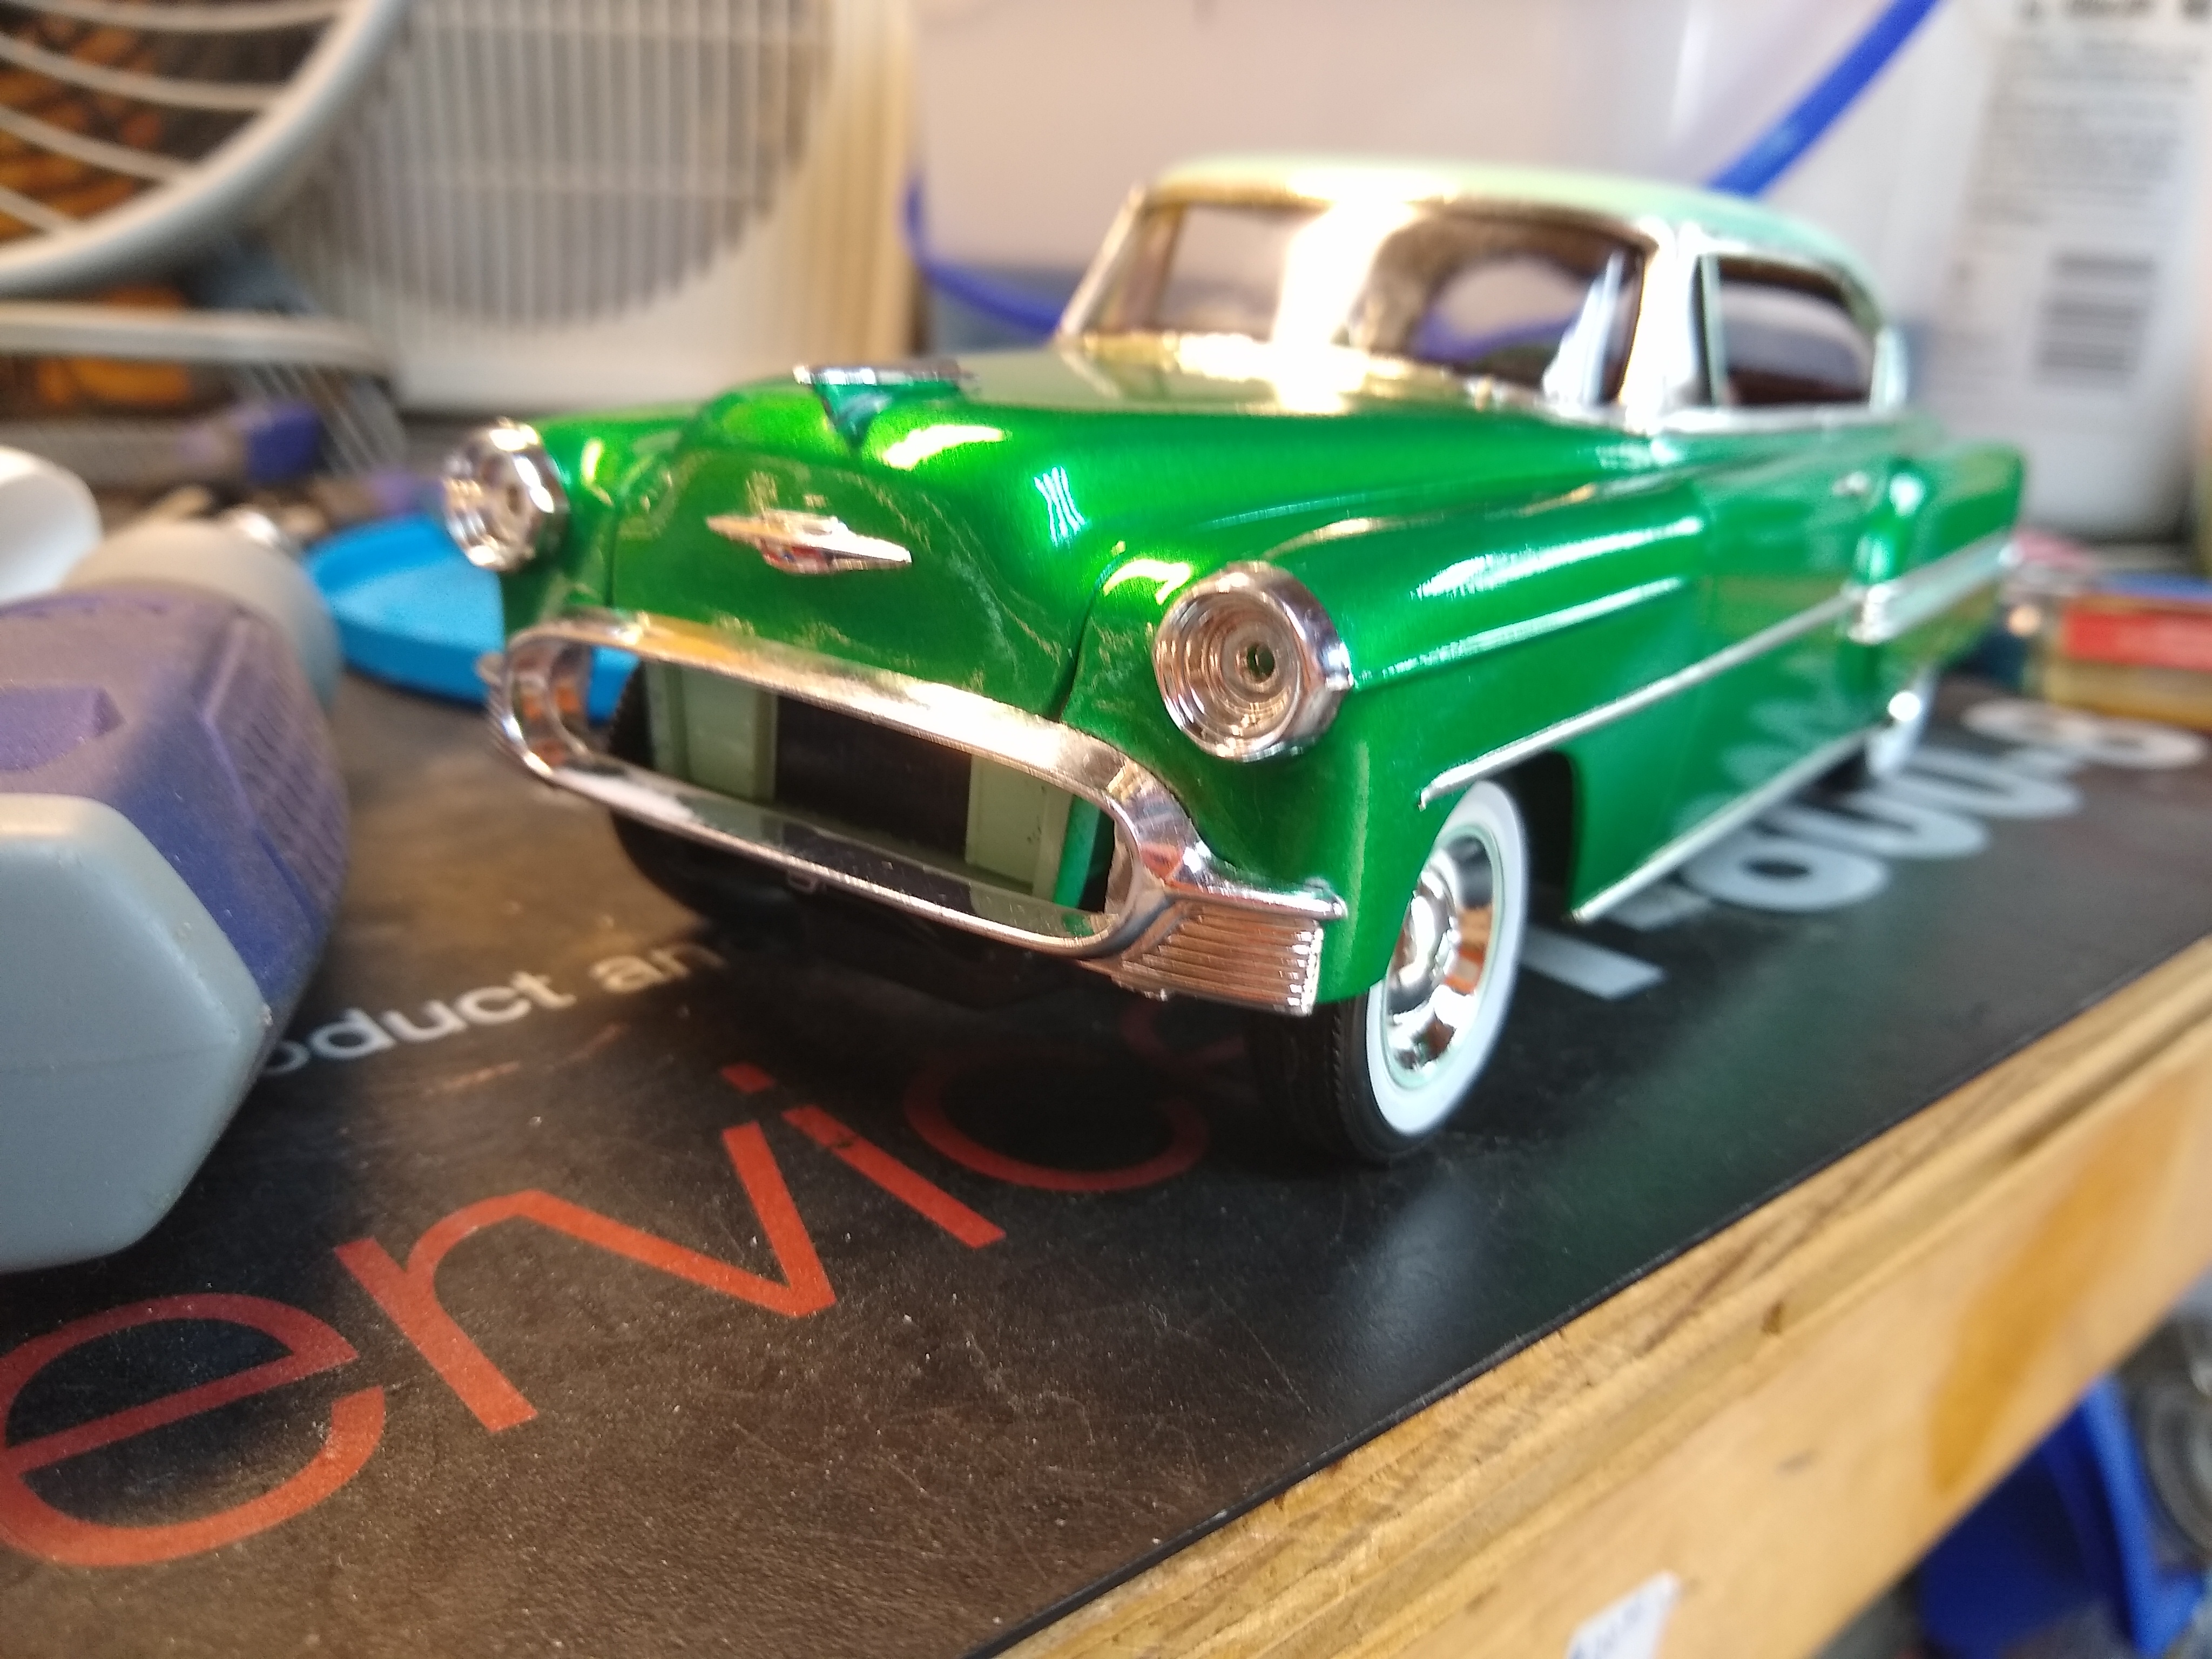
Thanks, everyone. I must say, that green is spectacular in all lighting. Right now, it's on our coffee table and it almost glows. Testors extreme lacquer if you're interested. Highly recommended if you want to build a green car.
-
Trying to sort out classic kit quality
randyc replied to ICMF's topic in General Automotive Talk (Trucks and Cars)
The guy I'm building for is shopping for himself. He is only buying in plastic what isn't available to him in diecasts. So I dare not tell him about more. LOL. I have about 8 kits for him right now. Ugh, but then again, I get to build things I wouldn't normally buy for myself and there isn't much out now from US mfrs that I haven't already built. I actually told him to not buy MORE for me to build without checking with me first. I do wish he would send me a Pocher kit. Never done one of those and would love to, but he is adamant about sticking to 1/24-25. Plus he claims to have budget restraints. If it takes me a month average to complete each kit, then I'm well into next year. -
Trying to sort out classic kit quality
randyc replied to ICMF's topic in General Automotive Talk (Trucks and Cars)
Since I'm building for someone else, he understands that I will only use what's in the box or what I have on hand. I'll have to see if I have those DM parts on hand. I may. but thanks for the info. this is the kind of stuff I'm looking for as I wade into things I haven't done before. I can put a 80s -90s NASCAR kit together in my sleep, but these are a whole new world of modeling fun. I'm pretty stoked about this new venture. -
Trying to sort out classic kit quality
randyc replied to ICMF's topic in General Automotive Talk (Trucks and Cars)
I did see your photos when I googled that one. Super nice! PM sent. -
Trying to sort out classic kit quality
randyc replied to ICMF's topic in General Automotive Talk (Trucks and Cars)
This is an old thread, but I found it searching and figured I'd resurrect it since I just got 3 Hellers - the Bugatti T50, Delahaye 135, and Talbot Record. Also a Monogram 31 Rolls, Johan Cadillac roadster, Monogram TR8, and finally a Minicraft TR3 to build for a friend. That's about it for the rest of my building year! lol. I am also starting a 32 Chrysler while working on a Lotus Esprit and Lindberg/Round 2 37 Ford convertible (Smoothster tooling). I don't get to keep any of these, but that's okay, I don't have a place to display them if I did. The joy of the hobby for me is the building, most of the time. Once in a while a car really stays with me - the 53 Chevy I just completed is an example. But it was for me anyway. The "classic" kits all look fascinating to build. I did build the 32 Chrysler many years ago - beige/brown car on box. Connoissuers Classic releas I think. So I was kinda excited to try it again as an "adult" build. Anyone working with these or experience, let me know - jump in with the pitfalls. I'm looking the kits up and the real cars, preparing for the builds. -
Looks nice! I don't understand why there aren't more plastic and diecasts of dirt cars.
-
I built it. Took years of starts and stops and I lost the rear bumper along the way. The chrome is a real 3 stpe process, bras,nickel, chrome? Almost impossbile to sand off the sprue nubs. Builds ok I guess.
-
Nice replica! 1/18 has some nice stuff, but it takes up so much space to display. I have to cram all I can in my space so the 1/18s are going away as I replace them with 1/24 or smaller. But that is surely a ncie model.
-
Round 2/AMT 1977 Pinto - Super Loser (out of box)
randyc replied to Faust's topic in Car Kit News & Reviews
Man, these were so a part of my childhood. And I owned 2 '73 Vegas, a GT wagon and a hatchback. My aunt had a green metallic early pinto (small bumper). A friend had a Crusing Wagon. And there were a LOT of these losers running the roads. But just not sure I can justify the expense for such a sparse kit that I may not get to for a couple years. Thanks for showing what's in the box and adding your fun perspective to it. Always look forward to reading your comments. And seeing the builds. -
Thanks for the compliments everyone. the more I look at this one, the more I like it. Fits perfectly with my collection and I am super happy with how it turned out. The metallic green is Testors Extreme Lacquer that is supposed to be primer/sealer/paint all in one can. I did paint direct to plastic. No primer, nothing. Over white kit plastic. It did well. Impressive. The aqua is Testors Modelmaster 50s aqua straight over the lacquer green. All decanted to jar for airbrush. It wasn't bad, kinda shiny. But I added a couple coats of wetlook lacquer straight from can. Was getting too heavy (I'm heavy handed with a can), so I stopped and left it as is. It's not a show car, so no polishing, except a couple spots where I errantly marked it with a sharpie. the testors extreme lacquer worked well enough that I bought a couple more cans at hobby lobby for future builds. I do love a paint that dries quickly with a moderate shine. Thanks again, everyone.
-
Nice addition.
-
Was it really that fast? Didn't feel that way, but I guess it was kinda quick, compared to some of the others I've been on lately. I do work several at a time like many do, so they are all overlapping. And I'm about as happy with the build as any I've done lately.
-
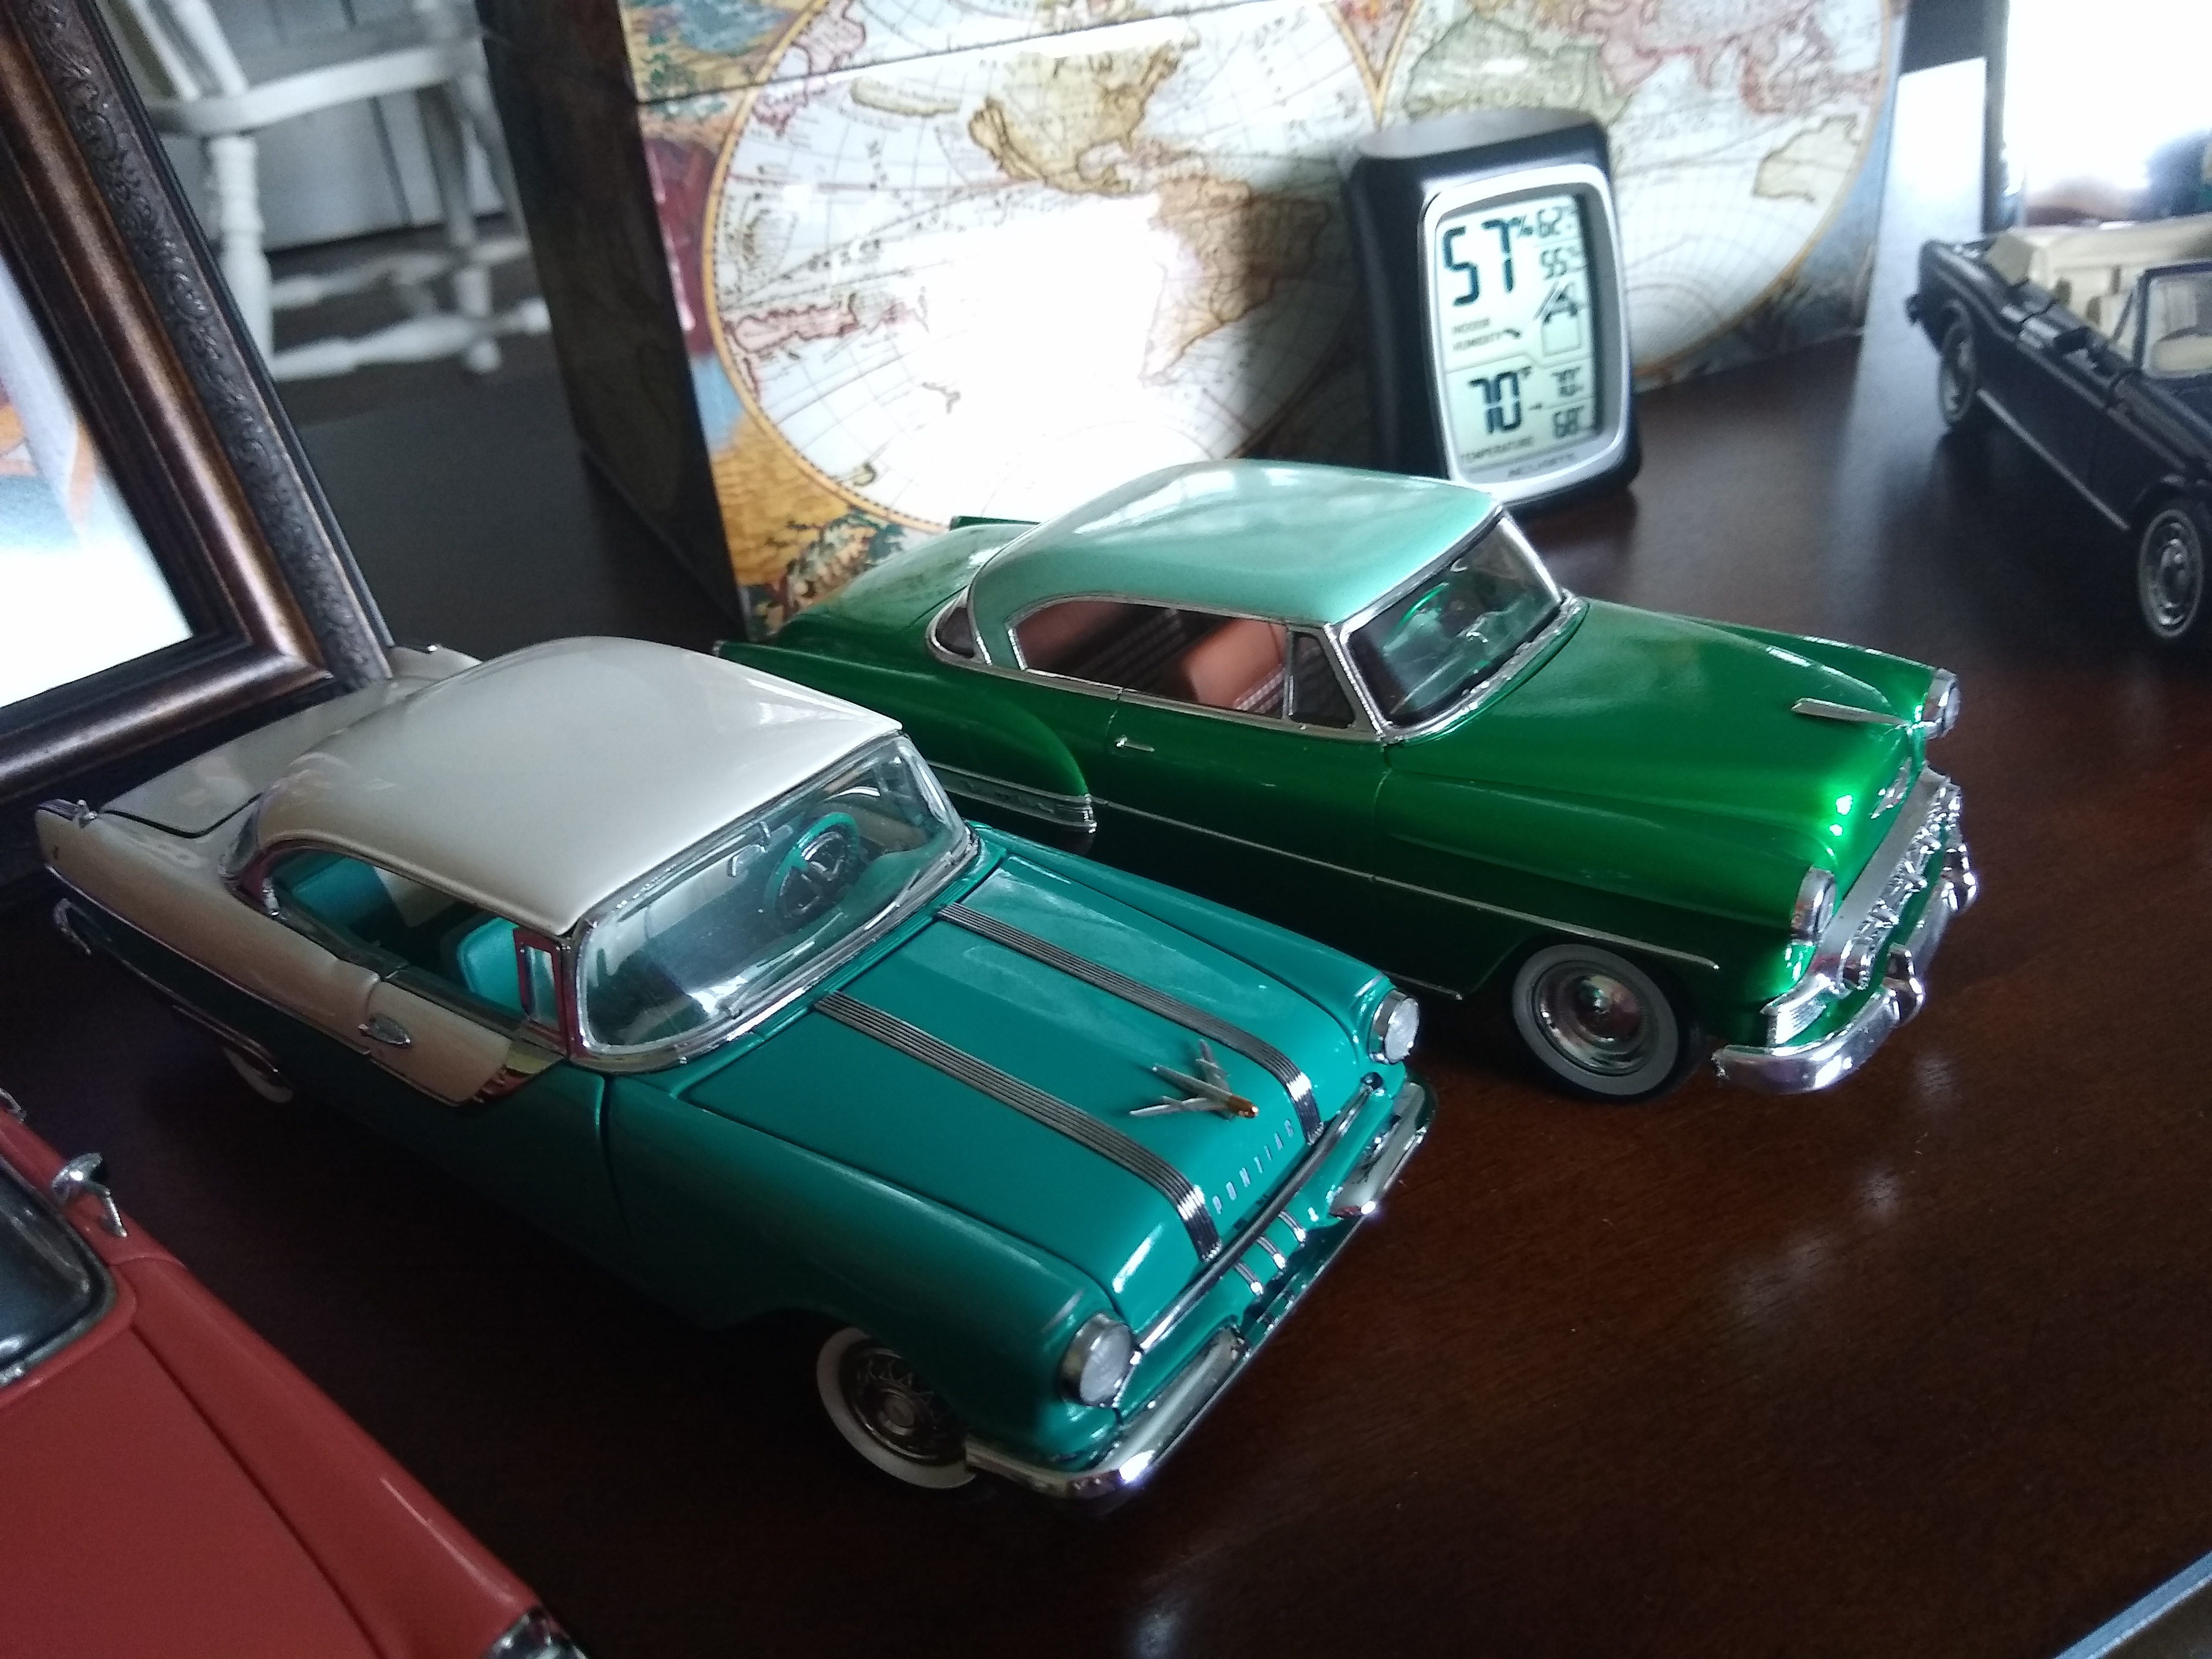
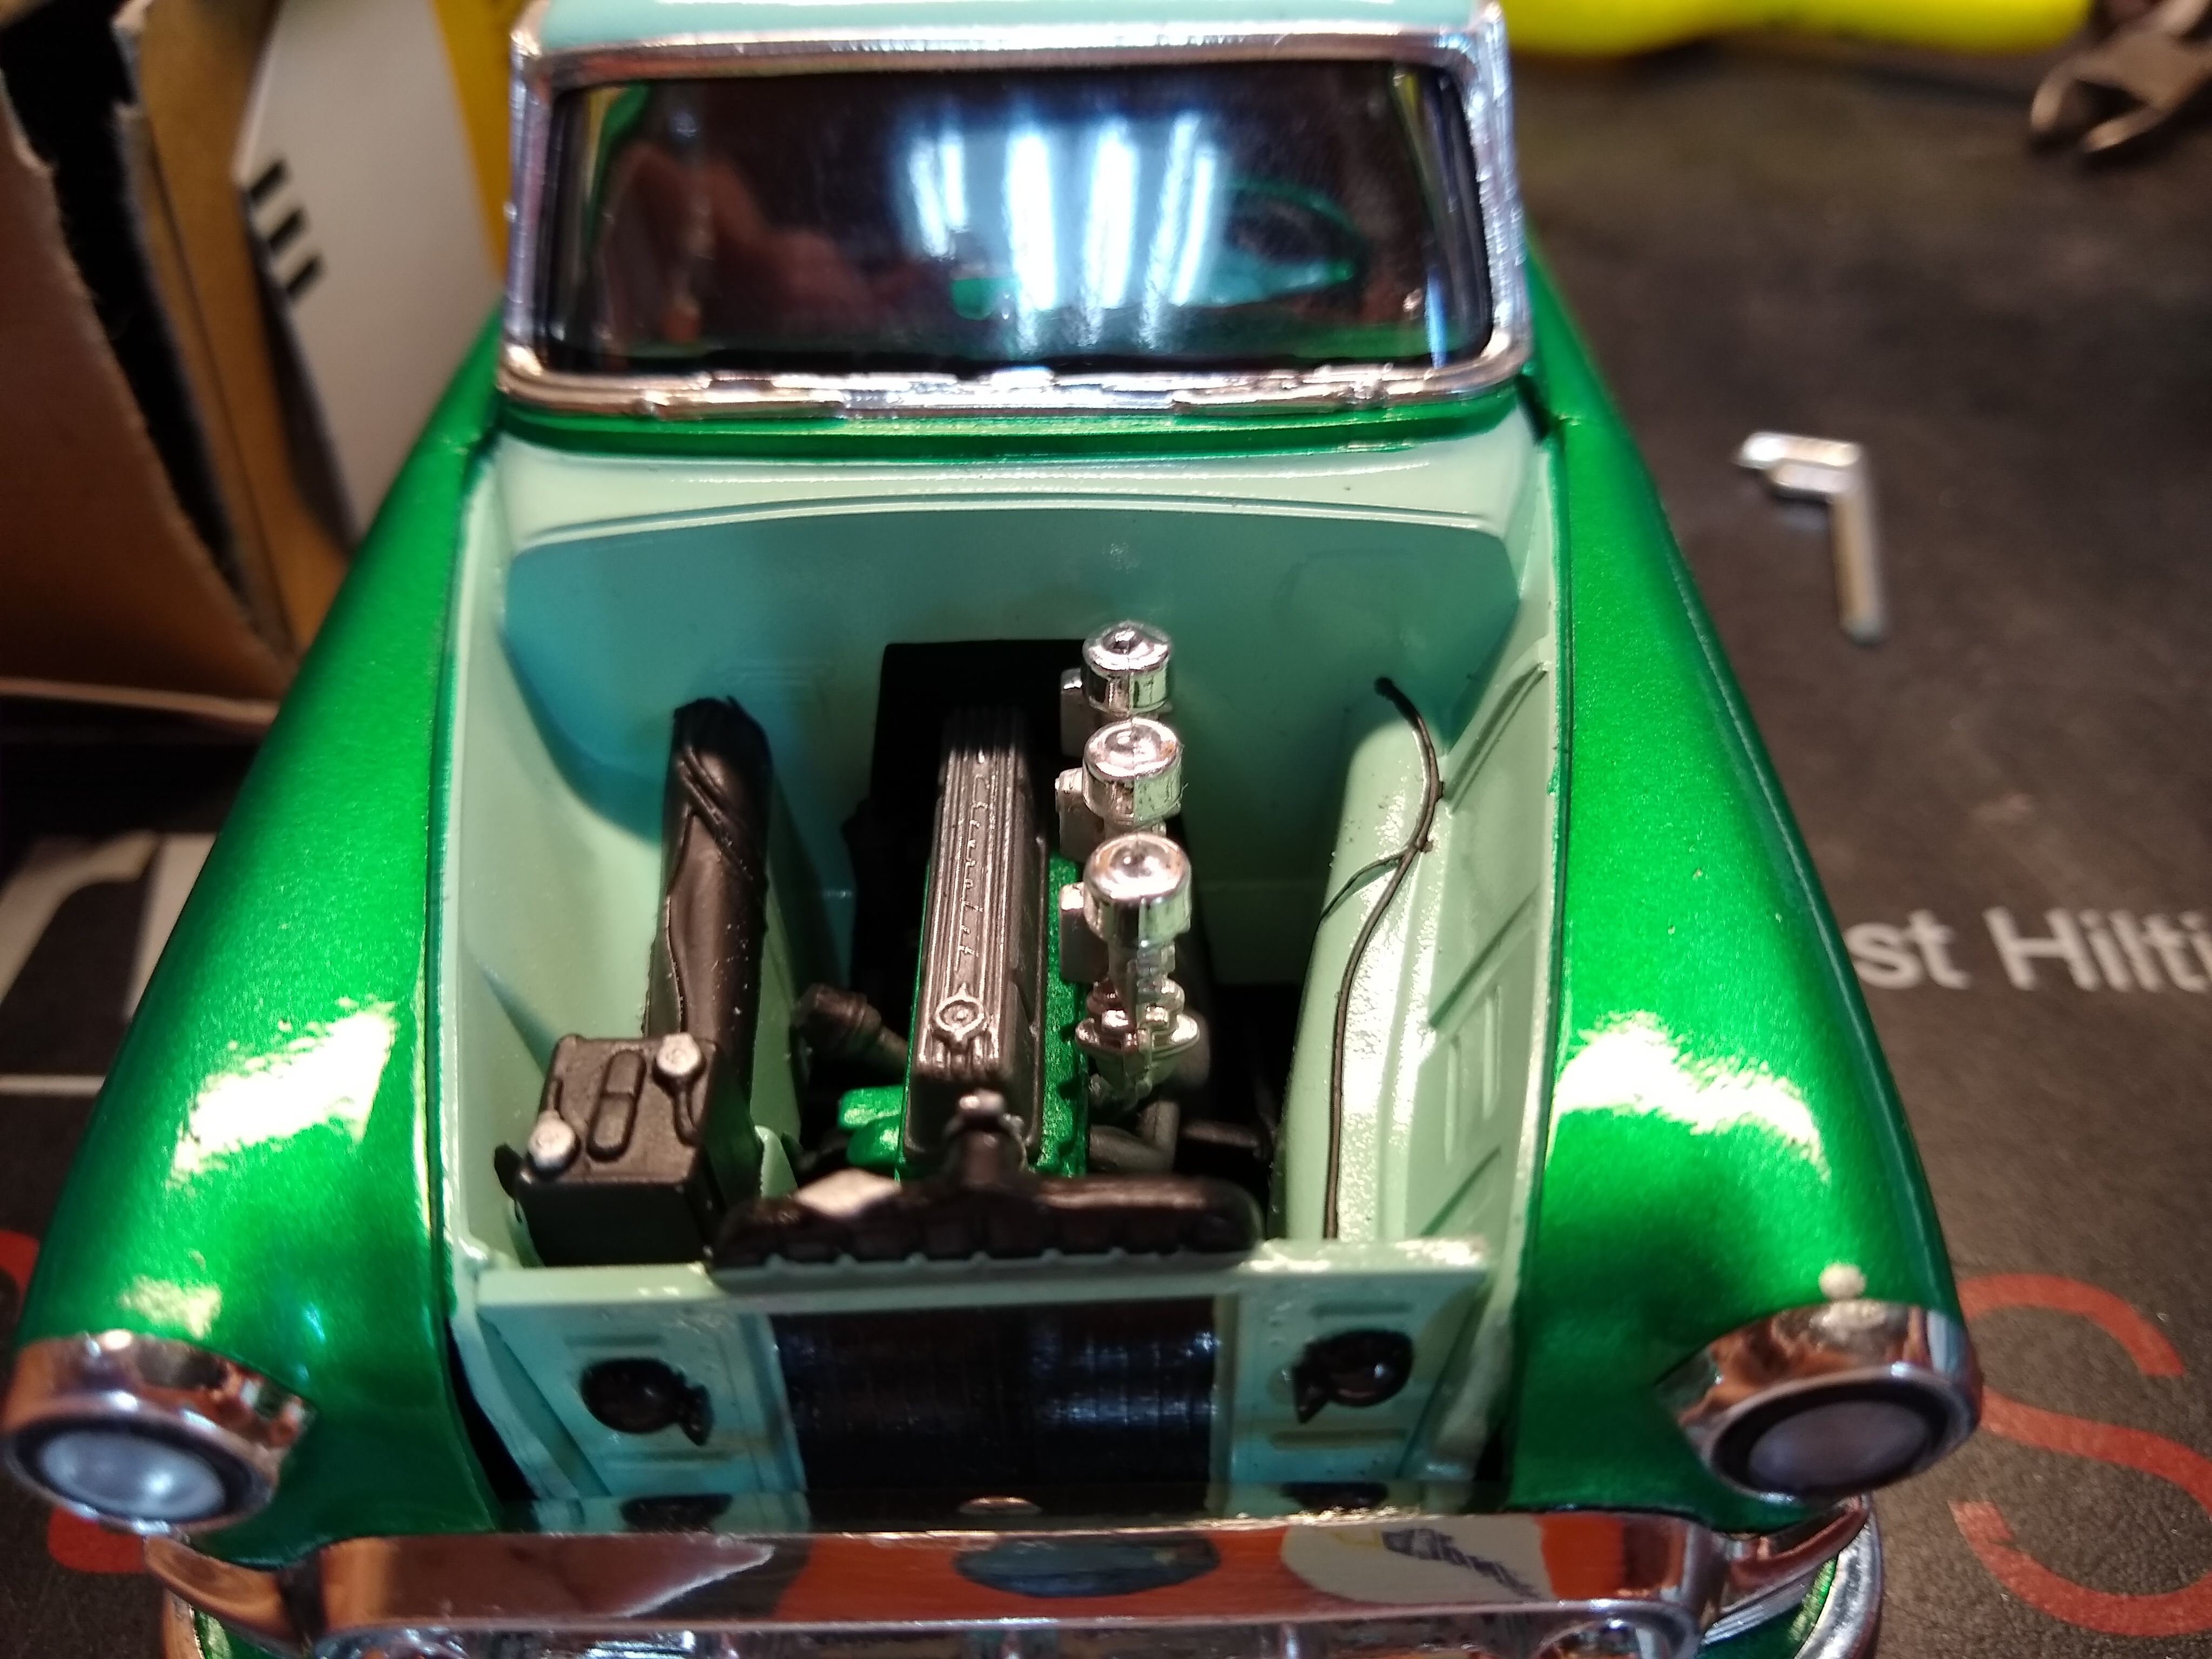
I sorta had the same feeling back when it was the red car on the box. I did use the engine for a street stock racer project. But I really wanted one of this generation of Chevy. The Mint cars are a little too high. And this one is built how is build it in my driveway possibly. This kit can be cleaned up into a satisfactory replica. I like this as good as a die cast any day. See photo. They go together just fine. And the 53 is my choices for color and options. This kit is worth a look if this is your genre.
-
Beautiful! Gotta get me one of them!
-
Neat! Won't see many of those. Especially as nicely built. Good job!
-
Several of you have been following this one. Here it is outside, finished. I left the license plate off because I just like it that way. No major mods, really. Just tried to build as cleanly as possible. Used the lowered rear suspension setup and the stock front to give it a bit of 50s custom taildragger.
-
Yes the monogram 1/24, most recent issue
-
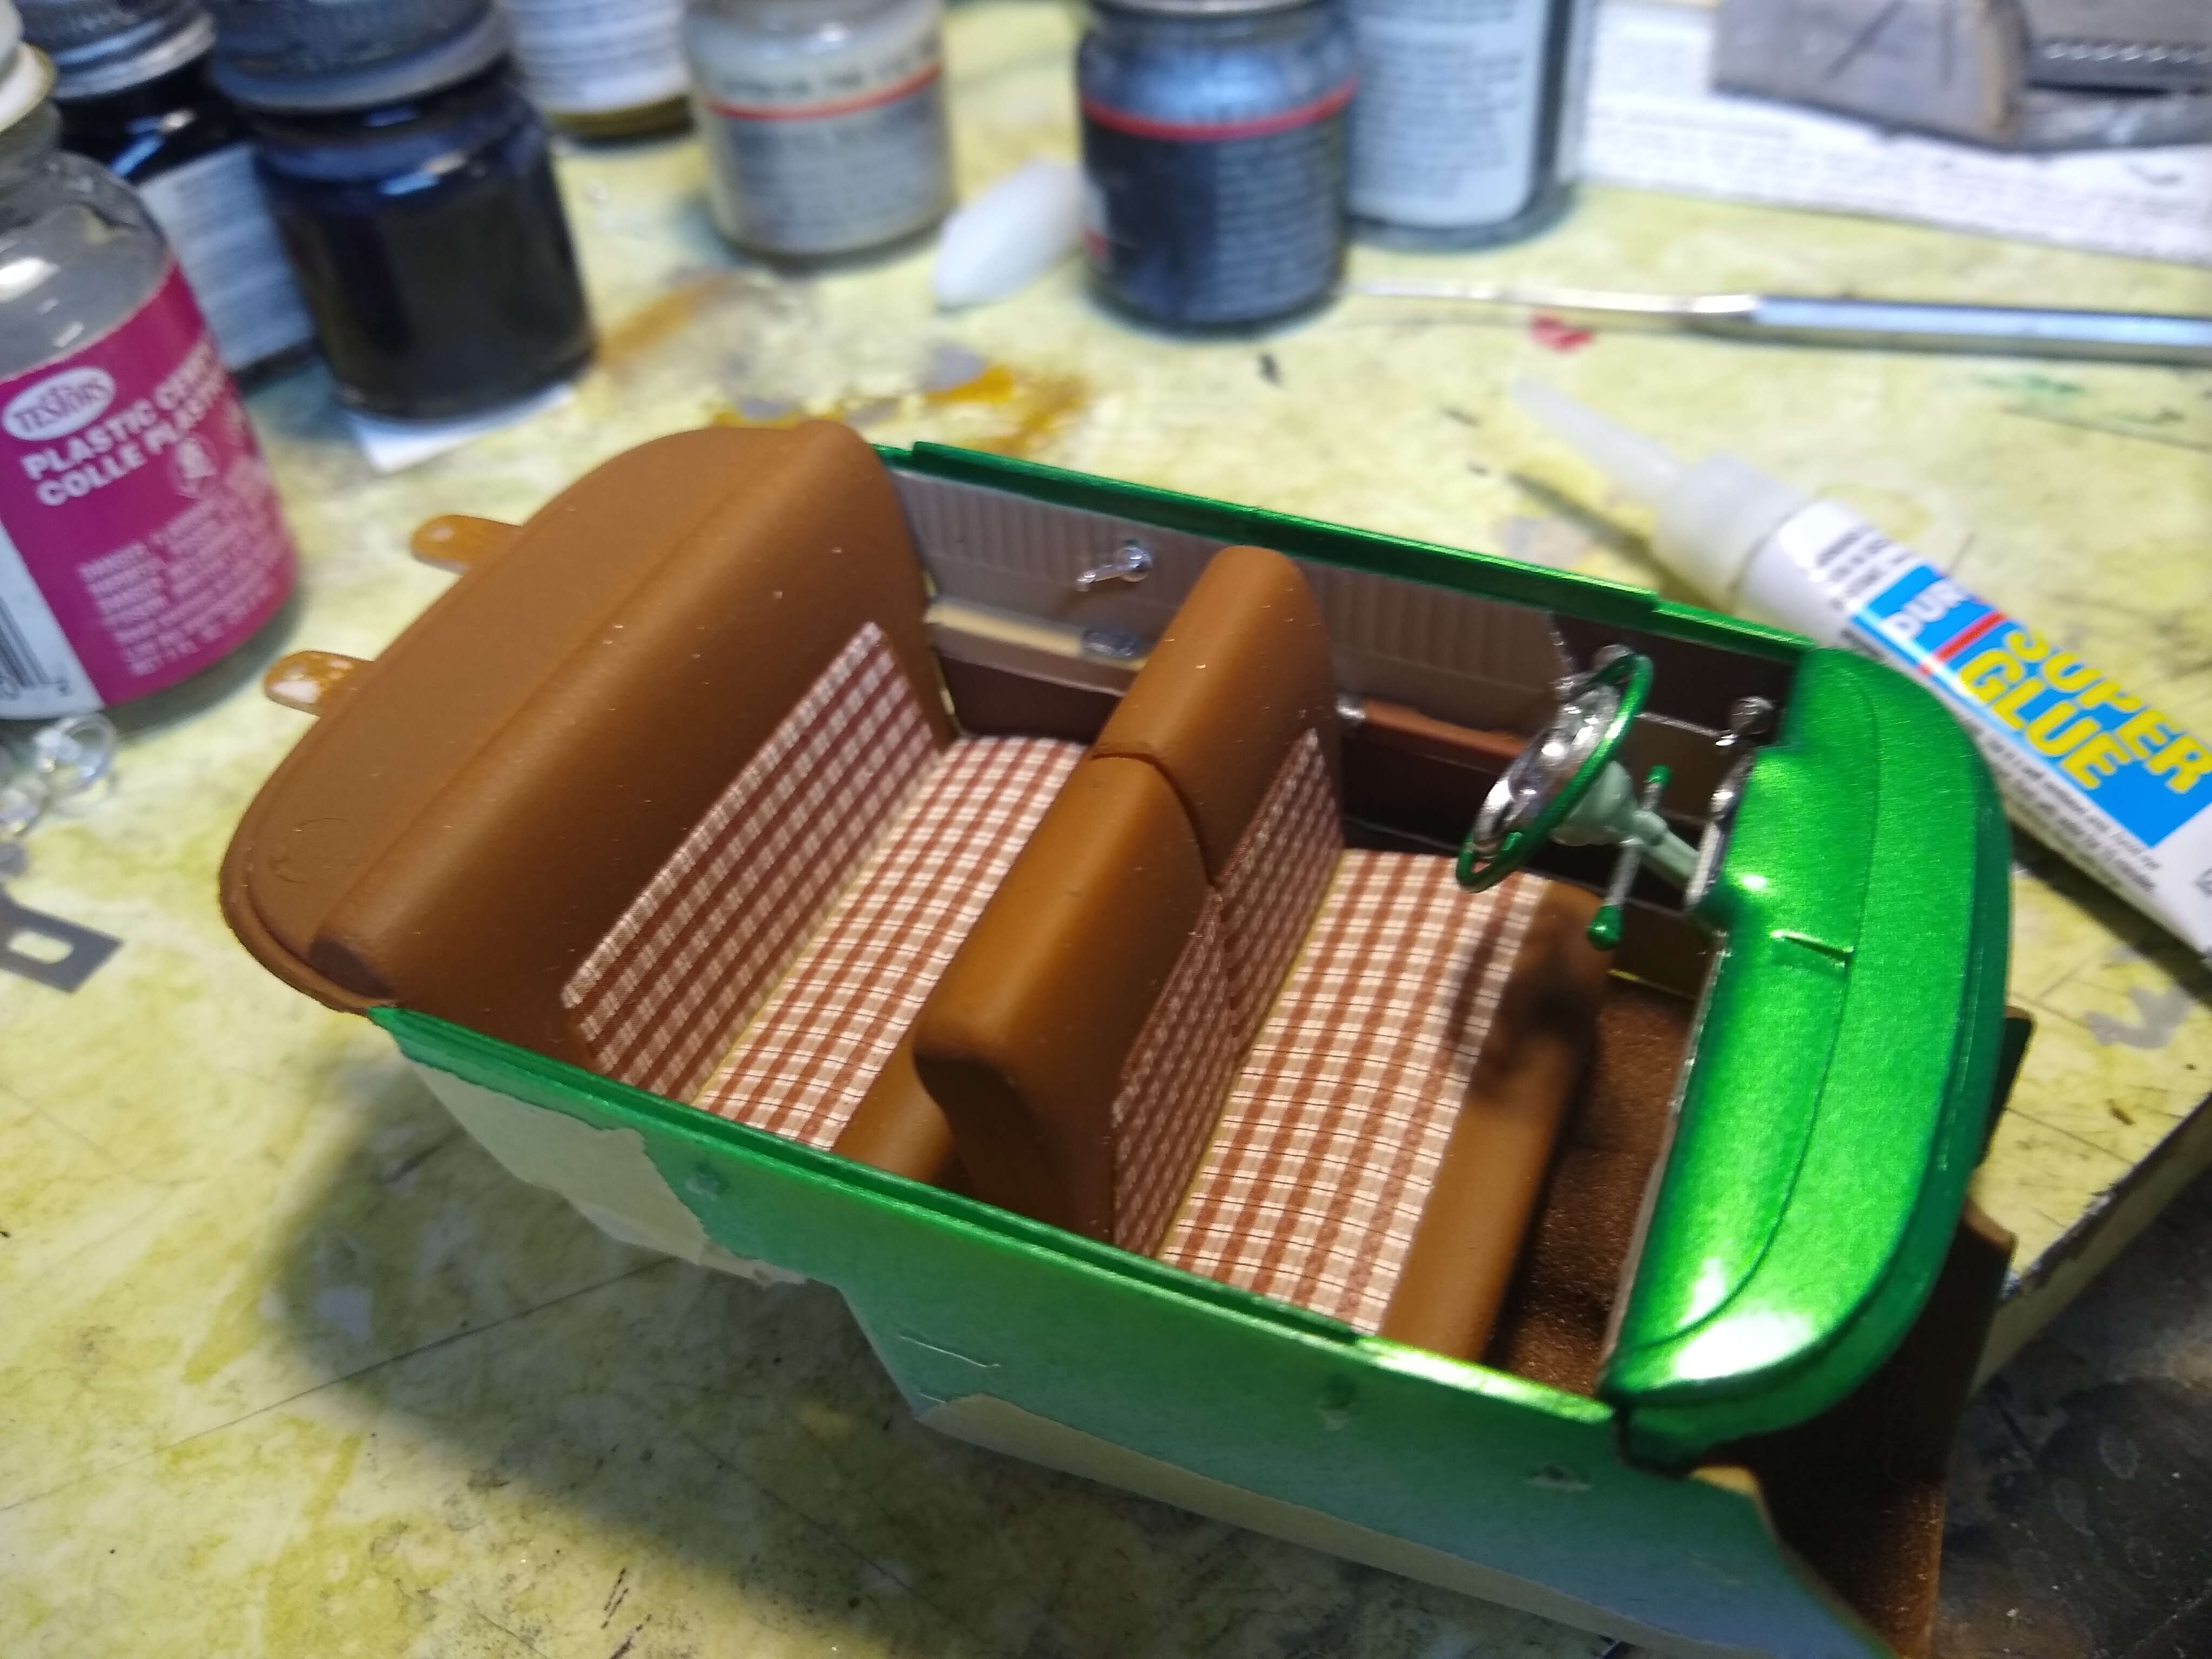
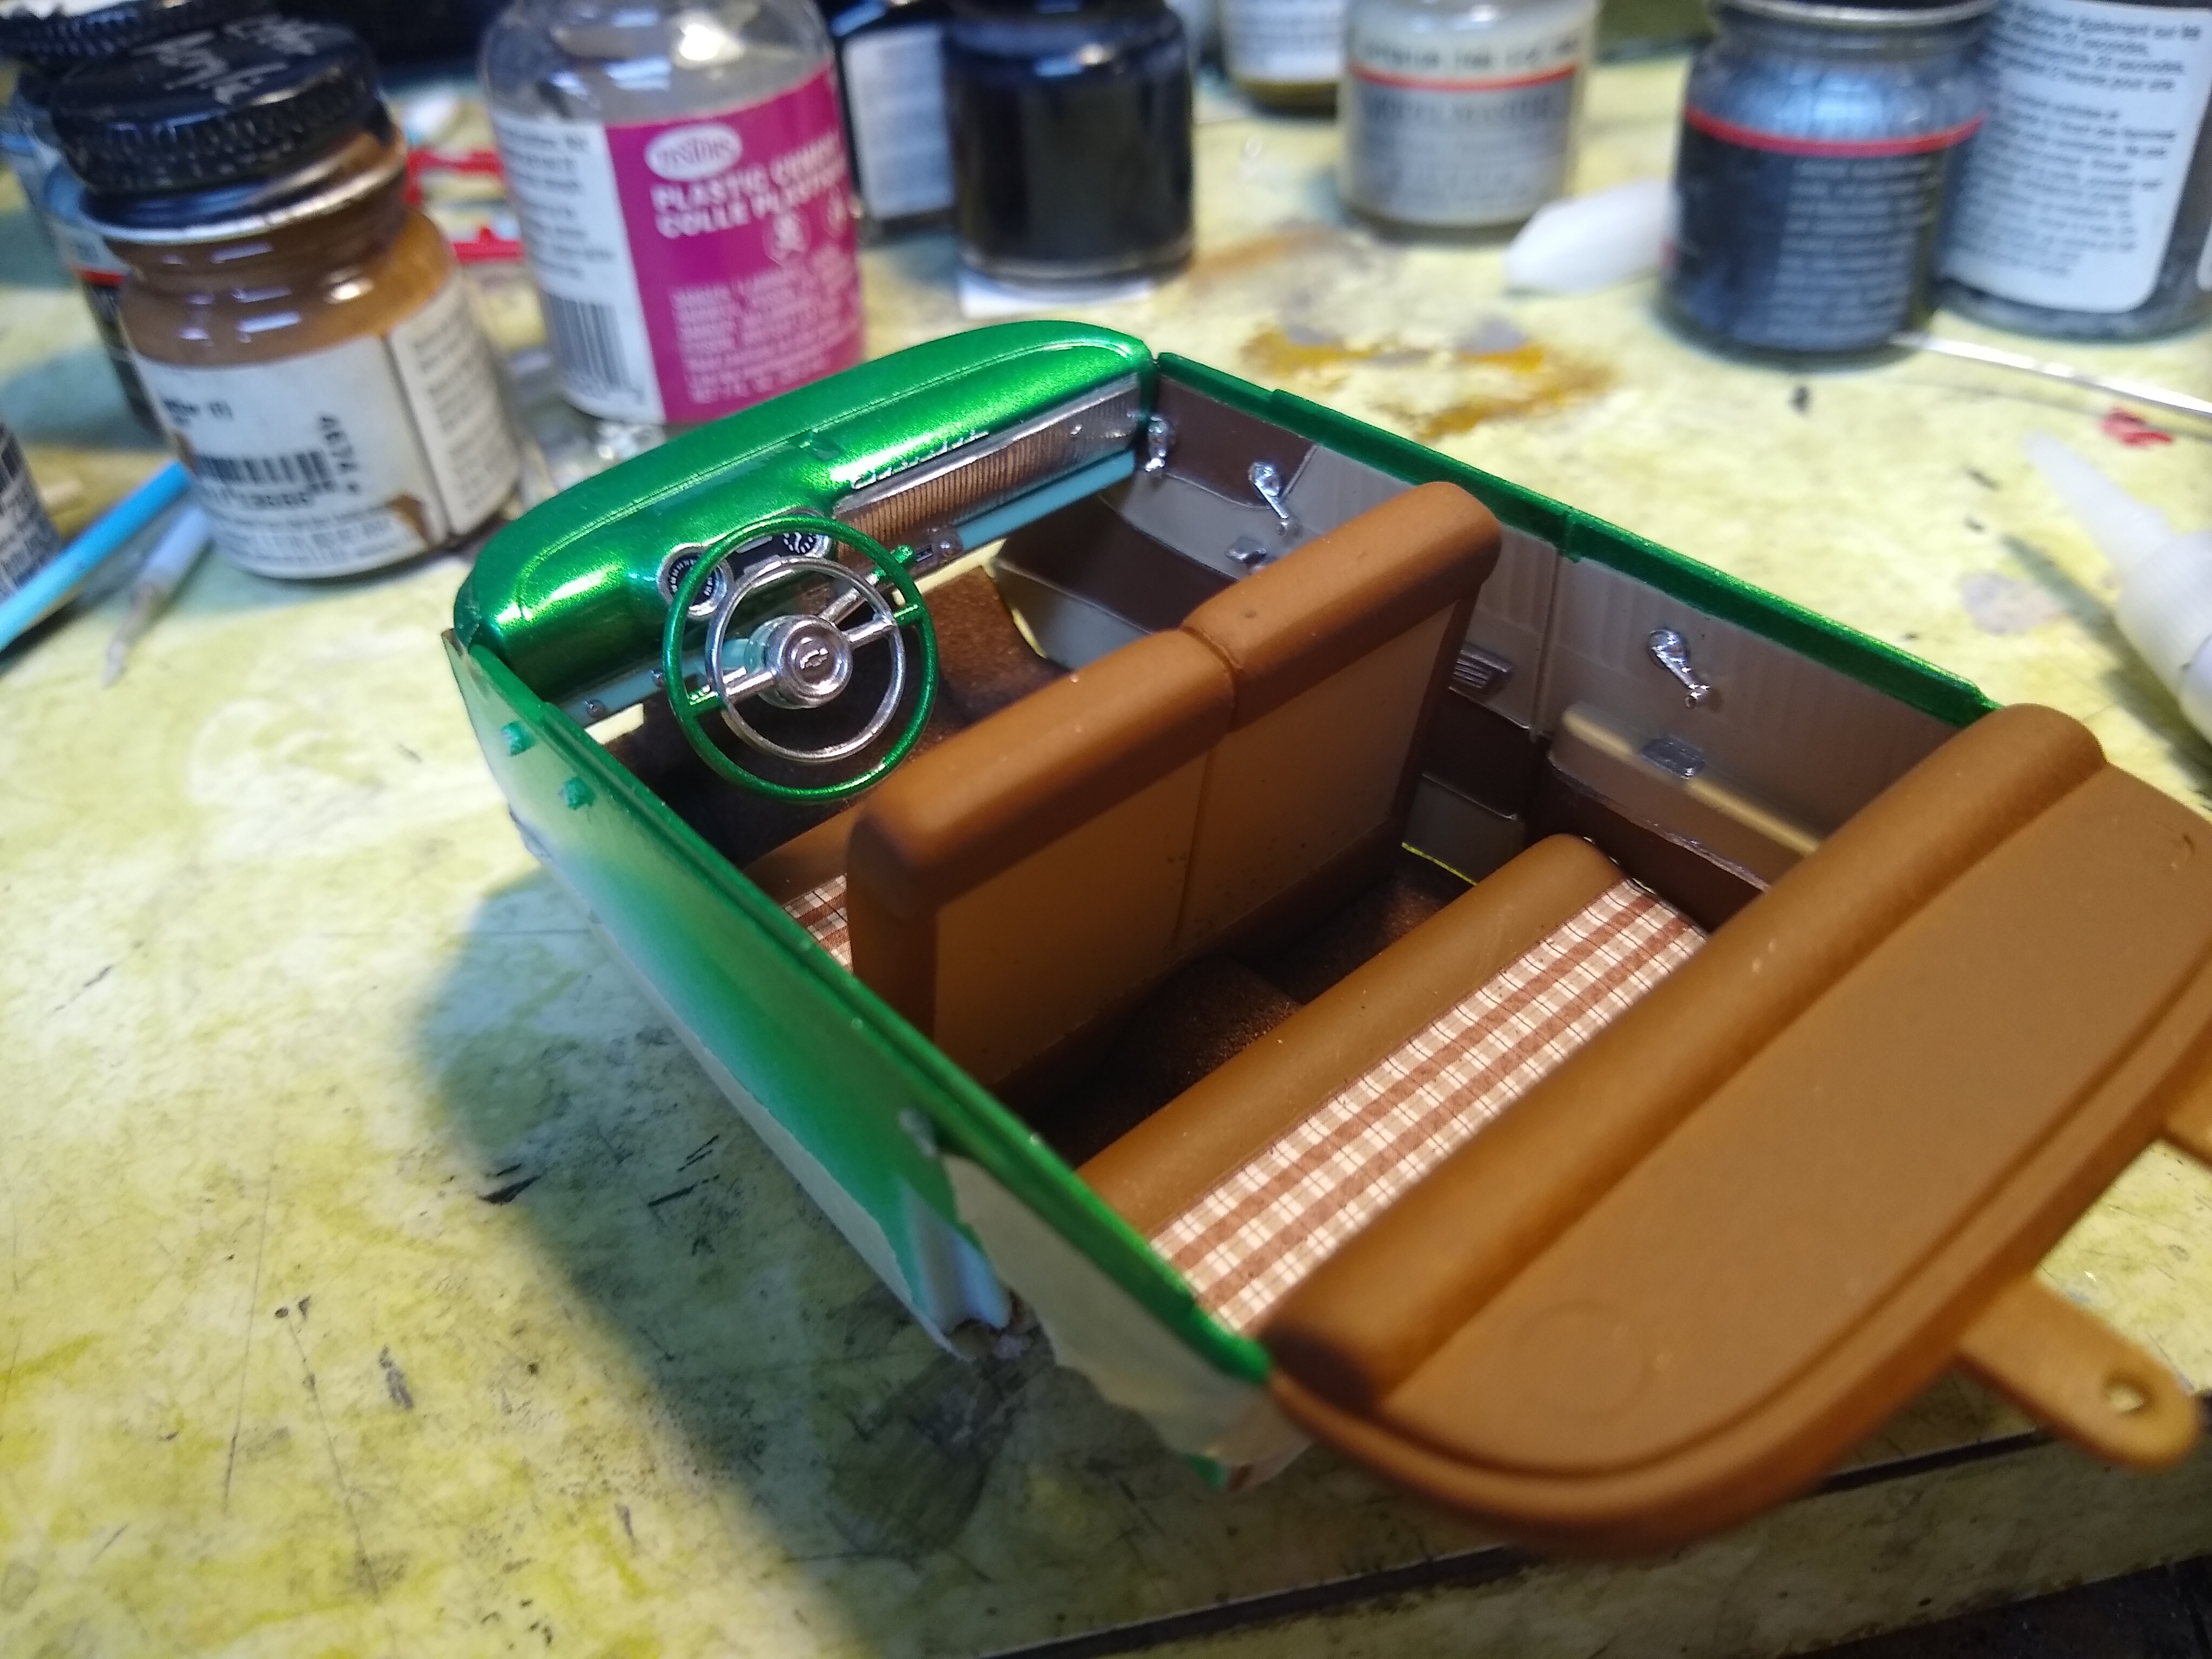
Time for more photos... A 60 Chevy Impala donated it's window cranks and armrest. The arm rest is way incorrect, but I found the in the junkyard, just like a real person would. Window cranks? Close enough. Kit decals for the upholstery. Foil and Molotow for chrome. I added the rear view mirror before I put interior in for the last time. Hopefully finish it tomorrow or this weekend anyway. Body is glued on, so we're in the homestretch. Then back to the Esprit.