my66s55
-
Posts
1,395 -
Joined
-
Last visited
Content Type
Profiles
Forums
Events
Gallery
Everything posted by my66s55
-
http://fabresinworks.com/125auto.htm http://www.fireballmodels.info/auto_main.html I'll buy Joseph's.
-
 Your welcome. I hope they help you. That is a fine model you have created.
 -
If we went solely on cost of goods sold, a Picasso or Rembrandt would only be worth the few dollars that went into the paint and canvas You forget one basic economic factor in this statement. Price is somewhat related to supply and demand. Cost of goods sold is a cost accounting figure used to set profit margins and monitor profits. It contains both fixed and variable costs and variable costs can change.
-
Sorry for the delay. This thing locked up on me and I couldn't post a reply. If you trade, the item you received has a value. That becomes your sale price of the item traded and the profit is that value less the cost of the item you traded. Traded Future liner valued at $165 for items values at $166. Your profit increased $1. If you have a profit margin of $100 and spent 1 hour earning it, you are happy. If you have a profit margin of $100 and spend 20 hrs earning it, your not going to be very happy. At that point you either raise you price or quit.
-
This was intended for Lysleder. His post was just before mine.
-
You would do as you did, and a fine job doing it I might add, but exclude your labor and add a comfortable profit margin to reach a desire result. The method of breakdown in cost is very good to prove your point and the inclusion of you labor helps drive home to those who need to see it. The cost accounting method of profit and loss is more realist in my opinion and gives a real picture of p & l. With it, you would not incur a profit until you reach a break even point. I.e. all expenses were recovered and everything over that is profit. If you paid out $k for resin as an example, no profit is realize until that $k and and all other expenses have been earned. It's the risk of doing business and why only 2 to 3 start up small business's survive past the first year or so.
-
Someone else's labor would be included in c.g.s. A person working for themselves is considered a sole proprietor and thus his labor is not considered in c.g.s. If the producing entity was a corporation, his wages would be included. A corporation is an entity in itself and even though the person may be the sold shareholder in the corporation, they are separate.
-
Lets set this straight right now. I am, as of the 13th of this month, a 72 year old practicing public account. I have operated my small business accounting practice here in Central Florida for over 25 years. I earned a 4 year degree from an accredited university and majored in both accounting and economics. 4.0 g.p.a. in econ and 3.7 g.p.a. in accounting. People pay me good money for this type of information. Bob, you are so far off base that it's pathetic. Profit margin is the difference between sale price and c.g.s and is earnings. That's why a person goes into business. Interest is a return on investment. Either way, profit margin or r.o.i., it's all one thing. Earnings.
-
He's not working for free Pete. He has a profit margin in the neighborhood of $65. I wouldn't call that free.
-
His labor should not be included in the cost of goods sold.
-
He didn't call them pulls, he called them good shots and used a number of 25 per mold.
-
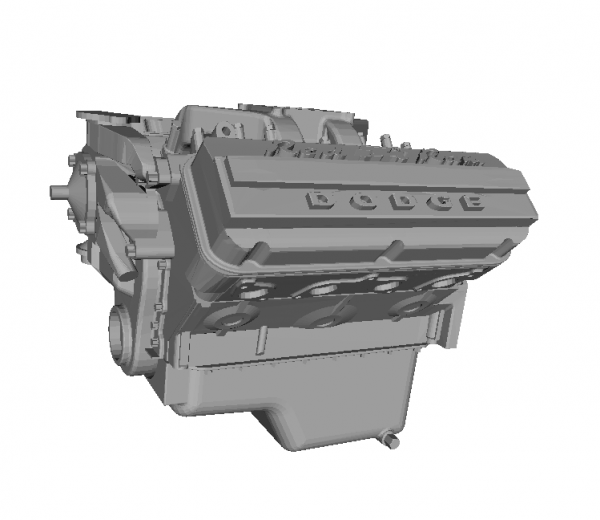
My Chrysler A 318 poly head engine 3d printed at home
my66s55 replied to my66s55's topic in WIP: Model Cars
I made the heads with the recessed hole for authenticity and just in case I want to use spark plugs. I have also finished one exhaust header
-
HIPPS, as in high impact styrene. You have to heat the print bed same as for ABS, but HIPPS prints better and is easier to work with.
-
I have printed that thickness requirement with both style printers, but the filament printer can only do it flat on the print bed. Then you have to smooth it out. I have printed 1/25th spark plugs with the sla printer that are .5 mm diameter in the verticle position. I also have that thickness on the radiator shell and part of the front fender of my 12th scale 35 Lasalle convertible coupe. These were printer with the sla printer. To get some idea of the 2 different printers, check out this post: modelcarsmag.com/forums/topic/101922-1935-lasalle-convertible-coupe-3d-printed-at-home-aug-30/?page=1. For something recent, check out this post: http://www.modelcarsmag.com/forums/topic/119256-my-chrysler-a-318-poly-head-engine/.
-
If you buy the original Prussa i3, you can't go wrong. Josef Prussa is one of the original developers of open source filament 3d printers. The printer filament printer I built and is in my avatar is a Prussa i3. Prussa is like the godfather of this type printer. If you just want to get your feet wet and learn what's needed to produce successful 3d prints, this would be a good, inexpensive route to take. But, as you guys are aware, there is a lot of difference in print success and quality between a printer that melts plastic with specifications as a layer height max as low as 50 microns and xy max of 400 microns compared to an sla uv resin cured printer with specifications of a layer height as low as 20 microns and xy of 50 microns, plus does the print in a fraction of the time.
-
My Chrysler A 318 poly head engine 3d printed at home
my66s55 replied to my66s55's topic in WIP: Model Cars
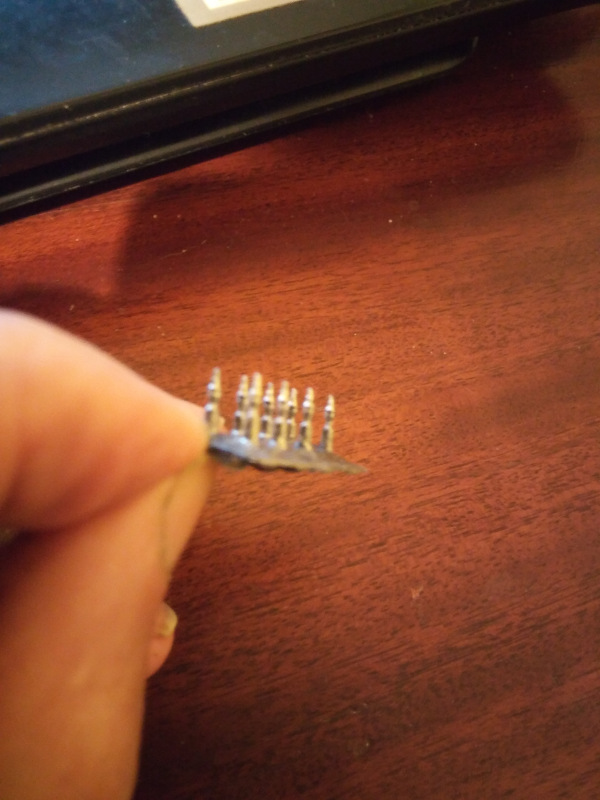
I got the intake manifold scaled right so it fits perfect. Here's a better picture of the Carter wcfb carbs.
-
I did it by using a model miter box. Lay it on it's side and cut as close to the carb as your comfortable with. Then use a sanding stick and draw it evenly across the stick which is laying on a flat surface. Go slow and check your sanding results often so as to get it even as you can.
-
There are a number of things you need to know about 3d desk top printers and 3d printing before you invest in one. I don't believe your ready.
-
Brian, instead of buying from CGTarder, get the file creator on CG and go to their website. You'll save $30 to $50 that way. I have a list off CG that I want to get, but went to the creator website.
-
My Chrysler A 318 poly head engine 3d printed at home
my66s55 replied to my66s55's topic in WIP: Model Cars
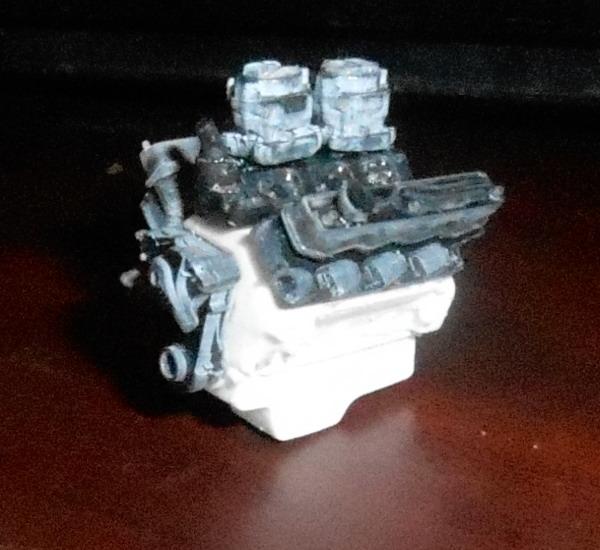
I used Aleene's tacky glue to do a mock up to check major parts for proper size and fit. The intake manifold appears to need widening. The carbs have not had their bottom sanded yet. This is just a preliminary before fine tuning.
-
Mopar A series 318 "Poly" V8
my66s55 replied to Atmobil's topic in General Automotive Talk (Trucks and Cars)
Dodge didn't use the A engine until 1959. It was used only in the plymouth 56-58. -
Mopar A series 318 "Poly" V8
my66s55 replied to Atmobil's topic in General Automotive Talk (Trucks and Cars)
"So the question remains. How can I assemble an "A" series poly 318 in 1:25 scale?" One of 3 ways. 1-Get some scratch building supplies and create the parts needed. 2-Learn cad drawing and create the files to build it. Then purchase a high detail uv resin curing 3d printer, learn how to use it and print out the parts needed. 3-Wait until someone else with the proper skills creates it and makes it available to you. -
Kleenklay http://www.sculpt.com/catalog_98/clay/kleanklay.htm Also this video may help https://www.youtube.com/watch?v=dBEK_Jyfvek
-
My Chrysler A 318 poly head engine 3d printed at home
my66s55 replied to my66s55's topic in WIP: Model Cars
For the life of me, I don't know why you made that long post. If you read my post, you will clearly see what I said. Many times, modelers will use something available to complete a build. Personally, I don't see any demand for the older poly version in scale. Chrysler did use a 354 in it's low line and Plymouth only offered a 270 older version in 56. The A engine was designed for Plymouth because it was cheaper and simpler to manufacture and was offered in the 56, 57 & 58 models exclusively. No hemi based poly engine was offered as standard equipment in 57-58. Notice I said standard. This doesn't mean that it might be available on special ordered or wasn't used in Canadian and other markets. -
I just read this on my ATT Google home page. They said it was heart failure.