my66s55
-
Posts
1,395 -
Joined
-
Last visited
Content Type
Profiles
Forums
Events
Gallery
Everything posted by my66s55
-
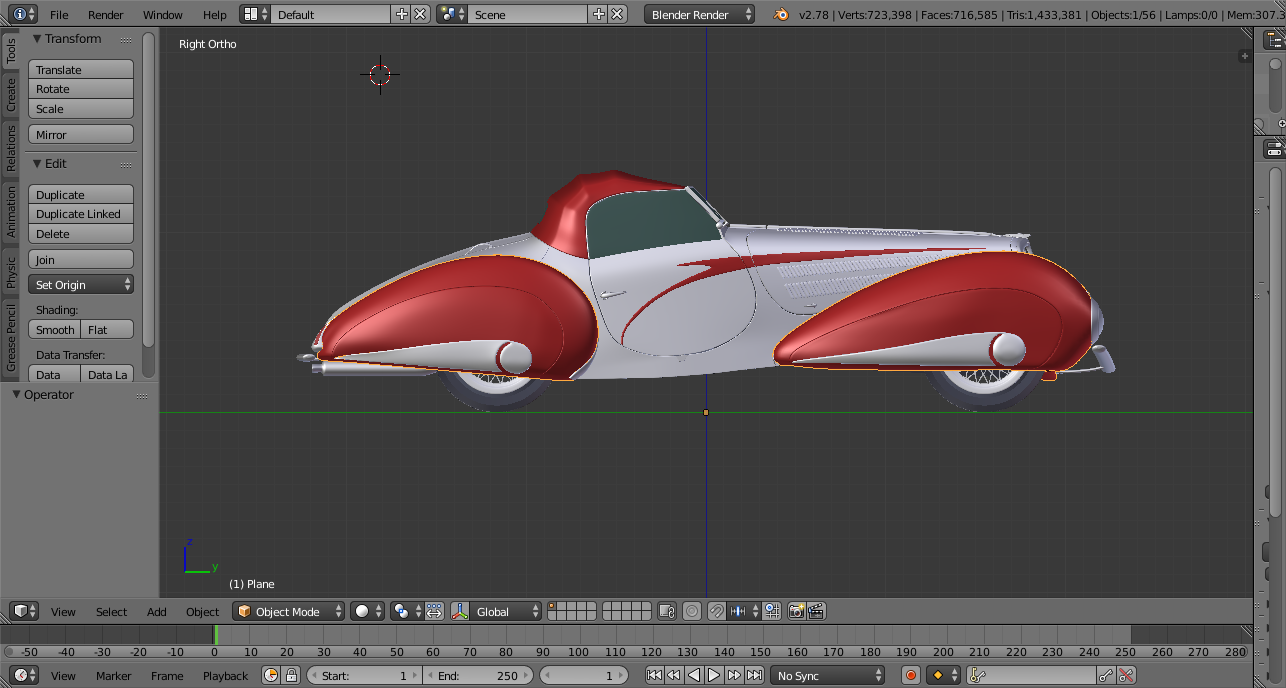
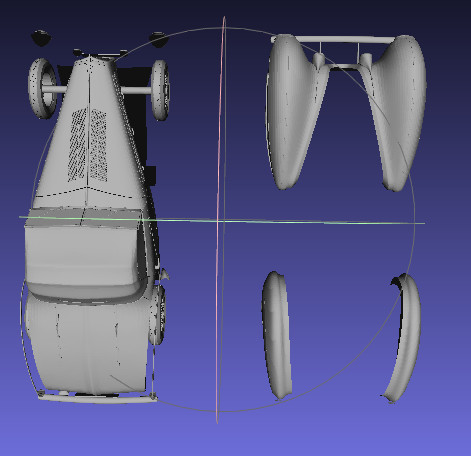
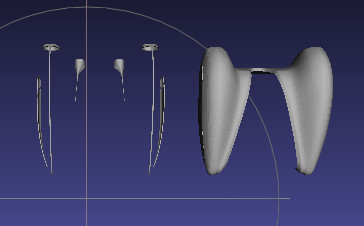
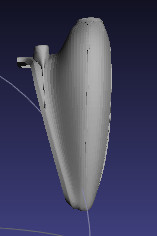
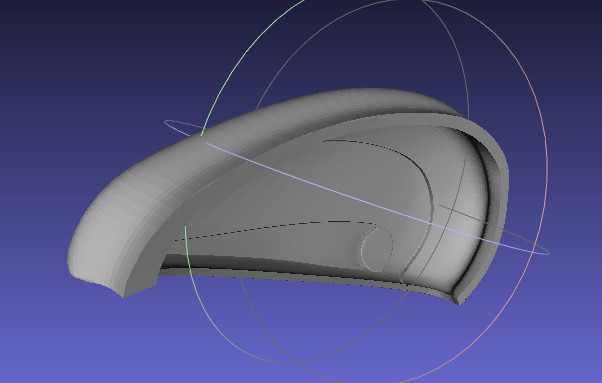
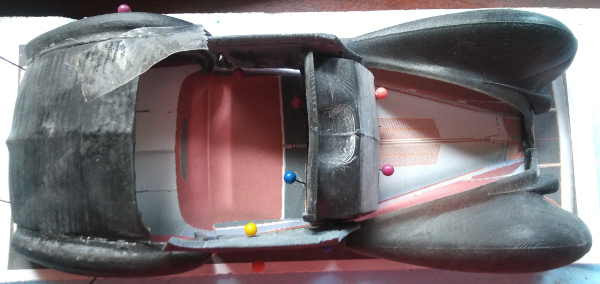
For those who haven't seen any of my 3d printed projects on here before, I have built my own printers and used them. The latest one I build and made my first print on Christmas Day, is a dlp style. That is to say, it cures ultra violate liquid resin with the beam of light from a dlp movie projector. This method gives very good fine detail. All my other projects have required me to create my on 3d printable files. This one I located on the web. The first thing I had to do was scale a top and side view of the 3d file. I opened it up in Bender, the cad software I use and took screen shots of the file. Then, I open them in Gimp and cropped each file bumper to bumper. I then loaded the cropped picture into Gimp. Used "image-photo size" and scaled the image to the proper size for 1/24. I was able to do this because I had already looked up the proper bumper to bumper and wheel base spec's. I then printed them out, checked the afore mentioned spec's, grabbed my micrometer and proceeded to take measurements of different parts. When you purchase a file such as this, it's important to know what you are doing. First off, make sure it is the sum of it's parts equal the whole. In other words, it disassembles. Here I have removed the fenders, front bumper, lights and chrome trim. Then I have to make the part fit on the printer in the best position to create the best end result. Lastly, the part is still not ready for 3d printing. There is no thickness to the parts. I opened the fender in Blender and created thickness where needed. It takes multiple prints to get the correct one. The final parts f it perfectly on my top view scaled image. Lastly, I am going to use the Heller Delehaye 135m kit for the rolling chassis and engine. All else will be 3d printed.

-
I have a 55 Monogram Ford panel truck.
-

My Chrysler A 318 poly head engine 3d printed at home
my66s55 replied to my66s55's topic in WIP: Model Cars
Chris, you can save as well and import files into a number of formats. Open Blender. Right click File. To import other files, right click import and select the file you want. To export, click file, export and choose the format you want and save as. Your on the right track with you goals and ahead of the curve. There is much to learn, but with your attitude and determination, you'll succeed. If I can help, just p.m. me. -
My Chrysler A 318 poly head engine 3d printed at home
my66s55 replied to my66s55's topic in WIP: Model Cars
The printer technology is coming quite quickly. Late last December, a Chinese company introduced a resin dlp style printer that cures uv resin with uv led light shining through an altered lcd screen. Cost, $600. It was followed at the beginning of this year by a large Chinese 3d printer manufacturer. It's called the Wanhoe d7. Cost, $399. Both these printers were bought by members of the diy 3d community who tested and improved them. The problem is, they are not made for the general public. There are things that need to be done to make them work right. Then, just recently, this same style printer showed up on Kick Starter. https://www.kickstarter.com/projects/249504031/sparkmaker-the-most-affordable-desktop-sla-3d-prin?ref=preview&token=6f87b384. It appears to be general consumer friendly. Cost, less than the two printers mentioned above. -
Caliper/micro-meter recommendations
my66s55 replied to aurfalien's topic in Model Building Questions and Answers
I've used the Harbor Freight digital calipers for at least the past two years. They are perfect for scaling on my 3d printed projects. -
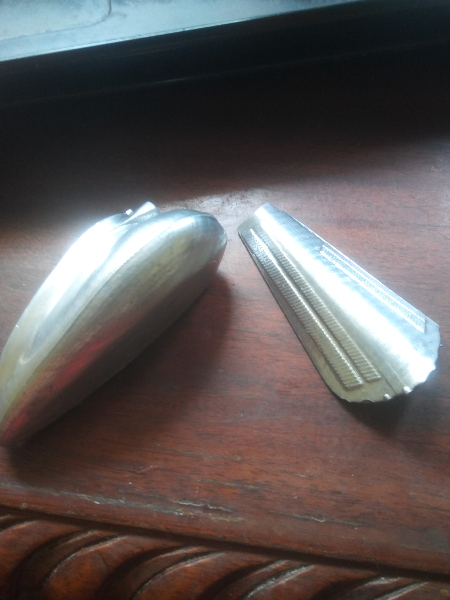
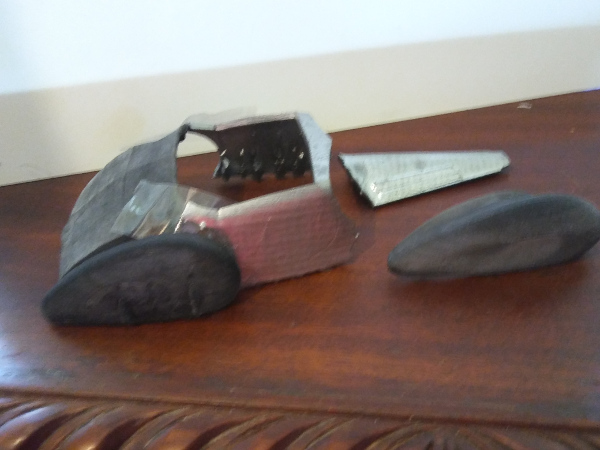
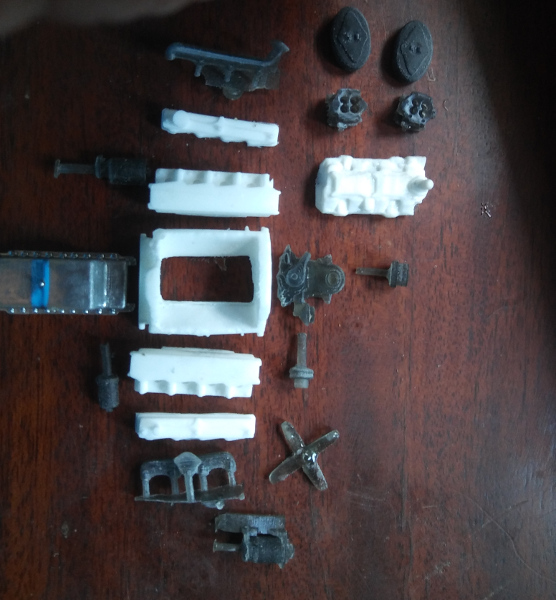
These are the preliminary prints of this project to check scale calculation and print accuracy. They are printed at low setting so that I can get the end pieces faster. The first prints were to see how they came out. After I was satisfied with the results, I went for scale. The picture the parts are placed on is a scale of the file used to create them.
-
My Chrysler A 318 poly head engine 3d printed at home
my66s55 replied to my66s55's topic in WIP: Model Cars
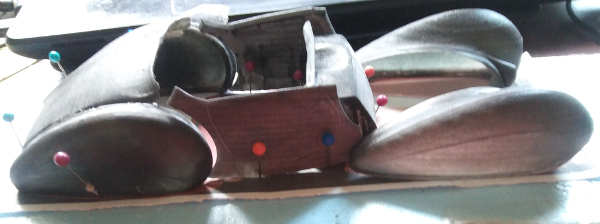
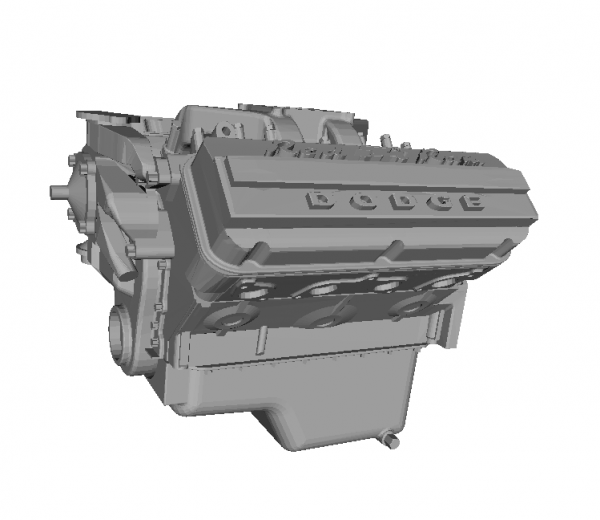
I am about done with this project. I created this engine for my personal use and one other person. Others have expressed an a desire to get one for themselves. There currently isn't a 2bbl option as it's not something I need. If I receive interest for some, I'll finish the intake manifold and create a Carter DDB carb for it. I have made a Face Book page with info on how to obtain the current versions. It's on the bottom of my posts below my name. If you aren't a Face Book person, text me. Thanks to Bill Geary, aka MrObsessive for his incredible build of the 58 engine. This is what I supplied him. The 3d prints on a resin cured printer need supports in order for them to come out right. They have to be removed by clipping them close to the part and then sanding. Here is an example of the engine block stl. file used to print them. The prints do not come out flat on the bottom. You can see by the amount of supports on the block that there is a bit of sanding to do after the supports are removed. I have made some changes after building the single 4bbl version and fitting it to the 58 frame that I am using on my 59 build. The fan pulley was shortened. The front of the oil pan was changed for better fit. The proper bell housing was drawn up and printed and had the trans from the 57 Chrysler A488 adapted. The carb is one of Joseph's AFB's.
-
Anybody recognise these old resin bodies?
my66s55 replied to Simon's topic in Car Aftermarket / Resin / 3D Printed
Absolutely correct on the 33 frame being totally unacceptable. In 1934, G.M went to independent front suspension. This style carried through into the early 50's. The 1948 Chevrolet and 1950 Olds kits have this style. As far as the frame, it goes from two straight rails to forming to the shape of the body. The frame would look like this LaSalle frame, only a different size.
-
How much have you spent on a build?
my66s55 replied to Jantrix's topic in General Automotive Talk (Trucks and Cars)
I'm also single, retired and on a fixed budget. If you don't know how much you spend on something, it's your choice. To tell people that, because they know how much they spend for a build, they need a new hobby is only you opinion. Not fact. -
How much have you spent on a build?
my66s55 replied to Jantrix's topic in General Automotive Talk (Trucks and Cars)
I totally disagree. There are people in this life that keep track of their spending. It's their nature. I can tell you where every penny I spend goes. I'm an accountant and that's how I control my budget. It's got nothing to do with a hobby. -
Not a chance.
-
I have some of the old kits all the way back to 1961. I bought them because I wanted to build a model of the car and fully intend to do so.
-
Bill is correct. I personally would rather use Future. That's what I use to clear coat.
-
I use clean water and this: To get this and more.
-
As has been mentioned before. Make sure it's made from stainless steel. Otherwise, the stripper could also dissolve it.
-
I use Gimp. It is a cross platform free software that is extremely efficient. Since I don't use Microsloth's windozs and use Linux instead, the procedures may be a little bit different. Open your picture in Gimp. Right click and select "transform tools", "crop". Crop (cut out) the picture to it's outside dimentions. Press enter key. Right click and choose "image", "print size". Enter size as needed. Press enter. Right click and in File, choose "export as". Make sure the extension is jpeg and going to the right folder. Press enter. Done deal.
-
Paint from Paintscratch.com? Any good?
my66s55 replied to crowe-t's topic in Model Building Questions and Answers
Just checked this out and book marked it. Hard to find sierra gold used on 56 Chevy's. I want to paint the Nomad like this.
-
different diameter plug wires available?
my66s55 replied to fiatboy's topic in Model Building Questions and Answers
But they are much less than yours. I calculated the diameter against the plug wires on my 66 Merc and the 30 gauge are perfect. I ordered 10' of black and orange Yesterday when I found the train website listed above. -
My Chrysler A 318 poly head engine 3d printed at home
my66s55 replied to my66s55's topic in WIP: Model Cars
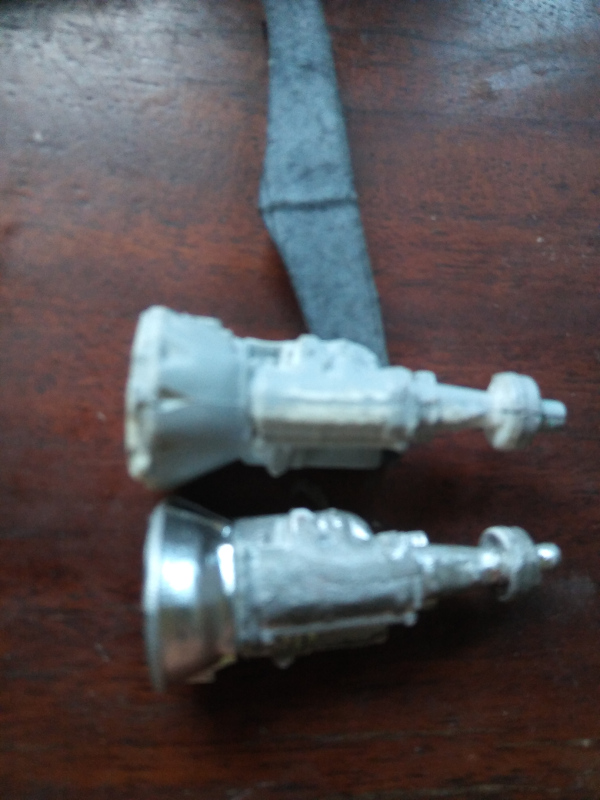
Some new changes as I am using a single 4 bbl engine in my 59 Plymouth convertible project. The engine that comes in the 58 Plymouth is terrible beyond belief. AMT cut out details and fudged part sizes so that they could fit it into the engine bay. I'm using the 58 frame for the 59. The bell housing on the 58 is the same size as the 57 Chrysler. I knew that the 318 poly engine had it's own bell housing for the A488 trans. and had drawn up a mostly complete file. As a result, I printed out a proper bell housing, cast the 57 trans. and bell housing and cut off the trans to attach to that bell housing. Here's the result.
-
Shapeways 3D 66 Pro mod Nova (Lots of sanding)
my66s55 replied to NYLIBUD's topic in WIP: Model Cars
This is actually the best way to go about making this body usable. Back a few few years ago, I did a post that showed how to deal with 3d printed parts and the difference in types of printer. I built my own printers and used them as examples, but the principles are still the same. Here's a link to that post: http://www.modelcarsmag.com/forums/topic/101922-1935-lasalle-convertible-coupe-3d-printed-at-home-aug-30/?page=1 -
To answer your question Gerald, yes. The silver paint I use to display printed parts has a filling ability that I didn't use on most of these parts. This paint has little effect on the detail of the part. Just the engine block that was resin cast had this coating. Everything else was raw printing.
-
I pose this question many times. My answer is quite simple. A bear goes anywhere it wants to, are you gonna stop it?
-
This answer is totally correct. The 65 full size Mercury engine was black with orange valve covers and air cleaner. I ran into this situation when I was building my full size 66 Mercury S55 convertible. The 66 brochure showed the 65 engine. Wrong colors for 66.
-
Replacement windshield heat formed
my66s55 replied to Lovefordgalaxie's topic in Tips, Tricks, and Tutorials
I successfully used this method for windshields for late 50's Chrysler products. Specifically the 57-58-59 Dodge and 59 Plymouth. I used my heat gun set on low and continually worked it over the plastic until it formed perfectly. Came out perfect. -
Works for me.