MrObsessive
-
Posts
9,785 -
Joined
-
Last visited
Content Type
Profiles
Forums
Events
Gallery
Everything posted by MrObsessive
-
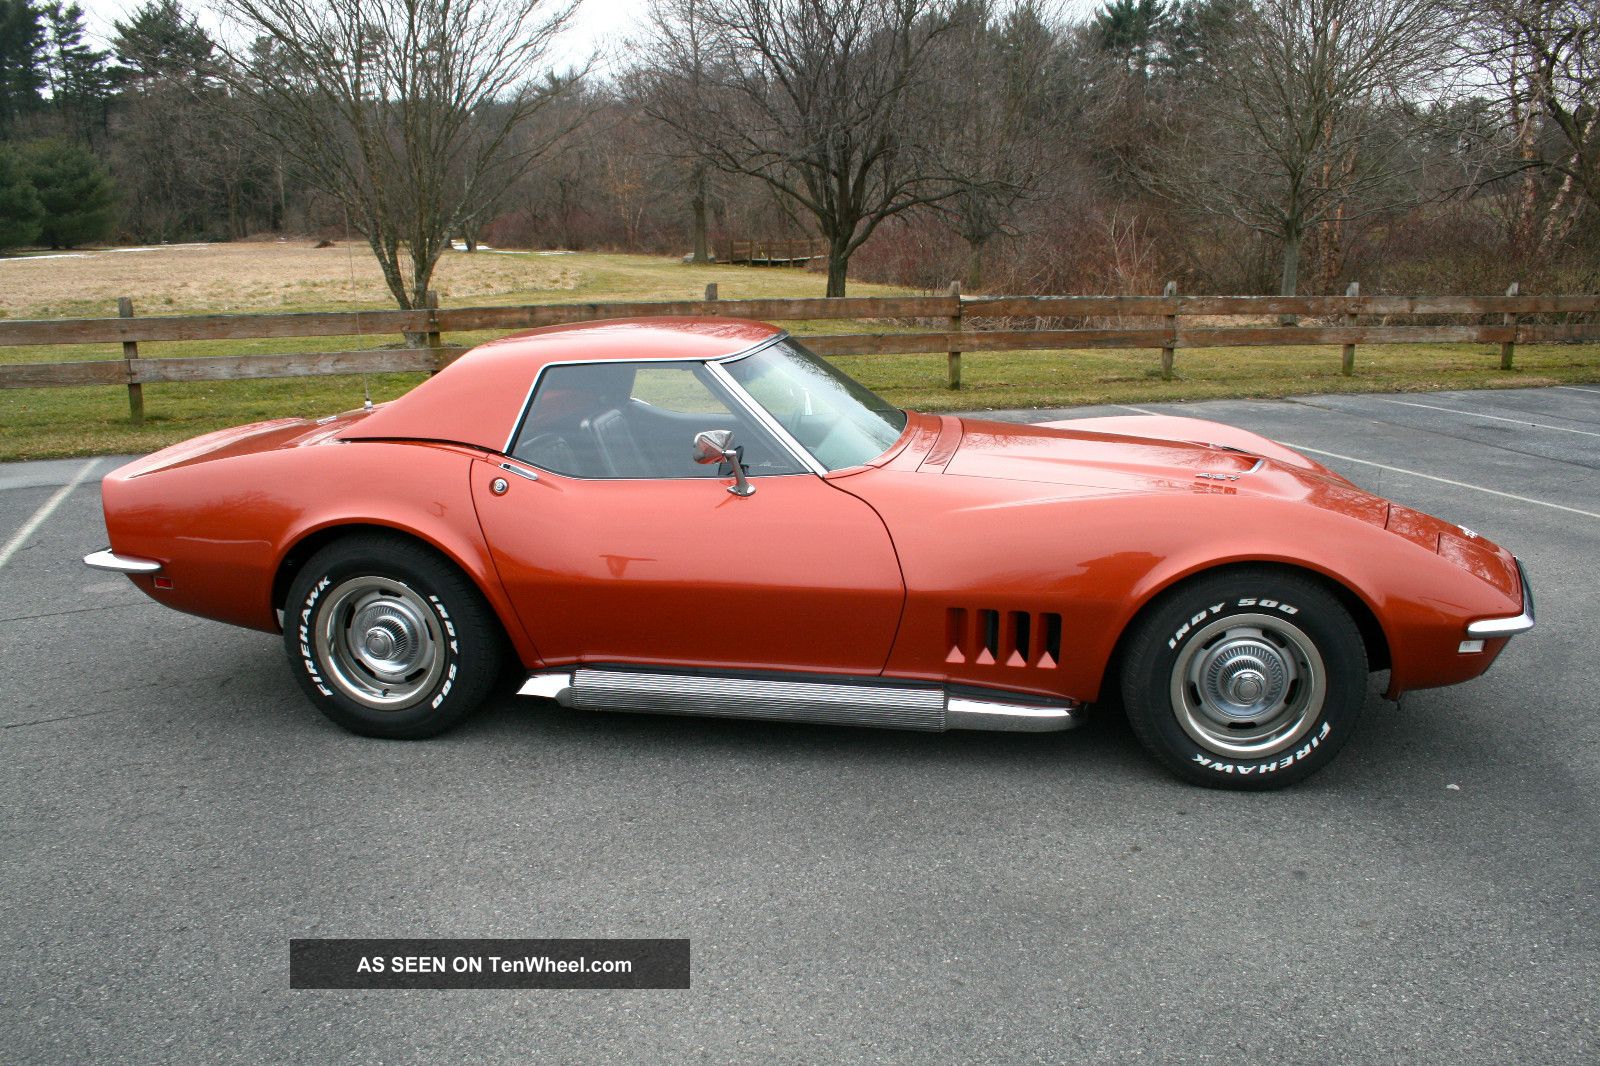
Well now she's finally all done! Hard to believe that it's been over 30 years since I first built this one and time sure does fly! I can tell you, this will be better taken care of this time around, so no more rebuilds will be necessary! Paint is '68 Corvette Bronze and I got to hand it to my paint guy.....according to pics I have of the 1:1 on my hard disc in this color, he got the match pretty much spot on! He mixed the paint in a very fine metallic so the flakes are not jumping out at you when you first view it. Tires are from the AMT parts pack redlines, and I had to tweak the wheels somewhat with some tape to make them fit a little tighter inside the tire. I did tweak the suspension somewhat as one major pet peeve I've had with Revell kits is that they always sit too high. Now the stance is the way I want it, and I can live with it. Here's a 1:1 for comparison as far as the color............. And now my resto of the original I did in 1988............. I decided to leave the uptop white for the time being. I do have pics showing the top in beige, but a nice bright white will do for the time being. Nice hardtop included in the kit. I decided to paint that body color as it looks better and I'm not a fan of the vinyl covered ones. I took a tip from Steve Guthenmiller and decided to try the BMF under script lettering instead of PE. Well I have to admit, I like the way this turned out, and I'll be definitely trying this again in the future! I didn't go super crazy with engine bay details, just some wiring for the engine and fuel lines. I do have the air cleaner but more often than not when shown, it'll have the air cleaner off. Thanks for looking folks! There will be other restos in the future, but I'm debating whether or not to go back to the Green Hornet Shelby. I have to redo some things on that (a bit of a setback) but OTOH, I really want to get that one done before year's end.

-
Now this is what I like to see............a very nice and clean mid '60's Mopar build! I love these types of cars and they're just too far and between seen these days. That's a good color choice for that too.......nice and subtle and just blends right in with the '60's.
-
Exactly Tom! I certainly have my share of resin kits and God knows how many plastic kits I have. I've lost count. The time will approach down the road where I'll have to consider getting rid of a lot of them as the models will outlive me with many never getting built. I'm starting to notice even in the 1:1 world at shows and auctions, the ever changing "face" of the hobby. There are some young people, but it's mostly us gray haired guys that remember these cars when we were kids and many young people obviously can't relate to them. I've been noticing on eBay in fact quite a few collections turning up for auction. Untouched original kits that languish because either the seller has the starting price too high, or indeed the interest in those kits just isn't there as it might have been 10-20 years ago. Interesting just the same and that nagging thought does come up every once in a while--------just WHO is going to want all these models of mine in say 20-30 years, or whenever??
-

The birth of a classic (?)
MrObsessive replied to Richard Bartrop's topic in General Automotive Talk (Trucks and Cars)
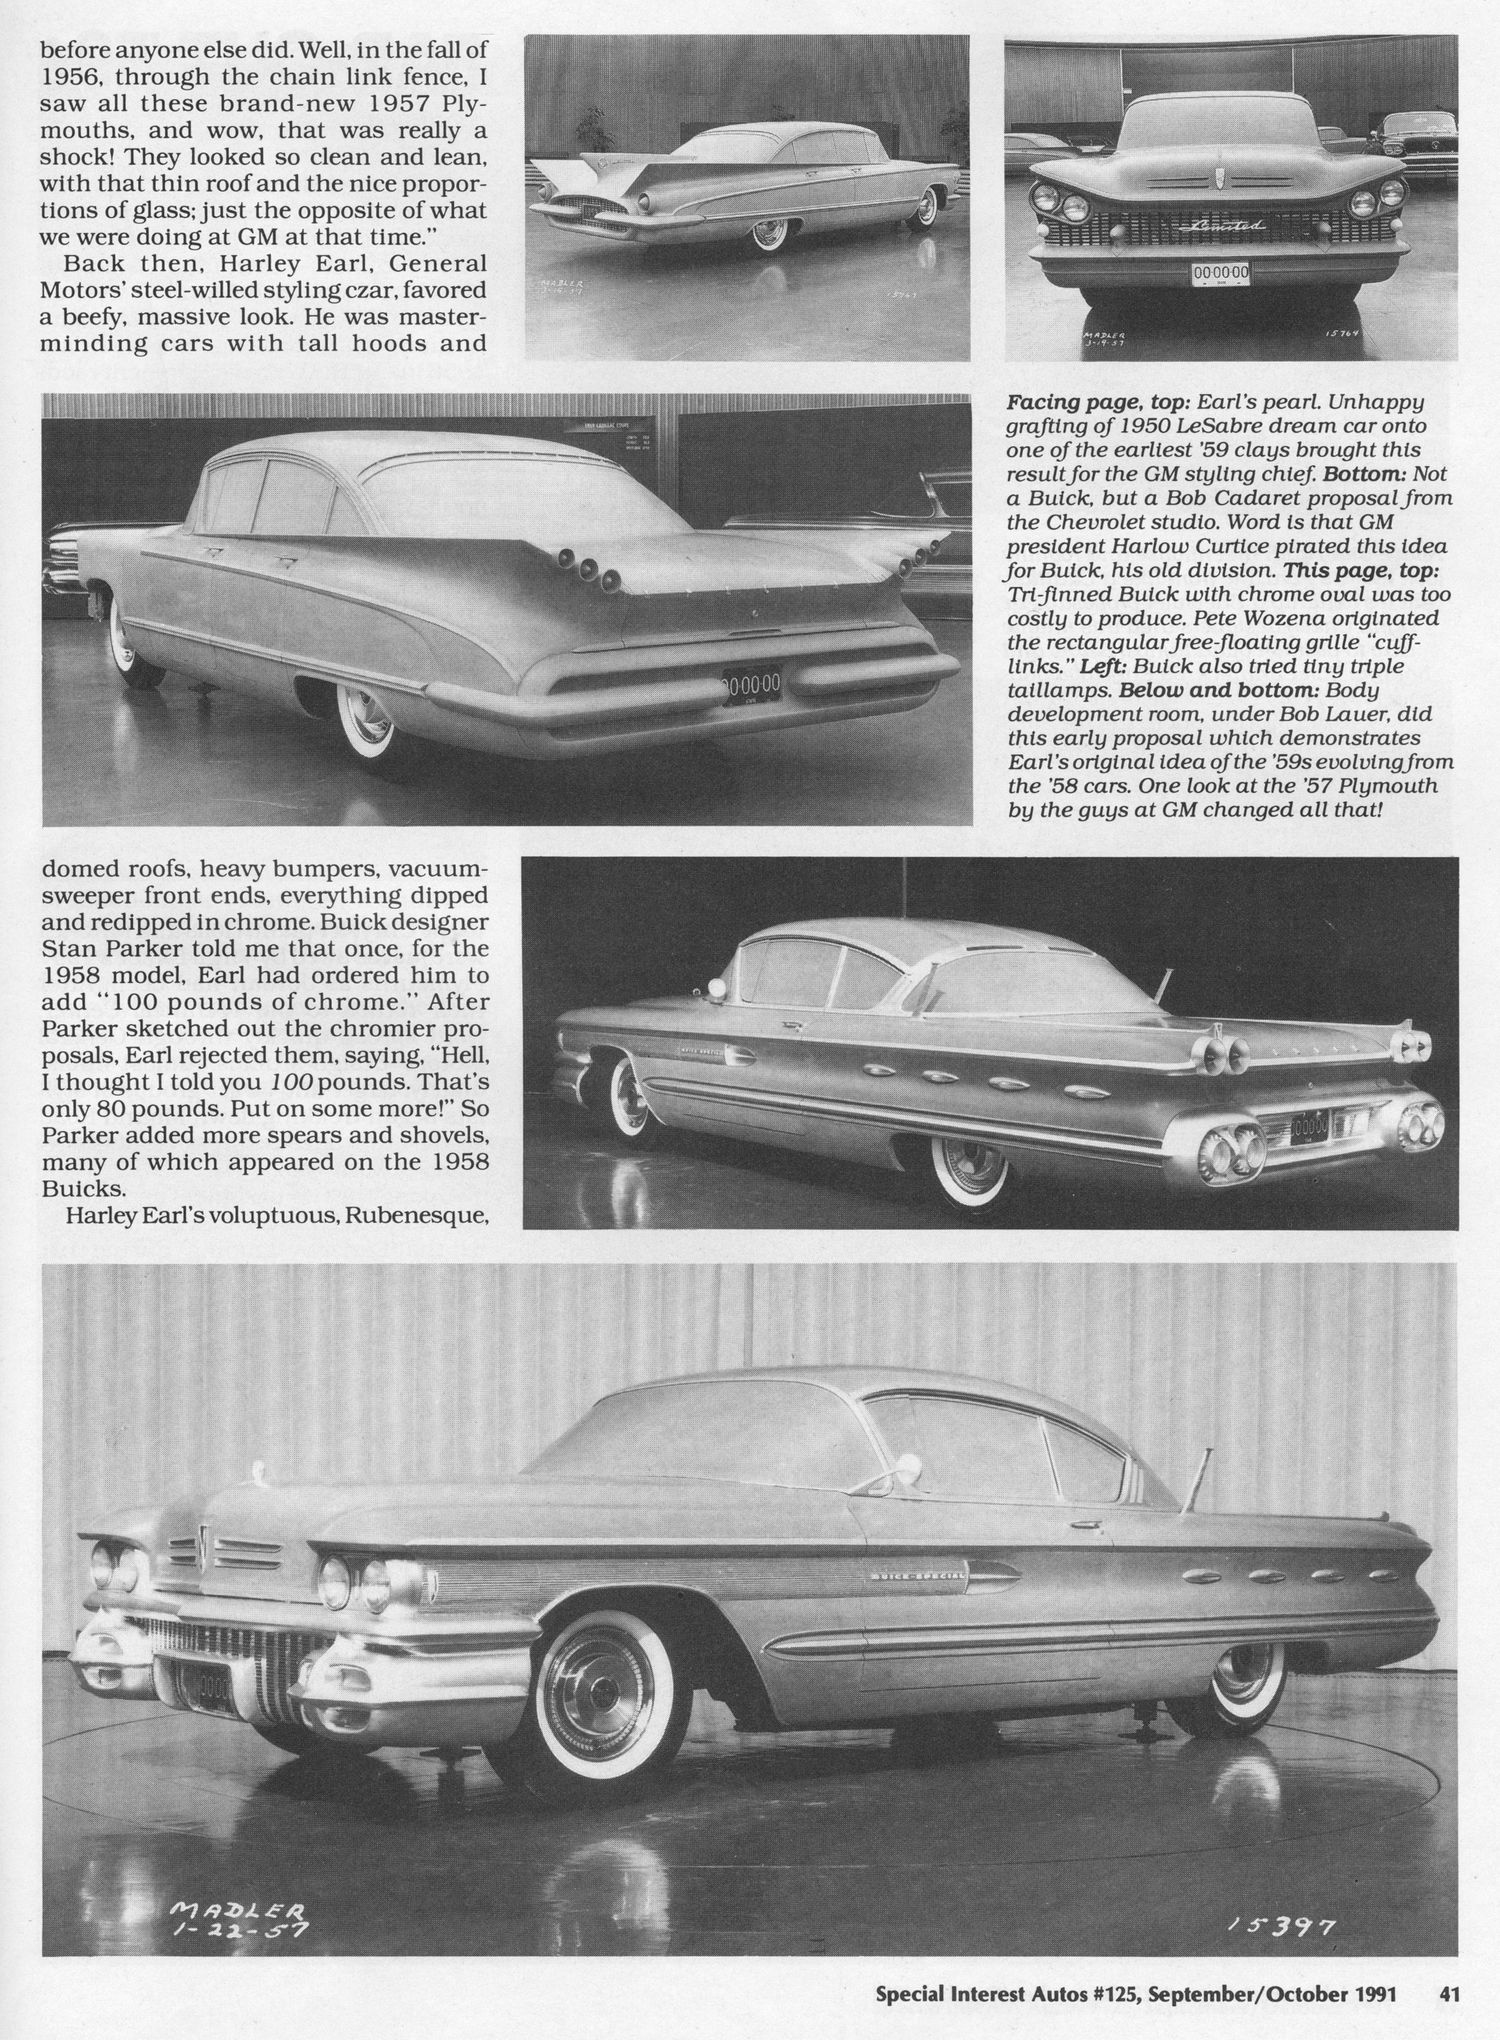
I just did a little digging on my hard disc and I came across one of those pages of 'Special Interest Autos' which showed what GM originally had planned for '59. I don't think I'd want to be caught dead in any of these cars. NOT pretty at all IMO!
-
The birth of a classic (?)
MrObsessive replied to Richard Bartrop's topic in General Automotive Talk (Trucks and Cars)
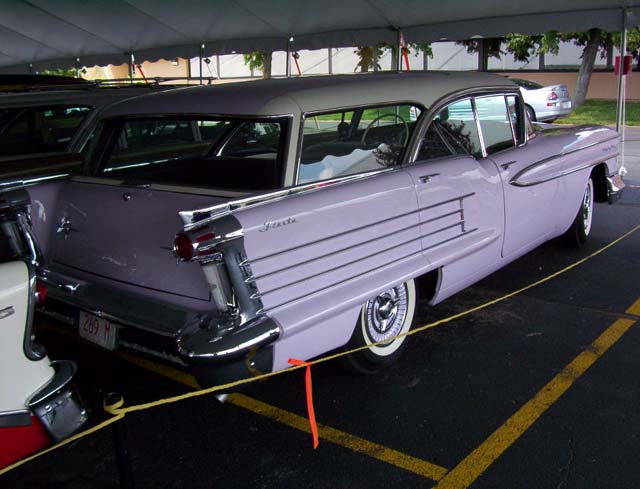
I have a now OOP resin of R&R's '58 Olds wagon and that's the color I'd like to paint mine. Did it look something like this? I believe Olds called that color "Heather". It's certainly very '50's and suits the lines of that car for sure. I've seen those design proposals and all I can say is.................UGGGGH!! Thank goodness the designers saw what Chrysler had coming for '57 which made them literally tear up and crush everything and start over. Some of those original '59 designs were simply downright HIDEOUS!
-
The birth of a classic (?)
MrObsessive replied to Richard Bartrop's topic in General Automotive Talk (Trucks and Cars)
-
The birth of a classic (?)
MrObsessive replied to Richard Bartrop's topic in General Automotive Talk (Trucks and Cars)
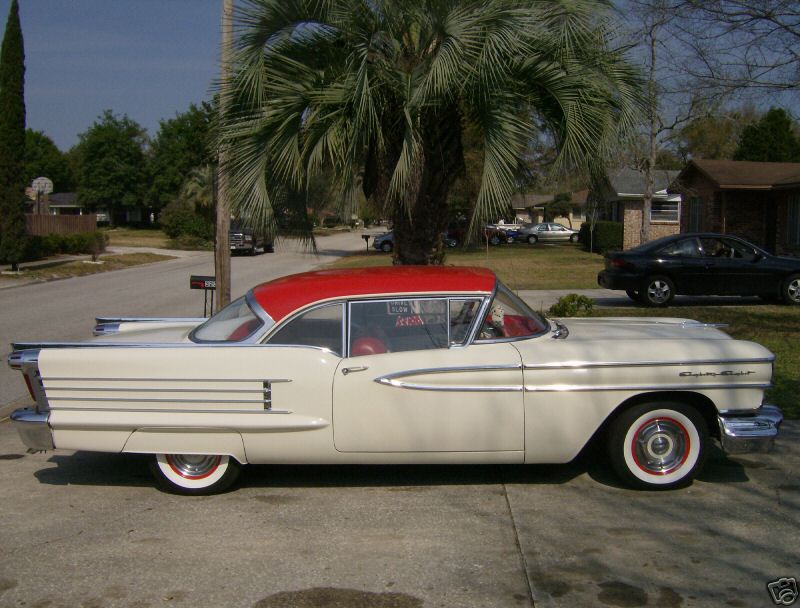
Back in the mid '60's when I was a (little) kid, my Uncle had a '58 Olds (98?) convertible. MILES of chrome and as a long as a city block or so it seemed to a five year old. One time my Mom kept laughing about something and she said that someone came out one morning and painted musical notes (with water colors) on the side of my Uncle's (her brother's car). It was years till I figured out that yes.............the side chrome on the '58 Olds looks just like a sheet of music!
-
Wow! That is one of the nicest I've seen built! Clean as a whistle and your photography is excellent! Same here.....I've got an untouched original in its box along with a very clean rebuilder sitting in the box with it. I'd probably restore the builtup and leave the original alone. I think this is one of Bill Mitchell's best ever designs for GM. Over 50 years later and it STILL looks terrific!
-
I know of who you're speaking about and not long ago, he had something on eBay that I wanted BADLY! I put in a set bid and sure enough, right at the last minute someone jumped in and sniped it. I was a little depressed, but I figured that's how it goes. A day or so later, the seller had dropped me a line to let me know that he had another one to offer and if I was interested, he would sell it to me at the auction price.......no bidding! Of course, I jumped at the chance and I agree that this is the way he likes to do business. He didn't have to do that and I was VERY appreciative as this is something that no one else is offering at the moment. And yes, he is offering things that would be considered very esoteric by most, but for those of us that are into those oddball cars that will never see the light of day from the major model manufacturers, we at least have this avenue (eBay) to get what we want. Not suitable for everyone..........I get that, but like you said with a lot of caster's time at a premium with full time jobs and whatnot, this is what works for them.
-
I couldn't have said it any better!
-
You can check here for Star Models site. Steve's phone number is on the page. Very nice guy to deal with!
-
The entire pack which Model Master has in their set. These can include 2400 through 12,000 grit. I'm not sure what they cost now as it's been years since I had to buy them. They're all over the 'Bay though.
-
I want to add that it might be worth it to invest in the polishing cloths. While there's sandpaper out there that may say it's a certain grit, a lot of times it's too much for paints as it can wear things away faster than it should. Not to mention the creases and gouging one can get if they're not handled correctly. Polishing cloths can be folded up to gently get into tight areas where regular sandpaper can leave gouges and marks. The cloths should last you quite a long time if you use them wet, and keep them cleaned up after each use and put them away after your done. I can bet that I've had my same cloths for probably 5-10 years and they're still as good as when I first got 'em.
-
Doug, I don't use the rubbing compound at all. Remember, a lot of this stuff can be very harsh on hobby enamels.....particularly if you're using hobby clears such as Testors. Here's what I use for all of my polishing........ It's all I've used since perhaps the late '90's for polishing. Very mild as I've rubbed out Tamiya's acrylics for instance. I exclusively use a chamois cloth for polishing as that's the closest you'll get for using basically 'skin'. You can pick up chamois cloths mostly at any auto parts place. It usually comes in a great big sheet. I'll take it and split it up into three sections for example so it's not so cumbersome for handling the model. BTW, I'll use the cloth when handling the model for the final detail stuff. Keeps all the fingerprints and whatnot off of things as you're finishing up.
-
???
-
Here ya go! Pics courtesy of eBay
-
That is a VERY nice model of that! From the mid '90's through the mid '00's, I lived in an apartment which was above what used to be a Fiat dealership. Believe it or not, there were a couple of these that were still below me sitting in the garage. I don't think they were running, but the guy I rented from he would occasionally work on other Fiats that folks would bring to him. There was also a 850 Spyder sitting in the lot across the street that he wanted me to buy, but that one was just too dang small for me, and after having a '78 Fiat 124 Spyder which ultimately broke its timing belt, I was not interested in taking on another Fiat. Yes, I too would love to see a detailed, 1/25 kit of this car. I've been watching a kit of a Fiat Zagato coupe which has been online for the longest time. There's four of 'em, but no takers.
-
Very true David! Your final result is only as good as your previous coats. For whatever reason though the Testors clears are prone to orange peel when they're fully dry. I suspect it has a lot to do with the shrinkage factor of that particular formula as I've not noticed that in their regular Model Master paints. Mine went on nice and smooth, but after letting it sit for a week to fully cure, it had noticeable orange peel. I was able to rub it out with no issue however as the undercoats were smooth. Here was the '74 'Vette before and after the clear coats.........Not super severe orange peel but clearly needing rubbed out for my tastes. The color before the clear coat................. And after............ And here it is after I fully rubbed and polished it out.
-
1/8 scale Jaguar E type from DeAgostini
MrObsessive replied to traditional's topic in Diecast Corner
DeAgostini keeps tempting me with sending be ads about this car. Since I bought their kit of the 1/8 '67 Shelby, they won't leave me alone! This is REALLY a beautiful model and very well done and as I already have the 1/8 Monogram kit, this will be a tough choice. This is worlds better than the Monogram one, but I right now I'm not sure I want to drag out paying for this for two years, while the Shelby is languishing at the moment. So many models and not enough hours in the day! I wholeheartedly agree! This is what's killing me to go ahead and spring for it! VERY nicely done wires, and besides the 1/12 MFH kits I have, one of the best I've ever seen in this scale! -
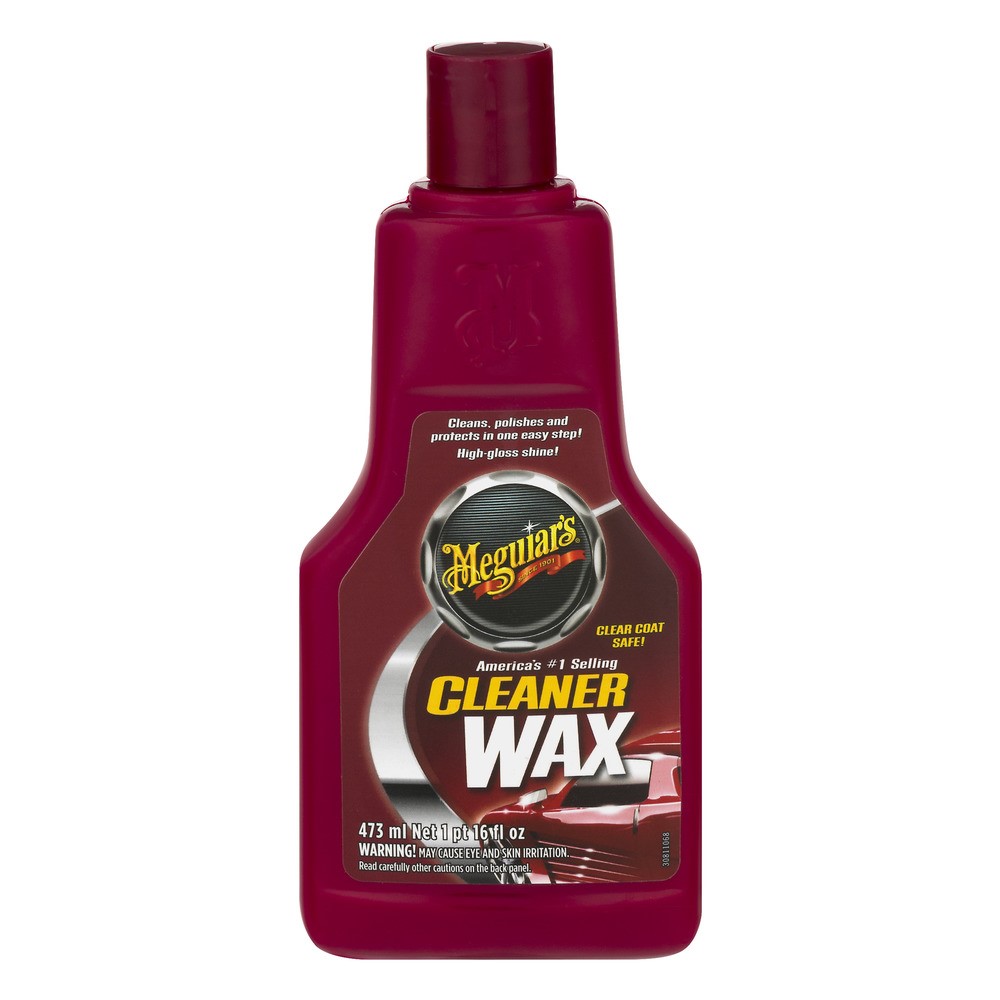
It's hard to give an answer as to when to stop sanding. It's like an artist or designer has to know when to pick up their pencil. I can say that it's a good idea if your wet sanding, to wipe off the water every few passes to see where you are before moving on to the next grit. I will say that in most cases, 2500 grit is a bit too harsh for starting a rub out job. Certainly 1500 grit! I'd start with something less abrasive such as 3200 or even 3600 grit. I did get the same type of orange peel you got as the Testors did go on smoothly, but dried to that orange peel finish you described. So yes......before moving on to the higher number grit, make sure the orange peel is gone to your satisfaction. I used the Testors clear as I didn't want any reaction between a harsher clear and the automotive paint I was using. Some of them may not play nice together and redoing paint jobs is one of of my major pet peeves in this hobby. As I mentioned before, you might want to switch waxes as I think Novus might be a bit too harsh, especially for a hobby clears such as Testors. I've been using Meguiar's Car Cleaner Wax since the '90's and I've never had an issue with it. Even the soft acrylic hobby paints I've rubbed out in the past with it. Yes, before polishing out the whole works, I want the entire body rubbed out with the cloths. This may be time consuming to some, but it's worked for me for many years and the paint guys in the 1:1 world can tell you that's pretty much how it's done.
-
how to remove glass from rebuilders
MrObsessive replied to michelle's topic in Model Building Questions and Answers
Getting out badly glued in kit glass in a body is NO fun! I had that daunting task when I bought a '74 Corvette rebuilder and I didn't see how bad it was till of course it got here to me. Bad enough that there were very visible sink marks in the roof! I was able to get the glass out, but not without damage to the glass, and the aftermath on the underside of the roof. I eventually ended up getting out my Dremel and grinding out the rest of the runner that was stuck. A bit time consuming, but I got it cleaned up. I then did as Tom suggested and made my own glass. The front was tricky as the curves are different top to bottom, so I ended up vacuforming that. The rear glass I was able to make using a piece of clear stencil sheet you can get at the Arts and Crafts store. Easy enough as that was a simple flat piece. I have to echo what Mark said though.........you can save yourself a LOT of grief if you can get builtups that do not have bad glass. I've even passed up what would be rare kits because the glass was put in so badly. Good luck! -
Doug, I generally start with either 3200 or 3600 grit polishing cloth and work all the way up to 12,000 grit (wet sand). It takes time, but I'm a big believer in rubbing out your model just the same as you would a 1:1. A door, then a front fender, then the hood, trunk etc. I then use a chamois cloth and Meguiar's Car Cleaner Wax to polish things out. It can take me upwards of several days over a series of hours to get the finish I want. I've not had to wash the car to get the wax out of shut lines-------you can take a stiff, wide paint brush and "sweep" inside those lines to try and get the wax out. Also, depending on how wide the shut lines are, you can take the corners of a 3x5 card and go in between the shut lines to get it out. BTW, on the model you see above and on one I'm trying to finish up ('68 Corvette Convertible), I also used Testor's clear. So what I described should work in your case if you want to keep using that particular clear. I'm not familiar with Novus..........Iike Meguair's as it's quite mild for paint, especially for hobby clears. Hope this all helps!
-
Paul, I take it that the Revell Starsky and Hutch Torino chassis would work with some tweaks for those of us that might want to superdetail this one? They pretty much had the same wheelbase through those years.
-
Absolutely fantastic Paul! Lines and proportions are spot on and that's a big deal for me! Love to grab one sometime!
-
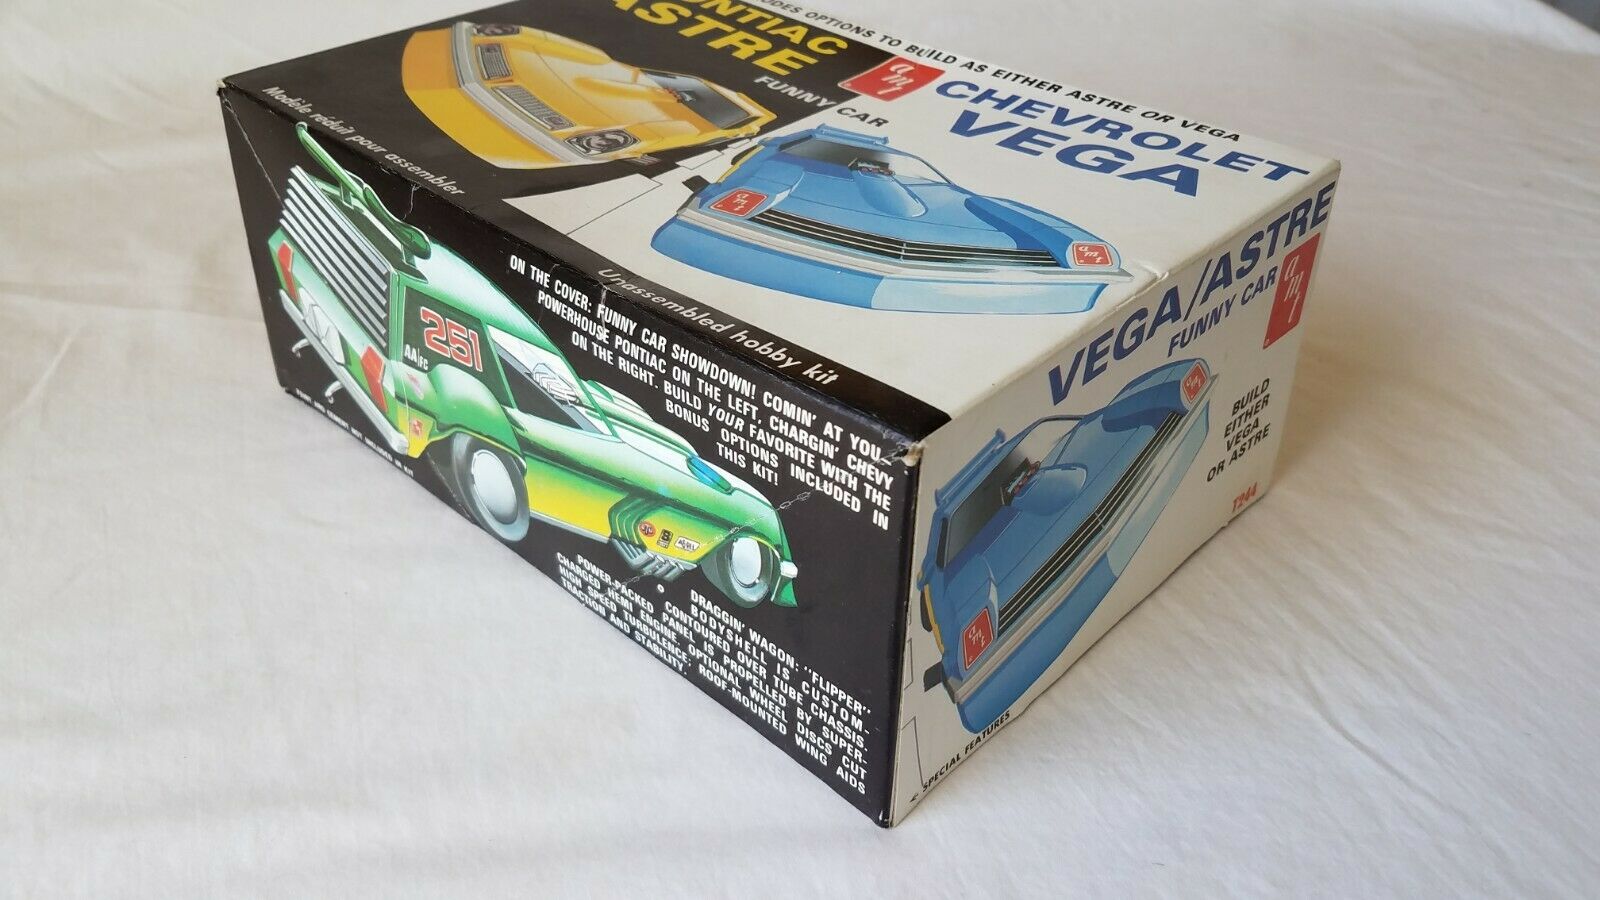
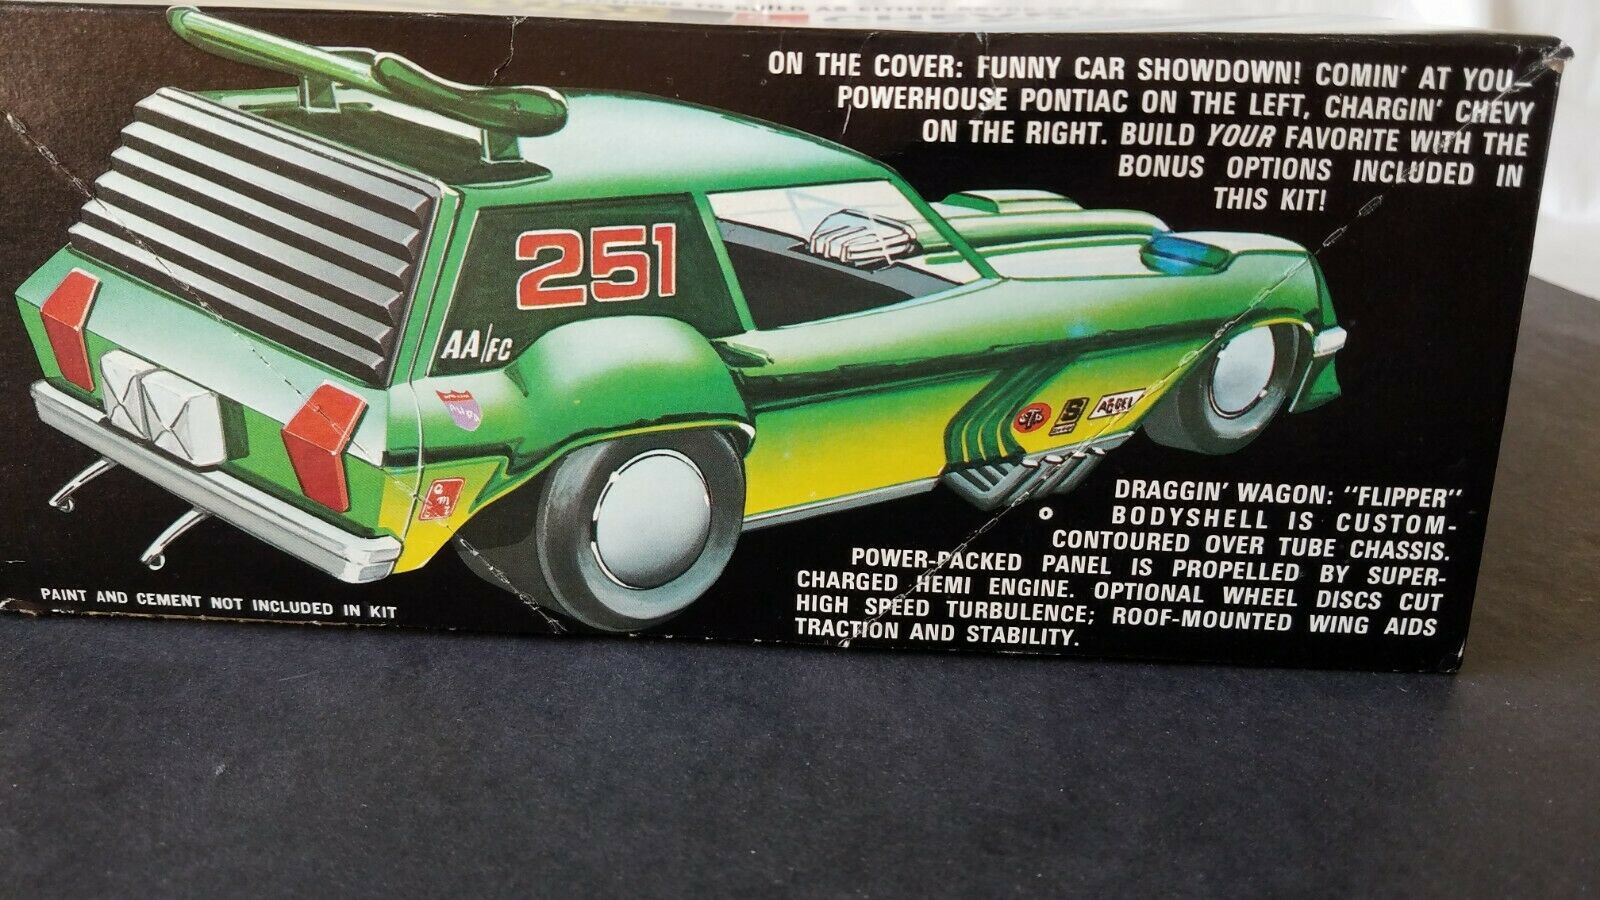
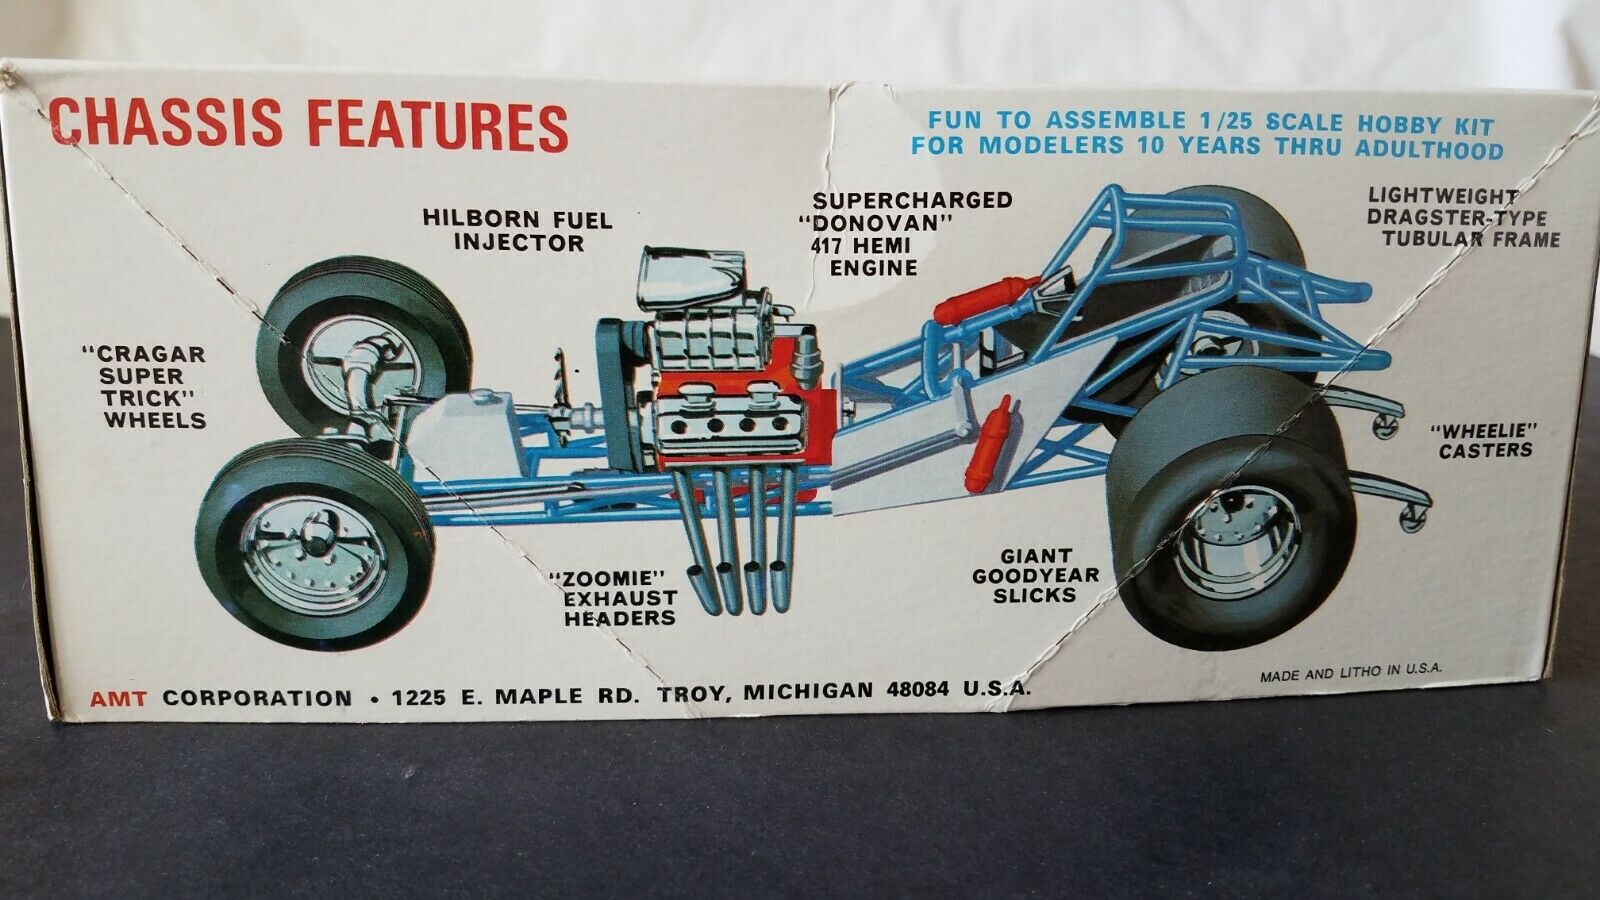
Hmmmm...............didn't see this one coming! I just bought a very clean builtup off the 'Bay and I might have waited for a fresh minty-mint kit. I do plan to restore that one though with an upgraded chassis from either the Z-16 or Revell '66 wagon. I may pick this one up as it should be molded in white and not that horrible yellow plastic. Box art is cool too with those surf boards!