crowe-t
-
Posts
1,965 -
Joined
-
Last visited
Content Type
Profiles
Forums
Events
Gallery
Everything posted by crowe-t
-

1/16th Dukes Charger * 3/28/15* Update, **DAISY DUKE AUTOGRAPH**
crowe-t replied to Rdkingjay's topic in WIP: Model Cars
Jay, I'm glad to see you're back at this one. It looks fantastic! And the tail lights look fine. This is an amazing build. Mike. -
I didn't get to read through all the posts in this thread. However I pasted an article from the Small Art Works website that explains the history of the MPC Knight Rider KITT model. I also attached a link to that site. The site's owner, Jim Small, is an accomplished model builder who does a lot of the build ups for Round 2 so he does indeed know what he's talking about. It seems like the most accurate version is the 1st release with the 'Golden Opportunity' offer on the box. I don't know if Round 2 will fix the issues with the upcoming re-release but it does say on their site that it will be molded in black and have tinted windows. http://smallartworks.ca/Gallery/Kitt/Kitt.html Here is the article from the Small Art Works site: Apparently there were at least three releases of the kit, but only the first release is considered the accurate one. I currently own two original releases of the kit (one of them is pictured finished above, the other remains unassembled) as well as the most recent 2002 re-release. The information posted here about the second release was told to me by another collector. I post these details here to aid collectors in acquiring the desired kit. The original release of the model by MPC, kit number 1-0675, was molded in black plastic and came in a box with the "Golden Opportunity" offers advertised. It had the correct vents behind the front fenders and also lacks the body side molding and various embossed emblems seen on the newest re-release which is molded in typical "Ertl Gray". The original release had only the MPC logo on the box, as the kit was produced before Ertl bought the company. The second release, kit number 6377, had the MPC/Ertl logo on the box cover and the words "Features Authentic Details" in place of "A Golden Opportunity Kit" on the box top. The newest re-release has the new box cover with the AMT/Ertl logo. The correctly styled fender vents are not on the second OR the newest release, only on the original first release. Apparently what has happened is that a re-tooled or incorrect body mold was used on the re-release(s) of the kit which is incorrect, but note that on the NEW release box cover, the picture (claiming to be a photo of the actual assembled and painted kit) nevertheless shows these vents and other more accurate details in intact! Perhaps the tooling used for the Knight Rider kit was modified to do a newer model year of the Trans Am kit, as the manufacturers probably didn't think they'd do another run of the KITT kit. Other differences between the two (original 1982 and current 2002 release) kits are: * The new release comes with three (?) slightly rounded and detailed Pontiac taillight lenses, all of them incorrect, but identical. The original release had a flat, featureless (plain) taillight lens, which is correct for KITT. Two other small mystery red lenses are also included in the new release. * The interior is also a re-tooling. There are differences mainly in the details in the centre console and the rear seats are different. The front seats are the same. * The original release came with tinted winshield, rear window and rooftops. The new release windows are completely clear. * Both kits came with two hoods, the one seen on KITT and an extra one. The extra one included in the original is featureless, but the extra one in the new release has scoops and vents added that match a newer model of a real Trans Am, probably an '84 or '85 model or thereabouts.. There are other very subtle changes too, but nothing major that I've noted except that the newer release of the kit appears to be from a slightly crisper, less sloppy tooling, but you have to look very hard to see the differences. Beyond that I can tell you nothing further. If anyone out there has more helpful information to add I'd be happy to post it. Bottom line is that the new release is not as accurate as the original. I was also disappointed to find out that the re-release of the kit was incorrect as well. I guess this makes the originals more valuable. Hope this helps solve some of the puzzles that some of you may have had about these KITTs.
-
Ron, This build came out fantastic! I love the color. BTW, what scale is this, 1:25, 1:32... ? Mike.
-
project pro street 4.25.15 brass time!
crowe-t replied to streetmachine11's topic in WIP: Model Cars
Nice work so far Jason! Did you make the torque converter? When the engine and transmission are in the car that won't be seen or will you do something different? -
1/16th Dukes Charger * 3/28/15* Update, **DAISY DUKE AUTOGRAPH**
crowe-t replied to Rdkingjay's topic in WIP: Model Cars
WOW Jay, it looks like a sheet of glass! I can't wait to see it finished. Mike. -
Casey, Excellent work and attention to the details! I always liked the shorty Dodge '71 -'77 vans. The MPC Cannonball Run kit I shortened years ago was cut behind the side doors since the doors were moved forward starting in '78. I didn't do such a great job at the time. What's odd was that the body of the Cannonball Run van represented a '79 instead of a '78. I think all the MPC Cannonball Run kits had the '79 'Ram' bodies but not sure. Mike.
-
That's amazing! It looks like a styrene kit. It's hard to believe its resin in the picture.
-
'70 Dodge Charger Conversion
crowe-t replied to Mr. Moparman's topic in Car Aftermarket / Resin / 3D Printed
Time Machine Resin also makes a conversion for the MPC kit. http://www.timemachineresin.bravehost.com/moparkits.htmll For what it's worth the conversion kit from Missing Link is based on the Revell kit and therefore going to be more detailed and accurate. -
SMBC sells black resin slicks. Below is the description of the (scale) measurements from their website. I actually have a set of these and they look quite large. 1:25 Scale Pro-Stock Slicks Tire Set (2) (1:1) Tread Width 17", Tire Dia. 34", Rim 15-16"
-
1974 Econoline
crowe-t replied to Repstock's topic in WIP: Model Trucks: Pickups, Vans, SUVs, Light Commercial
Awesome!!! -
Thanks guys! Monty, Your old thread was a big help. I think a dark gray, like German Gray or Engine Gray, will do the trick for the floor pans.
-
Len, What color is your 78's body floor? Is it the color of the body or black?
-
Does anyone know what color the C3 Corvettes' undercarriage(chassis) was painted at the factory? More specifically the late 70's - early 80's C3's. Was it in primer with over spray from the body or black? If primer then what shade? I think GM used a dark gray primer but I'm not too sure.
-
Beautiful build!!!
-
It's beautiful Matt!!!
-
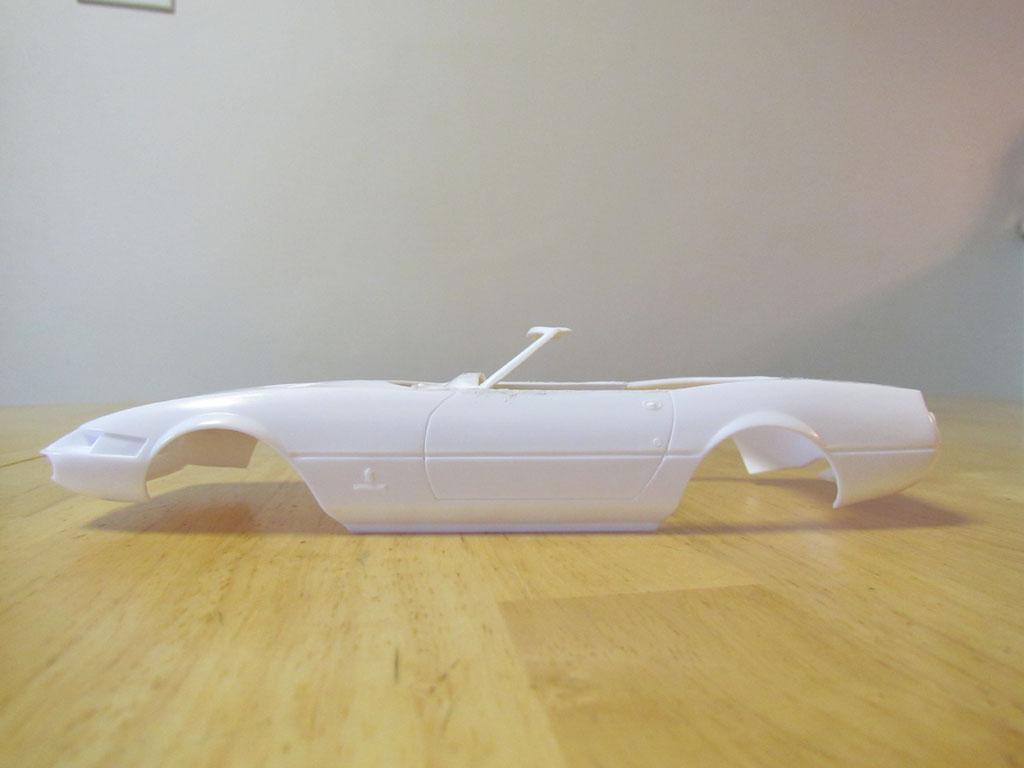
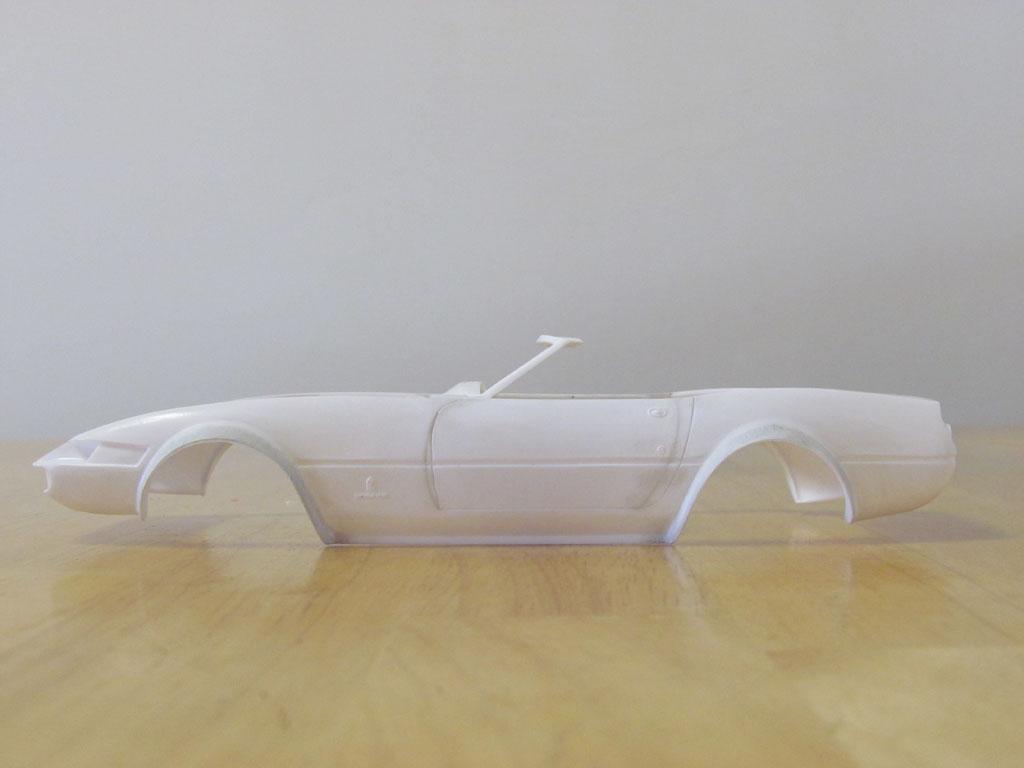
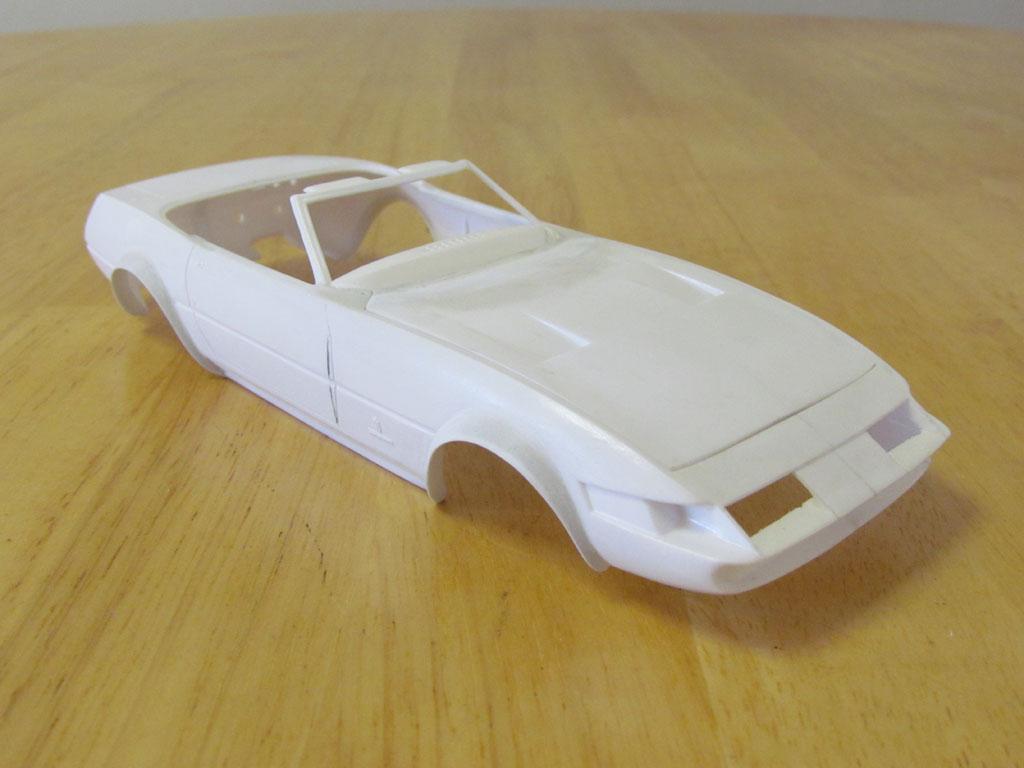
Here's a small update! I re-scribed the front and rear of the doors to look the way they do on the McBurnie Daytonas. The doors are also a bit longer on the McBurnie Daytonas. Here's a 'Before' picture: Here's how it looks now with the re-scribed doors. In the next few days I'll work on the headlight areas and remove the Pininfarina logos from the fenders.

-
The fender flares are almost done! I still have to shave off about .5 mm from the front flares and finish the work on the hood and the head lights. Here are some pictures of where I'm at with the body.
-
1969 Camaro Pro Mod.... updates 11/12/13
crowe-t replied to tyrone's topic in WIP: Drag Racing Models
Tyrone, This looks incredible as do all of your builds! What metalizer paint and colors did you use on the headers? They look real. Mike. -
1/25...Vinny Budano 68' Camaro Pro Mod build....
crowe-t replied to Dirt Demon's topic in WIP: Drag Racing Models
William, This is AWESOME!!! Can you post a picture with the nose on? Mike. -
Matt, This is a beautiful build! I really like the color.
-
Decanting spray paint for airbrush use
crowe-t replied to Zoom Zoom's topic in Tips, Tricks, and Tutorials
Bob, This is a great trick which I'll use soon. Mike. -
has anyone used testors "wet look" clear.....
crowe-t replied to foxbat426's topic in Model Building Questions and Answers
WOW, Marcos, these all shine like glass!! -
1/24 Goodyear Eagle GT tires now available
crowe-t replied to Chief Joseph's topic in Car Aftermarket / Resin / 3D Printed
I received a set of Joseph's 1/24 Goodyear Eagle GT tires today. They are fantastic! The set I purchased are cast in black rubber and look way better and far more accurate then the 1/24 Monogram kit tires. Don't hesitate to order tires from Joseph. His communication is excellent and I received them in record time. -
The tires arrived today from Chief Joseph(Joseph Osborn) aka Fireball Modelworks and they are perfect! I highly recommend them.
-
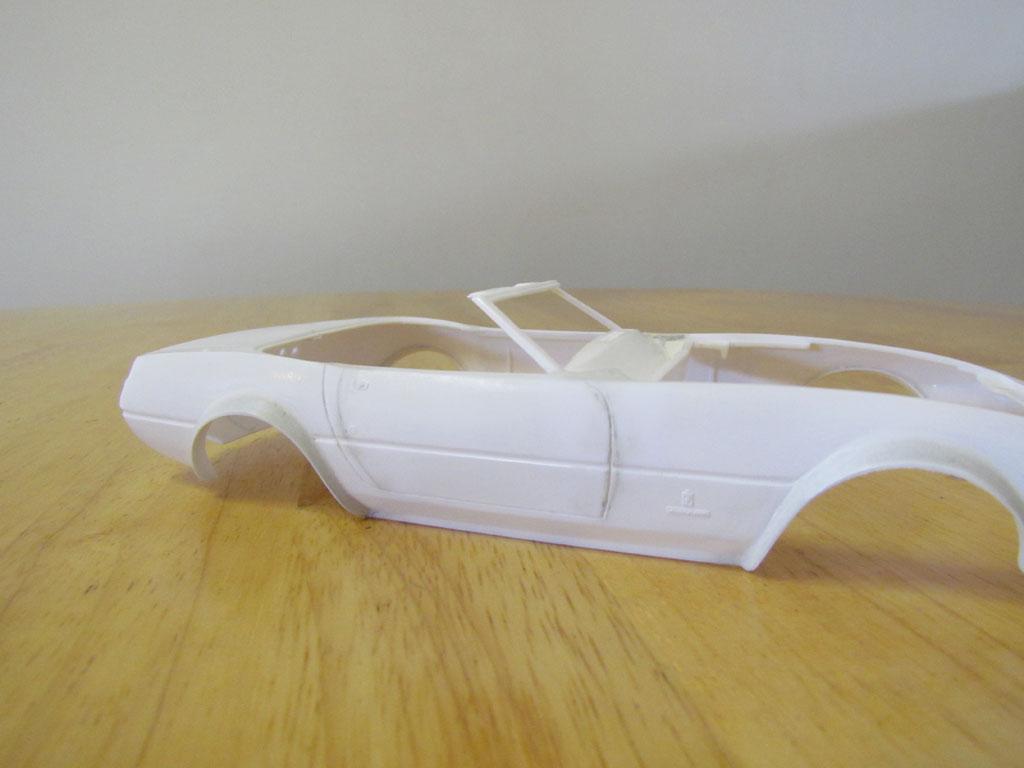
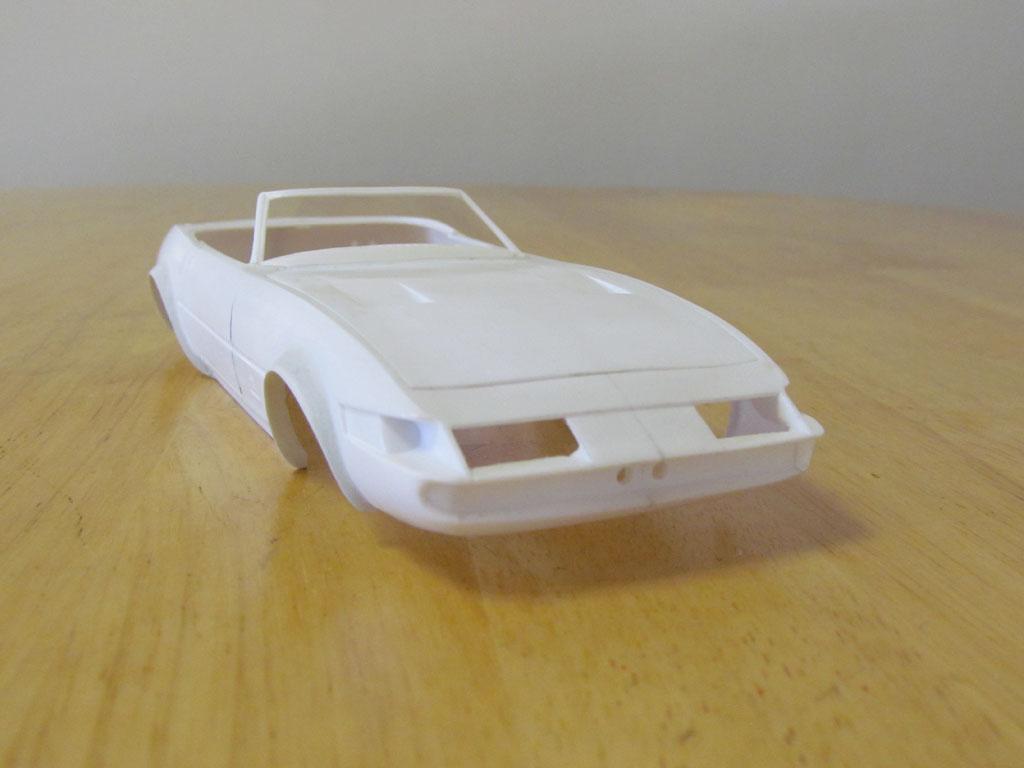
Time for another update! I started adding the fender flares. I glued in .015" sheet styrene around the perimeter of the wheel openings and added a couple more strips on the outside top to strengthen them a bit. Putty is now applied to the front flares. Here are some progress pictures.