Codi
-
Posts
2,675 -
Joined
-
Last visited
Content Type
Profiles
Forums
Events
Gallery
Everything posted by Codi
-

Tamiya1/18 Lola T-160 TS
Codi replied to mitchy's topic in WIP: Other Racing: Road Racing, Land Speed Racers
Great job Mitchy. The paint and body work is just stunning. For your first effort after 25 year lay off, I'd say you've mastered a thing or three. cheers, tim -
Cooper barn find
Codi replied to absmiami's topic in WIP: Other Racing: Road Racing, Land Speed Racers
Andrew, don't care what you're building, worth following along as the info / details shared are fantastic. Now I have to go check out your "Engines" thread. Cheers, tim -
Forum Software Upgrade is Partly Complete
Codi replied to Dave Ambrose's topic in General Automotive Talk (Trucks and Cars)
For what it's worth Dave, it FLIES when you up load now. Very noticeable difference. Good luck with the next update! -
Your build Kurt has the sterility & accuracy of a surgeon. Certainly meant as a compliment. No glue anywhere, everything where it should be......just super clean. VERY nicely done.....cheers, tim
-
Mickey Thompson 69 Mustang Mach 1 Funnycar x 2!
Codi replied to Alan Barton's topic in WIP: Drag Racing Models
Really like your solution you came up with. Certainly better to catch it now than later. Ready for some new pics though. hint-hint............ -
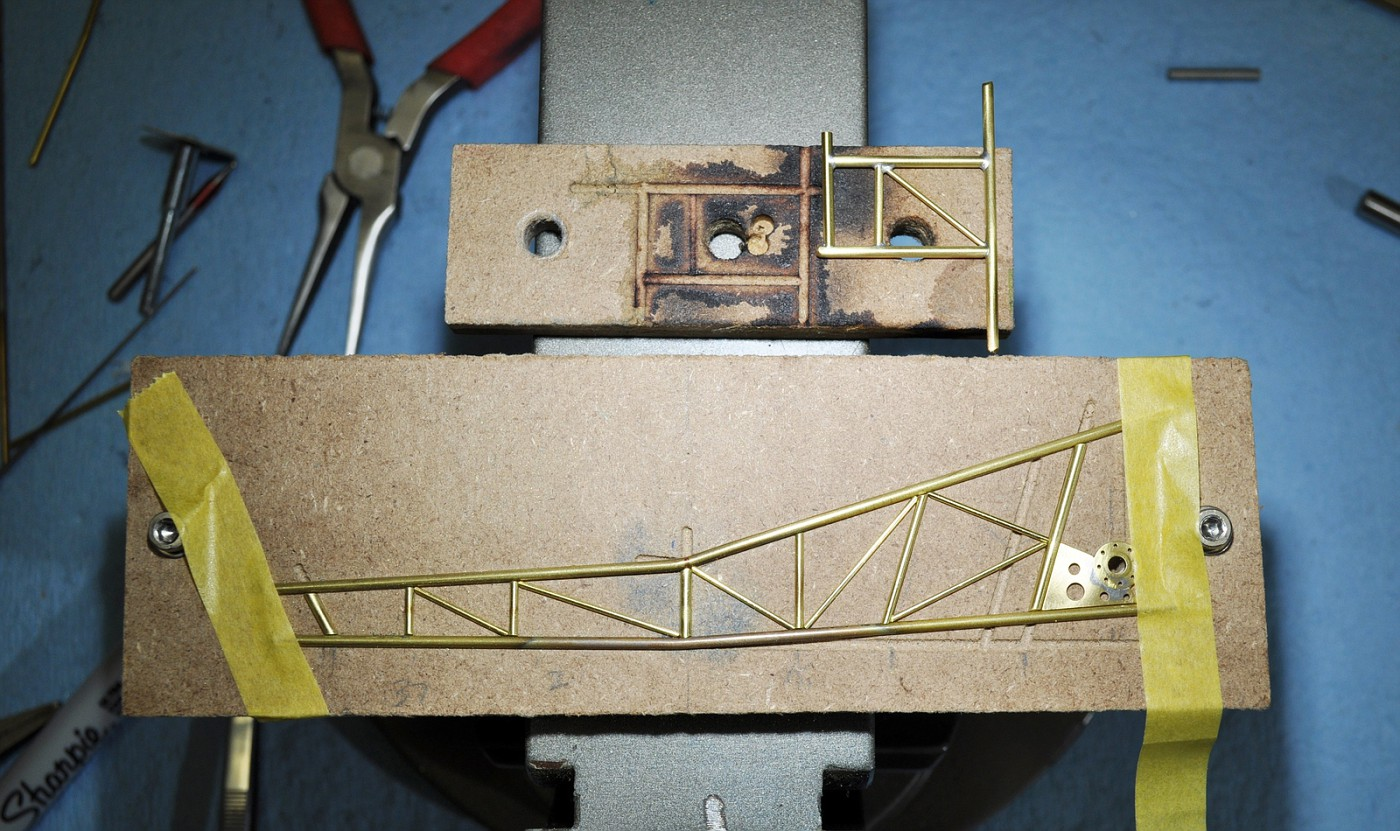
Again, thanks for the chuckle Brad. I'll take pics with the wheels /wing on it and post over the weekend. I just have to detail the body yet. But for sure YEAH!! It's done. Bob, I know guys that get phenomenal joints using a soldering iron (Clay Kemp & Randy D. come to mind) But my experiment of machining grooves into particle board and laying various sized tubing in place (that way I didn't have to touch it and nothing moved AND most importantly both sides were EXACTLY the same). I put Tix flux at each joint all at once, placed a small sliver of Tix solder over top of the joint and then flame soldered the rails together. I use a Benzomatic mini torch. Granted, having a mill helps to do that but I had no re-work, nothing moved, great joints and almost non-existent clean up. For the other parts of the chassis I used my resistance soldering iron which I've gotten better at using with time and experience. Here's a pic of the particle board/chassis that I milled for the soldering operation. Thanks too for the compliment(s). Appreciated Chris!! I'm going to do a simpler build next before I jump back to the Pro Mod. A bit of a mental break if you will. Really keen to do a Pro Stock Maverick. I was able to pick up a sweet, totally complete kit from a gentlemen in the U.K. Great foundation for it. I've been checking out the forum and there is a ton of great info on the topic from others here. Nobody beats this site for knowledge when it comes to modelling IMO. Cheers !!

-
A guy with a soldering iron in his hand. Life doesn't get any better. I'm enjoying seeing this thread progress. You too move fast and the car looks good. cheers, tim
-
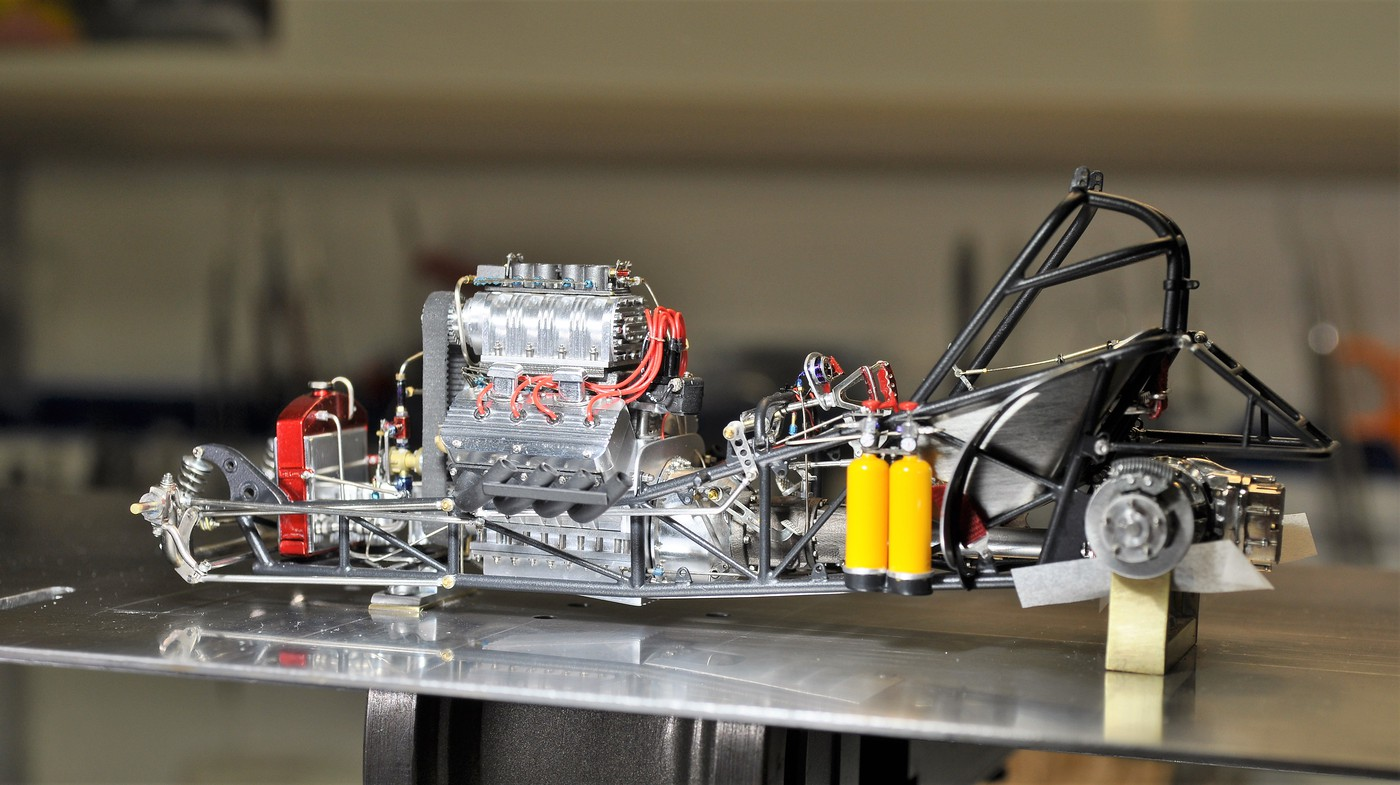
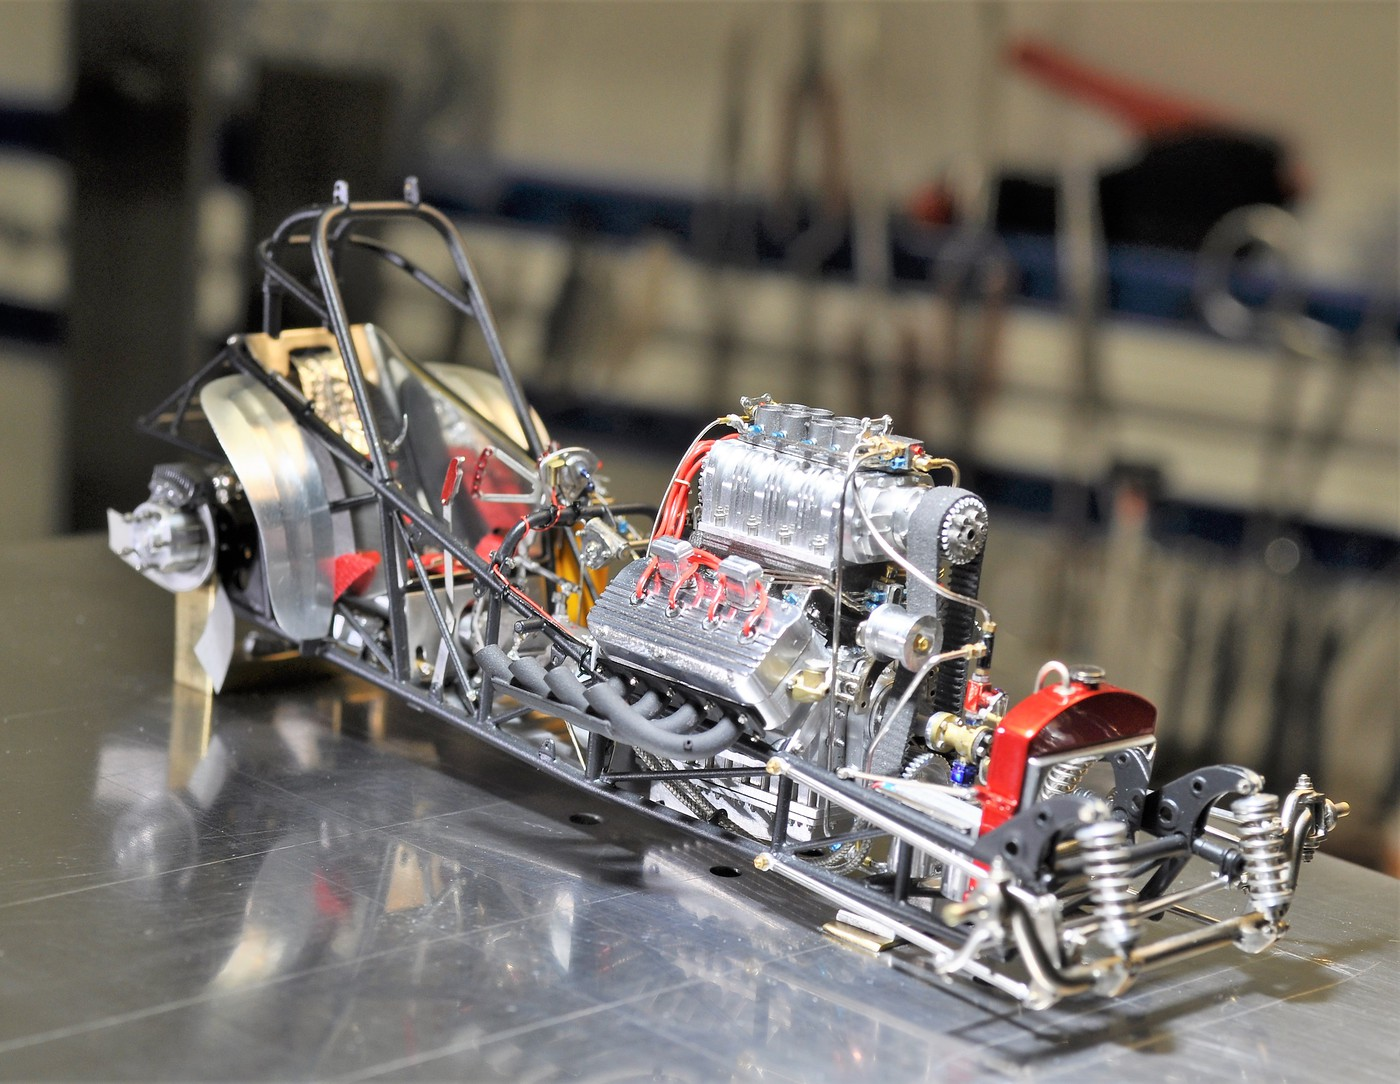
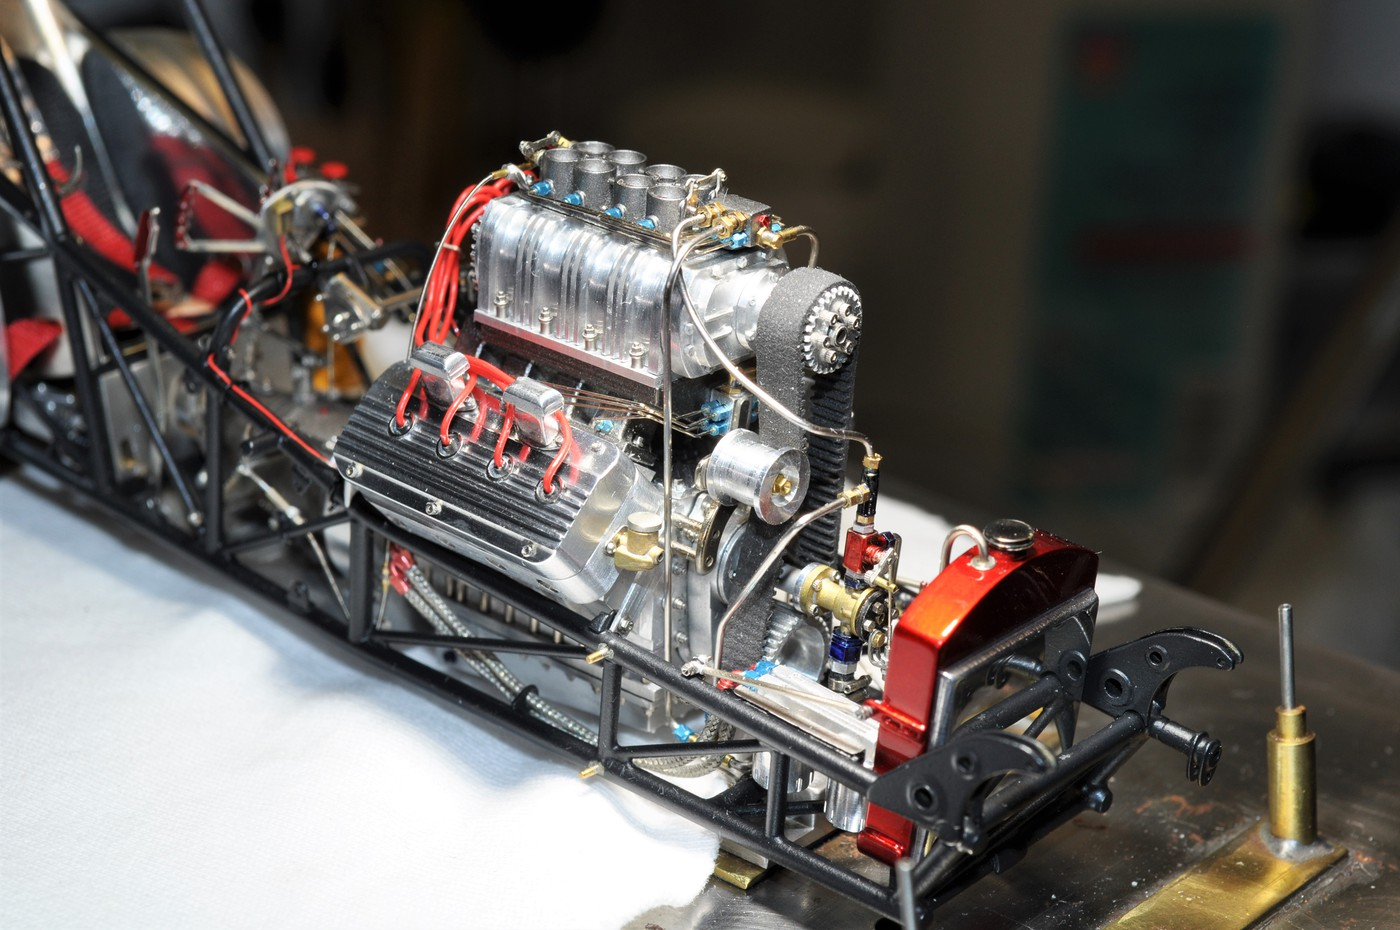
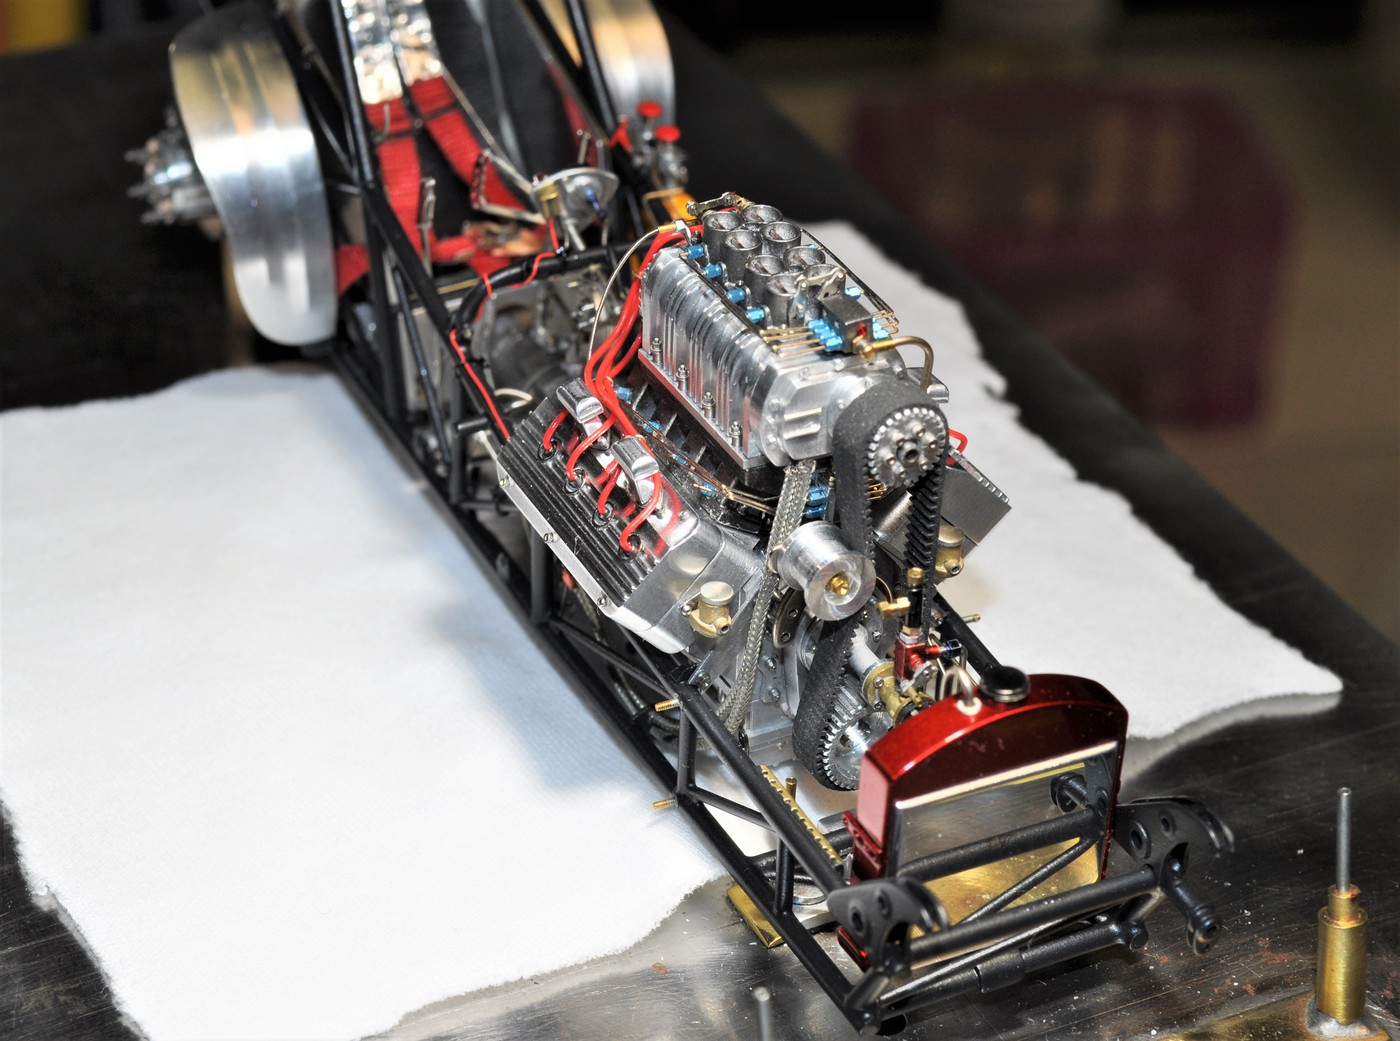
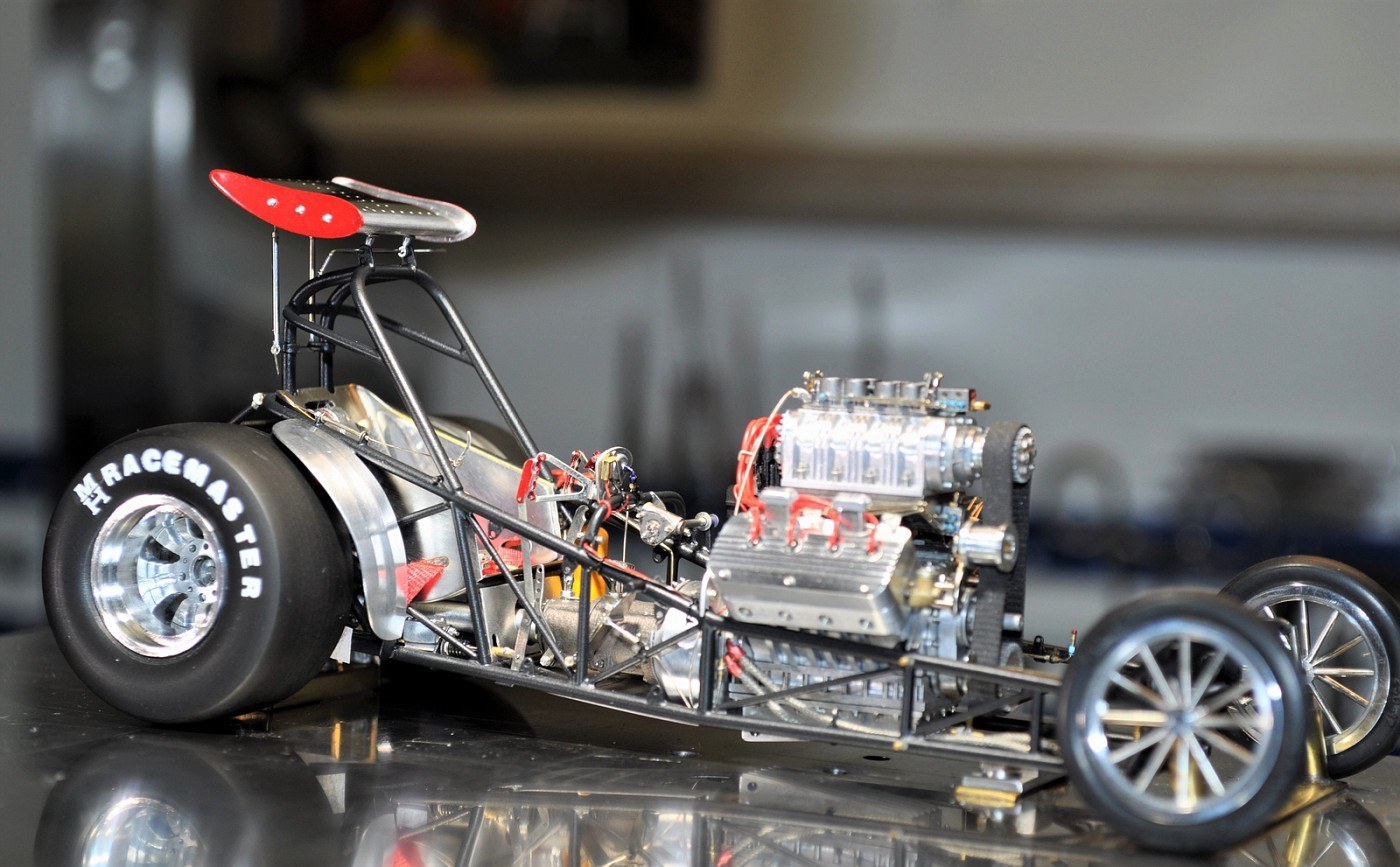
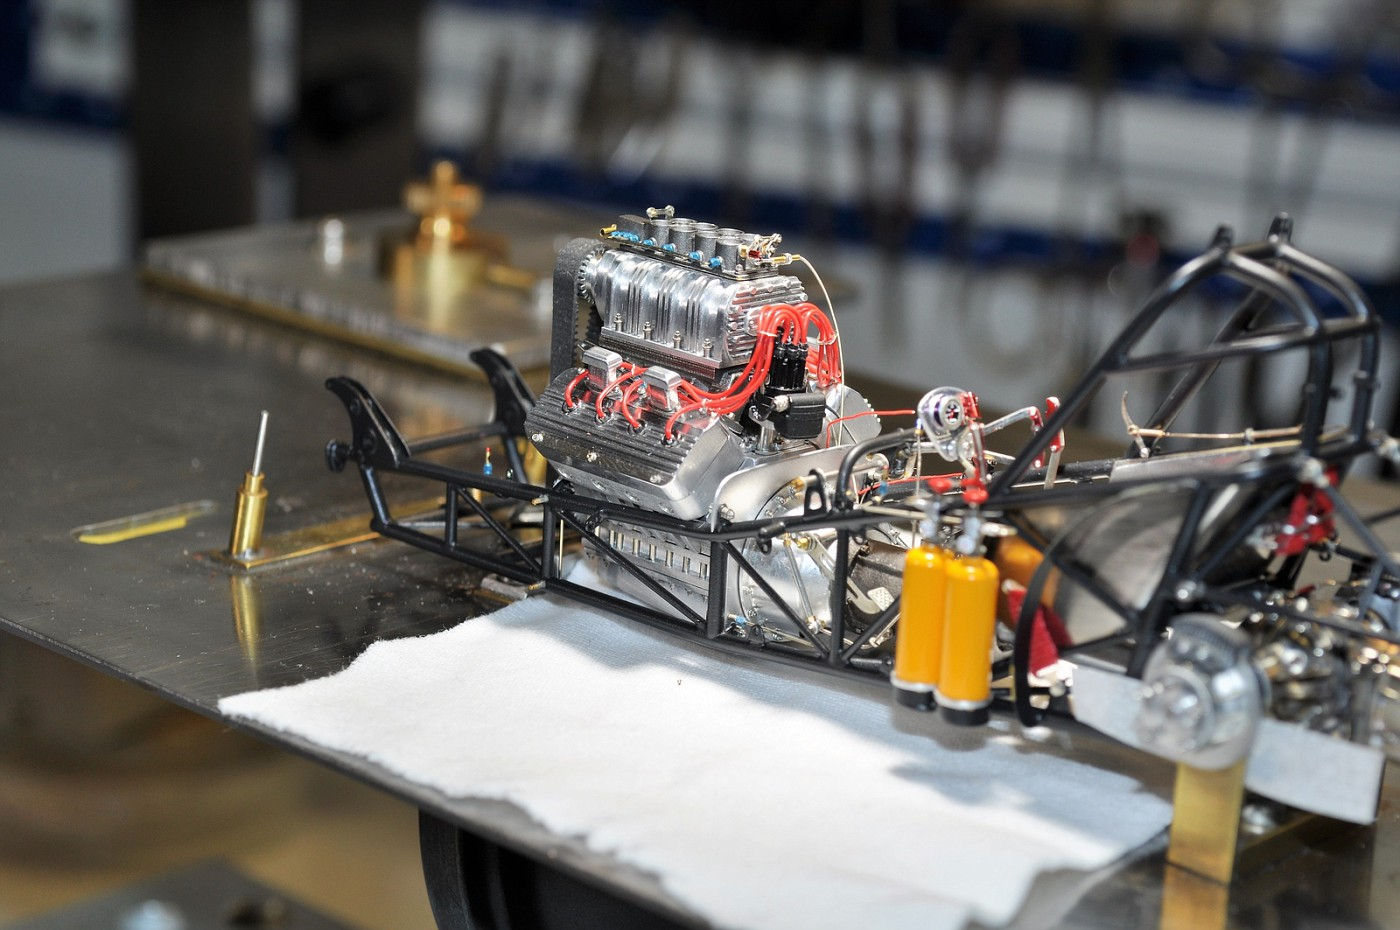
Thank you Claude........don't know much about nano science but I have figured out finally how to use my shrink gun. Dave, quite the compliment from an accomplished builder in his own right. I didn't leave anything on the field as they say on this one. 3+ years and I'm happy it's virtually done. See ya' Friday! John T. thanks man. No autographs but we'll have to figure out where we can meet some day to finally be properly introduced. Hakan, thanks too. It's come together these last few days. I promised better pics in the near future. I want to see what in looks like in natural sunlight. cheers Brad, Brad, Brad...........you're going to need more wall space because when it's all buttoned up and I take the glamour shots, you're going to be confused as can be. Thanks too for the laugh and the VERY nice compliment. I made good progress assembling the front suspension and steering and added the headers. Only the water neck lines to run to the headers and the chassis /engine is done FINALLY. Some small touch up here and there and a few brass nuts to touch up with paint. After 3 years and 2000+ hours conservatively. At some point I'm going to weigh it as I couldn't believe the heft of it when I picked it up today..........these couple pics are for you Brad! cheers, tim
-
Building The 1/25 <deleted>...a 72 Nova street car...
Codi replied to QuikTimz's topic in WIP: Drag Racing Models
Your 1:1 is quite sanitary. Look forward to your updates on the model of it. cheers, tim -
Man are you fast Wayne. I have a question that no one has answered yet for me related to the approach of painting the body early on in a build as opposed to waiting during the later stages as you near completion. Everyone has a style & preference but I take the bodies off so many times during a build that I do it later as it lessens the chance of a mishap. I've seen your build threads and you don't suffer that problem from what I've seen. Many others have the same approach as you and it seems to work well. Good luck with the build too! Cheers, Tim
-
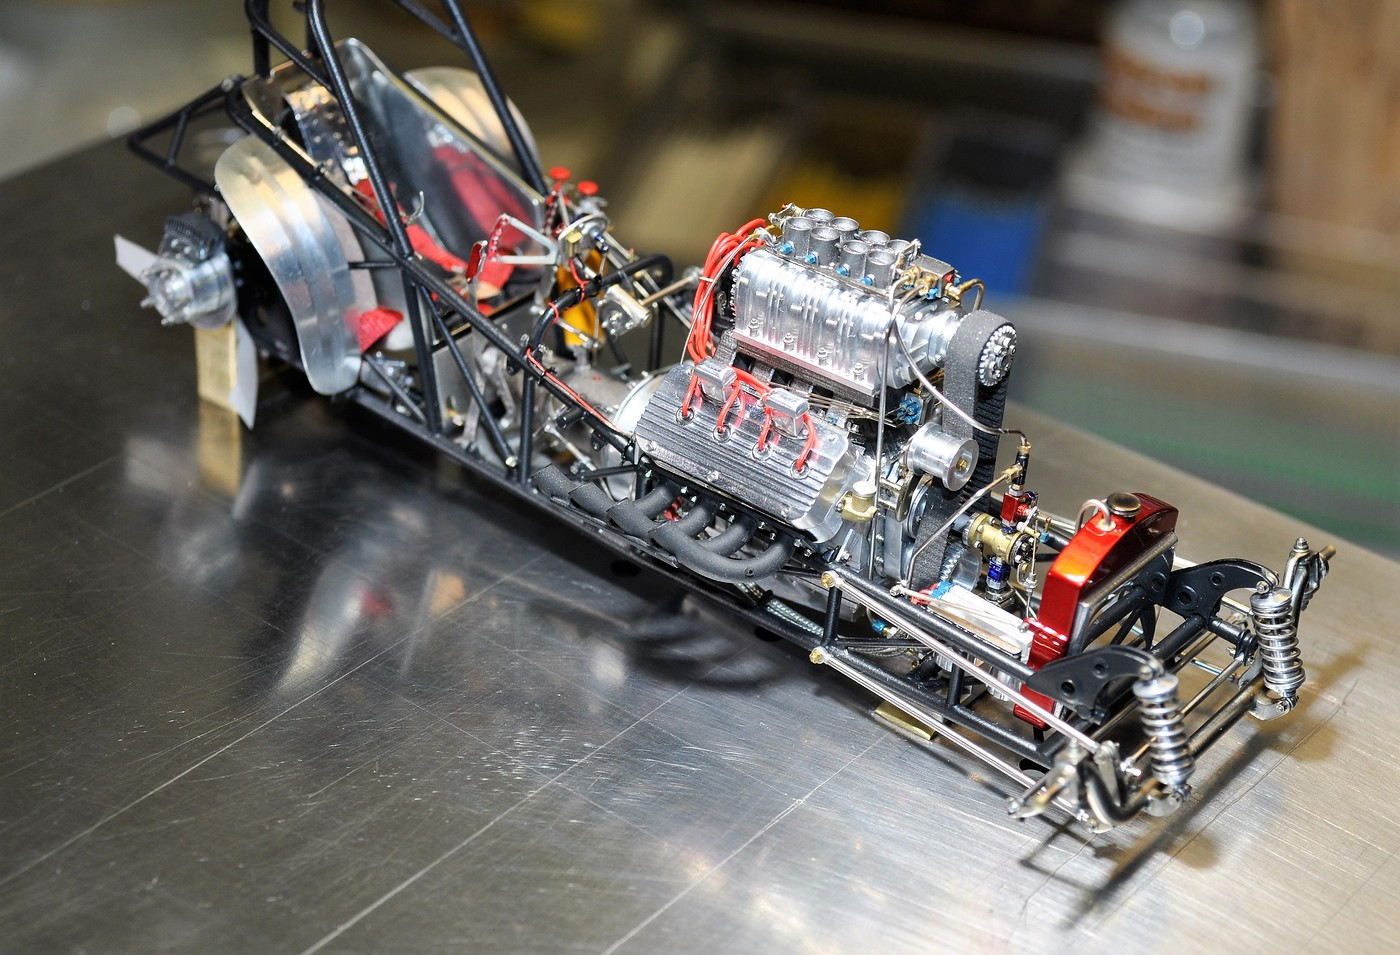
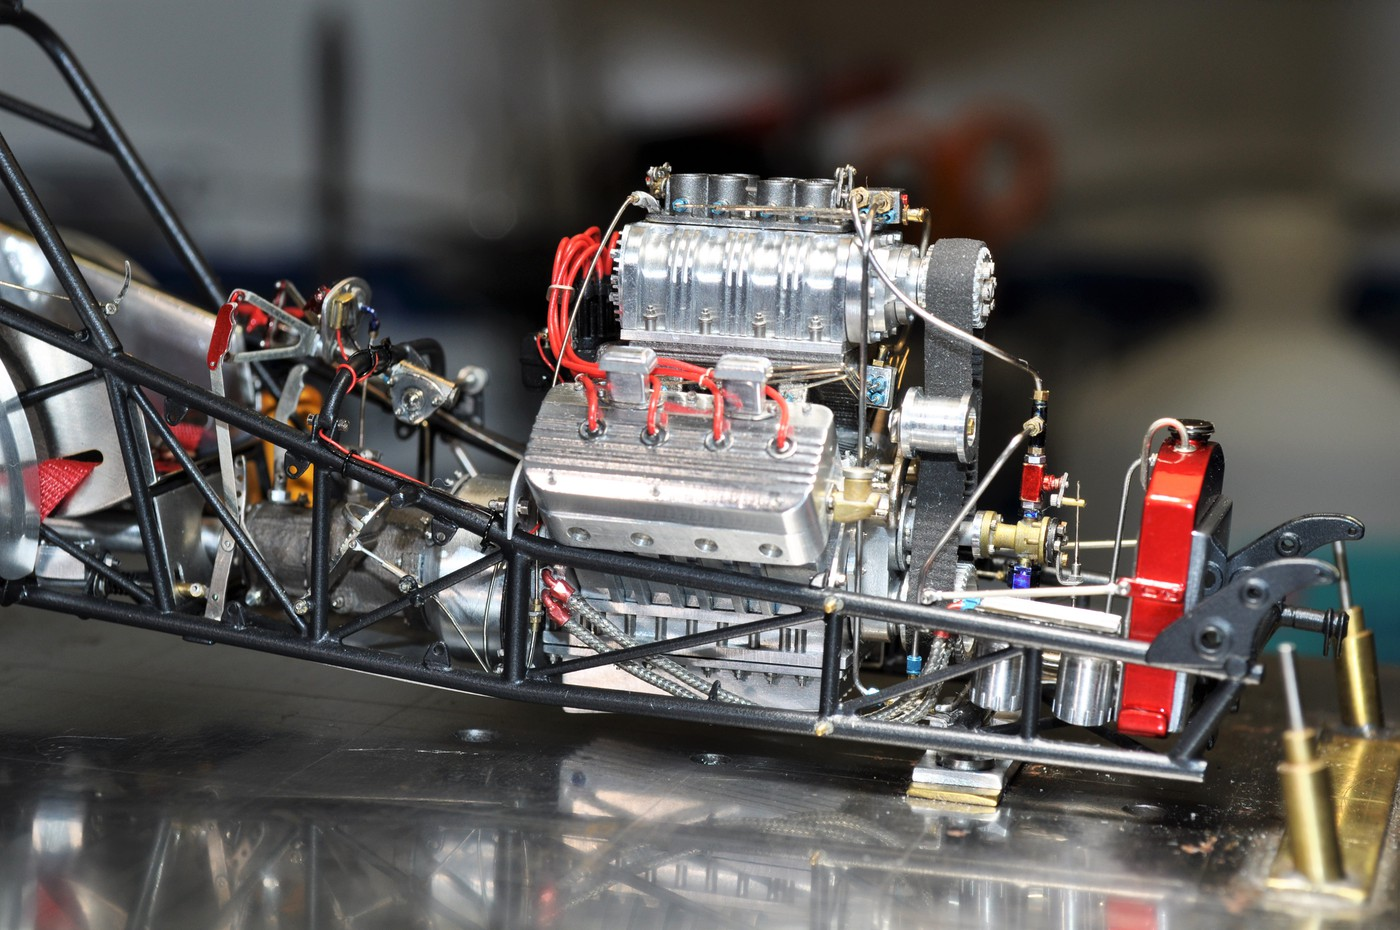
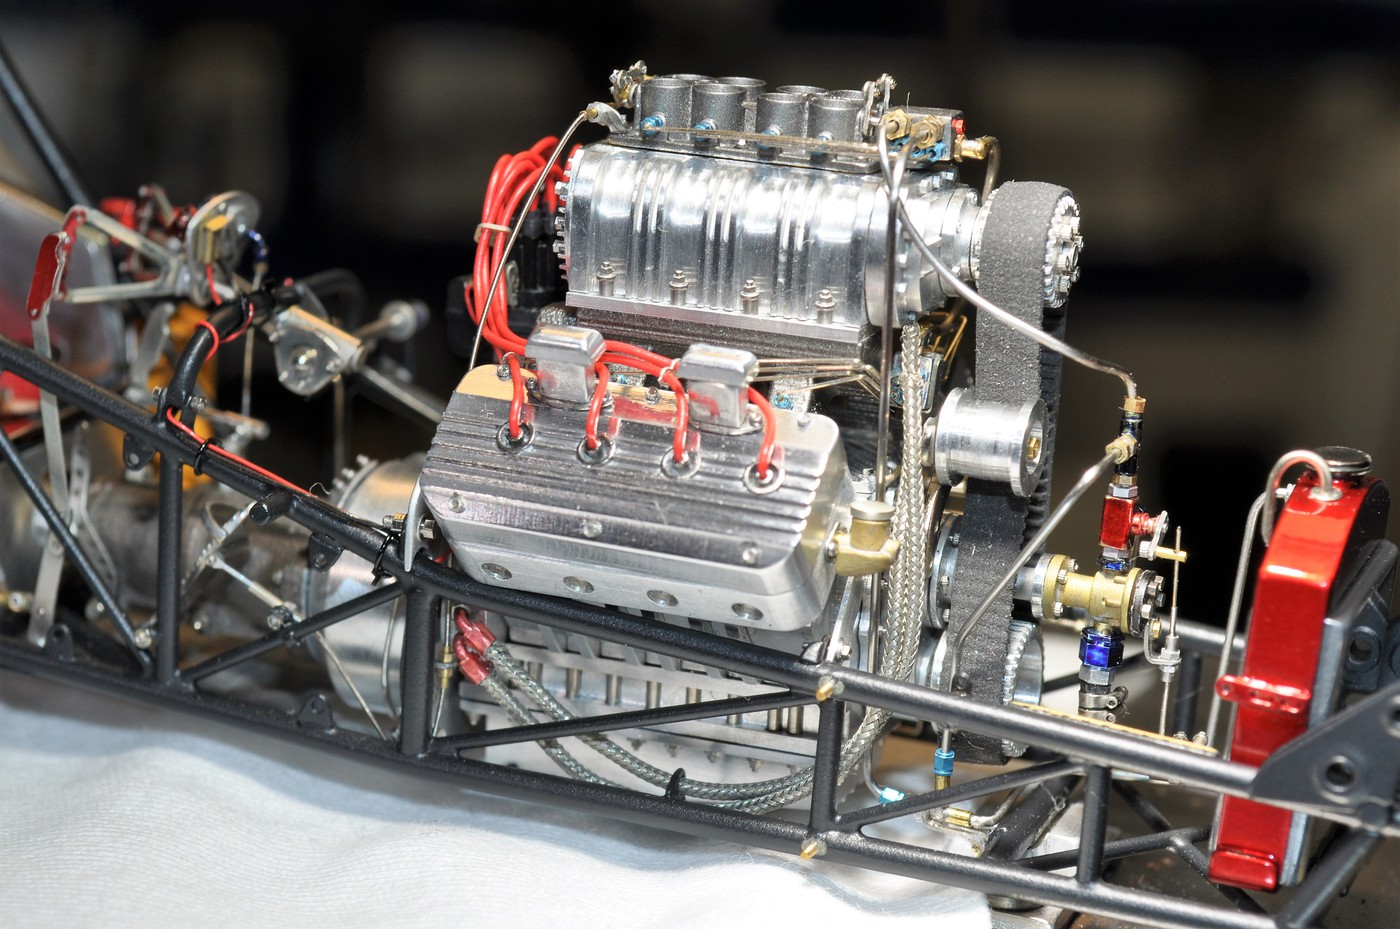
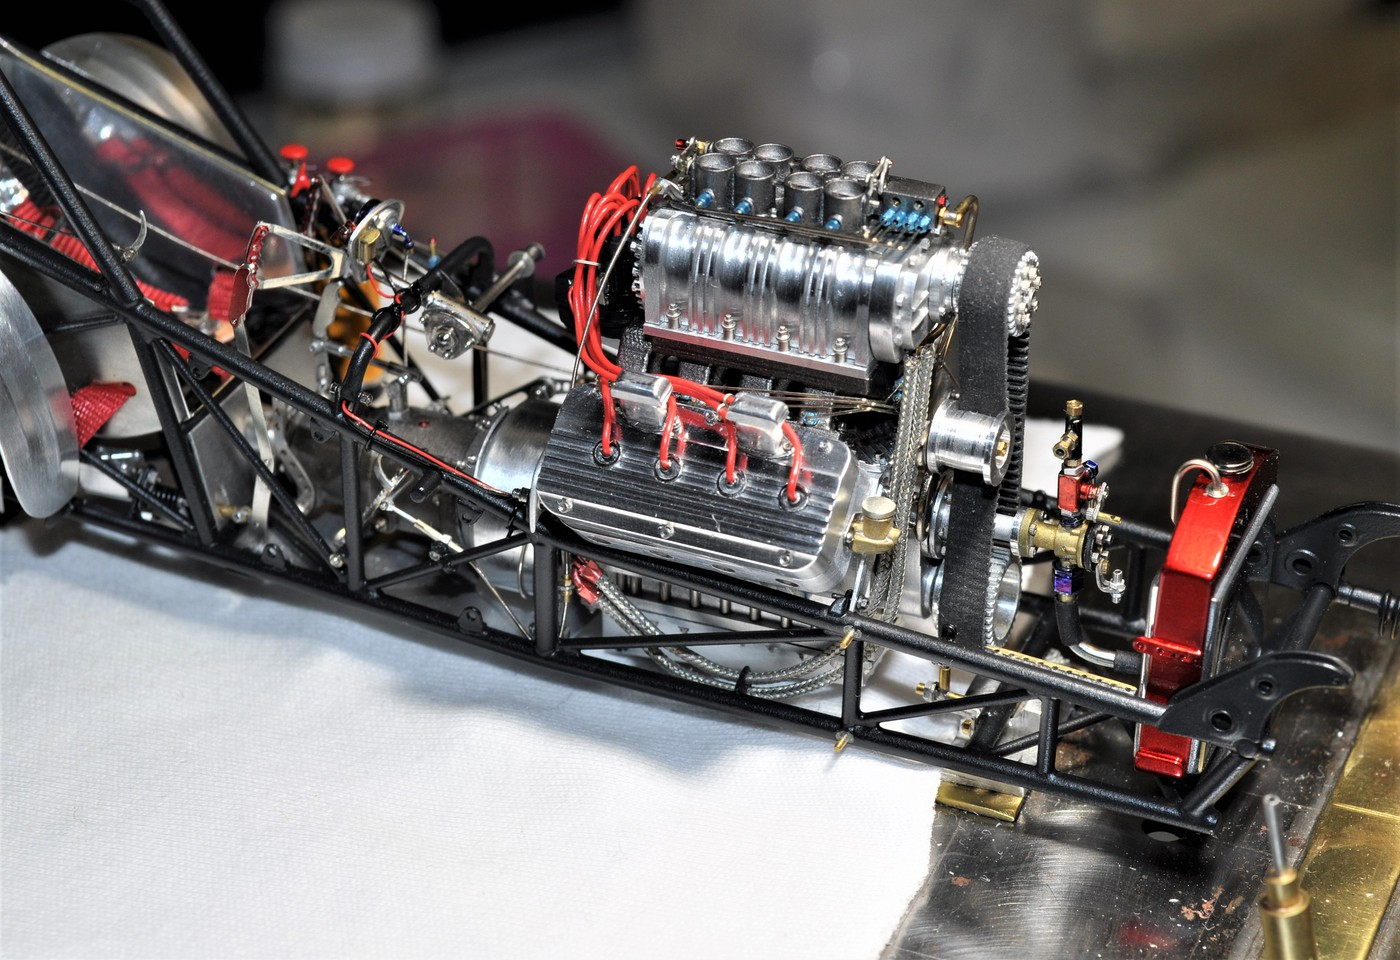
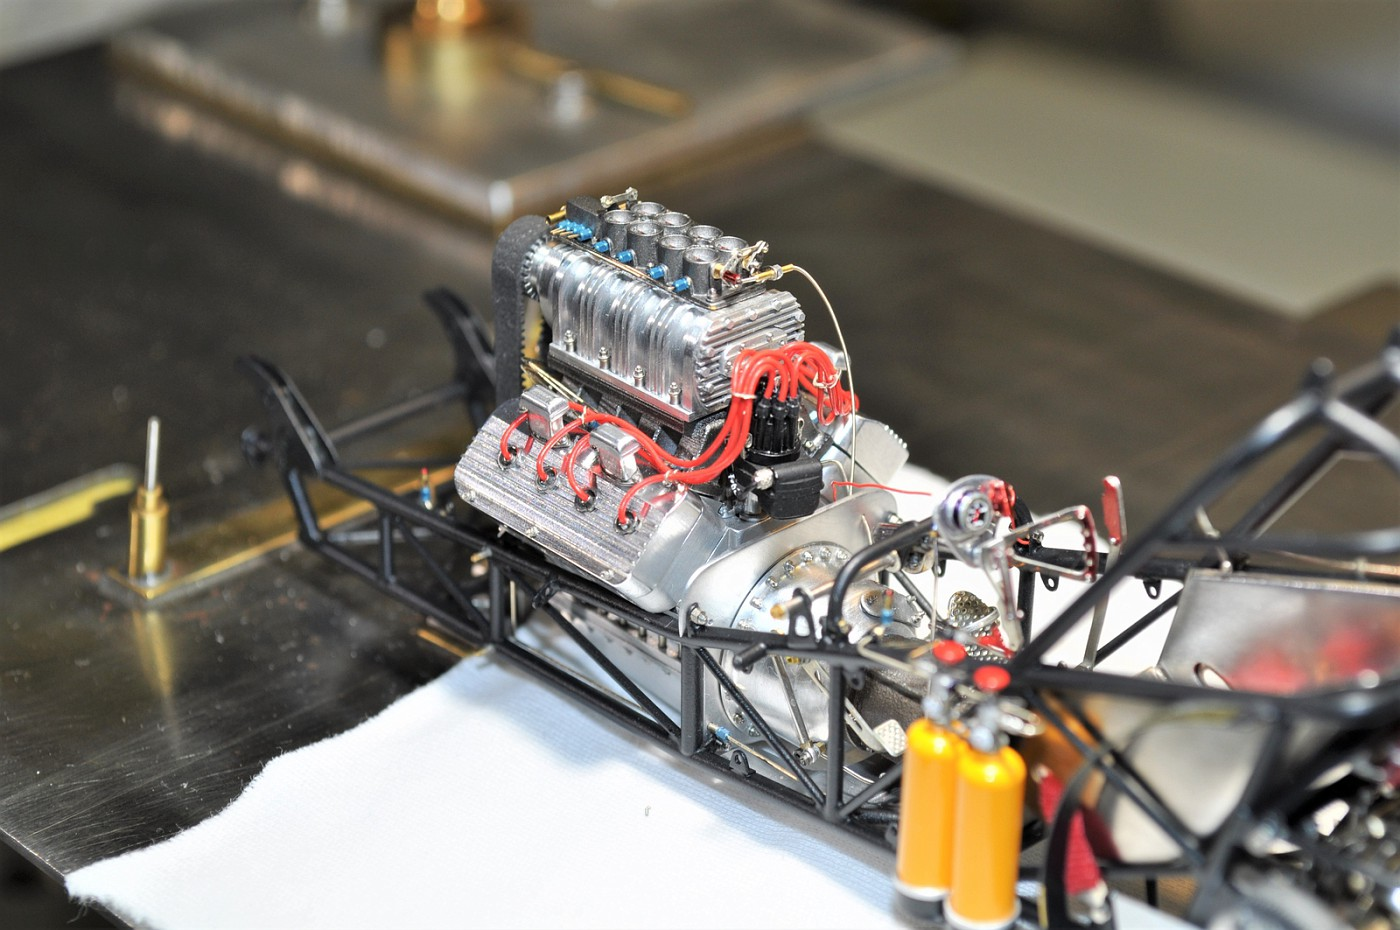
I'm embarrassed to admit that it took me about 6+ hours to just install the oil filters, their lines & fittings and finally the fuel tank braces. There is a pic included showing the chassis from above and it gives the best idea of how tight it truly is between the frame rails. Please remember, the entire chassis is about 6" in length. Only the front suspension & headers to install and the entire chassis will be complete. Only the tins & bracing to install on the body and this build will be complete. Oh so close. Cheers one and all, tim This is the pic I referenced above...... This pic shows the oil filters and lines...........
-
Fresh hot coffee through the nose can be painful AND messy. Thanks for that hearty laugh Dave. I sent a PM about a visit. Your car DOES have a/c right? cheers,tim Oh Chris, you truly do know how happy I am to see this one just about done. Going back and forth now on whether to do the Pro Stock Colt, a Pro Stock Maverick OR get back to and build the replacement for the Henry............a problem I thought I'd never get to. cheers!!! Thank you Hakan, I'm sure you were quite pleased with John Force's 150th career win yesterday. His car was strong throughout the day. Thought he blew it though in the final with his reaction time but what a win! cheers, tim
-
This is going to be a fun build Wayne. I like the profile and body mods you made to it already. cheers
-
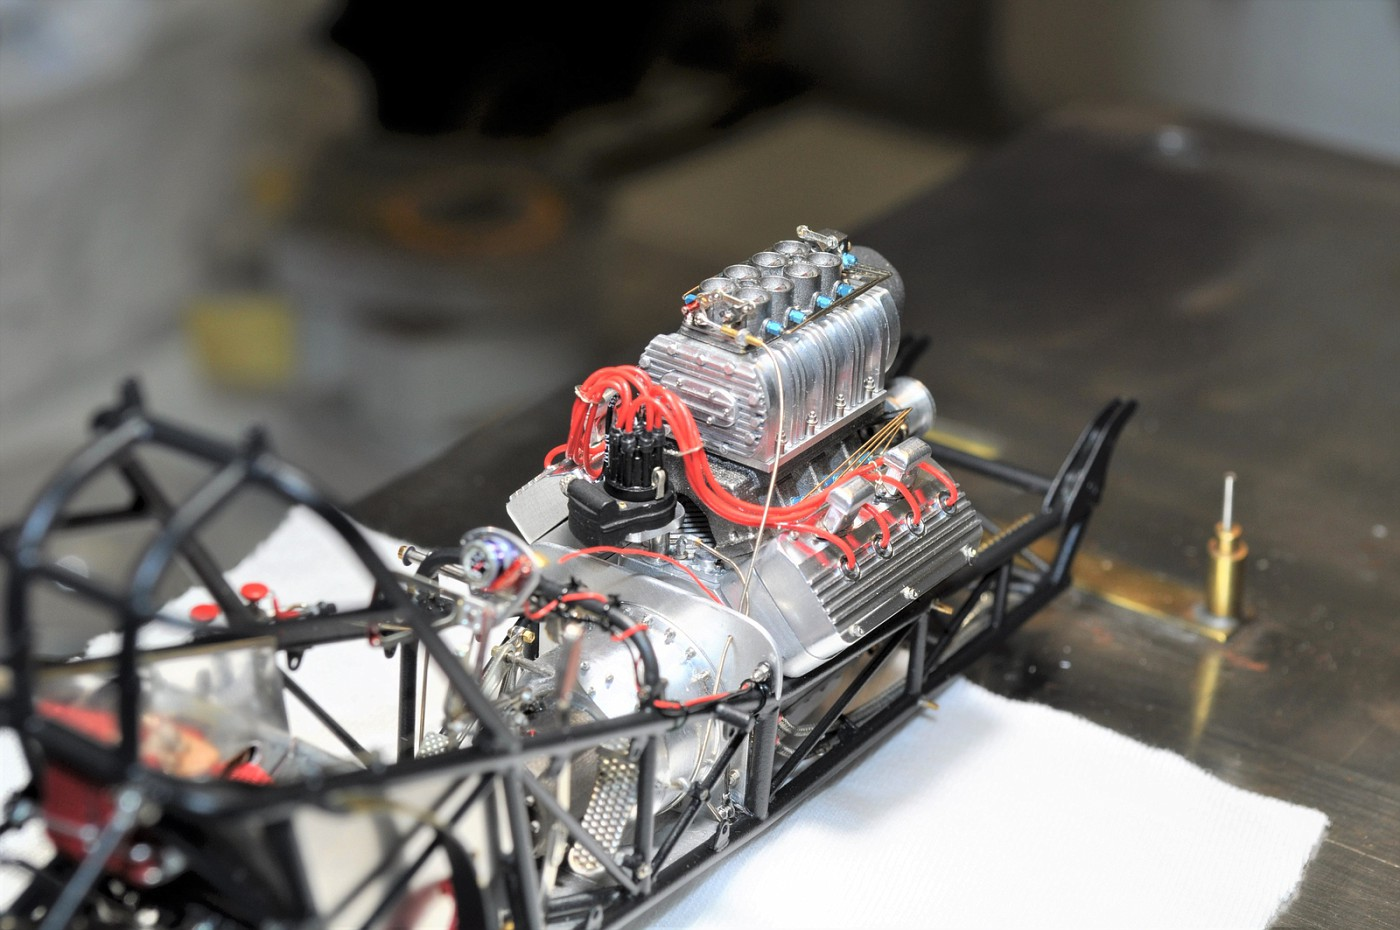
Hard lines are a pain. Tank, lines, fuel shut-off etc. are all installed finally. Remote oil filter install next and the engine will finally be complete. cheers, tim
-
Just a mock-up of the tank polished and assembled with the fuel pump & line. Unbelievably tight quarters and I have the oil filters & main fuel lines yet to install as well. I promise to reply to all that have commented lately but I'm off for a birthday dinner!! cheers to all.
-
Very nicely done Stephen. That's a gorgeous funny car if ever there was one. cheers, tim
-
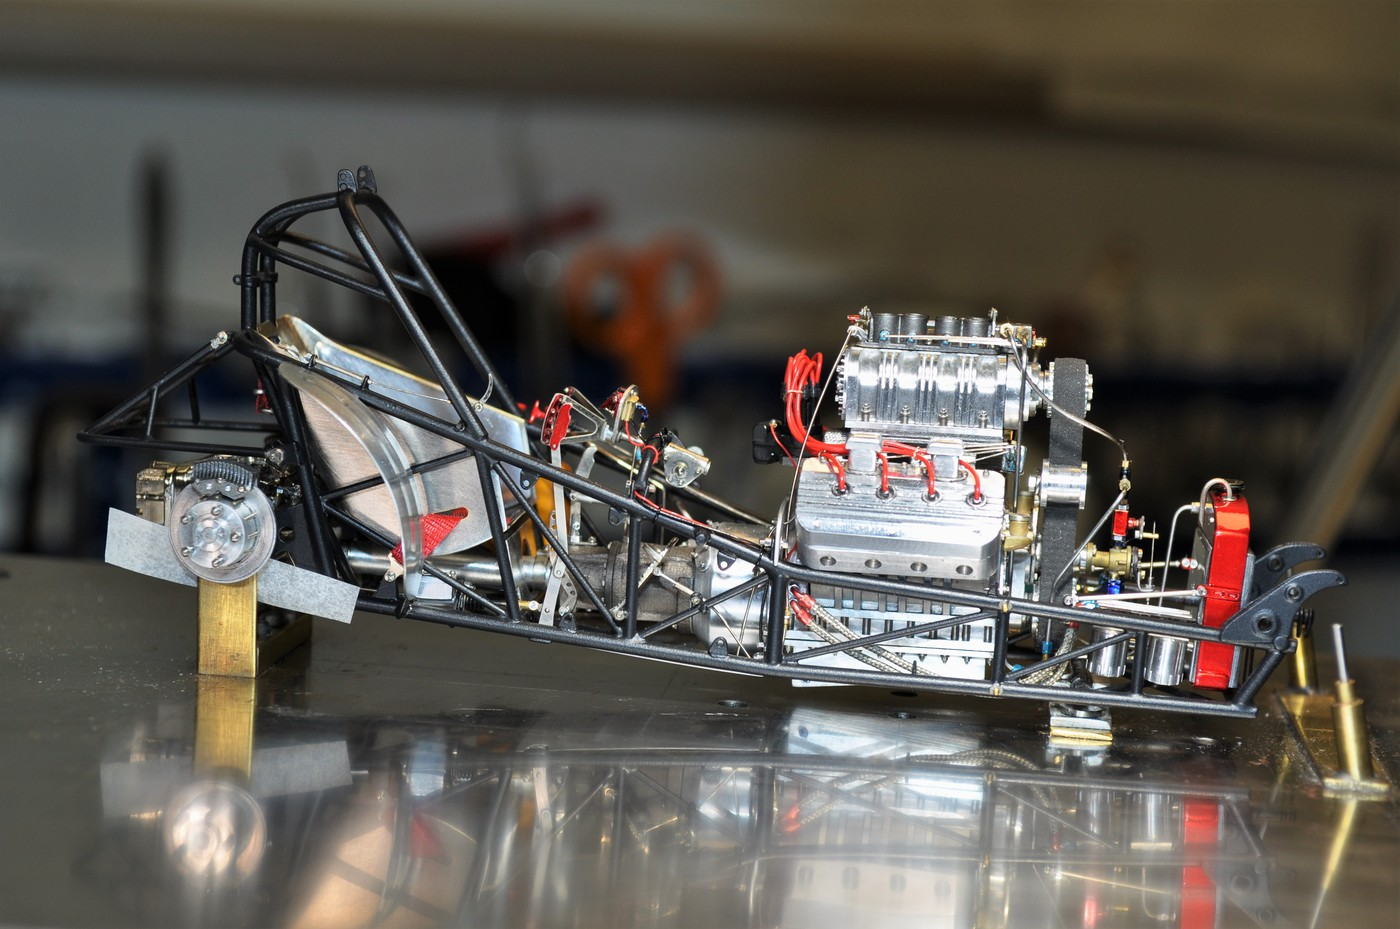
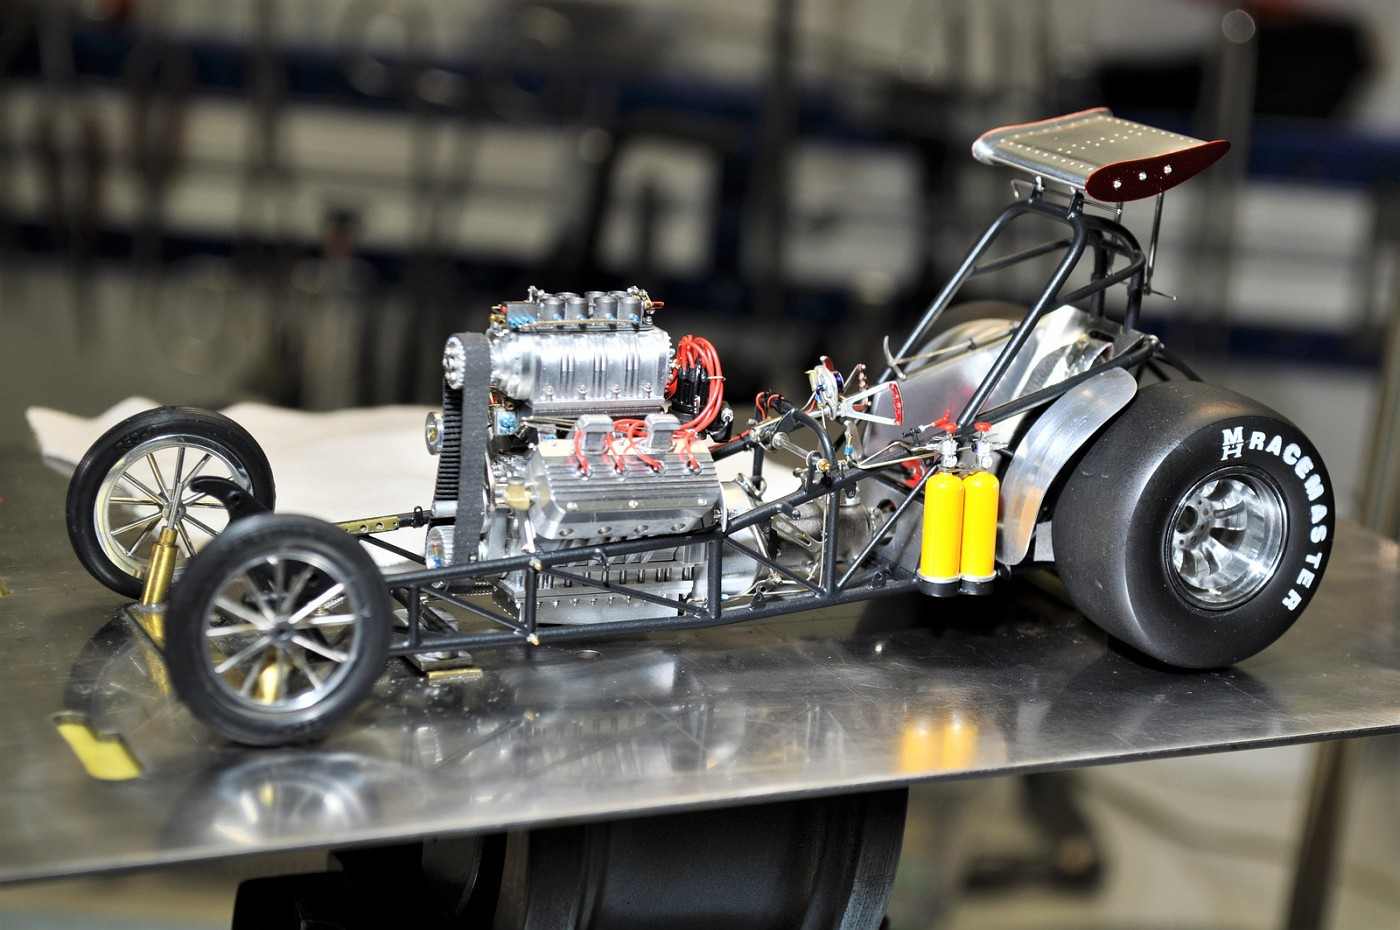
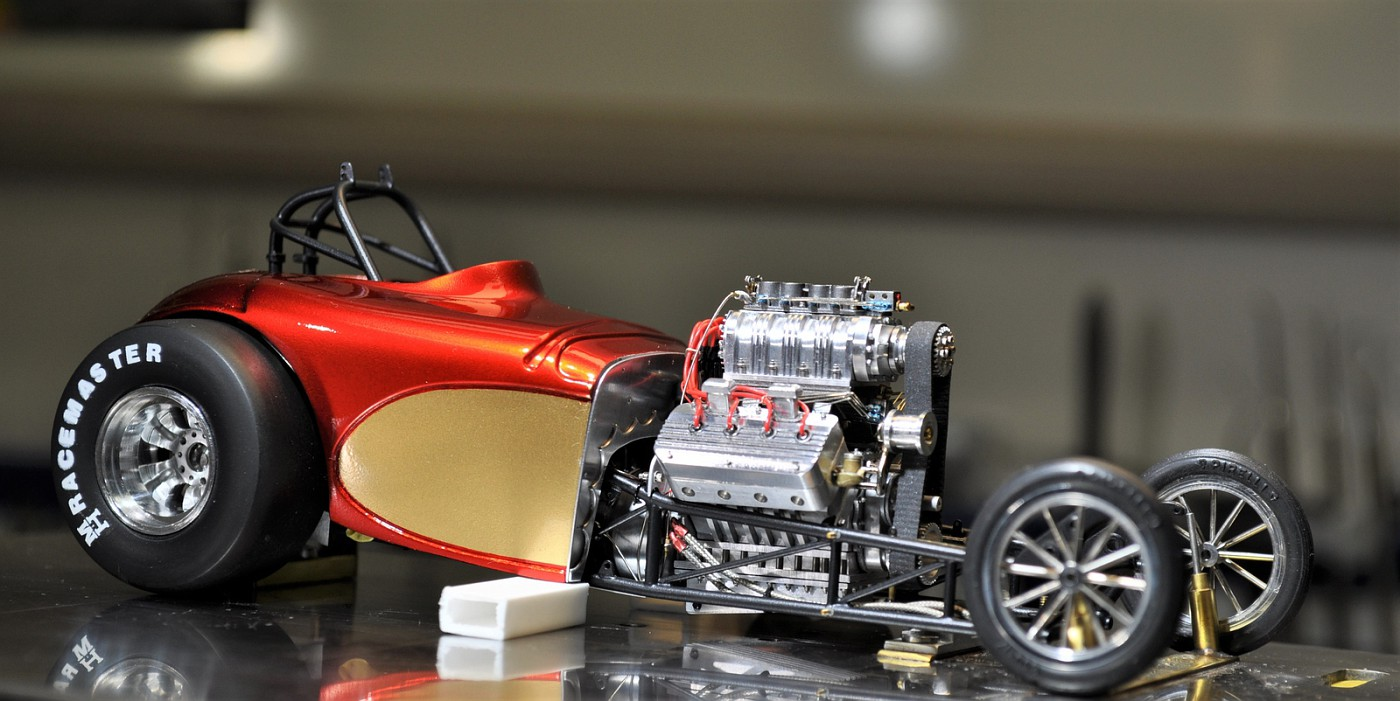
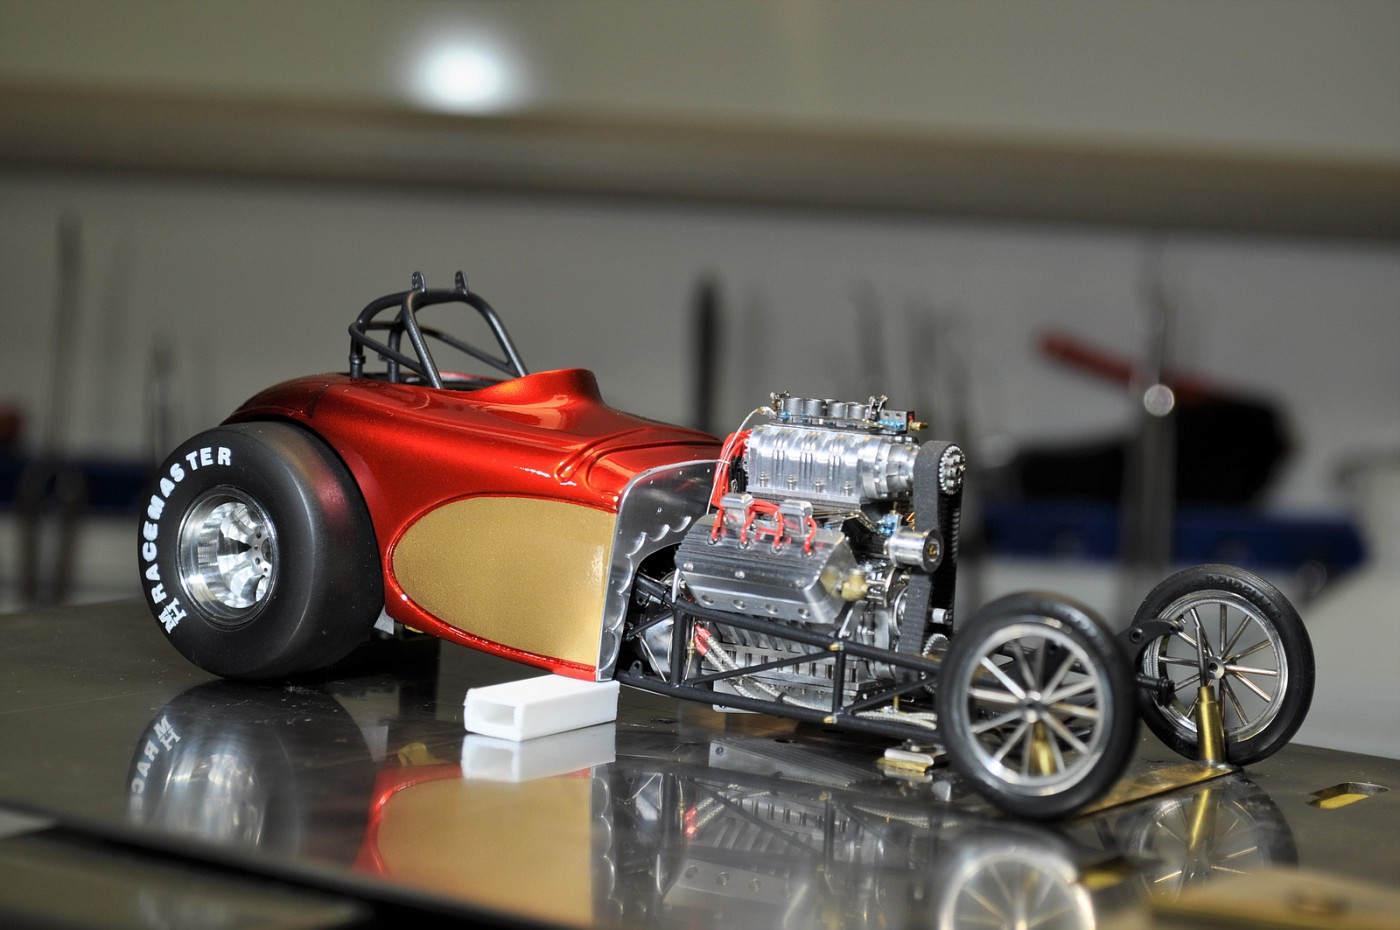
Gentlemen, your encouraging words got me going early this week. Got the fenders on the chassis finally and I was super pleased with how well they fit inside the body. Attached the mag kill wire and the wing assembled and mocked up on the chassis. Couple more off the punch list. I'm going to work on the tank next so I can get it installed along with the fuel pump and remaining fuel lines. Cheers everyone!
-
James, your 8 years of effort shine through on your build. It's a truly stunning car you've crafted. Congratulations on such a fantastic effort. Cheers, tim
-
test fitting the inner fenders again to get them permanently affixed to the chassis. more massaging but I think they're about ready now. I slipped the firewall in as well. the gap between the mag & firewall is less than 1/16"". cat whisker close. cheers sorry about the lighting too.........the pics don't "pop" the way I would want but you get the idea I think. "
-
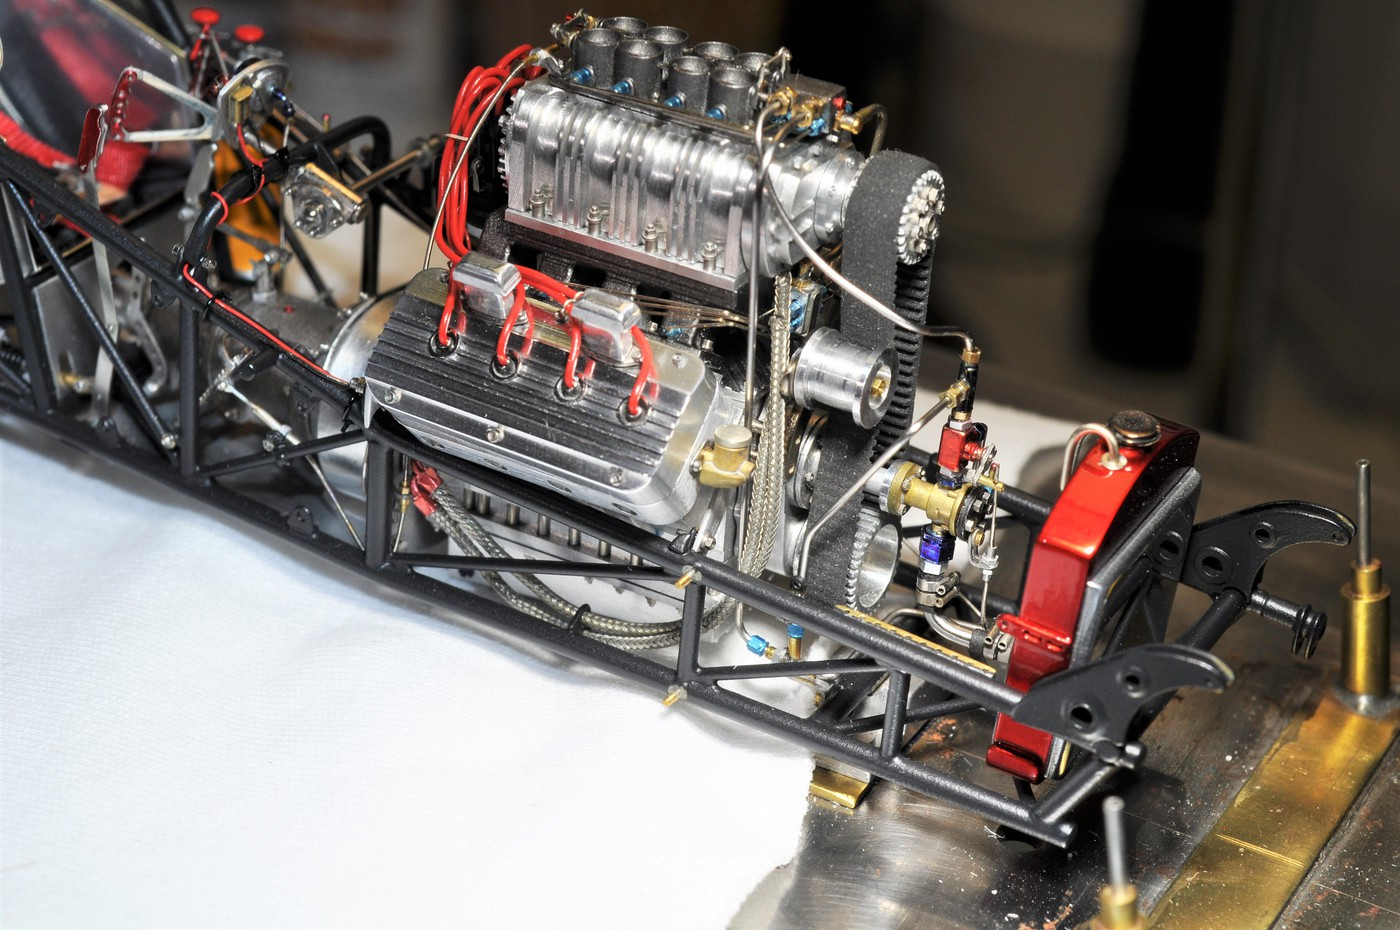
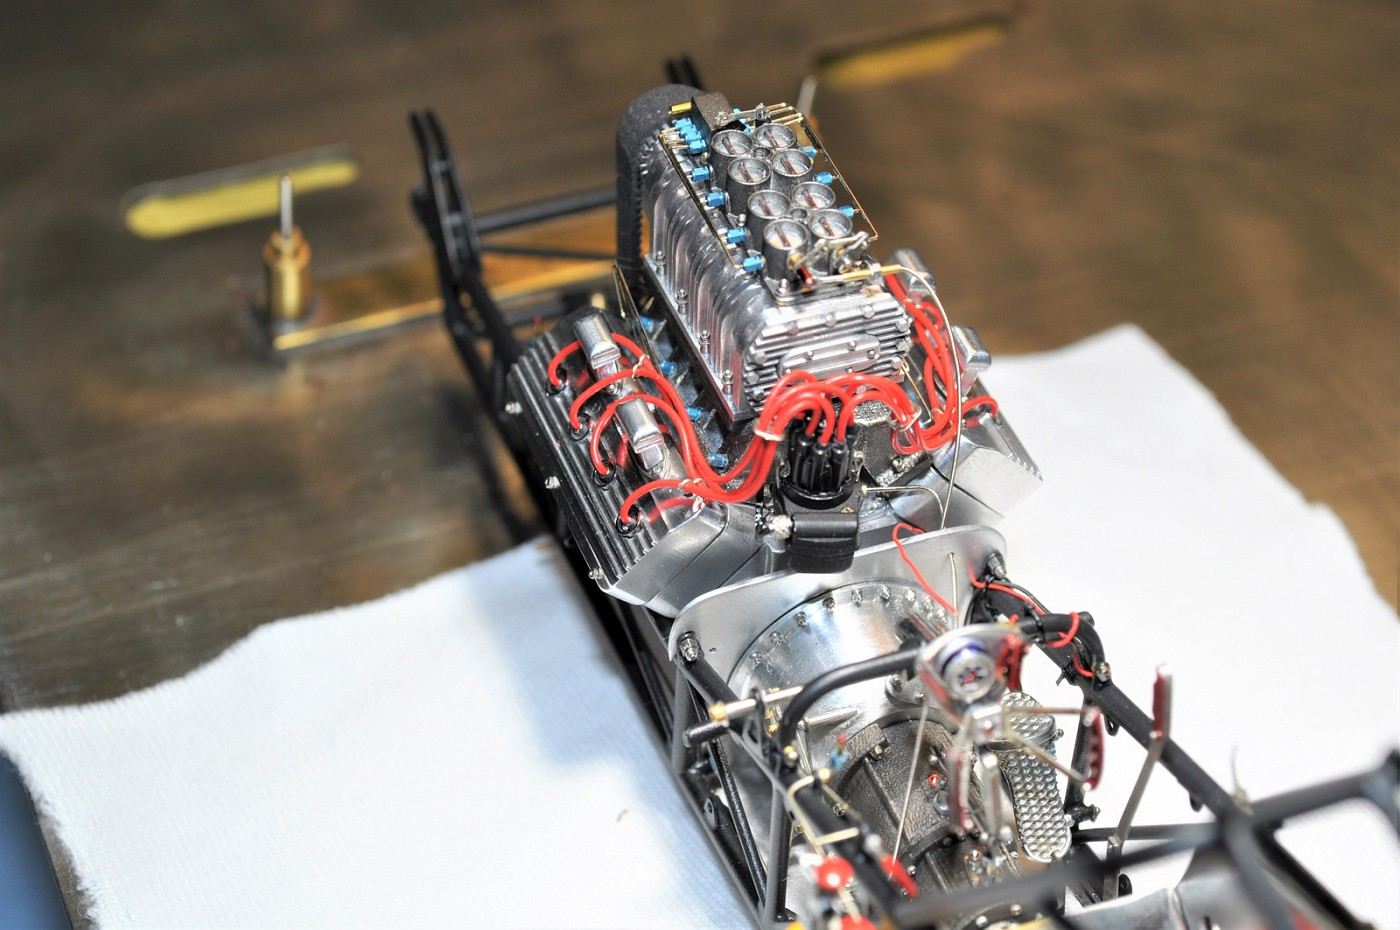
Thank you Daniel for the compliment. Dave, you would think just sticking one end of a wire in the valve cover and another in the mag would be zippity-do-da right? Detailing the entire mag including the wires was between 3 1/2 to 4 hours. Granted I lost 1/2 hour getting the kill wire back on it as it had come off and needed re-attaching. You put your plug wires on your 37' Chevy in 30 minutes by comparison I'm sure. Cheers!
-
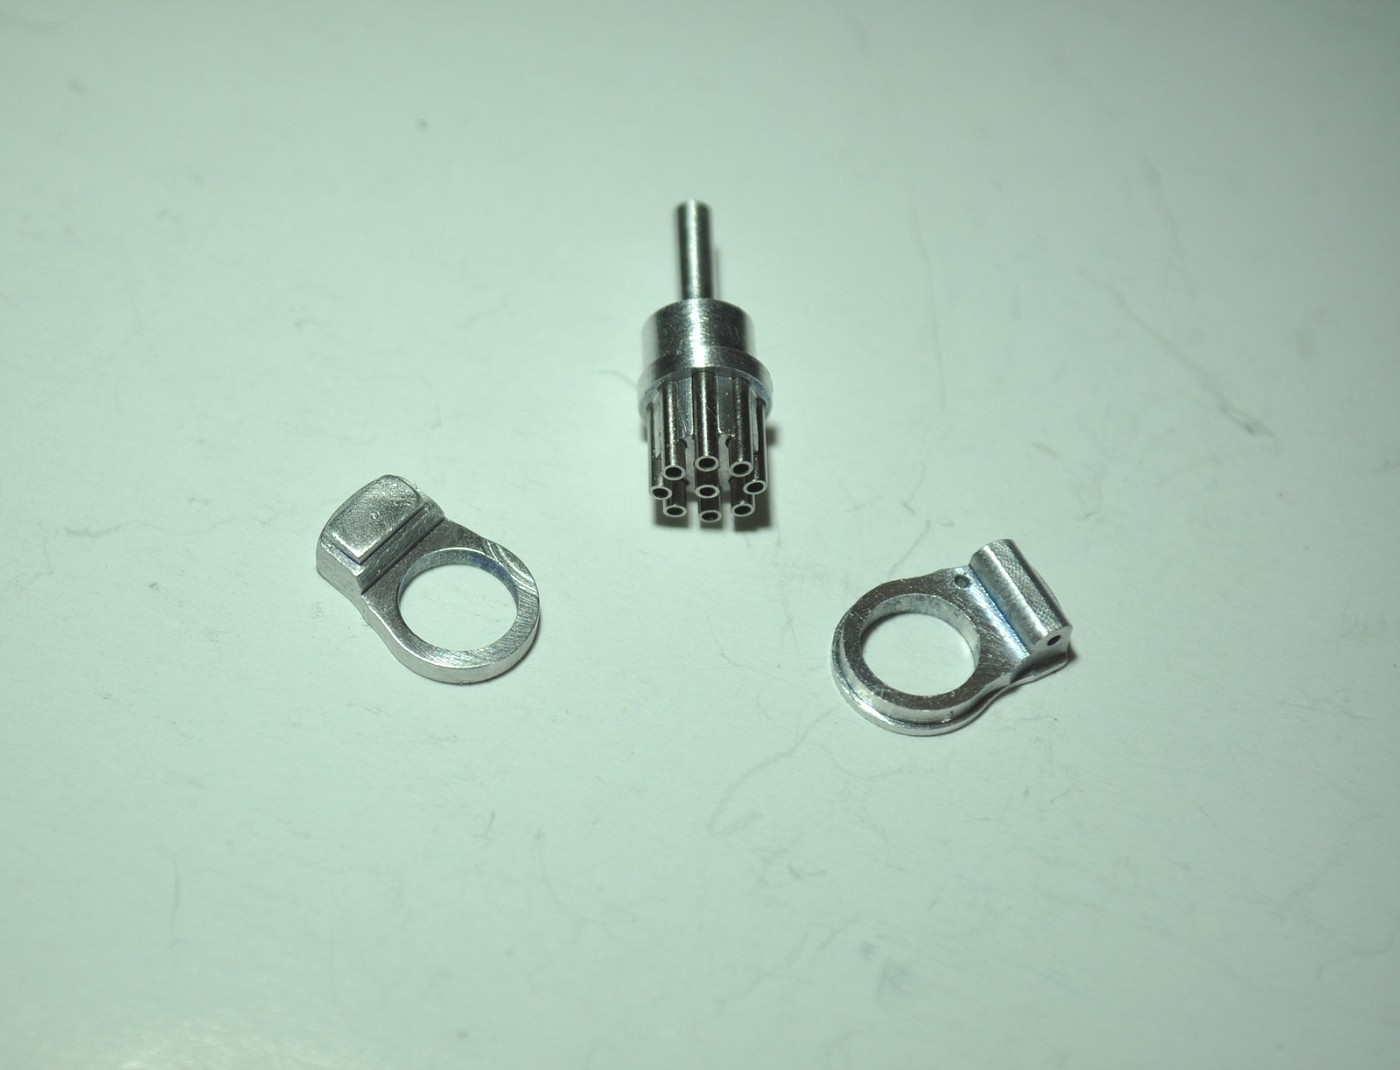
Much appreciated as always fellas! I did want to answer Daniel's question...........yup, scratch-built. I machined it out of aluminum. A pic before it was painted and detailed. Cheers, tim
-
small update. Mag & plug wires installed. Have to add the kill wire to the mag yet but the throttle cable's installed as well. ProTech plug wires, Model Car Garage looms and RB plug boots and the firing is order is correct. Next couple items on the list should really make the car pop. cheers, tim
-
Been a little while since I peeked in here, like the updated pics on your build Wayne. Those decals must have been a bear to put on. Nicely done sir. cheers, tim
-
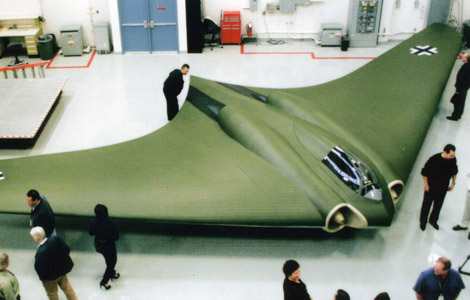
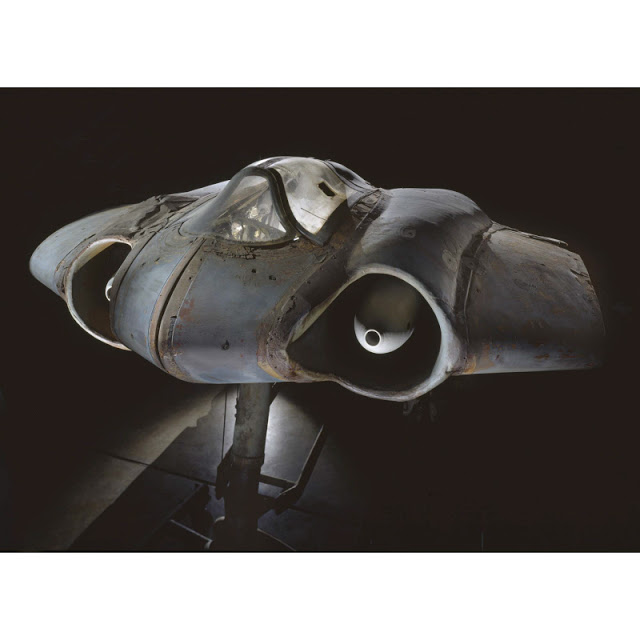
So many fantastic posts here. Even though on the wrong side of the war, this one caught my attention when I visited the Smithsonian Air & Space Museum next to the Dulles airport in D.C. The Horton 229 was an experimental craft and I think only 3 examples were built near the end of the war. We captured them and brought them back to the U.S. This example is actually at the museum awaiting restoration. Pics of it flying are very rare. I consider it the true ancestor to today's stealth aircraft. Considering it was build in 1944 /45, it's amazing the cutting edge engineering. Jack Northrop saw the potential and exploited it with our own new designs. Here's a pic with its wings removed and it's interesting to see how small it was with the men standing next to it. cheers, tim a pic of it with the wings on...this was a 1:1 mock up that the U.S. made to test the radar cross section of the craft. It was deemed very effective in comparison to most other craft flying at the time. last pic of the one at the Smithsonian.
-
Summer vacation is officially over for you young man. Time to get back on this one! cheers, tim